

Page 1
Operating Instructions
Vacuum Cleaner (Domestic)
Model No. MC-UG522
Thank you for purchasing this vacuum cleaner.
Please read these instructions carefully before using the vacuum cleaner
and save these instruction for future reference.
This product complies with the directive 2006/95/EC and 2004/108/EC
.
Page 2
- 2 -
Page
• Caution for AC Mains Lead (UK and Ireland only)................ 2
• Important Safety Instructions for the User ............................ 3
• Cautions................................................................................ 3
• Identification of main parts .................................................... 4
ASSEMBLY INSTRUCTIONS
A) How to attach the handle .............................................. 5
B) Tool storage.................................................................... 5
C) Attaching hose ............................................................... 6
D) Mains lead storage......................................................... 6
HOW TO OPERATE YOUR VACUUM CLEANER
A) Mains lead...................................................................... 7
B) On/Off switch.................................................................. 7
C) Handle release............................................................... 8
D) How to use the accessories........................................ 8-9
PERFORMANCE FEATURES
A) Edge cleaning .............................................................. 10
B) Automatic adjusting nozzle .......................................... 10
C) Motor protection system............................................... 10
TABLE OF CONTENTS
Page
MAINTENANCE AND SERVICING
A) Dust bag replacement ...................................................11
B) Secondary filter cleaning/replacement ..........................12
C) HEPA media exhaust filter replacement ............................12
D) Belt replacement ...........................................................13
E) Clog removal .................................................................14
F) Beater bar cleaning .......................................................15
G) Cleaning exterior ...........................................................15
H) Troubleshooting.............................................................16
• Specifications.......................................................................17
• Disposal information ............................................................17
• Consumables / Accessories.................................................18
• Guarantee ...........................................................................19
• Reminder for Customer .......................................................19
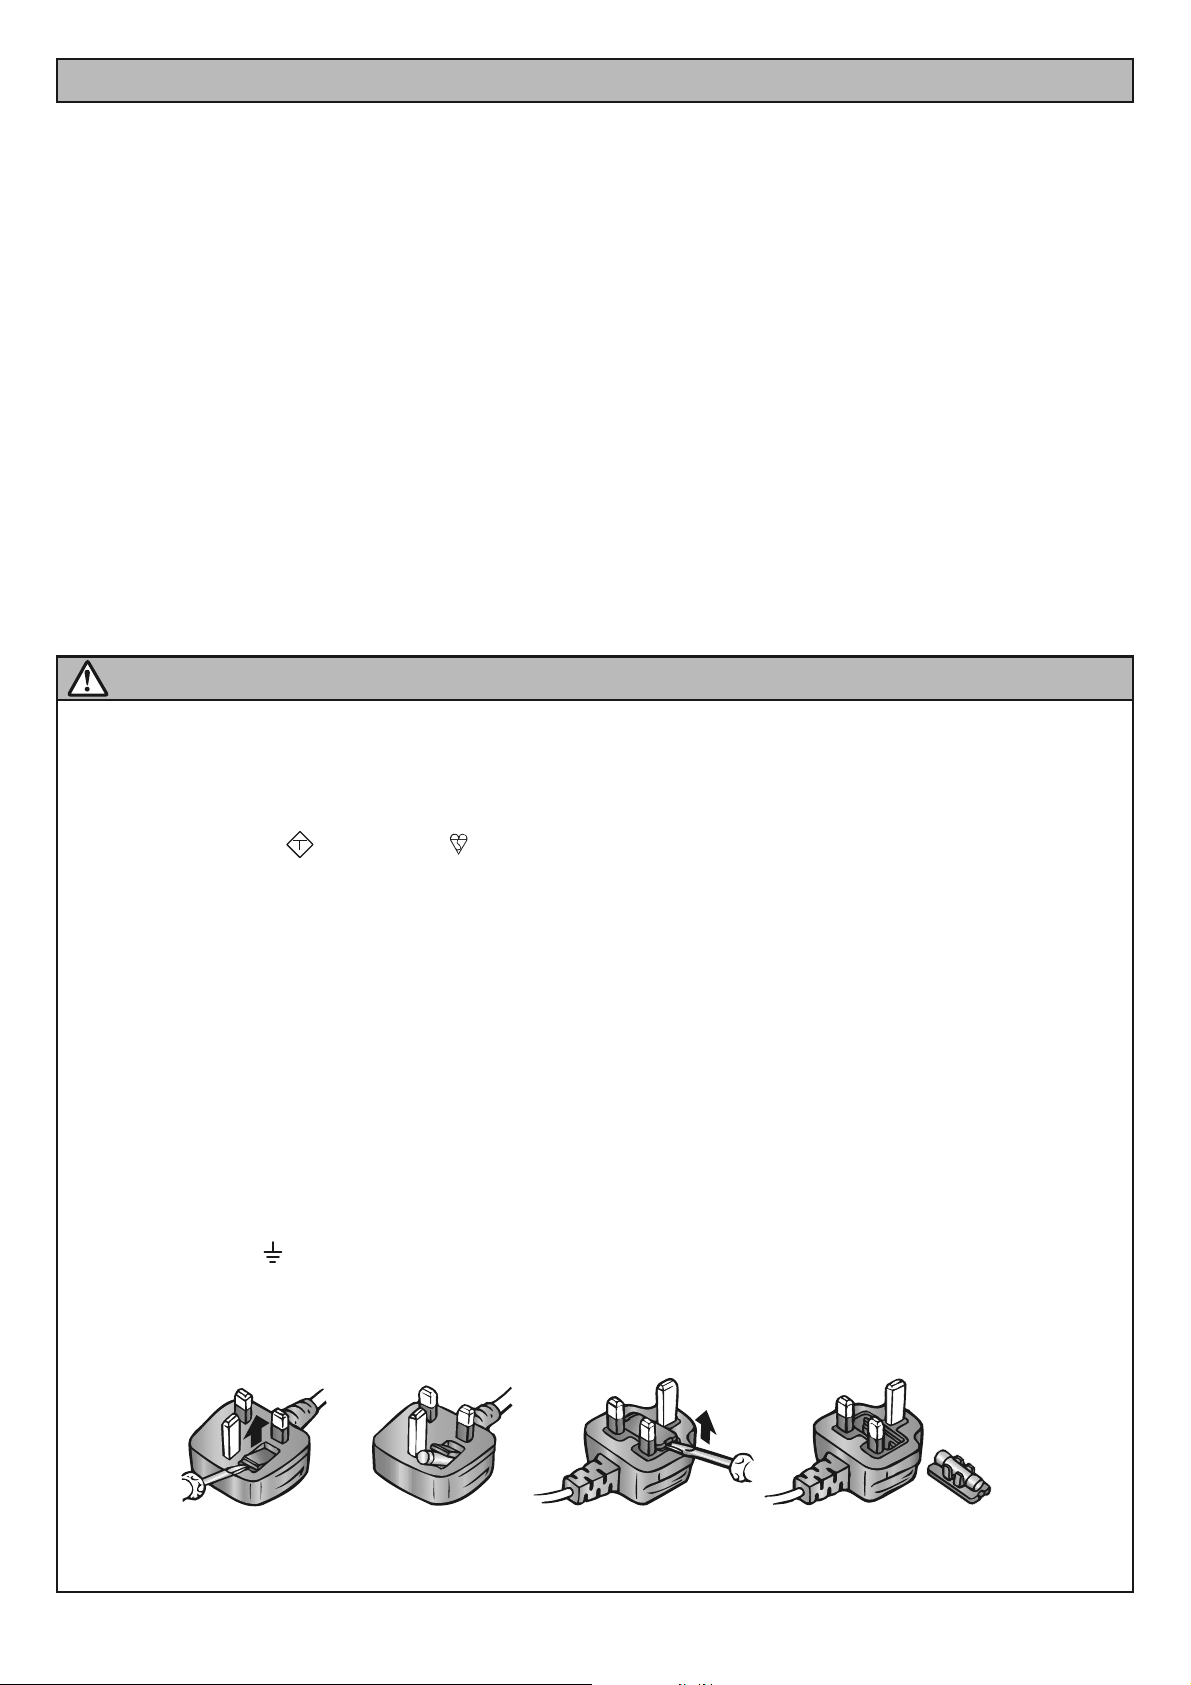
FOR YOUR SAFETY PLEASE READ THE FOLLOWING TEXT CAREFULLY
This appliance is supplied with a moulded three pin mains plug for your safety and convenience.
A 13 amp fuse is fitted in this plug.
Should the fuse need to be replaced please ensure that the replacement fuse has rating of 13 amps and that it is approved by ASTA
or BSI to BS1362.
Check for the ASTA mark or the BSI mark on the body of the fuse.
If the plug contains a removable fuse cover you must ensure that it is refitted when the fuse is replaced.
If you lose the fuse cover the plug must not be used until a replacement cover is obtained.
A replacement fuse cover can be purchased from your local Panasonic Dealer.
IF THE FITTED MOULDED PLUG IS UNSUITABLE FOR THE SOCKET OUTLET IN YOUR HOME THEN THE FUSE SHOULD BE
REMOVED AND THE PLUG CUT OFF AND DISPOSED OF SAFELY. THERE IS A DANGER OF SEVERE ELECTRICAL SHOCK IF
THE CUT OFF PLUG IS INSERTED INTO ANY 13 AMP SOCKET.
If a new plug is to be fitted please observe the wiring code as shown below.
If in any doubt please consult a qualified electrician.
IMPORTANT: The wires in this mains lead are coloured in accordance with the following code:
Blue : Neutral
Brown : Live
As the colours of the wire in the mains lead of this appliance may not correspond with the coloured markings identifying the terminals
in your plug, proceed as follows:
The wire which is coloured BLUE must be connected to the terminal in the plug which is marked with the letter N or coloured BLACK.
The wire which is coloured BROWN must be connected to the terminal in the plug which is marked with the letter L or coloured RED.
Under no circumstances should either of these wires be connected to the earth terminal of the three pin plug, marked with the letter
E or the Earth Symbol
How to replace the Fuse:
• There are two types of the supplied AC Mains Lead : A and B as shown below.
1 Open the fuse compartment with a screwdriver.
2 Replace the fuse and fuse cover if detachable.
ASA
CAUTION FOR AC MAINS LEAD (UK and Ireland only)
TYPE A TYPE B
Page 3
- 3 -
• Do not leave the vacuum cleaner plugged into mains socket. Unplug from the socket when not in use and before cleaning the appliance
or undertaking maintenance operations.
• This appliance can be used by children aged from 8 years and above and persons with reduced physical, sensory or mental capabilities
or lack of experience and knowledge if they have been given supervision or instruction concerning use of the appliance in a safe way and
understand the hazards involved.
• Children shall not play with the appliance. Cleaning and user maintenance shall not be made by children without supervisions.
• Do not use if the mains lead or mains plug is damaged. If the mains lead or mains plug is damaged it must be replaced by the manufacturer,
it’s service agent or similarly qualified persons to avoid hazard.
• If the vacuum cleaner is not working as it should be, or has been dropped, damaged, left outdoors, or come into contact with water, consult
an authorised Panasonic Service Centre.
• Do not pull or carry by the mains lead, use the mains lead as a handle, close a door on the mains lead, pull the mains lead around sharp
edges or corners. Do not run over the mains lead with the vacuum cleaner. Keep the mains lead away from heated surfaces.
• Do not handle plug or vacuum cleaner with wet hands.
• Do not put any object into openings. Do not use with any opening blocked; keep free of dust, lint, hair and anything that may block or
reduce air flow.
• Keep hair, loose clothing, fingers, and all parts of body away from openings and moving parts.
• Do not use the vacuum cleaner without filters and /or dust bin in place.
• Do not use wet filters after wash, see E) Secondary Filter Cleaning.
• Turn off all controls before unplugging.
• Do not use to pick up flammable or combustible materials, or others that may become so or use in areas where they may be present.
• This appliance should be serviced by an authorised Panasonic Service Centre, and only genuine Panasonic spare parts should be used.
• Use extra care when cleaning on stairs. Keep hold of the handle to prevent the vacuum cleaner from falling.
• To prevent damaging carpeted floors, tiled floors, Linoleum, etc. Do not leave the beater bar rotating in the same place for too long.
• Keep bare feet and hands away from the beater bar. (It may cause injury)
NOTE: This vacuum cleaner is designed for general household use only and is not suitable for use in a garage,
garden or to suck up liquids.
IMPORTANT SAFETY INSTRUCTIONS FOR THE USER
Before using the vacuum cleaner, please read these basic precautions.
WARNING: To reduce the risk of fire, electric shock, or injury.
1. To avoid any possible damage to
the mains lead, never run over the
mains lead or allow it to become
caught in the beater bar when using
the vacuum cleaner.
2. Do not run the vacuum cleaner over
tassels or fringes of rugs or mats as they
could get caught up in the beater bar
and may cause damage to belt.
4. To avoid damaging the vacuum
cleaner, never let the vacuum
cleaner pick up wet matter, mud,
burning ashes or large and sharp
objects.
5. Do not pull on the mains lead when
disconnecting the appliance from the
mains socket, always pull on the plug
body itself.
6. To avoid injury, keep your fingers
and hands away from the beater bar,
and never put them between the body
parts.
CAUTIONS
3. Keep the vacuum cleaner away
from heat sources such as radiators,
fires, direct sunlight, etc.
Page 4

- 4 -
IDENTIFICATION OF MAIN PARTS
Nozzle
Hose
Nozzle
Hose
Mains Lead
Dusting Brush
Suction Inlet
On/Off Switch
Wand Holder
Carrying
Handle
Hose Holder
Locking Notch
Belt (inside)
Cover Release
Dust Cover
(Dust Bag inside)
Wand
Crevice Tool
Exhaust Filter
(inside)
Secondary Filter
(inside)
Furniture Guard
Beater Bar
(underneath)
Handle
Quick Release
Cord Hook
Lower Cord Hook
Page 5
- 5 -
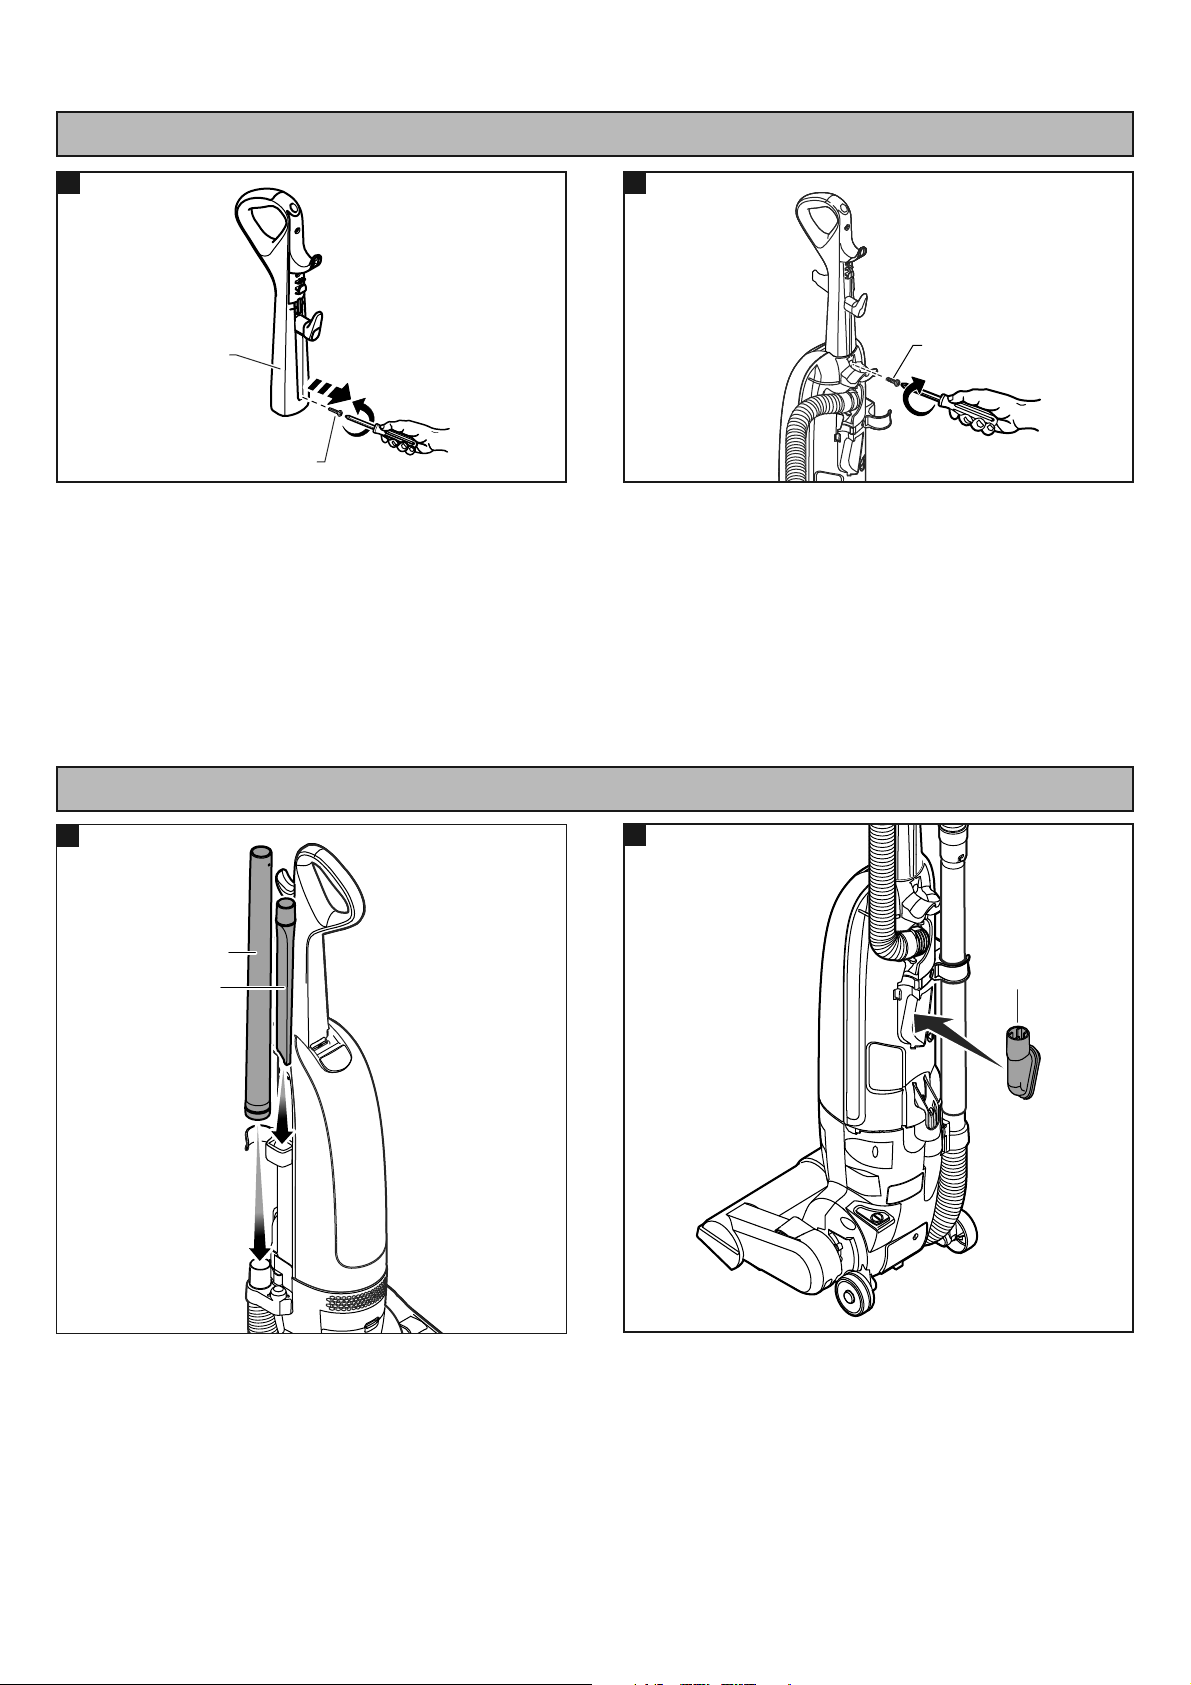
A) HOW TO ATTACH THE HANDLE
Handle
Handle Screw
Remove the handle screw from the rear of the handle. Insert the handle in the handle opening as shown in the
illustration.
Using screwdriver, tighten handle screw.
NOTE: It may be necessary to adjust the handle
slightly to align the screw hole.
Handle
Screw
12
11
ASSEMBLY INSTRUCTIONS
Wand
Crevice Tool
Insert the wand and crevice tool into the storage
locations as shown.
Insert the dusting brush into the back of the vacuum
cleaner.
B) TOOL STORAGE
Dusting
Brush
12
11
Page 6

- 6 -
Hose
Suction Inlet
Tabs
11
Attach the hose to the suction inlet on the back of the
vacuum cleaner aligning the tabs as shown.
Push in and snap both tabs in place. A noticable click
can be heard.
Route the hose as shown.
Insert the raised tab on the wand into the “J” slot on the
hose handle. Twist the wand to lock in place.
C) ATTACHING HOSE
Hose
Wand
Hose Holder
12
Lower
Cord Hook
Quick Release
Cord Hook
Locking Notch
11
Make sure that the quick release cord hook is rotated in
the upright position as shown.
Insert mains lead into the locking notch on rear of the
handle.
Wrap mains lead loosely around quick release cord hook
and lower cord hook.
Lock the plug onto the mains lead.
D) MAINS LEAD STORAGE
Cord
Lock
12
“J” Slot
Wand
Hose
Handle
Raised
Tab
Page 7

- 7 -
A) MAINS LEAD
Quick Release
Cord Hook
11
Mains Lead
Locking Notch
13
Turn the quick release upper cord
hook to either side and down to
release the mains lead.
Detach the plug from the mains lead
and pull the mains lead off the quick
release upper cord hook.
Be sure the mains lead is locked
under the locking notch on the rear of
the handle.
Plug the mains lead into a 240 volt
mains socket located near the floor.
Note: To store mains lead, turn the
quick release cord hook to the up
position, then wrap cord loosely
around quick release cord hook
and lower cord hook. Refer to
MAINS LEAD STORAGE (page 6).
HOW TO OPERATE YOUR VACUUM CLEANER
B) ON/OFF SWITCH
To turn vacuum cleaner on or off, press on the on/off
switch.
On/Off Switch
11
CAUTION
To prevent damaging carpeted floors, tiled floors,
linoleum, etc. Do not leave the beater bar rotating in
the same place for too long.
CAUTION
Moving parts! To reduce the risk of personal injury, DO NOT touch
the beater bar when vacuum cleaner is on. Contacting the beater bar
while it is rotating can cut, bruise, or cause other injuries. Always
unplug from electrical socket before servicing.
Use caution when operating near children.
Mains Lead
Plug
13
Page 8

- 8 -
C) HANDLE RELEASE
Release the handle by placing foot on the nozzle and
pulling back and down on the handle with your hand.
CAUTION
To prevent damaging carpeted floors, tiled floors,
linoleum, etc. Do not leave the beater bar rotating in
the same place for too long.
NOTE: After use, unplug the mains lead from the socket
and store the vacuum cleaner in the upright (vertical)
position.
11
Use low position for cleaning under
furniture.
Step on nozzle top and pull back to
change from normal use position to
low position.
Move vacuum cleaner to middle
position for normal use.
Move vacuum cleaner to upright
position for storage and tool use.
12 13 14
D) HOW TO USE THE ACCESSORIES
11
Crevice
Tool
Wand
NOTE: Hold the handle to support the vacuum
cleaner when using tools and disconnecting or
attaching the hose.
Disconnect the hose & wand from the vacuum cleaner by
gently pulling the wand in the direction of the arrow.
It may be necessary to slightly twist the wand to loosen
from the nozzle hose.
Page 9

- 9 -
Attach crevice tool or dusting brush as needed.
Crevice tool and dusting brush can attach to either wand
or hose handle.
For additional reach, the dusting brush may be attached
to the end of the crevice tool.
The beater bar rotates when using tools, use care to insure
that nothing comes into contact with beater bar.
The crevice tool may be
used on the following items:
• Furniture
• Cushions
• Curtains
• Stairs
• Walls
12
Wand
Dusting Brush
Crevice Tool
Hose
Handle
13 14
15
Note: Always clean tools before using.
The dusting brush may be
used on the following items:
• Furniture
• Curtains
• Stairs
• Walls
16
17
CAUTION
While using the accessories, hold the handle with one
hand to avoid pulling the vacuum cleaner over.
CAUTION
To avoid accidental injury, keep children away from
the beater bar while in operation.
Page 10

- 10 -
THERMAL PROTECTOR
This vacuum cleaner has a thermal protector which
automatically trips to protect the vacuum cleaner from
overheating.
If a clog prevents the normal flow of air to the motor, the
thermal protector turns the motor off automatically. This
allows the motor to cool in order to prevent possible
damage to the vacuum cleaner.
TO CORRECT PROBLEM:
Turn the vacuum cleaner off and unplug the power cord
from the outlet to allow the vacuum cleaner to cool and
the thermal protector to reset.
Check for and remove clogs, if necessary. Refer to
CLOG REMOVAL ( page 14). Also check and replace
any clogged filters and change dust bag, if necessary.
Wait approximately fifty (50) minutes and then plug the
vacuum cleaner in and turn back on to see if the motor
protector has reset.
Bypass
Value
PERFORMANCE FEATURES
11
BYPASS VALVE
This vacuum cleaner has a motor protector bypass valve
which prevents motor overheating and damage.
The valve opens to provide cooling air when a clog or
full bag prevents normal air flow to the vacuum cleaner
suction motor.
You will notice a change of sound as air rushes through
the valve opening.
To correct problem install a new dust bag/or locate
and remove the clog. Refer to CLOG REMOVAL
(page 14).
NOTE: The bypass valve may open when cleaning new
carpet due to reduced airflow caused by the new carpet
lint filling the dust bag quickly.
Note: Do not block bypass valve.
C) MOTOR PROTECTION SYSTEM
A) EDGE CLEANING
Edge cleaning feature enables improved cleaning of
carpets near walls and furniture.
11
B) AUTOMATIC ADJUSTING NOZZLE
The nozzle of your Panasonic vacuum cleaner
automatically adjusts to any carpet pile height.
Feature allows nozzle to float evenly over carpet pile
surfaces.
No manual adjustments required.
Shallow Pile Carpet
Deep Pile
Carpet
Nozzle
Pivot Point
11
Page 11

- 11 -
MAINTENANCE AND SERVICING
Always follow all safety precautions when cleaning and servicing the vacuum cleaner.
WARNING
Electrical Shock And Personal Injury Hazard
Disconnect from electrical supply before servicing or cleaning the vacuum cleaner. Failure to do so could result in
electrical shock or personal injury from vacuum cleaner suddenly starting.
Remove dust bag by grasping
cardboard portion and pulling out.
Pull outward to remove dust cover.
Latch
Dust Bag
Spread out new dust bag, taking care
not to tear bag.
A)
DUST BAG REPLACEMENT
NOTE: Always operate vacuum cleaner with genuine Panasonic dust bags.
Recommended (Best Filtration): HEPA Media Dust Bag, Type U-13 (AMC-D1EP)
Alternate (Good Filtration): Paper Dust Bag, Type U-14 (AMC-M1EP)
11
12 13
Place dust cover on vacuum cleaner
by aligning groove on dust cover with
tab on vacuum cleaner.
Place new dust bag onto bag holder
by holding collar and pushing back.
Make sure bag is tucked in on all
sides.
Dust Bag
Tab
Press dust cover and snap into place.
Do not pinch dust bag.
14 15 16
Page 12

- 12 -
Ensure filter is fully inserted and
sercurely close the filter door.
NOTE: When the cleaning of the filter no
longer restores vacuum cleaner suction to
full power, replace the filter.
DO NOT operate without secondary filter
installed.
Turn off and unplug the vacuum
cleaner.
Remove dust bag.
Press tab on filter door (located
behind dust bag) and pull open.
Remove remove filter.
The secondary filter protects the motor. It is recommended to clean filter with cold water at least every three (3) months.
Check the secondary filter frequently and clean when dirty. Check filter when installing a new dust bag.
Secondary
Filter
Filter
Door
Tab
B) SECONDARY FILTER CLEANING / REPLACEMENT
11 12 13
Wash with cold water only. DO NOT use
detergent or soap. DO NOT wash in a
dishwasher.
Once the filter is washed clean, squeeze
by hand and allow to air-dry. DO NOT
install the filter when damp.
Allow filter to dry for 24 hours before
placing back into vacuum cleaner.
Reinstall the exhaust filter cover by
inserting the tab into the slot in the
vacuum cleaner.
Press firmly to snap exhaust filter
cover into place.
Turn off and unplug the vacuum
cleaner.
Press latch to remove exhaust filter
cover.
The HEPA media exhaust filter removes dirt from exhaust air. Check filter when changing dust bag and replace when
dirty. The exhaust filter cannot be cleaned and should be replaced at least once each year.
Latch
Tab
Slot
C) HEPA MEDIA EXHAUST FILTER REPLACEMENT
11
Air Flow
Exhaust Filter
Filtre d’évacuation
Filtre de salida
Air Flow
12 13
Grasp the exhaust filter and pull out
to remove.
Place the new filter into the vacuum
cleaner with the AIRFLOW arrow
pointing upwards.
Page 13

- 13 -
Place the vacuum in the upright position
standing on the handle. This will minimize
wheel interference when removing lower
plate.
Remove lower plate by rotating upward.
Turn off and unplug the vacuum cleaner.
Lay unit on floor with nozzle flat as
shown.
Remove nozzle hose from body by (1)
pressing in locking tab and (2) sliding up
and (3) out of retaining slot.
Replace belt whenever beater bar stops turning or a burning rubber smell caused by excessive slippage occurs. Use
part number AC28SDRZZØØØ.
2
1
3
Nozzle Hose
Locking
Tab
D) BELT REPLACEMENT
11
Four (4)
Screws
12 13
Remove the four screws from the lower
plate.
Place the vacuum in the upright position
standing on the handle. This will minimize
wheel interference when installing lower
plate.
Reinstall nozzle cover by (1) aligning the
tabs on the lower plate with the slots in
the nozzle and (2) rotating to installed
position.
Lay unit with nozzle flat as shown.
Remove beater bar by carefully lifting out.
Remove worn or broken belt.
Clean beater bar and the end caps.
Refer to BEATER BAR CLEANING (page
15).
Belt
Motor
Shaft
Beater
Bar
2
1
Tabs
Slots
1
4
Belt
Motor
Shaft
End Cap
Beater
Bar
Groove
15 16
Lay unit on floor bottom up with nozzle
flat.
Install the four screws to the lower plate.
Four Screws
17
Loop new belt around motor shaft and
belt groove on beater bar. Make sure belt
is routed in the belt guide as shown. See
illustration for correct belt routing.
Reinstall beater bar back into nozzle by
placing end caps into grooves.
After reinstalling the beater bar, turn it by
hand to make sure that belt is not twisted
or pinched and that all rotating parts turn
freely.
Route nozzle hose to hose holder. Align
nozzle hose bracket with slot on vacuum
cleaner and slide down until it clicks into
place.
Return the vacuum cleaner to the upright
position before plugging into a mains
socket.
1
2
18 19
Page 14

- 14 -
E) CLOG REMOVAL
If the dust bag and filter areas are free
of clogs, check the extension hose.
Disconnect the hose from the wand
by twisting hose handle to unlock
raised tab from “J” slot.
Disconnect wand from nozzle hose.
Check for clogs in wand and nozzle
hose connection (indicated by arrow)
and clear any obstructions.
If the vacuum cleaner does not seem to have adequate suction, first check if the dust bag is full or if a filter is clogged.
Refer to DUST BAG REPLACEMENT (Page 11), SECONDARY FILTER CLEANING / REPLACEMENT (Page 12), and
HEPA MEDIA EXHAUST FILTER REPLACEMENT (Page 12).
Hose
Wand
“J” Slot
Wand
Hose
Handle
Raised
Tab
Hose
Nozzle
Hose
Wand
If the dust bag, filter areas and the
hose areas are free of clogs,
disconnect the nozzle hose from the
wand holder and check the nozzle for
clogging.
Lay unit on floor with nozzle flat as
shown.
Remove nozzle hose from body by
(1) pressing in locking tab and (2)
sliding up and (3) out of retaining slot.
Check and clear any obstructions.
2
1
3
Nozzle Hose
Locking
Tab
15
11
Reinstall hose and connect hose to
wand. Refer to ATTACHING HOSE
(page 6).
Reinstall wand to nozzle hose.
Return the vacuum cleaner to the
upright position.
Plug in vacuum cleaner and turn on.
Hose
Wand
Nozzle
Hose
4
1
2
3
16
14
Plug in the vacuum cleaner and turn it
on.
Stretch the extension hose to
maximum length and then allow the
hose to return to its natural length.
This may pull the clog into the dust
bag.
Hose
12
If clog still exists, turn off and unplug
vacuum cleaner.
Remove hose from back of the
vacuum cleaner by pressing tabs and
pulling off.
Check and clear any obstructions
from the hose and suction inlet area.
Hose
Tabs
Suction
Inlet
13
Page 15

- 15 -
Unplug mains lead from mains socket.
Clean exterior using a clean, soft cloth that has been
dipped in a solution of mild liquid detergent and water,
then wrung dry. DO NOT drip water on vacuum cleaner.
Wipe dry after cleaning.
To reduce static electricity and dust build-up, wipe outer
surface of vacuum cleaner.
G) CLEANING EXTERIOR
F) BEATER BAR CLEANING
WARNING
Electrical Shock And Personal Injury Hazard
Disconnect electrical supply before servicing or
cleaning the vacuum cleaner. Failure to do so could
result in electrical shock or personal injury from
vacuum cleaner suddenly starting.
Remove lower plate. Refer to BELT REPLACEMENT (page 13).
Cut off any hair, thread, string, carpet pile, and lint entangled around beater bar
with a pair of scissors.
Remove beater bar. Refer to BELT REPLACEMENT (page 13).
Remove any string or debris located on the end caps.
Reinstall beater bar and lower plate. Refer to BELT REPLACEMENT (page 13).
Clean beater bar after every five uses and every time the belt is replaced.
11
Page 16

- 16 -
Vacuum cleaner won’t run. 1. Unplugged at mains socket. 1. Plug in firmly, push on/off switch.
2. Tripped circuit breaker replace at 2. Reset circuit breaker or fuse.
household service panel.
3. Thermal protector tripped. 3. Allow vacuum cleaner to cool
50 minutes. (page 10)
4. Defective mains socket. 4. Check with another appliance or lamp.
Have socket properly serviced.
Poor job of dirt pick-up. 1. Full or clogged dust bag. 1. Change bag. (page 11)
2. Worn or broken belt. 2. Replace belt. (page 13)
3. Worn beater bar. 3. Replace beater bar.
4. Clog in the air path. 4. Refer to CLOG REMOVAL. (page 14)
5. Motor protection system 5. Check for clogs. (page 14)
activated.
6. Dirty secondary filter and/or exhaust 6. Clean or change filters. (page 12)
filter.
Beater bar does not turn. 1. Worn or broken belt. 1. Replace belt. (page 13)
2. Beater bar entangled. 2. Clean beater bar. (page 15)
Sound changes. 1. New carpet fuzz clogged air path. 1. Refer to BYPASS VALVE (page 10)
and CLOG REMOVAL (page 14).
PROBLEM POSSIBLE CAUSE
POSSIBLE SOLUTION
Before contacting your Panasonic service centre, check the following points:
NOTE: Failure to correctly maintain your product may result in a charge if referred to a service agent for attention.
H) TROUBLESHOOTING
WARNING
Disconnect electrical supply before performing maintenance to the vacuum cleaner. Failure to do so could result in
electrical shock or personal injury.
Page 17

- 17 -
MODEL NO. MC-UG522
POWER SOURCE 230-240V / 50Hz
MAX. INPUT POWER 1200w
MOTOR PROTECTION YES
HOSE YES
TOOL STORAGE YES
DUSTING BRUSH
YES
CREVICE TOOL YES
EXHAUST FILTER HEPA Media
DIMENSIONS (W x L x H) 311x422x930 mm
NET WEIGHT 6.0 kg
SPECIFICATIONS
DISPOSAL INFORMATION
Disposing the appliance
Before disposing the appliance, remove the dust bag and all filters, and dispose them with normal household waste.
Information on Disposal for Users of Waste Electrical & Electronic Equipment
(private households)
This symbol on the products and/or accompanying documents means that used electrical and
electronic products should not be mixed with general household waste.
For proper treatment, recovery and recycling, please take these products to designated collection
points, where they will be accepted on a free of charge basis. Alternatively, in some countries you
may be able to return your products to your local retailer upon the purchase of an equivalent new
product.
Disposing of this product correctly will help to save valuable resources and prevent any potential
negative effects on human health and the environment which could otherwise arise from
inappropriate waste handling. Please contact your local authority for further details of your nearest
designated collection point.
Penalties may be applicable for incorrect disposal of this waste, in accordance with national
legislation.
Information on Disposal in other Countries outside the European Union
This symbol is only valid in the European Union.
If you wish to discard this product, please contact your local authorities or dealer and ask for the correct method of
disposal.
Disposing Packaging
Make sure that any package, for example, plastic bags, are kept out of reach of children to avoid risk of suffocation.
The packaging used to protect the appliance from damage during transportation is all recyclable. For information on
recycling, contact your local authority.
Disposing dust bags and filters
Dust bags and filters can be disposed of in normal hosehold waste.
Page 18

Sales and support information
Customer Communications Centre
· For customers within the U.K.: 0844 844 3899
· For customers within Ireland: 01289 8333
· For further support on your product, please visit our
website: www.panasonic.co.uk
Direct Sales at Panasonic U.K.
· Order accessory and consumable items for your
product with ease and confidence by phoning
our Customer Communications Centre Monday Thursday 9:00am - 5:30pm, Friday 9:30am - 5:30pm
(Excluding public holidays).
· Or go on line through our Internet Accessory ordering
application at www.pas-europe.com
· Most major credit and debit cards accepted.
· All enquiries transactions and distribution facilities
are provided directly by Panasonic U.K.
· It couldn’t be simpler!
· Also available through our Internet is direct shopping
for a wide range of finished products. Take a
browse on our website for further details.
- 18 -
DESCRIPTION MC-UG522
HEPA media exhaust filter Part number
AC38KDDJZØØØ
Secondary filter Part number
AC37KDKTZØØØ
Crevice tool Part number
AC6ØRZFZVU7
Dusting brush Part number
AC63RYUZVØ7
Wand Part number
AC4ØPJPZVØ7 RE
Belt Part number
AC28SDRZZØØØ
Beater Bar Part number
AC84RDVMZØØØ
Hose assembly Part number
AC84PDTGZV07
HEPA Media Dust Bag Kit Part number
(Recommended - Best Filtration) AMC-D1EP
TYPE U-13
Paper Dust Bag Kit Part number
(Alternate - Good Filtration) AMC-M1EP
TYPE U-14
VACUUM CLEANER CONSUMABLES / ACCESSORIES
For customers within the UK and the Republic of Ireland:
Note: Specifications are subject to change without notice.
Page 19

- 19 -
The model and serial number of the product may be found
on the nameplate located at the back of your vacuum
cleaner. You should note the model and serial number in
the spaces provided and retain this book for future
reference.
· The guarantee conditions set by our representatives in the country of sale is applied.
· Using dust bags which are not those of Panasonic will make the guarantee invalid.
· Repairs should be done by Panasonic service persons or technicians. Otherwise the guarantee will be invalid.
· For more information, refer to the warranty card which has been included with this product.
Model Number: ......................................................
Serial Number: ........................................................
Date Purchased: ....................................................
Dealer’s Name ........................................................
Dealer’s Address ....................................................
Telephone Number: ................................................
REMINDER FOR CUSTOMER
GUARANTEE
Page 20

http://www.panasonic.net/
© 2012 Panasonic Appliances Company of America,
Division of Panasonic Corporation of North America. All Rights Reserved.
Pursuant to the directive 2004/108/EC, article 9 (2)
Panasonic Testing Centre
Panasonic Service Europe, a division of Panasonic Marketing Europe GmbH
Winsbergring 15, 22525 Hamburg, F.R. Germany
CØ1ZDVM2ØEØØ Issued in 06 2012
ACØ1ZDVMZØEØ
Printed in Mexico
 Loading...