

Panasonic DMC-XS1R, DMC-FH10P, DMC-XS1PZK09, Lumix DMC-FH10, Lumix DMC-XS1 Owner's Manual
...
Owner’s Manual
for advanced features
Digital Camera
Model No. DMC-XS1
DMC-FH10
DMC-XS1 DMC-FH10
Please read these instructions carefully before using this product,
and save this manual for future use.
Register online at
www.panasonic.com/register
(U.S. customers only)
VQT4P59
F1212HH0

Contents
Before Use
Care of the camera...................................................................................................... 5
Standard Accessories............................................... .. .. .. .. .. ..... .. .. .. .. .. .. .. .. ..... .. .. .. .. .. .. .. 6
Names and Function s of Main Par ts..... ........... ..................... .......... ..................... ...... 7
Preparation
Charging the Batter y........... ........... ..................... .......... ..................... ........... .............11
• Inserting th e Ba ttery........................... ........... ..................... .......... ..................... ..12
• Charging........................................ .......... ..................... ..................... ........... ...... 13
• Approximate operating time and number of recordable pictures........................ 16
Inserting and Removing the Card (optional).......................................................... 18
About the Built-in Memory/the Card........................................................................19
• Approximate number of recordable pictures and available recording time......... 21
Setting Date/Time (Clock Se t) ....... ..................... .......... ..................... ........... ............22
• Changing the Clock Setting.. ..............................................................................23
Tips for taking good pictures................................................................................... 24
• Fit the strap and hold the camera carefully......................................................... 24
• Preventing jit te r (camera shake)............ ........... .......... ..................... ........... ........24
Basic
Selecting the Recording Mode..................................... ..................... ..................... ..2 5
Taking pictures using the automat ic function
(Intelligent Auto Mode) ............................................................................................. 26
• Changing the settings.........................................................................................28
Taking pictures with your favorite settings
(Normal Picture Mode).......... ........... .......... ..................... ........... ..................... ..........2 9
Focusing .................................................................................................................... 30
Recording Motion Pictures.................. ..................... .......... ..................... ........... ...... 32
Playing Back..............................................................................................................34
• Displaying Multiple Screens (Multi Playback)..................................................... 36
• Using the Playback Zoom.................. ........... ..................... .......... ..................... ..36
Deleting Pictures........... .......... ........... ..................... .......... ..................... ................... 37
• To delete a single picture....................................................................................37
• To delete multiple pictures (up to 50) or all the pictures..................................... 37
Setting the Menu ....................... ..................... ........... ..................... .......... ................. 38
• Setting menu items...................................................................... .... .. ......... .... .. ..38
About the Setup Menu............ ..................... ..................... ........... ..................... ........ 40
Recording
About the LCD Monitor............................................................................................. 45
Using the Zoom .........................................................................................................47
• Optical Zoom.............. ..................... ........... ..................... .......... ..................... .... 47
• Extended Optical Zoom (EZ).............................................................................. 48
• Intelligent Zoom....................... .. .. .. .. .. .. .. .. ..... .. .. .. .. .. .. .. .. ..... .. .. .. .. .. .. .. .. ..... .. .. .. .. .. ..48
- 2 -

• Digital Zoom...................... ..................... ........... ..................... .......... ................... 49
Taking Pictures Using the Built-in Flash.................................................................50
• Switching to the appropriate flash setting........................................................... 50
Taking Pictures with the Self-timer.......................................................................... 54
Compensating th e Ex pos ure.................................. ..................... .......... ................... 55
Taking Pictures with different image effects
(Creative Control Mode) (DMC-XS1) ......................................................................... 56
• [Expressive].............. .......... ..................... ........... ..................... .......... ................. 57
• [Retro]..................... ..................... .......... ..................... ........... ..................... ........57
• [High Key].............................. ..................... .......... ..................... ........... .............. 57
• [Low Key]............................ ..................... ........... ..................... .......... ................. 57
• [Sepia]................................. ........... ..................... .......... ..................... ........... ...... 58
• [Dynamic Monochrome].......................................... .... ......... .... .. .... .... ....... .... .... ..58
• [Impressi ve Art].................................. ........... ..................... .......... ..................... ..58
• [High Dynamic] ........... ........... .......... ..................... ........... ..................... .............. 58
• [Cross Process] ............................................ .......... ..................... ........... ............59
• [Toy Effect].......... .......... ..................... ........... ..................... .......... ..................... ..59
• [Miniature Effect]........................................... .......... ..................... ........... ............59
• [Soft Focus]................................ .......... ..................... ........... ..................... ..........60
• [One Point Col o r]............................................ ..................... .......... .....................60
Taking panorama pictures (Panorama Shot Mode)....................... ..................... .... 61
Taking pictures that match the scene being recorded (Scene Mode).................. 64
• [Portrait]........................ ..................... ........... ..................... .......... ..................... ..65
• [Soft Skin] ............. .......... ........... ..................... .......... ..................... ........... ..........65
• [Scenery].............................................................................................................65
• [S p o rts]................................... ..................... .......... ..................... ........... .............. 66
• [Night Portrait]................................ .......... ..................... ........... ..................... ...... 66
• [Night Scenery]......... ..................... .......... ..................... ........... ..................... ...... 66
• [Food].......................... .. .. .. ....... .. .. .. .. .. .. .. .. ..... .. .. .. .. .. .. .. .. ..... .. .. .. .. .. .. .... ..... .. .. .. .. .. ..66
• [Baby1]/[Baby2]............................... ........... ..................... ..................... .......... .... 67
• [Pet]....................................... .......... ..................... ..................... ........... .............. 67
• [Sunset]............. ..................... .......... ..................... ........... ..................... .......... .... 67
• [High Sens.]......................................... ........... ..................... ..................... ..........67
• [S tarry Sky] ............... .......... ..................... ........... ..................... .......... ................. 68
• [Glass Through]................................. ..................... ........... ..................... .......... ..68
• [Photo Frame]............. ........... ..................... .......... ..................... ........... .............. 68
Using the [Rec] Menu.............. ..................... ........... ..................... .......... ................... 69
• [Picture Size]............. .......... ..................... ........... ..................... .......... ................. 69
• [Sensitivit y]............................. ..................... .......... ..................... ........... .............. 70
• [White Balance]................. ........... ..................... .......... ..................... ........... ........ 71
• [AF Mode]................................................ ..... .. .. .. .. .. .. .. .. ....... .. .. .. .. .. .. .. ..... .. .. .. .. .. ..73
• [i.Exposure]......... .......... ..................... ........... ..................... .......... ..................... ..75
• [i.Zoom].......... ..................... ........... ..................... .......... ..................... ........... ...... 75
• [Digital Zoom]......................................... ........... ..................... .......... ................... 75
• [Burst]................... ..................... .......... ..................... ..................... ........... ..........76
• [Color Mode] ................................................. .. .. .. .. .. .. .. .. ..... .. .. .. .. .. .. .. .. ..... .. .. .. .. .. ..78
• [Red-Eye Removal]................................ ........... ..................... .......... ................... 79
- 3 -

• [S tabilizer].............................. .......... ..................... ........... ..................... .......... .... 79
• [Date Sta mp]......... .......... ..................... ........... ..................... .......... .....................80
• [Clock Set] ............ .......... ........... ..................... ..................... .......... .....................80
Using the [Motion Picture] Menu............................................................................. 81
• [Rec Quality]............. ..................... .......... ..................... ..................... ........... ...... 81
• [Continuous AF]........................... .. .. .. .. .. .. ..... .. .. .. .. .. .. .. .. ..... .. .. .. .. .... .. .. ..... .. .. .. .. .. ..81
Playback/Editing
Various methods of playback................................................................................... 82
• [Slide Show].............. .......... ..................... ........... ..................... .......... ................. 83
• [Filtering Play]........... .......... ..................... ........... ..................... ..................... ...... 85
• [Calendar]......................................................... .... .. .... ......... .. .... .... .. ......... .... .... ..87
Having Fun with Recorded Pictures (Retouch).......... ........... .......... ..................... ..88
• [Auto Retouch ]................ ..................... ..................... ........... ..................... ..........88
• [Creative Retouch] (DMC-XS1)............................................................................ 90
Using the [Playback] Menu......... .............................................................................. 91
• [Retouch] (DMC-XS1).......................................................................................... 91
• [Auto Retouch] (DMC-FH10)................................................................................91
• [Resize]............. .......... ........... ..................... .......... ..................... ........... .............. 91
• [Favorite]................... ..................... .......... ..................... ........... ..................... ...... 93
• [Protect].............. .......... ........... ..................... .......... ..................... ..................... ..94
• [Copy]..................... ..................... .......... ..................... ........... ..................... ........95
Connecting to other equipment
Playing Back Pictures on a TV Screen .................................................................... 96
Saving stil l pic tures and motion pictures on your PC........ .......... ..................... .... 98
• About the supplied software ............................................................................... 98
Printing th e Pictures....... ..................... ..................... .......... ..................... ........... .... 102
• Selecting a single picture and printing it...........................................................103
• Selecting multiple pictures and printing them................................................... 103
• Print Setting s................................. ..................... .......... ..................... ........... .... 104
Others
Screen Display......................................................................................................... 107
Cautions for Use......................................................................................................109
Message Display .......................................... .. ....... .. .. .. .. .. .. .. ..... .. .. .. .. .. .. .. .. ..... .. .. .. .. .. .114
Troubleshooting .......................................................................................................116
The camera illustrati ons and on -screen disp lay illustrat ions provid ed in this manual may dif fer f rom
•
the actual product appearance or on-screen displays. In thi s manual, (DMC-XS1) is used for
examples of the camera illustrations and on-s creen display illustrati ons when operation or other
information is more or less the s ame between models.
Therefore, the camera illustration s an d on-screen display illustrations in this manual may differ
from your model.
•The operations, procedures, or functions that differ among models are indicated separately,
together with the relevant model number.
e.g.: (DMC-XS1)
(DMC-FH10)
- 4 -
Before Use
Care of the camera
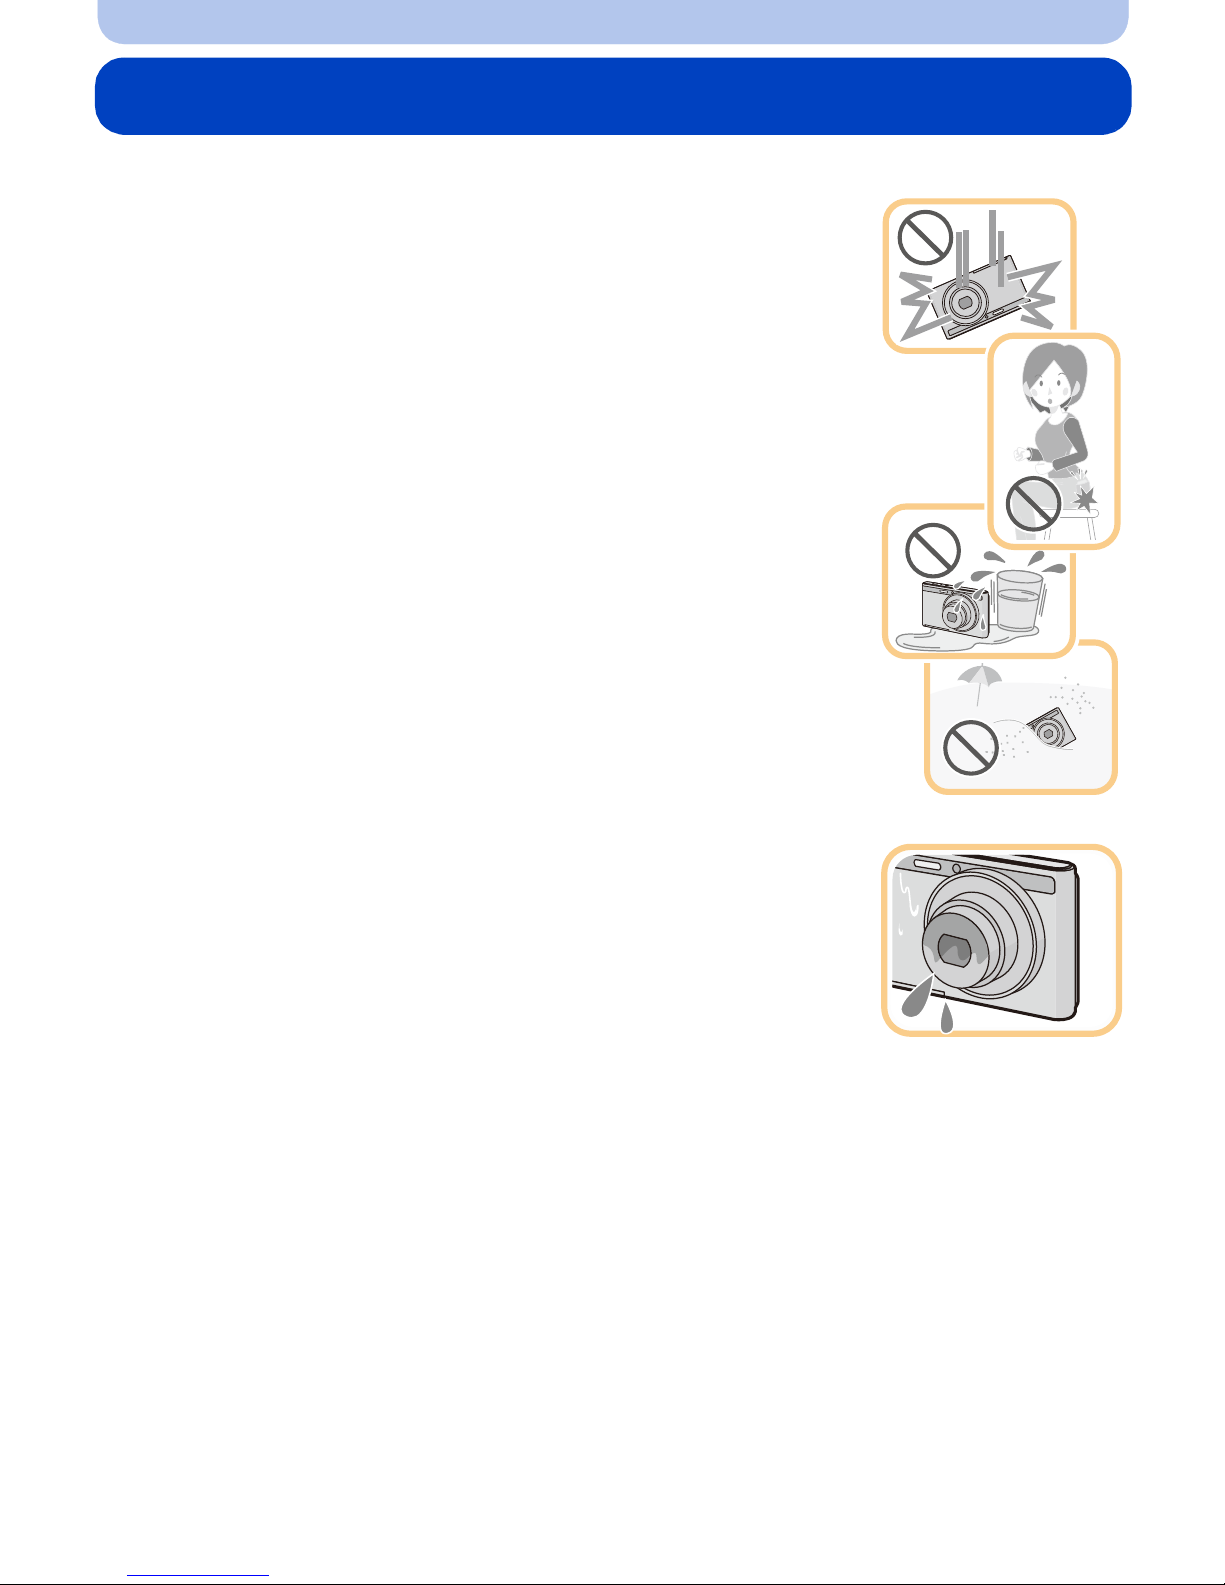
Do not subject to strong vibration, shock, or pressure.
The lens, LCD monitor, or external case may be damaged if used in the
•
following conditions.
It may also malfunction or image may not be recorded if y ou:
–Drop or hit the camera.
–Sit down with the camera in your trousers pocket or forcefully insert it
into a full or tight bag, etc.
–Attach any items such as accesso r ies to the strap attached to the
camera.
–Press hard on the lens or the LCD monitor.
This camera is not dust/splash/water proof.
Avoid using the camera in places with a lot of dust, water, sand,
etc.
Liquid, sand and othe r foreign material may get into the sp ace arou nd the
•
lens, buttons, etc . Be particularly careful since it may not just ca use
malfunctions, but it may also become irreparable.
–Places with a lot of san d or dust.
–Places where water can come into contact with this unit, such as when
using it on a rainy day or at the beach.
∫ About Co ndensation (When the lens is f o gged up)
•
Condensation occurs when the ambient tempera ture or humidity
changes. Be car eful of condensation since it causes lens stains, fungus
and camera malfunction.
•If condensation occ urs, turn the camera of f and leave it for about 2 hours.
The fog will disappear naturally when the temperature of the camera
becomes close to the ambient temperature.
- 5 -

Before Use
Standard Accessories
Check that all the accessories are supplied before using the camera.
The accessories and their shape will differ depending on the country or area where the camera wa s
•
purchased.
For details on the accessories, refer to “Basic Owner’ s Manual”.
•Battery Pack is indicated as battery pack or battery in the text .
•microSD Memory Card, microSDHC Memory Card are indicated as card in the text.
•The card is optional.
You can record or play back pictures on the built-in memory when you are not using a card.
•If any accessories are los t, custome rs in the USA and Pu erto Rico s hould conta ct Pan asonic ’ s p ar ts
department at 1-800-833-9626 and cus tomers in Canada should cont act 1-800-99-LUMIX
(1-800-995-8649) for further information about obtaining replacement parts.
- 6 -

Before Use
Names and Functions of Main Parts
(DMC-XS1)
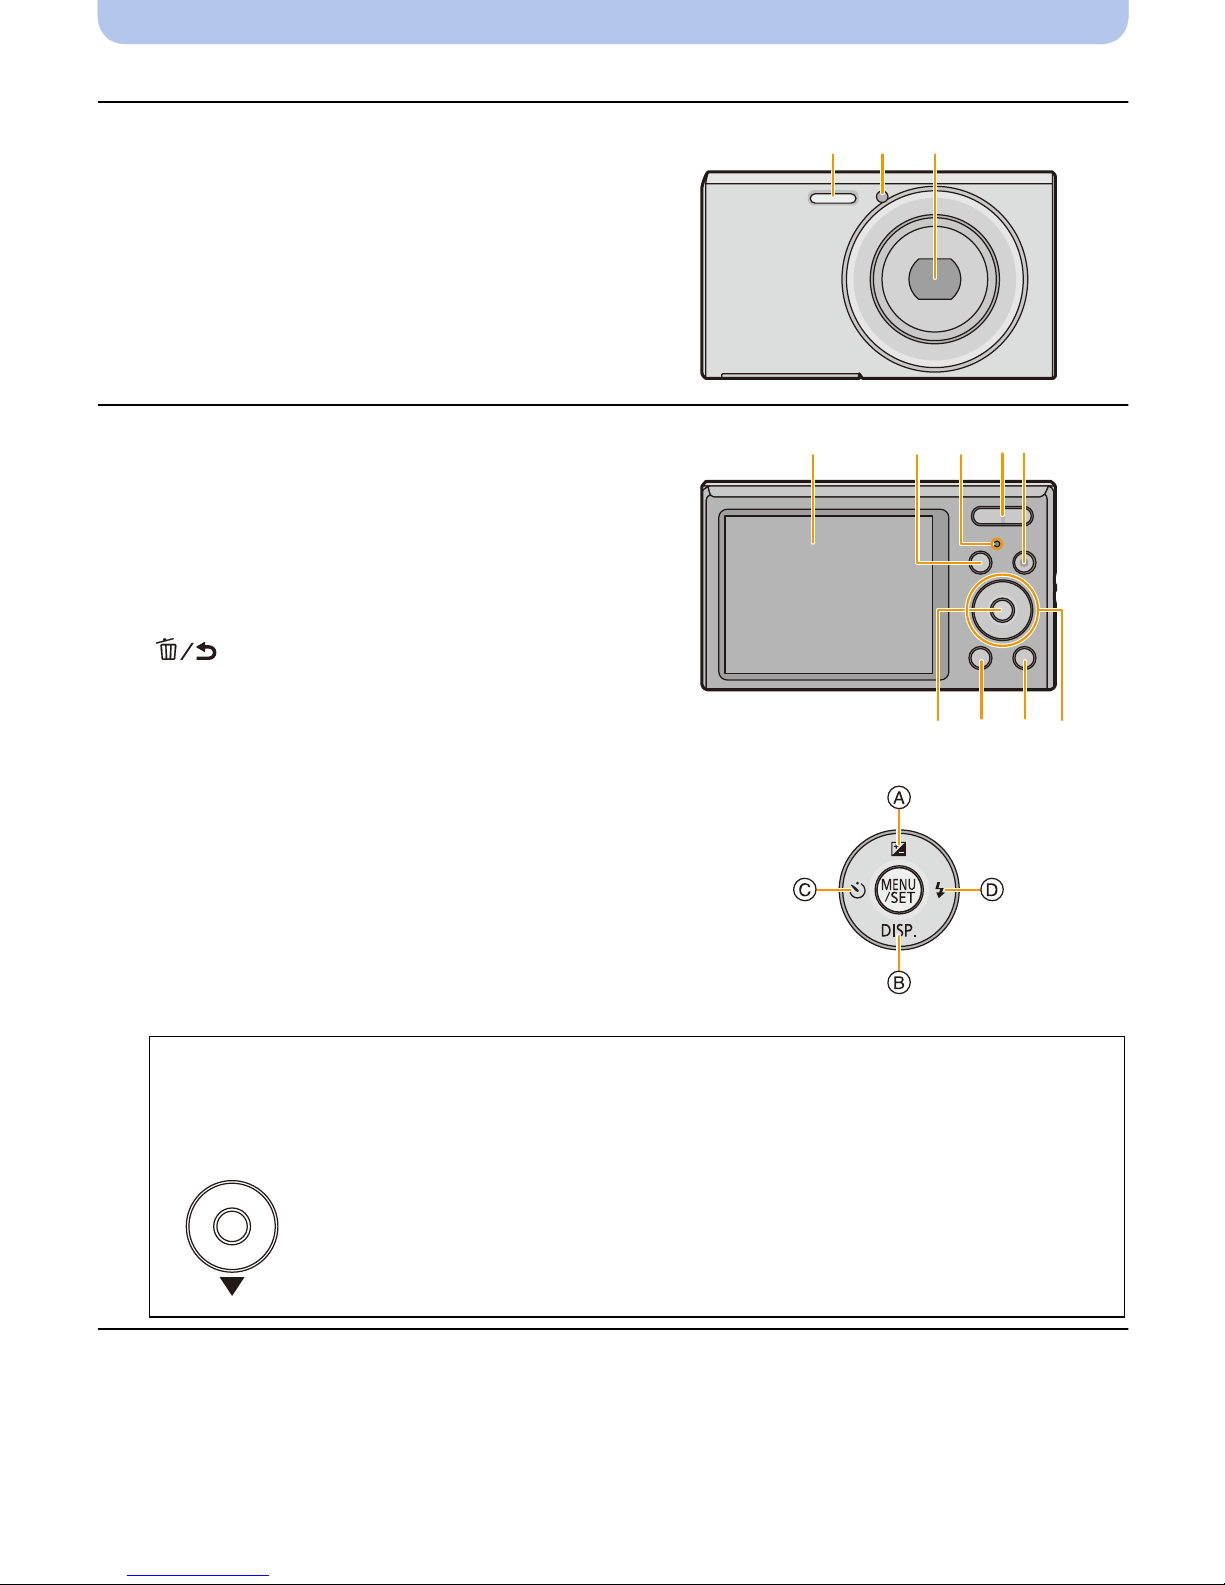
1Flash (P50)
2 Self-timer indicator (P54)
3 Lens (P5, 110)
4 LCD monitor (P45, 107, 110)
5 [MODE] button (P25, 82)
6 Charging lamp (P13)
7 Zoom button (P47)
8 Motion picture button (P32)
9 [MENU/SET] button (P38)
10 [(] (Playback) button (P34)
11 [ ] (Delete/Cancel) button (P37)
4
31 2
5 6
78
12 Cursor buttons
A: 3/Exposure compensation (P55)
B: 4/[DISP.] (P45)
C: 2/Self-timer (P54)
D: 1/Flash setting (P50)
In this Owner’s Manual, the cursor buttons are described as shown in the figure below
or described with 3/4/2/1.
e.g.: When you press the 4 (down) button
or Press 4
91110 12
- 7 -
Before Use
14
15
13
16 17 18
19 20 21
22
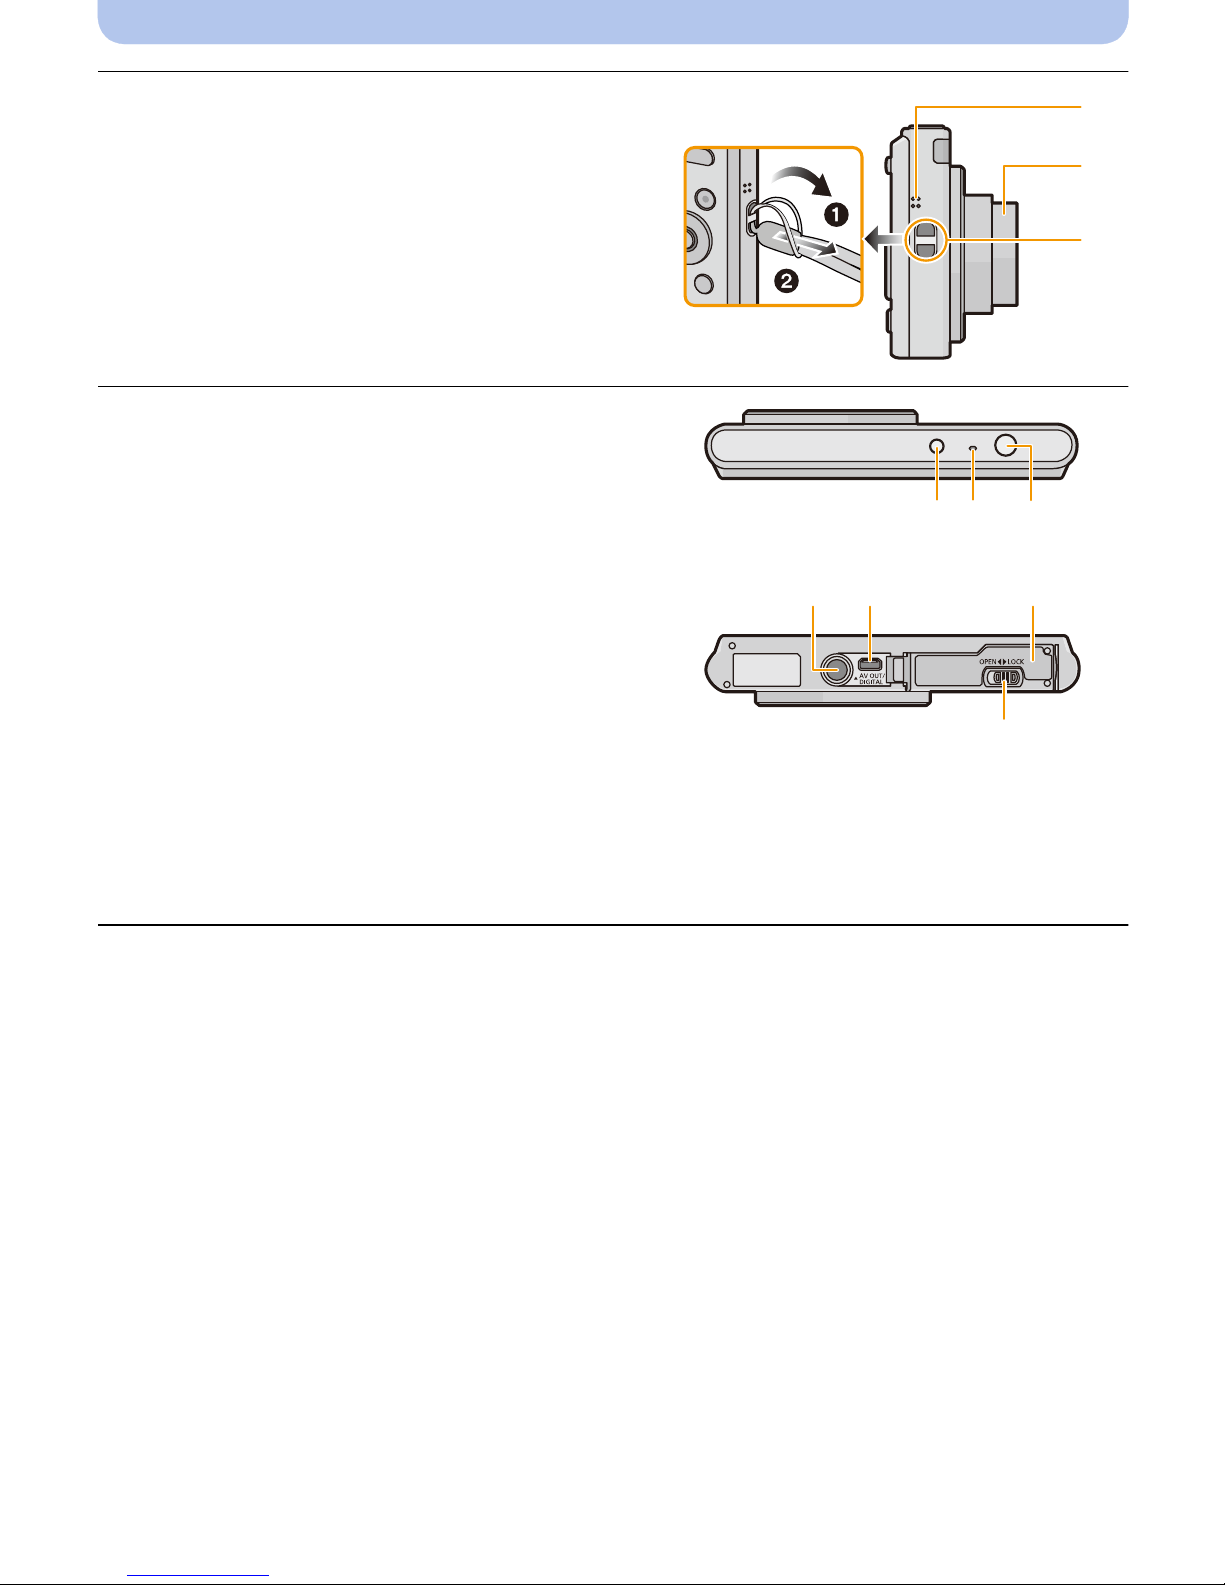
13 Speaker (P41)
•
Be careful not to c over the speaker with your
finger. Doing so may make sound difficult to
hear.
14 Lens barrel
15 Strap eyelet (P24)
Be sure to attach th e stra p w h en usi n g the
•
camera to ensure that you will not drop it.
16 Camera [ON/OFF] button (P22)
17 Microphone
Be careful not to cover the microphone with
•
your finger.
18 Shutter button (P26, 29)
19 Tripod mount
•
A tripod with a screw length of 5.5 mm
(0.22 inch) or more may damage this unit if
attached.
20 [AV OUT/DIGITAL] socket (P13, 96, 100,
102)
This socket is also used when charging the
•
battery.
• Take care not to subjec t the socket with water or other li quids.
21 Card/Battery door (P12, 18)
22 Release lever (P12, 18)
- 8 -
(DMC-FH10)
31 2
1Flash (P50)
2 Self-timer indicator (P54)
3 Lens (P5, 110)
Before Use
4 LCD monitor (P45, 107, 110)
5 [MODE] button (P25, 82)
6 Charging lamp (P13)
7 Zoom button (P47)
8 Motion picture button (P32)
9 [MENU/SET] button (P38)
10 [(] (Playback) button (P34)
11 [ ] (Delete/Cancel) button (P37)
12 Cursor buttons
A: 3/Exposure compensation (P55)
B: 4/[DISP.] (P45)
C: 2/Self-timer (P54)
D: 1/Flash setting (P50)
4
5 6
78
91110 12
In this Owner’s Manual, the cursor buttons are described as shown in the figure below
or described with 3/4/2/1.
e.g.: When you press the 4 (down) button
or Press 4
- 9 -
Before Use
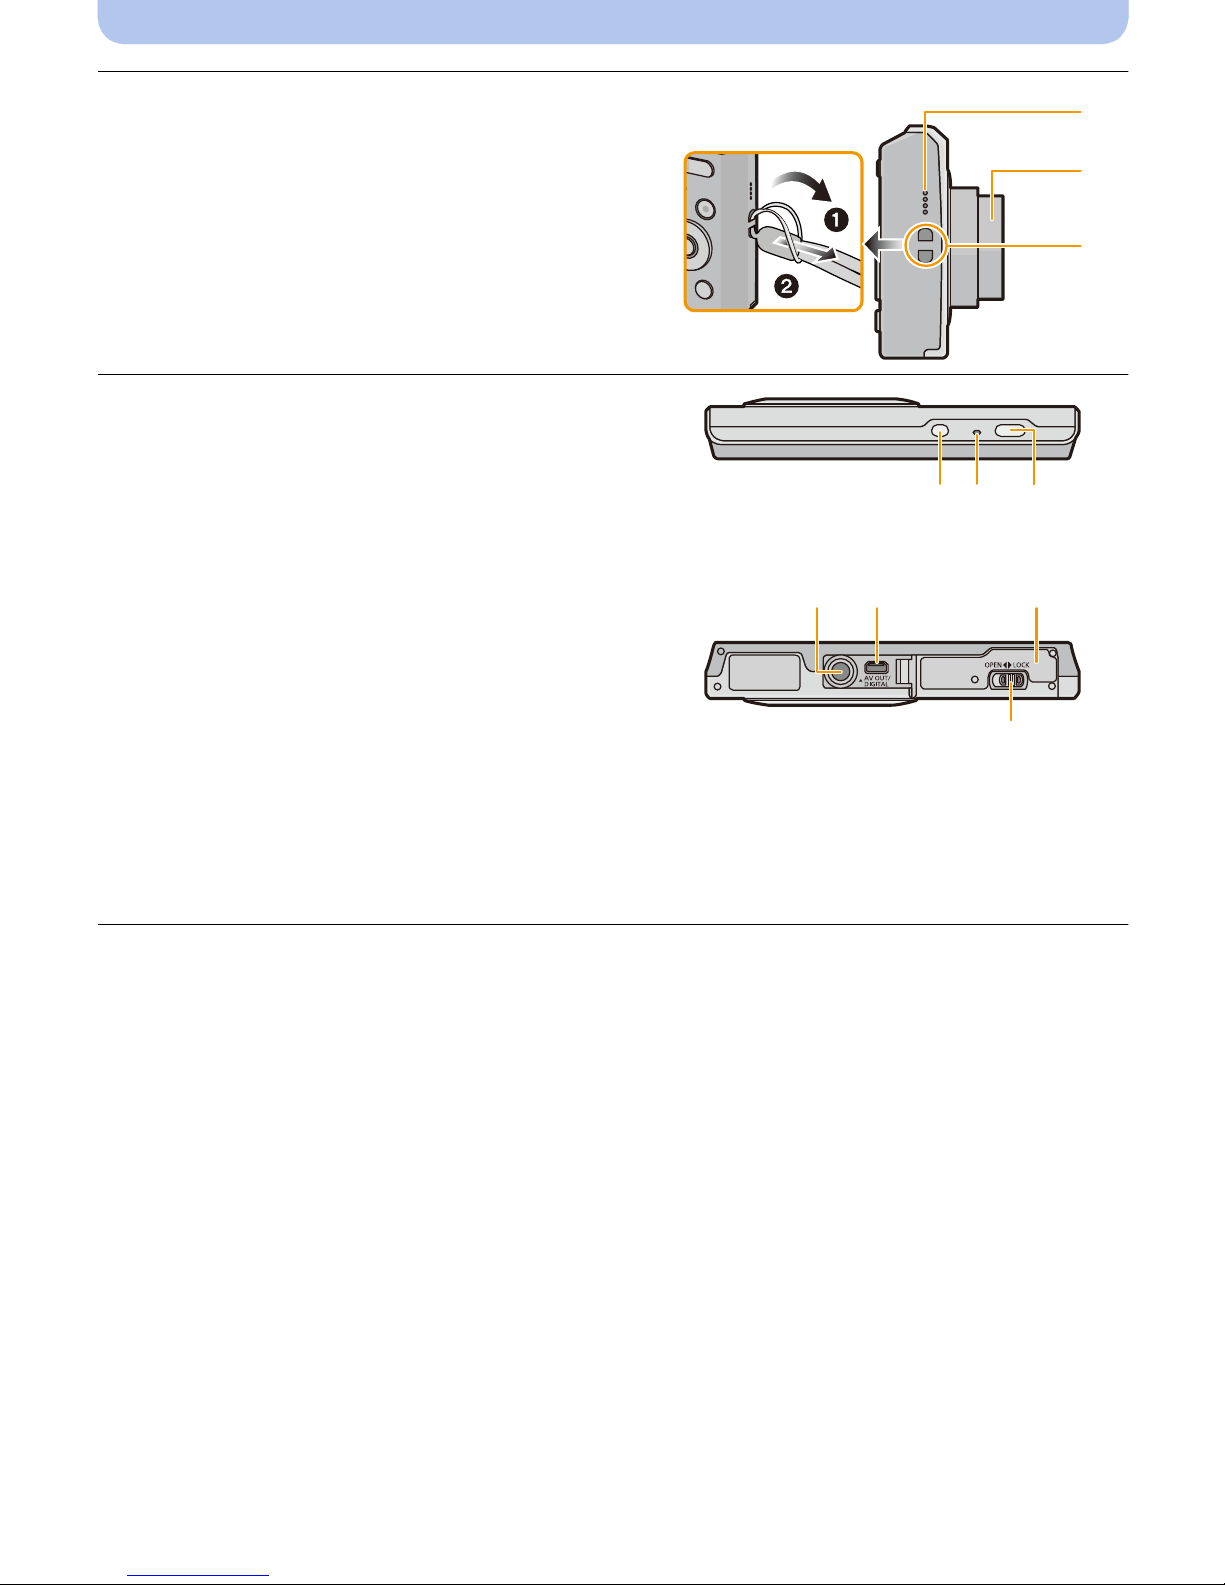
14
15
13
16 17 18
19 20 21
22
13 Speaker (P41)
•
Be careful not to c over the speaker with your
finger. Doing so may make sound difficult to
hear.
14 Lens barrel
15 Strap eyelet (P24)
Be sure to attach th e stra p w h en usi n g the
•
camera to ensure that you will not drop it.
16 Camera [ON/OFF] button (P22)
17 Microphone
Be careful not to cover the microphone with
•
your finger.
18 Shutter button (P26, 29)
19 Tripod mount
A tripod with a screw length of 5.5 mm
•
(0.22 inch) or more may damage this unit if
attached.
20 [AV OUT/DIGITAL] socket (P13, 96, 100,
102)
This socket is also used when charging the
•
battery.
• Take care not to subjec t the socket with water or other li quids.
21 Card/Battery door (P12, 18)
22 Release lever (P12, 18)
- 10 -

Preparation
Charging the Battery
Use the dedicated AC adaptor (supplied), USB connection cable (supplied) and battery.
•
The battery is not charged when the camera is shipped. Charge the battery before use.
•Charge the battery only when it is inserted in the camera.
Camera conditions Charge
Turned off
Tu rned on —
∫ About batteries that you can use with this unit
It has been found that counterfeit battery packs which look very similar to the
genuine product are made available for purchase in some markets. Some of these
battery packs are not adequately protected with internal protection to meet the
requirements of appropriate safety standards. There is a possibility that these battery
packs may lead to fire or explosion. Please be advised that we are not liable for any
accident or failure occurring as a result of use of a counterfeit battery pack. To
ensure that safe products are used, we recommend that a genuine Panasonic battery
pack is used.
∫ About the power supply
If you use the AC adaptor (supplied) when the battery is in this unit, you can supply power from
a power outlet via the USB connection cable (supplied).
The battery may be running out during recording. The camera will turn off if the battery power
•
is gone.
•When the battery is not insert ed, power is not supplied.
•Before connecting or disconnecting the AC adaptor (supplied), turn the camera off.
≤
- 11 -
Preparation
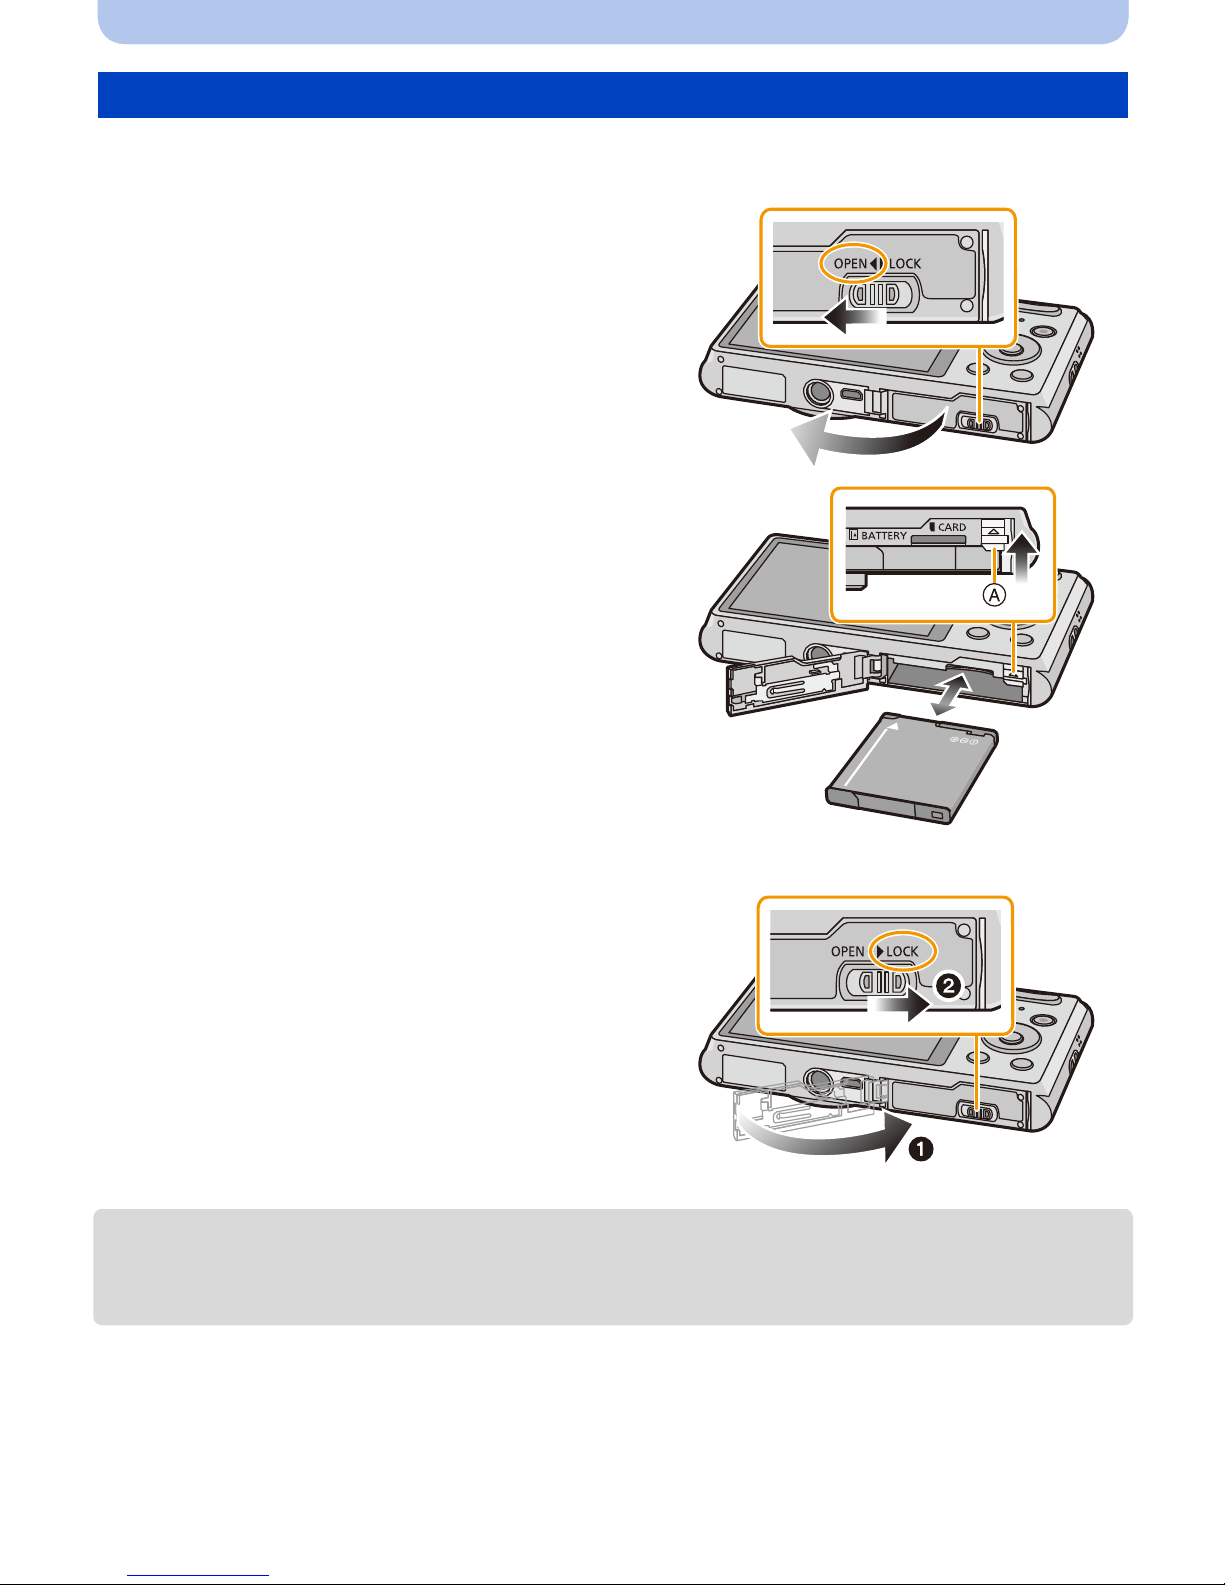
Inserting the Battery
Insert the battery into the camera to charge it.
Slide the release lever in the direction
1
of the arrow and open the card/batte ry
door.
• Always use genuine Panasonic batteries.
• If you use other batteries, we canno t
guarantee the quality of this product.
Being careful about the battery
2
orientation, securely insert it all the
way in, and then c heck that it is loc ked
by the lever A.
T o re move the battery, pull the lever A
in the direction of the arrow.
1: Close the card/battery door.
3
2: Slide the release lever in the
direction of the arrow.
•Turn the camer a off and wait for the “LUMIX” dis play on the LCD monitor to clear before removing
the battery. (Otherwise, this unit may no longer operate normally and the card itself may be
damaged or the recorded pictures may be lost.)
- 12 -
Preparation
Charging
•Charge the battery in ar eas with an ambient temperat ure, between 10 oC and 30 oC (50 oF and
86 oF) (same as the battery temperature), is recommended.
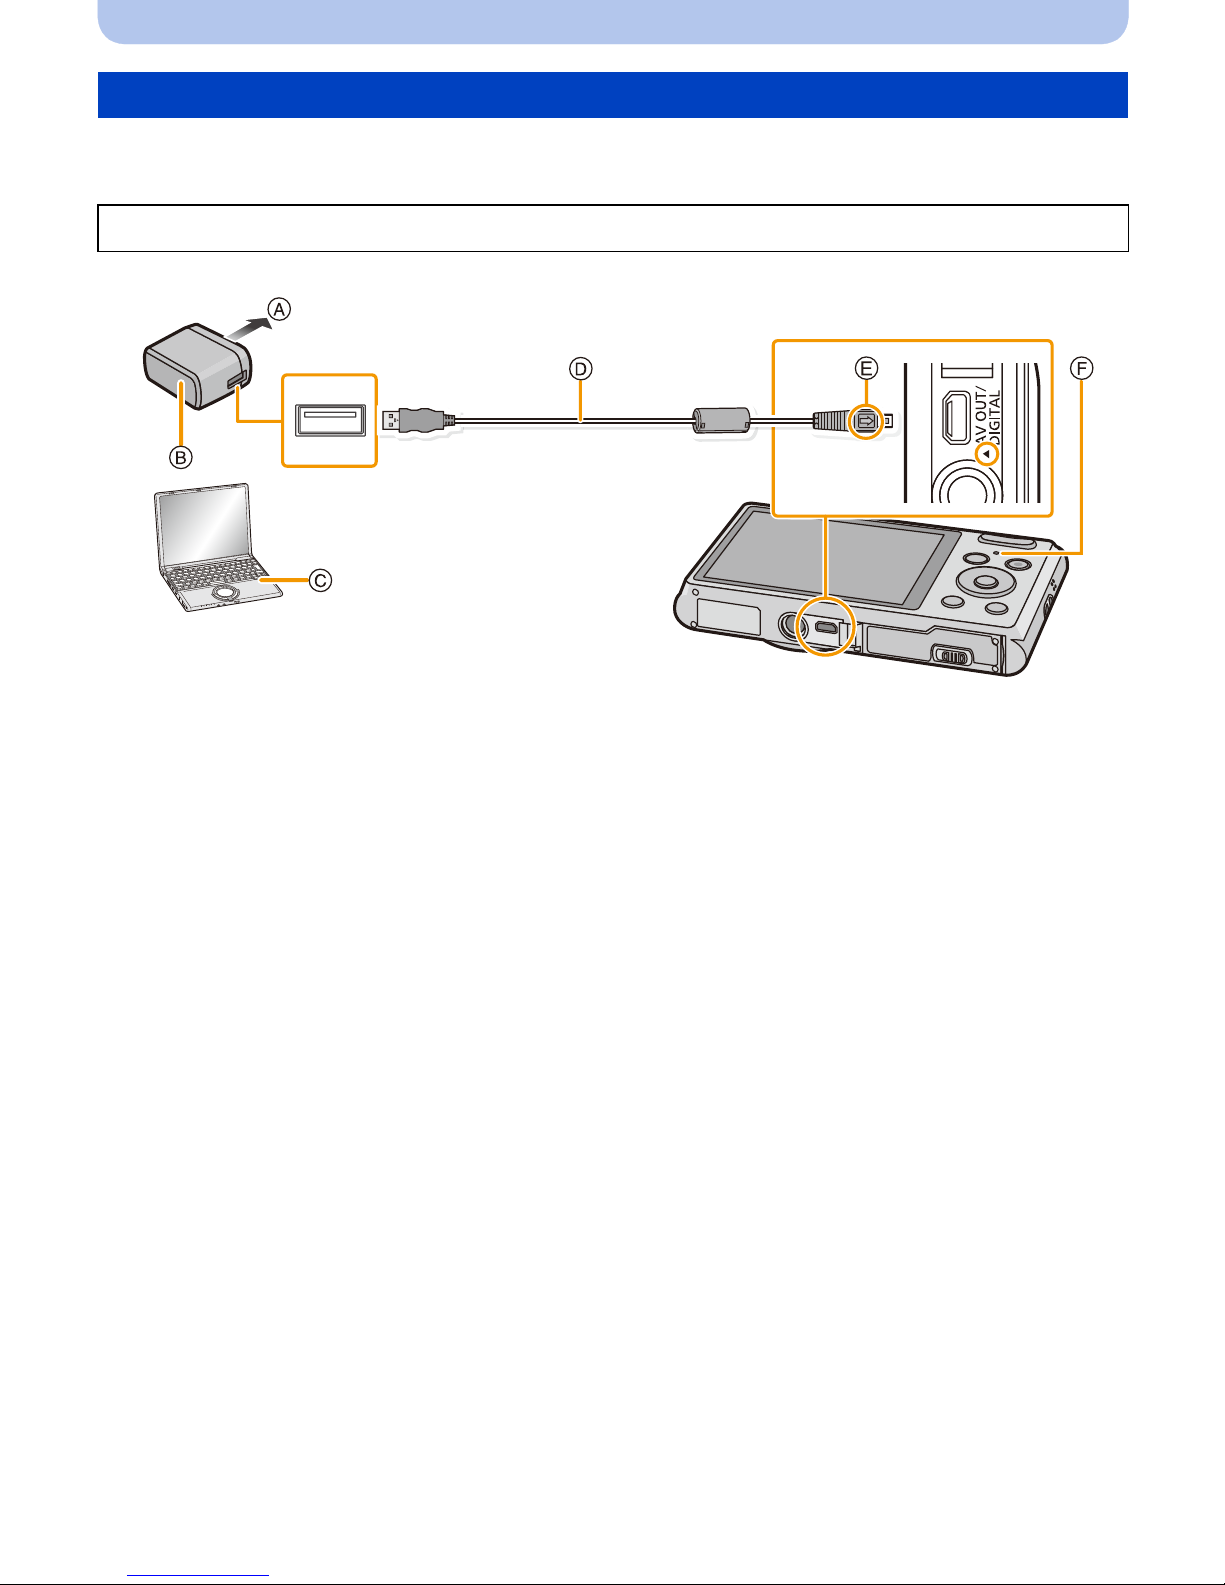
Check that this unit is turned off.
A To power outlet
B AC adaptor (supplied)
C PC (Turned on)
D USB connection cable (supplied)
•Check the directions of the connectors, and plug them straight in or unplug them straight out.
(Otherwise the connectors may bend out of shape, which may cause malfunction.)
E Align the marks, and insert.
F Charging lamp
(Charging from the power outlet)
Connect the AC adaptor (supplied) and this camera with the USB connection
cable (supplied), and insert the AC adaptor (supplied) into the power outlet.
- 13 -

Preparation
(Charging from a computer)
Connect the computer and this cam era with the USB connect ion cable
(supplied).
•Charging may not be possible depending on computer specifications.
•If the computer enters a suspended sta te while charging the battery, charging will stop.
•Connecting this camera to a notebook computer that is not conn ected to a power outlet will cause
the notebook computer battery to drain f aster. Do not leave the camera connected for extended
periods of time.
•Be sure to always connect the camera to a computer USB terminal. Do not c onnect the camera to a
monitor, keyboard or printer USB terminal, or a USB hub.
∫ About the charging lamp
On: Charging.
Off: Charging has completed. (When charging is complete, disconnect the camera
from the power outlet or computer.)
∫ Charging time
When using the AC adaptor (supplied)
Charging time Approx. 150 min
The indicated charg ing time is for when the battery ha s been discharged comple tely. The
•
charging time may vary depending on how the battery has been used. The charging time for
the battery in hot/cold environments or a battery that has not been used for a long time may
be longer than normal.
•The charging time when connected to the computer depends on the computer’s
performance.
∫ Battery indication
The battery indication is displayed on the LCD monitor.
The indication turns red and blinks if the remaining battery power is low. Recharge the battery or
•
replace it with a fully charged battery.
- 14 -

Preparation
•Do not leave any met al items (such as clips) near the contact areas of the power plug.
Otherwise, a fire and/or electric shocks may be caused by short-circuiting or the resulting
heat generated.
•Do not use any other USB connection cables except the supplied one or a genuine Panasonic USB
connection cable (DMW-USBC1: optional).
•Do not use any other AC adapto rs except the supplied one.
•Do not use a USB extension cable.
•The AC adaptor (su pplied) and USB connec tion ca ble (suppl ied) are for this camera o nly. Do not use
them with other devices.
•Remove the battery after use. (The battery will be exhausted if left for a long period of time after
being charged.)
•The battery becomes warm after using and during and after charging. The camera also becomes
warm during use. This is not a malf unction.
•The battery can be recharged even when it still has some power left, but it is not recommended that
the battery cha r ge be frequently topped up while the battery is full y charged. (Since characteristic
swelling may occur.)
•If a problem occurs in the power outlet, such as a power outage, charging may not be completed
normally. If this happens, disconnect the USB connection cable ( supplied) and connect it again.
•If the charging lamp does not turn on or blinks when you connect the AC adaptor (supplied) or PC,
this indicates tha t t he charging has been stopped because the unit is not in a temper ature range
suitable for charging, and does not indicate a fault.
Reconnect the USB connection cable (supplied) in a location where the ambient temperature (and
the temperature of battery) is in a 10 oC to 30 oC (50 oF to 86 oF) range, and try ch arging again.
- 15 -

Preparation
Approximate operating time and num ber of recordable pictures
∫ Recording still pictures
Number of recordable
pictures
Recording time Approx. 130 min
Approx. 260 pictures
By CIPA standard in Normal
Pictur e M ode
Recording conditions by CIPA standard
•
CIPA is an abbreviation of [Camera & Imaging Products Association].
•Temperature: 23 oC (73.4 oF)/Humidity: 50%RH when LCD monitor is on.
•Using a Panasonic microSDHC Memory Card (16 GB).
•Using the supplied battery .
•St arting recording 30 seconds after the camera is turned on. (Whe n the Optical Image Stabilizer
functio n is set to [ON].)
•Recording once every 30 seconds using full flash every second recording.
•Changing the zoom magnification from Tele to Wide or vice versa in every recording.
•Turning the c amera off every 10 recordings and leaving it until the te mperature of the batter y
decreases.
The number of recordable pictures varies depending on the recording interval time. As
the recording interval time becomes longer, the number of recordable pictures
decreases. [For example, if you were to take one picture every two minutes, then the
number of pictures would be reduced to approximately one-quarter of the number of
pictures given above (based upon one picture taken every 30 seconds).]
∫ Recording motion pictures
When recording with picture quality set to [HD]
Recordable time Approx. 90 min
Actual recordable tim e Approx. 45 min
These times are fo r an ambien t temper at ure of 23 oC (73.4 oF) and a humidity of 50%RH. Ple ase be
•
aware that these times are approximate.
•Actual recordable ti me is the time a vailable fo r recording whe n repeating a ctions suc h as turni ng this
unit on and off, starting/stopping recording, z oom operation, etc.
•Motion pictures can be recorded continuousl y up to 2 GB.
The maximum available recording time for up to 2 GB only is displayed on the scr een.
- 16 -

Preparation
∫ Playback
Playback time Approx. 240 min
The operating times and number of recordable pictures will differ according to the
•
environment and the operating conditions.
For example, in the following cases, the operating times will shorten and the number of recordable
pictures is reduced :
–In low-temperature environments, such as on ski slopes.
–When operations s uch as flash and zoom are used repeatedly.
•When the operating time of the camera becomes extremely short even after properly charging the
battery, the life of the battery may have expired. Buy a new battery.
- 17 -
Preparation
Inserting and Removing the Card (optional)
•Check th at this un it is tur n ed off.
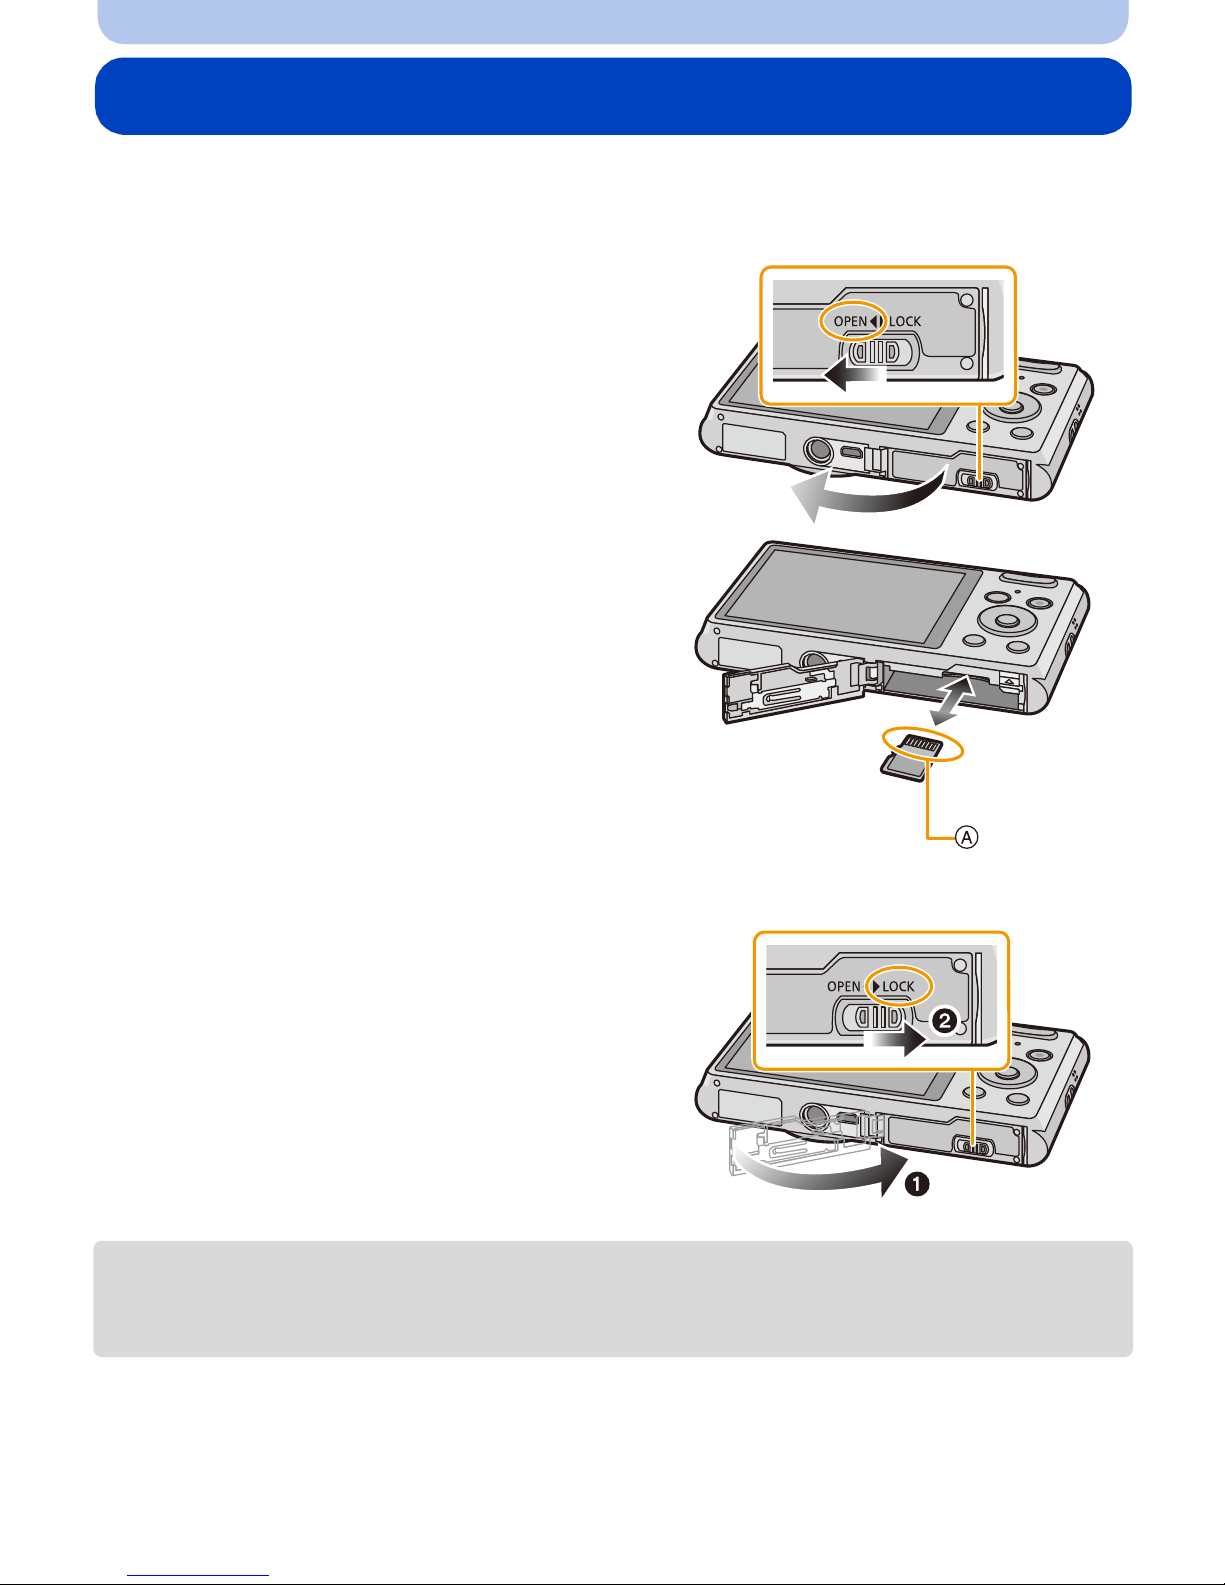
•We recommend using a Panasonic card.
Slide the release lever in the direction
1
of the arrow and open the card/batte ry
door.
Push it securely all the way until you
2
hear a “click” while being careful
about the direction in w hich you insert
it.
To remove the card, push the card
until it clicks, then pull the card out
upright.
A:Do not touch the connection terminals of
the card.
1: Close the card/battery door.
3
2: Slide the release lever in the
direction of the arrow.
•Turn the camer a off and wait for the “LUMIX” dis play on the LCD monitor to clear before removing
the card. (Otherwise, this unit may no longer operate normally and the card itself may be damaged
or the recorded pict ures may be lost.)
- 18 -
Preparation
5
About the Built-in Memory/the Card
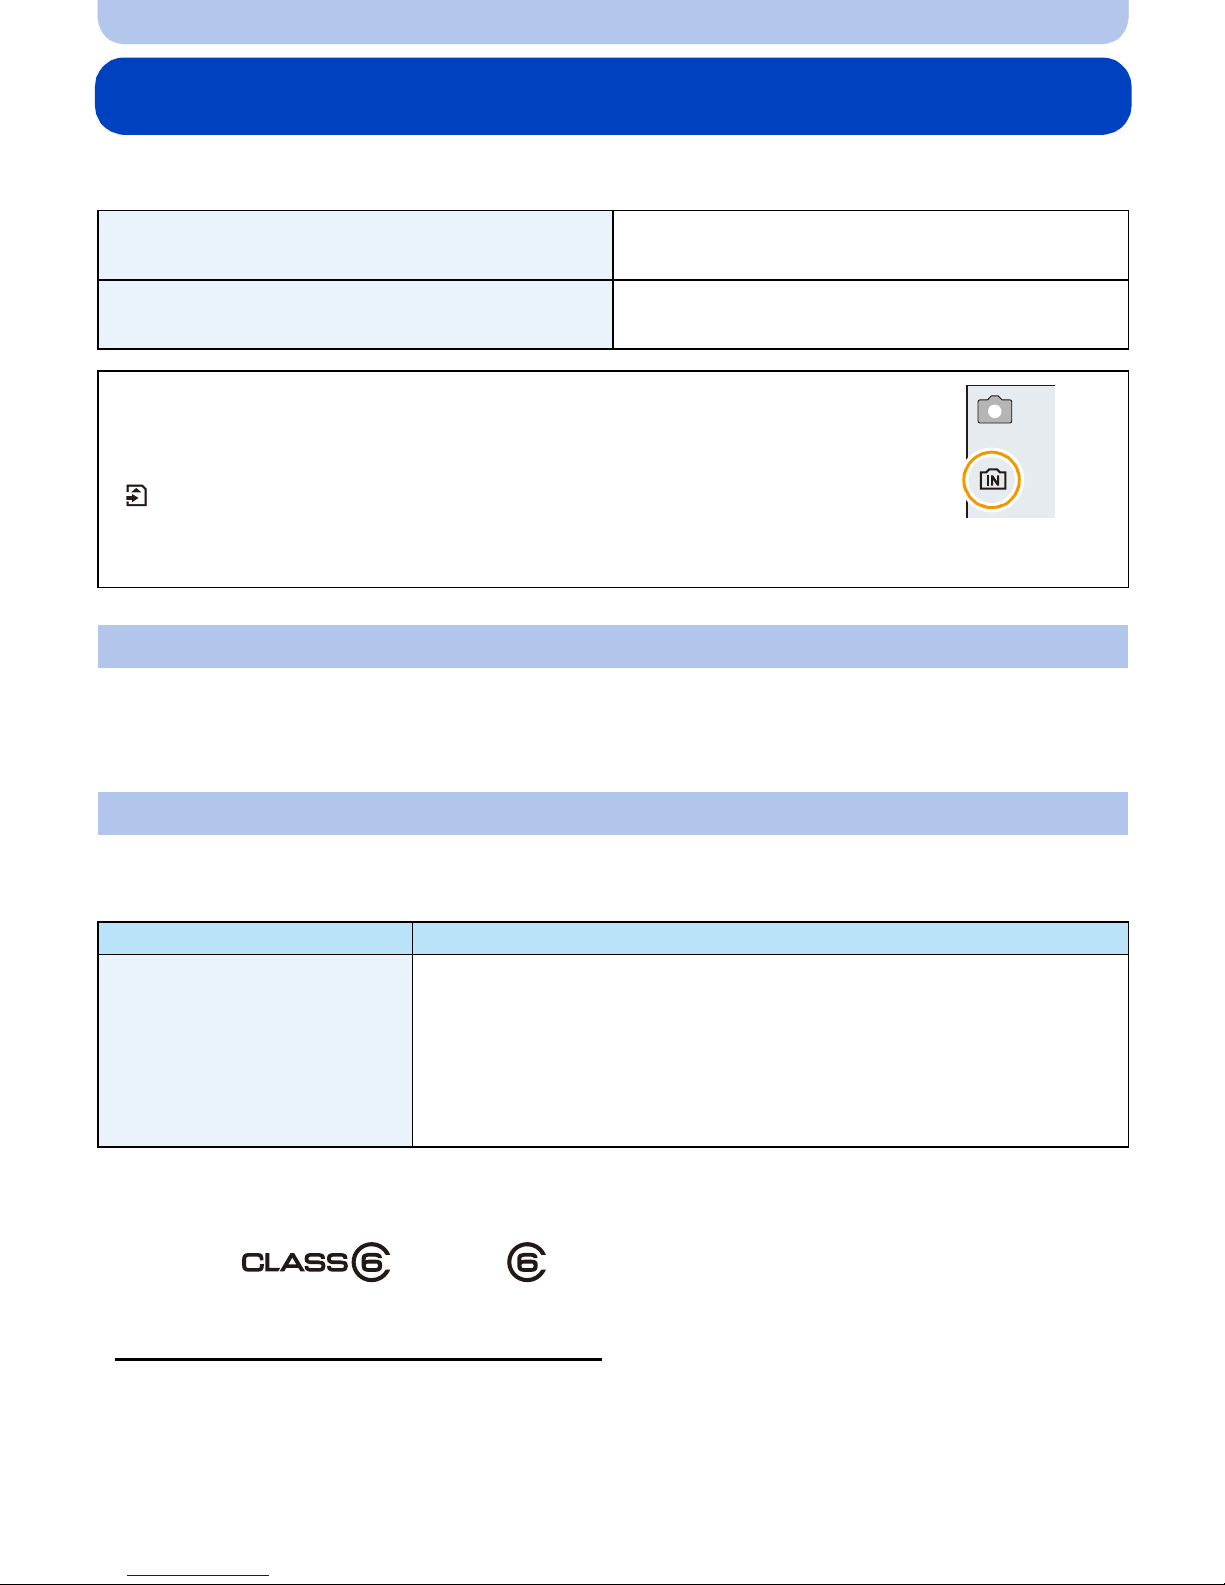
The following operations can be performed using this unit:
When a card has not been inserted
When a card has been inserted
Pictures can be recorded o n the built -in memory
and played back.
Pictures can be r ecorded on the card and
played back.
•When using the built-in memory:
>ð (access ind ication
k
¢
)
•When using the card:
¢
(access indication
¢ The a ccess i ndicat ion is display ed in re d wh en pic tures are bein g r ecorde d on
the built-in memory (or the ca rd).
)
Built-in Memory
•You can copy the recorded pictures to a card. (P95)
•Memory size: Approx. 90 MB
•The access time for the built-in memory may be longer than the access time for a card.
Card
The following cards, which conform to the SD video standard, can be used with this unit.
(These cards are indicated as card in the text.)
Remarks
¢
with “Class 6” or higher when
microSD Memo ry Card
(64 MB to 2 GB)
microSDHC Memory Card
(4 GB to 32 GB)
•Use a card with SD Spee d Class
recording motion pictures.
•microSDHC Memory Cards can only be used with compatible
models, however cannot be used with models that are only
compatible with microSD Memory Cards.
•Only the cards with cap acity listed left can be used.
¢ SD Speed Class is the speed standard regarding continuous writing. Check via the label on the
card, etc.
e.g.:
•Please confirm the latest information on the following website .
http://panasonic.jp/support/global/cs/dsc/
(This site is English only.)
- 19 -

Preparation
•During access (image wri ting, reading and dele ting, formatting etc.), do not turn this unit off,
remove the battery, card or disconnect the AC adaptor (supplied). Furthermore, do not
subject the camera to vibration, impact or static electricity.
The card or the data on the card may be damaged, and this unit may no longer operate
normally.
If operation fails due to vibration, impact or static electricity, perform the operation again.
•The data on the built-in memory or the card may be damaged or lost due to electromagnetic waves,
static electr icity or brea kdown of the camera or th e card. We reco mmend storing important data on a
PC etc.
•Do not format the card on your PC or other equipment. Format it on the camera only to ensure
proper operation. (P44)
•Keep the Memory Card out of reach of children to prevent swallowing.
- 20 -
Preparation
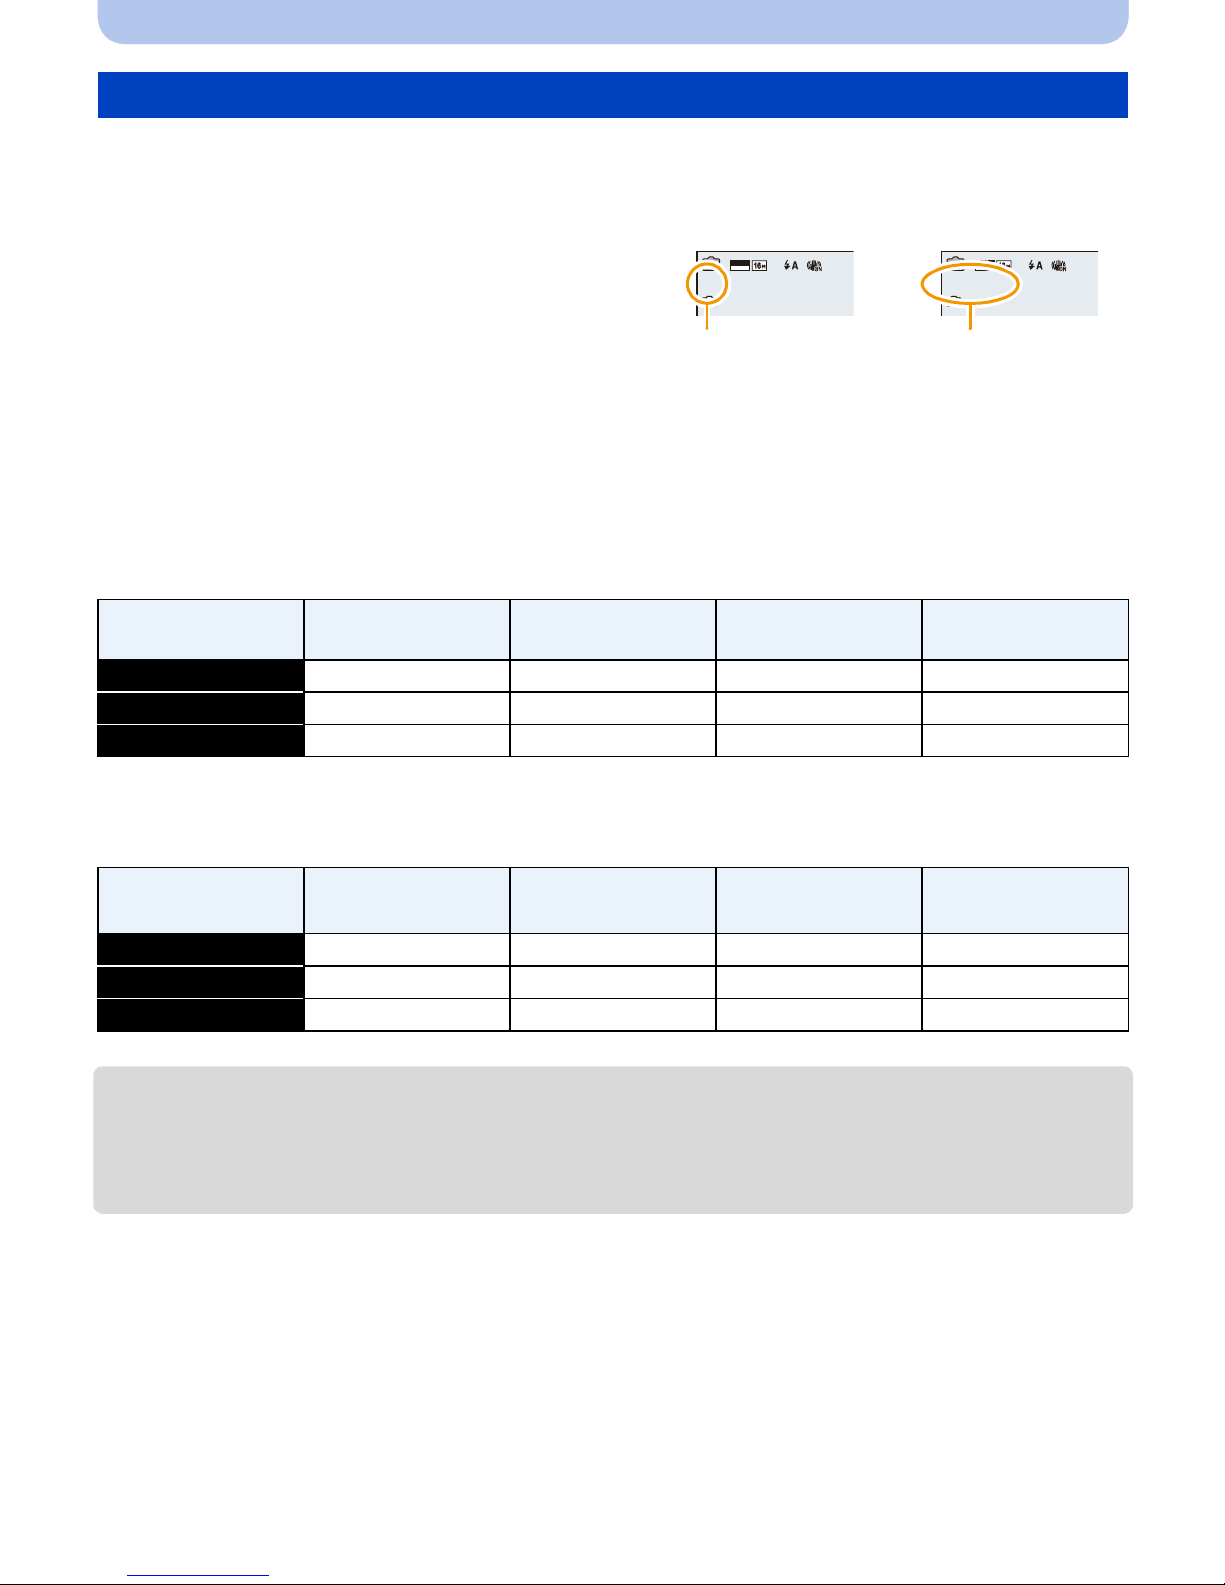
5
MJPEG
QVGA
A
R1m10s
MJPEG
QVGA
B
Approximate numb er of recorda ble pictures and available recording time
∫ About the display of the number of recordable pictures and available recording time
•Switch the display (number of rec ordable pictures, availa ble recording time, etc.) by pressing 4.
(P45)
A Number of recordable pictu r es
B Available recording time
•The number of recordable pictures and the available record ing time are an approximation. (These
vary depending on the recording conditions and the type of card.)
•The number of recordable pict ures and the available recording time varies depending on the
subjects.
∫ Number of recordable pictures
[i99999] is displa yed if there are more than 100,000 pictures remaining.
•
Picture size
Built-in Memory
(Approx. 90 MB)
2GB 4GB 32 GB
16M (4:3) 10 230 451 3720
5M (4:3) 23 500 979 8070
0.3M (4:3) 386 7540 14582 120110
∫ Available recording time (when recording motion pictures)
•
“h” is an abbreviation for hour, “m” for minute and “s” for second.
Recording
quality setting
Built-in Memory
(Approx. 90 MB)
2GB 4GB 32 GB
HD j 7m53s 15m00s 2h00m00s
VGA j 20m00s 40m00s 5h20m00s
QVGA 2m47s 1h00m00s 2h00m00s 16h00m00s
•The recordable time is th e total time of all the motion pictures which have been recorded.
•Motion pictures can be recorded continuousl y up to 2 GB.
The maximum available recording time for up to 2 GB only is displayed on the scr een.
•The maximum available continuous recording time is displayed on the screen.
- 21 -
Preparation
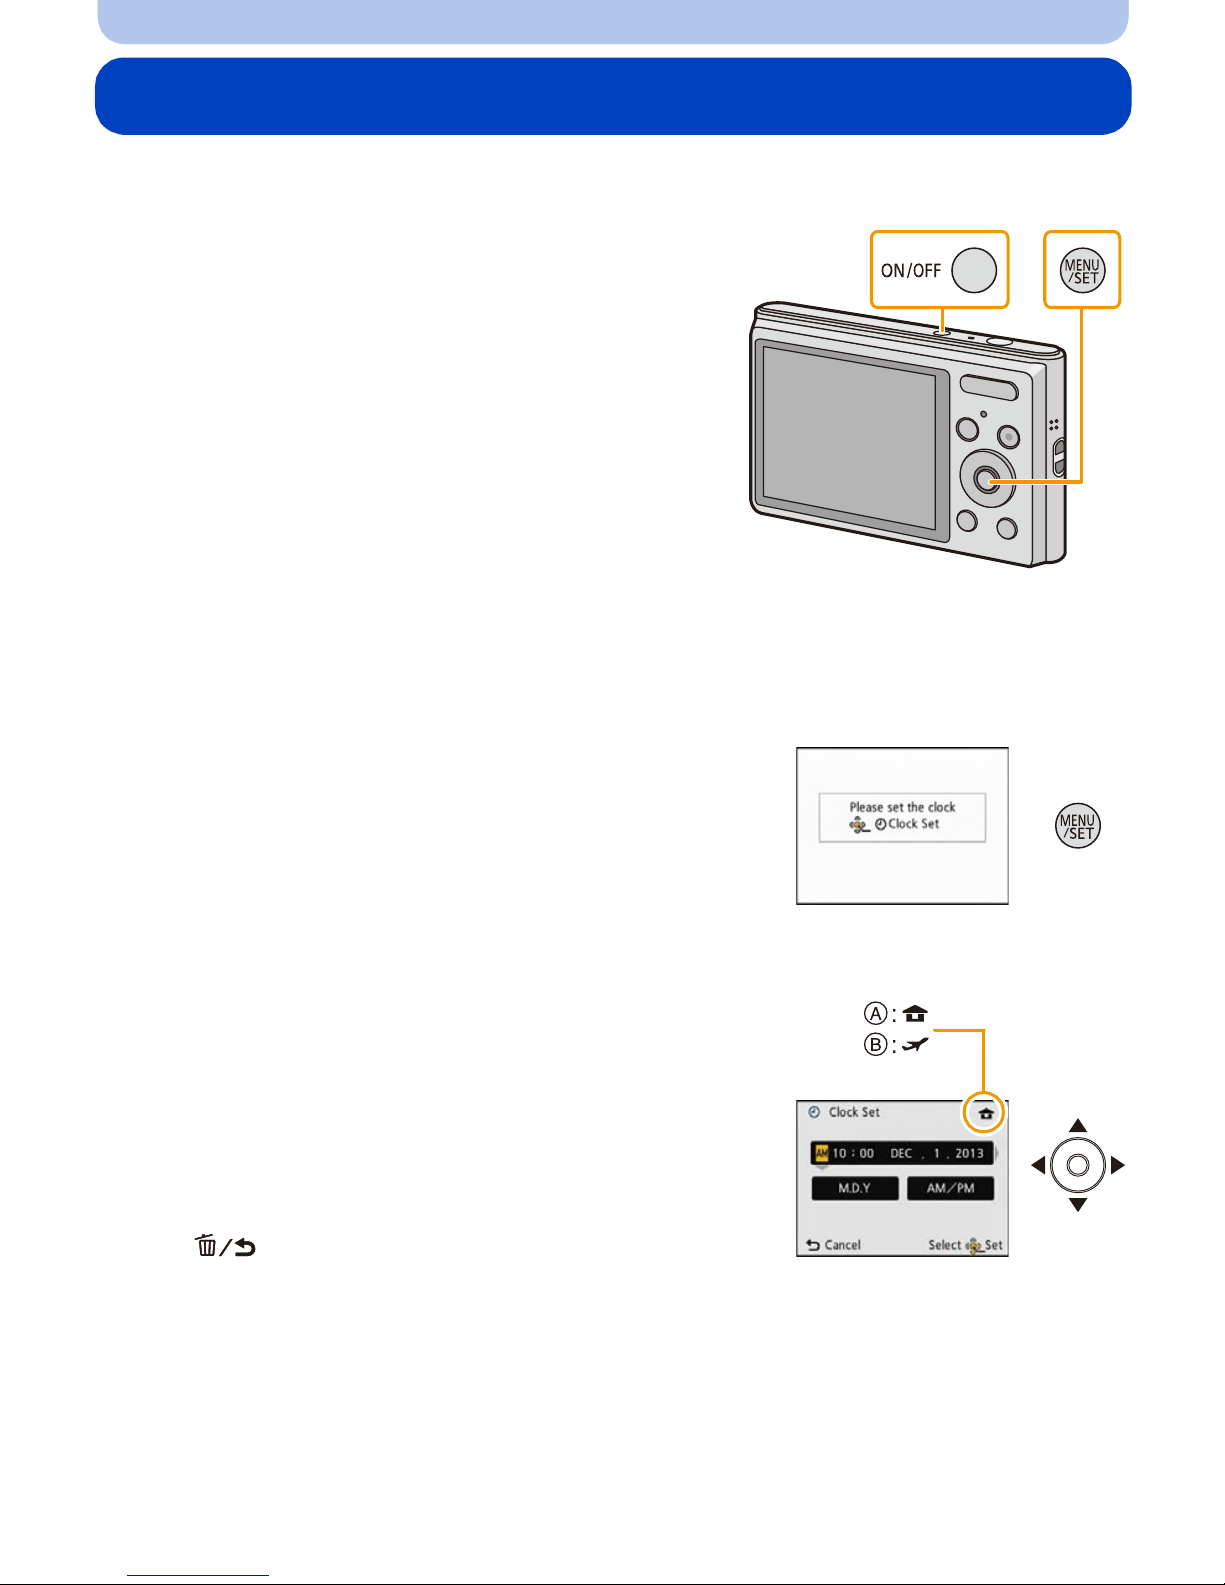
Setting Date/Time (Clock Set)
•The clock is not set when the camera is shipped.
Press camera [ON/OFF] button.
1
• If the language select screen is not displayed,
proceed to step
4.
Press [MENU/SET].
2
Press 3/4 to select the language, and press [MENU/SET].
3
Press [MENU/SET].
4
Press 2/1 to select the items (year, month,
5
day, hour, minute, display sequence or time
display format), and press 3/4 to set.
A: Time at the home area
B: Time at the travel destination
You can cancel with ou t s e tti n g the clo c k by pr es sing
•
[].
Press [MENU/SET] to set.
6
Press [MENU/SET].
7
- 22 -

Preparation
Changing the Clock Setting
Select [Clock Set] in the [Rec] or [Setup] menu, and press [MENU/SET]. (P38)
•
The clock can be reset as shown in steps 5 and 6.
•The clock setting is maintained for about 20 hours using the built-in clock battery even
without the battery . (Leave the charged battery in the unit for about 10 minutes to charge the
built-in battery. )
•If the clock is not set, the correct date cannot be printed when you order a photo studio to print the
picture, or when you st amp the date on the pictures with [Date Stamp].
•If the c lock is set, th e c o rr e c t d at e c a n be pr i n te d even if the da t e is no t di s p l a yed on the scr e en of
the camera.
- 23 -
Preparation
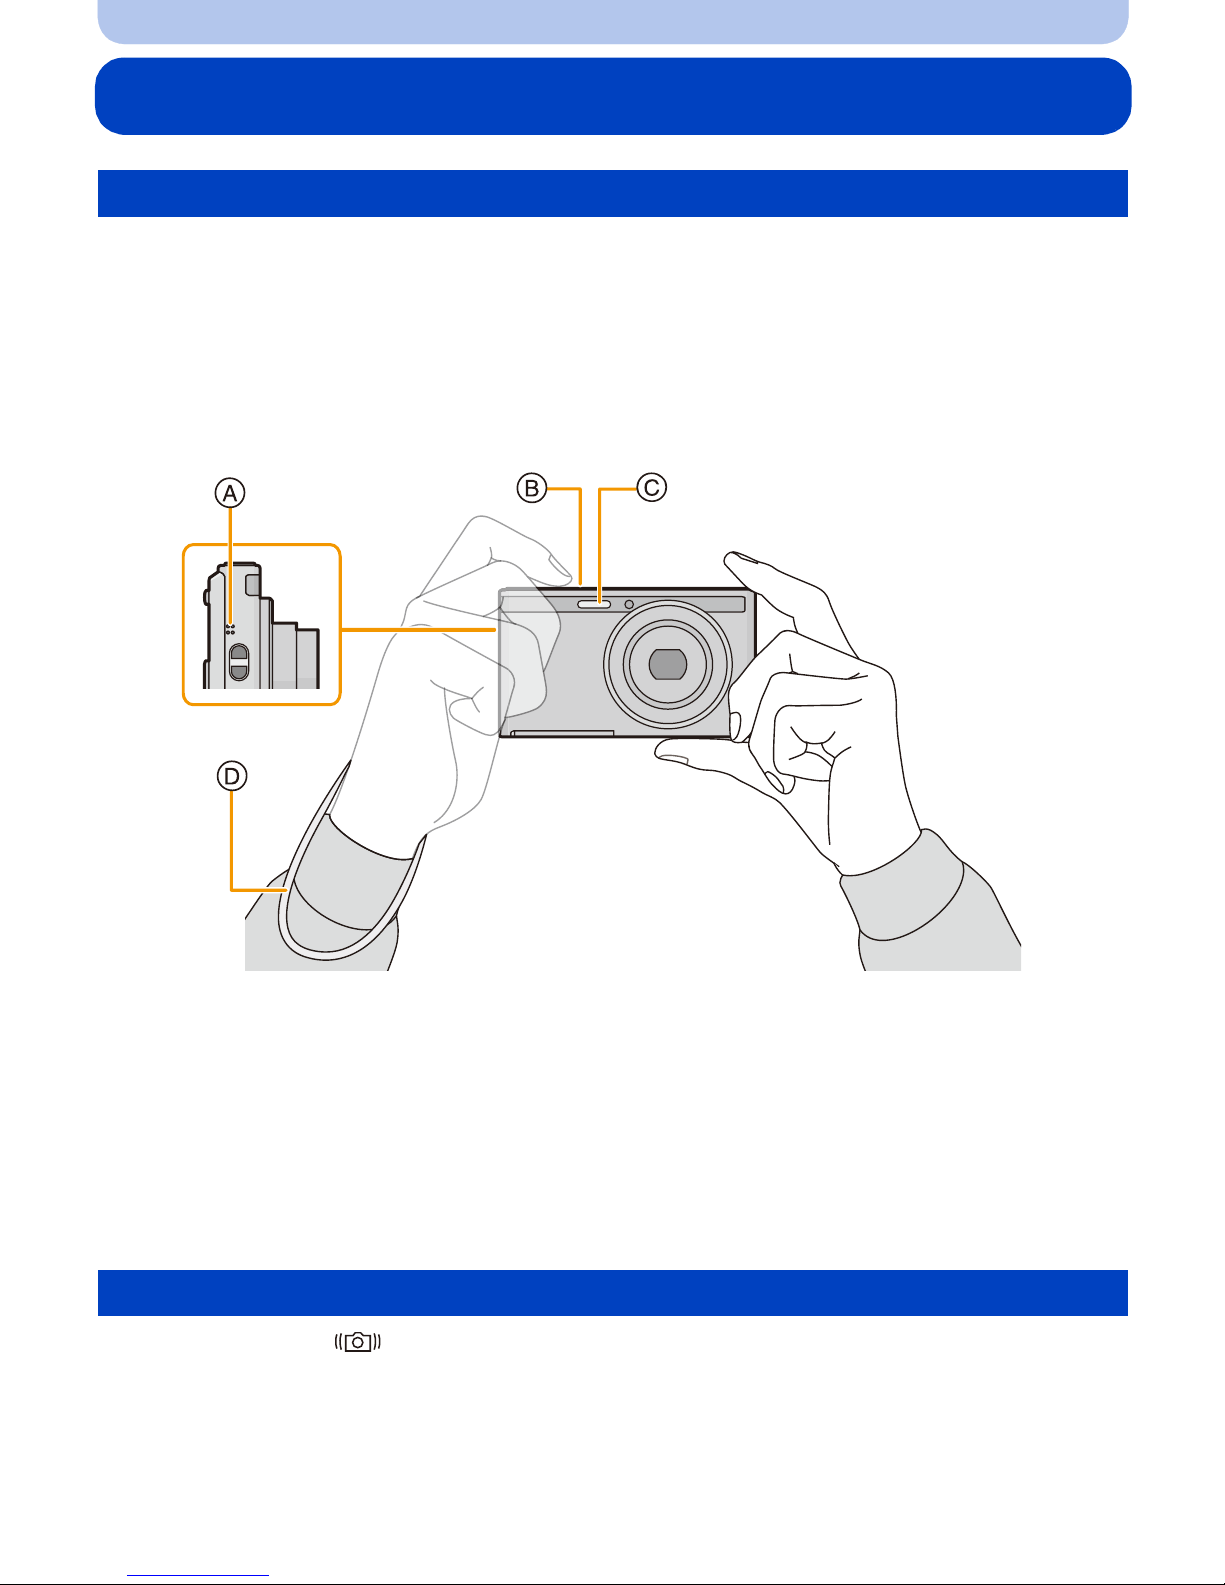
Tips for taking good pictures
Fit the strap and hold the camera carefully
Hold the camera gently with both hands, keep your arms still at your side and
stand with your feet slightly apart.
•To prevent dropping, be sure to attach the supplied strap and fit it to your wrist. (P8)
•Do not swing around or pull forcefully on the unit with the strap attached. The strap may break.
•Be careful not to move the camera when you press the shutter button.
•Be careful not to put your fingers on the flas h, microphone, speak er or lens etc.
A Speaker
B Microphone
∫ Directi on D e tection Function ([ R otate Disp.])
Pictures recorded with the camera held vertically are played back vertically (rotated). (Only
when [Rotate Disp.] (P43) is set)
When the camera i s held vert ically and t ilted up and down to re cord p ic tures , the Dire ctio n Det ection
•
function may not work correctly.
•Motion pictures taken with the camera held vertically are not dis play ed vertically.
Preventing jitter (camera shake)
When the Jitter alert [ ] appears, use [Stabilizer] (P79), a tripod or the Self-timer (P54).
•
Shutter speed will be slower particularly in the following cases. Keep the camera still from the
moment the shutte r butto n is pr essed unt il th e pict ure ap pears on the scr een. W e recommend usin g
a tripod.
–Slow sync./Red-Eye Reduct ion
–[Night Portrait]/[Nig ht Scenery]/[Starry Sky] (Scene Mode)
C Flash
D Strap
- 24 -

Basic
Selecting the Recording Mode
Press [MODE].
1
Press 3/4/2/1 to select the Recording Mode.
2
Press [MENU/SET].
3
∫ List of Recording Modes
¦ Intelligent Auto Mode (P26)
The subjects are recorded using settings automatically selected by the camera.
! No rmal Picture Mode (P29)
The subjects are recorded using your own settings.
Creative Control Mode (P56) (DMC-XS1)
Record while checking the image effect.
Panorama Shot Mode (P61)
This mode allows you to take panorama pictures.
Û Scene Mode (P64)
This allows you to take pictures that match the scene being recorded.
•
When the mode has been switched from Playback Mode to Recording Mode, the previously set
Recording Mode will be set.
- 25 -
Basic
B
C
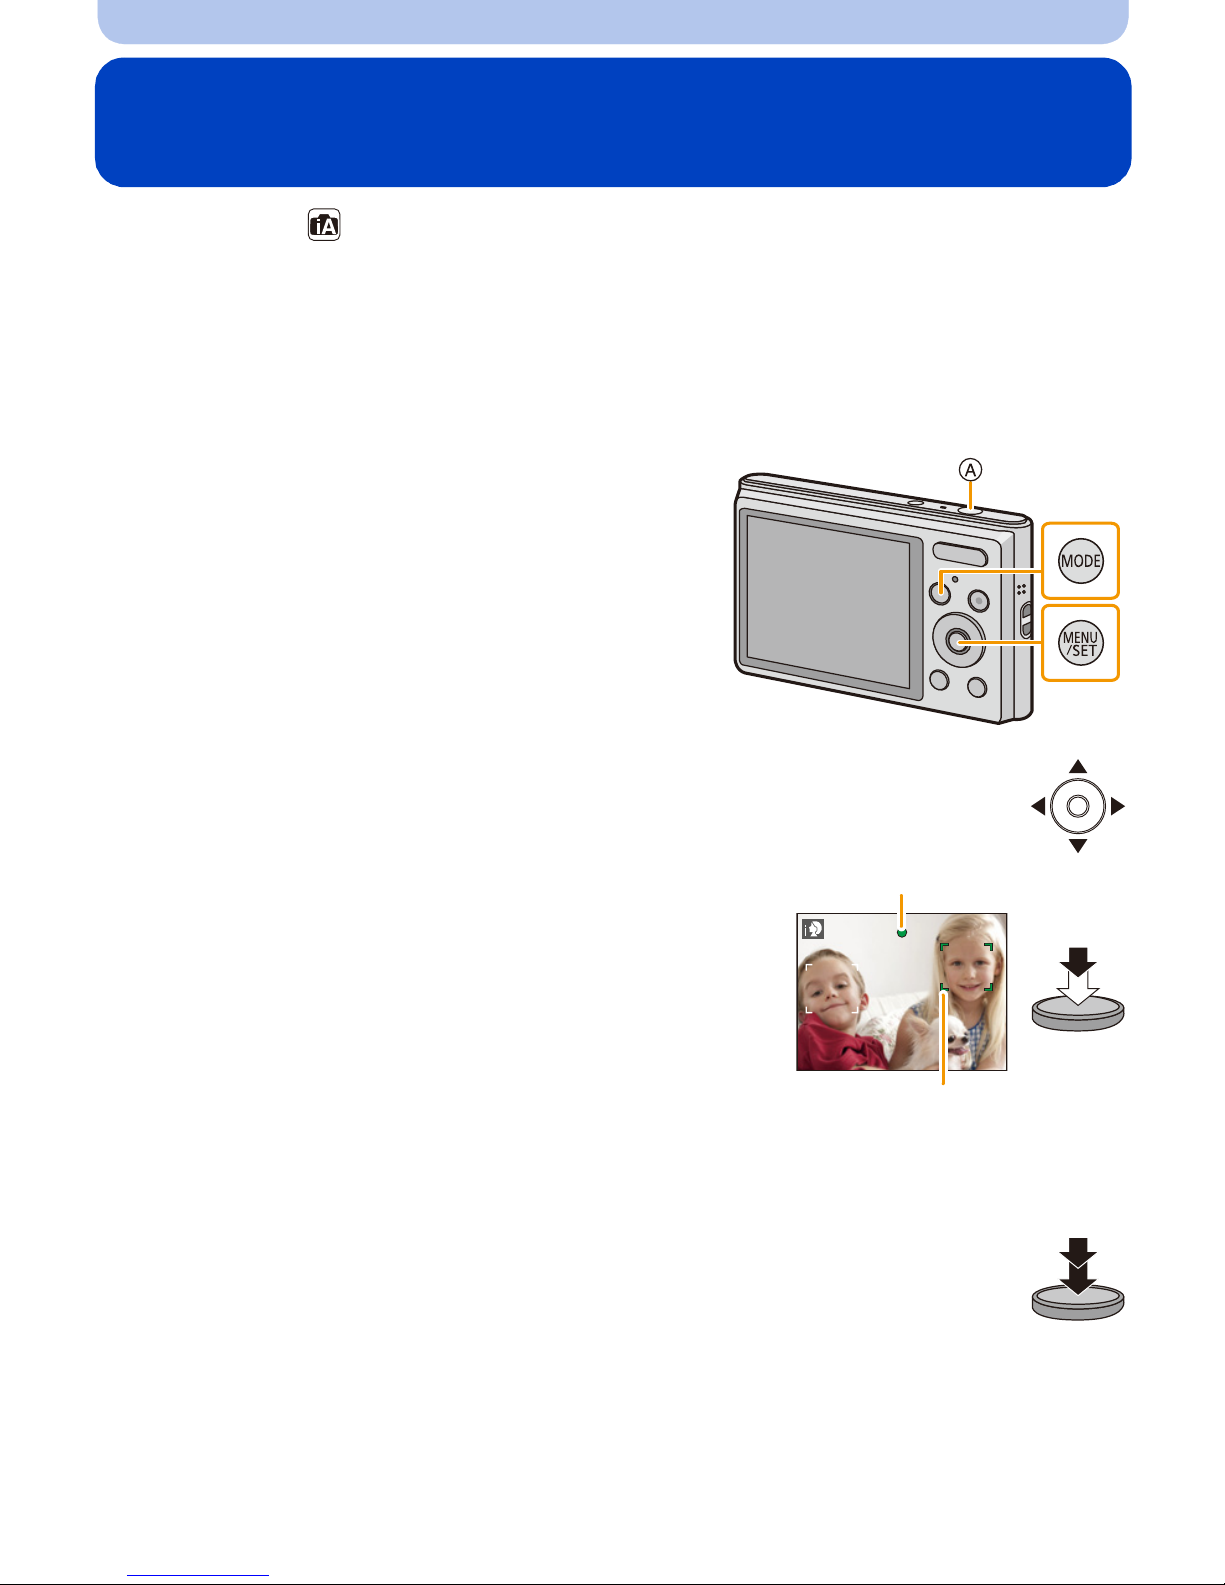
Taking pictures using the automatic function
(Intelligent Auto Mode)
Recording Mode:
The camera will set the most appropriate settings to match the subject and the recording
conditions so we recommend this mode for beginners or those who want to leave the settings
to the camera and take pictures easily.
The following functions are activated automatically.
•
–Scene Detection/Backlight Compensation/I ntelligent ISO sensitivity control/Auto White Balance/
Face Detection/[i.Exposure]/[i.Zoom]/[Red-Eye Removal]/[Stabilizer]/[Continuous AF]
Press [MODE].
1
A Shutter button
Press 3/4/2/1 to select [Intelligent Auto],
2
and then press [MENU/SET].
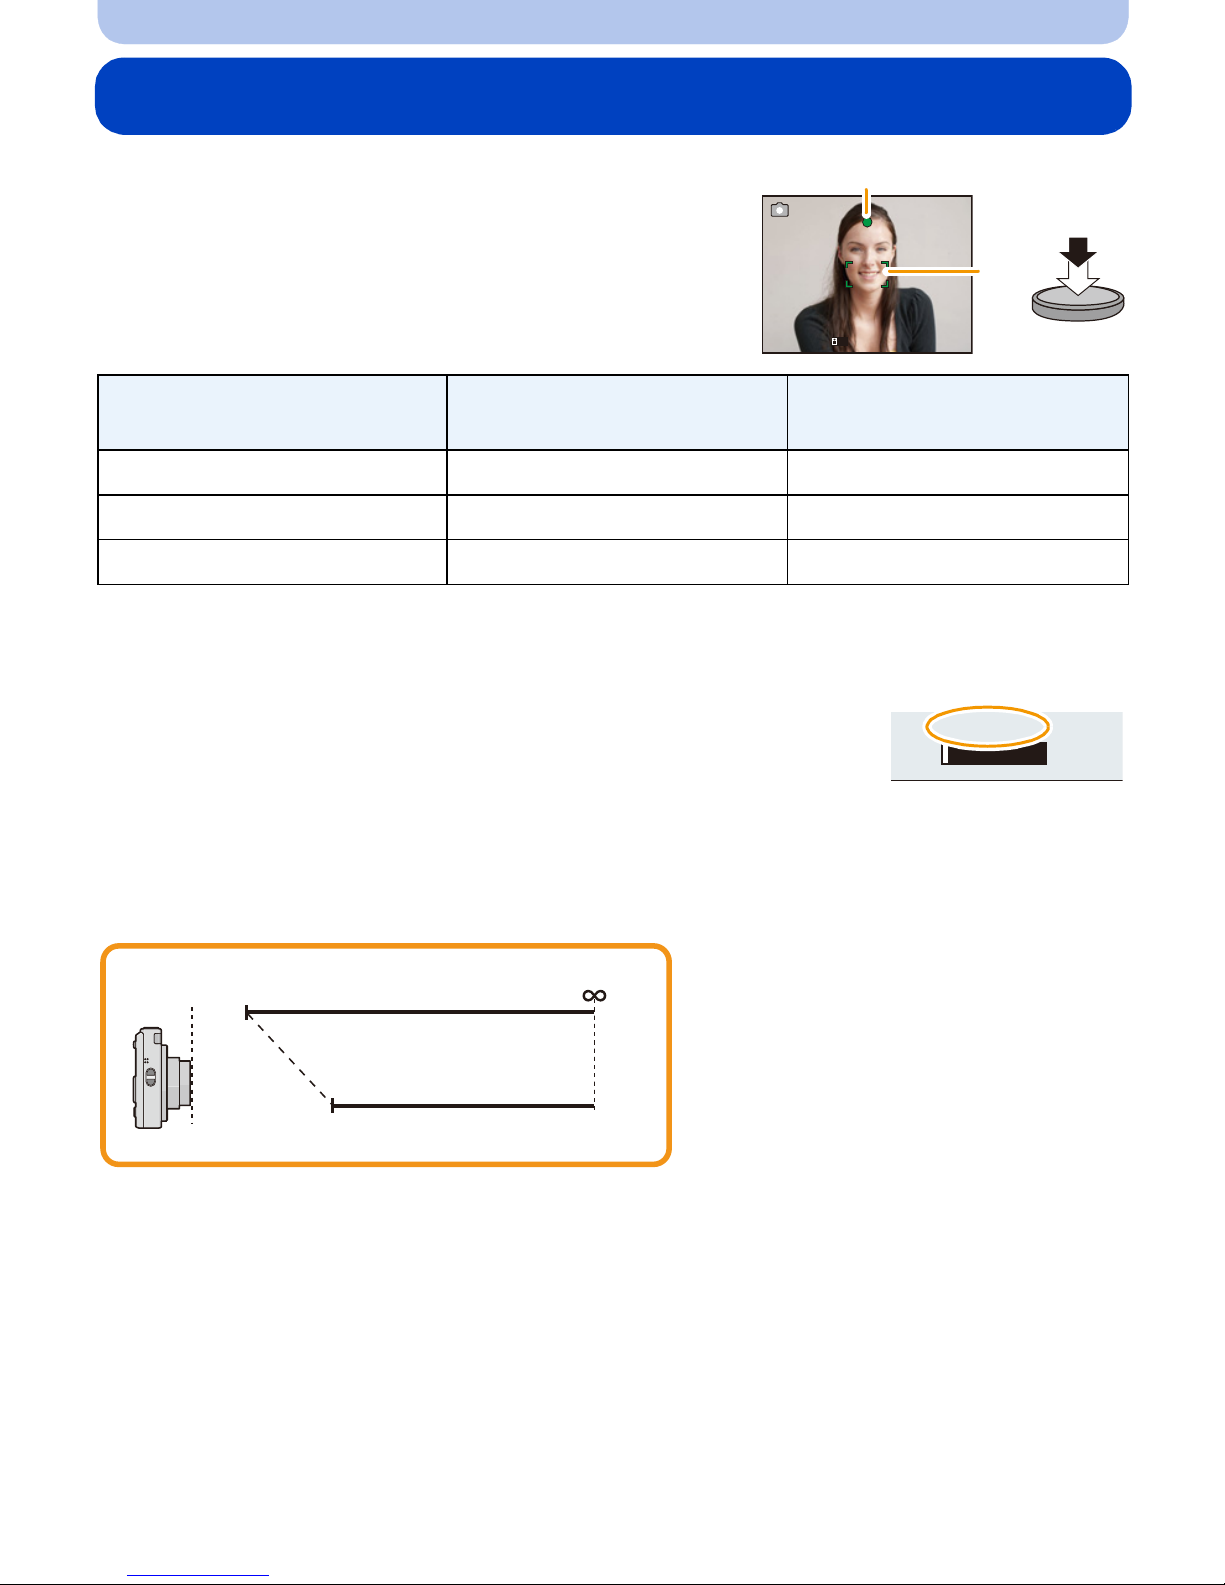
Press the shutter button halfway to focus.
3
• The focus indication B (green) lights when the s ubject is
focused.
• The AF area C is displayed around the subject’s face by
the Face Detection function. In other cases, it is displayed
at the point on the subject which is in focus.
• The minimal distance (how close you can be to the
subject) will change depending on the zoom factor.
Please check with the recordable range display on the
screen.
Press the shutter button fully (push it in
4
further), and take the picture.
(P30)
- 26 -
Basic
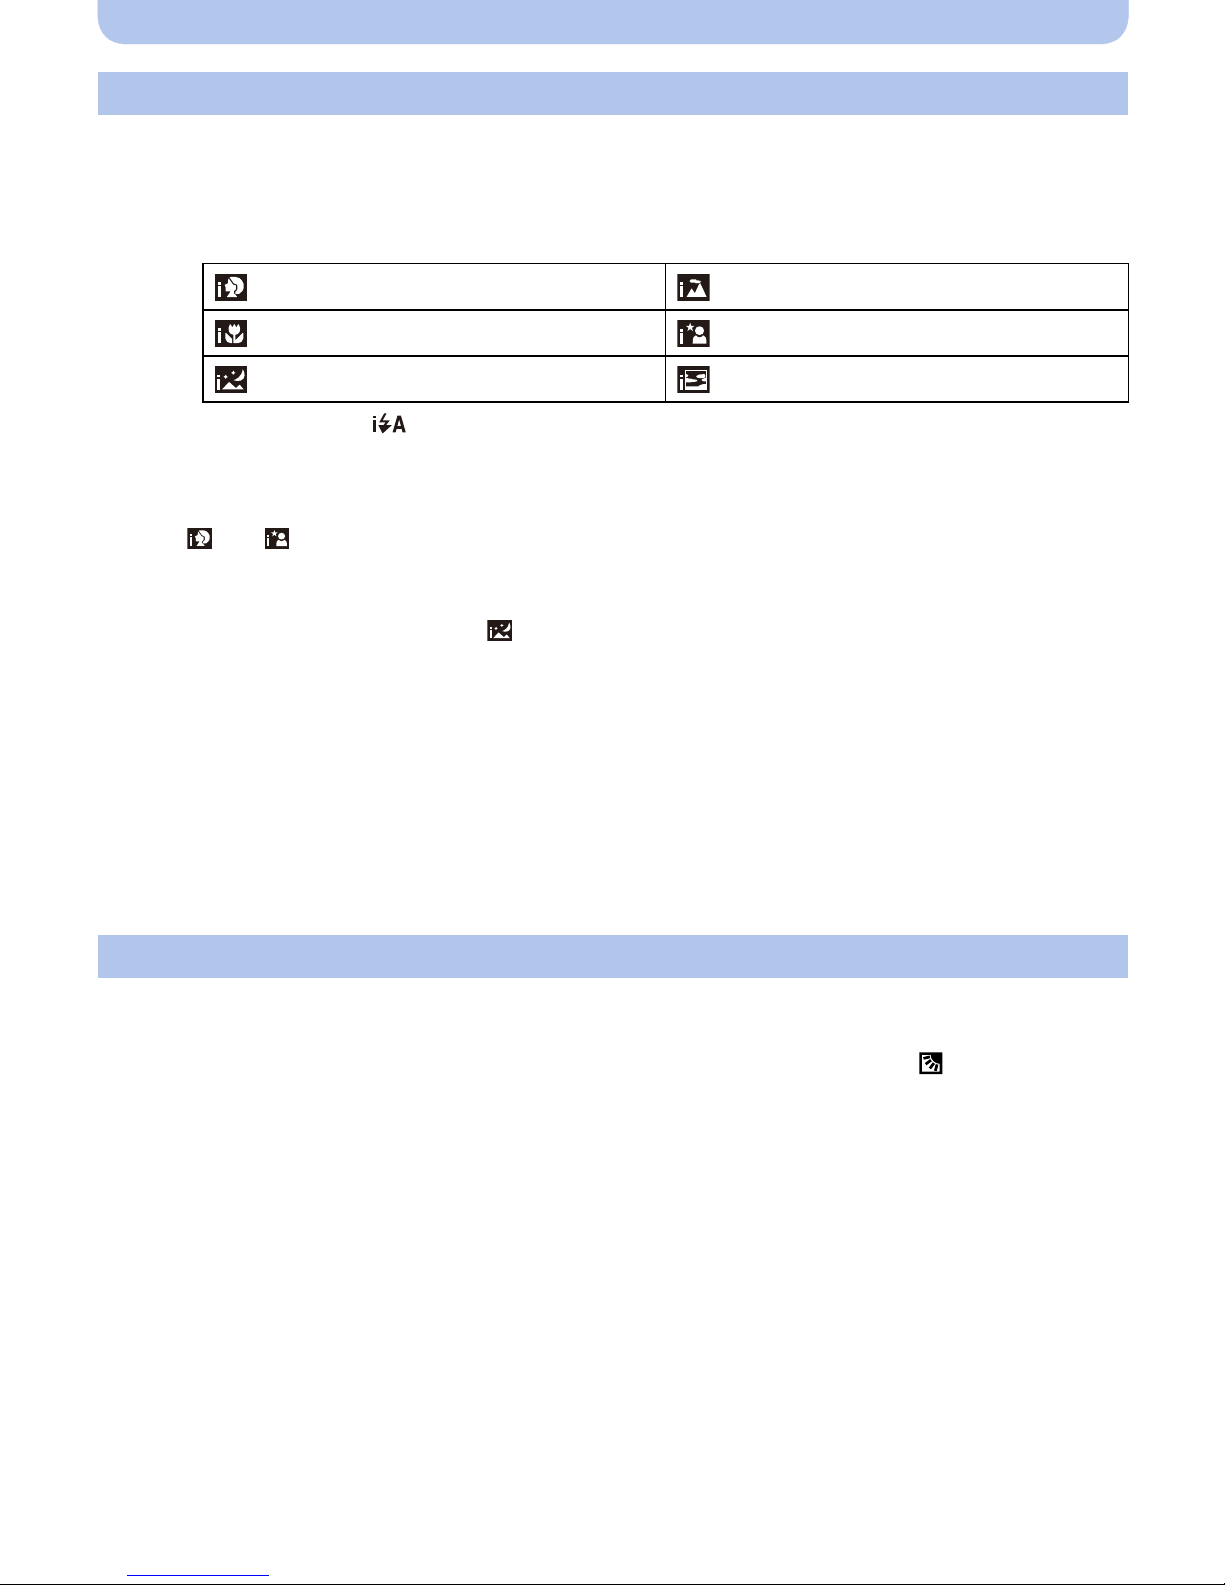
Scene Detection
When the camera identifies the optimum scene, the icon of the scene concerned is displayed in
blue for 2 seconds, after which its color changes to the usual red.
When taking pictures
¦
>
[i-Portrait] [i-Scenery]
[i-Macro] [i-Night Portrait]
¢
[i-Night Scenery] [i-Sunset]
¢ Only when [ ] is selected.
•
[¦] is set if none of the scenes are applicable, and the standard settings are set.
•When [ ] or [ ] is selected, the camera automatically detects a person’s face, and it will adjust
the focus and exposure. (Face Detection)
•If a tripod is used, for instance, and the camera has judged that camera shak e is minimal when the
Scene Mode has been identified as [ ], the shutter speed will be set to a maximum of 8 seconds.
Take care not to move the camera while taking pictures.
•Due to conditions such as the ones below, a different scene may be identified for the same subject.
–Subject condi tio ns: Wh en the f ace i s b righ t or dark, the s iz e of th e subj ec t, the c olo r of th e subje ct ,
the distance to the subject, the contrast of the subject, when the subject is moving
–Recording conditions: Sunset, sunrise, under low brightness conditions, when the camera is
shaken, when zoom is used
•For the best results, i t is r ec ommended that you take pictures in the appropriate Record ing Mode.
•[¦] is used for recording when reco rding motion pictures. Sc ene Detection does not work.
The Backlight Compensation
When there is a backlight, the subject appears darker and the camera will automatically
attempt to correct it by increasing the brightness of the picture.
In Intelligent Auto Mode, backlight compensation works automatically. The [ ] is displayed on
the screen when backlighting is detected. (Depending on the backlighting conditions,
backlighting may not be detected correctly.)
- 27 -

Changing the settings
Following menus can be set.
Menu Item
Basic
[Rec] [Picture Size]¢/[Burst]¢/[Color Mode]
¢
[Motion Picture] [Rec Quality]
[Setup] [Clock Set]/[World Time]/[Beep]/[Language]/[Stabilizer Demo.]
•
Menu items other than th ose liste d above are not displayed, but you
can set them in other Recording Modes.
For the setting method of the menu, refer to P38.
•
¢ Available settings may be different from other Recording Modes.
[Color Mode]
•Color setting of [Happy] is available in [Col or Mode]. It is possible to automat ically tak e a picture with
a higher level of brillianc e for the color brightness and vividness.
About the flash (P50)
•When [ ] is selected, [ ], [ ], [ ] or [ ] is set depending on the type of subject and
brightness.
•When [ ], [ ] is set, [Red-Eye Removal] is enabled.
•Shutter speed will be slower during [ ] or [ ].
- 28 -

Basic
ISO
1/601/601/60
F2.8F2.8F2.8
B CD
Taking pictures with your favorite settings
(Normal Picture Mode)
Recording Mode:
The camera automatically sets the shutter speed and the aperture value according to the
brightness of the subject.
You can take pictures with greater freedom by changing various settings in the [Rec] menu.
Press [MODE].
1
A Shutter button
Press 3/4/2/1 to select [Normal Picture],
2
and then press [MENU/SET].
Aim the AF area at the point you want to focus on.
3
Press the shutter button halfway to focus and
4
then press it fully to take the picture.
B ISO sensitivity
C Aperture value
D Shutter speed
• Aperture value and shutter speed is displayed in red when
correct exposure is not achieved. (Excl ude when using a
flash)
- 29 -
Basic
ISO
1/601/601/60
F2.8F2.8F2.8
A
B
1X
W
T
0.16ft.
-
∞
T
W
5 cm (0.16 feet)
1 m (3.3 feet)
Focusing
Aim the AF area at the subject, and then press
the shutter button halfway.
Focus
Focus indication A O n Blinks
AF area B White>Green White>Red
Sound Beeps 2 times Beeps 4 times
When the subject is focused When the subject is not
focused
•The AF area may be displayed larger for certain zoom magnifications and in dark places.
∫ About focus range
The focus range is displayed when operating the zoom.
•
The focus range is displa ye d in red when it is not focused after pressing
the shutter button halfway.
The focus range may change gradually depending on the zoom
position.
e.g.: Range of focus during the Intelligent Auto Mode
- 30 -
 Loading...