

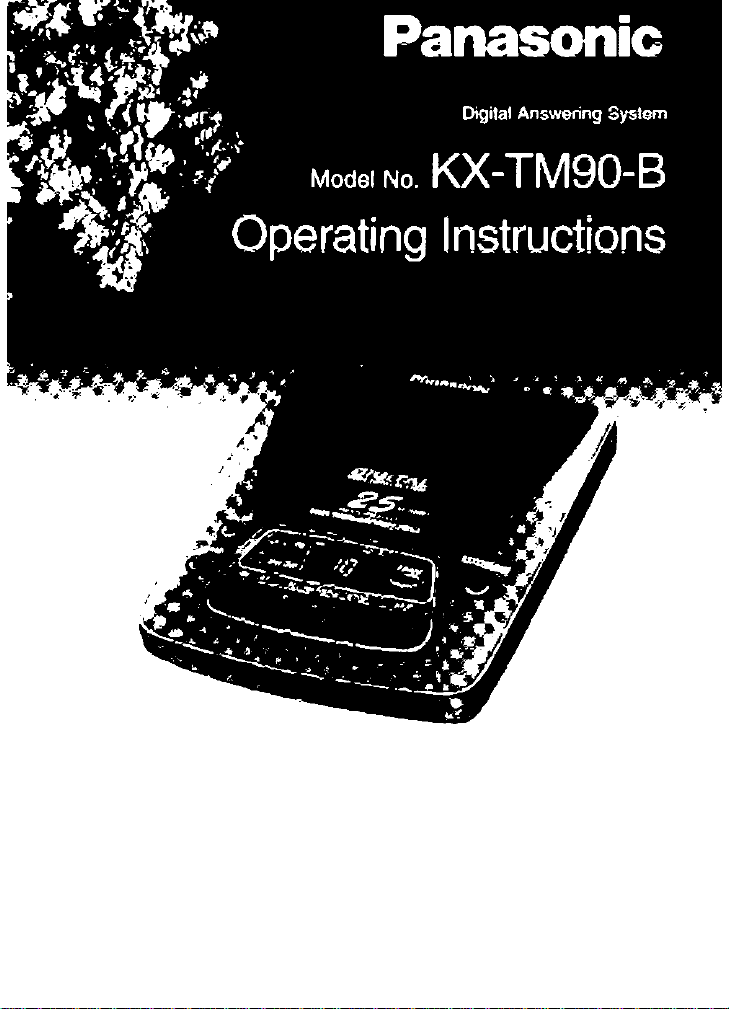
Panasonic KX-TM90-B User Manual
DIGITAL
PLEASE READ BEFORE USE AND SAVE.
Before Initial Use
Please read IMPORTANT SAFETY
INSTRUCTIONS on pages 30-32 before
use.
Read and understand all instructions.
Thank you for purchasing the Panasonic automatic telephone
answering system with full-digital memory.
I
----------------------------------------------
I Attach your purchase receipt here. i
For your future reference
1
Serial No.
(found on the bottom of the unit)
Name and address of dealer
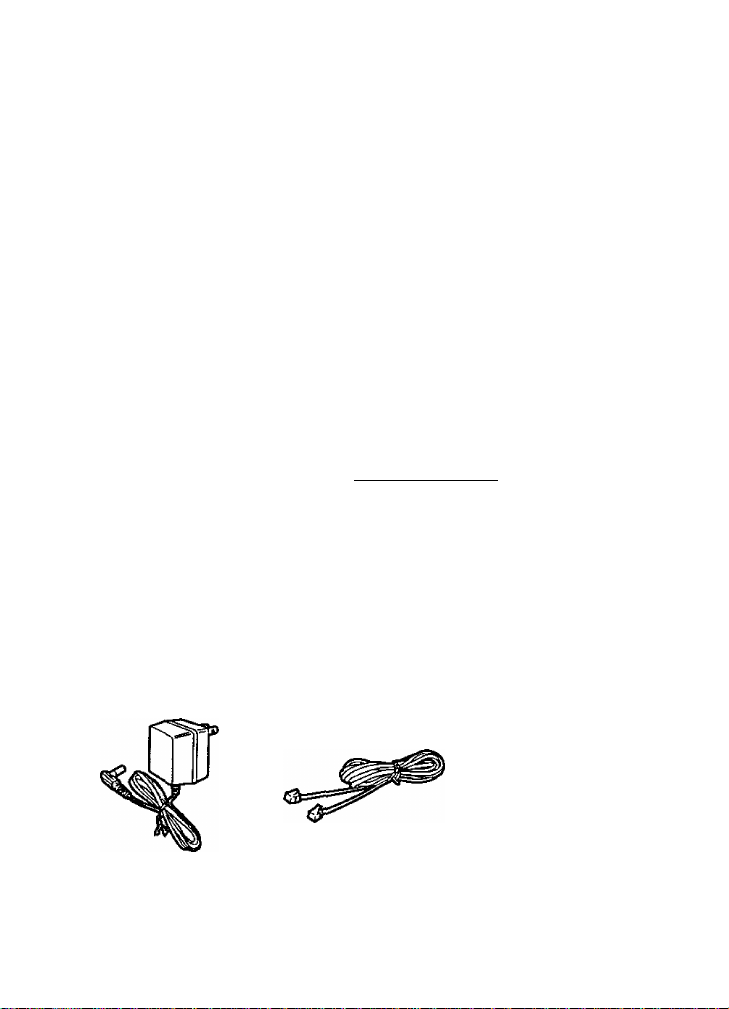
Accessories
□ AC Adaptor
(p. 7)
one
•To order accessories, call 1'800-332-5368.
□ Telephone Line Cord
(p. 7)
one
Date of purchase
□ 9V Size Battery
(P- 6)
one

Contents
___________________
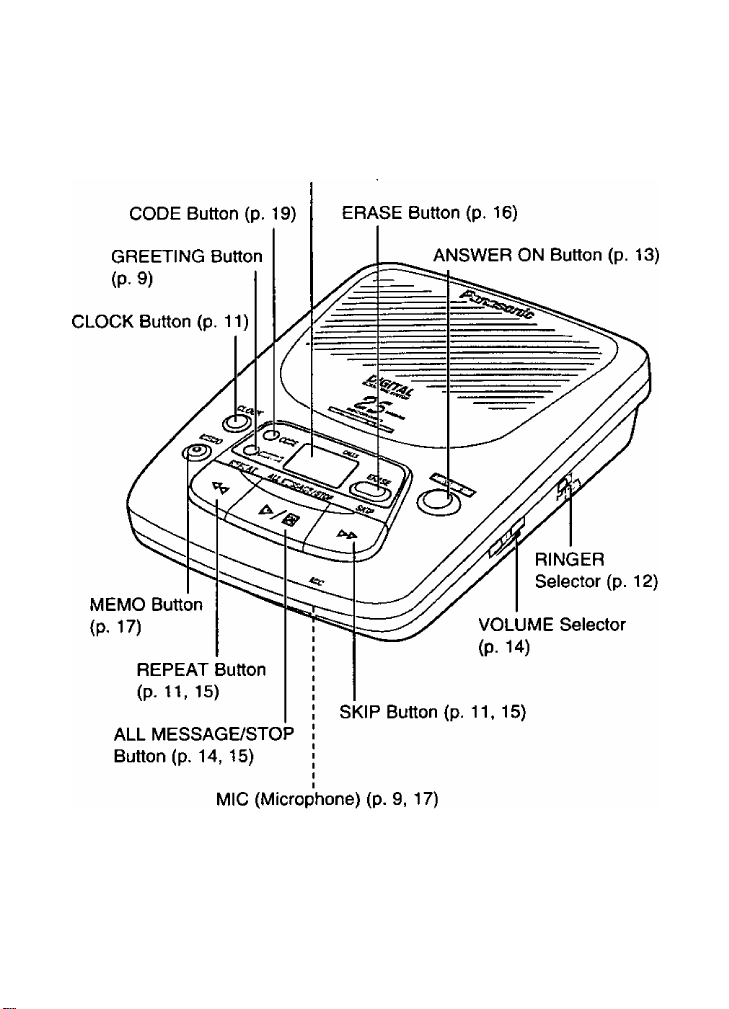
Location of Controls
Display.................................................................................... 5
Setting Up.................................................................................. 6
Battery Installation................................................................ 6
Connection........................................................................... 7
Recording a Greeting Message
Day and Time Adjustment ..................................................10
Selecting the Number of Rings ..........................................12
Automatic Answering Operation
Setting the Unit to Answer Calls
Listening to Messages ...........................................................14
Erasing Messages ..................................................................16
Recording a Memo Message .................................................17
Remote Operation ..................................................................18
Setting the Security Code Number
...............................................................
..........................................
..........................................
........................................
...................................
13
13
19
4
8
Voice Menu Operation........................................................20
Direct Remote Operation
Battery Replacement
Before Requesting Help
FCC and Other Information...................................................28
Important Safety Instructions...............................................30
...................................................
.............................................................
........................................................
22
25
26
L©eati©in ©f Controls
Display

Display
I „
L
U
n
u
zt
Fu
on
The battery is not installed or battery power
is low. Install a new battery (p. 6, 25).
The answering function is turned on and no
messages are recorded.
The answering function is turned off.
Zi
3 messages have been recorded.
3 messages including new message(s)
have been recorded, (p. 14)
Memory is full. Erase some or all of the
messages {p. 16).
The unit is answering an outside call.
. r
f u
The unit is being operated from a remote
phone.
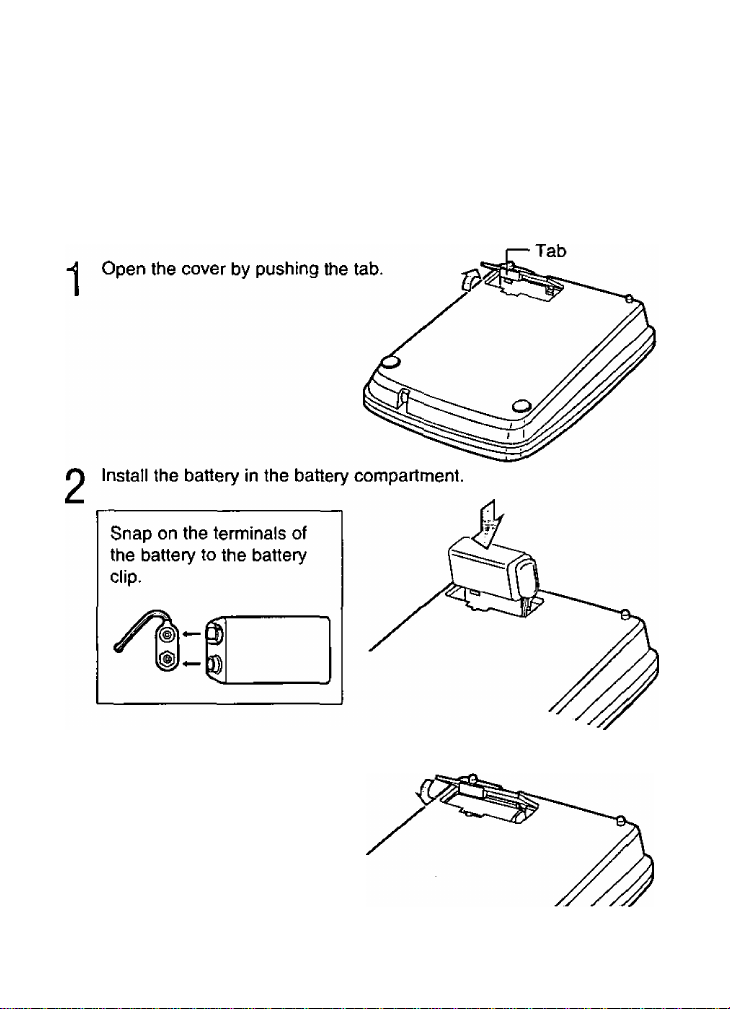
>ettiog Up
Battery Installation
Install the included 9 V size battery in the unit.
After a new battery has been installed, the unit will retain recorded
messages and maintain the correct time (p. 10) for approximately one day
during a power failure.
Close the cover.
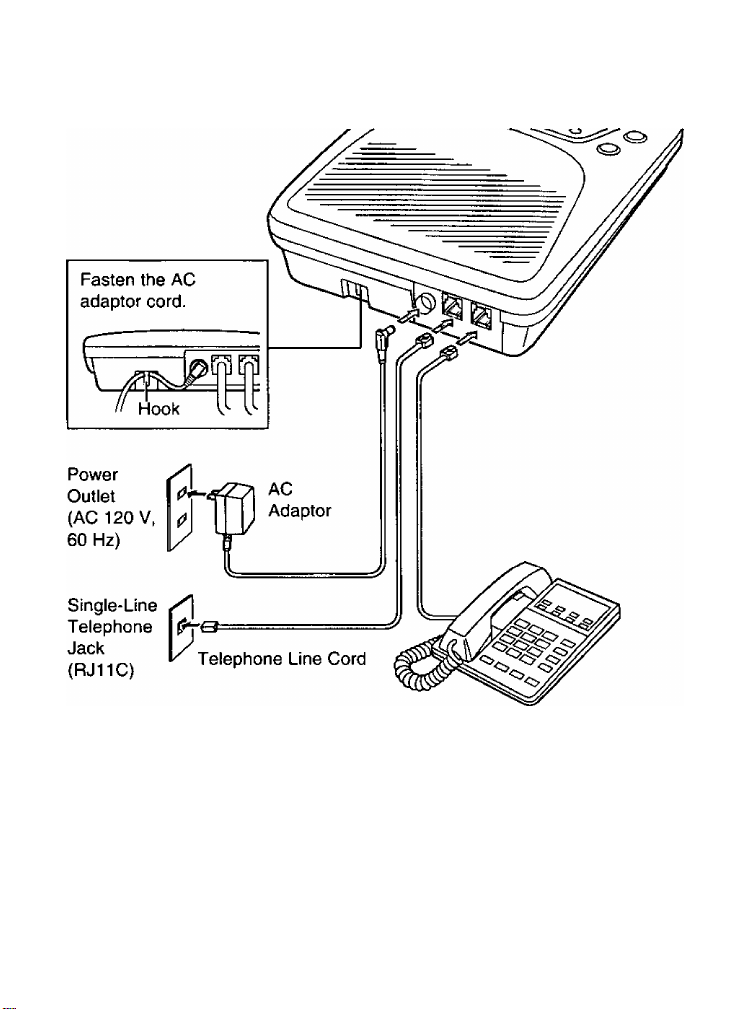
Connection
OUSE ONLY Panasonic AC ADAPTOR KX-A17.
oThe AC adaptor must remain connected at all times. (It may feel warm
during use. This is normal.)
olf “Lo" flashes for over 10 seconds, the battery is not installed or battery
power is low. Install a new battery (p. 25).
o|f “Lo" flashes for over 10 seconds after installing a new battery,
disconnect the AC adaptor and reinsert it again without removing the
battery. “Lo” flashing will disappear after 10 seconds.
i) Setting Up
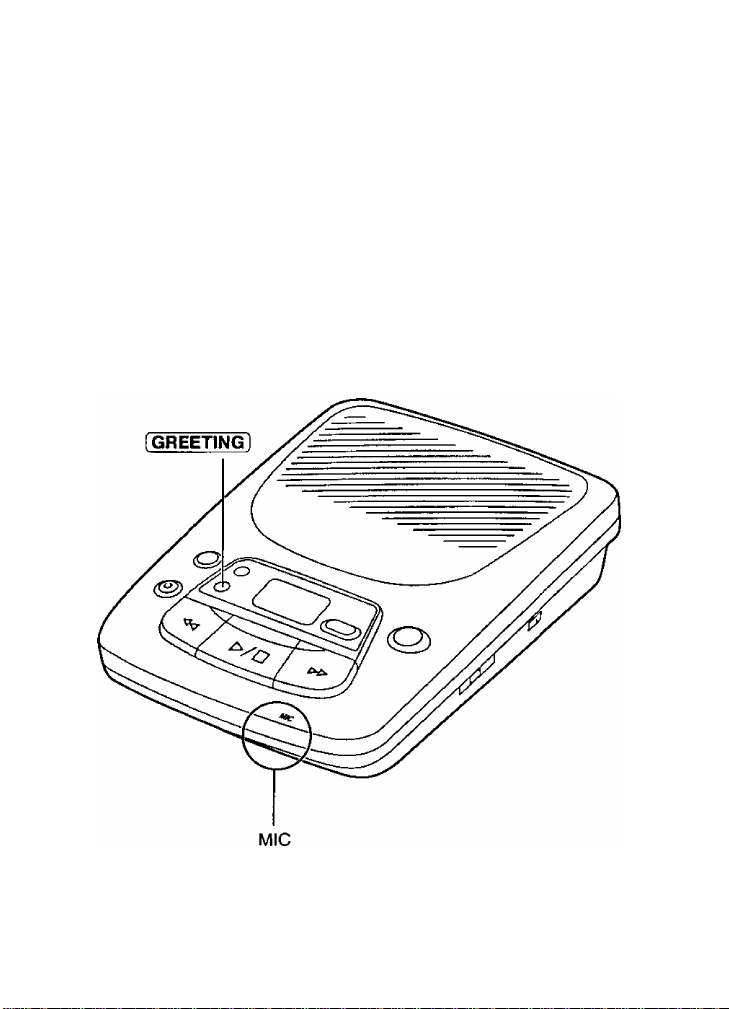
Recording a Greeting Message
A greeting message (announcement) must be recorded. If a greeting
message is not recorded, the unit will not answer calls.
All of the messages (greeting, incoming, memo, etc.) are stored in digital
memory. Total recording time is about 25 minutes. (The maximum
recording time per caller is 3 minutes.)
We recommend you record a brief greeting message leaving more time
in memory.

Press and hold [GREETirTG].
1
After a long beep, continue pressing [greeting] and speak clearly
about 8 inches (20 cm) away from the MIC (microphone).
oThe display counts up the recording time.
When finished, release [GREETING).
oA short beep sounds and the recorded greeting message is played.
oTo change the greeting message, repeat from step 1.
To check the greeting message
Press and release [GREETING].
oThe recorded greeting is played.
©Press [GREETING] again to stop playback.
o“No announcement”
recorded.
Sample of greeting message
“Hello, this is (your name and/or number). Sorry, I cannot take your call.
Please leave a message after the long beep. (Your recording time is
3 minutes.) Thank you.”
is heard if a greeting message has not been
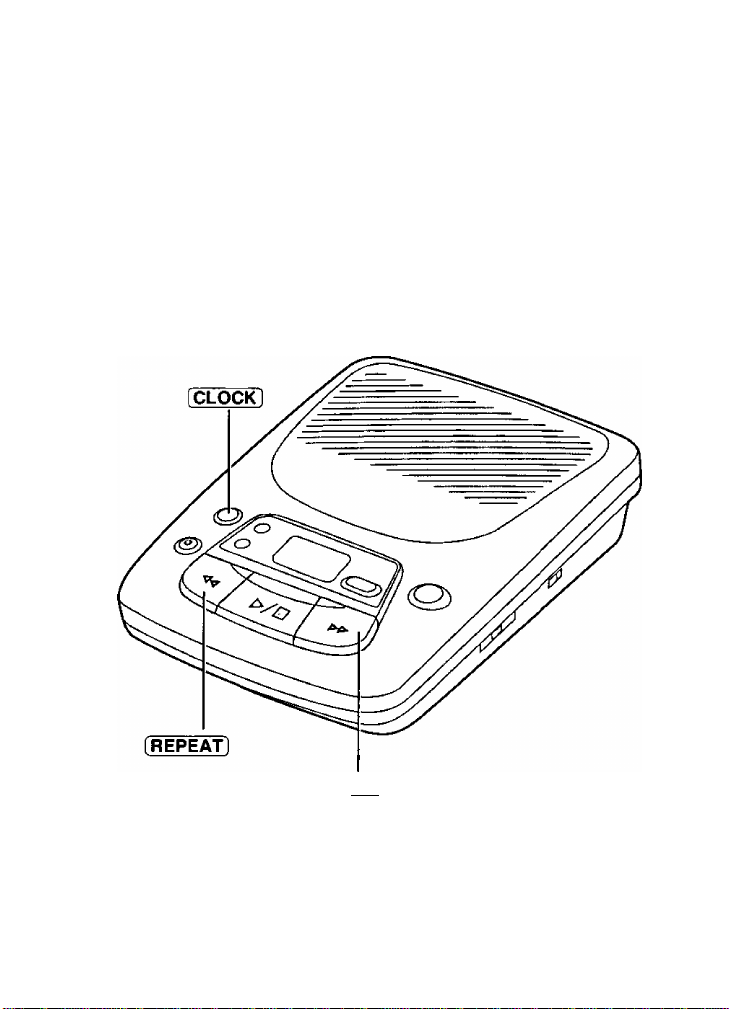
[) Setting Up
Day and Time Adjustment
Voice Day/Time Stamp: During playback a synthesized voice will
announce the day and time when each message was recorded.
10
[si^

Please complete each step within 8 seconds time. If not, you will have to
start from the beginning (Step 1).
Push down and hold [CLOCK] until you hear a long beep.
1
Press (SKIP] or [REPEAT] until you hear the current day.
2
Press [CLOCK] to set hour of day.
3
Press (SKIP) or [REPEAT] until you See current hour displayed.
©Unit will announce any change between AM and PM.
Press [ CLOCK ] to set minutes.
5
Pf6ss [SKIP] or [REPEAT] until you see current minutes displayed.
6
©Pressing and holding [SKIP] or [REPEAT] will change the minute
display quickly.
Press [CLOCK] to set the clock.
©The clock accuracy is approximately ±60 seconds a month at room
temperature.
To check the day/time
Press [CLOCK]
II
 Loading...