

Page 1

PC Phone Software
Installation Manual
Model no. KX-TDA0350
Thank you for purchasing the Panasonic PC Phone Software, KX-TDA0350.
Please read this manual before using this product and save for future use.
This manual is designed to provide instructions for installing the PC Phone Software and
USB driver on your personal computer.
Table of Contents
System Requirements..............................1
Introduction............................................... 2
Conditions .................................................... 2
Installing the PC Phone Software ........... 3
Installing the USB Driver .........................6
Windows 98 ............................................ 6
Windows 2000 ...................................... 12
Windows XP.......................................... 14
Updating the USB Driver........................ 16
Windows 98 .......................................... 16
Windows 2000 ...................................... 19
Windows XP ......................................... 23
Deleting the USB Driver......................... 27
Windows 98 .......................................... 27
Windows 2000 ...................................... 28
Windows XP ......................................... 29
Uninstalling the PC Phone Software ....30
Starting the PC Phone Software ...........30
System Requirements
• Microsoft® Windows® 98 Second Edition, 2000, or XP (Windows Me is not supported)
• Internet Explorer 5.0 or later
• Minimum Requirements (for installing the KX-TDA0350 only)
CPU: Pentium® II 350 MHz
RAM: 64 MB
HDD: 100 MB available space (when installing)
Display: XGA (1024*768)
Peripheral Devices: Sound Board (for recording and replying features), Speaker (for
listening to voice messages), USB port, CD-ROM drive
Trademarks
• Microsoft and Windows are either registered trademarks or trademarks of Microsoft Corporation in the
United States and/or other countries.
• Pentium is either a registered trademark or a trademark of Intel Corporation or its subsidiaries in the
United States and other counties.
• All other trademarks identified herein are the property of their respective owners.
Note:
Screen shots reprinted with permission from Microsoft Corporation.
Page 2

Introduction
The PC Phone is designed to interwork with Panasonic Hybrid-IP PBX (KX-TDA Series),
and enables the personal computer to handle calls instead of the proprietary telephone.
Notice:
The PC Phone handles a maximum of 10 calls at a time. To receive more than one call
simultaneously, you first need to assign the desired number of Incoming Call Distribution
Group buttons (max. 10) to the proprietary telephone assigned as the PC Phone. If you
assign more than 10 buttons, you may not be able to receive or make a call. For assignment, consult your manager or dealer.
Conditions
• Before installation, the PBX must be turned on.
• The Panasonic digital proprietary telephone (KX-T7633 and KX-T7636 only) must be
equipped with the USB Module KX-T7601, and a USB cable should connect your PC and
the telephone. For installation instructions, refer to the documentation of the KX-T7600
series.
• To install the PC Phone on, or to uninstall it from a PC running Windows 2000 or XP
Professional, you should be in the group “Administrators“. The user in any other groups is
not authorised.
• Be sure to assign a private folder as Data Folder when installing the software, if the user of
the PC Phone is not in the group “Administrators“.
Do not assign any of system folders, including “Program Files“ folder. Otherwise, the
application does not run properly.
• While operating the PC Phone, System Standby Mode (Suspend) and Hibernation should
be disabled.
• Depending on the OS, the default audio device of the PC will be switched to the USB
Audio Device that is installed at the time of USB Driver installation. To playback audio, reselect the preferred device via the Control Panel.
• If a connection error message appears during the operation, exit from the PC Phone,
confirm the following, then restart the PC Phone.
– A TEL cord connects the PBX and the telephone.
– A USB cable connects the telephone and the PC.
– The PBX is turned on.
• If you have any questions or experience any improper performance, consult your dealer.
2
Page 3
Installing the PC Phone Software
Notice:
Shutdown any other applications before installing the software.
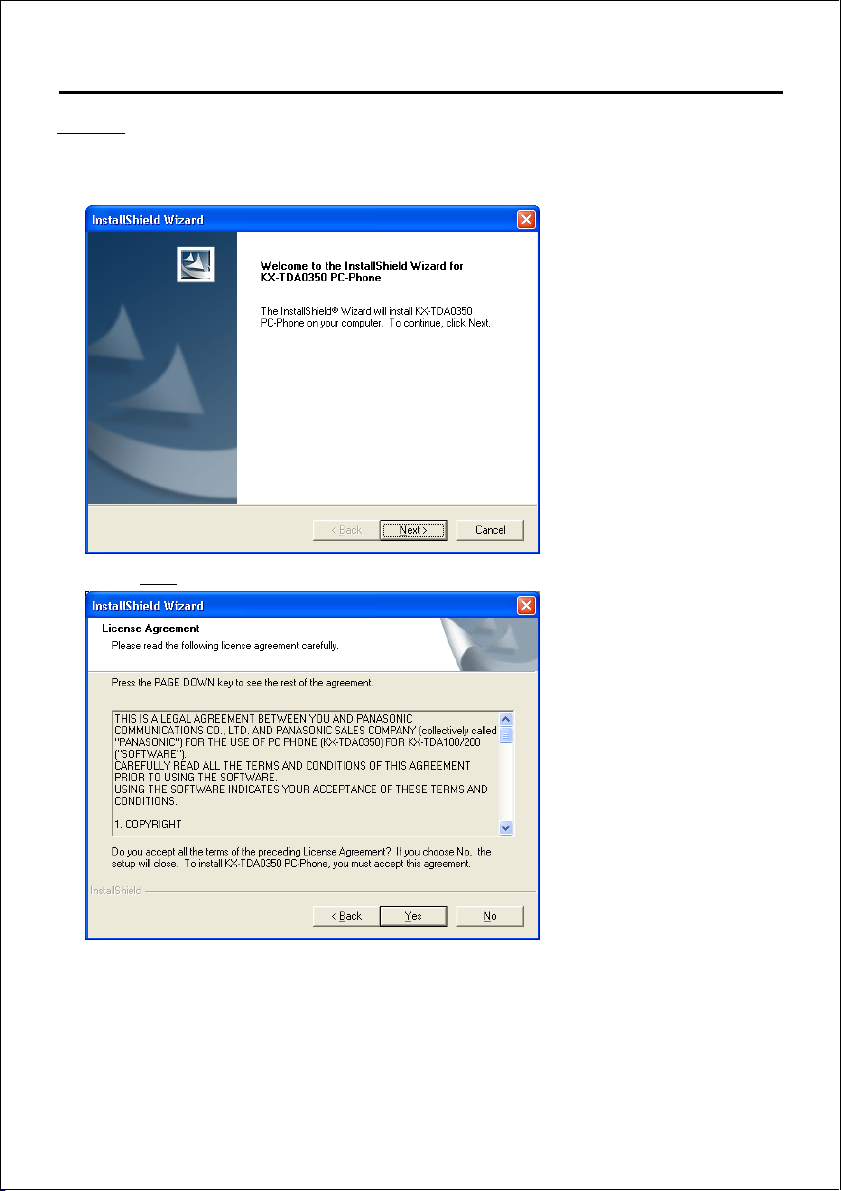
1. Double-click “Setup.exe“ on the CD-ROM.
2. Click Next.
3. Read the Licence Agreement carefully.
3
Page 4
Installing the PC Phone Software
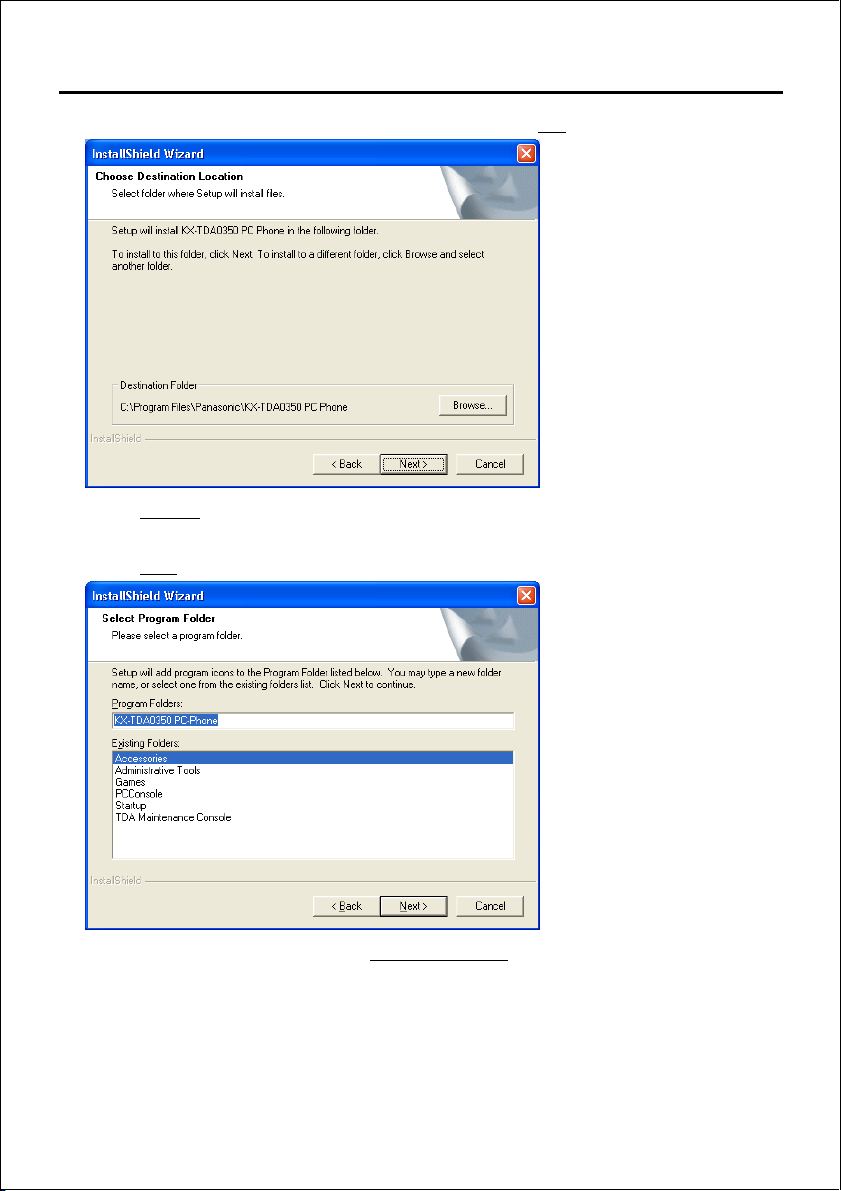
4. If you accept the terms of the License Agreement, click Ye s .
5. Click Browse to change the installation folder.
This step is optional, and can be skipped.
6. Click Next.
7. Rename the program folder in the Program Folders: field.
This step is optional, and can be skipped.
4
Page 5

Installing the PC Phone Software
8. Click Next.
9. Click Browse to change the location to save work data.
This step is optional, and can be skipped.
10.Click Next.
11.Enter the extension number of the extension to which the PC Phone is set, then click
OK.
5
Page 6
Installing the PC Phone Software
12.Click OK.
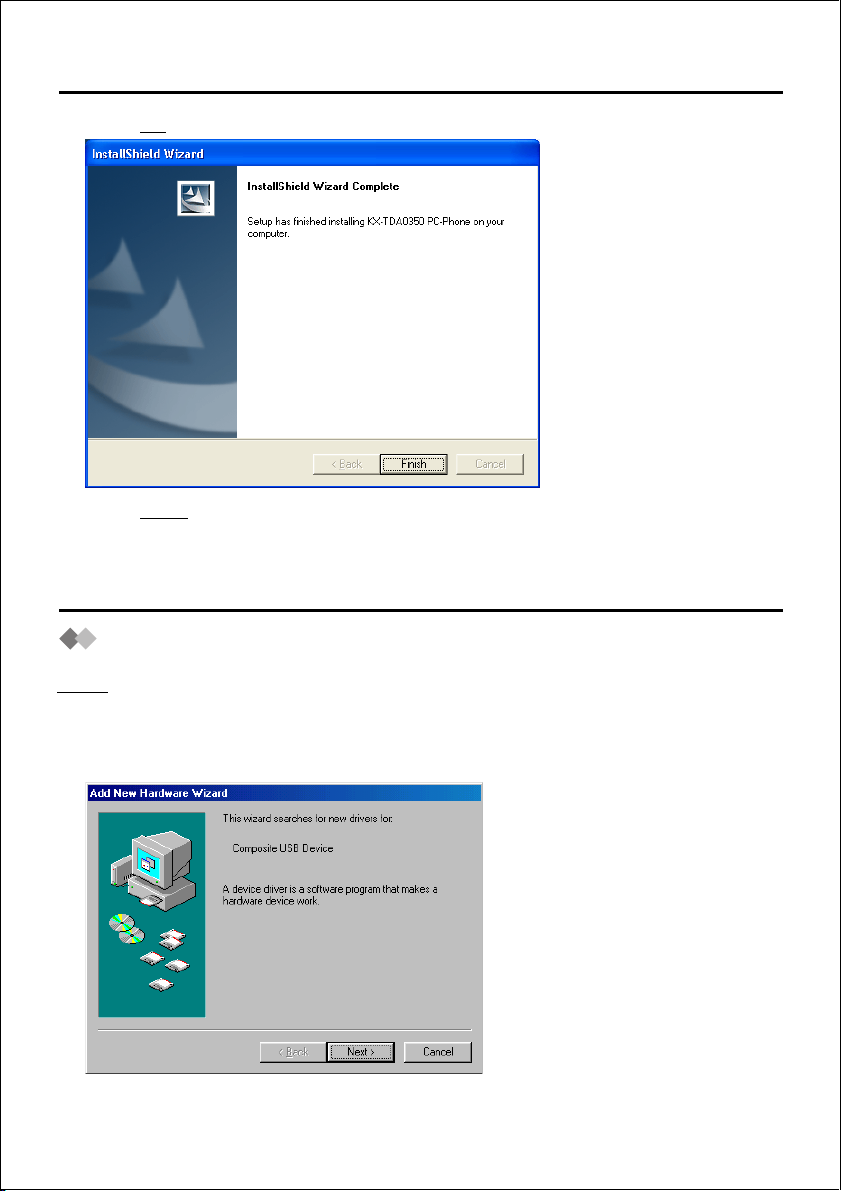
13.Click Finish.
Installing the USB Driver
Windows 98
Note:
Depending on the environment of your PC, you may need the Windows 98 installation
CD-ROM when installing the “USB Composite Device“ and “USB Audio Device“.
1. Connect your telephone to your PC with the USB cable.
6
Page 7
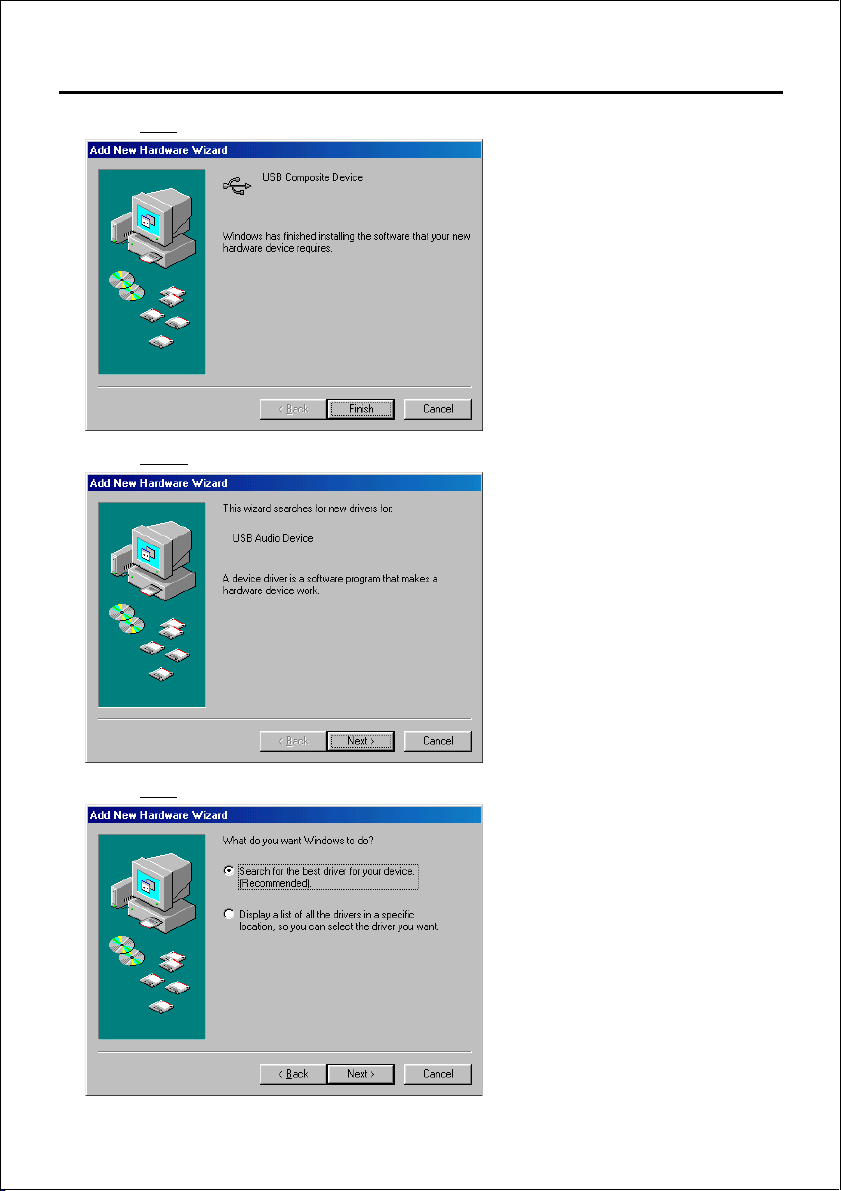
Installing the USB Driver
2. Click Next.
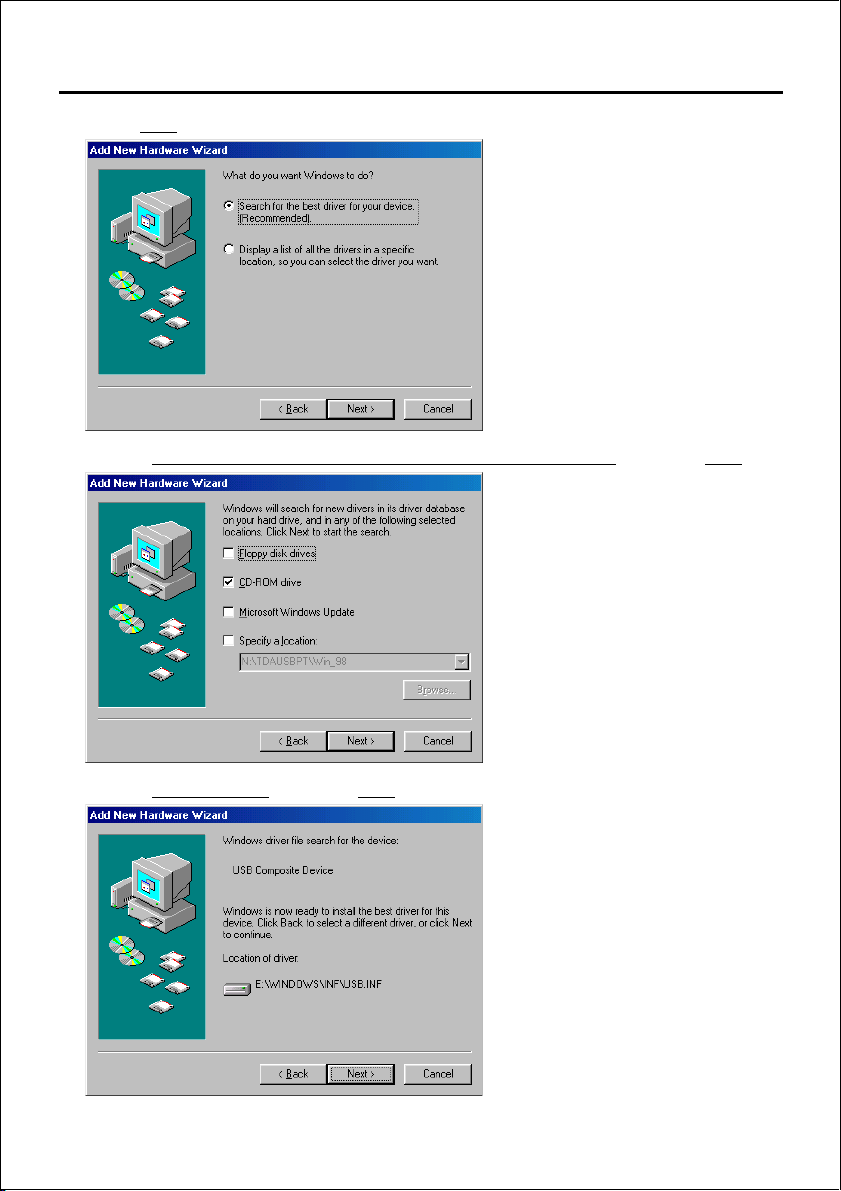
3. Select Search for the best driver for your device. [Recommended], then click Next.
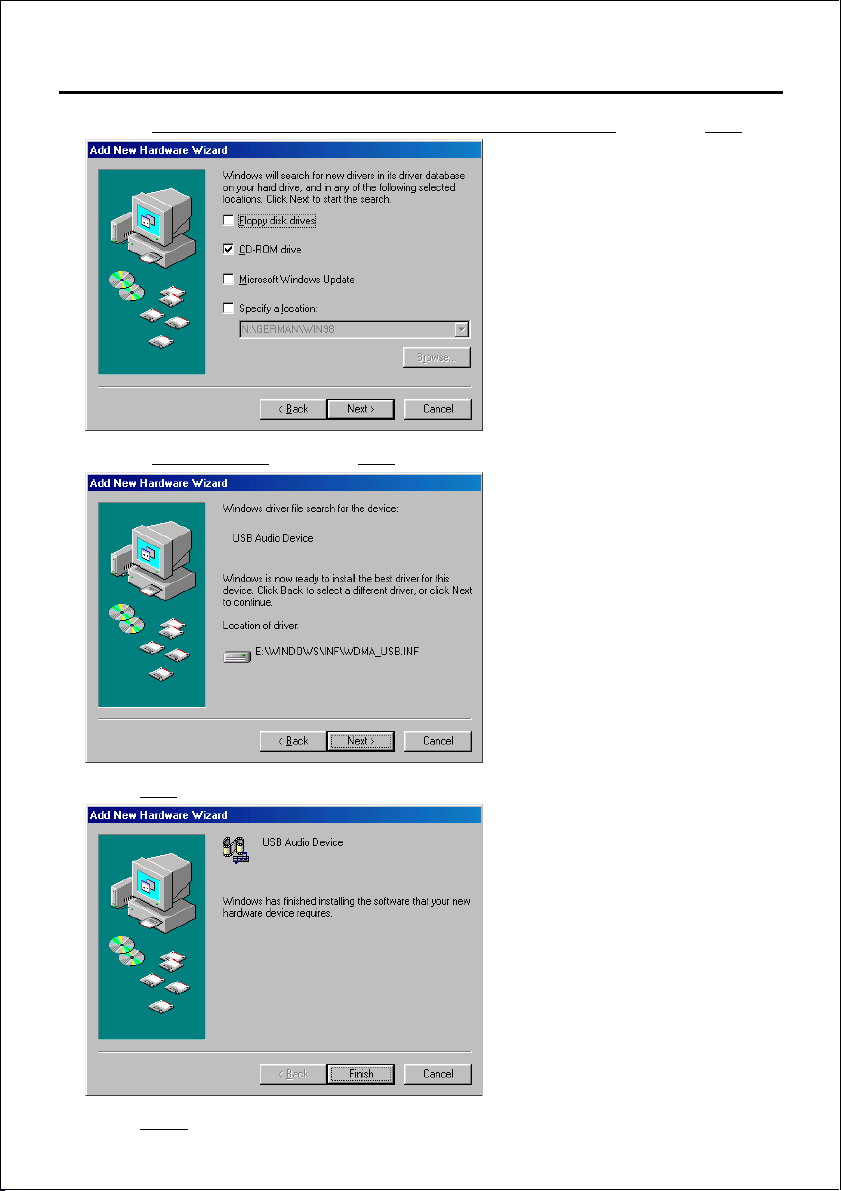
4. Select CD-ROM drive, then click Next.
7
Page 8
Installing the USB Driver
5. Click Next.
6. Click Finish.
7. Click Next.
8
Page 9
Installing the USB Driver
8. Select Search for the best driver for your device. [Recommended], then click Next.
9. Select CD-ROM drive, then click Next.
10.Click Next.
11.Click Finish.
9
Page 10
Installing the USB Driver
Note:
If your PC recommends, restart your PC.
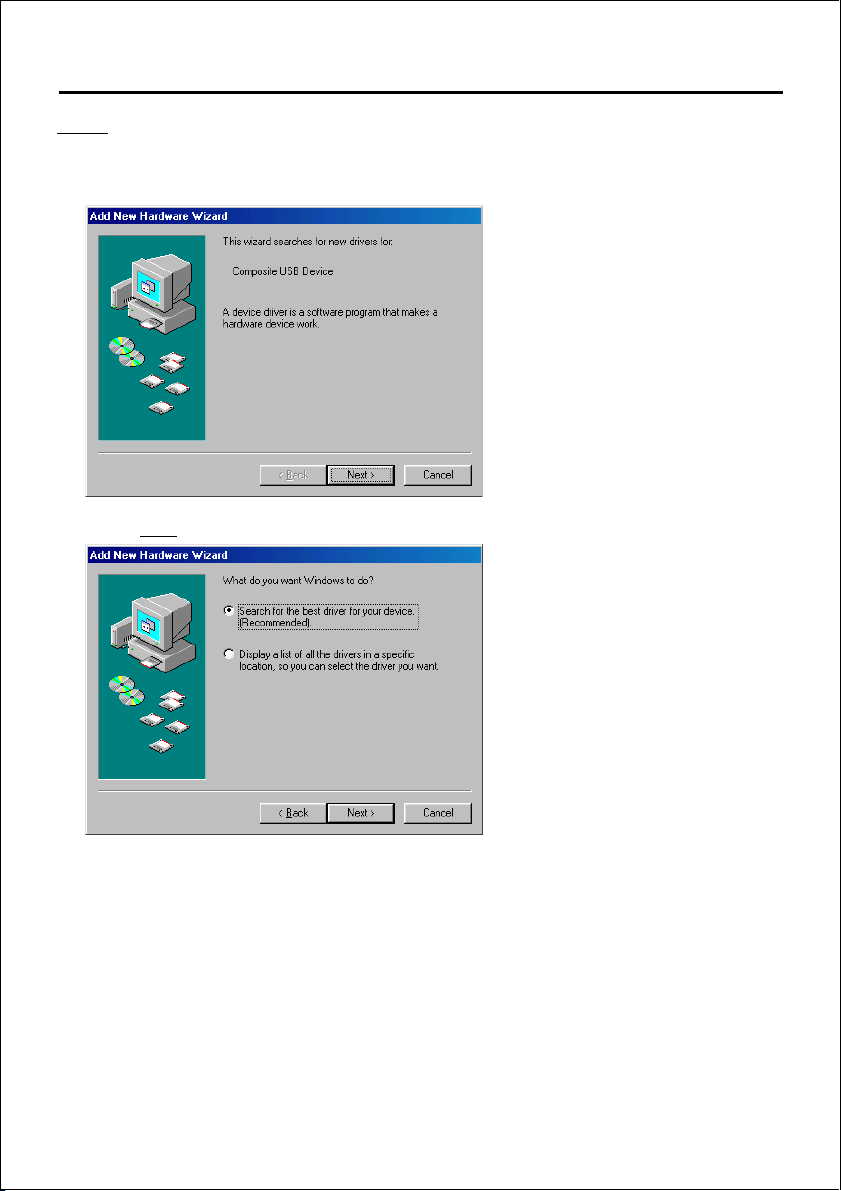
12.Click Next.
10
Page 11

Installing the USB Driver
13.Select Search for the best driver for your device. [Recommended], then click Next.
14.Select CD-ROM drive and Specify a location.
15.Click Browse to specify CD-ROM Drive:\TDAUSBPT\Win_98, then click Next.
16.Click Next.
11
Page 12

Installing the USB Driver
17.Click Finish.
Note:
If your PC recommends, restart your PC.
Windows 2000
1. Connect your telephone to your PC with the USB cable.
2. Click Next.
12
Page 13

Installing the USB Driver
3. Select Search for a suitable driver for my device. [Recommended], then click Next.
4. Select CD-ROM drives, and then click Next.
5. Click Next.
13
Page 14

Installing the USB Driver
6. Click Finish.
Windows XP
1. Connect your telephone to your PC with the USB cable.
2. Select Install from a list or specific location [Advanced], then click Next.
3. Select Search for the best driver in these locations.
14
Page 15

Installing the USB Driver
4. Select Search removable media [floppy, CD-ROM...], then click Next.
5. Click Continue Anyway.
6. Click Finish.
15
Page 16

Updating the USB Driver
Windows 98
1. Open Device Manager.
2. Click Properties, and click the Driver tab.
16
Page 17

3. Click Update Driver.
4. Click Next.
Updating the USB Driver
5. Select Display a list of all the drivers in a specific location, so you can select the driver
you want., and click Next.
17
Page 18

Updating the USB Driver
6. Select Panasonic KXTDAUSB PT Unit driver, then click Have Disk.
7. Click Browse to specify the TDAUSBPT folder, then click OK.
8. Select Panasonic KXTDAUSB PT Unit driver, then click Next.
9. Click Ye s .
18
Page 19

10.Click Next.
11.Click Finish.
Windows 2000
1. Open Device Manager.
Updating the USB Driver
19
Page 20

Updating the USB Driver
2. Right-click Panasonic KXTDAUSB PT Unit driver (under Universal Serial Bus
controllers), then click
3. Click the Driver tab, then click Update Driver.
Properties.
20
Page 21

Updating the USB Driver
4. Click Next.
5. Select Display a list of the known drivers for this device so that I can choose a specific
driver, then click Next.
6. Select Show compatible hardware, then click Have Disk.
21
Page 22

Updating the USB Driver
7. Click Browse to specify the TDAUSBPT folder, then click OK.
8. Select Panasonic KXTDAUSB PT Unit driver, then click Next.
9. Click Next.
22
Page 23

10.Click Finish.
Windows XP
1. Open Device Manager.
Updating the USB Driver
23
Page 24

Updating the USB Driver
2. Right-click Panasonic KXTDAUSB PT Unit driver, then click Update Driver.
3. Select Install from a list or specific location [Advanced], then click Next.
24
Page 25

Updating the USB Driver
4. Select Don’t search. I will choose the driver to install., then click Next.
5. Click Have Disk.
6. Click Browse to specify the TDAUSBPT folder, then click OK.
25
Page 26

Updating the USB Driver
7. Select Panasonic KXTDAUSB PT Unit driver, then click Next.
8. Click Continue Anyway.
9. Click Finish.
26
Page 27

Deleting the USB Driver
Windows 98
1. Open Device Manager.
2. Select Panasonic KXTDAUSB PT Unit driver, then click Remove.
3. Click OK.
27
Page 28

Deleting the USB Driver
Windows 2000
1. Open Device Manager.
2. Right-click Panasonic KXTDAUSB PT Unit driver, then click Uninstall.
3. Click OK.
28
Page 29

Windows XP
1. Open Device Manager.
Deleting the USB Driver
2. Right-click Panasonic KXTDAUSB PT Unit driver, then click Uninstall.
3. Click OK.
29
Page 30

Uninstalling the PC Phone Software
Uninstall the software from [Control Panel] -> [Add/Remove Programs].
Starting the PC Phone Software
Notice:
All features of the PC Phone software are available for 90 days from the date of
installation. After this period expires, some features will become unavailable.
1. Start PC Phone.
Notes:
•When logging in to the PC Phone for the first time, it may take several minutes to
retrieve the necessary data.
•When logging in to the PC Phone for the first time, the following dialogue box appears:
Sound playback by PC: Assign a sound device. Note you cannot select a USB Audio
Device for sound playback by PC.
Sound transfer / receive with PBX: Assign the USB Audio Device installed at the time of
USB Driver installation.
•If the extension number registered in the PC Phone is different from that of the actual
device (connected to the PC), the following dialogue box appears:
Extension Number: Enter the correct extension number.
30
Page 31

31
Page 32

Panasonic Communications Co., Ltd.
1-62, 4-chome, Minoshima, Hakata-ku, Fukuoka 812-8531, Japan
Copyright:
This material is copyrighted by Panasonic Communications Co., Ltd., and may be
reproduced for internal use only. All other reproduction, in whole or in part, is
prohibited without the written consent of Panasonic Communications Co., Ltd.
© 2003 Panasonic Communications Co., Ltd. All Rights Reserved.
PSQX3515ZA KK0804EB0
 Loading...