

Page 1
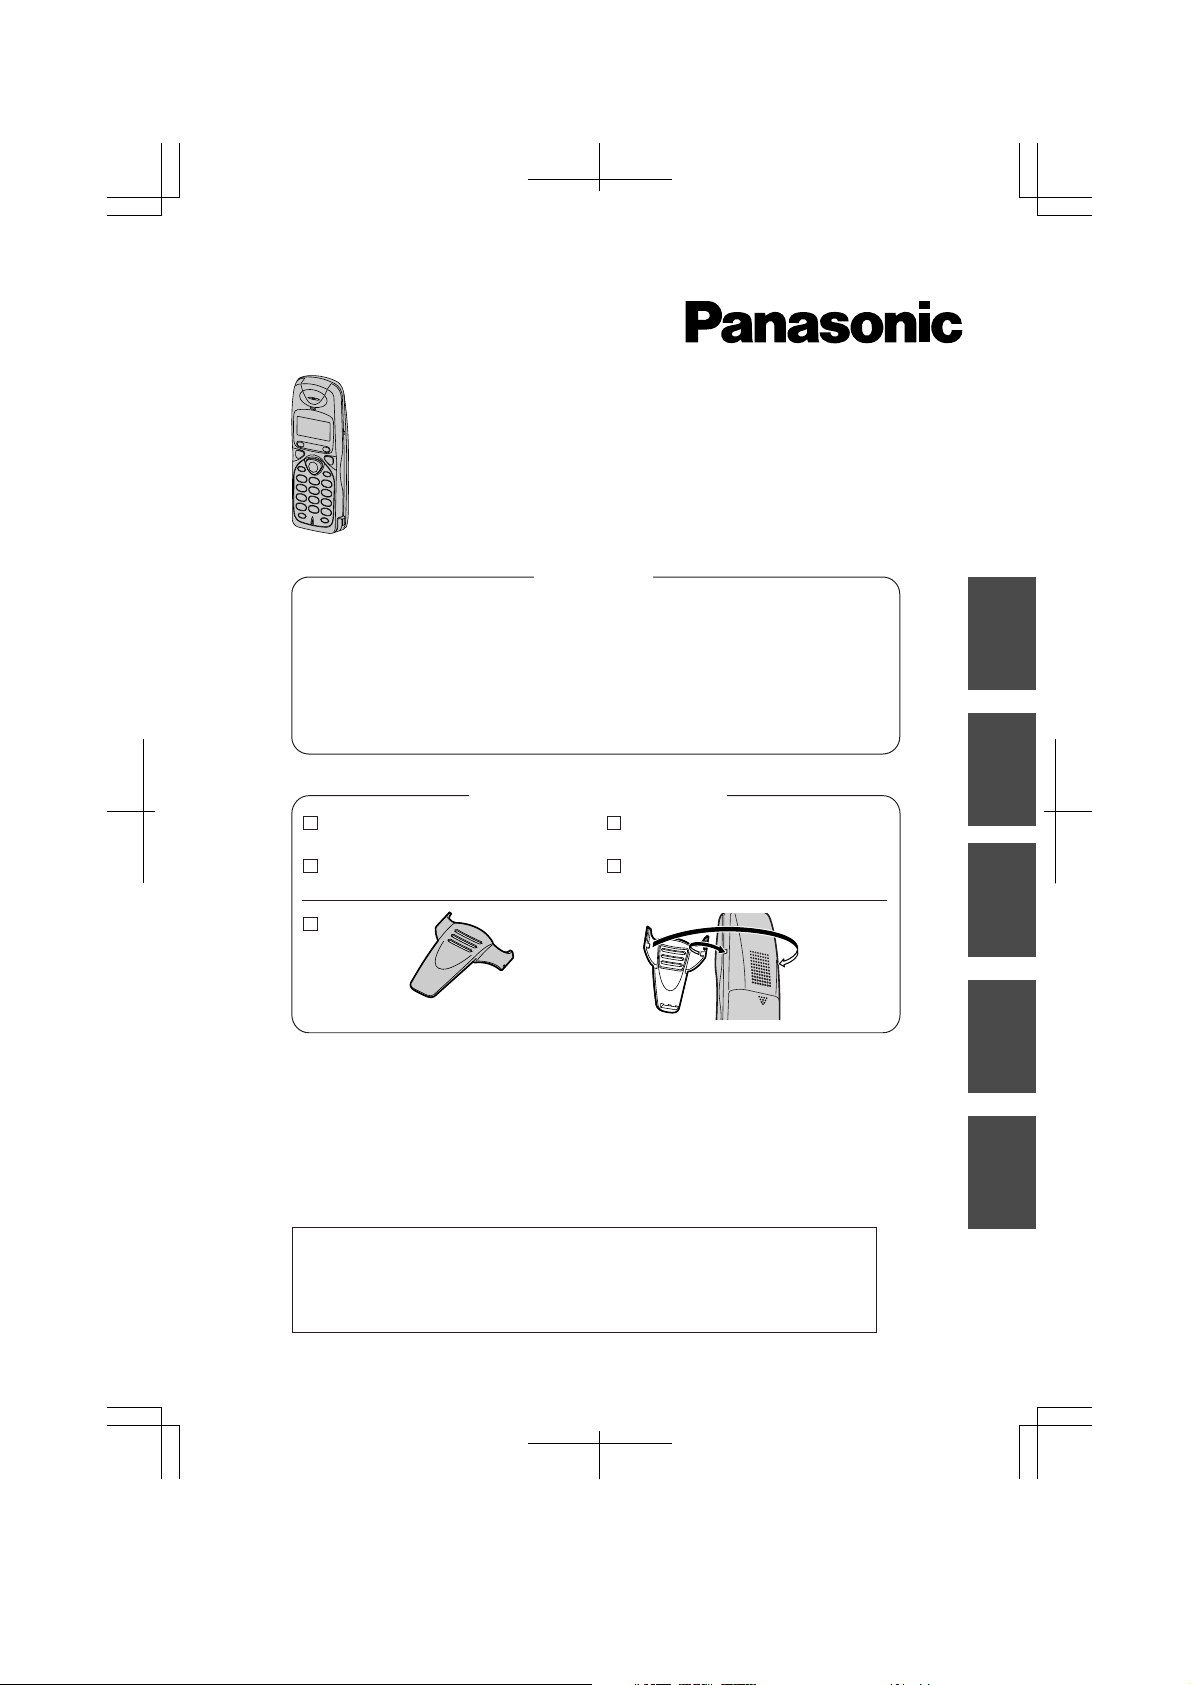
DECT Portable Station
Operating Instructions
Model KX-TD7580
Contents
Setting Up................................. 2
Before Operation....................... 3
Operation...................................4
Using the Phonebook................6
Handset Programming.............11
Important Information...............13
Specifications.......................... 16
English..................................1-16
Deutsch...............................17-32
Français..............................33-48
Nederlands.........................49-64
Svenska.............................. 65-80
Accessories (included)
AC Adaptor*
Charger
Belt Clip
– Thank you for purchasing a DECT Handset (= Portable Station).
– Charge the battery for about 15 hours before initial use.
– This manual is designed to be used with your Handset and a Panasonic
KX-TD816/KX-TD1232 system.
– In this manual, the last letter of each model number is omitted.
*
Available AC Adaptors: KX-TCA1, KX-TCA1AL, KX-TCA1CE and KX-TCA1E.
The part number is different from each country. Refer to the number on the
label on the AC Adaptor.
The handset supports the single line telephone (SLT) features.
Please refer to the appropriate section in the User Manual for
the KX-TD816/1232 system to operate the handset.
Some of the features are not available.
To attach
Batteries
(Panasonic P-6P or BYD PQHHR120AA12)
Operating Instructions
English Deutsch Svenska
Français
Nederlands
Page 2
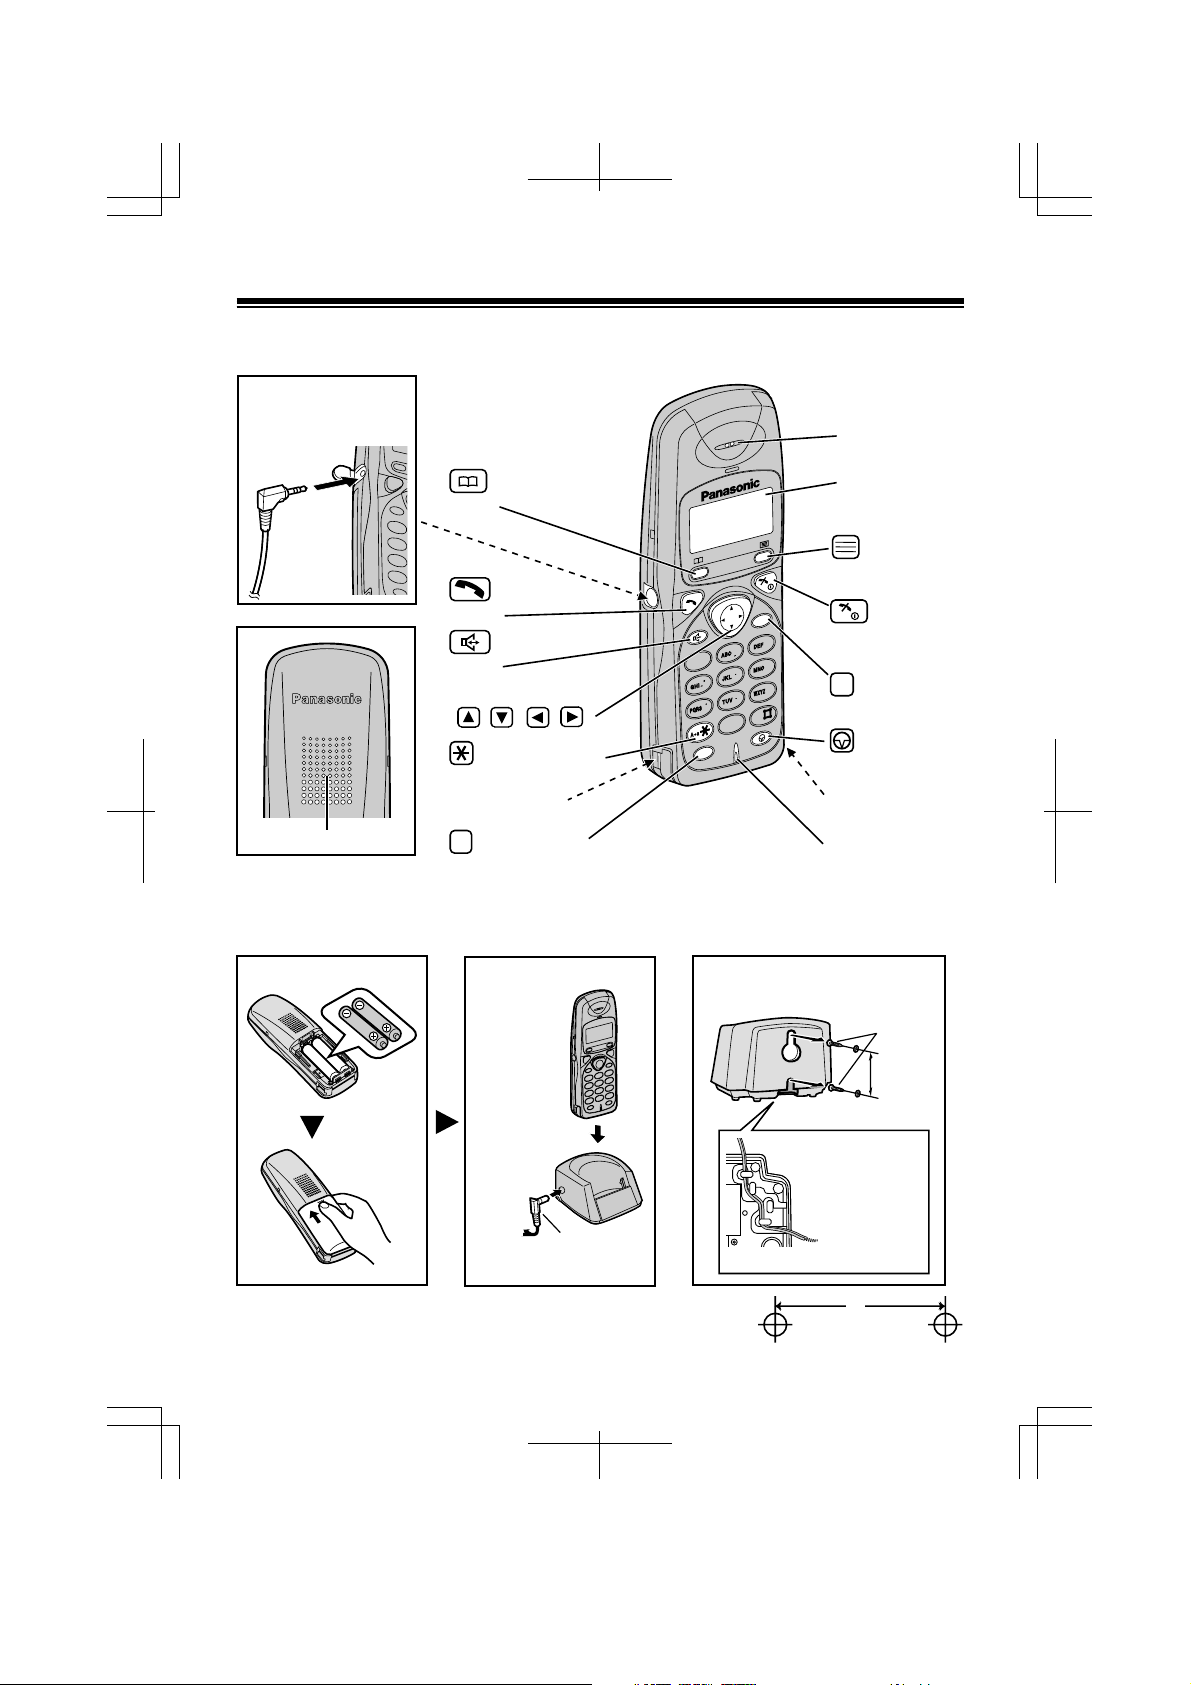
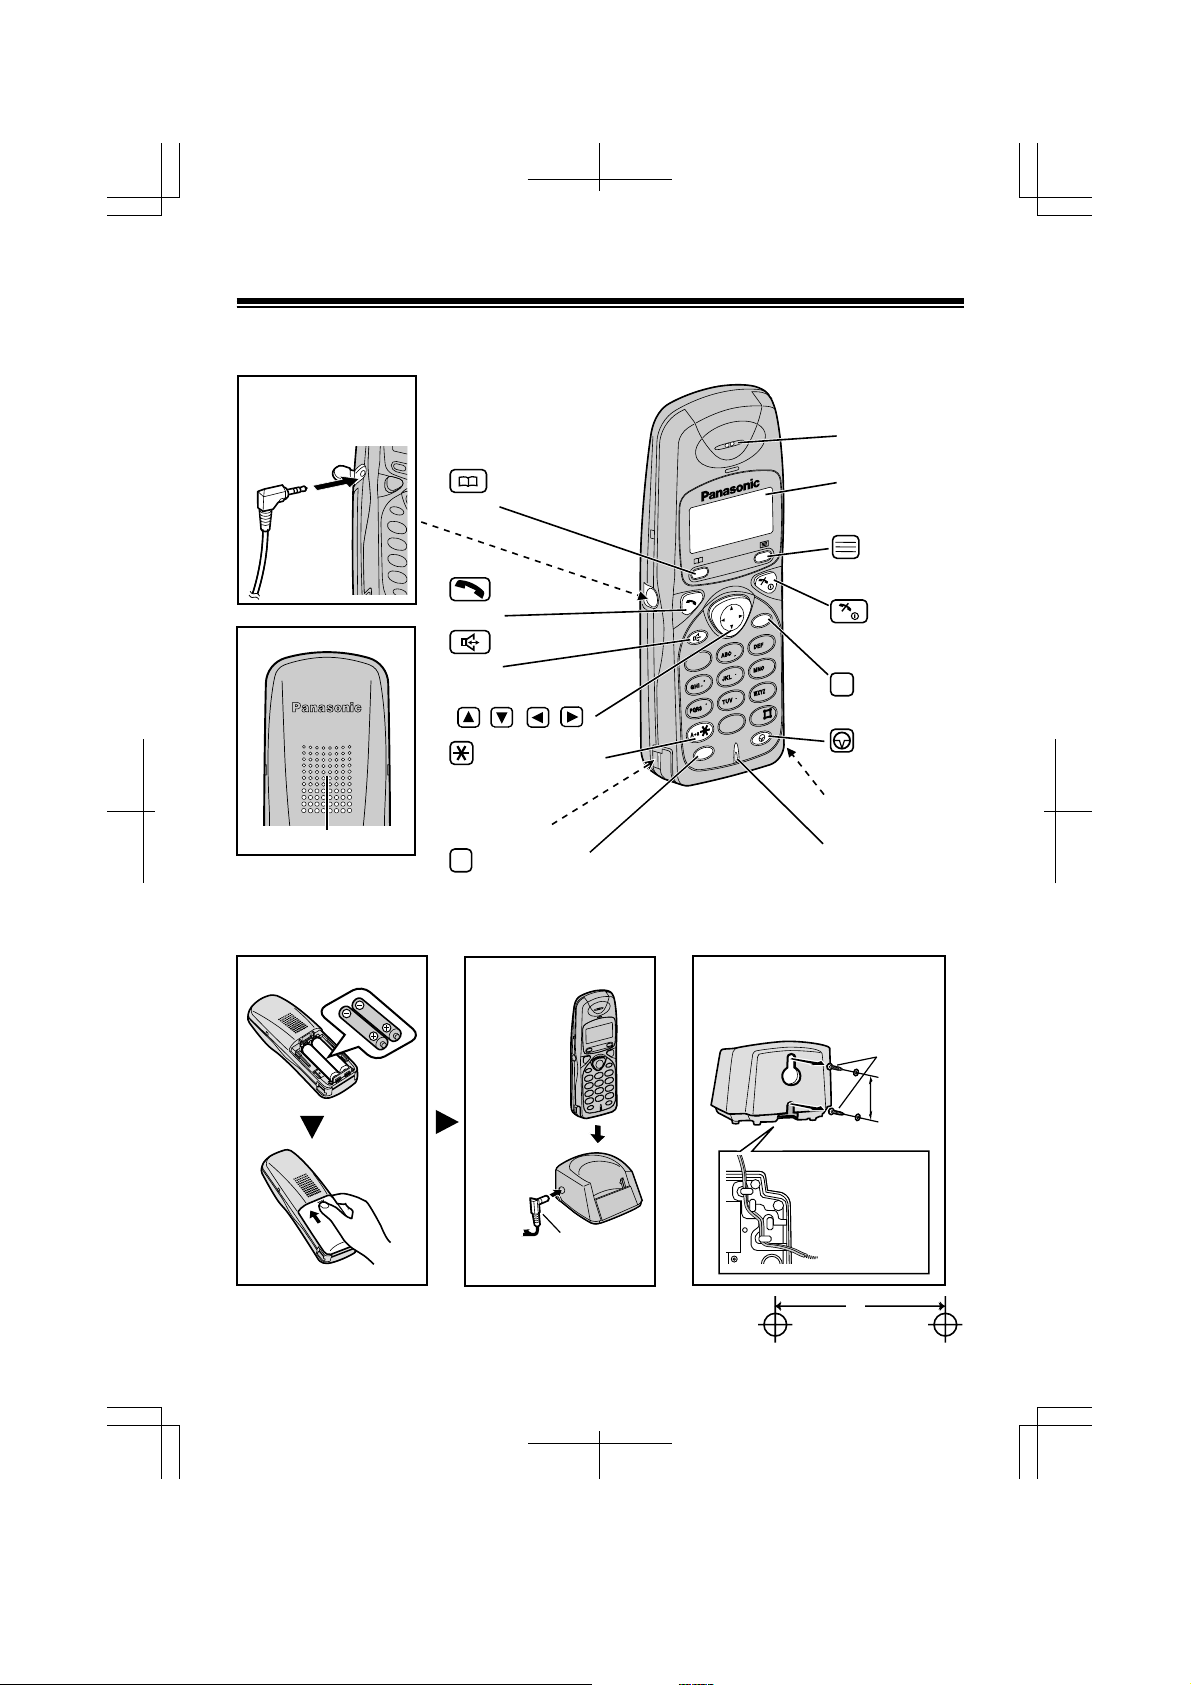
Setting Up
Handset
Headset Jack (Please
use only a Panasonic
headset.)
Back
Speaker
(Phonebook)
Button
(Talk)
Button
(Speakerphone)
Button
Navigator Key
( , , , )
(Capital Change)
Button
Charge Contact
R
(Recall) Button
Receiver
Display
(Function/OK)
Button
C
3
3
2
2
1
1
4
4
7
7
R
6
6
5
5
9
9
8
8
0
0
(OFF/Power)
Button
(Clear)
C
Button
(Pause)
Button
Charge Contact
Microphone
Insert and charge the batteries for about 15
hours as shown below.
To power
outlet
AC Adaptor
2
Mount the charger
securely on the wall.
Use the template below for wall
mounting.
Screws
30 mm
Insert the cord
in the groove for
wall mounting
or desktop
positioning.
30 mm
Page 3
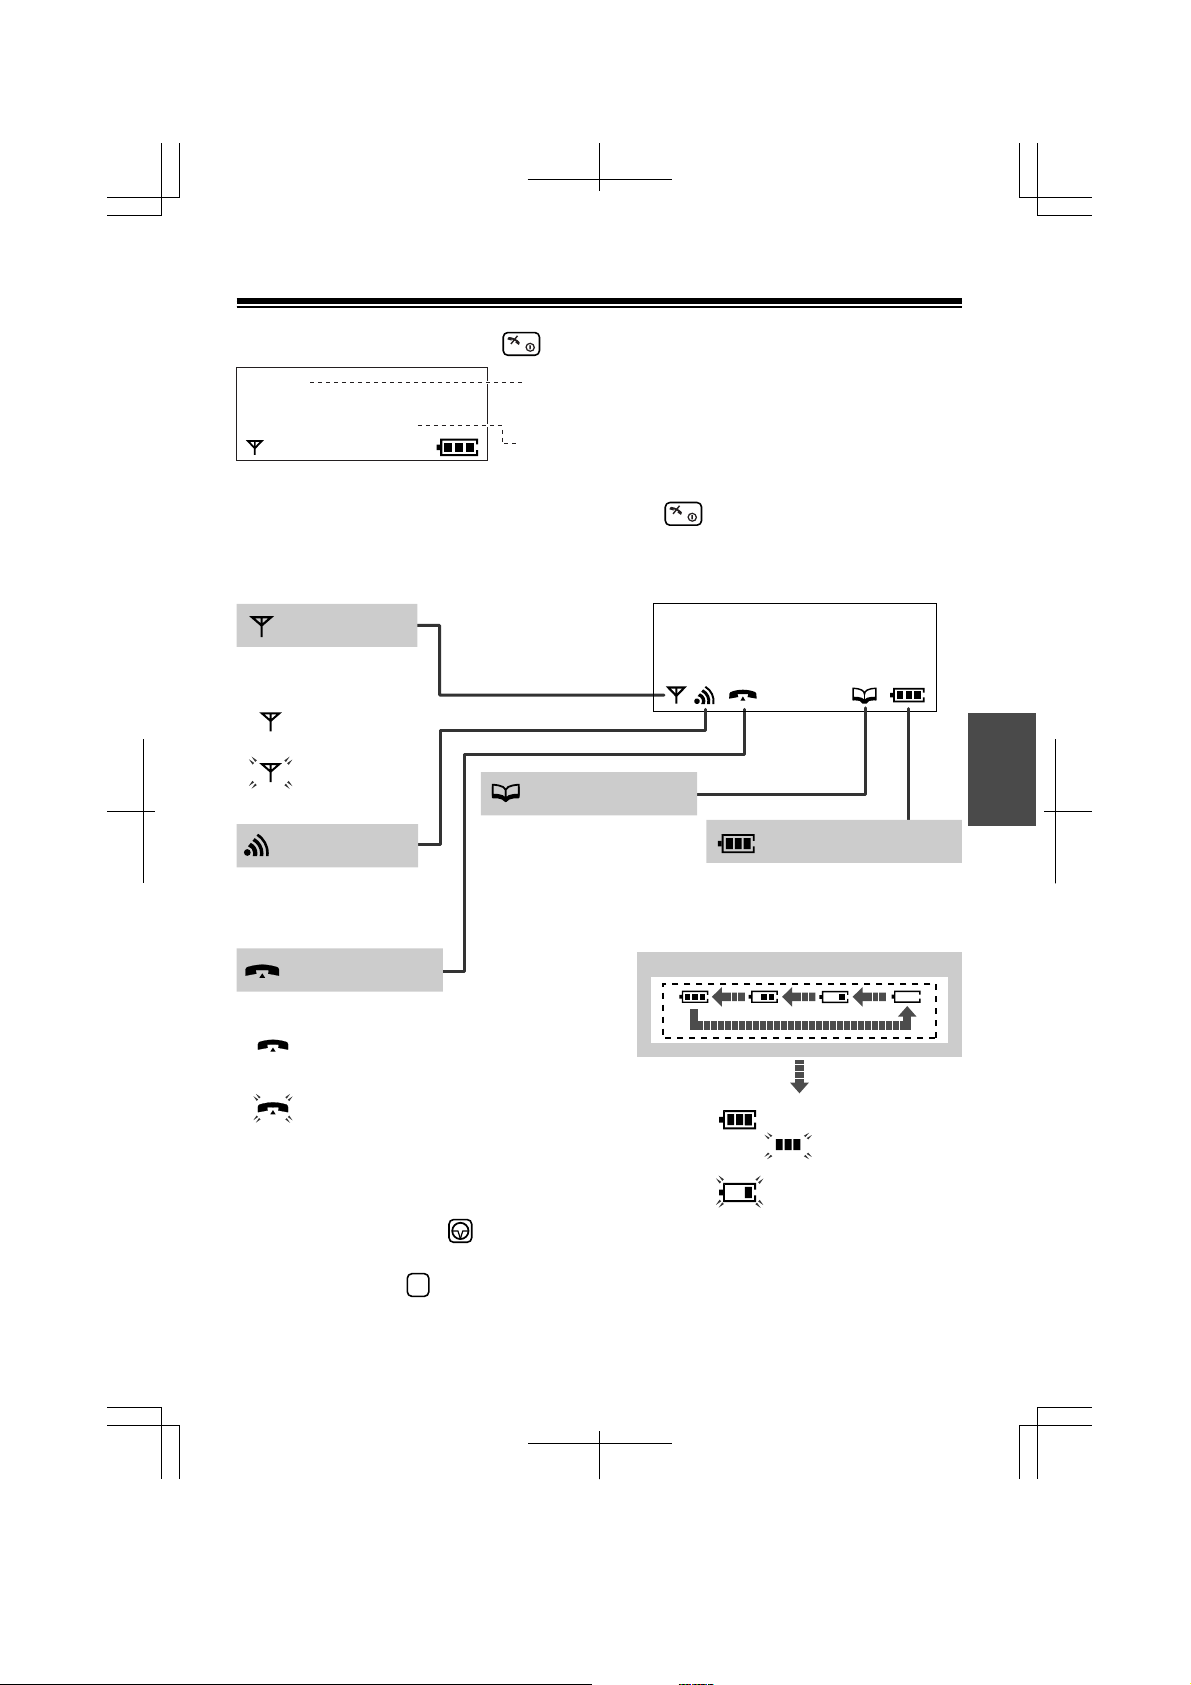
Before Operation
To turn the power ON, press and hold .
[280]
15.05 13:58
●
To turn the power OFF, press and hold until a beep sounds.
● To change the display language, see page 12.
The extension number:
For programming, see page 12.
The current date and time
In-range icon
Displays when the
handset is:
in range.
out of range.
(Flashing)
Intercom icon
Flashes when receiving
an internal call.
Talk icon
Displays when:
making or
answering a call.
receiving an outside
(Flashing)
call.
Phonebook icon
Displays when storing
or viewing phonebook
items.
ABCDEFGHIabcdefg
English
1234567890123456
Battery Strength
Shows the battery strength.
During charging the battery,
battery icon is as shown below.
<During charge>
Full
(Flashing )
Characters
P is pressed while dialling.
R
F is pressed while dialling.
(Flashing)
Needs to be
charged.
3
Page 4
Operation
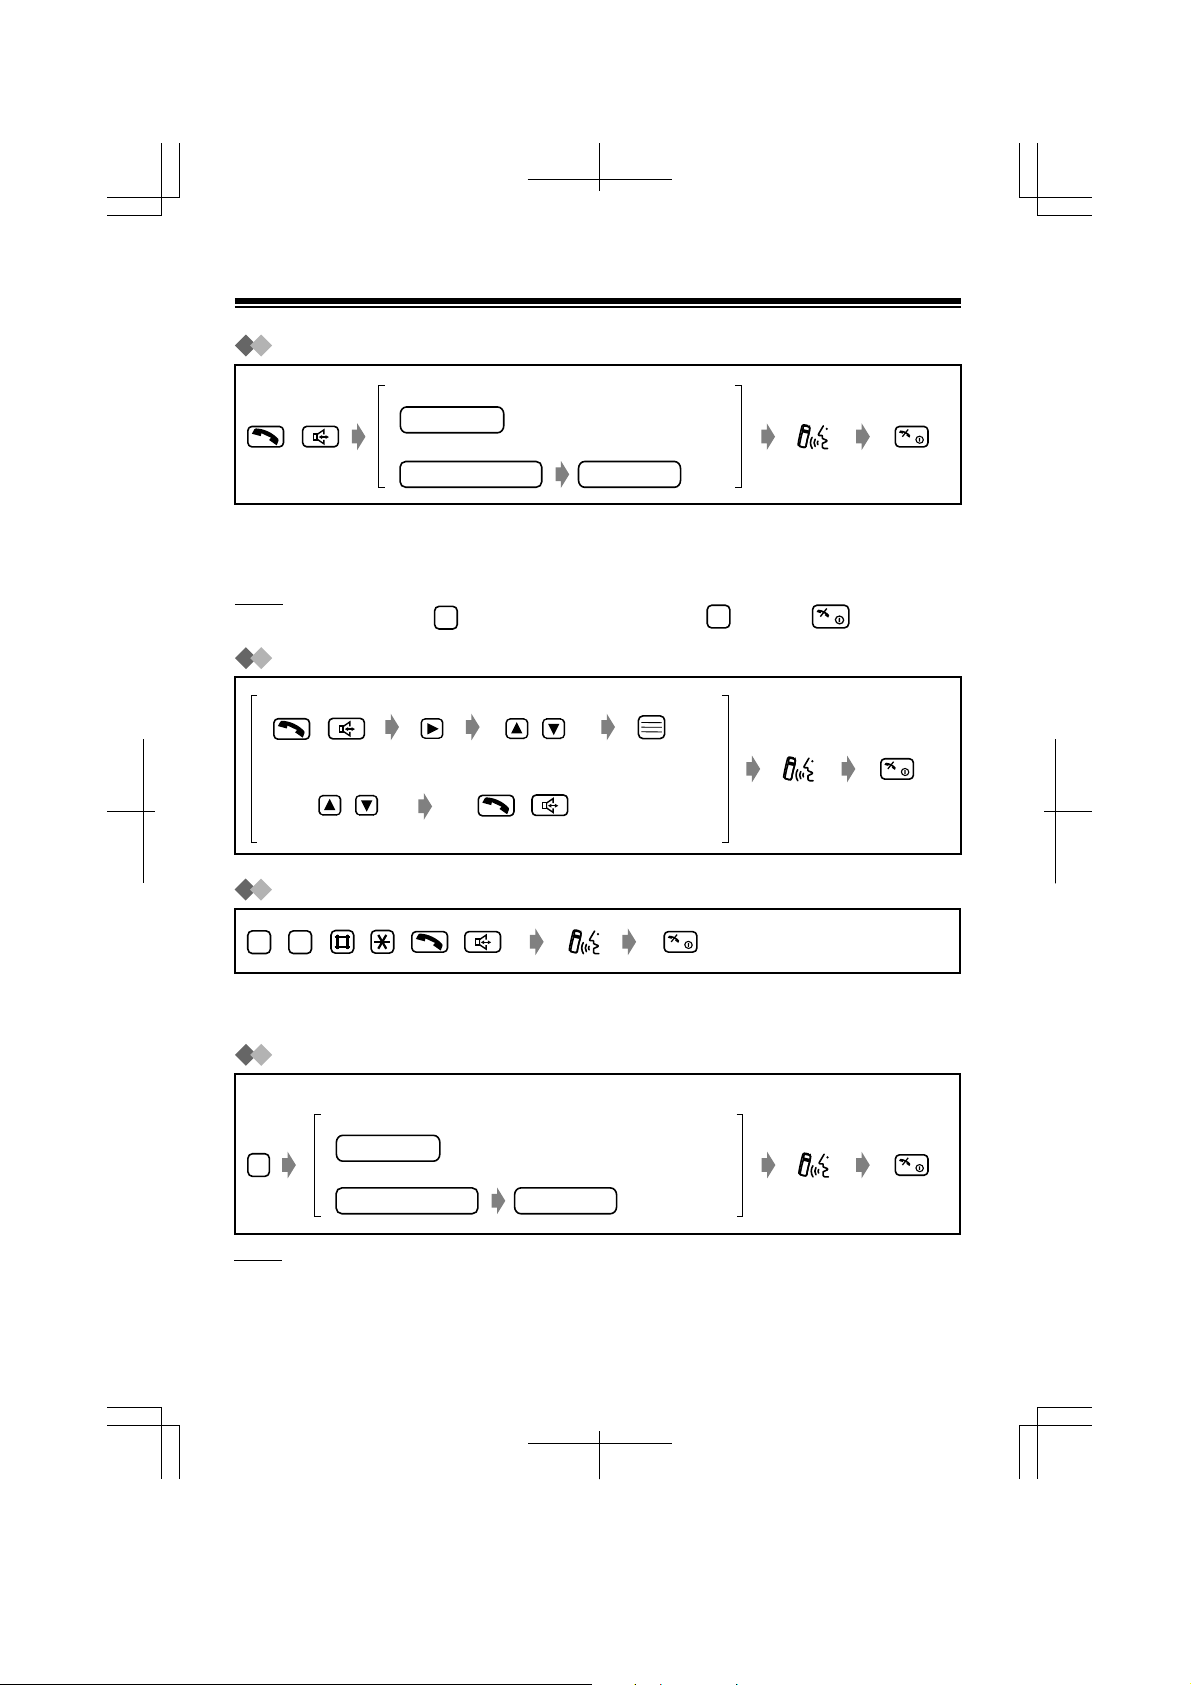
Basic Calling
To an extension
extension no.
/
●
While talking, you can switch back and forth between the hands-free operation
and the receiver.
●
Predialling: You can dial first, and then go off-hook.
Note
●
If you misdial, press . To cancel, press and hold or press .
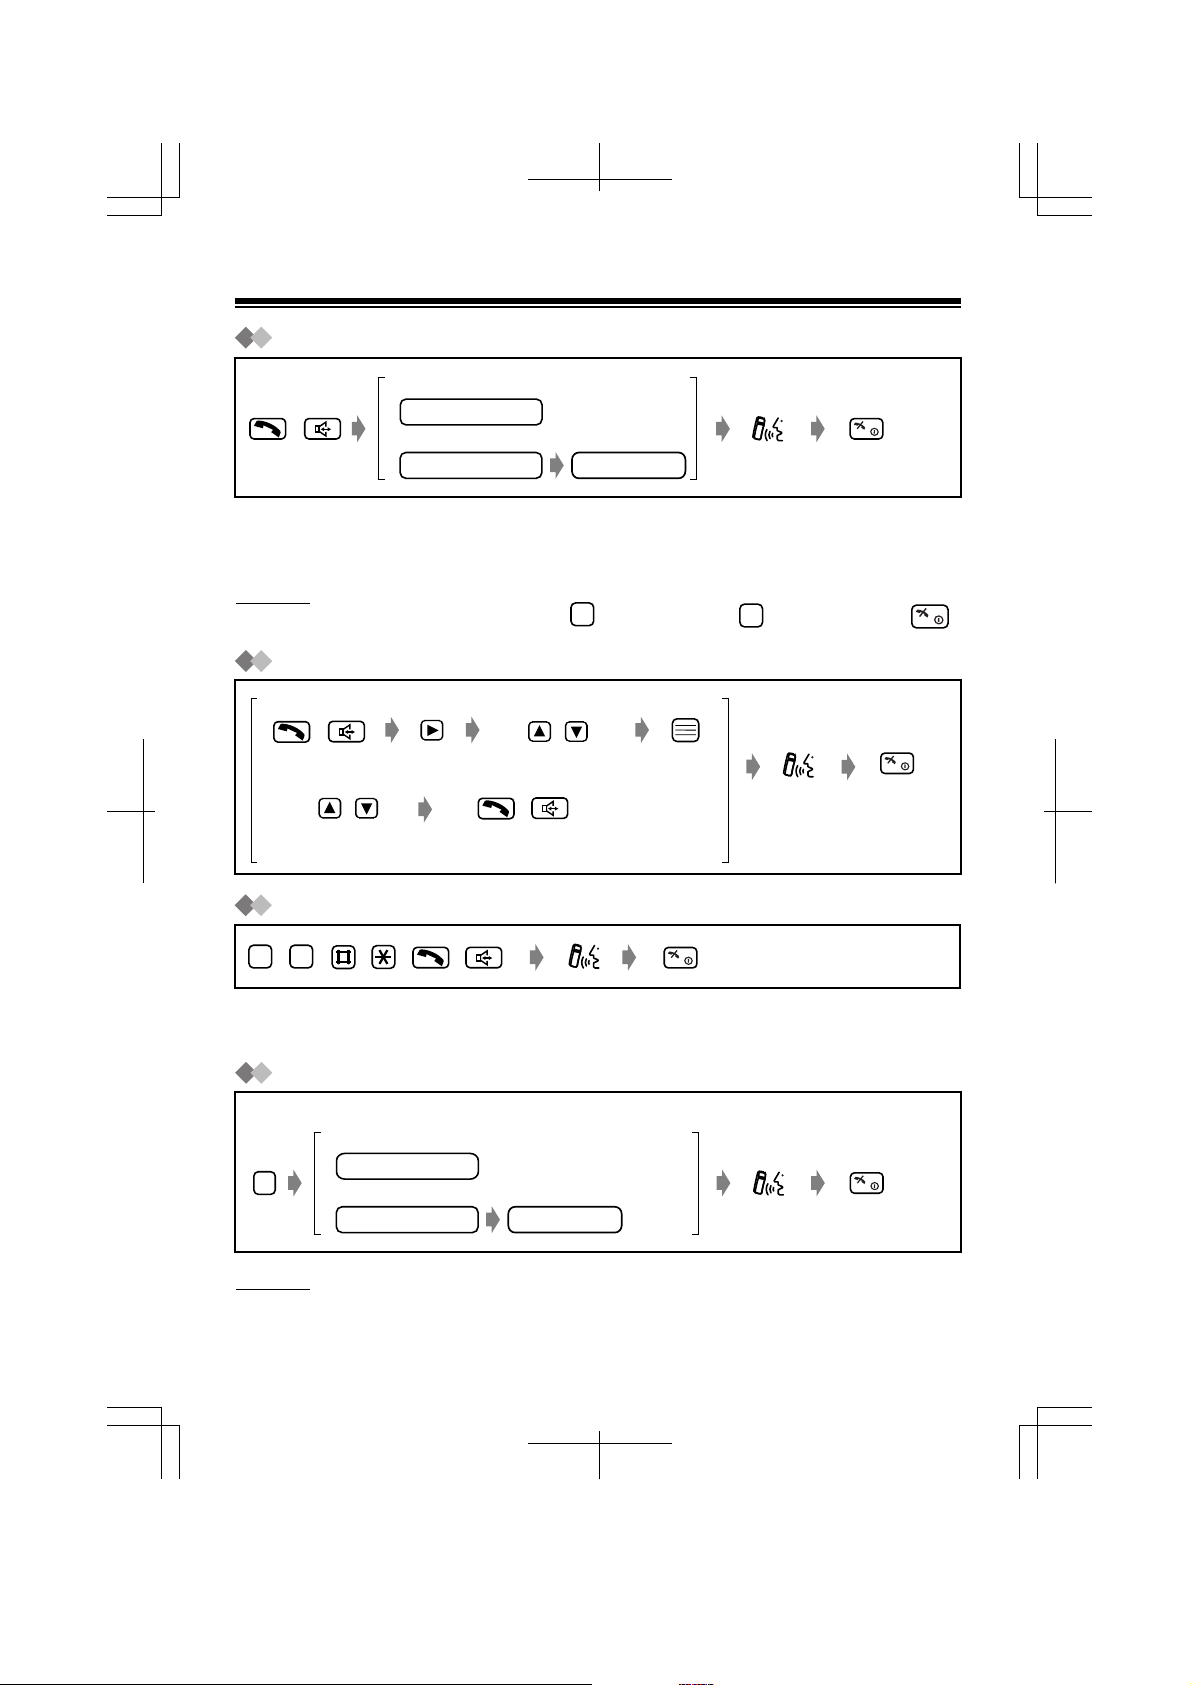
Redialling
To redial the last number
/ /
To redial using the redial list
Select the redial number.
To an outside party
line access code
C
Select "Redial."
//
phone no.
C
Receiving Calls
–
9
0
●
When receiving an outside call from a caller registered in the phonebook, the
caller's name and phone number will appear on the display.
/
/
/
/
Transferring Calls
While talking
To an extension
R
Note
●
You can also hang up by placing the handset on the charger.
4
extension no.
To an outside party
line access code
phone no.
Page 5
Tone Signalling
During an outside call or while dialling, you can transmit tone signals
automatically using the keypad (e.g., to control answering system remotely).
/
Select "TONE."
Clearing the Number in the Redial Memory
To clear the selected number
/
/
Select the redial
number.
Select "Clear."
To clear all numbers
/
Select "All Clear."
/
Select "YES."
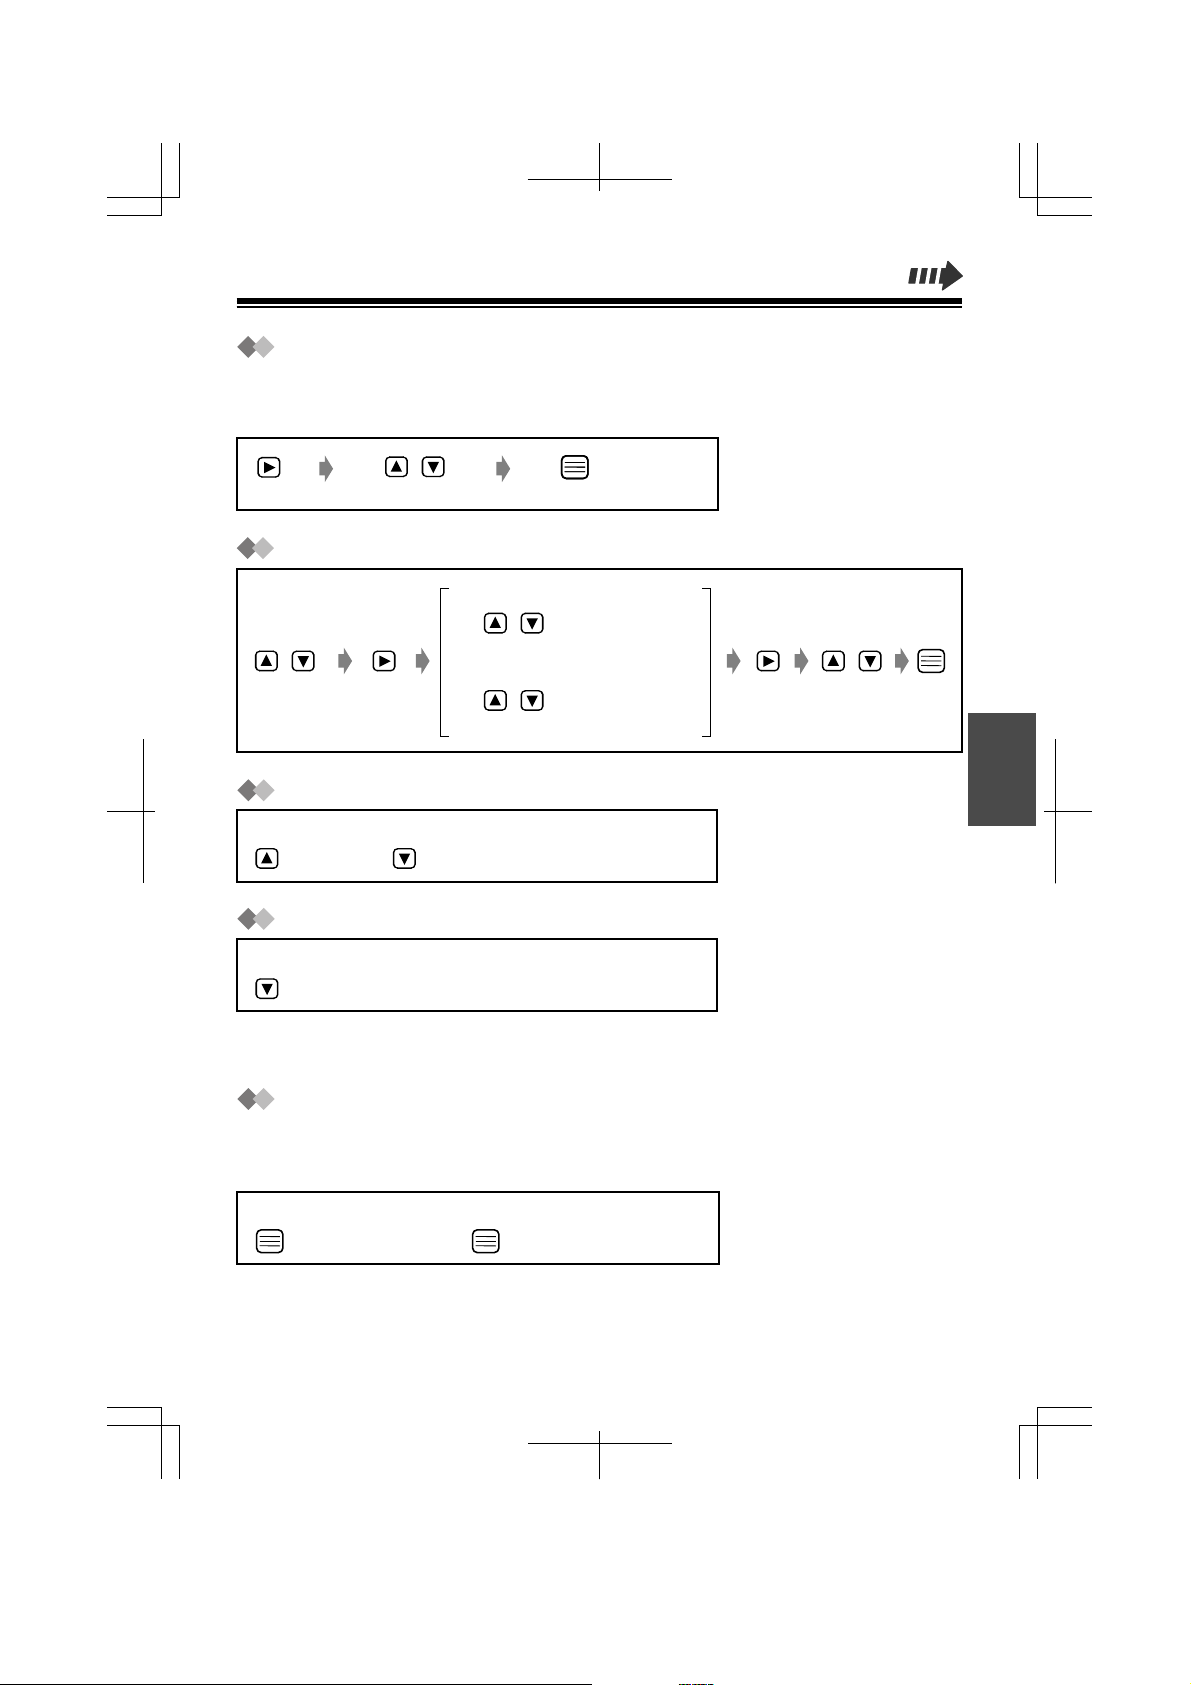
Adjusting the Receiver/Speaker Volume
While talking
(to increase) (to decrease)
Turning the Handset Ringer off Temporarily
While ringing
(press and hold.)
●
The ringer will turn back on for the next call.
●
This function will not work when the handset is on the charger.
Setting the Key Lock
You can lock the handset dialling buttons. Only incoming calls are accepted until
the key lock is cancelled. While locked, "[X]" will be shown on the display.
English
To set
(press and hold.)
●
The key lock will also be cancelled when the power is turned OFF (p. 3).
To cancel
(press and hold.)
5
Page 6
Using the Phonebook
You can store up to 100 names and extension/outside numbers in the
phonebook. All phonebook items are sorted in alphabetical order. Using the
phonebook, you can make a call by selecting a name on the display.
●
We recommend you insert access code (p. 12).
●
If the phonebook is locked (p. 12), enter the 4-digit handset PIN to go to the
phonebook list.
●
You can exit the phonebook setting mode anytime by pressing .
●
When programming is completed, a beep sounds.
Using the Private Category Feature
You can assign the caller's information to one of 8 private categories (1-8), "OFF"
and "INT." When storing an extension number in the phonebook, you must select
"INT."; otherwise, you cannot make an internal call from the phonebook. (If both
extension/outside numbers are the same, do not store the extension number in
"INT." in the phonebook.)
For each private category 1-8, you can select the display backlight colour and ring
type (p.11-12). When receiving an outside call, you can easily figure out who has
called. (For example, Category 1 for family, Category 2 for friends and Category 8
for business.) If you do not assign an item to any private category number, the
handset will ring in the preset ring type and light in the preset colour when
receiving an outside call.
For "INT.," you cannot select the ringer type and the display backlight colour.
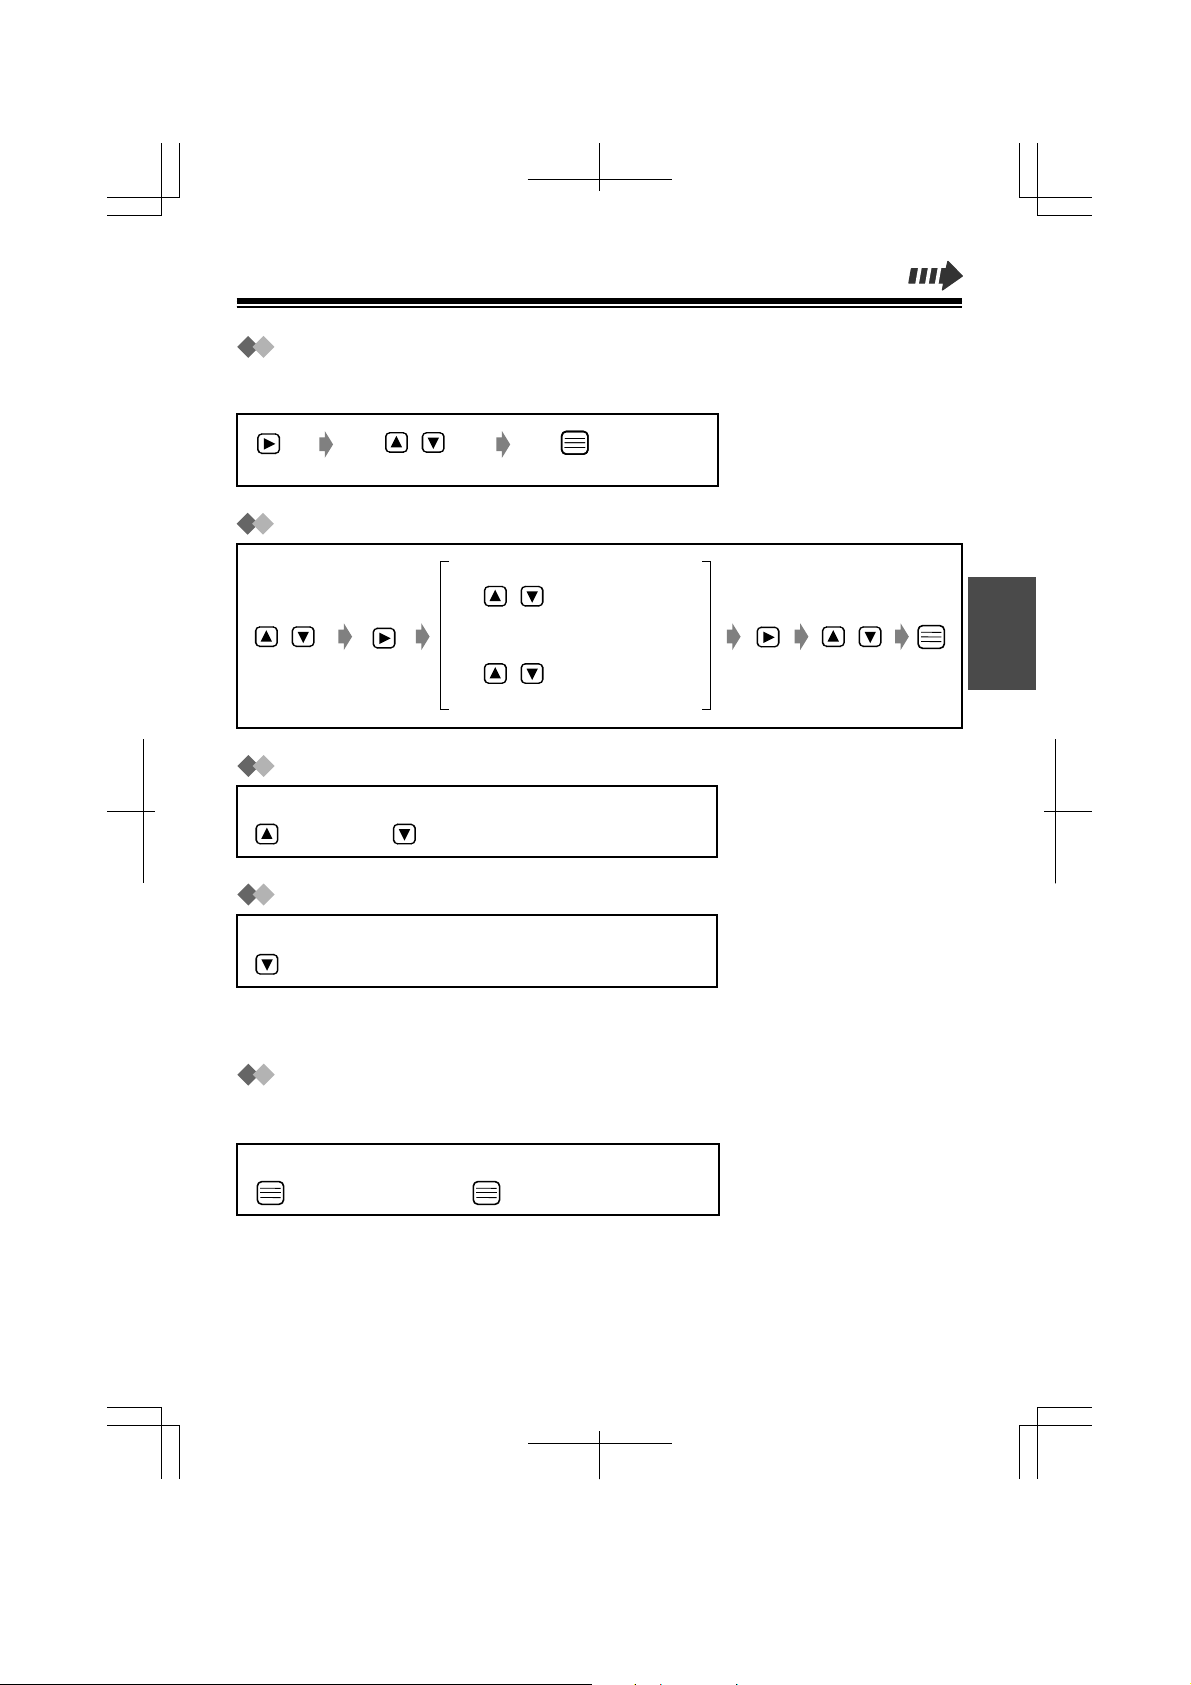
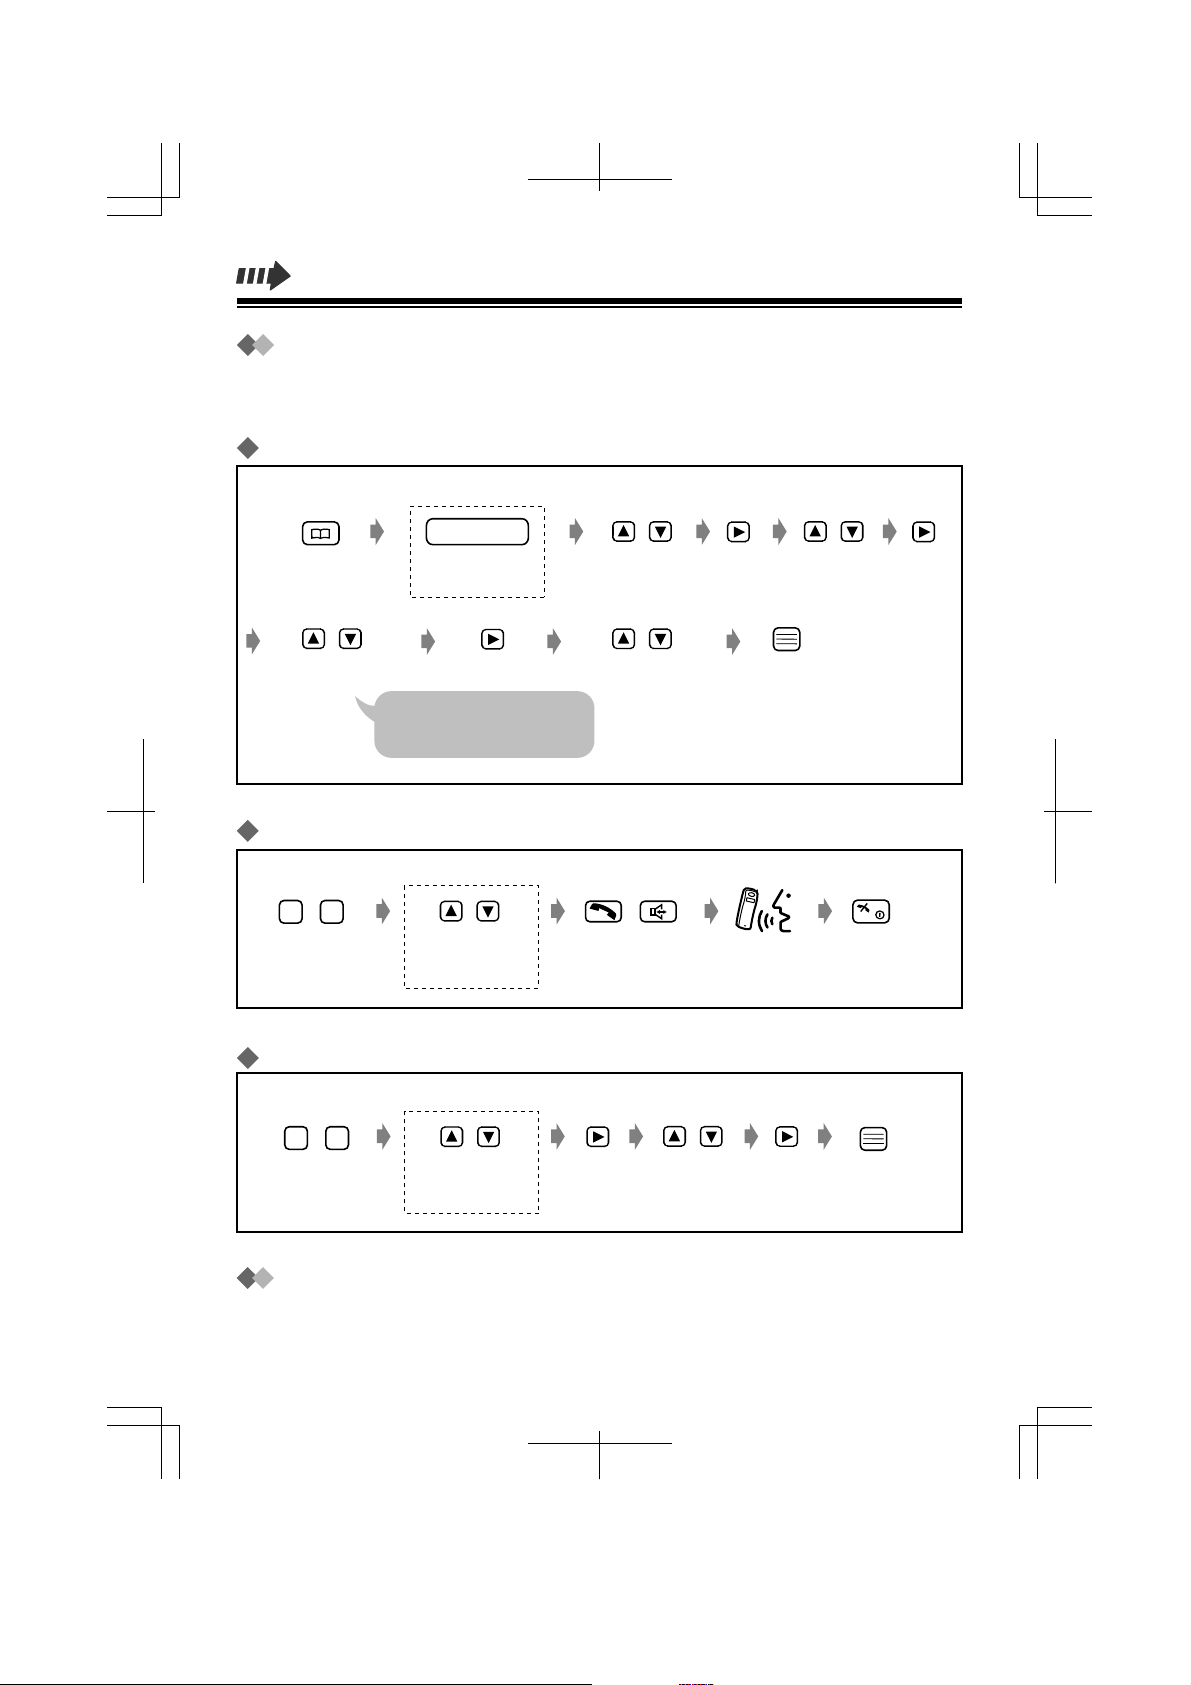
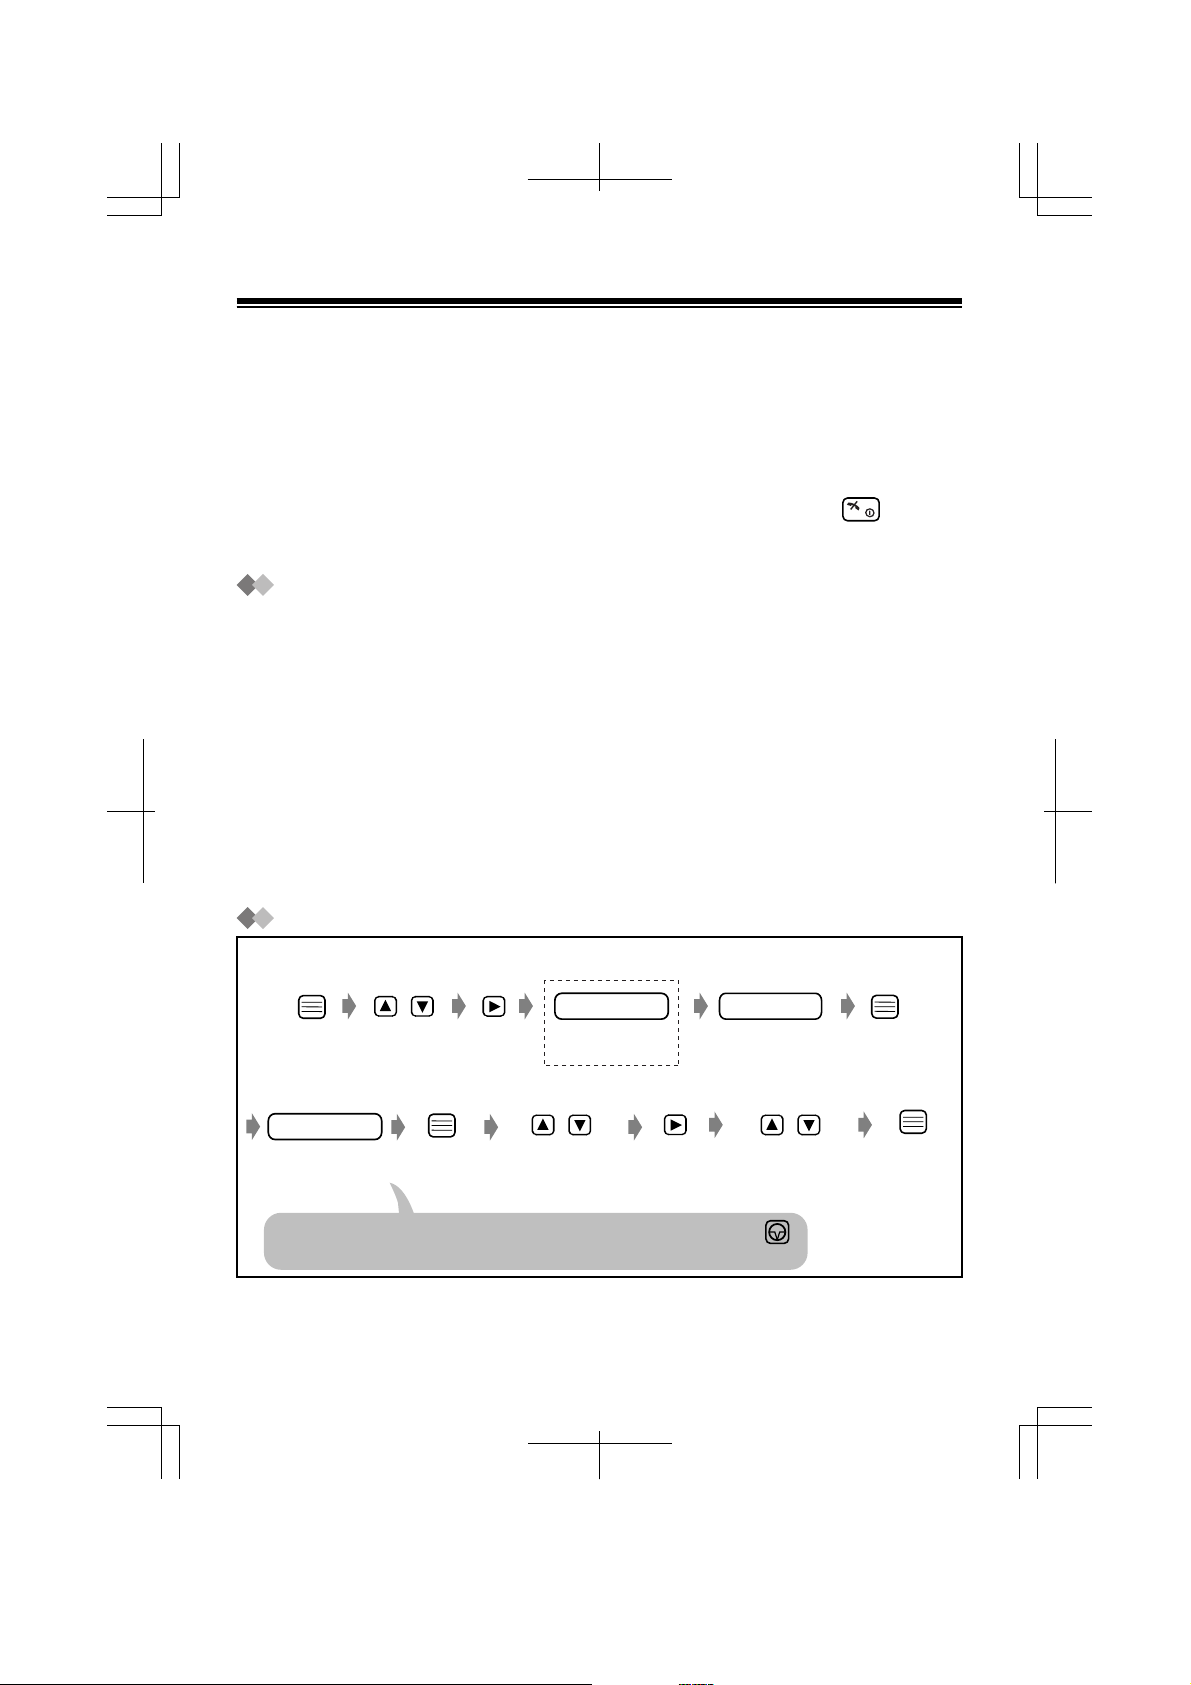
Storing Names and Numbers in the Phonebook
<If required>
/
Select "New
Phonebook."
Handset PIN
1
*
Enter the 4-digit
handset PIN.
name
Enter name
(max. 16
characters).
2
*
phone no.
Enter the phone
number
(max. 24 digits).
If a pause is required for dialling, press .
A space can be stored in a phone number counting as one digit.
1
*
If the display shows ''Memory Full,'' the display will return to the standby mode. Clear other stored
items in the phonebook (p. 9).
*2 See the steps for entering names and symbols (p. 7).
/
Select the desired
private category
number, "OFF" or "INT."
/
Select "Save."
6
Page 7
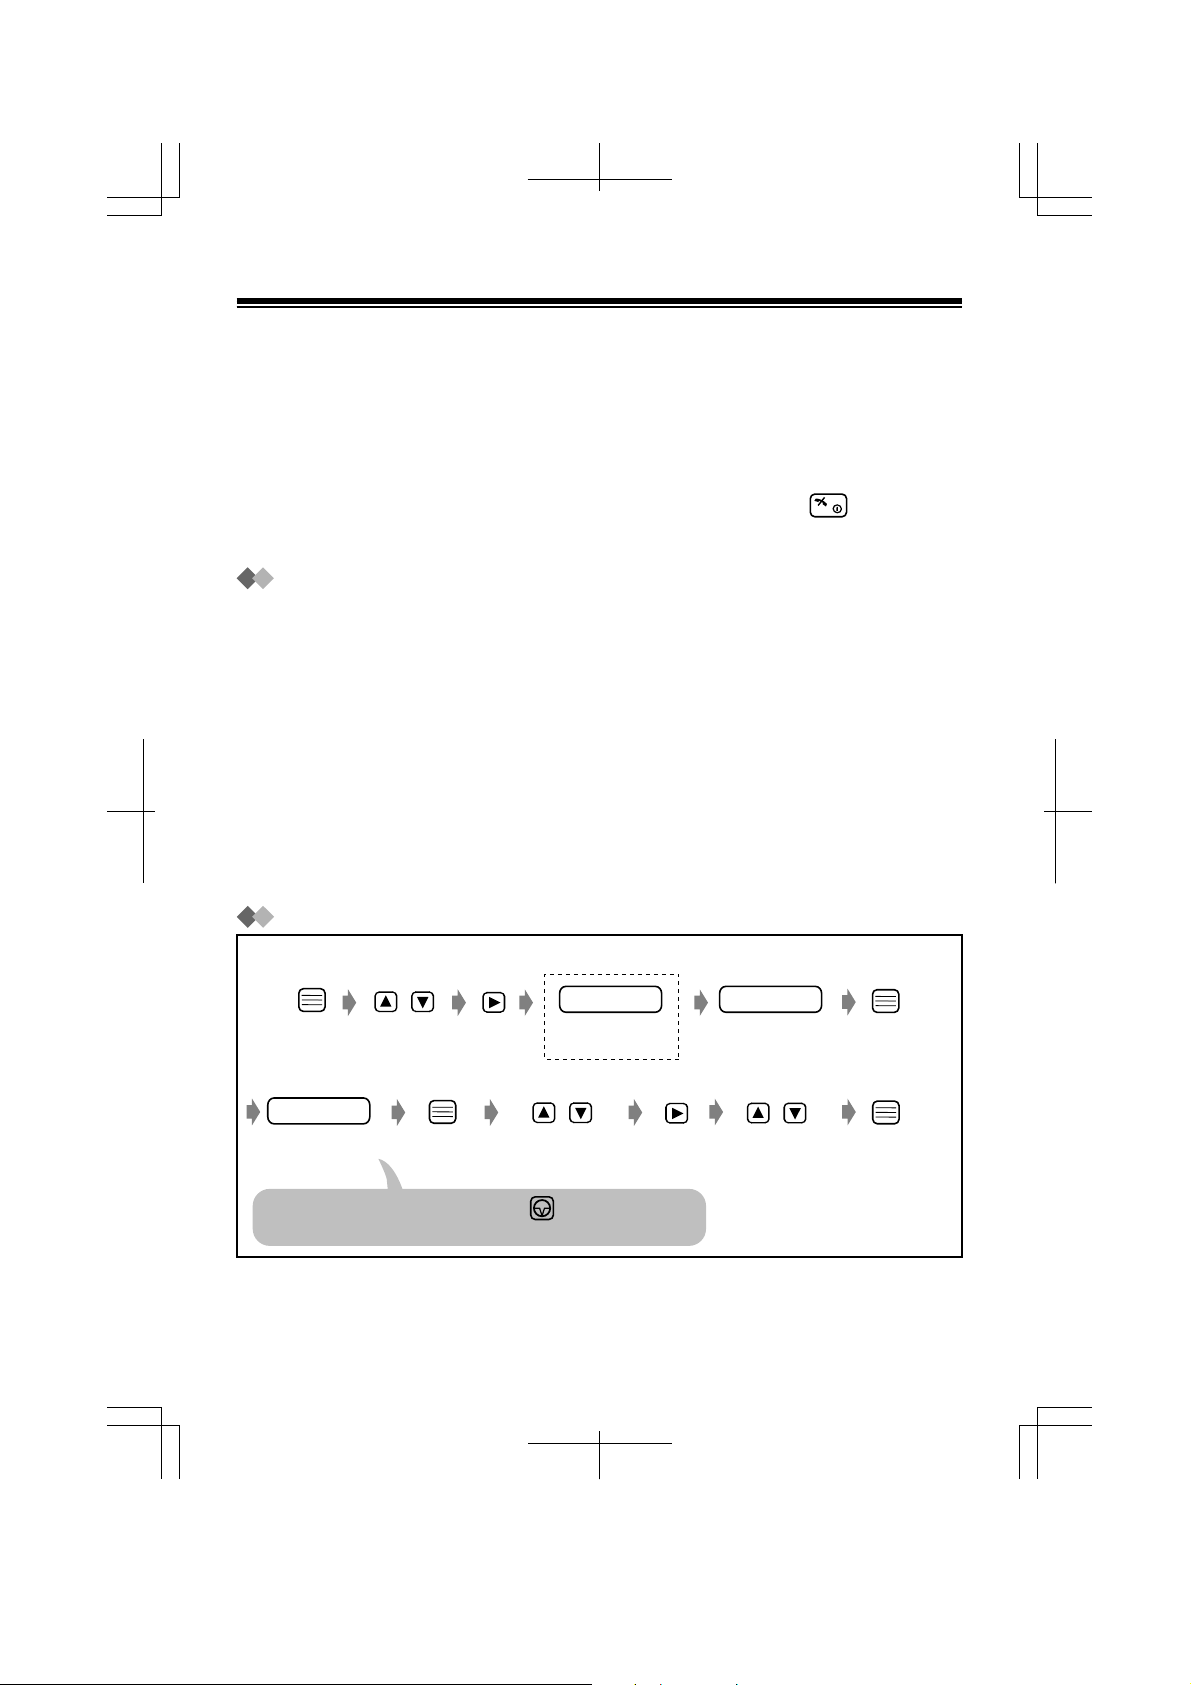
Storing a Redial or Predial Number
<Redial number>
/
Select the desired
redial number.
name
Enter name
(max. 16
characters).
<Predial Number>
phone no.
OR
Enter the desired
phone number.
Confirm the number.
/
Select "Save
Phonebook."
/
Select the desired
private category
number, "OFF" or "INT."
Select "Save."
<If required>
Handset PIN
Enter the 4-digit
handset PIN.
/
Entering Characters
The dialling buttons can be used to enter letters and character symbols. The
letters are printed on the dialling buttons.
Selecting the Character Mode
While entering a name
/
Select the desired Character Mode.
ABC
0-9
ΑΒΓ
AÄÅ
Alphabet
Numeric
Greek
Extended
See the "Character
Mode Table" on the
next page.
English
For example, to enter "Anne23'':
A n en
2 2
336666
2
3
3
7
Page 8

Character Mode Table
Buttons ABC (Alphabet)
# & ’ ( ) , – . / # & ’ ( ) , – . / # & ’ ( ) , – . /
1
A B C
2
a b c
D E F
3
d e f
G H I
4
g h i
J K L
5
j k l
M N O
6
m n o
P Q R S
7
p q r s
T U V
8
t u v
W X Y Z
9
w x y z
0-9 (Numeric)
2
2
3
3
4
4
5
5
6
6
7
7
8
8
9
9
ΑΒΓ (Greek) AÄÅ (Extended)
# & ’ ( ) , – . /# & ’ ( ) , – . /# & ’ ( ) , – . /11
ΑΒΓ
ΑΒΓ
∆ΕΖ
∆ΕΖ
ΗΘΙ
ΗΘΙ
ΚΛΜ
ΚΛΜ
ΝΞΟ
ΝΞΟ
ΠΡΣ
ΠΡΣ
ΤΥΦ
ΤΥΦ
ΧΨΩ
ΧΨΩ
A À Á Â Ã Ä Å Æ B C Ç
a à á â ã ä å æ b c ç
D E È É Ê Ë E F
d e è é ê ë e f
G G H I Ì Í Î Ï I
g g h i ì í î ï
J K L
j k l
M N Ñ O Ò Ó Ô Õ Ö Ø
m n ñ o ò ó ô õ ö ø
P Q R S S ß
p q r s s ß
T U Ù Ú Û Ü U V
t u ù ú û ü u v
W X Y Z
w x y z
blank
0
blank
To move the cursor to the left.
To move the cursor to the right. (To enter another character using the
same dialling button, move the cursor to the next space.)
To erase the character. To erase all characters, press and hold.
C
To shift from capital to lower case, press . Each time you press ,
the mode will change.
0
0
blank
blank
blank
blank
8
Page 9
Finding Items in the Phonebook
<If required>
Handset PIN
Enter the
Handset PIN.
●
Dialling from the Phonebook
/
●
Editing an Item in the Phonebook
/
Select "Edit."
<To edit the number>
phone no.
Enter the phone
number
(max. 24 digits).
<To search for a name by initial>
–
9
0
Press the dialling
button for the first
letter of the
desired name.
<To edit the name>
e.g., to find "Felix," press
repeatedly until the first item
under "F" is displayed.
namename
Enter name
(max. 16 characters).
/ /
Select the desired
private category
number, "OFF" or "INT."
/
Select the desired
name.*
3
English
Select "Save."
●
Clearing an Item from the Phonebook
/ /
Select "Clear."
After a few seconds, the display will show
the next item.
* All phonebook items are sorted in the following order:
Character Symbol Number
Select "YES."
9
Page 10
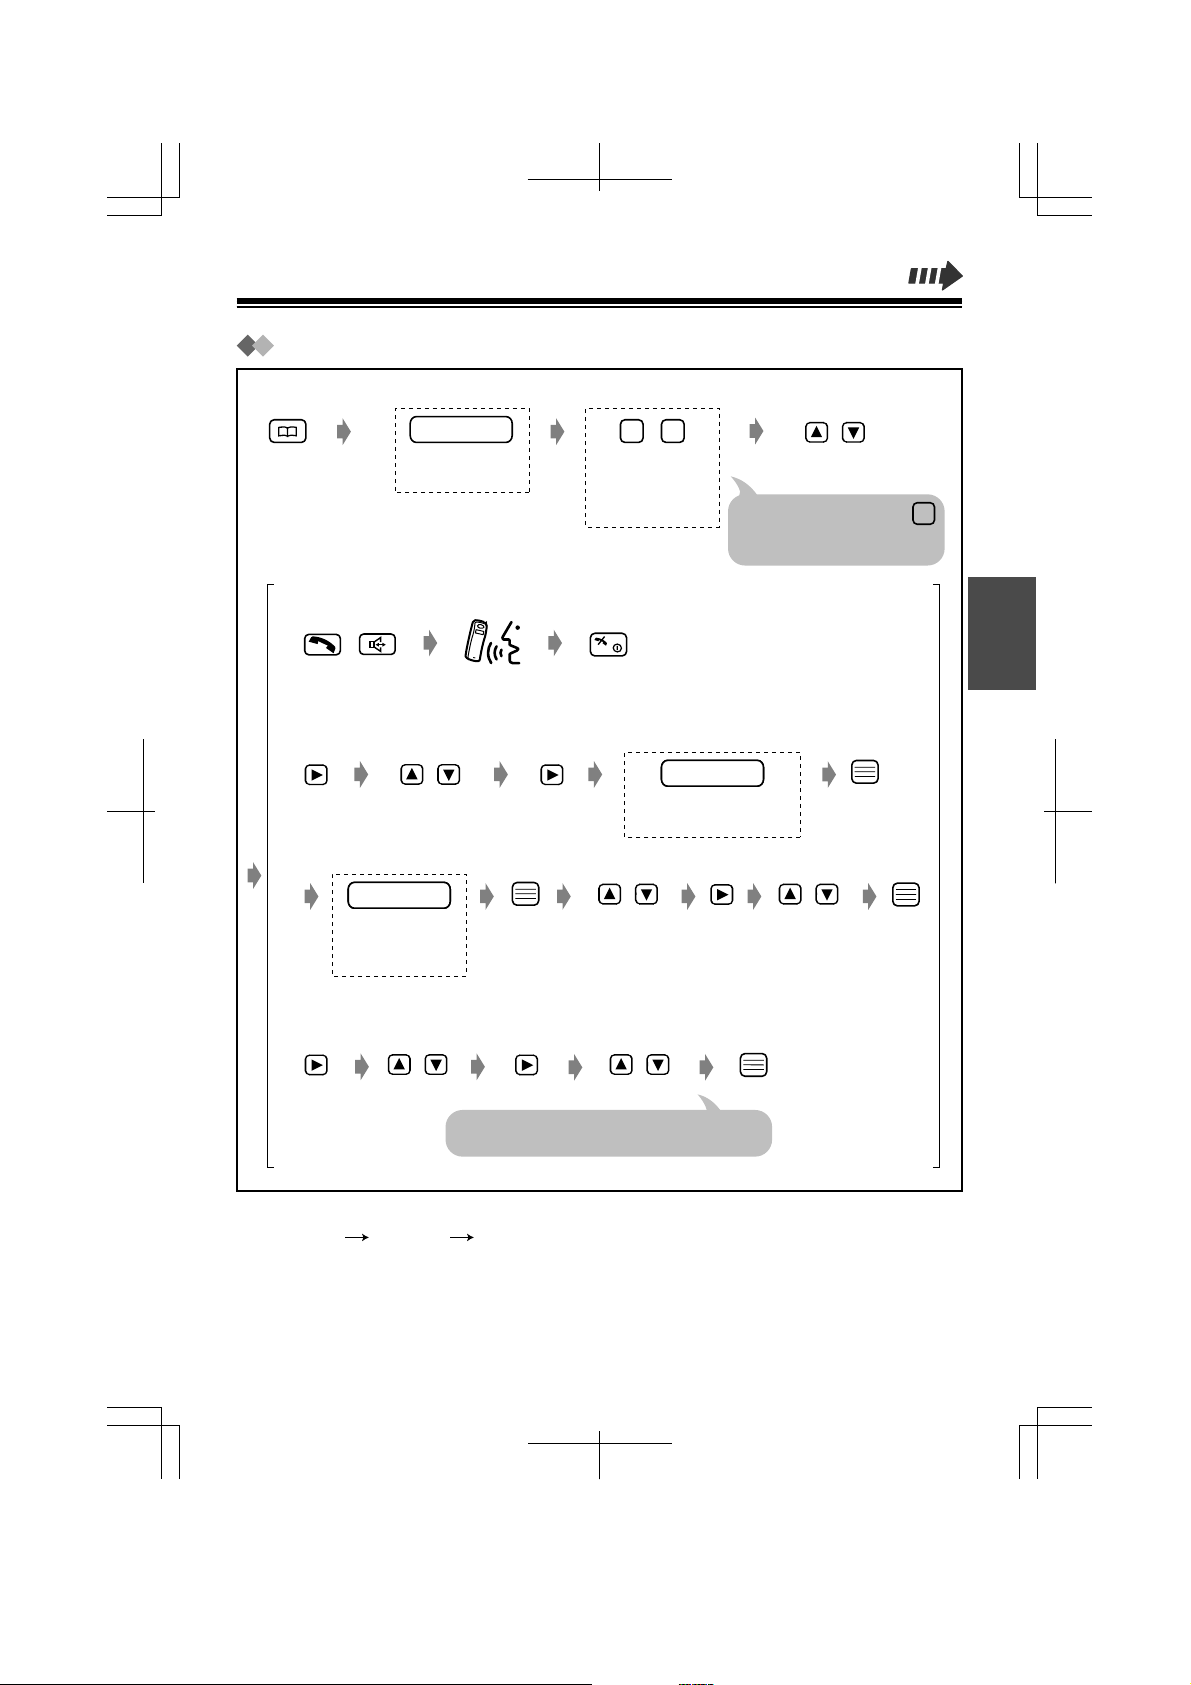
Using the Hot Key Dial Feature
The dialling buttons (1-9) function as one-touch dials. You can assign up to 9
phone numbers from the phonebook items into dialling buttons as hot key dials.
Storing Phonebook Items as Hot Key Dials
<If required>
Handset PIN
Enter the 4-digit
handset PIN.
/
Select the desired
hot key number.
If already stored an item, "✓"
will be displayed on the left of
the hot key number.
Select the
desired item.
/
Select "Save"
or "Overwrite."
Dialling a Stored Number
<To search a number>
–
9
1
Press and hold
a hot key number.
/
Select the
desired number.
/
Clearing an Item in the Hot Key Dial
<To search a number>
//
Select "Reg.
To Hot Key."
–
1
9
Press and hold
a hot key number.
/
Select the
desired number.
Locking the Phonebook
See page 12.
10
/
Select "Clear."
While "YES" is at
the arrow.
Page 11
Handset Programming
You can programme the handset according to your needs. The display shows the
instructions. After selecting ''Setting Handset,'' the main menu is displayed.
Most items in the main menu have a sub-menu. The sub-menu is shown after
selecting the item in the main menu.
While Programming:
●
You can press to go to the next menu of the function menu instead of
pressing .
●
To return to the previous step during programming, press or .
●
You can exit the programming mode any time by pressing .
●
When programming is completed, a beep sounds.
To Change the Initial Settings
/
Select "Setting
Handset."
/
Select the desired
main item.
/
Select the desired
sub item.
/
Select the
desired setting.
C
English
Main Item
Ringer Option
Tone Option
Sub Item
Ringer Volume
Ring Outside
Ring Internal
Private Ringer
Key Tone ON/OFF
Range Alarm
Description Setting*
6 levels are available.
When set to OFF, the handset will
not ring.
You can set the ring type for the
calls from an outside line. 20 ring
types are available.
You can set the ring type for the
calls from an extension. 20 ring
types are available.
You can set the handset ring type
(20 types) for each private
category.*
You can turn on/off the handset key
sound (key tone, confirmation tone,
error tone).
You can turn on/off the range
warning alarm.
2
1
Level
Level 3
OFF
Ringer no.
Ringer 1
Ringer no.
Ringer 3
Ringer no.
Ringer 1
ON
OFF
ON
OFF
11
Page 12
Main Item
Display Option
Sub Item
Standby Display
Select Language
Backlight Color
Private Color
LCD Contrast
Call Option Base AccessCode
Phonebook Lock
Other OptionOther Option
Change Hset PIN
Quick Answer
Cancel Base
Registration
Register H/Set
Description Setting*
You can choose whether to display
the currently connected base unit
number, extension number or no
display while in the standby mode.
You can choose one of 12 display
languages.
You can set the display backlight
colour to green, orange, or red.
Base Number
Extn Number
OFF
Language
English
Green
Orange
1
Red
You can select the display backlight
colour (red, orange, or green) for
each private category.*
2
Green
Orange
Red
You can select the display contrast
level from 1 to 3.
1
2
3
You can avoid adding the line access code to the outside
numbers in the phonebook, by setting the base access code
(max. 8 digits).
You can prohibit anyone from
entering the phonebook.*
3
When locked, you cannot dial from
the phonebook.
ON
OFF
You can programme a 4-digit handset PIN (Personal
Identification Number). See the next page to set the PIN.
You can answer a call by lifting the
ON
handset off the charger without
pressing a button.
OFF
For details, consult your dealer.
Select Base
You can clear the settings on the
Memory Clear
handset. When selected, Handset
Programming settings will return
to their initial settings.*3 You can
also clear Handset receiver volume
and Redial memory.
1
*
The initial setting is in gray. *
2
*
You must choose the desired private category.
12
3
You must enter the handset PIN.
YES
NO
Page 13
Setting the PIN
In the "Setting Handset" mode
/ /
Select "Other
Option."
Select "Change
Hset PIN."
old PIN new PIN
Enter the current
4-digit handset
PIN.
Enter the new
4-digit PIN
TWICE.
Important Information
Battery Information
After your batteries are fully charged:
Operation
While in use (Talk)
While not in use (Standby)
●
Battery life may be shortened depending on usage conditions, such as:
–when talking in speakerphone mode, using headset and ambient temperature.
●
Clean the handset and the charger contacts with a soft, dry cloth once a month. Clean more
often if the unit is subject to grease, dust or high humidity. Otherwise the batteries may not
charge properly.
●
The batteries cannot be overcharged.
●
Read "Important Notice Concerning the Correct Use and Charging of Ni-MH Batteries."
Replacing the Batteries
If " " flashes after a few telephone calls even when the handset batteries have been fully
charged, it is time to replace the batteries with new ones (p. 2).
Before replacing the batteries, turn the power off to prevent memory loss (p. 3). Make sure you charge
the new batteries for about 15 hours in order to display the battery strength prompt correctly.
Approx. Ni-MH battery life
Up to about 15 hours
Up to about 120 hours
English
Caution:
To reduce the risk of fire or injury to persons, read and follow these instructions.
1. Use only the batteries specified.
2. Do not use non-rechargeable batteries.
3. Do not mix old and new batteries.
4. Do not dispose of the batteries in a fire. They may explode. Check with local waste management
codes for special disposal instructions.
5. Do not open or mutilate the battery. Released electrolyte is corrosive and may cause burns or injury
to the eyes or skin. The electrolyte may be toxic if swallowed.
6. Exercise care in handling the batteries in order not to short the batteries with conductive materials
such as rings, bracelets, and keys. The batteries and/or conductor may overheat and cause burns.
7. Charge the batteries provided with or identified for use with this product only in accordance with the
instructions and limitations specified in this manual.
13
Page 14

Important Notice Concerning the Correct Use and Charging of Ni-MH Batteries
Batteries, due to their construction, undergo some wear and tear. The lifetime of a battery also
depends on correct maintenance. Charging and discharging are the most important factors. You
should take notice of the following to maintain the life of the battery as long as possible.
Ni-MH batteries have a kind of memory, the "memory effect." If fully charged batteries are used
several times only for 15 minutes in the handset and then recharged, the capacity of the batteries will
be reduced to 15 minutes due to the memory effect. Therefore you should discharge the batteries
completely, i.e. use them in the handset until " " on the display starts flashing. Then recharge
them as described in the manual. After the memory effect has occurred, it is possible to achieve
almost complete capacity of the Ni-MH batteries by charging and discharging several times one after
another.
Ni-MH batteries can also self-discharge. This self-discharge depends on the ambient temperature. At
temperatures under 0°C, the self-discharge will be the lowest. High humidity and high temperatures
support the self-discharge. Also long-term storage will lead to self-discharge. A dead Ni-MH battery
should not be disposed of normally. They contain toxic heavy metal hydride and therefore should be
recycled.
Pay special attention to the safety suggestions listed below.
Safety
1) Power source: The AC adaptor should be connected to a power supply only of the type as marked
on the AC adaptor.
2) Non use periods: When the Handset is not being used, turn the power off. When left unused for a
long period of time, the charger should be unplugged from the household AC outlet.
Installation
Environment
1) Water and moisture: Do not use the Handset, the charger and the AC Adaptor near water—for
example, near a bathtub, washbowl, sink, etc. Damp basements should also be avoided.
2) Heat: The Handset, the charger and the AC Adaptor should be kept away from heat sources such
as radiators, kitchen ranges, etc. They also should not be placed in rooms where the temperature
is less than 5ºC or greater than 40ºC.
Placement
1) Stacking: Do not place heavy objects above the Handset and the charger.
2) Foreign material: Care should be taken so that objects do not fall onto and liquids are not spilled
into the Handset and charger. Do not subject the Handset and charger to excessive smoke, dust,
mechanical vibration, or shock.
3) Surface: Place the charger on a flat surface. If the charger is mounted on the wall, install it straight.
14
Page 15

For Best Performance
Operating Range
1) The range of operation depends on the topography of your office, weather or usage conditions,
because signals are transmitted between the Cell Station (CS) and the Handset by radio waves.
2) Normally, you will get greater range outdoors than indoors. If there are obstacles such as walls,
noise may interfere with your telephone calls. In particular, high metal shelves or reinforced
concrete walls will shorten your operating range.
3) A Handset may not work when it is too far from the CS depending on the structure of the building.
Noise
Occasional noise or interference may occur due to other sources of electromagnetic radiation, such as
refrigerators, microwave ovens, faxes, TVs, radios, or personal computers. If noise disturbs your
telephone calls, keep the Handset away from other electrical appliances.
WARNING:
TO PREVENT FIRE OR ELECTRICAL SHOCK, DO NOT EXPOSE THIS UNIT TO RAIN OR
MOISTURE.
TO REDUCE THE RISK OF ELECTRIC SHOCK, DO NOT DISASSEMBLE THIS UNIT. TAKE THE
UNIT TO AN AUTHORISED SERVICE CENTER WHEN SERVICE IS REQUIRED.
English
15
Page 16
Specifications
Radio Access Method: Multi Carrier TDMA-TDD
Frequency Band: 1 880-1 900 MHz
Number of Carriers: 10
Carrier Spacing: 1 728 kHz
Bit rate: 1 152 kbps
Carrier Multiplex: TDMA, 24 (T×12, R×12) slots per frame
Frame Length: 10 ms
Modulation: GFSK
Voice Coding: 32 kbps ADPCM (CCITT G.721)
Transmission Output: Max. 250 mW
●
Specifications are subject to change.
●
The illustrations used in this manual may slightly differ from the original device.
0682
This device is a DECT Portable Station operating in the frequency band of
1 880 MHz to 1 900 MHz.
This device complies with the requirements of the directive 1999/5/EC.
The usage of this device is generally allowed in all the EU countries.
Kyushu Matsushita Electric (U.K.) Limited hereby declare that this product is in
conformity with the essential requirements and other relevant
provisions of the R&TTE directive, 1999/5/EC.
A copy of the manufacturers declaration of conformity to the essential
requirements of the R&TTE directive is available at the following web
address: http://doc.panasonic-tc.de
16
Page 17
Bedienungsanleitung
Vorbereitungen........................18
In Betrieb nehmen................... 19
Bedienung...............................20
Einsatz des Telefonbuchs.......22
Programmierung des Handset
Wichtige Informationen........... 29
Technische Daten................... 32
.. 27
Zubehör (Lieferumfang)
Mobilteil
Modell KX-TD7580
Inhalt
English..................................1-16
Deutsch...............................17-32
Français..............................33-48
Nederlands.........................49-64
Svenska.............................. 65-80
Deutsch Svenska
Steckernetzteil*
Ladestation
Trageclip
Aufsetzen
Akkus
(Panasonic P-6P oder BYD PQHHR120AA12)
Bedienungsanleitung
Français
Nederlands
–
Wir freuen uns, dass Sie sich für ein DECT-Handset (= Mobilteil) von Panasonic entschieden haben.
– Vor dem ersten Gebrauch die Akkus etwa 15 Stunden lang aufladen.
– Diese Bedienungsanleitung bezieht sich auf den Einsatz Ihres Handset
mit einer TK-Anlage KX-TD816/KX-TD1232 von Panasonic.
–
Im Folgenden wird der letzte Buchstabe hinter der jeweiligen Modellbezeichnung ausgelassen.
* Lieferbare Netzadapter: KX-TCA1, KX-TCA1AL, KX-TCA1CE und KX-
TCA1E. Die Bauteilnummer ist für jedes Land unterschiedlich. Richten Sie
sich nach der Nummer auf dem Etikett des Netzadapters.
Dieses Handset stellt die Funktionen eines Standardtelefons zur Verfügung.
Erläuterungen hierzu finden Sie im entsprechenden Abschnitt der
Bedienungsanleitung zur KX-TD816/1232.
Einige Funktionen stehen nicht zur Verfügung.
17
Page 18
Vorbereitungen
Handset
Sprechgarnitur-Buchse (HeadsetBuchse) (Benutzen Sie bitte nur
die Sprechgarnitur von Panasonic
mit der Bezeichnung.)
(Telefonbuch)
Taste
Taste
Rückseite
Lautsprecher
Taste
Navigationstasten
( , , , )
(Wechsel Klein-/
Großbuchstaben)
Taste
Ladekontakt
R
(Rückruf) Taste
(Sprechtaste)
(Freisprechen)
Hörer
Display
(Funktion/OK)
Taste
C
3
3
2
2
1
1
4
4
7
7
R
6
6
5
5
9
9
8
8
0
0
Taste
(Löschen)
C
Taste
(Pause)
Taste
(AUS/EIN)
Ladekontakt
Mikrofon
Setzen Sie die Akkus wie in der Abbildung gezeigt ein.
Laden Sie die Akkus danach etwa 15 Stunden lang auf.
Montieren Sie die Ladestation
fest an der Wand.
Drehen Sie Schrauben an den Positionen
in die Wand, die sie Sie zuvor mit Hilfe der
unten abgebildeten Schablone markiert
haben.
Zur
Netzsteckdose
Steckernetzteil
18
Schrauben
30 mm
Legen Sie das
Kabel in den
Schlitz für die
Wandmontage/
Tischaufstellung.
30 mm
Page 19
In Betrieb nehmen
Zum Einschalten Taste für einige Zeit gedrückt halten.
[280]
15.05 13:58
●
Um das Handset auszuschalten, halten Sie so lange gedrückt, bis ein
Signalton ertönt.
● Zum Wechsel der Displaysprache siehe Seite 28.
Die Nebenstellen-Nummer:
Zur Programmierung siehe Seite 28.
Das aktuelle Datum und die aktuelle
Uhrzeit
Reichweiten-Symbol
Anzeige, wenn das
Handset sich befindet:
innerhalb der
Funkreichweite.
außerhalb der
(Blinkt)
Funkreichweite.
Interngespräch-Symbol
Blinkt bei Empfang eines
Interngesprächs.
Gesprächs-Symbol
Anzeige:
bei Gespräch nach Anruf
oder Anrufannahme.
bei Signalisierung eines
(Blinkt)
externen Anrufs.
Telefonbuch-Symbol
Wird beim Einsehen oder
Speichern von
Telefonbucheinträgen
angezeigt.
Buchstaben
P Beim Wählen wurde gedrückt.
F Beim Wählen wurde die
Rückfragetaste gedrückt.
R
ABCDEFGHIabcdefg
1234567890123456
Deutsch
Ladezustand der Akkus
Zeigt den Ladezustand der
Akkus an.
wird wie folgt angezeigt.
<Während des Ladevorgangs>
(Blinkt )
(Blinkt)
Der Ladevorgang
Voll
Muss aufgeladen
werden.
19
Page 20
Bedienung
Anrufen
Eine andere Nebenstelle
nebenstellen-nummer
/
●
Während des Gesprächs können Sie zwischen Freisprechbetrieb und normalem Telefonieren wählen.
●
Wahlkontrolle: Sie können auch erst die zu wählende Telefonnummer eingeben und dann die
Gesprächstaste drücken, um sich an die Leitung anzuschalten.
Hinweis
●
Falls Sie eine falsche Ziffer eingegeben haben, drücken Sie
Wahlwiederholung
Erneutes Anwählen der zuletzt angewählten Rufnummer
/ /
Wahlwiederholung einer der zuletzt gewählten Rufnummern
Wählen Sie die
gewünschte Nummer in der
Wahlwiederholungsliste aus.
Einen externen Teilnehmer
Amtskennziffer
Wählen Sie "Wahlwiederhol."
telefonnummer
C
. Zum Löschen halten Sie
//
C
gedrückt oder drücken Sie
.
Anrufe annehmen
–
9
0
●
Wenn ein Anruf von einem externen Teilnehmer eingeht, den Sie auch in Ihrem Telefonbuch
gespeichert haben, werden Name und Rufnummer des Anrufers angezeigt.
/
/
/
/
Vermitteln von Gesprächen
Während des Gesprächs
Eine andere Nebenstelle
R
Hinweis
●
Sie können ein Gespräch auch beenden, indem Sie das Handset in den
Schacht der Ladestation einsetzen.
20
nebenstellen-nummer
Einen externen Teilnehmer
Amtskennziffer
telefonnummer
Page 21
MFV-Wahl
Während einer externen Gesprächsverbindung oder auch beim Wählen können Sie
jederzeit MFV-Signale senden, indem Sie die entsprechenden Tasten der Tastatur drücken
(z. B. um die Fernabfrage eines Anrufbeantworters zu aktivieren).
/
Wählen Sie "MFV-Nachwahl."
Nummer aus Wahlwiederholungsliste löschen
Um die Nummer zu löschen
/
/
Wählen Sie die
gewünschte Nummer in der
Wahlwiederholungsliste
aus.
Wählen Sie "Löschen."
Um alle Nummern zu löschen
/
Wählen Sie "Alle Löschen."
/
Wählen Sie "Ja."
Lautstärke des Hörers/Lautsprechers einstellen
Während des Gesprächs
(lauter) (leiser)
Akustische Rufsignalisierung des Handset vorübergehend ausschalten
Deutsch
Während der Signalton ausgegeben wird
(gedrückt halten.)
●
Der nächste Anruf wird wieder akustisch signalisiert.
●
Diese Funktion kann nicht benutzt werden, wenn sich das Mobilteil in der Ladestation befindet.
Tastensperre
Sie können die Wähltasten des Handsets gegen unbeabsichtigtes Betätigen
sperren. Sie können dann nur eingehende Gespräche annehmen. Bei aktivierter
Tastensperre wird "[X]" auf dem Display angezeigt.
Einschalten
(gedrückt halten.)
●
Die Tastensperre wird auch dann aufgehoben, wenn das Gerät ausgeschaltet
wird (S. 19).
Einschalten
(gedrückt halten.)
21
Page 22
Einsatz des Telefonbuchs
Im Telefonbuch können Sie bis zu 100 Namen und Nebenstellennummern/externe Rufnummern
speichern. Die Telefonbucheinträge werden automatisch alphabetisch sortiert. Sie können mit dem
Telefonbuch einen Anruf einleiten, indem Sie auf dem Display den betreffenden Namen auswählen.
●
Wir empfehlen Ihnen, die Amtskennziffer einzugeben (S. 28).
●
Ist der Zugriff auf das Telefonbuch gesperrt (S. 28), dann geben Sie die 4-stellige
PIN des Handsets ein, danach haben Sie wieder Zugriff auf das Telefonbuch.
●
Sie können jederzeit die Telefonbuch-Bearbeitung abbrechen, indem Sie die Taste
●
Nach Beenden der Programmierung hören Sie einen Bestätigungston.
Die Funktion "Privat" verwenden
Sie können die Anruferinfornmation einer von 8 Privat-Kategorien (1-8) zuordnen oder als
"Aus" bzw. "Intern" festlegen. Beim Speichern von Nebenstellennummern im Telefonbuch
müssen Sie "Intern." festlegen. Andernfalls können Sie mit Hilfe des Telefonbuchs keine
Interngespräche führen. (Wenn Nebenstellennummern und externe Rufnummern
übereinstimmen, speichern Sie die Nebenstellennummer nicht unter "Intern" im Telefonbuch.)
Für jede der Privat-Kategorien (1-8) können Sie die Farbe der Display-Hintergrundbeleuchtung
und die Rufsignalmelodie festlegen (S. 27-28). Dann können Sie bei eingehendem Anruf auf
Grund der Farbe sofort erkennen, wer anruft. (Beispiel: Kategorie 1 für Familie, Kategorie 2 für
Freunde, Kategorie 8 für Geschäft) Wenn ein Eintrag keiner speziellen "Privat"-Kategorie
zugeordnet wurde, ertönt bei einem Anruf die voreingestellte Rufsignal-Melodie, das Display
zeigt die voreingestellte Hintergrundbeleuchtungsfarbe. Bei "Intern," können Sie die
Rufsignalmelodie und die Farbe der Display-Hintergrundbeleuchtung nicht wählen.
drücken.
Namen und Rufnummern im Telefonbuch speichern
<Falls erforderlich>
/
Wählen Sie "Neuer
Eintrag."*
telefonnummer
Geben Sie die
Rufnummer ein
(max. 24 Stellen).
Falls Sie in eine Rufnummer eine Pause einfügen möchten, drücken Sie .
Eine eingefügte Pause wird wie eine Ziffer gezählt.
1
*
Zeigt das Display ''Speicher Voll,'' kehrt das Handset in den Bereitschaftszustand zurück. Löschen Sie dann
andere Telefonbucheinträge (S. 25).
2
*
Wie Sie Buchstaben, Sonderzeichen und Symbole eingeben, wird auf Seite 23 erklärt.
1
Wählen Sie die gewünschte
Privat-Kategorie aus oder
wählen Sie, "Aus" oder "Intern."
Handset-PIN (MT-PIN)
Geben Sie die 4-stellige
PIN des Handset ein.
/ /
name
Geben Sie den
Namen*2 ein
(max. 16 Zeichen).
Wählen Sie "Speichern."
22
Page 23
Nummer aus Wahlwiederholungsliste oder eingegebene Nummer speichern
<Nummer aus Wahlwiederholungsliste>
/
Wählen Sie die Nummer in der
Wahlwiederholungsliste aus.
name
Geben Sie den
Namen ein (max.
16 Zeichen).
Buchstaben, Sonderzeichen und Symbole eingeben
<Eingegebene Nummer>
telefonnummer
ODER
Geben Sie die
Rufnummer ein.
Prüfen Sie die Nummer.
/
Wählen Sie
"Sichere Eintrag."
/
Wählen Sie die gewünschte
Privat-Kategorie aus oder
wählen Sie, "Aus" oder "Intern."
<Falls erforderlich>
Handset-PIN (MT-PIN)
Geben Sie die 4-stellige
PIN des Handset ein.
/
Wählen Sie
"Speichern."
Für die Eingabe von Buchstaben, Sonderzeichen und Symbolen werden die
Wähltasten verwendet. Auf den Wähltasten stehen die entsprechenden Zeichen.
Wechsel in den Zeichenmodus
Bei der Eingabe eines Namens
/
Wählen Sie den gewünschten
Zeichenmodus.
Siehe "Zeichentabelle"
auf der nächsten Seite.
Deutsch
ABC
0-9
ΑΒΓ
AÄÅ
Alphabet
Ziffern
Griechisch
Erweiterter
Zeichensatz
Beispiel: Eingeben von "Anne23":
A n en
2 2
2
336666
336666
2
3
3
23
Page 24
Zeichentabelle
Tasten ABC (Alphabet)
# & ’ ( ) , – . / # & ’ ( ) , – . / # & ’ ( ) , – . /
1
A B C
2
a b c
D E F
3
d e f
G H I
4
g h i
J K L
5
j k l
M N O
6
m n o
P Q R S
7
p q r s
T U V
8
t u v
W X Y Z
9
w x y z
0-9 (Ziffern)
2
2
3
3
4
4
5
5
6
6
7
7
8
8
9
9
ΑΒΓ (Griechisch)
ΑΒΓ
ΑΒΓ
∆ΕΖ
∆ΕΖ
ΗΘΙ
ΗΘΙ
ΚΛΜ
ΚΛΜ
ΝΞΟ
ΝΞΟ
ΠΡΣ
ΠΡΣ
ΤΥΦ
ΤΥΦ
ΧΨΩ
ΧΨΩ
AÄÅ (Erweiterter Zeichensatz)
# & ’ ( ) , – . /# & ’ ( ) , – . /# & ’ ( ) , – . /11
A À Á Â Ã Ä Å Æ B C Ç
a à á â ã ä å æ b c ç
D E È É Ê Ë E F
d e è é ê ë e f
G G H I Ì Í Î Ï I
g g h i ì í î ï
J K L
j k l
M N Ñ O Ò Ó Ô Õ Ö Ø
m n ñ o ò ó ô õ ö ø
P Q R S S ß
p q r s s ß
T U Ù Ú Û Ü U V
t u ù ú û ü u v
W X Y Z
w x y z
24
leer
0
leer
Um den Cursor nach links zu bewegen .
Um den Cursor nach rechts zu bewegen
anderes Zeichen einzugeben, bewegen Sie den Cursor zur nächsten Stelle.)
Zum Löschen eines Zeichens. Um alle Zeichen zu löschen Taste gedrückt halten.
C
Um zwischen Groß- und Kleinschreibung zu wechseln, drücken Sie . Jedes Mal,
wenn Sie drücken, wird zwischen Groß- und Kleinschreibung gewechselt.
0
0
leer
leer
leer
leer
. (Um mit derselben Wähltaste ein
Page 25

Suchen von Telefonbuch-Einträgen
<Falls erforderlich>
<Suchen von Namen über die Anfangsbuchstaben>
Handset-PIN (MT-PIN)
Geben Sie den PINCode des Handset ein.
●
Wählen mit Hilfe des Telefonbuchs
Drücken Sie die Wähltaste,
die dem Anfangsbuchstaben
des gewünschten Namens
zugeordnet ist.
/
●
Ändern eines Telefonbucheintrags
/
Wählen Sie "Editieren."
<Zum Ändern der Nummer >
telefonnummer
Geben Sie die
Rufnummer ein
(max. 24 Stellen).
Wählen Sie die gewünschte
Privat-Kategorie aus oder
wählen Sie, "Aus" oder "Intern."
–
90
Wählen Sie den
gewünschten Namen aus.*
Beispiel: Um "Felix" zu finden,
drücken Sie wiederholt ,
bis der erste Name mit dem
Anfangsbuchstaben "F"
angezeigt wird.
<Zum Ändern des Namens>
name
Geben Sie den Namen
ein (max. 16 Zeichen).
/ /
Wählen Sie
"Speichern."
/
3
Deutsch
●
Löschen eines Telefonbucheintrags
/ /
Wählen Sie "Löschen."
Nach ein paar Sekunden wird der nächste
Eintrag angezeigt.
* Die Telefonbucheinträge sind wie folgt sortiert:
Zeichen Symbol Nummer
Wählen Sie "Ja."
25
Page 26

Zielwahl
Bei Kurzwahl können Sie durch Drücken einer einzigen Wähltaste eine
Verbindung herstellen. Dazu ordnen Sie den Wähltasten 1-9 jeweils einen
Telefonbucheintrag zu. Dann können Sie die entsprechende Rufnummer einfach
per Tastendruck anwählen; die Wähltasten fungieren dann als Kurzwahltasten.
Speichern eines Telefonbucheintrags unter einer Zielwahlnummer
<Falls erforderlich>
Handset-PIN (MT-PIN)
Geben Sie die 4-stellige
PIN des Handset ein.
Wählen Sie den
gewünschten Eintrag.
/
Wählen Sie die gewünschte
Zielwahlnummer aus.
Falls die Nummer bzw. Taste bereits
belegt ist, wird links neben der
Tastennummer "✓" angezeigt.
Wählen per Zielwahl
<Zum Suchen einer Nummer>
–
9
1
Taste der
Zielwahlnummer
gedrückt halten.
/
Gewünschte
Nummer auswählen.
Löschen einer Zielwahlnummer
<Zum Suchen einer Nummer>
–
1
9
Taste der
Zielwahlnummer
gedrückt halten.
/
Gewünschte
Nummer auswählen.
Wählen Sie "Speichern"
oder "Überschreiben."
Wählen Sie "Löschen."
//
Wählen Sie
"zufüg.Kurzwahl."
/
/
/
Während der Pfeil
auf "Ja" zeigt.
Sperren des Telefonbuchs
Siehe Seite 28.
26
Page 27

Programmierung des Handset
Sie können das Handset gemäß Ihren Anforderungen und Wünschen programmieren. Auf dem
Display erscheinen die entsprechenden Anweisungen. Nachdem Sie ''Einstell.Handy'' ausgewählt
haben, erscheint das Hauptmenü. Zu den meisten Hauptmenüpunkten gibt es ein Untermenü. Das
jeweilige Untermenü erscheint, sobald Sie den entsprechenden Hauptmenüpunkt angewählt haben.
Während der Programmierung:
●
Sie können auch die Taste drücken statt um zum nächsten Untermenü
zu wechseln.
●
Wollen Sie zum vorherigen Schritt zurückkehren, drücken Sie oder .
●
Sie können jederzeit die Programmierung abbrechen, indem Sie die Taste
drücken.
●
Nach Beenden der Programmierung hören Sie einen Bestätigungston.
Ändern der Grundeinstellungen
C
Wählen Sie "Einstell.Handy."
/
Wählen Sie den gewünschten
Hauptmenüpunkt.
Hauptmenüpunkt
Auswahl Rufton
Auswahl Töne
/
Wählen Sie den gewünschten
Untermenüpunkt.
Untermenüpunkt
Ruflautstärke
Rufton Extern
Rufton Intern
VIP-Rufton
Tastenton
Reichweitenton
/
Wählen Sie die gewünschte
Einstellung.
/
Erläuterung Einstellung*
Es stehen 6 Lautstärkeeinstellungen
zur Verfügung. Bei Aus gibt das
Handset bei einem eingehendem Anruf
kein akustisches Rufsignal.
Sie können die Rufmelodie für die Signalisierung
externer Anrufe auswählen. Es stehen 20
Melodien zur Verfügung.
Sie können die Rufmelodie für die Signalisierung
interner Anrufe auswählen. Es stehen 20
Melodien zur Verfügung.
Jeder Privat-Kategorie können Sie eine
der 20 Rufmelodien zuordnen.*
Der Tastenton kann ein- bzw. ausgeschaltet werden
(Tonsignal beim Drücken von Tasten,
Bestätigungston, Signalton bei Fehler).
Sie können den Reichweitenwarnton
ein- bzw. ausschalten.
2
Lautstärke
Lautstärke 3
Aus
Rufmelodie-Nr.
Typ 1
Rufmelodie-Nr.
Typ 3
Rufmelodie-Nr.
Typ 1
Ein
Aus
Ein
Aus
Deutsch
1
27
Page 28

Hauptmenüpunkt
Display Auswahl
Ruf Option
Andere Optionen
Untermenüpunkt
Display Anzeige
Auswahl Sprache
Farbe LCD-Beleu
VIP LCD-Farbe
LCD Kontrast
Amtsziff. Basis
Telfbuch Sperre
PIN Ändern
Schnellantwort
Erläuterung Einstellung*
Sie können auswählen, ob im
Bereitschaftsmodus auf dem Handset-Display
die Nummer der zugehörigen Basisstation, die
Nebenstellen-Nummer des Handset oder nichts
angezeigt wird.
Für die Anzeige auf dem Display
können Sie unter 12 Sprachen wählen.
Sie können für die
Hintergrundbeleuchtung des Displays
die Farben Grün, Orange oder Rot
wählen.
Sie können für jede Privat-Kategorie
die Farben Grün, Orange oder Rot für
die Hintergrundbeleuchtung des
Displays auswählen. *
2
Sie können den Display-Kontrast auf
eine Stufe von 1 bis 3 stellen.
Basis Kennung
Nebenstellennr.
Aus
Sprache
English
Grün
Orange
Rot
Grün
Orange
Rot
1
2
1
3
Sie brauchen die Amtskennziffer für Externgespräche nicht
jedesmal mit der Rufnummer zu speichern, wenn Sie diese
als Basis-Amtskennziffer gespeichert haben (max. 8 Ziffern).
Sie können den Zugriff auf Ihr Telefonbuch
verhindern.
3
*
Ist das Telefonbuch gesperrt, ist
die Wahl per Telefonbuch nicht möglich.
Ein
Aus
Für das Handset können Sie eine 4-stellige PIN (Personal Identification Number)
frei nach Ihren Wünschen festlegen. Um die PIN festzulegen, siehe nächste Seite.
Sie können einen Anruf entgegennehmen, indem
Sie das Handset aus der Ladestation nehmen,
ohne eine Taste zu drücken.
Ein
Aus
Weitere Informationen erhalten Sie bei Ihrem Fachhändler.
Registrierung
Lösche Basis
Einbuchen Handy
Auswahl Basis
Sie können alle von Ihnen durchgeführten Handset-
MT zurücksetzen
Einstellungen aufheben. Dann wird die HandsetProgrammierung auf die werksseitig vorgenommene
Voreinstellung zurückgesetzt.
3
*
Sie können auch die
Hörerlautstärke zurücksetzen und die
Wahlwiederholungsliste löschen.
1
*
Die werksseitig vorgenommene Voreinstellung ist jeweils auf grauem Grund angegeben.
2
*
Eine Privat-Kategorie muss ausgewählt werden.
3
*
Die Handset-PIN muss eingegeben werden.
28
Ja
Nein
Page 29

PIN (Persönliche Identifikations-Nummer) festlegen
Im Modus "Einstell.Handy"
/ /
Wählen Sie "Andere
Optionen."
Wählen Sie "PIN
Ändern."
alte PIN neue PIN
Geben Sie die aktuelle
4-stellige PIN des
Handset ein.
Geben Sie ZWEIMAL
die neue 4-stellige
PIN ein.
Wichtige Informationen
Gebrauchszeiten der Akkus
Bei voll geladenen Akkus ergeben sich folgende Gebrauchszeiten:
Betriebsart
Im Gesprächszustand
Im Bereitschaftszustand
● Die Akkus können früher leer werden, zum Beispiel:
–bei Benutzung der Freisprecheinrichtung oder der Sprechgarnitur und bei extremer Umgebungstemperatur.
● Die Ladekontakte des Handset und der Ladestation sollten einmal monatlich mit einem weichen, trockenen Tuch
gereinigt werden. Reinigen Sie die Ladekontakte gegebenenfalls häufiger, wenn das Telefon in einer Umgebung
benutzt wird, wo Fett, Staub oder erhöhte Luftfeuchtigkeit auftreten. Andernfalls werden die Akkus möglicherweise
nicht richtig geladen.
● Die Akkus können nicht überladen werden.
● Beachten Sie den "Wichtiger Hinweis zum Gebrauch von NiMH-Akkus."
Austauschen der Akkus
Tauschen Sie die Akkus aus, wenn das Akkusymbol
die Akkus vor kurzem voll aufgeladen worden sind (S. 18).
Bevor Sie die Akkus austauschen, schalten Sie das Gerät aus, damit gespeicherte Einstellungen nicht verloren gehen (S. 19).
Die neuen Akkus sollte für ungefähr 15 Stunden geladen werden, damit das Gerät den Ladezustand zuverlässig anzeigen kann.
Durchschnittliche Nutzungsdauer bei Ni-MH-Akkus
Ca. 15 Stunden maximal
Ca. 120 Stunden maximal
" "
bereits nach kurzer Gesprächsdauer zu blinken beginnt, obwohl
Deutsch
Sicherheitshinweise für den Umgang mit wiederaufladbaren Akkus:
Bitte beachten Sie die folgenden Sicherheitsmaßnahmen sorgfältig, um die Gefahr von Brand und Verletzungen zu reduzieren.
1. Verwenden Sie ausschließlich Akkus des angegebenen Typs.
2. Verwenden Sie keine Batterien, die nicht wiederaufladbar sind.
3. Mischen Sie nicht alte mit neuen Akkus.
4. Werfen Sie einen verbrauchten Akku nicht in ein Feuer. Es besteht Explosionsgefahr. Entsorgen Sie verbrauchte Akkus stets
gemäß den geltenden Umweltschutzauflagen.
5. Versuchen Sie auf keinen Fall, einen Akku zu öffnen oder gewaltsam zu beschädigen. Der Elektrolyt ist stark ätzend und
kann beim Auslaufen Verbrennungen und andere Verletzungen verursachen, wenn er mit Augen oder Haut in Kontakt gerät.
Bei Verschlucken von Elektrolyt besteht Vergiftungsgefahr!
6. Achten Sie beim Umgang mit dem Akku darauf, diesen nicht durch Kontakt mit leitfähigen Metallgegenständen, z.B.
Schmuckstücken und Schlüsseln, kurzzuschließen. Anderenfalls können Akku bzw. Leiter überhitzt werden und
Verbrennungen verursachen.
7. Die mit diesem Gerät gelieferten Akkus oder solche, die für den Betrieb mit diesem Gerät vorgesehen sind, laden Sie bitte
strikt gemäß der Instruktionen in dieser Bedienungsanleitung.
29
Page 30

Wichtiger Hinweis zum Gebrauch von NiMH-Akkus
Akkus unterliegen, bedingt durch Ihre Bauart, einem Verschleiß. Die Lebensdauer eines Akkus ist
auch abhängig vom ordnungsgemäßen Gebrauch. Die entscheidenden Faktoren sind die Lade-und
Entladevorgänge. Um die Lebensdauer so lange wie möglich zu halten, empfehlen wir. die folgenden
Hinweise unbedingt zu beachten.
Nickel-Metallhydrid-Akkus (NiMH) haben ein "Erinnerungsvermögen," den sog. Memory-Effekt. Dieser
Memory-Effekt wirkt sich wie folgt aus: Wird ein vollgeladener Akku z. B. mehrere Male nacheinander
für 15 Minuten im Handset betrieben und dann wieder aufgeladen, verringert sich die Kapazität des
Akkus, bedingt durch den Memory-Effekt, auf 15 Minuten. Es ist also ratsam, den Akku so lange zu
betreiben, bis er fast ganz entladen ist, d. h. bis das Akkusymbol " " blinkt. Und erst dann sollte
er entsprechend der Ladevorschrift neu aufgeladen werden. Ist der Memory-Effekt aufgetreten, kann
man den NiMH-Akku durch mehrere Lade-und Entladevorgänge wieder fast auf die volle Kapazität
bringen.
NiMH-Akkus entladen sich auch von selbst. Diese Selbstentladung ist abhängig von der
Umgebungstemperatur. Bei Temperaturen unter 0°C ist die Selbstentladung am geringsten. Hohe
Temperaturen und hohe Luftfeuchtigkeit fördern die Selbstentladung. Auch lange Lagerung führt dazu,
dass Akkus schwach werden. Verbrauchte Akkus gehören nicht in den Hausmüll, sondern in den
Sondermüll. Sie enthalten giftige Schwermetallhydride und sollten deshalb dem Recycling zugeführt
werden.
Achten Sie besonders auf die Einhaltung folgender Punkte.
Sicherheit
1) Stromversorgung: Der Netzadapter sollte nur an eine Stromversorgung angeschlossen werden, die
den Angaben auf dem Netzadapter entspricht.
2) Bei Nichtbenutzung: Schalten Sie das Handset aus, wenn es nicht verwendet wird. Bei längerem
Nichtgebrauch sollte das Ladegerät von der Netzsteckdose getrennt werden.
Installation
Umgebung
1) Wasser und Feuchtigkeit: Verwenden Sie Handset, Ladegerät und Netzadapter nicht in feuchter
Umgebung oder in der Nähe von Badewannen, Spülen, Waschbecken etc.
2)Temperatur: Handset, Ladegerät und Netzadapter sollten keiner übermäßigen Hitze ausgesetzt
werden, etwa durch Heizkörper, Küchenherde o.ä. Vermeiden Sie eine Aufstellung in Räumen, in
denen die Temperatur niedriger als 5°C oder höher als 40°C ist.
Aufstellung
1) Belastung: Stellen Sie keine schweren Gegenstände auf Handset oder Ladegerät.
2) Fremdkörper: Lassen Sie keine Gegenstände auf das Handset oder Ladegerät fallen und achten
Sie sorgfältig darauf, dass keine Flüssigkeiten auf das Handset und Ladegerät verschüttet werden
oder ins Geräteinnere eindringen. Schützen Sie Handset und Ladegerät vor Rauch, Staub,
mechanischen Schwingungen und Erschütterungen.
3) Unterlage: Stellen Sie das Ladegerät auf einer ebenen Unterlage auf. Falls das Ladegerät an einer
Wand montiert wird, ist es gerade aufzuhängen.
30
Page 31

Für optimale Leistung
Funkreichweite
1) Da die Signalübertragung zwischen Basisstation und Handset über Funkwellen erfolgt, hängt die
effektive Reichweite von verschiedenen Faktoren ab, u.a. von der Topographie Ihres Büros sowie
von Witterungs-und Einsatzbedingungen.
2) Normalerweise wird bei Gebrauch im Freien eine größere Reichweite als in Räumen erzielt.
Hindernisse wie Wände in der Umgebung können Rauschen in der Verbindung erzeugen.
Insbesondere wird die Reichweite durch hohe Metallregale und Stahlbetonwände verkürzt.
3) In Abhängigkeit von der Baukonstruktion arbeitet das Handset u.U. nicht in einer zu großen
Entfernung von der Basisstation.
Rauschen
Wenn sich andere Quellen elektromagnetischer Strahlung in der Umgebung befinden, z.B. ein
Kühlschrank, Mikrowellenherd, Faxgerät, Fernsehgerät, Radio oder Computer, können Rauschen und
Probleme durch Übersprechen die Verbindung beeinträchtigen.
Verwenden Sie das Handset ggf. in größerem Abstand von störenden Elektrogeräten.
WARNUNG:
UM BRÄNDE ODER ELEKTRISCHE SCHLÄGE ZU VERMEIDEN, DARF DIESES PRODUKT
KEINEM REGEN UND KEINER FEUCHTIGKEIT AUSGESETZT WERDEN.
UM DAS RISIKO EINES STROMSCHLAGES ZU VERMEIDE, SOLLTEN SIE DAS GERÄT
KEINESFALLS AUSEINANDERNEHMEN. LASSEN SIE REPARATUREN AUSSCHLIESSLICH
DURCH ZUGELASSENE PANASONIC-SERVICE-CENTER VORNEHMEN.
Deutsch
31
Page 32

Technische Daten
Radio Access Method: Multi Carrier TDMA-TDD
Frequenzband: 1 880-1 900 MHz
Anzahl der Trägerfrequenzen: 10
Frequenzabstand: 1 728 kHz
Bitrate: 1 152 kbps
Carrier Multiplex: TDMA, 24 (T×12, R×12) Slots pro Frame
Frame-Länge: 10 ms
Modulation: GFSK
Sprachcodierung: 32 kBit/s ADPCM (CCITT G.721)
Sende-Ausgangsleistung: Max. 250 mW
●
Technische Änderungen vorbehalten.
●
Die in dieser Bedienungsanleitung verwendeten Illustrationen können vom
Aussehen des tatsächlichen Produkts leicht abweichen.
0682
Bei diesem Gerät handelt es sich um ein Mobilteil. Es arbeitet im Frequenzbereich
zwischen 1 880 MHz und 1 900 MHz.
Dieses Gerät entspricht den Anforderungen der EU-Direktive 1999/5/EC.
Das Gerät besitzt für die Länder der Europäischen Gemeinschaft eine allgemeine
Betriebserlaubnis.
Hiermit erklärt Kyushu Matsushita Electric (U.K,) Limited, dass dieses Gerät mit
den grundlegenden Anforderungen und anderen relevanten Bestimmungen der
Richtlinie 1999/5/EC übereinstimmt.
Wenn Sie eine Kopie der originalen Konformitätserklärungen des Herstellers zu
"R&TTE"- konformen Geräte benötigen, erhalten Sie diese im Internet unter der
folgenden Adresse: http://doc.panasonic-tc.de
32
Page 33

Poste DECT
Instructions d'utilisation
Modèle KX-TD7580
Contenu
Installation...............................34
Avant utilisation.......................35
Opérations à effectuer.............36
Utilisation du répertoire téléphonique
Programmation du combiné....43
Informations importantes.........45
Spécifications techniques........48
..38
English..................................1-16
Deutsch...............................17-32
Français..............................33-48
Nederlands.........................49-64
Svenska.............................. 65-80
Accessoires (inclus)
Adaptateur secteur*
Chargeur
Clip pour
ceinture
– Merci d'avoir fait l'acquisition d'un combiné DECT (= Poste).
–
Charger la batterie pendant environ 15 heures avant la première utilisation.
– Le présent manuel a été concu pour une utilisation de votre combiné avec
un système Panasonic KX-TD816/KX-TD1232.
–
Dans ce manuel, la dernière lettre de chaque modèle a été volontairement omise.
*
Adaptateurs secteur disponibles: KX-TCA1, KX-TCA1AL, KX-TCA1CE et KXTCA1E. La référence est différente dans chaque pays. Reportez-vous à la
référence figurant sur l'étiquette de l'adaptateur secteur.
Pour fixer
Batteries
(Pnasonic P-6P ou BYD PQHHR120AA12)
Instructions d'utilisation
English Deutsch Svenska
Français
Nederlands
Le combiné reconnaît les fonctions d'un poste simple (PS).
Veuillez vous reporter à la section correspondante du manuel d'utilisation
du système KX-TD816/1232 pour le fonctionnement du combiné.
Certaines des fonctions ne sont pas disponibles.
33
Page 34

Installation
Combiné
Prise pour casque
d'écoute (Veuillez utiliser
un casque d'écoute
Panasonic.)
Dos
Haut-parleur
(Répertoire
téléphonique)
Touche
(Parler)
Touche
(Haut-parleur)
Touche
Touche de navigation
( , , , )
(Changement de
capitale) Touche
Contact de charge
R
(Rappel) Touche
Ecouteur
Affichage
(Fonction/OK)
Touche
C
3
3
2
2
1
1
4
4
7
7
R
6
6
5
5
9
9
8
8
0
0
(Eteint
[OFF]/Allumé)
Touche
(Supprimer)
C
Touche
(Pause)
Touche
Contact de charge
Micro
Insérer les batteries et les charger pendant
environ 15 heures comme illustré ci-dessous.
Vers la
prise secteur
Adaptateur
secteur
34
Fixer fermement le
chargeur au mur.
Enfoncer les vis en utilisant le
gabarit ci-dessous.
Vis
30 mm
Insérer le
cordon dans la
rainure pour
montage mural
ou pose sur le
bureau.
30 mm
Page 35

Avant utilisation
Pour allumer l'appareil, appuyer sur et le maintenir enfoncé.
[280]
15.05 13:58
●
Pour éteindre l'appareil, appuyer sur et le maintenir enfoncé jusqu'à
ce que vous entendiez un bip.
● Pour changer de langue d'affichage, voir page 44.
Le numéro du poste:
Pour la programmation, voir page 44.
La date et l'heure exactes
Icône de zone de réception
S'affiche lorsque le
combiné se trouve:
dans la zone
de réception.
hors portée.
(Clignote)
Icône d'appel interne
Clignote lors de la réception
d'un appel interne.
Icône Parler
S'affiche quand:
vous appelez un
correspondant ou que
vous répondez à un appel.
vous recevez un appel
(Clignote)
extérieur.
Icône du répertoire
S'affiche lors de la
mémorisation ou de la
consultation des
éléments du répertoire.
ABCDEFGHIabcdefg
1234567890123456
Puissance de la batterie
Indique la puissance de la batterie. Pendant
la mise en charge de la batterie, l'icône
apparaît comme illustré ci-dessous.
<Pendant la charge>
Complètement
chargée
(Clignote )
Français
Caractères
P Vous appuyez sur pendant la
numérotation.
F Vous appuyez sur pendant la
numérotation.
R
Doit être rechargée.
(Clignote)
35
Page 36

Opérations à effectuer
Appels de base
Vers un poste
numéro de poste
/
●
Pendant la communication, vous pouvez commuter entre le fonctionnement en
mode mains libres et l'écouteur.
●
Pré-numérotation: Permet de composer le numéro avant de décrocher.
Note
●
Si vous commettez une erreur de numérotation, appuyez sur . Pour annuler,
appuyez sur et maintenez-le enfoncé ou appuyez sur .
Rappel
Pour rappeler le dernier numéro
/ /
Pour rappeler en utilisant la liste des derniers numéros appéles
Sélectionner le numéro à rappeler.
Vers un correspondant externe
code d'accès à la ligne
C
Sélectionner "RENUMEROTATION."
//
numéro de téléphone
C
Pour recevoir des appels
–
9
0
●
Lors de la réception d'un appel extérieur d'un correspondant enregistré dans le
répertoire téléphonique, le nom et le numéro de téléphone de ce correspondant
s'affichent.
/
/
/
/
Transfert d'appels
Pendant une communication
Vers un poste
R
Note
●
Vous pouvez également raccrocher en plaçant le combiné sur le chargeur.
36
numéro de poste
Vers un correspondant externe
code d'accès à la ligne
numéro de téléphone
Page 37

Tonalité de signalisation
Pendant un appel extérieur ou lors de la numérotation, vous pouvez transmettre des tonalités
automatiquement à l'aide du clavier (par ex. pour contrôler un répondeur à distance).
/
Sélectionner "TONALITE."
Pour supprimer le numéro de la mémoire de rappel
Pour supprimer le numéro sélectionné
/
/
Sélectionner le
numéro à rappeler.
Sélectionner "EFFACEMENT."
Pour supprimer tous les numéros
/
Sélectionner "EFFACEMEN.TOTAL."
/
Sélectionner "OUI."
Réglage du volume de l'écouteur/du haut-parleur
Pendant une communication
(pour augmenter le volume) (pour diminuer le volume)
Pour couper provisoirement la sonnerie du combiné
Français
Pendant la sonnerie
(appuyer et maintenir enfoncé.)
●
La sonnerie revient à l'appel suivant.
●
Cette fonction n'est pas opérationnelle lorsque le combiné est sur le chargeur.
Pour verrouiller le clavier
Vous pouvez verrouiller les touches de numérotation du clavier. Seuls les appels entrants sont
acceptés tant que le clavier est verrouillé. Pendant le verrouillage, "[X]" apparaît à l'écran.
Pour activer
(appuyer et maintenir enfoncé.)
●
Le verrouillage des touches s'annule également lors de la mise hors tension de
l'appareil (p. 35).
Pour désactiver
(appuyer et maintenir enfoncé.)
37
Page 38

Utilisation du répertoire téléphonique
Vous pouvez mémoriser jusque 100 noms et extensions/numéros extérieurs dans le
répertoire téléphonique. Toutes les entrées du répertoire téléphonique sont
mémorisées par ordre alphabétique. Le répertoire permet d'appeler un correspondant
en sélectionnant son nom à l'écran.
●
Nous vous recommandons d'introduire le code d'accès (p. 44).
●
Si le répertoire est verrouillé (p. 44), entrer le code PIN à 4 chiffres du combiné
pour visualiser la liste du répertoire.
●
Vous pouvez quitter le mode de programmation du répertoire à tout moment en appuyant sur
●
Lorsque la programmation est terminée, vous entendez un bip.
Utilisation de la fonction de catégorie personnelle
Vous pouvez attribuer les informations de l'appelant à une des 8 catégories personnelles
(1-8), "NON" et "INTERN." Lorsque vous mémorisez une extension dans le répertoire
téléphonique, vous devez sélectionner "INTERN." Si vous ne le faites pas, il ne vous sera
pas possible d'effectuer un appel interne à partir du répertoire téléphonique. (Si l'extension
et le numéro extérieur sont identiques, ne mémorisez pas l'extension en "INTERN" dans le
répertoire téléphonique.) Pour chaque catégorie personnelle 1 à 8, vous pouvez
sélectionner la couleur de l'éclairage de l'écran et le type de sonnerie (pp. 43-44). Lors de
la réception d'un appel extérieur, vous pouvez facilement savoir qui a appelé. (Par ex.,
catégorie 1 pour la famille, catégorie 2 pour les amis et catégorie 8 professionnelle.)
Si vous n'affectez pas une entrée à un numéro de catégorie personnelle, lors de la
réception d'un appel extérieur, la sonnerie du combiné et la couleur de l'éclairage seront
celles prédéfinies. Pour "INTERN," vous ne pouvez pas sélectionner le type de sonnerie ni
la couleur de l'éclairage de l'écran.
.
Mémorisation des noms et des numéros dans le répertoire
<Si demandé>
/
Sélectionner
"REPERTOIRE."
numéro de téléphone
Entrer le numéro
de téléphone
(max. 24 chiffres).
Si une pause est nécessaire dans la numérotation, appuyer sur
Vous pouvez placer un espace dans un numéro de téléphone, il vaudra pour un chiffre.
1
*
Si l'affichage indique ''MEMOIRE PLEINE,'' il se remet en mode de veille. Supprimer des données
mémorisées du répertoire (p. 41).
2
*
Voir les étapes pour l'entrée des noms et des symboles (p. 39).
1
*
Code PIN du combiné
Entrer le code PIN à 4
chiffres du combiné.
/ /
Sélectionner le numéro
de catégorie personnelle,
"NON" ou "INTERN."
nom
Entrer le nom*
(max. 16
caractères).
Sélectionner
"SAUVEGARDE."
.
2
38
Page 39

Mémorisation d'un numéro à rappeler ou d'un numéro de pré-numérotation
<Numéro à rappeler>
/
Sélectionner le numéro
à rappeler souhaité.
nom
Entrer le nom
(max. 16
caractères).
<Numéro de pré-numérotation>
numéro de téléphone
OU
Entrer le numéro de
téléphone souhaité.
Sélectionner le numéro
Vérifier le numéro.
de catégorie personnelle,
"NON" ou "INTERN."
/
Sélectionner
"SAUVEG.REPERT."
/
Sélectionner
"SAUVEGARDE."
<Si demandé>
Code PIN du combiné
Entrer le code PIN à
4 chiffres du combiné.
/
Entrée des caractères
Les touches de numérotation peuvent servir à entrer des lettres et des symboles.
Les lettres correspondantes sont imprimées sur les touches de numérotation.
Sélection du Mode de caractères
Pendant l'entrée d'un nom
/
Sélectionner le mode de
caractères souhaité.
ABC
0-9
ΑΒΓ
AÄÅ
Alphabet
Numériques
Grecs
Etendu
Voir la "Table des
modes de caractères"
à la page suivante.
Français
Par exemple, pour entrer "Anne23":
A n en
2 2
336666
2
3
3
39
Page 40

Table des modes de caractères
Touche ABC (Alphabet)
# & ’ ( ) , – . / # & ’ ( ) , – . / # & ’ ( ) , – . /
1
A B C
2
a b c
D E F
3
d e f
G H I
4
g h i
J K L
5
j k l
M N O
6
m n o
P Q R S
7
p q r s
T U V
8
t u v
W X Y Z
9
w x y z
0-9 (Numériques)
2
2
3
3
4
4
5
5
6
6
7
7
8
8
9
9
ΑΒΓ (Grecs) AÄÅ (Etendu)
# & ’ ( ) , – . /# & ’ ( ) , – . /# & ’ ( ) , – . /11
ΑΒΓ
ΑΒΓ
∆ΕΖ
∆ΕΖ
ΗΘΙ
ΗΘΙ
ΚΛΜ
ΚΛΜ
ΝΞΟ
ΝΞΟ
ΠΡΣ
ΠΡΣ
ΤΥΦ
ΤΥΦ
ΧΨΩ
ΧΨΩ
A À Á Â Ã Ä Å Æ B C Ç
a à á â ã ä å æ b c ç
D E È É Ê Ë E F
d e è é ê ë e f
G G H I Ì Í Î Ï I
g g h i ì í î ï
J K L
j k l
M N Ñ O Ò Ó Ô Õ Ö Ø
m n ñ o ò ó ô õ ö ø
P Q R S S ß
p q r s s ß
T U Ù Ú Û Ü U V
t u ù ú û ü u v
W X Y Z
w x y z
40
blanc
0
blanc
Pour déplacer le curseur vers la gauche.
Pour déplacer le curseur
utilisant la même touche de numérotation, déplacer le curseur à l'espace suivant.)
Pour effacer le caractère. Pour effacer tous les caractères, appuyer et maintenir enfoncé.
C
Pour passer de majuscules en minuscules, appuyer sur . Chaque fois
que vous appuyez sur , le mode change.
0
0
blanc
blanc
vers la droite. (Pour entrer un autre caractère en
blanc
blanc
Page 41

Recherche de données dans le répertoire
<Si demandé>
<Pour chercher un nom par son initiale>
Code PIN du combiné
Entrer le code PIN
du combiné.
●
Appel à partir du répertoire
Appuyer sur la touche de
numérotation correspondant
à la première lettre du nom
souhaité.
/
●
Modification d'un élément du répertoire
/
Sélectionner
"MODIFICATION."
<Pour modifier le numéro>
numéro de téléphone
Entrer le numéro
de téléphone
(max. 24 chiffres).
Sélectionner le numéro
de catégorie personnelle,
"NON" ou "INTERN."
–
9
0
Par ex. pour trouver "Felix," appuyer
sur
ce que "F" s'affiche.
<Pour modifier le nom>
nom
Entrer le nom
(max. 16 caractères).
/ /
/
Sélectionner le
nom souhaité.*
de manière répétitive jusqu'à
3
Sélectionner
"SAUVEGARDE."
Français
●
Pour supprimer un élément du répertoire
/ /
Sélectionner "EFFACEMENT."
Après quelques secondes, l'écran affiche
l'élément suivant.
* Tous les éléments du répertoire sont triés dans l'ordre suivant:
Caractère Symbole Numéro
Sélectionner "OUI."
41
Page 42

Utilisation de la fonction de Numérotation directe
Les touches de numérotation (1-9) peuvent servir pour la numérotation 1 touche. Vous pouvez ainsi affecter jusqu'à 9
numéros de téléphone des éléments du répertoire aux touches de numérotation pour pouvoir y accéder directement.
Mémorisation des éléments du répertoire sous des touches d'accès direct
<Si demandé>
Code PIN du combiné
Entrer le code PIN à 4
chiffres du combiné.
/
Sélectionner le numéro
d'accès direct souhaité.
Si un élément est déjà sélectionné
sous ce numéro "✓" s'affiche à
gauche du numéro d'accès direct.
Sélectionner
l'élément souhaité.
/
Sélectionner
"SAUVEGARDE"
ou "ECRASER."
Appel d'un numéro mémorisé
<Pour rechercher un numéro>
–
9
1
Appuyer sur la touche
d'accès direct et la
maintenir enfoncée.
/
Sélectionner le
numéro souhaité.
/
Pour supprimer un numéro d'accès direct
<Pour rechercher un numéro>
//
Sélectionner
"INSC TOUCHE RAP."
–
1
9
Appuyer sur la touche
d'accès direct et la
maintenir enfoncée.
/
Sélectionner le
numéro souhaité.
Verrouillage du répertoire
Voir page 44.
42
/
Sélectionner
"EFFACEMENT."
Lorsque "OUI" est
indiqué sur la flèche.
Page 43

Programmation du combiné
Vous pouvez programmer le combiné selon vos besoins. L'écran vous fournit
toutes les instructions. Après la sélection de ''PROG.COMBINE'' le menu principal
s'affiche. La plupart des éléments de ce menu possèdent un sous-menu, qui
apparaît après la sélection de l'élément du menu principal.
Pendant la programmation:
●
Vous pouvez appuyer sur pour passer au menu suivant du menu de
fonctions au lieu d'appuyer sur .
●
Pour revenir à l'étape précédente pendant la programmation, appuyer sur ou sur .
●
Vous pouvez quitter le mode de programmation à tout moment en appuyant sur .
●
Lorsque la programmation est terminée, vous entendez un bip.
Pour modifier les réglages initiaux
/
Sélectionner
"PROG.COMBINE."
/
Sélectionner l'élément
principal souhaité.
Elément principal
OPTION SONNERIE
OPTION BIP
Sélectionner le
sous-élément souhaité.
Sous-élément
VOLUME SONNERIE
TYPE SONN EXT
TYPE SONN INT
SONN PROTEGEE
BIP TOUCHE O/N
AVERT.HORS ZONE
/
Description Réglage*
6 niveaux sont disponibles.
Lorsqu'il est réglé sur NON, le
combiné ne sonne pas.
Vous pouvez sélectionner le type de
sonnerie pour les appels extérieurs. Il
y a 20 types de sonnerie disponibles.
Vous pouvez sélectionner le type de
sonnerie pour les appels internes. Il y
a 20 types de sonnerie disponibles.
Vous pouvez sélectionner le type de
sonnerie du combiné (20 types différents)
pour chacune des catégories personnelles.*
Vous pouvez activer/désactiver la tonalité des
touches du combiné (tonalité des touches,
tonalité de confirmation, tonalité d'erreur).
Vous pouvez activer/désactiver la
tonalité d'avertissement de zone
de réception/hors portée.
/
Sélectionner le
réglage souhaité.
2
Niveau
Niveau 3
NON
N° de sonnerie
SONNERIE 1
N° de sonnerie
SONNERIE 3
N° de sonnerie
SONNERIE 1
OUI
NON
OUI
NON
C
1
Français
43
Page 44

Elément principal
CHOIX AFFICHAGE
OPTION APPEL
AUTRE OPTION
Sous-élément Description
Vous pouvez choisir d'afficher le
ECRAN VEILLE
CHOIX LANGAGE
COULEUR DE FOND
COULEUR PRIVEE
CONTRASTE LCD
CODEACC. BASE
VERROU REP.
PIN COMBINE ?
REPONSE AUTO
numéro de la borne connectée, le
numéro de poste ou pas d'affichage
en mode de veille.
Vous pouvez choisir une des 12
langues d'affichage.
Vous pouvez régler la couleur de
l'éclairage de l'écran entre vert,
orange ou rouge.
Vous pouvez sélectionner l couleur
d'éclairage (rouge, orange ou vert)
pour chacune des catégories
personnelles.*
2
Vous pouvez sélectionner le niveau
de contraste de l'affichage entre 1
et 3.
Vous pouvez éviter d'ajouter le code d'accès à la ligne aux
numéros extérieurs dans le répertoire téléphonique en
définissant le code d'accès de base (max. 8 chiffres).
Vous pouvez interdire à toute personne
d'accéder à votre répertoire.
Lorsque celui-ci est verrouillé, vous ne
pouvez pas appeler en l'utilisant.
Vous pouvez programmer un code PIN (numéro d'identification
personnel) à 4 chiffres. Voir page suivante pour la définition de ce code.
Vous pouvez répondre à un appel en
soulevant le combiné du chargeur,
sans appuyer sur aucune touche.
Réglage*
1
NO.DE BASE
NO DE POSTE
NON
Langue
ANGLAIS
VERT
ORANGE
ROUGE
VERT
ORANGE
ROUGE
1
2
3
3
*
OUI
NON
OUI
NON
Pour plus de détails, consulter votre revendeur.
INSCRIPTION
ANNULATION BASE
INSCRIP.COMBINE
SELECTION BASE
Vous pouvez supprimer les réglages de
EFFACE MEM
votre combiné. Cette option rappelle les
réglages de programmation d'origine du
combiné.
supprimer le volume de l'écouteur du
combiné et la mémoire de rappel.
1
*
Le réglage initial apparaît en gris.
2
*
Vous devez choisir la catégorie personnelle souhaitée.
3
*
Vous devez entrer le code PIN du combiné.
44
3
*
Vous pouvez également
OUI
NON
Page 45

Définition du code PIN
Dans le mode "PROG.COMBINE"
/ /
Sélectionner
"AUTRE OPTION."
Sélectionner
"PIN COMBINE ?"
ancien code PIN
Entrer le code PIN
actuel (à 4 chiffres)
du combiné.
nouveau code PIN
Entrer DEUX FOIS
le nouveau code PIN
à 4 chiffres.
Informations importantes
Informations concernant les batteries
Après la charge complète des batteries:
Fonctionnement
En communication
En mode veille
●
La durée de vie des batteries peut diminuer en fonction des conditions d'utilisation comme:
–l
ors de communications en mode mains libres, en utilisant un casque d'écoute ou selon la température ambiante.
●
Nettoyer les contacts du combiné et du chargeur avec un chiffon doux et sec une fois par
mois. Les nettoyer plus souvent si l'appareil est soumis à des graisses, de la poussière ou à
un taux élevé d'humidité. Sinon, les batteries risquent de ne pas charger correctement.
●
Les batteries ne peuvent pas être surchargées.
●
Lire "Avis important concernant l'utilisation et la charge correctes des batteries Ni-MH."
Remplacement des batteries
Si
" "
entièrement chargées, il est temps de les remplacer par de nouvelles (p. 34).
Avant de remplacer les batteries, mettre l'appareil hors tension pour éviter toute perte de mémoire (p. 35). Veiller
à charger les batteries pendant environ 15 heures afin que l'indication de puissance des batteries soit correcte.
clignote après quelques appels téléphoniques même quand les batteries du combiné ont été
Durée de vie approx. des batteries Ni-MH
Jusqu'à 15 heures
Jusqu'à 120 heures
Français
Précaution:
Lire attentivement les instructions suivantes afin d'éviter tout risque d'incendie ou de blessures.
1. Utiliser uniquement les batteries indiquées.
2. Ne pas utiliser de batteries non rechargeables.
3. Ne jamais mélanger des vieilles et des nouvelles batteries.
4. Ne jamais jeter la batterie dans un feu car elle risquerait d'exploser. Les batteries doivent être
jetées conformément aux réglementations locales.
5.
Ne jamais ouvrir ou détériorer la batterie. L'électrolyte qui pourrait s'en dégager est corrosif et peut provoquer
des brûlures ou des blessures aux yeux ou sur la peau. L'électrolyte peut s'avérer toxique en cas d'ingestion.
6. Manipuler soigneusement les batteries afin de ne pas les court-circuiter avec des objets
conducteurs comme des bagues, des bracelets et des clés. Les batteries et/ou l'élément
conducteur pourraient chauffer et provoquer des brûlures.
7. Charger les batteries fournies ou celles conçues pour une utilisation avec cet appareil
conformément aux instructions et limitations spécifiées dans le présent manuel.
45
Page 46

Avis important concernant l'utilisation et la charge correctes des batteries Ni-MH
Les batteries, étant donné leur conception, souffrent d'usure et de vieillissement. La durée de vie
d'une batterie dépend également d'un entretien correct. La charge et la décharge sont les facteurs les
plus importants et il convient de prendre note des points suivants pour préserver autant que possible
la durée de vie des batteries.
Les batteries Ni-MH ont un "effet mémoire." Si des batteries chargées à fond sont utilisées plusieurs
fois pendant 15 minutes uniquement dans le combiné puis qu'elles sont rechargées, leur capacité sera
réduite à 15 minutes à cause de cet effet mémoire. Il convient dès lors de les décharger
complètement, notamment en les utilisant dans le combiné jusqu'à ce que " " se mette à
clignoter à l'écran. Les recharger ensuite comme décrit dans le manuel. Lorsque l'effet de mémoire
s'est produit, il est possible de retrouver la capacité presque intégrale des batteries Ni-MH en les
chargeant et en les déchargeant plusieurs fois de suite.
Les batteries Ni-MH peuvent égalément se décharger d'elles-mêmes, en fonction de la température
ambiante. La décharge automatique est plus faible à des températures inférieures à 0°C elle est plus
forte en cas d'humidité et de températures élevées. Une longue conservation épuise également les
batteries. Une batterie Ni-MH épuisée ne doit pas être mise au rebut avec les déchets ordinaires. Ces
batteries contiennent de l'hydrure de métal fort toxique et doivent dès lors être recyclées.
Faire particulièrement attention aux consignes de sécurité mentionnées ci-dessous.
Sécurité
1) Alimentation: Le chargeur doit être connecté à une prise du même type décrit dans le manuel
utilisateur ou notée sur le chargeur.
2) Périodes sans utilisation: Lorsque le combine n'est pas utilisé, le mettre hors tension. Débrancher
le chargeur lorsque le combiné ne doit pas être utilisé pendant une longue période.
Installation
Environnement
1) Eau et humidité: Ne pas utiliser le combiné, le chargeur et l'adaptateur secteur à proximité d'eau—
ou, par exemple, près d'une baignoire, d'un lavabo, d'un évier, etc. Les sous-sols humides sont
aussi à éviter.
2) Chaleur: Le combiné, le chargeur et l'adaptateur secteur ne doivent pas être exposés à des
sources de chaleur telles que radiateurs, fourneaux de cuisine, etc. Ne pas les placer non plus
dans des pièces où la température est inférieure à 5°C ou supérieure à 40°C.
Emplacement
1) Empilage: Ne jamais placer d'objets lourds sur le combiné ni sur le chargeur.
2) Corps étrangers: Veiller à ce qu'aucun objet ou liquide ne pénètre dans le combiné ou le chargeur.
Ne jamais exposer le combiné et le chargeur à de la fumée et à une poussière excessive, à des
vibrations mécaniques ou aux chocs.
3) Surface: Placer le chargeur sur une surface plane. En cas de montage mural du chargeur, veiller à
le monter bien droit.
46
Page 47

Pour une meilleur performance
Zone de détection
1) La zone de détection dépend de l'ergonomie de votre bureau, du temps et des conditions
d'utilisation car les signaux sont transmis entre la borne et le combiné par ondes radio.
2) Normalement, vous devriez obtenir une meilleure capacité d'exploitation à l'extérieur qu'à l'intérieur.
Les obstacles tels que les murs et les bruits peuvent en effet interférer sur vos appels et les murs
en béton armé ainsi que les étagères en métal diminueront la zone d'exploitation.
3) Le combiné peut ne pas fonctionner s'il est utilisé dans des endroits trop éloignés de la borne, en
fonction de la structure du bâtiment.
Bruit
Des bruits occasionnels ou des interférences peuvent être provoqués par d'autres sources de
radiations électromagnétiques comme les réfrigérateurs, les fours à micro ondes, les télécopieurs, les
téléviseurs, les radios ou les ordinateurs. Si vos appels sont perturbés par des interférences, éloigner
le combiné d'autres appareils électriques.
ATTENTION:
AFIN D'EVITER TOUT RISQUE D'INCENDIE OU DE COURT-CIRCUIT, NE JAMAIS EXPOSER CE
PRODUIT A LA PLUIE OU A L'HUMIDITE. POUR REDUIRE LE RISQUE D'ELECTROCUTION, NE
JAMAIS TENTER DE DEMONTER L'APPAREIL.
LE PORTER CHEZ UN REPARATEUR AGREE S'IL NECESSITE UNE INTERVENTION
TECHNIQUE.
Français
47
Page 48

Spécifications techniques
Méthode d'accès radio: Ondes porteuses multiples TDMA-TDD
Bande de fréquences: 1 880-1 900 MHz
Nombre de porteuses: 10
Espace des porteuses: 1 728 kHz
Vitesse de transmission: 1 152 kbps
Système multiplex:
Longueur des séquences: 10 ms
Modulation: GFSK
Codage vocal: 32 kbps ADPCM (CCITT G.721)
Sortie de transmission: Max. 250 mW
●
Les spécifications peuvent être sujettes à modifications.
●
Les illustrations utilisées dans le présent manuel peuvent différer légèrement de
l'appareil réel.
TDMA, 24 connecteurs (Tx12, Rx12) par séquence
0682
Le présent appareil est un combiné portable (Poste DECT) fonctionnant sur la
bande de fréquences de 1 880 à 1 900 MHz.
Le présent appareil est conforme aux exigences de la norme 1999/5/CE.
Son utilisation est généralement autorisée dans tous les pays de l'UE.
Kyushu Matsushita Electric (U.K.) Limited déclare par la présente que son produit
est conforme aux principales exigences et autres dispositions utiles de la directive
R&TTE, 1999/5/CE.
Une copie de la déclaration de conformité des fabricants aux principales
exigences de la directive R&TTE est disponible à l'adresse web suivante:
http://doc.panasonic-tc.de
48
Page 49

DECT Draagbaar Station
Bedieningshandleiding
Model KX-TD7580
Inhoud
Voorbereiding..........................50
Alvorens u gaat beginnen....... 51
Basisbediening........................52
Gebruik van het telefoonboek..54
Handset programmering..........59
Belangrijke informatie..............61
Specificaties............................64
English..................................1-16
Italiano................................17-32
Español............................... 33-48
Nederlands......................... 49-64
Accessoires (bijgeleverd)
AC adapter (wisselstroomadapter)*
Oplader
Riemclip
–
Hartelijk dank voor het aanschaffen van een DECT handset (= Draagbaar Station).
–
Laad de batterijen ongeveer 15 uren op voordat u de telefoon in gebruik neemt.
– Deze handleiding is geschreven voor het gebruik van uw handset en een
Panasonic KX-TD816/KX-TD1232 systeem.
– In deze handleiding is de laatste letter van modelnamen weggelaten.
* Verkrijgbare wisselstroomadapters: KX-TCA1, KX-TCA1AL, KX-TCA1CE
en KX-TCA1E. Het onderdeelnummer is per land verschillend. Het
nummer vindt u op de sticker op de wisselstroomadapter.
Bevestigen
Batterijen
(Panasonic P-6P of BYD PQHHR120AA12)
Bedieningsinstructies
English Español
Italiano
Nederlands
De handset ondersteunt funkties van een enkelvoudig toestel (SLT).
Lees het betreffende hoofdstuk in de bedieningshandleiding voor het
KX-TD816/1232 systeem voor de bediening van de handset.
Sommige funkties zijn niet beschikbaar.
49
Page 50

Voorbereiding
Handset (HS)
Koptelefoonaansluiting
(Gebruik alleen de
Panasonic koptelefoon.)
Luidspreker
(Telefoonboek)
toets
(Spreken)
toets
Achterzijde
(Handen-vrij)
toets
Navigator toets
( , , , )
(Hoofdletter)
toets
Oplaadcontact
Luidspreker
R
R-toets
Plaats de batterijen en laad ze ongeveer 15
uren op zoals hieronder wordt weergegeven.
Display
(Funktie/OK)
toets
C
3
3
2
2
1
1
4
4
7
7
R
6
6
5
5
9
9
8
8
0
0
(UIT/Stroom)
toets
(Wissen)
C
toets
(Pauze)
toets
Oplaadcontact
Microfoon
Monteer de oplader
stevig tegen de muur.
Boor gaten met behulp van de
onderstaande boormal.
Schroeven
50
Naar
stopcontact
30 mm
Leid het snoer
door de groef
voor wandmontage of bureau-
gebruik.
AC adapter
(wisselstroomadapter)
30 mm
Page 51

Alvorens u gaat beginnen
Houd ingedrukt om de stroom AAN te zetten.
[280]
15.05 13:58
●
Om de stroom UIT te zetten, houd u
● Zie blz. 60 voor het veranderen van de displaytaal.
Het toestelnummer:
Zie blz. 60 voor de programmering.
De huidige datum en tijd
ingedrukt tot u een pieptoon hoort.
Bereik symbool
Verschijnt als de
handset:
binnen bereik is.
buiten bereik is.
(Knippert)
Telefoonboek symbool
Intercom symbool
Knippert bij een inkomend
intern gesprek.
Spreken symbool
Verschijnt als u:
een gesprek begint
of beantwoordt.
een extern gesprek
(Knippert)
ontvangt.
Verschijnt als u gegevens
in het telefoonboek
opslaat of zoekt.
Tekens
P wordt ingedrukt tijdens kiezen.
R
F wordt ingedrukt tijdens kiezen.
ABCDEFGHIabcdefg
1234567890123456
Batterijsterkte
Geeft de batterijsterkte aan.
Tijdens het opladen ziet het
batterij symbool er als volgt uit.
<Tijdens opladen>
Nederlands
Vol
(Knippert )
Moet worden
(Knippert)
opgeladen.
51
Page 52

Basisbediening
Basisbediening
Naar een intern toestel
toestelnr.
/
●
Tijdens een gesprek kunt u heen en weer schakelen tussen handen-vrij
telefoneren en de luidspreker.
●
Voorkiezen: U kunt eerst een nummer intoetsen en het dan laten kiezen.
Opmerking
●
Druk op als u verkeerd intoetst. Om te stoppen, ingedrukt houden of druk op .
C
Herhalen van het laatst gekozen nummer
Het laatst gekozen nummer herhalen
/ /
Herhalen via de herhaallijst
Selecteer het te herhalen nummer.
Naar een externe partij
netlijncode
Selecteer "Herhalen."
tel. nr.tel. nr.
//
C
Gesprekken ontvangen
–
9
0
●
Bij een inkomend gesprek van een beller, die is vastgelegd in het telefoonboek,
worden de naam en het telefoonnummer van de beller op het display getoond.
/
/
/
/
Gesprekken doorverbinden
Tijdens het gesprek
Naar een intern toestel
R
Opmerking
●
U kunt het gesprek ook beëindigen door de handset op de oplader te plaatsen.
52
toestelnr.
Naar een externe partij
netlijncode
tel. nr.tel. nr.
Page 53

Toon-signalering
Tijdens een extern gesprek of tijdens kiezen, kunt u met behulp van de toetsen automatisch
toonsignalen verzenden (bijv.: voor afstandsbediening van een antwoordapparaat).
/
Selecteer "TOON."
Een nummer uit het herhaalgeheugen wissen
Geselecteerde nr. wissen
/
/
Selecteer het te
herhalen nummer.
Selecteer "Wissen."
Alle nummers wissen
/
Selecteer "Alles Wissen."
/
Selecteer "JA."
Het luidsprekervolume regelen
Tijdens het gesprek
(verhogen) (verlagen)
Het handset-belsignaal tijdelijk uitschakelen
Tijdens het belsignaal
(ingedrukt houden.)
●
Bij het volgende gesprek zal het belsignaal weer overgaan.
●
Deze funktie werkt niet als de handset zich op de oplader bevindt.
De toetsblokkering instellen
U kunt de druktoetsen van de handset blokkeren. Alleen inkomende gesprekken
worden geaccepteerd tot de toetsblokkering wordt geannuleerd. Tijdens
blokkering zal "[X]" op het display worden getoond.
Instellen
(ingedrukt houden.)
●
De toetsblokkering zal ook geannuleerd worden als de stroom wordt
uitgeschakeld (Blz. 51).
Annuleren
(ingedrukt houden.)
Nederlands
53
Page 54

Gebruik van het telefoonboek
U kunt maximaal 100 namen en interne/externe nummers in het telefoonboek
opslaan. Alle telefoonboek items worden in alfabetische volgorde gesorteerd. Via
het telefoonboek kunt u opbellen door een naam op het display te kiezen.
●
Wij raden u aan om de netlijncode (blz. 60) in te voegen.
●
Als het telefoonboek is geblokkeerd (blz. 60), voert u de 4-cijferige handset PIN
in om naar de telefoonboeklijst te gaan.
●
U kunt de instelmodus van het telefoonboek altijd verlaten door op te drukken.
●
Als de programmering voltooid is, hoort u een pieptoon.
Het gebruik van de privé categorie funktie
U kunt de informatie over de beller opslaan in één van de 8 privé categorieën (1-8),
"UIT" en "Intern." Als u een toestelnummer in het telefoonboek opslaat, moet u
"Intern" kiezen; u kunt anders niet intern opbellen via het telefoonboek. (Als
interne/externe nummers identiek zijn, sla het interne nummer dan niet in het
telefoonboek op onder "Intern.") Voor elke privé categorie 1-8, kunt u de kleur van de
displayverlichting en het belsignaaltype kiezen (blz. 59-60). Als u een extern gesprek
ontvangt, kunt u eenvoudig zien wie er belt. (Bijvoorbeeld: categorie 1 voor familie,
categorie 2 voor vrienden en categorie 8 voor zakelijk.) Als u een item niet aan enig
privé categorie nummer toekent, zal de handset overgaan met het
voorgeprogrammeerde beltype en oplichten in de voorgeprogrammeerde kleur als u
van dat nummer een gesprek ontvangt.
Voor "Intern," kunt u geen belsignaaltype en geen verlichtingskleur kiezen.
Namen en nummers opslaan in het telefoonboek
<Indien nodig>
/
Selecteer "Nieuw
Nummer."*
tel. nr.
Voer het telefoonnummer
in (max. 24 cijfers).
Als tijdens het kiezen een pauze nodig is, drukt u op .
In een telefoonnummer kan een spatie worden opgeslagen, hetgeen telt als één cijfer.
1
*
Als ''Geheugen Vol'' op het display verschijnt, gaat het display terug naar de standby modus. Wis
andere opgeslagen gegevens in het telefoonboek (blz. 57).
2
*
Zie de stappen voor het invoeren van namen en symbolen (blz. 55).
1
Selecteer het gewenste
privé categorie nummer,
"UIT" of "Intern."
Handset PIN
Voer de 4-cijferige
handset PIN in.
/ /
54
naam
Voer de naam in*2
(max. 16 tekens).
Selecteer "Opslaan."
Page 55

Een laatst gekozen (herhaal) nummer of voorkiesnummer opslaan
<Herhaalnummer>
/
Kies het gewenste
herhaalnummer.
naam
Voer de naam in
(max. 16 tekens).
<Voorkiesnummer>
OF
tel. nr.
Voer het gewenste
telefoonnummer in.
Bevestig het nummer.
/
Selecteer "Tel.Nr.
Opslaan."
/
Selecteer het gewenste
privé categorie nummer,
"UIT" of "Intern."
Selecteer "Opslaan."
<
Indien nodig
Handset PIN
Voer de 4-cijferige
handset PIN in.
/
Tekens invoeren
De druktoetsen kunnen gebruikt worden voor het invoeren van letters en
symbolen. De letters zijn gedrukt op de toetsen.
De tekenset selecteren
Tijdens het invoeren van een naam
/
Selecteer de gewenste tekenset.
ABC
0-9
ΑΒΓ
AÄÅ
Alfabet
Numeriek
Grieks
Speciaal
Zie de "Tekenset
tabel" op de
volgende bladzijde.
>
Nederlands
Om bijvoorbeeld "Anne23" in te voeren:
A n en 2
2 2
336666
3
3
55
Page 56

Tekenset tabel
Toets
1
2
3
4
5
6
7
8
9
ABC (Alfabet)
# & ’ ( ) , – . / # & ’ ( ) , – . / # & ’ ( ) , – . /
A B C
a b c
D E F
d e f
G H I
g h i
J K L
j k l
M N O
m n o
P Q R S
p q r s
T U V
t u v
W X Y Z
w x y z
0-9 (Numeriek)
2
2
3
3
4
4
5
5
6
6
7
7
8
8
9
9
ΑΒΓ (Grieks) AÄÅ (Speciaal)
# & ’ ( ) , – . /# & ’ ( ) , – . /# & ’ ( ) , – . /11
ΑΒΓ
ΑΒΓ
∆ΕΖ
∆ΕΖ
ΗΘΙ
ΗΘΙ
ΚΛΜ
ΚΛΜ
ΝΞΟ
ΝΞΟ
ΠΡΣ
ΠΡΣ
ΤΥΦ
ΤΥΦ
ΧΨΩ
ΧΨΩ
A À Á Â Ã Ä Å Æ B C Ç
a à á â ã ä å æ b c ç
D E È É Ê Ë E F
d e è é ê ë e f
G G H I Ì Í Î Ï I
g g h i ì í î ï
J K L
j k l
M N Ñ O Ò Ó Ô Õ Ö Ø
m n ñ o ò ó ô õ ö ø
P Q R S S ß
p q r s s ß
T U Ù Ú Û Ü U V
t u ù ú û ü u v
W X Y Z
w x y z
56
blanco
0
blanco
Cursor naar links verplaatsen.
Cursor naar rechts verplaatsen. (Om een volgend teken in te voeren met
dezelfde druktoets, de cursor naar de volgende spatie verplaatsen.)
Om een teken te wissen. Ingedrukt houden als u alle tekens wilt wissen.
C
Om te wisselen van hoofdletter naar kleine letter, op drukken. Telkens
als u op drukt zal de modus veranderen.
0
0
blanco
blanco
blanco
blanco
Page 57

Zoeken in het telefoonboek
<Indien nodig>
<Een naam zoeken via de beginletter>
Handset PIN
Voer de
handset PIN in.
●
Opbellen via het telefoonboek
Druk op de toets
waarop de beginletter
van de gewenste
naam staat.
/
●
Gegevens in het telefoonboek wijzigen
/
Selecteer "Edit."
<Wijzig het nummer>
tel. nr.
Voer het
telefoonnummer
in (max. 24 cijfers).
Selecteer het gewenste
privé categorie nummer,
"UIT" of "Intern."
–
9
0
Kies de gewenste
naam.*
Om bijv. "Felix" te zoeken, drukt
u steeds op
naam onder "F" verschijnt.
<Wijzig de naam>
naam
Voer de naam in
(max. 16 tekens).
/ /
Selecteer "Opslaan."
/
tot de eerste
3
Nederlands
●
Gegevens in het telefoonboek wissen.
/ /
Selecteer "Wissen."
Na enkele seconden toont het display het
volgende item.
* Alle telefoonboek worden op de volgende manier gesorteerd:
Teken Symbool Nummer
Selecteer "JA."
57
Page 58

Het gebruik van de snelkies funktie (Hot Key)
De druktoetsen (1-9) werken als snelkiestoetsen. U kunt maximaal 9
telefoonnummers uit het telefoonboek toewijzen als snelkiestoetsen.
Telefoonboek items opslaan als snelkiesnummers
<Indien nodig>
Handset PIN
Voer de 4-cijferige
handset PIN in.
Kies het
gewenste item.
/
Kies de gewenste
snelkiestoets.
Als er reeds een item is
opgeslagen, verschijnt "✓"
links van het snelkiesnummer.
Een opgeslagen nummer kiezen
<Een nummer zoeken>
–
9
1
Houd een snelkiestoets
ingedrukt.
/
Kies het gewenste
nummer.
Een snelkiesnummer wissen
<Een nummer zoeken>
Selecteer "Opslaan"
of "Overschrijven."
//
Selecteer "Reg
to Hot Key."
/
/
–
1
9
Houd een snelkiestoets
ingedrukt.
/
Kies het gewenste
nummer.
Selecteer "Wissen."
Het telefoonboek blokkeren
Zie blz. 60.
58
/
Terwijl "JA" bij de
pijl staat.
Page 59

Handset programmering
U kunt de handset naar eigen wensen programmeren. Het display toont de
instructies. Na selectie van ''InstellenHands.'' verschijnt het hoofdmenu. De
meeste titels in het hoofdmenu hebben een submenu. Het submenu verschijnt als
u een titel in het hoofdmenu heeft gekozen.
Tijdens het programmeren:
●
In plaats van op te drukken, kunt u indrukken om naar het volgende
menu van het funktiemenu te gaan.
●
Om tijdens het programmeren terug te gaan naar de vorige stap drukt u op
●
U kunt de programmeermodus altijd verlaten door op te drukken.
●
Als de programmering voltooid is, hoort u een pieptoon.
De fabrieksinstellingen wijzigen
/
Selecteer
"InstellenHands."
/
Kies de gewenste
hoofdfunktie.
/
Kies de gewenste
subfunktie.
/
Kies de gewenste
instelling.
C
of .
Hoofdfunktie
Beloptie
Toonoptie
Subfunktie
Belvolume
Netlijn sign.
Toestel sign.
Anonieme Beller
Tst.toonAAN/UIT
Buiten Bereik
Beschrijving Instelling*
Er zijn 6 niveaus beschikbaar.
Indien ingesteld op UIT, zal de handset
niet overgaan.
U kunt het belsignaal van
netlijngesprekken kiezen. Er zijn 20
typen beschikbaar.
U kunt het belsignaal kiezen voor
interne gesprekken. Er zijn 20 typen
beschikbaar.
U kunt voor elke privé categorie
een belsignaaltype (20 typen)
2
kiezen.*
U kunt de toetstonen van de
handset aan-/uitzetten (toetstoon,
bevestigingstoon, foutmeldingstoon).
U kunt de waarschuwingstoon voor
"buiten bereik" aan-/uitzetten.
Niveau
Niveau 3
UIT
Belsignaal nr.
Belpatroon 1
Belsignaal nr.
Belpatroon 3
Belsignaal nr.
Belpatroon 1
AAN
UIT
AAN
UIT
1
Nederlands
59
Page 60

Hoofdfunktie
Keuze Display
Keuze Gesprek
Andere optie
Subfunktie
Standby Display
Kies Taal
Achtergr.kleur
Privékleur
LCD-contrast
ToegangcodeBase
Nr.blokkering
PIN Wijzigen
Auto Spreken
Beschrijving Instelling*
U kunt kiezen of in de standbymodus
op het display het huidige
basisstationnummer, toestelnummer of
niets wordt getoond.
U kunt kiezen uit 12 displaytalen.
Basisnummer
Tst Nummer
UIT
Taal
1
Engels
Voor de displayverlichting kunt u kiezen
uit groen, oranje of rood.
Groen
Oranje
Rood
Voor elke privé categorie kunt u de
kleur (rood, oranje, of groen) van de
displayverlichting kiezen.*
2
Groen
Oranje
Rood
Voor het displaycontrast kunt u kiezen
uit niveaus 1 t/m 3.
1
2
3
Als u de basisstation toegangscode (max. 8 cijfers) instelt,
hoeft u in het telefoonboek geen netlijn toegangscode voor de
externe telefoonnummers toe te voegen.
U kunt voorkomen dat iemand uw
telefoonboek opent.
3
*
Indien deze geblokkeerd is, kan niet via
het telefoonboek gekozen worden.
AAN
UIT
U kunt een 4-cijferig handset PIN (Persoonlijk Identificatie Nummer)
programmeren. Zie de volgende bladzijde voor het instellen van een PIN.
U kunt een gesprek beantwoorden,
AAN
zonder op een toets te drukken, door de
hoorn van de haak te nemen.
UIT
Raadpleeg uw leverancier voor details.
RegistreerHands
Afmelden Basis
RegistreerH/set
Selecteer Basis
U kunt de instellingen op de handset
Reset Geheugen
wissen. Als u daarvoor kiest, zullen de
fabrieksinstellingen worden hersteld.
U kunt ook het luidsprekervolume en
herhaalgeheugen van de handset wissen.
1
*
De fabrieksinstellingen staan in de grijze vlakjes.
2
*
U moet de gewenste privé categorie kiezen.
3
*
U moet de handset PIN invoeren.
60
3
*
JA
NEE
Page 61

PIN instellen
In de "InstellenHands." modus
/ /
Selecteer "Andere
optie."
Selecteer "PIN
Wijzigen."
oude PIN nieuwe PIN
Voer 4-cijferig
handset PIN in.
Voer het 4-cijferig
PIN TWEEMAAL
in.
Belangrijke informatie
Batterij informatie
Als uw batterijen vol zijn opgeladen:
Werking
In gebruik (Spreken)
Buiten gebruik (Standby)
●
De levensduur kan korter zijn als gevolg van bruiksomstandigheden, zoals:
–handen-vrij telefoneren, koptelefoongebruik en omgevingstemperatuur.
●
Reinig de handset en de oplaadcontacten maandelijks met een zachte, droge doek. Vaker
reinigen als het toestel in aanraking komt met vet, stof of een hoge vochtigheidsgraad.
Anders zullen de batterijen niet goed worden opgeladen.
●
De batterijen kunnen niet worden overladen.
●
Lees "Belangrijke informatie over het juiste gebruik en opladen van Ni-MH batterijen."
De batterijen vervangen
Als " " na een klein aantal telefoongesprekken knippert, zelfs als de batterijen vol zijn opgeladen,
is het tijd om de batterijen te vervangen door nieuwe (blz. 50). Schakel, voordat u de batterijen gaat
vervangen, de stroom uit om geheugenverlies te voorkomen (blz. 51). Zorg dat u de nieuwe batterijen
ongeveer 15 uren oplaadt, zodat de batterijsterkte goed op het display wordt weergegeven.
Gemiddelde levensduur Ni-MH batterij
Maximaal 15 uren
Maximaal 120 uren
Nederlands
Let op:
Om het gevaar van brand of persoonlijk letsel zoveel mogelijk te beperken, de onderstaande
instructies lezen en in acht nemen.
1. Gebuik alleen de gespecificeerde batterijen.
2. Gebruik alleen oplaadbare batterijen.
3. Houd oude en nieuwe batterijen gescheiden.
4. De batterij nooit in het vuur werpen. Deze kan dan ontploffen. Vraag bij de plaatselijke overheid of
er speciale voorschriften voor het opruimen bestaan.
5.
De batterij niet open maken of anderszins beschadigen. Het vrijkomende elektrolyt is bijtend en kan
brandwonden of oog-of huidletsel veroorzaken. Het elektrolyt kan giftig zijn als dit wordt ingeslikt.
6. Ga met zorg om met de batterijen, zodat de levensduur niet verkort wordt door bijvoorbeeld ringen,
armbanden en sleutels. De batterijen en/of polen kunnen oververhit raken en brandwonden
veroorzaken.
7. De geleverde batterijen of andere geschikte batterijen mogen alleen worden opgeladen volgens de
instructies en voorwaarden in deze handleiding.
61
Page 62

Belangrijke informatie over het juiste gebruik en opladen van Ni-MH batterijen
Batterijen zijn, door hun constructie, onderhevig aan slijtage. De levensduur van een batterij is mede
afhankelijk van goed onderhoud. Opladen en ontladen zijn de meest belangrijke factoren. Neem het
volgende in acht om ervoor te zorgen dat de batterijen zo lang mogelijk meegaan.
Ni-MH batterijen zijn gevoelig voor geheugeneffect. Als vol opgeladen batterijen in de handset een
aantal keren slechts 15 minuten gebruikt worden, en daarna (meteen) weer worden opgeladen, zal de
capaciteit van de batterijen als gevolg van het geheugeneffect worden teruggebracht tot 15 minuten.
Daarom moet u de batterijen geheel laten ontladen, d.w.z. de handset gebruiken totdat op het display
" " begint te knipperen. Laad ze daarna op zoals in deze handleiding staat beschreven. Nadat
het geheugeneffect zich heeft voorgedaan, is het mogelijk om bijna de complete capaciteit van de NiMH te verkrijgen door een aantal keren op te laden en weer te ontladen.
Ni-MH batterijen kunnen zichzelf ontladen. Deze zelf-ontlading is afhankelijk van de
omgevingstemperatuur. Bij temperaturen onder 0°C zal de zelf-ontlading het laagst zijn. Een hoge
vochtigheidsgraad en hoge temperaturen beïnvloeden de zelf-ontlading. Ook lange-termijn opslag zal
leiden tot zelf-ontlading. Een dode Ni-MH batterij mag u niet zomaar weggooien. Zij bevatten zwaar
giftig metaal hydride en moeten daarom worden gerecycled.
Geef de onderstaande veiligheidstips speciale aandacht.
Veiligheid
1) Voeding: De wisselstroomadapter mag alleen worden aangesloten op een voeding van het type dat
staat aangegeven op de wisselstroomadapter.
2) Perioden van buiten gebruik: Als de HS niet gebruikt wordt, de voeding uitschakelen. Indien het
apparaat langere tijd niet gebruikt wordt, de wisselstroomadapter uit het stopcontact trekken.
Installatie
Omgeving
1) Water en vocht: Gebruik de HS, de oplader en de wisselstroomadapter niet bij water—bijvoorbeeld,
in de buurt van een bad, wastafel, gootsteen, enz. Vochtige kelders moeten eveneens worden
gemeden.
2) Hitte: De HS, de oplader en de wisselstroomadapter moeten uit de buurt van warmtebronnen
worden gehouden, zoals radiatoren, fornuizen, enz. Ze mogen ook niet in kamers worden geplaatst
waar de temperatuur lager is dan 5°C of hoger dan 40°C.
Plaatsing
1) Stapelen: Geen zware voorwerpen op de HS en oplader plaatsen.
2) Vreemde voorwerpen: Opletten dat er geen voorwerpen op de HS en oplader kunnen vallen of dat
er vloeistof in gemorst wordt. De HS en oplader niet blootstellen aan veel rook, stof, mechanische
trillingen of schokken.
3) Ondergrond: Zet de lader op een vlakke ondergrond. Als de lader aan de muur wordt gemonteerd,
deze recht installeren.
62
Page 63

Voor Optimale Prestaties
Werkbereik
1) Het bereik hangt af van de ligging van uw kantoor, het weer of andere gebruikscondities, omdat de
signalen tussen het Basiscelstation (CS) en de HS worden verzonden via radiogolven.
2) Normaal heeft u buitenshuis een groter bereik dan binnen. Als er obstakels zoals muren zijn, kan er
storing optreden bij uw telefoongesprekken. Vooral hoge metalen rekken of muren van gewapend
beton verkleinen het werkbereik.
3) Een HS werkt niet als deze gebruikt wordt op plaatsen die te ver van de CS afliggen afhankelijk van
de constructie van het gebouw.
Ruis
Af en toe kan er ruis of storing optreden door andere bronnen van elektromagnetische straling zoals
koelkasten, magnetrons, faxapparaten, TV's, radio's of personal computers. Als uw gesprekken veel
last hebben van ruis, de HS uit de buurt houden van andere elektrische apparaten.
WAARSCHUWING:
OM BRAND OF HET GEVAAR VAN EEN ELEKTRISCHE SCHOK TE VOORKOMEN, DIT PRODUCT
NIET BLOOTSTELLEN AAN REGEN OF ANDER VOCHT.
OM HET GEVAAR VAN ELEKTRISCHE SCHOK ZOVEEL MOGELIJK TE BEPERKEN, DEZE UNIT
NIET DEMONTEREN. ALS SERVICE NODIG IS DE UNIT NAAR EEN OFFICIEEL
SERVICECENTRUM BRENGEN.
Nederlands
63
Page 64

Specificaties
Toegangsmethode radiogolven:Multi Carrier TDMA-TDD
Frequentieband: 1 880-1 900 MHz
Aantal carriers: 10
Carrier frequentie: 1 728 kHz
Bit snelheid: 1 152 kbps
Carrier Multiplex: TDMA, 24 (T×12, R×12) slots per frame
Frame snelheid: 10 ms
Modulatie: GFSK
Voice codering: 32 kbps ADPCM (CCITT G.721)
Transmissie uitgang: max. 250 mW
●
Wijzigingen voorbehouden.
●
De afbeeldingen in deze handleiding kunnen enigszins afwijken van het
werkelijke toestel.
0682
Dit toestel is een DECT Draagbaar Station die werkt in de frequentieband van
1 880 MHz tot 1 900 MHz.
Dit toestel is in overeenstemming met de Europese Richtlijnen 1999/5/EG.
Het gebruik van dit toestel is in alle EG landen algemeen toegestaan.
Kyushu Matsushita Electric (U.K.) Limited, verklaart hierbij dat dit produkt in
overeenstemming is met de eisen en andere relevante bepalingen van de R&TTE
richtlijn 1999/5/EG.
Een kopie van de verklaring van overeenstemming met betrekking tot de R&TTE
richtlijn kunt u verkrijgen via ons webadres: http://doc.panasonic-tc.de
64
Page 65

DECT Bärbara Telefon
Användarhandbok
Modell KX-TD7580
Innehåll
Installation...............................66
Innan du börjar........................67
Funktioner...............................68
Använda telefonboken............ 70
Programmera handenheten.....75
Viktig information.....................77
Specifikationer.........................80
English..................................1-16
Deutsch...............................17-32
Français..............................33-48
Nederlands.........................49-64
Svenska.............................. 65-80
Tillbehör (ingår)
Adapter för växelström*
Laddare
Bältfäste
– Tack för att du valt en DECT Bärbara Telefon.
– Ladda batteriet i ca 15 timmar innan du börjar använda handenheten.
– Handboken beskriver handenhetens användning tillsammans med en
Panasonic KX-TD816/KX-TD1232.
– I handboken har sista bokstaven i varje modellbeteckning tagits bort.
*
Tillgängliga adaptrar för växelström är: KX-TCA1, KX-TCA1AL, KX-TCA1CE och KXTCA1E. Artikelnumret är olika i varje land. Se numret som finns på adapterns etikett.
Att fästa
Batterier
(Panasonic P-6P eller BYD PQHHR120AA12)
Användarhandbok
English Deutsch Svenska
Français
Nederlands
Handenheten använder de analoga telefonfunktionerna.
Mer information om telefonfunktionerna finns i motsvarande kapitel i
användarhandboken för KX-TD816/1232.
Vissa funktioner kan inte användas.
65
Page 66

Installation
Handenhet
Headset-uttag (Använd
endast Panasonics
headset.)
Baksida
Högtalare
(Telefonbok)
knapp
(Tala)
knapp
(Högtalartelefon)
knapp
Bläddringsknapp
( , , , )
(Ändra skiftläge)
knapp
Laddningsuttag
R
(Återuppringning)
knapp
Telefonlur
Teckenfönster
(Funktion/OK)
knapp
C
3
3
2
2
1
1
4
4
7
7
R
6
6
5
5
9
9
8
8
0
0
knapp
C
knapp
knapp
(AV/Ström)
(Ta bort)
(Paus)
Laddningsuttag
Mikrofon
Sätt in och ladda batterierna i ca 15 timmar
enligt nedanstående.
Till
strömuttag
Adapter för
växelström
66
Sätt fast laddaren
ordentligt på väggen.
Fäst skruvarna enligt
nedanstående väggmall.
Skruvar
30 mm
Sätt in sladden
i skåran vid
väggmontering
eller bordsplacering.
30 mm
Page 67

Innan du börjar
Sätt på strömmen genom att hålla intryckt.
[280]
15.05 13:58
●
Stäng av strömmen genom att hålla intryckt tills du hör en ljudsignal.
● Se sidan 76 om du vill ändra språk i teckenfönstret.
Anknytningsnumret:
Läs om programmering på sidan 76.
Aktuellt datum och tid
Räckvidd-symbol
Visas när
handenheten är:
inom räckvidd.
utom räckvidd.
(Blinkar)
Telefonbok-symbol
Internt-symbol
Blinkar när du tar emot
ett internt samtal.
Tala-symbol
Visas när du:
ringer eller tar emot
ett samtal.
tar emot ett externt
(Blinkar)
samtal.
Visas när du lagrar eller
visar data i telefonboken.
Tecken
P har tryckts under uppringning.
R
F har tryckts under uppringning.
ABCDEFGHIabcdefg
1234567890123456
Batteristatus
Visar batteriets styrka.
Under batteriladdning visas
batterisymbolen enligt nedan.
<Under laddning>
Fullt
(Blinkar )
Behöver laddas
(Blinkar)
Svenska
67
Page 68

Funktioner
Vanlig uppringning
Till en anknytning
anknytnings-nr.
/
●
Under ett samtal kan du växla mellan att använda handsfree och telefonlur.
●
Förvald uppringning: Du kan slå numret först och därefter lyfta luren.
Anm.
●
Om du råkar slå fel, tryck på . För att avbryta trycker du och håller
nedtryckt eller trycker på .
Återuppringning
Återuppringa senast slaget nummer
/ /
Återuppringa med listan för återuppringning
Välj nummer som
ska återuppringas.
Till en extern part
linjeval
C
Välj
"Återuppringning."
//
telefonnr.
C
Ta emot samtal
–
9
0
●
När du besvarar ett externt samtal från någon som finns registrerad i telefon-
boken visas namn och telefonnummer på teckenfönstret.
/
/
/
/
Överflytta samtal
Under pågående samtal
Till en anknytning
R
Anm.
●
Du kan också lägga på handenheten genom att placera den på laddaren.
68
anknytnings-nr.
Till en extern part
linjeval
telefonnr.
Page 69

Tonsignaler
Under ett externt samtal eller vid uppringning kan du sända tonsignaler
automatiskt genom att använda knappsatsen (t ex vid fjärrmanövrering av
talsvarssystem).
/
Välj "Tonval."
Ta bort lagrat nummer för återuppringning
Ta bort valt nummer
/
/
Välj nummer som
ska återuppringas.
Välj "Radera."
Ta bort alla nummer
/
Välj "Radera alla."
/
Välj "JA."
Justera telefonluren/högtalarvolymen
Under pågående samtal
(öka) (minska)
Tillfälligt stänga av handenhetens ringanordning
När det ringer
(tryck och håll nedtryckt.)
●
Ringanordningen aktiveras igen vid nästa samtal.
●
Detta fungerar inte när handenheten ligger på laddaren.
Låsa tangenterna
Du kan låsa handenhetens uppringningsknappar. Endast inkommande samtal
accepteras när tangenterna är låsta. "[X]" visas i teckenfönstret så länge
tangenterna är låsta.
Aktivera
(tryck och håll nedtryckt.)
●
Tangentlåset avbryts även när strömmen slås av (sid. 67).
Avbryta
(tryck och håll nedtryckt.)
Svenska
69
Page 70

Använda telefonboken
Du kan lagra upp till 100 namn och anknytnings-/externa nummer i telefonboken.
Alla poster i telefonboken sorteras i bokstavsordning. Med hjälp av telefonboken
kan du ringa ett samtal genom att välja ett namn i teckenfönstret.
●
Vi rekommenderar att du lägger in linjevalsnummer (sid. 76).
●
Om telefonboken är låst (sid. 76) slår du den 4-siffriga PIN-koden för att öppna den.
●
Du kan lämna telefonbokens aktiveringsläge när som helst genom att trycka på
.
●
När programmeringen är klar hörs en ljudsignal.
Använda funktionen för privat kategori
Du kan tilldela information om uppringaren till en av åtta kategorier (1-8), "AV" och
"Intern." När du lagrar ett anknytningsnummer i telefonboken måste du välja "Intern";
annars går det inte att ringa internt från telefonboken. (Om anknytningsnumret och det
externa numret är identiska ska du inte lagra anknytningsnumret i telefonbokens
"Intern.")
Du kan välja bakgrundsfärg och ringsignal för respektive kategori 1-8, (sid. 75-76).
När du tar emot ett externt samtal är det enkelt att veta vem som ringer. (Du kan
exempelvis ha kategori 1 för familj, kategori 2 för vänner och kategori 8 för jobbet.)
Om du inte tilldelar en post till något kategorinummer, kommer luren att ringa med den
förinställda ringsignalen och visa den förinställda färgen när du tar emot ett samtal.
Det går inte att välja ringsignal och bakgrundsfärg för "Intern."
Lagra namn och nummer i telefonboken
<Om så önskas>
/
Välj "Lagra
Nytt Nr."*
telefonnr.
Ange telefonnumret
(max 24 siffror).
Om det krävs en paus vid uppringningen trycker du på .
Ett blanktecken kan lagras i ett telefonnummer och det behandlas som en siffra.
1
*
Om ''Minnet Fullt'' visas i teckenfönstret kommer det att återgå till viloläge. Ta bort
lagrade namn i telefonboken (sid. 73).
2
*
Se anvisningarna för hur du lägger in namn och symboler (sid. 71).
1
Handenhetens PIN-kod
Ange lurens
fyrsiffriga PIN-kod.
/ /
Välj önskat
kategorinummer,
"AV" eller "Intern."
70
namn
Ange namn*2
(max 16 tecken).
Välj "Spara."
Page 71

Lagra ett återuppringnings- eller förvalt nummer
<Återuppringningsnummer>
/
Välj önskat
återuppringningsnummer.
namn
Ange namn
(max 16
tecken).
<Förvalt nummer>
ELLER
telefonnr.
Ange önskat
telefonnummer.
Bekräfta numret.
/
Välj "Spara
Nummer."
/
Välj önskat
kategorinummer,
"AV" eller "Intern."
<Om så önskas>
Handenhetens PIN-kod
Ange lurens
fyrsiffriga PIN-kod.
/
Välj "Spara."
Ange tecken
Uppringningsknapparna kan användas för att ange bokstäver och
teckensymboler. Bokstäverna finns markerade på uppringningsknapparna.
Välja teckenläge
När du anger ett namn
/
Välj önskat teckenläge.
ABC
0-9
ΑΒΓ
AÄÅ
Se teckenlägetabellen
på nästa sida.
Alfabet
Numerisk
Grekisk
Utökat
Om du exempelvis vill skriva "Anne23'':
A n en
2 2
336666
2
3
Svenska
3
71
Page 72

Teckenlägetabell
Knapp ABC (Alfabet)
# & ’ ( ) , – . / # & ’ ( ) , – . / # & ’ ( ) , – . /
1
A B C
2
a b c
D E F
3
d e f
G H I
4
g h i
J K L
5
j k l
M N O
6
m n o
P Q R S
7
p q r s
T U V
8
t u v
W X Y Z
9
w x y z
0-9 (Numerisk)
2
2
3
3
4
4
5
5
6
6
7
7
8
8
9
9
ΑΒΓ (Grekisk) AÄÅ (Utökat)
# & ’ ( ) , – . /# & ’ ( ) , – . /# & ’ ( ) , – . /11
ΑΒΓ
ΑΒΓ
∆ΕΖ
∆ΕΖ
ΗΘΙ
ΗΘΙ
ΚΛΜ
ΚΛΜ
ΝΞΟ
ΝΞΟ
ΠΡΣ
ΠΡΣ
ΤΥΦ
ΤΥΦ
ΧΨΩ
ΧΨΩ
A À Á Â Ã Ä Å Æ B C Ç
a à á â ã ä å æ b c ç
D E È É Ê Ë E F
d e è é ê ë e f
G G H I Ì Í Î Ï I
g g h i ì í î ï
J K L
j k l
M N Ñ O Ò Ó Ô Õ Ö Ø
m n ñ o ò ó ô õ ö ø
P Q R S S ß
p q r s s ß
T U Ù Ú Û Ü U V
t u ù ú û ü u v
W X Y Z
w x y z
72
tom
0
tom
Flyttar markören åt vänster.
Flyttar markören åt höger. (Om du vill ange ett ytterligare tecken med
samma uppringningsknapp, flyttar du markören till nästa blankutrymme.)
Raderar tecknet. Om du vill radera alla tecken, håller du knappen nedtryckt.
C
Ändra skiftläge genom att trycka på Läget ändras varje gång du trycker
på .
0
0
tom
tom
tom
tom
Page 73

Hitta namn i telefonboken
<Om så önskas>
<Söka ett namn efter initialen>
Handenhetens PIN-kod
Ange
PIN-koden.
●
Ringa upp någon via telefonboken
Tryck på
uppringningsknappen
som gäller för första
bokstaven i önskat namn.
/
●
Ändra ett namn/nummer i telefonboken
/
Välj "Ändra."
<Ändra numret>
telefonnr.
Ange
telefonnumret
(max 24 siffror).
Välj önskat
kategorinummer,
"AV" eller "Intern."
–
90
Välj önskat namn.*
För att t ex hitta "Felix" trycker du
på upprepade gånger tills
3
första namnet under "F" visas.
<Ändra namnet>
namn
Ange namn (max 16
tecken).
/ /
Välj "Spara."
/
●
Ta bort en uppgift från telefonboken
/ /
Välj "Radera."
Efter några sekunder visas nästa namn på
teckenfönstret.
* Alla poster i telefonboken ligger sorterade i följande ordning:
Tecken Symbol Nummer
Välj "JA."
Svenska
73
Page 74

Använda snabbval
Uppringningsknapparna (1-9) fungerar som snabbval. Du kan tilldela upp till 9
telefonnummer från telefonboken som snabbval.
Lagra nummer från telefonboken som snabbval
<Om så önskas>
Handenhetens PIN-kod
Ange lurens
fyrsiffriga PIN-kod.
Välj önskad
post.
/
Välj önskat
snabbvalsnummer.
Om det redan finns en lagrad
post visas "✓" till vänster om
snabbvalsnumret.
Ringa upp ett lagrat nummer
<Söka ett nummer>
–
9
1
Tryck på och håll
ner ett
snabbvalsnummer.
/
Välj önskat
nummer.
Ta bort en post under snabbval
<Söka ett nummer>
Välj "Spara"
eller "Skriv över."
//
Välj "Lägg som
SnabbV."
/
/
–
1
9
Tryck på och håll
ner ett
snabbvalsnummer.
/
Välj önskat
nummer.
Låsa telefonboken
Se sidan 76.
74
/
Välj "Radera."
När "JA" visas
vid pilen.
Page 75

Programmera handenheten
Du kan programmera luren enligt dina önskemål. Teckenfönstret ger dig
anvisningar. När du har valt ''Inställning:Lur'' visas huvudmenyn. De flesta
alternativ på huvudmenyn har en undermeny. Undermenyn visas efter att du har
valt ett alternativ på huvudmenyn.
Under programmering:
●
Du kan trycka på för att gå till nästa meny i funktionsmenyn i stället för att
trycka på .
●
För att återgå till föregående steg under programmeringen, trycker du på eller .
●
Du kan lämna programmeringsläget när du vill genom att trycka på .
●
När programmeringen är klar hörs en ljudsignal.
Ändra de ursprungliga inställningarna
/
Välj
"Inställning:Lur."
/
Välj
huvudalternativ.
/
Välj
underalternativ.
/
Valj önskad
inställning.
C
Huvudalternativ
Ringsignal Val
Ton Alternativ
Underalternativ
Ringvolym
Ringsign.-Ln
Ringsign.-Int
Egen Ringsignal
Knappljud PÅ/AV
Räckvidds Larm
Beskrivning Inställning*
Det finns sex tillgängliga nivåer.
Om du anger AV ringer inte
handenheten.
Du kan välja typ av ringsignal för
samtal från en extern linje. Det finns
tjugo olika typer av ringsignaler.
Du kan välja typ av ringsignal för
samtal från en anknytning. Det finns
tjugo olika typer av ringsignaler.
Du kan välja lurens typ av
ringsignal (finns 20 typer) för
respektive kategori.*
Du kan aktivera/avbryta lurens
knappljud (knappton, verifieringston
och felton).
Du kan aktivera/avbryta räckviddens
alarmsignal.
2
Nivå
Nivå 3
AV
Ringsignal-nr.
Signal 1
Ringsignal-nr.
Signal 3
Ringsignal-nr.
Signal 1
PÅ
AV
PÅ
AV
1
Svenska
75
Page 76

Huvudalternativ
Displayinställn
Uppring.Altern.
Andra Val
Underalternativ
Du kan välja om du vill visa nu
Display: Passn.
Välj Språk
Bakgrundsfärg
Egen Färg
Displaykontrast
Bastillgångskod
Telefonbokslås
Byt Lur PIN
Snabbsvar
anslutet basstations- eller
anknytningsnummer eller ingen bild
alls under viloläge.
Du kan välja ett av tolv språk för
teckenfönstret.
Du kan ställa in teckenfönstrets
bakgrundsfärg till grön, orange eller
röd.
Du kan välja teckenfönstrets
bakgrundsfärg (röd, orange eller
grön) för respektive kategori.*
Du kan välja teckenfonstrets
kontrastnivå från 1 till 3.
Genom att ställa in baslinjeval (max 8 siffror) behöver du inte
lägga till detta nummer till de externa telefonnumren i
telefonboken.
Du kan förhindra att någon annan
kan se din telefonbok.
När den är låst går det inte att ringa
från telefonboken.
Du kan programmera en fyrställig PIN-kod (personlig kod). Se
nästa sida hur du gör.
Du kan besvara ett samtal genom att
lyfta handenheten från batteriladdaren
utan att trycka på någon knapp.
Beskrivning Inställning*
Bas Nummer
Ankn. Nummer
AV
Språk
Engelska
Grön
Orange
Röd
Grön
2
3
*
Orange
Röd
1
2
3
PÅ
AV
PÅ
AV
1
Registrera
Registrera Lur
Välj Bas
Standard inst.
Ta Bort Bas
1
*
Grundinställningen är markerad med grått.
2
*
Du måste välja onskad kategori.
3
*
Du måste ange handenhetens PIN-kod.
76
Kontakta din återförsäljare för mer information.
Du kan nollställa handenhetens
inställningar. De programmerade
inställningarna kommer då att återgå
till sina ursprungliga inställningar.
3
*
Du kan även ta bort lurens volym och
JA
NEJ
minnet för återuppringning.
Page 77

Ställa in PIN-koden
I läget "Inställning:Lur"
/ /
Välj "Andra Val."
Välj "Byt Lur PIN." Ange den nya fyrställiga
gammal PIN ny PIN
Ange aktuell,
fyrsiffrig
PIN-kod.
PIN-koden TVÅ gånger.
Viktig information
Information om batteri
När dina batterier är helt uppladdade:
Funktion
Vid användning (talläge)
Ej i användning (viloläge)
●
Batteriets livslängd kan avkortas beroende på användningen, som exempelvis:
–
när du talar i högtalarläge eller använder headset och även beroende på omgivningens temperatur.
●
Rengör handenheten och laddarens kontakter med en mjuk, torr trasa en gång i månaden.
Rengör oftare om enheten är utsatt för fett, damm eller hög luftfuktighet. Annars kanske inte
batterierna kan laddas upp fullständigt.
●
Batterierna kan inte överladdas.
●
Läs "Viktig anmärkning om korrekt bruk och laddning av Ni-MH-batterier."
Byta batterier
Om " " blinkar efter bara några få telefonsamtal även om lurens batterier är nyladdade, är det
dags att byta ut batterierna (sid. 66).
Stäng av strömmen innan tar bort batterierna så att inte minnet nollställs (sid. 67). Se till att de nya
batterierna laddas i ca 15 timmar vilket är tillräckligt för att korrekt batteristyrka ska visas.
Ungefärlig livslängd för Ni-MH-batteri
Upp till 15 timmar
Upp till 120 timmar
Observera:
För att minska risken för eldsvåda eller personskador, läs och följ dessa instruktioner.
1. Använd endast rekommenderade batterier.
2. Använd endast laddningsbara batterier.
3. Blanda inte gamla och nya batterier.
4. Släng inte batteriet i eld. Det kan explodera. Kontrollera lokala regler för avfallshantering om det
finns speciella instruktioner för bortskaffande.
5. Öppna eller skada inte batteriet. Utsläppt elektrolyt är frätande och kan orsaka brännskador eller
skador på ögon och hud. Elektrolyten kan vara giftig om den sväljs.
6.
Hantera batterierna varsamt så att du undviker kortslutning med ledande material som exempelvis ringar,
armband och nycklar. Batterierna och/eller det ledande materialet kan överhettas och orsaka brännskador.
7. Ladda medlevererade batterier eller andra batterier av rekommenderad typ enligt handbokens
anvisningar och angivna restriktioner.
77
Svenska
Page 78

Viktig anmärkning om korrekt bruk och laddning av Ni-MH-batterier
Batterier, är på grund av sin konstruktion, utsatta för visst slitage. Ett batteris livslängd förbättras om
det underhålls på rätt sätt-laddning och urladdning är därvid det viktigaste. Du bör beakta följande för
att batteriet ska få största livslängd.
Ni-MH-batterier har ett sorts minne-en så kallad "minneseffekt." Om helt uppladdade batterier används
flera gånger under endast 15 minuter i handenheten och därefter återladdas, kommer kapaciteten att
minska med 15 minuter beroende på minneseffekten. Du bör därför ladda ur batterierna helt, dvs
använda dem i handenheten tills " " i teckenfönstret börjar blinka. Därefter laddar du dem enligt
anvisningarna i handboken. Om minneseffekten har inträffat, är det möjligt att uppnå nästan fullständig
kapacitet i Ni-MH-batterierna genom att ladda och ladda ur dem flera gånger i följd.
Ni-MH-batterierna kan även självurladdas. Självurladdningen beror på omgivningens temperatur. Vid
temperaturer under noll grader kommer självurladdningen att vara som lägst. Hög luftfuktighet innebär
hög självurladdning. Långtidsforvaring kommer också att leda till självurladdning. Ett dött Ni-MH-batteri
bör inte kastas på vanligt sätt. De innehåller giftig tungmetallhydrid och bör därför återvinnas.
Observera nedanstående säkerhetsåtgärder.
Säkerhet
1) Strömförsörjning: AC-adaptern ska endast anslutas till strömförsörjning av den typ som markerats
på AC-adaptern.
2) Perioder ej i användning: Slå av strömmen när handenheten inte används. När den lämnas
oanvänd för en lång tidsperiod, bör laddningsaggregatet dras ut ur uttaget för växelström.
Installation
Omgivning
1) Vatten och fukt: Använd inte handenheten, laddaren och AC-adaptern nära vatten—t ex i närheten
av ett badkar, tvättbalja, diskho. Fuktiga källare bör också undvikas.
2) Värme: Handenheten, laddaren och AC-adaptern bör hållas borta från värmekällor som t ex
radiatorer, köksplattor. De ska inte heller placeras i rum där temperaturen är lägre än 5°C eller
högre än 40°C.
Placering
1) Stapling: Placera inte tunga föremål ovanför handenheten och laddningsaggregatet.
2) Främmande material: Var försiktig så att inte föremål faller ner på och vätskor spills ut över
handenheten och laddningsaggregatet. Utsätt inte handenheten och laddningsaggregatet för
omåttligt med rök, damm, mekaniska vibrationer eller stötar.
3) Yta: Placera laddningsaggregatet på en platt yta. Om laddningsaggregatet har monterats på
väggen placera det rakt.
78
Page 79

För bästa prestanda
Arbetsområde
1) Arbetsområdet beror på topografin på ditt kontor, väder eller användningsvillkor, eftersom signaler
överförs med radiovågor mellan cellstationen (CS) och handenheten.
2) I normala fall kommer du att få ett större område utomhus än inomhus. Om det finns hinder i form
av väggar, kan det hända att brus stör dina telefonsamtal. Särskilt höga metallhyllor eller
stålbetongmurar kommer att minska ditt arbetsområde.
3) Handenheten kanske inte fungerar om den används på platser som ligger alltför långt från
cellstationen beroende på byggnadens struktur.
Brus.
Tillfälligt brus eller störningar till följd av andra källor för elektromagnetisk strålning, som kylskåp,
mikrovågsugnar, faxar, TV-apparater, radioapparater, eller persondatorer. Om brus stör dina
telefonsamtal så håll handenheten borta från andra elektriska anordningar.
VARNING:
FÖR ATT FÖRHINDRA RISK FÖR ELD ELLER STÖTAR, UTSÄTT INTE DENNA PRODUKT FÖR
REGN ELLER ANNAN TYP AV FUKT.
FÖR ATT MINSKA RISKEN FÖR ELEKTRISKA STÖTAR, DEMONTERA INTE ENHETEN. TA
ENHETEN TILL ETT AUKTORISERTA SERVICE CENTRUM NÄR SERVICE KRÄVS.
Svenska
79
Page 80

Specifikationer
Radioaccessmetod: Multibärvåg TDMA-TDD
Frekvensband: 1 880-1 900 MHz
Bärvågsantal: 10
Bärvågsmellanrum: 1 728 kHz
Bithastighet: 1 152 kbps
Bärvågsmultiplex: TDMA, 24 (T×12, R×12) spår per ram
Ramlängd: 10 ms
Modulering: GFSK
Talkodning: 32 kbps ADPCM (CCITT G.721)
Transmissionens uteffekt: Max. 250 mW
●
Vi förbehåller oss rätten att ändra specifikationerna.
●
Illustrationerna som används i handboken kan skilja sig något från
originalutrustningen.
0682
Enheten är en DECT Bärbara Telefon som fungerar inom frekvensbanden 1 880
MHz till 1 900 MHz.
Enheten uppfyller kraven enligt EU-direktiven 1999/5/EC.
Användningen av enheten är allmänt godkänd inom samtliga EU-länder.
Kyushu Matsushita Electric (U.K.) Limited intygar att den här produkten uppfyller
kraven och andra relevanta bestämmelser enligt R&TTE-direktiven, 1999/5/EC.
En kopia av tillverkarens deklaration om överensstämmelse med kraven i R&TTEdirektiven finns på webbadressen: http://doc.panasonic-tc.de
Manufacturer:
Kyushu Matsushita Electric (U.K.) Ltd.
Pencarn Way, Duffryn, Newport, South Wales, NP10 8YE, United Kingdom
© 2001 Kyushu Matsushita Electric Co., Ltd. All Rights Reserved.
Printed in the United Kingdom PSQX2470YA KK0301AH1041
 Loading...