

Page 1
Panasonic
Panasonic
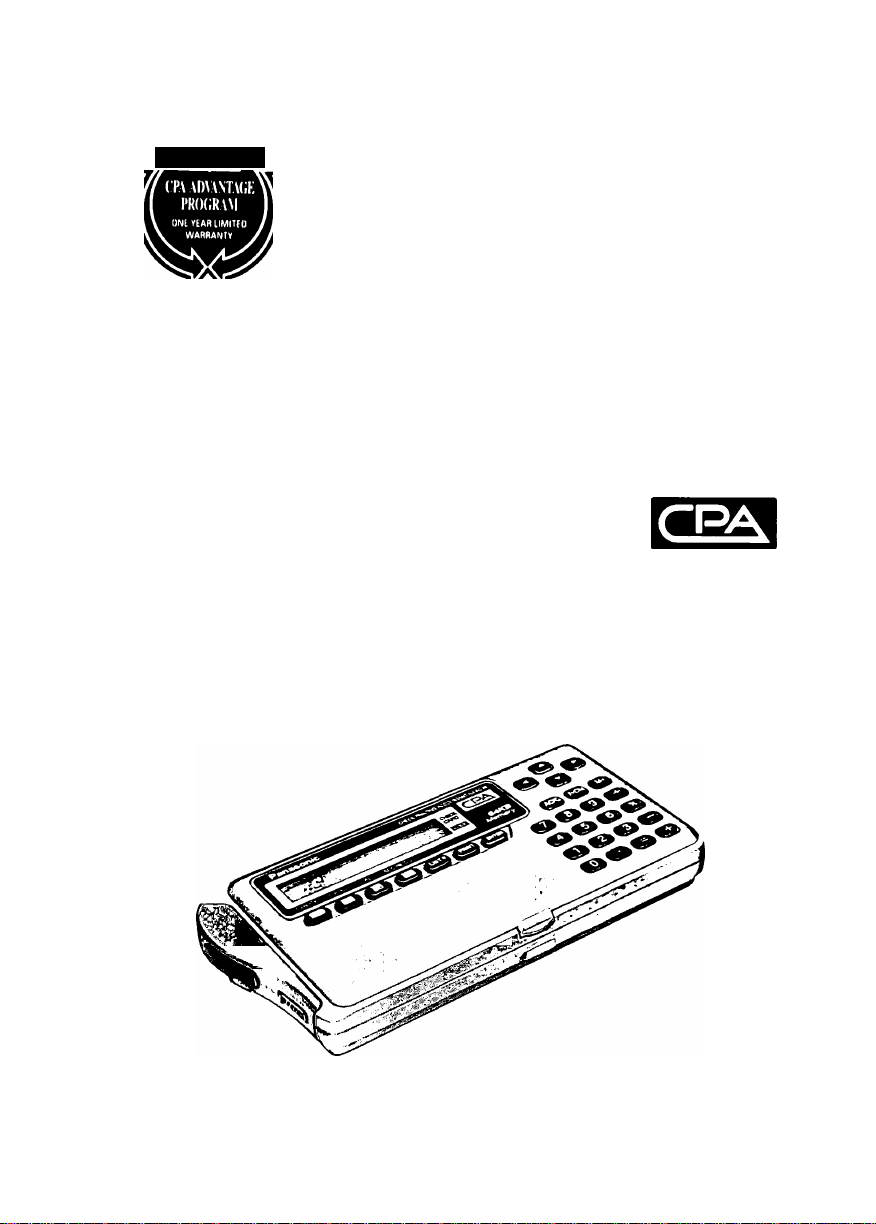
Opera ti ng Ins tru cti on s
Check Printing Accountant
MODEL NO.
KX-RC95
m
Please read before using.
Page 2

Thank you for purchasing the Panasonic Check Printing Accountant
KX-RC95.
Nole:
This equipment has been tested and found to comply with the limits for a
Class B digital device, pursuant to Part 15 of the FCC Rules. These limits are
designed to provide reasonable protection against harmful interference in a
residential installation. This equipment generates, uses and can radiate radio
frequency energy and, if not installed and used in accordance with the
instructions, may cause harmful interference to radio communications.
However, there is no guarantee that interference will not occur in a particular
installation. If this equipment does cause harmful interference to radio or
television reception, which can be determined by turning the equipment off
and on, the user is encouraged to try to correct the interference by one or
more of the following measures;
Reorient or relocate the receiving antenna.
Increase the separation between the equipment and receiver.
Connect the equipment into an outlet on a circuit different from that to which
the receiver is connected.
Consult the dealer or an experienced radio/TV technician for help.
FCC Warning: To assure continued FCC compliance, the user must
use only shielded interfacing cables when connecting to computer or
peripheral. Also, any unauthorized changes or modifications to this
equipment would void the users authority to operate.
CAUTION: AC ADAPTOR (KX-WZ4) IS FOR INDOOR USE ONLY.
Caution, since your Check Printing Accountant has been designed to
hold your personal checks, you should be as careful as you would be
of your checkbook. If you should lose your Check Printing Accountant,
be sure to notify your bank as to the numbers of the lost checks.
'Macintosh is a registered trademark of Apple Computer, Inc.
Page 3

NOTICE
• Panasonic strongly recommends that separate permanent written
records be kept of all important data. Data may be lost or altered in
virtually any electronic memory product under certain circumstances.
Panasonic assumes no responsibility for data lost or otherwise
rendered unusable for any reason, including without limitation, defect,
repair, improper use, battery replacement, use after the specified
battery life has expired, or any other reason. See limited warranty for
details.
• Panasonic assumes no responsibility, directly or indirectly, for financial
losses or claims from third persons resulting from the use, loss or
misuse of this product.
WARNING: TO PREVENT FIRE OR SHOCK HAZARD,
DO NOT EXPOSE THIS PRODUCT TO RAIN
OR ANY TYPE OF MOISTURE.
• It is recommended that you periodically print the content of the
memory of your Check Printing Accountant, so that you wiii have a
permanent record in the event of any unexpected memory loss.
The serial number of this unit may be found on the upper label located on
the back side.
Write this number below and keep this book along with your proof of
purchase to serve as a permanent record of your purchase or for future
reference.
MODEL NO. KX-RC95
SERIAL NO.
NAME OF DEALER
ADDRESS OF DEALER
DATE OF PURCHASE
____
Page 4
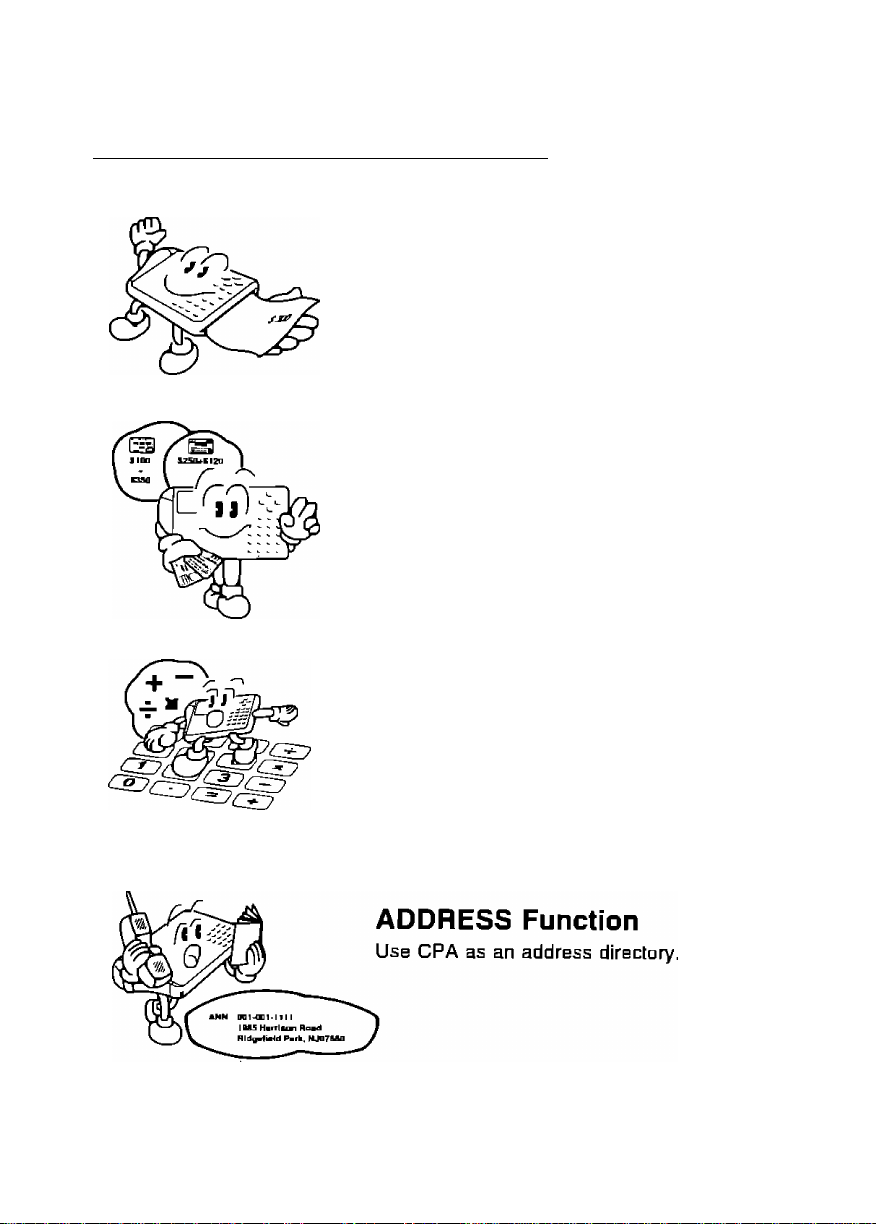
Enjoy the Convenient Functions of Your Check Printing Accountant! (CPA)
CHECK Function
Hand-whling a check is no longer necessary.
Enter the necessary data and CPA prints the
check. CPA also balances your checking ac
count.
CARD Function
Whenever you pay with a credit card enter
the data and CPA adds up the amount of
each credit card payment.
CALCULATION Function
Use CPA as a pocket calculator.
_______________
Page 5
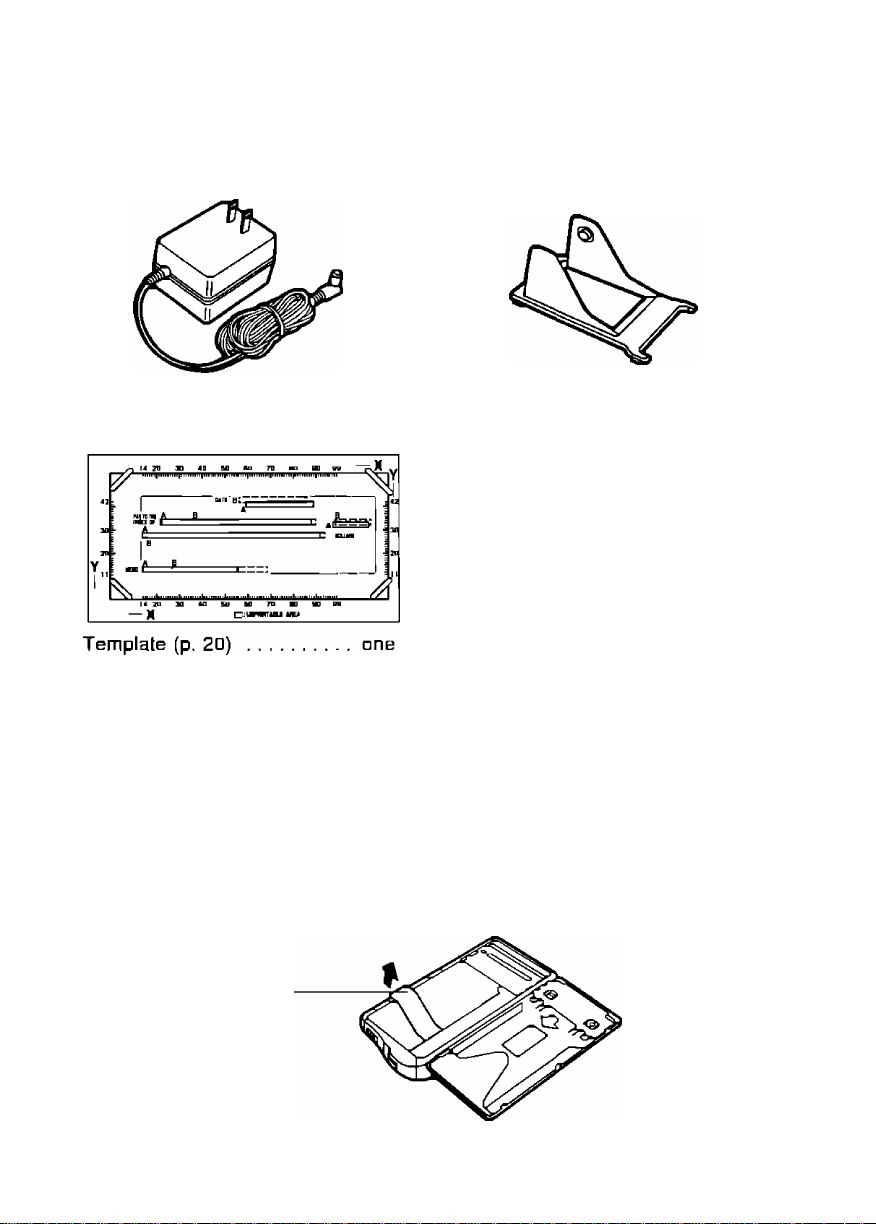
Accessories
Make sure that the following accessories are included with CPA.
AC adaptor (p. 11)
Printed material
Operating instructions.....................one
Payee list card
(found on the back
of CPA)
..........................
.......................................
one Paper feeder (p. 39)
Quick start guide
Owner information card .... one
Sample sheet ................................ two
one
............................
Important!
Before using, remove the protective sheet from CPA.
one
one
ProteclivB sheet
5
Page 6

Table of Contents
Page
Precautions
................................................................
Before Using...............................................................9
Part Names
Front view............................................................................................. 3
Printer parts ......................................................................................... 9
Keyboard ............................................................................................ 10
Power Supply............................................................................................11
From household AC.............................................................................11
Using the rechargeable Ni-Cd battery
Preparation
Turning On/Turning Off CPA
Resetting CPA (Clears all memory)...........................................................14
Setting the Clock .......................................................................................1G
Adjusting Display Contrast........................................................................1G
CHECK Function
Entering Your Bank Name.........................................................................17
Making the Payee List ..............................................................................10
Inserting a Check.......................................................................................13
Setting Print Positions on Your Check.......................................................20
Issuing a Check (Entering With draw als/Servi ce Charges) ... 23
Entering Deposit Data ..............................................................................26
Searching a CHECK Record
Reconciling (✓ ) a Check ...........................................................................29
Voiding a Check After Issued
Deleting the CHECK Record(s) . .
....
.............................................................................................9
.................................................
..............................................................
....................................................................
......................................................
....................................................................
....................................................................
...........
................................................
13
17
8
11
13
20
29
30
CARD Function........................................................31
Making the Card List ................................................................................31
Entering Data for Purchase with a Credit Card
Searching a CARD Record .......................................................................33
Deleting the CARD Record(s)
..................................................................
.........................................
CALCULATOR Function..........................................35
Memory Calculation ..................................................................................35
32
34
Page 7
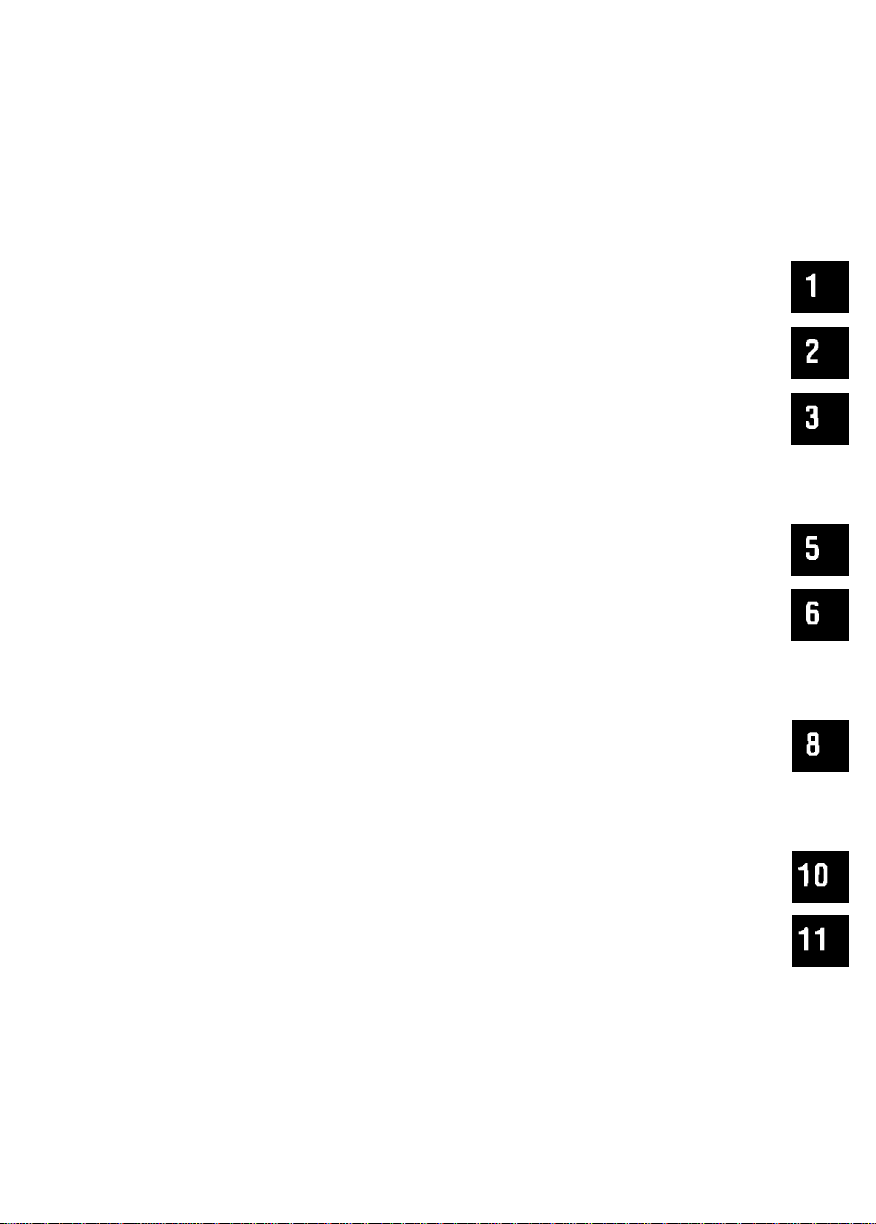
Table of Contents
Page
ADDRESS Function
Making the Address List........................................................................... 36
Searching an ADDRESS Record.......................................... . . ................37
Deleting an ADDRESS Record .................................................................3B
REPORT Function
Putting the Paper Roll on the Printer........................................................ 39
Confirming Contents of CHECK/CARD/ADDRESS Records . . 41
Other Functions
Showing Remaining Memory for CHECK, CARD
and ADDRESS.........................................................................................44
Showing Remaining Battery Power............................................................44
Password ...................................................................................................45
Entering the password
Changing/Clearing the password..........................................................46
.................................................
....................................................
.......................................................
..........................................................................
36
39
44
Transferring Data......................................................47
Transferring Data..................................................................................... .47
Connecting CPA to Another CPA..........................................................47
Setting the Link Parameter ..................................................................4B
Performing the transfer.........................................................................4B
45
General Information
Troubleshooting Guide...............................................................................50
Adjusting Print ........................................................................................... 52
Resetting CPA without Disturbing the Memory..........................................53
Changing the Ribbon Cassette
Changing the Battery Pack
Specifications.............................................................................................57
Appendix
List of Display Messages...........................................................................5B
List of Code Key Functions .
Category List ............................................................................................. 62
Options.......................................................................................................63
Indei...................................................................-
...................................................................
.................................................
................................................................
.....................................................................
..........
..........................................................61
..........................
- .... 64
50
54
.56
58
Page 8
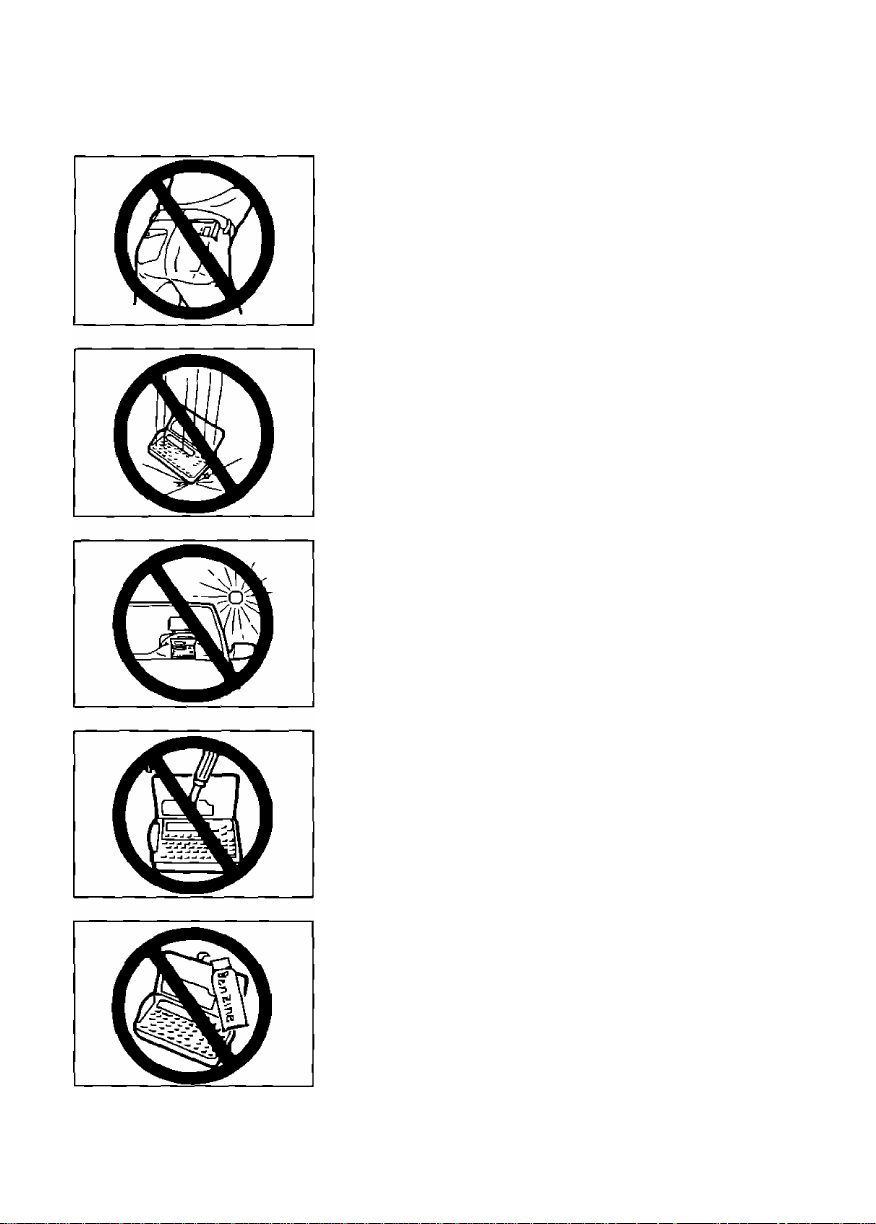
Precautions
Do noi keep CPA in your back pocket as
it may break when you sit down
Do not drop or jar CPA
Do not place CPA where it will be exposed to
direct sunlight or heat, especially in an
automobile
To prevent electric shock, do not remove any
screws
Your stored data may be erased
Use only a soft, dry cloth to clean CPA
Water or cleaning fluids may damage the case
or electronic circuitry
Page 9
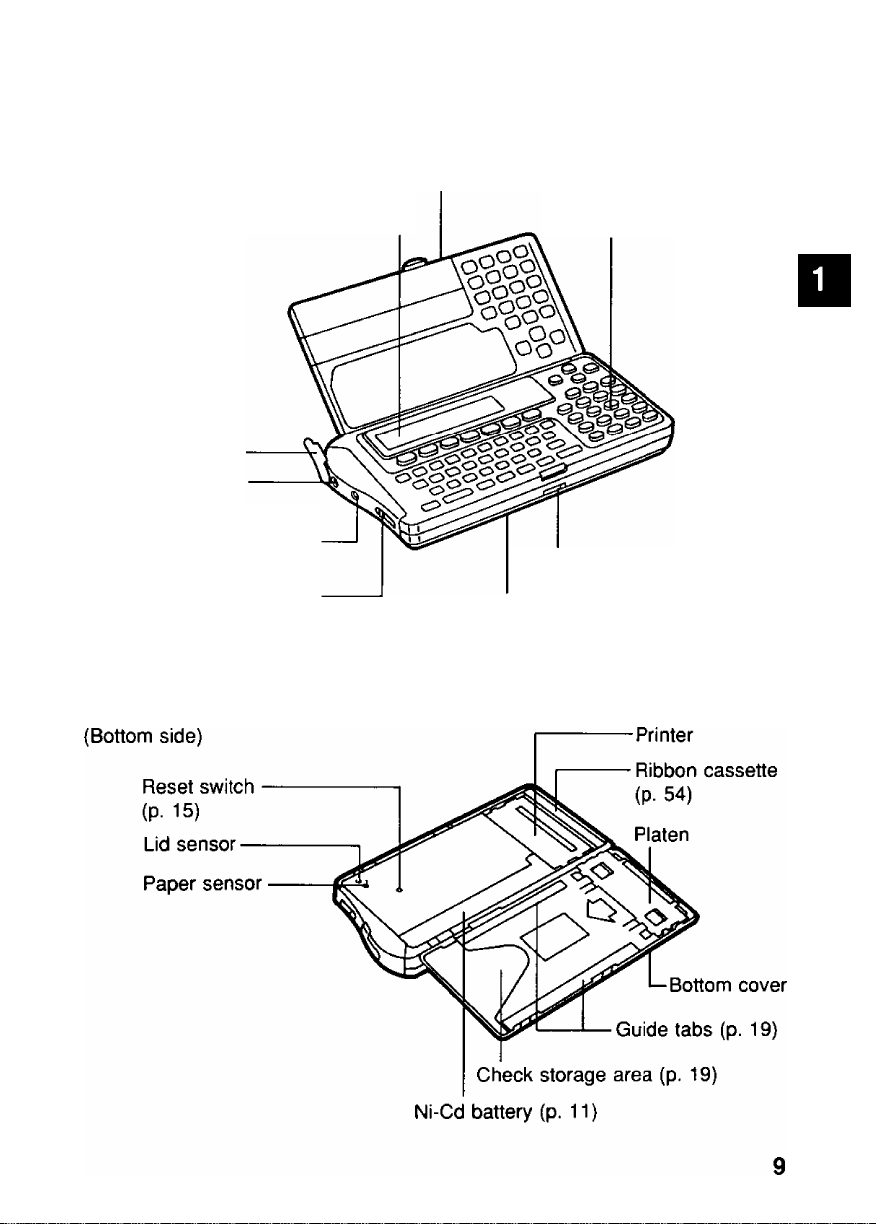
Part Names
Front view
Jack cover
DC IN Jack
(p. 11)
Interface connector
(p. 47)
Power switch
(p. 13)
Display
upper cover
Bottom cover
Keyboard
(P- 10)
Bottom cover knob
W
(D
O
(D
S2.
5‘
(Q
5
I
(A
Printer parts
Page 10
ш
S. Part Names
О
------------------------
% Keyboard
Function keys
CHECK key (p 23)
CARD key (p 32)
CALC key (p 35)
ADDRESS key (p 36)
LIST # key (p 23)
PRINT key (p 25)
ENTER key
ChECH PHimiHG ICXXIUNTINT КЗ RC9S '
□ HECK ПДПО TALC ADORES
® ® CD © ® GD
__ __ ___
VCTD MTTMT
Cursor keys. To move the cursor
CHECK
CARD
___
мшт
(JD ® © ® ® ® ®
[ mwE ]
Figure keys: To enter numerical values
Calculation keys' Used lor calculations
[CB^I
Б4КВ
Мялюгу
________
(±)(i)
rh (T) (T)Ik-
10
Sub function keys
CODE key To enter special functions,
combined with other keys (p 16)
SPACE key To enter a space
FIND key To search for a desired record (p 2B)
RECON key To reconcile your CHECK record (p 2Э)
REPORT key To confirm what is in the memory (p 41)
SETUP key To begin setting up functions
DONE key To finish an operation and to return
to the initial display (current time)
DELETE key To delete a letter/number
under the cursor
Page 11
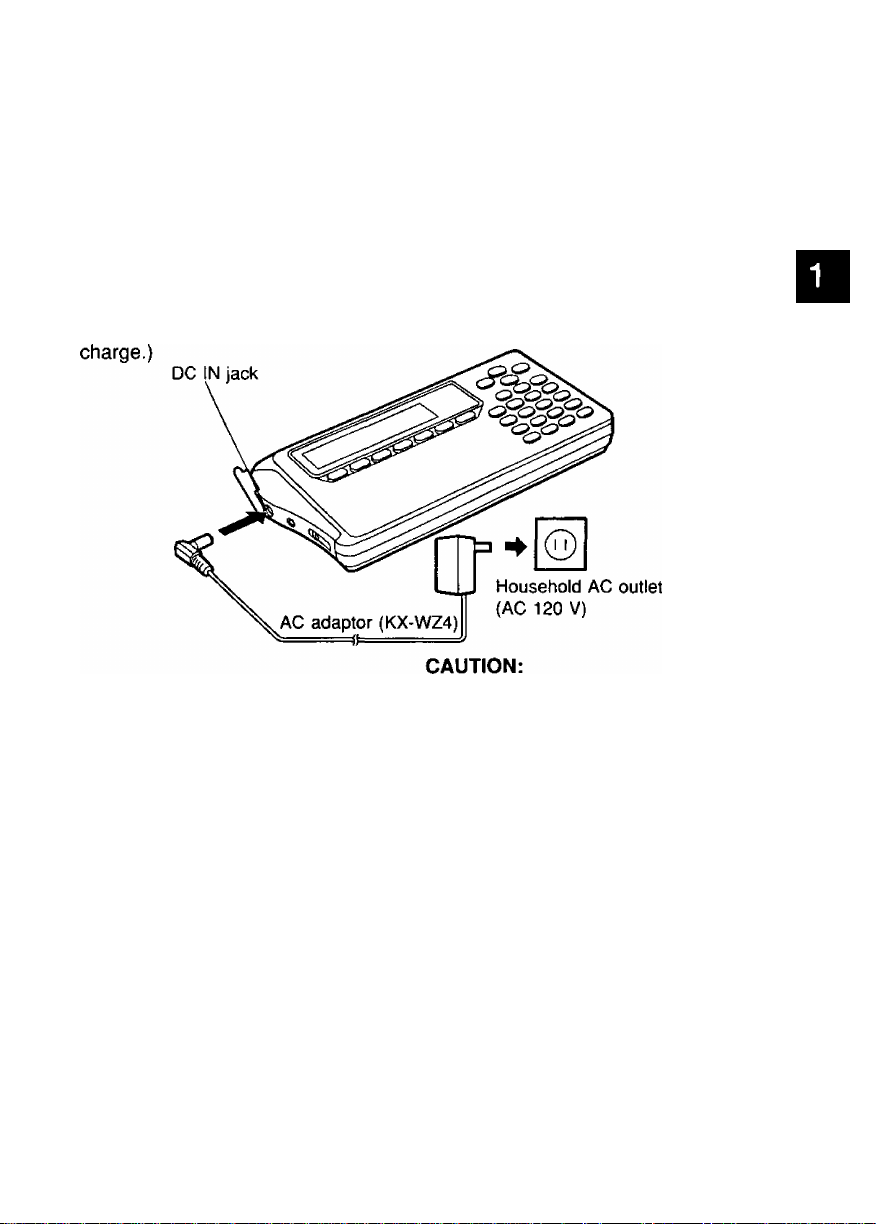
Power Supply
CPA has two power sources:
• Household AC (AC 120 V)
• Rechargeable Ni-Cd battery (built-in CPA)
From household AC
Before operating CPA connect it to the household AC outlet (AC 120 V) with
the AC adaptor for about three (3) hours in order to charge the battery.
(While charging you can operate CPA. However, it will take longer for it to
W
(D
O
(D
5'
(Q
?
I
Use only the supplied AC adaptor.
Other adaptors may damage CPA.
Using the rechargeable Ni-Cd battery
When connected to household AC as illustrated above, the built-in Ni-Cd
battery automatically charges itself.
A full battery charge requires about three (3) hours.
After charging, disconnect the AC adaptor from CPA and the AC outlet.
CPA can now be operated from battery power.
The printing capability of the fully charged battery is about 50 sheets for
check printing or about 35 pages for report printing at 25°C (77°F).
For "Showing Remaining Battery Power”, refer to p. 44.
ATTENTION:
The product that you have purchased contains a recharge
able battery. The battery is recyclable. At the end of it’s
useful life, under various state and local laws, it may be
illegal to dispose of this battery into the municipal waste
stream. Check with your local solid waste officials for de
tails in your area for recycling options or proper disposal.
NFCd
11
Page 12

S. Power Supply
Notes about the rechargeable battery:
■ Before initial use, or use after a long period of time (about 6 months),
recharge CPA for about three (3) hours.
■ When the display shows "WEAK NI-CD BATTERY" several sheets of check
can be printed but recharge CPA soon.
■ When the display shows "RECHARGE NI-CD BATTERY" CPA will not print.
Recharge CPA soon.
■ When the display shows "INSERT AC ADAPTOR", the keys will not
function. Recharge CPA soon.
■ Repetitive short-term recharging and discharging makes the battery life
shorter than usual and/or the remaining battery power may be shown
incorrectly. To solve this, continue operating CPA until the display shows
"WEAK NI-CD BATTERY" then recharge it. For about 30 minutes after the
display shows "WEAK NI-CD BATTERY", CPA refreshes the battery
automatically, during it, recharging the battery is not possible. Recharge
CPA for about three (3) hours including the above refreshing time period.
■ The battery drains excessively when used under unusually high or low
temperature. Also, when CPA is left in an automobile for a long period of
time the battery will weaken and the battery life shortens. Use CPA within
an appropriate temperature range of 5°C (4rF) to 35°C (95°F).
■ If CPA remains unused for several months or more, the remaining battery
power shows incorrectly. The battery has become inactive. Continue
operating CPA until the display shows "WEAK NI-CD BATTERY". Recharge
the battery for about three (3) hours.
■ When you find the printable number of checks reduced after repetitive
recharging, the battery life is exhausted. Purchase a new battery pack
(KX-RC3D) from your dealer.
12
Page 13
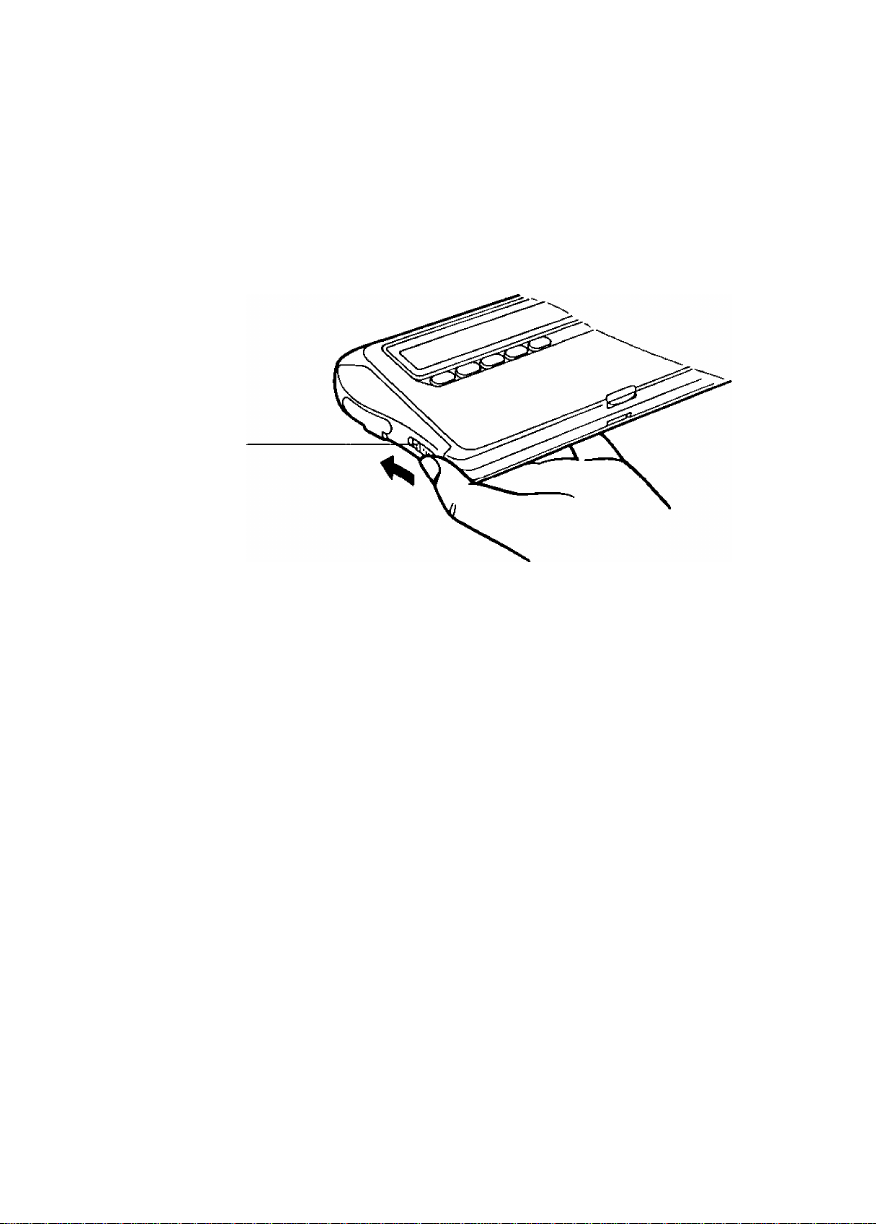
Turning On/Turning Off CPA
To turn on CPA, slide the power switch in the direction of the arrow for
about one (1) second, until the display appears.
To turn off CPA, slide the power switch again in the same direction until the
display disappears.
Power switch
Auto shut-off function
If CPA is not in operation for more than 5 minutes while using battery power,
it automatically shuts off to prevent battery drainage.
Turn the power switch on again to resume using CPA.
(D
■o
D)
fi>
13
Page 14
Resetting CPA (Clears all memory)
Before using CPA for the first time, resetting is necessary to clear the
memory.
(D
■o
fi>
CAUTION: This operation clears the memory.
0)
o'
After resetting CPA, recharge CPA for about three (3) hours and make
3
sure that CPA is fully charged by looking on the display, (p. 44)
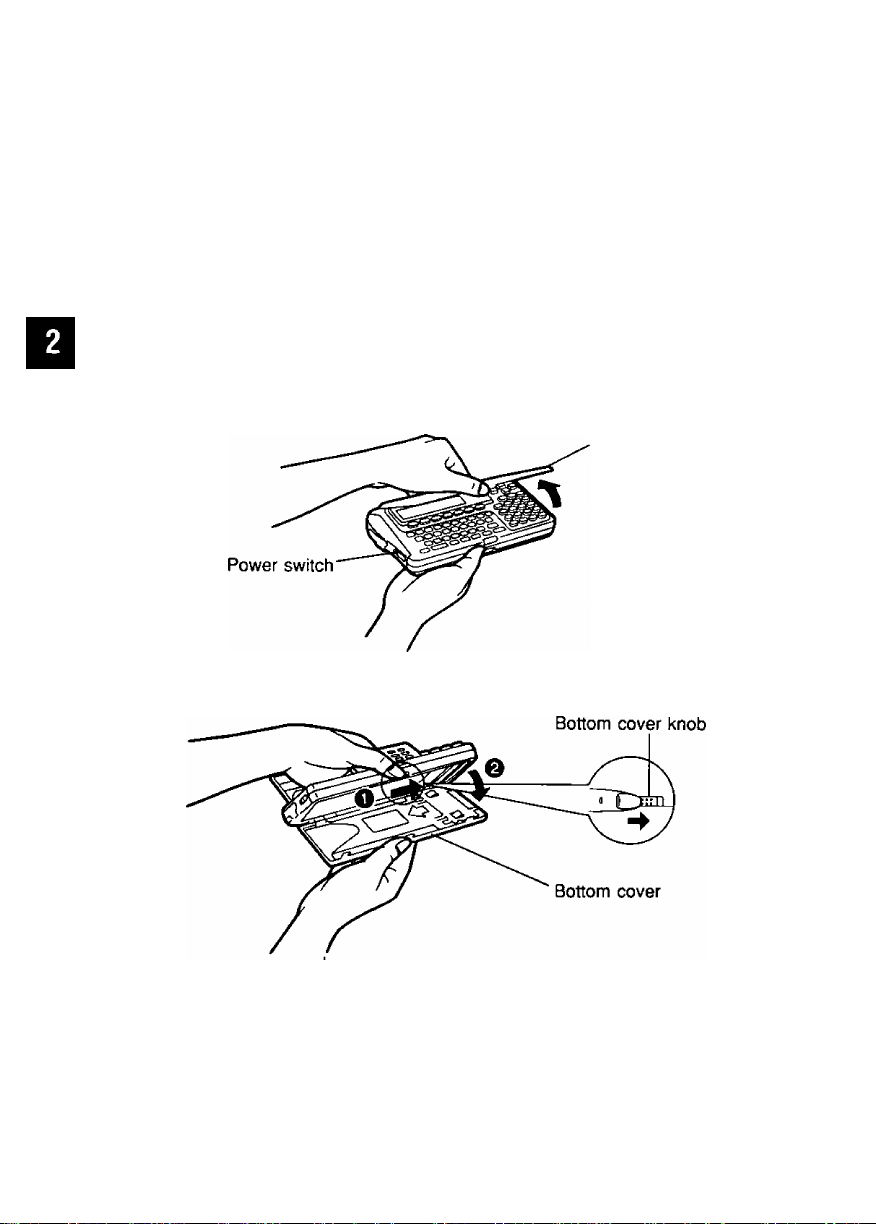
7* Be sure that the power is ON.
to
(6
3.
3
(Q
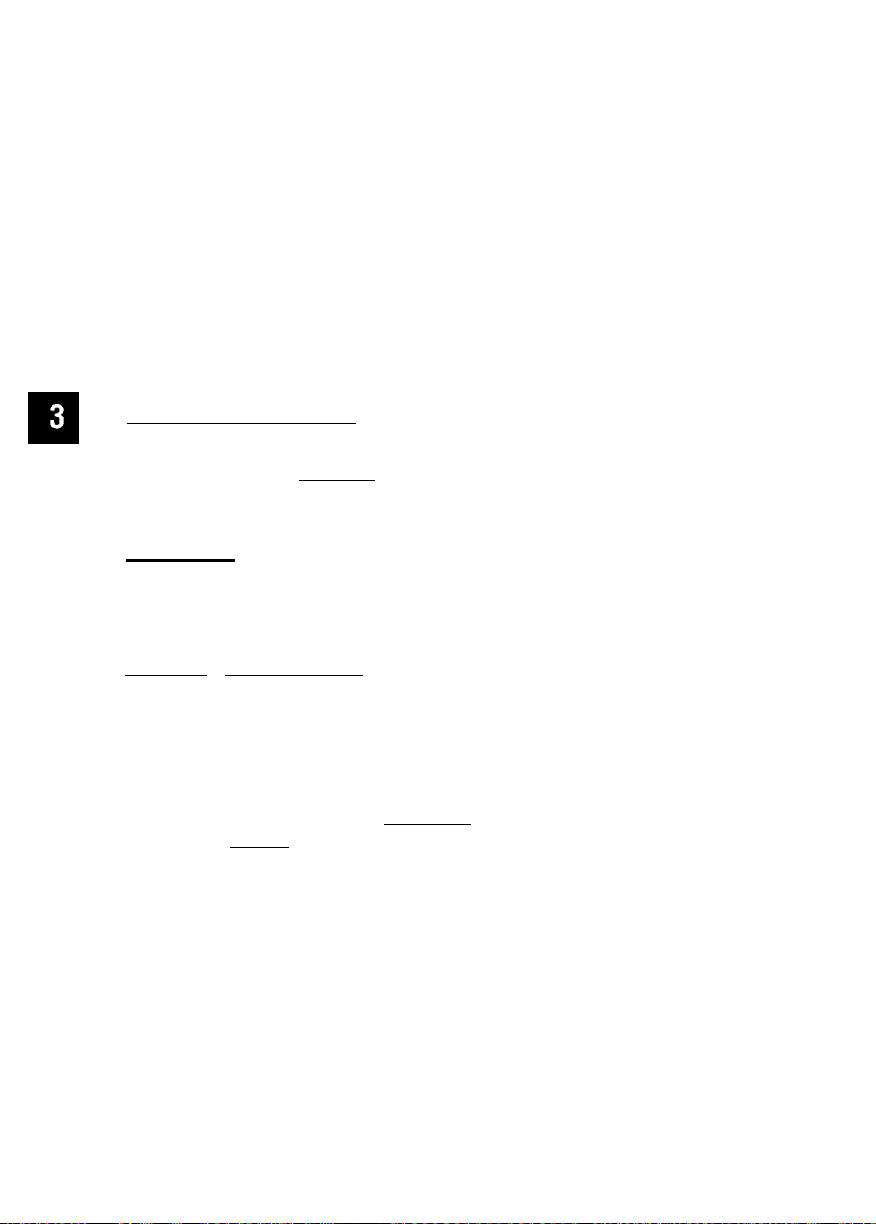
Open the upper cover by pulling the tab up gently.
Upper cover
i
3
fb
3
2. Open the bottom cover by sliding the bottom cover knob to the right.
o
14
Page 15
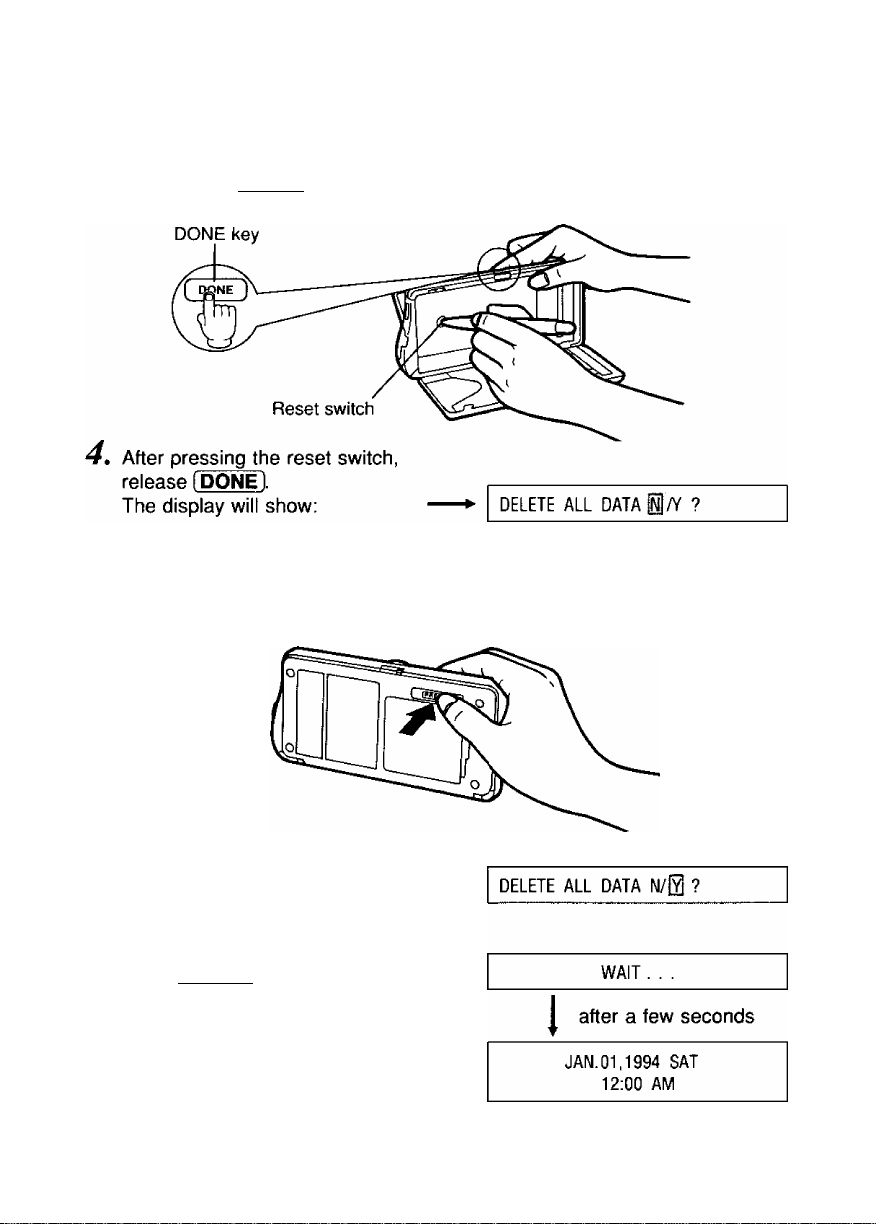
Resetting CPA (Clears all memory)
3* While pressing [DONE], press the reset switch with the tip of a bail-point
pen.
(D
■o
0)
fi)
5'
3
S'*
$
jji
S
i
5» Close the bottom cover.
(Press the “PRESS” mark.)
6> Press O or (B to YES.
7. Press [ENTER],
s
tS
to
3
to
3
o
15
Page 16

Setting the Clock
Example: Setting “January 28, 1994, 10:30 PM”.
(D
fi)
0)
S'. ® Enter month, day and year.
§ [ SETUP Ui ENTER ]-^[^iTli^i8l[n№
CO
tQ
o
o
0
(D
3.
3
3
Enter the hour and minute(s).
1 ENTER l^iTTÔIâïÔI
Select AM or PM.
[ ENTER ENTER I-h^Î DONE 1
1
c
fa
(Q
GSr
5
■8
How to correct a mistake
• Return to the incorrect letters/numbers by using (51 ^ (B ^ (5 ^ (B.
then write the new entry over the old one.
Operation
(Select DATE)
(Select PM)
Display/Description
DATE: 01 / 28 / 90
TIME: 12:00 AM
•Calendar runs from 1992 to
2091.
DATE:
TIME:
•To set the second at “0”,
press [ENTER] at the minute
or AM/PM.
01 / 28 / 94
10:3[Üj AM
JAN.28,1994 FRI
10:30 PM
?
3
s
Adjusting Display Contrast
(n
Operation
® (CÔDËV^ÎDl
@ Select appropriate contrast.
(5 or®
@ Return to initial display.
[ENTER] or [DONE]
16
Dispiay/Description
LCD CONTRAST
LIGHT DARK
LCD CONTRAST
LIGHT
Display: ®] was pressed twice
JAN.28,1994 FRI
10:35 PM
!□□□ DARK
Page 17
Entering Your Bank Name
One bank name can be entered.
Confirm the checking account balance before entering it.
Example: Account name: FIRST
Balance: $5000
Operation Display/Description
® Enter bank name.
f SETUP ]-^fF>^[ ENTER l-^fFlfTlfRl
(Select CHECK) (S]®
@ Enter current balance.
iENTERl^rafOlfOl®
@ Return to initial display.
[enterMdone]
tl^ How to correct a mistake
•Clear the incorrect letters/numbers under the cursor by pressing
(3/3/B/@ and [DELETE].
Pressing [AC/C] clears all of the letters/numbers on the line that the
cursor is currently positioned at.
NAME ACCT : FIRST □
BAL ACCT : $0.00
Bank name: up to 8 letters/numbers
NAME ACCT : FIRST
BAL ACCT : $5000Q
Current balance; up to $99,999.99
JAN.28,1994 FRI
10:40 PM
O
m
O
7s
"n
c
17
Page 18
Making the Payee List
O It is recommended that you make a payee list of those to whom you most
X frequently write checks to and also to fill out the PAYEE LIST card attached
J!J on the back of CPA. It makes entering CHECK data much easier. Enter up to
^ 25 payee names each with memo.
-n ----------------------------------------------------------------------------------------------------------------
C Example: Entering payee name “PANA SHOP” into payee list number 1.
Operation
(T) Enter payee’s name.
[ SETUP ENTER ]
Display/Description
PAYLIST 01 ; PANA SHOPD
MEMO:
(Select PAYLIST)
SPACE IMhXMFI
Payee's name: up to 32 letters/numbers
Enter memo if necessary.
( ENTER l^fEIfLlÎETClfTÏRlfÔI
[N]0][Ç]I1]
Return to initial display.
[ENTER ]-^[ DÔNÉ DONE ]
PAYLIST 01 : PANA SHOP
MEMO : ELECTRONICS □
Memo: up to 20 letters/n umbers
JAN.28,1994 FRI
How to correct a mistake
•Clear the incorrect letters/n umbers under the cursor by pressing
(3/and (DELETE).
Pressing [AC/C] clears all of the letters/n umbers on the line that the
cursor is currently positioned at.
10:42 PM
18
Page 19
Inserting a Check
NOTE: A check with duplicate copies cannot be printed.
Use standard wallet-sized checks. {2^4"X6" (Max. 22^z"x6i/i6' )}
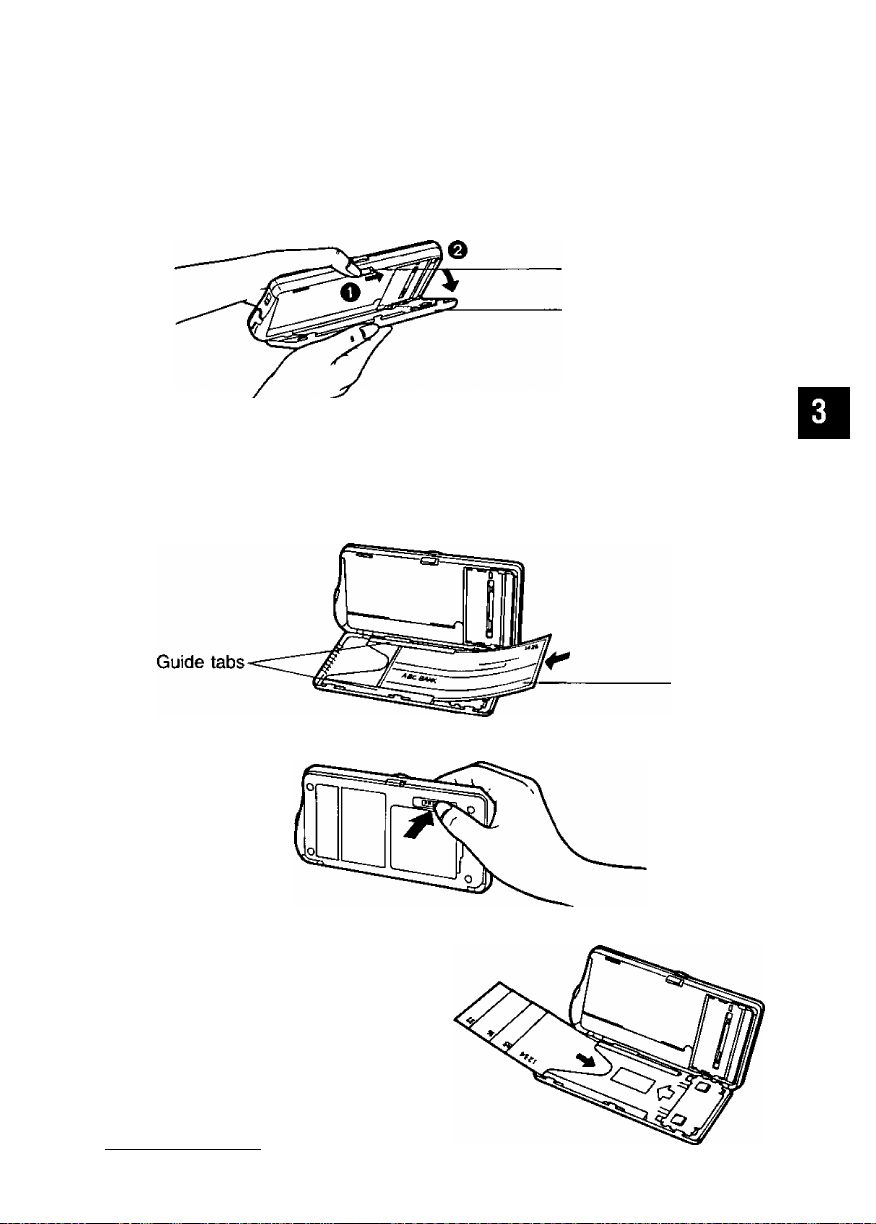
7, open the bottom cover by sliding the bottom cover knob to the right.
Bottom cover knob
Bottom cover
2. Insert only one check under the guide tabs until you feel some resistance.
Align the bottom edge of the check with the bottom side of the guide tab.
It is recommended that you use the sample sheet to confirm the print
positions at first.
NOTE: Make sure that the check number corresponds to CHK# of the
data.
Check
O
3, Close the bottom cover. (Press the “PRESS” mark.)
How to store checks
Inside the bottom cover is a check
storage area where you can store up
to 25 separate checks. Stack them
from the smallest number check on
the top to the largest number check
on the bottom and to insert less than
12 or 13 checks at one time. This
eliminates possible errors in check
number and order._________________
19
Page 20
Setting Print Positions on Your Check
o The Following Five (5) items out of the CHECK entries print at a specified
X position on a check:
m
2 1 date
^ 2 PAY TO THE ORDER OF
c 3 s
3 4 DOLLARS
a 5 MEMO
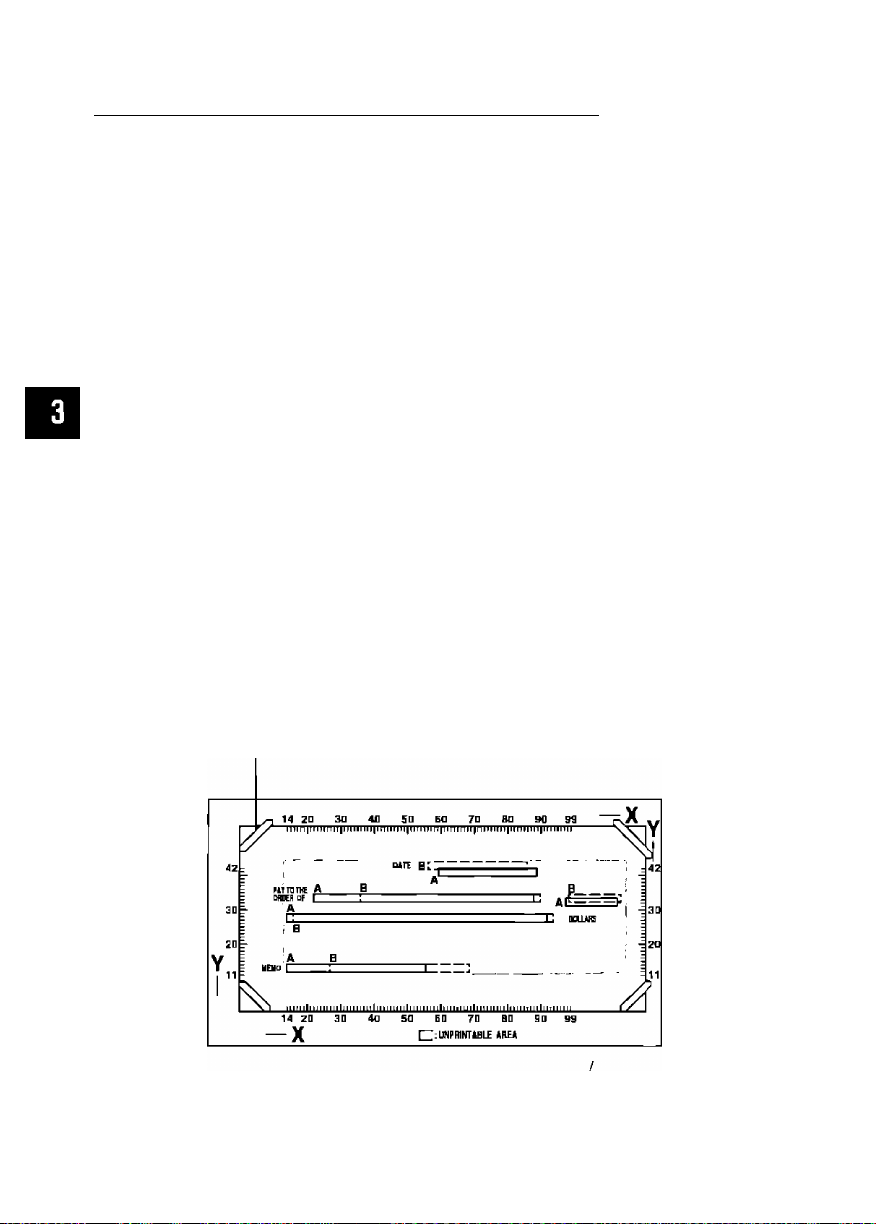
Deciding the print positions
Some checks have their own print position for each item. By using the
template included with CPA you can select from two types oF print positions
(A or B), and CPA prints data at the proper position.
How la use Ihe lemplale:
0 Place the template on the top oF your check.
0 Fit the bottom-left corner oF your check in the bottom-left corner of the
template, then insert the remaining corners. Align the bottom and left side
of your check with bottom and left lines on the template.
@ Check to see where the above Five (5) positions on your check
correspond to on the template, "A" or "B".
Template:
Slil
When defaulted, the above print positions sel at “A”.
(Using Ihe template ruler you can manually set other desired print positions.
We discuss this on p. 22.)
20
Page 21

Setting Print Positions on Your Check
It is recommended that a demo print be done after setting print positions. A
demo print will indicate the print positions with X and Y values.
Be sure to insert a check or a sample sheet into CPA (p. 19).
Example: Setting the “DATE” and “$” at the "B” position,
“PAY TO”, “DOLLARS” and “MEMO” at the “A” position.
Operation
® Select position of “DATE” (Select B).
[ SE^W ENTER
Display/Description
DATE : A|]R PAY ; A $ ; A
DDL. : A MEMO ; A
(Select PRINTER)
@ Select positions of “PAY TO”
(Select A) and “$” (Select B).
[ ENTER Ui ENTER
DATE : B PAY : A $ :AiR
DOL : A
MEMO
: A
•When selecting “B” position for
“PAY TO” and entering more
than 25 letters/numbers for the
payee’s name, it overlaps the
$ sign.
Select positions of “DOLLARS” and
“MEMO" (Select A).
[ ENTER ] three times
@ Print demo if necessary.
fFlorlTMENTERl
LOCATIONS SELECTED
PRINT DEMO 1/Y?
LOCATIONS SELECTED
PRINTING . . .
O
X
m
o
7s
Tl
c
3
o
o'
3
3.
I
•V
o’
3
(0
o
3
?
?
5
o
sc
Example of demo print:
Please use this paper to checK print settings.
“PAY TO”—
is printed
at A position
(22, 32).
PAY TO
ORMROF RP0VEE:<X=22/t'=32>; : :PRYEE:PfiVEE
® Return to initial display.
[DONE]
“DATE” is printed
at B position (56, 42).
DATE BOOTS: X=58V=42+*+
BX38Y32
JAN.28,1994 FRI
10:48 PM
21
Page 22

Setting Print Positions on Your Check
O When a position on your check corresponds to neither “A” nor “B”.
X
s ® Place the template on the top of your check.
@ Fit the bottom-left corner of your check in the bottom-left corner of the
^ template, then insert the remaining corners. Align the bottom and left side
C of your check with bottom and left lines on the template.
^ (3) Check to see where the bottom-left point of each of five (5) data items
correspond to on the template ruler.
Example: Setting print position for “DATE” according to the template ruler
(X=60, Y=39).
Operation
® Select position of “DATE” (Select R).
(SETUP ENTER
(Select PRINTER)
(gl Enter “X” and “Y” points.
o
[ENTER
S
s
?
g
o
o
3T
Return to initial display.
[ ENTER l-^ÎDÔNË1-^fDÔNËl
How to correct a mistake
•Clear the incorrect letters/numbers under the cursor by pressing
® /(B/S/S and (DfLUD.
• If “PRINTING AREA OVER CONTINUE NA^?” is displayed when you
attempt to print a demo, it means that you have entered a number that
will cause data to be truncated when printed. Press “Y” to print the
demo or press “N” and re-enter the data.
Display/Description
1
DATE : ABg PAY ; A
DDL.: A MEMO : A
ENTER X
DATE
• By entering numbers not within
X=60 Y=39n
the range setting (X; 14 to 99,
Y; 11 to 42) of each of the five
(5) items, the print positions
will be automatically set on the
Maximum or Minimum value of
the X, Y coordinates.
• If you want to print a demo,
see p. 21.
JAN.28,1994 FRI
11:03 PM
$ : B
22
Page 23

Issuing a Check
(Entering Withdrawals/Service Charges)
Have you finished setting the clock {p. 16), entering your bank name (p. 17),
making the payee list (p. 18), inserting a check (p. 19) and setting the print
position (p. 20)?
When you issue
• PAY TO
• DATE
•CHECK#
•CLASS
•TAX
•CATEGORY
• MEMO
•AMOUNT
Example: Suppose you purchase a CD player at a PANA SHOP as a
a check, enter the following data:
Can be selected from the payee list
The date when you will issue the check
Number of the check
Business, Personal or Others
Tax-related or No tax-related
Can be selected from the category list (p. 62)
Automatically entered if “PAY TO” is selected from the
payee list
The amount of money that will be paid with the check
birthday gift on January 29, 1994. It costs $300, You issue
check #1426 for it, (Class-^Business Tax->Tax-re!ated)
Operation
Display/Description
O
(T) a) Enter pay to.
c^(=[ CHECK ])^[ ENTER]
-^IB(B®[A)(SPACEIS](H)(0]®
b) Enter payee number from list.
(M) (=iCHECK ])-^{ ENTER ]
LIST # ENTER ]
Enter date.
[ ENTER
(Select PAYMENT)
(Select PAYMENT)
PAY TO : PANA SHOPD
DATE : 01 / 28 / 94 CHK#:1
Payee’s name: up to 32 letters/numbers Si.
PAYLIST 01 :EiANA SHOP
MEMO : ELECTRONICS
•To select another payee from
the list, press (5- The list can
not be modified here.
PAY TO : PANA SHOP
DATE : 01 / 29 / 9§ CHK# :1
23
Page 24

Issuing a Check (Entering Withdrawais/Service Charges)
@ Enter check number.
O
z
m
o
7s
Entering Withdrawais/Service Charges
Withdrawals and service charges can be entered as check data.
NOTE: When you withdraw your money from your bank, press [A]- ®
or [O).
[Xl: ATM (Automated teller machine)
(§: SVC (Service charges)
fOl: OTH (Other charges)
PAY TO : PANA SHOP
DATE : 01 / 29/ 94 CHK# : 1426
•Counting will start from the
next number.
(4) Select class (Business).
(ENTER 1-^r^ or®
Select tax (Tax-related).
(ENTERor®
Select category (Example: GIFTS).
[ ENTER
(?) a) Enter memo (Example: Electronics).
[ENTER ]-^iETnil^[TliRliOl
SO]©®
b) Confirm memo
(b
.(n
(if “PAY TO” is selected from list).
(ENTER)
Enter amount.
[ ENTER
24
CLASS : B/ P / 0 TAX : N
CATEGORY : MISC
B: Business P: Personal O: Others
CLASS : B TAX : N/0?
CATEGORY : MISC
N; No tax-related V: Tax-related
CLASS : B TAX : Y
CATEGORY : GIFTS □
MEMO : ELECTRONICSD
AMOUNT: $
MEMO: Electronics
AMOUNT: $
MEMO : ELECTRONICS
AMOUNT : $300n
Amount: up to $99,999.99
• If amount is zero (0), the data
will not be stored in memory.
Page 25

Issuing a Check (Entering Withdrawals/Service Charges)
Confirm each item.
[ENTER]
01 / 29 / 94 1426 PANA SHOP
ÉLECTRONI $300.00 T
Summarized display
•When entering withdrawals
and service charges as check
data, jump to step
® [ENTER
1
END OF TRANSACTION
PRESS PRINT/CHECK KEY
• If you want to enter data for other checks continuously, press [CHECK ].
• If required, you can print checks later by using “Searching a CHECK
Record” on p. 28.
5j) Print the check.
IPRINTl^fFlorfYl
ENTER]
PRINT CHECK N
N: To cancel Y: To execute
PRINTING . . .
PLEASE ENDORSE CHECK !
/ 0 ?
►To stop the printing halfway
through, press (DONE).
O
® Return to initial display.
[DONE]
JAN.28,1994 FRI
01:26 PM
How to correct a mistake
• Clear the incorrect letters/numbers under the cursor by pressing
(3/E/S/S and [DELETE].
Pressing ( AC/C ] clears all of the letters/numbers on the line that the
cursor is currently positioned at.
• If “PRINTING AREA OVER CONTINUE N/Y?” is displayed when you
attempt to print a check, it means that you have entered data that will
cause printout to be truncated because it exceeds the printable area
on the check. Press “Y” to print the check or press “N” and re-enter
the data.
25
Page 26

Entering Deposit Data
The amount of the deposit is automatically added to the balance of the
checking account. You need not worry about looking up the previous
balance, adding the new deposit on, and entering a new balance.
Have you finished setting the clock (p. 16), entering your bank name (p. 17)?
Whenever you deposit money into your checking account, enter the following
data;
•DESCRIPTION
• DATE
•CLASS
•TAX
•CATEGORY
• MEMO
•AMOUNT
Example: You deposit your salary, $4000, into your FIRST bank checking
account on January 30, 1994.
(Class->Personal Tax->Tax-related)
For your records, if necessary
The date when you deposited money
Business, Personal or Others
Tax-related or No tax-related
Can be selected from the category list {p. 62)
For your records, if necessary
The amount of money deposited
Operation
Enter type of deposit
(Example: SALARY).
(^(=[CH|CK])->(B or ®
(Select DEPOSIT)
Enter date.
dNTCR}^(o]®®®®S
Select class (Personal).
[ENTER]
0 Select tax (tax-related).
lENTER)->r»n or®
26
Display/Description
DESCRP : SALARY □
DATE ; 01 / 31 / 94
DESCRP : SALARY
DATE : 01 /30/91U
CLASS: B/0/0 TAX : N
CATEGORY : MISC
B: Business P: Personal O: Others
CLASS: P TAX:N/0?
CATEGORY : MISC
N: No tax-related Y: Tax-related
Page 27

Entering Deposit Data
Select categot7 (Example SALARY)
lENTERI^i^
Enter memo if necessary
[ ENTER l^fJÏCTinrDlfÂllMŸl
@ Enter amount
[ ENTER ]-^Î4lÔIÏÏIÏÏl
® Confirm each item
(ENTER)
(§) Return to initial display
[ ENTER ]-^[ DONE)
How to correct a mistake
•Clear the incorrect letters/numbers under the cursor by pressing
and [DELETE]
Pressing [AC/C] clears all of the letters/numbers on the line that the
cursor IS currently positioned at
CLASS P
CATEGORYSALARY □
MEMO JANUARY □
AMOUNT $
Memo up to 20 letters/numbers
MEMO JANUARY
AMOUNT $4000Q
Amount up to $99,999 99
01 / 30 / 94 SALARY
JANUARY
Summarized display
JAN 31,1994 MON
TAX Y
i
02 02 PM
$4,000 00 T
o
X
m
o
7s
"n
c
3
o
o'
?
ÎÎ
3*
(Q
I
O
(0
►The balance displayed may differ from the actual balance due to a
commission subtracted or interest added Please check your bank
records
The balance can only be modified in step (2), “Entering Your Bank
Name” (p 17)
•You can reconcile deposit data by following the same way as
“Reconciling {/) a Check” (p 29)
27
Page 28

Searching a CHECK Record
o You can search for a desired check record by specifying its date or check
X number and, if required, print the check Use the most convenient one for
S you
Example: You want to know the data of check #1426
Operation
0 Select search item
(Example CHECK#)
lf=rCHECK])^iFiN^
Enter check number
[ENTER
(3) Display the check record
[ENTER]
@ Return to initial display
[DONE]
Display/Description
^HECK# DATE
ENTER CHECK# 1426Q
>To search withdrawals,
service, or other charges,
press [S] or [O] (p 24)
01 / 29 / 94 1426 PANA SHOP
ELECTRONI $300 00 T
• If you want to print the check,
press [PRINT] (p 23-25)
•When searching by date, ATM,
SVC or OTH, the last record is
displayed
To dislay the previous desired
record, press (CODE}-»[FIND]
JAN 31,1994 MON
02 02 PM
28
Page 29

Reconciling (/) a Check
Example: You receive, from your bank, the statement of issued checks
Confirm the statement according to the CHECK records in CPA
Confirmation wilt be easier if you reconcile (/) the record while
checking {/) the corresponding statement
Operation
(T) Repeat steps © through @ on p 28
and reconcile {/) display
Display/Description
01 / 29 / 94 1426 PANA SHOP
ELECTRONI $300 00 T /
•To cancel, press [recon ) again
•To display other check record
for reconciling, press
[CODE)-^r^ or [CODEl-^m
Return to initial display
[DONE)
FEB 06,1994 SUN
11 07 AM
Voiding a Check After Issued
Example: You issue a check but later void it
You must also void the corresponding CHECK record so that
the amount of that check is added again to the balance
o
Reconciled
Operation
© Repeat steps © through © on p
and void check record
[CODEl-^iVl
Return to initial display
(OOH^
28
Display/Description
01 / 29 / 94 1426 PANA SHOP
ELECTRONI $300 00 TV
Voided
•To cancel, press [CODE 1-^fvl
again or [r^on ]
•The amount of that check is
again added to the balance
FEB 06,1994 SUN
11 14 AM
29
Page 30

Deleting the CHECK Record(s)
CPA can hold data for up to 500 checks. If you have entered data for
o
500 checks in order to enter more you must delete old data.
X
m
The check record data will be deleted: the balance will not be changed.
___________
o
7s
Example: You want to delete the data of check #1426 and #1427 at one
time.
Operation
© Repeat steps ® through (5) on p. 28.
Select type of deletion
{Example: Block).
i CODE Ui DELETE or (D
Select record to be deleted.
[ENTEWM DELETE]
Display/Description
01 / 29 / 94 1426 PANA SHOP
ELECTRONI $300.00 T
DELETE
RECORD
• If selecting “Record”, jump to
step (5).
RECORD: To delete each record
BLOCK: To delete two or more
records at one time
01 /29/ 94 1426 PANA SHOP
ELECTRONI $300.00 TD
»After pressing [DELETE] a “D"
will appear to indicate that you
wish to delete this record. If
you do not wish to delete the
record, press [ DELETE] again
and the "D” will disappear.
iLOCK
Delete
(4) Select the other record to be deleted.
DELETE]
Delete record{s)
dNUffhlB or®
Return to initial display.
[ENTER M DONE]
30
01 /30 / 94 1427 NATIONAL
GAS $100.00 D
END OF BLOCK
DELETE RECORDS N /0?
N: To cancel Y: To execute
FEB.06,1994 SUN
11:18 AM
Page 31

Making the Card List
Up to 5 card names can be entered.
Confirm the card balances before entering it.
Example: Make the card list using the card name “XYZ CARD” and card
number “9876543”.
Operation
(T) Enter card name.
[ SETUP twice
(Select CARD)
.1
ENTER
l-^fnfYlf?!
SPACE
1
Display/Description
CARD NAME : XYZ CARD □
CARD#:
Card name: up to 20 letters/numbers
©®®[D)
Enter card number.
I ENTERl^f9Ï8Ï7l[6Ï5)Î4Ï3)
Enter current card balance.
|ENTER|^f4liÔ][ÏÏ1
® Enter credit card limit.
( ENTER )^[4l[^[ÔliÔl
CARD NAME : XYZ CARD
CARD# : 9876543 □
Card number; up to 16 digits
BALANCE : $400 □
CREDIT LIMIT : $0.00
Balance: up to $99,999.99
• Calculations will start from this
amount.
BALANCE : $400
CREDIT LIMIT ; $4200D
Credit limit: up to $99,999.99
O
>
DD
a
3
o
O
3
□
I
5*
to
3o
s ?
a
(0
Return to initial display.
[ ENTER l-^ÎDÔNËV^rPÔNil
How to correct a mistake
• Clear the incorrect letters/numbers under the cursor by pressing
S/E/S/B and (DELETE).
Pressing [ AC/C ) clears all of the letters/numbers on the line that the
cursor is currently positioned at.
FEB.20,1994 SUN
08:30 PM
31
Page 32

Entering Data for Purchase with a Credit Card
Have you finished setting the clock (p. 16) and making the card list (p. 31)?
When you purchase something with a credit card, enter the following data:
• DATE
O
•AMOUNT
>
• MEMO
30
•CLASS
a
•TAX ■
•CATEGORY
c
3
o
Example: You pay $100 with the XYZ Card for a dinner at the “ABC”
5'
3
The date when you purchased something
The amount of your purchase
For your records, if necessary
Business, Personal or Others
Tax-related or No tax-related
Can be selected from the category list (p. 62)
market on February 21, 1994.
□
© Enter date and amount.
S’
!?
3
tQ
S-
I
(n
(b
3
&>
?
Q.
s ?
a
(M) (=[ CARD ])-^[ ENTER
^iW2inTl9T^i ENTER ]
^d)®®
Enter memo if necessary.
f ENTER SPACE 1
Select class (Personal).
[ENTER]
@ Select tax (No tax-related).
i ENTER1
Operation
CiiQiQiiamQ
Display/Description
1
XYZ CARD DATE : 02 / 21 / 94
AMOUNT : $100D
• If selecting another card, first
press [CARD] until the desired
card name appears.
•The “AMOUNT” you enter
adds to the “Balance” of XYZ
card.
MEMO : ABC MARKET □
CLASS ; P TAX : N
Memo: up to 20 letters/numbers
MEMO : ABC MARKET
CLASS: 8/0/0 TAX ; N
B: Business P: Personal O: Others
MEMO : ABC MARKET
CLASS : P TAX : @|/ Y ?
N: No tax-related Y: Tax-related
Select category (Example: DINING).
(ENTER 1-^r^
32
CATEGORY: DINING□
END OF TRANSACTION
Page 33

Entering Data for Purchase with a Credit Card
Return to initial display.
i ENTER M DONE]
How to correct a mistake
•Clear the incorrect letters/numbers under the cursor by pressing
l3/(B/S/®and [DELETE).
Pressing [ AC/C ] clears all of the letters/numbers on the line that the
cursor is currently positioned at.
FEB.24,1994 THU
04:05 PM
Searching a CARD Record
Example: You want to know how much you paid with the XYZ card on
February 21, 1994.
Operation
(T) Search by date.
(f^(=[CARD])^ÎËNTË^ÎFÎNDl
Display/Description
ENTER DATE ;
•Can search only by date.
• If selecting another card,
press [ CARD ] until the desired
card name appears.
□/ /
I'
o
>
D
a
c
3
o
5'
3
(D
&)
3-
2
30
s
o
o
a
Enter date.
®[2](2][3][9l4)
Display the card record.
[ENTER!
(4) Return to Initial display.
[DONE]
ENTER DATE : 02/21/911!
XYZ CARD DATE; 12/21/94
AMOUNT: $100.00
»When two or more records
exist, the last one is displayed.
»To display the previous desired
record, press [CODEMFIND).
FEB.24,1994 THU
04:05 PM
33
Page 34

Deleting the CARD Record(s)
CPA holds data for up to 200 card purchases.
If you have entered data for 200 payments by a credit card, you must delete
old data in order to enter more.
Only the card record data will be deleted, and the amount will not be
o
subtracted from the balance automatically.
>
D
Example: You want to delete a record dated February 21, 1994 of the
O
"n
c
Z3
o
XY2 Card.
Operation
Display/Description
© Repeat steps (T) through @ on p. 33.
□
§
(T
I
Delete a record.
[ CODE U{ DELETE or®
Return to initial display.
f ENTER l-^rPONEl
s
u
o
Example: You want to delete all records of the XYZ Card.
o
o
a
® Select card name.
1 SETUPtwice -CENTER)
(2) Delete the records.
[ CODE 1-^ DELETE or®
(3) Continue to delete.
[ENTER or®
Operation
{Select CARD)
XYZ CARD DATE : §2/21/94
AMOUNT: $100.00
DELETE RECORD N/0?
N: To cancel Y: To execute
FEB.28,1994 MON
09:28 PM
Display/Description
CARD NAME : gjYZ CARD
CARD# : 9876543
DELETE RECORD N /0?
N: To cancel Y: To execute
ALL CARD CHARGE DELETED
CONTINUE N/0?
@ Return to initial display.
(ENTER MDONEl twice
34
FEB.28,1994 MON
09:28 PM
Page 35

Memory Calculation
CPA can calculate, memorizing a midway result, with a 10 digit maximum.
Example: Q. (12.3x4)+{3.4x4)+1.5=
Operation
© ('S^(=iCALC]) Display shows “0”.
@ cuDaixMMi]
® [R-CMl
Display/Deschption
49.2
[MEMORY]
Result of (12.3x4) has been
memorized.
13.6
[MEMORY]
Result of (3.4x4) will be added
to the memory.
1.5
[MEMORY]
“1.5” will be added to the
memory.
64.3
[MEMORY]
O
>
I"
o
>
H
o
J}
c
3
o
I
3
o
s?
o'
c
S'
o'
3
Return to initial display.
iPONE]
«You can correct mistakes made during calculations.
To reset a figure to “0” press (ACTC] once.
To clear “x”, or press [AC/C] once or twice.
To clear ‘‘[MEMORY]” press [R-CM] twice.
«When you press ©->0. the displayed number is added to itself.
(Example: the answer is 10.)
»When the result exceeds “9,999,999,999”, or you try to divide by “0”,
“[ERROR]” is displayed. To clear “[ERROR]” press [AC/C].
FEB. 27,1994 SUN
09:25 AM
Final result
35
Page 36

Making the Address List
You can enter up to 75 addresses.
Example: You want to enter the following name, the telephone number
and address.
Name Telephone No. Address
>
MONICA SIMPSON
a
a
33
m
0)
© Enter name.
СЛ
"П
c
3
0
СЖ)(=[ ADDRESS])
^(МЩЩ[СШ5РАСЁ1
(ШЦрШВ®
5‘
a
Enter telephone number.
(ENTER brnf^lFIfili^felFl
1
5;
tQ
5
0
b
Enter street name.
[ ENTER )->®® SPACE IfHIfTYClKl®
1
CA
@ Enter city and state name.
(ENTER 1-^(NTeIwK SPACE ]
®®®(Ю
123-456-7890
Operation
а®®®
ISPACEJ®|J](1]I1](1)(T)
_
i CODE iniNTYlSPACE ]
(ШИШИ)
_______
29 HICKS STREET
NEW YORK. NY 10004
Display/Description
NAME ; MONICA SIMPSON □
PHONE :
Name: up to 32 letters/numbers
•To add a new name, telephone
number and address, press
[ADDRESS] twice.
NAME : MONICA SIMPSON
PHONE : 123-45e-7890Q
Telephone number: up to 12 digits
STREET: HICKS STREET□
CITY,ST.:
Street name: up to 32 letters/numbers
STREET : 29 HICKS STREE
CITY,ST.: YORK,NY 10004Ц
_
City and state name: 32 letters/numbers
Return to initial display.
(ENTER Ы DONE]
36
FEB, 24,1994 THU
08:30 PM
Page 37

Making the Address List
How to correct a mistake
or
•Clear the incorrect Ietters/numbers under the cursor by pressing
® /(B/S/S and [DELETE).
Pressing [AC/Q clears all of the I etters/n umbers on the line that the
cursor is currently positioned at.
Entries will be sorted in alphabetical order according to the first name.
MONICA SIMPSON
PAUL SMITH —
ALICIA PRITCHETT
ALICIA PRITCHETT
-► MONICA SIMPSON
PAUL SMITH
Searching an ADDRESS Record
Example: You want to know Monica’s telephone number and address.
Operation
(T) Search by name.
car) (=( ADDRESS))^(FÍÑDl
Enter name.
Display the address record.
[ENTER]
Display/Description
ENTER NAME : Q
ENTER NAME : MONICAD
•You can also search using
only the first letter of the
name. Press (3 until the
desired name is displayed.
gONlCA SIMPSON
123-456-7890
>
a
a
3D
m
CO
c/>
c
3
o
O
3
□
(D
&)
s
3-
<Q
Sk
O
o
31
CO
3)
o
o
o
3.
@ Return to initial display.
[DONE]
FEB,25,1994 FRI
10:24 PM
37
Page 38

Deleting an ADDRESS Record
CPA can hold up to 75 addresses If you have entered 75 addresses, you
must delete old data in order to enter more
Operation
(J) Repeat steps © through ® on p 37
>
G
D
30
m
Delete a record
iCODl>->rDELETE]^fFI or (Y]
c/>
cn
Return to initial display
[ ENTER M DONE]
o
3
I
o
tQ
fit
3
tk
C3
C3
?!
CO
0)
%
(D
O
O
5.
Display/Description
J^ONICA SIMPSON
123^56-7890
DELETE RECORD N /0 ?
N To cancel Y To execute
FEB 25,1994 FRI
10 31 PM
38
Page 39

Putting the Paper Roll on the Printer
If you want to know what is in the memory for CHECK, CARD and
ADDRESS use the REPORT function. This will show you the contents
of the records on the display or will print them on the paper roll.
If you want the records to be printed on the paper roll, please purchase a
paper roll specified below and attach the paper roll to the printer.
Paper roll: 2V4" standard adding machine roll paper (diameter: 3^2" or less)
Put the paper roll on the paper feeder.
1.
Make sure the paper is fed from underneath not from the top.
Paper roll
3D
m
"O
O
3D
c
3
o
5'
Connect the paper feeder to CPA on a stable or level surface.
2.
The two hooks of the feeder should be inserted into the holes on the
bottom of CPA.
Hooks
39
s
3
I
I
o
3
3
(D
5
3'
Page 40

Putting the Paper Roll on the Printer
3. Open CPA by sliding the bottom cover knob to the right.
X
m
“D
O
X
4, Pull the paper out forward along the paper setting lines marked on both
sides and leave the paper out about inch.
c
3
o
o'
{Be sure the paper is set exactly along the lines marked.)
tQ
I
I
5. Close CPA while setting the paper exactly to the marks.
I
o
3
3
o
5
3‘
?
40
Paper setting
lines
about 1/^ inch
Page 41

Confirming Contents of CHECK/CARD/ADDRESS Records
Example: You want to print a list of checks from 01/01/94 to 01/31/94
(FIRST bank).
Operation Display/Description
(J) Select item (Example; CHECK).
[REPORT)
(2) Select search item (Example: DATE).
[ ENTER twice
ALL
CHECK#
DATE
NONRECON.
TAX
NAME
CLASS
CATEGORY
SELECT
All CHECK/CARD/PHONE records
Records within a specified range of check
numbers or records of ATM withdrawals
and/or charges
Records with specified date
Records that have not been reconciled
Records entered as “Tax-related"
Records for specified payee
Records in specified class
Records in specified category
Can be searched by entering a desired name.
SELECT ITEM
0HECK CARD ADDRESS
• If selecting “CARD” press
[CARD] until the desired card
record appears.
Search item display for CHECK/CARD
ALL *CHK# OATE ‘NONRECON.
TAX ‘NAME CLASS CATEGORY
*: Can not be selected, when selecting
■‘CARD"
Search item display for ADDRESS
§LL SELECT
•When selecting “ALL”, jump to
step (5). When selecting
“SELECT”, enter the name
and jump to step d).
3}
m
"0
O
30
3
o
QS?
i o
riia
§1
P
P-
0
1
41
Page 42

Confirming Contents of CHECK/CARD/ADDRESS Records
@ Enter start date
@ Enter end date
[ ENTER
3D
m
"D
Select “SEND TO PRINTER”
[ ENTER 1-^r^
o
3D
H
C
3
o
o
3
rria
§1
Print report
[ENTER]
Return to initial display
[DONE]
How to view CHECK records
(When selecting “VIEW ON SCREEN” in step ®)
[ ENTER i^lWni^iTl9l4l
START DATE 01/01 /9g]
END DATE / /
•Start date must be before end
date
START DATE
END DATE 01 /31/90
VIEW ON SCREEN
HENDTO PRINTER
• If you want to view the
contents of It, select “VIEW
ON SCREEN”
PRINTING REPORT
FEB 27,1994 SUN
01 / 01 / 94
9 30 PM
3)
Oi?
03
31
o
Ci
0
1
CHK# DATE PAYEE ^
1426 01/29/94 PANA SHOP
a
^ PAYMENT
300 00
DEPOSIT / V
CB
s
CHK# DATE PAYEE ^ PAYMENT DEPOSIT / V
1427 01/30/94 NATIONAL
•The final screen of the check report shows “CUR BAL” (Current
Balance) and "REP TOTAL” (Report Total) “CUR BAL” shows the
current checking account balance and "REP TOTAL” shows the total
amount that you have entered as check data
42
®
ai
100 00
Page 43

Confirming Contents of CHECK/CARD/ADDRESS Records
When printing has finished:
1, Cut the paper.
2. open CPA by sliding the bottom cover knob to the right (refer to
step 3 on p. 40).
3* Pull the paper roll out of CPA.
3}
m
“D
o
33
H
"n
c
3
o
4, Close CPA {refer to step 5 on p. 40).
5, Remove the paper feeder from CPA by holding the paper feeder down
43
i o
rria
I?
585.
0
1
Page 44

Showing Remaining Memory for CHECK,
CARD and ADDRESS
Operation
© (codeHS)
(2) Show memory for ADDRESS.
@ Return to initial display.
[DONE]
(V
T1
c
3
o
Showing Remaining Battery Power
o
3
0>
(T) ìcòdIWbì
Operation
Display/Description
CHECK : 3/500 FULL
CARD ; 2/200 FULL
ADDRESS : 2/75 FULL
FEB.25,1994 FR!
08:30 PM
Display/Description
NI-CD BAHERY
EMPBMDD FULL
Si
0 o
1 ^
.3"
tQ(Q
(b tb
3 3
£ S
3'3'
3 3
tQ(Q
QOS
§§
CAUTION: The remaining battery power may be shown incorrectly when
used under unusual high or low temperature.
•When AC adaptor is inserted
the display shows
"CHARGING...” for a few
seconds then returns to the
previous display.
If Ni-Cd battery is full, the
display shows
"EMPHIHFULL”.
?"
II
44
Page 45

Password
If you do not want others to operate CPA enter a password
CAUTION: If you forget your password you have to use the “Resetting
CPA {Clears all memory)“ on p 14 to 15
Using the “Resetting CPA (Clears all memory)" also clears all
memory that has been entered
Entering the password
Example: You want to enter the password “0321 ’
Operation
® Enter password
ISETUPl^r^ twicer®
->[ ENTER )^f0l[3)i2im
(2) 1 ENTER 1-^® or (Y]
Return to initial display
[ ENTER H DONE]
After setting the password, CPA requires you to enter it whenever using
the (CHECK), iCARPI. [ADDRESS). (REPORT) or (SETUP) functions
When entering the password, it will not be shown on the display
Display/Description
NEW PASSWORD 0321 □
Password up to 7 letters/numbers
NEW PASSWORD 0321
ARE YOU SURE N ’
FEB 25,1994 FRl
08 38 PM
o
(D
■n
c
o
3
u>
(A
№
1
a
45
Page 46

Password
Changing/Clearing the password
Example; You want to change the password from “0321” to “Q30A".
® fSETUP)
o
<D
T1
c
3
a
5'
3
CO
s
0)
(0
Enter old password.
® twice-^iFV»[ENTE~Rl
fENTERor®
@ Enter new password.
I
s.
iENTER]->rFl or®
Operation
HhIbMqH)®®
Display/Description
0ATE CHECK CARD
PAYLIST PRINTER
► If the display shows “ENTER
PASSWORD” enter the preset
password.
ENTER PASSWORD ;
0321
CHANGE PASSWORD N /0 ?
NEW PASSWORD : Q30AD
>lf you want to clear the
password, press [ ENTER ] to
leave it blank, then press
(DONE) to return to initial
display.
NEW PASSWORD : Q30A
ARE YOU SURE N/0 ?
MORE!
□
iENTERMDONEl
46
FEB.25,1994 FRI
08:30 PM
Page 47

Transferring Data
Connecting CPA to Another CPA
KX-RC20 (optional), an interface cable for data transfer with another CPA,
must be purchased before data can be transferred.
7, Turn off both CPAs.
2, Open the jack covers of both CPAs.
•When a cable is not plugged into the jacks, be sure to insert the jack
covers. Dust or dirt particles may get into them or static electricity may
occur around them.
3. Plug the interface cable into the interface connectors of both CPAs.
Be sure to plug the cable in securely.
0)
3
<J>
<D
3
(Q
O
&)
03
4, Turn on both CPAs.
tQ
47
Page 48

Transferring Data
Setting the Link Parameter
Before transferring data, both CPAs must be set to the same baud rate (baud
rate of 9600 is set at the factory).
Operation
® Select the baud rate (Example: 9600).
[ SETUP ]-^r^ twice-^ENTER]
(Select LINK)
Confirm the other parameters.
[ ENTER l-»(y| or®
09
3
0)
<D
Z. (3) Return to initial display,
(g [ ENTER M DONE]
a
0 Set the same baud rate of the other
09
09
CPA in the same way.
Performing the transfer
Display/Description
BAUD : 2400 4800 1600
PARITY: NONE STOP : 1 BIT
LENGTH : 8BITS OKN/0?
Parity bit: no parity
Stop bit: 1 bit
Data length: 8 bits
•These parameters are for
communication with a personal
computer.
FEB.25,1994 FRI
08:38 PM
^ Note: When receiving data, all existing data is deleted.
Example: You want to transfer all the data from CPA-a (sender) to CPA-b
(Q
s-
© On CPA-a:
Select item to be sent (Example: ALL).
i CODE l-^n^fENT^
(Select SEND)
(receiver).
Operation
Display/Description
CARD ADDRESS
48
CHECK
Page 49

Transferring Data
On CPA-b:
Receive the data.
[ CODE ENTER ]
(Select RECEIVE)
or ENTER]
(Select Y)
On CPA-a:
Send the data.
[ENTER]
© On both CPAs
Return to initial display.
[DONEMDONE]
(S^ •Before starting the transfer, make sure that the memory size of CPA-b
is larger than the existing data size of CPA-a. If not, the existing data
of CPA-b will all be cleared. If necessary, delete some records in
CPA-a.
• If KX-RC100 is the sender, the data of Second Bank, Cash, Card
#6—10 and Phone will not be sent to CPA (KX-RC95).
• If KX-RC105 is the sender, the data of Second Bank, Cash and Card
#6—10 will not be sent to CPA (KX-RC95).
• "LINK ERROR” will occur in the following cases:
1. If the baud rate is different between the CPA units.
2. If the CPA units are not connected correctly by the interface cable.
3. If address data is sent to a CPA which has phone data.
4. If phone data is sent to a CPA which has address data.
•Withdrawals and service charges are entered on a KX-RC100/105 by
entering 0 as the check number. When this data is transferred to a
KX-RC95 it will be included when you make a report and select the
check number as “A”, “S” or "O” (p. 24, 41). To search for this type
of record on a KX-RC95, press [ FIND ] and enter “0” as the check
number (p. 28). 49
CPA-b is ready to receive the
data.
•Press [ ENTER ] within 30
•To stop transferring data,
RECEIVING . . .
PRESS DONE KEY TO EXIT
SENDING . . .
PRESS DONE KEY TO EXIT
seconds, or “LiNK ERROR”
wiii occur.
press [DONE] on either CPA-a
or CPA-b.
The data on the way is
transferred to CPA-b (receiver).
FEB.25,1994 FRI
09:12 PM
0)
<D
(Q
a
09
Q)
(Q
s
a
(A
I
S’
Page 50

Troubleshooting Guide
When trouble occurs, check the following points before returning CPA for
service
Trouble
Press a key but
nothing appears on
the display
Press a key but
nothing enters
Turn on the power
switch, but nothing
appears on the
display
Cause Procedure
CPA IS not turned on Turn the power switch on
(See p 13)
The bottom cover is
open
The battery is not
charged
The battery pack is
not installed
The protective sheet
has not been
removed from the
battery terminal
The power switch is
not operated
correctly
Close the bottom cover
(See p 15)
Charge the battery for
about three (3) hours
(See p 11)
Install the battery pack
(See p 56)
Remove the protective
sheet (See p 5)
Try turning on again
following procedure on
p 13 If nothing appears
on the display, press the
reset switch with the tip of
a ball-point pen (p 53)
then slide the power
switch again
The remaining
battery amount is
incorrectly displayed
The display shows
"INSERT AC
ADAPTOR" and
CPA will not accept
any key function
Troubleshooting (continued)
The battery has
become inactive
The battery is empty
50
Keep operating CPA until
“WEAK BATTERY” is
displayed then recharge
the battery (See p 11)
Plug in the AC adaptor
and charge the battery for
about three (3) hours
(See p 11)
Page 51

Troubleshooting Guide
Trouble
The display shows
"CHANGE LITHIUM
BATTERY" and CPA
will not accept any
key function.
CPA does not print
correctly or printing
is blurred.
The printing
positions are not
correct.
A check is not fed.
The display shows
"MEMORY ERROR”.
CPA does not
operate properly, or
memory may contain
garbled characters.
Cause
The life of the lithium
battery is terminated.
The ribbon cassette
is not installed or is
installed incorrectly.
The ribbon cassette
is run out.
The printing
positions are set
incorrectly.
A check is not set
on the printer
correctly.
Noise on the AC line
or static electricity
may prevent CPA
from operating
properly.
Procedure
Gc to a service center to
have the battery pack
exchanged.
(See the Included list of
authorized service centers.)
Install ribbon cassette
correctly. (See p. 54)
Replace with new ribbon
cassette.
(See P. 54)
Set the printing positions
correctly. (See p. ZD)
Set a check on the printer
correctly.
(See p. 19)
Turn the power switch oft
for a few seconds then
turn the power switch on
again. If the CPA.does not
function properly, reset
CPA (p- 53), and then
print the records on the
paper roll. If the CPA still
does not function properly,
perform a total reset
following the procedure on
p. 14.
Q
o
3
D>
Troubleshaoting
51
Page 52

Adjusting Print
You can adjust the print in the following way.
Operation
0 Insert the paper roll {refer to steps 1
through 5 on p. 39-40).
Adjust print.
f SETUP l-^r^ three times
(Select PRINT ADJUST)
-^[ ENTER or®
(Select Y)
[ENTER]
Example of print;
O
(D
3
0>
5"
o
0 Select the best print number.
B
fi)
(Example: 3)
Display/Description
ADJUST PRINT N /0 ?
PRINTING . . .
SELECT DESIRED NUMBER
987604321
PRINTING . . .
5'
3
c‘
CO
5
3
or
(B twice-^i ENTER)
Example of print:
Return to initial display.
[ ENTER }-»rDONjil
(Select N)
52
ADJUST PRINT §/Y ?
FEB. 20.1994 SUN
09:30 PM
Page 53

Resetting CPA without Disturbing the Memory
If CPA is exposed to intense noise or a strong shock during operation it may
get out of order and not accept any key function. When this occurs, follow
the procedures below to reset CPA without harming the memory.
7. Open the bottom cover by sliding the bottom cover knob to the right.
_______________________________
O
(D
3
(D
5"
o
“T
3
fi)
Reset switch
C3 3)
at
is.
o 2
53
Page 54

Changing the Ribbon Cassette
When the printing starts to fade, purchase a new ribbon cassette, KX-RC10
(optional), and replace with the new ribbon cassette.
(Only use Panasonic KX-RC10. Other ribbons may damage the unit.)
_________________
7. Open the bottom cover by sliding the bottom cover knob to the right.
O
CD
3
2. Push the printer open lever and pull up the printer as indicated by the
(D
Q)
arrows.
3
o
3
fi)
5'
3
PD
EU 3(0 0}
O (o
5
(ft
31
B=
o-
o
a
54
Page 55

Changing the Ribbon Cassette
3. Remove the old cassette and install a new one Make sure the ribbon is
between the printhead and the ribbon guider sheet
NOTE' Do not touch the printhead
Wind the ribbon with
your finger in the
direclmn of the arrow
before and after
installing the
cassette
Press the printer down until it clicks into place
Ribbon cassette
Ribbon guider sheet
o
(D
3
(D
D)
ocr
3
o
55
Page 56

Changing the Battery Pack
Even though operated and charged correctly, the battery life will terminate.
When this occurs, purchase a new Ni-Cd battery pack, KX-RC30 (optional),
and replace the old battery pack.
1, Turn off CPA and unplug the AC adaptor.
2, Open the bottom cover and remove the battery pack screw.
3. Remove the old battery pack and install the new one
o
(D
3
(D
“t
fl)
4, Replace and tighten the screw.
3
fi)
5‘
After exchanging the battery pack be sure to plug in the AC adaptor and
3
recharge the battery for about three (3) hours as the remaining battery
amount will be incorrectly displayed.
O
3ttt
3
to
3*
(Q
S
(b
QQ
oa
5
O
3^
CAUTION: To reduce the risk of fire or injury, read and follow these
instructions carefully.
•Never disassemble or modify the battery pack. It is made of strong
alkali and may irritate skin or damage clothes.
• Never short-circuit the battery pack. Overheating the battery pack may
cause burns.
• Never dispose of the battery pack in a fire. It may explode.
•Never try to recharge the battery without the pack unit. Always
recharge the entire battery pack CPA.
56
Page 57

Specifications
CHECK Memory
CARD Memory
ADDRESS Memory
Clock
Calculation
Printer
Print Speed
Ribbon
Display
Display Size
Interface
Power Requirements
Auto Shut-OFF
Memory Life
Power Consumption
Operating Temperature
Operating Humidity
Storage Temperature
Dimensions
Mass {Weight}
1 bank name 500 checks
5 card names 200 entries
75 addresses
Year, month, day, day of the week, hour, AM/PM
From 1992 to 2091 ±30 seconds/month (at 25“C)
Up to 10 digits: Addition, Subtraction,
Multiplication, Division
4-pin dot matrix printer
About 20 seconds/check
Fabric ribbon
Liquid Crystal Display
23-charactersx2-line
Interface with other CPA (Using optional
KX-RC20); Interface with a personal computer
(Using optional KX-RC21 or KX-RC22)
AC 120 V±10%, 60 Hz, Ni-Cd Battery
(For memory back-up: lithium battery)
After about 5 minutes with battery unit
Minimum 5 years (with lithium battery)
Refer to the nameplate on the bottom of CPA
5'‘C (41“F) to 35°C (95°F)
20 to 80% RH
-20“C (-4“F) to 60“C (140°F)
183 (W)x88 (D)x29.8 (H) mm
{77/52"(W)x31№'(D)x1:Vi6"(H)}
0.385 kg (0.85 lb)
o
(D
3
(D
3
o
3
0)
o'
3
57
2
s’
O
3
to
Page 58

List of Display Messages
Message Description
^ ADDRESS DATABASE FULL H< . .Address database is full.
________________
ADJUST PRINT N/Y?
ALL CARD CHARGE DELETED
CONTINUE NA' ? deleted.
ARE YOU SURE N/Y ?
BOTTOM COVER IS OPEN
BUILDING REPORT.........................The machine is building a report.
CANNOT PRINT
CHECK ALREADY PRINTED
CANNOT PRINT
DEPOSIT, ATM, SVC, OTH service charge data.
CANNOT PRINT
VOIDED CHECK
^ CARD DATABASE FULL ..............Card database is full.
CHANGE LITHIUM BATTERY !
CHANGE PASSWORD N/Y ?
>
■o
~a
CHARGING.......................................Charging the Ni-Cd battery.
o
3
CHECK ALREADY ENTERED
Q.
X
* CHECK DATABASE FULL ... .Check database is full.
......................
.....
....................
.............
...............................
..............................
...............................
......
..........
.........
Do you want to adjust the print?
{See p. 52)
All records relating to this card will be
Do you want to continue? (See p. 34)
Are you sure you want to enter, change or
clear the password? (See p. 45-46)
The bottom cover is open. (See p. 15)
This check has already been printed.
You cannot print deposit, withdrawal and
This check has been voided.
Please change the lithium battery.
Do you want to change the password?
The same check number or zero (0) has
been entered.
CHECK NOT INSERTED
9 (A
(0
SP o
to (5-
CONTINUE N/Y ? printing area. (See p. 19)
DELETE ALL DATA N/Y ?
(Si
DELETE RECORD N/Y ?
9
o
'S
* DELETED *
58
.................
...............
................
..................................
A check has not been placed inside the
Do you want to delete all data?
Are you sure you want to delete the
record?
The record has been deleted.
Page 59

List of Display Messages
Message Description
END OF BLOCK ..............................Do you want to delete a block of records?
DELETE RECORDS NA'?
END OF LINK
.................................
Sending or receiving is done.
PRESS ANY KEY
END OF TRANSACTION
[ERROR]
..........................................
* ERROR *
.................................
................
This line is the end of the transaction.
Error has occurred during calculating,
Will be displayed if consecutive payments
BALANCE OVERFLOW or deposits exceed 99,999.99.
ERROR ADDRESS TOO LARGE .... Memory became full while receiving
PRESS ANY KEY address data.
ERROR CARD TOO LARGE
...........
Memory became full while receiving card
PRESS ANY KEY data.
ERROR CHECK TOO LARGE
.......
Memory became full while receiving check
PRESS ANY KEY data.
EXISTING DATA SHOULD BE
........
This action deletes existing data. Are you
DELETED CONTINUE NA^ ? sure?
INSERT AC ADAPTOR
..................
Insert AC adaptor and recharge the Ni-Cd
THEN PRESS ANY KEY battery. (See p. 11)
^ INVALID PASSWORD ^
..............
Invalid password was entered.
^ LINK CANCELED .........................Sending or receiving is canceled.
LINK ERROR !
................................
Error has occurred while sending or
PRESS ANY KEY receiving data. (See p. 49)
LOCATIONS SELECTED
...............
Do you want to print a demo?
PRINT DEMO NA'?
■o
■o
<D
3
Q.
>
X
[MEMORY]
MEMORY ERROR !
......................................
.........................
Data is stored in memory.
Data in memory is damaged.
PRESS ANY KEY (See “Troubleshooting Guide" on p. 51)
* NO CARD RECORDS *
^ NO CHECK RECORDS *
.................
.............
There are no card records in memory.
There are no check records in this account.
59
O (A
(A
^ O
(b ^
<A S*
a
Page 60

List of Display Messages
Message Description
NO NI-CD BATTERY !
PRESS ANY KEY
NO PAYEE LIST ENTRIES
............................
....................
Ni-Cd battery is not connected. (See p. 56)
There are no payee list entries in memory.
^ NOT FOUND ........................................The required record is not found.
^ NUMBER MUST BE 1-25 ^ ... .Payee list number must be 1 to 25.
PAPER NOT INSERTED ........................
CONTINUE N/Y ?
^ PRINT CANCELED ^
PRINT CHECK NA^ ?
............................
............................
Paper roll is not inserted. (See p. 39-40)
Print is canceled.
Will you print the check?
^ PRINTER ERROR ^ ........ .The cover is open.
COVER OPEN
PRINTER ERROR ^
PRINTER NOT READY
PRINTING
PLEASE ENDORSE CHECK!
PRINTING AREA OVER.........................Payee’s name will overlap the $ sign or
CONTINUE N/Y? your entered data will exceed the printable
.........................
...................................
Something is wrong with the printer.
The check is being printed.
area. Do you want to continue?
PRINTING REPORT
>
“O
"O
(D
3
a.
li
ni b]
(11 ^
№ a
'go
tn 5'
S'
RECEIVING
PRESS DONE KEY TO EXIT
RECHARGE NI-CD BATTERY I
PRESS ANY KEY
SEARCHING.............................. .Searching the records.
SENDING
PRESS DONE KEY TO EXIT transfer.
WEAK LITHIUM BATTERY !
PRESS ANY KEY
WEAK NI-CD BATTERY ! ......................
PRESS ANY KEY
...............................
............................. iThe machine is receiving data via transfer.
............
............................ . .The machine is sending the data via
...................
The machine is printing the report.
Recharge the Ni-Cd battery.
Lithium battery is getting weak.
Ni-Cd battery is getting weak.
60
Page 61

List of Code Key Functions
[CODE]-^iBl
[codeHd)
(CODE^^fP
[CODEl-^rMl
[CODEl-^(Vl
[CODEMDELETE] Deletes a CHECK/CARD/ADDRESS record.
(CODEl-^rR^
(CODEl^m
Shows the remaining battery power on the display.
When AC adaptor is inserted the display shows
“CHARGING...” for a few seconds.
If Ni'Cd battery is full, the display shows
“EMPIHH FULL”.
Adjusts the contrast of the display.
Sends (receives) data to (from) another CPA or to a
personal computer.
Shows the remaining CHECK, CARD and ADDRESS
memory.
Voids a check.
Deletes current entry or moves cursor to the first
column.
Displays the previous record when searching by date,
ATM, SVC or OTH.
Jumps up to the previous CHECK/CARD/ADDRESS
record.
(CQDfkS
(CODE)-H.fA^
iCODEl-^iRCM]
[CODEj-^fM+l
iCO^K>(7l
[CODE]-^[8l
iCODE>^i^
icoDT^m
Jumps down to the next CHECK/CARD/ADDRESS
record.
Enters “ "
Enters “ ^
Enters
Enters
Enters “%”.
Enters “' ”.
Enters “ ' ”.
•These five accent symbols (
can only be used in combination
with the characters shown.
AEIOU
AEiOU
AEIOU
AEIOU
N
..................
)
61
■D
T3
nr*
§5o ^
g?
>
(D
3
a
><■
I
Page 62

List of Code Key Functions
ÌCÒDEUÌ41 Enters “¥
fCODlUfSl
fcòDÈUfeì
(CODE)-^r>r|
fCODE]-^rn
fCODE]->i^ Enters
Enters (code)-^R Enters
Enters " / (CODEl-^fOl Enters
Enters
Enters (CODlUFl Enters
(CODEUÌ3Ì
fCODÈÌ-^n
fCdDÉV>f+1 Enters
Enters
Enters
Category List
The 50 categories are listed in the alphabetical order.
A E
AUTO EDUCATION LATE FEES TAX
AUTO FUEL ENTERTAIN TAX FEDERAL
AUTO LOAN
AUTO SERVICE
B
>
BANK CHARGE
T3
BONUS
■o
(D
3
a
c
x'
CHARITY
CHILDCARE
CHRISTMAS
CLOTHING
COMMISSION
s?
.i?
•§
D
DINING
r-
DIVIDND INCM
5‘
DUES
G
GIFT RECVD
GIFTS
GROCERIES
H
HOME REPAIR OTHER INCM
HOUSEHOLD
HOUSING
I
INSURANCE
INT INCM
INT PAID
INVEST EXP
INVEST INCM
L T
M
MEDICAL
MISC
MORTGAGE
0
OTHER EXP
R
RECREATION
RENT PAID
REPAIRS
s
SALARY
SUBSCRIPT
SUPPLIES
TAX FICA
TAX OTHER
TAX PROPERTY
TAX STATE
TELEPHONE
TRAVEL
u
UTILITIES
UTL GAS/ELEC
UTL WATER
62
Page 63

Options
The following options are available through your local authorized
parts distributor.
Part No.
KX-RC10
KX-RC20
KX-RC21
KX-RC22
KX-RC30
Description
Fabric ribbon
Interface cable for data transfer
with other CPA
Interface adaptor for data transfer with
a personal computer
Interface adaptor for data transfer with
a Macintosh
Ni-Cd battery pack
Comment
1 unit
1 unit
1 unit
1 unit
1 unit
>
■o
“O
(D
3
Q.
><'
63
§
§
Page 64

index
AC adaptor
Accessories
Account name .......................................17
ADDRESS key.......................................10
Address list, making
Adjust print.............................................52
ATM (Automated teller machine) ... .24
Auto shut-off
.......................................
............................................
..............................
..........................................
B
Balance .................................................17
Bank name, entering
Battery pack, changing
Bottom cover
Bottom cover knob
CALC key
CALCULATOR
CARD key..............................................10
Card list, making
CATEGORY
Category list...........................................62
Charging
Check
>
■o
■o
<D
3
Q.
CHECK key
x'
CLASS ..................................................23
Clock, setting
CODE key .............................................10
Code key function
3
Connecting
I
Contrast, display....................................16
Credit card.............................................32
Cursor keys
..............................................
..........................................
...............................................
inserting
issuing................................................23
size
storage area..................................9, 19
with duplicate copies .........................19
CPA ..................................................11
household AC
............................................
....................................................
..........................................
..........................................
............................
.........................
...................................
.....................
......................................
..................................
........................................
................................
...................................
5, 11
9, 14
9, 14, 19
31
11
61
11
17
56
10
35
23
19
19
10
16
10
36
13
DC IN jack
5
DELETE key .......................
Deleting
ADDRESS record
CARD record
CHECK record
Deposit
Display
Display contrast, adjusting
Display message
DONE key
ENTER key ............................................10
Figure keys .
FIND key ...
FIRST bank .
Function keys
Guide tabs..........................................9, 19
...........................
............
..................
.................
...............................
................................
.................
..........................
.9, 11
. . .10
....38
___
34
___
30
___
26
.........9
. .. .16
___
58
.10, 15
.10
.10
.17
.10
H
Household AC
Interface
cable . . ..
connector
Jack cover.................................................9
Keyboard ...........................................9, 10
.......................................
11
.47
. .9
64
Page 65

Index
Lid sensor
LIST # key
M
Memory, remaining
ADDRESS
Battery power . . ,
CARD........................
CHECK
...............
..................
N
Ni-Cd battery...............................................9, 11
Options . .
Paper feeder . .
Paper roll................
Paper sensor . .
Part names , . .
Password
Changing .. .
Clearing
______
Entering ....
Payee list
Platen
Power Supply . .
Power switch . .
Precautions . . .
PRINT key
Print position . .
Printer
Printer
Printing check .
Protective sheet
...............
.....................
______
...................
open lever . .
parts
...................
. . .63
.5, 39
. . .39
___
___
............
............
............
...........
..........
............
.9. 13, 14
............
............
.............
___
9. 39
___
..........
___
..........
,44
,44
,44
.44
46
46
45
ia
11
10
20
54
25
. 9
10
9
S
Rechargeable battery ................................11,12
RECON. key
Reconciling check
REPORT .
REPORT key...................................................10
Reset switch .......................................9, 15, 53
Resetting..................................................14, S3
Ribbon cassette
Ribbon cassette, changing
Searching
ADDRESS record ........................
CARD record................................
CHECK record
Setting clock ...
SETUP key
Showing
ADDRESS record ........................
CARD record................................
CHECK record
9
9
SPACE key......................................
Specifications....................................
Sub function keys
SVC (Service charges)
TAX..................................................................23
Template................................. ..................5, 20
Template ruler
Transferring data
Troubleshooting...............................................50
Turning oft........................................................13
Turning on........................................................13
......
..........................................
...........................................
.....
.................................................39
................................................
...........
.................
s
............
............
..................... . . .
................
......................................
..........................................
.................
.............................
............................
....................
T
.............................................
...... 20
............
............
............
............
............
............
............
............
............
10
20, 22
29
54
37
33
16
10
44
44
44
10
57
10
24
47
9
>
“O
TJ
(0
3
□.
X
3
U
9
5
Upp er cover
....
.........................................
9, 14
g-
Voiding check
.................................................
29
65
Page 66

Servicenter Directory
PRODUCT INFORMATION - OPERATION ASSISTANCE
DIAL TOLL FREE: 1-B0D-CPA-7033 (1-H0D-Z7Z-7033)
Cuslamer Service Cenler ZF-3, One Panasonic Way, Secaucus, NJ □7094 (Headquarters)
2D1-34fl-g09D (9:D0am-B:G0pm Monday-Friday, EST)
SERVICE INQUIRIES
NORTHEAST
2221 Cabal BnulBVanl WbsI
SuilB A
LanflhnrnB, PA 13D47
215-741-067Б
CaVBTB;
CT, DE, ME, MD. MA.
NH. NJ, NY, PA, Bl, VT,
VA, DC, WV, Easlern QH
PRODUCT SERVICE
TENNESSEE
gl9-Blh Avenue Soulh
Nashville, TN 37ZD3
Regional Customer Care Department
MIDWEST
17D2 Nnnh Randall Hnad
Elgin, IL B0123
7DB-46fl-553D
CDVara:
IL, IN, lA, HS, MY, Ml,
MN. MO. NE, NO, SO,
Wl, Waslam OH
WESTERN
ESSO MalBlIa Avenue
Cypress, CA SD63Q
714-373-7440
Cavere:
AM, AZ, CA, CD, Ш,
HT, NV, NM, OR, 1Я.
WA, WY, HI
Factory Servicenters
SOUTHERN
1054 ShaeWsInrd Court
Sails 41E5
Norcrnss, GA 3D093
4D4-717-6EZB
Cavera:
AL, AH, FL, GA, LA,
MS, NC. OK. SC, TN, TM
615-244-4434
AUTHORIZED SERVICENTERS • PARTS DISTRIBUTOR LOCATIONS
To locale an independent authorized servicenter or parts distributor in your area, within the USA
dial loll tree 1-flOO-545-2672, 24 hours a day, 7 days a week.
ACCESSORY PURCHASES
1^00-332-5368 (Consumer Orders Only)
MelsushllB Services Company Вам 01, 545 Tollgale Hoad Suite C, Elgin, IL Б0123
(S:DGam-7:30pm Monday-Thursday; S:GDam-5:DQpm Friday; B:00am-12:30pm Saturday; CST)
(Visa, Mastercard, Discover card, Check or Money Order]
If you ship Ihe product:
Carefully pack and send it prepaid, adequately insured and preferably in the
original carton. Attach a postage-paid letter, detailing the complaint, to the
outside of the carton. DO NOT send the product to the Executive or Regional
Sales offices. They are NOT equipped to make repairs.
66
Page 67

PANASONIC COMPANY, DIVISION OF
MATSUSHITA ELECTRIC CORPORATION
OF AMERICA
One Panasonic Way Secaucus, New Jersey
07094
PANASONIC CHECK PRINTING ACCOUNTANT
LIMITED WARRANTY
Panasonic Company or Panasonic Company
(West) of America (collectively referred to as
"Panasonic”) will repair this product with new
or rebuilt parts, free of charge, in the U.S.A.
from the date of the original purchase in the
event of a detect in materials or workmanship
as follows:
Check Printing Accountant—for One (1) Year.
Batteries (When applicable)—New recharge
able batteries in exchange for defective re
chargeable batteries—For ten (10) days.
Non-rechargeable batteries are not warranted.
One (1) Year Extended Warranty on Lithium
Battery—New lithium battery in exchange for
a defective lithium battery during the second
(2nd) year after the original purchase: pur
chaser pays for all labor charges for removal
and installation of the lithium battery.
Carry-in or Mail-in service in the continental
U.S.A. can be obtained during the warranty
period by contacting a Matsushita Services
Company (MSC) Factory Servicenter listed in
the Servicenter Directory. Or call 1-800-5452672, toll free, to locate an authorized MSC
Servicenter.
This Warranty is extended only to the original
purchaser. A purchase receipt or other proof
of date of original purchase will be required
before warranty performance is rendered.
This warranty only covers failures due to de
tects in materials or workmanship which occur
during normal use and does not cover the
print ribbon or damage which occurs in ship
ment or failures which are caused by products
not supplied by Panasonic or failures which
result from accident, misuse, abuse, neglect,
mishandling, misapplication, interfacing, set
up, adjustments, improper maintenance, line
power surge, introduction of sand, dust.
PANASONIC COMPANY (WEST) OF
AMERICA, DIVISION OF MATSUSHITA
ELECTRIC CORPORATION OF AMERICA
6550 Katella Avenue Cypress, CA 90630
humidity and liquids, modification, or commer
cial use of the product, such as hotel, office or
rental use of the product, or service by anyone
other than an MSC Factory Servicenter or
damage that is attributable to acts of God.
LIMITS AND EXCLUSIONS
There are no express warranties except as
listed above. PANASONIC SHALL NOT BE
LIABLE FOR INCIDENTAL, CONSEQUEN
TIAL OR PUNITIVE DAMAGES, INCLUDING,
WITHOUT LIMITATION, LOSS OF GOOD
WILL, PROFITS OR REVENUE. LOSS OF
USE OF THIS PRODUCT OR ANY ASSOCI
ATED EQUIPMENT, COST OF SUBSTITUTE
EOUIPMENT, DOWNTIME COSTS, OR
CLAIMS'OF ANY PARTY DEALING WITH
BUYER FOR SUCH DAMAGES, RESULTING
FROM THE USE OF THIS PRODUCT, OR
ARISING OUT OF ANY BREACH OF THIS
WARRANTY OR CONTRACT, NEGLIGENCE,
OR ANY OTHER LEGAL THEORY. ALL EX
PRESS AND IMPLIED WARRANTIES, IN
CLUDING THE WARRANTIES OF MER
CHANTABILITY, ARE LIMITED TO THE AP
PLICABLE PERIOD SET FORTH ABOVE.
Some states do not allow the exclusion or
limitation of incidental or consequential dam
age, or limitations on how long an implied war
ranty lasts, so the above exclusions or limita
tions may not apply to you.
This warranty gives you specific legal rights
and you may also have other rights which vary
from state to state.
If a problem with this product develops during
or after the warranty period, you may contact
your dealer or Servicenter. If the problem is
not handled to your satisfaction, then write to
the Customer Service Center at the company
address indicated above.
67
Page 68

Panasonic Company
Division of Matsushila Electric Corporation of America
One Panasonic Way, Secaucus, New Jersey 07094
Panasonic Company (West) of America
Division of Matsushita Electric Corporation of America
6550 Katella Avenue, Cypress, California 90B30
PJQX6676ZA F0494W0 M
 Loading...