

Panasonic KX-RC105 User Manual
Operating Instructions
Panasonic
Check Printing Accountant
MODEL NO.
KX-RC105
TM
Please read before using.

Thank you for purchasing the Panasonic Check Printing Accountant
KX-RC105
Note:
This equipment has been tested and found to comply with the limits for a
Class B digital device, pursuant to Part 15 of the FCC Rules These limits are
designed to provide reasonable protection against harmful interference in a
residential installation This equipment generates, uses and can radiate radio
frequency energy and, if not installed and used in accordance with the
instructions, may cause harmful interference to radio communications
However, there is no guarantee that interference will not occur in a particular
installation If this equipment does cause harmful interference to radio or
television reception, which can be determined by turning the equipment off
and on, the user is encouraged to try to correct the interference by one or
more of the following measures
Reorient or relocate the receiving antenna
Increase the separation between the equipment and receiver
Connect the equipment into an outlet on a circuit different from that to which
the receiver is connected
Consult the dealer or an experienced radio/TV technician for help
FCC Warning: To assure continued FCC compliance, the user must
use only shielded interfacing cables when connecting to computer or
peripheral Also, any unauthorized changes or modifications to this
equipment would void the users authority to operate
CAUTION: AC ADAPTOR (KX-WZ4) IS FOR INDOOR USE ONLY.
Caution, since your Check Printing Accountant has been designed to hold
your personal checks, you should be as careful as you would be of your
checkbook If you should lose your Check Printing Accountant, be sure to
notify your bank as to the numbers of the lost checks

NOTICE
• Panasonic strongly recommends that separate permanent written
records be kept oF all important data Data may be lost or altered in
virtually any electronic memory product under certain circumstances
Panasonic assumes no responsibility For data lost or otherwise
rendered unusable For any reason, including without limitation, detect,
repair, improper use, battery replacement, use after the specified
battery liFe has enpired, or any other reason See limited warranty For
details
• Panasonic assumes no responsibility, directly or indirectly, for financial
losses or claims From third persons resulting from the use, loss or
misuse of this product
WARNING: TO PREVENT FIRE OR SHOCK HAZARD.
DO NOT EXPOSE THIS PRODUCT TO RAIN
OR ANY TYPE OF MOISTURE
■ It IS recommended that you periodically print the content of the
memory of your Check Printing Accountant, so that you will have a
permanent record in the event of any uneMpected memory loss
The serial number oF Fhis uniF may be Found on Fhe upper label locaFed on the
back side
Write this number below and keep this book along with your prooF of
purchase Fo serve as a permanent record cf ycur purchase or for future
reference
FVIODEL NO KX-HC105
SERIAL NO
NAiyiE OF DEALER
ADDRESS OF DEALER
DATE OF PURCHASE
_______________
________
Enjoy the Convenient Functions of Your Check Printing Accountant! (CPA)
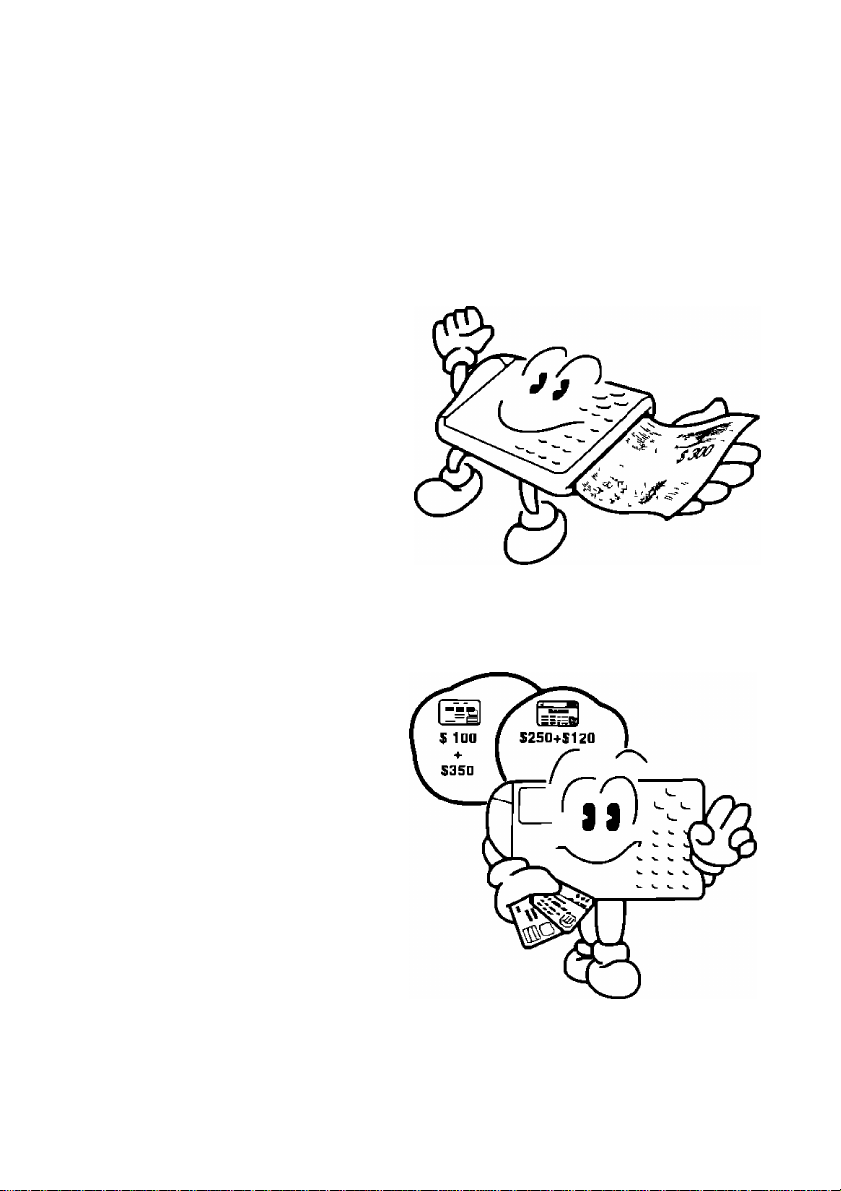
CHECK Function
Hand-writmg a check is no longer necessary
Enter the necessary data and CPA prints the check CPA also balances your
checking account
A
CARD Function
Whenever you pay with a credit card enter the data and CPA adds up the
amount of each credit card payment
Enjoy the Convenient Functions of Your
Check Printing Accountant} (CPA)
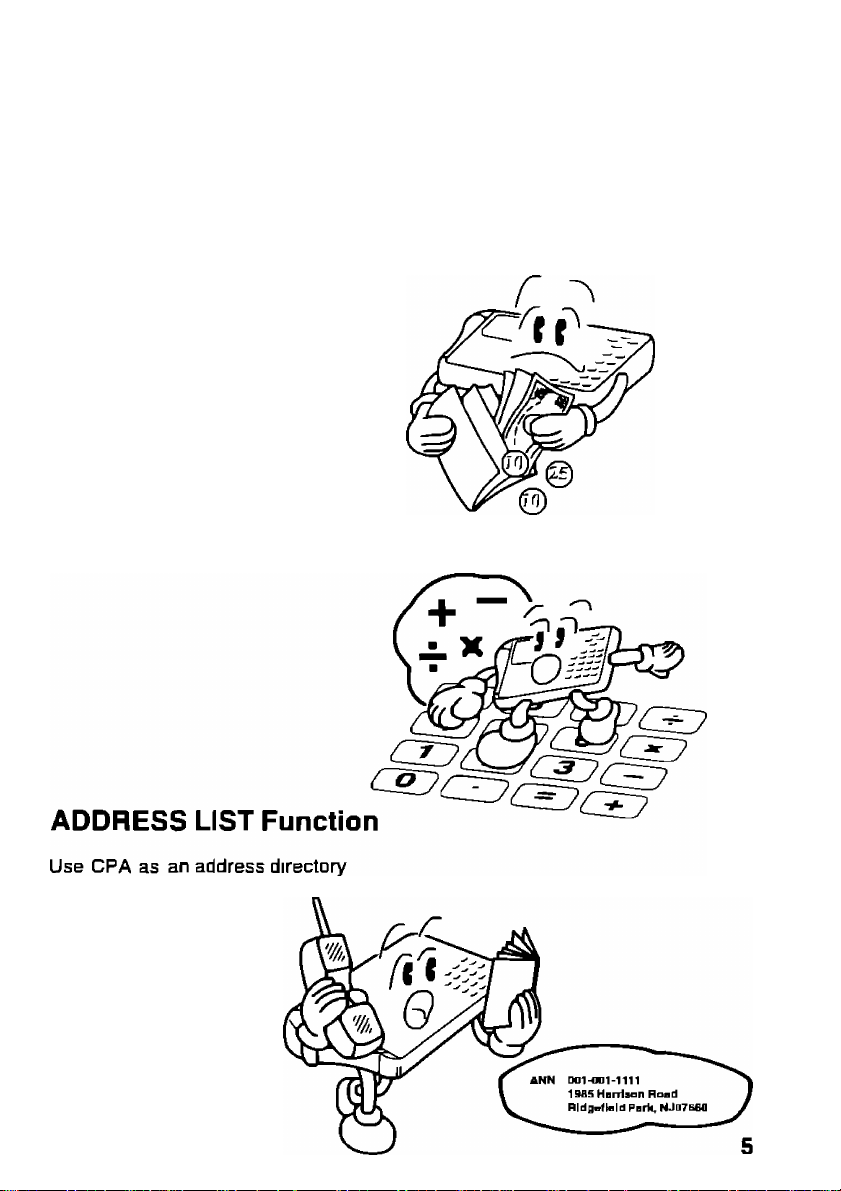
CASH Function
When paying in cash enter the data
CALCULATION Function
Use CPA as a pocket calculator
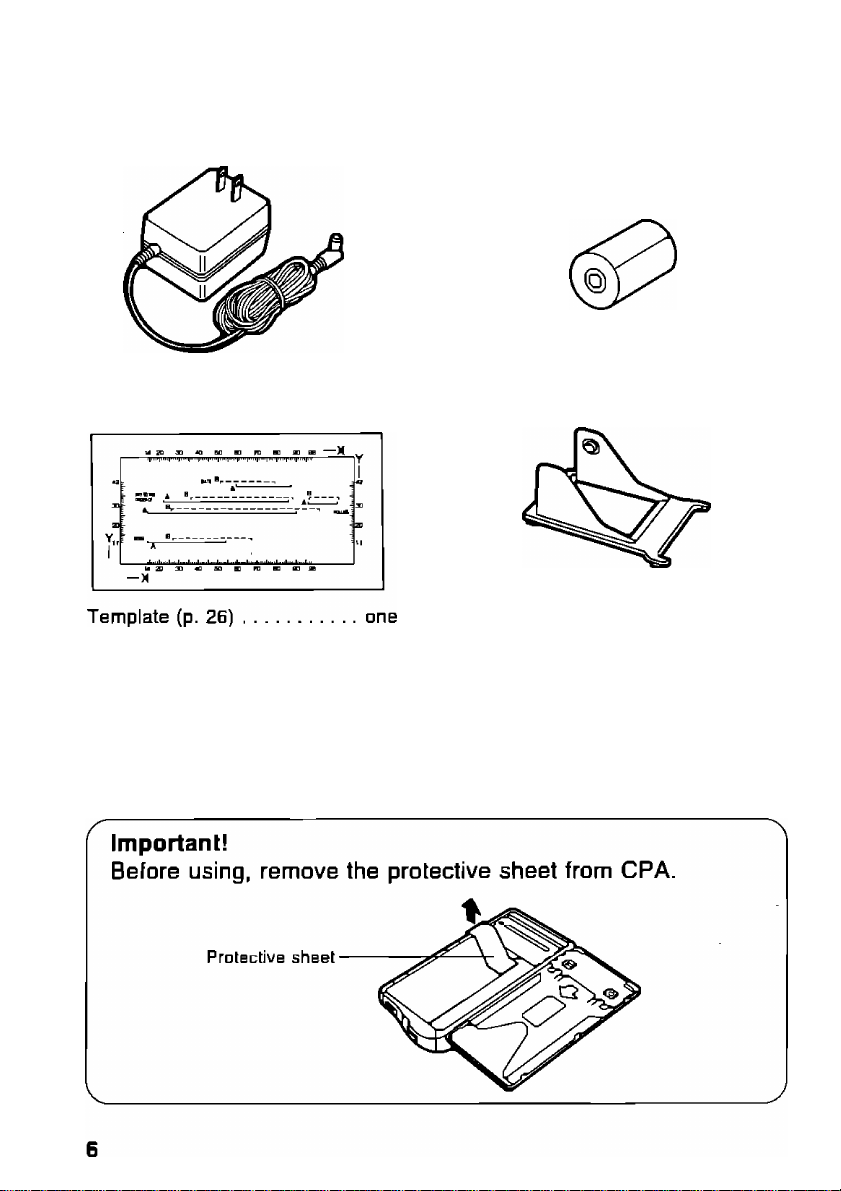
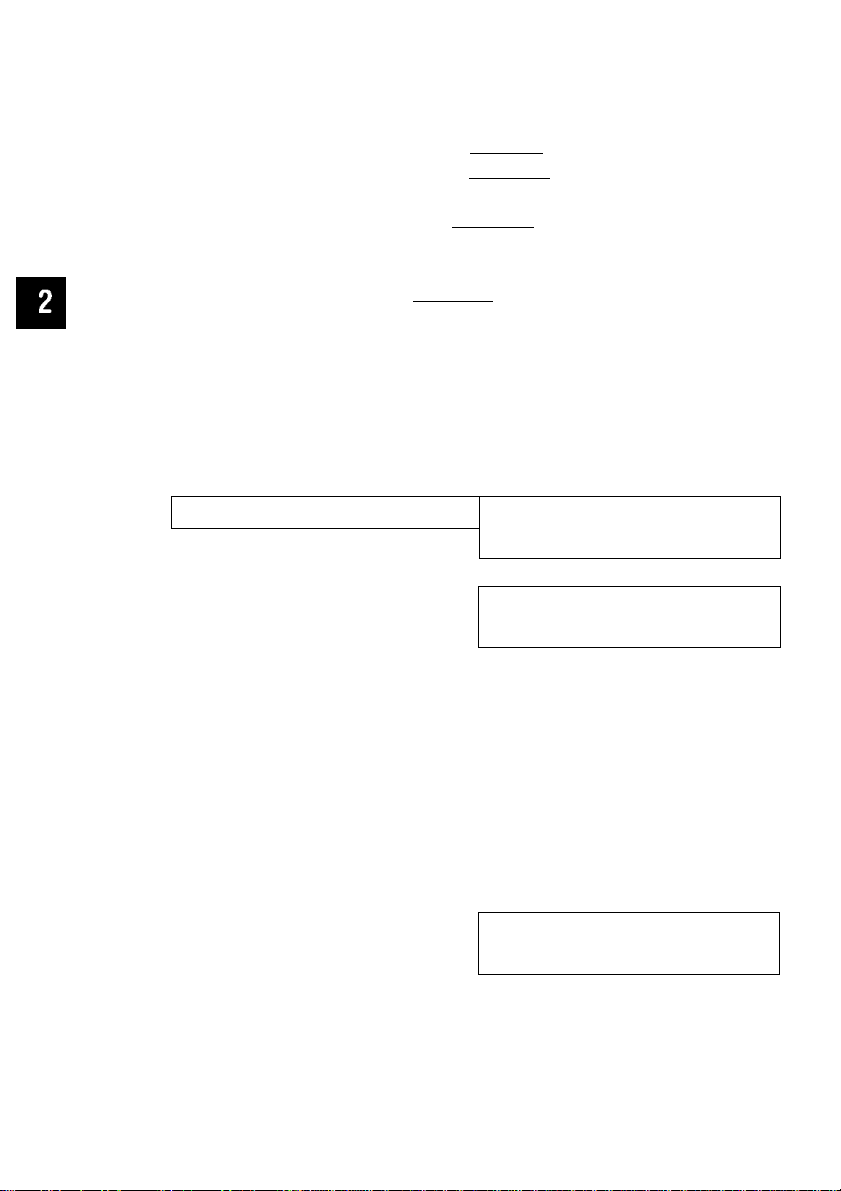
Accessories
Make sure thal (he following accessories are included with CPA.
AC adaptor (p. 12)
Printed material
Operating instructions
Payee list card
(found on the back
of CPA)
..................
..................
one
one
one
Paper roll (p. 7B)
Paper feeder (p. 7B)
Quick start guide
Sample sheet
....................
....................
.......................
.............
one
one
one
three
Table of Contents
Precautions ...........................................................................8
____________________
Page
Chapter 1 Before Using
Chapter 2 Preparation
Chapter 3 CHECK Function............................................21
Chapter 4 CARD Function............................................. 49
Chapter 5 CASH Function
Chapter 6 CALCULATOR Function............................................65 ^
Chapter 7 ADDRESS LIST Function
Chapter 8 REPORT Function
Chapter 9 Other Functions
.....................................................
.....................................................
...............................................
...............................
.........................................
.............................................
9
15
59
69
77
■
93 ^
Chapter 10 Transferring Data to Another CPA Unit
Chapter 11 General Information
Chapter 12 Appendix..................................................... 119
.....................................
___
101
109
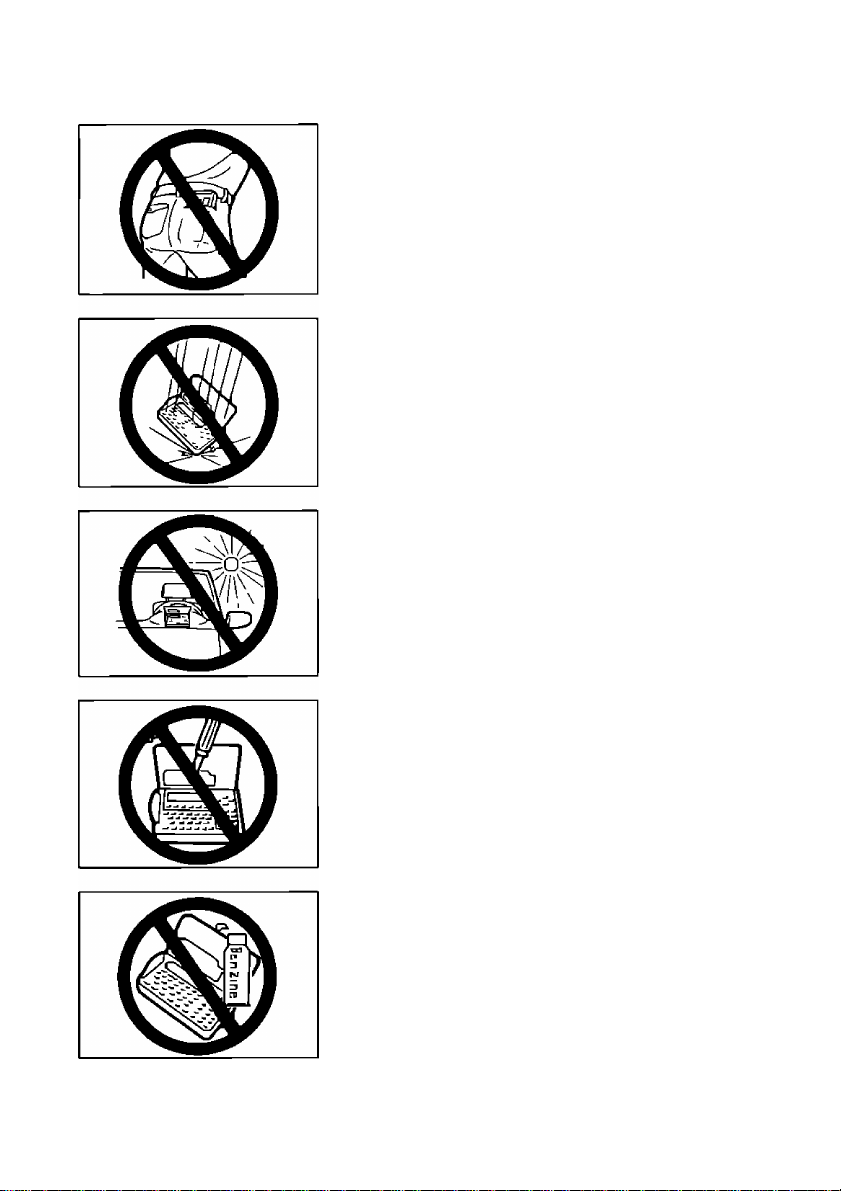
Precautions
Do not keep CPA in your back pocket as
it may break when you sit down
Do not drop or jar CPA
Do not place CPA where it will be exposed to
direct sunlight or heat, especially in an
automobile
To prevent electric shock, do not remove any
screws
Your stored data may be erased
Use only a sott, dry cloth to clean CPA
Water or cleaning fluids may damage the case
or electronic circuitry

Chapter 1
Before Using
Page
CD
(D
O
(D
C
S2.
5'
(Q
Part Names
Front view
Printer parts
Keyboard............................................11
Power Supply
From household AC ...........................12
Using the rechargeable Ni-Cd
battery
..............................................
..........................................
........................................
..........................................
.............................................
10
10
10
12
12
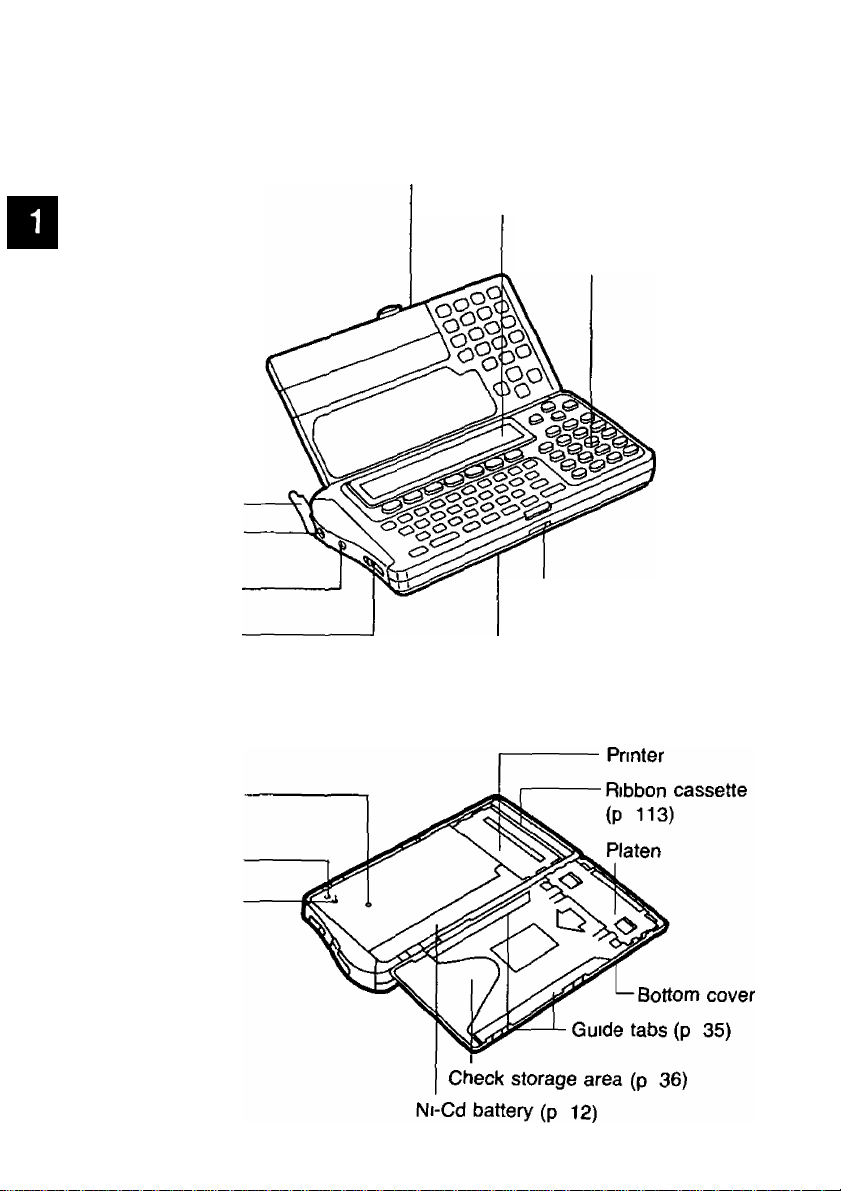
Part Names
Front view
CD
<D
o
(D
S2 .
(Q
Interface connector
(P 103)
Power switch
(P 16)
Upper cover
Display
Keyboard
(P 11)
Jack cover
DC IN Jack
(P 12)
Bottom cover knob
Bottom cover
Printer parts
(Bottom side)
Reset switch
(P 17)
Lid sensor
Paper sensor
10
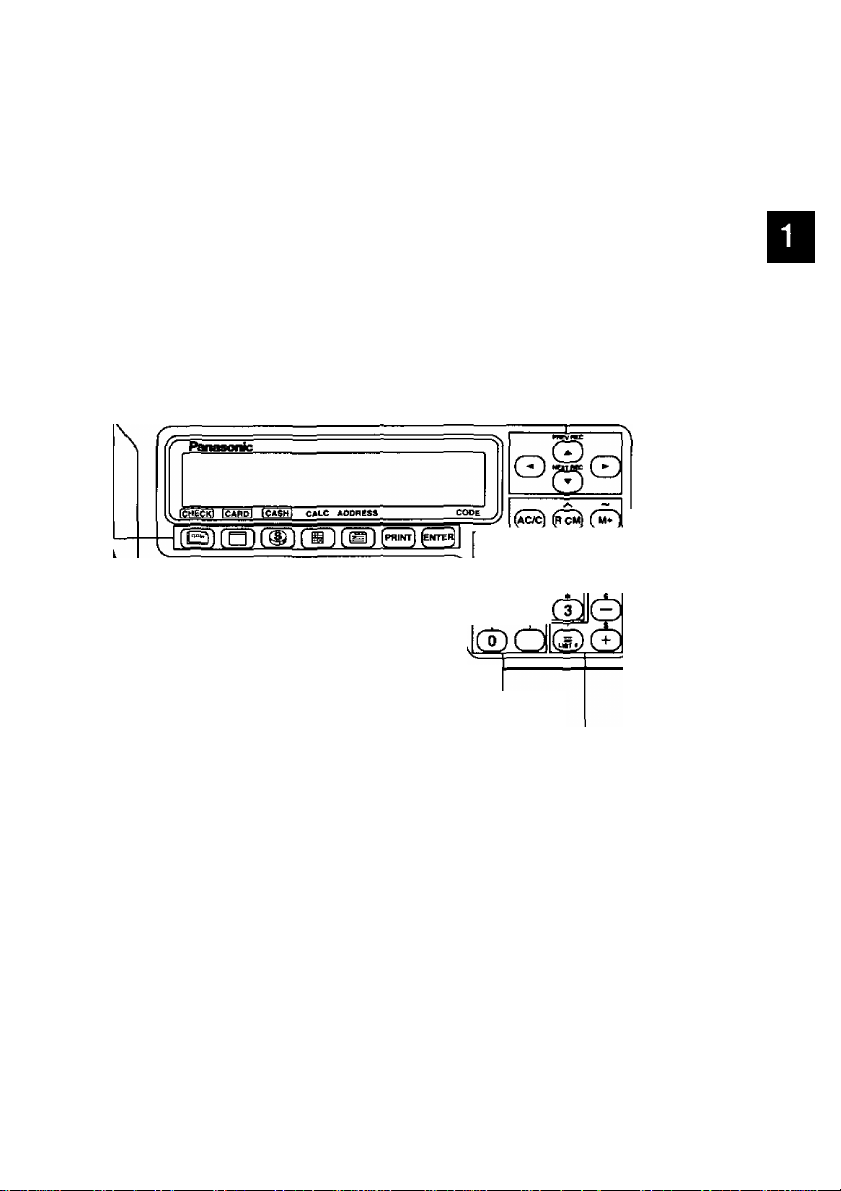
Keyboard
Function keys
‘ CHECK key (p 21)
CARD key (p 49)
CASH key (p 59)
CALC key (p 65)
ADDRESS key {p 69)
PRINT key (p 37)
ENTER key
Cursor keys: To move the cursor
@®"(9
Cl) Cl).
POWEli
Part Names
00
<D
O
(D
S2 ,
5’
(O
Figure keys: To enter numerical values
Calcuiation keys: Used for calculations
Sub function keys
CODE key To enter special functions,
combined with other keys (p 123)
SPACE key To enter a space
FIND key (p 43)
RECON key (p 45)
REPORT key (p 77)
SETUP key To begin setting up functions
DONE key To finish an operation and to return
to the initial display (current time)
DELETE key To delete a letter/number
under the cursor
11
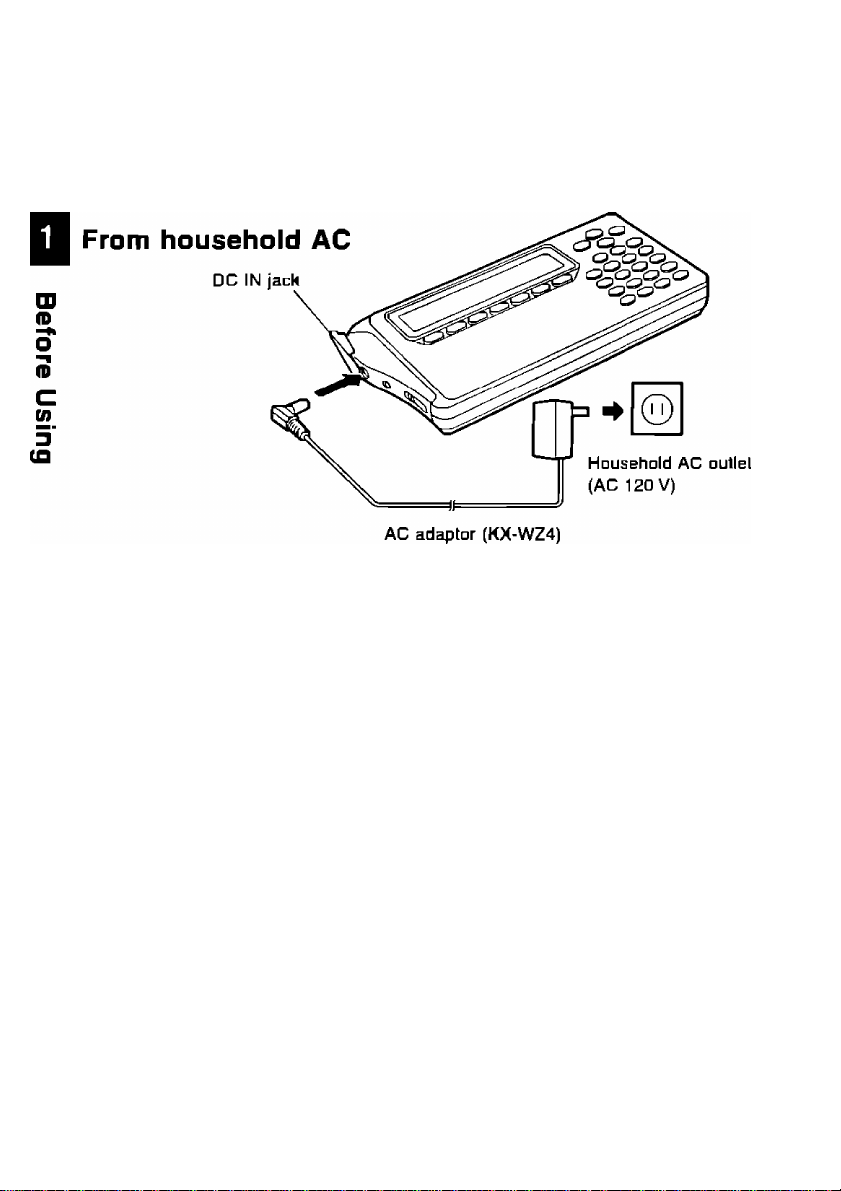
Power Supply
CPA has two power sources;
■ Household AC (AC 12D V)
■ Rechargeable Ni-Cd battery (built-in CPA)
CAUTION:
Use only the supplied AC adaptor.
Other adaptors may damage CPA.
Using the rechargeable Ni-Cd battery
When connected to household AC as illustrated above, the built-in Ni-Cd
battery automatically charges itseir.
A full battery charge requires about three (3) hours.
After charging, disconnect the AC adaptor from CPA and the AC outlet.
CPA can now be operated from battery power.
The printing capability of the fully charged battery is about 5G sheets for
check printing or about 35 pages for report printing at 25°C (77°F).
For "Showing Remaining Battery Power", refer to p. 94.
12

Power Supply
Notes about the rechargeable battery:
■ Before initial use, or use after a long period of time (about 6 months),
recharge CPA for about three (3) hours
■ When the display shows "WEAK NI-CD BATTERY" several sheets of check
can be printed but recharge CPA soon
■ When the display shows "RECHARGE NI-CD BATTERY" CPA will not print
Recharge CPA soon
■When the display shows "INSERT AC ADAPTOR", the keys will not
function Recharge CPA soon
■ Repetitive short-term recharging and discharging makes the battery life
shorter than usual and/or the remaining battery power may be shown
incorrectly To solve it, continue operating CPA until the display shows
"WEAK NI-CD BATTERY" then recharge it For about 30 minutes after the
display shows “WEAK NI-CD BATTERY", CPA refreshes the battery
automatically During it, recharging battery is not possible Recharge CPA for
about three (3) hours including above refreshing period of time
■The battery drains excessively when used under unusually high or low
temperature Also, when CPA is left in an automobile for a long period of
time the battery will weaken and the battery life shortens Use CPA within
an appropriate temperature range of 5°C (41 °F) to35°C (95T)
■ If CPA remains unused for several months or more, the remaining battery
power shows incorrectly The battery has become inactive Continue
operating CPA until the display shows "WEAK NI-CD BATTERY" Recharge
the battery for about three (3) hours
■When you find the printable number of checks reduced after repetitive
recharging, the battery life is exhausted Purchase a new battery pack
(KX-RC30) from your dealer
CO
(O
13

Power Supply
ATTENTION:
The product that you have purchased contains a
rechargeable battery The battery is recyclable
At the end of it’s useful life, under various state
and local laws, it may be illegal to dispose of this
battery into the municipal waste stream Check
with your local solid waste officials for details in
W
your area for recycling options or proper disposal
%
O
•t
O
w
3
(O
Ni-Cd
14

Chapter 2
Preparation
Page
Connecting CPA to Household AC...........16
■o
<D
-n
U
5‘
Turning On/Turning Off CPA
Resetting CPA..........................................17
Setting the Clock
Adjusting Display Contrast
......................................
....................
......................
16
19
20
15
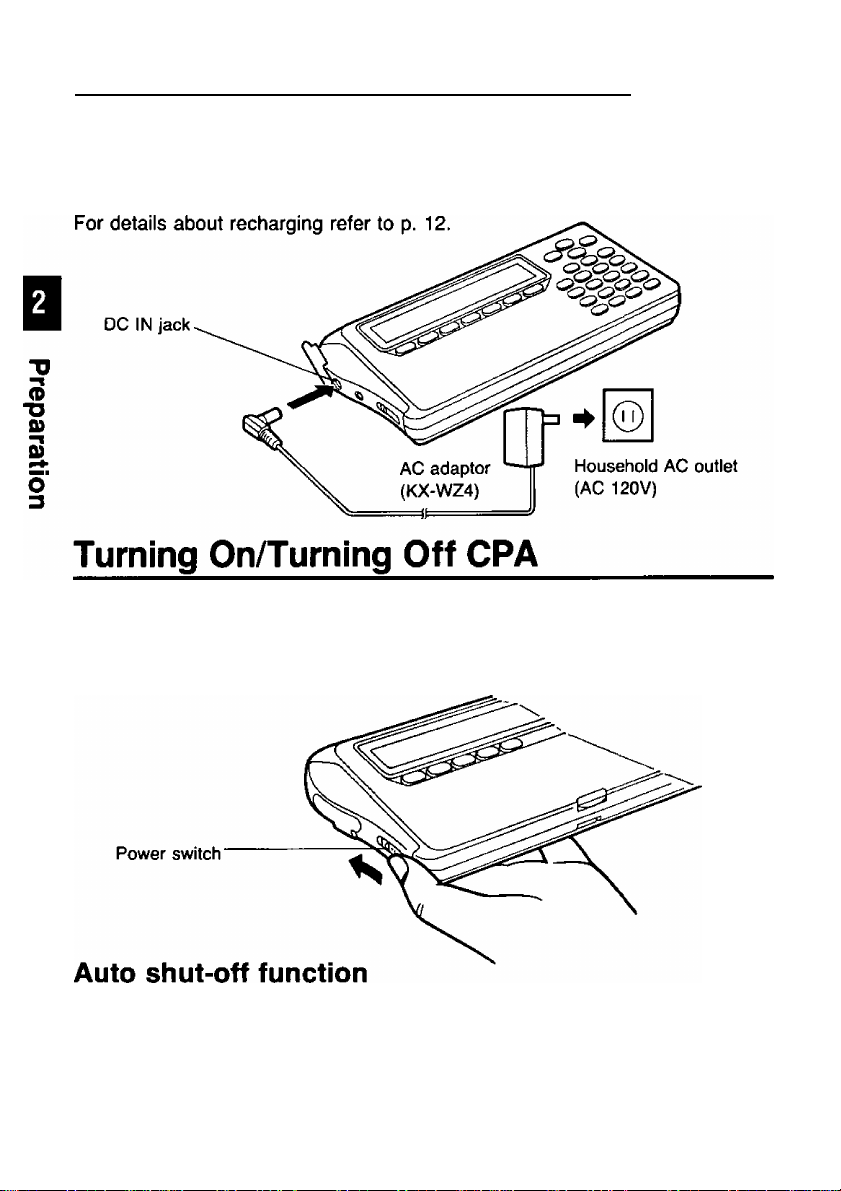
Connecting CPA to Household AC_______
Before operating CPA connect it to the household AC outlet (AC 120 V) with
the AC adaptor for about three (3) hours in order to charge the battery. (While
charging you can operate CPA. However, it will take longer for it to charge.)
To turn on CPA, slide the power switch in the direction of the arrow for about one
(1) second, until the display appears.
To turn off CPA, slide the power switch again in the same direction until the
display disappears.
If CPA is not in operation for more than 5 minutes while using battery power,
it automatically shuts off to prevent battery drainage.
Turn the power switch on again to resume using CPA.
16
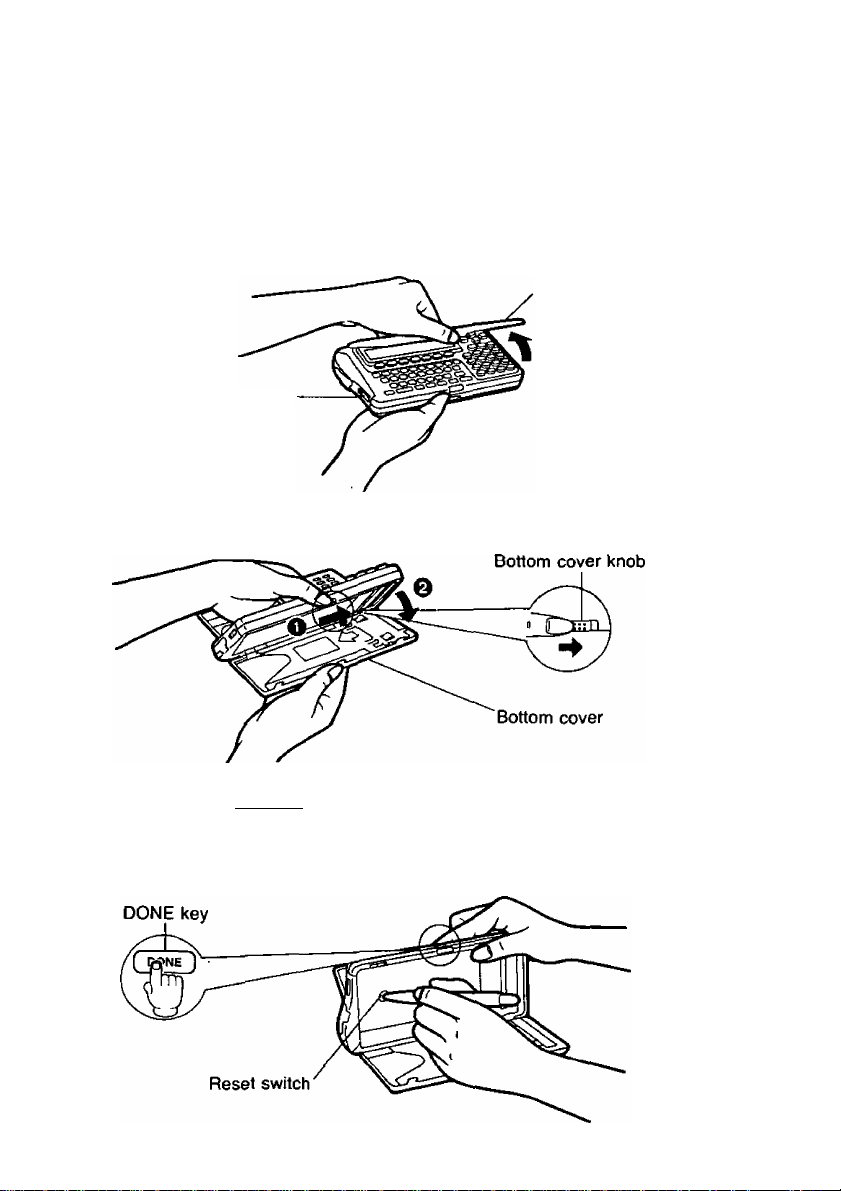
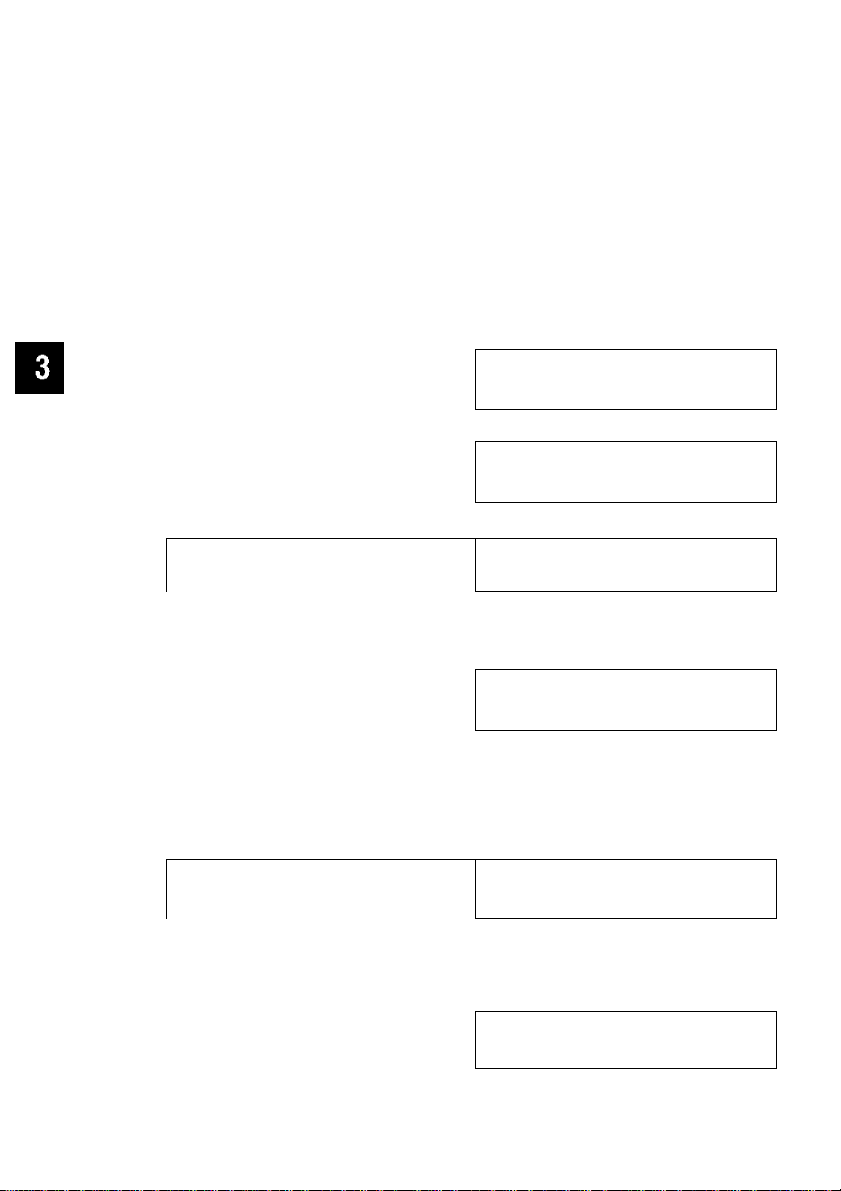
Resetting CPA
Before using CPA for the first time, resetting is necessary
to clear the memory.
1, Be sure that the power is ON.
Open the upper cover by pulling the tab up gently.
Upper cover
Power switch
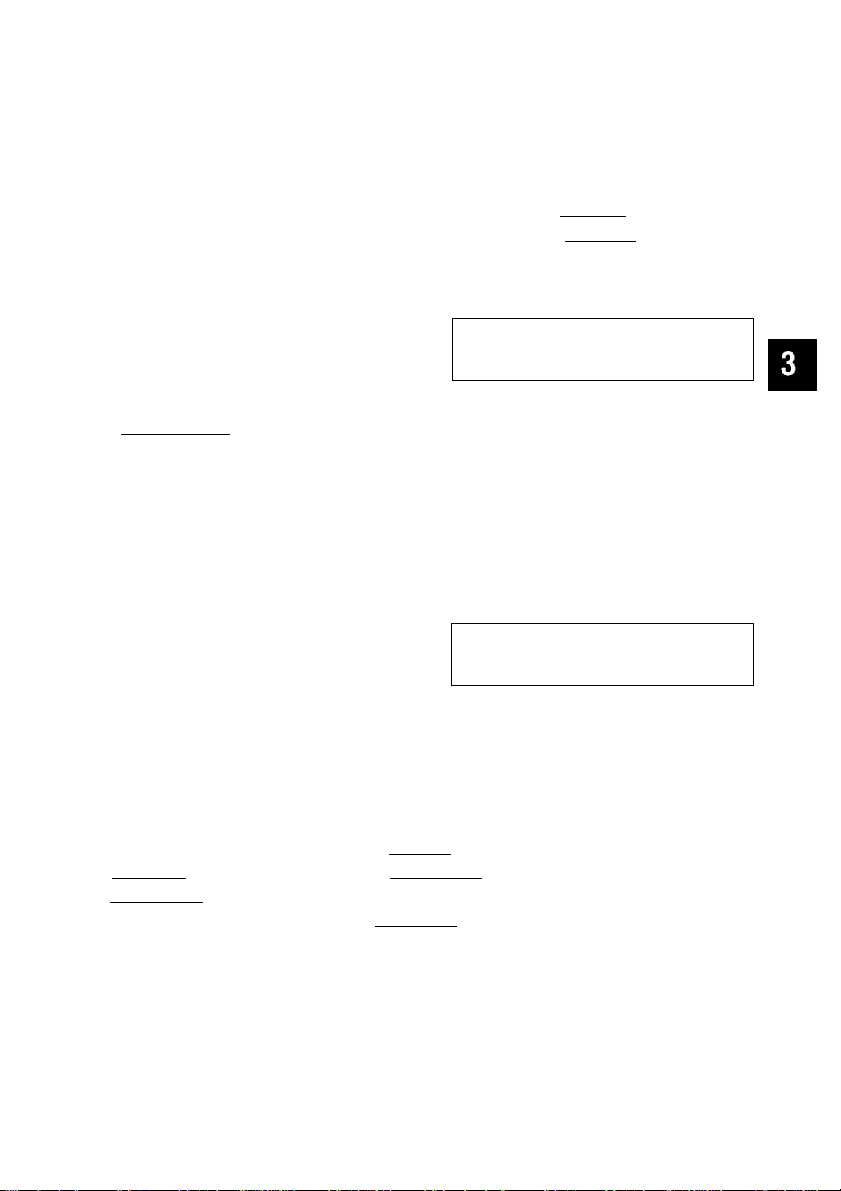
2. open the bottom cover by sliding the bottom cover knob to the right.
While pressing ibONE],
3.
press the reset switch inside
the bottom compartment of CPA with a
sharp object like the point of a pen.
(D
■o
&)
5'
3
17
Resetting CPA
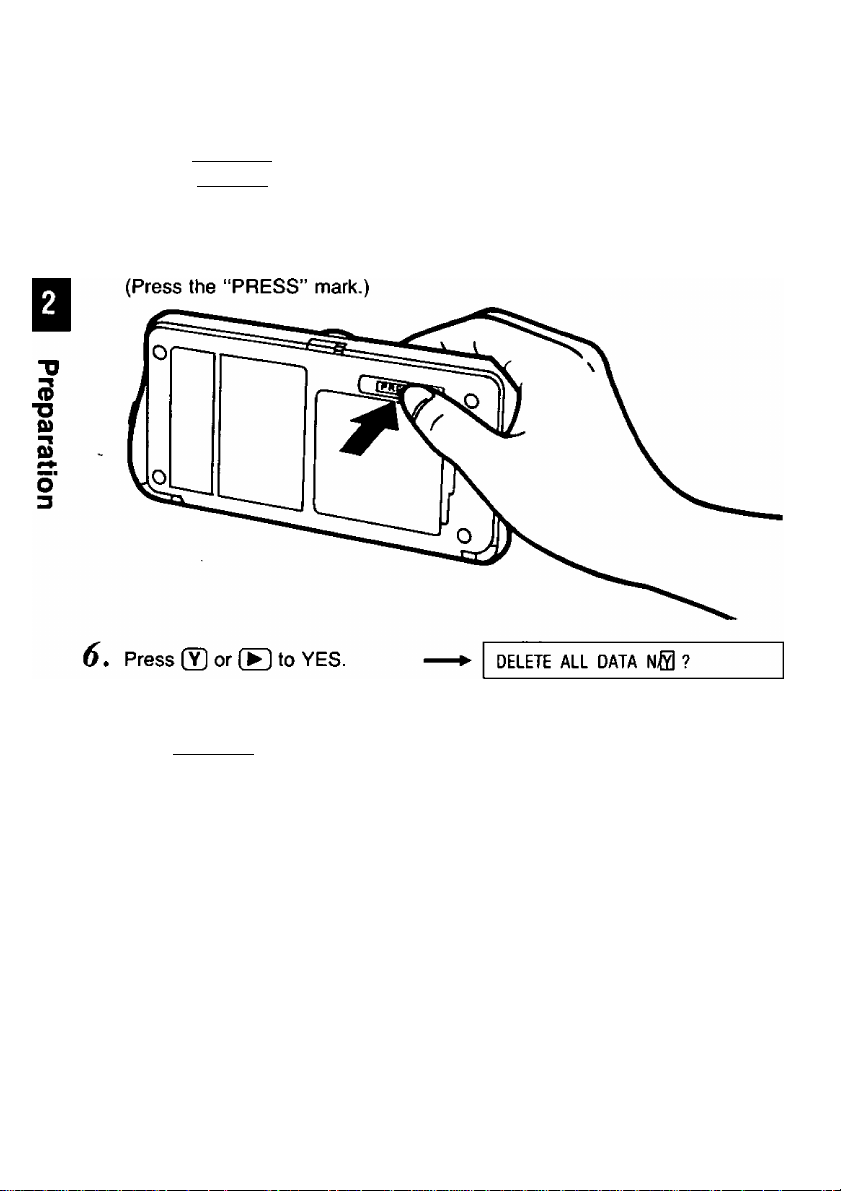
4, After pressing the reset switch,
release [DONE].
The display will show:
5, Close the bottom cover.
DELETE ALL DATA ?
7. Press [ENTER].
after a few seconds
\
JAN. 01, 1993 FRI
CAUTION: This operation clears the memory.
After it, the remaining battery power will be incorrectly displayed. Recharge CPA for about three (3) hours.
18
WAIT . . .
12:00:00 AM
Setting the Clock
Before using CPA for the first time, set the clock.
Example: Setting ‘‘January 28, 1993, 10:30 AM’’.
1
2
3
4
5
6
Operation
SETUP
To select “DATE” press
ENTER
Enter month, day, and year.
Example:
00Cl1000
ENTER
Enter the hour and minute(s).
Example:
□000
ENTER
)
Display/Description
iATE CHECK CARD
CONTRAST
DATE: (g;i/01/93
TIME: 12:00 AM
DATE: 01/28/®
TIME: 12:00 AM
•Calendar runs from 1992 to
2091.
DATE: 01/28/93
TIME: 5^:00 AM
DATE: 01/28/93
TIME: AM
DATE: 01/28/93
TIME;
10:30 EM/PM
MORE!
•a
(D
fi)
Q)
5'
3
To select “AM” or “PM" press
7
Q or Q.
To return to SETUP menu
8
press
Q To return to initial display
ENTER
press done] .
DATE: 01/28/93
TIME: 10:30 0VI/PM
Sate check
CONTRAST MORE!
JAN. 28, 1993 THU
10:30:03 AM
CARD
19
Setting the Clock
Correct mistakes either before or after entering numbers/letters.
• If you find a mistake before pressing [ENTER], press [◄]! (B- then
write the new entry over the old one^
• If you find a mistake after pressing [ENTER], press (3 to move up,
then write the new entry over the old one.
•To set the second at “0”, press [ENTER] at the minute or AM/PM.
_____
Adjusting Display Contrast___________
(D
■o
Example: To make the display darker.
fi)
Operation
o'
3
1
SETUP
Display/Description
Sate check
CONTRAST
CARD
MOREi
20
2
3
4
To select “CONTRAST” press
Q
[enter]
Select appropriate contrast.
Example:
Press
twice.
CD
To return to SETUP menu
press
To return to initial display press
DONE
ENTER
DATE CHECK
Eontrast
LCD CONTRAST
LIGHT DARK
LCD CONTRAST
LIGHT
►To make the display lighter,
press Si-
DATE CHECK
Eontrast
JAN. 28, 1993 THU
10:35:00 AM
CARD
MORE!
!□□□ DARK
CARD
MORE!

Chapter 3
CHECK Function
Entering Your Bank Name(s)
Making the Payee List
Setting Print Positions on
Your Check
Entering Data for Each Check
Printing a Check
Entering Deposit Data
Searching a CHECK Record
Reconciling (/) a Check
Voiding a Check After Issued
..........................................
......................................
..............................
..............................
....................
............................
..................
..................
..................
Page
22
24
26
31
35
39
43
45
46
o
X
m
o
3
o
5'
3
Deleting a CHECK Record
Entering Withdrawals/Service
Charges.................................................48
......................
47
21
Entering Your Bank Name(s)
Two bank names can be entered
Confirm the checking account balances before entering it
Example. You have two checking accounts
• In the FIRST bank (Balance $5000)-^Primary bank
•In the SECOND bank (Balance $3000)
o
m
o
7s
"n
c
3
o
o'
3
1
2
3
4
5
Operation
setup]
To select “CHECK” press
S
ENTER
Enter bank name
(up to 8 letters/numbers)
Example
©CD0CEI0
^ENTER I
Display/Description
[DATE CHECK CARD
CONTRAST MORE!
DATE [^ECK CARD
CONTRAST MORE i
NAME ACCT1
BAL ACCT1
NAME ACCT1
BAL ACCT1
• Bv pressino [ENTER] without
entering a bank name,
“ACCT1 ” IS automatically
entered
NAME ACCT1
BAL ACCT1
D
$0 00
firstD
$0 00
first
sSoo
22
6
Enter current balance
(up to $99,999 99)
Example
0000
NAME ACCT1
BAL ACCT1
first
$5000Q
Entering Your Bank Name(s)
8
9
10
11
12
ENTER
Enter second bank and
balance by repeating steps 4
through 6 on p 22
^enter’
k
______
-
To select
Q or
enter'
^
______
-
To return
f-----------\
DONE
NAME ACCT2
BAL ACCT2
• If only entering one bank
name, press [DONE] to finish
• If entering a second bank
name, proceed as follows
NAME ACCT2
BAL ACCT2 $30000
SELECT PRIMARY ACCT
QRST SECOND
SELECT PRIMARY ACCT
QRST SECOND '
DATE ^ECK
CONTRAST
D
$0 00
SECOND
JAN 28. 1993 THU
10 40 03 AM
CARD
MORE!
o
X
m
o
■n
c
3
o
5*
3
Correct mistakes either before or after entering letters/numbers
• If you find a mistake before pressing [ ENTER 1. press (3 ^ ^nd
[DELETE] This clears the letter/number under the cursor
• If you find a mistake after pressing [ENTER], press (3 to move up
then write the new entry over the old one
23
Making the Payee List
It is recommended that you make a payee list of those to whom you most
frequently write checks. It makes entering CHECK data much easier.
Enter up to 25 payee names each with memo.
Example: Entering payee name "PANA SHOP"into payee list number 1.
m
o
■n
c
3
o
o'
1
2
3
4
5
Operation
SETUP
press
Q
Enter payee's name
(up to 32 letters/numbers).
Example:
twice.
ENTER
0000(i^
©000
ENTER
G
Display/Description
EIaTE CHECK
CONTRAST MORE!
E\YLIST PRINTER LINK
PASSWORD
PAYLIST D1:D
MEMO:
PAYLIST 01: PANA SHOPD
MEMO:
PAYLIST D1: PANA SHOP
MEMO:0
CARD
MORE!
24
6
Enter memo if necessary
(up to 20 letters/numbers).
Example:
©□©00©©
00©0
PAYLIST 01: PANA SHOP
MEMO: ELECTRONICS □

Making the Payee List
y enter]
Q If entering other payees and
O memos repeat steps 4 through
7 (up to 25 payees can be
entered).
Q To return to SETUP menu
press DONE .
10 return to initial display press
[done] .
Correct mistakes either before or after entering letters/numbers.
• If you find a mistake before pressing [ENTER 1. press ! (B
[DELETE], This clears the letter/number under the cursor.
• If you find a mistake after pressing [ENTER], press (3 to move up
then write the new entry over the old one.
PAYLIST 02: D
MEMO:
[E^ylist printer link
PASSWORD MORE f
JAN. 28, 1993 THU
10:42:28 AM
•
O
X
m
O
"n
c
3
o
5'
3
• It is recommended that you memorize your payee list on the PAYEE
LIST card attached on the back of CPA.
25
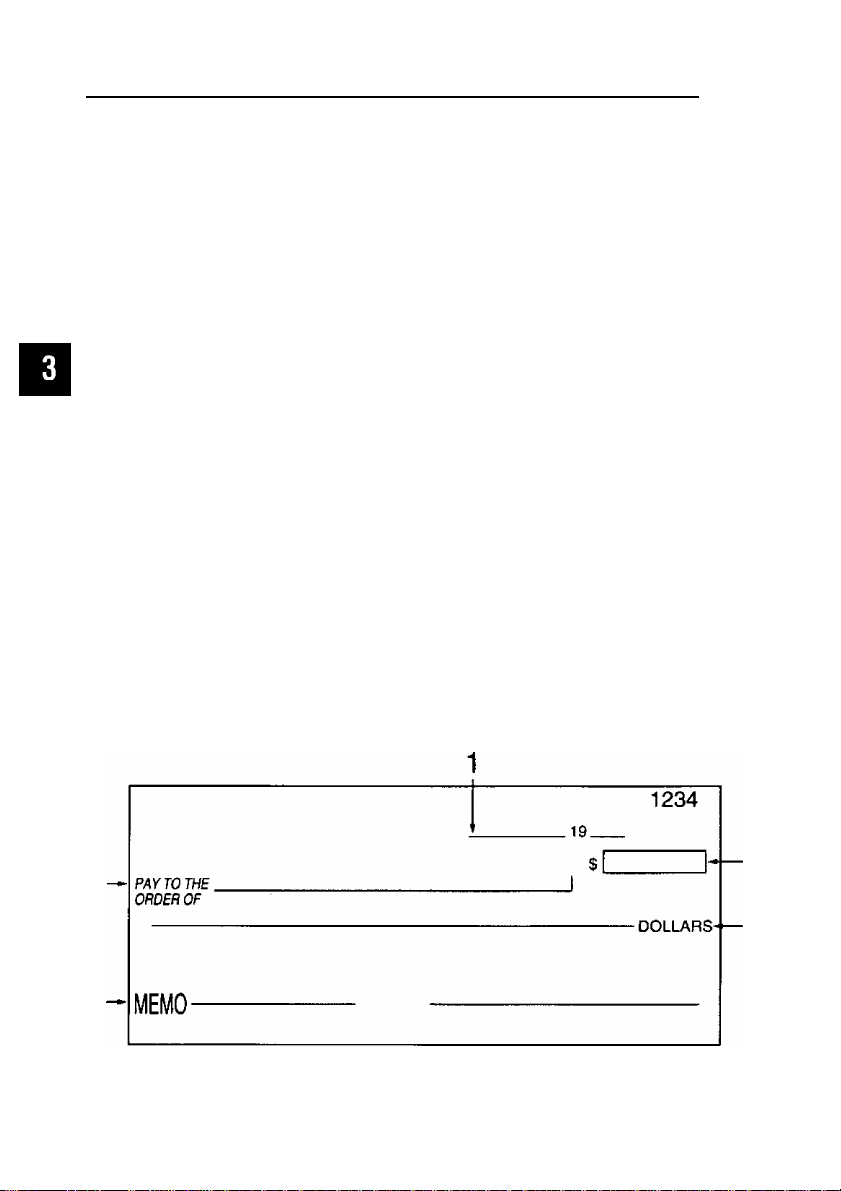
Setting Print Positions on Your Check
The following five (5) items out of the CHECK entries print at a specified
position on a check:
1 DATE
2 PAY TO
3 AMOUNT
4 DOLLARS
5 MEMO
Deciding the print positions
The check has its own print position for each item. By using the template
O
included with CPA you can select two types of print position (A or B) and let CPA
X
print data at proper positions closer to them. Place the template on top of your
m
check adjusting left and bottom rulers with left and bottom ends of your check.
o
Check to see where the above five (5) positions on your check correspond to
on the template, “A” or “B”.
■n
c
When defaulted, the above print positions set at “A”.
3
(Using the template ruler you can manually set other desired print positions.
o
We discuss this on p. 29.)
Example of a check:
26
Setting Print Positions on Your Check
Example: Setting the “DATE” and “PAY TO” at the “B" position
1
2
3
4
5
6
Operation
SETUP
Press
To select “PRINTER” press
Q
twice
(Z)
(enter]
To select Account press
g or Q
[enter]
Display/Description
Bme
CONTRAST
&YLIST
PASSWORD
PAYLIST EiilNTER LINK
PASSWORD MORE!
SELECT ACCOUNT
§;CT1 ACCT2
SELECT ACCOUNT
EtCT1
SELECT LOCATION
DATE a B
CHECK CARD
MORE!
PRINTER LINK
MORE!
ACCT2
RULER
O
z
m
O
7s
a
5'
7
8
Select position of “DATE'
Example select “B” by
pressing 0
SELECT LOCATION
DATE A i RULER
PAY TO i B
$ A
‘DATE” position has been set at
‘B"
RULER
27

Setting Print Positions on Your Check
Select position of “PAY TO”
Example select “B” by
pressing 0
PAY TO A i RULER
$
•When selecting “B” position for
“PAY TO" and entering more
than 25 letters/numbers for the
name, it overlaps the $ sign
A
O
X
m
o
7s
TTl
c
O
3
10
11
12
^ENTER
To return to SETUP menu
ENTER
To return to initial display press
DONE
three times
PAY TO B
$
“PAY TO" position has been set
at “B"
• If changing another item repeat
steps 7 and 8 on p 27
PAYLIST IBtINTER LINK
PASSWORD
JAN 28, 1993 THU
B RULER
MOREt
10 48 11 AM
28
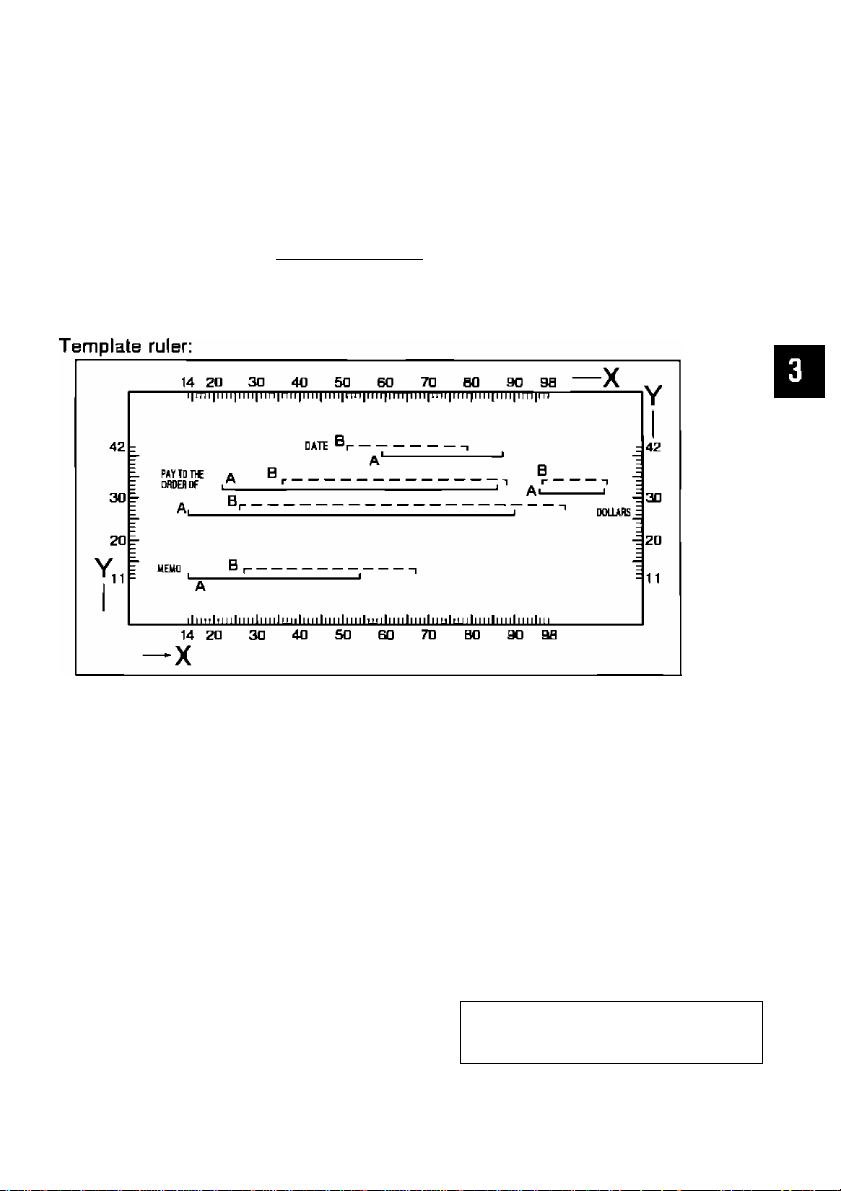
SeHing Print Positions on Your Check
When a position on your check corresponds to neither “A” nor “B”:
Place the template on lop of your check adjusting left and bottom rulers with left
and bottom ends oT your check.
Check to see where the bottm-left point of each of five (5) data items
correspond to on the template ruler. Check height on the left or right side, and
horizontal on the top or bottom.
m
o
7^
o
o'
Ejiample: Setting print position for “DATE” according to the template ruler
(X=Bn, Y=39).
1
2
3
Operation
Repeat steps 1 through 6 on
p. 27.
To select "RULER” press
s twice.
ENTER
Display/Description
SELECT LOCATION
DATE : 0 B RULER
SELECT LOCATION
DATE ; A B EPLER
ENTERX,Y
DATE
X=^ Y=4D
‘ I ^
Default of "A” position
for "DATE '.
29

Setting Print Positions on Your Check
Enter “X” and “Y” points
Example
0000
ENTER X,Y
DATE X=60
•By entering numbers not within
the range (X, 14 to 98, Y, 11 to
42) setting of each of the five
(5) Items, the display
automatically shows "X=14,
Y=ir
Y=39Q
ENTER
O
X
PAY TO 0
$ A
m
o
7s
3
o
6
7
\5^ Correct mistakes either before or after entering letters/numbers
To return to SETUP menu
press I done]
To return to initial display press
done]
.....
.
• If you find a mistake before pressing [ENTER], press (3! (B and
[DELETE] This clears the letter/number under the cursor
• If you find a mistake after pressing [ENTER], press (3 to move up
then write the new entry over the old one
PAYLIST ©WINTER
PASSWORD
JAN 28, 1993 THU
B RULER
LINK
MOREt
11 03 33 AM
30
 Loading...