

Page 1
Facsimile
Quick Reference Guide
KX-PW308DL
Table of Contents
Finding the controls …………………………………………………………… 2
Installations and connections ………………………………………………… 4
Setting the date and time ……………………………………………………… 7
Setting your facsimile telephone number …………………………………… 7
Setting your logo ……………………………………………………………… 8
Character input and command key table …………………………………… 9
Voice guide …………………………………………………………………… 10
Automatic dialing on the main unit ………………………………………… 11
Automatic dialing on the portable handset (KX-FKN526) ……………… 13
Intercom ……………………………………………………………………… 14
Sending faxes ……………………………………………………………… 15
Receiving faxes ……………………………………………………………… 16
Operating the built-in answering device ………………………………… 17
Call block …………………………………………………………………… 19
Specifications ……………………………………………………… Back cover
Model No.
Main unit:
Portable handset:
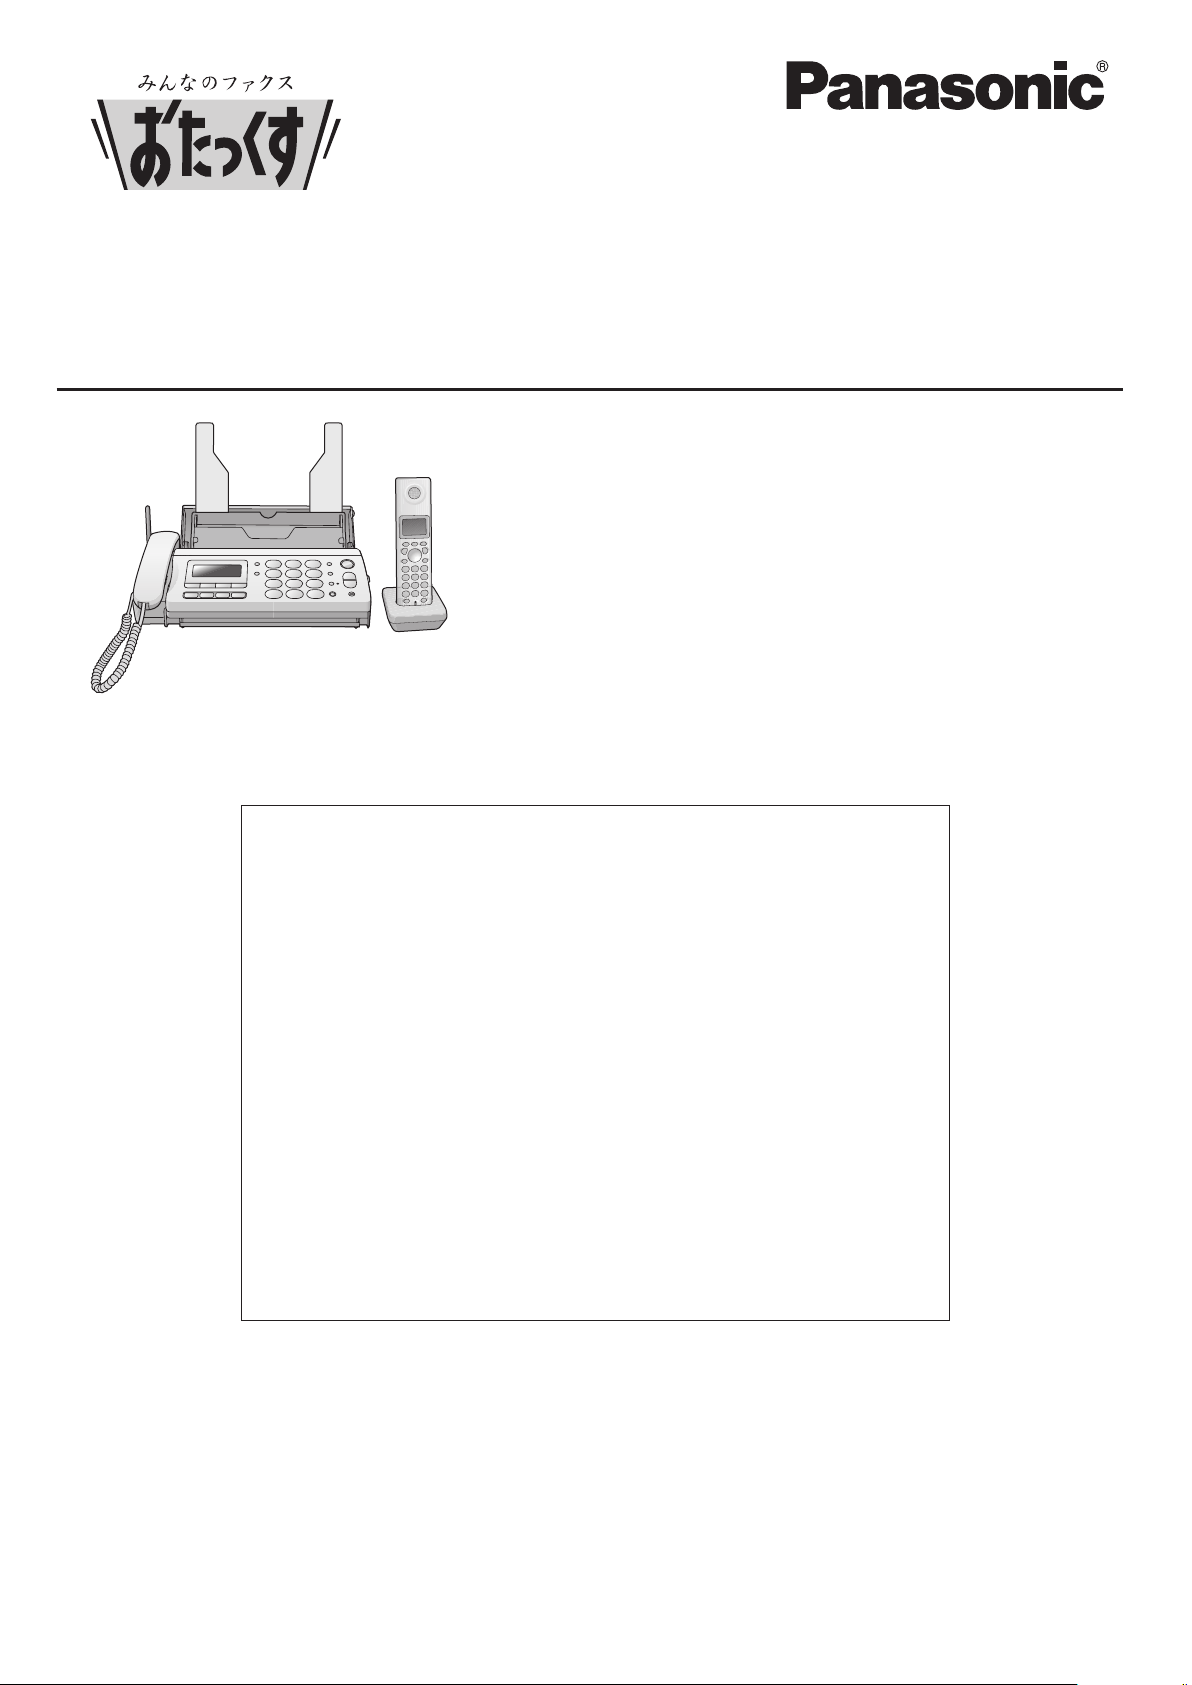
Thank you for purchasing a Panasonic facsimile.
KX-PW308DL
KX-PW308DW
KX-PW308
KX-FKN526
This guide explains some basic features and operations, but not all of them.
For further details, see the Japanese operating instructions.
This product is designed for use in Japan.
Panasonic cannot provide service for this product if used outside Japan.
Any details given in this guide are subject to change without notice.
This unit is equipped with the voice guide features. (Japanese only)
For details about voice guide, please see page 10.
Page 2
Finding the controls
1 2
4
16 17 18
7
8
15
9
14
5 6
10 11 12 13 19
3
1
2
3
4
5
6
7
8
9
10
11
12
13
14
15
16
17
18
19
Main unit
Liquid crystal display
Flash button (For call waiting service users.)
Erase button
Redial button redials the phone numbers in
the redial list. The last 10 phone numbers
dialed are stored in memory.
Select button
Playback button plays back recorded
messages.
Record button records a telephone
conversation.
Intercom button
Auto Answer button & indicator
—light on: answering device activated.
—light off: used as a regular telephone.
Fax button starts faxing.
Copy button starts copying.
Stop button
Function button initiates programming.
Resolution button selects the resolution
when faxing or copying.
One-touch Dial buttons
Phonebook button
Block button for the undesired call
Volume buttons adjust the volume.
Search buttons
Secure button
While the unit is ringing, press this button.
The unit announces a message to the caller.
The message is announced in Japanese
and means “This unit is currently set to
Caller Verifying mode. Could you please
speak out your name?”.
To talk to the caller, lift the handset.
To hang up, press .
Set button stores a parameter.
Tone button switches to tone dialing.
Sharp button
Monitor button
Hold button
Call Memory button starts a search in the
Number Display (Caller ID) log.
Call Memory indicator lights when a call
was missed.
(For Number Display service users.)
22
Page 3
Finding the controls
●
To adjust the volume.
●
To redial the phone
numbers in the redial list.
The last 10 phone
numbers dialed are
stored in memory.
●
To make/answer calls.
●
To put a call on hold.
●
To start a search in the
Number Display log.
(For Number Display
service users.)
Sharp button
Key lock button
●
To lock the portable
handset so that no calls
or setings can be made.
To turn key lock on,
press this button for
about 3 seconds until a
single beep is heard.
●
To turn key lock off,
press this button for
about 3 second
a single beep is heard.
s until
●
To use the phonebook.
and buttons refer to the function
displayed on the bottom of the display.
They function differently depending on
the mode.
Dial buttons
Earpiece
Liquid crystal display
Microphone
Do not cover the
microphone while
talking.
Function menu that is
controlled by or
Portable handset number
(and name)
No link to the main unit
Battery strength
Tone button
●
To switch to tone dialing.
●
To end a call.
●
To end or exit from editing or
other operations.
How to use key
Secure button
●
●
To page the main unit
and/or portable handset(s).
●
To change the character
input mode.
While the portable handset is
ringing, press this button. The
portable handset announces
a message to the caller. The
message is announced in
Japanese and means “This
unit is currently set to Caller
Verifying mode. Could you
please speak out your
name?”.
■
To talk to the caller,
press
.
■
To hung up, press .
Mute button
●
To mute your voice to the
other party by pressing this
button.
(To release the mute,
press this button again.)
How to use buttons
●
To use the speakerphone.
●
For call waiting service
users.
●
To clear letters/numbers.
Portable handset (KX-FKN526)
33
Page 4
Installations and connections
1 Open the control panel.
2 Open the back cover.
4 If the ink film is slack, tighten it by
winding this gear (
orange)
.
3 Insert the ink film.
Insert the orange
gear
into the left slot
of the main unit.
Insert the white gear into the right slot
of the main unit.
5 Close the back cover pressing
“ ” down on both sides
until it clicks into place.
6 Close the control panel.
Installing the ink film
When the unit runs out of ink film, the following message will be displayed.
フィルムガ ナクナリマシタ
コウカンシテクダサイ
Install a new ink film.
Replacement ink film:
KX-FAN190 (15 m) ¥714
KX-FAN190W (15 m X 2) ¥1,208
KX-FAN191 (15 m) (*1) ¥893
KX-FAN191W (15 m X 2) (*1) ¥1,523
44
U23
フィルムガ ナクナリマシタ
ヒンバン :
K X-F A N1 9 0
*1 KX-FAN191/KX-FAN191W leaves a fainter print trail on the film
than does the KX-FAN190/190W.
・As of August 2008. ・Tax included.
Page 5
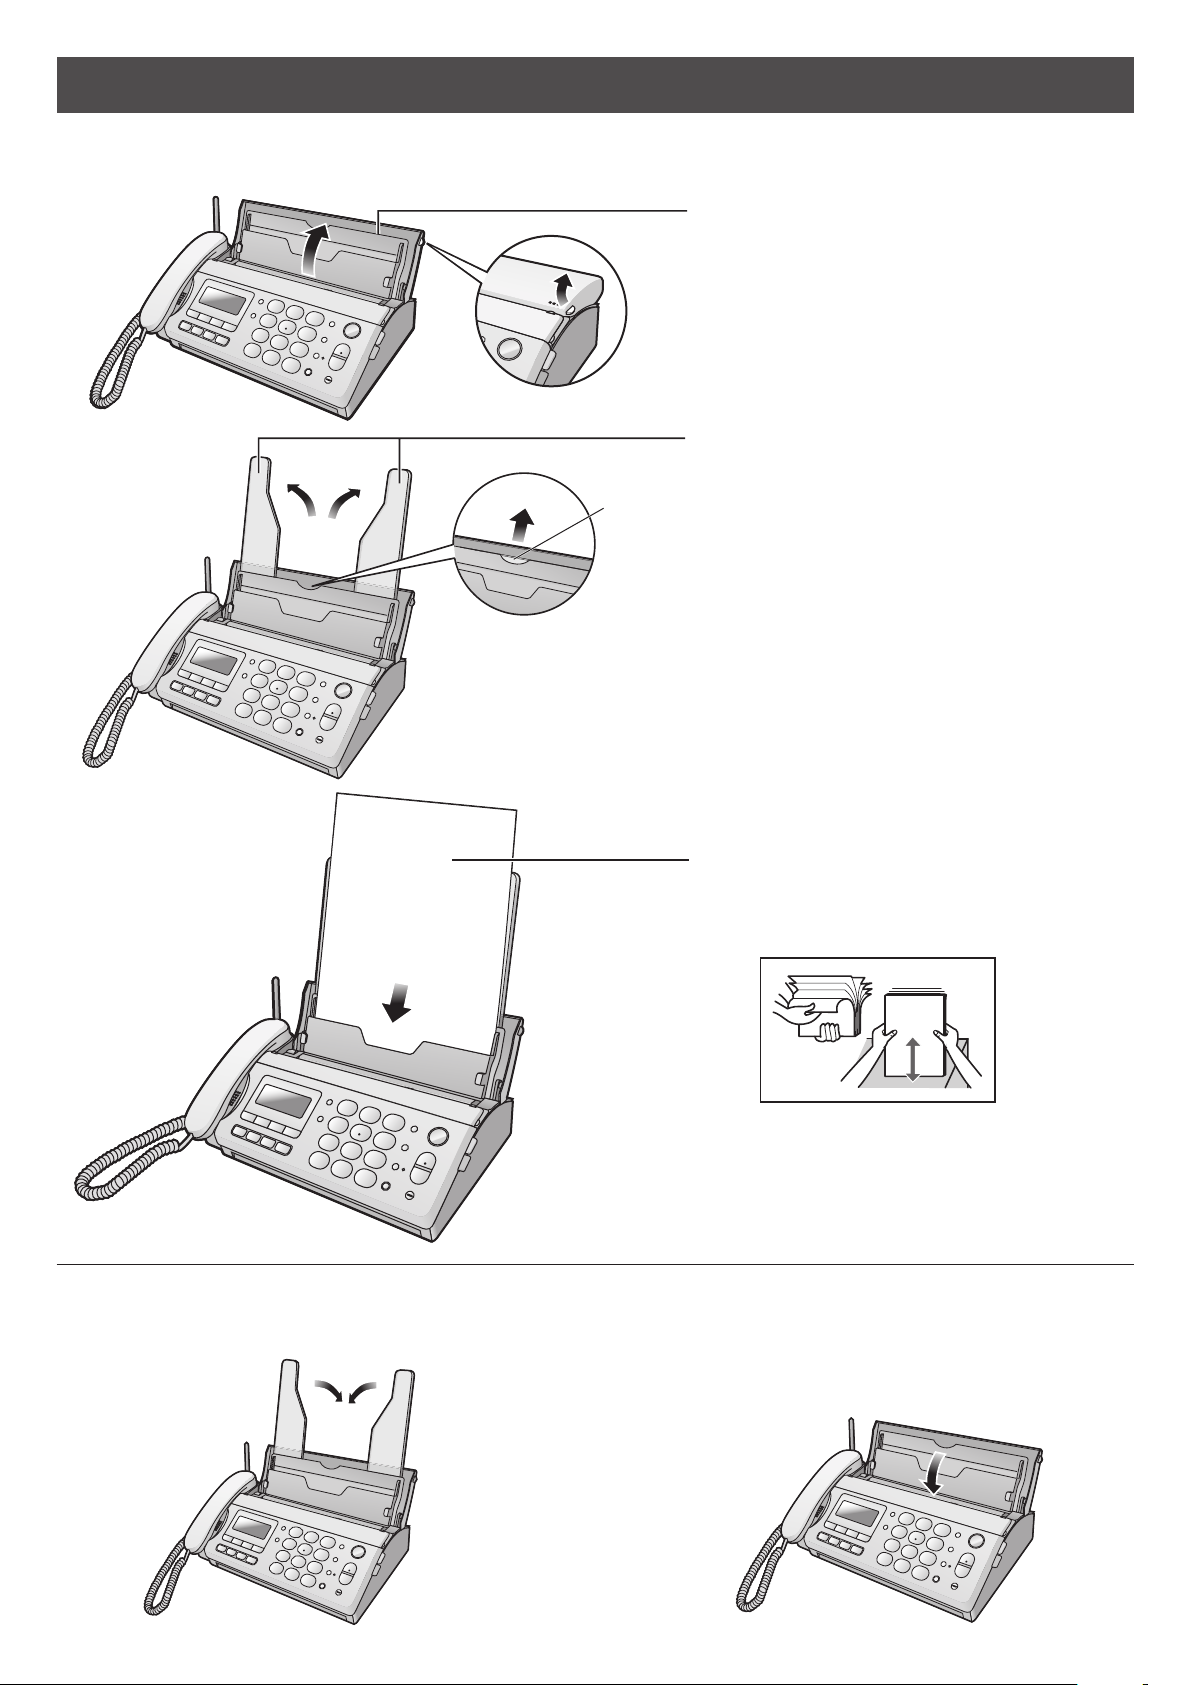
Installations and connections
2 Set up the recording paper stands.
Pull out the front stand first.
3 Insert the recording paper into the
recording paper tray. (Up to 15 sheets)
Fan the stack of recording paper.
Recording paper
Printing side is
on the back.
1 Open the recording paper tray.
Installing recording paper (A4 size)
Folding the recording paper tray
1 Remove the recording paper and fold the recording
paper stands in.
2 Close the recording paper tray.
55
Page 6

Installations and connections
1 Raise the antenna.
Power cord
Telephone line cord
(supplied accessory)
Wall jack
Power outlet
(AC 100 V)
3 Connect the telephone line cord.
4 Connect the power cord.
2 Connect the cord and
place the handset on
the main unit.
Battery
Charger
Power outlet
(AC 100 V)
Connecting the main unit
Setting up the portable handset
(KX-FKN526)
1 Press on the battery cover and slide the cover.
2 Insert the battery into the compartment and close the
battery cover.
After the Power On...
1 This unit will automatically select the dialing
mode (Pulse/Tone).
2 When the following is displayed, press
(Stop).
エランデケータイノセッテイ
[
ケッテイ]オス
If you cannot make a call...
Set the dialing mode with the main unit.
1. Press (Function/Resolution).
2.
Press
3. Press (Search button) repeatedly until the
desired setting is selected.
Example :
カイセンシュベツ=ジドウ
[
センタク]→[ケッテイ]オス
4. Press (Set).
.
プッシュ : Tone
20 : Pulse (20 PPS)
10 : Pulse (10 PPS)
ジドウ : Auto (Default)
3 Connect the charger to the power outlet, then place
the portable handset on the charger for about
10 hours.
After your Panasonic battery is fully charged,
it will last up to about 5 hours of conversation.
5. Press (Stop).
6
Page 7

Setting the date and time
Setting your facsimile
telephone number
1 Press (Function/Resolution). 1 Press (Function/Resolution).
キノウ トウロク モード
[,]
オス
キノウ トウロク モード
[,]
オス
2 Press
3 Press
(Set).
.
Example :
ヒヅケ・ジコクノ セッテイ
[
ケッテイ]オス
20 08年11月30
15:00
日
Cursor
4 Enter the correct year/month/day.
Example: December 1, 2008
Press .
20 08年12月01
15:00
日
5 Enter the correct hour/minute in a 24-hour clock entry.
Example: 15:45 (3:45 PM)
Press .
20 08年12月01
15:45
日
(Set).
.
アナタノデンワバンゴウ
T E L
?
2 Press
3 Press
4 Enter your facsimile telephone number, up to
20 digits.
Example: +098 7654··
T E L
?
+09 8 7 6 5 4..
To correct a mistake, press
(Flash/Erase).
The (Hold/Call memory)
button replaces the digit with a
space.
The (Tone) button replaces
the digit with “+”.
[
ケッテイ]オス
6 Press (Set). 5 Press (Set).
トウロク シマシタ
ヒヅケ・ジコクノ セッテイ
[
ケッテイ]オス
6 Press (Stop).7 Press (Stop).
Example :
1 2月1日15:4 5
ヨウケン ロクオン 0ケン
Example :
トウロク シマシタ
アナタノデンワバンゴウ
[
ケッテイ]オス
1 2月1日15:4 5
ヨウケン ロクオン 0ケン
7
Page 8

Setting your logo
1 Press (Function/Resolution).
2 Press
.
3 Press (Set).
キノウ トウロク モード
[,]
アナタノナマエ
[
ケッテイ]オス
ナマエ
? [カナ]
オス
Example: Micah
1. Press once.
ナマエ
? [ AB ]
M
Cursor
2. Press six times.
ナマエ
? [ AB ]
M
i
3. Press six times.
ナマエ
? [ AB ]
M
i c
4. Press to move the cursor to the next space,
then press four times.
ナマエ
? [ AB ]
M
i c a
5. Press five times.
ナマエ
? [ AB ]
M
i c a h
Cursor
4 Enter your logo, up to 30 characters, using the dial
keypad.
To enter English characters easily, press
(Intercom) repeatedly and select “AB” (English and
sign input mode).
For details, see the table on page 9 for instructions.
5 Press (Set).
6 Press (Stop).
Example :
トウロク シマシタ
アナタノナマエ
[
ケッテイ]オス
1 2月1日15:4 5
ヨウケン ロクオン 0ケン
8
Page 9

Character input and command key table
Pressing the dial keys will select a character as shown below.
Character Katakana English and signs Numbers
Display of the
main unit and the
portable handset
Dial key
Main
(
unit
)
Portable
handset
(
KX-FKN526
)
[カナ] [AB] [12]
アイウエオ
ァィゥェォ
カキクケコ A B C a b c 2
サシスセソ D E F d e f 3
タチツテトッ G H I g h i 4
ナニヌネノ J K L j k l 5
ハヒフヘホ M N O m n o 6
マミムメモ P Q R S p q r s 7
@ . _ – & $ ¥ % + = ~
^
1
ヤユヨャュョ T U V t u v 8
ラリルレロ W X Y Z w x y z 9
ワヲンー!? ( ) ! ? / ー # ‚ ; : | ・ ’ ” ( ) [ ] { } 〈 〉「 」 0
゛°、 。 、 。
(Main unit), (Portable handset)
(Main unit)
Command keys
The characters on the display are somewhat different from those shown in the character input and command key table.
(Portable handset)
(Main unit), (Portable handset)
(Main unit), (Portable handset)
Used to change the character
input mode.
Used to move the cursor to the
right.
Used to move the cursor to the
left and right.
Used to delete a character.
Used to insert a space.
99
Page 10

Voice guide
Operation guide
The unit starts the following voice guidance in Japanese:
Operations To cancel the operation guide (using the main unit)
Send a fax
Copy
Store phone numbers in the one-touch
dialers
Make a call using the phonebook/redial/
call memory
(Select “ナシ”)
(Select “ナシ”)
Change a ink film
Print fax documents from the main unit
memory
(Select “ナシ”)
(Select “ナシ”)
Reading-out dial
The unit announces the number dialed in Japanese, when you make a call with the main unit.
To cancel the reading-out dial
(Select “ナシ”)
1010
Page 11

Automatic dialing on the main unit
Storing names and telephone
numbers in the phonebook
To use the phonebook on the main unit, you need to
transfer the stored phonebook of the portable handset to
the main unit. (You cannot store directly in the phonebook
on the main unit.)
Store names and telephone numbers in the portable
handset phonebook before using this feature
(see page 13).
Transferring the phonebook entries from the portable
handset to the main unit
Making a voice call using the
phonebook
1 Press (Phonebook).
2 Press (Search button) repeatedly until the
desired name is displayed.
3 Lift the handset.
1 Press .
2 Press
3 Press .
.
デンワチョウ テンソウ
テンソウサキ=オヤキ
センタクハ
[,]
4 Press .
5
To transfer a stored phonebook entry individually
1 Press .
2 Press (Search button) repeatedly until the
desired name is displayed.
3 Press .
To transfer other names, repeat steps 2 and 3.
4 After the “ テンソウ シマシタ ” (Transfer complete) is
displayed, press (Off).
To transfer all of the stored phonebook entries
Erasing a stored name and
number in the phonebook
オス
1 Press (Phonebook).
2 Press (Search button) repeatedly until the
desired name is displayed.
3 Press (Erase).
1 Press (Search button) repeatedly to select
“ デンワチョウ=イッセイ ” (Transfer all).
2 Press twice.
3 After the “ テンソウ シマシタ ” (Transfer complete) is
displayed, press (Off).
4 Press .
5 Press (Stop).
11
Page 12

Automatic dialing on the main unit
Storing telephone numbers in the
one-touch dialers
You can store a telephone number in each one-touch
dialer.
1 Press (Function/Resolution).
Making a voice call using the
one-touch dialer
1 Lift the handset.
2 Press the one-touch dialer ( or ).
キノウ トウロク モード
2 Press the one-touch dialer ( or ).
Example: one-touch dialer 1
One-touch dialer number
ワンタッチ
1
トウロク ヲ カイシシマス
T E L
?
3 Enter the telephone number, up to 24 digits.
To correct a mistake, press (Flash/Erase).
The (Hold/Call memory) button replaces the
digit with a space.
4 Press (Set).
[,]
オス
Erasing a stored number in the
one-touch dialer
1 Press (Function/Resolution).
2 Press the one-touch dialer ( or ).
12
3 Press (Flash/Erase).
4 Press (Set).
Page 13

Automatic dialing on the portable handset (KX-FKN526)
Storing names and telephone
numbers in the phonebook
1 Press (Phonebook).
ケンサクハ
[,]
2 Press .
“XXX” shows the remaining
station numbers you can store.
You can program up to
150 stations, including
4 pre-programmed stations.
ナマエ? [カナ
アキ
×××
オス
ケン
Making a voice call using the
phonebook
1 Press (Phonebook).
2 Press (Search button) repeatedly until the
desired name is displayed.
3 Press (Talk).
]
Editing a stored name or number
in the phonebook
3 Enter the name, up to 12 characters (see the table on
page 9 for instructions).
4 Press .
5 Enter the telephone number, up to 24 digits.
To correct a mistake, press (Flash/Erase).
6 Press .
7 Enter the group number ( to ).
8 Press .
To program other items, repeat steps 3 to 8.
9 Press (Off) to exit the program.
1 Press (Phonebook).
2 Press (Search button) repeatedly until the
desired name is displayed.
3 Press .
4 Edit the name (see the table on page 9 for
instructions).
If you do not need to edit the name, skip to step 5.
5 Press .
6 Enter the correct telephone number.
If you do not need to edit the telephone number,
skip to step 7.
7 Press .
8 Edit the group number.
If you do not need to edit the group number, skip to
step 9.
9 Press .
10
Press (Off) to exit the program.
13
Page 14

14
Intercom
An intercom is available between the portable handsets or between the main unit and portable handset(s).
Using the main unit: Using the portable handset (KX-FKN526):
1 For single portable handset users
1 Lift the handset.
2 Press (Intercom).
For multiple portable handset users
1 Lift the handset.
2 Press (Intercom).
3
Call the portable handset(s) in the following ways:
– To call a specific portable handset, press the
portable handset number ( to ) which
you want to call.
– To call all the portable handsets, press .
デンワバンゴウ
コキ1ヨビダシ チュウ
?
1 For single portable handset users
Press (Intercom).
For multiple portable handset users
1 Press (Intercom).
2 Call the main unit and/or portable handset(s) in
the following ways:
– To call a specific portable handset, press the
portable handset number ( to ) which
you want to call.
– To call the main unit, press .
– To call the main unit and all the portable
handsets, press .
2 Start talking.
ナイセンツウワ チュウ
2 Start talking.
Example :
コキ1ナイセンツウワ チュウ
3 Replace the handset to end the intercom call.
3 Press (Off) to end the intercom call.
Page 15

Sending faxes
FA
CE U
P
Document
Document
guides
Document cover
FA
CE U
P
Document
Sending a fax manually
1 Open the document cover, and adjust the width of the
document guides to the size of the document.
Sending a fax using automatic
dialing
Using the phonebook
1 Insert the document (up to 5 pages) FACE UP until a
single beep is heard.
2 Insert the document (up to 5 pages) FACE UP until a
single beep is heard.
2 Press (Phonebook).
3 Press (Search button) repeatedly until the
3 If necessary, press (Search button)
repeatedly to select the desired resolution while
“ ガシツ=” is displayed (see below).
4 Press
(Fax).
desired name is displayed.
4 Press
The unit will start fax transmission.
Using the one-touch dialer
(Fax).
5 Dial the fax number.
1 Insert the document (up to 5 pages) FACE UP until a
single beep is heard.
6 Press
The unit will start fax transmission.
To select the resolution
Select the desired resolution according to the type of document, by pressing repeatedly while “ ガシツ=” is
displayed.
To display “ ガシツ=”, press (Function/Resolution) once or twice.
(Fax).
2 Press the one-touch dialer ( or ).
The unit will start fax transmission.
ガシツ=フツウジ
ガシツ=チイサイ
ガシツ=シャシン
[,]
[,]
[,]
(Standard) for printed or typewritten originals with normal-sized characters.
(Fine) for originals with minute printing.
(Photo) for originals containing photographs.
15
Page 16

16
Receiving faxes
light on
Receiving faxes
Receiving a fax manually
(AUTO ANSWER off)
Using the main unit:
1 When you hear a ring, lift the handset to answer the
call.
2 When:
– document reception is required,
– a fax calling tone (slow beep) is heard, or
– no sound is heard,
2 When:
– document reception is required,
– a fax calling tone (slow beep) is heard, or
– no sound is heard,
press .
3 Press (Search button) repeatedly until the
“ ファクス ジュシン ” is displayed, then press .
4 Press .
The main unit will start fax reception.
Receiving a fax automatically
(AUTO ANSWER on)
press (Fax), then replace the handset.
The unit will start fax reception.
Using the portable handset (KX-FKN526):
1 If the (Auto answer) light is off, turn it on by
pressing .
2 When receiving a call, the unit will receive a fax
document or record a voice message automatically
depending on the caller’s request.
1 When you hear a ring, lift the portable handset from
the charger, then press (Talk) to answer the call.
Page 17

Operating the built-in answering device
light on/
flash
Recording your own greeting
message
You can record your own greeting message. When
receiving a call, it will be played to callers instead of the
pre-recorded Japanese greeting message.
1 Press (Function/Resolution).
2 Press
.
ジサク オウトウ ロクオン
[
ケッテイ]オス
Activating the answering device
1 Turn the (Auto answer) light on by pressing .
2 When receiving a call, a greeting message will be
played and the unit will record a voice message.
To record your own greeting message, see left.
Listening to recorded messages
When new messages are recorded, the (Auto
answer) light will flash.
Press to listen to recorded messages.
After the messages are played back, the following will be
displayed.
To erase the messages, press
To save the messages, press
Listening to all of the recorded
messages
.
サイセイシタヨウケンショウキョ
.
スル= シナイ=#
3 Press (Set).
4 Lift the handset.
5 Press (Set) and speak your greeting message
after a beep, up to 16 seconds, to the handset.
6 Press (Stop) and replace the handset.
Your greeting message will be played back
automatically.
Erasing your own greeting
message
1 Press (Function/Resolution).
2 Press
.
ジサク オウトウ ショウキョ
[
ケッテイ]オス
3 Press (Set).
Press (Playback) when new messages are not
recorded.
When new messages are recorded, only the new
messages will be played back.
After all of the recorded messages are played back, the
following will be displayed.
To erase the messages, press .
To save the messages, press .
スベテ ショウキョシマスカ
ハイ= イイエ=#
Erasing a specific message
Press (Flash/Erase) while listening to the
message you want to erase, then press .
Erasing all of the recorded
messages
1 Press (Function/Resolution).
2 Press
.
ヨウケン ゼンショウキョ
[
ケッテイ]オス
?
4 Press .
The pre-recorded Japanese greeting message will
be played when you receive a call.
3 Press (Set).
4 Press .
17
Page 18

18
Operating the built-in answering device
light on
Operating the answering device
from a remote location
Preparation: Programming the remote operation ID
1. Press (Function/Resolution).
2.
Press
.
Operation: Listening to a recorded message from a
remote location
Turn the (Auto answer) light on before you go out.
Remote operations are available only from a touch tone
telephone.
1. Call your unit.
2. Enter the remote operation ID during the greeting
message.
3. Press 2 or wait 4 seconds.
Only the new recorded messages will be played
back.
To listen to all the recorded messages, press 4.
3. Enter any 4-digit number (remote operation ID) except
or #.
Example :
4. Press (Set).
5. Press (Stop).
アンショウ No.
[4ケタ]→[ケッテイ]オス
=1 2 3 4
Page 19

Call block
Blocking the incoming calls
Using the main unit:
To block a call using a message
While the unit is ringing, press (Block).
OR
While you are on an incoming call, press (Block),
then press .
The unit announces a message to the caller 2 times,
then hangs up automatically. The message is
announced in Japanese and means
“We’re sorry, but your call cannot be connected.”.
To block a call using chimes
Using the portable handset (KX-FKN526):
1 While the unit is ringing, press .
OR
While you are on an incoming call, press , then
press (Search button) repeatedly until the
“ ツウワ キョヒ ” is displayed.
1 While you are on an incoming call, press (Block).
2 Press .
Chimes are heard by the caller.
3 Tell the caller that a visitor has come and hang up.
For Number Display service subscribers
If you subscribe to Number Display service, the message
heard by the caller will change according to the caller’s
situation.
Example :
If the caller requested not to send caller’s
information,
change to mean
“Your phone number is blocked by service provider.
Please call again with adding ‘186’ to the beginning
of the phone number.”.
When the following is displayed after pressing
(Block), you can set the unit to block the call from
the same telephone number.
To block the call, press .
To cancel blocking, press .
When the following is displayed,
the message heard by the caller will
メイワク セッテイ シマスカ
ハイ= イイエ=#
press to cancel.
キョヒ セッテイ シマスカ
ハイ= イイエ=#
?
?
2 Press .
The unit announces a message to the caller 2 times,
then hangs up automatically. The message is
announced in Japanese and means
“We’re sorry, but your call cannot be connected.”.
For Number Display service subscribers
If you subscribe to Number Display service, the message
heard by the caller will change according to the caller’s
situation.
Example :
If the caller requested not to send caller’s
information,
change to mean
“Your phone number is blocked by service provider.
Please call again with adding ‘186’ to the beginning
of the phone number.”.
When the following is displayed after operating step 1
and 2, you can set the unit to block the call from the same
telephone number.
To block the call, press .
To cancel blocking, press
When the following is displayed,
the message heard by the caller will
メイワク セッテイ
.
press to cancel.
ハイ= イイエ=#
キョヒ セッテイ
ハイ= イイエ=#
?
?
19
Page 20

Specifications
Main unit
KX-PW308DL
KX-PW308DW
Main unit
Power supply AC 100 V (50 Hz/60 Hz)
Transmission: Approx. 10 W
Reception: Approx. 13 W
Power
consumption
Copy: Approx. 16 W
Stand by: Approx. 0.7 W
(When the F-net service is not in use.)
Maximum(*1): Approx. 130 W
Approx. 86 X 296 X 191 mm
Dimensions
(H x W x D)
Mass (Weight)
Operating
environment
(without handset, projections)
Approx. 265 X 296 X 231 mm
(recording paper tray opened,
without handset, projections)
Approx. 2.4 kg
(10 m ink film installed)
5 °C – 35 °C, 45 % – 85 % RH (Relative Humidity)
Portable handset
(KX-FKN526)
Battery charger
Ni-MH battery
(Part no. KX-FAN51)
AC 100 V (50 Hz/60 Hz)
DC 3.6 V, 650 mAh
• Charging:
Approx. 1.2 W
• Stand by:
Approx. 0.5 W
(When the portable handset
is off the charger.)
Approx. 171 X 44.5 X 33.5 mm Approx. 34 X 72.5 X 100.5 mm
Approx. 157 g
(battery installed)
Approx. 160 g
KX-PW308DL
KX-PW308DW
Main unit
Applicable line Public Switch Telephone Network (Pulse/Tone), F-Net, NCC Lines
DC resistance 275 W
Compatibility G3 compatible
Document size A4 – A5 (Max. 210 mm in width, Max. 600 mm in length)
Effective scanning size 208 mm (A4)
Effective printing size 202 mm (A4 size plain paper)
Transmission time Approx. 15 s/page (Original mode) (*2)
Modem speed 9,600 / 7,200 / 4,800 / 2,400 bps; Automatic fallback
Halftone level 64-level
Scanning density
Horizontal : 8 pels/mm
Vertical : 7.7 lines/mm (Fine/Photo), 3.85 lines/mm (Standard)
Scanner type Contact image sensor
Printer type Thermal transfer printing on plain paper
Data compression system Modified Huffman (MH), Original mode
Recording paper size A4: 210 mm x 297 mm (Plain paper)
Greeting message: Digital recording system (up to 16 sec)
Answering device
Pre-recording greeting message
ICM Recording: Digital recording system (Approx. 12 min. in total) (*3)
Memory capacity
Max. Approx. 50 pages (Only receiving fax etc.) (*4)
Max. Approx. 12 min. (Only recording message) (*3)
*1 When copying a 100 % black document.
*2 Transmission speed is based on an A4-size document of 700 characters sent in standard resolution at 9,600 bps. The
actual transmission speed depends upon the contents of the page, resolution, telephone line conditions and capability
of the other party’s machine.
*3 If there is a silent pause, the total recording time will be longer.
*4 The memory capacity is based on an A4-size document of 700 characters sent in standard resolution
(8 x 3.85 lines/mm).
C
2008 Panasonic Communications Co., Ltd. All Rights Reserved.
PNQX1620ZA FK0708TA0
 Loading...