

Page 1
Panasonic
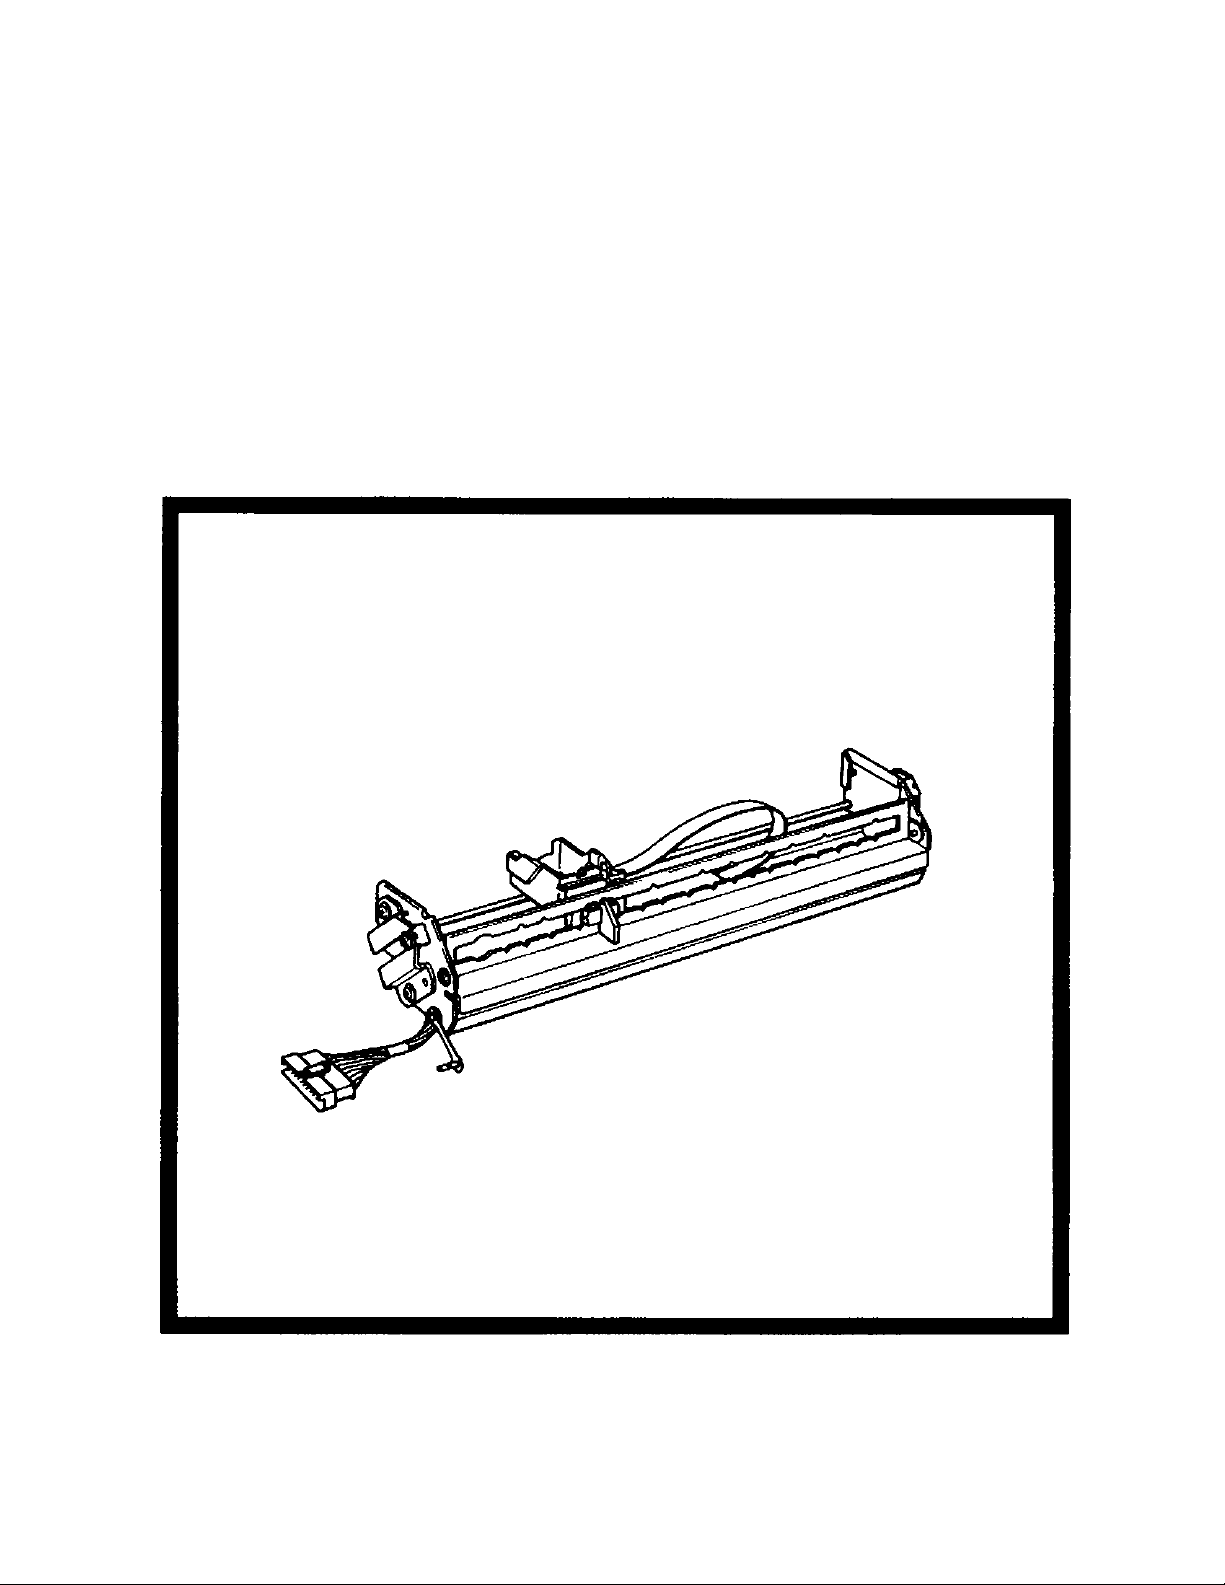
Imprinter Unit
Operating Instructions
Model No. KV-SS010
Please read all sections of these instructions completely before using this product.
Keep all documentation regarding this product in safe place for future reference.
Page 2
Thank you for purchasing a Panasonic "Imprinter Unit",
------------Table of Contents
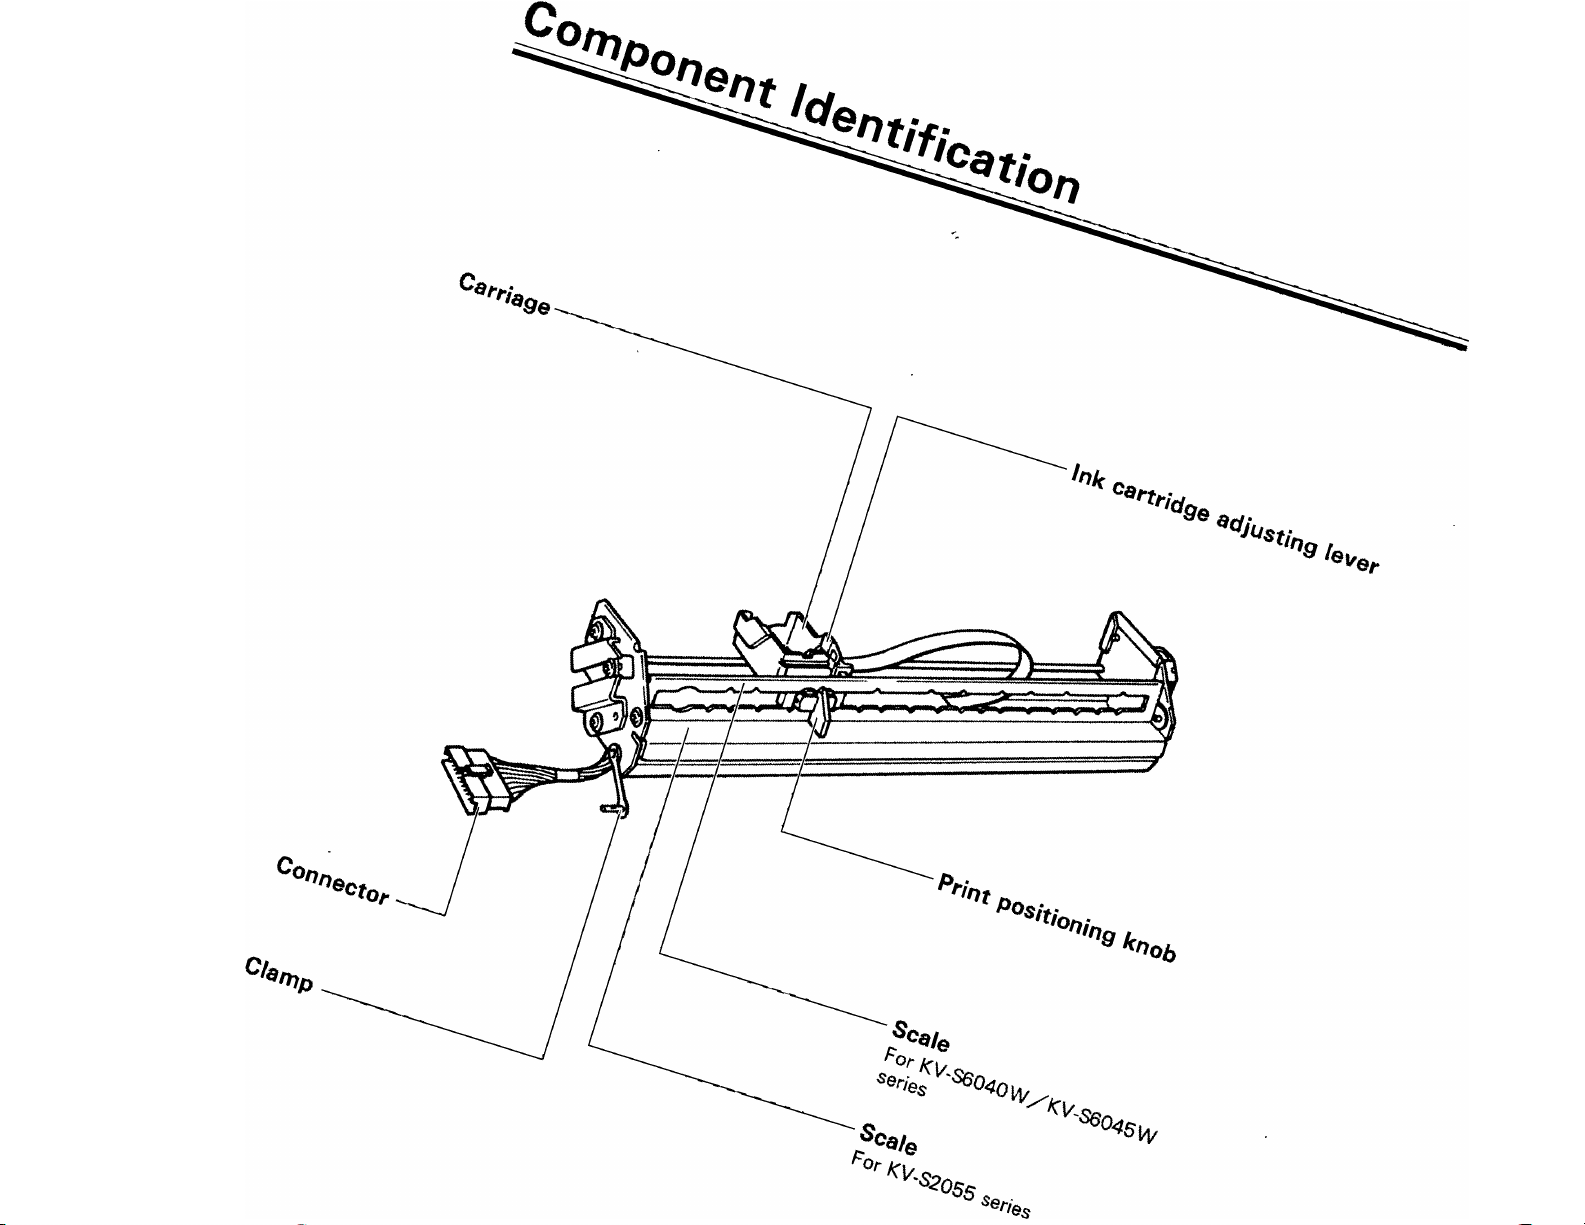
Component Identification ..................................................................................3
Application Setting.............................................................................................4
Installing the Imprinter Unit
• The KV-S2055 series pre-imprinter installation ..............................................................5
• The KV-S2055 series post-imprinter installation ............................................................6
• The KV-S6040W/KV-S6045W series imprinter installation
Installing the Ink Cartridge...............................................................................10
• For the KV-S2055 series pre-imprinter.........................................................................10
• For the KV-S2055 series post-imprinter. ......................................................................11
• For the KV-S6040W/KV-S6045W series imprinter.......................................................12
• Ink cartridge cautions....................................................................................................12
...............................................................................
------------------
...........................................
Page
5
8
Printing ..........................................................................................................1 3
• Adjusting the printing position
• Printing position ...........................................................................................................13
• Printing area..................................................................................................................14
• Printable characters chart.............................................................................................14
Troubleshooting and Specifications................................................................... 15
• Troubleshooting ........................................................................................................... 15
• Specifications....................................................................................................Back cover
.....................................................................................
13
These Operating Instructions are printed on recycled paper
Page 3
Page 4

Application Setting
This unit can be used with the KV-S2055 series and KV-S6040W/KV-S6045W series scanners by changing
the print positioning knob index.
Move the print positioning knob
to the left side of the imprinter
1
unit.
Pull up the print positioning knob
(®), rotate it 180 degrees (@),
2
and match the index with the
scanner to be used.
Print positioning
knob index
For KV-S2055 series
Print positioning
knob index
Print positioning knob
For KV-S6040W/KV-S6045W
series
Print positioning
knob index
Page 5
Installing the Imprinter Unit
The KV-S2055 series pre-imprinter will print in the same direction as the scanning document
The KV-S2055 series post-imprinter will print in the opposite direction of the scanned document.
The KV-S6040W/KV-S6045W series imprinter will print in the same direction as the scanning document.
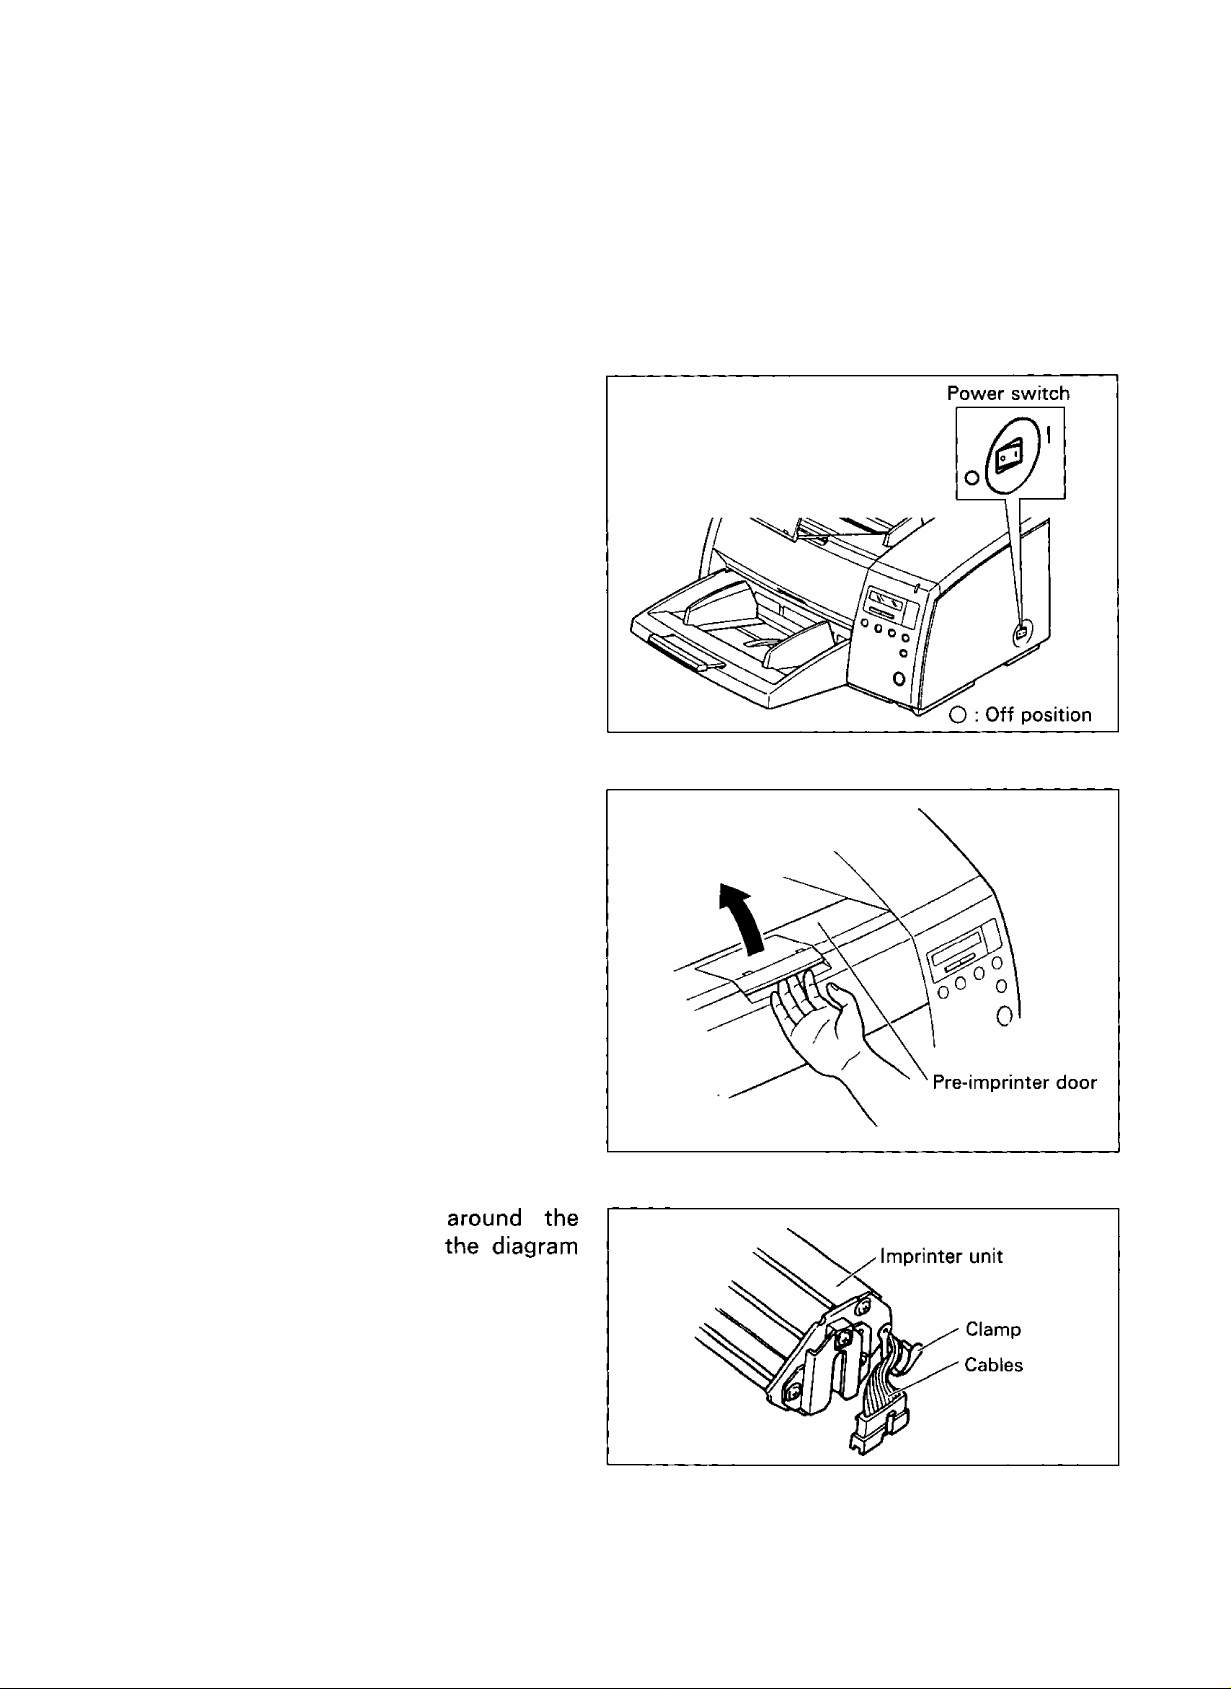
The KV-S2055 series pre-imprinter installation
Turn off the scanner's (KVS2055 series) power and unplug
1
the power cord.
Open the pre-imprinter door of
the scanner.
2
Secure the clamp
cables as shown in
3
to the right.
Page 6

Installing the Imprinter Unit
Match and
pins with
4
grooves.
• Be sure to completely insert the
scanner pins in the imprinter unit
grooves as shown in the diagram to
the right.
If it is not, printing can not be done
correctly.
• When installing the imprinter unit,
hold it as shown below.
Disengage the scanner connector
from the clamp and insert it into
5
the connector of the imprinter
unit as shown in the diagram to
the right.
• Be sure to completely insert the
connector.
insert the scanner
the imprinter unit
Insert the scanner connector's
cables into the clamp, and deal
6
with the scanner connector by
pressing it against the side of the
scanner as shown in the diagram
to the right.
Close the pre-imprinter door.
7
The KV-S2055 series post-imprinter installation
Turn off the scanner's (KVS2055 series) power and unplug
1
the power cord.
•Refer to stepi, "The KV-S2055 series
pre-imprinter installation", on page 5.
Page 7

Open the post-imprinter door of
the scanner.
2
Secure the clamp around the
cables as shown in the diagram
3
to the right.
Installing the Imprinter Unit
Match and insert the scanner
pins with the imprinter unit
4
grooves.
• Be sure to completely insert the
scanner pins in the imprinter unit
grooves as shown in the diagram to
the right.
If it is not, printing can not be done
correctly.
• When installing the imprinter unit,
hold it as shown below.
Page 8

Installing the Imprinter Unit
Insert the connector of the
imprinter unit into the scanner
5
connector.
• Be sure to completely insert the
connector.
Close the post-imprinter door.
6
The KV-S6040W/KV-S6045W series imprinter installation
Turn off the scanner's (KV-
S6040W / KV-S6045W series)
1
power and unplug the power
cord.
Power switch
O : Off position
Open the imprinter door of the
scanner.
2
Page 9

Insert the connector of the
imprinter unit into the scanner
3
connector.
• Be sure to completely insert the
connector.
• Rotate the clamp in the direction of
arrow so that the clamp does not
push the imprinter door.
• When attaching the connector, hold
the imprinter unit as shown below.
Installing the Imprinter Unit
Match and
pins with
4
grooves.
• Be sure to completely insert the
scanner pins in the imprinter unit
grooves as shown in the diagram to
the right.
If it is not, printing can not be done
correctly.
• When installing the imprinter unit,
hold it as shown below.
Close the imprinter door.
insert the scanner
the imprinter unit
5
Page 10

Installing the Ink Cartridge
iFor the KV-S2055 series pre-imprinter.
Press the protective sheet of the
ink bag using the included pin
1
until the ink accumulates as
shown in the diagram to the
right.
• Be sure that the pin presses the
protective sheet on the ink bag, not
the ink bag itself. Otherwise, the pin
may puncture the ink bag.
Remove any
tissue paper.
2
Move the print positioning knob
to the right side, lift up the
3
imprinter unit (®) and tilt it at
an angle ((D).
Insert the ink cartridge's top side
into the carriage. (®)
4
Press the bottom side of the ink
cartridge into the carriage ((D)
and then lock the ink cartridge
adjusting lever. ((D)
•Follow the sequence of 0 through CD
in the diagram to the right.
excess ink with
Bottom side
Top side
Ink cartridge
adjusting lever
10
Carriage
Page 11

Insert the imprinter unit to return
it to the original position.
5
• Be sure to completely insert the
scanner pins in the imprinter unit
grooves.
For the KV-S2055 series post-imprinter.
Installing the Ink Cartridge
Perform operation steps 1 and 2,
"For the KV-S2055 series pre
1
imprinter", on page 10.
Move the print positioning knob
to the right side.
2
Perform operation step 4, "For
the KV-S2055 series pre
3
imprinter", on page 10.
11
Page 12

Installing the Ink Cartridge
For the KV-S6040W/KV-S6045W series imprinter.
Perform operation steps 1,2 and 4, "For the KV-S2055 series pre-imprinter", on page
10.
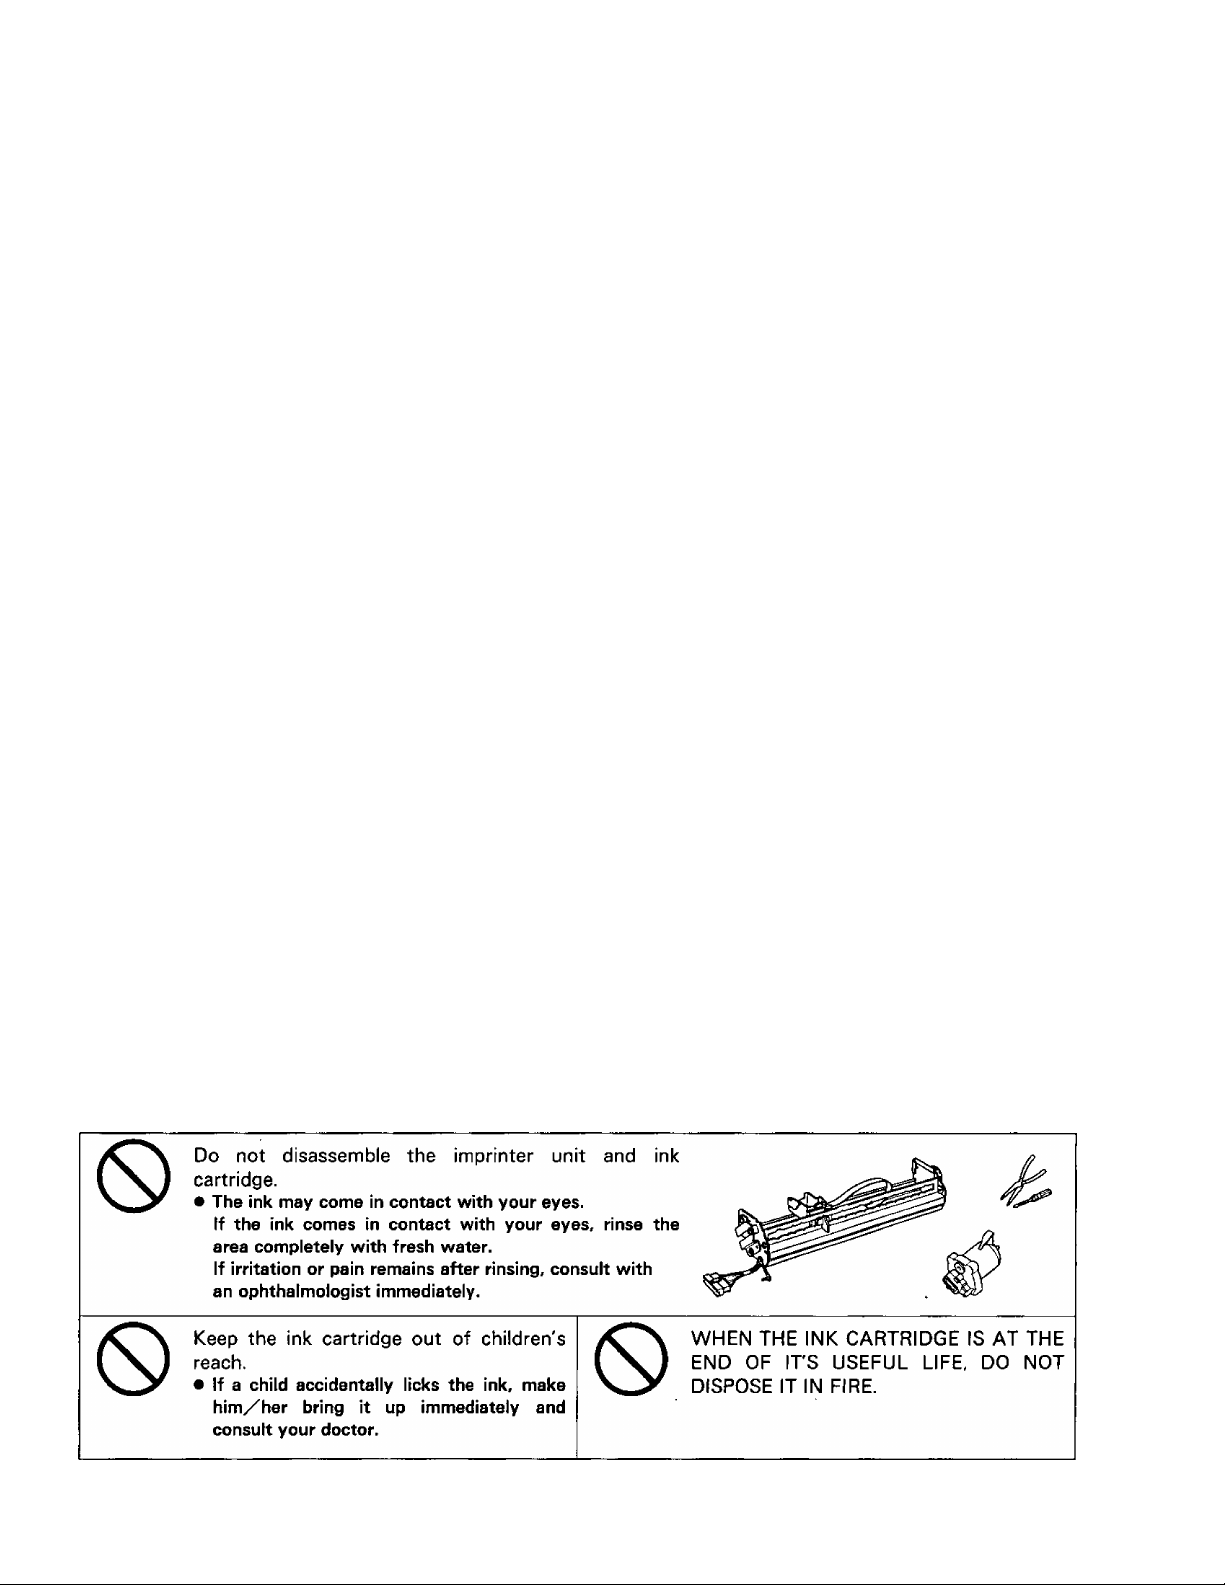
Ink cartridge cautions
If the inkflow point is touched with your hands or a dirty object the ink may not flow properly. Do not
touch the inkflow point.
Inkflow point
• Do not subject the ink cartridge to shock as it consists of many small components.
• Place the ink cartridge gently in a horizontal direction.
• If the date marked on the box has expired, the print quality may be affected.
12
• If the ink cartridge is not used within 6 months after unpacking the unit, the print quality may be
affected.
• Be sure that the storage temperature is between 0“C and 40°C (32T and 104T ).
• Store the ink cartridge away from direct sunlight.
• Do not clean the ink cartridge with alcohol.
Page 13

Printing
Adjusting the printing position
Confirm if the print positioning
knob index matches the desired
1
scanner.
•Refer to step 2, "Application Setting",
on page 4.
Move the knob to the desired
position on the scale.
2
• Move the knob until it locks into
position. Printing cannot be done if it
is in any other position.
•Adjust the knob so that the top side
of the ink cartridge comes on the
document.
Printing position
13
Page 14

Printing
For the KV-S6040W/KV-S6045W series imprinter.
I Printing area
For the KV-S2055 series
pre-imprinter.
The shaded area can be printed. It will
print in the same direction as the
scanning document.
• The characters are also scanned at the
same time.
For the KV-S2055 series post-imprinter.
The shaded area can be printed. It will
print in the opposite direction of the
scanned document.
For the KV-S6040W/KV-S6045W
series imprinter.
The shaded area can be printed. It will
print in the same direction as the
scanning document.
• The characters are also scanned at the
same time.
Printable characters chart
SP
9
R S T U V w X Y Z
I m
#
<
n 0
%
$
=
>
P q
"
!
'
&
?
r s t u V w X
@
( )
A B
C
[ \ ]
+
D E
~
,
F G H 1 J K L M N 0 P Q
a b c d e
z
y
0
{ 1 }
1 2 3 4 5 6 7 8
f
—
h i
9
k
i
14
If the display language is set to "Japanese", the " \ ” character will be printed as "¥‘
Page 15

Troubleshooting and Specifications
Troubleshooting
If a problem occurs while the unit is being used, first check the following items. If the unit still
malfunctions, turn it OFF, and call for service.
Symptom Possible Cause Remedy
Confirm that the connector is
completely inserted.
Clean the top side of the ink
cartridge with a tissue, etc.
Perform installing the ink cartridge
again.
Perform installing the ink cartridge
again. If nothing still print out, the ink
has run out. Replace the ink cartridge
to the new one.
The unit does not print.
The connector is not connected.
There is dirt on the top side of the
ink cartridge.
The ink is jammed.
(If the unit is not used for a long
period of time, it may not work
properly.)
The ink has run out.
Printing is not complete.
Dots are missing.
Printing position is wrong.
Setting the print positioning knob
index is wrong.
Installing the imprinter unit is not
correct.
There is dirt, etc., on the top side of
the ink cartridge.
The ink is jammed,
(If the unit is not used for a long
period of time, it may not work
properly.)
Printing position is wrong.
Setting the print positioning knob
index is wrong.
Confirm that the printing position is
correct or not.
Confirm that the setting the print
positioning knob index is correct or
not for your scanner.
Inset the scanner pins in the
imprinter unit grooves completely.
Clean the top side of the ink
cartridge with a tissue, etc.
Perform installing the ink cartridge
again.
Confirm that the printing position is
correct or not.
Confirm that the setting the print
positioning knob index is correct or
not for your scanner.
15
Page 16

Troubleshooting and Specifications
Specifications
Printing side
KV-S2055 series :
Back or front side of the document
KV-S6040W/KV-S6045W series :
Front side of the document
Unit
Operating
Environment
Storage
Environment
Accessory
and Option
Resolution
Printing area
Nozzles
Unusable documents Plastic film, coated documents
External dimensions
(Width X Depth xHeight)
Mass (Weight)
Operating temperature
and humidity
Storage temperature
and humidity
Ink cartridge (KV-SS06)
Please call 1-800-346-4768 (U.S.A. only) or your dealer.
Main printing direction (Horizontal) : 55.8 dpi (0.455 mm)
Sub-printing direction (Vertical) : 95.1 dpi (0.267 mm)
Vertical : excluded area is 10 mm from the top of the
document and 10 mm from the bottom of the
document
Horizontal: 242 mm (manual setting)
12 nozzles
304 X 68 X 50 mm (12.0 x 2.7 x 2.0 in.)
600 g (1.3 lbs.)
15°C to 30“C (59 T to 86T). 30% to 80%RH
0“C to 35°C (32T to 95T), 10% to 80%RH
Panasonic Communications & Systems Company
Division of Matsushita Electric Corporation of America
Two Panasonic Way, Secaucus, New Jersey 07094
Panasonic Canada Inc.
5770 Ambler Drive, Mississauga, Ontario, L4W 2T3
Matsushita Electric Industrial Co., Ltd.
Central P. O. BOX 288, Osaka 530-91, Japan
Printed in Japan
PBQX50237ZA K0199E0
 Loading...