

Panasonic EY6105-UI User Manual
Cordless Drill & Driver
EY6105-U1
ORDER NO.PTD0408U36C1
F16
SPECIFICATIONS
CONTENTS
Page Page
1 SCHEMATIC DIAGRAM 2
2 WIRING CONNECTION DIAGRAM
3 DISASSEMBLY/ASSEMBLY INSTRUCTIONS
4 TROUBLESHOOTING GUIDE 7
2
5 EXPLODED VIEW
3
6 REPLACEMENT PARTS LIST
8
9
© 2004 Matsushita Electric Works Ltd. All rights
reserved. Unauthorized copying and distribution is a
violation of law.
EY6105-U1
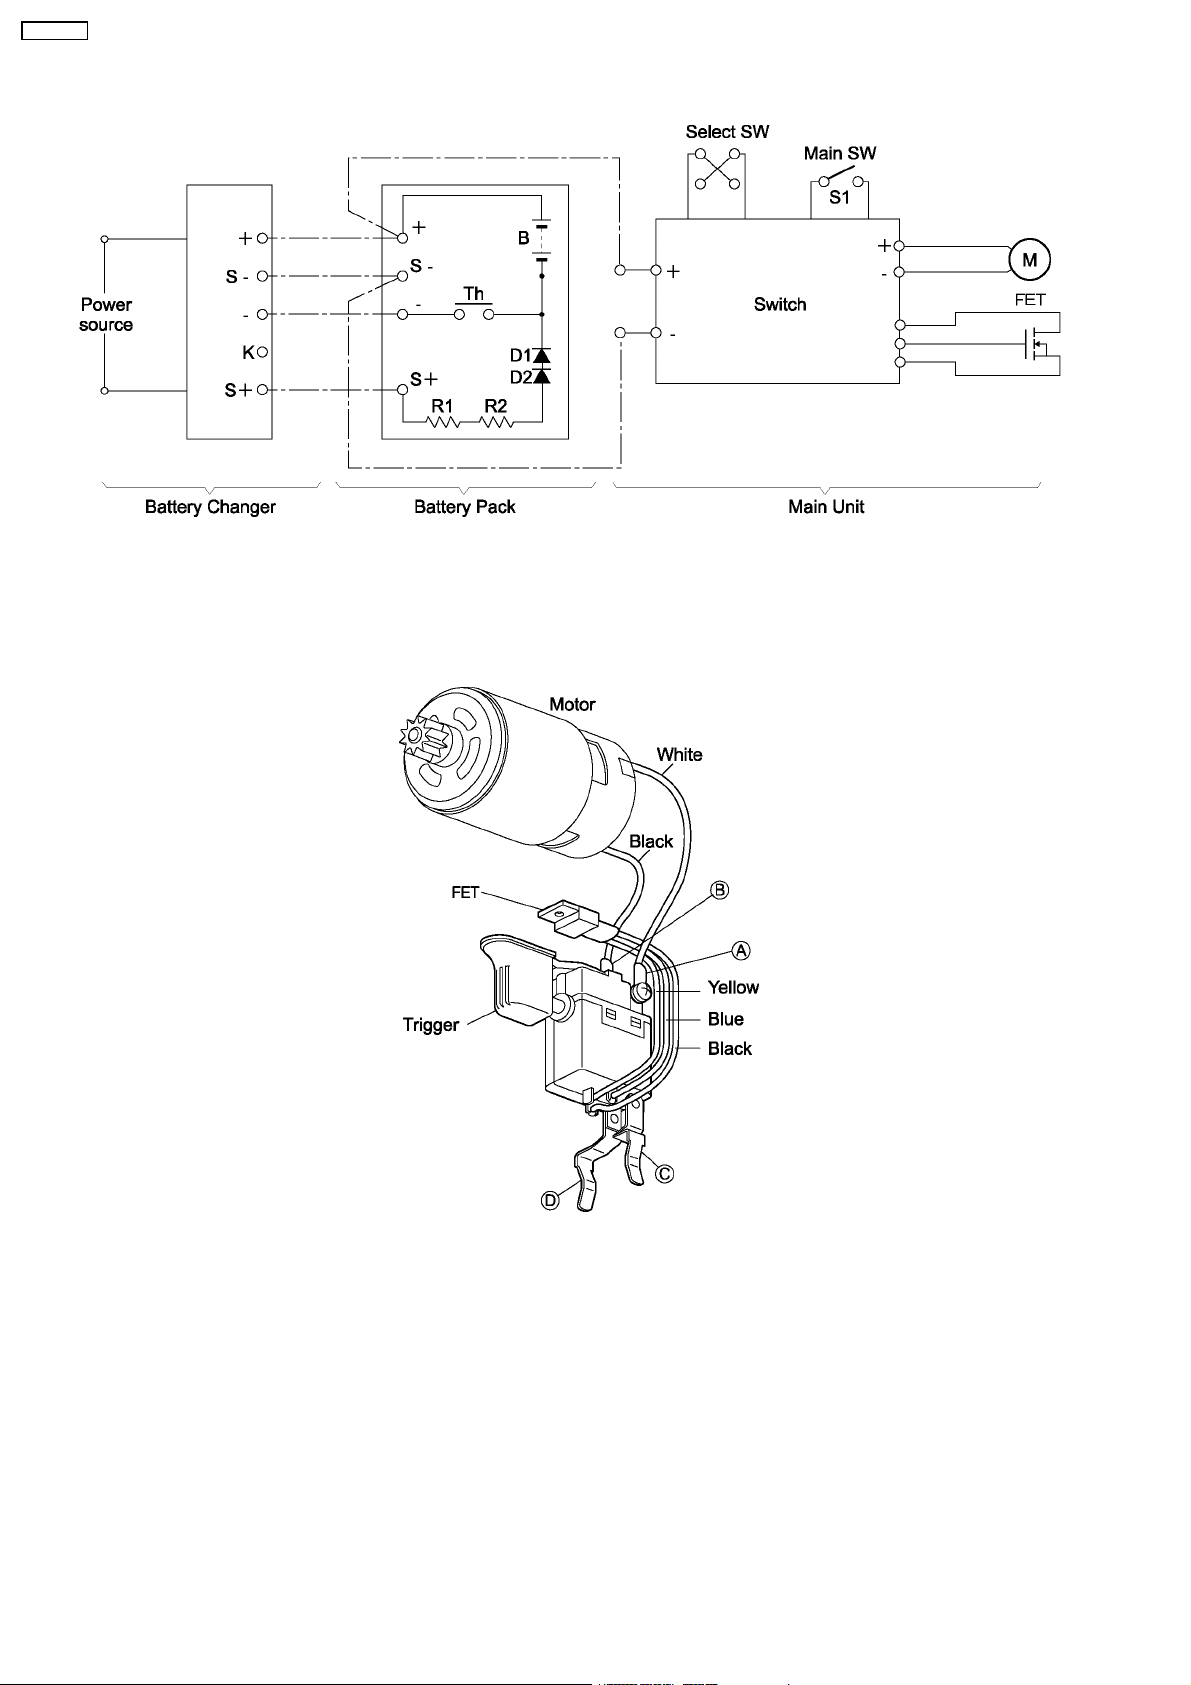
1 SCHEMATIC DIAGRAM
2 WIRING CONNECTION DIAGRAM
2
3 DISASSEMBLY/ASSEMBLY INSTRUCTIONS
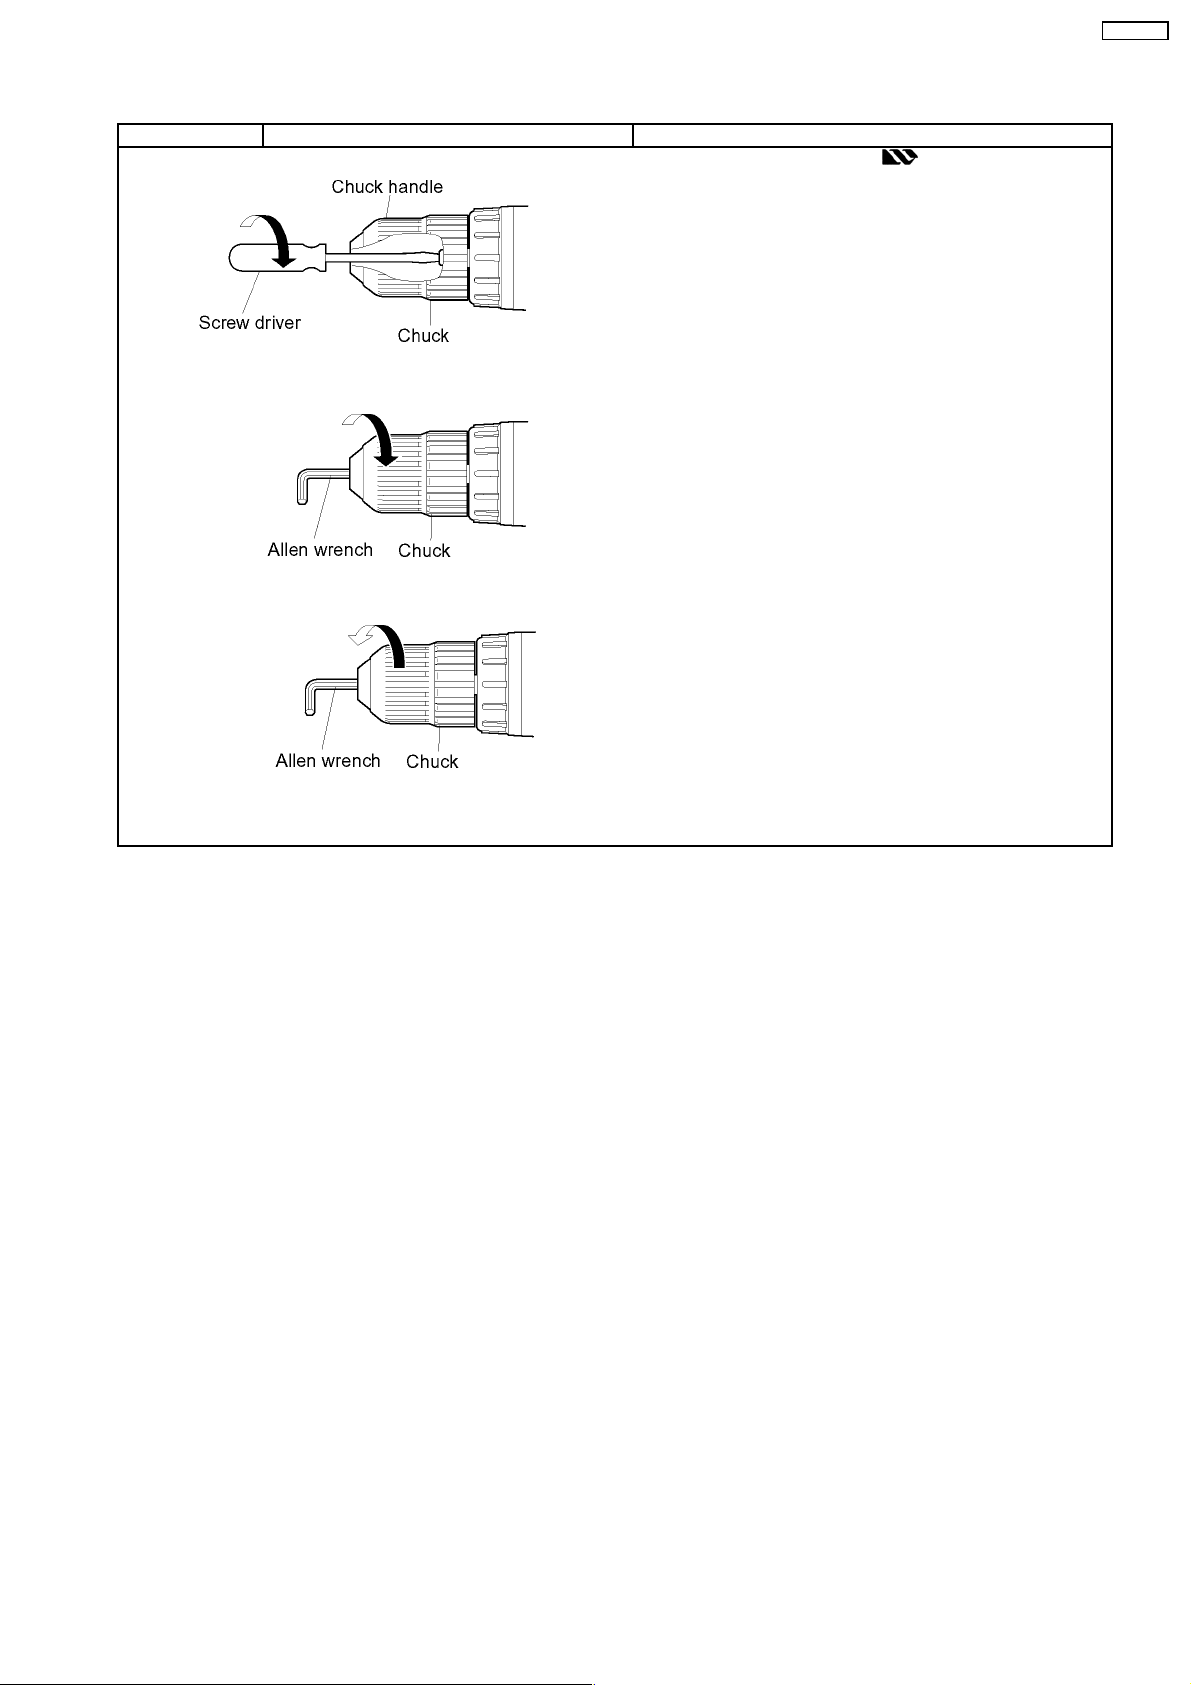
■HOW TO DISASSEMBLE KEYLESS CHUCK.
Ref. No. 1A Procedure 1A Removal of the Keyless Drill Chuck.
1. Set the clutch handle to position and select "LOW"
position.
2. Turn the lock collar counterclockwise direction to open the chuck
jaws.
3. Use a screwdriver to turn the chuck fastening screw inside the
chuck clockwise direction of the arrow, and remove the screw.
(See Fig.1)
NOTE :
If the chuck fastening screw will not come loose, insert the
allen wrench into the chuck and lightly tap in the clockwise
direction with a ham mer to tighten the chuck, and then loosen
Fig.1
Fig.2
the chuck fastening screw. (See Fig.2)
4. Insert the allen wrench into the chuck, and turn counterclockwise
direction in the arrow with holding the unit by the vise to remove
the chuck. (See Fig.3)
EY6105-U1
Fig.3
3
 Loading...