

Page 1
Panasonic
Cordless
Metal Cutter
Operating instructions
Model No: EY3530
A IMPORTANT
This manual contains safety Information. Read manual completely before first
using this product and save this manual for future use.
SAVE THESE INSTRUCTIONS
Page 2

Table of Contents
Introduction
•How to Use This Manual
..........................................................
................................................................
GENERAL SAFETY RULES-FOR ALL BATTERY
OPERATED TOOLS
SPECIFIC SAFETY RULES
FOR BATTERY CHARGER & BATTERY PACK
...........................................
..................................
....
Parts and Controls.................................................
Setting Up
•Charging Battery Pack...................................................................
• Inserting Battery Pack...................................................................
Operation
• Before Uskig Metal Cutter
• Using Metal Cutter
•Cuttteg depth adjustment
• Rip fence {EY3500B7727)
•Alignment with cutting ine
•For Proper Use (Further DetaH)......................................................
.............................................................
..............................................................
.............................................................
........................................................................
..............................................................
........................
.............................................................
.....................................
Maintenance..........................................................
• Removing Blade
•Installing Blade..............................................................................
•For i^ropriate use of Battery pack...................................................
• Battery Pack life
• Cleaning Metal Cutter
•Transparent Window......................................................................
Accessories
...........................................................................
............................................................................
....................................................................
...........................................................
Specifications.........................................................
Page
*•"4
...
4
'■•4
—5
-7
•10
•10
•11
•11
•11
•12
•13
•13
■13
•14
•16
‘16
•17
.17
■17
•17
‘17
‘17
■18
— 3 —
Page 3

Introduction
Thank you for purchasing the Panasonic
Metal Cutter. The powerful cutting action of
this cutter, combined with the convenience of
its rechargeable battery pack, provides you
with great metal cutting performance.
This Metal Cutter is only to be used for
cutting unhardened ferrous metal and plastic
material.
DANGER
This product is a cutting tool, designed to
cut through metal. It has a rotating blade
which is capable of a cutting you deeply,
causing serious injury or death. As a result,
please read this manual and the cautionary
markings on the tool carefully, and obey all
of the safety instructions and additional
safety instructions to avoid such injury.
WARNING
>To avoid irtjury, never insert your finger or
any other object into any opening of the
metal cutter.
How to Use This Manual
• Please read this manual completely before
starting to cut with your Metal Cutter.lf you let
someone else use the Metal Cutter, make
sure they either read this manual or are fully
instruct^ in the proper use and all safety
precautions concerning the Metal Cutter.
• Please Keep this manual for further reference.
It contains important safety information that
you must foNow to use the Metal Cutter safety.
•This manual and product use the following
signal words:
NOTE
Notes provide additional information that you
should know about the Metal Cutter.
CAUTION
Caution indfcaiss a poCentiaMy hazardous situation,
which could resuR in rninor or rnoderate iiMy if not
avoided. Cwjtions also alert you to unsafe pta^ioes
to be avoided.
WARNING
№mting indtoatas a potofitiatty fskzantous situation, which
could result in serious injury or death if not avoided.
DANGER
Oartger Incticates an imminent hazard which will
result in serious toju^ or death If not avoided.
GENERAL SAFETY RULESFÒR ALL BATTERY
OPERATED TOOLS
WARNING!
READ AND UNDERSTAND ALL MSTRUCT10NS.
Failure to follow all instructions listed below,
may result in electric shock, fire and / or
serious personal injury.
SAVE THESE JNSTHUCTIONS
Work Area
1} Keep your work area clean and wril lit
Ctuttered benches and dark areas irwRe aoddenla.
2} Do not operate power toole in exploeeve
aftmoepheree, such as In the ргемпсе of
flammable liquide, gasee, or dust
Power tools create sparks which may
ignite the dust or fumes.
3) Keep bystanders, children, and vlaltora
away while operating a power tool
Distractions can cause you to lose control.
Make sure that no one is beneath, or on the
other side of the area where you ate working.
Electrical Safety
4) A battery operated tool with Integral
battartee or a aaparala batlary pack must
be recharged only with the specified
charger for the battery.
A charger that may be suitable for one type
of battery may create a risk of fire when
used wHh another battery.
5) Use battery operated tool only with
epedhcetly designated battery pack.
Use of any other batlerfee may create a risk
of file.
Personal Safety
6) Stay alert, watoh what you art doing, and
use common aanee whan operating a
power tool. Do not use tool while tired or
under the Influence of drugs, aicohol, or
medication.
A monert of inattention while operating power
tools may result in serious personal injury.
7) Drees properly. Do not wear loose cktfhing
or jewelry. Conteln long hair. Keep yow
hair, clothing, end gloves ewey from
moving parts.
Loose clothes, jewelry, or long hair, can be
caught in moving parts.
4 —
Page 4

8} Avoid acddMital starting. &• sure t¥fttch
la In tha locked or off position before
inserting battery pack.
Carrying tools with your finger on the switch
19) Check for misalignment or binding of
or inserting the battery pack into a tool with
the switch on invites accidents.
9) Remove adjusting kaya or wranchas
before turning the tool on.
A wrench or a key that is left attached to a
rotating part of the tool may reaull in peisoriat
trrtury.
10) Do not overreach. Keep proper footing
and balance at all times.
20) Uae only accaaaorlae that are recommandad
Proper footing and balance enable better
control of the tool in unexpected mtuations.
11) Uee safety equipment Always wear ays
protacdon.
Dust mask, non*skid safety shoes, hard hat,
Service
21 )Tool tervico must bs porformsd only by
or hearing protection must be used for
appropriate conditions.
Tool use and care
12) Use clamps or othar practical way to
aacure and support tha workplaoe to a
atabla plattorm.
Holding the work by hand or against ycxff body
is unstable and may lead to loss of control and
serious bodOyinjuiy.
13) Do not loroe tool. Use the correct tool
for your ^tpllcatkm.
The correct tool wU do the Job better and safer
at the rate for which it is draignad.
14) Oo not uae tool If switch does not turn
it on or off.
A toot that cannot be controllad w№ the switch
is dangerous and must be repaired.
1 StDiaconnael bettarv neck Irom kxil or oleoe
the switch In the locked or off position
betore Risking any ediuelmsnia, changing
acoaseortaSi or storing die tod.
Such preventive safety measures reduce the
risk of starling the toot accidentally.
16) Store idle tools out of reach of children
and other untrained persons.
Tools are dangerous in the hands of untrained users.
17) When battery peck Is not In use, keep it
away from other metal objects like:
paper dips, coins, keys, nails, screws,
or other smell metal objects that can
make a connection from one teiminel to
another.
Shorting the battery terminals together may
cause sparks, bums or a fire.
18) Malntain tools with care. Keep cutting
tools sharp end clean.
22) When servicing a tod, use only Identlcat
SPECIFIC SAFETY RULES
2) Check lower guard for proper closing
Property maintained tools with sharp cutting
dd^ are less likely to bind and are easier to
control.
, movlitg parts, breakoga of parta,arKl any
othar condition that may affect tha tod's
operation. If danwged. have the tod ser
viced before using.
Many acctderts are caused by poorly inairttained
tools.
by tha manufacturer for your model.
Accessories that may be suiteüsle for one tool
may create a risk of injury when used on
another tool.
qualiflod repair paraonnel.
Service or maintenance performed by
urrqualtfied personnel may result in a risk of
injuiy.
replacement parts. Follow instructlone In
the Maintenance section of this menual.
Use of Unauthorized parts or faiure to follow
Maintenance Instructions may create a risk of
shock or injury,
DANGER!
1) Keep hands away from cutting area
and blade. Keep your second hand on
auxiliary handle or motor housing.
if both hands ara holding the cutter, they
caivKit be cut by the blade.
Keep your body positioned to either
side d the cutler dede, but not in line
with the cutter Weds.
KICKBACK could cause the cutter to Jump
backwards.(See KICKBACK)
Do not reach underneath the work.
The guard can not protect you from the
blade below the work.
before each use. Oo not operate cutter
If lower guard does not move freely end
close instantly. Never clamp or tie the
lower guard into the open position.
If cutter is aociderilally dropped, lower guard
may be bent Raise the lower guard with the
Lower Guard Lift Lever and make sure it
moves freely and does not touch the blade or
any other pert, in all angles and depths of cut
— 5 —
Page 5

3) Ch*ck ttw optratlon and condition of
ttw lowar guard apring. If ttw guard and
tha apring ara not operating proparly,
thay muat ba aarvicad bafora uaa.
Lower guard may operate sluggishly due
to damaged parts, gummy deposits, or a
buildup of debris.
4) Lower guard should ba latraclad manually
only for apaclal cuts such aa **Pocket
Cuts" and “Compound Cute“. Ralaa lower
guard by Lower Guard Lift Laver. As soon
aa blada antsrs №a malarfat, lower guard
must ba ralaaaad.
For all other cutting, the lower guard
^oukJ operate automatically.
5} Always observa that tha lowar guard la
covering the Made before placing cutter
down on bench or floor.
An unprotected, coasting blade will cause the
cutter to walk beckwaids, cutting whatever is
m its path. Be aware of the time it t^tes for
the blade to stop after swith is released.
6) NEVER hold place being cut In your
hands or across your lag.
It is important to support the work properiy
to minimize body exposure, blade binding,
or loss of control.
7) Hold tool by Insulated gripping aurfacaa
whan performing an operation where
tha cutting tool may contact hidden
Contact with a “live" wire will also make
exposed metal parts of the tool live” and
shock the operator.
8) Whan ripping alwaya uaa a rip farwa or
straight edge guMa.
This improves the accuracy of cut and
rerkices the chance for blade binding.
9) Alwaya uaa blade wWi correct alza and
ahapa (diamond va. round) arbor holas.
Blades that do not match the mounting hard
ware of tie cutter ^ run eccentrically, causing
loss of control.
10) Never use damaged or incorrect blade
wMhere or boite.
The Made washers and bolt were specially
designed for your cullw, for optimum performance
and safety of opertfoa
11 )Causa and Operator Prevention of lOekback:
Kickback is a sudden reaction to a
pinched, bound, or misaligned cutter
blade, causing an uncontrolled cutter to lift
up and out of the workpiece toward the
operator. When the blade is pinched or
bourtd tightly by the kerf closing down, the
blade stalls and the motor reaction drives
, the unit rapidly back toward the operator.
If the blade becomes twisted or misaligned
, in the cut, the teeth at the back edge of the
blade can dig into №e top surface of the
metat causing the blade to dimb out of the
kerf and jump back toward tha operater.
Kickback is the result of tool mlsi»e and/or
incxxrect operating procedures or conditions and
can be avoided by taking proper precautions as
given below;
12) Meintain e firm grip on the cutter and
position your body end arm In a way
that allows you to resist KICKBACK
forces.
KICKBACK forces can be controlled by the
operator, if proper precautions are taken.
13) When blade it binding, or when Interrupting
a cut for any reason, releese the trigger end
hold ttw cutter mottonlese In ttw material
until ttw btads comes to e oompltte stop.
Never attempt to remove ttw cutter from ttw
work or puU ttw cutter backward while ttw
blade Is In motion or KICKBACK may
occur.
Investigate and take corrective actions to
eliminate the cause of blade binding.
14} When raaterting a cutter In ttw workpiece,
center the cutter blade In the kerf and
check that teeth era not engaged Into ttw
nwtariaL
If cutter blade e binding, it may walk up or
KICKBACK from the workpiece as the cutter
isieetarted.
15) Support large panels to minimize the
risk of blade pinching and KICKBACK.
Large panels tend to sag under their own
weight. Supports must be placed under
the panel on both sides, near the line of
cut and near ttw edge of the panel.
16) Do not use dull or damaged blade.
Unsharpened or improperly set blades
produce narrow kerf causing excessive
friction, blade binding, and KICKBACK.
17) Bladt dapth wkI bevel adfuettng locking
levers must be tight end aeeure before
making cuL
If blade adjustment shifts while cutting, it
will cause binding and KICKBACK.
18) Uee extra caution when making a
“Pocket Cut" Into existing well« or
other blind areas.
The protruding blade may cut objects that
— 6 —
Page 6

can cause KICKBACK, or a live wire couM
cause electric shock.
19) The risk ol kickback Increases as the
battery peek (Hscharges.
20) Be sure to inspect mMarlak Avoid cutting
bolts, naUs or other different maleilaL
21) Be caiefuf not to drop Metal Cutter.
22) Never swing Metal Cutler.
23) Wsvsr cover toe vsnIHation slots, and keep
tosfn free ftom dust or ctosr пм1вг1а1.
24) Do not damp Metal Cutlsr In a vlat. Never
cut wHh UotsI Cutter held upside down in
a vise. Thie It cxbremely dsngeroue and
can lead to ssftous scddents.
25) Nevsr wear kntttad glovaa.
26) Ba aura no ona It balow whan using
Metal Cutter in high locationa.
27) Do not touch tha blade Immadiataty
after oparatloa It may be hot and could
bum your akin.
Symbol
___
____
rV)
— / min
V
revolutions or reciprocation
per minute
Meaning
volts
Direct Current
no load speed
FOR BATTERY CHARGER &
BATTERY PACK
SAVE THESE IN
STRUCTIONS T».
manual contains important safety and
operating instructions for battery charger
EY0230.
1) Before using battery charger, read all
instructions and cautionary markings on
(1) battery charger, (2) battery pack.
2) CAUTION -To reduce the risk of
injury, charge only Battery Pack EY9001,
EY9O0O, EYdOSS, EY90Q6, EY9086, EY9101,
EY9180, EY9182, EY9106, EY9107. EY»136,
EY9230, EY9200, EY9108.
Other types d batteries may burst caus
ing personal injury and damage.
3} Do rwt expose charger to rain or snow.
4) To reduce risk of damaging the electric
phjg arxl cord, puMby plug rather than cord
when disconnecting charger.
5) Make sure cord is located so that it wll not
be stepped on, tripped over, or otherwise
subjected to damage or stress.
6) An extension cord should not be used
unless absolutely necessary.
Use of improper extension cord could
result in a risk of fire and electric shock. If
extension cord must be used, make sure;
a. toat pins on plug of extension cord are
the same nurdwr, size and shape as
those of plug on charger.
b. that extension cord is property wired
and in good electrical oondiUon.
c. that wire size is laiye enough tor ampere
rating of charger as specified below.
RECOMMENDED MINIMUM AWQ SIZE OF
EXTENSION CORDS FOR
BATTERY CHARGERS
AC Input Rating. Ampens
Equal to or But less
graatarihan than
0 2 15 18 18 16
AWG Size Of Cord
Length of Cord, Feet
25 SO 100 150
7) Do not operate charger with damaged cord
or plug-^ake itto a qualified serwoeman.
8) Do not operate charger if It has received
a sharp blow, been dropped, or otherwise
damaged in any way; take it to a qualifted
serviceman.
9) Do not disassemble charger; take it to a
qualified serviceman when service or
repair is required, incorrect reassembly
may result in a risk of electric shock or
fire.
10) To reduce the risk of electric shock, unplug
charger from outlet before attempting any
maintenence or cleaning.
11) The charger and battery pack are ^wciHcally
designed to work togetoer. Do not attempt to
charge any other cordless tool or battery
pack with this charger.
12) Do not attempt to charge the battery pack
with any other charger.
13) Do not attempt to disaseemble toe battery
pack housing.
14) Do not store the tool and battery pack In
locations where the tsmperatuie may teach
or exceed 122**F (50**C) (such a mstal tad
shad, or a car in the summer), which can
lead to deterioration of toe battery pack.
15) Do not charge battery pack when the
temperature is BELOW 32**F (0*C) or
ABOVE 104*F (40“C).
Page 7

16} Do not incinerate the battery pack. It can
explode in a Are.
17) Avoid dangerous environment Do not use
charger in damp or wet locations.
Do not hold the plug wt№ a wet hand.
18) The charger is designed to operate on
standard household 120V AC electrical
power only.
Do not attempt to use It on any other volt*
agel Before connecting the charger to a
power source (rsoeptacie, outlet, etc.), be
sure the voltage supplied is standard 120
volt AC.
DO NOT PLUG THE CHARGER into a
power source greater than that specified
for the ctwrger. ITiis can result in dam
age to the ^rger and is a potmtial fire
hazard.
Do not use a generator as a power source.
19) Do not abuse cord. Never carry charger by
cord or yank it to dsoonnect from outleL Keep
cord awsy ftom heat, ol and sharp edges.
20) Charge the battery pack in a well ventilated
place, do not cover the charger and battery
pack with a doth, etc., while charging.
21) Use of an attachment not recommended
may result In a risk of fire, electric shock,
or Irrjury to persons.
22) Do not short the battery pack. If you keep
a battery pack in a tool box. for example,
it could be dwrted by touching any metal
ob)ects In the box. Store in a dry location.
Do not allow the battery pack to become
wet vri№ any liquid. A battery short can
cause a large current flow, overfleating
and bums.
23) Use ortiy a dry, soft doth for cleaning the
charger. Do not use a damp doth, thin
ner, benzine, or other volatile solvents for
cleaning.
24) NGrrE If №e supply cord of this appliance is
damaged, have it serviced by a gualified
senfcer.
25} TO REDUCE THE RISK OF ELECTRIC
SHOCK, THIS APPLIANCE HAS A
POLARIZED PLUG (ONE BLADE IS
WIDER THAN THE OTHER).
This plug will fit in a polarized outlet only
one way. If the plug does not fit fully in
the outlet, reverse the plug. If It still does
not fit, contact a qualified electrician to
install the proper outlet. Do not change
the plug in any way.
8 —
Page 8

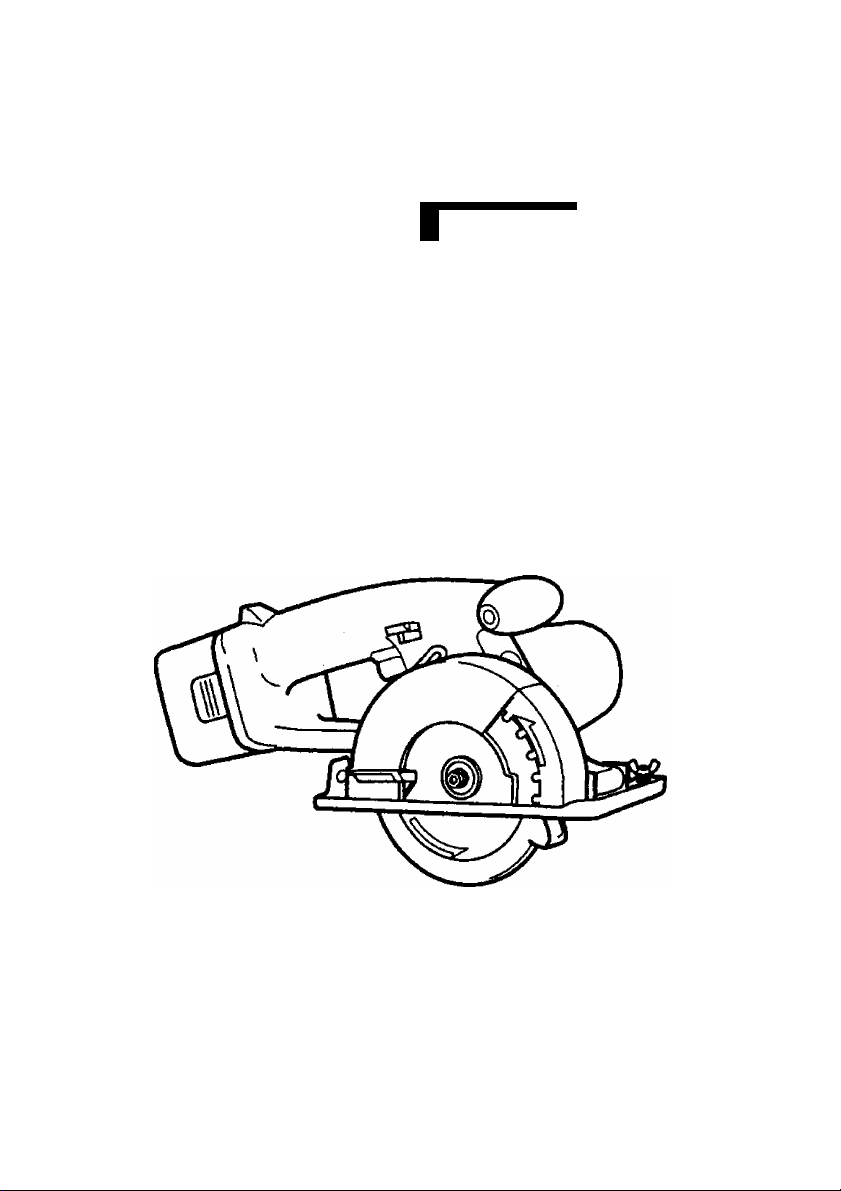
Parts and Controls
A I ^rvj^fEVsgggr
wtnsparom
i
i
Fig. 1
■rmvj I I ——I
I RbFBno>T»anaDoeBaofv)l
— 9 —
Page 9

Setting Up
Cheuping Battery Pack
Charge the battery pack when the cutting
speed becomes too slow for effective cutting.
If you have two battery packs, you can use one
to continue working while charging the other
orte.
Note: When you charge the battery pack
for the first time, or after prolonged
storage, charge it for about 24
hours to bring the batteries up to fuil
capacity.
1. Plug the charger into the AC outlet.
Nole: * Sparks may be produced when the
plug Is inserted Into the AC power
supply, but this is not a problem in
terms of stdety.
2. Insert the battery pack firmly into the
charger.
Battery
pack I outlet
utes. the charging lamp may flash
qulc^ to indicate the charging is com
pleted.
6. If the charging lamp does not light Imme. dlately after the charger is plugged In, or
if after the standarcT charging time the
lamp does not go off, consult an autho
rized dealer.
Note: * When a cold battery (of ^ut
5*C or less) is to be charged In a
warm room, leave the battery in
the room for at least one hour
and charge it when it has
warmed up to room temperature.
(Failing to do so may result in
less than a full charge.)
• Cool down the charger when
charging more than two
* Do not insert your fingers into
contact hole, when holding
charger or any other occasions.
CAUTION: * Do not use power source
Irom an engine generator.
■ Do not cover vent hdes
on the charger and the
battery pack.
Battery
charger
3. During charging, the charging lamp will
be lit.
When charging Is completed, an inter
nal electronic switch wilt automatically
be triggered to prevent overcharging.
* Charging will not start If the battery
pack is warm (for example, Immedi
ately after heavy-duty operation).
The orange standby lamp will be lit
until the battery cools down. Charging
win then begin automatically.
4. When charging \s completed, the charg-
irn lamp wifl start fiashing rapidly.
5. When the battery pack has not been
used for a long time, the charging lamp
starts fiaahing slowly to indicate protec
tive oharging.Protective charging takes
longer to fuHy charge the battery pack,
tiian the standard charging time. (Max.
charging time la approx, w minutss).
* If a fuUy charged battery pack is Insert
ed into the chuger again, the charging
lamp may light up. After several min-
— 10 —
Page 10

Lamp indication
—
Chaîner ts ptuggM Into a waH outlet Reedy
toctwoe.
Now charging
Charging le completed
Protective charging
Battery peck le warm. Charging wilt begin
when temperature of battery pack dtope.
Charging la not poeelble. Clogged with
dust or maHunction of the battery pack.
U
FltiNnflquicWy
-C l) ,
►CD
Inserting Battery Pack Operation
CAUTION
Before Inserting the battery pack, check
that the power switch In the Metai Cutter
actuates properly and returns to the ‘OFP
position when released.
1. To insert the battery pack:
Slide the battery pack in place at the rear of
the metal cutter. The battery should snap
into place. If the battery Is loose, It has not
been property connected.
Press the two tabs on the sides of the battery
pack. Sbde the battery pack out of the metal
cutter body.
Before Using Metal Cutter
Each time you use the metal cutter, you must
make sura it is in good operating condition.
Use the following checklist:
1. Is №e blade installed in the correct direction?
The arrow on the blade must point In the
same direction as the arrow on the upper
blade cover.
2. Is the blade installed properly?
Make sure the hex bolt is tightened
securely. (See Fig. 13 page 16}
3. Does the blade look all right?
Retrace the blade immediately if there are
any cracks in it or if any teeth are broken.
4. Does the lower blade guard close property?
WARNING
To avoid Injury, do not use the metal cutter
if the lower blade guard does not close
quickly over the blade.
5. Is the transparent window securely
installed?
6. is the battery pack charged arnf inserted
firmly to the metal cutter?
— 11 —
Page 11

Using Metal Cutter
CAUTION
R«ad the ^Seneral and Specific Safety
Rules” at the front of this manual before
using the metal cutter.
Follow ttiese steps;
Hold the metal cutter with both hands, as
shown in Rq. 4, Do not attempt to remove cut
material when Made is moving.
1. Une up the center of the notch with your
cuttirtg line.
2. Press the switch lock lever down, then
squeeze the power switch to start the
motor,
CAUTION
This tool has no provision to lock the switch
in the ”ON* position, and you must not
attempt to secure it in the "ON” position.
3. Start cutting when the blade reaches full
speed.
4. During cutting, keep your cutting line
straight. Move the metal cutter forward at a
steady speed, while looking at the tip of the
blade through the transparent window.
WARNING
• To prevent dangerous kickback, keep the
base of the metal cutter flat on the auriaoe
of the material being cuL
• Never force the cutter. Use light and continuous
pressure.
5. If the motor starts to feet too warm, stop
cutting. Let the metal cutter cool down
before continuing work.
6. It is always a safe practice to remove the
battery pack after use and before storing
the metal cutter.
CAUTION
• Check that the switch lock lever works.
If power switch can be activated without
depressktg the switch lock lever, discon
tinue use immediately. Take the toot to
an authorized service center.
• Always hold the handle with one hand
and the front grip with the other. (See Fig.
4. page 12) Maintain a firm grip and
depress the switch fuKy.
• The blade should not touch the cutting
material before you start the motor. Wait
untit the Made reaches full speed before
starting a cut
— 12 —
Page 12

Cutting depth adjustment
• Loosen the depth ac^uetment wing nut and
acquêt the cutting depth.
Ttghten the depth adjustment wing nut
eecurely atthe desired cutting deptii.
Depth ac^uetment wing nut
Fig. 6
Rip fence (EY3500B7727)
(Avaiiable as an accessory, not included)
• Rip fence is convenient for rip cuts and
repeated cuts of tmiform width.
Adjust rip fence as shown.
(S) Tighten
® Puli down
(S) Adjust
Alignment with cutting line
«Use the notch as a guide to estabfish
cutting position. Align the notch with
cutting Ine.
As the cutting position may differ
depending on the blade, do a trial cut
beforehand.
Rg.6
Fig. 7
■ 13 —
Page 13

For Proper Use (Further Detail)
WARNING
1. It to InipOftant lo use an appropriate device
to hold the malertol being cut property, and
to hold the cutter firmly with both hands to
prevent loes of control which could cause
personal Irijury.
• Rgure 8 shows proper cuning position.
Note that hands are kept away from cutting
area.
Whwi cutting, do not try to hold the material
with your hand.
WARNING
2. Support large pieces of material, near
the cut. Be sure to support large pieces
of material properly to minimize the risk
of blade pinching and kickback.
• Use sharp blades only. Clean and shaqp
blades minimize stalting and kidcback.
3. Oont support the material away from the
cut.
Page 14

WARNING
• When making an incomplete cut or cutting is interrupted, or blade is binding or cutter is
stalling; release the trigger immediately and hold the cutter motionless in the material until
the blade comes to a complete stop. To avoid kipkback, never attempt to remove №e cutter
from the work or putt the cutrer backward while the blade is In motion. Make sure the blade
has come to a complete stop, then remove cutter from cut. To resume cuttmg, start metal
cutter, allow the blade to reach fuN speed, reenter №e cut tiowly and resume cutting.
4. Place the wider part of the cutter base on the part of ttte work piece which is solidly supported
(Rg. 11), never on the section that will kail off when the cut is made(Rg. 12).
• Hold the cutter firmly to prevent loss of control. Working carelessly can cause severe personal
injury.
5. Make sure the blade stops.
Even though your metal cutter has an automatic brake, before setting the metal cutter down,
make sise the Made has come to a complete stop and the lower blade guard has dosed.
6. Do rK)t use if anything seems unusual. Remove battery pack immediately.
• If the metal cutter body becomes very hot, or does not work property, remove the battery padt
aiKf do not use. Have it checked by an authorized service center.
WARNING
Do not try to repair the metal cutter yourself. Never disassemble or modify the metal cutter
body. There are no user-repairable parts inside.
7. • NEVER ALLOW THE CUTTER TO COME IN CONTACT WITH YOUR BODY.
• After completing a cuL do not allow the cutter to brush against your leg or side.
Since the tower guard Is retractable. It could catch on your dothlng and expose the blade.
Keep dotNng away from metal cutter. Be aware of the exposed blade sections that exist in
both the upper and lower guard areas.
_ 15 —
Page 15

WARNING
Because cutting metal creates sparks;
• Always use safety goggles.
• Do not use metal cutter near any flammab^ substance or in an area where flammable
substances are used. Rre and bum ir^ury could result.
8. Never engage the shaft lock while blade is running, or engage in an effort to stop the tool.
Never turn the switch on when the shaft lock is engaged. Serious damage to your metal cutter
will result.
Maintenance
WARNING
To avoid severe personal injury, always
lemoee the battery pack from the metal cutter
before starting any maintenanoe procedure.
Follow these steps:
1. Remove the battery pack from the metal
cutter.
2. Hold the shaft lock button dowa This prevents
the blade from noticing.
3. Use the provided hex wrench to loosen the
hex bolt.
NOTE
CAUTION
To asaura ptodud SAFETY and SEUABIUTY,
servicing shoiM be perforrned by an authorized
service center. Always insist on genuine
Panasonic replacement parts.
Removing Blade
Keep the hex wrench in the storage slot on
the metal cutter's body when not using ft,
4. Remove the hex bolt and outer washer.
5. Use the lower guard lift lever to retract
(open) the lower guard.
6. Carefully remove №e blade.
7. Clean the metal cutter if necessary.
CAUTION
CAUTION
The blade will be hot right after cutting. Be
sure to let the blade cool down before
lemowngK.
Lower guard Hit lever
• Be careful to avoid cutting your hands on
the blade.
When disposing of a blade, secure it inside
heavy or corrugated paper. 'Riis will help
prevent anyone from being cut by the
discarded blade.
Inrwr washer
Plaça Iha Inrwr waihar
with cut-out facing you.
Tighten
Rg.13
— ia —
Shaft locktxitton
Place the prolrutkxi of
Iha outar waahar Into Iha
poattion of ttw wBShar.
Page 16

Installing Blade
Follow these steps:
1. Remove the battery pack from the metal
cutter.
2. Remove any cutting debris from blade area.
3. Use the lower guard lift lever to retract
(open) the lower guard.
4.lnstall the blade as Illustrated in Fig. 13
(page 16). Make sure that both the direction
arrow on the blade and the direction arrow
on the upper blade cover point in the same
direction.
5. Set the outer washer in place.
6. Insert the hex bolt.
7. Hold the shaft lock button dowa This preverá
the blade from rotating.
6. Tighten the hex boN secmely with the provided
hex wrench. Store the hex wrench.
Cleaning Metal Cutter
Keep your metal cutter clean for good cutting
performance and to help keep it safe to use.
follow these steps:
1. Remove the battery pack from the metal
cutter.
2. Wipe the metal cutter with a dry, soft cloth.
Do not use a wet cloth or cleaning liquids.
They could damage the metal cutter’s finish.
3. Be sure to rub off any oil or grease which
could make the metal cutter sli|m0ry or hard
to harxile.
4. Remove the blade and brush off any dust.
CAUTION
To avoid injury or damage to the unit, never
immerse any part of №e tool in a Hqiid.
Transparent Window
CAUTION
Keep the hex mench In the storage slot on
the metal cutter's body when not using it
WARNING
Failure to follow these instructions can
result in severe personal injury.
For Appropriate use of
Battery pack
WARNING
If the window is cracked, or is broken, take
the metal cutter to an authorized service
center for replacement. Do not attempt to
operate cutter. It could result in serious
personal injury.
Never use your metal cutter with a damaged
transparent window or without the transparent
window installed. Flying ch^ could result in
serious injury.
Ni-MH Baneiy pack (EY9230)
• Charge the Ni-MH battery fully before storage
in order to ensure a longer service life.
• The ambient temperature range is between
0*Cand40‘C.
If the battery pack is used when the battery
temperatuiB is below 0*C, the toot may fail to
function property. In that, charge the battery
until charging is completed for impropriate
functioning of the battery.
Accessories
WARNING
* The use of any accessories not specified in
this manual may result in fire, electric
shock, or personal injury. Use recom
mended accessories only.
* Use of a blade on material that is thickBr or
thinner than that recommended for that
blade will result in a rough cut, and could
increase the risk (rf "kick back*or other hjury.
Battery Pack Life
The rechargeable batteries have a Irniled Ufa. If the
operation time becomes extremely short after
rschatging, replacs ttie battery peck witti a new one.
Note: • Ute under arttrernely hot or cold oorxftions
will reduce operating capacity per
charge.
NOTE
Even if you don’t use the Metal Cutter,
charge the battery pack at least once every
six months.
— 17 —
Blade for metal material
• EY9PM13C
For cutting unhardened ferrous material
Thickness of material
0.5mm-6.0mm(1/32"-1/4*)
Blade for cutting thin metal material
• EY9PW13B
For cutting unhardened ferrous materisd
Thickness of material
0.5mm-6.0mm(1/32“-1/4'')
Page 17

Blade for plastic
• EY9PP13B
For cutdno plastic.
Raoomended thickness of matertal acrylic
and vinyl chloride plates:
2.0mnh5.0nim{S/64''-a/16")
corrugated platM, pipes:
0.8mm-5.0rnm(1 /32"-3/16*)
Specifications
Metal Cutter (EY3530)
Motor voltage
Blade Speed
Blade Size
Outside diameter 135 mm, (5-5/16")
Art>orslze
Mardmum cutting depth
Dimensions (L x W x H)
Wei(^ (with battery pack)
Battery Pack (EY9230)
Storage Battery
Voltage
15.6 V DC
3100/min (rpm)
20 mm, (25 / 321
3-46 mm, (1/ 8"-M3/16") (^ 135mm blade)
45” angle cutting • • - 30mm, (1-3 /161
%0x 196x181 mm
(13-25 / 32* x7-51/64''x7-1/81
3.05 kg (6.7 K)s)
Ni-MH Battery
15.6VDC(1.2Vx13cells)
Battery Charger (EY0230)
Charging time
Weiÿit
Applicable Battery Pack
EY9001
EY9006
EY9101
EY9106
EY9107
EY9108
EY9200
— 18 —
12V
15.6V
—
—
EY9136
EY9230
0.78 kg (1.7 lbs.)
9.6V
EY0060
EY9066
EY9160
EY9162
— —
—
7.2V
EY9065
—
—
Standard
charging time
Approx. 20 min.
Approx. 25 min.
Apprm. 30 min.
Approx. 45 min.
Page 18

IfiSBlf ., 30-DAy QUAUTY
iijii
ACTION GUARANTEE:
dissatisfied with any Pans4oni(|i
ss Power Tool for any reasorf,
pi| return it to the place of purchjase
h jiidated proof of purchase, in thje
gi|||ii packaging, with ail accessoi^esi
instructions, within 30 dayb or
e of purchase, for a full refun|j, or
nasonic at 201-392-6655. AbMse
pplication of any power tool
|he guarantee. ^
■iiawiiiii
m-
Kii?
PANASONIC HOME & COMMERCIAL PRODUCTS COMPANY
No.l EN (USA)
EY981135301 HI 202
One Panasonic Way, Secaucus, New Jersey 07094
Printed in USA
 Loading...