

Stereo Cartridge
Headshell
terminal
BA
Operating Instructions
Model No.
Before connecting, operating or adjusting this product, please
read these instructions completely.
Please keep this manual for future reference.
EPC-U1200
E P
For Europe
Matsushita Electric
Industrial Co.,Ltd.
Osaka 542-8588, Japan
2000 Matsushita Electric Industrial Co., Ltd.
Printed in Japan
For U.S.A.
Panasonic Consumer Electronics
Company, Division of Matsushita
Electric Corporation of America
One Panasonic Way Secaucus,
New Jersey 07094
http://www.panasonic.com
Panasonic Sales Company,
Division of Matsushita Electric of
Puerto Rico, Inc. (“PSC”)
Ave. 65 de Infantería, Km. 9.5
San Gabriel Industrial Park, Carolina,
Puerto Rico 00985
RQT5726-E
En
M1200TK0
Dear customer
Thank you for purchasing this product.
For optimum performance and safety, please read these instructions carefully.
(Only for U.S.A.)
User memo:
DATE OF PURCHASE
DEALER NAME
DEALER ADDRESS
TELEPHONE NUMBER
Supplied accessories
Please check and identify the supplied accessories.
(Only for U.S.A.)
Use numbers indicated in parentheses when asking for replacements parts.
To order accessories contact 1-800-332-5368
or web site (http: //www.panasonic.com).
Head shell weight (RMJ0011) . . . . . . . . . . . . . . . . . . . . . . 1
Mounting screws (RHD26036) . . . . . . . . . . . . . . . . . . . . . . 2
Stylus cover (RMJ0010) . . . . . . . . . . . . . . . . . . . . . . . . . . . 1
Features
Designed for scratch play.
• Moving magnet (MM) type for high output and high quality
sound.
• Easily attached to Technics headshells.
Please Note
Treat the stylus with care.
The stylus is a delicate instrument for picking up sounds from
the grooves on records. The only surface it should touch is a
record.
• Do not move the tip of the stylus.
• Do not allow it to catch on anything.
• Do not allow the stylus to touch hard surfaces.
• Attach the stylus cover when you have finished play.
Remove dust from the record and stylus regularly.
Take the headshell off the tone arm and, using a soft-tipped
brush, carefully remove the dust with a brushing movement
toward the point of the stylus.
Wipe the headshell terminal occasionally.
Dust or fluff on the terminal can cause the connection to be
incomplete. Wipe it with a soft cloth and put the headshell back
on the tone arm.
SP records (78 r/min) cannot be played.
Use a cartridge designed for SP records.
Product service
Do not attempt to remove the cover(s) or repair the unit yourself.
Refer servicing to qualified personnel only.
(Only for U.S.A.)
Product information
For product service, product information or assistance with product operation, refer to the servicenter directory.
Before requesting service, make the below checks. If you
are in doubt about some of the check points, or if the remedies indicated in the chart do not solve the problem, contact below.
In the U.S.A., contact the Panasonic Customer Call Center
at 1-800-211-7262, or web site (http://www.panasonic.com).
In Canada, contact Panasonic Canada Inc. Customer Care
Centre at 905-624-5505, or web site (www.panasonic. ca), or
an authorized Servicentre nearest you.
Specifications
Type Moving magnet stereo cartridge
Stylus point 0.6 mil (Conical diamond)
Output voltage 6 mV (1 kHz, 3.54 cm/s)
Frequency response 10 Hz – 20 kHz
Channel separation 20 dB (1 kHz)
Channel balance 1.5 dB (1 kHz)
Compliance 4 X 10⁻⁶ cm/dyne (100 Hz)
Optimum stylus pressure 2 g
Recommended load resistance 47 – 100 KΩ
Mass 5.3 g (0.19 oz.)
Replacement stylus part no. EPS-1200CS
Specifications are subject to change without notice.
Mass and dimensions are approximate.
A
Headshell
weight
B
Stylus tip
C
Headshell
Terminal
Cartridge
Stylus tip
Overhang gauge
(Included with SL-1200 series
turntables)
52 mm
Locking nut
Mounting screw
Headshell
(Included with SL-1200 series
turntables)
Wire
(2.05 in.)
(Wire)
Red
Green
White
Blue
Terminal
(
R+(Red)
R–(
Green
White
L+(
L–(Blue)
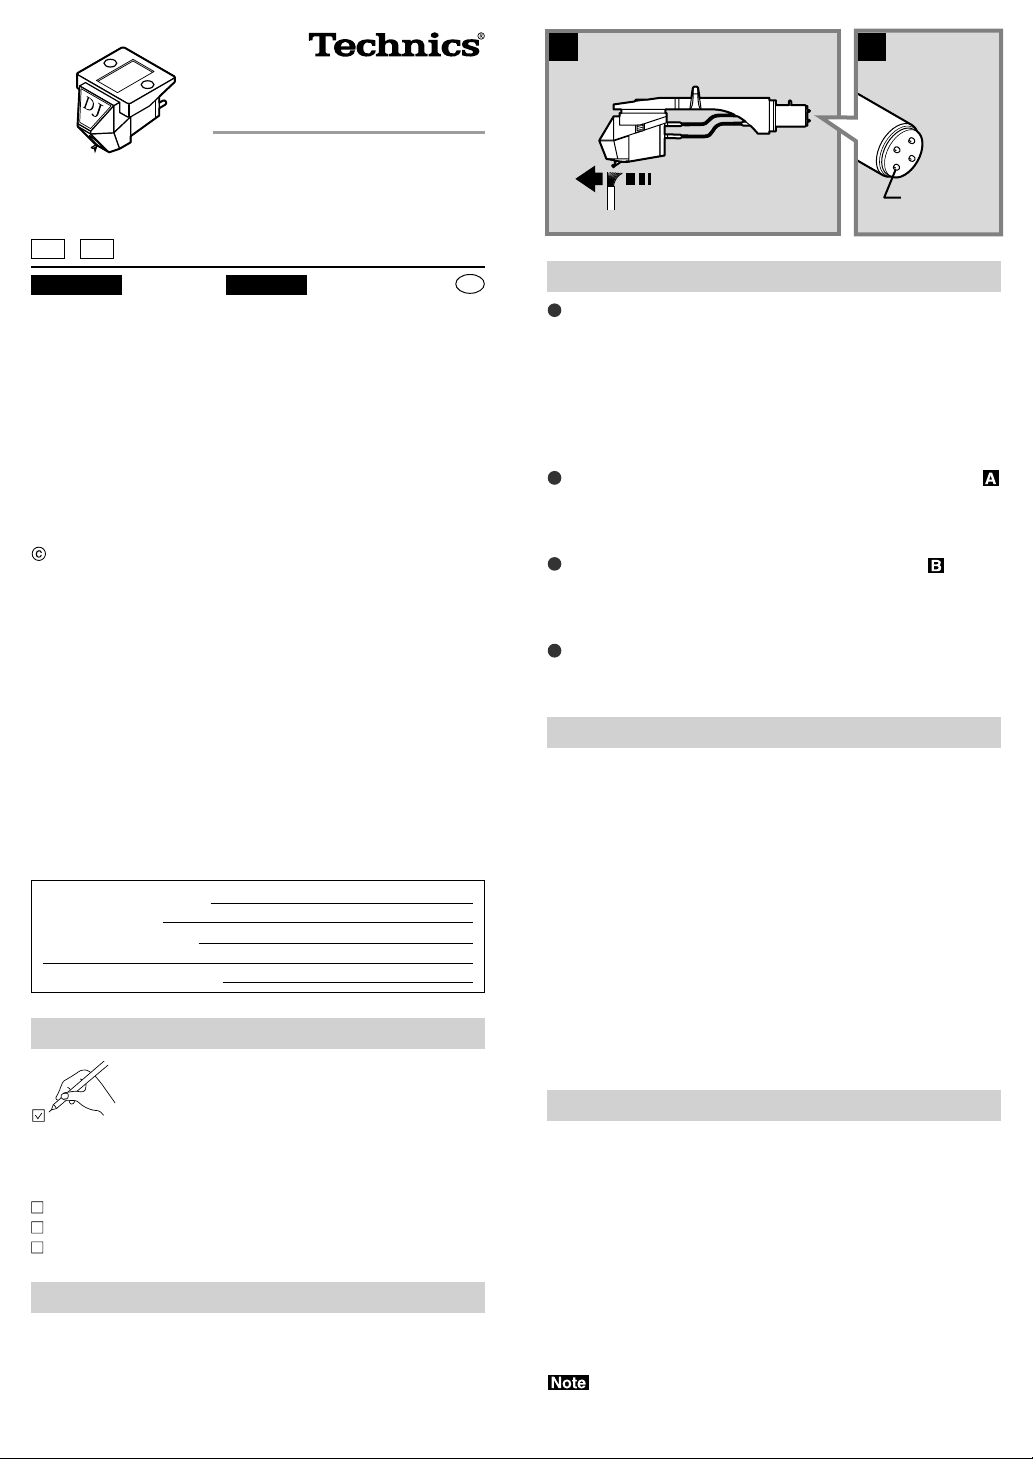
Attaching the cartridge
( e.g.,when using with SL-1200 series turntables )
Use the screws to attach the included headshell
)
)
)
weight and cartridge to your headshell.
• Remove the stylus (with the stylus cover attached) from
the cartridge to protect the stylus tip.
• Connect the headshell's wires to the cartridge’s termi-
nals, following the color or symbol coding.
• Reinsert the stylus (with the stylus cover attached) after
attaching the cartridge.
Ensure the stylus is firmly in place.
Adjust the facing and overhang.
• Change the facing of the cartridge so it is straight on the
headshell.
• Adjust the overhang so the stylus tip is 52 mm from the
plug.
Use the overhang gauge included with SL-1200 series turntables to adjust the correct 15-mm overhang for this series.
• If the cartridge is fitted to a different kind of tone arm or
player, consult the appropriate manual for adjustment
instructions.
Tighten the screws firmly.
Method of use
Insert the headshell into the end of the tone arm
and fasten the locking nut.
Adjust the stylus pressure.
The optimum stylus pressure for this stylus is 2 grams.
Set the horizontal balance of the tone arm to zero (0), then set
the stylus pressure to the correct value.
• Sound is distorted or the stylus jumps if the recording level
on the record is high or if the player is used in a cold room.
Increase the stylus pressure if this occurs.
• Increase the stylus pressure for scratch play if the stylus
jumps.
• Overly increasing the stylus pressure can cause the cartridge
body to touch the record. Reduce stylus pressure if this
occurs.
D
Cartridge dimensions
(millimeters)
18
(0.71 in.)
23
(0.71 in.)
18
9.5
M2.6
(0.91 in.)
(0.37 in.)
12.7
Replacing the stylus
Replace the stylus with part no. EPS-1200CS when necessary.
• Replace the stylus after about 500 hours of use.
Remove the stylus from the cartridge.
Insert the new stylus (with the stylus cover attached)
into the cartridge.
Ensure the stylus is firmly in place.
(0.5 in.)
 Loading...