

Panasonic DVD-S31EG, DVD-S35EG User Manual
DVD/CD PLAYER
DVD-S35/S31
Operating Instructions
DVD/ CD PLAYER DVD-S35
DOWN ZOOMMODE
DVD-RAM VIDEO PLAYBACK
OPEN/CLOSE
UP
For error-free handling of your appliance, please read these
operating instructions carefully. Keep this manual for future
reference.
Contents page
Precautions 2
Warning 3
The DVDplayer 4
The remotecontrol unit 5
Connections /batteries 6 -7
Home cinema 8
Basic settings 9
SETUP menu 10 -14
Ratings 11
General playback 15 -19
Programme play 20
Other functions 21
On-screen displays 22 -23
JPEG 24
MP3/WMA/ menu 25
General noteson DVDs 26
Glossary oftechnical terms 27
Before requestingservice 28 -29
Information /Language codes 30
Specifications 31
Index last page
DVD-RAM
Precautions
Inside of product
Tuotteen sisällä
Back of product, see page 6
Dear customer
Thank you for trusting and purchasing this high-quality product. Panasonic is one of the
leading companies of the consumer electronics industry.
We are sure that this DVD player will meet with all your expectations.
Voltage:
Do not use high voltage power sources. This can overload the unit and cause a fire.
Do not use a DC power sources. Check the source carefully when setting the unit up on
a ship or other place where DC is used.
AC mains lead protection:
Ensure the AC mains lead is connected correctly and not damaged. Poor connection and
lead damage can cause fire or electric shock.
Service:
Do not attempt to repair this unit by yourself. If sound is interrupted, indicators fail to light,
smoke appears, or any other problem that is not covered in these instructions occurs,
disconnect the AC mains lead and contact your dealer or an authorized service center.
CLASS 1
LASER PRODUCT
LUOKAN 1 LASERPLAITE
KLASS 1 LASER APPARAT
2
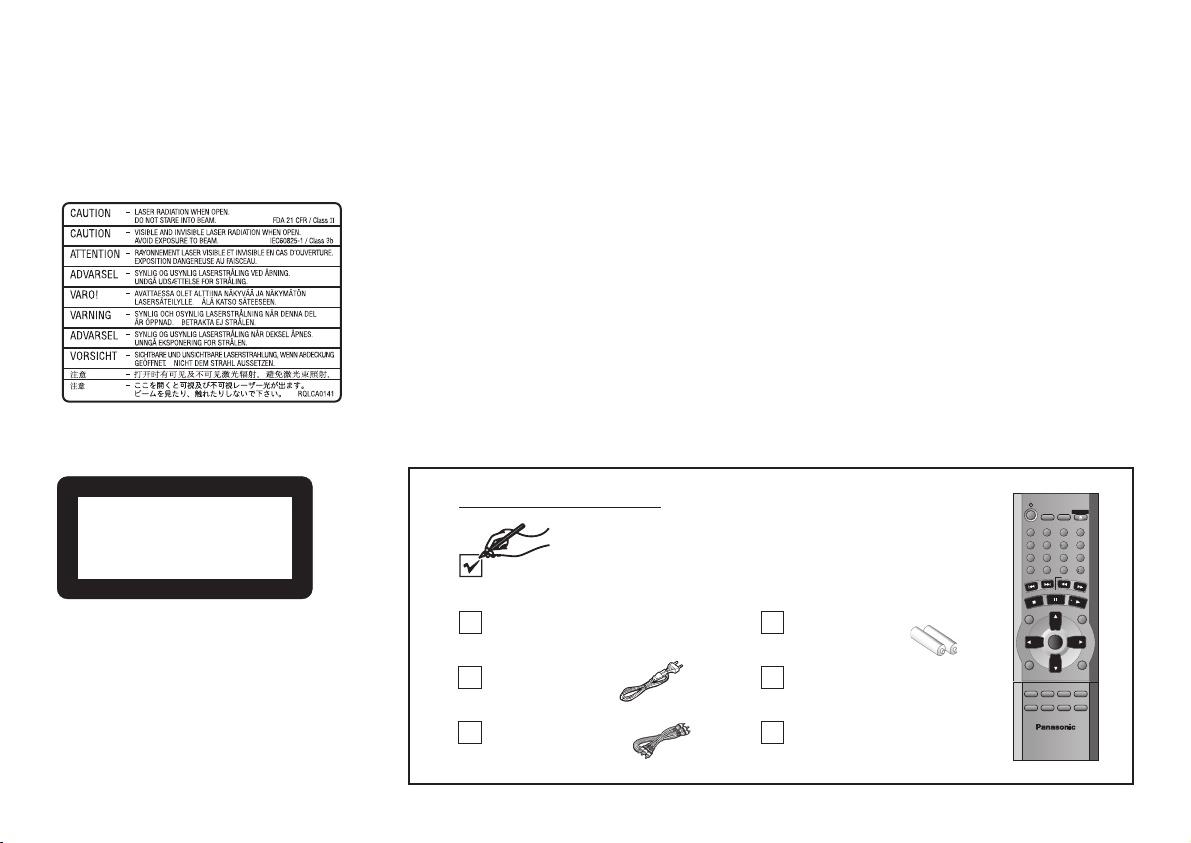
Included accessories
Remote Control
N2QAJB000069
AC Mains Lead
RJA0043-1C
Audio/Video Cable
K2KA6CA00001
Remote Control Batteries
AA, UM3 or R6
Operating Instructions
Guarantee Card
SLEEP SETUP
A.SRD
123
CINEMA
4
5
D.ENH
789
CANCEL
GROUP
0
SLOW/SEARCH
SKIP
PAUSE
STOP
DIRECTNAVIGATOR
TOP
MENU
ENTER
DISPLAY RETURN
SUBTITLE
ANGLE/PAGE
AUDIO
REPEAT
ZOOM
PLAYMODE
DVD PLAYER
N2QAJB000069
OPEN/CLOSE
PLAY
PLAYLIST
QUICKREPLAY
POSITION
MEMORY
6
10
MENU

Warning
SUOMI
WARNING:
TO REDUCE THE RISK OF FIRE, ELECTRIC SHOCK OR PRODUCT
DAMAGE, DO NOT EXPOSE THIS APPARATUS TO RAIN, MOISTURE,
DRIPPING OR SPLASHING AND ENSURE THAT NO OBJECTS FILLED
WITH LIQUIDS, SUCH AS VASES, SHALL BE PLACED ON THE
APPARATUS.
CAUTION!
!
DO NOT INSTALL OR PLACE THIS UNIT IN A BOOKCASE, BUILT-IN
CABINET OR IN ANOTHER CONFINED SPACE. ENSURE THE UNIT
IS WELL VENTILATED. TO PREVENT RISK OF ELECTRIC SHOCK OR
FIRE HAZARD DUE TO OVERHEATING, ENSURE THAT CURTAINS
AND ANY OTHER MATERIALS DO NOT OBSTRUCT THE VENTILATION
VENTS.
!
DO NOT OBSTRUCT THE UNIT’S VENTILATION OPENINGS WITH
NEWSPAPERS, TABLECLOTHS, CURTAINS, AND SIMILAR ITEMS.
!
DO NOT PLACE SOURCES OF NAKED FLAMES, SUCH AS LIGHTED
CANDLES, ON THE UNIT.
!
DISPOSE OF BATTERIES IN AN ENVIRONMENTALLY FRIENDLY
MANNER.
THIS UNIT IS INTENDED FOR USE IN MODERATE CLIMATES.
THIS PRODUCT UTILIZES A LASER. USE OF CONTROLS OR
ADJUSTMENTS OR PERFORMANCE OF PROCEDURES OTHER
THAN THOSE SPECIFIED HEREIN MAY RESULT IN HAZARDOUS
RADIATION EXPOSURE. DO NOT OPEN COVERS AND DO NOT
REPAIR YOURSELF. REFER SERVICING TO QUALIFIED
PERSONNEL
.
VAROITUS:
TULIPALO-, SÄHKÖISKUVAARAN TAI TUOTETTA KOHTAAVAN
MUUN VAHINGON VÄHENTÄMISEKSI EI LAITETTA SAA ALTISTAA
SATEELLE, KOSTEUDELLE, VESIPISAROILLE TAI ROISKEELLE,
EIKÄ NESTETTÄ SISÄLTÄVIÄ ESINEITÄ, KUTEN ESIMERKIKSI
MALJAKOITA, SAAASETTAA LAITTEEN PÄÄLLE.
VAROITUS!
!
ÄLÄ ASENNA TAI LAITA TÄTÄ LAITETTA KABINETTITYYPPISEEN
KIRJAKAAPPIIN TAI MUUHUN SULJETTUUN TILAAN, JOTTA
TUULETUS ONNISTUISI. VARMISTA, ETTÄ VERHO TAI MIKÄÄN
MUU MATERIAALI EI HUONONNA TUULETUSTA, JOTTA
VÄLTETTÄISIIN YLIKUUMENEMISESTA JOHTUVA SÄHKÖISKU
TAI ULIPALOVAARA.
!
ÄLÄ PEITÄ LAITTEEN TUULETUSAUKKOJA SANOMALEHDELLÄ,
PÖYTÄLIINALLA, VERHOLLA TAI MUULLA
VASTAAVALLA ESINEELLÄ.
!
ÄLÄ ASETA PALAVAA KYNTTILÄÄ TAI MUUTA AVOTULEN
LÄHDETTÄ LAITTEEN PÄÄLLE.
!
HÄVITÄ PARISTOT LUONTOA VAHINGOITTAMATTOMALLA TAVALLA.
TÄMÄ LAITE ON TARKOITETTU KÄYTETTÄVÄKSI LEUDOSSAILMASTOSSA.
LAITTEEN KÄYTTÄMINEN MUULLA KUIN TÄSSÄ KÄYTTÖOHJEESSA
MAINITULLA TAVALLA SAATTAA ALTISTAA KÄYTTÄJÄN
TURVALLISUUSLUOKAN 1 YLITTÄVÄLLE NÄKYMÄTTÖMÄLLE
LASERSÄTEILYLLE.
This product may receive radio interference caused by mobile telephones
during use. If such interference is apparent, please increase separation
between the product and the mobile telephone.
Tämä tuotteen toimintaan saattaa tulla häiriöitä lähellä olevasta
matkapuhelimesta. Mikäli matkapuhelimesta johtuvia häiriöitä ilmenee,
siirrä matkapuhelin mahdollisimman kauas laitteesta jotta häiriöt
poistuvat.
3
The DVD player
DVD / CD PLAYER DVD-S35
DVD-RAM VIDEO PLAYBACK
OPEN/CLOSE
DOWN ZOOMMODE
UP
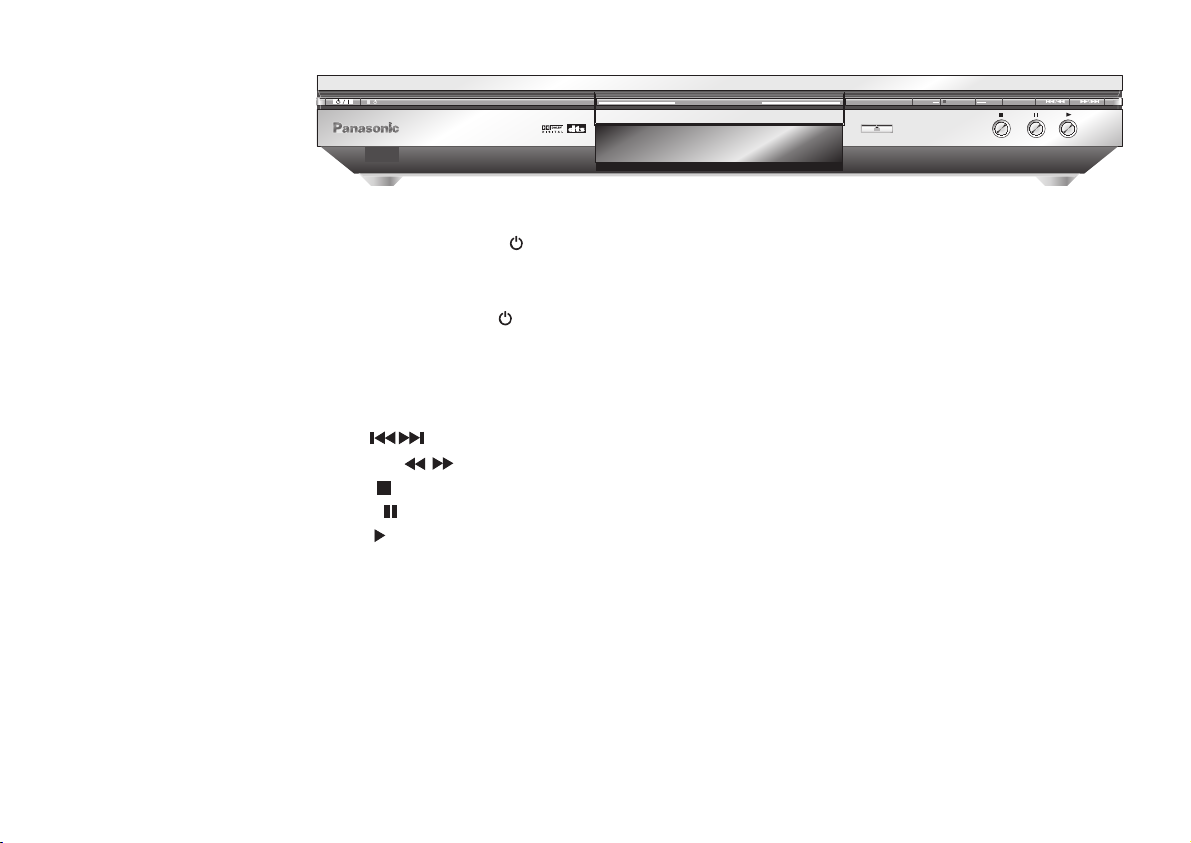
Stand-by/On switch
/I
Press to switch the unit from on to standby mode or vice versa. In standby mode, the unit is still
consuming a small amount of power.
Stand-by indicator
When the unit is connected to the AC mains supply, this indicator lights up in standby mode and goes
out when the unit is turned on.
ZOOM MODE
SKIP
SEARCH
STOP
PAUSE
PLAY
Press to zoom
Press to skip chapters, tracks or pictures
Press to search ( keep button pressed )
Press to stop playback
Press to pause playback
Press to start playback
page 19
page 16
page 15
page 15
page 15
page 15
Your DVD player provides a perfect reproduction of digital images stored on DVDs. Depending on
the type of DVD, your hi-fi equipment or your stereo TV set you can play back stereo sound or digital
multi-channel sound in excellent cinema quality. DVD video also features options for selecting the
audio channel, the synchronised language, the language of subtitles and for choosing from various
camera pick-up angles.
All basic functions of your DVD player can be controlled either via the unit or by means of the remote
control. The remote control lets you make any changes to the device settings which will be retained
when you switch off the player unit.
4
The remote control unit
OPEN/CLOSE
SLEEP SETUP
A.SRD
123
CINEMA
4
D.ENH
789
CANCEL
GROUP
SKIP
STOP
DIRECT NAVIGATOR
TOP
MENU
DISPLAY RETURN
SUBTITLE
AUDIO
ZOOM
PLAYMODE
DVD PLAYER
N2QAJB000069
PAUSE
ENTER
ANGLE/PAGE
REPEAT
5
0
SLOW/SEARCH
PLAY
PLAYLIST
QUICK REPLAY
POSITION
MEMORY
6
10
MENU
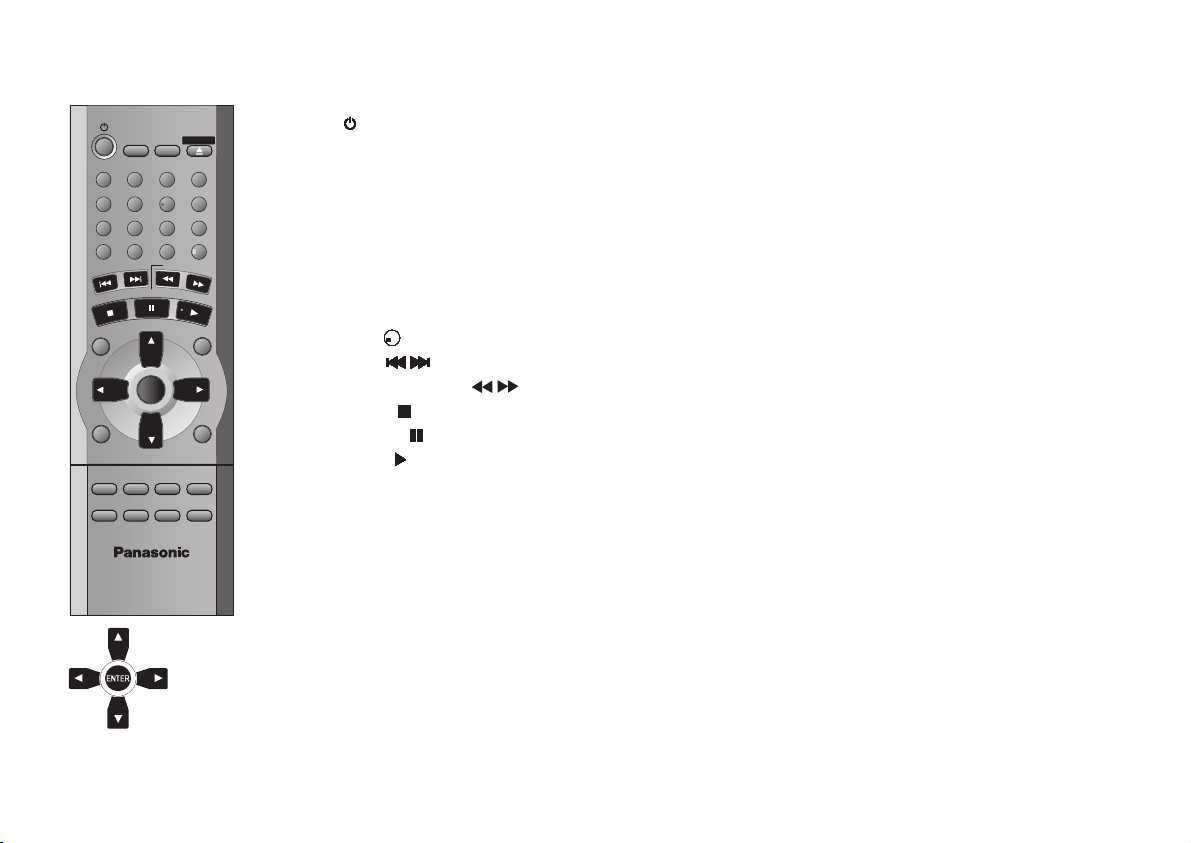
Cursor keys
ENTER to accept the menu
function you selected
SLEEP
SETUP
OPEN/CLOSE
A.SRD
CINEMA
D.ENH
GROUP
CANCEL
0...9
SKIP
SLOW/SEARCH
STOP
PAUSE
PLAY
DIRECT NAVIGATOR/
TOP MENU
PLAY LIST/MENU
DISPLAY
RETURN
SUBTITLE
AUDIO
ANGLE/PAGE
QUICK REPLAY
PLAY MODE
ZOOM
REPEAT
POSITION MEMORY
Page
Switches on and off the DVD player from and back into stand-by mode
Switches off the unit at the set time
Displays the SETUP menu (basic DVD player settings)
Opens and closes the disc tray
ADVANCED SURROUND
Provides something similar to a surround effect
:21
Enhances the contrast of pictures
DIALOGUE ENHANCER:
Puts up the volume of the dialogue tone
On-screen display of groups of tracks
Discards entries
>10>10>10>10>10>10>10>10>10>10>10>10>10>10>10>10>10>10>10>10>10>10>10>10>10>10>10>10>10>10>10>10>
10
Numeric key pad; input of two-digit numbers
Press to skip chapters, tracks or pictures
Slow motion and search function
Stops playback
Pauses playback
Starts playback
Displays the main menu
Displays the menu
24,25,26
Enables the on-screen display
Quits a menu
Selects the language of subtitles
Changes the audio track
Chooses from various camera angles; turns menu pages
Repeats the last couple of seconds of the current playback
Random play/Programme play
Zoom function during playback
Repeat function
Resumes playback at stored position following an interruption
4
17
10-14
15
21
21
22
11
20
16
15
15
15
15
25,26
22-24
9,10
22
22
22,24
16
17,20
19
19
18
5
Connections
Before you make any connections
!
Verify that all devices to be connected up are unplugged from the AC mains.
!
Read the operating instructions of your TV set.
Attach the unit as illustrated on this page.
Note on all connections shown
Attach the unit directly to the TV set. If you let the player connection go through a
video recorder you will experience a disturbed picture when playing copy-protected
DVDs.
To avoid sound quality problems deactivate function A.SRD ( Advanced Surround )
when you attach an amplifier with Dolby Pro Logic functionality.
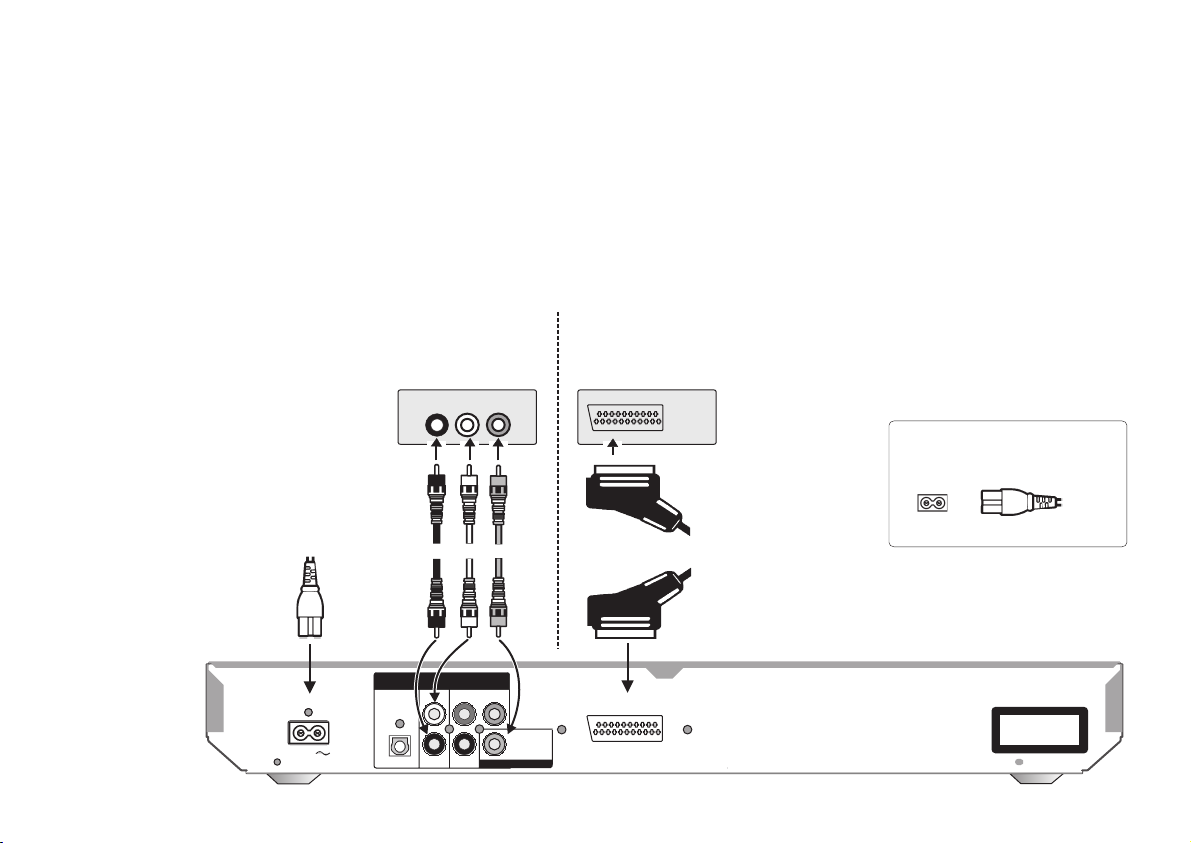
Connection to a TV set without a scart socket or to
an amplifier component ( home cinema ):
VIDEO IN
AUDIO IN
R
TV set or
L
amplifier
Audio
cable
Yellow
White
Red
Rear of
DVD player
AC IN
DIGITAL AUDIO OUT
(PCM/BITSTREAM)
OPTICAL
AUDIOOUT
L
R
COMPONENT
B
P
P
R
VIDEO OUT
Y
6
Video
cable
Please connect
directly to TV
VIDEOOUT
Connection to a TV set with scart socket:
AV socket
on rear of
AV
21-pin scart cable
AV
TV set
When the unit is fully attached
plug the AC mains cable back in
AC IN ~
CLASS 1
LASER PRODUCT
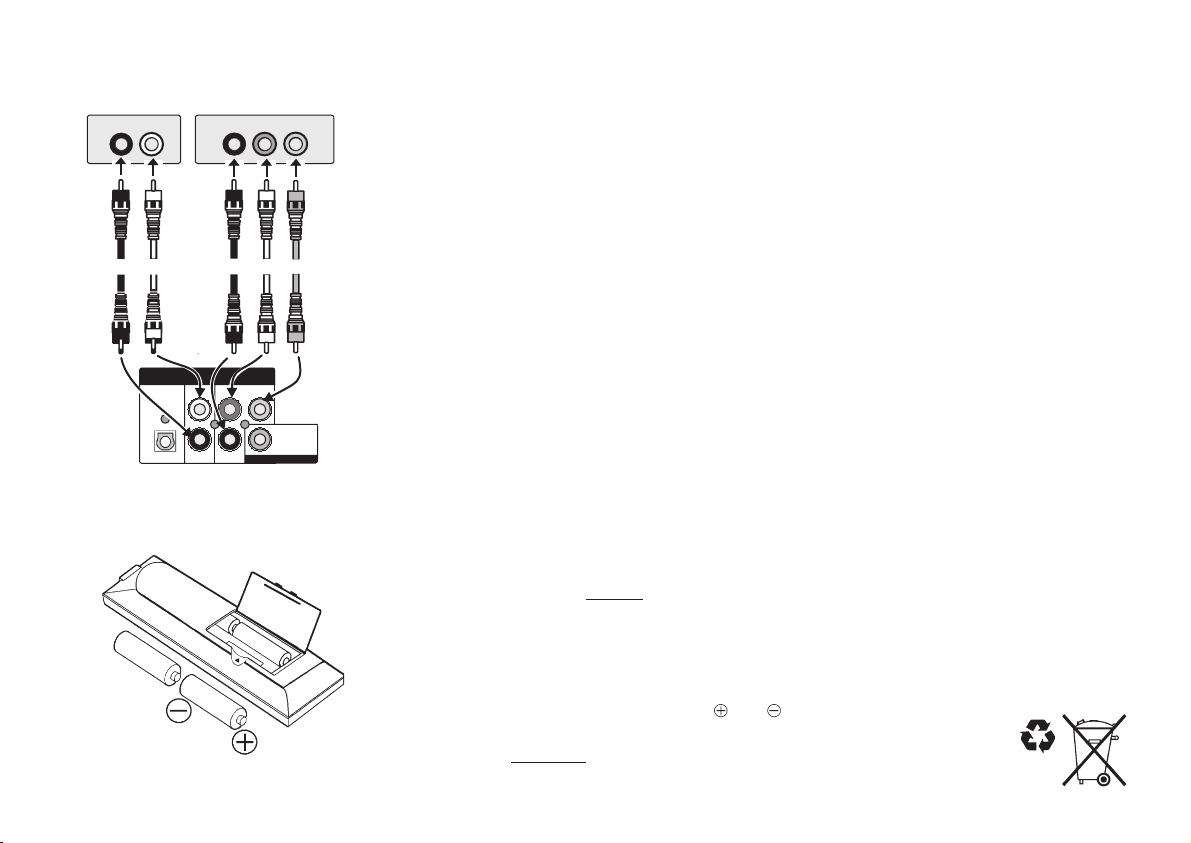
Connections
Rear of TV set (example)
AUDIO IN
R
Red
White
COMPONENT VIDEO IN terminal
P
R
L
COMPONENT VIDEO OUT terminal
P
Y
B
The Component Video Out terminal separately outputs the colour difference signals
( PB/PR ) and the brightness signal Y, thus providing for an enhanced resolution and
colour response.
!
The labelling of the Component Video In terminal may differ depending on the
TV set or monitor you use ( e.g. Y/P /P ,Y/B-Y/R-Y, Y/C /C ).
BR BR
Please refer to the operating instructions of your TV set.
!
Attach the cables as shown on the illustrations. Make sure not to confuse the colours of
cables or the labels of sockets.
DIGITAL AUDIO OUT
(PCM/BITSTREAM)
OPTICAL
Batteries
AUDIOOUT
L
R
COMPONENT
B
P
P
R
VIDEO OUT
Y
Please connect
directly to TV
VIDEOOUT
Inserting batteries into the remote control unit:
The batteries last for about a year, depending on how often you use the RC unit.
!
Do not mix old with new batteries or batteries of different types.
!
Only use batteries any harmful substances (such as lead, cadmium, mercury).
!
Do not use rechargeable type batteries.
!
Remove the batteries if the remote control unit is not used for longer periods of time.
!
Do not heat or short-circuit the batteries.
!
Immediately remove used-up batteries and replace with batteries of type AA, UM3 or R6.
!
Be sure not to confuse the polarity
Dispose of , packaging material and the unit
batteries according to
statutory regulations
without
and .
. They must not be thrown into the household refuse.
7
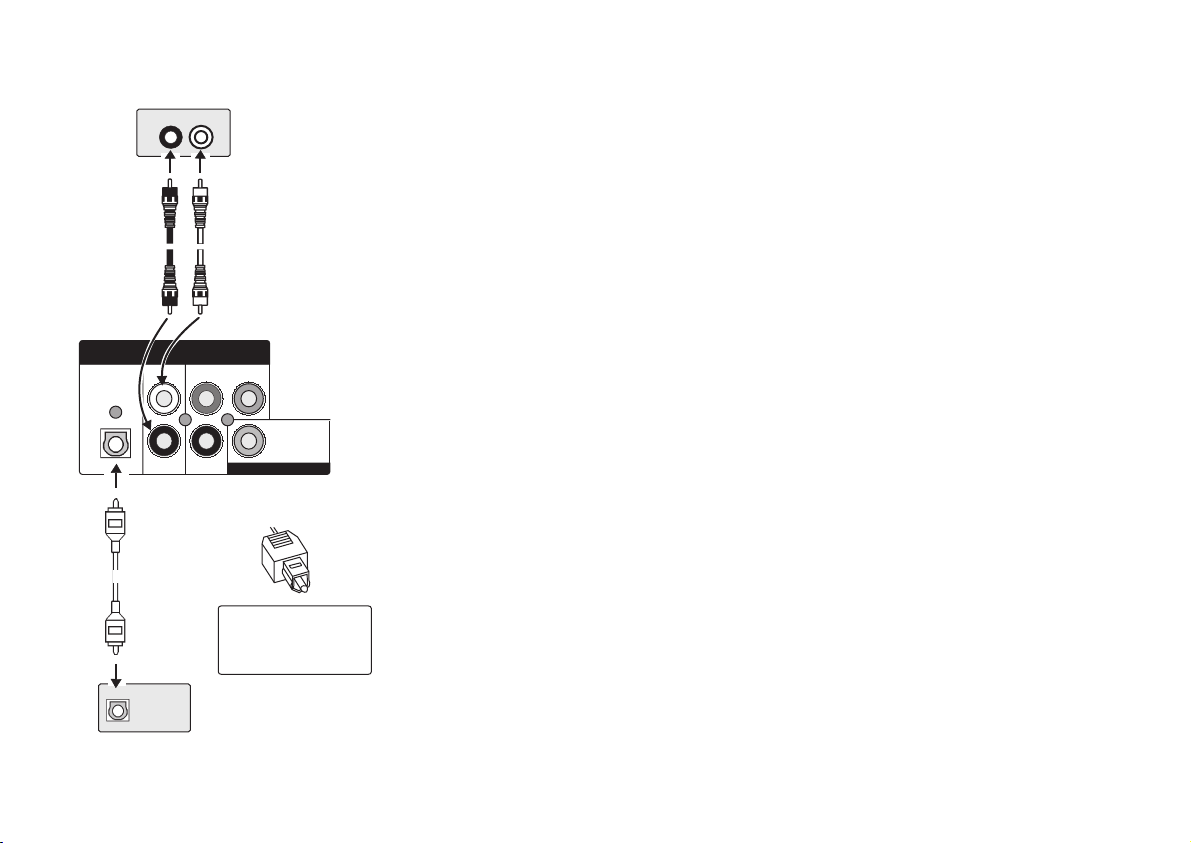
Home cinema
AUDIO IN
R
L
Amplifier (example)
Analogue connection ( AUDIO OUT ):
To be able to hear sound in stereo or Dolby Pro Logic quality, attach an amplifier or an
analogue audio component supporting these features.
8
DIGITAL AUDIO OUT
(PCM/BITSTREAM)
OPTICAL
Optical digital
audio cable
Red
Red
AUDIO OUT
L
R
OPTICAL
White
White
COMPONENT
B
P
P
R
Rear of
VIDEO OUT
DVD player
Y
Please connect
directly to TV
VIDEO OUT
Push in the jack all
the way into the
socket with this side
facing up.
Amplifier (example)
Connect the analogue outputs ( L and R ) with a "Dolby Pro Logic amplifier", for example.
Attach the audio cables as shown on the illustrations. Make sure not to confuse the
colours of cables or the labels of sockets ( white/L, red/R ).
!
To avoid sound quality problems deactivate function A.SRD ( Advanced Surround )
when you attach an amplifier with Dolby Pro Logic functionality.
Please refer to page 21.
Digital connection ( OPTICAL ):
For optimum surround sound, connect a digital amplifier or a digital audio component.
To play programmes with a 5.1-channel surround sound, connect the digital audio output
( OPTICAL ) with an external "Multi-channel Dolby Digital amplifier", for example.
Prerequisites for making recordings with an external digital recorder :
!
The original disc must not be copy-protected.
!
The recorder must be able to process signals with a sampling frequency of 48 kHz/16 bit.
!
You cannot make recordings from MP3/WMA.
Adapt the settings of SETUP menu ( see page 13 ) to the following:
!
PCM Down Conversion : Yes
!
Dolby Digital : PCM
!
DTS Digital Surround : PCM
!
MPEG : PCM
Deactivate function A.SRD ( Advanced Surround ) ( see page 21 ).
Audio
Basic settings
SETUP
QUICK SETUP
Die Menü-Sprache wählen
Select the menu language.
English
Deutsch
ENTER
SELECT
RETURN
Español
Svenska
.
Français
Italiano
Português
Nederlands
QUICK SETUP
When the appliance is properly connected press to switch on the unit.
Press the button on your remote control unit to display the QUICK SETUP
SETUP
menu which allows you to make some basic settings. Navigate the user-friendly and
clearly arranged on-screen menu by means of the cursor keys on the remote
control unit.
Every menu item provides further information on the options you have.
!
ENTER
!
RETURN
accepts your selection.
takes you back to the previous on-screen menu.
First of all, choose the .menu language
Select the audio/subtitle language :
If the language you want is not on the list, go to item "Other" and type in the appropriate language code ( page 30 ) using the numeric key pad of your remote control unit.
Select your TV's aspect ratio :
The format of TV screens is either 4:3 ( standard ) or 16:9 ( wide-screen ).
Select the aspect ratio that matches the screen setting of your TV set.
Select the output combination for the AV and component terminals :
Before you proceed please check which setting is supported by your TV set.
Please refer to the operating instructions of your TV set.
AV :
To improve the quality of the picture, you can set the video signal output via the
terminal from "Video/Y P P " ( standard quality ) to either "S-Video/Y P P "
( enhanced quality ) or "RGB/No Output" ( best quality ).
S-Video RGB:
and Requires a 21-pin scart cable.
Component Video Out :
BR BR
Select "Video/Y P P " or "S-Video/Y P P ".
BR BR
9
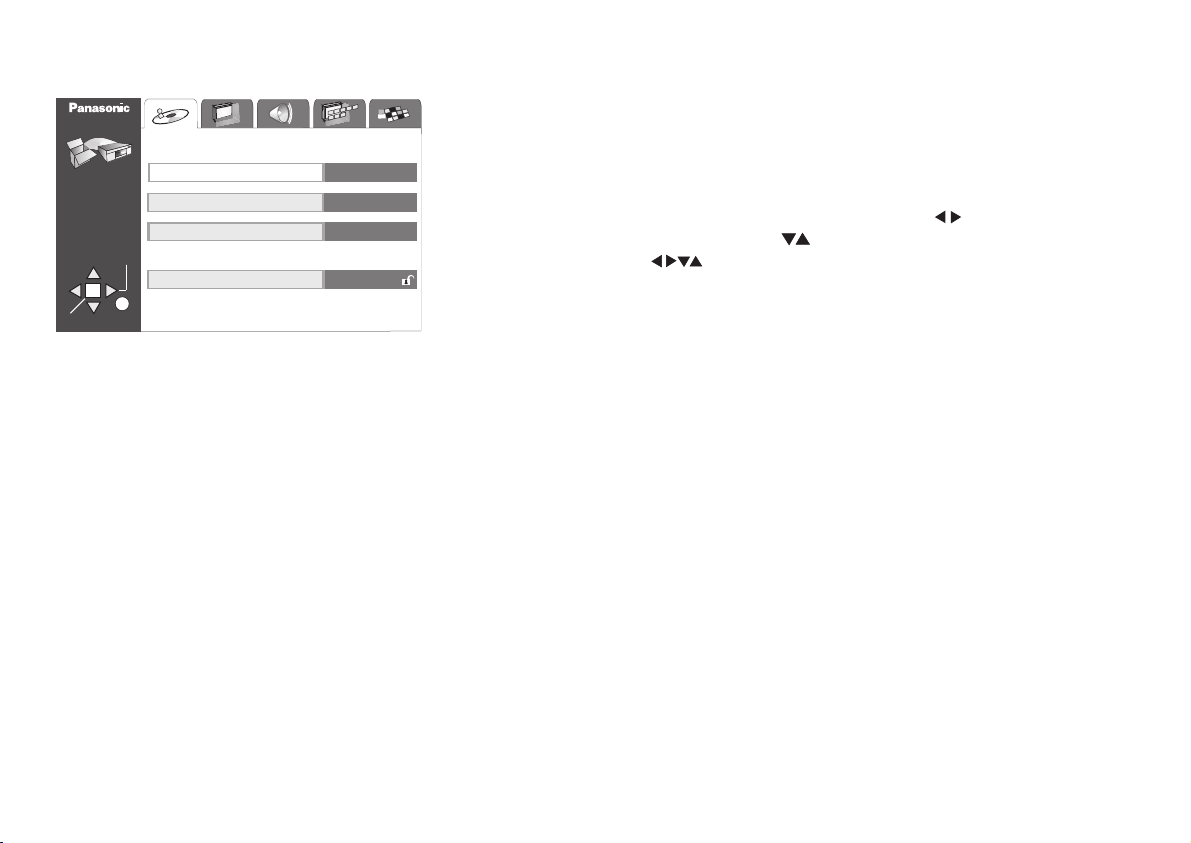
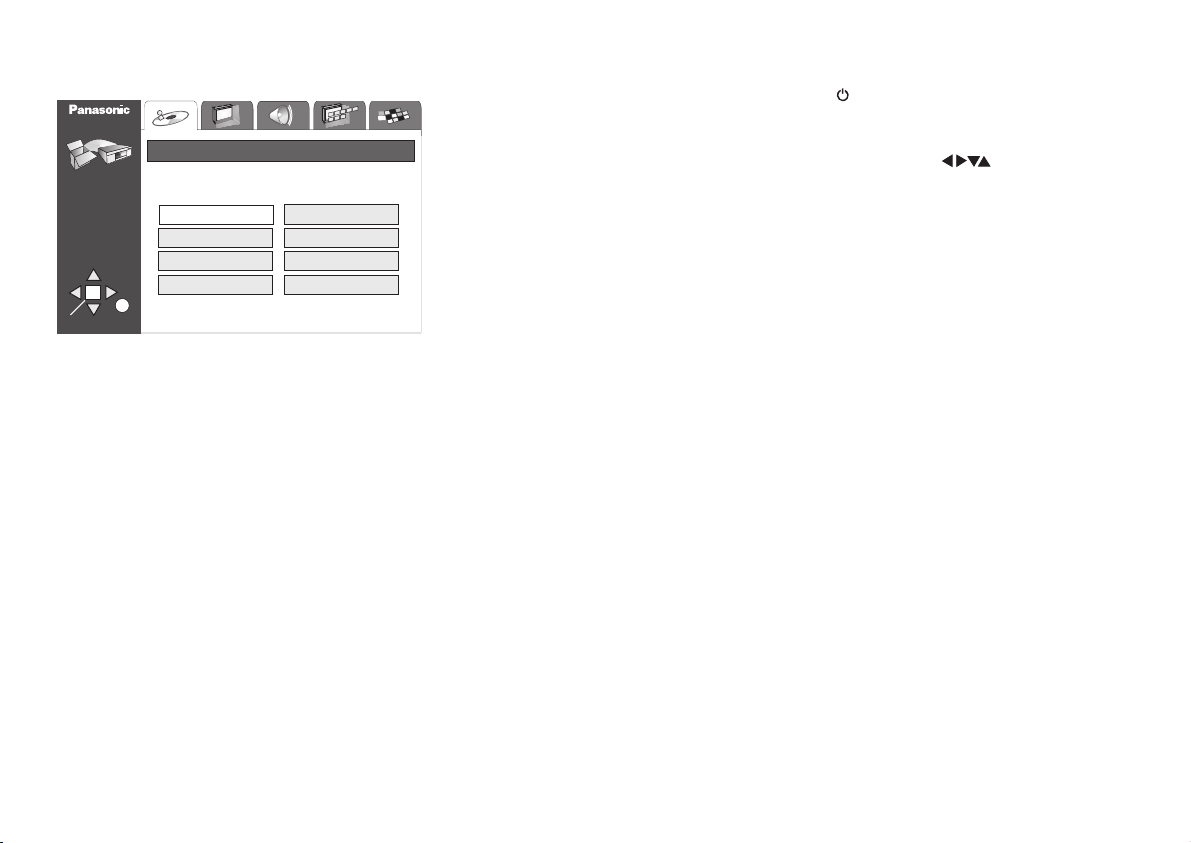
SETUP menu
Options of the SETUP menu
SELECT
ENTER
SETUP
TAB
RETURN
DISC
Disc
Audio
Subtitle
Menus
Ratings
English
Automatic
English
Level 8
The SETUP menu contains options concerning menu items " ", " ", " ",
" " and " ".
Display Others
Disc Video Audio
A clearly arranged on-screen menu guides you to and through the options.
!
SETUP
!
To select one of the SETUP sub-menus ( e.g. " " ) press
!
To select the option to be changed press , then press to confirm.
!
To select a setting press , then press to confirm.
!
RETURN takes you back to the previous screen
!
SETUP quits the menu
displays the SETUP screen.
Disc
ENTER
.
ENTER
Audio :
Select a dialogue language as appropriate.
The menu lists eight languages for you to choose from.
"Original" : The primary language on the disc is played.
If the language you want is not on the list, go to item "Other" and type in the appropriate language code ( page 30 ) using the numeric key pad of your remote control unit.
Subtitle :
Select a subtitle language as appropriate.
Select the "Automatic" display of subtitles if the disc contains no track with a dialogue
language recording.
To select another language for the subtitles proceed as described in section .Audio
10
Menus:
Select the language for the disc menus.
Proceed as described in section .Audio
 Loading...