

PANASONIC DVD-LS70EG User Manual
2
ALL
3
5
2
Operating Instructions
Bedienungsanleitung
Mode d’emploi
Instrucciones de funcionamiento
Istruzioni per l’uso
Handledning för uppsättning
Installatiegids
Kortfattet betjeningsvejledning
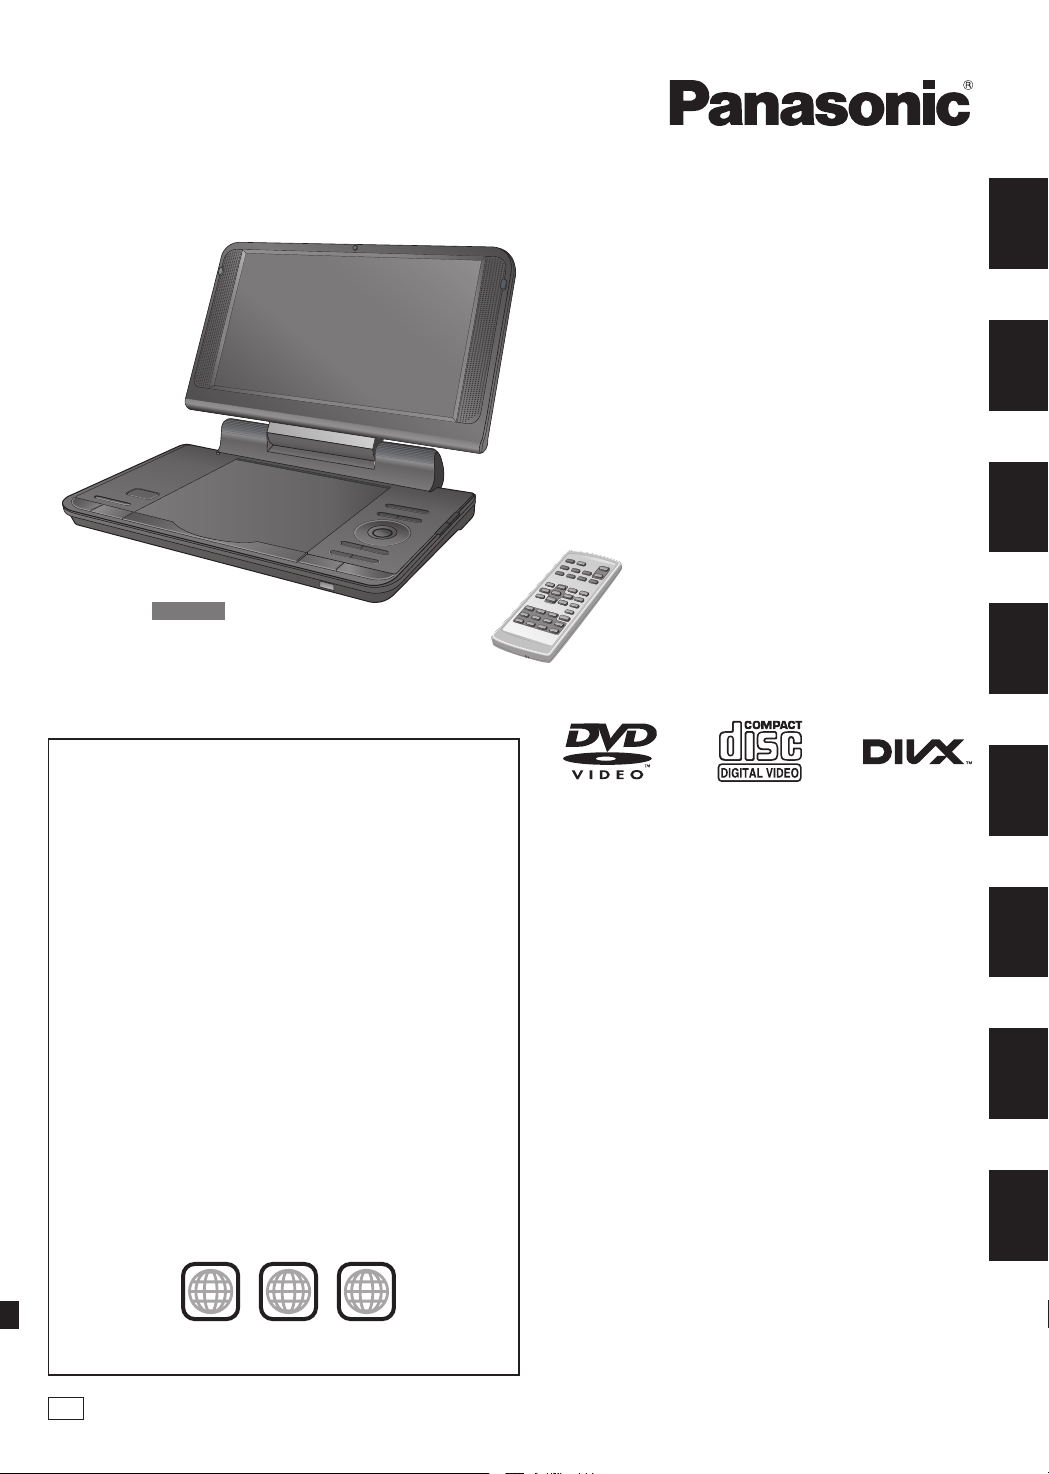
Portable DVD/CD Player
Tragbarer DVD/CD-Player
Lecteur de DVD/CD portable
Reproductor portátil de DVD/CD
Lettore DVD/CD portatile
Bärbar DVD/CD-spelare
Portable DVD/CD Speler
Bærbar DVD/CD-afspiller
ENGLISHDEUTSCHFRANÇAISESPAÑOLITALIANOSVENSKA
DVD-LS92
Region number
The player plays DVD-Video marked with labels containing the
region number “2” or “ALL”.
Regionalcode
Der Player kann DVD-Videodiscs wiedergeben, die mit den
Symbolen “2” oder “ALL” gekennzeichnet sind.
Code de zone
Ce lecteur fait la lecture des DVD-Vidéo dont l’étiquette porte le
code de zone “2” ou “ALL”.
Número de región de este reproductor
El reproductor reproducirá discos DVD-Video marcados con las
etiquetas que tengan “2” o “ALL”.
Codice regionale supportato da questo lettore
Il lettore può utilizzare i DVD video contrassegnati dalle etichette
che contengono “2” o “ALL”.
Regionsnummer som kan användas med den här skivspelaren
Skivspelaren kan spela av DVD-videoskivor som är märkta med
etiketter innefattande “2” eller “ALL”.
Regiocode door deze speler ondersteund
Op deze speler kunt u DVD-Video discs weergeven die een
label hebben waarop “2” of “ALL” is aangeduid.
Regionsnummer, som understøttes af denne afspiller
Afspilleren kan afspille DVD-Video med etiketter, som indeholder
“2” eller “ALL”.
Example:
Beispiel:
Exemple:
Ejemplo:
Esempio:
Exempel:
Vourbeeld:
Eksempel:
Model No.
DVD-LS92
DVD-LS70
Unless otherwise indicated, illustrations in these operating
instructions are of DVD-LS92.
Wenn nicht anders angegeben, stammen die Abbildungen
in dieser Bedienungsanleitung vom DVD-LS92.
Sauf indication contraire, les illustrations contenues dans
ces instructions d’utilisation appartiennent à DVD-LS92.
A menos que se indique lo contrario, las ilustraciones de
estas instrucciones de funcionamiento corresponden al
DVD-LS92.
Salvo indicazione contraria, le illustrazioni contenute in
questo manuale si riferiscono al modello DVD-LS92.
Om inget annat anges föreställer illustrationerna i dessa
användarinstruktioner modellen DVD-LS92.
Behalve anders aangeduid, zijn de illustraties in deze
handleiding van de DVD-LS92.
Medmindre andet er anført, refererer illustrationerne til
DVD-LS92.
Denna handledning för uppsättning ger enkla förklaringar
av grundläggande operationer. Var vänlig och läs
den medföljande engelska bruksanvisningen för mer
detaljerade anvisningar.
Deze installatiegids geeft een eenvoudige beschrijving
van de basisbedieningen. Raadpleeg a.u.b. de bijgesloten
Engelse gebruiksaanwijzing voor meer gedetailleerde
aanwijzingen.
Denne opsætningsguide giver enkle beskrivelser af
grundlæggende operationer. Se venligst den medfølgende
betjeningsvejledning på engelsk angäende detaljer.
NEDERLANDS
DANSK
EG
RQTC0177-D

RQTC0177
2
Dear customer
Thank you for purchasing this product.
For optimum performance and safety, please read these instructions carefully.
Before connecting, operating or adjusting this product, please read the instructions completely.
Please keep this manual for future reference.
Precautions
Read these operating instructions carefully before using
the unit. Follow the safety instructions on the unit and the
applicable safety instructions listed below. Keep these
operating instructions handy for future reference.
1) Read these instructions.
2) Keep these instructions.
3) Heed all warnings.
4) Follow all instructions.
5) Do not use this apparatus near water.
6) Clean only with dry cloth.
7) Do not block any ventilation openings.
Install in accordance with the manufacturer’s instructions.
8) Do not install near any heat sources such as radiators, heat
registers, stoves, or other apparatus (including amplifiers)
that produce heat.
9) Protect the AC mains lead from being walked on or pinched
particularly at plugs, convenience receptacles, and the
point where they exit from the apparatus.
10) Only use attachments/accessories specified by the
manufacturer.
11) Unplug this apparatus during lightning storms or when
unused for long periods of time.
12) Refer all servicing to qualified service personnel. Servicing
is required when the apparatus has been damaged in any
way, such as AC mains lead or plug is damaged, liquid has
been spilled or objects have fallen into the apparatus, the
apparatus has been exposed to rain or moisture, does not
operate normally, or has been dropped.
WARNING:
TO REDUCE THE RISK OF FIRE, ELECTRIC
SHOCK OR PRODUCT DAMAGE,
DO NOT EXPOSE THIS APPARATUS TO RAIN,
●
MOISTURE, DRIPPING OR SPLASHING AND
THAT NO OBJECTS FILLED WITH LIQUIDS,
SUCH AS VASES, SHALL BE PLACED ON THE
APPARATUS.
USE ONLY THE RECOMMENDED ACCESSORIES.
●
DO NOT REMOVE THE COVER (OR BACK);
●
THERE ARE NO USER SERVICEABLE PARTS
INSIDE. REFER SERVICING TO QUALIFIED
SERVICE PERSONNEL.
CAUTION!
● DO NOT INSTALL OR PLACE THIS UNIT IN A
BOOKCASE, BUILT-IN CABINET OR IN ANOTHER
CONFINED SPACE. ENSURE THE UNIT IS WELL
VENTILATED. TO PREVENT RISK OF ELECTRIC
SHOCK OR FIRE HAZARD DUE TO OVERHEATING,
ENSURE THAT CURTAINS AND ANY OTHER
MATERIALS DO NOT OBSTRUCT THE VENTILATION
VENTS.
● DO NOT OBSTRUCT THE UNIT’S VENTILATION
OPENINGS WITH NEWSPAPERS, TABLECLOTHS,
CURTAINS, AND SIMILAR ITEMS.
● DO NOT PLACE SOURCES OF NAKED FLAMES,
SUCH AS LIGHTED CANDLES, ON THE UNIT.
● DISPOSE OF BATTERIES IN AN ENVIRONMENTALLY
FRIENDLY MANNER.
CAUTION!
THIS PRODUCT UTILIZES A LASER.
USE OF CONTROLS OR ADJUSTMENTS OR
PERFORMANCE OF PROCEDURES OTHER THAN
THOSE SPECIFIED HEREIN MAY RESULT IN
HAZARDOUS RADIATION EXPOSURE.
DO NOT OPEN COVERS AND DO NOT REPAIR
YOURSELF. REFER SERVICING TO QUALIFIED
PERSONNEL.
The socket outlet shall be installed near the equipment and
easily accessible.
The mains plug of the power supply cord shall remain readily
operable.
To completely disconnect this apparatus from the AC Mains,
disconnect the power supply cord plug from AC receptacle.
This product may receive radio interference caused by
mobile telephones during use. If such interference is
apparent, please increase separation between the product
and the mobile telephone.
THIS UNIT IS INTENDED FOR USE IN MODERATE
CLIMATES.
Product Identification Marking is located on the bottom of
units.
WARNING
DRIVER MUST NOT OPERATE OR VIEW THIS UNIT
WHILE OPERATING THE VEHICLE.
Doing so will distract the driver and could cause a collision
resulting in serious injury or property damage.
2
Do not rest the unit on your lap for a long time while
using it. The unit can become hot and cause burns.

RQTC0177
3
Precautions for Listening with the
Headphones or Earphones
● Do not play your headphones or earphones at a high
volume. Hearing experts advise against continuous
extended play.
● If you experience a ringing in your ears, reduce volume or
discontinue use.
● Do not use while operating a motorized vehicle. It may
create a traffic hazard and is illegal in many areas.
● You should use extreme caution or temporarily discontinue
use in potentially hazardous situations.
●
Even if your headphones or earphones are the open-air
type designed to let you hear outside sounds, don’t turn up
the volume so high that you can’t hear what’s around you.
● Excessive sound pressure from earphones and
headphones can cause hearing loss.
● Listening at full volume for long periods may damage the
user’s ears.
Be sure to use the supplied or recommended headphones
or earphones.
To prevent damage
Avoid the following:
● Spraying flammable insecticides near the unit.
● Pressing the LCD.
● Touching the lens and other parts of the laser pickup.
Do not use the unit in the following places:
● Sandy places such as beaches.
● On top of cushions, sofas, or hot equipment such as
amplifiers.
Do not leave in an unventilated automobile or exposed to
direct sunlight and high temperatures.
Notice about the rechargeable battery
The battery is designated recyclable.
Please follow your local recycling regulations.
AC adaptor
This AC adaptor operates on AC between 100 V and 240 V.
But
● Obtain a suitable plug adaptor if the plug does not fit the
AC mains socket.
ENGLISH
Warning
Risk of fire, explosion and burns. Do not disassemble.
Do not heat the batteries above the following temperatures
or incinerate.
Button-type battery 100 °C
Battery pack 60 °C
CAUTION
Danger of explosion if battery is incorrectly replaced.
Replace only with the same or equivalent type recommended
by the manufacturer. Dispose of used batteries according to
the manufacturer’s instructions.
Warning
Keep the Button-Type battery out of the reach of children.
Never put Button-Type battery in mouth. If swallowed call
your doctor.
Batteries
1 Battery pack (Lithium ion battery pack)
●
Use the specified unit to recharge the battery pack.
●
Do not use the battery pack with equipment other than
the specified unit.
●
Do not use the player outside if it is snowing or raining.
(The battery pack is not waterproof.)
●
Do not get dirt, sand, liquids, or other foreign matter on
the terminals.
●
Do not touch the plug terminals (+ and -) with metal
objects.
●
Do not disassemble, remodel, heat or throw into fire.
●
Do not heat or expose to flame.
●
Do not leave the battery(ies) in an automobile exposed
to direct sunlight for a long period of time with doors and
windows closed.
●
Do not store the battery pack in temperature over 60°C.
2 Button-type battery (Lithium battery)
●
Insert with poles aligned.
●
Do not touch the terminals (+ and -) with metal objects.
●
Do not recharge, disassemble, remodel, heat or throw
into fire.
●
Keep out of reach of children.
●
Do not heat or expose to flame.
●
Do not leave the battery(ies) in an automobile exposed
to direct sunlight for a long period of time with doors and
windows closed.
If any electrolyte should come into contact with your hands
or clothes, wash it off thoroughly with water.
If any electrolyte should come into contact with your eyes,
never rub the eyes.
Rinse eyes thoroughly with water, and then consult a doctor.
3 Disposing of the batteries
Check and follow your local regulations before disposal.
3
RQTC0177
4
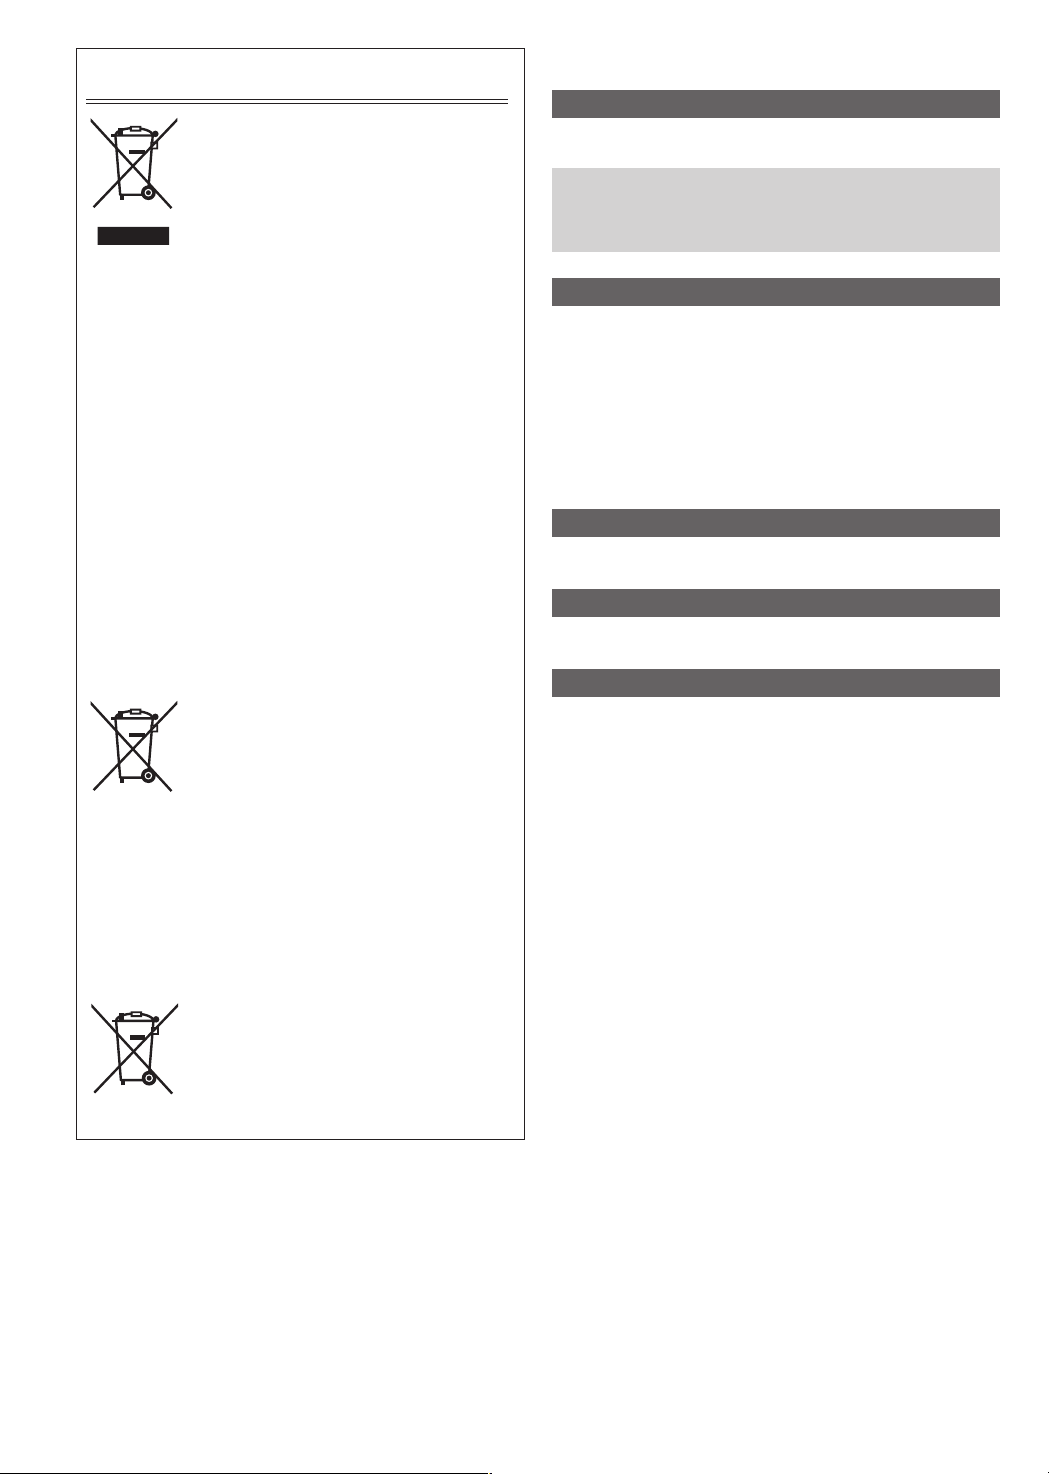
Information for Users on Collection and Disposal
Cd
of Old Equipment and used Batteries
These symbols on the products, packaging,
and/or accompanying documents mean that
used electrical and electronic products and
batteries should not be mixed with general
household waste.
For proper treatment, recovery and recycling
of old products and used batteries, please
take them to applicable collection points, in
accordance with your national legislation and
the Directives 2002/96/EC and 2006/66/EC.
By disposing of these products and batteries
correctly, you will help to save valuable
resources and prevent any potential
negative effects on human health and the
environment which could otherwise arise
from inappropriate waste handling.
For more information about collection and
recycling of old products and batteries,
please contact your local municipality, your
waste disposal service or the point of sale
where you purchased the items.
Penalties may be applicable for incorrect
disposal of this waste, in accordance with
national legislation.
For business users in the European
Union
If you wish to discard electrical and
electronic equipment, please contact your
dealer or supplier for further information.
[Information on Disposal in other
Countries outside the European Union]
These symbols are only valid in the
European Union. If you wish to discard these
items, please contact your local authorities
or dealer and ask for the correct method of
disposal.
Note for the battery symbol (bottom two
symbol examples):
This symbol might be used in combination
with a chemical symbol. In this case it
complies with the requirement set by the
Directive for the chemical involved.
Table of contents
Getting started
Precautions .................................................................2
Accessories ................................................................5
Preparations
Attaching the battery .............................................6
Recharging the battery .......................................... 6
Adjusting the LCD angle ........................................6
Discs that can be played ...........................................7
Playback
Playing discs ..............................................................8
Useful functions .......................................................11
Switching drives ....................................................... 11
Playing CD, data disc and USB device ................... 11
Transition effect ........................................................
About DivX® VOD content ........................................ 12
About DivX subtitles text display ............................13
Tips for making data discs .....................................
Settings
Using On-Screen Menus ..........................................14
Changing the player settings .................................. 15
Enjoying in various situations
Enjoying in a car .......................................................16
Using this unit with other equipment ..................... 16
Reference
Maintenance ..............................................................17
Specifications ........................................................... 17
Troubleshooting guide .............................................
Frequently asked questions ....................................19
Index ............................. Inner page of the back cover
12
13
18
4
RQTC0177
5
Accessories
1 Remote control (N2QAYC000040)
1 Button-type battery for remote control
(for replacement → 10)
1 Audio/video cable
1 AC adaptor
1 AC mains lead
● For use with this unit only. Do not use it with other
equipment.
Also, do not use cords for other equipment with this unit.
1 Car DC Adaptor
1 Rechargeable battery pack
Included Optional
DVD-LS92
DVD-LS70
● Depending on the battery pack, playback time may differ.
[→ 6, Approximate recharging and play times (Hours)]
DY-DB20 DY-DB30
CGR-H711
CGR-H712
Manufactured under license from Dolby Laboratories.
Dolby and the double-D symbol are trademarks of Dolby
Laboratories.
This item incorporates copy protection technology that is
protected by U.S. patents and other intellectual property
rights of Rovi Corporation. Reverse engineering and
disassembly are prohibited.
MPEG Layer-3 audio coding technology licensed from
Fraunhofer and Thomson.
“DVD Logo” is a trademark of DVD Format/Logo Licensing
Corporation.
DivX®, DivX Certified® and associated logos are trademarks
of DivX, Inc. and are used under license.
ENGLISH
Getting started
5

RQTC0177
6
Preparations
RELEASE
DETAC
H
ATTACH
RELEASE
DETACH
ATTACH
RELEASE
DETACH
ATTACH
DC IN
Attaching the battery
(When the unit is off)
The illustrations shown are of DY-DB20; however the steps for the other
batteries (→ 5) are the same.
Bottom side of this unit
Battery pack
Check to make sure it is securely fastened.
Clicks into place
g Detaching
● Turn the unit off before
detaching the battery pack.
Press and hold
When not using for long periods of time
● Remove the battery pack (→ above).
(Even when the unit is turned off, there is a small amount of voltage running through the unit, and this may result in a
malfunction.)
● Recharge the battery for re-use.
Recharging the battery
The battery is not charged at the time of purchase. Charge before initial use.
AC mains lead
(included)
To household
AC adaptor (included)
mains socket
The unit is in the standby condition (the
[^] indicator lights) when the AC mains
lead is connected. The primary circuit is
always “live” as long as the AC adaptor
is connected to an electrical outlet.
To conserve power
This unit consumes 0.5 W of power
even when turned off. When the unit
is not going to be used for a long time,
disconnect the AC mains lead from the
household mains socket.
● You can also use this unit without charging
while connecting the AC adaptor and the AC
mains lead.
● You can also use this unit without charging
while connecting Car DC Adaptor. (→ 16,
Connecting the included Car DC Adaptor)
Recharging time:
→ below, Approximate recharging
and play times (Hours)
When finished, disconnect the AC
adaptor and the AC mains lead.
CHG
Adjusting the LCD angle
● When moving the unit: Close the LCD.
Don’t hold by the LCD.
● Functions operated by buttons on the unit
will not work when the LCD is closed.
Approximate recharging and play times (Hours)
(at room temperature using headphones)
LCD brightness level
Battery pack
Recharging
(When the unit is off)
(at 20 °C)
-5 0 5
DY-DB20 7 11 9.5 8 11
CGR-H711
DY-DB30 (option)
CGR-H712 (option) 7 11 9.5 8 11
6
5 5 5 4 5.5
8 14 12 10 14
Open the LCD
Play
Started
[^] goes out → lights*
[CHG] lights → goes out
* Only when recharged with the unit
off.
[^] indicator
When the unit is connected to the AC
mains supply, this indicator lights up
in standby mode and goes out when
the unit is turned on.
Standard
● The times indicated on the
left may differ depending
on use.
LCD Off
● To change the LCD
brightness (→ 11).
Finished
RQTC0177
7
Checking the remaining battery charge
When the unit is on (→ 8) and powered by the battery pack
Press [DISPLAY] to check on the LCD (Displays for a few seconds).
(flashing)
(screen)
Recharge
Appears automatically when
there is only a few minutes
of charge remaining.
Discs that can be played
Commercial discs
Disc
Logo
DVD-Video
Video CD
CD Music discs
Recorded disc (O: Available —: Not available)
Disc
Logo
DVD-R/RW
Indicated in these
instructions by
DVD-V
VCD
CD
Recorded on a DVD
recorder, etc.
2
*
DVD-V
O O O O Necessary
High quality movie and
music discs
Music discs with video
Including SVCD
(Conforming to IEC62107)
Recorded on a personal computer, etc.
Remarks
MP3
g Discs that cannot be played
Blu-ray, HD DVD, discs recorded with
AVCHD format, DVD-Audio, Version 1.0
of DVD-RW, DVD-RAM, DVD-VR, CDV,
CD-G, SACD, Photo CD, “Chaoji VCD”
available on the market including CVD,
DVCD and SVCD that do not conform to
IEC62107.
JPEG DivX
Necessity of finalize*
ENGLISH
Getting started
3
DVD-R DL
O — — — Necessary
+R/+RW
—
+R DL
—
CD-R/RW*
—
1
(O) — — — Necessary
(O) — — — Necessary
— O O O Necessary*
4
● It may not be possible to play the above discs in all cases due to the type of discs, the condition of the recording, the recording
method and how the files were created (→ 13, Tips for making data discs).
*1 This unit can play CD-R/RW recorded with CD-DA or Video CD format.
*2 Discs recorded on DVD recorders or DVD video cameras, etc. using DVD-Video Format.
For +R/+RW and +R DL: Discs recorded using a format different from DVD-Video Format, therefore some functions cannot be
used.
*3 A process that allows play on compatible equipment. To play a disc that is displayed as “Necessary” on this unit, the disc must
first be finalized on the device it was recorded on.
*4 Closing the session will also work.
7
RQTC0177
8
ON
VOL
OPEN
Playing discs
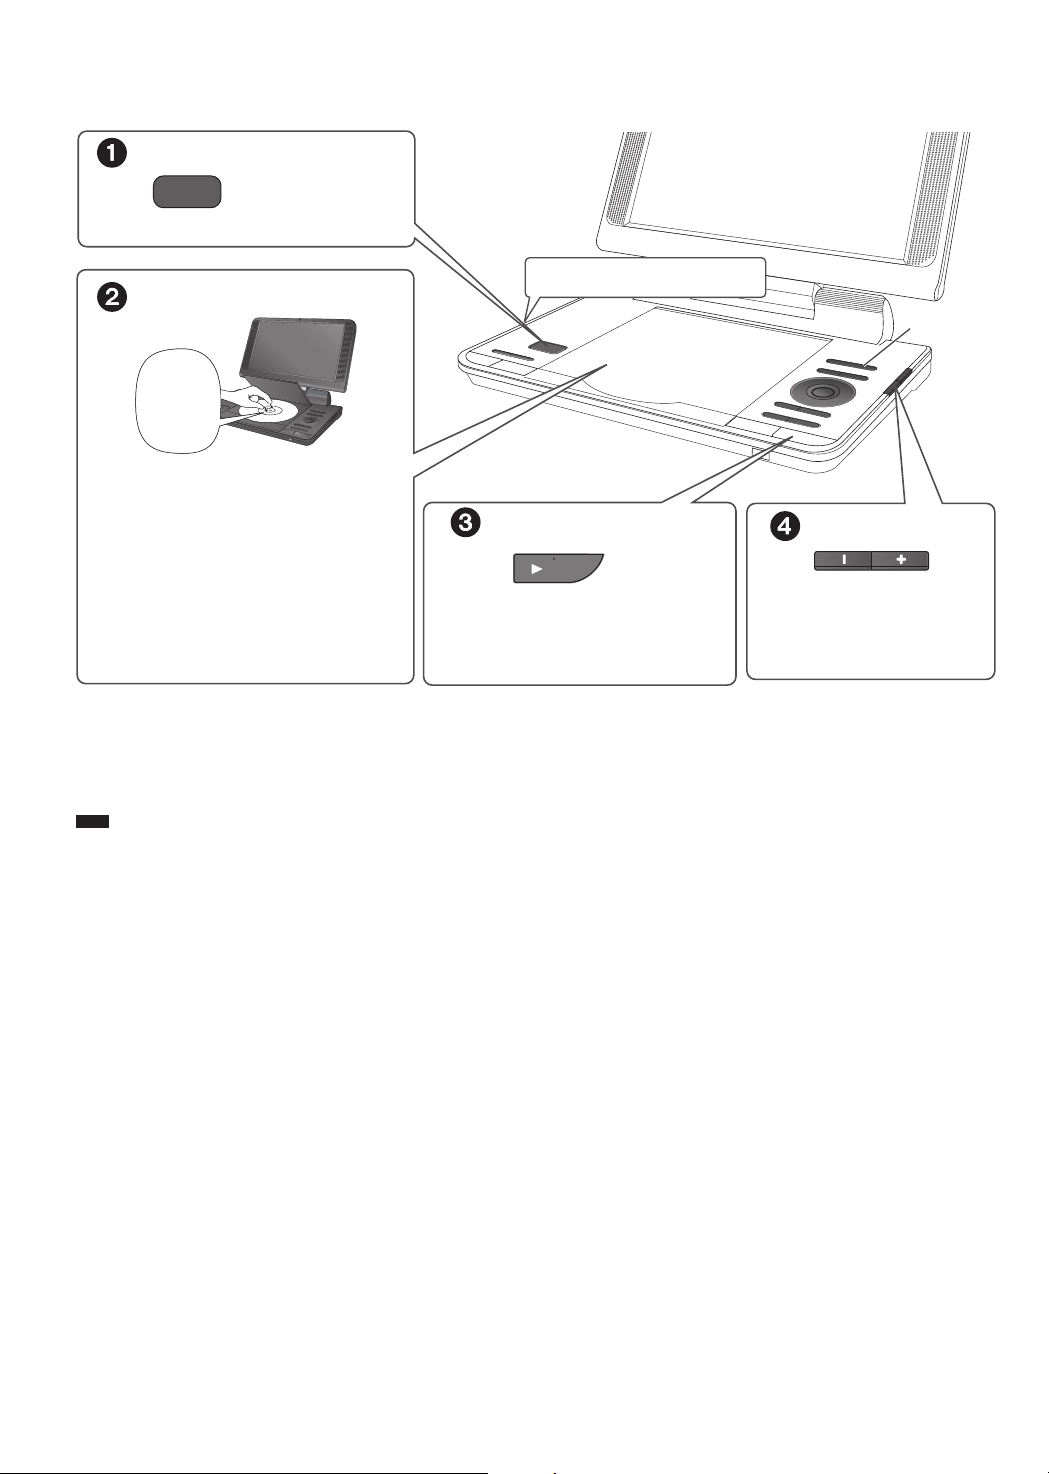
Open the lid.
Click into
place
Insert a disc and close the lid.
● Load double-sided discs so the label for
the side you want to play is facing up.
● Some discs start to play automatically
when the unit is on.
Headphone terminals [W]
ø 3.5 mm stereo mini jack
Press.
The unit turns on and play begins.
● Press [AV SELECT]
or “USB”.
to select “DISC”
AV SELECT
Adjust the volume.
When using headphones,
turn down the volume before
connection.
● To change the language on the display → 15, “Language” tab
● While stopped, the unit automatically turns off once about 15 minutes (about 5 minutes when using the battery pack) have
elapsed.
● Total title number may not be displayed properly on +R/+RW.
● If you are experiencing problems, refer to troubleshooting guide (→ 18).
● During playback of DTS source, there will be no sound from the speakers. Select a different audio source (e.g. Dolby Digital).
Note
DISCS CONTINUE TO ROTATE WHILE MENUS ARE DISPLAYED. Press [
motor.
–OFF] when you finish to preserve the unit’s
g
8
RQTC0177
9
Operations
ON
OFF
TOP MENU
MENU
RETURN
OK
Turn unit on/play
Pause
When the unit is off:
Press, the power comes on and play begins.
When the unit is on:
Press and play begins.
Press [q ON] to restart play.
Stop
● Press
[q ON] to resume. (Resume play)
Opening the disc lid or pressing [g –OFF] cancels the memorized position.
Turn unit off Press and hold until the unit is off.
The position is memorized when you press it for the first time.
Skip
Search
Slow play
Press [u, i].
Press and hold [u, i].
Press [q ON] to return to normal play.
DVD-V
Press and hold [u, i] while paused.
VCD DivX
Press and hold [i] while paused.
Press [q ON] to return to normal play.
Top menu
Menu
DVD-V
Shows a disc top menu.
DVD-V
Shows a disc menu.
VCD
Switch PBC on/off.
MP3
Navigation Menu (→ 11)
Return
Menu operation
Number Select
Frame-by-frame
JPEG DivX
Returns to the previous screen.
VCD
(with playback control) Returns to the menu.
Press [e r w q] and [OK] to set.
(with PBC off)
VCD
Press [DISPLAY]
Press
DVD-V
VCD DivX
[e r] to select item.
Press
[w q] to enter number.
Press
[OK].
While paused, press [q] or [h] to step forward, press [w] to step backward.
While paused, press [h] to step forward only.
to display On-Screen Menus.
ENGLISH
Playback
9
RQTC0177
10
Remote control
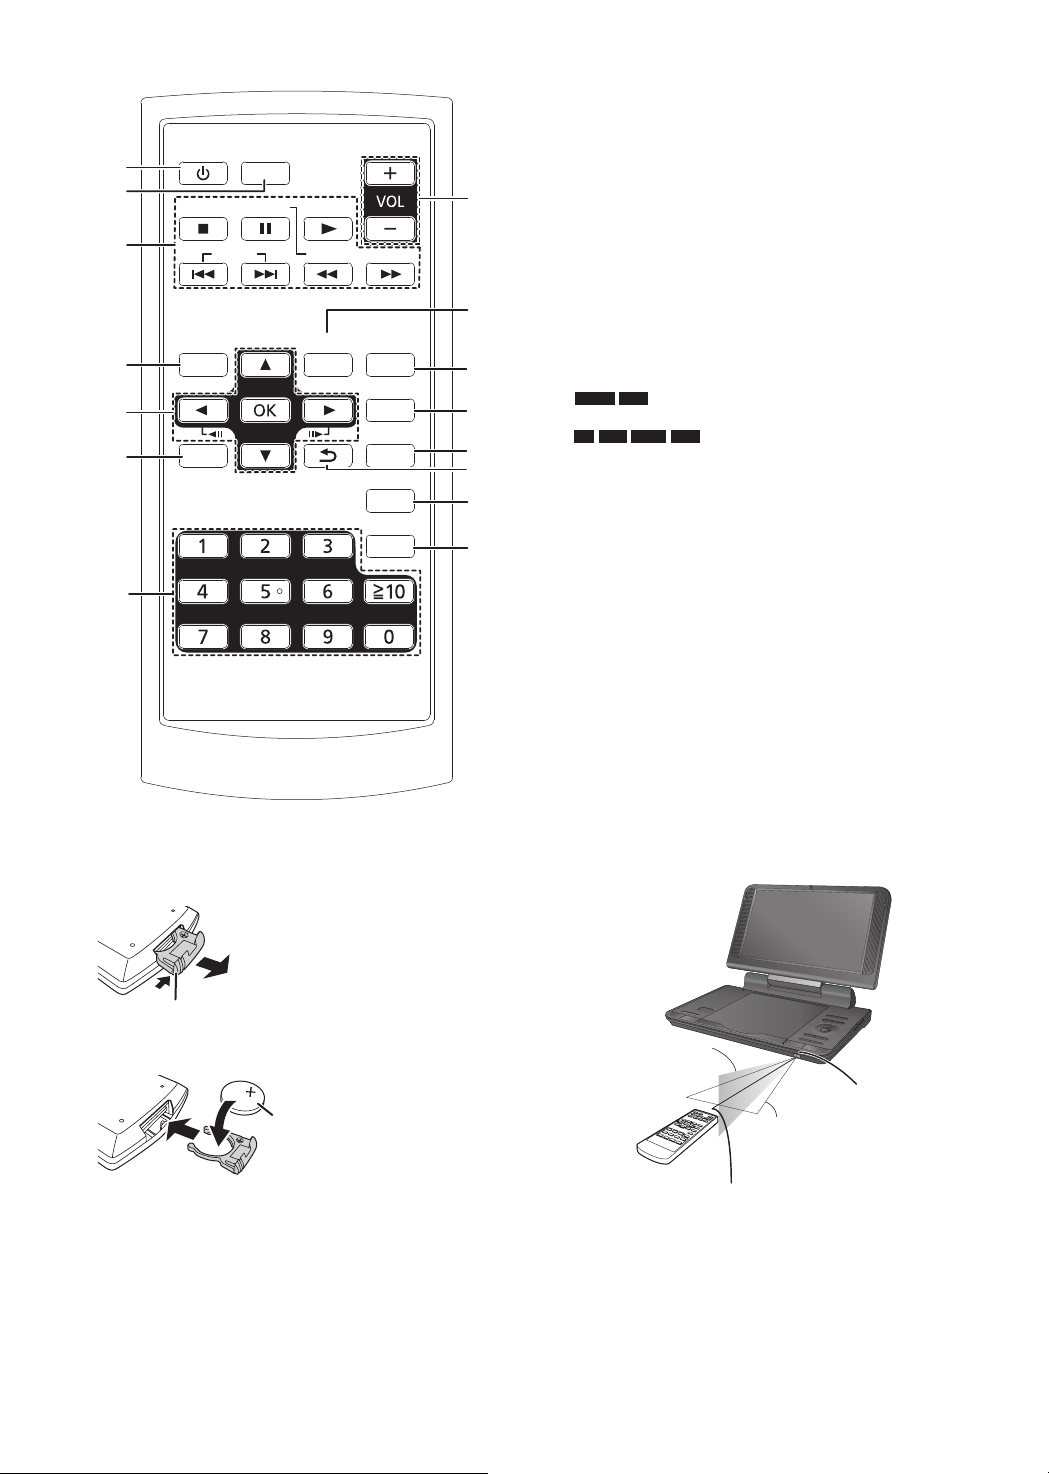
1
3
5
6
4
7
2
14
9
8
10
11
12
13
15
AV SELECT
PAUSESTOP
SKIP
TOP MENU
DISPLAY RETURN
ANGLE
AUDIO
SETUP
CANCEL
SUBTITLE
MENU
SLOW/SEARCH
PLAY
1 Turn the unit on and off (→ 8)
● You cannot turn the unit on when using the battery pack.
2 Switch the drive to playback (→ 11)
3 Basic operations for playback
4 Show Top menu
5 Selection/OK, Frame-by-frame
● To select: Press up, down, left, or right ([e, r, w, q])
● To enter: Press
● Frame forward/Frame backward:
(While paused) press left or right ([w h] [h q])
6 Show on-screen menu (→ 14)
7 Select title numbers, etc./Enter numbers
(with PBC off)
DVD-V
VCD
e.g. To select 12: [≧10] → [1] → [2]
MP3
CD
JPEG DivX
e.g. To select 123: [1] → [2] → [3] → [OK]
8 Adjust the volume
9 Show menu
10 Select angle (→ 11)
11 Select subtitle (→ 11)
12 Select audio (→ 11)
13 Return to previous screen
14 Change the setup of this unit (→ 15)
15 Cancel the values that were entered
[OK]
g Insert the button-type battery (included)
Pull out the holder.
Bottom
g Range of use
Pull out while pressing here
Insert the battery and return the holder.
+ facing up
Lithium battery: CR2025
Within 20 degrees
angle either up
or down
Remote control
signal sensor
Within 30 degrees angle
either left or right
● Keep the button-type battery out of reach of children to
prevent swallowing.
Remote control transmitter
Within 7 m in front
The distance and angles are approximate.
10
RQTC0177
11
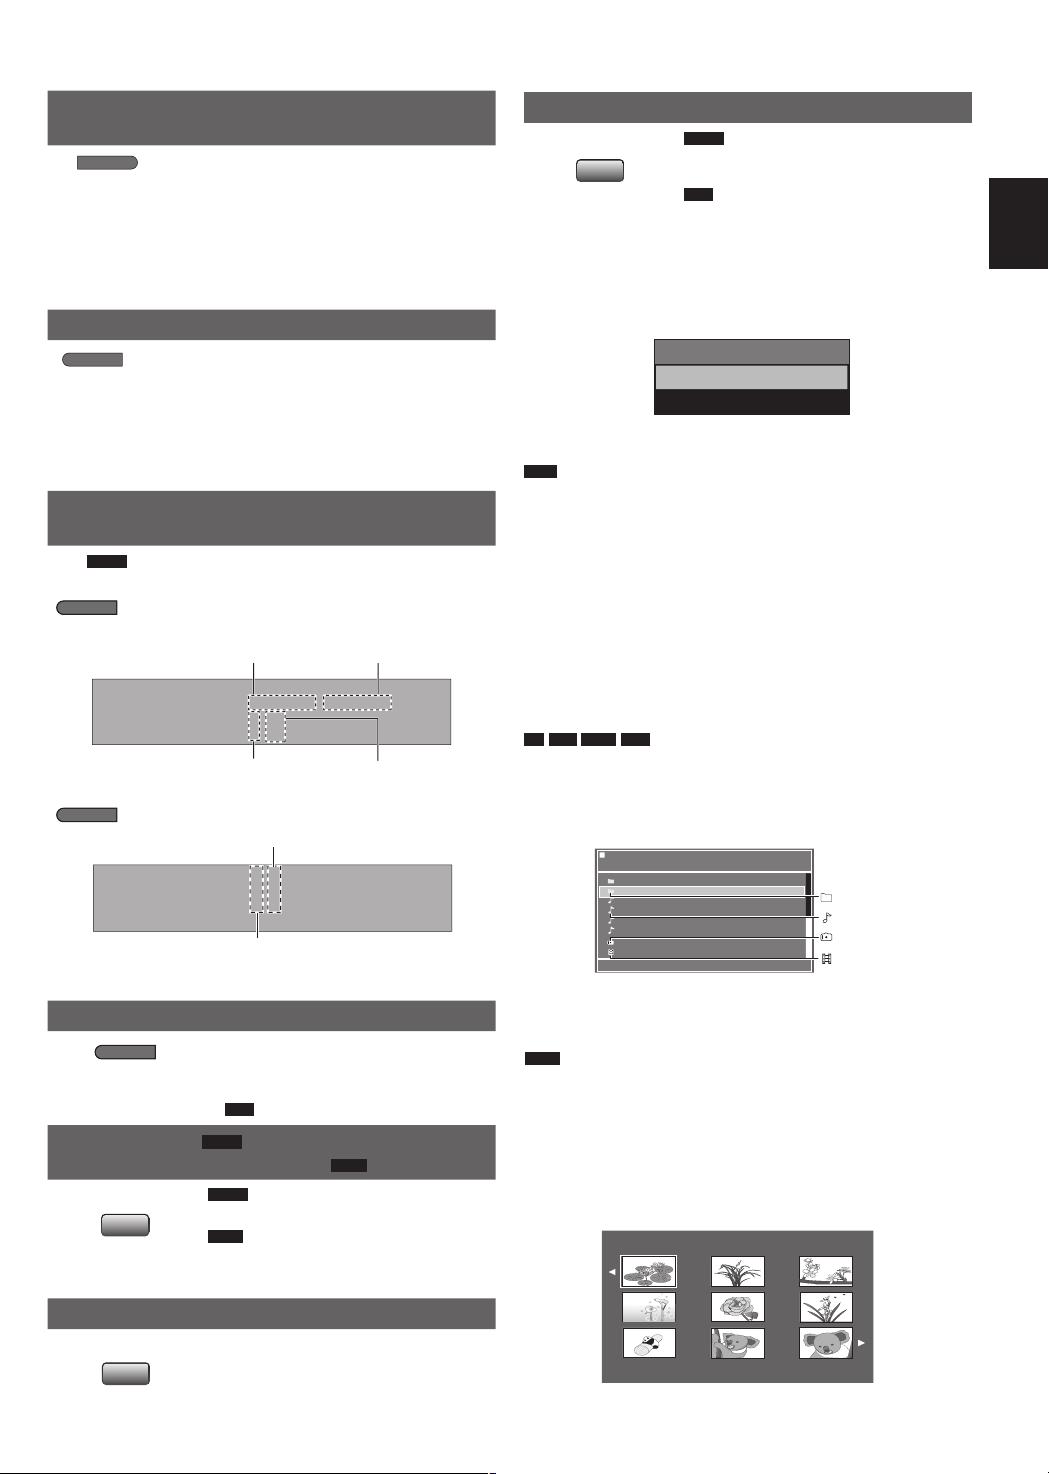
Useful functions
Time
00 :0 2: 09 /0 0:40: 19
Title
2/ 10
Chapter 1/ 2
DV
D- Vi de o
Subtitle
1/ 3 EN
G
1/ 3 MP E
G 2 ch EN G
Angl
e
1/ 2
Audi
o
-
/16
DISC /Picture
Neanderthal
2008 Vacation
Cartoons
Trilobites
Discovery
IMG_0035
Soccer
Picture
DISC
AV Select
USB
LCD SIZE
-
BRIGHT-LCD
DISPLAY
DISPLAY
REPEAT
ANGLE
SUBTITLE
AUDIO
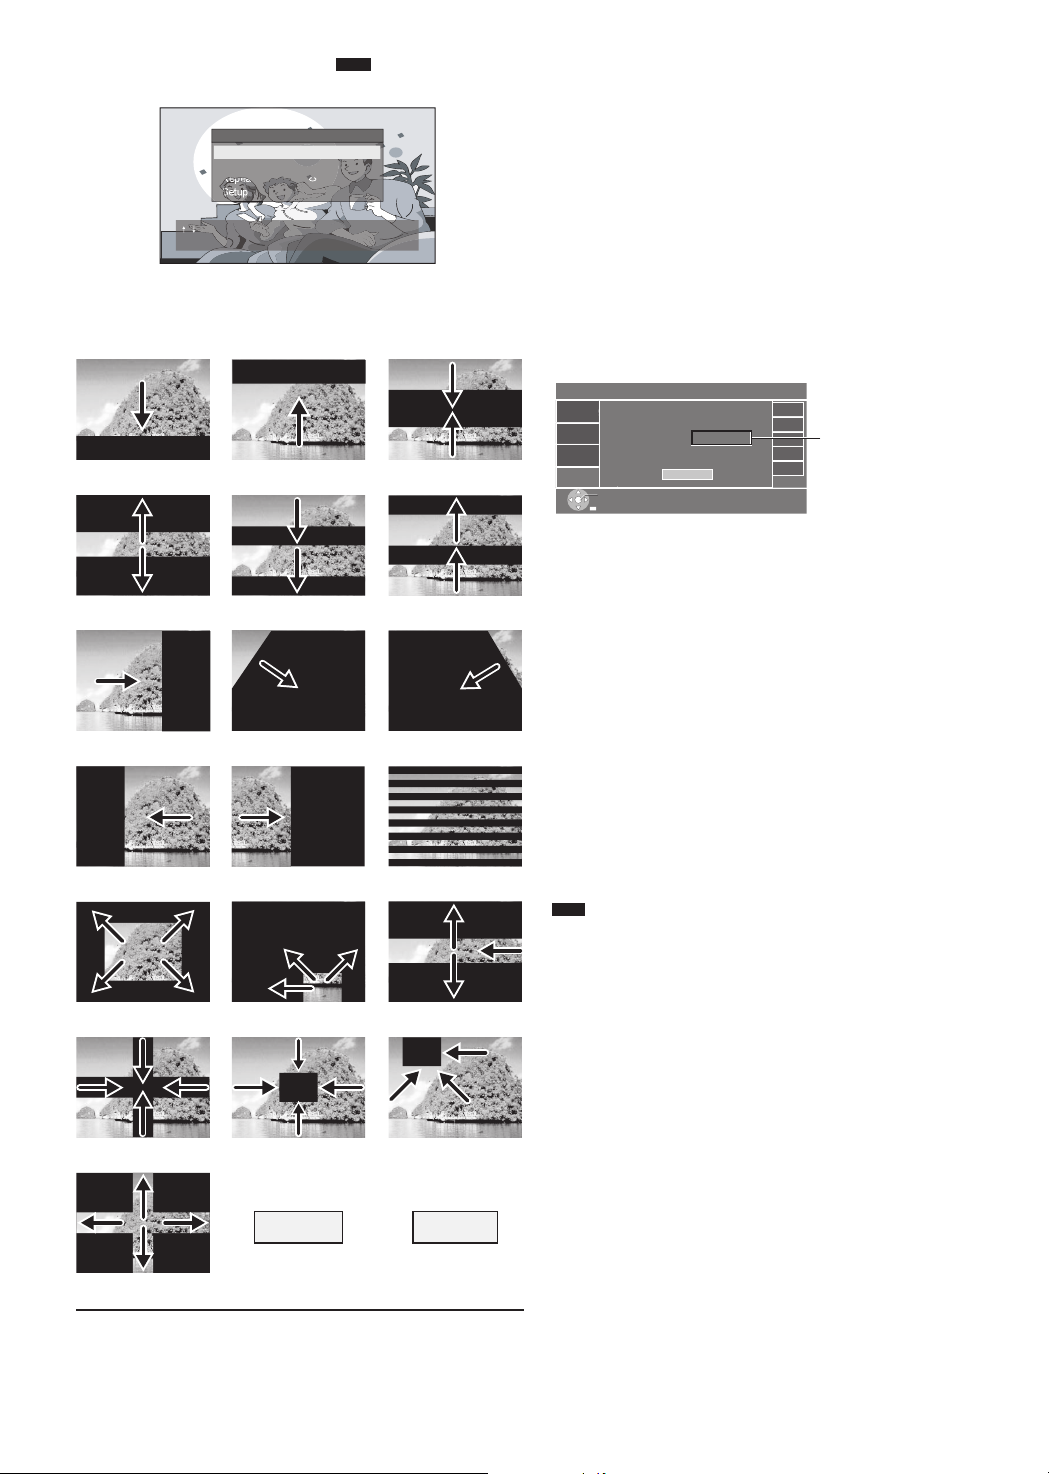
Selecting how to show 4:3 aspect pictures
on the LCD
Monitor Normal: Effective in 4:3 video only
Monitor Full: Stretched horizontally
Press to
change.
Monitor Off: No picture
● If you are not using the LCD on this unit,
select “Monitor Off” to conserve power.
(The [^] indicator flashes.)
● The LCD turns off automatically if you
close it.
Selecting the picture quality on the LCD
Press [e r] to select the item, and
[w q] to change the setting.
Press to
change.
Brightness: -5 to 5
Contrast: -5 to 5
Tint: -5 to 5
Colour: -5 to 5
●
To exit the screen: Press [RETURN
Displaying current playback condition
(Quick OSD)
e.g.
DVD-V
Press three times.
Total play time of current
Elapsed play time
playback title
Changing soundtracks
(with multiple soundtracks)
DVD-V
Press [AUDIO] to select the
soundtrack.
VCD
(Remote control)
You can use this button to select
“L”, “R”, “L+R” or “L R”.
ENGLISH
Switching drives
Press [AV SELECT] to select “DISC” or “USB” while the unit is
stopped or in the status of “No Disc”.
Playback
If media is inserted while the unit is stopped or in the status of
“No Disc”, the “AV Select” menu displays automatically.
].
Note
● This unit does not guarantee connection with all USB
devices.
● This unit does not support USB device charging.
● FAT12, FAT16 and FAT32 file systems are supported.
● This unit supports USB 2.0 Full Speed.
● When overcurrent error on USB device occurred, please
remove the USB device.
Playing CD, data disc and
Current playback number
Press four times.
Current playback number
● To exit the screen: Press [RETURN].
Repeat play
During play, press several times
to select the content to be
repeated.
● With PBC off.
Angle select (with multiple angles)
DVD-V
Changing transition effect
DVD-V
the angle.
(Remote control)
JPEG
Press [ANGLE] to change the
transition effect. (→ 12)
Changing subtitles
(Remote control)
Press [SUBTITLE] to select the
subtitle language. (Discs with
subtitles)
● This may not work depending on the
Total number
Total number
VCD
JPEG
Press [ANGLE] to select
During play
disc’s recording.
USB device
MP3
CD
JPEG DivX
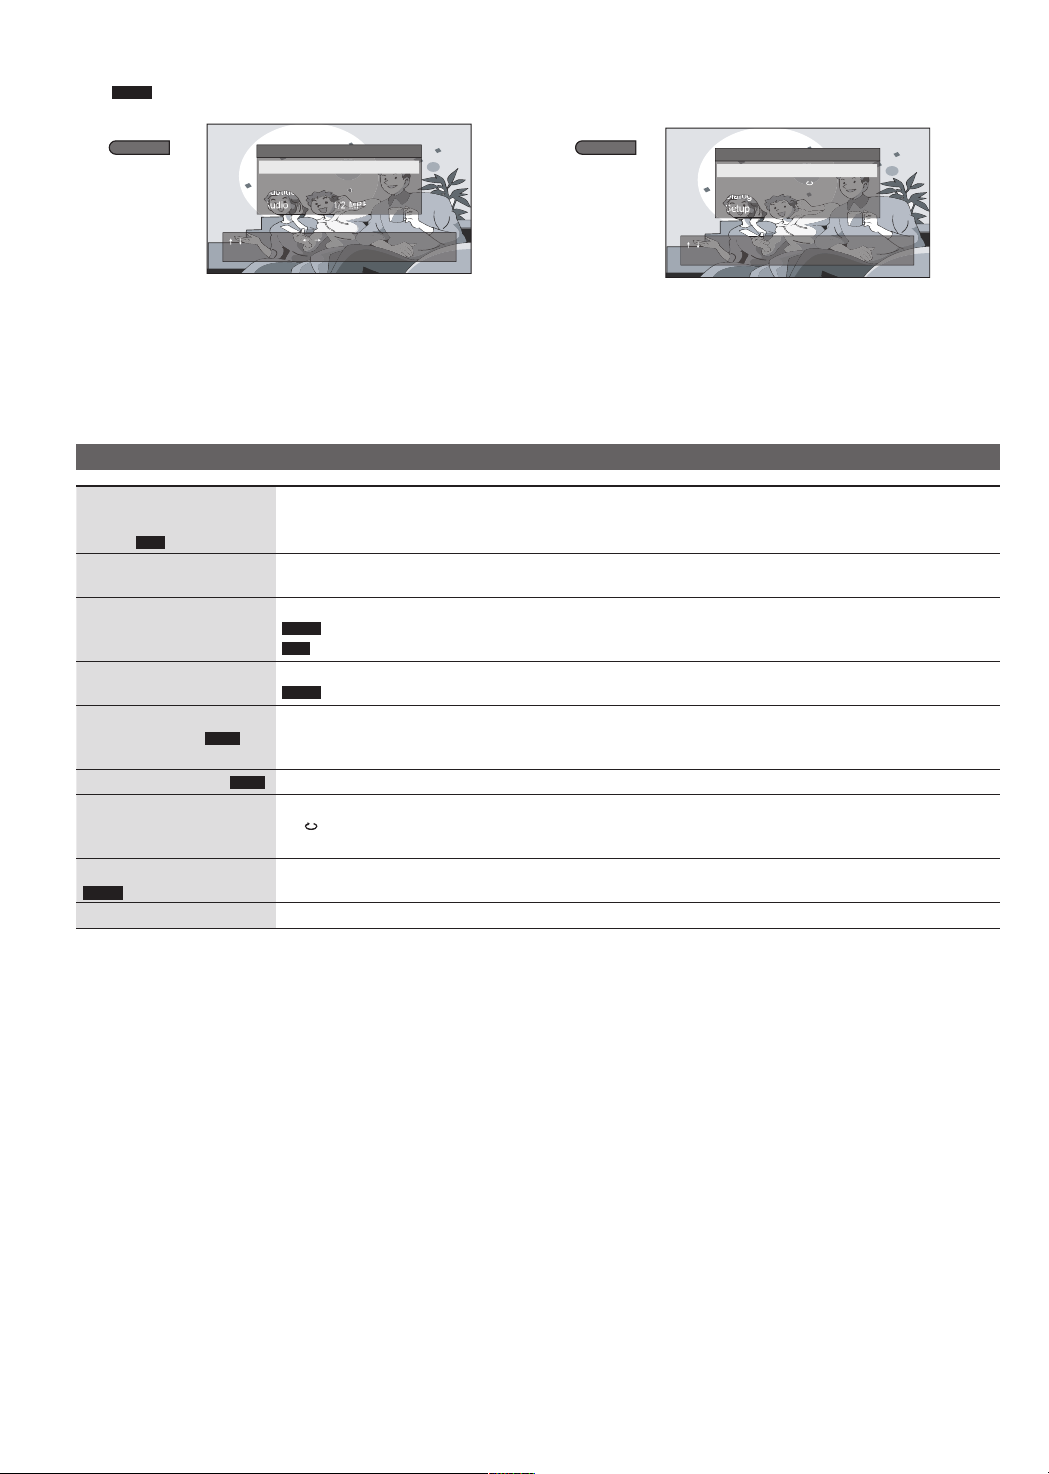
Insert a CD, data disc or USB device.
While the menu is displayed, press [e r] to select an item
and press [OK].
● Repeat this step if there are multiple layers.
e.g. data disc
Group (Folder)
MP3 (File)
JPEG (File)
DivX (File)
● Press
g Select the picture in thumbnails menu
1 While pictures are being played, press
2 To select a picture in a group.
Press [e r w q] to select the picture and press [OK].
● Press [i] to skip forward page by page.
● Press [u] to skip backward page by page.
● To exit the screen: Press [MENU].
[RETURN] to go back to previous screen.
JPEG
[TOP MENU] to display the thumbnails.
11
RQTC0177
12
Transition effect
JPEG Interval
Repeat
Others
Transition Effect
: Fast
: Off
Setup
: Normal
[OK] to Confirm [RETURN] to exit
/
to select
Random
Normal
Set
Return
Language
Setup
Video
Audio
Others
USE DEFAULT SETTINGS
DIVX REGISTRATION
You must register your device to play
DivX protected videos.
Register at http://vod.divx.com
Registration code:
XXXXXXXXXX
OK
it
JPEG
Press [DISPLAY] while playing JPEG.
● Press [e r] to select “Transition Effect”.
● Press [OK] to select the effect you want.
There are 21 effects on this unit.
Type1 Type2 Type3
Type4 Type5 Type6
Type7 Type8 Type9
Type10 Type11 Type12
Type13 Type14 Type15
About DivX® VOD content
ABOUT DIVX VIDEO:
DivX® is a digital video format created by DivX, Inc. This is an
official DivX Certified
com for more information and software tools to convert your
files into DivX video.
ABOUT DIVX VIDEO-ON-DEMAND:
This DivX Certified® device must be registered in order to play
purchased DivX Video-on-Demand (VOD) movies.
To obtain your registration code, locate the DivX VOD section
in your device setup menu.
Go to vod.divx.com for more information on how to complete
your registration.
Display the unit’s registration code
(→ 15, DivX® VOD Registration)
● After playing DivX VOD content for the first time, the
registration code is not displayed.
● If you purchase DivX VOD content using a registration code
different from this unit’s code, you will not be able to play this
content.
Cancel the unit’s registration
(→ 15, DivX® VOD deactivation)
Use the deregistration code to cancel the registration in
www.divx.com.
Regarding DivX VOD content that can only be
played a set number of times
Some DivX VOD contents can only be played a set number of
times. When you play this content, the number of times already
played and initially playable number of times is displayed.
● The remaining number of plays decreases each time a
programme is played. However, when playing from the point
where play was previously stopped, the remaining number of
plays does not decrease due to the resume play function.
Note
● Video images of the copyright protect DivX
on a USB device cannot be output.
To view the protected DivX video output to TV, please copy
the video to compatible disc on your computer.
®
device that plays DivX video. Visit divx.
10 alphanumeric
characters
®
contents stored
Type16 Type17 Type18
Type19
● You can also press the button [ANGLE] on the remote
control to change the transition effect directly.
12
RQTC0177
13
002 group
001
001 group
001 track.mp3
002 track.mp3
003 track.mp3
003 group
001 track.mp3
002 track.mp3
003 track.mp3
001 track.mp3
002 track.mp3
003 track.mp3
004 track.mp3
About DivX subtitles text
display
You can display subtitles text recorded onto the DivX video disc
on this unit.
This function has no relation to the subtitles specified in DivX
standard specifications and has no clear standard. Depending
on the methods used to create the file, the following functions
may not work.
g Displaying subtitles text
● The subtitle menu displays automatically when you select a
DivX file with subtitle text to play.
Select the subtitle you want.
● The menu will disappear after 40 secends without any
operation, and the default item “External Subtitle Off” is
selected.
● DivX video files that do not display “
Selection” do not contain subtitles text.
Subtitles text cannot be displayed.
● If the subtitles text are not displayed correctly, try changing
the language settings (→ 15, Subtitle Text).
● File format: MicroDVD, SubRip, or TMPlayer
● File extension: “.SRT”, “.srt”, “.SUB”, “.sub”, “.TXT”, or “.txt”
● The DivX video file and subtitles text file are inside the same
folder, and the file names are the same except for the file
extensions.
g Limitations of this unit
● If the file name of the DivX video file is not displayed
correctly on the menu screen (the file name is displayed as
“–”), the subtitles text may not be displayed correctly.
● The subtitles text cannot be displayed when search is being
performed.
● In some case, depending on the methods used to create the
file or the state of the recording, only parts of the subtitles
may be displayed, or the subtitles may not be displayed at
all.
External Subtitle File
Tips for making data discs
Format:
Disc: DVD-R/RW, CD-R/RW
Extension: “.MP3”, “.mp3”
Reference:
● Sampling frequency:
DVD-R/RW, CD-R/RW : 8, 11.025, 12, 16, 22.05, 24, 32,
● Compatible compression rate: between 32 kbps and
● This unit is not compatible with ID3 tags.
Format:
Disc: DVD-R/RW, CD-R/RW
Extension: “.JPG”, “.jpg”, “.JPEG”, “.jpeg”
Reference:
● JPEG files taken on a digital camera that conform to DCF
● This unit cannot display moving pictures, MOTION JPEG
Format:
Disc: DVD-R/RW, CD-R/RW
Extension: “.DIVX”, “.divx”, “.AVI”, “.avi”
Reference:
● DivX files greater than 2 GB or have no index may not play
● This unit supports all resolutions up to maximum of
● There may be differences in the display order on the menu
● This unit cannot play files recorded using packet writing.
MP3
44.1 and 48 kHz
320 kbps
JPEG
(Design rule for Camera File system) Standard Version 1.0
are displayed.
– Files that have been altered, edited or saved with computer
picture editing software may not be displayed.
and other such formats, still pictures other than JPEG (e.g.
TIFF) or play pictures with attached audio.
DivX
properly on this unit.
720 × 480 (NTSC)/720 × 576 (PAL).
screen and computer screen.
ENGLISH
Playback
Naming folders and files on
data discs
e.g.
root
MP3
(Files are treated as contents and
folders are treated as groups on this
unit.)
At the time of recording, prefix folder
and file names. This should be with
numbers that have an equal number of
digits, and should be done in the order
you want to play them (this may not
work at times).
DVD-R/RW
● Discs must conform to UDF bridge (UDF 1.02/ISO9660).
● This unit is not compatible with multi-session. Only the
default session is played.
CD-R/RW
● Discs must conform to ISO9660 level 1 or 2 (except for
extended formats).
● This unit is compatible with multi-session but if there are a
lot of sessions it takes more time for play to start. Keep the
number of sessions to a minimum to avoid this.
13
RQTC0177
14
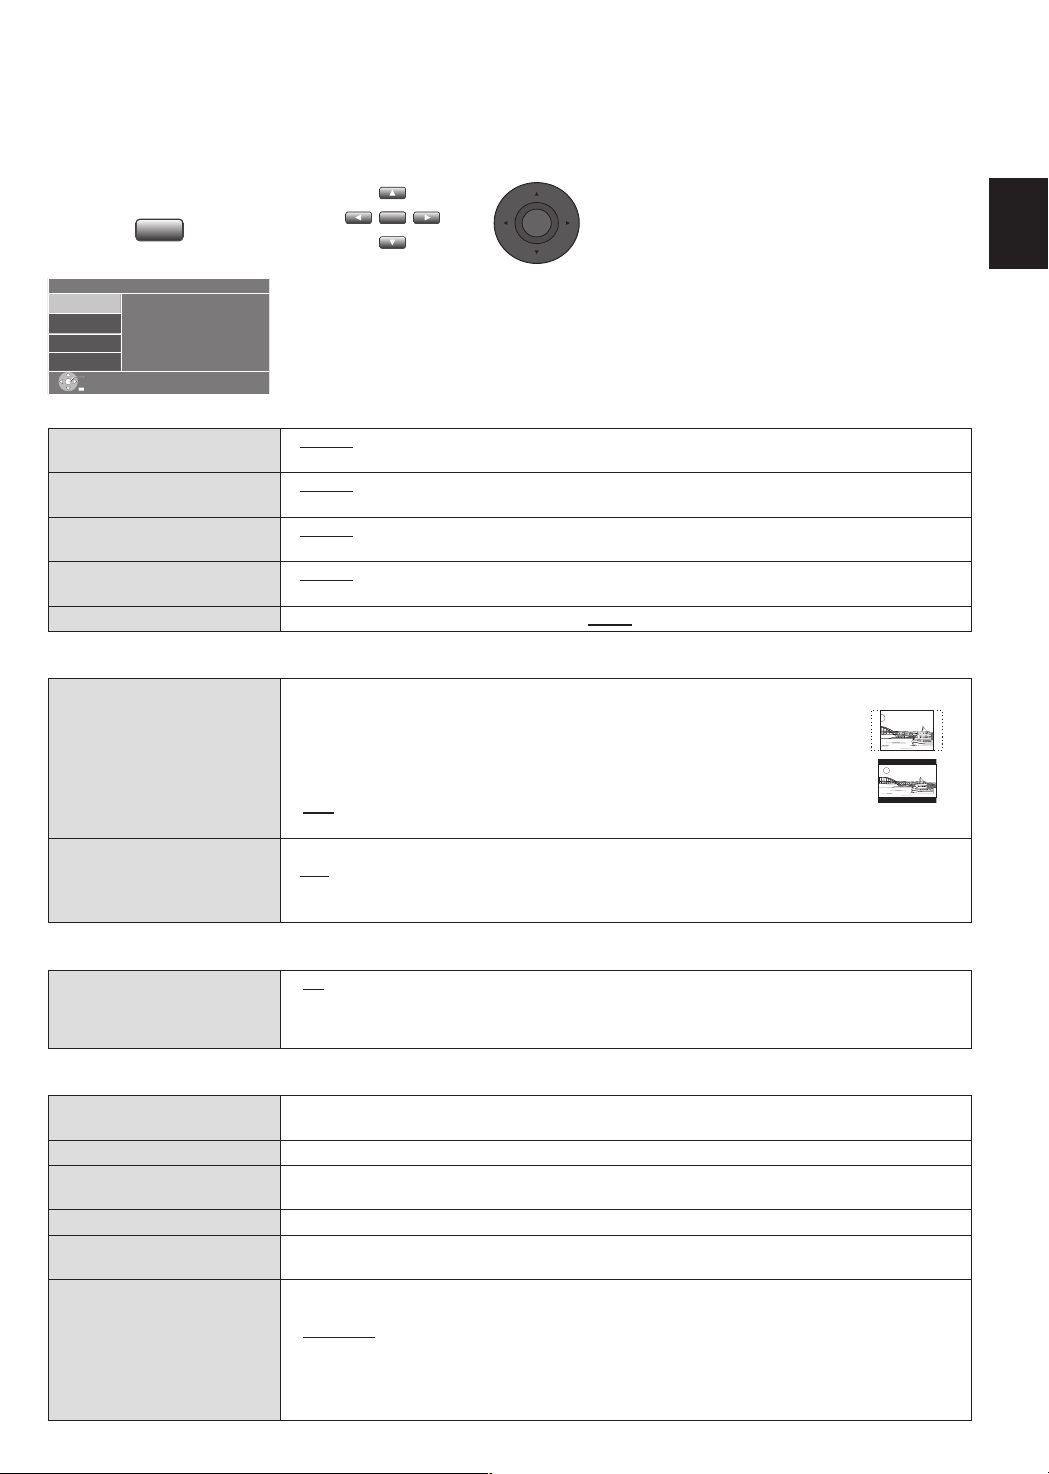
Using On-Screen Menus
DISPLAY
DISPLAY
Subtitle
Audio
DISC
Chapter
/
to select and / to change the option
[OK] to Confirm [RETURN] to exit
6
1/10 ENG
1/2 MPEG 2 ch ENG
1
Ti
tle
Angle
Dialogue Enhancer
Others
Repeat
: 1/1
: Of
f
Setup
: Off
[OK] to Confirm [RETURN] to exit
/
to select
e.g.
DVD-V
Press once.
1 Press [e r w q] to select.
2 Press [OK] to set.
● Please follow the on-screen instructions for the operation.
Repeat steps if necessary.
● Items shown differ depending on the type of software.
● Some functions only work during playback.
● To exit the screen: Press [RETURN].
Main menu
Title
Chapter
VCD
Track ( with PBC off)
Subtitle
Audio
Angle
JPEG Interval
JPEG
Transition Effect
Repeat
Dialogue Enhancer
DVD-V
Setup
To start from a specific item.
● Press
● Press
[e r] to select the item.
[w q] to change the number and press [OK] to play.
To change subtitles (Discs with subtitles).
● On +R/+RW, a subtitle number may be shown for subtitles that are not displayed.
To change soundtracks.
DVD-V
Change soundtracks.
VCD
Select “L”, “R”, “L+R”, “L R”.
To select angles.
DVD-V
with multiple angles.
To change the slideshow timing.
● Fast ● Normal ● Slow ● Off
● “Fast” is the factory preset.
To change transition effect. (→ 12)
JPEG
To change repeat mode.
Group” can only repeat the same type of material if you play a data disc with folders containing
● “
two or more types of MP3, JPEG and DivX contents.
Making the dialog in movies easier to hear.
On ↔ Off
To change settings in Setup menu. (→ 15)
Press twice.
14
RQTC0177
15
Changing the player settings
Set
Display
Subtitle
Audio
DVD Menu
:English
:English
:English
:English
Subtitle Text :Latin2
Language
Setup
Video
Audio
Others
Return
OK
SETUP
OK
● Referring to the table below, change as required.
● Underlined items are the factory presets.
● Items shown differ depending on the type of software.
The settings remain intact even if you switch the unit to standby.
1 2
(Remote control)
“Language” tab
Display
Subtitle
Audio
DVD Menu
Subtitle Text
“Video” tab
TV Aspect
TV System
Effective only when you
connect Audio/Video cable to
this unit.
or
(Remote control)
● Press
● To enter number: press
● To return to the previous screen: Press
[e r w q] and [OK] to set.
[e r] to select.
[RETURN].
● To exit the screen: Press [RETURN] several times.
● English ● Deutsch ● Français ● Español ● Italiano
● Nederlands ● Svenska ● Polski
● English ● German ● French ● Spanish ● Italian
● Dutch ● Swedish ● Polish ● Off
● English ● German ● French ● Spanish ● Italian
● Dutch ● Swedish ● Polish
● English ● German ● French ● Spanish ● Italian
● Dutch ● Swedish ● Polish
● Latin1 ● Turkish ● Latin2 ● Cyrillic
Choose the setting to suit your television and preference.
● 4:3 Pan&Scan: Regular aspect television (4:3)
The sides of the widescreen picture are cut off so it fills the screen (unless
prohibited by the disc).
● 4:3 Letterbox: Regular aspect television (4:3)
Widescreen picture is shown in the letterbox style.
● 16:9: Widescreen television
Use the television’s screen modes to change the way the picture is shown.
● NTSC: Output signals from all discs remains as NTSC.
● PAL: Output signals from all discs remains as PAL.
ENGLISH
Settings
“Audio” tab
Dynamic Range
“Others” tab
Restore Default Settings
System Information
DivX® VOD Registration
DivX® VOD deactivation
Set Password
Ratings
● Off
● On: Adjusts for clarity even when the volume is low through compressing the range of the
lowest sound level and the highest sound level. Convenient for late night viewing. (Only
works with Dolby Digital.)
This returns all values in the Setup menu and the on-screen menu, except for “Set Password”
and “Ratings” to the default settings.
Display firmware version of this unit.
You need this registration code to purchase and play DivX Video-on-Demand (VOD) content.
(→ 12)
Cancel the unit’s registration. (→ 12)
Press to set password.
● Enter the default password “8888” then set your password.
Setting ratings (When level 8 is selected)
● 1 to 7: To prohibit play of DVD-Video with corresponding ratings recorded on them.
● 8 No Limit
When setting a ratings level, a password screen is shown. Follow the on-screen instructions.
Do not forget your password.
A message screen will be shown if a DVD-Video exceeding the ratings level is inserted in the
unit. Follow the on-screen instructions.
15
RQTC0177
16
Enjoying in a car
AUDIO IN
L
R
AUDIO/VIDEO
AUDIO/VIDEO
AUDIO/VIDEO
AUDIO/VIDEO
AUDIO IN
L
R
VIDEO IN
● Do not leave the unit on a surface that may become hot such as a dashboard. The unit is not heat-resistant so may
malfunction.
● DRIVER MUST NOT OPERATE OR VIEW THIS UNIT WHILE OPERATING THE VEHICLE.
Doing so will distract the driver and could cause a collision resulting in serious injury or property damage.
Connecting the included Car DC Adaptor
Before connection, consult your car owner’s manual or your dealer.
● Connect to the cigarette lighter socket of a vehicle that has a 12 V battery. It is not compatible with a vehicle that has a 24 V
battery.
● This is a special negative grounded Car DC Adaptor. Using this Car DC Adaptor with a plus grounded car can cause
malfunction and lead to fire.
Replacing the fuse
Car DC Adaptor
(included)
Replace only with the specified 125 V/250 V, 2.5 A fuse. Use of
any other type can cause fire.
Replace the fuse (125 V/250 V, 2.5 A type)
2
DC IN
Left side of this unit
Place the unit on a stable surface.
Cautions
● To avoid draining your car battery
– Disconnect the Car DC Adaptor from the cigarette lighter after use. The Car DC Adaptor continues to consume some power
even if it is not being used, and if a battery pack is attached to this unit, it will start recharging which uses more power.
– Do not use the Car DC Adaptor for long periods when the engine is not running.
● Turn the unit off before stopping the engine while using Car DC Adaptor, otherwise resume play (→ 9) may not work.
● Leave some slack in the cord.
● No responsibility will be taken for damage that occurs due to faulty installation.
You can enjoy audio through your car audio system by connecting a car stereo cassette adaptor
(not included) to the headphone jack on the left side of this unit.
Left side of this unit
To the cigarette
lighter socket
3
1
Close
Open
Using this unit with other equipment
Turn off all equipment before connecting and read the appropriate operating instructions.
Enjoying stereo audio
Audio/video cable (included)
Yellow
Left side of this unit
Enjoying with a television
Connect the video output from this unit directly to the television.
Audio/video cable (included)
Yellow
Left side of this unit
● The unit’s speakers do not have magnetic shielding. Do not place the unit near televisions, personal computers or other
devices easily influenced by magnetism. Do not keep this unit and magnetized cards (bank cards, commuter passes, etc.)
close together.
● If you raise the volume on the television while playing this unit, the volume may abruptly become very loud when you switch to
a television broadcast. Return the volume to its normal level before changing.
● Please use the provided Audio/video cable in the accessories.
If you use other Audio/video cables, video and audio may output incorrectly.
● When you connect Audio/Video cable to this unit, the LCD will be off, and video signal is output from VIDEO OUT Jack.
Yellow
Amplifier/System component
White
Red
Television
Yellow
White
Red
16
RQTC0177
17
Maintenance
To clean this unit, wipe with a soft, dry cloth.
● Use eyeglass cleaner to remove stubborn dirt from the LCD.
● Never use alcohol, paint thinner or benzine to clean this unit.
Maintenance of the lens
● Remove dust carefully with an air blower for camera lenses
(optional).
● Recommended product:
Lens cleaner kit (SZZP1038C) (Available from Panasonic
dealers.)
● You cannot use a CD type lens cleaner.
● Be careful not to touch the lens with your fingers.
To clean discs
● Wipe with a damp cloth and
then wipe dry.
Specifications
Operating temperature range: +5 to +35 °C
Operating humidity range: 5 to 85 % RH (no condensation)
Discs played (8 cm or 12 cm):
(1) DVD (DVD-Video, DivX*
(2) DVD-R (DVD-Video, JPEG*
(3) DVD-R DL (DVD-Video)
(4) DVD-RW (DVD-Video, JPEG*
(5) +R/RW (Video)
(6) +R DL (Video)
(7) CD, CD-R/RW (CD-DA, Video CD, SVCD*
JPEG*
3, 4, 5
, DivX*4)
Signal system: PAL/NTSC selectable
LCD screen:
DVD-LS92
DVD-LS70
9 inch, TFT wide-screen LCD (640 × 234 × RGB)
7 inch, TFT wide-screen LCD (480 × 234 × RGB)
AUDIO/VIDEO output:
Output terminal: ø 3.5 mm mini jack
Number of terminals: 1 system
Composite-video:
Output level: 1 Vp-p (75 Ω)
Audio:
Output level: 1.5 Vrms (1 kHz, 0 dB, 10 kΩ)
Audio performance:
(1) Frequency response:
● DVD (linear audio):
4 Hz to 22 kHz (48 kHz sampling)
4 Hz to 44 kHz (96 kHz sampling)
● CD audio: 4 Hz to 20 kHz
(2) S/N ratio: 100 dB
(3) Dynamic range: 80 dB
(4) Total harmonic distortion: 0.1 %
Speaker: 1.2 W+1.2 W (10 % Distortion)
Headphone output:
Output: ø 3.5 mm stereo mini jack
Number of terminals: 2 systems
USB:
Number of terminals: 1 system
USB standard: USB2.0 Full speed
Pickup:
Wave length: 655 nm/790 nm (DVD/CD)
Laser power: CLASS 1M/CLASS 1 (DVD/CD)
Power supply:
DC 12 V (DC IN terminal)/DC 7.2 V (Exclusive battery terminal)
Power consumption
(using included AC adaptor): 14 W (Unit only: 12 W)
Power consumption in Standby mode
(using included AC adaptor): approx. 0.5 W
4
)
3, 4, 5
, MP3*
3, 4, 5
, MP3*
2, 4
, DivX*4)
2, 4
1
, DivX*4)
, MP3*
2, 4
,
Disc handling precautions
● Do not attach labels or stickers to discs (This may cause disc
warping, rendering it unusable).
● Do not write on the label side with a ball-point pen or other
writing instrument.
● Do not use record cleaning sprays, benzine, thinner, static
electricity prevention liquids or any other solvent.
● Do not use scratch-proof protectors or covers.
● Do not drop stack, or impact discs. Do not place objects on
them.
● To protect discs from scratches and dirt, return them to their
cases or cartridges when you are not using them.
● Do not use the following discs:
– Discs with exposed adhesive from removed stickers or
labels (rented discs etc.).
– Discs that are badly warped or cracked.
– Irregularly shaped discs, such as heart shapes.
Power consumption in Recharge mode
(using included AC adaptor): 12 W
AC adaptor:
Power source: AC 100 to 240 V, 50/60 Hz
Power consumption: 22 W
DC output: 12 V, 1.3 A
Car DC Adaptor:
DC output: 12 V, 1.5 A
(Vehicle with 12 V battery only)
Battery pack (lithium ion)
DVD-LS92
DY-DB20 (included):
Voltage: 7.2 V
Capacity: 4200 mAh
DVD-LS70
CGR-H711 (included):
Voltage: 7.2 V
Capacity: 2100 mAh
Dimensions (W × H × D)
(excluding protrusions and battery):
242.6 mm (W) × 46.0* mm (H) × 173.5 mm (D)
*24.6 mm at lowest point
(H=51.5 mm including battery)
DVD-LS92
(D=179.3 mm including battery)
DVD-LS70
(H=46.6 mm including battery)
(D=173.5 mm including battery)
Mass:
(including battery):
DVD-LS92
approximately 1117
DVD-LS70
approximately 922
(without battery):
DVD-LS92
approximately 885
DVD-LS70
approximately 780
Note
Specifications are subject to change without notice.
*1 Conforming to IEC62107
*2 MPEG-1 Layer 3, MPEG-2 Layer 3
*3 Exif Ver 2.1 JPEG Baseline files
Picture resolution:
16:9 picture: 4 × 4 ~ 5760 × 3240 pixels
4:3 picture: 4 × 4 ~ 5760 × 4320 pixels
(Sub sampling is 4:2:0 or 4:2:2)
*4 The total combined maximum number of recognizable audio,
picture and movie contents and groups: 2000 audio, picture
and movie contents and 200 groups.
*5 Extremely long and slender pictures may not be displayed.
g
g
g
g
ENGLISH
Enjoying in various situations/Reference
17

RQTC0177
18
Troubleshooting guide
Before requesting service, make the following checks. If you are in doubt about some of the check points, or if the solutions
indicated in the chart do not solve the problem, consult your dealer for instructions. (Reference pages are shown in parentheses.)
The following do not indicate malfunction.
● Sound from the AC adaptor during recharging.
● The battery pack warming up when recharging or during use.
● The surface and area around the unit becoming warm when used for long periods.
Power
No power. ● Check connections to the AC adaptor or battery pack. (6)
Unit turns off
automatically.
Cannot charge or the
[CHG] indicator fails to
light.
Play time dramatically
reduced after
recharging.
No operation
No response when any
buttons pressed (U99).
You have forgotten your
ratings password.
No picture or sound. ● Check that the disc has something recorded on it.
● The unit has protection circuitry that is activated if it becomes too hot or too cold. The unit will not
work if this occurs. Use the unit between 5°C and 35°C.
● The unit turns off after it has been stopped for about 15 minutes (about 5 minutes when the unit is
powered by the battery pack) to conserve power. Turn the unit on again.
● The charging time increases when the temperature is too hot or too cold, and charging may not
be possible under some circumstances.
● Check connections to the AC adaptor or battery pack. (6)
● The battery pack has reached the end of its service life (It can be recharged about 300 times).
● This unit cannot play discs other than the ones listed in these operating instructions.
● The unit may not be operating properly due to lightning, static electricity or some other external
factor. Turn the unit off and then back to ON. Alternatively, turn the unit off, disconnect the power
source (AC or battery pack), and then reconnect it.
● Condensation has formed: Wait 1 to 2 hours for it to evaporate.
● Please insert the disc correctly.
● Press
[u], [h] and [q ON] at the same time in the status of “No Disc”. The unit restarts after
“Initialized” displaying on the screen. All settings will return to the default values.
(8)
(7)
Specific operation impossible or incorrect
It takes time before play
starts.
No subtitles. ● Display the subtitles. (14)
Play doesn’t start. ● If playing DivX VOD content, refer to the homepage where you purchased the DivX VOD content.
● Play may take time to begin when an MP3 track has still picture data. Even after the track starts,
the correct play time will not be displayed; however, this is normal.
● This is normal on DivX video.
(Example: www.divx.com/vod)
● If a disc contains CD-DA and other formats, proper playback may not be possible.
Sound incorrect
Sound distorted. ● Move unit away from mobile phones.
Effects do not work. ● Some audio effects do not work or have less effect with some discs.
No sound from the
unit’s speaker.
No sound from other
speakers.
No sound. ● Audio may not be output due to how files were created. (13)
● The speaker is off if the LCD is closed or headphones are connected.
● Turn up the volume.
● Check all connections and settings.
DivX
(8)
(16)
18
RQTC0177
19
Picture incorrect
Picture distorted. ● There may be some video distortion during search, but this is normal.
Picture stops. ● Picture may stop if the DivX files are greater than 2 GB.
No picture on the LCD. ● Check connections. (6)
The LCD is dark. ● Adjust the brightness. (11)
LCD pixels turn black
or radiate different
colours.
Picture doesn’t appear
on the television (or
the size of the picture
seems wrong).
● Select a LCD-SIZE other than “Monitor Off” (No picture). (11, Selecting how to show 4:3 aspect
pictures on the LCD)
● When you connect Audio/Video cable to this unit, the LCD will be off, and video signal is output
from VIDEO OUT Jack.
● The LCD is constructed with precision technology so 99.99 % of the pixels are active, but of the
remaining of 0.01 %, there are pixels that may be black or emit light constantly. This phenomenon
is not a malfunction.
● Check connections.
● Check that the television is on.
● Check that the input mode on the television is correct.
● Check the settings of “TV Aspect” in “Video” tab.
● Ensure that the unit is connected directly to the television, and is not connected through a video
cassette recorder.
● Use the television to change the aspect.
(16)
(15)
(16)
Displays
“5”
“ ERROR 01” ● A problem has occurred with the battery pack. Consult your dealer.
“ ERROR 02” ● The battery pack has been recharging for 20 hours but has failed to recharge for some reason.
“ ERROR 03” ● The battery is recharged in a location that is too hot or too cold. Recharge at normal temperature
● The operation is prohibited by the unit or disc.
Recharge again.
(+5 to +35°C).
[^] and [CHG] indicators
The [^] indicator
flashes rapidly.
The [^] indicator
flashes slowly.
The [CHG] indicator
flashes rapidly.
The [CHG] indicator
flashes slowly.
● The unit has malfunctioned. Consult your dealer.
● The unit is on and the LCD is closed or the LCD-SIZE is set to “Monitor Off” (No picture). Turn the
unit off when you have finished.
● There is a problem with the battery pack. Turn the unit on and check the message on the LCD.
(above)
● Battery pack charge is low. The unit will turn off automatically after a few minutes.
ENGLISH
Reference
Frequently asked questions
Reference pages are shown in parentheses.
Can I play a DVD-Video
bought in another
country?
Can I use on an airplane
or in a hospital?
Can I use in a car? You can use this unit by connecting with the included Car DC Adaptor for power. Damage may occur
Can I connect with a
computer?
You can play if the region number includes “2” or “ALL”.
Check the disc jacket. (Cover)
Electromagnetic waves that are emitted from this unit may affect equipment on an airplane or in a
hospital.
Please obey the rules and/or instructions indicated by the hospital or airline.
if you do not use the specified car adaptor. (16)
You can enjoy use of the computer as a television monitor when connecting with the AV input
terminal on a computer. However, you cannot operate this unit as peripheral equipment.
19

RQTC0177
20
Werter Kunde!
Wir danken Ihnen, dass Sie dieses Produkt gekauft haben.
Zur größtmöglichen Sicherheit und optimalen Leistung bitten wir Sie, diese Anleitung sorgfältig durchzulesen.
Bitte lesen Sie diese Anleitung vollständig durch, bevor Sie das Gerät anschließen, in Betrieb nehmen oder einstellen.
Bewahren Sie diese Anleitung zur späteren Verwendung gut auf.
Vorsichtsmaßnahmen
Lesen Sie vor Gebrauch des Geräts diese Bedienungsanleitung sorgfältig
durch. Folgen Sie den Sicherheitsanweisungen auf dem Gerät wie
auch den unten aufgeführten entsprechenden Sicherheitsanweisungen.
Bewahren Sie diese Bedienungsanleitung für späteres Nachschlagen auf.
1) Lesen Sie diese Anweisungen.
2) Behalten Sie die Anweisungen.
3) Beachten Sie alle Warnhinweise.
4) Befolgen Sie die Anweisungen.
5) Benutzen Sie das Gerät nicht in der Nähe von Wasser.
6) Reinigen Sie es nur mit einem trockenen Tuch.
7) Verdecken Sie keine Lüftungsöffnungen.
Richten Sie sich bei der Aufstellung nach den Anweisungen
des Herstellers.
8) Stellen Sie das Gerät nicht neben Wärmequellen wie
Heizkörper, Öfen oder andere Geräte (einschließlich
Verstärker), die Wärme produzieren.
9)
Schützen Sie das Netzkabel gegen versehentliches
Drauftreten und Knicke, besonders an Steckern, Steckdosen
und der Stelle, an der sie aus dem Gerät treten.
10) Verwenden Sie nur die vom Hersteller angegebenen
Anschlüsse und Zubehörteile.
11) Trennen Sie das Gerät bei Gewittern oder längerem
Nichtgebrauch vom Netzstrom.
12)
Überlassen Sie die Wartung qualifiziertem Wartungspersonal.
Eine Wartung ist nur bei Beschädigung des Geräts notwendig,
wenn z.B. ein Netzkabel oder -stecker beschädigt wurde,
wenn Flüssigkeiten oder Fremdkörper in das Gerät gelangt
sind, wenn es Regen oder Feuchtigkeit ausgesetzt war, nicht
normal funktioniert oder fallen gelassen wurde.
WARNUNG:
ZUR REDUZIERUNG DER GEFAHR VON BRAND,
ELEKTRISCHEM SCHLAG UND BESCHÄDIGUNG:
DIESES GERÄT SORGFÄLTIG VOR NÄSSE,
●
FEUCHTIGKEIT, SPRITZ- UND TROPFWASSER ZU
SCHÜTZEN; BLUMENVASEN UND ANDERE MIT
FLÜSSIGKEITEN GEFÜLLTE BEHÄLTER DÜRFEN
NICHT AUF DIESES GERÄT GESTELLT WERDEN.
AUSSCHLIESSLICH DAS EMPFOHLENE
●
ZUBEHÖR VERWENDEN.
AUF KEINEN FALL DIE ABDECKUNG (ODER
●
RÜCKWAND) ABSCHRAUBEN; IM GERÄTEINNEREN
BEFINDEN SICH KEINE TEILE; DIE VOM
WARNUNG!
● UM AUSREICHENDE BELÜFTUNG ZU
GEWÄHRLEISTEN, DARF DIESES GERÄT NICHT IN
EINEM BÜCHERREGAL, EINBAUSCHRANK ODER
EINEM SONSTIGEN ENGEN RAUM INSTALLIERT
ODER AUFGESTELLT WERDEN. SORGEN SIE
DAFÜR, DASS DER BELÜFTUNGSZUSTAND NICHT
DURCH VORHÄNGE ODER ANDERE MATERIALIEN
BEHINDERT WIRD, UM STROMSCHLAG- ODER
FEUERGEFAHR DURCH ÜBERHITZUNG ZU
VERMEIDEN.
● ACHTEN SIE DARAUF, DIE ENTLÜFTUNGSSCHLITZE
DES GERÄTES NICHT DURCH GEGENSTÄNDE
AUS PAPIER ODER STOFF ZU BLOCKIEREN, Z.B.
ZEITUNGEN, TISCHDECKEN UND VORHÄNGE.
● STELLEN SIE KEINE QUELLEN OFFENER FLAMMEN,
Z.B. BRENNENDE KERZEN, AUF DAS GERÄT.
● BEACHTEN SIE BEI DER ENTSORGUNG
VERBRAUCHTER BATTERIEN DIE EINSCHLÄGIGEN
UMWELTSCHUTZBESTIMMUNGEN.
WARNUNG!
DIESES PRODUKT ERZEUGT LASERSTRAHLUNG.
DURCHFÜHRUNG ANDERER VORGÄNGE ALS DER
HIER ANGEGEBENEN KANN ZU GEFÄHRLICHER
STRAHLUNG FÜHREN.
REPARATUREN DÜRFEN NUR VON QUALIFIZIERTEM
FACHPERSONAL DURCHGEFÜHRT WERDEN.
Das Gerät sollte in der Nähe einer Netzsteckdose so
aufgestellt werden, dass im Störungsfall jederzeit ein
unbehinderter Zugang zum Netzstecker gewährleistet ist.
Ein unbehinderter Zugang zum Netzstecker muss stets
gewährleistet sein.
Um dieses Gerät vollständig vom Netz zu trennen, den
Netzstecker aus der Netzsteckdose ziehen.
Dieses Gerät kann beim Betrieb Hochfrequenzstörungen
auffangen, die von einem in der Nähe verwendeten Handy
verursacht werden. Falls eine solche Störbeeinflussung
festgestellt wird, sollte das Handy in größerer Entfernung
von diesem Gerät betrieben werden.
DIESES GERÄT IST FÜR DEN BETRIEB IN LÄNDERN MIT
GEMÄSSIGTEM KLIMA BESTIMMT.
BENUTZER GEWARTET WERDEN KÖNNEN.
REPARATURARBEITEN SIND GRUNDSÄTZLICH
DEM KUNDENDIENSTPERSONAL ZU ÜBERLASSEN.
Die Produktkennzeichnung befindet sich jeweils auf der
Unterseite der Geräte.
2
WARNUNG
WÄHREND DER FAHRT DARF DER FAHRER WEDER
DIESES GERÄT BEDIENEN NOCH DESSEN ANZEIGE
BEOBACHTEN.
Dies würde den Fahrer ablenken und könnte zu einem Unfall
mit schweren Personen- oder Sachschäden führen.
RQTC0177
21
Das Gerät sollte während des Betriebs nicht für einen
längeren Zeitraum auf Ihrem Schoß liegen. Da es eine
hohe Betriebstemperatur erreichen kann, ziehen Sie sich
möglicherweise Verbrennungen zu.
Batterien
1 Akkupack (Lithium-Ionen-Akkupack)
●
Verwenden Sie dieses Gerät zum Aufladen des Akkupacks.
●
Das Akkupack darf nicht mit anderen Geräten außer
dem dafür vorgesehenen Player verwendet werden.
●
Betreiben Sie den Player nicht im Freien, wenn es schneit
oder regnet. (Das Akkupack ist nicht wasserdicht.)
●
Achten Sie darauf, die Kontakte von Schmutz, Sand,
Flüssigkeiten und Fremdkörpern freizuhalten.
●
Bringen Sie keine Metallgegenstände in Kontakt mit den
Polen (+ und -).
●
Versuchen Sie auf keinen Fall, den eingebauten Akku
oder das Akkupack zu zerlegen oder nachzugestalten,
erhitzen Sie sie nicht und werfen Sie sie nicht ins Feuer.
●
Niemals starker Hitze oder offenem Feuer aussetzen.
●
Lassen Sie Batterien niemals über längere Zeit in einem
geschlossenen Fahrzeug in direkter Sonneneinstrahlung liegen.
●
Bei der Lagerung des Akkupacks darf die
Umgebungstemperatur 60°C nicht überschreiten.
2 Lithium-Knopfzelle
●
Legen Sie die Lithium-Knopfzelle polaritätsrichtig in das
Batteriefach ein.
●
Bringen Sie keine Metallgegenstände in Kontakt mit den
(+ und -).
●
Nicht aufladen, zerlegen, modifizieren, erhitzen oder
verbrennen.
●
Halten Sie die Lithium-Knopfzelle außer Reichweite von
Kindern.
●
Niemals starker Hitze oder offenem Feuer aussetzen.
●
Lassen Sie Batterien niemals über längere Zeit in einem
geschlossenen Fahrzeug in direkter Sonneneinstrahlung liegen.
Falls Elektrolyt mit Körperteilen oder Kleidungsstücken
in Berührung gerät, spülen Sie die betroffenen Stellen
unverzüglich unter fließendem Wasser ab.
Falls Elektrolyt in die Augen gerät, dürfen Sie diese auf
keinen Fall reiben.
Spülen Sie die Augen gründlich unter fließendem Wasser
aus und suchen Sie dann unverzüglich einen Arzt auf.
3 Entsorgen von Batterien
Bitte beachten Sie die einschlägigen Vorschriften zur
Entsorgung von Batterien.
Vorsichtshinweise zum Gebrauch von
Kopf- oder Ohrhörern
●
Verwenden Sie Kopf- und Ohrhörer nicht mit hoher Lautstärke.
Gehörexperten raten von einem längerem Gebrauch ab.
●
Wenn Sie ein Klingeln in den Ohren hören, verringern Sie
die Lautstärke oder setzen Sie den Kopf- bzw. Ohrhörer ab.
● Verwenden Sie keine Kopf- oder Ohrhörer, während Sie
ein Fahrzeug steuern. Dies kann den Straßenverkehr
gefährden und ist in vielen Gebieten sogar verboten.
● Seien Sie in potenziell gefährlichen Situationen besonders
aufmerksam oder setzen Sie Kopf- bzw. Ohrhörer ab.
●
Auch wenn Ihre Kopf- oder Ohrhörer vom offenen Typ sind und
Außengeräusche durchlassen, drehen Sie die Lautstärke nie so
hoch, dass Sie nicht mehr hören, was um Sie herum geschieht.
● Zu hoher Schalldruck von Ohr- oder Kopfhörern kann zu
Gehörschäden oder zum Gehörverlust führen.
● Das Hören voller Lautstärke über längere Zeiträume kann
zu Gehörschäden führen.
Verwenden Sie unbedingt die mitgelieferten oder empfohlenen
Kopf- bzw. Ohrhörer.
Verhinderung von Schäden
Beachten Sie folgende Punkte:
● Verwenden Sie keine entzündlichen Insektensprays in der
Nähe des Geräts.
● Drücken Sie nicht auf das LCD-Display.
● Berühren Sie weder die Linsen noch sonstige Teile der
Lasertonabnahme.
Das Gerät darf nicht an folgenden Orten betrieben werden:
● An Orten mit Sand wie beispielsweise Stränden.
● Auf Kissen, Sofas oder Geräten, die eine hohe
Betriebstemperatur erreichen (z.B. auf Verstärkern).
Das Gerät darf nicht in einem Kraftfahrzeug ohne Belüftung gelassen
oder direktem Sonnenlicht und hohen Temperaturen ausgesetzt werden.
Hinweis zur wiederaufladbaren Batterie
Diese Batterie ist als wiederverwertbar gekennzeichnet.
Bitte beachten Sie den lokalen Vorschriften zur Wiederverwertung.
Netzadapter
Dieser Netzadapter ist für den Betrieb mit 100 V bis 240 V
Wechselspannung vorgesehen.
Zur Beachtung
● Bitte besorgen Sie sich einen geeigneten
Zwischenstecker, falls die Ausführung des Netzsteckers
nicht mit der Ausführung der Netzsteckdosen in Ihrem
Land übereinstimmt.
Warnung
Feuer-, Explosions- und Verbrennungsgefahr. Nicht zerlegen
oder auseinandernehmen.
Batterien nicht über die folgenden Temperaturen erhitzen
oder einäschern.
Batterie (Knopfzelle) 100 °C
Batteriepack 60 °C
ACHTUNG
Explosionsgefahr bei falschem Anbringen der Batterie.
Ersetzen Sie nur mit einem äquivalentem vom Hersteller
empfohlenem Typ. Behandeln Sie gebrauchte Batterien
nach den Anweisungen des Herstellers.
Warnung
Die Knopfzelle stets außerhalb der Reichweite von Kleinkindern
aufbewahren. Die Knopfzelle auf keinen Fall in den Mund
nehmen. Falls sie verschluckt wird, unverzüglich ärztliche
Behandlung aufsuchen.
DEUTSCH
3
RQTC0177
22
Benutzerinformation zur Sammlung und Entsorgung
Cd
von veralteten Geräten und benutzten Batterien
Diese Symbole auf den Produkten,
Verpackungen und/oder Begleitdokumenten
bedeuten, dass benutzte elektrische und
elektronische Produkte und Batterien nicht in
den allgemeinen Hausmüll gegeben werden
sollen.
Bitte bringen Sie diese alten Produkte und
Batterien zur Behandlung, Aufarbeitung
bzw. zum Recycling gemäß Ihrer
Landesgesetzgebung und den Richtlinien
2002/96/EG und 2006/66/EG zu Ihren
zuständigen Sammelpunkten.
Indem Sie diese Produkte und Batterien
ordnungsgemäß entsorgen, helfen Sie
dabei, wertvolle Ressourcen zu schützen
und eventuelle negative Auswirkungen auf
die menschliche Gesundheit und die Umwelt
zu vermeiden, die anderenfalls durch eine
unsachgemäße Abfallbehandlung auftreten
können.
Wenn Sie ausführlichere Informationen zur
Sammlung und zum Recycling alter Produkte
und Batterien wünschen, wenden Sie sich
bitte an Ihre örtlichen Verwaltungsbehörden,
Ihren Abfallentsorgungsdienstleister oder
an die Verkaufseinrichtung, in der Sie die
Gegenstände gekauft haben.
Gemäß Landesvorschriften können wegen
nicht ordnungsgemäßer Entsorgung dieses
Abfalls Strafgelder verhängt werden.
Für geschäftliche Nutzer in der
Europäischen Union
Wenn Sie elektrische oder elektronische
Geräte entsorgen möchten, wenden Sie sich
wegen genauerer Informationen bitte an
Ihren Händler oder Lieferanten.
[Informationen zur Entsorgung in
Ländern außerhalb der Europäischen
Union]
Diese Symbole gelten nur innerhalb der
Europäischen Union. Wenn Sie solche
Gegenstände entsorgen möchten,
erfragen Sie bitte bei den örtlichen
Behörden oder Ihrem Händler, welches die
ordnungsgemäße Entsorgungsmethode ist.
Hinweis zum Batteriesymbol (unten zwei
Symbolbeispiele):
Dieses Symbol kann in Kombination mit
einem chemischen Symbol verwendet
werden. In diesem Fall erfüllt es die
Anforderungen derjenigen Richtlinie, die für
die betreffende Chemikalie erlassen wurde.
Inhaltsverzeichnis
Erste Schritte
Vorsichtsmaßnahmen ................................................2
Zubehör ....................................................................... 5
Vorbereitungen
Einsetzen der Batterie ............................................6
Aufladen der Batterie .............................................6
Einstellen des LCD-Winkels ..................................6
Abspiel bare Discs .....................................................7
Wiedergabe
Abspielen von Discs ..................................................8
Nützliche Funktionen ............................................... 11
Geräte wechseln ....................................................... 11
Abspielen einer CD, Daten-CD
und USB-Stick/Gerät ................................................ 11
Übergangseffekt ....................................................... 12
Über DivX® VOD Inhalt .............................................12
Über die Wiedergabe von DivX-Untertiteltext ........
Tipps zur Erstellung von Daten-Discs .................... 13
Einstellungen
Verwendung der Bildschirmmenüs ........................ 14
Ändern der Player-Grundeinstellungen .................15
Verwendung in verschiedenen Situationen
Verwendung in einem Fahrzeug ..............................16
Verwendung des Geräts mit anderen Geräten ......16
Hinweise
Wartung/Pflege ......................................................... 17
Technische Daten .....................................................
Anleitung zur Fehlersuche und -behebung ...........18
Häufig gestellte Fragen ............................................19
Index .......... Innenseite des hinteren Umschlagblatts
13
17
4
RQTC0177
23
Zubehör
1 Fernbedienung (N2QAYC000040)
1 Batterie (Knopfzelle) für Fernbedienung
(für den Ersatz → 10)
1 Audio-/Videokabel
1 AC-Adapter
1 Netzkabel
● Nur zur Verwendung mit diesem Gerät. Verwenden Sie
diese nicht mit anderen Geräten.
Verwenden Sie auch niemals Kabel von anderen Geräten
mit diesem Gerät.
1 KFZ-DC-Adapter
1 Wiederaufladbares Batteriepack
Mitgeliefert Optional
DVD-LS92
DVD-LS70
●
Die Wiedergabezeit ist vom Batteriepack abhängig und
kann entsprechend variieren. [→ 6, Ungefähre Aufladeund Wiedergabezeiten (Stunden)]
DY-DB20 DY-DB30
CGR-H711
CGR-H712
Hergestellt unter Lizenz von Dolby Laboratories.
Dolby und das Doppel-D-Symbol sind Warenzeichen von
Dolby Laboratories.
“DVD Logo” ist ein Markenzeichen der DVD Format/Logo
Licensing Corporation.
Dieses Gerät verfügt über eine eingebaute
Kopierschutztechnologie, die durch US-Patente und andere
geistige Eigentumsrechte der Rovi Corporation geschützt ist.
Gegentechnik und Zerlegen sind verboten.
Die MPEG Layer-3 Audio-Codiertechnologie wurde von
Fraunhofer IIS and Thomson lizensiert.
DivX®, DivX Certified® und die zugehörigen Logos sind
eingetragene Warenzeichen von DivX, Inc. und werden unter
Lizenz verwendet.
DivX®, DivX Certified® and associated logos are trademarks
of DivX, Inc. and are used under license.
DEUTSCH
Erste Schritte
5
RQTC0177
24
Vorbereitungen
RELEASE
DETAC
H
ATTACH
RELEASE
DETACH
ATTACH
RELEASE
DETACH
ATTACH
DC IN
Einsetzen der Batterie
(Bei ausgeschaltetem Gerät)
Die gezeigten Abbildungen stammen vom Modell DY-DB20; jedoch sind die Schritte für die
anderen Batterien (→ 5) die gleichen.
Unterseite des Geräts
Batteriesatz
Auf sichere Befestigung prüfen.
Rastet ein
g Entnahme
●
Schalten Sie das Gerät vor
Entnahme des Batteriesatzes aus.
Gedrückt halten
Bei längerem Nichtgebrauch
● Entfernen Sie das Batteriepack (→ oben).
(Auch wenn das Gerät ausgeschaltet ist, fließt eine geringe Spannung durch das Gerät. Dies kann zu Fehlfunktionen führen.)
● Batterie für Wiederverwendung aufladen.
Aufladen der Batterie
Der Akku ist beim Kauf nicht aufgeladen. Laden Sie ihn vor der ersten Verwendung auf.
Netzkabel
(mitgeliefert)
Netzteil (mitgeliefert)
● Wenn Sie das Netzteil an eine Netzsteckdose
anschließen, können Sie das Gerät auch
verwenden, ohne es zu laden.
●
Sie können das Gerät auch ohne Aufladung
einsetzen, indem Sie es an den KFZ-DC-Adapter
anschließen. (→ 16, Schließen Sie den mitgelieferten
Adapter für Zigarettenanzünder an)
An Netz-Steckdose
CHG
Ladezeit:
→ unten, Ungefähre Auflade- und
Wiedergabezeiten (Stunden)
Trennen Sie nach Beendigung den
Netzstecker vom Netzstrom.
Bei Anschluss des Netzkabels an eine
Netzsteckdose (die Anzeige
[^] leuchtet)
befindet sich das Gerät im elektrischen
Bereitschaftszustand. Solange der
Netzadapter an eine Netzsteckdose
angeschlossen ist, führt der Primärkreis
des Gerätes ständig Strom.
Strom sparen
Das Gerät verbraucht 0,5 W Strom, auch
wenn es ausgeschaltet ist. Wenn das Gerät
längere Zeit nicht benutzt werden soll, trennen
Sie das Netzteil von der Netzsteckdose.
Gestartet
Beendet
[^] erlischt → leuchtet*
[CHG] leuchtet → erlischt
* Nur beim Aufladen mit dem Gerät
aus.
[^]-Anzeige
Ist das Gerät an die AC-Netzspannung
angeschlossen, leuchtet diese Anzeige
im Standby-Modus auf und erlischt,
wenn das Gerät eingeschaltet wird.
Einstellen des LCD-Winkels
● Beim Bewegen des Geräts: LCD schließen.
Nicht am LCD festhalten.
● Funktionen, die mit Hilfe der Tasten
am Gerät bedient werden, stehen bei
geschlossenem LCD nicht zur Verfügung.
Ungefähre Auflade- und Wiedergabezeiten (Stunden)
Batteriesatz
DY-DB20 7 11 9,5 8 11
CGR-H711
DY-DB30 (Optional)
CGR-H712 (Optional)
6
(Bei ausgeschaltetem Gerät)
Aufladen
(bei 20 °C)
5 5 5 4 5,5
8 14 12 10 14
7 11 9,5 8 11
LCD öffnen
Standard
Wiedergabe
(bei Raumtemperatur, Kopfhörerbetrieb)
LCD-Helligkeit
-5 0 5
LCD aus
●
Die links angegebenen
Zeiten können je nach
Verwendungsbedingungen
abweichen.
● Zum Ändern der
LCD-Helligkeit (→ 11).
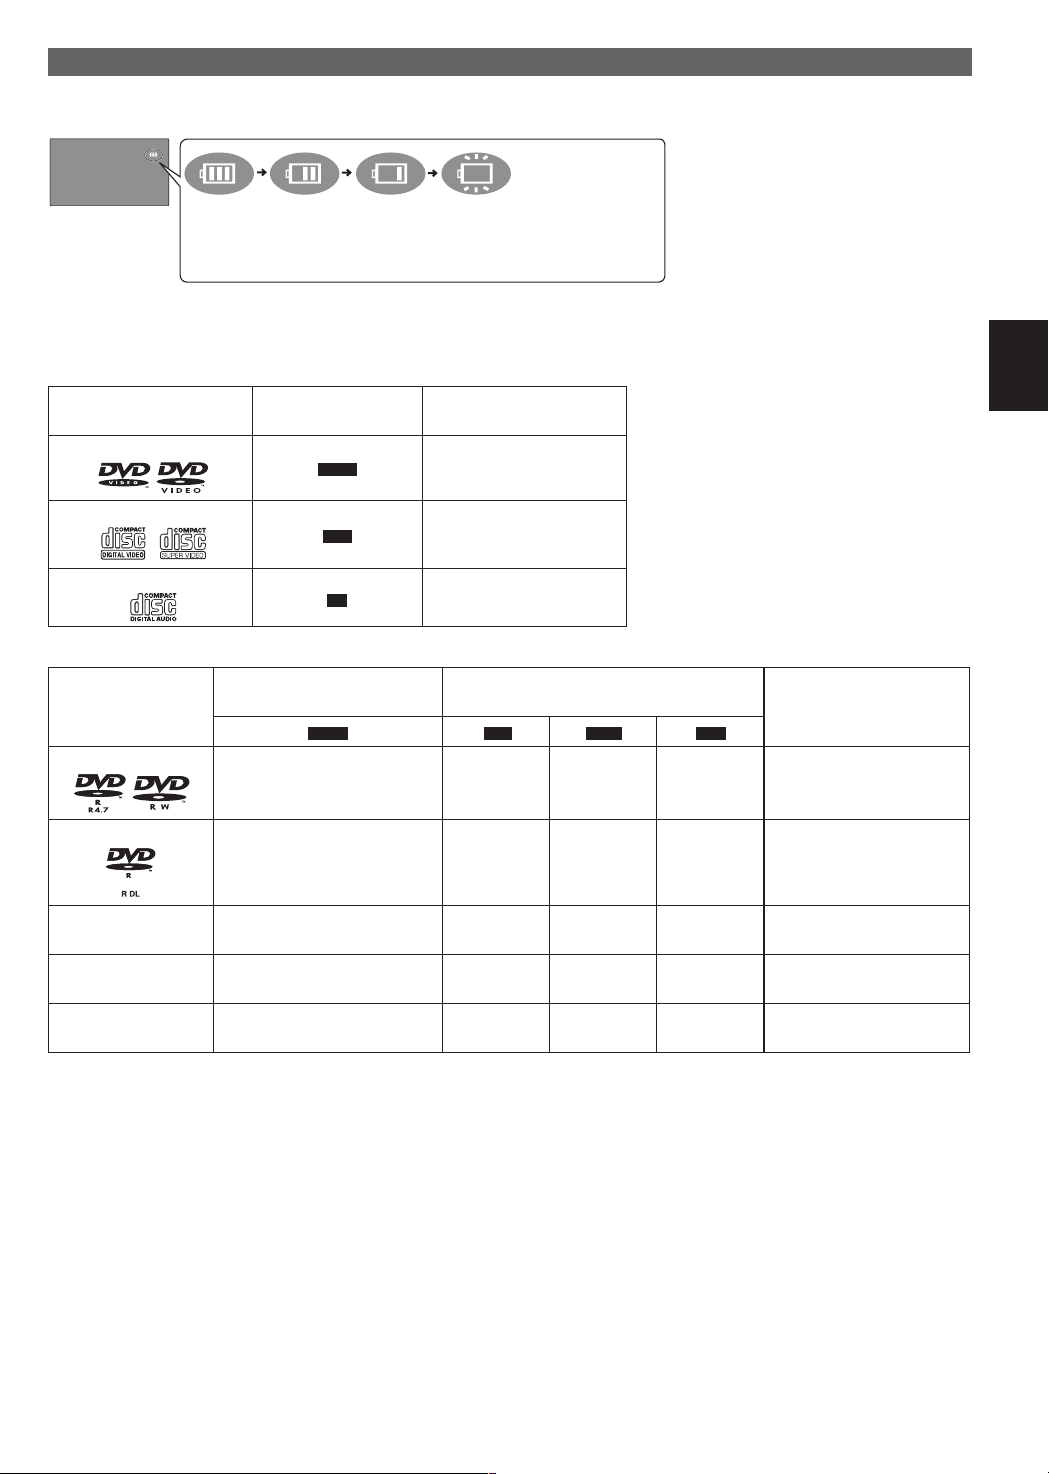
RQTC0177
25
Prüfen der verbleibenden Batterieladung
Wenn das Gerät eingeschaltet ist (→ 8) und über das Batteriepack versorgt wird
Drücken Sie [DISPLAY], um den LCD zu prüfen (Anzeige für wenige Sekunden).
(blinkt)
(Bildschirm)
Aufladen
Erscheint automatisch,
wenn nur noch wenige
Minuten Ladung verbleiben.
Abspiel bare Discs
Kommerzielle Discs
Disc
Logo
DVD-Video
Video CD Musik-Discs mit Video
CD Musik-Discs
Gebrannte Disc (O: Verfügbar —: Nicht verfügbar)
Disc
Logo
DVD-R/RW
In dieser Anweisung
bezeichnet als
DVD-V
VCD
CD
Mit einem DVD-Recorder
etc. erstellt.
2
*
DVD-V MP3
O O O O Notwendig
Anmerkungen
Hochqualitative Film- und
Musik-Discs
Einschließlich SVCD
(entspricht IEC62107)
Mit einem PC o.ä. aufgenommen
g Nicht mit diesem Gerät
abspielbare Discs
Blu-ray, HD-DVD, AVCHD-Discs,
DVD-Audio, Version 1.0 von DVD-RW,
DVD-RAM, DVD-VR, CDV, CD-G, SACD,
PhotoCD, auf dem Markt erhältliche
“Chaoji VCD” einschließlich CVD, DVCD
und SVCD, die nicht entsprechen
IEC62107.
Notwendigkeit des
Finalisierens*
JPEG DivX
DEUTSCH
Erste Schritte
3
DVD-R DL
O — — — Notwendig
+R/+RW
—
+R DL
—
CD-R/RW*
● Je nach Disc-Typ, Zustand der Aufzeichnung, Aufzeichnungsverfahren und Erstellungsart der Dateien kann es vorkommen, dass
nicht alle oben aufgelisteten Discs mit diesem Gerät abgespielt werden können (→ 13, Tipps zur Erstellung von Daten-Discs).
*1 Dieses Gerät kann CD-R/RWs wiedergeben, die im CD-DA oder Video CD-Format aufgezeichnet wurden.
*2 Discs, die mit DVD-Recordern oder DVD-Videokameras etc. mit dem DVD-Video-Format erstellt wurden.
Für +R/+RW und +R DL: Discs, die in einem vom DVD-Video-Format abweichenden Format erstellt wurden, daher können
einige Funktionen nicht verwendet werden.
*3 Ein Vorgang, der die Wiedergabe auf kompatiblen Geräten ermöglicht. Um eine Disc wiederzugeben, die auf diesem Gerät als
“Notwendig” angezeigt wird, muss die Disc zuerst auf dem Gerät, mit dem sie aufgezeichnet werden, finalisiert werden.
*4 Ein Schließen der Sitzung reicht ebenfalls aus.
1
—
(O) — — — Notwendig
(O) — — — Notwendig
— O O O Notwendig*
4
7

RQTC0177
26
ON
VOL
OPEN
Abspielen von Discs
Fach öffnen.
Kopfhöreranschlüsse [W]
ø 3,5 mm Stereo-Miniklinke
AV SELECT
Einrasten
lassen
Disc einlegen und Fach schließen.
● Legen Sie doppelseitige Discs so ein,
dass die Beschriftung der Seite, die Sie
abspielen möchten, nach oben zeigt.
● Einige Discs werden automatisch
abgespielt, wenn das Gerät eingeschaltet
ist.
● Zum Ändern der Sprache auf dem Display → 15, Register “Sprache”
● Im Stopmodus schaltet sich das Gerät nach etwa 15 Minuten (etwa 5 Minuten bei Betrieb mit dem Batteriepack) automatisch ab.
● Die Gesamtanzahl der Titel wird möglicherweise bei +R/+RW nicht korrekt angezeigt.
● Falls ein Problem auftritt, schlagen Sie bitte im Abschnitt zur Fehlersuche nach (
● Während des Abspielens einer DTS-Quelle sind keine Töne aus den Lautsprechern zu hören. Wählen sie eine andere
Audio-Quelle aus (z.B. Dolby Digital).
Hinweis
DISCS DREHEN SICH WEITER, WÄHREND DIE MENÜS ANGEZEIGT WERDEN. Drücken Sie [g –OFF], wenn Sie fertig
sind, um den Motor des Geräts zu schonen.
Drücken.
Das Gerät schaltet sich ein, und die
Wiedergabe beginnt.
● Drücken Sie [AV SELECT]
oder “USB” auszuwählen.
um “DISC”
→ 18).
Lautstärke einstellen.
Verringern Sie vor dem
Anschluss von Kopfhörern die
Lautstärke.
8
RQTC0177
27
Bedienvorgänge
ON
OFF
TOP MENU
MENU
RETURN
OK
Gerät einschalten/
Wiedergabe
Pause
Bei ausgeschaltetem Gerät:
Hier drücken; das Gerät wird eingeschaltet und das Abspielen beginnt.
Bei eingeschaltetem Gerät:
Drücken, und die Wiedergabe beginnt.
Drücken Sie [q ON], um die Wiedergabe neu zu starten.
Stopp
Gerät ausschalten
Überspringen
Suchlauf
Langsame
Wiedergabe
Hauptmenü
Menü
Navigations-Menü
Zurück
Menübedienung
Nummernwahl
EinzelbildWeiterschaltung
Die Position ist gespeichert, wenn Sie sie zum 1. Mal drücken.
● Drücken Sie
Nach dem Öffnen des CD-Fachs oder nach Drücken von
[q ON] um die Wiedergabe fortzusetzen. (Wiedergabe fortsetzen)
[g –OFF] ist die Speicherung
gelöscht.
Drücken und halten Sie den Knopf, bis dass das Gerät sich ausschaltet.
Drücken Sie [u, i].
[u, i] gedrückt halten.
Drücken Sie [q ON], um zur normalen Wiedergabe zurückzukehren.
DVD-V
[u, i] im Pausenzustand gedrückt halten.
VCD DivX
[i] im Pausenzustand gedrückt halten.
Drücken Sie [q ON], um zur normalen Wiedergabe zurückzukehren.
DVD-V
Anzeigen des Hauptmenüs einer Disc.
DVD-V
Anzeigen eines Discmenüs.
VCD
Schalten Sie PBC ein/aus.
(→ 11)
MP3
JPEG DivX
Zurück zum vorherigen Menü.
(mit Wiedergabesteuerung) Zurück zum Menü.
VCD
Drücken Sie [e r w q] und [OK] zum Einstellen.
(Betrieb mit PBC ausgeschaltet)
VCD
Drücken Sie [DISPLAY]
Drücken Sie
Drücken Sie
Drücken Sie [OK].
DVD-V
Wenn Pause gedrückt ist, drücken Sie
[e r], um den Eintrag auszuwählen.
[w q], um eine Zahl einzugeben.
, um die Bildschirmmenüs anzuzeigen.
[q] oder [h] für vorwärts, oder [w] für
Rückwärtslauf.
VCD DivX
Wenn Pause eingeschaltet ist, drücken Sie
[h] nur für vorwärts.
DEUTSCH
Wiedergabe
9
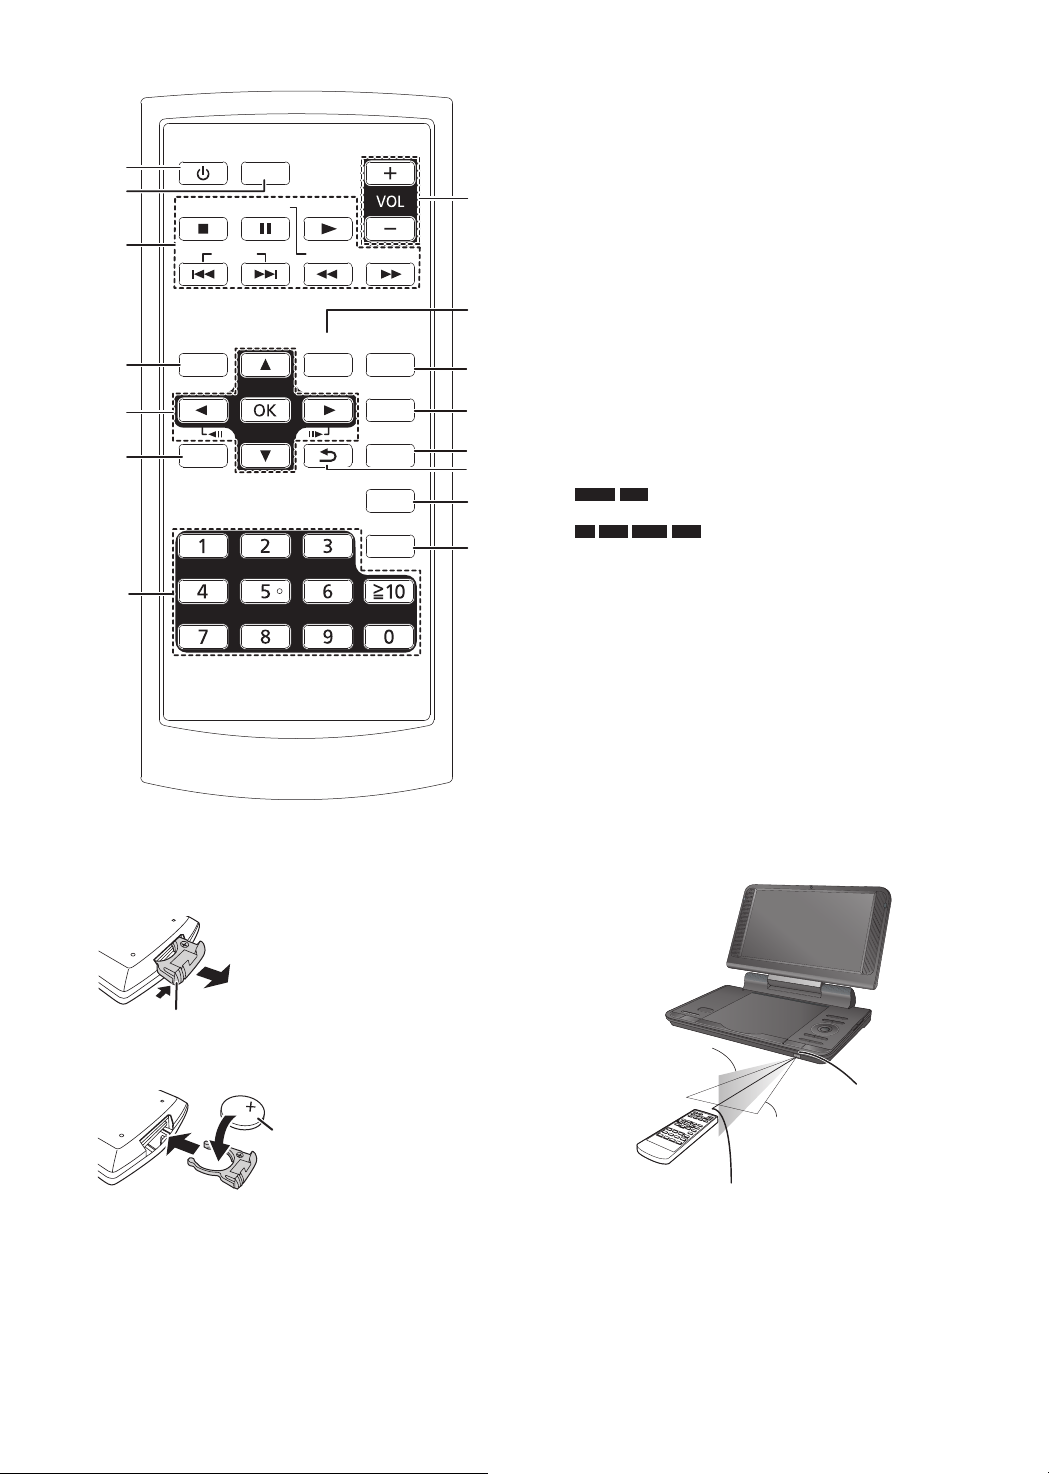
RQTC0177
28
Fernbedienung
1
3
5
6
4
7
2
14
9
8
10
11
12
13
15
AV SELECT
PAUSESTOP
SKIP
TOP MENU
DISPLAY RETURN
ANGLE
AUDIO
SETUP
CANCEL
SUBTITLE
MENU
SLOW/SEARCH
PLAY
1 Ein-/Ausschalten des Geräts (→ 8)
● Sie können das Gerät nicht einschalten, wenn Sie den
Batterie-Pack benutzen.
2 Umschalten auf das gewünschte Laufwerk zur
Wiedergabe (→ 11)
3 Grundlegende Wiedergabefunktionen
4 Anzeigen des Hauptmenüs
5 Auswahl/OK, Einzelbildwiedergabe
Wählen: Nach oben, unten, links oder rechts drücken
●
([e, r, w, q])
Zur Eingabe: Drücken Sie [OK]
●
Bild vorwärts/Bild rückwärts:
●
(Im Pause-Modus) drücken Sie links oder rechts
([w h] [h q])
6 Anzeigen des Bildschirmmenüs (→ 14)
7 Auswählen von Titelnummern, usw./Eingeben von
Zahlen
DVD-V
z.B. zur Auswahl von 12: [≧10] → [1] → [2]
CD
z.B. zur Auswahl von 123: [1] → [2] → [3] → [OK]
8 Lautstärkeregelung
9 Menü anzeigen
10 Winkel auswählen (→ 11)
11 Untertitel auswählen (→ 11)
12 Audio wählen (→ 11)
13 Rückkehr zum vorherigen Bildschirm
14 Ändern des Setups dieses Geräts (→ 15)
15 Löschen der eingegebenen Werte
(Betrieb mit PBC ausgeschaltet)
VCD
MP3
DivXJPEG
g Knopfzellen-Batterie (mitgeliefert) einsetzen
Halter herausziehen.
Unterseite
g Reichweite der Fernbedienung
Beim Herausziehen hier drücken
Batterie einlegen und Halter wieder einschieben.
● Halten Sie die Knopfzellen-Batterie von Kindern fern, damit
sie nicht verschluckt werden kann.
10
+ nach oben
Lithiumbatterie: CR2025
Innerhalb eines
Winkels von 20 Grad
nach oben oder unten
Fernbedienung
Signalsensor
Innerhalb eines Winkels
von 30 Grad nach links
oder rechts
Fernbedienungssensor
Maximale Reichweite bis zu 7 m
Der Abstand und die Winkel sind als annähernde Angaben zu
betrachten.
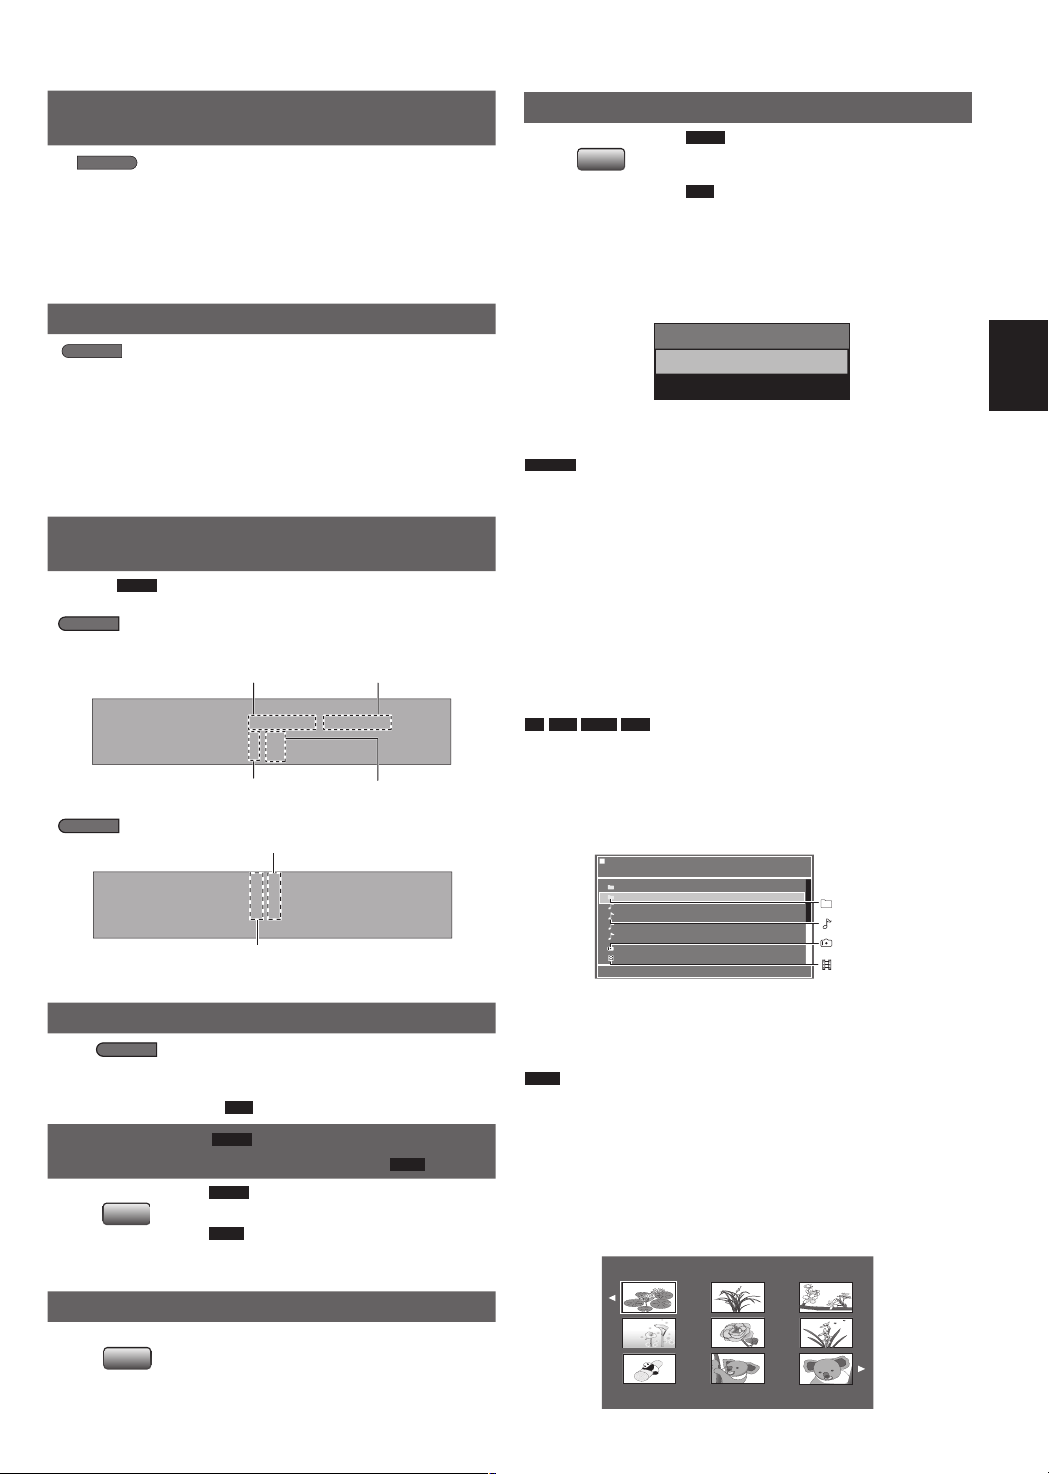
RQTC0177
29
Nützliche Funktionen
Zeit
00 :0 2: 09 /0 0:40: 19
Titel
2/ 10
Kapite
l 1/2
DV
D- Vi de o
Untertitel
1/ 3 EN
G
1/ 3 MP E
G 2 ch EN G
Winkel
1/ 2
Audi
o
-
/16
DISC /Picture
Neanderthal
2008 Vacation
Cartoons
Trilobites
Discovery
IMG_0035
Soccer
Picture
DISC
AV
-Auswahl
USB
LCD SIZE
-
BRIGHT-LCD
DISPLAY
DISPLAY
REPEAT
ANGLE
SUBTITLE
AUDIO
Auswahl der Darstellung von Bildern mit
Seitenverhältnis 4:3 auf dem LCD
Monitor normal: Nur in 4:3 Video verfügbar
Monitor voll: Horizontal gestreckt
Zum Ändern
drücken.
Monitor aus: Kein Bild
● Wenn Sie den LCD des Geräts nicht
verwenden, wählen Sie “Monitor aus”, um
Strom zu sparen. (Die Anzeige [^] blinkt)
● Der LCD wird beim Schließen automatisch
ausgeschaltet.
Auswählen der LCD-Bildqualität
Drücken Sie [e r], um den Eintrag
auszuwählen, und [w q] um die
Zum Ändern
drücken.
Einstellung zu ändern.
Helligkeit: -5 bis 5
Kontrast: -5 bis 5
Farbton: -5 bis 5
Farbe: -5 bis 5
●
Verlassen der Bildschirmanzeige:
Drücken Sie [RETURN
].
Zeigt den aktuellen Wiedergabestatus an
(Quick OSD)
Beispiel:
Dreimal drücken.
Vier Mal drücken.
DVD-V
Gesamtspielzeit des
Verstrichene
Spielzeit
gegenwärtigen
Wiedergabetitels
Laufende Wiedergabe-Nummer
Gesamtzahl
Gesamtzahl
Wechseln der Tonspur
DVD-V
(bei mehreren Tonspuren)
Drücken Sie [AUDIO], um die
(Fernbedienung)
Tonspur auszuwählen.
VCD
Mit dieser Taste können Sie “L”, “R”,
“L+R” oder “L R” auswählen.
Geräte wechseln
Drücken Sie [AV SELECT], um “DISC” oder “USB”
auszuwählen, wenn das Gerät gestoppt wurde oder wenn
“Keine Disc” angezeigt wird.
Wenn das Medium/CD eingelegt wurde, während das Gerät
gestoppt wurde oder bei Anzeige “Keine Disc”, erscheint
automatisch das “AV-Auswahl” Menü.
Hinweis
● Es kann nicht garantiert werden, dass das Gerät mit allen
USB-Sticks funktioniert.
● Das Grät unterstützt nicht die Funktion “Aufnahme auf USBStick”.
● Die Dateisysteme FAT12, FAT16 imd FAT 32 werden
unterstützt.
● Das Gerät unterstützt USB 2.0 volle Geschwindigkeit.
● Wenn eine Überspannung bei dem USB-Gerät eintritt,
entfernen Sie bitte den USB-Stick.
Abspielen einer CD, DatenCD und USB-Stick/Gerät
MP3
CD
Legen Sie eine CD oder Daten-CD ein oder schließen Sie den
USB-Stick an.
Bei Anzeige des Menüs, Drücken Sie [
eines Eintrags und dann [OK].
● Wiederholen Sie bei mehreren Schichten diesen Schritt.
DivXJPEG
Beispiel:
Daten-Disc
] zur Auswahl
e r
DEUTSCH
Wiedergabe
●
(Fernbedienung)
(Fernbedienung)
Laufende Wiedergabe-Nummer
Um den Bildschirm zu verlassen: Drücken Sie [RETURN].
Wiedergabewiederholung
Während der Wiedergabe, drücken
Sie mehrmals hier, um den zu
wiederholenden Inhalt auszuwählen.
VCD
● Betrieb mit PBC ausgeschaltet.
Winkelauswahl
Wechsel des Übergangseffektes
DVD-V
(bei mehreren Betrachtungswinkeln)
DVD-V
Drücken Sie [ANGLE], um den
JPEG
Betrachtungswinkel auszuwählen.
JPEG
Während der Wiedergabe
Drücken Sie [ANGLE], um den
Übergangseffekt zu wechseln. (→ 12)
Wechseln der Untertitel
Drücken Sie [SUBTITLE], um die
Untertitelsprache auszuwählen.
(Discs mit Untertiteln)
●
Je nach Aufzeichnungsart kann diese
Funktion u. U. nicht ausgeführt werden.
Gruppe (Ordner)
MP3 (Datei)
JPEG (Datei)
DivX (Datei)
●
Drücken Sie [RETURN], um zur vorherigen Bildschirmanzeige
zurückzukehren.
g Wählen Sie das Bild im Piktogrammmenü aus.
JPEG
1 Drücken Sie während der Anzeige von Bildern
[TOP MENU], um die Piktogramme aufzurufen.
2 So wählen Sie ein Bild in einer Gruppe aus
Drücken Sie [e r w q] zur Auswahl des Bildes und dann
[OK].
● Drücken Sie [i], um seitenweise vorzuspringen.
● Drücken Sie [u], um seitenweise zurückzuspringen.
● Verlassen der Bildschirmanzeige: Drücken Sie [MENU].
11
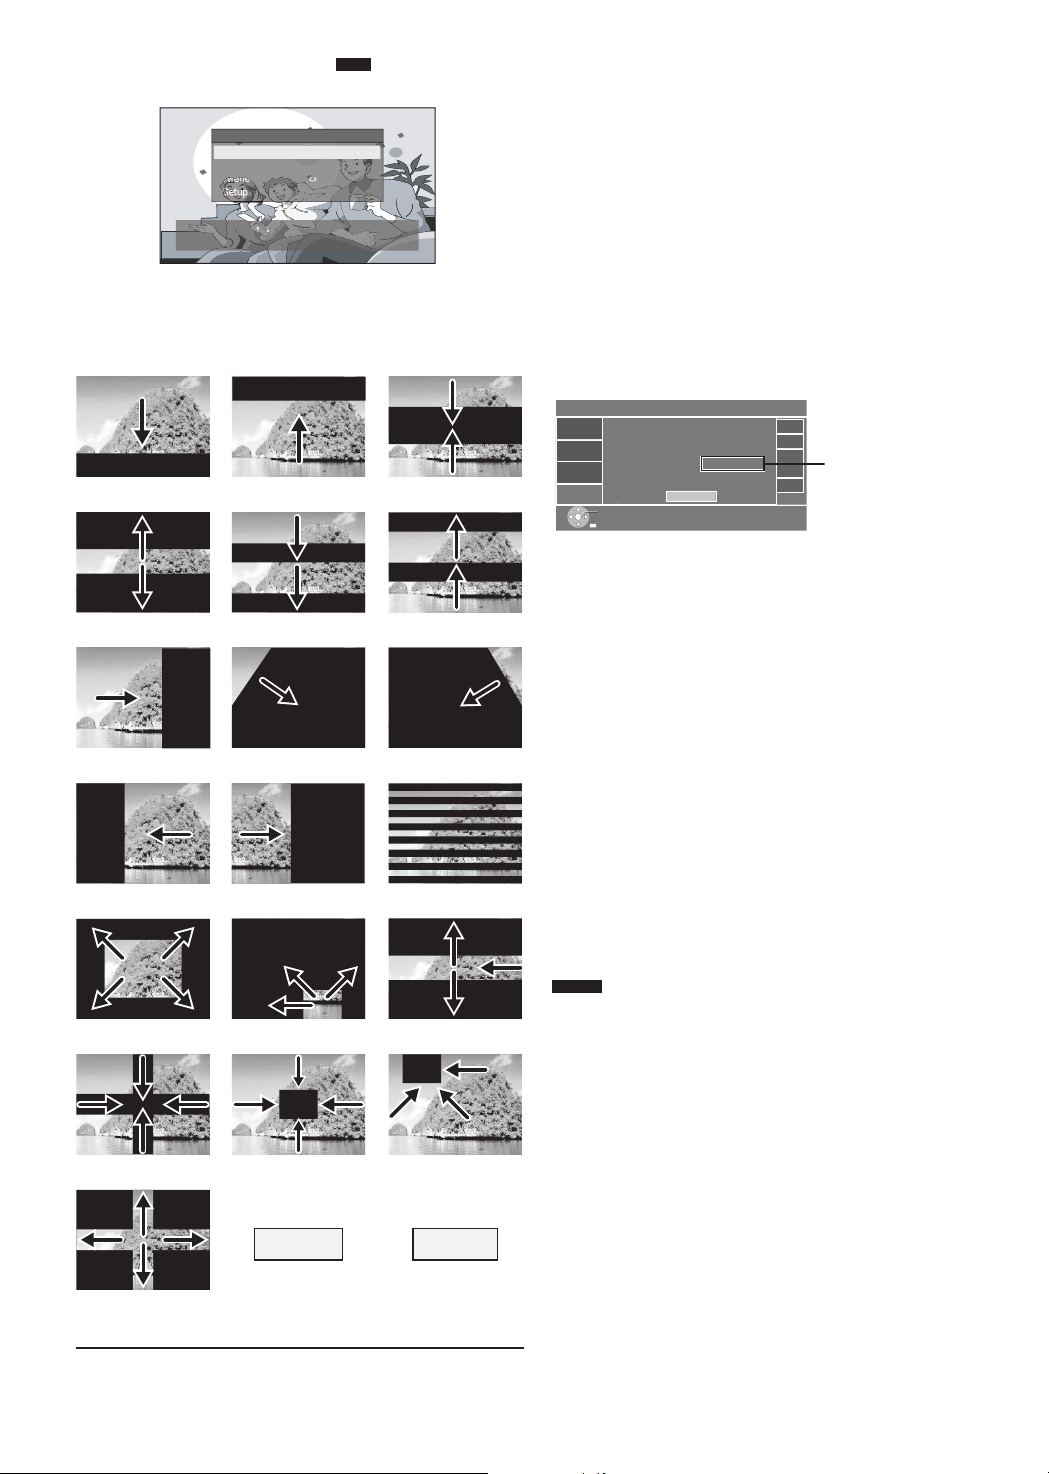
RQTC0177
30
Übergangseffekt
JPEG-Zeit
Wiederholen
Sonstiges
Übergangseffekt
: Schnell
: Aus
Setup
: Normal
[OK] zum Bestät. [RETURN] zum Beenden
Zum Auswählen /
drücken
Zufällig
Normal
Einstellen
Zurück
Sprache
Setup
Video
Audio
Sonstiges
USE DEFAULT SETTINGS
DIVX REGISTRATION
herst.
chr.
g
g
Zur Wiederg. von geschützten
DivX-Videos muss Gerät registriert
sein.
Registrieren auf: http://vod.divx.com
Registrierungs-Code:
XXXXXXXXXX
OK
JPEG
Drücken Sie [DISPLAY] wenn Sie ein JPEG-Format abspielen wollen.
● Drücken Sie [e
● Drücken Sie
], um den “Übergangseffekt” auszuwählen.
r
[OK], um den von Ihnen gewünschen Effekt
auszuwählen.
Mit dem Gerät können Sie 21 Effekte auswählen.
Typ1 Typ2 Typ3
Typ4 Typ5 Typ6
Typ7 Typ8 Typ9
Typ10 Typ11 Typ12
Über DivX® VOD Inhalt
ZU DIVX- VIDEO:
DivX® ist ein digitales Videoformat, das von DivX, Inc.
entwickelt wurde. Dies ist ein offiziell DivX Certified
das DivX-Videos wiedergibt. Für weitere Informationen und
Softwaretools zur Konvertierung Ihrer Dateien in DivX Videos
besuchen Sie divx.com.
ZU DIVX VIDEO-ON-DEMAND:
Dieses DivX Certified® Gerät muss registriert werden, um
erworbene DivX Video-on-Demand (VOD)-Filme wiederzugeben.
Rufen Sie, um Ihre Registriernummer zu erhalten, den DivX
VOD-Bereich im Setup-Menü des Gerätes auf.
Besuchen Sie vod.divx.com für weitere Informationen zur
Vervollständigung Ihrer Anmeldung.
Anzeige des Registriercodes des Geräts
(→ 15, DivX® VOD-Registrierung)
10 alphanumerische
Zeichen
● Nach der ersten Wiedergabe von DivX VOD-Material wird
kein Registriercode angezeigt.
● Wenn Sie DivX VOD-Material mit einem nicht diesem Gerät
entsprechenden Registrierungscode kaufen, können Sie das
Material nicht wiedergeben.
Löschen des Registriercodes des Geräts
(→ 15, DivX® VOD-Deaktivierung)
Benutzen Sie zum Löschen der Registrierung in www.divx.com
den Registrierungscode.
DivX VOD-Inhalte, die nur begrenzt oft
wiedergegeben werden können
Bestimmte DivX VOD-Inhalte können Sie nicht unbegrenzt,
sondern nur einige Male wiedergeben. Bei Wiedergabe des
Materials wird die Anzahl der durchgeführten Wiedergaben
sowie die mögliche Anzahl an Wiedergaben angezeigt.
● Die Anzahl der verbleibenden Wiedergaben verringert sich
bei jedem Abspielen eines Programms. Bei Wiederaufnahme
der Wiedergabe ab der Stelle, an der sie vorher gestoppt
wurde, erfolgt jedoch aufgrund der Funktion Fortsetzen der
Wiedergabe keine Verringerung der verbleibenden Anzahl
von Wiedergaben.
®
Gerät,
Typ13 Typ14 Typ15
Typ16 Typ17 Typ18
Typ19
12
● Sie können auch den Knopf [ANGLE] in der Fernsteuerung
drücken, um den Übergangseffekt direkt zu wechseln.
Hinweis
● Copyright-geschützte Video-Bilder mit DivX
®
-Inhalt, die auf
einem USB-Stick gespeichert sind, können nicht gelesen
werden.
Um das geschützte DivX Video auf dem TV anzusehen,
kopieren Sie bitte das Video an Ihrem Computer auf eine
kompatible Disk.
 Loading...