

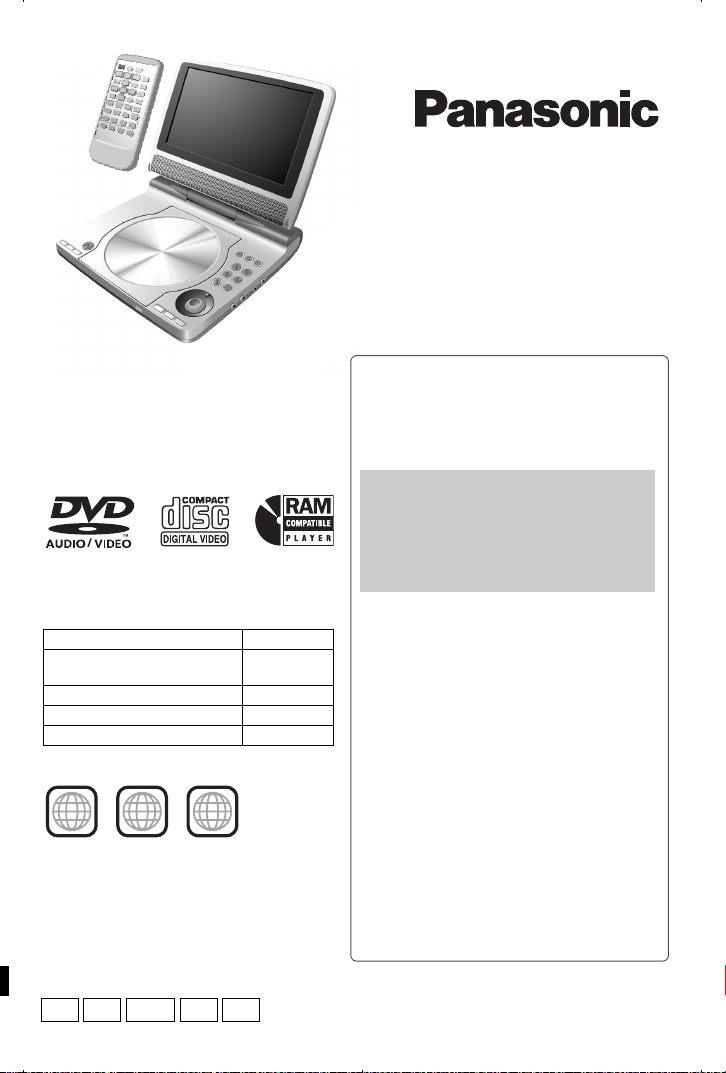
Panasonic DVD-LS55GCS, DVDLS55EG, DVD-LS55EB User Manual
[DVD-LS50]
®
Operating Instructions
Portable DVD/CD Player
Model No. DVD-LS50
DVD-LS55
Dear customer
Thank you for purchasing this product.
For optimum performance and safety, please read
these instructions carefully before connecting,
operating or adjusting this product. Please keep
this manual for future reference.
Region number
The player plays DVD-Video marked with labels
containing the region number or “ALL”.
For the United Kingdom and
Continental Europe
For Asia 3
For Australia and N.Z. 4
For Russia 5
Example: For the United Kingdom and
Continental Europe
Operations in these instructions are described
mainly with the main unit, but you can do the
operations on the remote control if the remote
controls are the same (➜ back cover)
Unless otherwise indicated, illustrations in these
operating instructions are of DVD-LS50.
EB
Region Number
2
ALL
EG GCS GN EE
2
2
3
5
Table of contents
Caution for AC Mains Lead . . . . . . . . .2
Precautions . . . . . . . . . . . . . . . . . . . . . .3
Discs that can be played . . . . . . . . . . .5
Accessories . . . . . . . . . . . . . . . . . . . . .6
Preparations
1 Attaching the battery . . . . . . . . . . 6
2 Recharging the battery. . . . . . . . . 6
3 The remote control . . . . . . . . . . . . 7
4 Adjusting the LCD angle . . . . . . . 7
Play . . . . . . . . . . . . . . . . . . . . . . . . . . . 8
Useful functions . . . . . . . . . . . . . . . . .10
Changing the play sequences. . . . . .12
RAM disc play . . . . . . . . . . . . . . . . . . . 13
Playing a HighMAT
Playing data discs . . . . . . . . . . . . . . .14
Using the contents screen to find
a track . . . . . . . . . . . . . . . . . . . . . . . 15
Operating with GUI screens . . . . . . .16
Changing the player settings . . . . . .19
Using this unit with other equipment
Battery pack . . . . . . . . . . . . . . . . . . . . 23
Using a car adaptor . . . . . . . . . . . . . .23
FM transmitter
Creating files on a computer. . . . . . .25
Specifications . . . . . . . . . . . . . . . . . . .26
Frequently asked questions . . . . . . .27
Maintenance . . . . . . . . . . . . . . . . . . . .27
Troubleshooting guide . . . . . . . . . . .28
Useful function guide. . . . . Back cover
“EB” on the packaging indicates the
[Note[
United Kingdom.
TM
CD . . . . . . . . . .13
. . .21
[DVD-LS55] [For]Asia] . . . .24
RQT7424-2B
Caution for AC Mains Lead
(For United Kingdom)
(“EB” area code model only)
For your safety, please read the following text
carefully.
This appliance is supplied with a moulded three
pin mains plug for your safety and convenience.
A 5-ampere fuse is fitted in this plug.
Should the fuse need to be replaced please
ensure that the replacement fuse has a rating of
5-ampere and that it is approved by ASTA or BSI
to BS1362.
Check for the ASTA mark Ï or the BSI mark Ì
on the body of the fuse.
If the plug contains a removable fuse cover you
must ensure that it is refitted when the fuse is
replaced.
If you lose the fuse cover the plug must not be
used until a replacement cover is obtained.
A replacement fuse cover can be purchased
from your local dealer.
CAUTION!
IF THE FITTED MOULDED PLUG IS
UNSUITABLE FOR THE SOCKET OUTLET
Caution for AC Mains Lead
IN YOUR HOME THEN THE FUSE
SHOULD BE REMOVED AND THE PLUG
CUT OFF AND DISPOSED OF SAFELY.
THERE IS A DANGER OF SEVERE
ELECTRICAL SHOCK IF THE CUT OFF
PLUG IS INSERTED INTO ANY 13-AMPERE
SOCKET.
If a new plug is to be fitted please observe the
wiring code as stated below.
If in any doubt please consult a qualified
electrician.
IMPORTANT
The wires in this mains lead are coloured in
accordance with the following code:
Blue: Neutral, Brown: Live.
As these colours may not correspond with the
coloured markings identifying the terminals in
your plug, proceed as follows:
The wire which is coloured Blue must be
connected to the terminal which is marked with
the letter N or coloured Black or Blue.
The wire which is coloured Brown must be
connected to the terminal which is marked with
the letter L or coloured Brown or Red.
WARNING: DO NOT CONNECT EITHER
WIRE TO THE EARTH TERMINAL
WHICH IS MARKED WITH THE LETTER
E, BY THE EARTH SYMBOL Ó OR
COLOURED GREEN OR GREEN/
YELLOW.
THIS PLUG IS NOT WATERPROOF—
KEEP DRY.
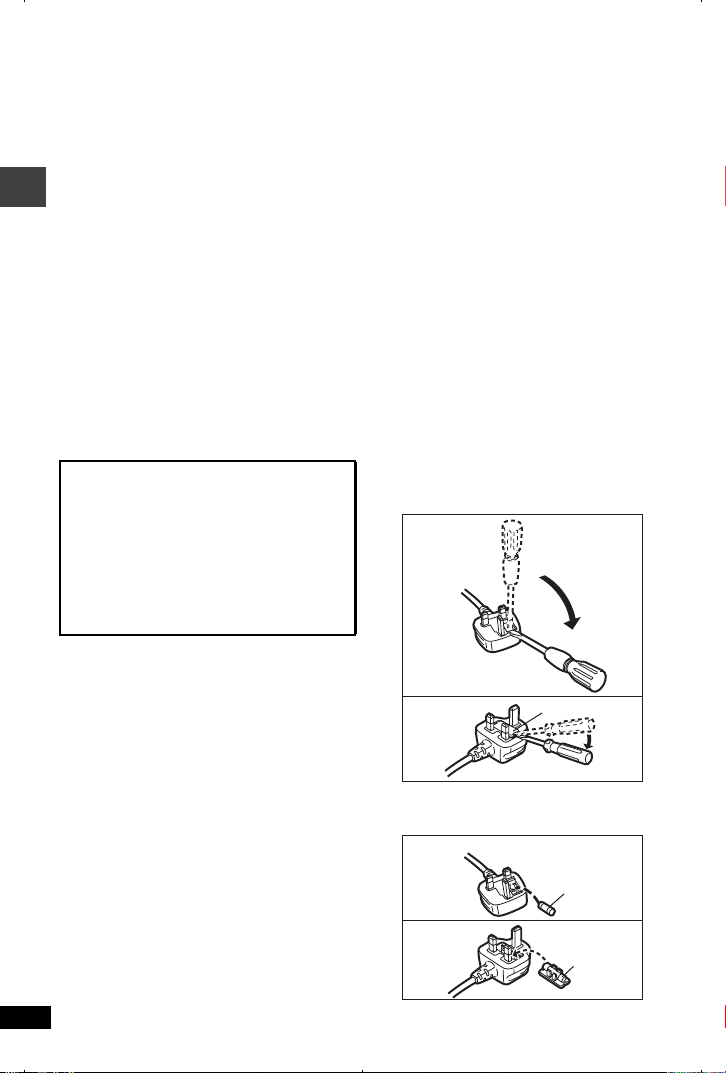
Before use
Remove the connector cover.
How to replace the fuse
The location of the fuse differ according to the
type of AC mains plug (figures A and B). Confirm
the AC mains plug fitted and follow the
instructions below.
Illustrations may differ from actual AC mains
plug.
1. Open the fuse cover with a screwdriver.
Figure A
Figure B
2. Replace the fuse and close or attach the fuse
cover.
Figure A
Figure B
Fuse cover
Fuse
(5 ampere)
Fuse
(5 ampere)
2
RQT7424

CAUTION!
THIS PRODUCT UTILIZES A LASER.
USE OF CONTROLS OR ADJUSTMENTS
OR PERFORMANCE OF PROCEDURES
OTHER THAN THOSE SPECIFIED HEREIN
MAY RESULT IN HAZARDOUS RADIATION
EXPOSURE.
DO NOT OPEN COVERS AND DO NOT
REPAIR YOURSELF. REFER SERVICING
TO QUALIFIED PERSONNEL.
WARNING:
TO REDUCE THE RISK OF FIRE, ELECTRIC
SHOCK OR PRODUCT DAMAGE, DO NOT
EXPOSE THIS APPARATUS TO RAIN,
MOISTURE, DRIPPING OR SPLASHING AND
THAT NO OBJECTS FILLED WITH LIQUIDS,
SUCH AS VASES, SHALL BE PLACED ON
THE APPARATUS.
CAUTION!
≥
DO NOT INSTALL OR PLACE THIS UNIT
IN A BOOKCASE, BUILT-IN CABINET OR
IN ANOTHER CONFINED SPACE.
ENSURE THE UNIT IS WELL
VENTILATED. TO PREVENT RISK OF
ELECTRIC SHOCK OR FIRE HAZARD
DUE TO OVERHEATING, ENSURE THAT
CURTAINS AND ANY OTHER MATERIALS
DO NOT OBSTRUCT THE VENTILATION
VENTS.
≥
DO NOT OBSTRUCT THE UNIT’S
VENTILATION OPENINGS WITH
NEWSPAPERS, TABLECLOTHS,
CURTAINS, AND SIMILAR ITEMS.
≥
DO NOT PLACE SOURCES OF NAKED
FLAMES, SUCH AS LIGHTED CANDLES,
ON THE UNIT.
≥
DISPOSE OF BATTERIES IN AN
ENVIRONMENTALLY FRIENDLY MANNER.
Marking sign is located on bottom of the unit.
The socket outlet shall be installed near the
equipment and easily accessible or the mains
plug or an appliance coupler shall remain
readily operable.
This product may receive radio interference
caused by mobile telephones during use. If
such interference is apparent, please increase
separation between the product and the mobile
telephone.
[For]the]United]Kingdom,]Continental]Europe,]Russia,[
[Australia]and]N.Z.[
THIS UNIT IS INTENDED FOR USE IN
MODERATE CLIMATES.
[For]Asia[
THIS UNIT IS INTENDED FOR USE IN
TROPICAL CLIMATES.
Precautions
Read these operating instructions carefully
before using the unit. Follow the safety
instructions on the unit and the applicable safety
instructions listed below. Keep these operating
instructions handy for future reference.
1) Read these instructions.
2) Keep these instructions.
3) Heed all warnings.
4) Follow all instructions.
5) Do not use this apparatus near water.
6) Clean only with dry cloth.
7) Do not block any ventilation openings.
Install in accordance with the manufacturer’s
instructions.
8) Do not install near any heat sources such as
radiators, heat registers, stoves, or other
apparatus (including amplifiers) that produce
heat.
9) Protect the AC mains lead from being walked on or
pinched particularly at plugs, convenience
receptacles, and the point where they exit from the
apparatus.
10)Only use attachments/accessories specified by
the manufacturer.
11)Use only with the cart, stand,
tripod, bracket, or table specified
by the manufacturer, or sold with
the apparatus. When a cart is
used, use caution when moving
the cart/apparatus combination
to avoid injury from tip-over.
12)Unplug this apparatus during lightning storms or
when unused for long periods of time.
13)Refer all servicing to qualified service personnel.
Servicing is required when the apparatus has
been damaged in any way, such as AC mains
lead or plug is damaged, liquid has been spilled
or objects have fallen into the apparatus, the
apparatus has been exposed to rain or moisture,
does not operate normally, or has been dropped.
Precautions
3
RQT7424
Precautions
Batteries
1.Battery pack (Lithium ion battery pack)
≥
Use this unit to recharge the battery pack.
≥
Do not use the battery pack with equipment
other than the specified player.
≥
Do not use the player outside if it is snowing
or raining. (The battery pack is not waterproof.)
≥
Do not get dirt, sand, liquids, or other foreign
matter on the terminals.
≥
Do not touch the plug terminals (i and j)
with metal objects.
≥
Do not disassemble, remodel, heat or throw
into fire.
≥
Do not store the battery pack in temperature
over 60
Precautions
2.Button-type battery (Lithium battery)
≥
≥
≥
≥
If any electrolyte should come into contact with
your hands or clothes, wash it off thoroughly with
water.
If any electrolyte should come into contact with
your eyes, never rub the eyes.
Rinse eyes thoroughly with water, and then
consult a doctor.
3.Disposing of the batteries
Check and follow your local regulations before
disposal.
CAUTION!
DANGER OF EXPLOSION IF BATTERY IS
INCORRECTLY REPLACED.
REPLACE ONLY WITH THE SAME OR
EQUIVALENT TYPE RECOMMENDED BY
THE MANUFACTURER. DISCARD USED
BATTERIES ACCORDING TO THE
MANUFACTURER’S INSTRUCTIONS.
This AC adaptor operates on AC between 100 V
and 240 V.
But
≥
Obtain a suitable plug adaptor if the plug does
not fit the AC mains socket.
Avoid the following;
≥
Spraying flammable insecticides near the unit.
≥
Pressing the LCD.
≥
Touching the lens and other parts of the laser
pickup.
4
RQT7424
oC.
Insert with poles aligned.
Do not touch the terminals (i and j) with
metal objects.
Do not disassemble, remodel, heat or throw
into fire.
Keep out of reach of children.
AC adaptor
To prevent damag e
Do not use the unit in the following places;
≥
Where the temperature is below 5 oC or above
35
oC. (Operating the unit beyond this range
can cause the protection circuitry to function
and render the unit inoperable.)
≥
Sandy places such as beaches.
≥
On top of cushions, sofas, or hot equipment
such as amplifiers.
Precautions for Listening with
the Headphones or Earphones
≥
Do not play your headphones or earphones at
a high volume. Hearing experts advise against
continuous extended play.
≥
If you experience a ringing in your ears, reduce
volume or discontinue use.
≥
Do not use while operating a motorized
vehicle. It may create a traffic hazard and is
illegal in many areas.
≥
You should use extreme caution or temporarily
discontinue use in potentially hazardous
situations.
≥
Even if your headphones or earphones are the
open-air type designed to let you hear outside
sounds, don’t turn up the volume so high that
you can’t hear what’s around you.
Do not rest the unit on your lap for a long time
while using it. The unit can become hot and
cause burns.
For United Kingdom and Republic of
Ireland
www.panasonic.co.uk (for UK customers only)
≥
Order accessory and consumable items for your
product with ease and confidence by telephoning our
Customer Care Centre Mon–Friday 9:00am–5:30pm.
(Excluding public holidays.)
≥
Or go on line through our Internet Accessory
ordering application.
≥
Most major credit and debit cards accepted.
≥
All enquiries transactions and distribution facilities
are provided directly by Panasonic UK Ltd.
≥
It couldn’t be simpler!
Customer Care Centre
For UK customers: 08705 357357
For Republic of Ireland customers: 01 289 8333
Technical Support
For UK customers: 0870 1 505610
This Technical Support Hot Line number is for
Panasonic PC software related products only.
For Republic of Ireland, please use the
Customer Care Centre number listed above for
all enquiries.
For all other product related enquiries, please use
the Customer Care Centre numbers listed
above.
Discs that can be played
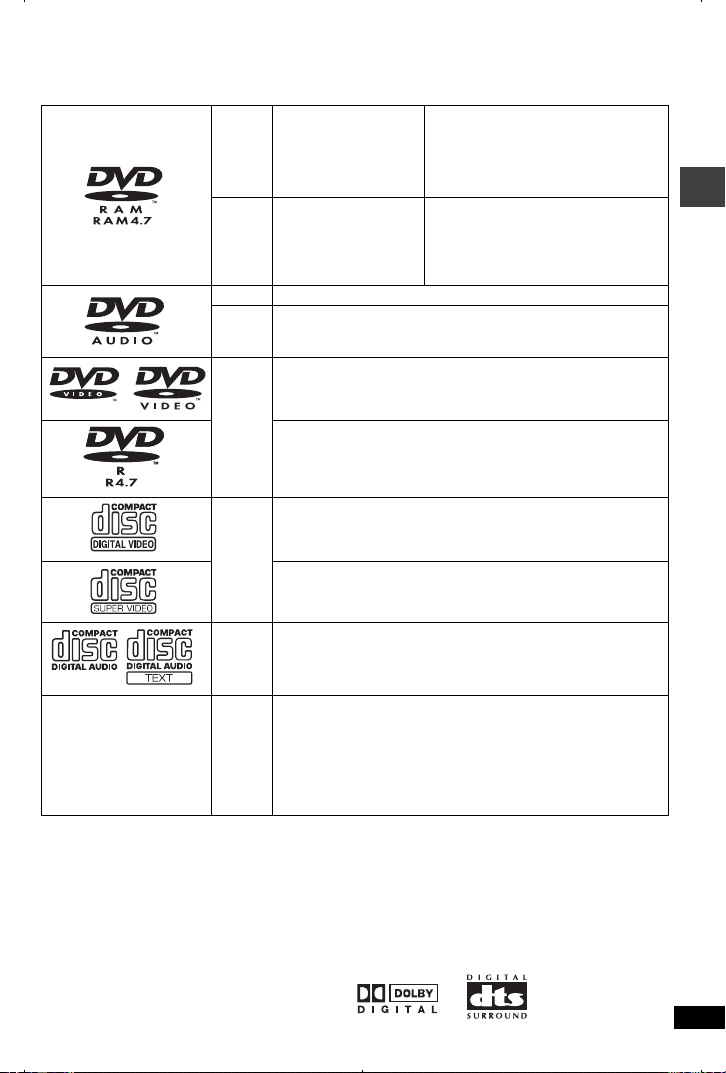
This operating instruction manual uses the following icons such as [RAM].
Recorded using Version
1.1 of the Video
Recording Format (a
[RAM]
unified video recording
standard).
Recorded using the
DCF (Design rule for
[JPEG]
Camera File system)
standard.
[DVD-A] Played on this unit in 2 channels.
Some DVD-Audio discs contain DVD-Video content.
[DVD-V]
To play DVD-Video content, select “Play as DVD-Video” in
Other Menu (➜ page 18).
—
≥
Recorded with DVD video
recorders, DVD video cameras,
personal computers, etc.
≥
Remove discs from their cartridges
before use.
≥
Recorded with Panasonic DVDVideo recorders.
≥
To play JPEG files, select “Play as
Data Disc” in Other Menu
(➜ page 18).
[DVD-V]
Panasonic DVD-R recorded and finalized
DVD-Video recorders or DVD- Video cameras are played as
DVD-Video on this unit.
—
[VCD]
Conforming to IEC62107
—
§
on Panasonic
[CD]
≥
[WMA]
—
§
A process that allows play on compatible equipment.
≥
It may not be possible to play the above discs in all cases due to the type of disc or condition of the recording.
[MP3]
[JPEG]
[CD]
[VCD]
This unit can play CD-R/RW (audio recording disc) recorded
with the formats on the left. Close the sessions or finalize
the disc after recording.
≥
HighMAT discs
WMA, MP3 or JPEG files only.
To play without using the HighMAT function, select “Play as
Data Disc” in Other Menu (➜ page 18).
§
Discs that cannot be played
DVD-ROM, CD-ROM, CDV, CD-G, DVDiR, iRW, DVD-RW, SACD, Divx Video Discs and Photo CD,
DVD-RAM that cannot be removed from their cartridge, 2.6-GB and 5.2-GB DVD-RAM, and “Chaoji
VCD” available on the market including CVD, DVCD and SVCD that do not conform to IEC62107.
Audio format of DVDs
You can play discs in stereo with these symbols.
Discs that can be played
5
RQT7424
Accessories
RELEASE
DETACH ATTACH
CHG
Use numbers indicated in parentheses when asking for replacement par ts.
The included AC mains lead and AC adaptor are for use with this unit only. Do not use
them with other equipment.
∑ 1
Remote control
(N2QAHC000012 or N2QAHC000019)
∑ 1
Button-type battery for remote control
(for replacement, see page 7)
∑ 1 Audio/video cable (K2KA6CB00003)
∑ 1
AC adaptor (RFEA906W-W)
∑ 1 AC mains lead
[For]the]United]Kingdom] (RJA0053-3X)
[For]Australia] (K2CJ2DA00007)
[
For]others] (RJA0019-2X)
∑ 1
Rechargeable battery pack
[DVD-LS50] (CGR-H701)
[DVD-LS55] (CGR-H703)
For replacement: Available from Panasonic
dealers
Preparations
FOR THE UNITED KINGDOM ONLY
READ THE CAUTION FOR THE AC MAINS LEAD ON PAGE 2 BEFORE CONNECTION.
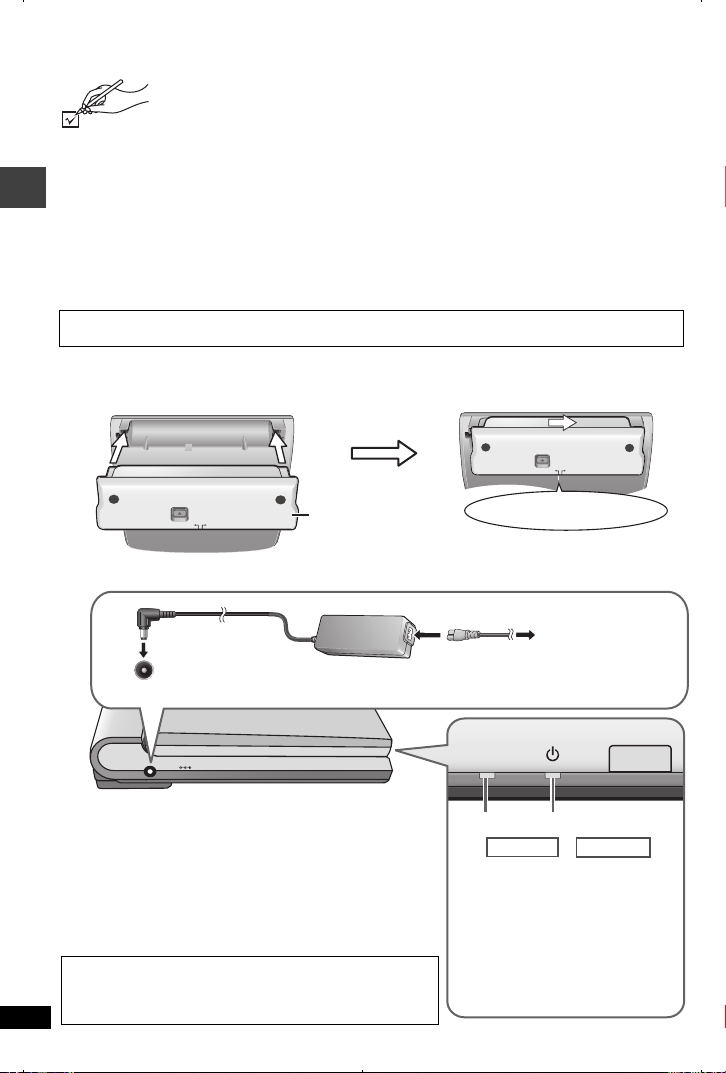
1 Attaching the battery (When the unit is off)
The illustrations show connection for CGR-H701. Connect CGR-H703 in the same way.
Bottom side of this unit
Accessories/Preparations
RELEASE
DETACH ATTACH
Battery pack
Check to make sure it is securely fastened.
2 Recharging the battery (When the unit is off)
AC mains lead
(included)
1
DC IN 9 V
%
DC IN
DC IN 9V
≥
You can also use the optional car adaptor (➜ page 23).
≥
You can also use this unit without charging while
connecting the AC adaptor and the AC mains lead.
To conserve power
This unit consumes 0.5 W of power even when turned off. When
the unit is not going to be used for a long time, disconnect the
AC mains lead from the household mains socket.
Checking the remaining battery charge/Approximate
play times/Detaching (➜ page 23)
The unit is in the standby condition (the [Í] indicator
lights) when the AC mains lead is connected. The primar y
circuit is always “live” as long as the AC adaptor is
connected to an electrical outlet.
6
RQT7424
AC adaptor
(included)
2
Clicks into place
Household
mains socket
3
Started
Í
Finished
CHG
[Í] goes out ➜ lights
[CHG] lights ➜ goes out
Recharging time:
[DVD-LS50]: Approx. 4 hours
[DVD-LS55]: Approx. 7 hours
When finished, disconnect the AC
adaptor and the AC mains lead.
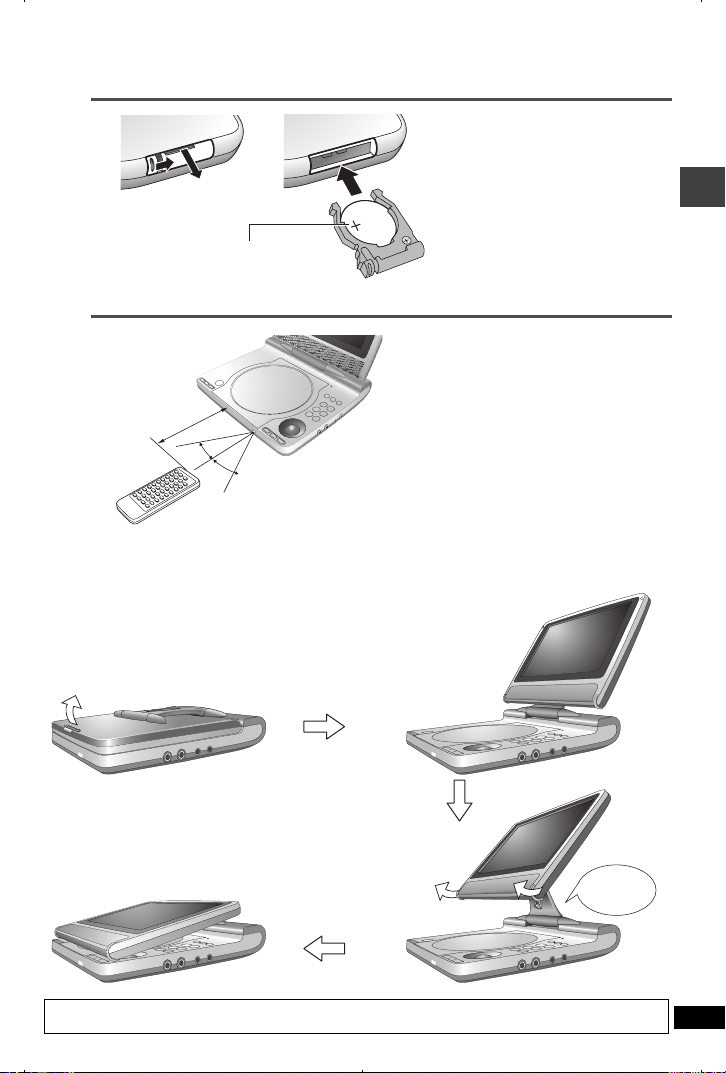
3 The remote control
Insert the button-type battery (included)
Bottom
312
_ facing up
Lithium battery: CR2025
Range of use
30 ˚
30˚
Aim at the sensor. Maximum range is up to 7 m.
4 Adjusting the LCD angle
Preparations
Standard
Open the LCD
Free
Compact
Slide
When moving the unit : Close the LCD. Don’t hold by the LCD.
Clicks!
7
RQT7424
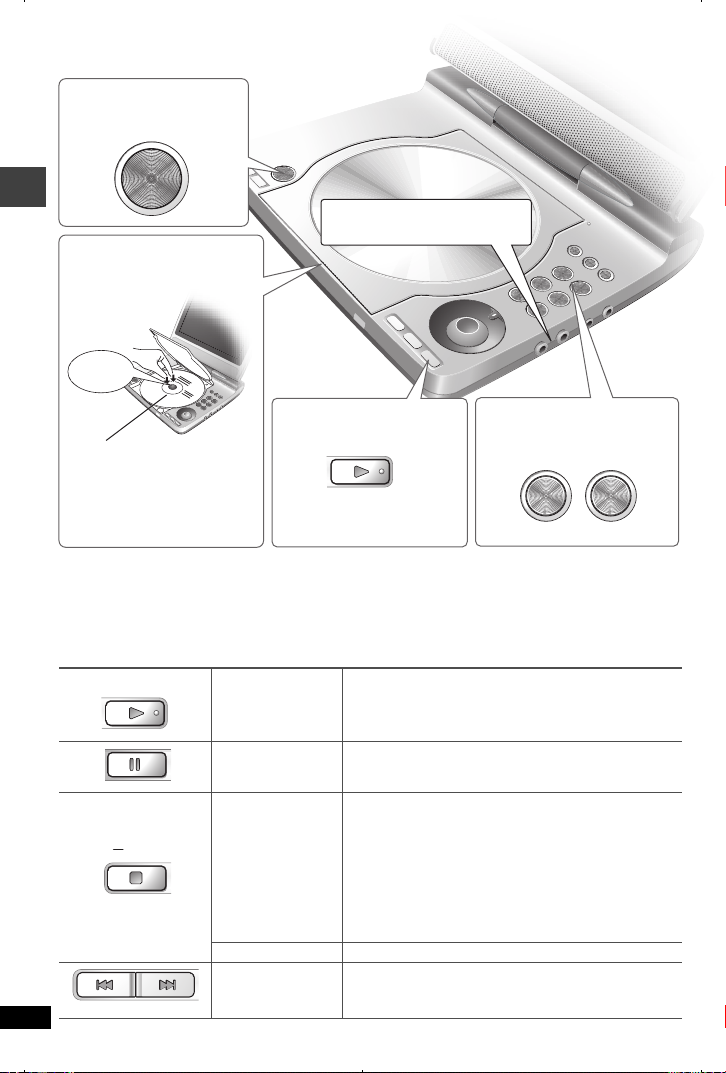
Play
ON
ON
1 Open the lid.
OPEN
2
Play
Insert a disc and
close the lid
Click into
place
Headphone terminals [Ë]
3.5 mm Stereo
.
For two sided discs, insert
the side you want to play with
the label facing up.
For DVD-RAM, remove the
disc from the cartridge.
≥
While stopped, the unit automatically turns off once 15 minutes (after approximately 5 minutes when
using the battery pack) have elapsed.
≥
Discs continue to rotate while menus are displayed. Press [∫, –OFF] when you finish to preserve
the unit’s motor.
Main unit operations
OFF
8
RQT7424
3 Press and hold.
Adjust the volume.
4
㧙VOL 㧗
The unit turns on and play
begins.
Turn unit on/play
Pause Press [1, ON] to re-start play.
Stop
Turn unit off Press and hold until “OFF” is displayed.
Skip Skips items.
Press and hold and the power comes on and play begins.
While “!” is flashing, press [1,
from the position where play stopped.
≥
[DVD-V] While the message is displayed, press
ON] and the previous chapters are reviewed.
[1,
Opening the lid, or pressing [∫, –OFF] while “!” is
flashing cancels the memorized position where play
stopped.
ON] and play begins
TOP MENU
Top menu [DVD-A] [DVD-V]
Direct navigator [RAM] (➜ page 13)
MENU
Menu [DVD-V]
Playlist play [RAM] (➜ page 13)
Navigation menu [WMA] [MP3] [JPEG] (➜ page 14)
RETURN
Return
Search
SEARCH
Slow play
Menu operation
ENTER
Frame by Frame
Group skip
Remote control operations
Í
∫;1
56
ENTER
ENTER
Turn on/off
Stop/Pause/Play (➜ page 8)
Search (During
play)/Slow play
(While paused)
Menu operation/
Frame by Frame/
Group skip
Returns to the previous screen.
[VCD] (with PBC) Returns to the menu.
Turn the shuttle dial.
Release the shuttle dial to return to normal play.
Turn the shuttle dial while paused.
Press [
1
, ON
[VCD] [
] to return to normal play.
5
] only.
Use [342 1] to select an item and press
[ENTER] to confirm.
While paused, use [
[VCD] [
1
] only.
2 1
].
[WMA] [MP3] [JPEG]
34
].
Use [
You cannot use the remote control to turn the unit
on when powered by the battery pack.
(➜ above)
(➜ above)
Play
13
2
46
5
7908
S10
Enter number
[RAM] [DVD-A] [DVD-V] [VCD] [CD]
e.g. To select 12: [S10] ➜ [1] ➜ [2]
[VCD] (with PBC)
While stopped, press the numbered buttons.
[WMA] [MP3] [JPEG]
e.g. To select 123: [1] ➜ [2] ➜ [3] ➜ [ENTER]
9
RQT7424
Useful functions
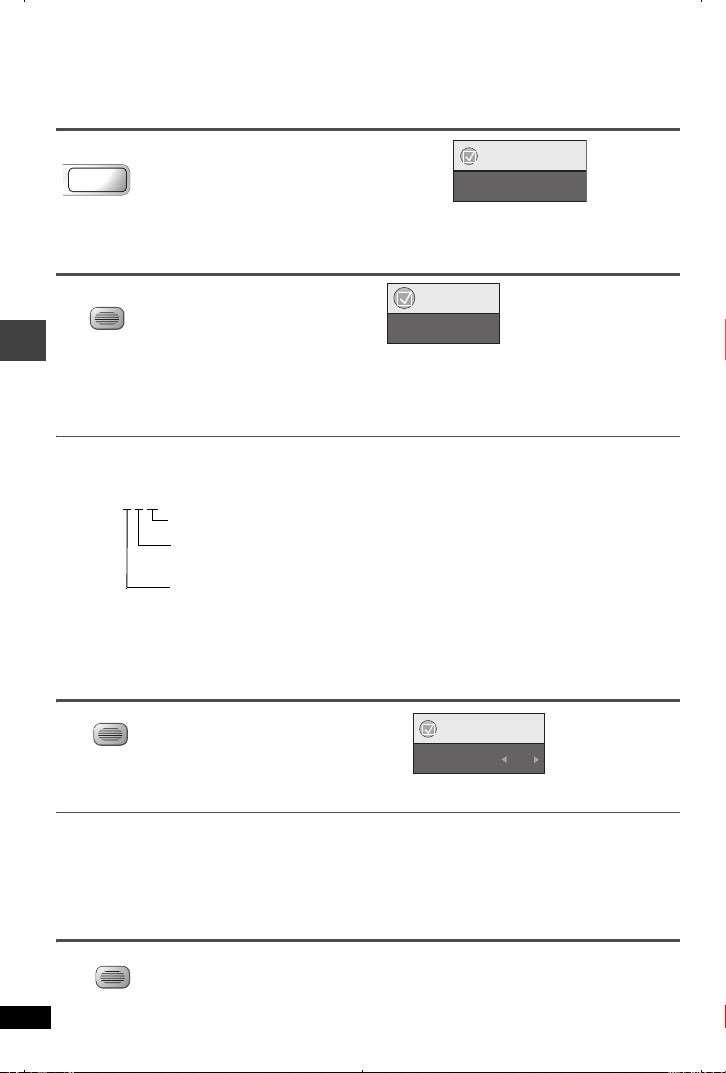
Repeat play
REPEAT
§
Can only be used with discs that show the elapsed time display.
For JPEG, you can use even if there is no elapsed time display.
Press to select the content to
repeat.
Repeat Off
Menu
Audio [RAM] [DVD-A] [DVD-V] [VCD] (For discs recorded with multiple audio)
AUDIO
(Remote control)
[RAM] [VCD]
You can use this button to select “L”, “R” or “L R”.
[DVD-V] (Karaoke discs)
Press [21] to select “On” for “Off” for vocals. Read the disc’s instructions for details.
Press to change.
Signal type/data
LPCM/PPCM/Î Digital/DTS/MPEG: Signal type
kHz (Sampling frequency)/bit/ch (Number of channels)
Example: 3/2 .1ch
Useful functions
.1: Low frequency effect (not displayed if there is no signal)
.0: No surround
1: Mono surround
2: Stereo surround (left/right)
1: Center
2: Front leftiFront right
3: Front leftiFront rightiCenter
Menu
Audio 1
Subtitle [RAM] (On/Off only) [DVD-V] (with multiple subtitles) [VCD] (SVCD only)
SUBTITLE
(Remote control)
To clear/display the subtitles
Press [2 1] to select “On” or “Off”.
[RAM] (Only discs that contain subtitle on/off information)
Subtitle on/off information cannot be recorded using Panasonic DVD Recorders. (Subtitle on/off
information is also not recordable on Panasonic DVD-R finalized with a Panasonic DVD Recorder.)
Press to change.
Menu
Subtitle
Off
Angle select and Still picture rotation
ANGLE
(Remote control)
10
RQT7424
[DVD-V] (with multiple angles)–Angle select
[JPEG] –Still picture rotation
 Loading...