How it Works
Log In / Sign Up
Buy Points
How it Works
FAQ
Contact Us
Questions and Suggestions
Users
PANASONIC
Loading...
D
DMRBST765EG
DMRBW780EB
DMRBW880EB
DMRBWT640EC9
DMRBWT700EB
DMRBWT745EC9
DMRE30EB
2
DMRE30EB1
DMRE30EG1
DMRE30GCS
DMRE30GH
DMRE30GN
DMRE3EG
DMRE-53-EG
2
DMRE-55-EB
3
DMRE-55-EBL
2
DMRE-55-EE
DMRE-55-EG
2
DMRE-55-EP
DMRE-55-GC
DMRE-55-GCS
DMRE-55-GN
DMREH-55-EC
DMREH-55-EP
DMREH-55-XX
DMREH-56-EG
DMREH-57-GN
DMREH-685-EG
DMREH-68-EC
DMREH-68-EP
DMREH76
2
DMREH76EC
DMRES-10-EB
DMRES-10-EBL
DMRES-10-EC
DMRES-10-EG
DMRES10EP
2
DMRES-18-EE
DMRES-18-GC
DMRES-18-GCA
DMRES-18-GCS
DMRES-35-VEC
DMRES-35-VEG
DMRES-40-VP
DMRES-40-VPS
DMRES-45-VP
DMRES-46-VP
DMREX773
6
DMREX86
2
DMREX89EB
DMREX-95-VEG
DMREX96C
DMREX99V
5
DMREZ-475-VP
DMREZ-47-VP
DMRHWT130
DMRPWT420EB
DMRPWT500EC
2
DMRPWT535EC9
DMRUBC80
2
DMRUBC80EG
DMRUBC86
2
DMRUBC90
3
DMRUBC90EG
DMRUBS80
2
DMRUBS90
3
DMRXW350
2
DMRXW380EB
DMW-AC10E
DMW-AC5
DMW-AVC1
DMW-BGG1E
DMW-BGG1PP
DMW-BGGH5
3
DMW-BTC10
DMW-CHFX30E
DMW-CHTZ3E
DMW-CLZ5E
DMW-CS5E-K
DMW-CT3E-K
DMW-CXA1E-A
DMW-CXA1E-K
DMW-CXA1E-R
DMW-CXA1E-T
DMW-CZH7E
DMW-CZS7E
2
DMW-DCC12
DMW-DCC5
DMW-FA1
DMW-FA1GU
DMW-FL200L
7
DMW-FL200LE
3
DMW-FL200LGK
DMW-FL200LPP
DMW-FL220
3
DMW-FL28
DMW-FL28PP
DMW-FL360
5
DMW-FL360E
3
DMW-FL360GK
Loading...
Loading...
Nothing found
DMREX89EB
User Manual
100 pgs
18.03 Mb
0
Table of contents
Loading...
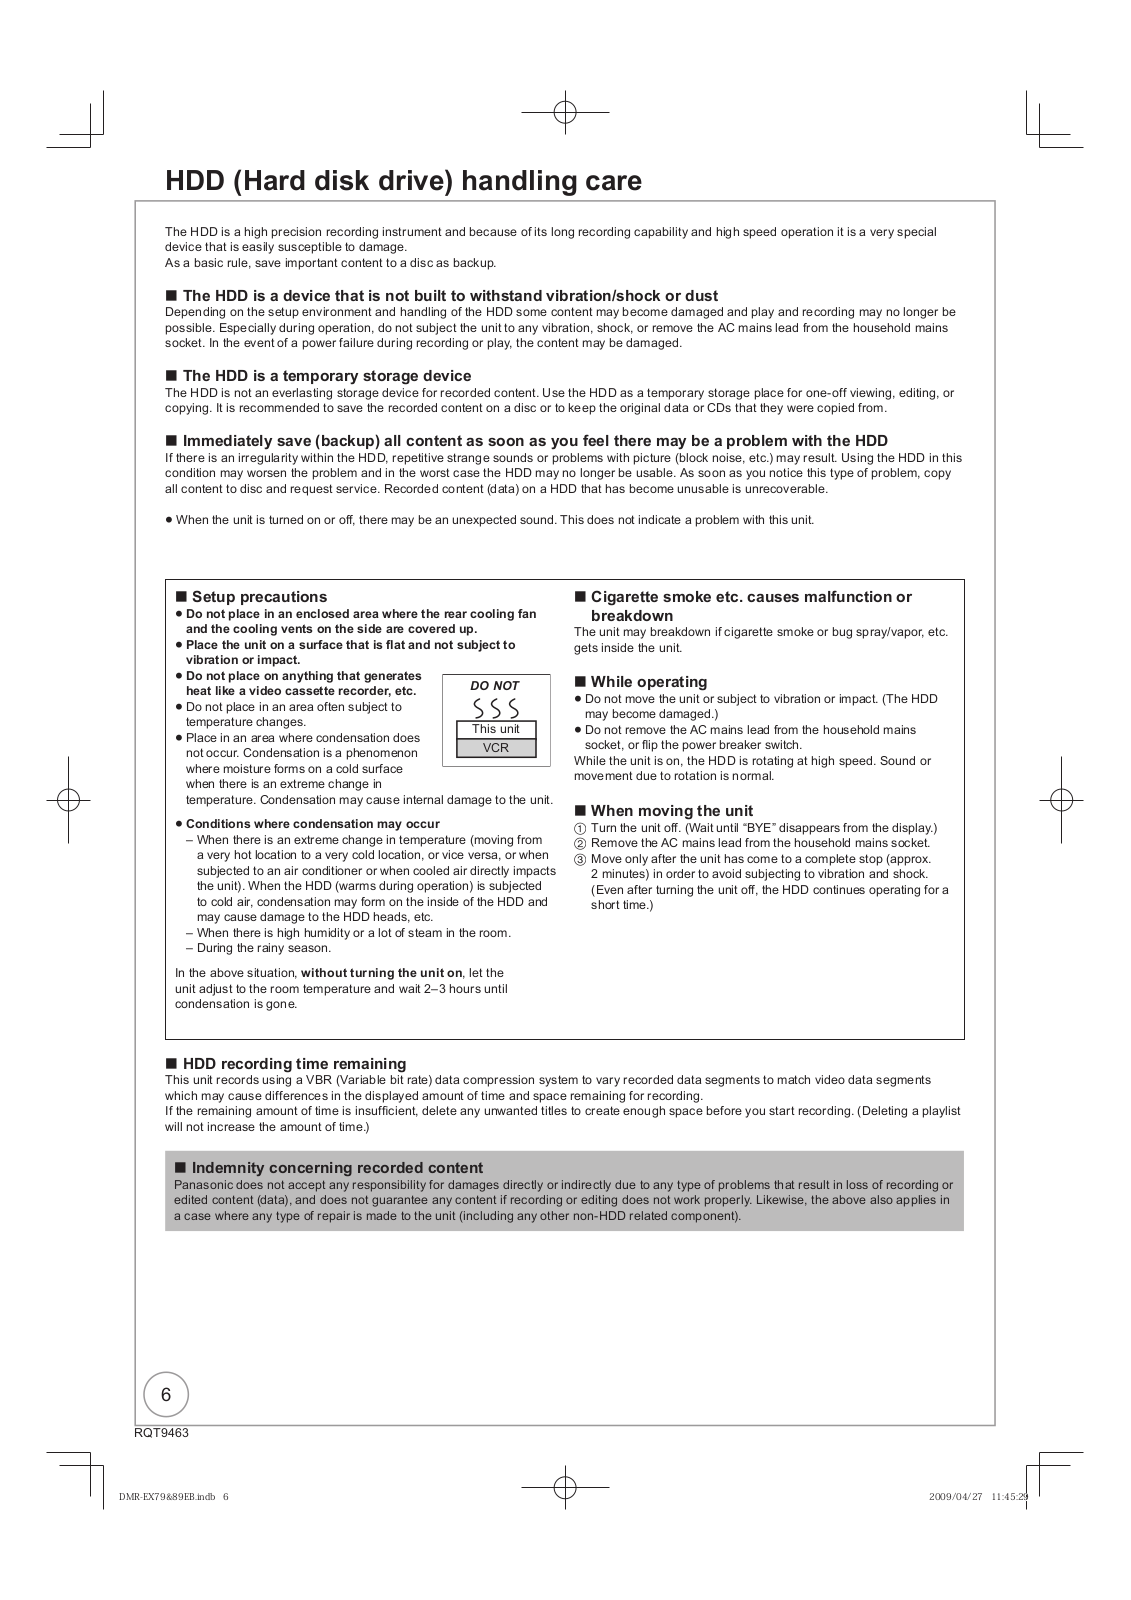
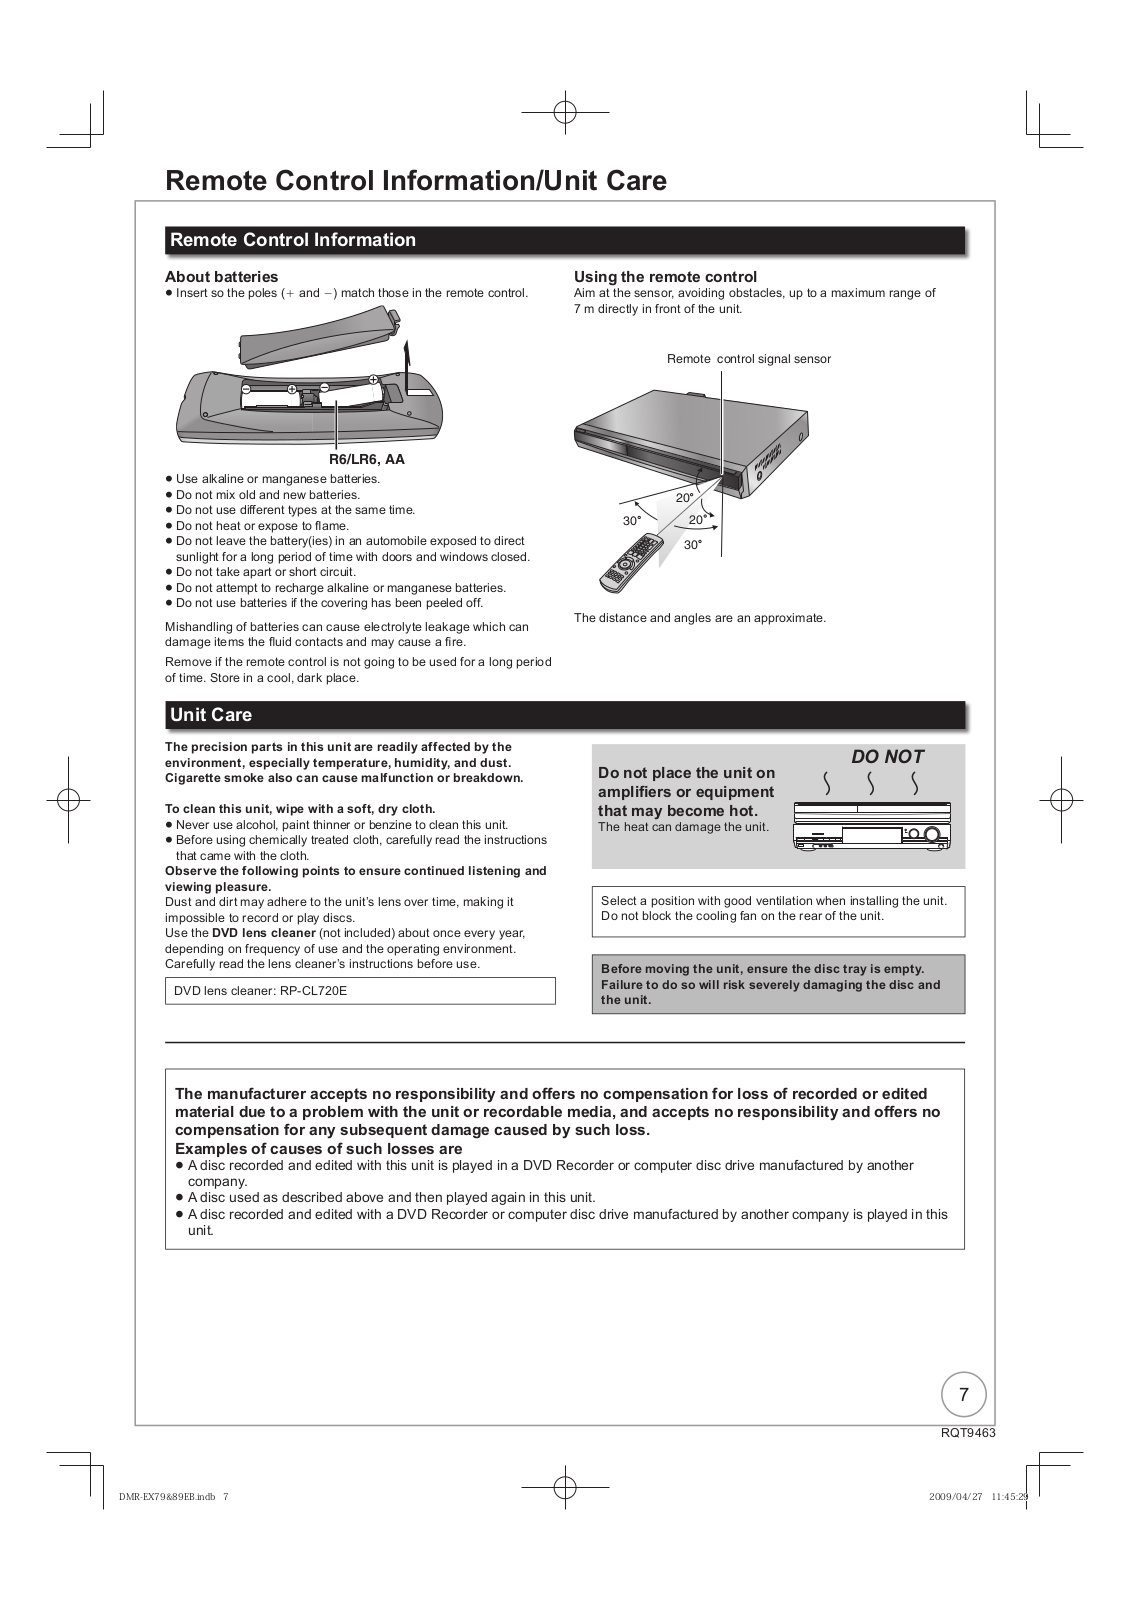
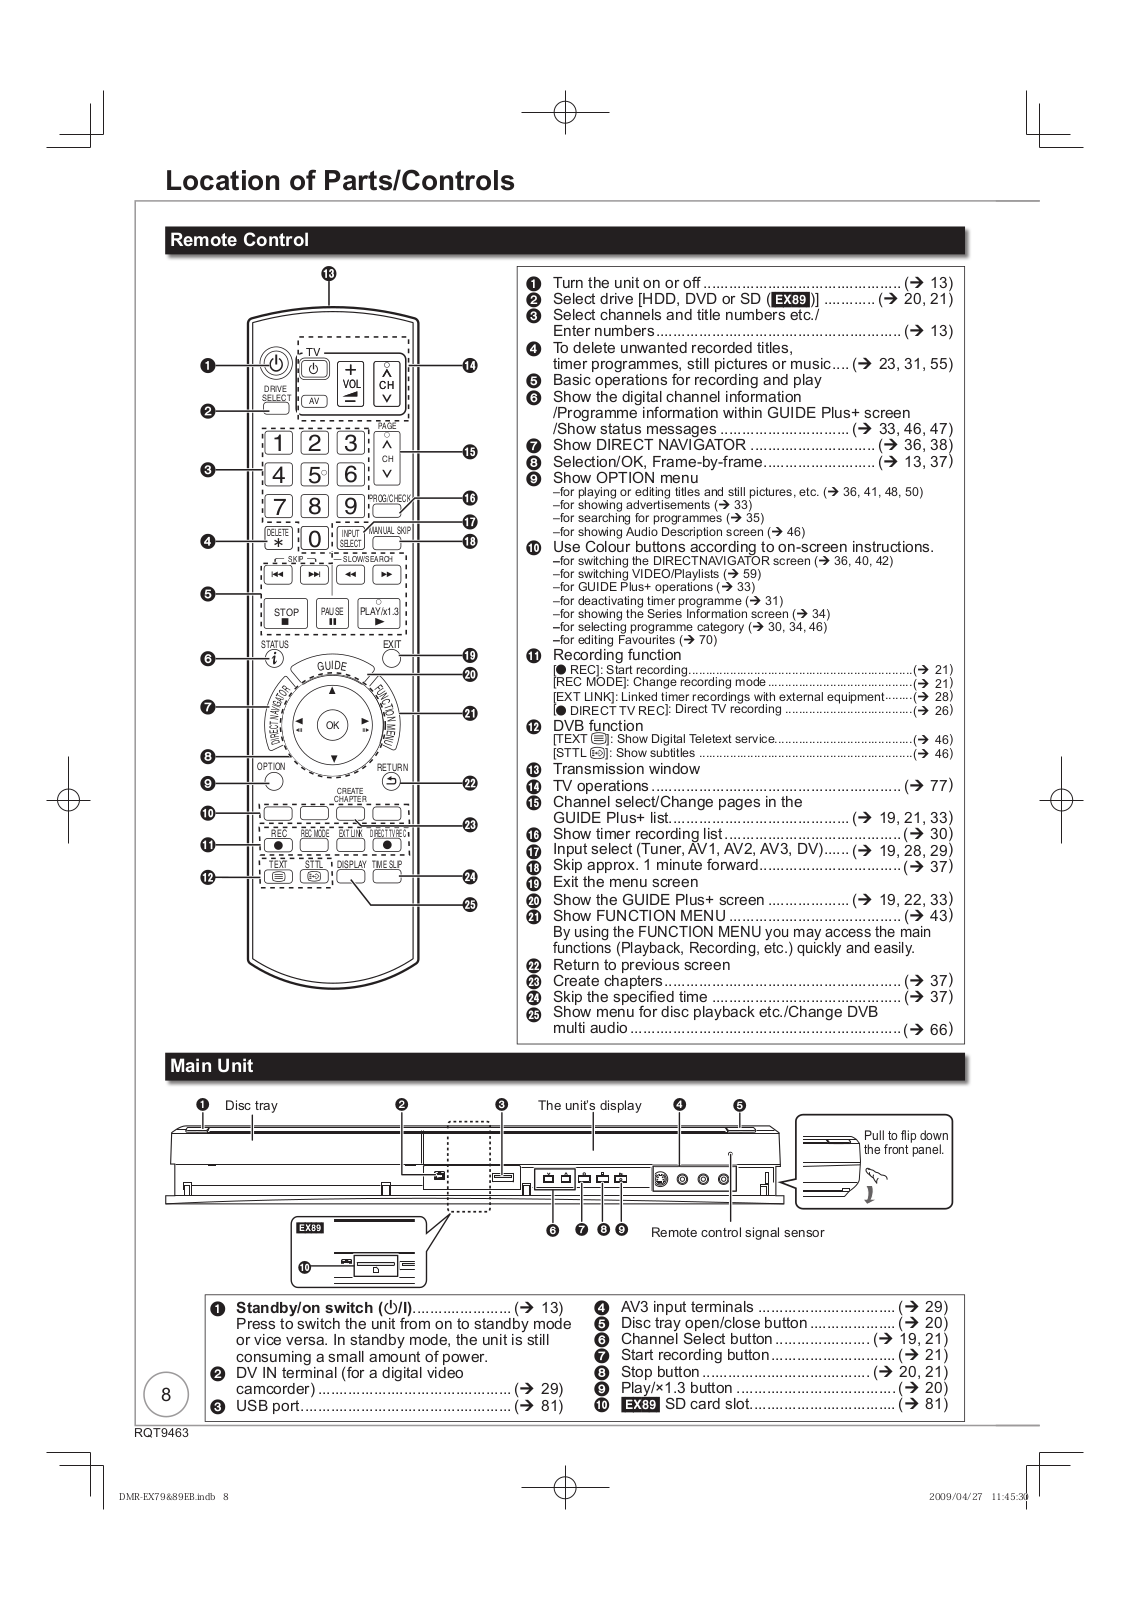
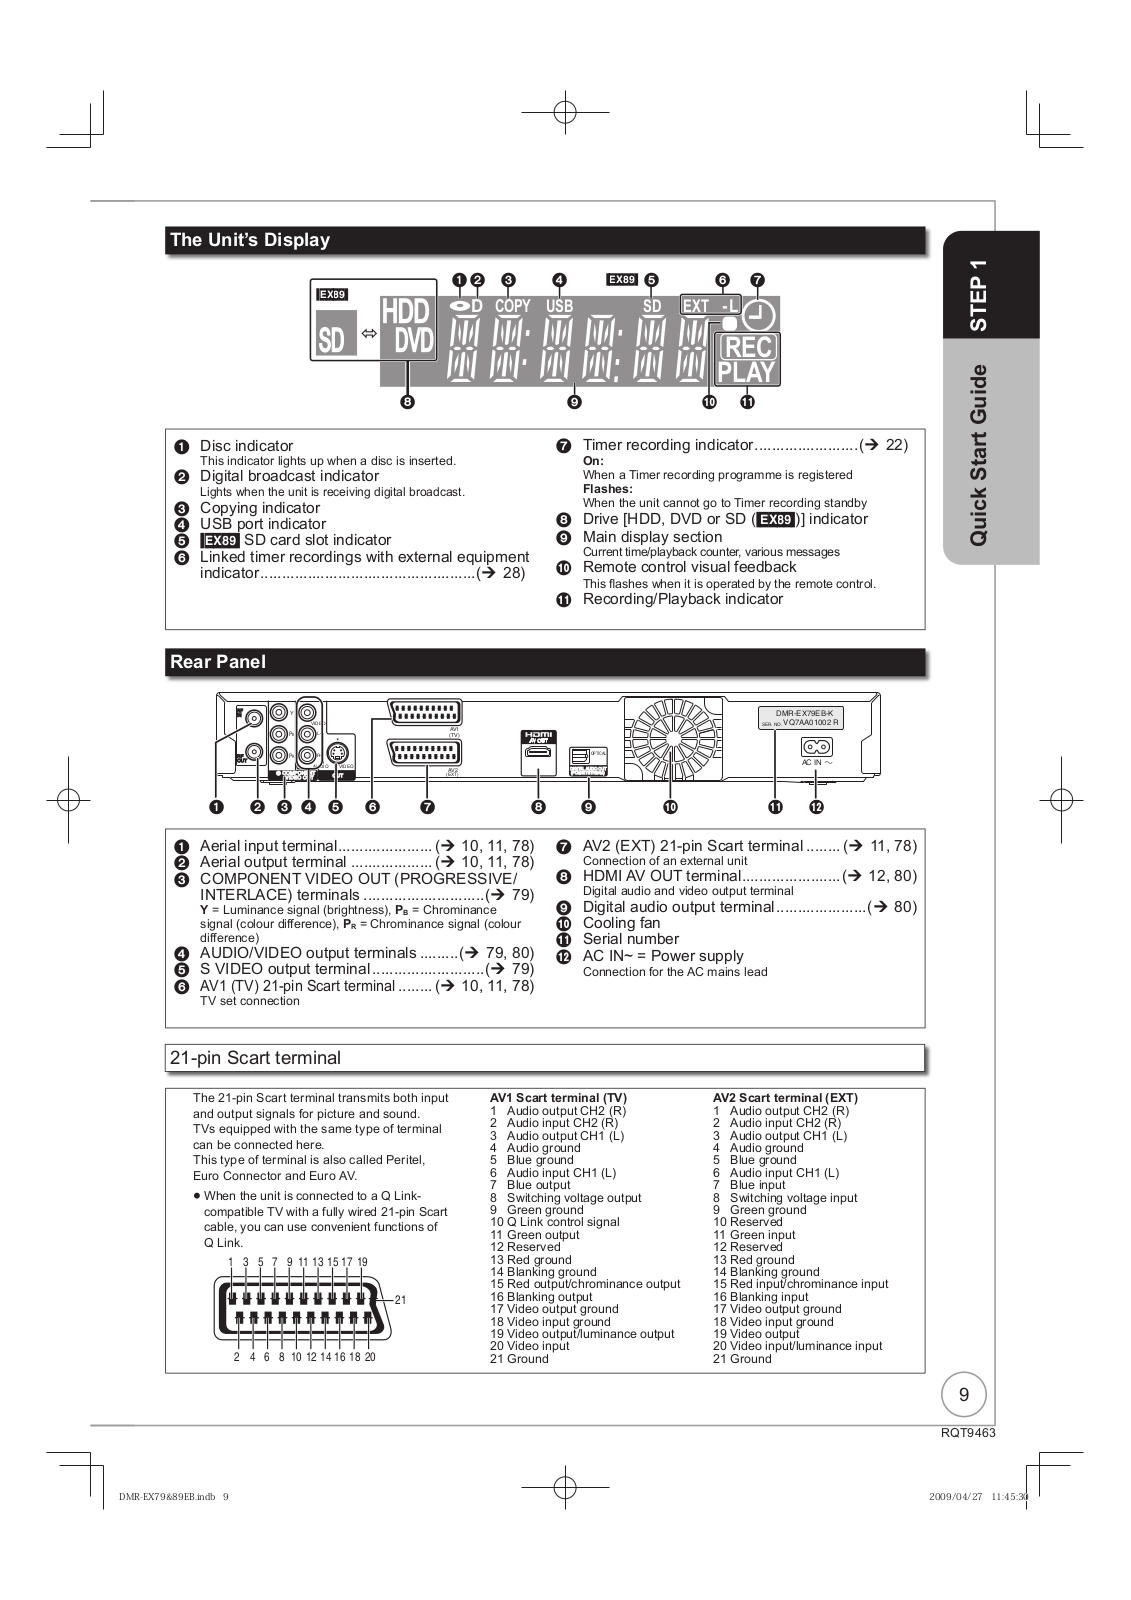
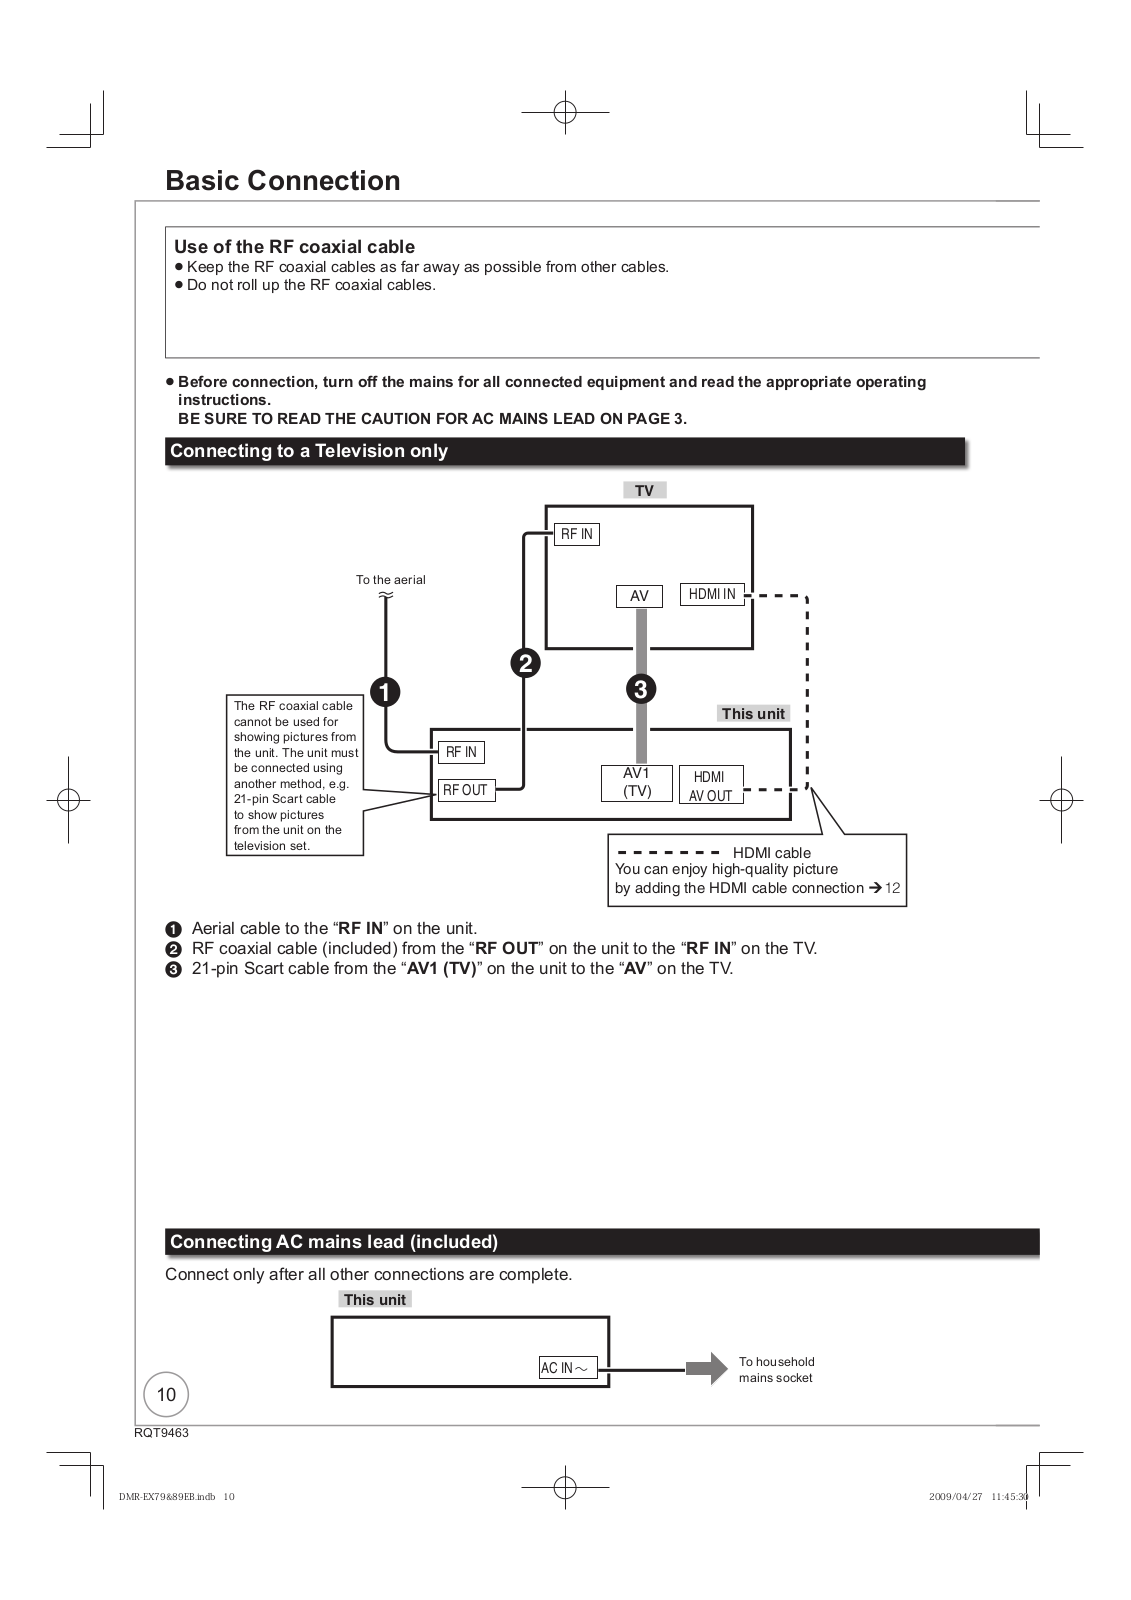
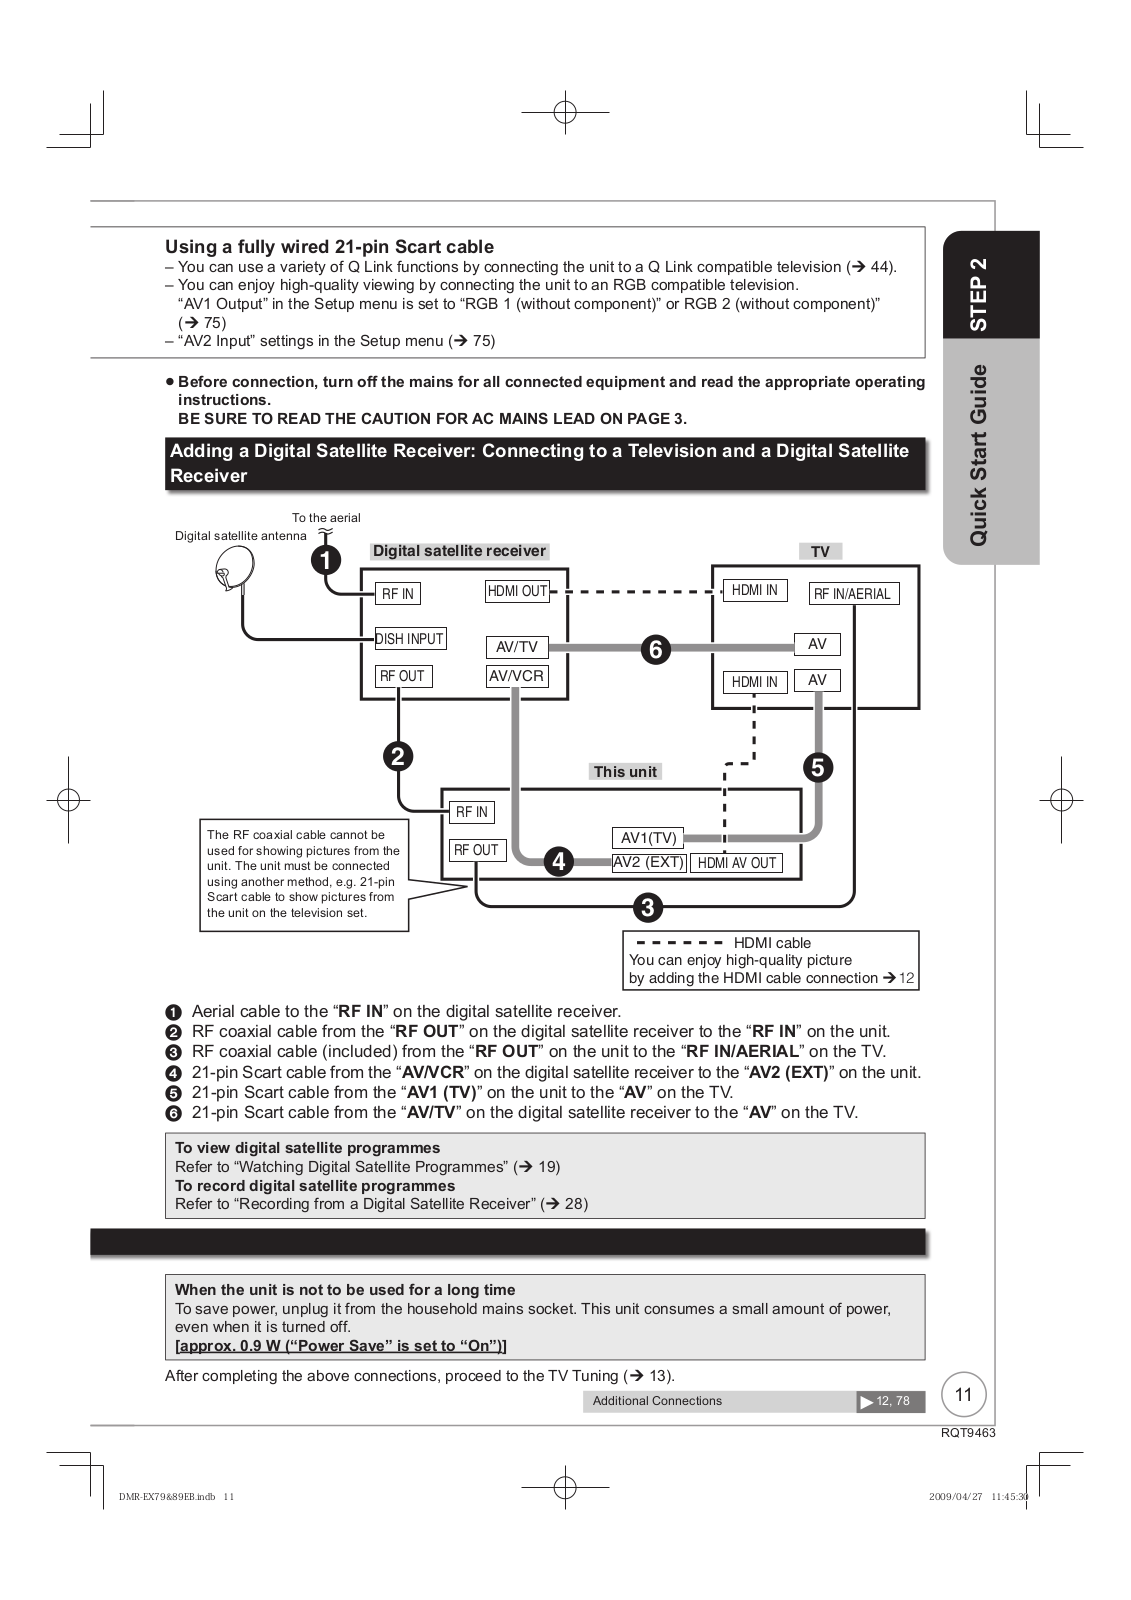
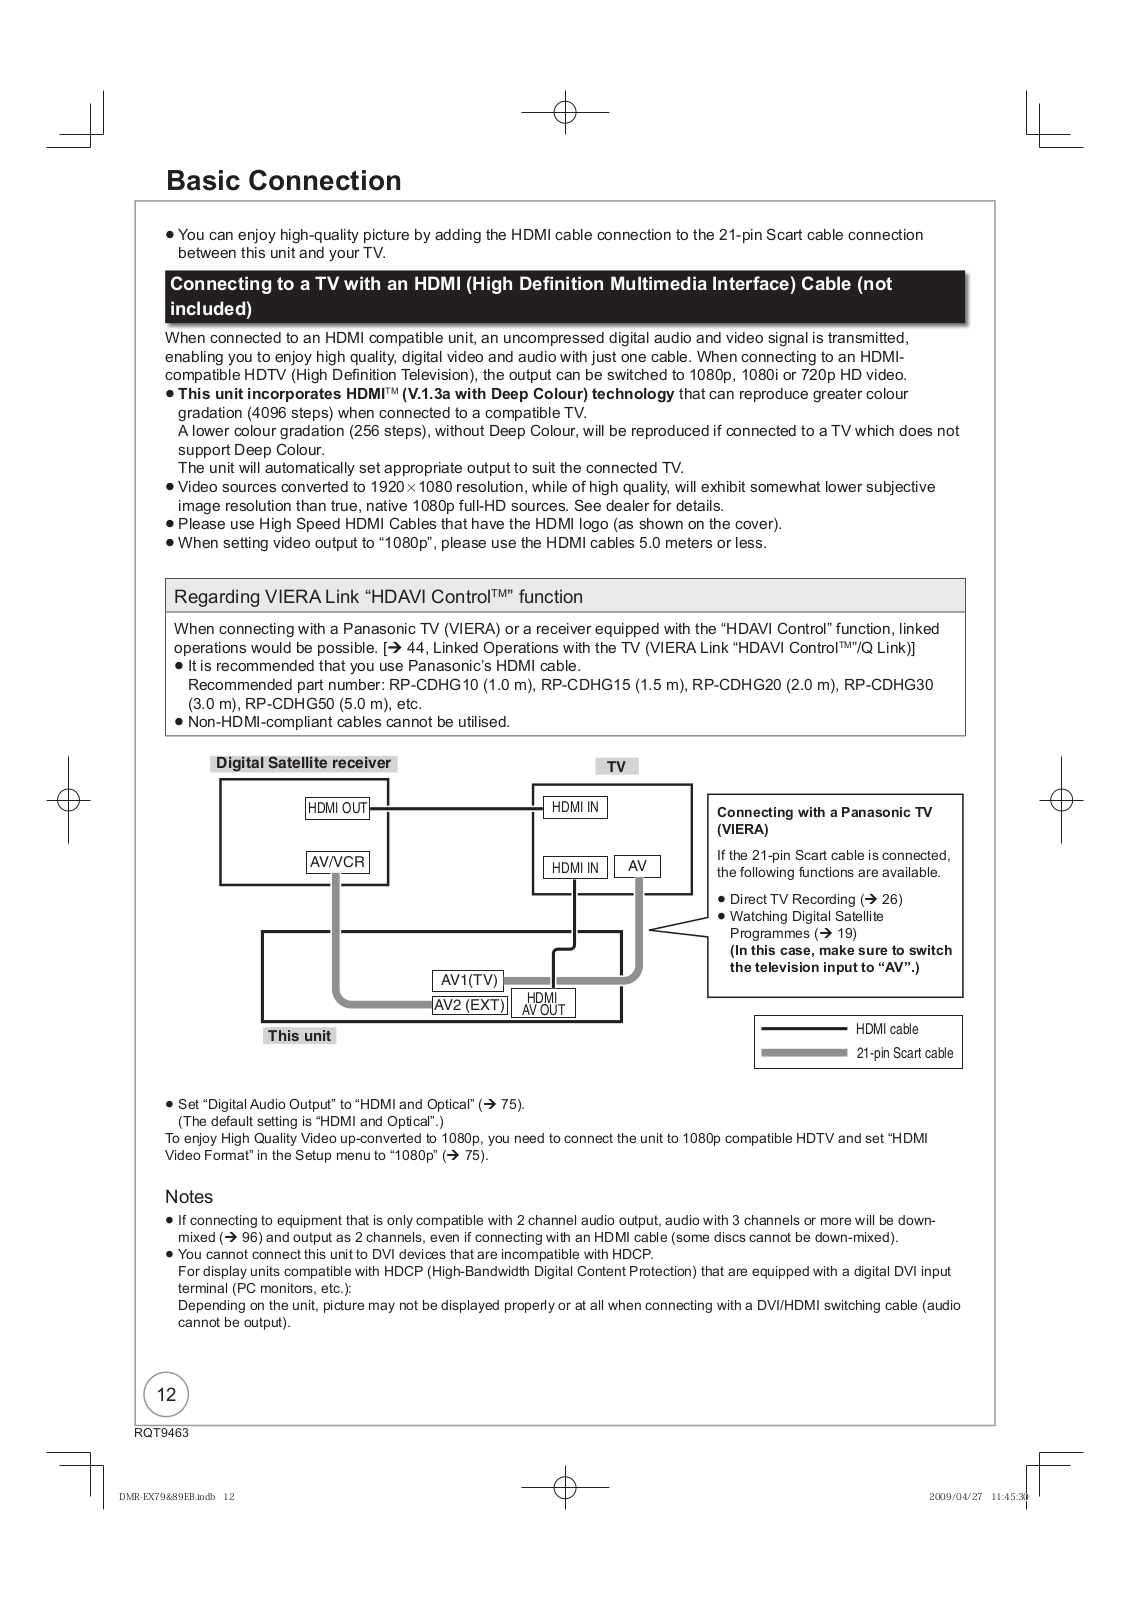
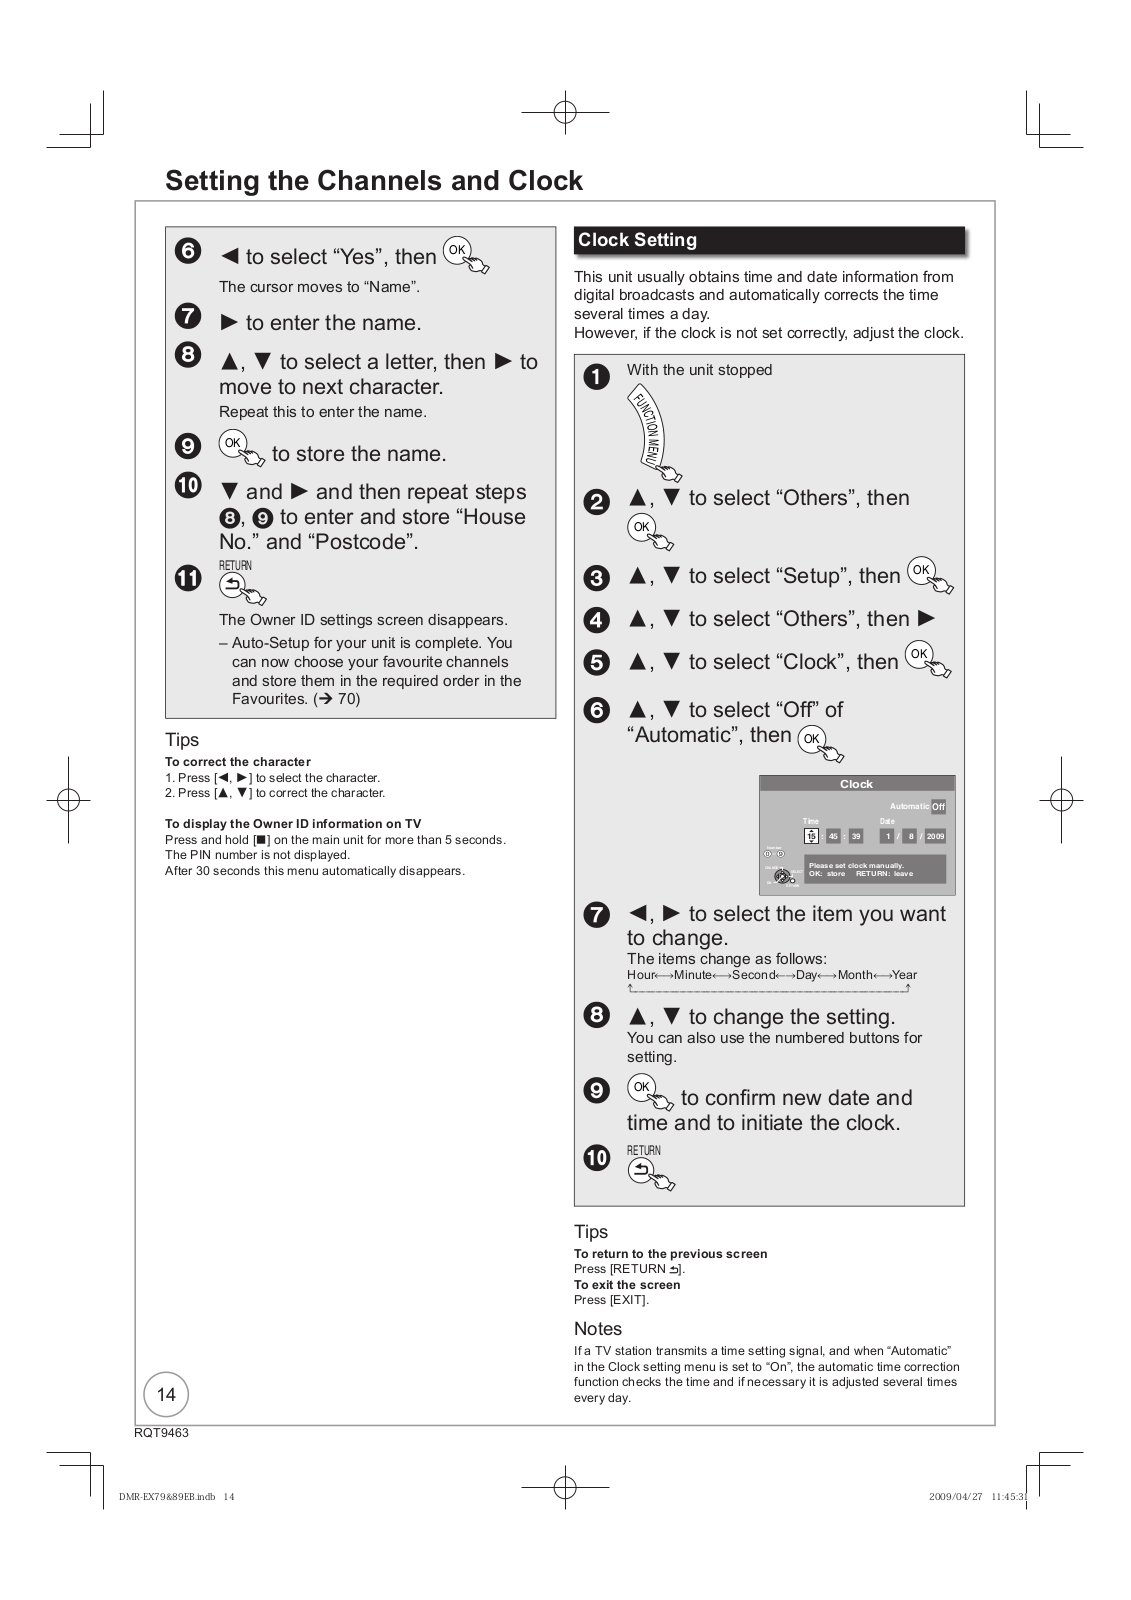
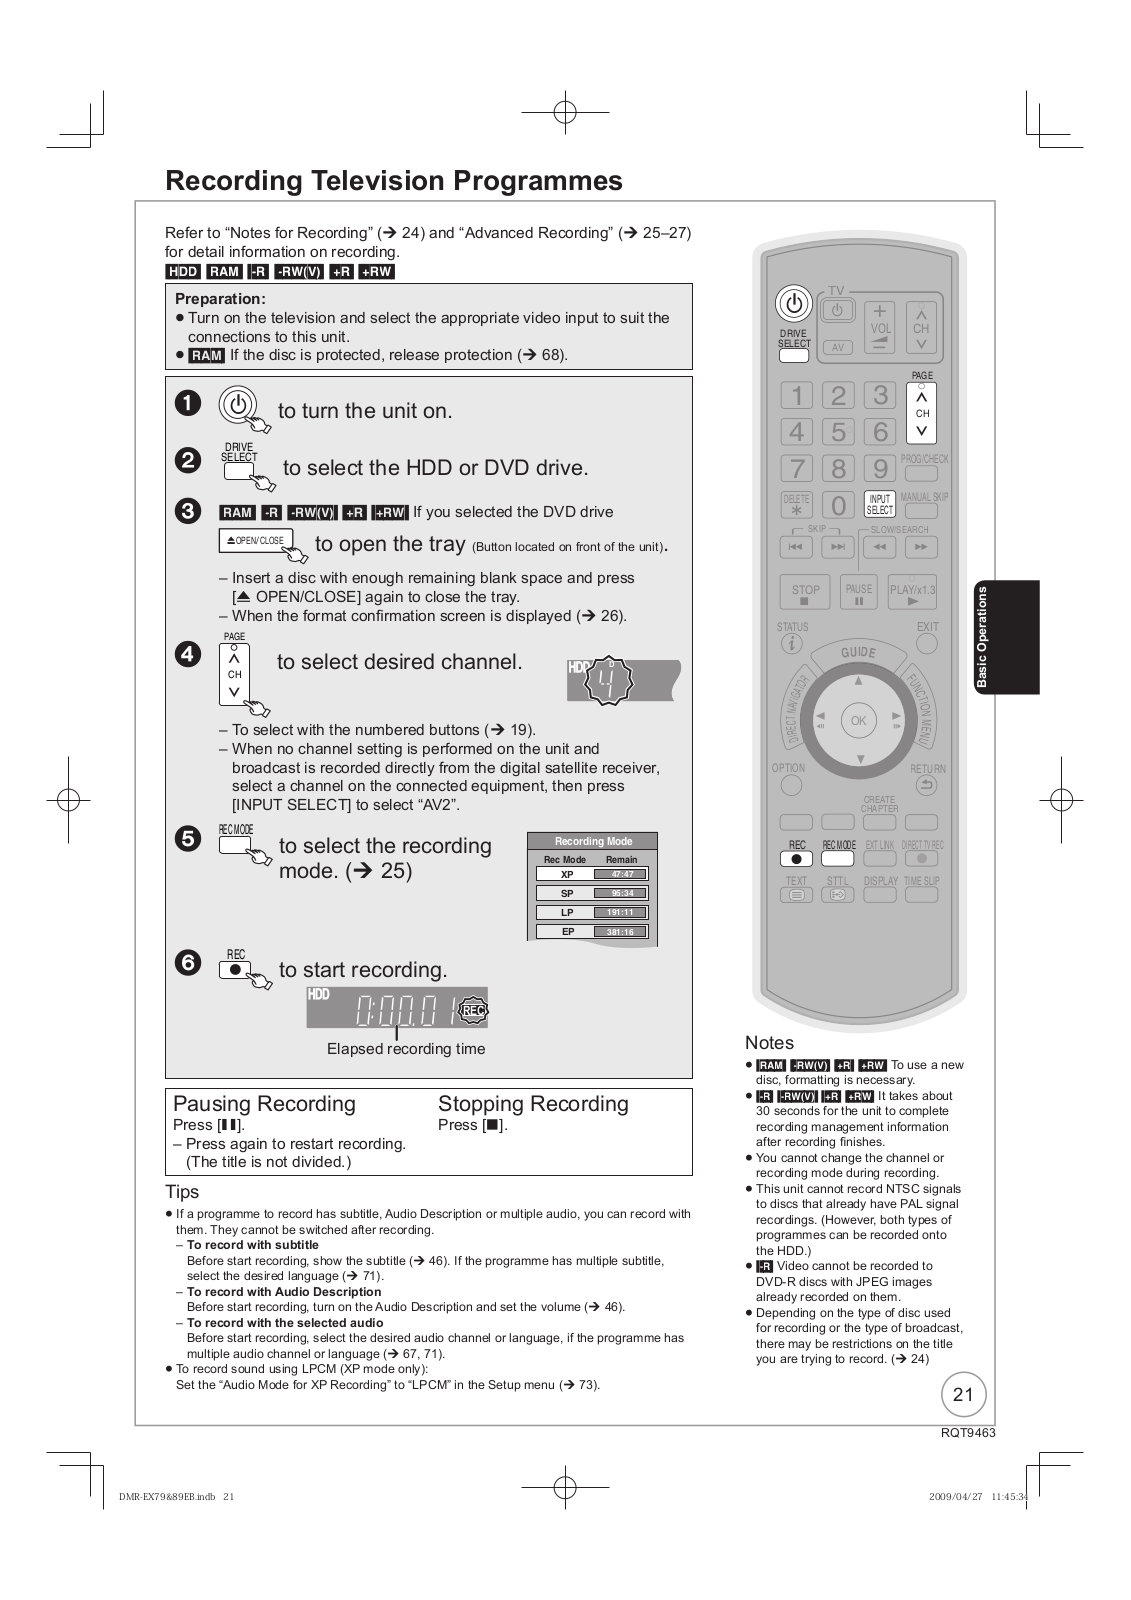
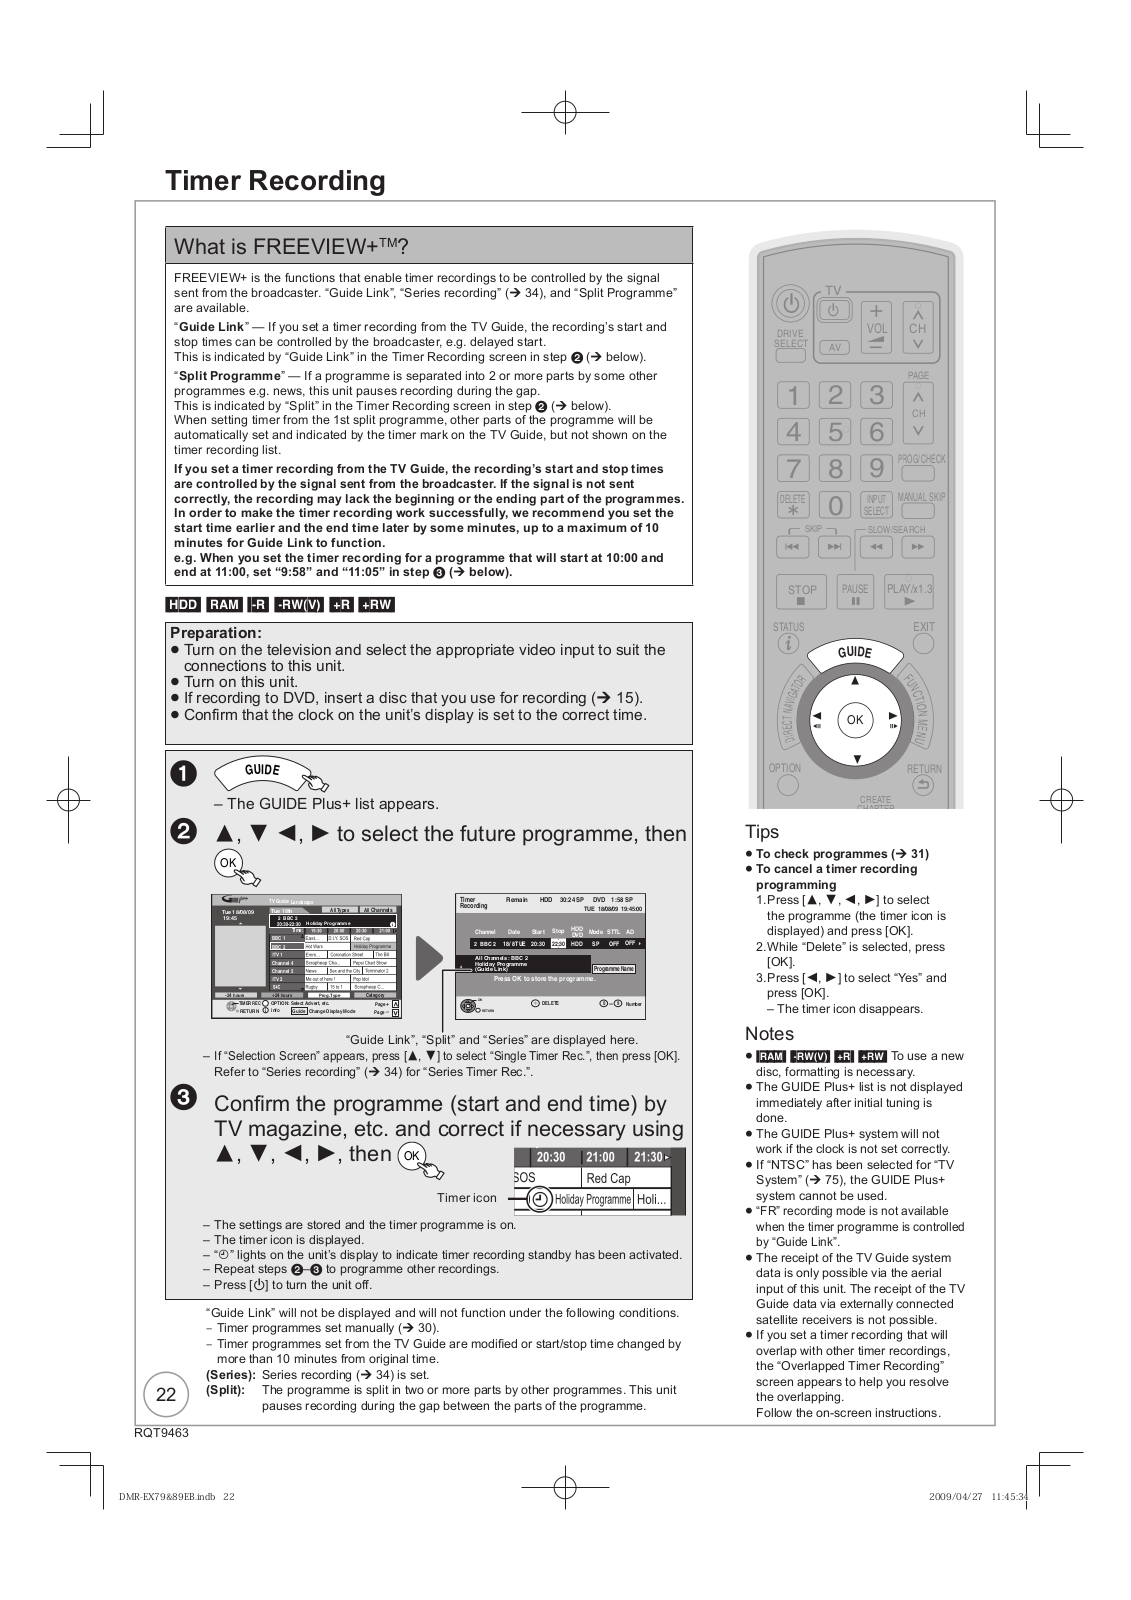
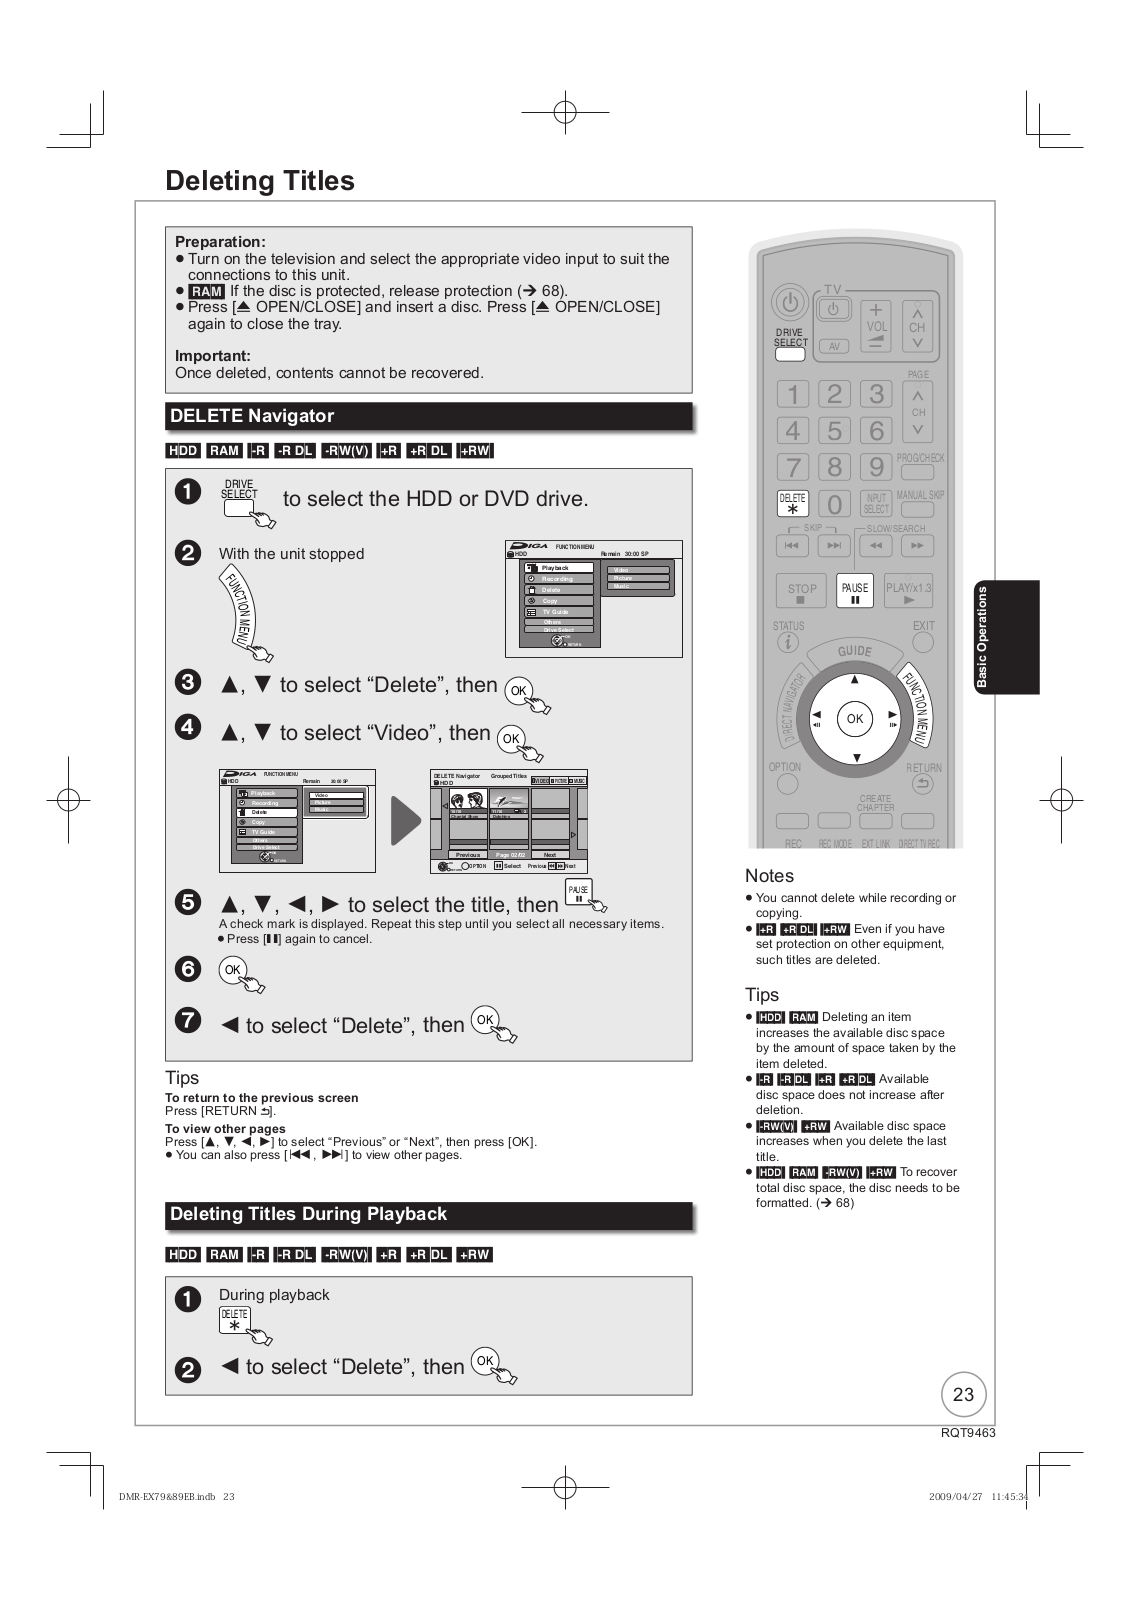
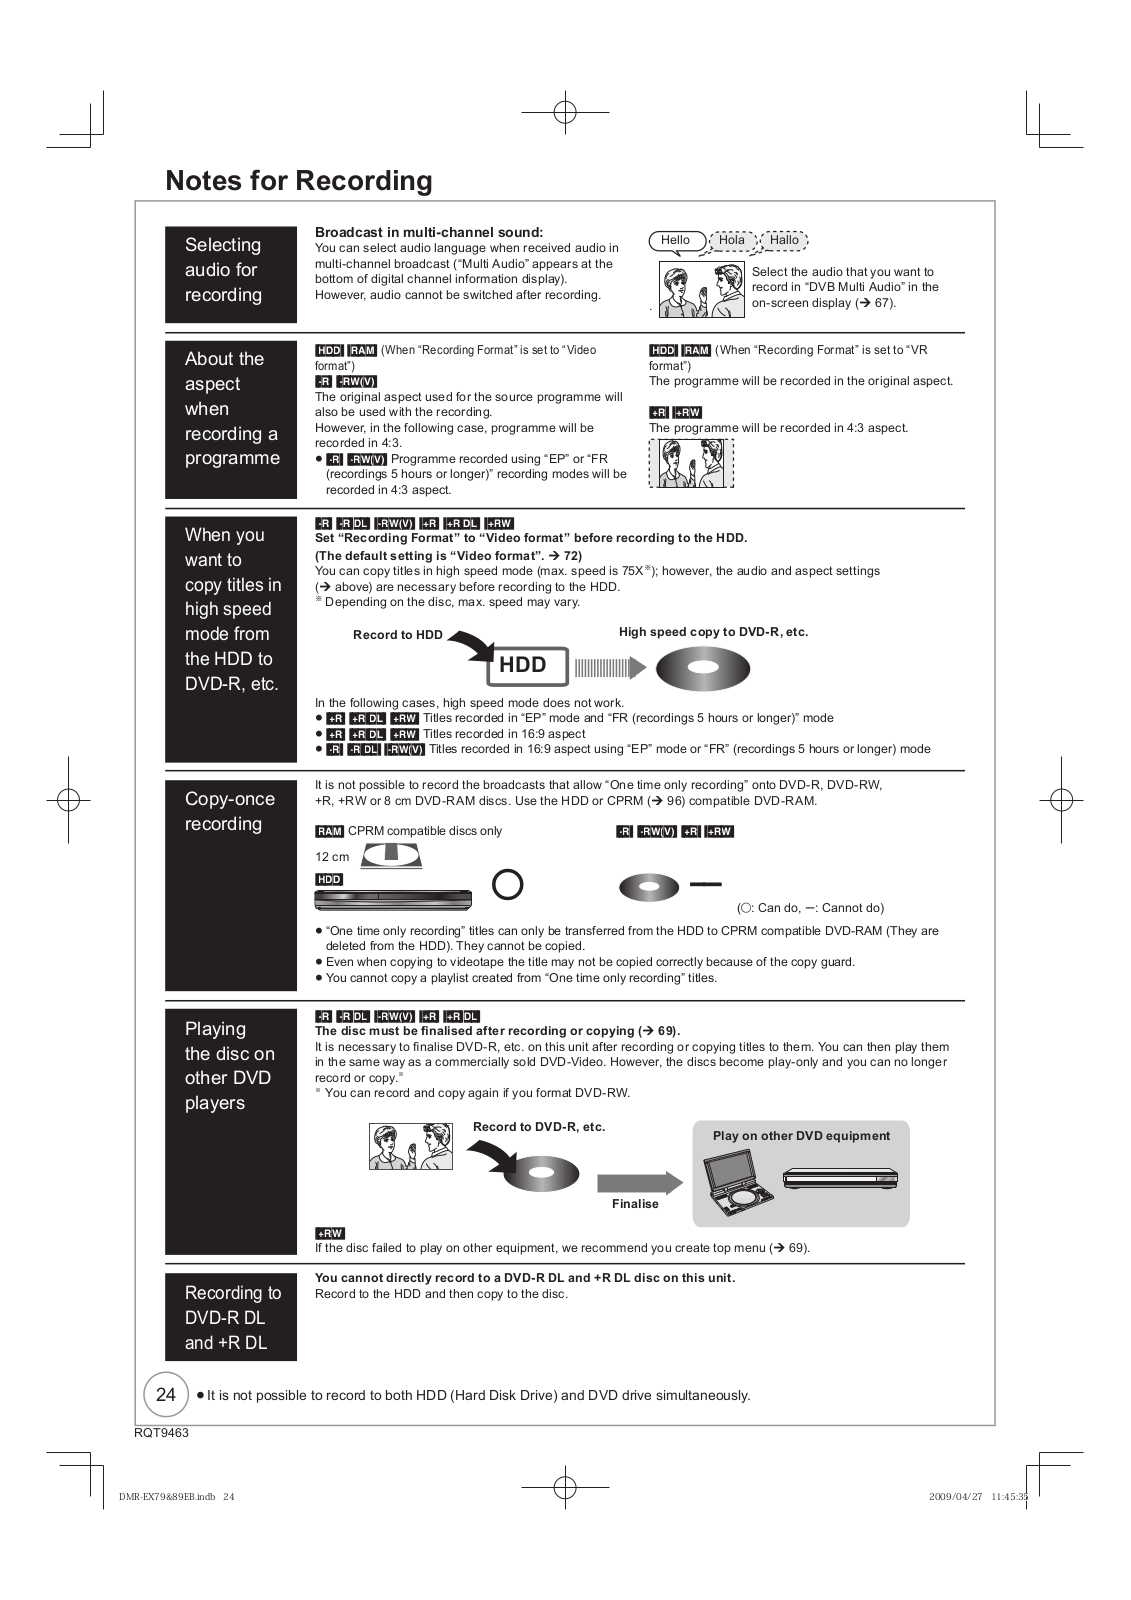
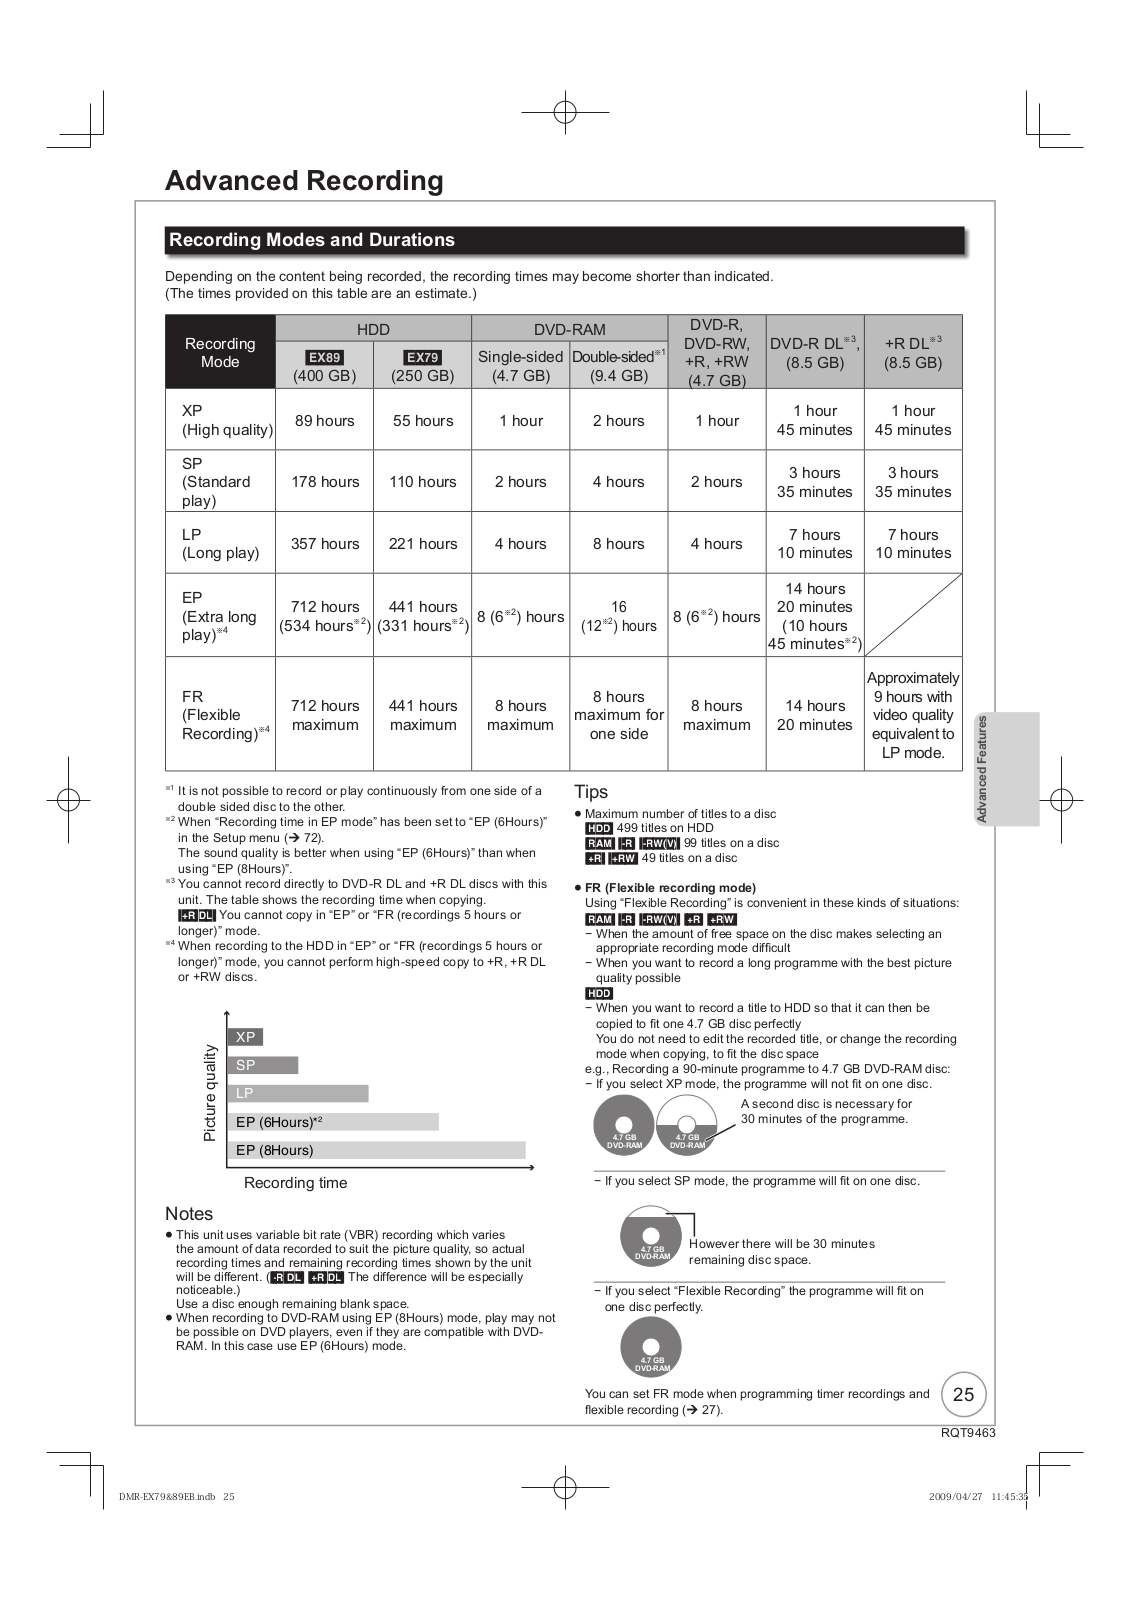
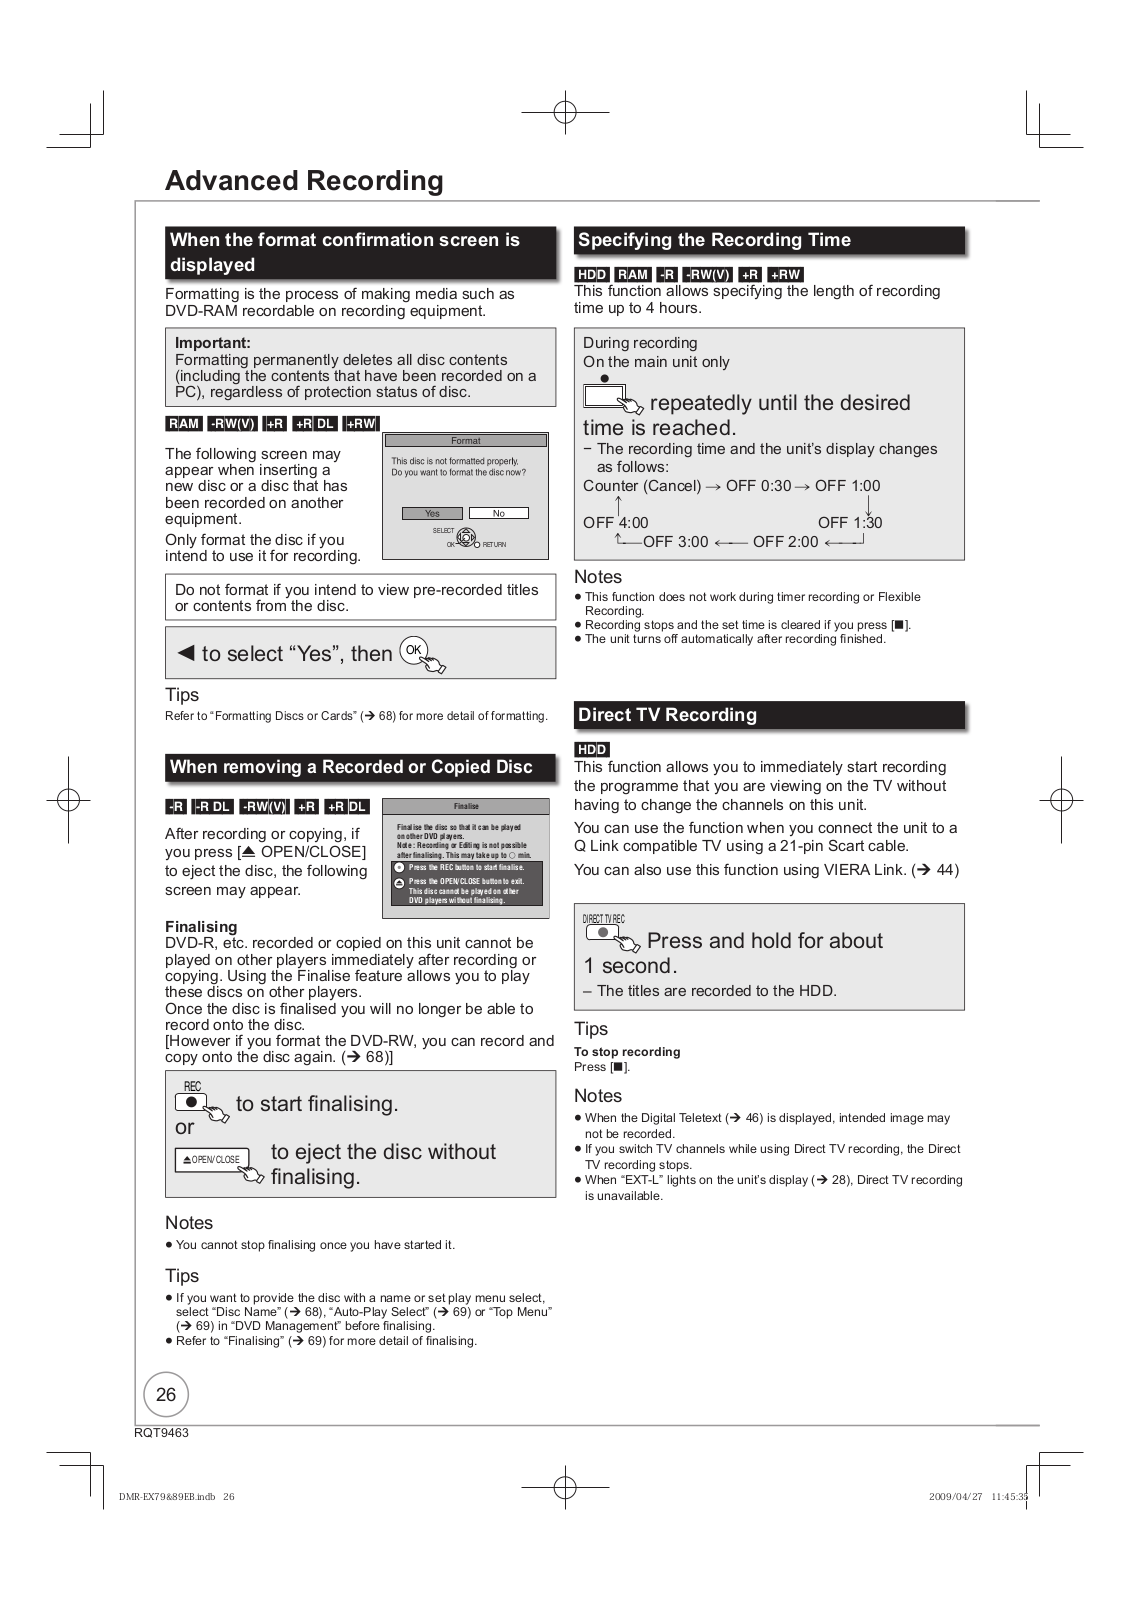
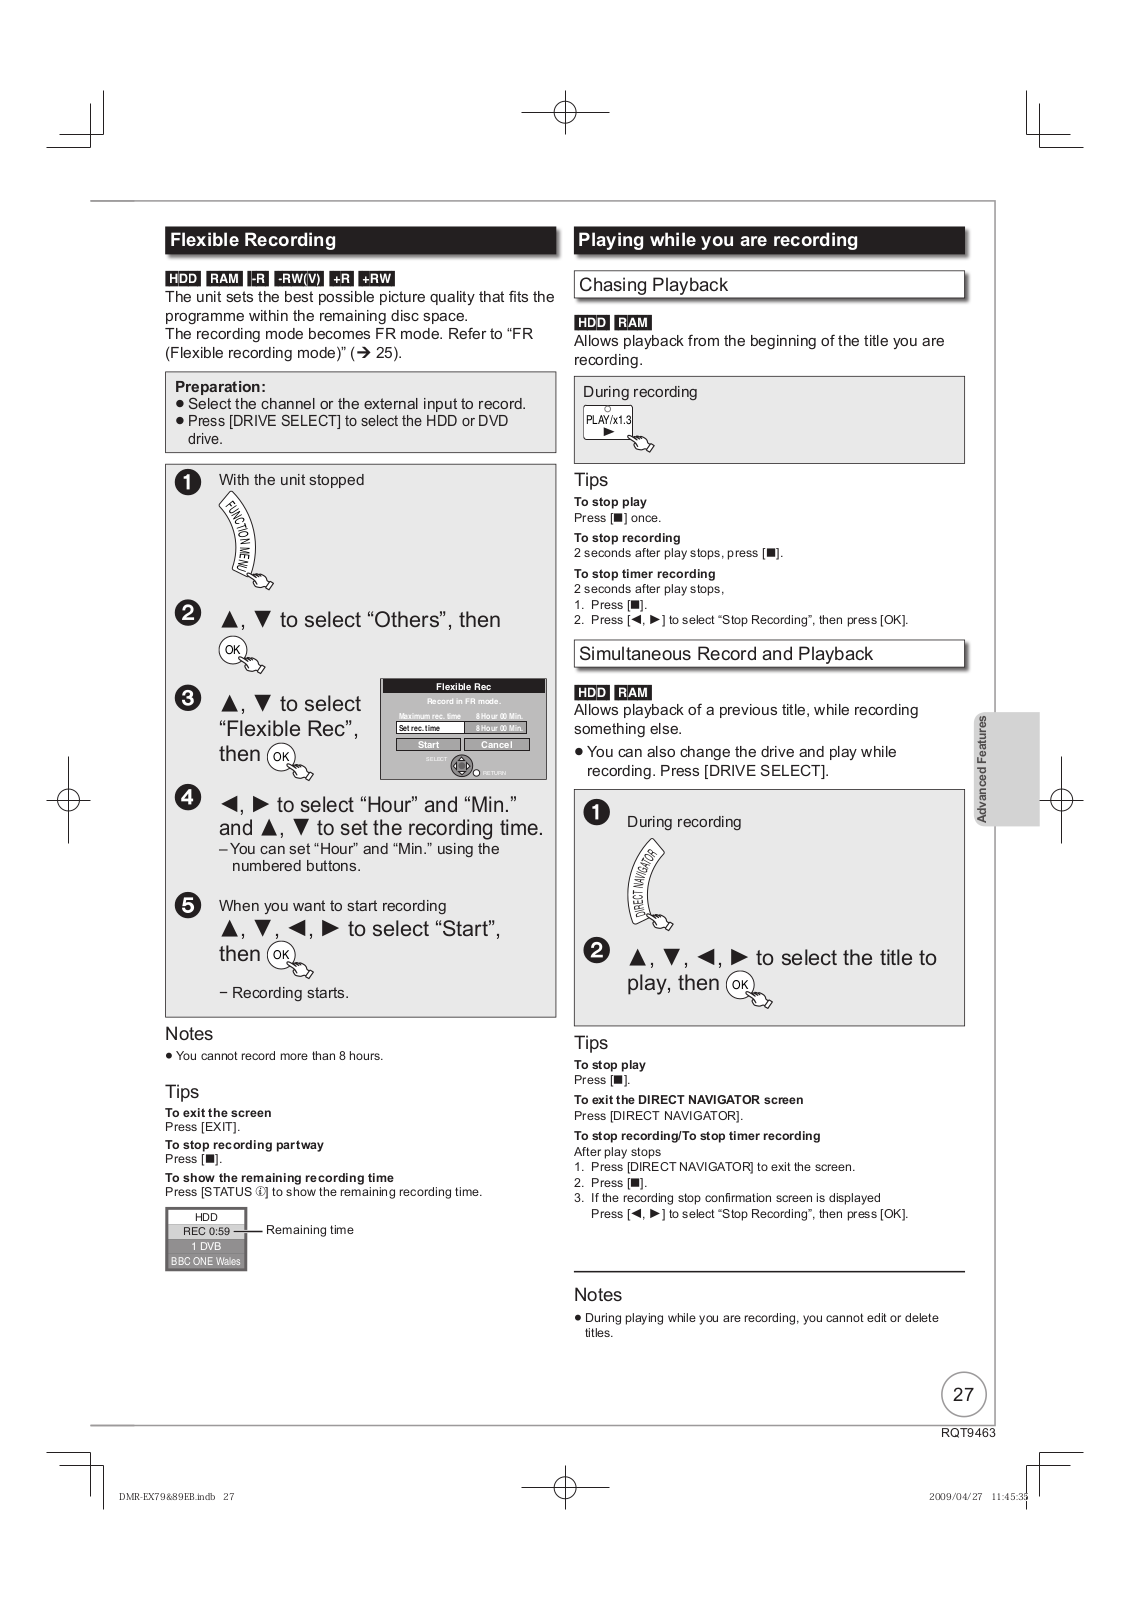
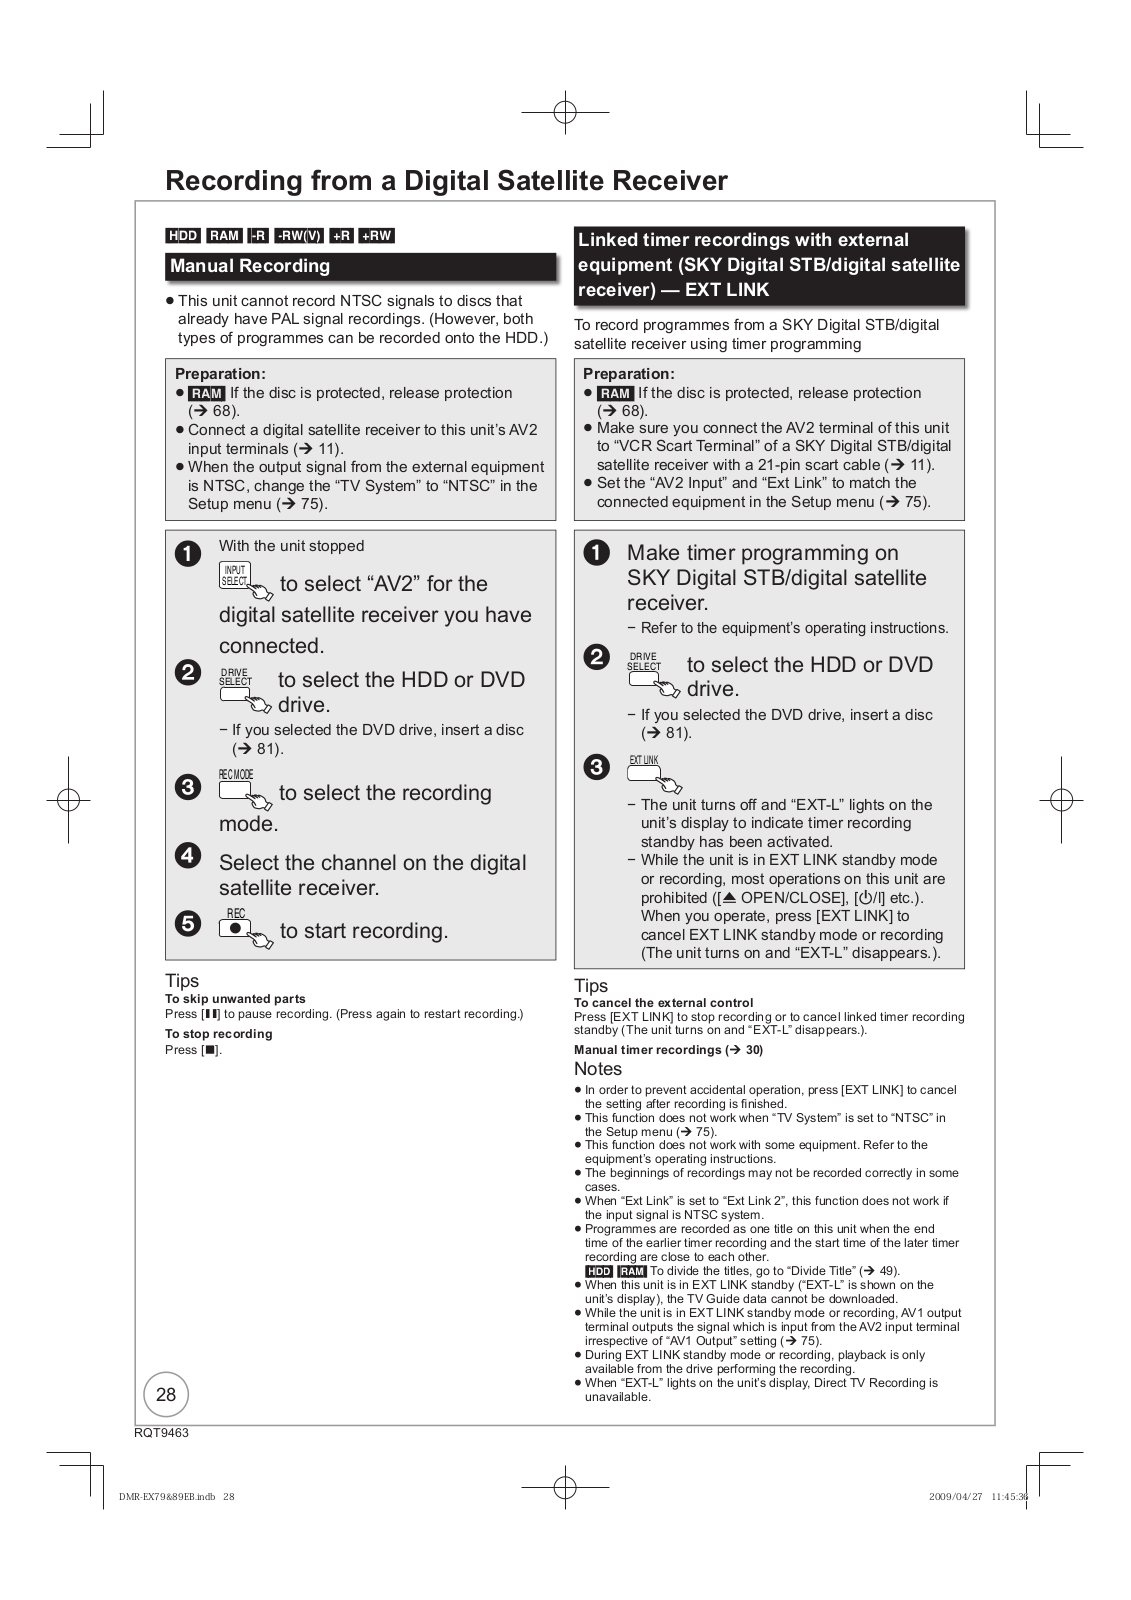
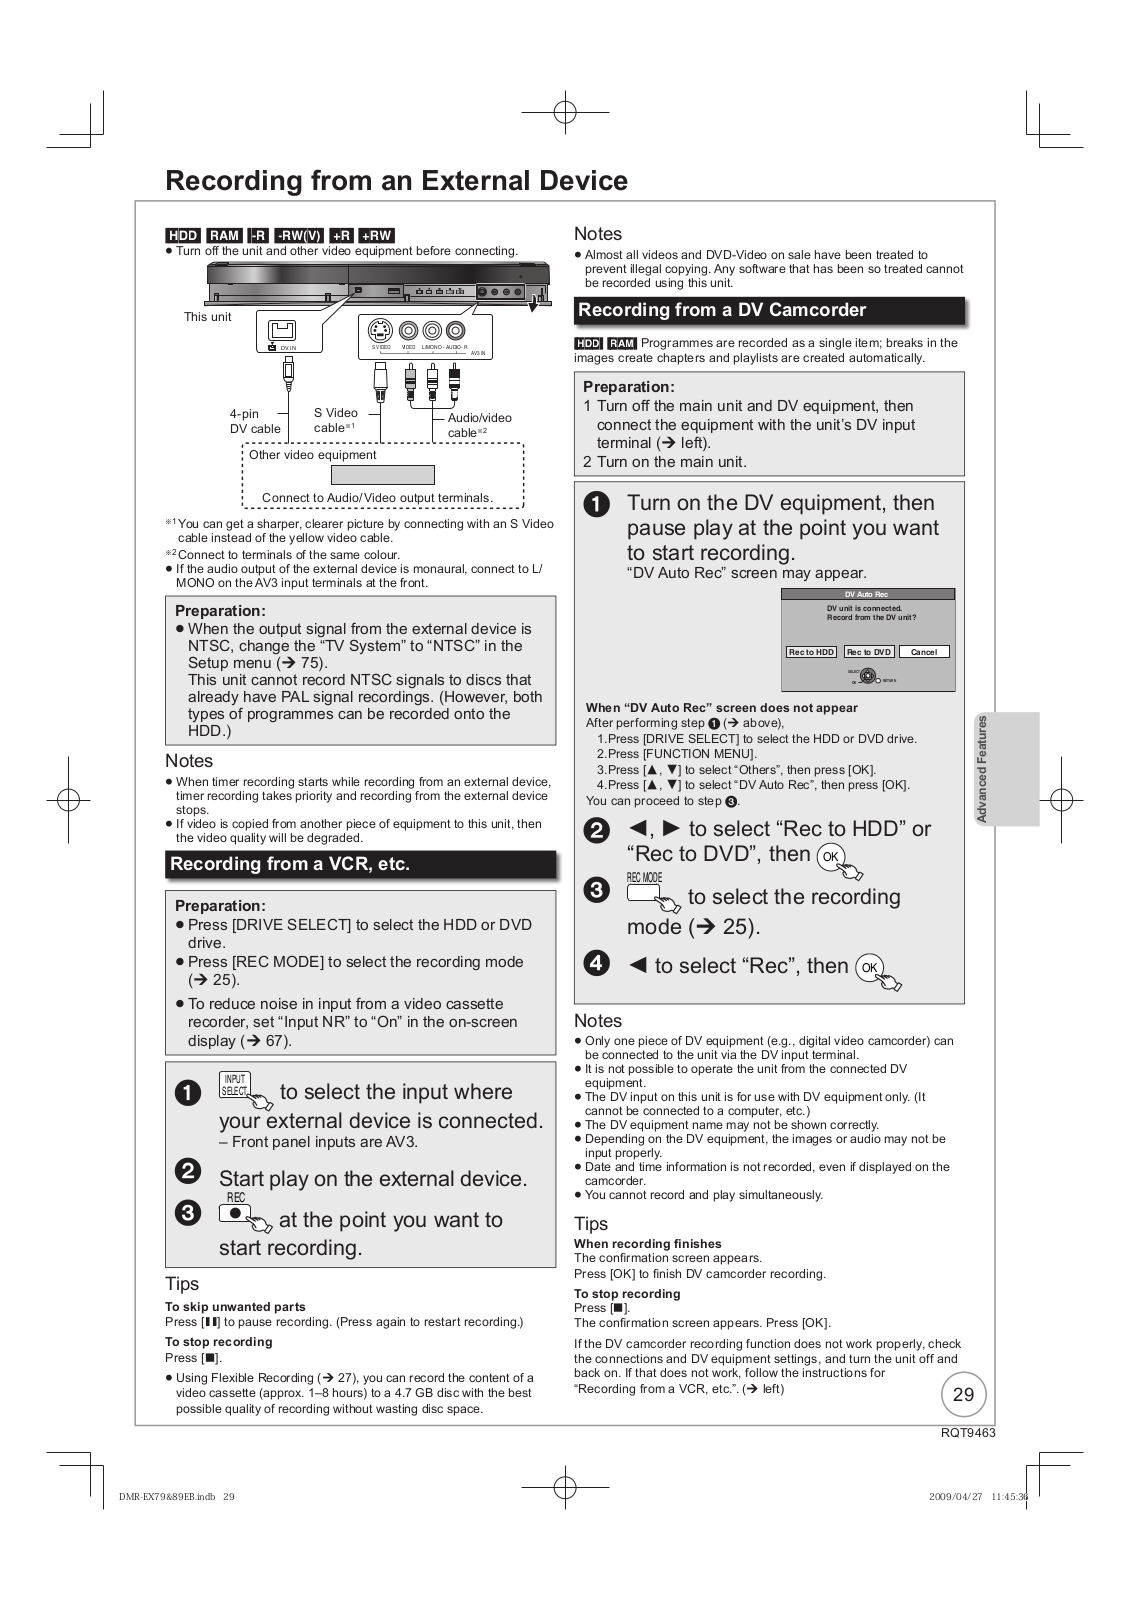
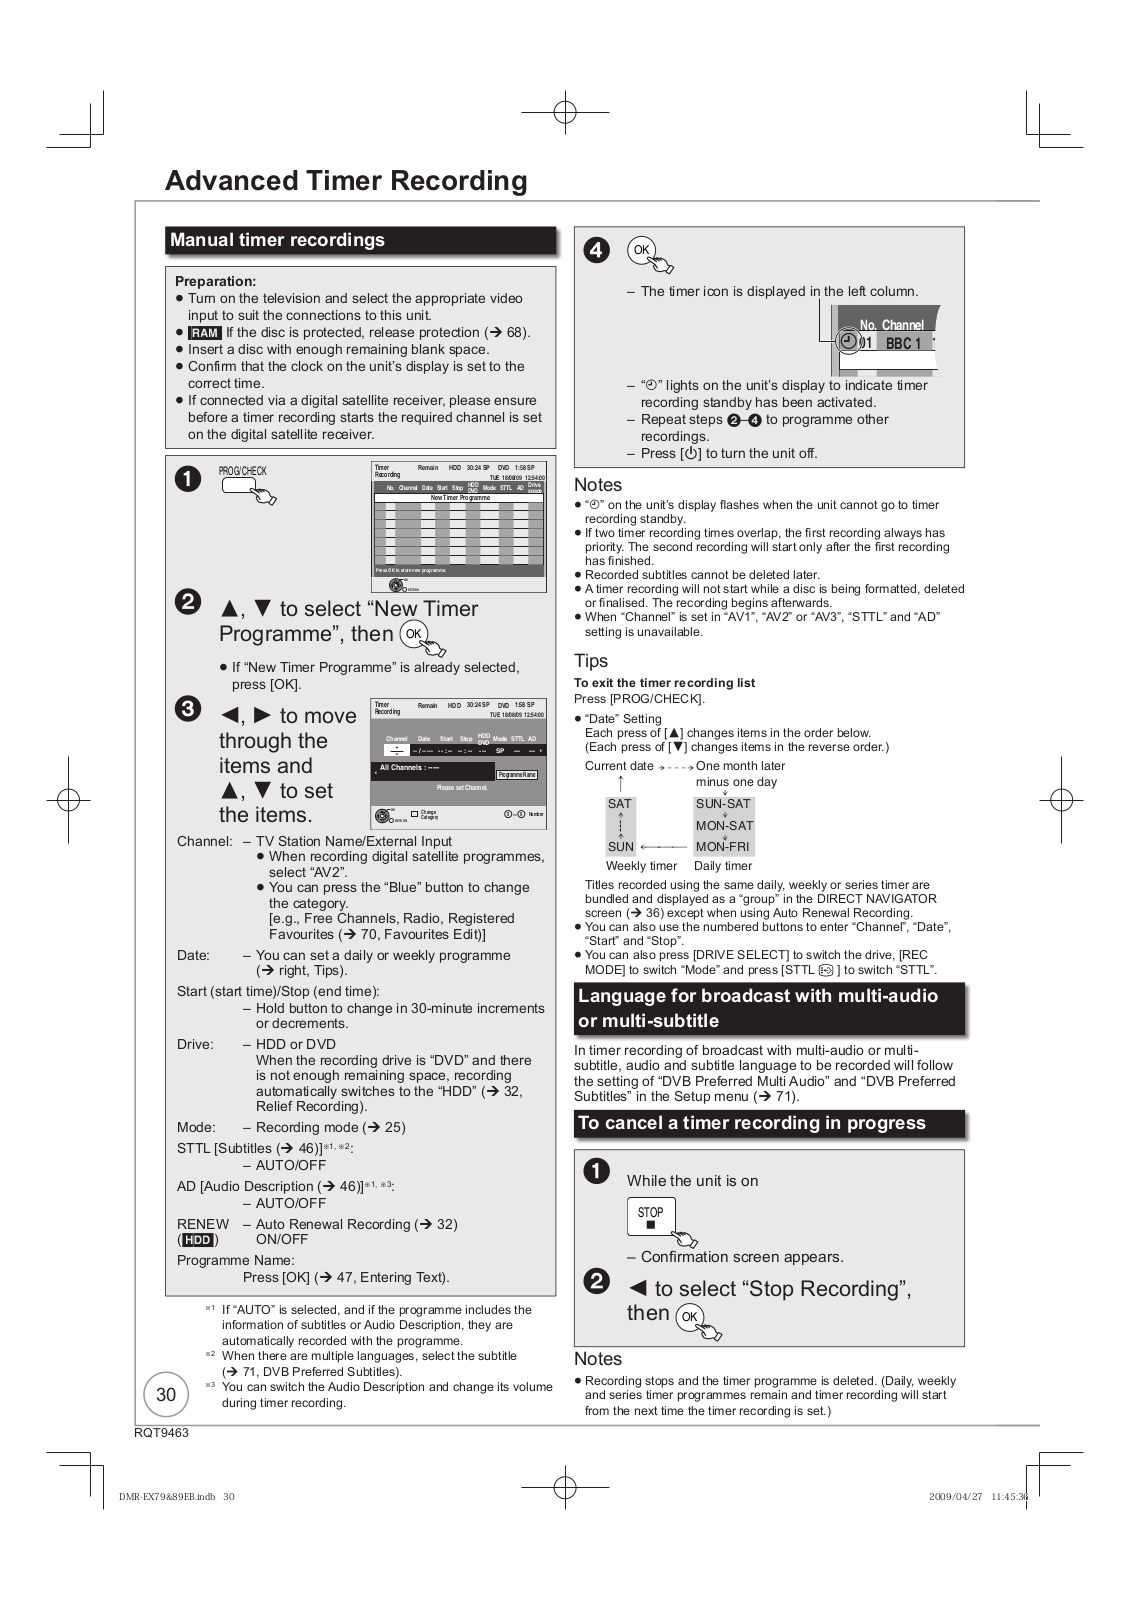
PANASONIC DMREX89EB User Manual
...
PANASONIC User Manual
Download
Specifications and Main Features
Frequently Asked Questions
User Manual
Download
Loading...
+
70
hidden pages
Unhide
You need points to download manuals.
1 point = 1 manual.
You can buy points or you can get point for every manual you upload.
Buy points
Upload your manuals
 Loading...