

Page 1
Owner’s Manual
for advanced features
Digital Camera
Model No. DMC-TS25
Please read these instructions carefully before using this product,
and save this manual for future use.
Register online at
www.panasonic.com/register
(U.S. customers only)
VQT4N69
F1112YS0
Page 2

Contents
Before Use
Care of the camera...................................................................................................... 6
(Important) A bout the Waterproof/Dustpr oof and Anti-shock Performance of
the Camera...................................................................................................................8
Standard Accessories.............................................................. .. .. .. .. .. .. .. .. ..... .. .. .. .. .. ..13
Names and Functions of Main Parts....................................................... .................1 4
Preparation
Charging the Battery.................................. ........................................ ....................... 16
• Charging...................................... ........................................ ............................... 16
• Approximate operating time and number of recordable pictures........................ 18
Inserting and Removing the Card (optional)/
the Battery.................................................................................................................. 20
About the Built-in Memory/the Card........................................................................ 22
• Approximate number of recordable pictures and available recording time......... 24
Setting Date/Time (Clock Set) ..... ....................................... ......................................25
• Changing the Clock Setting.. .............................................................................. 26
Tips for taking good pictures ................................................................................... 27
• Fit the strap and hold the camera carefully......................................................... 27
• Preventing jitter (camera shake)............................... ........................................ ..27
Basic
Selecting the Recording Mode................ ........................................ ......................... 28
Tak ing pictures using the automatic funct ion
(Intelligent Auto Mode) ............................................................................................. 29
• Changing the settings......................................................................................... 31
Taking pictures with your favorite settings
(Normal Picture Mode)............................................................. ................................. 32
Focusing ....................................................................................................................33
Recording Motion Picture s... ........................................ ........................................ .... 35
Playing Back.............................................................................................................. 37
• Displaying Multiple Screens (Multi Playback)..................................................... 38
• Using the Playback Zoom............................... ........................................ ............ 38
Deleting Pictures............................................................. ........................................ ..39
• To delete a single picture.................................................................................... 39
• To delete multiple pictures (up to 100) or all the pictures................................... 39
Setting the Menu ..................... ........................................ ........................................ ..40
• Setting menu items.............................................................................................40
• Using the Quick Menu........................................ ........................................ ........ 41
About the Setup Menu............................................................. .................................42
- 2 -
Page 3

Recording
About the LCD Monitor ............................................................................................. 51
Using the Zoom......................................................................................................... 52
• Optical Zoom...................... ........................................ ........................................52
• Extended Optical Zoom (EZ) .............................................................................. 53
• Intelligent Zoom................................. .. .. .. ..... .. .. .. .. .. .... .. ..... .. .. .. .. .. .. .. .. ..... .. .. .. .. .. ..53
• Digital Zoom........................... ....................................... ......................................53
Taking Pictures Using the Built-in Flash................................................................. 54
• Switching to the appropriate flash setting...........................................................54
Taking Close-up Pictures ([AF Macro]/[Macro Zoom])........................................... 58
Taking Pictures with the Self-timer.......................................................................... 59
Compensating the Exposure................................ ........................................ ............ 60
Taking Pictures Using Auto Bracket ....................................................................... 61
Taking Pictures with different image effects
(Creative Control Mode)............................................................................................ 62
• [Expressive].................................................... ........................................ ............ 63
• [Retro]............................................................... ........................................ .......... 63
• [High Key]...................................... ........................................ ............................. 63
• [Low Key]......................................... ........................................ ........................... 63
• [Sepia]........................... ........................................ ........................................ ...... 64
• [Dynamic Monochrome]......................................................................................64
• [Impressive Art]............................................... ........................................ ............ 64
• [High Dynamic]........... ........................................ ........................................ ........ 64
• [Cross Process]..................... ....................................... ......................................65
• [Toy Effect].............................................................. ........................................ .... 65
• [Miniature Eff ect]..................................................... ........................................ .... 66
• [One Point Color]............ ........................................ ........................................ .... 66
Take the Outdoors Scene Expressively ..................................................................67
• [Sports]........................................................ ....................................... .................67
• [Snow]................. ........................................ ....................................... .................67
• [Beach & Surf]..................................................................................................... 67
• [Advanced Underwater] ......................................................................................68
Taking panorama pictures ([Panorama Shot])........................................................69
Taking pictures that match the scene being recorded (Scene Mode).................. 72
• [Portrait]................................. ....................................... ......................................73
• [Soft Skin] ................................................... ....................................... .................73
• [Scenery].............................................................................................................73
• [Night Portrait]........................ ....................................... ......................................74
• [Night Scenery]................................ ........................................ ........................... 74
• [Food]......................................... .. .. .. .. .. .. .. ..... .... .. .. .. .. .. .. ..... .. .. .. .. .. .. .. .. ....... .. .. .. .. ..74
• [Baby1]/[Baby2]..................................... ........................................ .....................75
• [Pet]................................ ........................................ ........................................ .... 76
• [Sunset].............................................. ........................................ ......................... 76
• [High Sens.]...................................................... ........................................ .......... 76
• [St a rr ySky] ......................................................... ........................................ ........ 76
• [Glass Through].................................................... ........................................ ...... 76
- 3 -
Page 4

Entering Text.............................................................................................................. 77
Using the [Rec] Menu................................................ ........................................ ........ 78
• [Picture Size]................. ........................................ ........................................ ...... 78
• [Sensitivity]......................................... ........................................ ......................... 79
• [White Balance]........................................ ........................................ ...................80
• [AF Mode].............................................. .. ..... .. .. .. .. .. .. .. .. ....... .. .. .. .. .. .. .. ..... .. .. .. .. .. ..82
• [Face Recog.]............................................................... ......................................85
• [i.Exposure]................................................... ........................................ ..............89
• [i.Resolution]...................................... ........................................ ......................... 89
• [Digital Zoom]................................... ........................................ ........................... 89
• [Burst].................................................... ........................................ .....................90
• [Time Lapse Shot]...............................................................................................92
• [Color Mode].......................................... ....... .. .. .. .. .. .. .. .. ..... .. .. .. .. .. .. .. .. ..... .. .. .. .. .. ..95
• [Color Reproduction]........................................................................................... 95
• [AF Assist Lamp]............... ........................................ ........................................ ..95
• [Red-Eye Removal]..................................................... ........................................96
• [St a bilizer]....................................................... ........................................ ............96
• [Date Stamp].................................. ........................................ ............................. 97
• [Clock Set] .................................................. ....................................... .................97
Using the [MotionPicture] Menu.............................................................................98
• [Rec Quality].................................... ........................................ ........................... 98
• [Continuous AF]...................................................... .. .. .. ..... .. .. .. .. .. .. .. .. ..... .. .. .. .. .. ..98
Playback/Editing
Various methods of playback...................................................................................99
• [Slide Show].................................................... ........................................ ............ 99
• [Filtering Play]................... ........................................ ........................................101
• [Calendar]................................................................................ .... .... .. ......... .... ..104
Having Fun with Recorded Pictures (Retouch)..................................... ............... 105
• [Auto Retouch].................. ........................................ ........................................105
• [Creative Retouch]........................................ ........................................ ............106
• [Color Reproduction]......................................................................................... 107
Using the [Playback] Menu..................................................................................... 108
• [Text Stamp]................ ........................................ ........................................ ...... 108
• [Retouch]................................................. ........................................ ..................110
• [Video Divide]......................................... .. ..... .. .. .. .. .. .. .. .. ..... .. .. .. .. .. .. .. ....... .. .. .. .. .. .110
• [Time Lapse Video]............................................................................................111
• [Resize]................. ........................................ ........................................ .............1 1 2
• [Cropping]................................................................................ .... .... .. ......... .... .. .113
• [Favorite]..................................................... ....................................... ................114
• [Print Set].................. ........................................ ........................................ .........115
• [Protect]...................... ........................................ ........................................ .......117
• [Face Rec Edit]............. ..................... ........................................ ........................118
• [Copy]............... ....................................... ........................................ ..................119
- 4 -
Page 5

Connecting to other equipment
Playing Back Pictures on a TV Screen..................................................................120
Saving still picture s and motion pictures on your PC.................. ....................... 122
• About the supplied software ............................................................................. 122
Saving still picture s a nd m otion pictures on a Recorder.................................... 126
• Copy by inserting the SD card into the recorder............................................... 126
Printing the Picture s............. ........................................ ........................................ ..127
• Selecting a single picture and printing it........................................................... 128
• Selecting multiple pictures and printing them................................................... 128
• Print Settings............................................................ ........................................129
Others
Screen Display.........................................................................................................132
Cautions for Use......................................................................................................134
Message Display ........................................ .. .. ..... .. .. .. .. .. .... .. ..... .. .. .. .. .. .. .. .. ..... .. .. .. .. ..142
Troubleshooting ...................................................................................................... 145
- 5 -
Page 6

Before Use
Please be sure to read
Performance of the Camera
being mishandled, which may cause water to seep in.
“(Important) About the Waterproof/Dustproof and Anti-shock
” (P8) before using this unit underwater to prevent the unit from
Care of the camera
∫ Handling of the camera (to prevent water leakage and malfunction)
•
Foreign objects may adhere to the inner side of the side door (around the
rubber seal or connecting terminals) when the side door is opened or
closed in places with sand or dust etc. This may result in the impairment
of the waterproof performance if the side door is closed with foreign
objects adhere d. Be extremely careful since it may result in malfunction
etc.
•In case foreign objects adhere to the inner side of the side door, wipe
them off with a dry, lint-free cloth.
•If any liquid such as water droplets is adhered to the camera or inner side
of the side door, wipe off with a soft dry cloth. Do not open or close the
side door near the water, when underwater, using wet hands, or when the
camera is wet. It may cause water leakage.
Do not apply strong shock or vibration by dropping or knocking the
camera. Also, do not apply strong pressure to the camera.
e.g.:
Sit down with the camera in your trous ers pocket or forcefully insert it into a
–
full or tight bag, etc.
–Attach any items such as accessories to the strap attached t o the camera.
–When strong pressure is applied using the camera at a depth exceeding 7 m (23 feet).
•Waterproof perfo rmance may be impaired.
•Lens or LCD monitor may be damaged.
•It may cause malfunction in the performance or the function.
- 6 -
Page 7

Before Use
∫ When inner side of the lens is fogged (condensation)
It is not a malfunction or failure of the camera. It may be caused
by the environment in which the camera is used.
What to do whe n inner side of the le ns is fogged
Turn this unit off and open the side door in a place with constant ambient
•
temperature, away from high temperatures, humidity, sand and dust. The
fog will disappear naturall y in 10minutes to 2 hours with the side door open when the tempe rature of
the camera gets close to the ambient temperature.
•Contact Panasonic if the fogging does not disappear.
Conditions in which inn e r side of the lens may be fogged
Condensation may occur and the inner side of the lens may be fogged when the camera is
used in areas that undergo a significant change in temperature or in high humidity, such as the
following:
When the camera is used underwater suddenly after being on a hot beach etc.
•
•When the camera is m ov ed to a warm area from a cold area, such as at a ski resort or at high
altitude
•When the side door is opened in a high-humidity environment
- 7 -
Page 8

Before Use
(Important) About the Waterproof/Dustproof and Anti-shock Performance of the Camera
Waterproof/Dustproof Performance
This camera’s waterproof/dustproof rating complies with the “IPX8” and “IP6X”
ratings. Provided the care and maintenance guidelines described in this document
are strictly followed, this camera can operate underwater, to a depth not exceeding
7 m (23 feet) for a time not exceeding 60 minutes. (¢1)
Anti-shock Performance
This camera also complies with “MIL-STD 810F Method 516.5-Shock”. The camera
has cleared a drop test from a height of 1.5 m (5 feet) onto 3 cm (0.1 feet) thick
plywood. In most cases this camera should not sustain any damage if dropped from a
height not exceeding 1.5 m (5 feet). (¢2)
This does not guarantee no de struction, no malfunction, or waterpr oofing in all
conditions.
¢1 This means that the camera can be used underwater for specified time in specified pressure in
accordance with the handling method established by Panasonic.
¢2 “MIL-STD 810F Method 516.5-Shock” is th e tes t method standard of the U.S. Defense
Department, which specifies performing drop tests from a height of 122cm (4 feet), at
26 orientations (8 corners, 12 ridges, 6 faces) using 5 sets of devices, and passing the
26 orientation drops within 5 devices. (If failure occurs during the test, a new set is used to pass
the drop orientation test within a total of 5 devices)
Panasonic’s test method is based on the above “MIL-STD 810F Method 516.5-Shock”. However,
the drop height was changed from 122 cm (4 feet) to 150 cm (5 feet) dropping onto 3 cm
(0.1 feet) thick plyboard. This drop test was passed.
(Disregarding appearance c hange such as loss of pain t or dis tortion of the part where drop impac t
is applied.)
- 8 -
Page 9

Before Use
∫ Handling of the camera
•
Waterproofing is not guaranteed if the unit is subject to an impact as a result of being hit or dropped
etc. If an impact to the camera occurs, it should be inspected (subject to a fee) by Panasonic to
verify that the waterproofing is still eff ective.
•When the camera is splashed with deterg ent, soap, hot spring, bath additive, sun oil, sun screen,
chemical, etc., wipe it off immediately.
•Waterproof function of the camera is for sea water and fresh water only.
•Any malfunction caused by customer misuse, or mishandling will not be covered by the warranty.
•The inside of this unit is not waterproof. Water leakage will cause malfuncti on.
•Supplied accessories are not waterproof.
•Card and battery are not waterproof. Do not handle with a wet hand. Also, do not insert wet card or
battery into the cam era .
•Do not leave the camera for a long period of time in places where the temperatu re is very low (such
as at ski resorts or high alt itudes) or where the temperature may exceed 40ºC (104 oF) (such as
inside cars in strong sun light, cl ose to a hea ter, on boats, or on the beac h). (W ater proof pe rforman ce
may become degraded.)
∫ About the [Precautions] demonstration display
([Requirements for Underwater use])
[Precautions] is displaye d when this unit is turned on for the first time after purchase, with the side
•
door completely closed.
•Please check beforehand to maintain the waterproof performance.
1 Press 2 to select [Yes], and press [MENU/SET].
•
It will automatically skip to the clock setting screen if [No] is selected before it starts.
2 Press 2/1 to select the picture.
2: Return to the previous screen
1: View the next screen
•
It can be forcefully ended by pres sing [MENU/SET].
• When it is forcefully ended while checking by turning the unit off or pressin g [MENU/SET],
[Precautions] is displaye d every time this unit is turned on.
3 After the final screen (12/12), press [MENU/SET] to finish.
•
When [MENU/SET] is pressed a fter the final sc reen (12/12 ), [Pr ecaution s] is not d isplayed from
the next time this unit is turned on.
• This can also be viewed from [Precautions] (P42) in the [Set up] menu.
- 9 -
Page 10
Before Use
ロヰヤレ
ロヰヤレ
ロヰヤレ
Check before using underwater
Always wipe the rubber seal on the side door and the area where rubber seal sits with
a dry, lint-free cloth.
1 Check that there are no foreign objects on the inner side of the side door.
•
If there is any foreign object, such as lint, hair, sand, etc., on the surrounding area, water will
leak within a few seconds causing malfunction.
• Wipe it off with a dry soft cloth if there is any liquid.
It may cause water leaks and malfunctio n if you use the camera with liquid adhered.
• If foreign objects are present, wipe them off with a dry, lin t-free cloth.
• Be extremely careful to remo ve t he small s and e tc. t hat may adhe re to th e sid es an d c orners o f
the rubber seal.
2 Check for cracks and deformation of the rubber seal on the side door.
•
The integrity of the rubber se als may decrease after about 1 year, with use and age. To avoid
permanently damaging the camera t he seals should be replaced once each year. Please
contact Panasonic for re lated costs and other information.
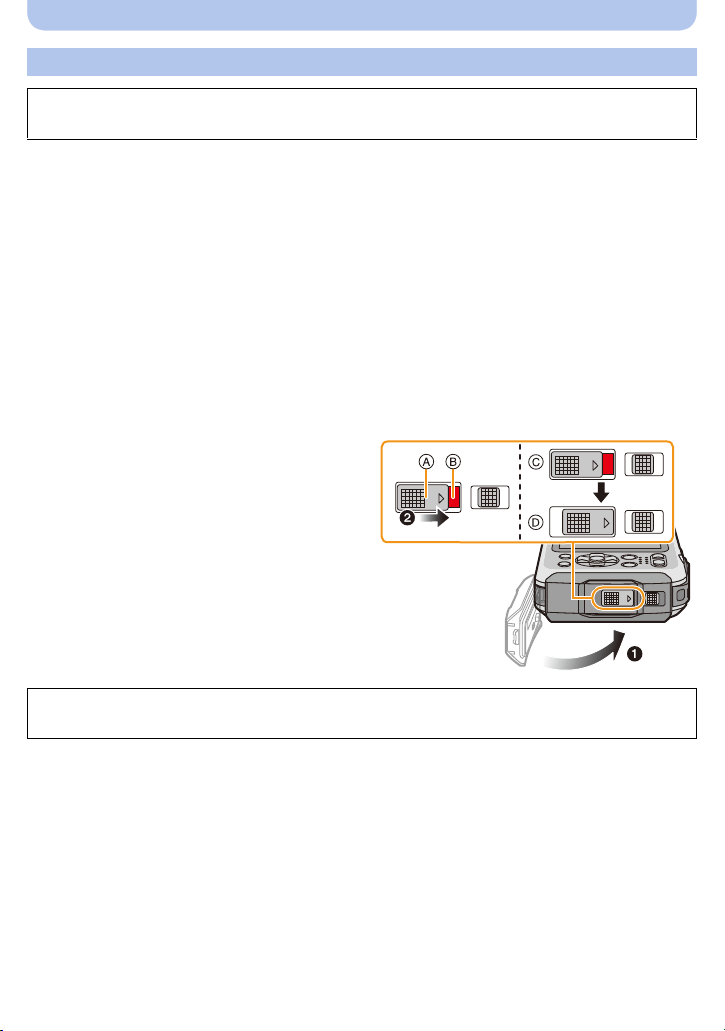
3 Close the side door securely.
A [LOCK] switc h (gray part)
B Red part
C Released state
D Locked state
• Lock the [LOCK] switch securely until the
red part is no longer visible.
• To prevent water intrusion, be care ful not to
catch foreign objects such as liquids, sand,
hair, dust, or the strap cord.
Do not open or close the side door in places with sand and dust, close to water, or with
wet hands. Sand or dust adhering may cause water leaks.
- 10 -
Page 11

Before Use
Using the camera underwater
•Use the camera underwater to 7 m (23 feet) with the water temperature between 0 oC and 40 oC
(32 oF and 104 oF).
•Do not use for scuba diving (Aqualung).
•Do not use the camera at a depth of over 7m (23 feet).
•Do not use it in the hot water over 40oC (104 oF) (in the bath or hot spring).
•Do not use the camera underwater for longer than 60minutes continuously.
•Do not open or close the side door underwater.
•Do not apply shock to the camer a under water. (Waterproof performan ce may no t be ma inta ined, and
there is a chance of water leak. )
•Do not dive into the water holding th e camera. Do not use the camera in a location where the water
will splash strongly, such as rapid flow or waterfall. (Strong water pressure may be applied, and it
may cause malfunction.)
•The camera will sink in the water. Take care not to drop the camera and lose it underwater by
securely placing the strap arou nd your wrist or similar measure.
Caring of the camera after using it underwater
Do not open or close the side door until the sand and dust is removed by rinsing the
camera with water.
Make sure to clean the camera after using it.
Thoroughly wipe off any water droplets, sand, and saline matter on your han ds, body, hair, etc.
•
•It is recommended to clean the camera indoors, avoiding places where water spray or sand may
fall.
After using it underwater, always clean the camera rather than leaving it in a dirty state.
•
Leaving the camera with foreign objects or saline matter on it may cause damage, discoloration,
corrosion, unusual odour, or deterioration of the waterproof performance.
1 Rinse with water with the side door closed.
•
After use at the seasid e or underwater, soak the unit in fresh
water pooled in a shallow container for 10 minutes or less.
• If the zoom button or camera [ON/OFF] button do not press
smoothly , it may be caused by an adhesion of foreign objects.
Using in such a state may cause malfunctions, such as
locking up, so wash off any foreign objects by shaking the
camera in fresh water.
• Bubbles may come out of the drainage hole when you
immerse the camera in water, but this is not a malfunction.
- 11 -
Page 12

Before Use
2 Drain water by holding the c a m e ra upside-down A and the right way up B and
shaking it lightly a few times.
After using the camera at the beach or in water, or after washing it, water may remain around
•
the speaker and microphone for a while and may cause a drop in volume or sound distortion.
• Make sure to put your hand through the strap to prevent the camera from falling.
3 Wipe off water drops on the camera with a dry
soft cloth and dry the camera in a shaded area
which is well ventilat e d.
Dry the camera by standing it on a dry clo th. This
•
unit incorporates drain design, draining water in
gaps in the camera [ON/OFF] button and zoom
button etc.
• Do not dry the camera with hot air fr om dr yer or
similar. Waterproof performance will deteriorate due to deformation.
• Do not use chemicals such as benzine, thinner, alcohol or cleanser, soap or detergents.
4 Confirm that there are no water droplets, open the side door, and wipe off any water
droplets or sand left inside using a soft dr y cloth. (P137)
Water droplets may adhere to the card or battery when the side door is opened without
•
thoroughly drying. Also, water may accumulate in the gap around the card/battery slot or the
terminal con n ector. Be sure to wipe any water off with a soft dry cloth.
• The water droplets may seep into the camera when the side door is closed while it is still wet,
causing condensation or failure.
- 12 -
Page 13

Before Use
Standard Accessories
Check that all the accessories are supplied before using the camera.
Supplied accessories are not waterproof.
•
•The accessories and their shape will differ depending on the country or area where the camera was
purchased.
For details on the accessories, refer to “Basic Owner’s Manual”.
•Battery Pack is indicated as battery pack or battery in the text.
•Battery Charger is indicated as battery charger or charger in the text.
•SD Memory Card, SDHC Memory Card and SDXC Memory Card are indicated as card in the text.
•The card is optional.
You can record or play back pictures on the built-in memory when you are not using a card.
•If any accessories are lost, custome rs in the USA and Pu ert o Rico should cont a ct Panas onic’s parts
department at 1-800-833-9626 and customers in Canada should contact 1-800-99-LUMIX
(1-800-995-8649) for further information about obtaining replacement parts.
- 13 -
Page 14
Before Use
2134567
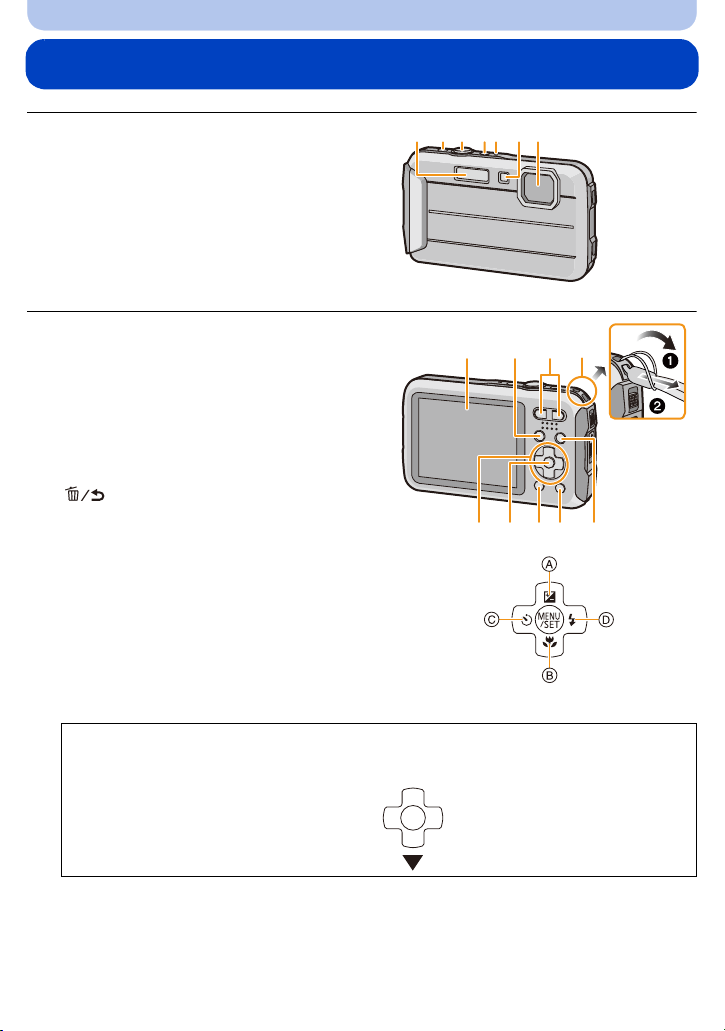
Names and Functions of Main Parts
1Flash (P54)
2 Motion picture button (P35)
3 Shutter button (P29, 32)
4 Camera [ON/OFF] button (P25)
5 Microphone
6 Self-timer indicator (P59)/
AF Assist Lamp (P95)/
LED light (P47)
7 Lens (P7, 138, 148)
8 LCD monitor (P51, 132, 137)
9 [MODE] button (P28, 99)
10 Zoom button (P52)
11 Strap eyelet (P27)
Be sure to attach the strap w hen usi n g the
•
camera to ensure that you will not drop it.
12 [(] (Playback) button (P37)
13 [Q.MENU] button (P41)/
[ ] (Delete/Cancel) button (P39)
14 [DISP.] button (P51)
15 [MENU/SET] button (P40)
16 Cursor buttons
A: 3/Exposure compensation (P60)
Auto Bracket (P61)
B: 4/Macro Mode (P58)
AF Tracking (P84)
C: 2/Self-timer (P59)
D: 1/Flash setting (P54)
In this Owner’s Manual, the cursor buttons are described as shown in the figure below
or described with 3/4/2/1.
e.g.: When you press the 4 (down)
button
8 91011
14
16
13
15
or Press 4
12
- 14 -
Page 15
Before Use
ャモヵヵユンヺ
モヷチヰヶヵバチュリヨリヵモロ
ヤモンュ
ロヰヤレ
19
20
21
22
23
24
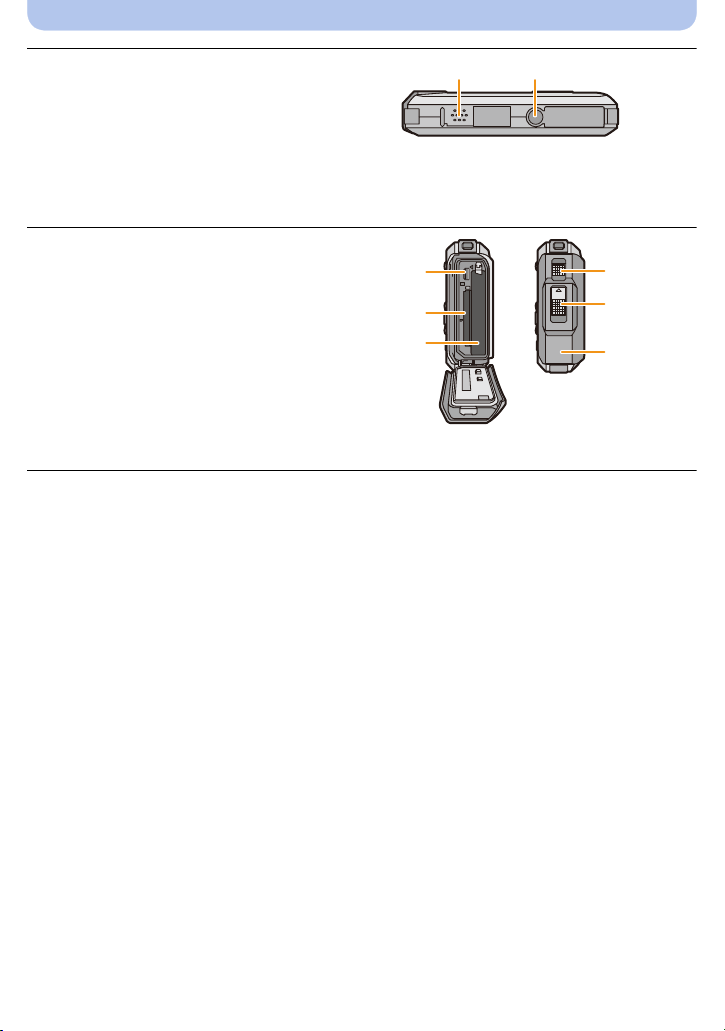
17 Speaker (P44)
•
Be careful not to cover the speaker with your
finger. Do ing so may make sound difficult to
hear.
18 Tripod mount
•
A tripod with a screw length of 5. 5mm
(0.22 inch) or more may damage this unit if
attached.
19 [AV OUT/DIGITAL] socket (P120, 124, 126,
127)
20 Card slot (P20)
21 Battery slot (P20)
When using an AC adaptor, ensure that the
•
Panasonic DC coupler (optional) and AC
adaptor (optional) are used. Fo r connection
details, refer to P21.
22 Release lever (P20)
23 [LOCK] switch (P10, 20)
24 Side door (P10, 20)
17 1817 1817 18
- 15 -
Page 16
Preparation
Charging the Battery
∫ About batteries that you can use with this unit
It has been found that counterfeit battery packs which look very similar to the
genuine product are made available for purchase in some markets. Some of these
battery packs are not adequately protected with internal protection to meet the
requirements of appropriate safety standards. There is a possibility that these battery
packs may lead to fire or explosion. Please be advised that we are not liable for any
accident or failure occurring as a result of use of a counterfeit battery pack. To
ensure that safe products are used. We recommend that a genuine Panasonic battery
pack is used.
Use the dedicated charger and battery.
•
Charging
•The battery is not charged when the camera is shipped. Charge the battery before u se.
•Charge the battery with the charger indoors.
•Charge the battery in areas with a n amb ient temperature, between 10 oC and 30 oC (50 oF and
86 oF) (same as the battery tem perature), is recommended.
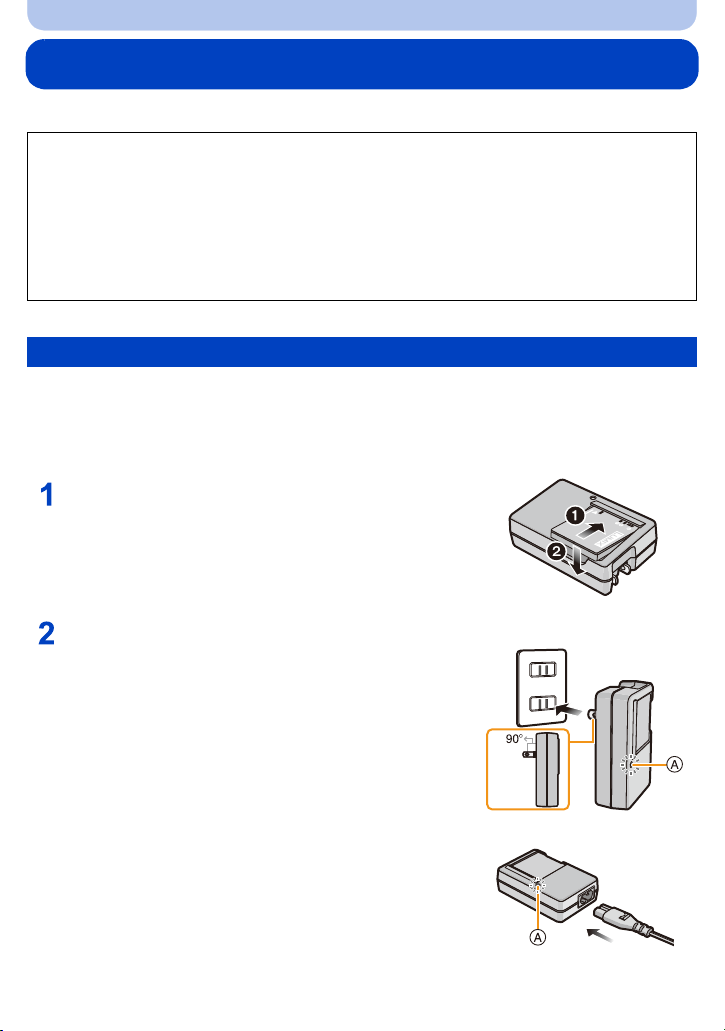
Attach the battery paying attention to the
direction of the battery.
Connect the charger to the electrical outlet.
• The [CHARGE] indicator A lights up and charging
begins.
- 16 -
plug-in type
inlet type
Page 17

Preparation
∫ About the [CHARGE] indicator
On: Charging.
Off: Charging has completed. (Disconnect the charger from the electrical socket and
detach the battery after charging is completed.)
•
When the [CHARGE] indicator flashes
–The battery temperatu re is too hig h or too low. It is recommended to charge the batt ery again in a n
ambient tem p er a ture of between 10 oC and 30 oC (50 oF and 86 oF).
–The terminals of the charger or the battery are dirty. In this case, wipe off the dirt with a dry cloth.
∫ Charging time
Charging time Approx. 120 min
•
The indicated charging time is fo r when the battery has been discharged completely. The
charging time may vary depending on how the battery has been used. The charging time for
the battery in hot/cold environments or a battery that has not been used for a long time may
be longer than normal.
∫ Battery indication
The battery indication is displayed on the LCD monitor.
The indication turns red and blink s if the remaining battery power is low. Rech arge the battery or
•
replace it with a fully charged battery.
•Do not leave any metal items (such as clips) near the contact areas of the power plug.
Otherwise, a fire and/or electric shocks may be caused by short-circuiting or the resulting
heat generated.
•The battery becomes warm after using it and during and after charging. The camera al so becomes
warm during use. This is not a malfunction.
•The battery can be recharged even when it still has some power left, but it is not recommended that
the battery charge be freq uently topped up while the battery is fully charged. (Since characteristic
swelling may occur.)
- 17 -
Page 18

Preparation
Approximate operating time and number of recordable pictures
∫ Recording still pictures
Number of recordable
pictures
Recording time Approx. 125 min
Recording conditions by CIPA standard
•
CIPA is an abbreviation of [Camera & Imaging Products Association].
•Temperature: 23 oC (73.4 oF)/Humidity: 50%RH when LCD monitor is on.
•Using a Panasonic SD Memory Card (32 MB).
•Using the supplied battery.
•Starting re cording 30 seconds after the camera is turned on. (When the Optical Image Stabili zer
function is set to [ON].)
•Recording once every 30 seconds using full flash every second recording.
•Changing the zoom magnification from Tele to Wide or vice versa in every recording.
•Turning the camera off every 10 recordings and leaving it until the te mperature of the battery
decreases.
The number of recordable pictures varies depending on the recording interval time. As
the recording interval time becomes longer, the number of recordable pictures
decreases. [For example, if you were to take one picture every two minutes, then the
number of pictures would be reduced to approximately one-quarter of the number of
pictures given above (based upon one picture taken every 30 seconds).]
∫ Recording motion pictures
When recording with picture quality set to [HD]
Recordable time Approx. 100 min
Actual recordable time Approx. 50 min
These times are for an ambient t emper ature of 23oC (73.4 oF) and a humidity of 50%RH. Please be
•
aware that these times are approximate.
•Actual recordable time is the time a vailabl e for record ing when repeat ing action s such as turni ng this
unit on and off, starting/stopping recording, zoom operation, etc.
•Maximum time to record motion pictures continuously is 29 minutes 59 seconds. The maximum
available recording time continuously is displayed on the screen.
Approx. 250 pictures
By CIPA standard in Normal
Picture Mo de
- 18 -
Page 19

Preparation
∫ Playback
Playback time Approx. 240 min
The operating times and number of recordable pictures will differ according to the
•
environment and the operating conditions.
For example, in the following cases, the operating t imes will shorten and the number of recordable
pictures is reduced:
–At low temperature or in cold locatio ns such as ski resorts or at high altitude
¢ Residual image may show on the LCD display when in use. The battery performance will
decrease, so keep the camera an d spare batteries warm by placing them in a warm place
such as inside your cold protection gear or clothing. Performance of batteries and LCD
monitor will restore to normal when the temperature returns to normal.
¢
–When using [Monitor Luminance].
–When operations such as flash and zoom are used repeatedly .
•When the operating time of the camera becomes extremely short even after properly charging the
battery , the life of the battery may have expired. Buy a new battery.
- 19 -
Page 20
Preparation
Inserting and Removing the Card (optional)/ the Battery
•Check that this un i t is turn ed off.
•Confirm that there is no foreign object. (P10)
•We recommend using a Panasonic card.
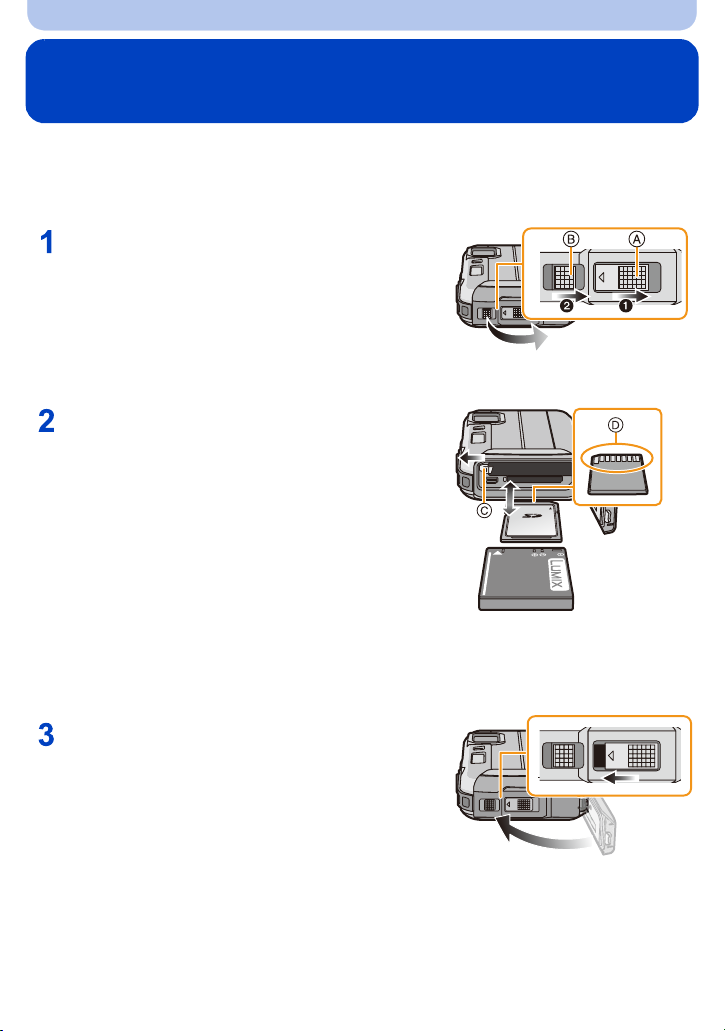
1: Slide the [LOCK] switch A, and release
the lock.
2: Slide the release lever B and open the
side door.
• Always use genuine Panasonic batteries.
• If you use other batteries, we cannot guarantee the quality of this product.
Battery: Being careful about the battery
orientation, insert all the way until you hear
a locking sound and then check that it is
locked by lever C. Pull the lever C in the
direction of the arrow to remove the
battery.
Card: Push it securely all the way until you
hear a “click” w hile b eing c arefu l a bout the
direction in which you insert it. To remove the card, push the c ard unti l it
clicks, then pull the card out upright.
D:Do not touch the connection terminals of the card.
ロヰヤレ
Close the side door until it clicks, and then lock
the [LOCK] s w itc h b y slid in g it toward [2].
• Confirm that the red part on the [LOCK] switch is not
showing.
- 20 -
ロヰヤレ
Page 21

Preparation
•Remove the battery after use. (The battery will be exhauste d if left for a long period of time after
being charged.)
•Turn the camera off and wait for the “LUMIX” display on the LCD monitor to clear bef ore removing
the card or battery. (Otherwise, this unit may no longer operate normally and the card itself may be
damaged or the recorded pictures may be lost.)
∫ About the water leakage warning message
To maintain the waterproof performance of this unit, a message prompting to check for any
foreign material inside the side door or to perform maintenance is displayed along with a
warning sound when the following are performed. (P144)
When this unit is turned on aft er opening the side door and replacing the card.
•
•When this unit is turned on after opening the side door and replacing the battery.
•After opening the side door, close it securely tak ing care not to get any foreign objects caught.
•If foreign objects are present, wipe them off with a dry, lint-free cloth.
•Warning message display can be turned off by pressing any button.
Using an AC adaptor (optional) and a DC coupler (optional) instead of the battery
The AC adaptor (optional) can only be used with the designated
Panasonic DC coupler (optional). The AC adaptor (optional)
cannot be used by itself.
1 Open the side door A.
2 Insert the DC coupler, being careful of the direction.
3 Plug the AC adaptor into an electrical outlet.
4 Connect the AC adaptor B to the [D C IN] socket C of the DC
coupler.
Ensure that only the AC adaptor and DC coupler for this camera are
•
used. Using any other equipment may caus e damage.
•Always use a genuine Panasonic AC adaptor (optional).
•When using an AC adaptor, use the AC cable supplied with the AC adaptor.
•Side door cannot be closed while the AC adaptor is connected.
•Do not apply any force to the side door with the weight of the cable or your hand when the AC
adaptor is connected. It may cause damage.
•The DC coupler may get disconnected from this unit if a cable is pulled when connecting the
AC adaptor, so take caution.
•Before removing the DC coupler, turn the camera off and disconnect the AC adaptor.
•Also read the operating instructions for the AC adaptor and DC coupler.
•Waterproof/dustproof function does not operate when the AC adaptor is connected.
- 21 -
Page 22
Preparation
About the Built-in Memory/the Card
The following operations can be performed using this unit:
When a card has not been
inserted
When a card has been inserted Pictures can be recorded on the card and played back.
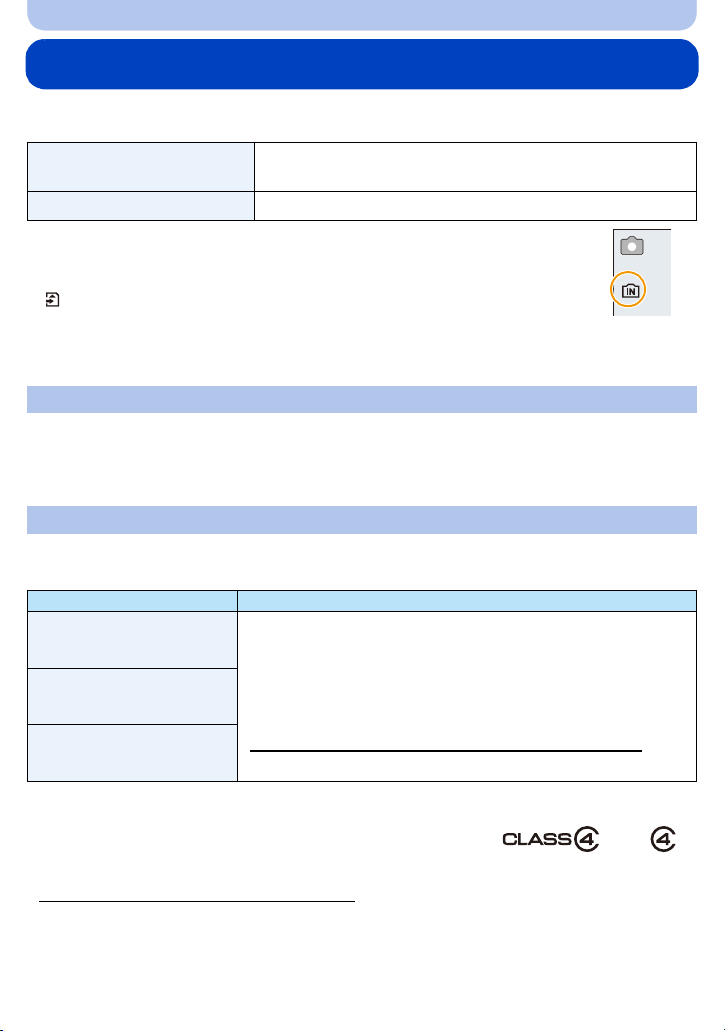
•When using the built-in memory
>ð (access indicatio n
k
•When using the card
(access indication
¢ The access indicatio n is display ed in red whe n pictures a re being recorded on the
built-in memory (or the card).
¢
Built-in Memory
•You c an copy the recorded pictures to a card. (P119)
•Memory size: Approx. 70 MB
•The access time for the built-in memory may be longer than the access time for a card.
Card
The following cards, which conform to the SD video standard, can be used with this unit.
(These cards are indicated as card in the text.)
SD Memory Card
(8 MB to 2 GB)
SDHC Memory Card
(4 GB to 32 GB)
SDXC Memory Card
(48 GB, 64 GB)
Pictures can be recorded on the built-in memory and played
back.
¢
)
)
Remarks
•Use a card with SD Speed Class
when recording motion pictures.
¢
with “Class 4” or higher
•SDHC Memory Cards and SDXC Memory Cards can be used only
with their compatible devices.
•Check that the PC and o ther equip ment ar e compa tible when u sing
the SDXC Memory Cards.
http://panasonic.net/avc/sdcard/information/SDXC.html
•Only the cards with capacity listed left can be used.
5
¢ SD Speed Class is the speed standard regarding continuous
writing. Check via the label on the card, etc.
Please confirm the latest information on the following website.
•
http://panasonic.jp/support/global/cs/dsc/
(This site is English only.)
- 22 -
e.g.:
Page 23

Preparation
•Do not turn this unit off, remove its battery or card, or disconnect the AC adaptor (optional)
when the access indicati on is lit (when pictures are being writ ten, read or deleted, or the
built-in memory or the card is being formatted). Furthermore, do not subject the camera to
vibration, impact or static electricity.
The card or the data on the card may be damaged, and this unit may no longer operate
normally.
If operation fails due to vibration, impact or static electricity, perform the operation again.
•Write-Protect switch A provided (When this switch is set to the [LOCK] position, no
further data writing, deletion or formatting is possible. The ability to write, delete and
format data is restored when the switch is returned to its original position.)
•The data on the built-in memory or the card may be damaged or lost due to
electromagnetic waves, static electricity or breakdown of the camera or the card. W e
recommend storing important data on a PC etc.
2
•Do not format the card on your PC or other equipment. Format it on the camera only to ensure
proper operation. (P50)
•Keep the Memory Card out of reach of chi ldren to prevent swallowing.
- 23 -
Page 24
Preparation
5
A
R1m10s
B
Approximate number of recordable pict ures and ava ilab l e recording time
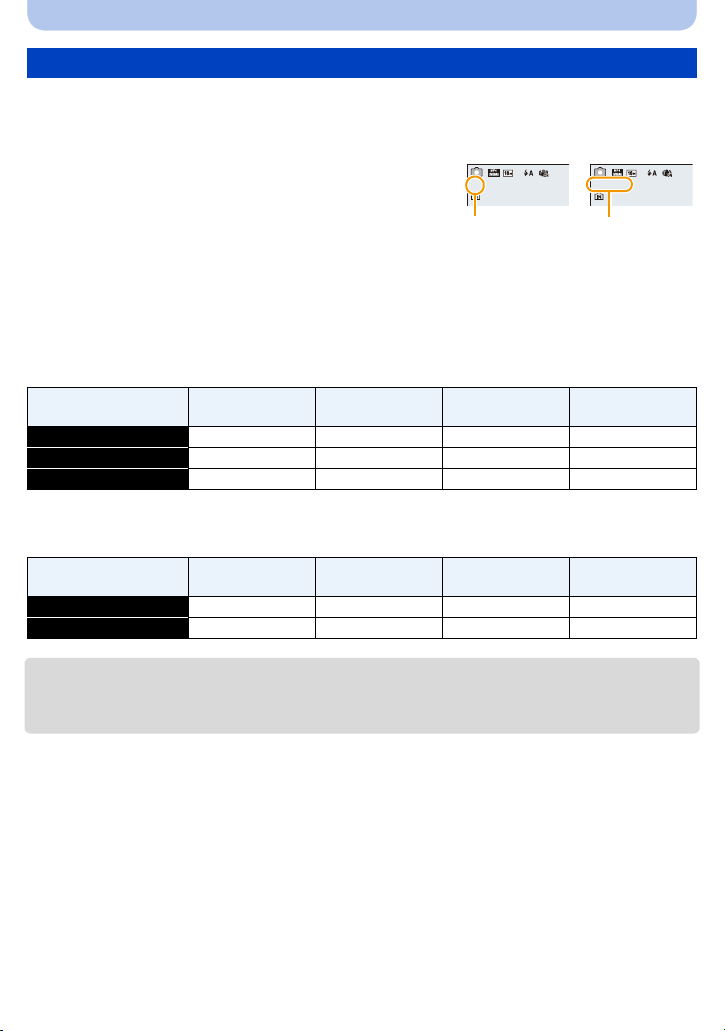
∫ About the display of the number of recordable pictures and available recording time
•
Switch the display (number of recordable pictures, available recording time, etc.) by pre ssing
[DISP.]. (P51)
A Number of recordable pictures
B Available recording time
•The number of recordable pictures and the available recording time are an approximation. (These
vary depending on the recording conditions and the type of card.)
•The number of recordable pictures and the available recording time varies depending on the
subjects.
∫ Number of recordable pictures
•
[i99999] is displayed if there are more than 100,000 pictures remaining.
[Picture Size]
16M (4:3) 14 300 4910 9880
5M (4:3) 32 660 10620 21490
0.3M (4:3) 510 10240 162960 247160
∫ Available recording time (when recording motion pictures)
•
“h” is an abbreviation for hour, “m” for minute and “s” for second.
[Rec Quality]
HD j 23m45s 6h28m15s 13h5m20s
VGA 2m22s 52m17s 14h14m28s 28h48m24s
Built-in Memory
(Approx. 70 MB)
Built-in Memory
(Approx. 70 MB)
2GB 32 GB 64 GB
2GB 32 GB 64 GB
•The recordable time is the total time of all the motion pictures which have been recorded.
•Maximum time to record motion pictures continuously is 29 minutes 59 seconds.
•The maximum available continuous recording time is displayed on the screen.
- 24 -
Page 25
Preparation
Setting Date/Time (Clock Set)
•The clock is not set when the camera is shipped.
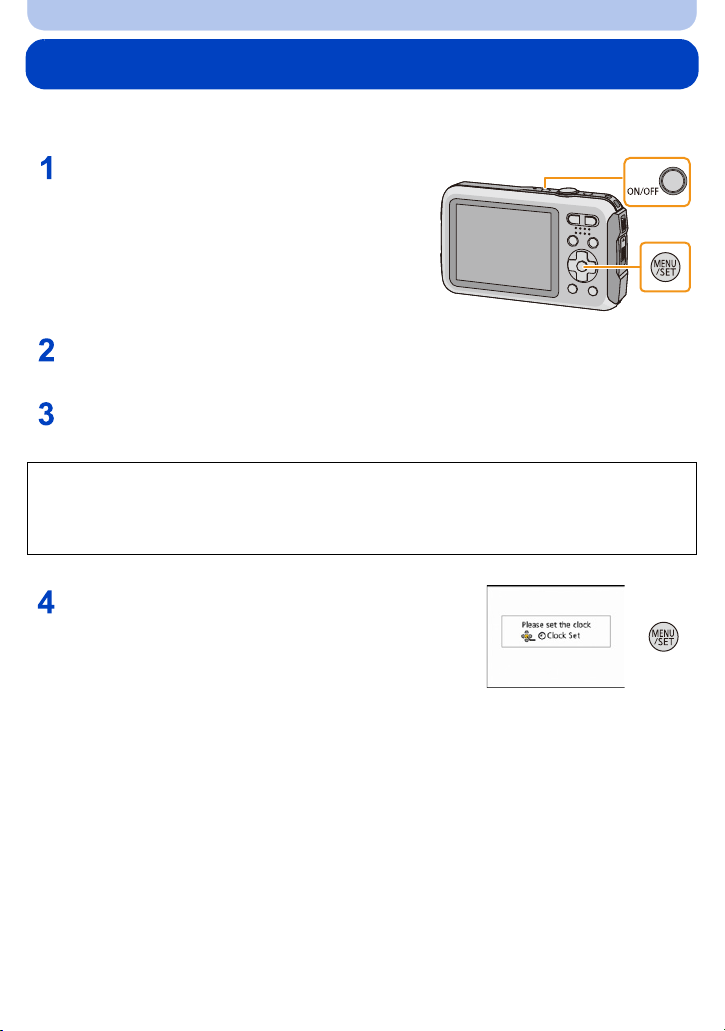
Press camera [ON/OFF] button.
• If the language select screen is not displayed,
proceed to [Requirements f or Underwater use]
below.
Press [MENU/SET].
Press 3/4 to select the language, and press [MENU/SET].
[Requirements for Underwater use]
Be sure to check this so that you can maintain the waterproof performance.
[Please set the clock] is displayed after viewing the last screen.
For details, refer to P9.
Press [MENU/SET].
- 25 -
Page 26
Preparation
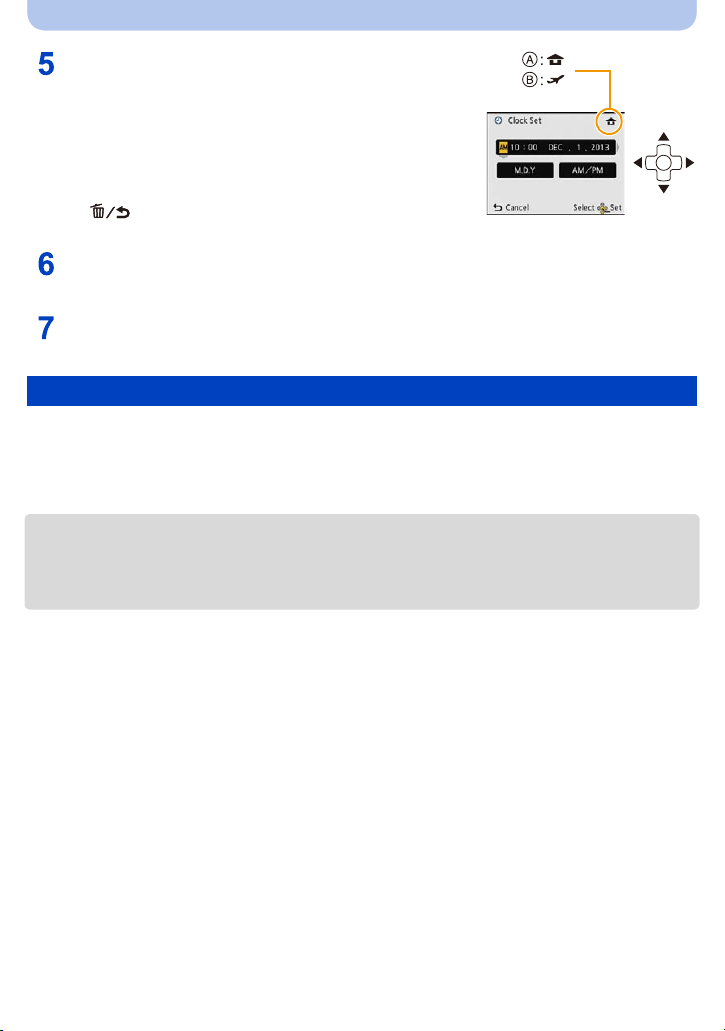
Press 2/1 to select the items (year, month,
day, hour, minute, display sequence or time
display format), and press 3/4 to set.
A: Time at the home area
B: Time at the travel destination
You can cancel without setti n g the clock by pres s i ng
•
[].
Press [MENU/SET] to set.
Press [MENU/SET].
Changing the Clock Setting
Select [Clock Set] in the [Rec] or [Setup] menu, and press [MENU/SET]. (P40)
The clock can be reset as shown in steps 5 and 6.
•
•The clock setting is maintained for 3 months using the built-in clock battery even without the
battery. (Leave the charged battery in the unit for 24 hours to charge the built-in battery.)
•If the clock is not set, the correct date cannot be printed when you order a photo studio to print the
picture, or when you stamp the date on the pictures with [Date Stamp] or [Text St amp].
•If the cloc k is s et , the correct dat e can be printed ev en if the da t e is no t di s p l a yed on the screen of
the camera.
- 26 -
Page 27
Preparation
Tips for taking good pictures
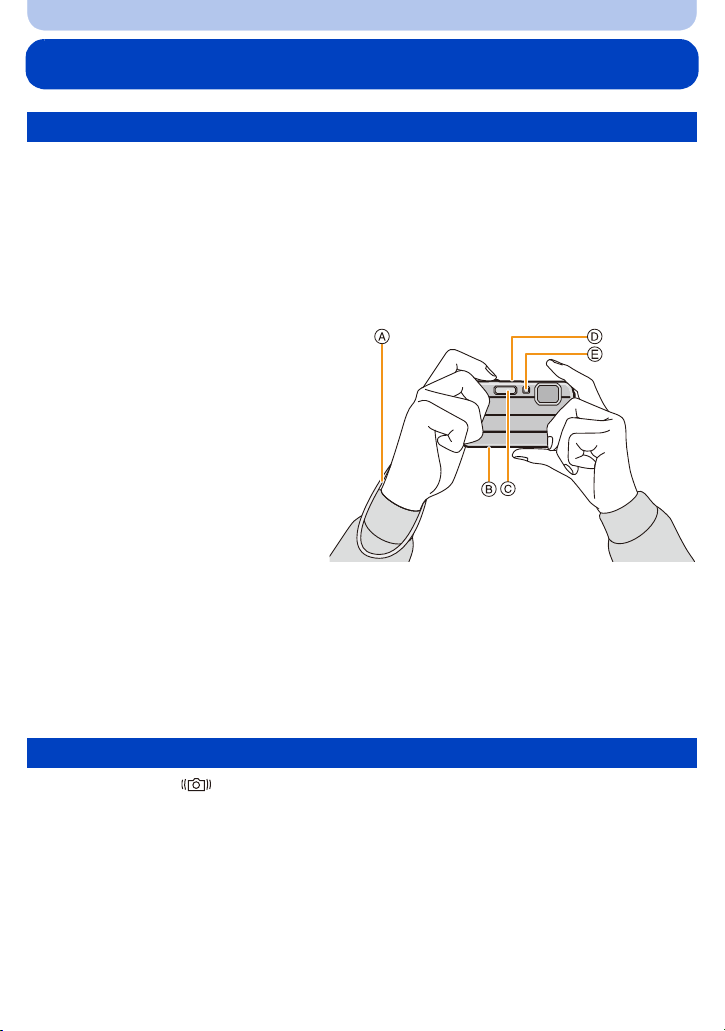
Fit the strap and hold the camera carefully
Hold the camera gently with both hands, keep your arms still at your side and
stand with your feet slightly apart.
•To prevent dropping, be sure to attach the supplied strap and fit it to your wrist. (P14)
•Do not swing around or pull forcefully on the unit with the strap attached. The strap may break.
•Be careful not to move the camera when you press the shutter button.
•Be careful not to put y our fi ngers on t he fla sh, AF as sist l amp/LED l ight, mic rophone , speaker o r lens
etc.
A Strap
B Speaker
C Flash
D Microphone
E AF Assist Lamp/LED light
∫ Direction Detec tion Function ([Rotate Disp.])
Pictures recorded with the camera held vertically are played back vertically (rotated). (Only
when [Rotate Disp.] (P 49) is set)
When the camera is held v ertic ally a nd tilt ed up and down to reco rd p ictur es, th e Direct io n Detect ion
•
function may not work correctly.
•Motion pictures taken with the camera held vertically are not displayed vertically.
Preventing jitter (camera shake)
When the Jitter alert [ ] appears, use [Stabilizer] (P96), a tripod or the Self-timer (P59).
•
Shutter speed will be slower particularly in the following cases. Keep the camera stil l from the
moment the shutter button is pr esse d until th e pic ture ap pear s on the sc reen . W e reco mmend using
a tripod.
–Slow sync./Red-Eye Reduction
–[Night Portrait]/[Night Scenery]/[Starry Sky](Scene Mode)
- 27 -
Page 28
Basic
Selecting the Recording Mode
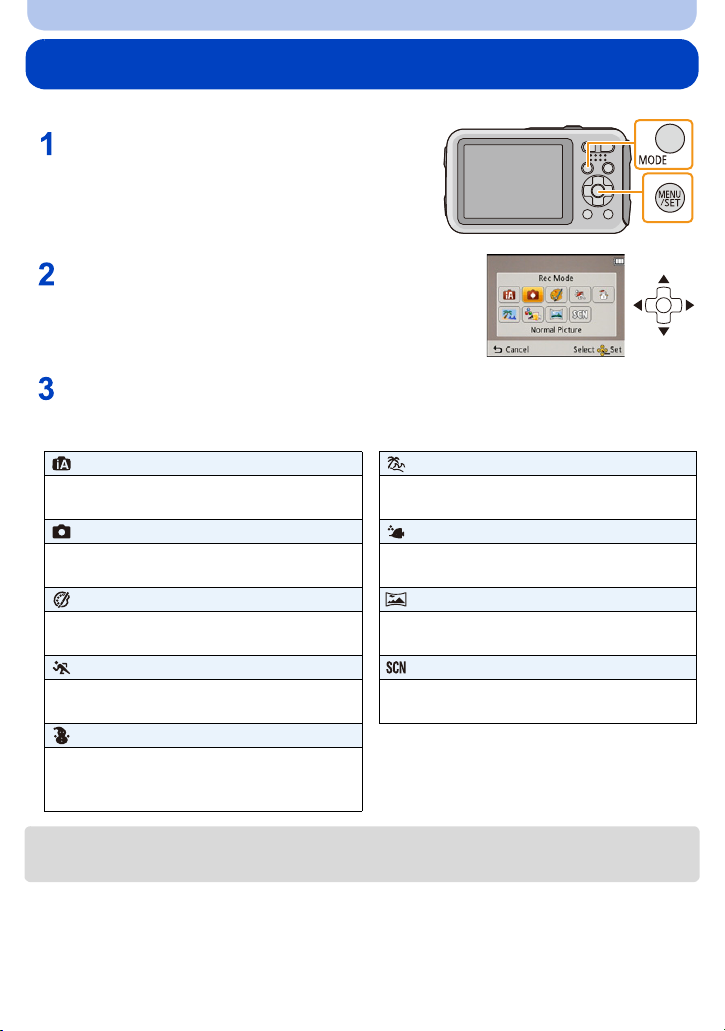
Press [MODE].
Press 3/4/2/1 to select the Recording Mode.
Press [MENU/SET].
∫ List of Recording Modes
Intelligent Auto Mode (P29) Beach & Surf Mode (P67)
The subjects are recorded using settings
automatically selected by the camera.
Normal Picture Mode (P32) Advanced Underwater Mode (P68)
The subjects are recorded using your own
settings.
Creative Control Mode (P62) Panorama Shot Mode (P69)
Record while checking the image effect. This mode allows you to take panorama
Sports Mode (P67) Scene Mode (P72)
Use this mode to take pictures of sporting
events, etc.
Snow Mode (P67)
This allows you to take pictures that show
the snow as white as possible at a ski resort
or a snow-covered mountain.
This mode is optimal for taking pictures to
3 m (10 feet) underwater and at the beach.
This mode is optimal for taking pictures at
depths of 3 m (10 feet) to 7 m (23 feet).
pictures.
This allows you to take pictures that match
the scene being recorded.
When the mode has been switched from Playback Mode to Recording Mode, the previously set
•
Recording Mode will be set.
- 28 -
Page 29
Basic
B
C
Taking pictures using the automatic function
(Intelligent Auto Mode)
Recording Mode:
The camera will set the most appropriate settings to match the subject and the recording
conditions so we recommend this mode for beginners or those who want to leave the settings
to the camera and take pictures easily.
The following functions are activated automatically.
•
–Scene Detection/Backlight Compensation/Intell igent ISO sensitivity control/Auto White Balance/
Face Detection/[i.Exposure]/[i.Resolution]/[i.ZOOM]/[AF Assist Lamp]/[Red-EyeRemoval]/
[Stabilizer]/[Continuous AF]
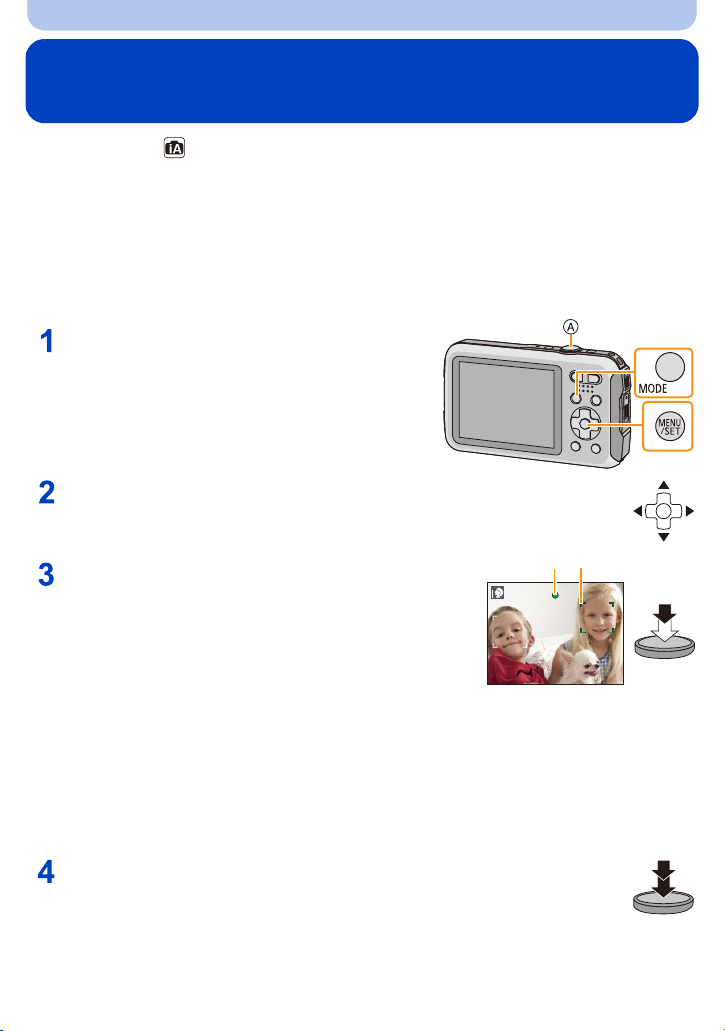
Press [MODE].
A Shutter button
Press 3/4/2/1 to select [Intelligent Auto], and
then press [MENU/SET].
Press the shutter button halfway to focus.
• The focus indication B (green) lights when the subject is
focused.
• The AF area C is displayed around the su bject’ s face b y the
Face Detection function. In ot her cases, it is displayed at th e
point on the subject which is in focus.
• The minimal distance (how close you can be to the
subject) will change depending on the zoom factor.
Please check with the recordable range display on the
(P33)
screen.
• If you press 3 while [AF Tracki ng] is display ed, yo u can set
AF tracking. For details, refer to P84. (AF tracking is
canceled by pressing 3 again)
Press the shutter button fully (push it in
further), and take the picture.
- 29 -
Page 30
Basic
Scene Detection
When the camera identifies the optimum scene, the icon of the scene concerned is displayed in
blue for 2 seconds, after which its color changes to the usual red.
When taking pictures
¦
> [i-Portrait] [i-Scenery]
[i-Macro] [i-Night Portrait]
¢1
[i-Night Scenery] [i-Sunset]
¢2
[i-Baby]
¢1 Only when [ ] is selected.
¢2 When [Face Recog.] is set to [ON], [ ] will be displayed for birthdays of registered
faces already set only when t he face of a person 3 years old or younger is detected.
When recording motion pictures
>
¦
[i-Portrait] [i-Scenery]
[i-Low Light] [i-Macro]
[¦] is set if none of the scenes are applicable, and the standard settings are set.
•
•When [ ], [ ] or [ ] is selected, the camera automatically detects a person’s face, and it will
adjust the focus and exposure. (Face Detection)
•If a tripod is used, for instance, and the camera has judged that camera shake is minimal when the
Scene Mode has been identified as [ ], the shutter speed will be set to a maximum of 8 seconds.
Take care not to move the camera while taking pictures.
•When [Face Recog.] is set to [ON], and the f ace similar to the registered face is detected, [R] is
displayed in the top right of [ ], [ ] and [ ].
•Due to conditions such as the ones below, a different scene may be identified for the same subject.
–Subject conditions : When t he fac e i s brigh t or dark, th e si ze of the s ubj ect, th e colo r of th e subje ct,
the distance to the sub ject, the contrast of the subject, when the subject is moving
–Recording conditions: Sunset, sunrise, under low brightness conditions, underwater, when the
camera is shaken, when zoom is used
•For the best results, it is recommended that you take pictures in the appropriate Recording Mod e.
•Face Detection may become slower or it may not detect underwater.
The Backlight Compensation
When there is a backlight, the subject appears darker and the camera will automatically
attempt to correct it by increasing the brightness of the picture.
In Intelligent Auto Mode, backlight compensation works automatically. The [ ] is displayed on
the screen when backlighting is detected. (Depending on the backlighting conditions,
backlighting may not be detected correctly.)
- 30 -
Page 31

Basic
Changing the settings
Following menus can be set.
Menu Item
[Rec] [Picture Size]¢/[Burst]¢/[Time Lapse Shot]/[Color Mode]¢/[Face
[Motion Picture] [Rec Quality]
[Setup] [Clock Set]/[World Time]/[Beep]
For the setting method of the menu, refer to P40.
•
¢ Settings may be different from other Recording Modes.
[Color Mode]
•Color setting of [Happy] is available in [Col orMode]. It is possible to auto matically t ake a picture wit h
a higher level of brilliance for the co lor brightness and vividness.
About the flash (P54)
•When [ ] is selected, [ ], [ ], [ ] or [ ] is set depending on the type of subject and
brightness.
•When [ ], [ ] is set, Red-Eye Removal is enabled.
•Shutter speed will be slower during [ ] or [ ].
Recog.]
¢
/[LED Light]/[Language]/
[Stabilizer Demo.]
Menu items other than those liste d above are not displayed, but you
•
can set them in other Recording Modes .
- 31 -
Page 32

Basic
ISO
1/601/601/60
F3.9F3.9F3.9
B C
D
Taking pictures with your favorite settings
(Normal Picture Mode)
Recording Mode:
The camera automatically sets the shutter speed and the aperture value according to the
brightness of the subject.
You can take pictures with greater freedom by changing various settings in the [Rec] menu.
Press [MODE].
A Shutter button
Press 3/4/2/1 to select [Normal
Picture], and then press [MENU/SET].
Aim the AF area at the point you want to focus on.
Press the shutter button halfway to focus
and then press it fully to take the picture.
B ISO sensitivity
C Aperture value
D Shutter speed
• Aperture value and shutter speed is displayed in red
when correct exposure is not achieved. (Exclude
when using a flash)
- 32 -
Page 33

Basic
ISO
1/601/601/60
F3.9F3.9F3.9
B
A
1X
W
T
1.6ft
-
∞
Focusing
Aim the AF area at the subject, and then press the
shutter button halfway.
Focus
Focus indication A On Blinks
AF area B White>Green White>Red
Sound Beeps 2 times Beeps 4 times
When the subject is focused When the subject is not
focused
•The AF area may be displayed larger for certain zoom magnifications and in dark places.
∫ About focus range
The focus range is displayed when operating the zoom.
•
The focus range is displayed in red when it is not focused after pressing
the shutter button halfway.
The focus range may change gradually depending on the zoom
position.
e.g.: Range of focus during the Normal Picture Mode
1 m (3.3 feet)
50 cm (1.6 feet)
- 33 -
Page 34

Basic
∫ When the subject is not in focus (such as when it is not in the center of the
composition of the picture you want to take)
1 Aim the AF area at the subject, and press the
shutter button half way to fix the focus and
exposure.
2 Press and hold the shutter button half way
while moving the camera as you compose the
picture.
You can repeatedly retry the actions in step 1 bef ore pressing the shutter button fully.
•
∫ Subject and recording conditions which are difficult to focus in
•
Fast-moving subjects, extremely bright subjects or subject s without contrast
•When recording subjects through windows or near shiny objects
•When it is dark or when jitter occurs
•When the camera is too close to the subj ect or when taking a picture of both distant and near
subjects
- 34 -
Page 35

Basic
3s3s3s
R
1m07
s
R
1m07
s
R
1m07
s
C
B
A
Recording Motion Pictures
Applicable modes:
Start recording by pressing the motion
picture button.
A Available recording time
B Elapsed recording time
• You can record motion pictures fitting each Recording Mode.
• Release the motion picture button right after you press it.
• The recording state indica tor (red) C wi ll f lash while reco rding mot io n
pictures.
• When recording with [Rec Quality] set to [HD], “Active Mode”
(stabilizer for motion pictures) will work automatically. For more
details, refer to [S tabilizer] (P96).
• For the setting of [Rec Quality], refer to P98.
Stop the recording by pressing the motion picture button again.
∫ About the recording format for recording motion pictures
This unit can record motion pictures in MP4 format.
MP4:
This is a simpler video format best used when extensive editing is needed, or when uploading
videos to online services.
∫ About the compatibility of the recorded motion pictures
Even if a compatible MP4 playback device is used, the video or sound quality of the recorded
motion pictures may be poor, or they may not be able to be played. There may also be times
when the recorded data is not displayed properly. If you experience such issues, please play
back the video on this camera.
For details on MP4 compatible devices, refer to the support sites below.
•
http://panasonic.jp/support/global/cs/dsc/
(This Site is English only.)
- 35 -
Page 36

Basic
•When recording to the built-in memory, [Rec Quality] is fixed to [VGA].
•The available recording time displayed on the screen may not decrease regularly.
•Depending on the type of the c a rd, th e card acc ess indi catio n may a ppear f or a while af t er rec ord ing
motion pictures. This is not a malfunction.
•The screen may be blacked out momentarily, or the unit may record noise due to static electricity or
electromagnetic waves etc. depending on the environment of the motion picture recording.
•Even if the aspect ratio setting i s the same in still pictures and mot ion pictures, th e angle of view may
change at the start of the motion picture recording.
When [Video Rec Area] (P46) is set to [ON], angle of view during motion picture recording is
displayed.
•About zooming while recording motion pictures
–If the Extended Optical zoom are used before pres sing the motion picture button, those settings
will be cleared, so the shooting range will change dramatically.
–If you operate the zoom etc. while recording motion pictu r es, the sound of the operation may be
recorded.
–The zoom speed will be slower than usual when recording moti on pictures.
–Operating the zoom while recording motion pictures can take time for the image to come into
focus.
•If you end motion picture recording after a short time when using [Miniature Effect] of the Creative
Control Mode, the camera may go on recording for a certain period. Please continue to hold the
camera until the recording finishes.
•Noise may be recorded underwater.
•It is recommended to use a fully charged battery or AC adaptor (optional) when recording motion
pictures.
•If while recording motion pictures using th e AC adapt or (o ptional) and the power supply is cut o ff due
to a power outage or if the AC ada ptor (optional) is disconnected, etc., the motion picture being
recorded will not be recorded.
•Motion pictures cannot be recorded in the following case.
–When using [Time Lapse Shot]
•A sound might be muffed or warped when there is water on the micropho ne or the speaker. Wipe the
residue after let ting the water drip out from the microphone and speaker by tipping it down, and use
it only after letting it dry for a while. (P138)
•It will be recorded in following categories for cer tain Recording Modes. A motion picture recording
matching each Recording Mode will be performed for the ones not listed below.
Selected Reco r d in g Mode Recording Mode while recording motion picture
•[Baby1]/[Baby2] (Scene Mode) Portrait Mode
•[Night Portrait]/[Night Scenery]/
[Starry Sky] (Scene Mode)
•[Sports]
•[Pet] (Scene Mode)
Low Light Mode
Normal motion picture
- 36 -
Page 37

Basic
100-0001100-0001100-0001
1/51/5
AB
3s3s3s
B
A
Playing Back
Press [(].
Press 2/1 to select pictures.
A File number
B Picture number
•If you press and hold 2/1, you can play back t he pictur es in
succession.
•Speed of picture Forwarding /Rewinding changes depending
on the playback status.
∫ Playing Back Motion Pictures
Select a picture with a Motion Picture icon (such as [ ]),
and then press 3 to play back.
A Motion picture icon
B Motion picture recording time
•If you have filtered images for pl ayback by using [Slide Show]
or [Filtering Play] (P101), the selection screen appears.
(P99)
Press 3/4 to select [Play Video], and then press [MENU/SET].
•After playback starts, the elapsed playback time is display ed on
the screen.
For example, 8 minutes and 30 seconds is displayed as [8m30s].
•Operations performed during Motion Picture Playback
Play/Pause
3
Stop
4
Fast rewind¢/
2
Frame-by-frame rewind (while paus i ng)
Fast forward¢/
1
Frame-by-frame forward (while pausing)
¢ The fast forward/rewind speed increases if you press 1/2 again.
–You can adjust the volume with the zoom button.
- 37 -
Page 38
Basic
1/26
A
2X2X2X
B
•If you turn on the camera by pressing and holding [(], playback starts automatically.
•This camera complies with the DCF standard “Design rule for Camera File system” established by
JEIT A “Japan Electronics and Information Technology Industries Association” and with Exif
“Exchangeable Image File Format”. Files that do not comply with the DCF standard cannot be
played back.
•Images recorded with other camera may not be able to play back on this unit.
•This unit was designed to play motion pic tures using the MP4 and QuickTime Moti on JPEG formats.
•When using a high capacity card, it is possible that fast rewinding may be slower than usual.
•T o play back the motion pictures recorded by this unit on a PC, use the “PHOTOfunSTUDIO”
software on the CD-ROM (supplied).
•Be careful not to block the speaker of the camera during playback.
Displaying Multiple Screens (Multi Playba ck)
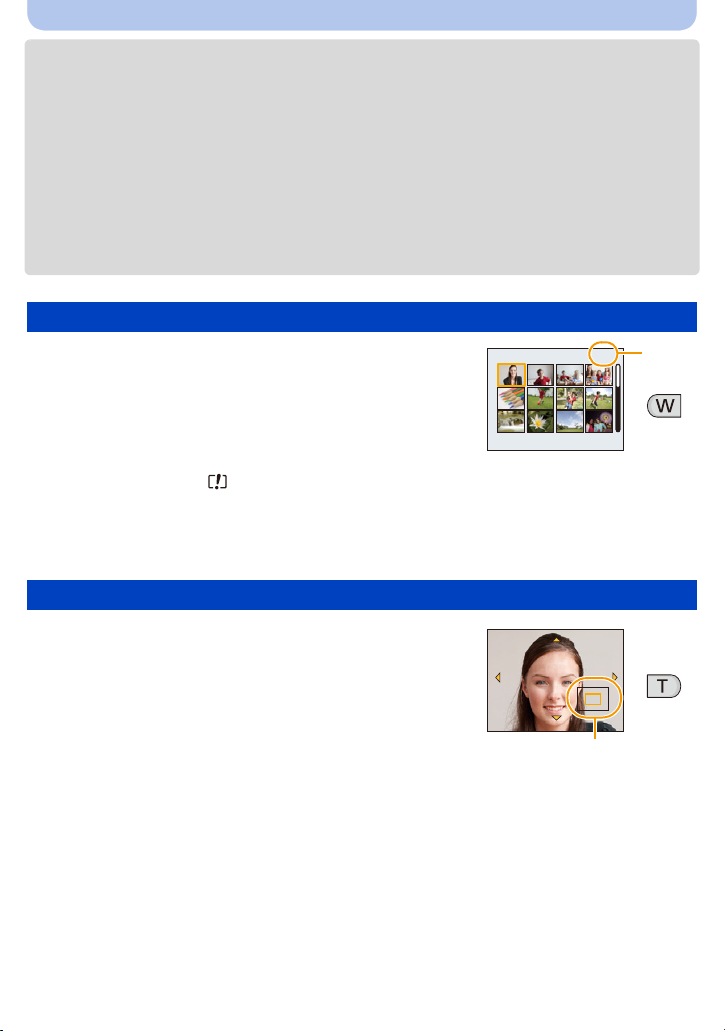
Press [W] of the zoom button.
1 screen>12 screens>30 screens>Calendar screen display
A Number of the selected pictur e and the tot al number of recorded
pictures
•Press [T] of the zoom button to return to the previous screen.
•Pictures displayed using [ ] cannot be pl ayed back.
∫ To return to normal playback
Press 3/4/2/1 to select a picture and then press [MENU/SET].
Using the Playback Zoom
Press [T] of the zoom button.
1k>2k>4k>8k>16k
When you pre ss [W ] of the zoom button afte r enlarging the pi cture,
•
the magnification becomes lower.
•When you change the magnification, the zoom position indication
B appears for about 2 seconds, and the position of the enlarged
section can be moved by pressing 3/4/2/1.
•The more a picture is enlarged, the more it s quality deteriorates.
- 38 -
Page 39

Basic
4 6
2
31
5
Deleting Pictures
Once deleted, pictures cannot be recovered.
•
Pictures on the built-in memory or the card that are being played back will be deleted.
•Pictures that are not in the DCF s tandard or those that are protected cannot be deleted.
To delete a single picture
Select the picture to be deleted, and
then press [ ].
•Confirm a ti on sc r ee n is di splayed.
Picture is deleted by selecting [Yes].
To delete multiple pictures (up to 100) or all the pictures
Press [ ].
Press 3/4 to selec t [Delete Multi] or [Delete All] and then press
[MENU/SET].
• [Delete All] > Confirmation screen is displayed.
Pictures are de l e te d by selecting [Yes].
• It is possible to delete all pictures except the ones set as favorite when [All
Delete Except Favorite] is selected with the [Delete All] set.
(When [Delete Multi] is selected) Press 3/4/2/1
to select th e p ictur e, a nd then p res s [D ISP.] to set.
(Repeat this step.)
• [ ] appears on the selected pictures. If [DISP.] is pressed
again, the setting is canceled.
(When [Delete Multi] is selected) Press [MENU/SET].
• Confirmation screen is displayed. Pictures are deleted by selecting [Yes].
•The picture group taken in [Time Lapse Shot] (pictures with the [ ] icon) will be treated a s a single
picture. Deleting the picture group will delete all pictures in the group. (P94)
•Do not turn the camera off while deletin g. Use a battery with sufficient battery power or the AC
adaptor (optional).
•Depending on the number of pictures t o be deleted, it may take some time to delete them.
- 39 -
Page 40

Basic
Setting the Menu
The camera comes with menus that allow you to choose the settings for taking pictures and
playing them back just as you like and menus that enable you to have more fun with the
camera and use it more easily.
In particular, the [Setup] menu contains some important settings relating to the camera’s clock
and power. Check the settings of this menu before proceeding to use the camera.
Setting menu items
Example: In the [Rec] menu, change [AF Mode] from [Ø] ([1-Area]) to [š] ([Face Detection])
Press [MENU/SET].
Press 2/1 to select menu and then press
[MENU/SET].
Menu Description of settings
[Rec] (P78 to 97)
(Recording Mode only)
[Motion Picture] (P98)
(Recording Mode only)
[Playback] (P108 to 119)
(Playback Mode only)
[Setup] (P42 to 50)
The menu lets you set the Coloring, Sensitivity or Number of
pixels, etc. of pictures you are recording.
This menu lets you set the set ting for motion pictures such as
recording quality.
This menu lets you set the Protection, Cropping or Print
Settings, etc. of rec orded pictures.
This menu lets you perform the c l ock settings, beep tone
settings and other settings which make it easier for you to
operate the camera.
- 40 -
Page 41

Basic
A
Press 3/4 to select the menu item and then
press [MENU/SET].
A Menu screen page
• It will switch to the next page when you reach the bottom.
(It will also switch by pressing the zoom button)
Press 3/4 to select the setting and then press
[MENU/SET].
• Depending on the menu item, its sett ing may not appear or it
may be displayed in a different way.
∫ Close the menu
Press [ ] until the screen returns to the
recording/playback screen or press the shutter
button half-way.
There are functions that cannot be set or used depending on the modes or menu settings being
•
used on the camera due to the spec ifications.
Using the Quick Menu
By using the Quick Menu, some of the menu settings can be easily found.
•
The features that can be adjusted using Quick Menu are determined by the mode or a display style
the camera is in.
Press [Q.MENU] when recording.
Press 3/4/2/1 to select the menu item and the setting
and then press [MENU/SET] to close the menu.
- 41 -
Page 42

Basic
A
BCD
About the Setup Menu
For details on how to select the [Setup] menu settings, refer to P40.
[Clock Set], [Auto Power Off] and [AutoReview] are important ite m s. Check their settings before
•
using them.
•In Intelligent Auto Mode, only [Clock Set], [World Time], [Beep]
[Stabilizer Demo.] ca n be set.
¢ Available setting s are different from other Recording Modes.
¢
, [LED Light], [Language],
[Precautions]
•Refer to P9 for details.
U [Clock Set]
•Refer to P25 for details.
[World Time]
To maintain waterproof performance, display the things you need to
check before use.
Setting Date/Time.
Set the time in your home area and travel destination.
You can display the local times at the travel destinations and record
them on the pictures you take.
After selecting [Destination] or [Home], press 2/1 to select an
area, and press [MENU/SET] to set.
Set [Home] first thing af ter purchasing. [Destination] can be set after
•
setting up [Home].
“ [Destination]:
Travel destination area
A Current time of the destination area
B Time dif ference from home area
– [Home]:
Your home area
C Current time
D Time difference from GMT (Greenwich
Mean Time)
•Press 3 if you are using Summer Ti me [ ]. (The time will move forward by 1 hour.) Press 3
once more to return to the normal time.
•If you cannot find the travel destination in the areas displayed on the screen, set by the time
difference from the ho me ar ea.
- 42 -
Page 43

Basic
Departure date and return date of the travel as well as the name of the
travel destination can be set.
You can display the number of days that have passed when playing
back the pictures and stamp it on the recorded pictures with [Text
Stamp] (P108).
[Travel Setup]:
[SET]:
Departure date and return date are set. Elapsed days (how many
days after) of the travel are recorded.
— [Travel Date]
[OFF]
The travel date is automatically canceled if the current date is after the
•
return date. If the [TravelSetup] is set to [OFF], [Location] will also be
set to [OFF].
[Location]:
[SET]:
Travel destination is recorded at the time of recording.
[OFF]
For details on how to enter characters, refer to “Entering Text” on P77.
•
•The number of days that have passed since the departure date can be printed out us ing the
“PHOTOfunSTUDIO” bundled software on the CD-ROM (sup plied).
•The travel date is c alcula ted u si ng th e dat e i n t he c lock set ti ng an d t he dep art ure date y ou s et. I f y ou
set [World Time] to the travel destination, the travel date is calculated using th e date in the clock
setting and the travel destination setting.
•The travel date setting is memorized even if the camera is turned off.
•The number of days that have passed since t he depa rt ure dat e is not recorded befo re the dep ar tu re
date.
•[Location] cannot be recorded when taking motion pictures.
•[Travel Date] cannot be set in the Intelligent Auto Mode. Setting of other Recording Mode will be
reflected.
- 43 -
Page 44

r [Beep]
1
2
123
Basic
This allows you to set the beep and shutter sound.
r [Beep Level]: [Shutter Vol.]:
[t]
([Low])
[u]
([High])
[s]
([OFF])
[Beep Tone]:
[]/[]/[]
3
[]
([Low])
[]
([High])
[]
([OFF])
[Shutter Tone]:
[]/[]/[]
u [Speaker Volume]
Adjust the volume of the speaker to any of the 7 levels.
•When you connect the camera t o a TV, the volume of t he TV spe ak ers do es not chang e. Also, when
connected, no sound is output from the camera speakers.
Brightness, color, or red or blue tint of the LCD monitor is adjusted.
[Brightness]:
Adjust the brightness.
[Contrast · Saturation]:
Adjust the contrast or clarity of colors.
[Monitor Display]
[Red Tint]:
Adjust the red tint.
[Blue Tint]:
Adjust the blue tint.
1 Select the settings by pressing 3/4, and adjust with 2/1.
2 Press [MENU/SET] to set.
•Some subjects may appear differently from actuality on the LCD monitor. However, this does not
affect the recorded pictures.
•When [Monitor Luminance] is set to [High Angle], [Brightness] and [Contrast · Saturation] cannot be
adjusted.
- 44 -
Page 45

Basic
These menu settings make it easier to see the LCD monitor when you
are in bright places or when you are holding the camera high above
your head.
¢
[„] ([Auto Power Monitor])
:
The brightness is adjusted automatically depending on how bright it is
around the camera.
[Monitor Luminance]
[…] ([Power Monitor]):
The LCD monitor becomes brighter and easier to see even when
taking pictures outdoors.
¢
[Å] ([High Angle])
:
The LCD monitor is easier to see when taking pictures with the camera
held high above your head.
[OFF]
¢ Can be set only during Recording Mode.
•High Angle Mode is also canceled if you turn the camera off or [Auto Power Off] is activated.
•The brightness of the pictures display ed on the LCD monitor is increased so some subjects may
appear different from real life on the LCD monitor. However, this does not affect the recorded
pictures.
•The LCD monitor automatically returns to normal brightness if no operations are preformed for
30 seconds when recording in [Power Monitor]. Press any button to make the LCD monitor bright
again.
•When [Monitor Luminance] is set, the usage time is reduced.
Set the pattern of the guidelines displayed when taking pictures. You
can also set whether or not to have the recording information
[Guide Line]
displayed when the guidelines are displayed. (P51)
[Rec. Info.]:
[ON]/[OFF]
[Pattern]:
[]/[]
•When you align the subject on the h oriz ont al and ve rti cal gu ideli nes or the c ross po int of th ese lin es,
you can take pictures with wel l-des igned co mposit ion by viewing th e si ze, th e s lop e and t he ba lance
of the subject.
•The [Pattern] setting is fixed to [ ] in the Intelligent Auto Mode.
•The guideline is not displayed in the [Panorama Shot].
- 45 -
Page 46

Basic
This allows you to set either to display or not display the histogram.
[ON]/[OFF]
A Histogram is a graph that displays brightness along
[Histog r a m ]
the horizontal axis (black to white) and the number of
pixels at each brightness level on the vertical axis.
It allows you to easily check a picture’s exposure.
A dark
B optimal
C bright
•When you take pictures with the flash or in dark places, the histogram is displayed in orange
because the recorded picture and the histogram do not match each other.
•The histogram is an approximation in Recordi ng Mode.
•The Histogram of a picture may not match in t he Recording Mode and the Playback Mode.
•The Histogram displayed in this camera does not match Histograms displayed by picture editing
software used in PCs etc.
•Histograms are not displayed in the following cases.
–Intelligent Auto Mode
–Multi Playback
–Recordin g m o ti on pi c t ures
–Playback Zoom
–Calendar
[Video Rec Area]
Angle of view for motion picture recording can be checked.
[ON]/[OFF]
•Motion picture recording area display is only an approximation.
•Recording area display may disappear when zo oming to Tele depend ing on the picture size setting.
•It will be fixed to [OFF] during the Intelligent Auto Mode.
- 46 -
Page 47

Basic
This will illuminate the subject with a lamp when taking motion pictures
in dark surrounding.
Also, the LED can also be used as a simple light when necessary.
[] ([On]):
LED light A is turned on continuously while
recording motion pictures.
[LED Light]
•Maximum illuminating range of the LED light is 50 cm (1.6 feet).
•The life of battery will decrease when the LED light is turned on constantly.
•In locations where the use of light is prohibited, set to [ ].
•It is fixed to [ ] in the following cases.
–[Advanced Underwater]
–[Panorama Shot]
–[Baby1]/[Baby2] (Scene Mode)
•It is not available in Playback Mode.
p [Aut o Power Off]
•[Auto Power Off] is set to [5MIN.] in the Intel ligent Auto Mode.
•[Auto Power Off] doe s no t wor k in th e fo l lowi n g cases.
–When using the AC adaptor
–When connecting to a PC or a printer
–When using [Time Lapse Shot]
–When recording or playing back mot i on pictures
–During a Slide Show
[] ([Off]):
To use a simple light
If you set to [ ], and press and hold down 1 (‰) on the recording
standby screen, the LED light will come on for 60 seconds. The LED
light can be conveniently used as a simple light when you wish to
illuminate your immediate surroundings in a dark location.
To turn off the light at any time, press [ ].
The camera is automatically turned off if the camera has not been
used for the time selected on the setting.
[2MIN.]/[5MIN.]/[10MIN.]/[OFF]
- 47 -
Page 48

Basic
Set the length of time that the picture is displayed after taking the still
picture.
[1SEC.]
o [Auto Review]
[2SEC.]
[HOLD]:
The pictures are displayed until one of the buttons is pressed.
[OFF]
•[Auto Review] is activated regardless of its setting in t he following cases.
–When using Auto Bracket
–When using [Burst]
•The Auto Review function is fixed to [2 SEC. ] in the following case.
–Intelligent Auto Mode
•[Auto Review] does not work in the following cases.
–When using [Time Lapse Shot]
–When recording motion pictur es.
v [No.Reset]
Reset the file number of the next recording to 0001.
•The folder number is updated and the file number starts from 0001.
•A folder number between 100 and 999 can be assigned.
When the folder number reaches 999, the number cannot be reset. We recommend formatting the
card (P50) after saving the data on a PC or elsewhere.
•T o reset the folder number to 100, format the built-in memory or the card first and then use this
function to res e t the file number.
A reset screen for the folder number will t hen appear. Select [Yes] to reset the folder number.
w [Reset]
The [Rec] or [Setup] menu settings are reset to the initial settings.
•When the [Rec] menu settings are r eset during recording, the operation that resets the lens is also
performed at the same time. You will hear the sound of the lens operating but this is normal and not
indicative of malfunctioning.
•When the [Rec] menu settings are reset, data registered with [Face Recog.] will be also reset.
•When [Setup] menu settings are r eset, the following settings are also reset.
–The birthday and name settings for [Baby1]/[Baby 2] and [Pet] in Scene Mode.
–The [TravelDate] setting. (Departure date, return date, destination)
–The [World Time] setting.
•The folder number and the cloc k s etting are not changed.
- 48 -
Page 49

Basic
Set to match the color television system in each country or the type of
TV.
| [Output]
[ ] ([TVAspect]):
[W]:
When connecting to a 16:9 screen TV.
[X]:
When connecting to a 4:3 screen TV.
•This will work when the AV cable (optional) is connected.
This mode allows you to display pictures vertically if they were
recorded holding the camera vertically.
[] ([On]):
M [Rotate Disp.]
Rotate pictures on a TV and the LCD monitor so that they are
displayed vertically.
[] ([External Only]):
Pictures are displayed vertically by rotating when played back on TV.
[OFF]
•Refer to P37 for information about how to play back pi ctures.
•When you play back pictures on a PC, t hey cannot be displayed in the rotated direction unless the
OS or software is compatible with Exif. Exif is a file format for still pictures which allows recording
information etc. to be added. It was established by “JEITA (Japan Electronics and Information
Technology Industries Association)”.
•It may not be possible to rotat e pictures that have been recorded with other equipment.
•Pictures are not rotated during Multi Playback.
[Version Disp.]
It is possible to check which version of firmware is on the camera.
- 49 -
Page 50

Basic
For Canadian assistance, please call:
1-800-99-LUMIX (1-800-995-8649) or
send e-mail to: lumixconcierge@ca.panasonic.com
For USA and Puerto Rico assistance, please call:
1-800-211-PANA(7262) or, contact us via the web at:
http://www.panasonic.com/contactinfo
A
B
[Format ]
The built-in memory or card is formatted. Formatting irretrievably
deletes all the data so check the data carefully before formatting.
•Use a battery with sufficient bat t ery power or the AC adapt or (optio nal) whe n for mattin g. Do not tu rn
the camera off during format ting.
•If a card has been inserted, only the card is formatted. T o format the built-in memory, remove the
card.
•If the card has been formatted on a PC or other equipment, format it on the camera again.
•It may take longer to format the bu ilt-in memory than the card.
•If you cannot format, contact the dealer or Panasonic.
~ [Language] Set the language displayed on the screen.
•If you set a different language by mistake, select [~] from the menu icons to set the desired
language.
Displays the amount of jitter the camera has detected.
A Amount of jitter
B Amount of jitter after correction
[Stabilizer Demo.]
•The Stabilizer function is switched between [On] and [Off] every time [MENU/SET] is pressed.
•[Stabilizer Demo.] is an approximation.
- 50 -
Page 51

Recording
2
R1m10s
3
100-0001
F3.9
ISO
100
1/60
AWB
1/5
Retouch
About the LCD Monitor
Press [DISP.] to change.
1 LCD monitor
When the menu screen appears, the [DISP.] button is not
•
activated. During Pla yback Zoom, while playing back
Motion Pictures and during a Slide Show, you can only
select E or G.
In Recording Mode
A Normal display
B Normal display
¢1
¢1
C No display
D No display (Recording guide line)
2 Nu mber of reco rdable pictures
3 Available recording time
In Playback Mode
E Normal display
F Display with recording information
G No display
¢2
AB
5
¢1
DC
EF
¢1
100-0001 1/5
10:00 DEC.1.2013
Retouch
G
¢1 If the [Histogram] in [Setup] menu is set to [ON], Histogram will be displayed.
¢2 Name of the registered person in [Face Recog.] is displayed when [DISP.] is pressed.
- 51 -
Page 52

Recording
Using the Zoom
Applicable modes:
You can zoom in to make people and objects appear closer or zoom out to record landscapes
in wide angle.
To make subjects appear further away use (Wide)
Press [W] of the zoom button.
To make subjects appear closer use (Tele)
Press [T] of the zoom button.
∫ Screen display
Example of display when Extended Optical Zoom (EZ), Intelligent Zoom and Digital Zoom are
used together.
A Extended Optical Zoom indication
B Optical Zoom range
C Intelligent Zoom range
D Digital Zoom range
E Zoom magnification (approximation)
When using the Zoom function, an estimate of the focus range will appear in conjunction
•
with the zoom display bar. (Example: 0.5 m (1.6 ft.) –¶)
Optical Zoom
Zooms in without deteriorating the image quality.
Maximum magnification: 4k
- 52 -
Page 53

Recording
Extended Optical Zoom (EZ)
This function works when any of the picture sizes (P78) indicated with is selected. You can
zoom in further than you can with the Optical Zoom without deteriorating the image quality.
Maximum magnification: 9k
(This includes the optical zoom magnification. The magnification level differs depending on
[Picture S i z e ] se tting.)
“EZ” is an abbreviation of “Extended Optical Zoom”.
•
•This function is not available in the following cases:
–In Macro Zoom Mode
–[Toy Effect] (Creative Control Mode)
–[High Sens.] (Scene Mode)
–When [Burst] in the [Rec] menu is set to [ ] or [ ]
–When recording motion pictur es
Intelligent Zoom
This function works when [i.Resolution] (P89) in the [Rec] menu is set to [i.ZOOM]. You can
zoom in up to twice the original zoom magnification while minimizing the deterioration of the
image quality.
This will work automatically in Intelligent Auto Mode.
•
•This function is not available in the following cases:
–In Macro Zoom Mode
–[Toy Effect] (Creative Control Mode)
–[High Sens.] (Scene Mode)
–When [Burst] in the [Rec] menu is set to [ ] or [ ]
Digital Zoom
This function works when [Digital Zoom] (P89) in the [Rec] menu is set to [ON]. Although the
image quality deteriorates every time you zoom in further, you can zoom in up to four times the
original zoom magnification.
When using the [i.ZOOM], the maximum magnification of the Digital Zoom is limited to 2k.
•
•We recommend using a tripod and the Self-timer (P59) for taking pictures.
•This function is not available in the following cases:
–Intelligent Auto Mode
–[Toy Effect]/[Miniature Effect] (Creative Control Mode)
–[High Sens.] (Scene Mode)
–When [Burst] in the [Rec] menu is set to [ ] or [ ]
- 53 -
Page 54

Recording
Taking Pictures Using the Built-in Flash
Applicable modes:
A Photo flash
Do not cover it with your fingers or other objects.
Switching to the appropriate flash setting
Set the flash to match the recording.
Press 1 [‰].
Press 3/4 to select the item and then press [MENU/SET].
- 54 -
Page 55

Recording
Item Description of settings
[‡] ([Auto]) The flash is automatically activate d when the recording conditions
[]([iAuto])
¢1
make it necessary.
The flash is automatically acti vated when the recording conditions
make it necessary.
[]
([Auto/Red-Eye])
¢2
It is activated once before the actual recording to reduce the
red-eye phenomenon (eyes of the subject appearing red in the
picture) and then activated again for the actual recording.
•Use this when you take pictures of people in low lighting
conditions.
The flash is activated every time regardless of the recording
[‰]
([Forced Flash On])
conditions.
•Use this when your subject is back-lit or u nder fluorescent
light.
If you take a picture with a dark back ground landscape, this
feature will slow the shutt er speed when the flash is activated so
[]
([Slow Sync./Red-Eye])
¢2
that the dark background will become brig ht. Simultaneously, it
reduces the red-eye phen omenon.
•Use this when you take pictures of people in front of a dark
background.
[Œ]
([Forced Flash Off]
)
The flash is not activated in any recording conditions.
•Use this when you take pictures in places where the use of
flash is not permitted.
¢1 This can be set only when Intelligent Auto Mode is set. The icon changes depending on the type
of subject and brightness. (P31)
¢2 The flash is activated twice. The subject should not move until the second flash is
activated. Interval until the second flash depends on the brightness of the subject.
[Red-Eye Removal] (P96) on the [Rec] menu is set to [ON], [ ] appears on the flash icon.
- 55 -
Page 56

Recording
∫ Available Flash Settings in Recording Mode
The available flash settings depend on the Recording Mode.
(±: Available, —: Not available, ¥: Scene Mode initial setting)
‡ ‰ Œ
¢
±
±±±— ±
± — ± — ±
———±
* + : ; ±¥±— ±
, / ï 5 ————¥
. ———¥±
1 í 9 ± — ± — ¥
¢ [ ] is displayed.
•The flash setting may change if the Rec ording Mode is changed. Set the flash setting again if
necessary.
•The flash setting is memorized even if the camera is turned off. However, the Scene Mode flash
setting is reset to the initial setting when the Scene Mode is changed.
•Flash will not be activated when recording motion picture.
- 56 -
Page 57

Recording
∫ The available flash range
Wide Tele
In [ ] in
[Sensitivity]
30 cm (0.98 feet) to 4.4 m (14 feet) 1 m (3.3 feet) to 3 m (9.8 feet)
∫ Shutter speed for each flash setting
Flash setting Shutte r speed (Sec. ) Flash setting Shutter speed (Sec.)
‡
1/60 to 1/1300
‰Œ
¢1 The shutter speed changes depending on the [Stabilizer] setting.
¢2 When [ ] in [Sensitivity] is set.
1 or 1/8 to 1/1300
1 or 1/4 to 1/1300
¢1
¢2
•¢1, 2: The shutter speed becomes a maximum of 1second in the following cases.
–When the Optical Image Stabilizer is set to [OFF].
–When the camera has deter mined that there is very little jitter when the Optical Image Stabilizer is
set to [ON].
•In Intelligent Auto Mode, shut ter speed changes depending on the identified sce ne.
•The shutter speed for [Sports], [Snow], [Beach & Surf], [ Adv anced Underwater] and Scene Modes
will be different from above table.
•If you bring the Flash too close to an objec t, the object may be distorted or discolored by the heat or
lighting fr om th e F l a s h.
•Recording a subject from to o clos e, or with out suf f icient flas h wi ll no t prov ide the a ppro priate level of
exposure, and may result in a picture that is too white or dark.
•When the Flash is being charged, the Flas h icon blinks red, and you cannot take a picture ev en
when you press the shutter button fully.
•If recording a subject without sufficient flash, the White Balance may no t be properly adjusted.
•The effects of the flash may not be adequately achieved under the following conditions.
–W h e n [B u rs t] in th e [Re c ] men u is se t to [ ]
–When the shutter speed is too fast
•It may take time to charge the Flash if you repeat taking a picture. Take a picture after the access
indication disappears.
•The Red-Eye Reduction effect differs between people. Also, if the subject is f ar away from the
camera or was not looking at the firs t Flash, the effect may not be evident.
- 57 -
Page 58

Recording
Taking Close-up Pictures ([AF Macro]/[Macro Zoom])
Applicable modes:
This mode allows you to take close-up pictures of a subject, e.g. when taking pictures of
flowers.
Press 4 [#].
Press 3/4 to select the item and then press [MENU/SET].
Item Description of settings
[]
([AF Macro])
[]
([Macro Zoom])
[OFF]
You can take pictures of a subject as close as 5 cm (0.16 feet)
from the lens by pressing the zoom button upmost to Wide (1k).
Use this setting to get close to the subject and then further
enlarge when taking the picture.
You can take a picture with the Digital Zoom up to 3k while
maintaining the distance to the subject for the extreme Wide
position [5 cm (0.16 feet)].
The image quality is poorer than during normal recording.
•
•Zoom range will be displayed in blue. (digital zoom range)
j
•We recommend using a tripod and the Self-timer.
•We recommend setting the flash to [Œ] when you take pictures at close range.
•If the distance between the camera and the subject is beyond the focus range of the camera, the
picture may not be properly focused even if the focus indication lights.
•When a subject is close to the camer a, the ef fe ctive focus range is sign ifica ntly narro wed. There fore,
if the distance between the camera and the subject is changed after focusing on the subject, it may
become difficult to foc us on it again.
•Macro Mode gives priority to a subject close to the camera. Therefore, if the distance between the
camera and the subject is far, it takes longer to focus on it.
•When you take pictures at close range, the resolution of the periphery of the picture may decrease
slightly. This is not a malfunction.
•[ ] cannot be set in the following cases.
–[Toy Effect]/[Miniature Effect] (Creative Control Mode)
–When [AF Mode] is set to [ ]
–When [Burst] is set to [ ] or [ ]
- 58 -
Page 59

Recording
Taking Pictures with the Self-timer
Applicable modes:
Press 2 [ë].
Press 3/4 to select the item and then press [MENU/SET].
Item Description of settings
([10sec.])
[]
[]([2sec.])
[OFF]
Press the shutter button halfway to focus and
then press it fully to take the picture .
• The self-timer indicator A blinks a nd th e sh utter is ac tiva ted
after 10 seconds (or 2 seconds).
Picture is taken 10 seconds after shutter is pressed.
Picture is taken 2 seconds after shutter is pressed.
•
When using a tripod, etc., this s etting is a convenient way to avoid
the jitter caused by pressing the shutter button.
j
•When you press the shutter button once fully, the subject is automatically focused just before
recording. In dark places, the Self-timer indicator will blink and then may turn on brightly, operating
as an AF Assist Lamp to allow the camera to focus on the subject.
•We recommend using a tripod when recording with the Self-timer.
•Self-timer is disabled in the following cases.
–When using [Time Lapse Shot]
–When recording motion pictur es
- 59 -
Page 60

Recording
Compensating the Exposure
Applicable modes:
Use this function when you cannot achieve appropriate exposure due to the difference in
brightness between the subject and the background.
Underexposed Properly exposed Overexposed
Compensate the exposure
towards positive.
Compensate the exposure
towards negative.
Press 3 [È] until [Exposure] appears.
Press 2/1 to compens ate the exposure an d then press
[MENU/SET].
• The exposure compensation value appears on the screen.
• Select [0 EV] to return to the original exposure.
•EV is an abbreviation of [Exposur e Value], a unit indicating the amount of exposure. The EV
changes with the aperture value or the shutter speed.
•The set exposure value is memorized even if the camera is turned off.
•The compensation range of the exposure will be limited depending on the brightness of the subject.
•You c annot use the Exposure Compensation in following conditio n.
–[StarrySky] (Scene Mode)
- 60 -
Page 61

Recording
Taking Pictures Using Auto Bracket
Applicable modes:
In this mode, 3 pictures are automatically recorded in the selected exposure comp ensation
range each time the shutter button is pressed.
With Auto Bracket d1EV
1st picture 2nd picture 3rd picture
d0EV j1EV i1EV
Press 3 [È] until [Auto Bracket]
appears.
Press 2/1 to set the compensation range of the
exposure and then press [MENU/SET].
• When you do not use Auto Bracket, select [OFF] (d0).
•When Auto Bracket is set, [ ] is displayed on the screen.
•When taking pictures usin g Auto Bracket after setting the exposure compensation range, the
pictures taken are based on the selected exposure compensation range.
•The exposure may not be compensated with Auto Bracket depending on the brightness of the
subject.
•[Œ] is set for the flash when Auto Bracket is set.
•You cannot use the Auto Bracket in following conditions.
–[Toy Effect]/[Miniature Effect] (Creative Control Mode)
–[StarrySky] (Scene Mode)
–When using [Time Lapse Shot]
–When recording motion pictur es
- 61 -
Page 62
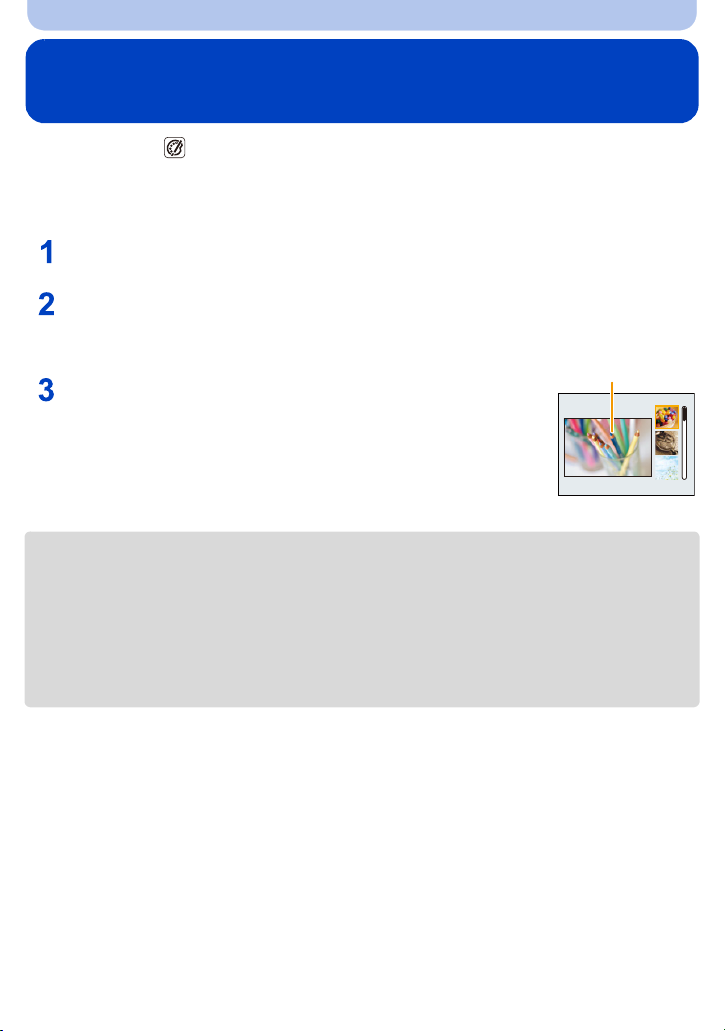
Recording
A
Taking Pictures with different image effects
(Creative Control Mode)
Recording Mode:
This mode records with additional image effects. You can set the effects to add by selecting
example images and checking them on the screen.
Press [MODE].
Press 3/4/2/1 to select [Creative Control], and then press
[MENU/SET].
Press 3/4 to select image effects and then press
[MENU/SET].
• The image effect of the selected example image will be applied in a
preview di s play
• A brief description of se lected image effect appears when you press
[DISP.].
•T o change the Creative Control Mode, press [MENU/SET], select [Creative Control] using 3/4/2/
1, and then press [MENU/SET].
•The displayed image on th e recording screen and th e preview of the se lected ima ge eff ect may di ffer
from the actu al re corded image.
•The Creative Control Mode setting is stored even after turning off this unit.
•White Balance will be fixed to [AWB].
•The following cannot be set as the camera adjusts automatically.
–[Sensitivity]
A.
- 62 -
Page 63

Recording
¢ These pictures are examples to show the effect.
[Expressive]
This effect emphasizes the color to make a pop art picture.
[Retro]
This effect gives a faded image.
[High Key]
This effect adds a bright, airy and soft feel to the overall image.
•If you select this effect with [Panorama Shot], the effect ma y not be
apparent in places with insufficient brightness.
[Low Key]
This effect adds a dark and relaxing feel to the overall image and
enhances bright parts.
- 63 -
Page 64

[Sepia]
This effect creates a sepia image.
[Dynamic Monochrome]
This effect gives a higher contrast to create an impressive black and
white picture.
[Impressive Art]
This effect gives your photo a dramatic contrast look.
•If you select this effect with [Panorama Shot], seams between pictures
may become noticeable.
Recording
[High Dynamic]
This effect produces the optimum brightness for both dark and bright
parts.
- 64 -
Page 65

[Cross Process]
[Toy Effect]
Recording
This effect gives your photo a dramatic color look.
Items that can be set
Color
•
Press 2/1 to select the color to en hance, and
press [MENU/SET].
This effect reduces peripheral brightness to give the impression of a toy
camera.
Items that can be set
Color Orange emphasized Blue emphasized
•Press 2/1 to select the color tone, and
press [MENU/SET].
Green tone/Blue tone/Yellow tone/Red tone
- 65 -
Page 66

[Miniature Effect]
[One Point Color]
Recording
This effect blurs peripheral areas to give the impression of a diorama.
•Display of the recording screen will be delayed more than usual and the
screen will look as if frames are being dropped.
•No sound is recorded in motion pictures.
•Approximately 1/10 of th e time period is recorded. (If you record for
10 minutes, the resulting motion picture recording will be approximately
1 minute long . )
The displayed available rec ording time is approximately 10 times. When
switching to Recording Mode, please check the available recording time.
•When taking pictu res of a la rge size, t he scre en may turn black af ter t aking
the picture because of signal processing. This is not a malfunction.
This effect leaves one selected color to emphasize impressiveness.
∫ Set the color to leave in
1 Fit the color you want to leave in the
frame at the center of the screen, and
then press [MENU/SET].
If you press [DISP.], you will return to step 1.
•
2 Check the color you have set, and then
press [MENU/SET].
The set color is memorized even if the
•
camera is turned off. In that case, the
operation starts from step
2.
•Depending on the subject, the s et color may not
be left in.
- 66 -
Page 67

Recording
Take the Outdoors Scene Expressively
Recording Mode:
By setting the Recording Mode to [ ], [ ], [ ] or [ ] pictures can be taken more effectively
matching the conditions such as sports, snow, beach & surf.
Tone of the color of the image may change when picture is taken with unmatched usage.
•
•The following cannot be set as the camera adjusts automatically.
–[Sensitivity]/[i.Exposure]/[i.Resolution]/[Color Mode]/[Red-Eye Removal]
[Sports]
Setting for when you want to take pictures of sports scenes or other fast-moving events.
Shutter speed may slow down up to 1second.
•
•This mode is suitable for taking pictures of subjects at distances of 5 m (16 feet) or more.
[Snow]
This allows you to take pictures that show the snow as white as possible at a ski resort or a
snow-covered mountain.
T o pr event wat er lea ka ge, mak e s ure that t here are no f orei gn o bject s , su ch as san d, ha ir, dust, etc.,
•
clamped and close the side doo r all the way until it clicks. Also, read
Waterproof/Dustproof and Anti-shock Performance of the Camera
“(Important) About the
” (P8) before using the c a m er a .
[Beach & Surf]
This mode is optimal for taking pictures to 3 m (10 feet) underwater and at the beach.
T o pr event wat er lea ka ge, mak e s ure that t here are no f orei gn o bject s , su ch as san d, ha ir, dust, etc.,
•
clamped and close the side doo r all the way until it clicks. Also, read
Waterproof/Dustproof and Anti-shock Performance of the Camera
•Dip the camera in fresh water in a shallow container for 10 minutes or less after using it, then wipe
the water off with dry soft cloth. (P11)
“(Important) About the
” (P8) before using the c a m er a .
- 67 -
Page 68

Recording
[Advanced Underwater]
This mode is optimal for taking pictures at depths of 3 m (10 feet) to 7 m (23 feet).
You can use [Color Reproduction] (P95) in the [Rec] menu and take pictures underwater
without losing the red tinge.
¢ This camera has a waterproof/dustproof function equivalent to “IP68”. It is possible to take
pictures in 7 m (23 feet) depth for 60 minutes.
∫ Fixing the focus underwater (AF Lock)
You can fix the focus before taking a picture with AF lock. This is useful if you want to take
pictures of a fast moving subject etc.
1 Aim the AF area at the subject.
2 Press 2 to fix the focus.
•
The AF lock icon appears when the subject is focused.
• Press 2 again to cancel AF lock.
• When you press the zoom button, the AF lock is canceled. In this case , focus on the subject
and fix the focus again.
• You cannot set to AF lock when [AFMode] is set to [ ].
∫ To beautifully record the underwater red tinge (Underwater colo r reproduction)
Subjects appear blue in pictures taken underwater. Using [Color Reproduction] in the [Rec]
menu will allow pictures to be taken without the subjects losing their red tone.
1 Select [Color Reproduction] in the [Rec] menu.
2 Press 3/4 to select the effect, and then press [MENU/SET].
•
You can select the effect of [HIGH], [MEDIUM], [LOW], or [OFF].
•Ichikawa Soft Laboratory has studied color loss in water based on the results of measurements of a
large number of color samples actually conducted in the ocean, and has developed “Natural Light
Technology” to reproduce vivid, accurate colors based on ongoing research into color reproduction
of pictures taken underwater.
[Color Reproduction] in the [Rec] menu and [ColorReproduction] under [Retouch] in the [Playback]
menu make use of this technology.
¢ “Natural Light Technology” is the technology behind “SILKYPIX Marine Photography”, Ichikawa
Soft Laboratory’s digital reproduction software designed for underwater pictures.
http://www.isl.co.jp/SILKYPIX/marine/p/
¢
•T o pr ev ent wat er lea kage, make sure th at t here are no forei gn o bjects, such as sand, hair, dust, etc.,
clamped and close the side doo r all the way until it clicks. Also, read
Waterproof/Dustproof and Anti-shock Performance of the Camera
“(Important) About the
” (P8) before using the c a m er a .
•Dip the camera in fresh water in a shallow container for 10 minutes or less after using it, then wipe
the water off with dry soft cloth. (P11)
•If there is a substantial amount of matter in the water, set flash to [Œ].
•[Color Reproduction] is initially set to [LOW] on the camera.
- 68 -
Page 69

Recording
Taking panorama pictures ([Panorama Shot])
Recording Mode:
Pictures are recorded continuously while moving the camera horizontally or vertically, and are
combined to make a single panorama picture.
Press [MODE].
Press 3/4/2/1 to select [Panorama Shot], and then press [MENU/SET].
Press 3/4 to select the recording direction and then
press [MENU/SET].
Press 3/4 to select the image effect, and then press [MENU/SET].
• Y ou can add th e same image ef fect as the Crea tive Contro l Mode with the sa me operation as
the Creative Control Mode. (except for [Toy Effect] and [Miniature Effect])
• Read P63–66 for details on the respect i ve effects.
• If you are not going to add an image effect, select [OFF].
After confirming the recording direction, press [MENU/SET].
• A horizontal/vertical guide is displayed.
If you press 1, you will return to step
3.
Press the shutter button halfway to focus.
- 69 -
Page 70

Recording
E
Press the shutter button fully and record a picture while moving the
camera in a small circle in the direction selected in Step 3.
Recording from left to right
Trace a half-circle with the camera, taking about 4 seconds.
•
Move the camera at a const ant speed.
Pictures may not be able to be recorded properly if the camera is moved too fast or slow.
A 1 second
B 2 seconds
C 3 seconds
D 4 seconds
E Recording direction and panning (Guide)
Press the shutter button once again to end the still picture recording.
• Recording can also be ended by keeping the camera still while recording.
- 70 -
Page 71

Recording
∫ Technique for Panorama Shot Mode
A Move the camera in the recording direction
without shakin g it. If th e ca m er a sha ke s to o
much, pictures may not be able to be
recorded, or the recorded p an orama pi cture
may become narrower (smaller).
B Move the camera towards the edge of the
range you wish to record. (The edg e of the
range will not be recorded in the last frame)
The zoom position is fixed to Wide.
•
•The focus, white balance, and exposure are fixed at the optimum values for the first pi cture. As a
result, if the focus o r brightness changes substantially during recording, the entire panora ma picture
may not be recorded at the suitable focus or brightness.
•White Balance is fixed to [AWB] while an image effect is applied.
•When multiple pictures are combined to create a single panorama picture, the subject may appear
distorted or the connection points may be noticeable in some cases.
•The number of recording pixels in the hori zontal and vertical directions of the panorama picture
varies depending on the recording di rection and the number of combined pictures. The maximum
number of pixels is shown below.
Recording direction Horizontal Resolution Vertical Resolution
Horizontal 3200 pixels 720 pixels
Vertical 960 pixels 3200 pixels
•A panorama picture may not be able to be created, or the pictures may not be combined properly
when recording the following subjects or under the recording conditions below.
–Subjects with a single, uniform color or repetitive pattern (such as the sky or a beach)
–Moving subjects (person, pet, car, waves, flowers bl owing in the breeze, etc.)
–Subjects where the color or patterns change in a short time (such as an image appearing on a
display)
–Dark places
–Locations with flickering light sources such as fluorescent lights or candles
∫ About playback
¢1
3 Start panorama playback
4 Stop
¢1 If you have filtered images for playback by using [SlideShow] (P99) or [Filtering Play] (P101), the
selection screen appears. Press 3/4 to select [Play Panorama], and then press [MENU/SET].
¢2 You can perf orm frame-by-frame forward/rewind by pressing
/Pause
¢2
1/2 during a pau s e .
- 71 -
Page 72

Recording
Taking pictures that match the scene being
recorded
Recording Mode:
When you select a Scene Mode to match the subject and recording situation, the camera sets
the optimal exposure and hue to obtain the desired picture.
(Scene Mode)
Press [MODE].
Press 3/4/2/1 to select [Scene Mode], and then press [MENU/SET].
Press 3/4/2/1 to select the Scene Mode and then
press [MENU/SET].
•T o change the Scene Mode, press [MENU/SET], select [Scene Mode] using 3/4/2/1, and then
press [MENU/SET].
•The following cannot be set in Scene Mode as the c amera adjusts automatically.
–[Sensitivity]/[i.Exposure]/[i.Resolution]/[Color Mode]
- 72 -
Page 73

Recording
[Portrait]
When taking pictures of people outdoors during the daytime, this mode allows you to improve
the appearance and make their skin tones look healthier.
∫ Technique for Portrait Mode
To make this mode more effective:
1 Press and hold down the zoom button as far as possible to Tele.
2 M ove close to the subject to make this mode more effective.
[Soft Skin]
When taking pictures of people outdoors during the daytime, this mode enables the texture of
their skin to appear even softer than with [Portrait]. (It is effective when taking pictures of people
from the chest up.)
∫ Technique for Soft Skin Mode
To make this mode more effective:
1 Press and hold down the zoom button as far as possible to Tele.
2 M ove close to the subject to make this mode more effective.
If a part of the background etc. is a color close to skin color, this part is also smoothed.
•
•This mode may not be effective when ther e is insufficient brightness.
[Scenery]
This allows you to take pictures of a wide landscape.
- 73 -
Page 74

Recording
[Night Portrait]
This allows you to take pictures of a person and the background with near real-life brightness.
∫ Technique for Night Portrait Mode
•
Use the flash. (You can set to [ ].)
•Ask the subject not to move while t aking a picture.
•We recommend using a tripod and the Self-timer for taking pictures.
•Shutter speed may slow down up to 8seconds.
•The shutter may remain closed (max. about 8 sec.) after taking the picture because of signal
processi ng . This is not a malfunction.
•Noise may become visible when you take pictures in dark places.
[Night Scenery]
This allows you to take vivid pictures of the nightscape.
We recommend using a tripod and the Self-timer for taking pictures.
•
•Shutter speed may slow down up to 8seconds.
•The shutter may remain closed (max. about 8 sec.) after taking the picture because of signal
processi ng . This is not a malfunction.
•Noise may become visible when you take pictures in dark places.
[Food]
This mode allows you to take pictures of food with a natural hue without being affected by the
ambient light in restaurants, etc.
- 74 -
Page 75

Recording
[Baby1]/[Baby2]
This takes pictures of a baby with a healthy complexion. When you use the flash, the light from
it is weaker than usual.
It is possible to set different birthdays and names for [Baby1] and [Baby2]. You can select to
have these appear at the time of playback, or have them stamped on the recorded image using
[Text Stamp] (P108).
∫ Birthday/Name setting
1 Press 3/4 to select [Age] or [Name] and then press [MENU/SET].
2 Press 3/4 to select [SET] and then press [MENU/SET] .
3 Enter the birthday or na me.
Birthday: 2/1: Select the items (year/month/day)
Name: For details on how to enter characters, refer to “Entering Text” on P77.
When the birthday or name is set, [Age] or [Name] is automatically set to [ON].
•
• If [ON] is selected when the birthday or name has not been registered, the setting screen
appears automatically.
3/4: Setting
[MENU/SET]: Set
4 Press 4 to select [Exit] and then press [MENU/SET] to finish.
∫ To cancel [Age] and [Name]
Select the [OFF] setting in step
The age and name can be printed out using the “PHOTOfunSTUDIO” bundled software on the
•
CD-ROM (supplied).
•If [Age] or [Name] is set to [OFF] even when the birthday or name has been set , t he age o r n ame will
not be displayed.
•Shutter speed may slow down up to 1second.
2.
- 75 -
Page 76

Recording
[Pet]
Select this when you want to take pictures of a pet such as a dog or a cat.
You can set your pet’s birthday and name.
For information about [Age] or [Name], refer to [Baby1]/[Baby2] on P75.
[Sunset]
Select this when you want to take pictures of a sunset view. This allows you to take vivid
pictures of the red color of the sun.
[High Sens.]
This mode minimizes the jitter of the subjects, and enables you to take pictures of these
subjects in dimly lit rooms.
∫ Picture Size
Select the picture size of 3M (4:3), 2.5M (3:2), 2M (16:9) or 2.5M (1:1).
[Starry Sky]
This mode allows you to take vivid pictures of a starry sky or a dark subject.
∫ Setting the shutter speed
Select a shutter speed of [15 sec.], [30 sec.] or [60 sec.].
Press the shutter butto n fully to display the countdown screen. Do not move the camera after this
•
screen is displayed. When countdown finishes, [Please wait...] is displayed for the same length of
time as the set shutter speed for signal processing.
∫ Technique for Starry Sky Mode
•
The shutter opens for 15, 30 or 60seconds. Be sure to use a tr ipod. We also recommend taking
pictures with the self-timer.
[Glass Through]
Objects in the distance are prioritized for focus.
This mode is ideal for taking pictures of scenery and other landscapes through clear glass,
such as in vehicles or buildings.
The camera may focus on the glass if it is dirty or has dust on it.
•
•The pictures taken may not look natural if the glass is colored . When this happens, change the white
balance settings.
(P80)
- 76 -
Page 77

Recording
Entering Text
It is possible to enter babies’ and pets’ names and the locations when
recording. When a screen that looks like the one on the right is displayed,
you can enter characters. (Only alphabetical characters and symbols can
be entered.)
Press 3/4/2/1 to select text and then press [MENU/SET] to register.
• Move the cursor to [ ] and then press [MENU/SET] to switch tex t bet ween [A] (capitals), [a]
(lower case), [1] (numbers) and [&] (special characters).
• To continuously enter the same character, move the cursor by pressing [T] on the zoom
button.
• The following operations can be performed by moving the cursor to the item and pressing
[MENU/SET]:
–[] ]: Enter a blank
–[Delete]: Delete a character
–[ ]: Move the entry position cursor to the l eft
–[ ]: Move the entry position cursor to the right
• The following characters and numbers can be entered.
–A maximum of 30 characters can be entered (Maximum of 9 characters when setting
names in [Face Recog.]).
A maximum of 15 characters can be entered for [ ], [ ], [ ], [ ] and [ ] (Maximum
of 6 characters when setting names in [Face Recog.]).
Press 3/4/2/1 to move the cursor to [Set] and then press [MENU/SET]
to end text input.
•T ext can be scrolled if all of the entered text does not fit on the screen.
•It is displayed in order of locati on, [Name] ([Baby1]/[Baby2], [Pet]), [Name] ([Face Recog.]).
- 77 -
Page 78
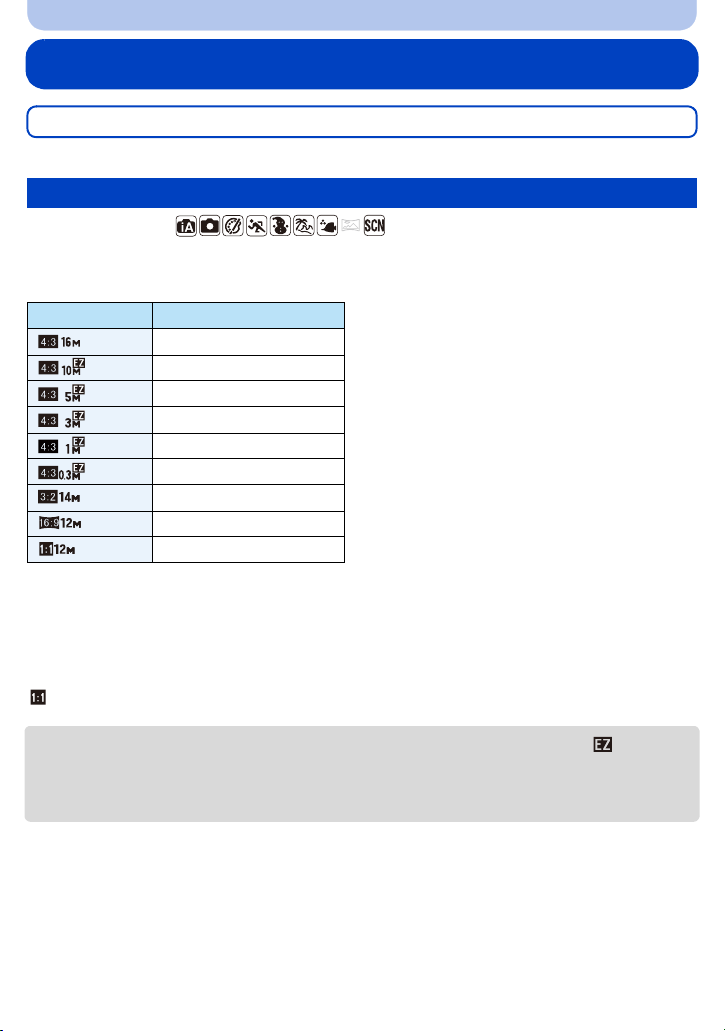
Recording
Using the [Rec] Menu
For details on [Rec] menu settings, refer to P40.
[Picture Size]
Applicable modes:
Set the number of pixels. The higher the numbers of pixels, the finer the detail of the pictures
will appear even when they are printed onto large sheets.
Settings Picture Size
[] 4608k3456
[]¢3648k2736
[] 2560k1920
[]¢2048k1536
[]¢1280k960
[] 640k480
[] 4608k3072
[] 4608k2592
[] 3456k3456
¢ This item cannot be set in the Intelligent Aut o Mode.
X :
Aspect ratio of a 4:3 TV
Y : Aspect ratio of a 35 mm film camera
W :
Aspect ratio of a high-definition TV, etc.
:
Square aspect ratio
•In specific modes, Extended Optical Zoom cannot be used, and the picture size for [ ] is not
displayed. For details regarding modes in which Extended Optical Zoom cannot be used, refer to
P53.
•Pictures may appear mosaic depending on the subject and the recording conditions.
- 78 -
Page 79
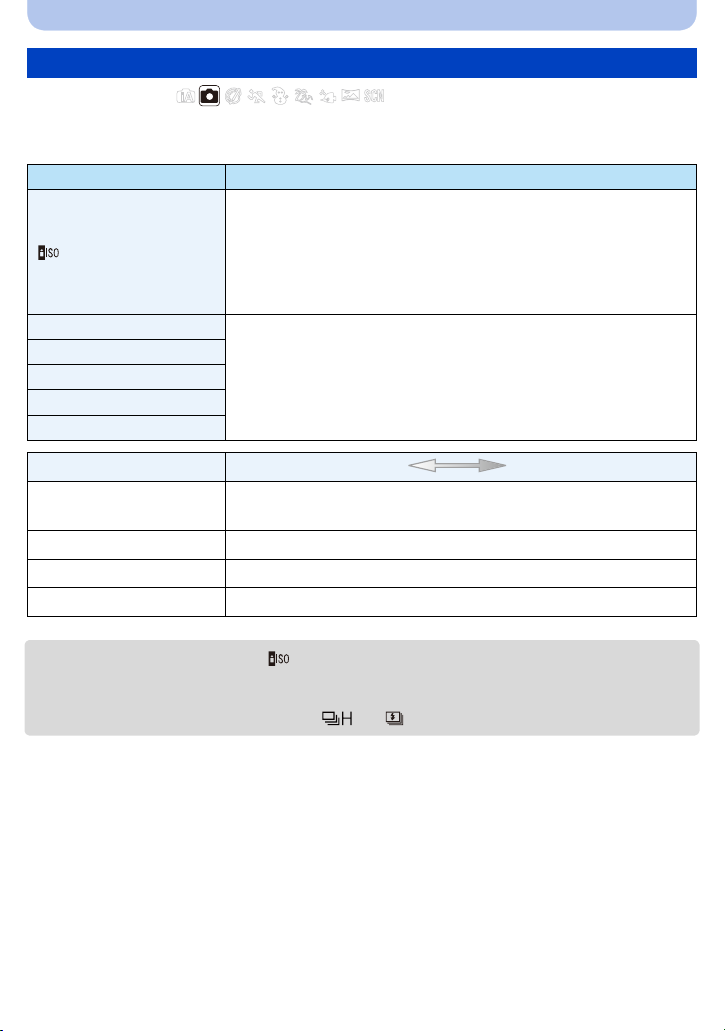
Recording
[Sensitivity]
Applicable modes:
This allows the Sensitivity to light (ISO sensitivity) to be set. Setting to a higher figure enables
pictures to be taken even in dark places without the resulting pictures coming out dark.
Settings Description of settings
The ISO sensitivity is adjust ed according to the movement of the
subject and the brightness.
[] ([i.ISO])
[100]
[200]
[400]
[800]
[1600]
•Maximum [1600]
•The shutter speed is not fixed when the shutter button is pressed
halfway. It is continuously changing to match the movement of the
subject until the shutter button is pressed fully .
The ISO sensitivity is fixed to various settings.
[100]
Recording location
(recommended)
Shutter speed Slow Fast
Noise Less Increased
Jitter of the subject Increased Less
For the focus ran ge of flash when [ ] is set, refer to P57.
•
When it is light (outdoors) When it is dark
[
1600]
•The ISO sensitivity is automatically set under the following conditions.
–When recording motion pictur es
–When [Burst] in the [Rec] menu is set to [ ] or [ ]
- 79 -
Page 80

Recording
[White Balance]
Applicable modes:
In sunlight, under incandescent lights or in other such conditions where the color of white takes
on a reddish or bluish tinge, this item adjusts to the color of white which is closest to what is
seen by the eye in accordance with the light source.
Settings Description of settings
[AWB]
([Auto White Balance])
[V]
([Daylight])
[Ð]
([Cloudy])
[î]
([Shade])
[Ñ]
([Incandescent])
[Ò]
([White Set])
[Ó]
([White Set Setting])
Automatic adjustment
When taking pictures outdoors under a clear sky
When taking pictures outdoors under a cloudy sky
When taking pictures outdoors in the shade
When taking pictures under incandescent lights
Value set by using [Ó]
Set manually
Under fluorescent lighting, LED lighting fixture etc., the appropriate White Balance will vary
•
depending on the lighting type, so use [AWB] or [Ó].
•The White Balance setting is memorized even if the camera is turned off. (However, the White
Balance setting for a Scene Mode returns to [AWB] when the Scene Mode is changed.)
•White Balance is fixed to [AWB] in following cases.
–[Scenery]/[Night Portrait]/[Night Scenery]/[Food]/[Sunset]/[Starry Sky] (Scene Mode)
- 80 -
Page 81

Recording
∫ Auto White Balance
Depending on the conditions prevailing when pictures are taken, the pictures may take on a
reddish or bluish tinge. Furthermore, when a multiple number of light sources are being used or
there is nothing with a color close to white, Auto White Balance may not function properly. In
this case, set the White Balance to a mode other than [AWB].
1 Auto White Balance will work within this range
2 Blue sky
3 Cloudy sky (Rain)
4 Shade
5 Sunlight
6 White fluorescent light
7 Incandescent light bulb
8 Sunrise and sunset
9 Candlelight
KlKelvin Color Temperature
Setting the White Balance manually
Set the White Balance value. Use to match the condition when taking photographs.
1 Select [Ó] and then press [MENU/SET].
2
Aim the camera at a sheet of white paper etc. so that the frame in the
center is filled by the white object only and then press [MENU/SET].
• White Balance may not be set when the subject is too bright or too dark.
Set the White Balance again after adjusting to appropriate brightnes s.
• Exit the menu after it is set.
- 81 -
Page 82

Recording
[AF Mode]
Applicable modes:
This allows the focusing method that suits the positions and number of the subjects to be
selected.
Settings Description of settings
[š]
([Face Detection])
[]
([AF Tracking])
[]
([23-Area])
[Ø]
([1-Area])
[Ù]
([Spot])
¢1[Ø] will be used during recording mot i on pictures or using [Time Lapse Shot].
Ø] will be used during recording motion pictures.
¢2[
¢1
¢2
¢2
•[AF Mode] is fixed to [Ø] in the following cases.
–[ Miniature Effect] (Creative Control Mode)
–[Starry Sky] (Scene Mode)
•It will be fixed to [š] when the [Face Recog.] is set to [ON].
•It is not possible to set [š] in the following cases.
–[Advanced Underwater]
–[Panorama Shot]
–[Night Scenery]/[Food] (Scene Mode)
•It is not possible to set [ ] in the following cases.
–[Sepia]/[Dynamic Monochrome]/[High Dynamic]/[Toy Effect] (Crea tiv e Control Mode)
–[Panorama Shot]
–[ B& W ]/ [SEPIA] ([Color Mod e] )
The camera automatically detects the person’s face. (max.
15 areas)
The focus and exposure can then be adjusted to fit that face no
matter what portion of the picture it is in.
Focus can be adjusted to a specified subject. Focus will keep on
following the subject even if it moves. (Dynamic tracking)
Up to 23 points for each AF area can be focused. This is effective
when the subject is not in the center of the screen.
(AF area frame will be same as image aspect ratio setting.)
The camera focuses on the subject in the AF area on the center
of the screen.
The camera focuses on a limited narrow area in the screen.
- 82 -
Page 83

Recording
∫ About [š] ([Face Detection])
The following AF area frames are displayed when the camera detects the
faces.
Yellow:
When the shutter button is pressed halfway, the frame turns green when
the camera is focused.
White:
Displayed when more than one face is detected. Other faces that are the same distance away
as the faces within the yellow AF areas are also brought into focus.
Under certain picture -ta king condit ions inc luding the fo llowing cas es, the face d etection f unction may
•
fail to work, making it impossible to detect faces. [AF Mode] is switched to [ ] ([Ø] while motion
pictures are taken).
–When the face is not facing the camera
–When the face is at an angl e
–When the face is extremely bright or dark
–When there is little contra st on the faces
–When the facial features are hidden behind sunglasses, etc.
–When the face appears small on the screen
–When there is rapid movement
–When the subject is not a human being
–When the camera is shaking
–When Digital Zoom is used
–Taking pictures underwater
•If the camera is registering something other than someone’s face, change the settings to something
other than [
š].
- 83 -
Page 84

Recording
A
∫ Setting up [ ] ([AF Tracking])
Align the subject with the AF tracking frame, and then press 4 to
lock onto the subject.
A AF tracking fr am e
•AF area will be displayed in yellow when a subject is recognized, and focus
will automatically adjust continuously following the subject’s movement
(Dynamic tracking).
•AF tracking is canceled when 4 is pressed again.
•Dynamic tracking function may not work in the following cases:
–When the subject is too small
–When the recording location is too dark or bright
–When the subject is moving too fast
–When the background has the same or similar color to the subject
–When jitter is occurring
–When using the zoom
–Taking picture underwater
•When the lock fails, the AF tracking frame will turn red and then disap pear. Press 4 again.
•The camera records pictures with [AFMode] as [Ø] when locked or Dynamic Tracking is not
working.
- 84 -
Page 85

Recording
KEN
[Face Recog.]
Applicable modes:
Face Recognition is a function which finds a face resembling a registered face and prioritizes
focus and exposure automatically. Even if the person is located towards the back or on the end
of a line in a group photo, the camera can still take a clear picture.
Settings: [ON]/[ OFF]/[MEMORY]
[Face Recog.] is initially set to [OFF] on the camera.
[Face Recog.] will turn [ON] automatically when the face image is registered.
The following functions will also work with the Face Recognition
•
function.
In Recording Mode
–
Display of corresponding na me wh en ca mera detec ts a re giste red fa ce¢ (if
name has been set for the registe red face)
In Playback Mode
–
Display of name and age (if information has been registered)
–Selective playback of pictures chosen from pictures registered with Face Recognition ([Category
Selection] in [Filtering Play]).
¢ Names of up to 3 people are displayed. Precedence for the names displayed when taking
pictures is determined according to the order of registration.
•During the Bu rs t M ode , [F a ce Re co g .] pi ct u re info r m a tion can be atta ch ed to on l y th e fi r st pi c ture.
•[Face Recog.] does not guarant ee secure recognition of a person.
•Face Recognition may take more t ime t o selec t and r ecogn ize dis tinct ive f acial f eatu res t han reg ular
face detection.
•Even when Face Recognition information has been registered, pictures taken with [Name] set to
[OFF] will not be categorized by Face Recognition in [Cat egory Selection] ([Filtering Play]).
•Even when Face Recognition information is changed (P88), Face Recognition information for
the pictures already taken will not be changed.
For instance, if the na me is chan ged, pictu res re corded be fore t he chang e will not be cat egor ized b y
Face Recognition in [Category Sele ction] ([Filtering Play]).
•
To change the name information of the pictures taken, perform the [REPLACE] in [Face Rec Edit] (P118).
•[Face Recog.] cannot be used in the following cases.
–Recording Modes which do not allow setting to [š] of [AF Mode]
–When recording motion pictur es
- 85 -
Page 86

Recording
1HZ
Face Settings
You can register information such as names and birthdays for face images of up to 6 people.
Registration can be facilitated by taking multiple face images of each person.
(up to 3 pict ures /regis tration)
1 Select [Face Recog.] on the [Rec] menu and then press [MENU/SET].
2 Press 3
/
4 to select [MEMORY] and then press [MENU/SET].
3 Press 3/4/2/1 to select the Face Recognition frame that is
not registered, and then press [MENU/SET].
4 Take the picture adjusting the face with the guide.
•
Confirmation screen is displayed. It is executed when [Yes] is selected.
• The faces of subjects other than people (pets, etc.) cannot be
registered.
• When [DISP.] is pressed, an explanation appears for taking face
images.
- 86 -
Page 87

Recording
5 Select item to edit with 3/4, and then press [MENU/SET].
Item Description of settings
1 Press 4 to select [SET] and then press [MENU/SET].
[Name]
[Age]
[Focus Icon]
[Add Images]
Exit the menu after it is set.
•
2 Enter the name.
For details on how to enter characters, refer to “Entering Text”
•
section on P77.
1 Press 4 to select [SET] and then press [MENU/SET].
2 Press 2/1 to select the items (Year/Month/Day), and then
press 3/4 to set and then press [MENU/SET].
Change the displayed focus icon when the subject is focused.
Press 3/4 to select the focus icon, and then press [MENU/
SET].
To add additional face images.
Add Images)
(
1 Select the unregistered face recognition frame, and then press
[MENU/SET].
2 Perform step
To delete one of the face images.
(Delete)
Press 2/1 to select the face image to delete, and then press
[MENU/SET].
If there is only one image registered, it cannot be deleted.
•
•Confirmation screen is dis played. It is executed when [Yes] is selected.
4 in “Face Settings”.
- 87 -
Page 88

Recording
∫ Point of recording when registering the face images
Face front with eyes open and mouth c l osed, making sure the
•
outline of the face, the eyes, or the eyebrows are not covered with
the hair when registering.
•Make sure there is no extreme shading on the fac e when
registering. (Flash will not flash during registration.)
∫ When it is not recognizing during recording
Register the face of same person indoors and outdoors, or with different expressions or angles. (P87)
•
•Additionally register at the loc ation of recording.
•When a person who is registered is not recognized, correct by re-registering.
•Face Recognition may not be possible or may not recognize faces correctly even for registered
faces, depending on the facial expression and environment.
Change or delete the information for a registered person
Y ou can modify the pictures or inf ormation of an already registered person. Y ou can also delete
the information of the registered person.
(Good example for
registering)
1 Press 4 to select [MEMORY] and press [MENU/SET].
2 Press 3/4/2/1 to select the face image to edit or delete and then press [MENU/
SET].
3 Press 3/4 to select the item and then press [MENU/SET].
Item Description of sett in g s
[Info E dit]
[Priority]
[Delete]
•
Exit the menu after it is set.
Changing the information of an already registered person.
Perform step
The focus and exposure are preferentially adjusted for
higher-priority faces.
Press 3/4/2/1 to select the priority and then press [MENU/
SET].
Deleting information of a registered person.
•
Confirmation screen is displa yed. It is executed when [Yes] is selected.
5 in “Face Settings”.
- 88 -
Page 89

Recording
[i.Exposure]
Applicable modes:
Contrast and exposure will be adjusted automatically when there is a big difference in
brightness between the background and subject, to bring the image close to real life.
Settings: [ON]/[ OFF]
[ ] in the screen tu rns yellow when [i.Exposure] is in effect.
•
•Even when the [Sensitivity] is set to [100], [Sensitivity ] may be set higher than [100] if the picture is
taken with [i.Exposure].
•Compensation effect may not be achieved depending on the conditions.
[i.Resolution]
Applicable modes:
Pictures with sharp profile and resolution can be taken by using the Intelligent Resolution
Technology.
Settings Description of settings
[ON]
[i.ZOOM]
[OFF] j
[i.Resolution] is activated.
[i.Resolution] is activated, and zoom magnification increased to 2 times
while limiting deterioration of the picture.
Refer to P53 for information about the Intelligent Zoom.
•
[Digital Zoom]
Applicable modes:
This can enlarge subjects even more than the Optical Zoom, Extended Optical Zoom, or
[i.ZOOM].
Settings: [ON]/[ OFF]
Refer to P53 for details.
•
•The setting is fixed to [ON] in Macro Zoom Mode.
- 89 -
Page 90

Recording
[Burst]
Applicable modes:
Pictures are taken continuously while the shutter button is pressed.
Settings Description of settings
Burst speed approx. 1.3 pictures/second
•You can take pictures until the capacity of the built-in memory or the card is
full.
[˜]
([Burst On])
[]
([Hi-SpeedBurst])
[]
([Flash Burst])
[OFF] j
•The burst speed becomes s lower halfw ay. The exact timing of this de pends
on the type of card and the Pict ure Size.
•The focus is fixed when the first picture is taken.
•The exposure and White Balanc e are adjusted each time you take a picture.
•The Burst speed (pictures/ second) may become slower depending on the
recording environment, such as in dark p lac es, if t he ISO s ensit ivity is high etc .
Burst speed approx. 8 pictures/second
Number of recordable
pictures
max. 100 pictures
•This can be set only during Normal Picture Mode.
•The picture size is fixed to 3M (4:3), 2.5M (3:2), 2M (16:9) or 2.5M (1:1).
•The Burst speed changes according to the recording conditions.
•The number of Burst recording pict ur es are limited by the picture-taking
conditions and the type and/ or status of the card used.
•The number of Burst recording pictures may increase when you use a card
with fast writing speed or card is formatted.
•The focus, zoom, exposure, White Balance, shutter speed and ISO sensitivity
are fixed to the settings for the first picture.
•The ISO sensitivity is automatically adjusted. However, the ISO sensitivity is
increased to make the shutt er speed become high-speed.
Number of recordable
pictures
max. 5 pictures
•Still pictures are taken continuously with flash.
•This can be set only during Normal Picture Mode.
•The picture size is fixed to 3M (4:3), 2.5M (3:2), 2M (16:9) or 2.5M (1:1).
•Settings for focus, zoom, expo sure, sh utter speed, IS O sensitiv ity, flash output
are fixed to the first picture.
•The flash setting is fixed to [‰].
- 90 -
Page 91

Recording
•Depending on the operating conditions, it may take time to take the next picture if you repeat the
recording of pictures.
•It may take time to save pictu res taken in Burst Mode on the card. If you take pictures
continuously while saving, the maximum number of recordable pictures decreases. For
continuous shooting, use of a high speed memory card is recommended.
•Burst Mode is not canceled when the camera is turned off.
•If you take pictures in Burst Mode with the built-in memory, it will take time to write the picture data.
•The Burst Mode cannot be used in the following cases.
–[Toy Effect]/[Miniature Effect] (Creative Control Mode)
–[StarrySky] (Scene Mode)
–When using [Time Lapse Shot]
•When the Self-Timer is used, the number of recordable pictures in Burst Mode is fixed to 3
(5 pictures in [ ]).
•The flash setting is fixed to [Œ] (except for [ ]).
- 91 -
Page 92

Recording
[Time Lapse Shot]
Applicable modes:
You can set the recording start time, the recording interval and the number of pictures, and
automatically record subjects such as animals and plants as time elapses.
You can create motion pictures using [Time Lapse Video] in [Playback] menu. (P111)
Set the date an d time settin g s in ad v a n ce . (P25)
•
•It cannot be recorded into the buil t-in memory. Please use a card.
∫ Set the recording start time/interval/number of pictures
1 Press 3/4 to select the item and then press [MENU/SET].
Item Description of settings
[Now]:
Start s the recording by fully-pressing the shutter button.
[Start Time]
[Shooting Interval]
[Image Count]
[Alert]
[Start Time Set]:
You can set the time to start recording. Any time up to 24 hours
ahead can be set.
Select the start time (hours/minutes) with 2/1, adjust with
3/4, and then press [MENU/SET] to set.
Sets the number of pictures to be taken and the recording interval.
Select the item (recording interval/number of pictures to be
taken) with 2/1, adjust with 3/4, and then press [MENU/
SET] to set.
[Shooting Interval]:
You can set the time ranging from 10 seconds to 1 minute in
10-second increments, and from 1 minute to 30 minutes in
1-minute increments.
The setting may be available from a 1-minute interval or 5-minutes
•
interval depending on th e shutter speed.
[Image Count]:
You can set the number of pictures ranging from 10 to 1000 in
10-picture increments.
[ON]:
The user is notified that recording is to start by a warning sound
and flashing AF assist lamp.
[OFF]:
There is no warning sound. Also, the AF assist lamp doesn’t flash.
- 92 -
Page 93

Recording
2 Press 3/4 to select [Start Shooting] and then press [MENU/SET].
3 Press the shutter button fully.
•
The recording starts automatically.
• If the recording interval is set to 40 seconds or more, this unit will tur n off aut omatic ally while in
recording standby. [Time Lapse Shot] is continued even with this unit turned off. When the
recording start time arrives, this unit turns on aut omatically. To turn on this unit manually, pres s
the camera [ON/OFF] button or press and hold [(].
• To stop the Time Lapse Shoot i ng partway through, press [MENU/SET] or [(] while this unit
turned on, and end the recording on the displayed confirmation screen.
•This function is not for use in a secu rity camera.
•If you leave the unit somewhere to perform [Time Lapse Shot], please be careful of theft.
•Recording for long periods in cold places such as ski resorts or places at high altitude, or in
warm, wet environments may cause a malfunction, so please be careful.
•When the recording interval is set to a value of less than 1 minute and the previous recording has
not finished yet, recordin g may be skipped.
•We do not recommend using [Time Lapse Shot] while underwater .
•When the recording warning is set to [ON], a warning s ound will be emitted. Check this setting is
suitable for the recording en vironment.
•The unit is fixed to the zoom position pri or to the start of recording.
•We recommend to use a fully charged battery.
•In situations that require longer recording time such as when recording in [Starry Sky] of the Scene
Mode or when recording in a dark place, we recommend you use an AC adaptor (optional).
•[Time Lapse Shot] will be canceled p art way through in the following cases.
–When the charge on the battery runs out
–When the number of recordable pictures drops to none
•Do not connect the AV cable (optional) or the USB connection cable (supplied) during Time Lapse
Shooting.
- 93 -
Page 94
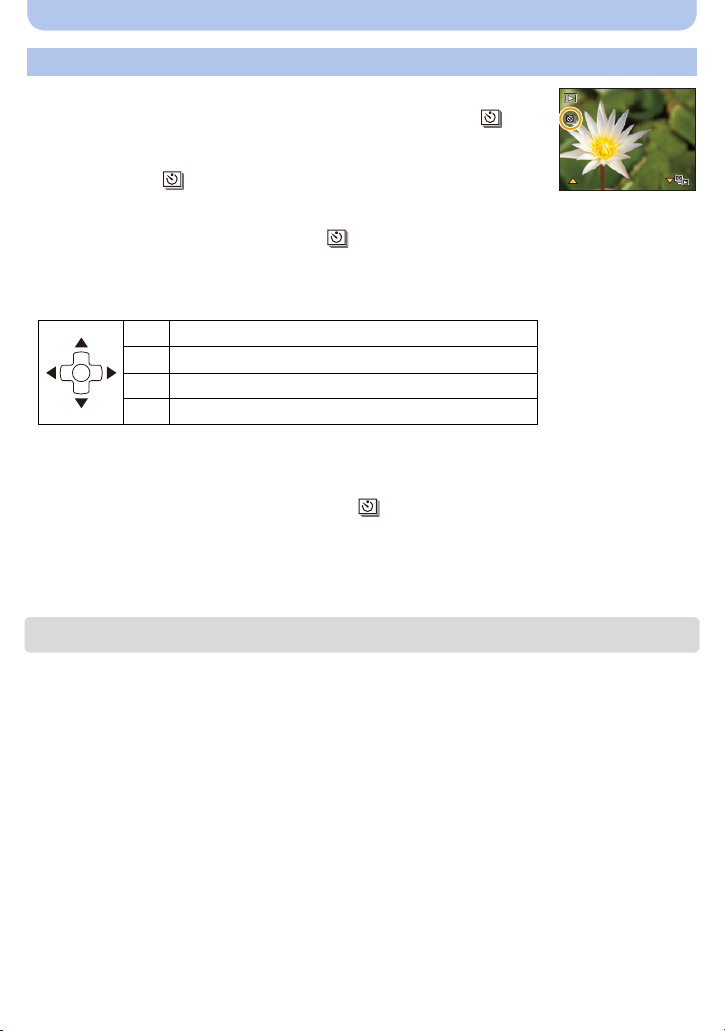
Recording
Playing back pictures taken in [Time Lapse Shot]
Pictures taken in [Time Lapse Shot] are stored in groups, each containing
the series of pictures recorded in a single Time Lapse Shot. The [ ] icon
is displayed for the group.
Deleting and editing in a group unit is possible. (For example, if you delete a
•
picture group with [ ], all the pictures in that group are delete d.)
∫ Continuously playing back
Press 2/1 to select a picture with the [ ] icon, and then press 3.
If you have filtered images for playback by using [Slide Show] (P99) or [Filtering Play] (P101), the
•
selection screen appears . Press 3/4 to select [Sequential Play], and then press [MENU/SET].
•Operations during continuous playback
Play/Pause
3
Stop
4
Fast rewind, Previous picture
2
1 Fast forward, Next picture
¢ These operat ions can be performed only in the Pause Mode.
¢
¢
∫ Playing back each picture
1 Press 2/1 to select a picture with the [ ] icon, and then press 4.
2 Press 2/1 to select the picture.
•
Press 4 again to return to the normal playback screen.
• Operations similar to those f or Normal Play can be used on the pictures in the group. (Multi
playback, playback zoom, dele ting the pictures, etc.)
•If you delete all pictures except one in the group, that pict ure will be saved as a single picture.
- 94 -
Page 95
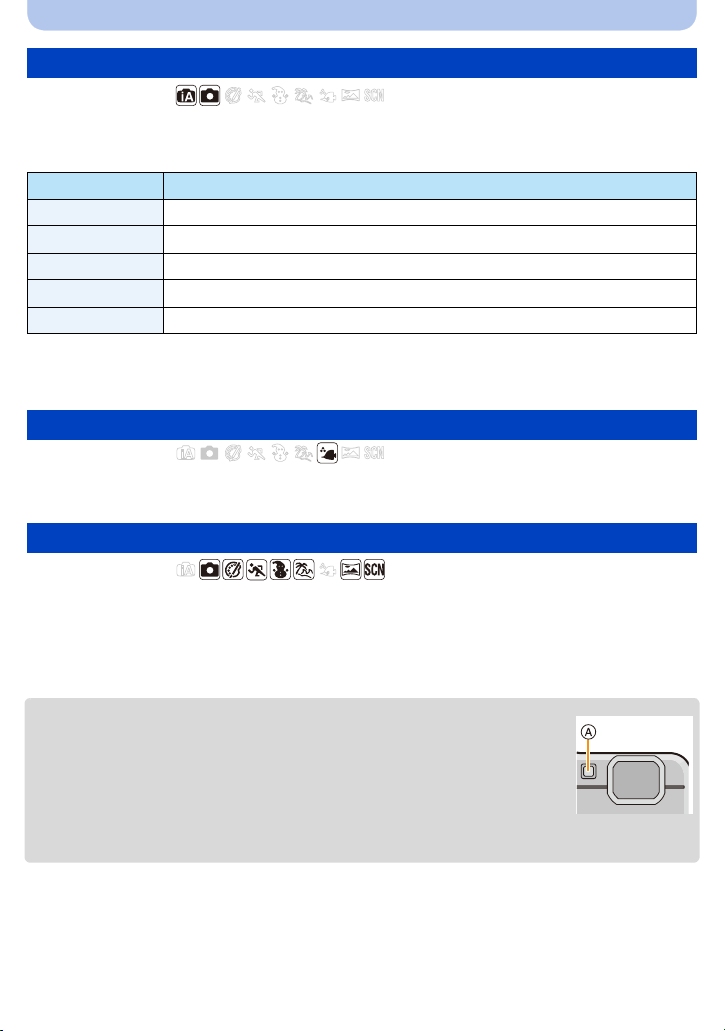
Recording
[Color Mode]
Applicable modes:
Sets various color effects, including making the picture sharper, brighter, or applying a sepia
tone.
Settings Description of settings
[STANDARD] This is the standard setting.
¢1
[Happy]
¢2
[VIVID]
[B&W]
[SEPIA] The picture becomes sepia.
¢1 This can be set only when Intelligent Auto Mode is set.
¢2 This can be set only during Normal Picture Mode.
Image with enhanced brightness and vividness.
The picture becomes sharper.
The picture becomes black and white.
[Color Reproduction]
Applicable modes:
Refer to P68 for details.
•
[AF Assist Lamp]
Applicable modes:
AF assist lamp will illuminate the subject when the shutter button is pressed halfway, making it
easier for the camera to focus when recording in low light conditions. (Larger AF area is
displayed depending on the recording conditions.)
Settings: [ON]/[ OFF]
The effective distance of the AF Assist Lamp is a maximum of approximately
•
1.5 m (4.9 feet).
•When you do not want to use the AF Assist Lamp A (e.g. when taking pictures
of animals in dark places), set the [AFAssist Lamp] to [OFF]. In this case, it will
become more difficult t o focus on the subject.
•[AF Assist Lamp] is fixed to [OFF] in the following cases.
–[Scenery]/[Night Scenery]/[Sunset]/[Glass Through] (Scene Mode)
- 95 -
Page 96

Recording
[Red-Eye Removal]
Applicable modes:
When Red-Eye Reduction ([ ], [ ]) is selected, Red-Eye Removal is performed
whenever the flash is used. The camera automatically detects red-eye and corrects the picture.
Settings: [ON]/[ OFF]
Only available when [AF Mode] is set to [š] and Face Detection is active.
•
•Under certain circumstances, red-eye cannot be corrected.
[Stabilizer]
Applicable modes:
Using this mode, jitter during picture taking is detected, and the camera automatically
compensates for the jitter, enabling jitter-free images to be taken.
When recording motion pictures, “Active Mode” (stabilizer for motion pictures) will automatically
function. This decreases the jitter of the image when recording motion pictures while walking,
etc.
Settings: [ON]/[ OFF]
During motion picture recording, this setting is fixed to [ON] and “Active Mode” is enabled.
•
Note that “Active Mode” is disabled when [RecQuality] is set to [VGA].
•In “Active Mode”, stronger ef fect of the correction can be achieved at the wi de end.
•The stabilizer function may not be effective in the f ollowing cases.
Be careful of camera jitter when you press the shutter butto n.
–When there is a lot of jitter
–When the zoom magnification is high
–In Digital Zoom range
–When taking pictures while following a moving subject
–When the shutter speed becomes slower to take pictures indoors or in dark places
•The setting is fixed to [OFF] in the following case.
–[StarrySky] (Scene Mode)
- 96 -
Page 97

Recording
[Date Stamp]
Applicable modes:
You can take a picture with date and time of recording.
Settings Description of settings
[W/O TIME]
[WITH TIME]
[OFF] j
Date information for pictures recorded with the [Date Stamp] set cannot be deleted.
•
Stamp the year, month, and day.
Stamp the year, month, day, hour, and minutes.
•When printing pictures with [Date Stamp] at a shop or with a printer, the date will be printed
on top of the other if you choose to print with the date.
•If the time has not been set, you cannot stamp with the date info rmation.
•The setting is fixed to [OFF] in the following cases.
–When using Auto Bracket
–When using [Burst]
–When recording motion pictur es
•[Text Stamp], [Resize], and [Cropping] cannot be set for pictures recorded with [DateStamp] set.
•Even if you take a picture with [DateStamp ] set to [OFF], it is possible to stamp dates onto the
recorded pictures using [Text Stamp] (P108) or setup the Date print (P116, 129).
[Clock Set]
•Refer to P25 for details.
- 97 -
Page 98

Recording
Using the [Motion Picture] Menu
For details on [Motion Picture] menu settings, refer to P40.
[Rec Quality]
Applicable modes:
This sets up the picture quality of motion pictures.
Settings Picture size/Bit rate fps Aspect ratio
[HD] 1280k720 pixels/Approx. 10 Mbps
[VGA] 640k480 pixels/Approx. 4 Mbps 4:3
What is bit rate
•
This is the volume of data for a def inite period of time, and the quality becomes higher when the
number gets bigger. This unit is using the “VBR” recording method. “VBR” is an abbreviation of
“Variable Bit Rate”, and the bit rate (volume of data for definite period of time) is changed
automatically depending o n t he su bject to re cord. The refore , the recor ding t ime is sh ort ene d when a
subject with fast movement is recorded.
30
[Continuous AF]
Applicable modes:
It will continually keep on focusing on a subject for which the focus was once set.
Settings: [ON]/[ OFF]
16:9
Set this function to [OF F] if you wish to fix the focus on the position where you started the motion
•
picture recording.
•The setting is fixed to [OFF] in the following case.
–[StarrySky] (Scene Mode)
- 98 -
Page 99

Playback/Editing
Various methods of playback
You can play back the recorded pictures in various methods.
Press [(].
Press [MODE].
Press 3/4/2/1 to select item, and then press [MENU/SET].
• Following items can be selected.
[]([All]) (P37) []([Filtering Play]) (P101)
[]([Slide Show]) (P99) []([Calendar]) (P104)
[Slide Show]
You can play back the pictures you have taken in synchronization with music, and you can do
this in sequence while leaving a fixed interval between each of the pictures.
You can also play back images that have been sorted by category, images that have been set
as favorites, etc. in a slide show.
This playback method is recommended when you have connected the camera to a TV set to
view the pictures you have taken.
Press 3/4 to select [Start] and then press [MENU/SET].
∫ Operations performed during slide show
The cursor displayed during playback is the same as 3/4/2/1.
Play/Pause
3
Stop
4
2 Back to previous picture
Ahead to next picture
1
Reduce volume level
Increase volume level
- 99 -
Page 100

Playback/Editing
∫ To filter images for slide show playback
You can filter images and play them back in a slide show by selecting
[Filtering] on the slide show menu screen.
•If you select [All], you can play back all images in a slide show.
Y ou can also fil ter images by using the same setting as [Filte ringPlay]. Refer
–103 for the setting.
to P101
•The filter settings are stored even after terminating slide show playback. To
cancel filtering, refer to P101.
∫ Changing the slide show settings
By selecting [Setup] on the slide show menu screen, you can change the
settings such as [Effect] and [Duration] for slide show playback.
Settings Description of settings
This allows you to select the screen effects or music effects when switching
from one picture to the nex t.
[NATURAL], [SLOW], [SWING], [URBAN], [OFF]
•When [URBAN] has been select ed, the picture may appear in black and
white as a screen effect.
[Effect]
•Some [Effect] will not operate when playing back pictures displayed
vertically.
•Even if [Effect] is set, it does not work during a slide show of Group
Pictures.
•[Effect]is locked to[OFF] when [Filtering] is set to the following:
–[Motion Pic. Only]
–[ ] in [Category Selection]
[1SEC.]/[2SEC.]/[3SEC.]/[5SEC.]
•When playing back the following pictures, the [Duration] setting is
[Duration]
disabled.
–Motion pictures
–Panorama pictures
–Group of pictures taken in [Time Lapse Shot]
[Repeat] [ON]/[OFF]
[OFF]: There will be no sound.
[AUTO]: Music is played when the still pictures are played back,
[Sound]
[Music]: Music is played back.
[Audio]: Audio (only for motion pictures) is played back.
and audio is played when the motion pictures are played
back.
- 100 -
 Loading...