

PANASONIC DMCFZ1 User Manual
For Digital Camera
PC Connection
Operating Instructions
QuickTime and the QuickTime logo are trademarks
used under license. The QuickTime logo is
registered in the U.S. and other countries.

Contents
Contents................................................................................... 2
Introduction .............................................................................4
Check the contents of the USB connection kit .........................................................4
Features ................................................................................... 5
Supporting to OS .................................................................... 6
Operating environment........................................................... 7
Install guide ............................................................................. 8
Installing the USB driver (For Windows)...................................................................8
When Uninstallation of the driver or software is necessary (For Windows) .............9
Installing the supplied software (for Macintosh) .......................................................10
Connecting PC and Digital Camera....................................... 11
Checking that the digital camera is recognized correctly .........................................12
Removing the USB connection cable safely ............................................................13
Starting the SD Viewer for DSC ............................................. 14
Starting the SD Viewer for DSC ...............................................................................14
Closing the SD Viewer for DSC................................................................................14
SD Viewer for DSC screen.......................................................................................15
Changing the picture display................................................. 16
Changing the display format in the picture display section ......................................16
Changing the thumbnail display size........................................................................17
Rearrangement of pictures.......................................................................................17
Displaying only the desired pictures.........................................................................18
Displaying DPOF informations .................................................................................18
Operating pictures .................................................................. 19
Selecting pictures .....................................................................................................19
Enlarging still pictures ..............................................................................................20
Playing back motion images.....................................................................................20
Using the Preview ....................................................................................................21
Saving files edited by the Preview............................................................................22
Copying pictures to another folder ...........................................................................23
Copying from the Memory Card to the PC...............................................................23
Copying an image to the Memory Card....................................................................24
Moving pictures to another folder .............................................................................24
Deleting a picture .....................................................................................................25
Renaming a picture ..................................................................................................25
Rotating a picture .....................................................................................................25
Changing the picture size.........................................................................................26
Making the picture into Wallpaper ............................................................................26
Updating the display contents in the Folder Bar or the picture display section ........27
Updating the display of Memory Card contents (connection)...................................27
Changing the picture format .....................................................................................27
Making the album.....................................................................................................28
2

DPOF Setting ........................................................................... 29
Adding print informations to the Memory Card (DPOF Setting)............................... 29
Searching for pictures............................................................ 30
Searching by file name ............................................................................................ 30
Find by Date ............................................................................................................ 31
SlideShow................................................................................ 32
Playback SlideShow ................................................................................................ 32
SD SlideShow.......................................................................................................... 34
Saving the SlideShow.............................................................................................. 34
Printing pictures ..................................................................... 37
Printing the picture................................................................................................... 37
Printing the list of pictures displayed (Index-printing) .............................................. 39
Printing the picture easily (Simple print) .................................................................. 41
Attaching a picture to an e-mail ............................................ 42
Attaching a picture to an e-mail automatically ......................................................... 42
Display bar .............................................................................. 43
[Toolbars]................................................................................................................. 43
[View Type Bar] ....................................................................................................... 44
[Launcher Bar] ......................................................................................................... 44
[Status Bar].............................................................................................................. 44
Context menu.......................................................................... 45
Menu ........................................................................................ 46
Troubleshooting
(Q&A) ............................................................. 49
Caution for Use ....................................................................... 50
3
Introduction
≥ Microsoft
America and other countries.
≥ Apple, the Apple logo and Macintosh, MacOS are the registered trademarks of the
Apple Computer, Inc., USA.
≥ Adobe, Adobe logo, Acrobat are the trademarks of the Adobe Systems Incorporated.
≥ Intel
countries.
≥ Further, various names, organization names, products etc. mentioned herein are the
registered trademarks or trademarks of respective organizations.
≥ The actual contents and screen, and those described in these operating instructions
may differ depending on the PC operating environments used, etc. Please be aware of
this beforehand.
≥ No information is provided about basic PC operations and terms. Please refer to the
relevant PC manual.
≥ The contents of these operating instructions may be subjected to changes without prior
notice.
≥ Reproduction of these operating instructions in part or in full without permission is
prohibited.
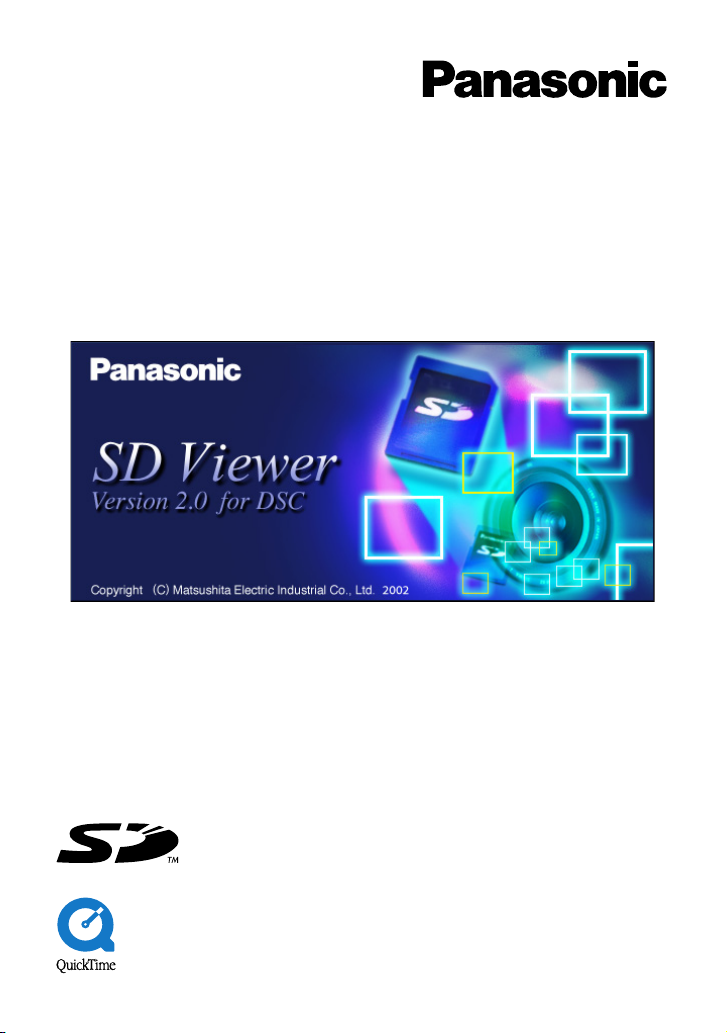
≥ In these operating instructions, SD Viewer Version 2.0 for DSC is indicated as SD
Viewer for DSC.
Check the contents of the USB connection kit
≥ CD-ROM
[For Windows]
SD Viewer Version 2.0 for DSC
≥ Operating instructions [PDF file]
ArcSoft Software Suite
QuickTime 5.0
USB device driver for digital camera
Adobe
[For Macintosh]
ArcSoft PhotoImpression
ArcSoft Panorama Maker
ArcSoft PhotoBase
QuickTime 5.0
≥ USB connection cable
This is the cable for connecting the USB terminal of the
Panasonic digital camera to the A-type USB terminal on
the PC.
≥ Operating instructions
®
Windows® is the registered trademark of the Microsoft Corporation, USA in
®
Pentium®II or Celeron™ is the registered trademark of the Intel Corporation in various
®
Acrobat® ReaderTM 5.0
4

Features
The digital camera and PC are connected using the supplied USB connection cable
and pictures in the SD Memory Card allowing the Multimedia Card can be transferred
to the PC. Moreover, by using the supplied software, the still pictures in the Memory
Card can be edited and processed.
SD Viewer Version 2.0 for DSC (Windows only)
Thumbnail* of the pictures in the Memory Card can be displayed.
In addition, a SlideShow for playback on camera can be created easily.
*Thumbnail means displaying pictures in small size.
ArcSoft Software Suite (Editing and processing software)
ArcSoft PhotoImpression
Editing, processing and printing of still pictures can be done. Pictures can be stored in
albums.
ArcSoft Panorama Maker
It is possible to combine several still pictures to make panoramic photos.
ArcSoft PhotoBase
Software which enables catalogue-making by bundling files together containing still
pictures, etc.
QuickTime (Picture playback software)
To playback motion images recorded with digital camera (motion JPEG format: file
extension.MOV).
≥ For details about the supplied software and user support, please refer to the Help files
for the respective software.
5

Supporting to OS
[USB Driver] Windows 98, Windows 98SE, Windows Me*1,
Windows 2000 Professional*
XP Professional*
[SD Viewer for DSC] Windows 98SE, Windows Me, Windows 2000 Professional
Windows XP Home Edition/XP Professional.
[ArcSoft] Windows 98, Windows 98SE, Windows Me,
Windows 2000 Professional, Windows XP Home Edition/
XP Professional, Mac OS 9.X and Mac OS X.
[QuickTime] Windows 98, Windows 98SE, Windows Me,
Windows 2000 Professional, Windows XP Home Edition/
XP Professional*
[Acrobat Reader] Windows 98, Windows 98SE, Windows Me,
Windows 2000 Professional and Windows XP Home
Edition/XP Professional*
*1 Use the standard driver equipped with OS.
*2 See the web site about QuickTime and Acrobat Reader. (QuickTime: http://
www.apple.com)(Acrobat Reader: http://www.adobe.com)
1
, Mac OS 9.X*1 and Mac OS X*1.
2
and Mac OS 9.X.
1
, Windows XP Home Edition/
2
.
6

Operating environment
[For Arcsoft Software Suite (PhotoImpression, Panorama Maker and PhotoBase)]
PC and OS:
Graphics display: High Color (16bit) or more
Random Access Memory:
Hard disk:
Disk drive: CD-ROM drive
Connection terminal: USB (A type)
Others: Mouse or equivalent pointing device
[For Windows]
DOS/V PC having Pentium/Pentium II or Celeron
800MHz or more recommended (includes compatible CPU),
and preloaded Microsoft Windows XP
XP Professional
Me, Windows
[For Macintosh]
iMac, iBook, Power Mac G3/G4, PowerBook G3/G4 with
Mac OS 9.0 or more
Desktop environment 800 x 600 or more
[For Windows]
64MB or more (128MB or higher recommended)
[For Macintosh]
64MB or more
[For Windows]
275MB or more free space
[For Macintosh]
275MB or more free space
, Windows 2000
98SE and Windows 98
Home Edition/
Professional
TM
CPU of
, Windows
[For SD Viewer for DSC]
PC and OS: DOS/V PC having Intel Pentium II or Celeron
Graphics display: High Color (16bit) or more
Random Access Memory: 32MB or more (64MB or higher recommended)
Hard disk: 30MB or more free space
Disk drive: CD-ROM drive
Connection terminal: USB (A type)
Others: Mouse or pointing device equivalent to mouse
300MHz or more, and preloaded Microsoft Windows XP
Professional/Home Edition, Windows 2000 Professional,
Windows Me and Windows
Desktop environment 800 x 600 or more
98SE
TM
CPU of
≥ When 2 or more USB devices are connected to one PC, or when devices are
connected through USB hub or by using extension cable, operation is not
guaranteed.
≥ When connected to the keyboard USB terminal, normal function may not be
possible.
7
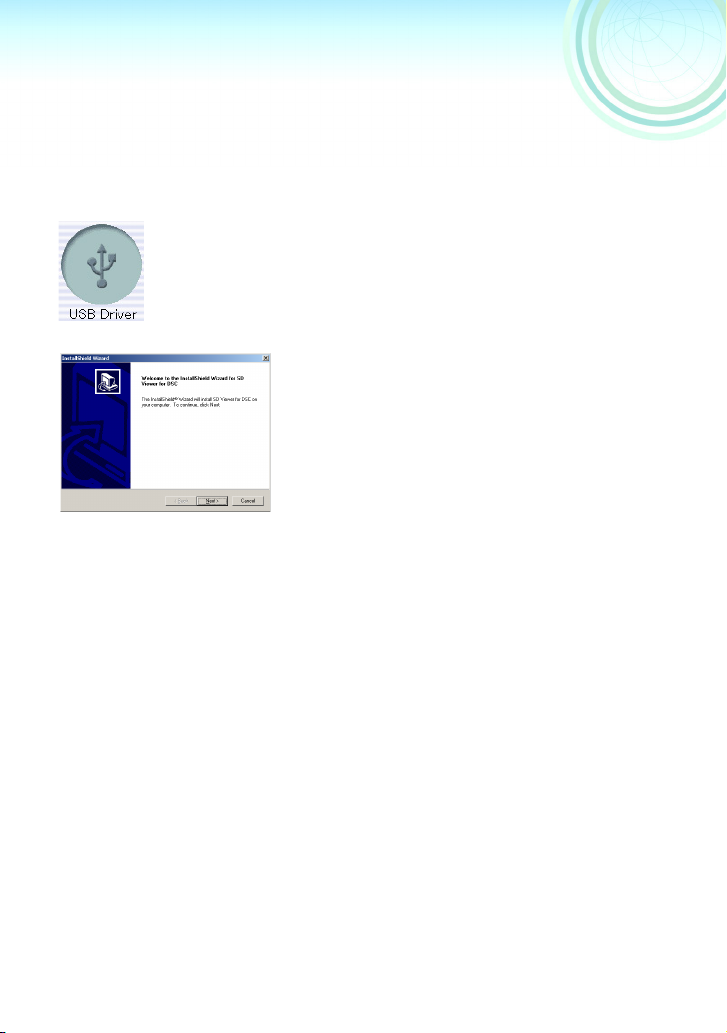
Install guide
Installing the USB driver (For Windows)
Be sure to install the driver before connecting the digital camera to the PC. (Only for
Windows 98 and Windows 98SE) Close all software programs (even permanently
resident software) running on Windows.
1
Insert the CD-ROM.
The Set Up menu starts automatically.
≥If the Set Up menu does not start automatically,
double click on the [instmenu.exe] from the CDROM.
2
Click on [USB Driver].
3
Click on [Next].
4
If the [Restarting Windows] dialog box
appears, click on [OK].
After restarting the PC, installation of the driver will
be finished.
≥ If you click on icons other than the USB driver, installation of the respective software
begins.
≥ For details about how to use the supplied software, please refer to the Help for the
respective software.
≥ When starting [SD Viewer for DSC], a message that there is no supported Memory Card
is displayed, confirm whether install of the USB driver has been finished.
8

When Uninstallation of the driver or software is
necessary
1
Click on [Start] >>> [Control Panel], and select [Add/Remove
Programs].
2
Select the software or the driver which you want to uninstall
procedure.
Select when uninstalling
[Arcsoft Software Suite] [PhotoImpression], [Panorama Maker] or
[SD Viewer for DSC] [SD Viewer for DSC]
[QuickTime] [QuickTime]
[Acrobat Reader 5.0] [Acrobat Reader]
[Panasonic USB Storage Driver] [USB Driver]
3
Click on [Add/Remove].
≥Repeat 2-3 if you want to uninstall more driver or software.
<Uninstalling the SD Viewer for DSC, the USB driver>
On clicking [SD Viewer], [USB Driver] on the Set Up menu screen, uninstall procedure
begins automatically.
≥ Depending on the OS, the uninstallation procedure may vary.
For details, please refer to operating instructions of the OS used.
≥ When using a Macintosh PC, it is not necessary to uninstall the driver.
(For Windows)
[PhotoBase]
9
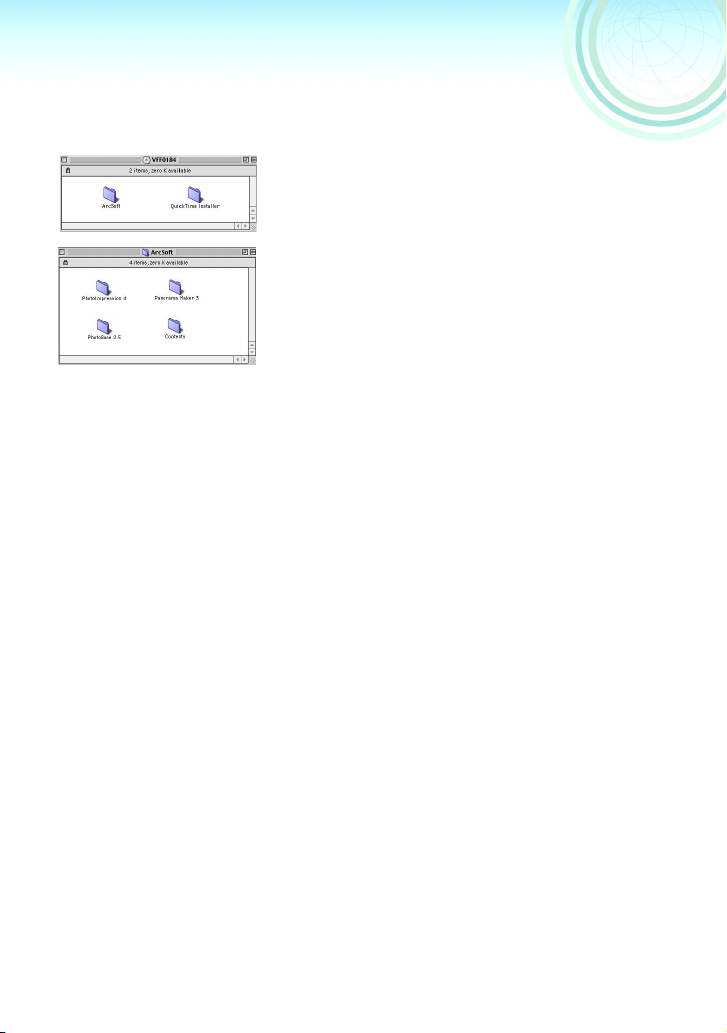
Installing the supplied software (for Macintosh)
2
≥After carefully reading the displayed contents, please start the installation
according to the instructions.
≥ For details about how to use the supplied software, please refer to the Help menu for the
respective software.
≥ When using a Windows PC, click on the software to be installed from the Set Up menu
(P8).
1
Insert the CD-ROM.
The folder is automatically displayed.
2
Double click on the folder containing the
software to be installed.
[ArcSoft]/[English]:
Select 1 of the 3 software programs and double click to
start installation.
[QuickTime Installer]/[English]:
Installation of QuickTime begins.
10
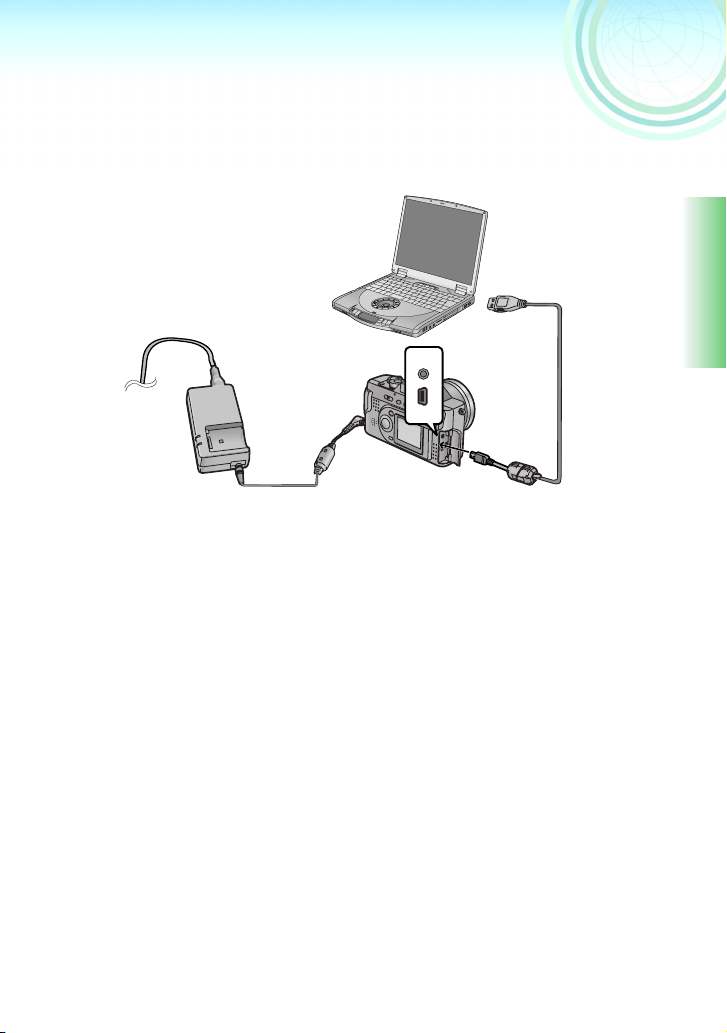
Connecting PC and Digital Camera
When using Windows 98/Windows 98SE, only connect after installing the driver (P8).
The DMC-FZ1 is used for illustration of Digital camera.
A
A/V
OUT
USB
B
A To USB terminal
B To USB connection terminal
1
Insert the Memory Card in the digital camera, and close the memory
card door.
2
Turn on the digital camera, and set to Playback mode.
3
Connect using the supplied USB connection cable.
≥Camera automatically changes to PC connection mode.
≥When connecting, use the AC adaptor as the digital camera power source. (When
using the battery, the data being transmitted may be damaged if the battery power
consumes)
≥ When the card access indication of the digital camera is lit, please do not disconnect the
USB connection cable. The software may not function correctly and damage the data
being transmitted. Please refer to the digital camera operating instructions.
≥ During connection, if a message is displayed that the file is not found, please see
P49.
11
Checking that the digital camera is recognized correctly
[For Windows]
1
Ensure that the [Removable Disk] is
included in [My Computer].
Drive name (H: etc.) varies with the PC being
used.
≥If camera does not operate correctly, please check the
connection again.
[For Macintosh]
<Folders in the Memory Card>
Still pictures or motion images recorded with the digital camera are saved in the following
folders within the Memory Card.
1
Ensure that the [untitled] icon is displayed
on the desktop.
≥If camera does not operate correctly, please check the
connection again.
Names may automatically change as [100_PANA]
([101_PANA], [102_PANA]...)
Saving still pictures (file extension .JPG), motion images
(file extension.MOV) recorded by digital camera
[MISC]
Saving DPOF Set up data (AUTPLAY1.MRK)
12
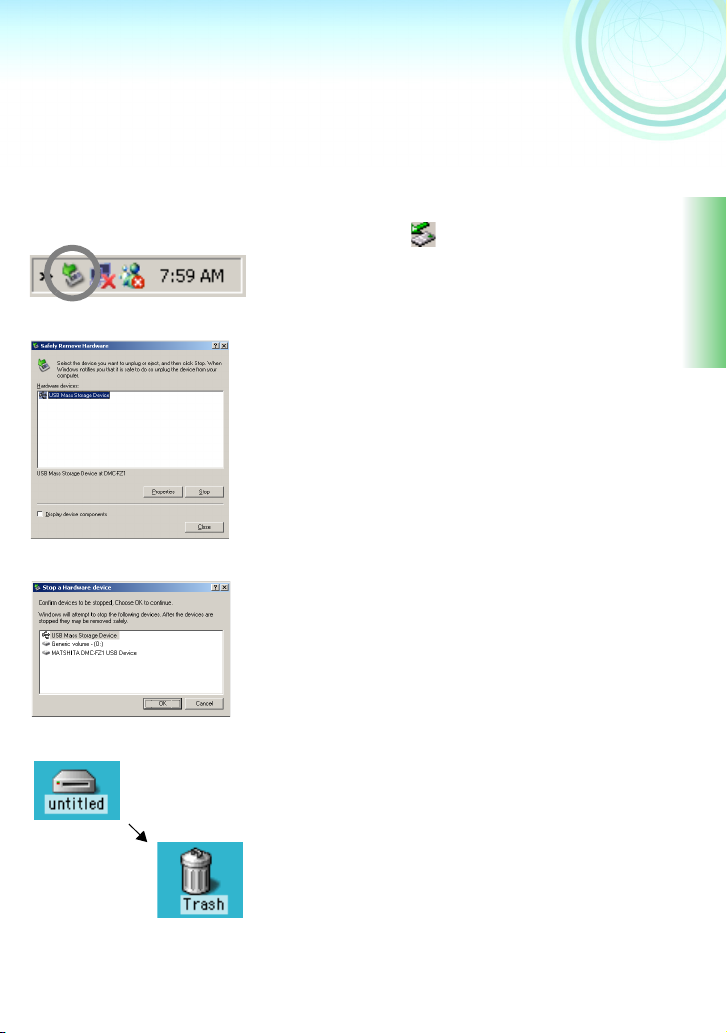
Removing the USB connection cable safely
[For Windows]
If the USB connection cable is removed or the power switched off while the PC is working,
an error dialog box may appear. In such cases, click on [OK] to close the dialog box. To
remove the USB connection cable without the error dialog box being displayed, proceed as
follows.
1
2
3
[For Macintosh]
1
Double click icon on the task tray.
The Hardware removal dialog box appears.
2
Click on [USB Mass Storage Device], and
click on [Stop].
3
Confirm that the [USB Mass Storage
Device] is selected, click on [OK].
4
Click on [OK].
The USB connection cable can be safely removed.
≥Depending on OS Windows 98SE, etc. the icon for safe
removal may not be displayed in the task tray. (There will
be no display depending on the set up of the OS) Make
sure that the card access indication of the digital camera
is off, then remove the cable. Please refer to the digital
camera operating instructions.
1
Drop the [untitled] icon which appeared
when you connected the digital camera
with the USB connection cable into the
recycle bin, then disconnect the USB
connection cable.
13
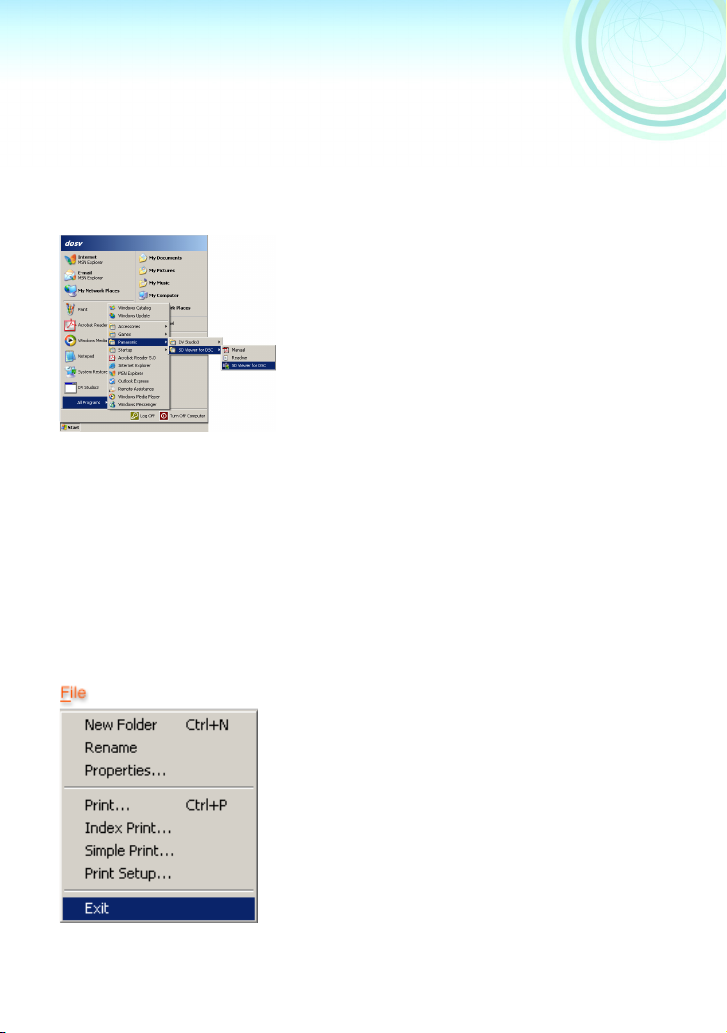
Starting the SD Viewer for DSC
Before starting, install the SD Viewer for DSC from the Set Up menu (P8).
Before using for the first time, click on [Readme] from [Start] >>> [All Program] >>>
[Panasonic] >>> [SD Viewer for DSC], please read the supplementary explanation or
updated information.
Starting the SD Viewer for DSC
1
Click on [Start] >>> [All Programs] >>>
[Panasonic] >>> [SD Viewer for DSC] >>> [SD
Viewer for DSC]
Or
When the indication of removable disc appears,
click on [List images] >>> [OK].
If the Memory Card has been inserted, the Memory Card
image is displayed.
≥ If the Memory Card has not been inserted, the message [There is no supported
memory card.] is displayed.
On clicking [OK], SD Viewer for DSC starts.
≥ It is also possible to start by double clicking on the shortcut icon on the desktop.
≥ Please do not disconnect the USB connection cable when SD Viewer for DSC is in use.
The software may not function correctly and damage the data being transmitted.
≥ To view the installed operating instructions, Adobe Acrobat
required. Please install Adobe Acrobat Reader 5.0 from the supplied CD-ROM.
Closing the SD Viewer for DSC
Reader 4.0 or higher is
14
1
Click on [File] >>> [Exit].
≥It is also possible to close by clicking on the [x] in
the top right-hand corner of the SD Viewer for
DSC.
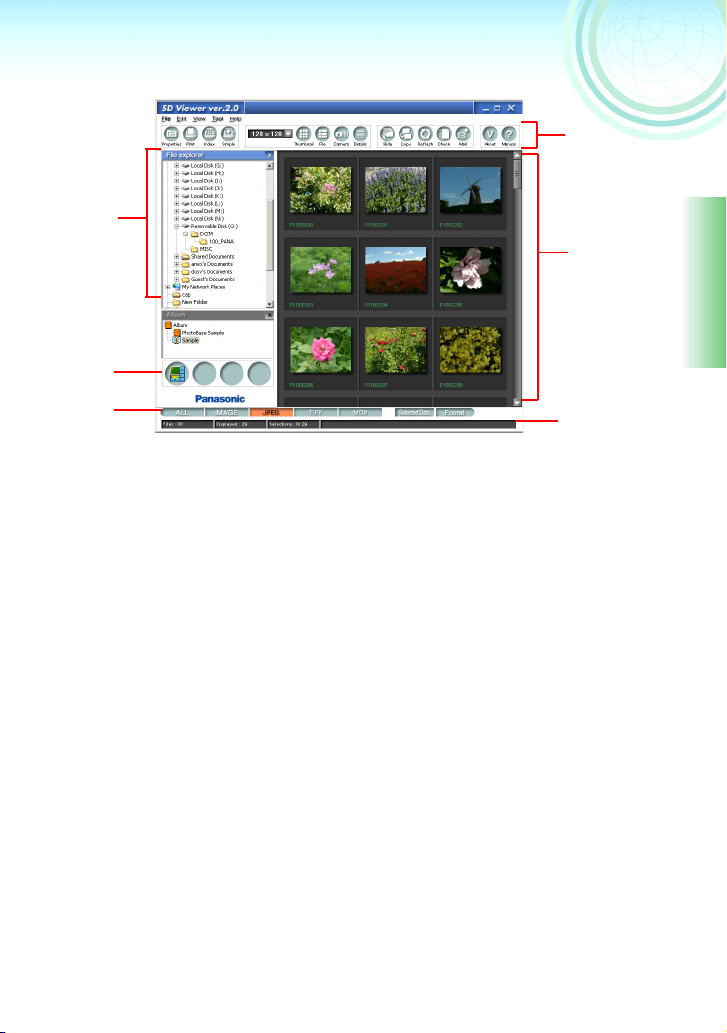
SD Viewer for DSC screen
1
2
4
5
3
1
[Folder Bar]
Folder structure in the Memory Card or hard disk is displayed.
•File explorer and Album are displayed.
2
[Launcher Bar] (P44)
If you register an application, you can start the application by one click. Preview is
registered at the default setting.
3
[View Type Bar] (P44)
It is possible to select the picture type displayed in the picture display section. Pictures
of only the type selected are displayed.
4
[Tool bars] (P43)
By clicking on the respective buttons, it is possible to perform various operations.
5
Picture display section
JPEG, MOV, TIFF, BMP etc. files in the folder are displayed with thumbnail. Other files
are displayed as icons. File data, etc. is also displayed.
•If the number of pictures in a folder is large, it may take time displaying the thumbnails.
•Some files of TIFF or MOV which were recorded by other products than Panasonic
digital cameras may not be displayed with thumbnail.
6
[Status Bar] (P44)
Displays the status of the selected folder.
[Files]: Displays the number of files present in the displayed folder.
[Displayed]: Displays the number of files shown in the picture display section.
[Selections]: Displays the number of files selected.
6
≥ To display anything other than the picture display section, select Display/Hide from the
[View] menu.
≥ Depending on the PC being used, scrolling in the picture display section with a scrolling
mouse may not be possible.
15
 Loading...