

Page 1
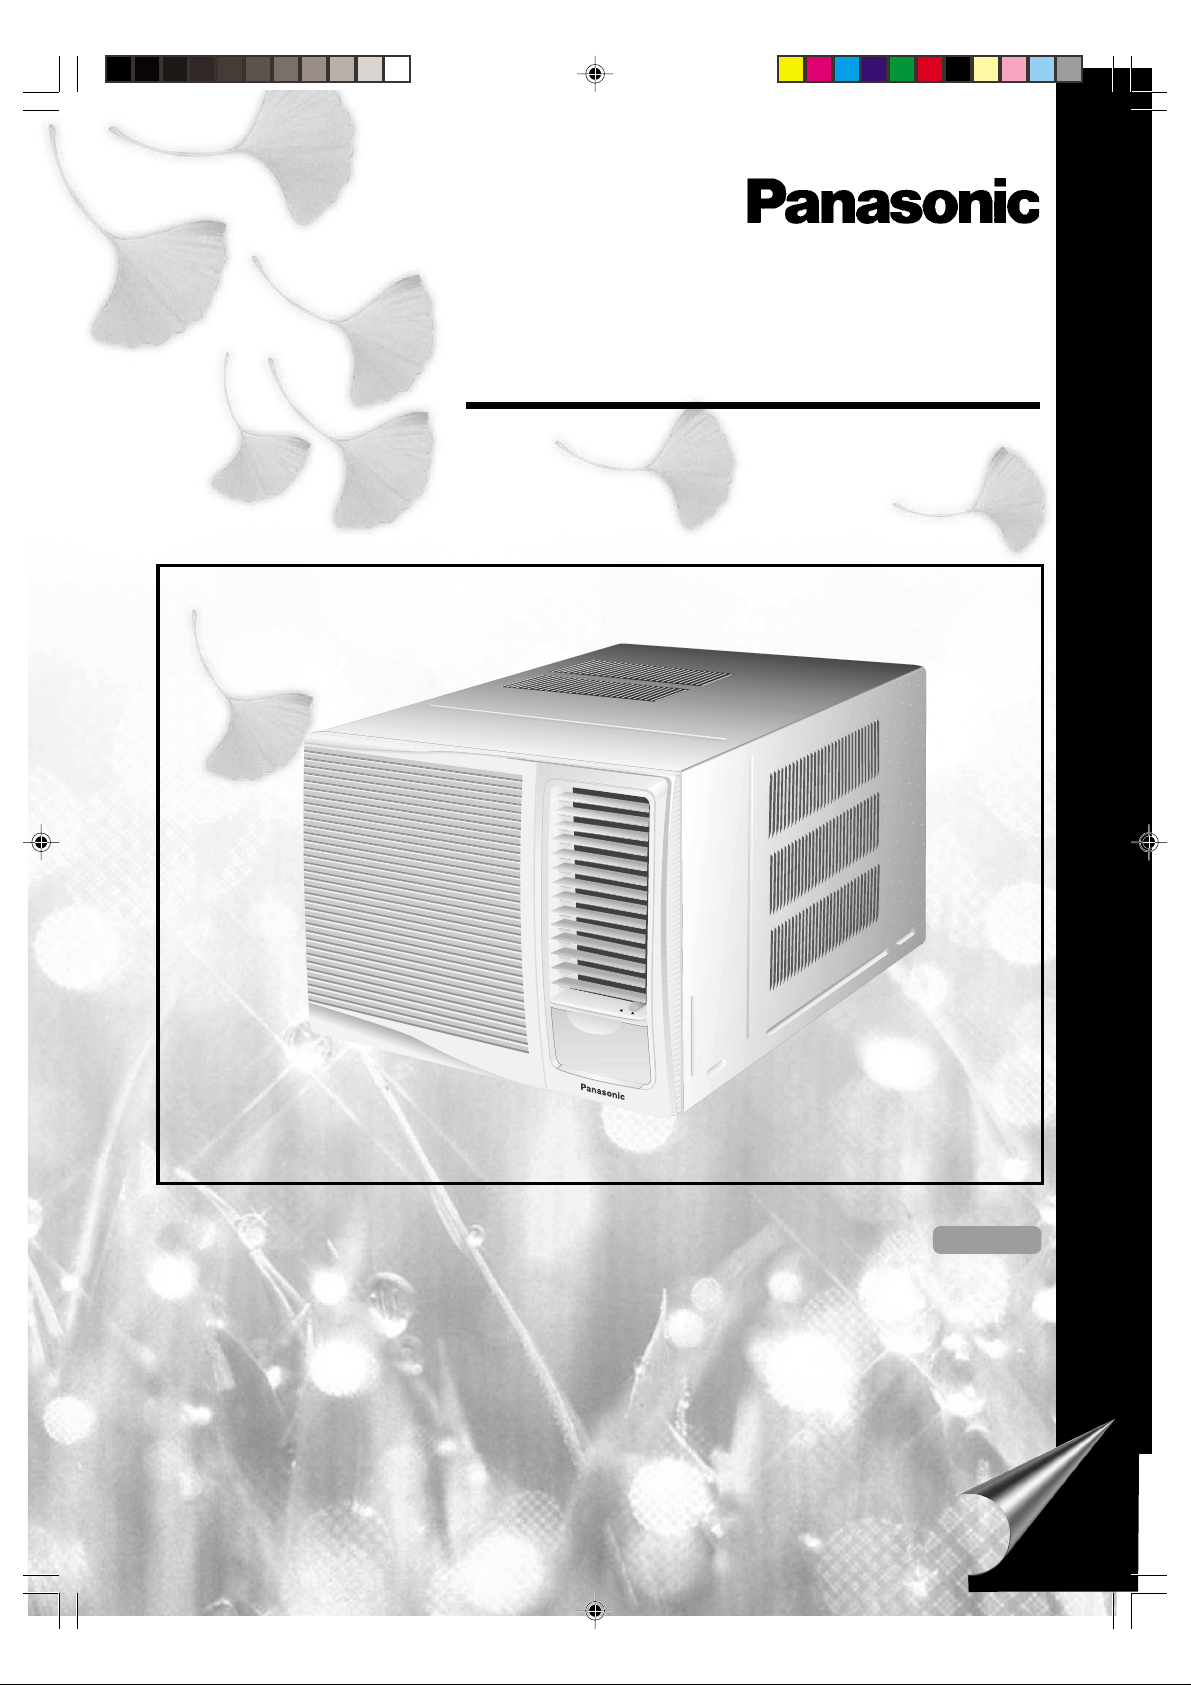
Room Air Conditioner
OPERATING INSTRUCTION S
Model s CW -C180EG, CW -C240EG
CW-A180EG
CLOSE VENT OPEN
CLOSE VENT OPEN
Please read these operating instructions thoroughly before
using your air conditioner and keep them for future reference.
ENGLISH
ESPAÑOL
F563259
CW-C180/240EG(01+C) 29/5/01, 8:22 pm1
Page 2
Thank you for choosing Panasonic
Gracias por elegir Panasonic
In the following pages we’ll guide you through the functions and features of your new
Room Air Conditioner.
En las páginas a continuación le guiaremos a través de las funciones y características de su nuevo
Acondicionador de Aire para Habitación.
FEATURES
FEATURES
CARACTERÍSTICAS
CARACTERÍSTICAS
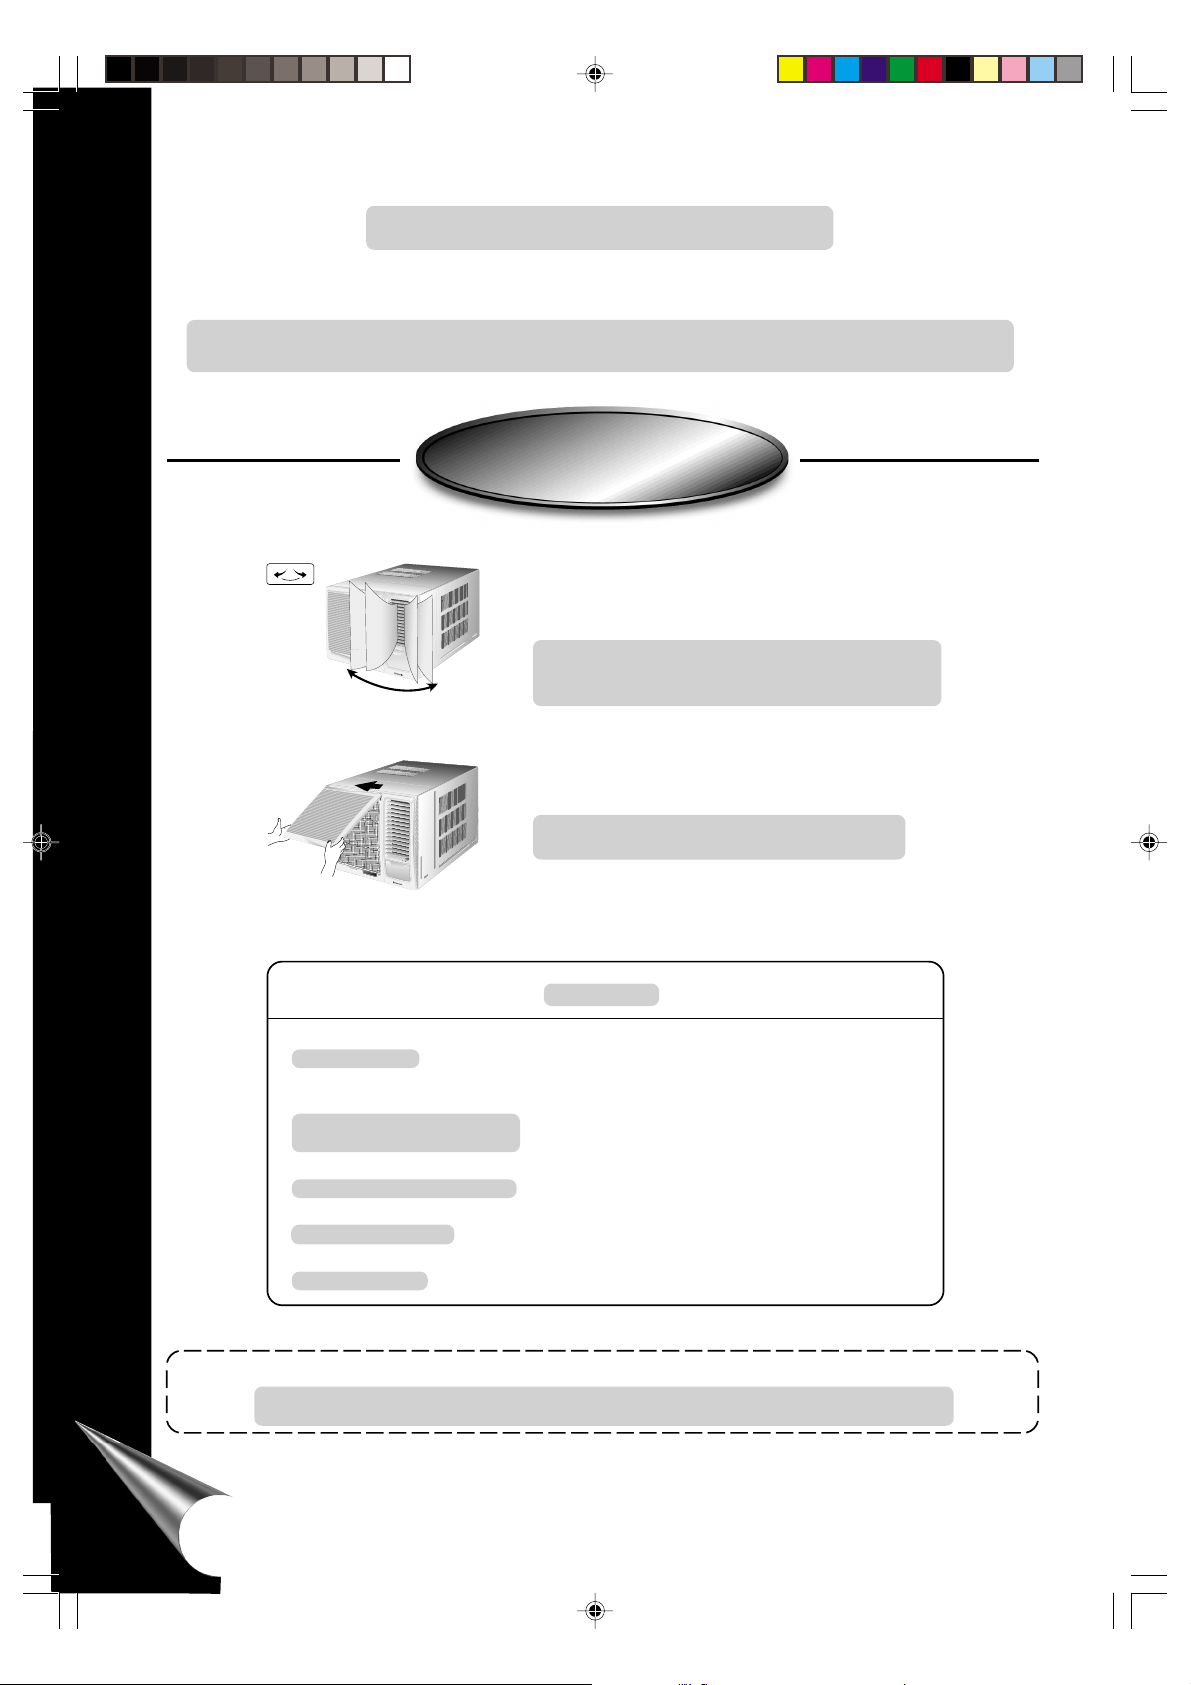
AIR SWING
☛
The automated lateral air deflection system ensures even cooling
C
C
L
L
O
O
S
S
E
E
V
V
E
E
N
N
T
T
O
O
P
P
E
E
N
N
and heating. (Refer to page ☞ 11 or 12)
ROTADO DEL AIRE
El sistema de desvio lateral de aire automático asegura un
enfriamiento y calefacción parejo. (Diríjase a la página ☞ 11 o 12)
REMOVABLE FRONT INTAKE GRILLE
☛
For quick and easy cleaning. (Refer to page ☞ 15)
REJILLA FRONTAL DE TOMA DE AIRE
C
C
L
L
O
O
S
S
E
E
V
V
E
E
N
N
T
T
O
O
P
P
E
E
N
N
Model Number : __________________________________________________________________________
Número del modelo:
Serial Number : ___________________________________________________________________________
(Located on the side of unit)
Número de serie :
(Localizado en el costado de la unidad)
Dealer's Name and Address : ________________________________________________________________
Nombre y dirección del comerciante :
Dealer's Tel : _____________________________________________________________________________
Teléfono del comerciante :
Date of Purchase : _________________________________________________________________________
Fecha de adquisicion :
Para una rápida y fácil limpieza. (Diríjase a la página ☞15)
REFERENCE
REFERENCIA
Please affix your proof of purchase here for future reference.
Favor de pegar la prueba de su compra aquí para su futura referencia.
1
CW-C180/240EG(01+C) 30/5/01, 9:22 am2
Page 3
CONTENTS
CONTENTS
CONTENIDO
CONTENIDO
■ SAFETY PRECAUTIONS......................................................................... 3 ~ 6
PRECAUCIONES DE SEGURIDAD
• Installation Precautions Precauciones de Instalación
• Operation Precautions Precauciones de Operación
■ PART IDENTIFICATION ....................................................................... 7 ~ 10
IDENTIFICACIÓN DE LOS COMPONENTES
• Main Unit Unidad Principal
■ AIR CONDITIONER OPERATION .................................................... 11 ~ 12
OPERACIÓN DEL ACONDICIONADOR DE AIRE
■ AIR CONDITIONER INSTALLATION .............................................. 13 ~ 16
INSTALACIÓN DEL ACONDICIONADOR DE AIRE
• Choosing The Installation Location Elección del Lugar de Instalación
• Noise considerations Consideraciones sobre el ruido
• Preparations Before Installation Preparaciones Antes de la Instalación
• Installation Procedures Procedimientos de Instalación
•
Removal of Front Grille Removimiento del Montaje de la Rejilla Frontal
• Electrical Work Trabajo Eléctrico
• Condensed Water Drainage Drenaje de agua condensada
• Transferring Transfiriendo
■ ENERGY SAVING HINTS ............................................................................17
CONSEJOS DE AHORRAMIENTO DE ENERGÍA
■ CARE AND MAINTENANCE ............................................................. 18 ~ 19
CUIDADO Y MANTENIMIENTO
■ BEFORE CALLING FOR SERVICE .................................................... 20 ~ 21
ANTES DE LLAMAR PARA MANTENIMIENTO
CW-C180/240EG(02~10) 29/5/01, 8:24 pm1
2
Page 4

SAFETY PRECAUTIONS
SAFETY PRECAUTIONS
PRECAUCIONES DE SEGURIDAD
PRECAUCIONES DE SEGURIDAD
• Please observe the following safety precautions when using your air conditioner.
Failure or negligence in observing these safety precautions could cause fire, electrical shock or personal injury.
Por favor observe las siguientes precauciones de seguridad cuando use su acondicionador de aire.
La falla o negligencia en observar las precauciones de seguridad puede causar incendios, descargas electricas o
lesiones personales.
This symbol (with a white background) denotes an action that is
PROHIBITED.
Este símbolo (con un fondo blanco) denota una acción que es
PROHIBIDA.
These symbols (with a green background) denote actions that are
COMPULSORY.
Estos símbolos (con un fondo verde) denotan acciones que son
OBLIGATORIAS.
INSTALLATION PRECAUTIONS
PRECAUCIONES DE INSTALACIÓN
WARNING
ADVERTENCIA
CAUTION
CUIDADO
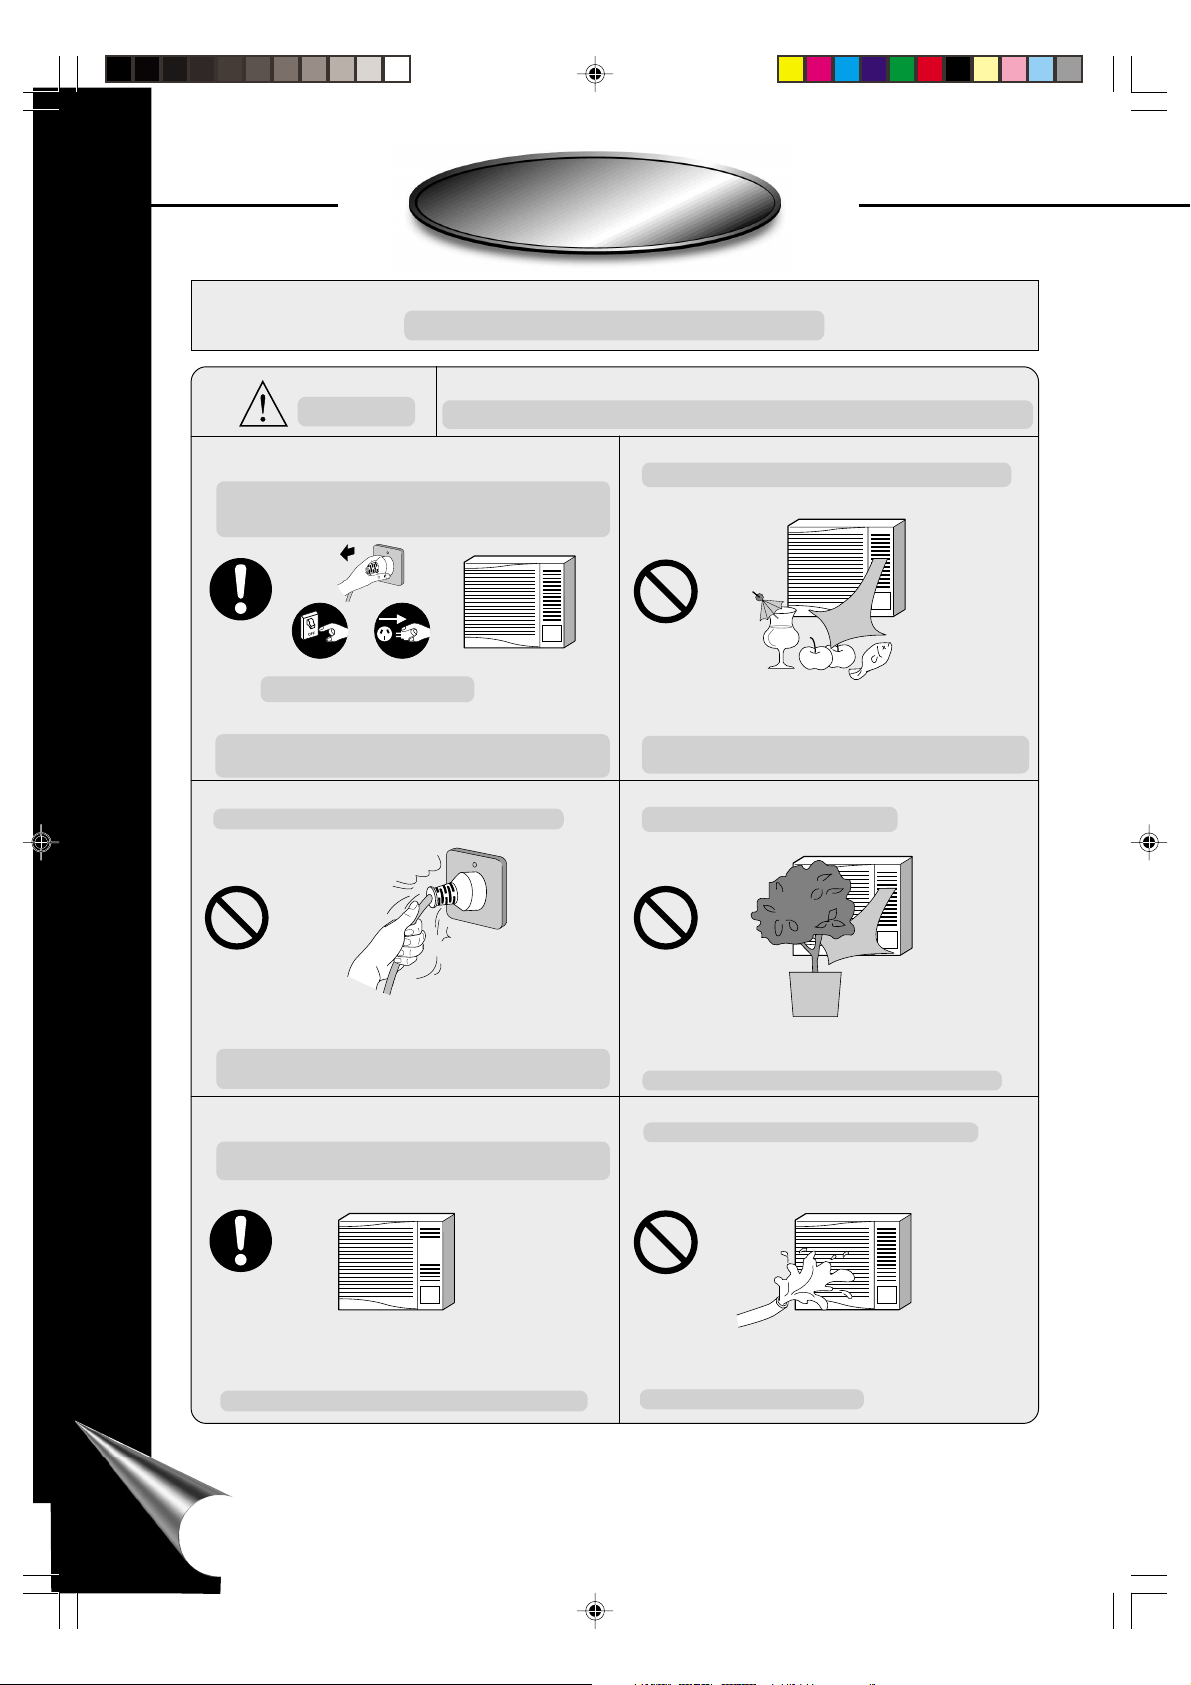
Do not install, remove and reinstall the unit yourself.
Improper installation may cause leakage, electric shock or fire. Please engage
an authorized dealer or specialist for the installation work.
No instale, ni remueva y no reinstale la unidad usted mismo.
La instalación incorrecta puede causar agujero, descarga eléctrica o incendio.
Por favor contectar a un comerciante autorizado o especialista para hacer el
trabajo de instalación.
The room air conditioner must be earthed.
El aire acondicionado de la habitación debe estar conectado a tierra.
Improper grounding could cause electric shock.
Un inadecuado conocimiento causará una descarga eléctrica.
Do not install the unit in a place where there are explosive gas leaks.
No instalar la unidad en lugares donde hay escape de gas inflamable.
Gas leaks near the unit could cause fire.
Una inadecuada conección a tierra puede causar una descarga eléctrica.
Ensure that the drainage piping is connected properly.
Asegúrese que el drenaje de la tuberia esté conectado adecuadamente.
Otherwise, water will leak out.
De otra manera, el agua goteará.
3
CW-C180/240EG(02~10) 29/5/01, 8:24 pm2
Page 5

OPERATION PRECAUTIONS
PRECAUCIONES DE OPERACIÓN
WARNING
ADVERTENCIA
• Do not modify the length of the power cord or use an extension
cord.
No modifique el largo de cable de suministro de poder ni use
cables de extensión.
It could cause electrical shock or fire.
Podría causar una descarga eléctrica o un incendio.
• Do not turn on the unit by inserting the power plug.
Do not switch off the unit by pulling out the power plug.
No encienda la unidad conectando el enchufe principal.
No apague la unidad sacando el enchufe principal.
It could cause electrical shock or fire.
Podría causar una descarga eléctrica o un incendio.
• If abnormal conditions (burnt smell, etc) occur, switch off and
remove the power plug.
Si detecta una situación anormal (por ejemplo, olor a quemado),
pare el acondicionador de aire y desconecte el suministro de
alimentación.
This sign warns of risk of death or serious injury.
Este símbolo advierte de riesgo de muerte o lesiones graves.
• Do not touch or operate with wet hands.
Do not modify or damage the cord.
No toque ni opere con las manos mojadas.
No modifique o dañe el cable eléctrico.
It could cause electrical shock or fire.
Podría causar una descarga eléctrica o un incendio.
• Plug in properly before operating and use a specified power
cord.
Enchufe adecuadamente antes de operar y utilice un cable
especificado.
It could cause electrical shock or fire.
Podría causar una descarga eléctrica o un incendio.
• Avoid an extended period of direct airflow.
Evite estar un largo tiempo expuesto directamente a la
corriente de aire.
Switch off the breaker and remove the power plug.
Apague el interruptor principal y desconecte el
The heat generated could cause electrical shock or fire. Please consult
an authorized dealer or servicenter.
El calor generado podría causar una descarga electrica o un incendio.
Por favor consulte a su comerciante autorizado o servicio técnico.
• Do not insert sticks, fingers or other objects into the unit.
No inserte palos, dedos o cualquier otra clase de objeto en la
unidad.
It could lead to physical injury as well as damage to the unit.
Podría causar alguna herida física asi como también dañar la unidad.
CW-C180/240EG(02~10) 29/5/01, 8:24 pm3
enchufe del suministro de alimentación.
It could lead to health problems.
Podría llevar a problemas de salud.
• Do not try to repair the unit yourself.
No intente reparar la unidad usted mismo.
It could lead to fire or cause an electrical shock.
Please call an authorized dealer or servicenter.
Podría llevar a causar un incendio o una descarga eléctrica.
Por favor consulte a su comerciante autorizado o servicio técnico.
4
Page 6
SAFETY PRECAUTIONS
SAFETY PRECAUTIONS
PRECAUCIONES DE SEGURIDAD
PRECAUCIONES DE SEGURIDAD
OPERATION PRECAUTIONS
PRECAUCIONES DE OPERACIÓN
CAUTION
CUIDADO
• Switch off the breaker and remove the power plug from the
socket if the unit will not be operated for a long period.
Apague el interruptor principal y desconecte el enchufe de
suministro de alimentación si la unidad no va a ser utilizada
por un largo período.
Switch off the breaker and remove the power plug.
Apague el interruptor principal y desconecte el
Dust accumulated on the power plug pin may cause over-heating and
fire.
El polvo acumulado en el enchufe puede causar un sobrecalentamiento
y un incendio.
• Do not remove the power plug by pulling the cord.
No quite el enchufe de alimentación tirando del cable.
enchufe del suministro de alimentación.
This sign warns of risk of injury or damage to property.
Este símbolo advierte de riesgo de lesiones o daños a la propiedad.
• Do not use the unit for other purposes.
No utilice el acondicionador de aire para otros propósito.
Do not use for cooling or preservation purposes. It will affect food
quality.
No use para fines de enfriar o preservar alimentos. Podría afectar
la calidad de estos.
• Do not block the air intake and outlet vanes.
No bloquee la salida ni entrada de aire.
Hold the power plug when disconnecting the power plug from the
wall outlet.
Sujete el enchufe cuando desconecte el enchufe de la salida de la
pared.
• Pay attention to any damage on the unit caused by extensive
usage.
Ponga atención a cualquier daño en la unidad causado por un
uso extensivo.
Ensure that the necessary repairs are carried out.
Asegúrese de que los reparos necesarios sean llevados a cabo.
5
CW-C180/240EG(02~10) 29/5/01, 8:24 pm4
Cooling or heating performance will be affected.
El proceso de enfriamiento o calefacción será afectado.
• Do not splash or direct water at the unit.
No salpique o lave la unidad directamente con agua.
It could cause electrical shock.
Podría causar una descarga eléctrica.
Page 7
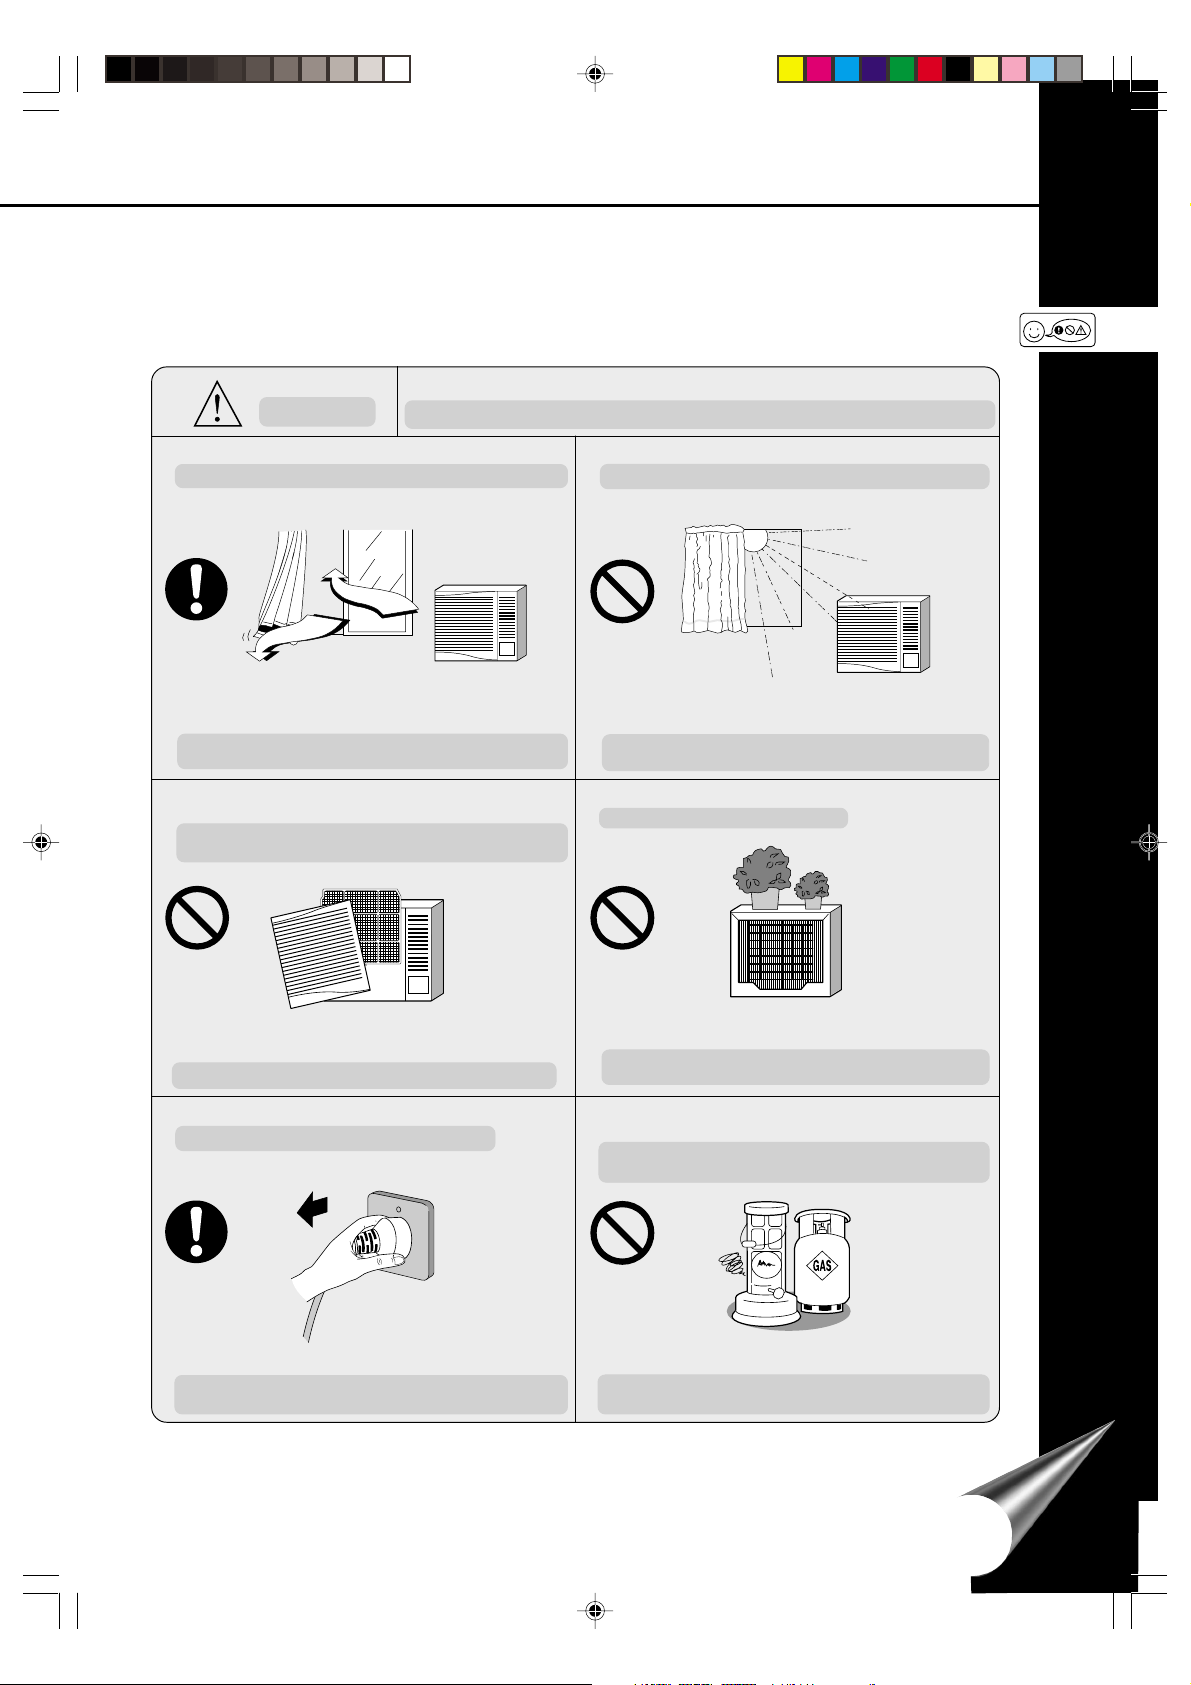
CAUTION
CUIDADO
This sign warns of risk of injury or damage to property.
Este símbolo advierte de riesgo de lesiones o daños a la propiedad.
• Ventilate the room occasionally where the unit is installed.
Ventile ocasionalmente el cuarto donde la unidad esta instalada.
Since windows are kept closed, it does good to open them periodically
to ventilate the room.
Ya que las ventanas están mantenidas cerradas, es bueno abrirlas
periodicamente para ventilar el cuarto.
• Do not operate the unit without the air filter installed or when
the front intake grille has been removed.
No opere sin el filtro de aire o cuando la rejilla frontal de toma
de aire haya sido removida.
• Do not expose the unit to direct sunlight during operation.
No exponer la unidad a la luz solar, mientras esta funcionando.
Cooling performance will be affected, thus increasing power
consumption. (For cooling operation only)
El proceso de enfriamiento será afectado, así se incrementará el
consumo de electricidad. (Solamente para operación de refrigeración)
• Do not place anything on the unit.
No coloque nada encima de la unidad.
It could cause dust to accumulate on the heat exchanger.
Podría causar acumulamiento de polvo en el intercambiador de calor.
• Remove the power plug when cleaning the unit.
Desconecte el enchufe cuando se limpie la unidad.
This is to prevent injury caused by the rotating fan in the unit.
Esto es para prevenir lesiones causadas por el ventilador que está rotando
en la unidad.
CW-C180/240EG(02~10) 29/5/01, 8:24 pm5
The object may fall off or its weight may cause the unit to collapse.
El objeto podría caerse o el peso del mismo podría causar un colapso
en la unidad.
• Do not operate any combustion equipment near the unit’s
airflow area.
No coloque ningún equipo de combustible en el paso del flujo
de aire de la unidad.
Incomplete combustion due to the airflow may cause toxic gas (CO)
poisoning.
La combustión deficiente debido a la corriente de aire podría causar
envenenamiento por gases tóxicos (CO).
6
Page 8

PART IDENTIFICATION
PART IDENTIFICATION
IDENTIFICACIÓN DE LOS COMPONENTES
IDENTIFICACIÓN DE LOS COMPONENTES
(CW-C180EG, CW-C240EG)
MAIN UNIT
UNIDAD PRINCIPAL
Air filter
(behind the front intake grille)
Filtro de aire
(detras de la rejilla frontal de toma
de aire)
(Cooling only)
Front intake grille
Rejilla frontal de
toma de aire
(Solamente de refrigeración)
Control panel cover
(Opened)
Cubierta del panel de control (Arbierto)
Power cord
Cable de suministro
Cabinet
Caja
Air inlet louvre
Tomas de aire para
ventilación
Front grille
Rejilla frontal
7
CLOSE VENT OPEN
Vertical airflow direction vane
(Airflow direction adjustment up-down)
The vertical airflow direction vane is controlled
by positioning the vane to discharge the air
upwards, downwards or straight out.
Paleta de Dirección Vertical de
la Corriente de aire
(Ajuste de la dirección de flujo de aire hacia arribaabajo)
La paleta de dirección del flujo de aire vertical se
controla colocando la paleta para que descargue
aire hafia arriba, hacia abajo o recto.
OPERATION CONDITIONS
CONDICIONES DE OPERACIÓN
Use the air conditioner under the following conditions:
• Operating temperature range.
Use el acondicionador de aire en las siguientes conditioned:
• Alcance de la temperatura operante.
Indoor side Outdoor side
Unidad interior Unidad exterior
Max. Temperature
Temperatura máxima
Min. Temperature
Temperatura mínima
D.B.T. : Dry Bulb Temperature Temperatura de la cubeta seca
W.B.T. : Wet Bulb Temperature Temperatura de la cubeta húmeda
NOTE: Humidity may exceed 90%
NOTA: La humedad puede exceder 90%
Continuous operation at over 90% high humidity may create
condensation and result in waterdrops on the intake and outlet vanes.
La operación continua a más del 90% de humedad, puede crear
condensación y goteos en los respiraderos de entrada y salida.
D.B.T. W.B.T. D.B.T. W.B.T.
32 23 43 26
21 15 21 15
(unit in °C)
(Unidad en °C)
CW-C180/240EG(02~10) 29/5/01, 8:24 pm6
Page 9

AIR SWING
ON
OFF
VENTILATION LEVER
PALANCA DE VENTILACIÓN
When the slide lever is in the :
Cuando la palanca se encuentra deslizada en la:
When the slide lever is in the :
Cuando la palanca se encuentra deslizada en la:
C
L
O
S
E
V
E
N
T
O
P
E
N
– “OPEN” position, the ventilation door opens
to allow air, smoke or odours to be expelled
from the room.
Posición “OPEN”, la puerta de ventilación
está abierta para permitir que el aire, humo
u olor sean expulsados de la habitación.
MAIN CONTROL PANEL
CONTROL DEL PANEL PRINCIPAL
G
N
I
W
S
R
I
A
F
N
F
O
O
THERMOSTAT
65
7
4
8
3
9
2
10
1
Operación de baja velocidad del ventilador
HIGH
FAN
LOW
LOW
COOL
FAN
OFF
O
HIGH
COOL
Low fan speed operation
Stops all operation
Detiene toda operación
Para menos enfriamiento
Air Swing Switch
OFF Stops the operation of Air Swing.
ON Air Swing is in operation. (Only for LOW COOL and HIGH COOL
operation.)
Interruptor de Rotado del Aire
OFF Detiene la operación del Rotado del Aire.
ON El Rotado del Aire está en operación. (Solamente para el operaciones
ENFRIAMIENTO A BAJA VELOCIDAD y ENFRIAMIENTO A ALTA
VELOCIDAD.)
Main Control Knob
Perilla del Control Principal
High fan speed operation
Operación de alta velocidad del ventilador
LOW
FAN
OFF
O
Thermostat Control Knob
Turn the thermostat control knob as shown:
Perilla de Control del Termostato
Gire la perilla de control del termostato como se muestra:
For less cool
HIGH
FAN
THERMOSTAT
4
3
2
1
– “CLOSE” position, the ventilation door is
closed and the air will be circulated inside
the room and conditioned.
Posición “CLOSE”, la puerta de ventilación
está cerrada y el aire circula dentro de la
habitación y así acondicionará.
Low fan speed with cooling operation
LOW
Operación de baja velocidad del
COOL
ventilador con enfriamiento
HIGH
COOL
High fan speed with cooling operation
Operación de alta velocidad del
ventilador con enfriamiento
65
7
8
For cooler
9
10
Para más enfriamento
8
CW-C180/240EG(02~10) 29/5/01, 8:24 pm7
Page 10

PART IDENTIFICATION
PART IDENTIFICATION
IDENTIFICACIÓN DE LOS COMPONENTES
IDENTIFICACIÓN DE LOS COMPONENTES
(CW-A180EG)
MAIN UNIT
UNIDAD PRINCIPAL
Air filter
(behind the front intake grille)
Filtro de aire
(detras de la rejilla frontal de toma
de aire)
(Cooling and Heating)
(Enfriamiento y Calefacción)
Front intake grille
Rejilla frontal de
toma de aire
Power cord
Cable de suministro
Control panel cover
(Opened)
Cubierta del panel de control (Arbierto)
Cabinet
Caja
Air inlet louvre
Tomas de aire para
ventilación
Front grille
Rejilla frontal
CLOSE VENT OPEN
Vertical airflow direction vane
(Airflow direction adjustment up-down)
The vertical airflow direction vane is controlled
by positioning the vane to discharge the air
upwards, downwards or straight out.
Paleta de Dirección Vertical de
la Corriente de aire
(Ajuste de la dirección de flujo de aire hacia arribaabajo)
La paleta de dirección del flujo de aire vertical se
controla colocando la paleta para que descargue
aire hafia arriba, hacia abajo o recto.
OPERATION CONDITIONS
CONDICIONES DE OPERACIÓN
Use the air conditioner under the following conditions:
• Operating temperature range.
Use el acondicionador de aire en las siguientes conditioned:
• Alcance de la temperatura operante.
Indoor side Outdoor side
Unidad interior Unidad exterior
Max. Temperature
Temperatura máxima
Min. Temperature
Cooling
Temperatura mînima
Enfriamiento
Max. Temperature
Temperatura máxima
Min. Temperature
Heating
Temperatura mînima
Calefacción
D.B.T. : Dry Bulb Temperature Temperatura de la cubeta seca
W.B.T. : Wet Bulb Temperature Temperatura de la cubeta húmeda
NOTE: Humidity may exceed 90%
NOTA: La humedad se excede 90%
Continuous operation at humidities of over 90% may cause
condensation to form on the intake and outlet vanes.
La operación continua a más del 90% de humedad, puede crear
condensación y goteos en los respiraderos de entrada y salida.
D.B.T. W.B.T. D.B.T. W.B.T.
32 23 43 26
21 15 21 15
27 – 21 15
20 – – 5 – 6
(Unit in °C)
(Unidad en °C)
9
CW-C180/240EG(02~10) 29/5/01, 8:24 pm8
Page 11

AIR SWING
ON
OFF
VENTILATION LEVER
PALANCA DE VENTILACIÓN
When the slide lever is in the :
Cuando la palanca se encuentra deslizada en la:
When the slide lever is in the :
Cuando la palanca se encuentra deslizada en la:
C
L
O
S
E
V
E
N
T
O
P
E
N
– “OPEN” position, the ventilation door opens
to allow air, smoke or odours to be expelled
from the room.
Posición “OPEN”, la puerta de ventilación
está abierta para permitir que el aire, humo
u olor sean expulsados de la habitación.
MAIN CONTROL PANEL
CONTROL DEL PANEL PRINCIPAL
G
N
I
W
S
R
I
A
F
F
N
O
O
THERMOSTAT
65
7
4
8
3
9
2
10
1
WARMER COOLER
Operación de baja velocidad del ventilador
Low fan speed with heating operation
High fan speed with heating operation
OFF
HEATING
COOLING
FAN FAN
LOW
HIGH HIGH
LOW
Air Swing Switch
OFF Stops the operation of Air Swing.
ON Air Swing is in operation.
Interruptor de Rotado del Aire
OFF Detiene la operación del Rotado del Aire.
ON El Rotado del Aire está en operación.
Main Control Knob
Perilla del Control Principal
Fan speed operation
Operación de baja velocidad del
ventilador con calentamiento
Operación de alta velocidad del
ventilador con calentamiento
Thermostat Control Knob
Turn the thermostat control knob as shown:
Perilla de Control del Termostato
Gire la perilla de control del termostato como se muestra:
For warmer
Para más caliente
Stops all operation
Detiene toda operación
HEATING
FAN FAN
LOW
HIGH HIGH
– “CLOSE” position, the ventilation door is
OFF
COOLING
LOW
THERMOSTAT
65
4
3
2
1
WARMER COOLER
closed and the air will be circulated inside
the room and conditioned.
Posición “CLOSE”, la puerta de ventilación
está cerrada y el aire circula dentro de la
habitación y así acondicionará.
Fan speed operation
Operación de baja velocidad del ventilador
Low fan speed with cooling operation
Operación de baja velocidad del
ventilador con enfriamiento
High fan speed with cooling operation
Operación de alta velocidad del
ventilador con enfriamiento
7
8
For cooler
9
10
Para más enfriamento
10
CW-C180/240EG(02~10) 29/5/01, 8:24 pm9
Page 12

AIR CONDITIONER OPERATION
AIR CONDITIONER OPERATION
OPERACIÓN DEL ACONDICIONADOR DE AIRE
OPERACIÓN DEL ACONDICIONADOR DE AIRE
CW-C180EG, CW-C240EG (Cooling only) (Solamente de refrigeración)
G
N
I
W
S
R
I
A
F
F
N
O
3
2
THERMOSTAT
4
1
O
HIGH
65
FAN
LOW
7
FAN
8
OFF
O
9
10
1. Open the control panel cover
LOW
COOL
HIGH
COOL
Abra la cubierta del panel de control
2. Power Supply
Switch off the breaker and set the main control knob to the OFF position before plugging the power
plug into an electrical outlet.
Suministro de Electricidad
Apague el enchufe principal y ajuste la perilla del control principal en posición OFF antes de enchufarlo
a una salida eléctrica.
3. Main Control Knob
Set to LOW COOL or HIGH COOL as desired. (FAN setting operates the fan only.)
CAUTION: If the main control knob is turned off or changed to a fan setting from a cooling
operation setting, WAIT at least 3 minutes before resetting to cooling operation.
Perilla del Control Principal
HIGH
COOL
Seleccione ENFRIAMIENTO A BAJA VELOCIDAD o ENFRIAMIENTO A ALTA VELOCIDAD
según desee. (Con FAN opera solo el ventilador.)
CUIDADO: Si la perilla del control principal es apagado o es ajustado a la función de ventilador
cuando se encontraba enfriando, ESPERE por lo menos 3 minutos antes de
reajustarlo a la operación de enfriamiento.
OFF
O
LOW
FAN
HIGH
FAN
LOW
COOL
THERMOSTAT
4
3
2
1
AIR SWING
OFF
4. Thermostat Control Knob
Set the thermostat control knob to your desired setting. (Usually, 6~7 is recommended) If the
room temperature is not as desired after a reasonable period, turn the thermostat control knob
clockwise to cool the room more or counter clockwise to cool the room less.
• When the thermostat control knob is set to 10, moisture may freeze onto the evaporator fins
65
7
8
9
10
and prevent effective cooling. If this happens, turn the main control knob to HIGH FAN and
the thermostat control knob counter clockwise. This will quickly defrost the evaporator fins
so that normal cooling can be resumed.
Perilla de Control del Termostato
Ajuste la perilla del control del termostato a la posición deseada. (Usualmente, 6 a 7 es
recomendada) Si la temperatura no es como desea, después de un periodo razonable gire la
perilla del control del termostato en dirección de la manecilla del reloj para enfriar más la
habitación o en sentido contrario a la manecilla del reloj para enfriar menos la habitación.
• Cuando la perilla de control del termostato está ajustada en 10, la humedad puede congelarse
en la aleta del evaporador e impedir un enfriamiento efectivo. Si esto sucede, gire la perilla de
control principal a HIGH FAN, y la perilla de control del termostato en dirección contraria a
las manecillas del reloj. Esto descongelará rápidamente las aletas del evaporador para así
poder volver a un enfriamiento normal.
5. Air Swing Switch
(Airflow direction adjustment Side-to-Side)
To obtain a fixed airflow direction, set the air swing switch to “ON” for the vanes to swing from side
to side until the desired flow direction is reached, then switch it to “OFF”. For continuous side-toside air circulation, set the air swing switch to “ON”.
ON
Interruptor de Rotado del Aire
(Ajuste de Lado a Lado de la dirección de corriente de aire)
Para obtener una dirección fija del flujo de aire, ajuste el interruptor a “ON” para balancear las
paletas de lado a lado hasta que la dirección deseada de flujo de aire sea alcanzada, luego ajuste el
interruptor a “OFF”. Para un barrido de aire lado a lado continuo, ajuste el interruptor de Rotado de
Aire a “ON”.
11
CW-C180/240EG(11~16) 29/5/01, 8:23 pm8
Page 13

THERMOSTAT
WARMER COOLER
10
9
8
7
65
4
3
1
2
HEATING
OFF
COOLING
HIGH HIGH
LOW
LOW
FAN FA N
A
IR
S
W
IN
G
O
N
O
F
F
CW-A180EG (Cooling and Heating) (Enfriamiento y Calefacción)
1. Open the control panel cover
Abra la cubierta del panel de control
2. Power Supply
Switch off the breaker and set the main control knob to the OFF position before plugging the power
plug into an electrical outlet.
Suministro de Electricidad
Apague el enchufe principal y ajuste la perilla del control principal en posición OFF antes de enchufarlo
a una salida eléctrica.
3. Main Control Knob
Set either LOW COOLING or HIGH COOLING and LOW HEATING or HIGH HEATING as desired.
OFF
HEATING
FAN FAN
LOW
HIGH HIGH
COOLING
(FAN setting operates the fan only.)
CAUTION: If the main control knob is turned off or changed to a fan setting from a cooling or
heating operation setting, WAIT at least 3 minutes before resetting to cooling or
heating operation.
LOW
Perilla del Control Principal
Ajuste cualquiera de los dos ENFRIAMIENTO A BAJA VELOCIDAD o ENFRIAMIENTO A ALTA
VELOCIDAD y BAJA CALEFACCIÓN o ALTA CALEFACCIÓN como desee.
(Ajustando en FAN solo hará funcionar el ventilador.)
CUIDADO : Si la perilla del control principal es apagado o es ajustado a la función de ventilador
cuando se encontraba enfriando, ESPERE por lo menos 3 minutos antes de reajustarlo
a la operación de enfriamiento o calefacción.
THERMOSTAT
65
4
3
2
1
WARMER COOLER
AIR SWING
OFF
4. Thermostat Control Knob
Set the thermostat control knob to your desired setting. (Usually, 4~5 is recommended setting for
heating and 6~7 is recommended setting for cooling.) If the room temperature is not as desired after
a reasonable period, turn the thermostat control knob clockwise to make the room cooler or counter
clockwise to make the room warmer.
• When the thermostat control knob is set to 10, moisture may freeze onto the evaporator fins and
prevent effective cooling. If this happens, turn the main control knob to FAN and the thermostat
7
8
9
10
control knob counter clockwise. This will quickly defrost the evaporator fins so that normal cooling
can be resumed.
Perilla del Control del Termostato
Ajuste la perilla del control del termostato en la posición deseado (Normalmente se recomienda un
ajuste entre 4~5 para calefacción y entre 6~7 para enfriamiento). Si la temperatura no es como desea,
después de un periodo razonable gire la perilla del control del termostato en dirección de la manecilla
del reloj para enfriar más la habitación o en sentido contrario a la manecilla del reloj para enfriar
menos la habitación.
• Cuando la perilla del control del termostato es ajusta en 10, la humedad puede congelarse en las
espirales e interferir en un enfriamiento efectivo. Si esto sucede, gire la perilla del control principal a
FAN, y la perilla del control del termostato en dirección contraria a las manecillas del reloj. Esto
enfriará rápidamente la evaporación, y el enfriamiento normal reiniciará.
5. Air Swing Switch
(Airflow direction adjustment Side-to-Side)
To obtain a fixed airflow direction, set the air swing switch to “ON” for the vanes to swing from side
to side until the desired flow direction is reached, then switch it to “OFF”. For continuous side-to-side
air circulation, set the air swing switch to “ON”.
ON
Interruptor de Rotado del Aire
(Ajuste de Lado a Lado de la dirección de corriente de aire)
Para obtener una dirección fija del flujo de aire, ajuste el interruptor a “ON” para balancear las paletas
de lado a lado hasta que la dirección deseada de flujo de aire sea alcanzada, luego ajuste el interruptor
a “OFF”. Para un barrido de aire lado a lado continuo, ajuste el interruptor de Rotado de Aire a “ON”.
CW-C180/240EG(11~16) 29/5/01, 8:23 pm9
12
Page 14

L
O
W
F
A
N
L
O
W
C
O
O
L
H
I
G
H
F
A
N
H
I
G
H
C
O
O
L
AIR CONDITIONER INSTALLATION
AIR CONDITIONER INSTALLATION
INSTALACIÓN DEL ACONDICIONADOR DE AIRE
INSTALACIÓN DEL ACONDICIONADOR DE AIRE
Choosing The Installation Location
• When installing, use the nearest power socket. Make sure the power socket is easy to reach so you can
quickly disconnect your air conditioner in case of emergency.
• Ensure that the air conditioner is well supported, securely fastened, easily reachable and not obstructed
(see “Dimensions” below).
• Avoid locations with: salty or sulphurous air, draughts, dampness and flammable gas.
• If you install the drainage system, be sure to channel the condensed water to a suitable location.
• Covers, obstructions and unsteady support may cause excessive operating noise and vibration.
• The rear end of the air conditioner is splash proof. You need not shield or cover it.
Elección del Lugar de Instalación
• Para instalar, utilice la toma de corriente más cercana. Asegúrese de que es una toma de fácil acceso, por si tiene que desconectar
el aire acondicionado en una situación de emergencia.
• Asegúrese de que el acondicionador de aire tenga un buen soporte, este sujeto seguramente, a un fácil alcance y no obstruido (Ve a
“Dimensiones” abajo).
• Evite lugares con: aire salado o sulfuroso, corrientes de aire, humedad y gas inflamable.
• Si instala el sistema de drenaje, asegúrese de canalisar el agua condensada a un lugar conveniente.
• Cubiertas, obstrucciones y poca estabilidad pueden causar un ruido y vibración excesiva durante el funcionamiento.
• La parte posterior del acondicionador de aire es a prueba de salpicaduras. No es necesario protegerla o cubrirla.
Noise considerations
• Select an installation location that can support the weight of the air conditioner and one that will not cause increased operating
noise and vibration.
• Ensure that airflow and noise from the rear side of the unit (outdoor) when installed do not disturb neighbouring residents.
• Obstacles placed in front of the air outlet on the rear side of the unit (outdoor), or covers placed over it will cause excessive noise
and deterioration in performance.
Consideraciones sobre el ruido
• Seleccione un fugar para instalación que pueda soportar el peso del acondicionador de aire y que a la vez no cause un incremento
de ruido y vibración cuando éste operando.
• Asegúrese que durante la instalación, la corriente de aire y el ruido provenientes de la parte trasera de la unidad (en el exterior),
no cause incovenientes a sus vecinos.
• Los obstáculos colocados en frente de la salida de aire de la parte posterior de la unidad (en el exterior), o cubiertas colocadas
sobre la misma, causan ruido excesivo y deterioran su función.
Preparations Before Installation
Dimensions
• There should not be any obstacles surrounding the unit.
• Prepare an installation hole slightly bigger than the
cabinet size.
• Left and right sides of the unit should be at least 15cm
away from the wall.
Preparaciones Antes de la Instalación
Dimensiones
• No existe ningún tipo de obstáculos alrededor de la
unidad.
• Prepare el hueco para la instalación un poco mayor al
tamaño de la unidad.
• Lados izquierdos y derecho de la unidad será al menos
15cm lejos de la pared.
WALL
Pared
CEILING
Techo
O
v
e
r 1
M
á
s
d
e
Over 15cm
Más de 15cm
5
c
m
1
5
c
m
66cm
6
6
c
m
42.8cm
42,8cm
C
LOSE
VEN
T OPEN
C
L
O
S
E
V
E
N
T
O
P
E
N
70cm
70cm
Less than 24cm
Menos de 24cm
Over 50cm
Más de 50cm
Fence
or likewise
Barda o equivalente
Installation Procedures
Procedimiento de Instalación
1
Remove the chassis locking bracket and screws
Unscrew and remove the chassis locking bracket from the front of the
cabinet.
Quite el soporte de cerradura del chasis y los tornillos
Desatornille y quite el soporte de cerradura del chasis del frente del
gabinete.
Counter clockwise
Contra las manecillas del reloj
Chassis locking bracket
Soporte de
cerradura del chasis
13
CW-C180/240EG(11~16) 29/5/01, 8:23 pm10
2
Slide the chassis out from the
cabinet
Deslice y saque el chasis del caja
H
I
G
H
L
O
F
W
A
N
F
A
N
L
O
W
C
O
O
L
H
I
G
H
C
O
O
L
Page 15

3
L
O
W
F
A
N
L
O
W
C
O
O
L
H
I
G
H
F
A
N
H
I
G
H
C
O
O
L
Place cabinet into the installation hole
Ponga el caja dentro del agujero de instalación
Tilt down for better
drainage (max.
10mm).
Incline hacia abajo
para mejor drenaje
(máxima 10mm)
Secure it with wood screws or nails.
Asegúrelo con tornillos para madera
o clavos.
5
Lock the chassis to the cabinet reusing the chassis
locking bracket and screw
Encierre el chasis al caja usando nuevamente el
soporte de cerradura del chasis y tornillo
Depending upon the location of the AC outlet, route
the AC cord to either the left or right side while
installing the front grille.
Dependiendo de la ubicación de la toma de CA, dirija
el cable hacia la derecha o izquierda mientras instala la
rejilla frontal.
HIGH
L
O
W
F
AN
F
AN
LOW
C
OOL
H
IGH
COOL
Clockwise
En el sentido del reloj
4
Slide the chassis back into the cabinet
Deslice el chasis de vuelta al caja
H
I
G
H
L
O
W
F
A
N
F
A
N
L
O
W
C
O
O
L
H
I
G
H
C
O
O
L
This figure shows the AC cord routed to the left side.
Esta figura muestra el cable de CA dirijida hacia la
izquierda.
6
Attach the front grille to the cabinet
and fasten it with screws
7
Insert the air filter
Inserte el filtro de aire
Coloque la rejilla frontal
en el caja y sujetela con los
tornillos
C
C
L
L
O
O
S
S
E
E
V
V
E
E
N
N
T
T
O
O
P
P
E
E
N
N
8
Attach the front intake grille
C
C
L
L
O
O
S
S
E
E
V
V
E
E
N
N
T
T
O
O
P
P
E
E
N
N
Reajuste la rejilla frontal de la toma de aire
C
L
O
C
S
L
E
O
S
E
V
E
N
V
T
E
N
T
O
P
E
O
N
P
E
Lift up to about 90°
Levante hasta más o menos 90°
Slide the front intake grille slightly to the right to attach it, then push down to secure it.
Deslice la rejilla frontal de toma de aire un poco a la derecha para sujetarla, luego presionela hacia abajo para asegurarla.
N
CW-C180/240EG(11~16) 29/5/01, 8:23 pm11
14
Page 16

CLOSE VENT OPEN
CLOSE VENT OPEN
L
O
W
C
O
O
L
H
I
G
H
F
A
N
H
I
G
H
C
O
O
L
AIR CONDITIONER INSTALLATION
AIR CONDITIONER INSTALLATION
INSTALACIÓN DEL ACONDICIONADOR DE AIRE
INSTALACIÓN DEL ACONDICIONADOR DE AIRE
Removal of Front Grille
Removimiento del Montaje de la Rejilla Frontal
1
Remove the Front Intake Grille
Raise the grille by approximately 90°. Slide it to the left to unhinge
then pull outwards.
Quite la Rejilla Frontal de Toma de Aire
Levante la rejilla a unos 90˚ aproximadamente. Deslicela hacia la
izquierda para desmontarla luego tire hacia afuera.
2
Remove the Air Filter
Quite el filtro de aire
Air filter
Filtro de aire
C
C
L
L
O
O
S
S
E
E
V
V
E
E
N
N
T
T
O
O
P
P
E
E
N
N
C
C
L
L
O
O
S
S
E
E
V
V
E
E
N
N
T
T
O
O
P
P
E
E
N
N
3
Remove the Front Grille
a
Open the control panel cover.
C
C
L
L
O
O
S
S
E
E
V
V
E
E
N
N
T
T
O
O
P
P
E
E
N
N
Lift filter by the holder and pull outwards.
Levante el filtro por el soporte y tire hacia afuera.
When performing the following steps, do not pull the bottom edge of the front grille towards
you more than 3 inches or you may damage the top tabs.
b
Press inwards on the cabinet near the bottom right side of the front grille while pulling the front
grille to the right then slightly towards you to release the right tab.
c
Press inwards on the cabinet near the bottom left side of the front grille while pulling the front
grille to the left then slightly towards you to release the left tab.
d
Slide the front grille upwards to release the two top tabs.
3
Quite la Rejilla Frontal
a
Abra la cubierta del panel de control.
Cuando se realicen los siguientes pasos, no tire el borde inferior de la rejilla frontal en su dirección más de 3 pulgadas o puede
dañar las lengüetas superiores.
b
Presione hacia adentro en el gabinete cerca del lado inferior derecho de la rejilla frontal mientras tira de la rejilla frontal hacia la
derecha y luego un poco hacia usted para liberar la lengüeta derecha.
c
Presione hacia adentro en el gabinete cerca del lado inferior izquierdo de la rejilla frontal mientras tira de la rejilla frontal hacia la
izquierda y luego un poco hacia usted para liberar la lengüeta izquierda.
d
Deslice la rejilla frontal hacia arriba para liberar las dos lengüetas superiores.
Electrical Work
• Always use at the rated voltage and with a specific air conditioning circuit.
• Some installation locations may require the installation of a shortcircuit breaker.
• Time delay fuse or circuit breaker rating is 16 Ampere for CW-C180EG/CW-A180EG and 20 Ampere for CW-C240EG.
• Nominal cross sectional area of power supply wire must be 3 core x 2.5 mm
• The power supply must be from an independent circuit.
• All electrical installations must be made in accordance with local wiring and safety regulations wherever applicable.
• There must be a double pole switch with a minimum of 3 mm contact gap in the fixed installation circuit.
• Please engage an authorized dealer or specialist for the installation work.
2
or above.
Trabajo Eléctrico
• Utilícese siempre en voltage estimado y con un circuito específico de Acondicionador de aire.
• Algunos tipos de lugares para instalación pueden requerir la instalación de un rompe corto circuito.
• El fusible de retardo de tiempo o cortacircuito es de 16 Amperios para CW-C180EG/CW-A180EG y 20 Amperios para
CW-C240EG.
• El área de la sección cruzada nominal del cable de suministro eléctrico debe de ser 3 corazón x 2,5 mm2 o más.
• La fuente de alimentación debe de provenir de un circuito independiente.
• Toda instalación eléctrica debe ser lievada a cabo de acuerdo con el alambrado local y las regulaciones de seguridad que
deban ser aplicadas.
• Debe haber un interruptor bipolar con una separación minima entre contactos de 3 mm en el circuito de instalación.
• Por favor contectar a un comerciante autorizado o especialista para hacer el trabajo de instalación.
15
CW-C180/240EG(11~16) 29/5/01, 8:23 pm12
Page 17

L
O
W
F
A
N
H
I
G
H
F
A
N
L
O
W
C
O
O
L
H
I
G
H
C
O
O
L
L
O
W
C
O
O
L
HIGH
F
A
N
H
I
G
H
C
O
O
L
LOW
FA
N
Condensed Water Drainage
Drenaje de agua condensada
This air conditioner employs a “Slinger-Up System” which is designed to splash the condensed water on the condenser coil for
maximum cooling efficiency, thus producing a splashing sound. If the splashing sound annoys you, you can provide an outside
drainage by using the following procedure which may, however, cause a small loss of performance.
Note:
If the unit is installed at coastal area, drainage of condensed water is recommended to prevent the condenser being corroded easily.
Este acondicionador de aire emplea un “Sistema de lanzado” el cual esta diseñado para salpicar el agua condensada en el rollo del
condensador para maximizar la eficiencia de enfriamiento, por esto se produce un sonido de salpicadura. Si el sonido de la salpicada
le molesta, puede proveer un drenaje externo siguiendo el procedimiento de a continuación que purde, sin embargo, disminuir el
grado de funcionamiento.
Nota:
Si la unidad es instalada en un área costera, se recomienda drenar el agua condensada para prevenir la corrosión en el condensador.
2
1
Slide the chassis out from the cabinet
(Refer to page ☞ 13)
Deslice el chasis hacia
afuera del caja
(Diríjase a la página ☞ 13)
3
Install the drain pan
Instale la bandeja de drenaje
H
I
G
H
L
O
W
F
A
N
F
A
N
L
O
W
C
O
O
L
H
I
G
H
C
O
O
L
Remove the rubber plug from the base pan
Quitar el tapón de
goma de la base
del caja
Rubber plug
Tapón de goma
4
Connect the drain hose
Conectar la manguera de drenaje
INTERNAL VIEW VISTA INTERIOR
CW-C180EG/240EG
Install the drain pan at
the right corner of the
cabinet.
Instale la bandeja de
drenaje en la esquina
derecha de la caja.
Screws
Tornillos
Drain pan
Bandeja de drenaje
5
Slide the chassis back into the cabinet
CW-A180EG
Install the drain pan at
the left corner of the
cabinet.
Instale la bandeja de
drenaje en la esquina
izquierda de la caja.
Drain pan
Bandeja de drenaje
Screws
Tornillos
EXTERNAL VIEW VISTA EXTERIOR
Bottom side view with drain pan.
Vista desde abajo con la bandeja de drenaje.
CW-C180EG/240EG CW-A180EG
Drain hose
Manguera de drenaje
Deslice el chasis hacia el interior de la caja
Note: Drain hose or tubing can be purchased locally to satisfy your particular needs.
Nota: La manguera de drenaje o el tubo pueden ser comprados en su localidad a fin de satisfacer
sus necesidades particulares.
Transferring
• Repositioning or transfer of the air conditioner due to renovation or moving requires an additional service charge. Please
consult your dealer before moving.
Transfiriendo
• Al reposicionar o transferir el acondicionador de aire debido a una renovación o mudanza requiere de un pago de
servicio adicional. Por favor consulte a su vendedor.
CW-C180/240EG(11~16) 29/5/01, 8:23 pm13
16
Page 18

ENERGY SAVING HINTS
ENERGY SAVING HINTS
CONSEJOS DE AHORRAMIENTO DE ENERGÍA
CONSEJOS DE AHORRAMIENTO DE ENERGÍA
Keep all doors and windows closed
Otherwise, cooling or heating performance will
be reduced and electricity wasted.
Mantenga cerradas todas las puertas y
ventanas
De otra forma, el desempeño del enfriamiento o
calefacción será reducido y la electricidad
desperdiciada.
Avoid direct sunlight
Keep curtains or drapes closed to keep out direct
sunlight during cooling operation.
Evite la luz solar directa
Mantenga cortinas o cortinillas cerradas para evitar
la luz solar directa durante la operación de
enfriamiento.
Do not overcool or overheat the room
This may affect your well-being as well as consume
more power.
No enfríe o caliente demasiado la
habitación
Esto puede afectar tanto su bienestar como también
consumir más energía.
Proper capacity of the room
The capacity of the room air conditioner must
match the room size for efficient and satisfactory
operation.
Capacidad apropiada en la habitación
La capacidad del acondicionador de aire para
habitación debe ser igual al tamaño de la habitación
para una operación eficiente y satisfactoria.
17
CW-C180/240EG(17~21) 29/5/01, 8:24 pm14
Air filter
Clean the air filter every 2 weeks (refer to page
☞18). A dirty filter may reduce cooling or heating
efficiency.
Filtro de aire
Limpie el filtro de aire cada dos semanas (Diríjase
a la página ☞ 18). Los filtros sucios pueden reducir
la eficacia de enfriamiento o calefacción.
Page 19

C
L
O
S
E
V
E
N
T
O
P
E
N
C
L
O
S
E
V
E
N
T
O
P
E
N
CARE AND MAINTENANCE
CARE AND MAINTENANCE
CUIDADO Y MANTENIMIENTO
CUIDADO Y MANTENIMIENTO
CAUTION
CUIDADO
Always turn off the air conditioner and the main power supply before
unplugging the power cord to clean the unit.
Siempre apague el acondicionador de aire y la fuente de alimentación antes
de desconectar el cable de alimentación para limpiar la unidad.
• Cleaning the
unit.
Limpiando la
unidad.
• Cleaning the
front intake
grille.
Limpiando la
rejilla frontal
de toma de
aire.
• Cleaning the
air filter.
Limpieza de
los filtro de
aire.
Clean the cabinet, front grille with a mild soap or
detergent and lukewarm water.
Limpie el caja y la rejilla frontal con un jabón suave
o detergente y agua tibia.
The front intake grille can be easily removed for
cleaning purposes (refer to page ☞ 15 for
Remove the Front Intake Grille). Gently wash
it with water and a sponge. (Do not use a
scrubbing brush or other hard cleaning aids).
La rejilla frontal de toma de aire puede ser
fácilmente quitada para propósitos de limpieza
(Diríjase a la página ☞ 15 para Quite la rejilla
frontal de la toma de aire). Lave despacio con
agua y esponja. (No utilice cepillos de fregado u
otra clase de elementos duros).
The filter can be easily cleaned using a vacuum
cleaner. Vacuum the front of the filter and then
wash the back with water. If it is badly soiled, wash
with a mild household detergent.
El filtro puede ser fácilmente limpiado usando una
aspiradora. Aspire el frente del filtro y luego lave
atrás de él con agua. Si esta muy sucio, lave con un
detergente casero que sea suave.
NOTE: Do not dry the front panel or the air filter in direct sunlight. (Exposure to direct sunlight may discolor or deform the
panel.)
NOTA: No saque el panel frontal o el filtro de aire a la luz del sol. (La exposición directa al sol puede decolorar o deformar el
panel.)
18
CW-C180/240EG(17~21) 29/5/01, 8:24 pm15
18
Page 20

CARE AND MAINTENANCE
CARE AND MAINTENANCE
CUIDADO Y MANTENIMIENTO
CUIDADO Y MANTENIMIENTO
Do not clean with benzene, thinner, scouring
powder or cloth soaked in caustic chemicals.
No limpie con benzeno, diluyente, polvo de
estregar o un paño empapado en químicos
cáusticos.
ANNUAL CHECK
If the unit is extremely dirty, heat transfer is less efficient and the unit may not cool
(heat) effectively. Contact your nearest servicenter for an annual check.
REVISIÓN ANUAL
Si la unidad está extremadamente sucia, la transferencia de calor es menos eficiente y
la unidad puede no enfriar (calienta) efectivamente. Contacte el centro de servicio más
cercano para una revisión anual.
HELPFUL INFORMATION
If the air filter becomes clogged with dust, the cooling (heating)
capacity will drop, and 6% of the electricity used to operate
the air conditioner will be wasted.
INFORMACIÓN ÚTIL
Si el filtro de aire llega a ser atascado con el polvo, la capacidad
de enfriamiento (calefacción) disminuirá, y se desperdiciará el
6% de la electricidad usada para operar el acondicionador de
aire.
Dolore magna aliquam
erat volutpat wisi enim
veniam quis nostrud.
Hendrerit in vulputate
velit elitesse molescorpu
at sanconsequat dolore
Desperdiciado
Pre-season Inspection
Inspección pre-estación
• Is the discharged air cold (warm)?
After 15 minutes of operation, it is normal for the temperature difference
between intake and outlet air to be more than 8°C for cooling and more
than 14°C for heating.
¿Esta descargado el aire frío (caliente)?
Después de 15 minutos de operación, es normal para la diferencia de
temperatura entre el aire de entrada y el de salida que sea más de 8ºC para
refrigeración y más de 14ºC para calefacción.
• Are the air intake or outlet vanes of the indoor or outdoor side
obstructed?
¿
Están las paletas de entrada o salida aire del lado interior y
exterior obstruidas?
RECOMMENDED INSPECTION
INSPECCIÓN RECOMENDADA
• Usage over several seasons will reduce performance as the unit becomes dirty.
A dirty unit may produce foul odours and dust may clog the dehumidifying drainage.
Seasonal inspection is recommended in addition to regular cleaning. Consult your nearest servicenter.
El uso durante varias estaciones reducirá el desempeño de la unidad ya que esta se ensucia.
Una unidad sucia puede producir malos olores y el polvo puede atascar el drenaje del deshumificador.
Las inspecciones estacionales son recomendadas además de la limpieza regular. Consulte su centro de servicio más
cercano.
Panasonic
19
CW-C180/240EG(17~21) 29/5/01, 8:25 pm16
Page 21

ANTES DE LLAMAR PARA MANTENIMIENTO
ANTES
If the unit is noisy during operation.
1
Si la unidad está ruidosa durante el
funcionamiento.
Humm…
BEFORE CALLING FOR SERVICE
BEFORE CALLING FOR SERVICE
ANTES DE LLAMAR PARA MANTENIMIENTO
Check the following points before calling for repairs or service.
If the malfunction persists, please contact your nearest
servicenter.
Revise los siguientes puntos antes de llamar para reparaciones
o mantenimiento. Si el problema persiste, por favor llame al
servicentro más cercano.
If the unit does not operate.
2
Si la unidad no funciona.
……
Sssssss…
If the unit does not cool or heat
3
properly.
Si la unidad no enfrigera o calienta
adecuadamente.
KACK!
C
C
L
L
O
O
S
S
E
E
V
V
E
E
N
N
T
T
O
O
P
P
E
E
N
N
If water drips from the rear of the unit.
4
Si agua gotea detrás de la unidad.
If water drips inside the room.
5
Si agua gotea dentro de la habitación.
POSSIBLE CAUSES OF THE ABOVE PROBLEMS
POSIBLES CAUSAS DE LOS PROBLEMAS ARRIBA MENCIONADOS
During normal operation, the following sounds may be detected:
• a low humming sound indicating that the unit is operating.
Condition
Condición
1
• a soft clicking sound when the compressor turns on and off.
• a flowing sound due to circulation of the refrigerant when the compressor is turned
on.
• a splashing sound indicating condensation in the condenser coil.
If you hear other noises, please consult your nearest servicenter.
Durante el funcionamiento normal, los siguientes sonidos pueden ser detectados:
• un murmullo suave para indicar que el aparato está funcionando.
• un suave “clic” cuando el compresor se enciende o apaga.
• un sonido de flujo debido a la circulación del refrigerante cuando el compresor se
enciende.
• un ruido de chapoteo indicando condensación en el condensador.
Si escucha otros sonidos anormales en la unidad, por favor contacte a su
servicentro más cercano.
CW-C180/240EG(17~21) 29/5/01, 8:25 pm17
20
Page 22

ANTES DE LLAMAR PARA MANTENIMIENTO
ANTES DE LLAMAR PARA MANTENIMIENTO
Condition
Condición
2
Condition
Condición
3
BEFORE CALLING FOR SERVICE
BEFORE CALLING FOR SERVICE
• The main power cord is not plugged in.
• The main fuse has blown.
• The main circuit breaker has tripped.
• El cable de alimentación no está enchufado.
• El fusible interno se ha quemado.
• El interruptor de circuitos del lugar se ha disparado.
• The thermostat control knob is set at below 6 for cooling and above 5 for heating.
• The room is too big for the unit’s cooling and heating capacity.
• The ventilation lever is set to OPEN.
• The air circulation is impeded by curtains or furniture.
• After 15 minutes of operation, it is normal for the temperature difference between
intake and outlet air to be more than 8°C for cooling and more than 14°C for heating.
• El botón del control del termostato ha sido ajustado en menos de 6 para refrigeración y por
encima de 5 para calefacción.
• La habitación es demasiado grande para la capacidad de refrigeración y calefacción de la unidad.
• La palanca de ventilación se encuentra en la posición "OPEN".
• El aire no puede circular bien por que cortinas o muebles se lo impiden.
• Después de 15 minutos de operación, es normal para la diferencia de temperatura entre el aire
de entrada y el de salida que sea más de 8ºC para refrigeración y más de 14ºC para calefacción.
Condition
Condición
4
Condition
Condición
5
• Humidity is high.
• Condensed water is overflowing.
• To rectify the problem, mount a drain pan to the unit.
• La humedad es alta.
• El agua condensada se está desbordando.
• Para solucionar el problema, monte una bandeja de drenaje en la unidad.
• The unit is tilted inward. To rectify this, tilt the unit slightly outward.
• Mount the supplied drain pan if you prefer.
• La unidad está inclinada hacia adentro. Para corregir, incline la unidad un poco
hacia afuera.
• Instale la bandeja de drenaje suministrada si prefiere.
To call the servicenter IMMEDIATELY
Llamar al centro de servicio INMEDIATAMENTE
Turn off the power and contact your
servicenter as soon as any of the
following events occur.
Apague el poder tan pronto como
alguno de los siguientes eventos ocurra
y contacte a su centro de servicio
1. The enclosure opposing the room side is splash proof (IPX4).
2. Do not install this appliance in a laundry room or other locations where water may drip from the ceiling, etc.
3. If the supply cord is damaged or need to be replaced, it must be replaced by the manufacturer or its service agent or a
similarly qualified person in order to avoid a hazard.
1. El recinto opuesto al lado de la habitación es a prueba de salpicaduras (IPX4).
2. No instale este aparato en una habitación de lavandería u otra localización donde el agua puede gotear desde el techo, etc.
3. Si el cordón provisto esta dañado o necesita ser reemplazado. Para evitar riesgo este puede ser reemplazado por la
fábrica o su agente de servicio o una persona calificada.
• The circuit breaker frequently trips or the fuse blows regularly.
• If water or foreign objects have accidentally entered the air conditioner.
• If there is abnormal sound during operation.
• El interruptor de circuitos se dispara con frecuencia o el fusible se
funde regularmente.
• Agua u otros objetos ajenos al aparato se han introducido
accidentalmente en el acondicionador de aire.
• Si se producen sonidos anormales durante el período de
funcionamiento.
NOTE
NOTA
21
CW-C180/240EG(17~21) 29/5/01, 8:25 pm18
21
Page 23

F563259
CW-C180/240EG(17~21) 29/5/01, 8:25 pm19
Matsushita Electric Industrial Co., Ltd.
Osaka 542-8588, Japan
Printed in Malaysia
F0103-0
 Loading...