

Page 1
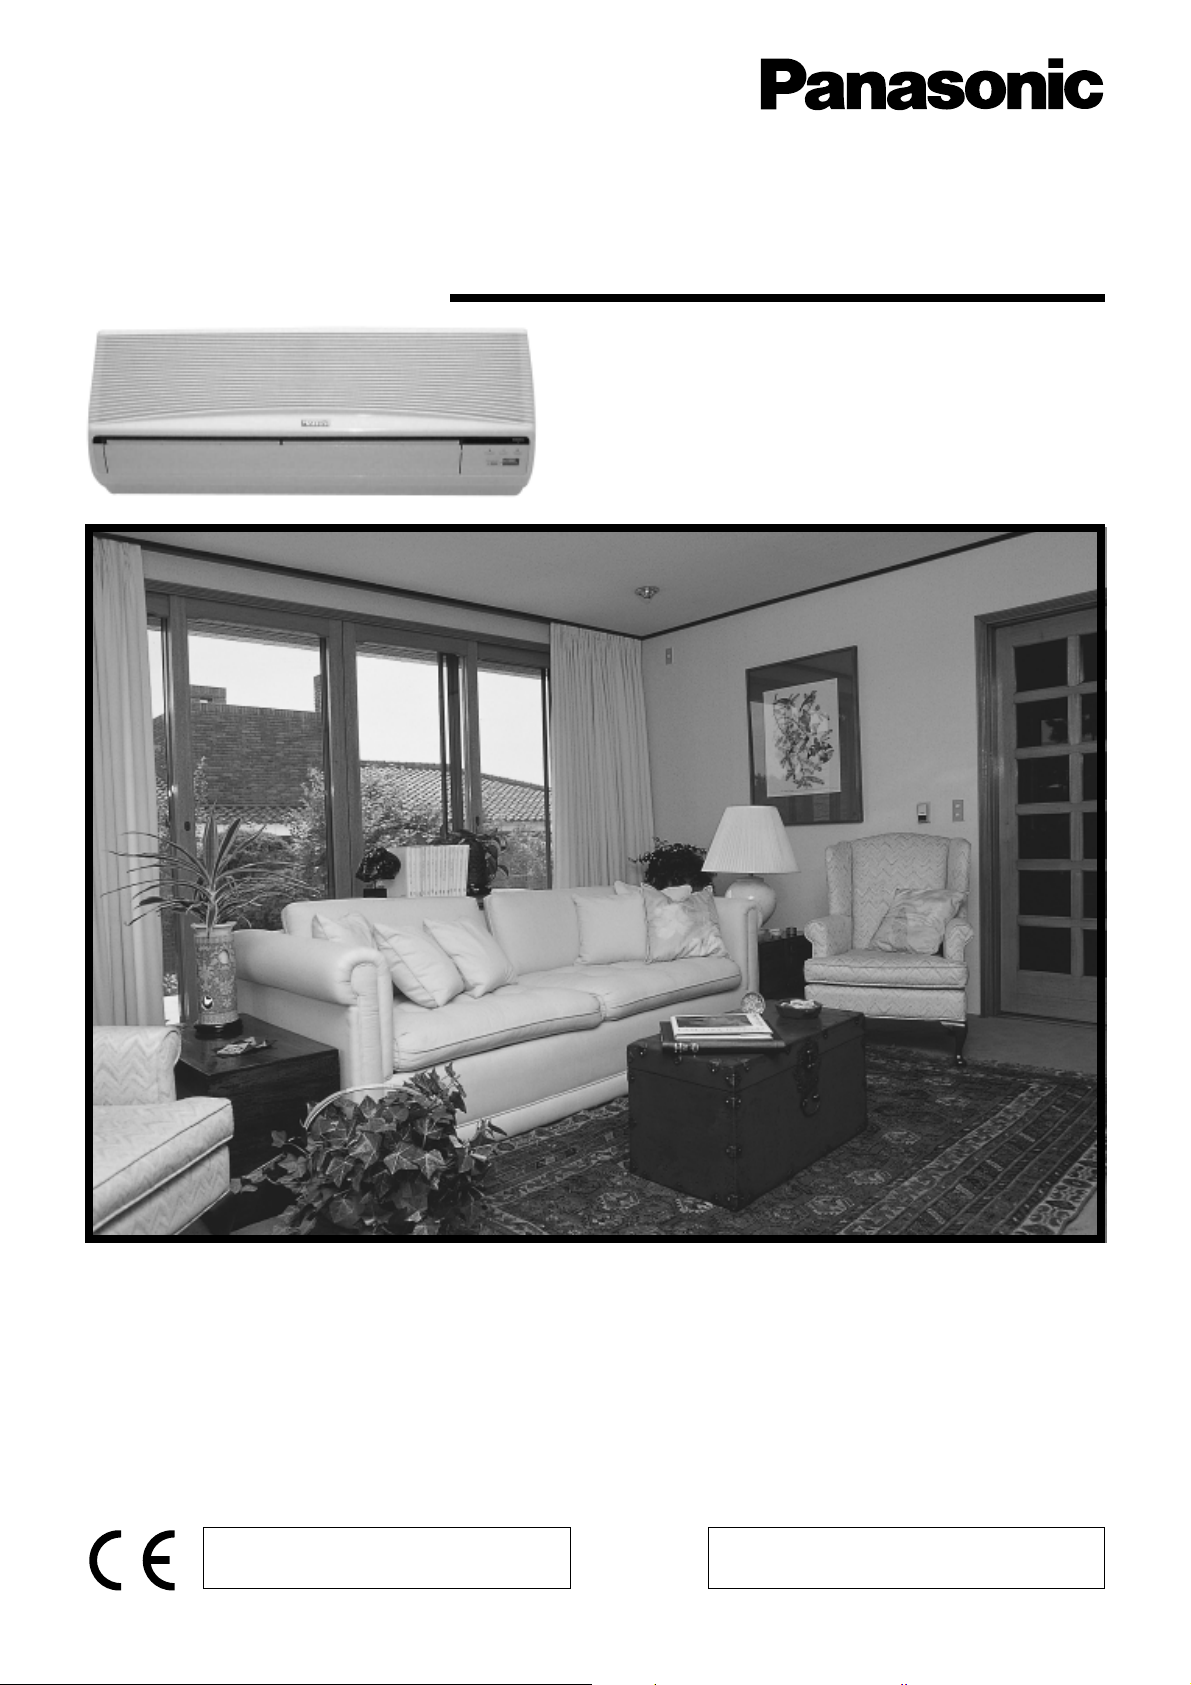
Room Air Conditioner
OPERATING INSTRUCTIONS
Indoor Outdoor
Model
CS-A75KE Model CU-A75KE
CS-A95KE CU-A95KE
CS-A125KE CU-A125KE
Before using your air-conditioner, please
read this operating instructions carefully
and keep it for future reference.
MATSUSHITA INDUSTRIAL CORP.
NO. 2, JALAN SS8/1, SUNGEI WAY FREE TRADE ZONE,
SELANGOR, MALAYSIA
ENGLISH /
DEUTSCH /
PORTUGUÊS......
FRANÇAIS.........
NEDERLAND /
ou/e
ou/et
of/en
o/a
Þ/êáé
o/y
Ë/ËÎË
/ ESPAÑOL ...............
................................
MATSUSHITA AIR-CONDITIONING CORP.
LOT 2, PERSIARAN TENGKU AMPUAN, SECTION 21, SHAH ALAM
INDUSTRIAL SITE, SELANGOR, MALAYSIA
GREEK
RUSSIAN
or/and
oder/und
ITALIANO ......
P. 1–P. 28
P. 29 – P. 5 6
P. 57 – P. 8 4
P. 85 – P. 113
P. 114 – P. 144
F563165
Page 2

CONTENTS
índice
Before use
1
Antes de
utilizar
: FEATURES....................................................................... 3
:
CARACTERÍSTICAS
: SAFETY PRECAUTIONS........................................... 4 – 6
● Installation Precautions
● Operation Precautions
:
RECOMENDAÇÕES DE SEGURANÇA
●
Recomendações de Instalação
●
Recomendações de Funcionamento
: NAME OF EACH PART ........................................... 7 – 10
● Indoor Unit
■ When the front panel is opened
● Outdoor Unit
● Accessories
● Remote Control
■ When the remote control is opened
■ How to use the remote control
■ When the back cover is opened
:
DESCRIÇÃO DAS PEÇAS
●
Unidade Interior
■
Quando o painel frontal está aberto
●
Unidade Exterior
●
Acessórios
●
Controlo Remoto
■
Quando o Controlo Remoto está aberto
■
Como utilizar o Controlo Remoto
■
Quando a tampa traseira está aberta
: PREPARATION BEFORE OPERATION ............... 11 – 12
● Indoor unit
● Remote Control
■ Inserting batteries
■ Setting the clock
■ About the batteries
:
PREPARAÇÃO ANTES DE UTILIZAR
●
Unidade Interior
●
Controlo Remoto
■
Instalar as pilhas
■
Acertar o relógio
■
Sobre as pilhas
How to use
2
Como utilizar
1
: HOW TO OPERATE............................................... 13 – 14
● Automatic • Heating • Cooling • Soft Dry
■ Operation details
● Adjusting Airflow Direction and Fan Speed
■ Operation details
:
COMO UTILIZAR O APARELHO
●
Automático • Aquecimento • Arrefecimento
• Desumidificação Suave
■
Detalhes de funcionamento
●
Regular a direcção do fluxo de ar e a velocidade do
ventilador
■
Detalhes de funcionamento
: SETTING THE TIMER............................................ 15 – 16
● Recommended Setting of Timer
:
PROGRAMAR O TEMPORIZADOR
●
Programação recomendada do temporizador
Page 3

If necessary
3
Se necessário
: CONVENIENCE OPERATION ............................... 17 – 18
● Sleep Mode
■ Operation details
● Economy or Powerful Mode
■ Operation details
:
UTILIZAÇÃO PRÁTICA
●
Modo Sleep
■
Detalhes de funcionamento
●
Modo Económico ou Potente
■
Detalhes de funcionamento
: CARE AND MAINTENANCE ................................. 19 – 22
● Cleaning the Indoor Unit and Remote Control
● Cleaning the Air Filter
● Cleaning the Front Panel
■ Removing the front panel
■ Fixing the front panel
■ Cleaning the front panel
● Replacing the Air Purifying Filters
■ Removing the air purifying filters
■ Reinstalling the air purifying filters
● Pre-season Inspection
● When the Air Conditioner is Not Used for an Extended
Period of Time
● Recommended Inspection
:
CUIDADOS E MANUTENÇÃO
●
Limpeza da Unidade Interior e do
Controlo Remoto
●
Limpeza do Filtro de Ar
●
Limpeza do Painel Frontal
■
Remoção do painel frontal
■
Instalação do painel frontal
■
Limpeza do painel frontal
●
Substituição dos Filtros de Purificação do Ar
■
Remoção dos filtros de purificação do ar
■
Instalação dos filtros de purificação do ar
●
Inspecção Pré-temporada
●
Quando o Ar Condicionado não é utilizado
por um período de tempo prolongado
●
Inspecção recomendada
: TROUBLESHOOTING ........................................... 23 – 24
● Normal Operation
● Abnormal Operation
● Call the Dealer Immediately
DETECÇÃO DE AVARIAS
●
Funcionamento Normal
●
Funcionamento Anormal
●
Contactar o Serviço de Assistência imediatamente
: HELPFUL INFORMATIONS........................................... 25
:
INFORMAÇÕES ÚTEIS
: ENERGY SAVING AND OPERATION HINTS............... 26
:
SUGESTÕES PARA POUPAR ENERGIA E OBTER
UM FUNCIONAMENTO MAIS EFICAZ
PORTUGUÊS
ENGLISH
2
Page 4
FEATURES
CARACTERÍSTICAS
● SELF-ILLUMINATING BUTTON
For your convenience to operate in the dark.
(Refer page 9)
●
BOTÃO AUTO-ILUMINÃVEL
Para facilitar a sua manipulação na escuridão.
(Pág. 9)
● AUTOMATIC OPERATION
Sence intake air temperature every hour to
select the optimum mode.
(Refer page 13)
●
OPERAÇÃO AUTOMÁTICA
Comprove a temperatura do fluxo de ar de hora
a hora para seleccionar o modo óptimo.
(Pág. 13)
● SLEEP MODE
Prevent the room from getting too hot or too cold
while you are sleeping.
(Refer page 17)
●
MODO SLEEP
Evita que a temperatura do quarto aqueça ou
arrefeça demasiado enquanto dorme.
(Pág. 17)
● ECONOMY MODE
To reduce electrical power consumption.
(Refer page 18)
●
MODO ECONÓMICO
Reduz o consumo de energia eléctrica.
(Pág. 18)
● POWERFUL MODE
Reaches the desired room temperature quickly.
(Refer page 18)
●
MODO POTENTE
Atinge rapidamente a temperatura pretendida da
sala.
(Pág. 18)
● REMOVABLE FRONT PANEL
For quick and easy cleaning (washable).
(Refer page 20)
●
PAINEL FRONTAL AMOVÍVEL
Para uma limpeza mais rápida e fácil (lavável).
(Pág. 20)
● CATECHIN AIR PURIFYING FILTER.
Filter that can trap dust, tabacco smoke and tiny
particles in the room. It can also prevent the growth of
bacteria and viruses trapped in this filter.
(Refer page 21)
●
FILTRO PURIFICADOR DO AR "CATECHIN"
Este filtro pode reter poeiras, fumo de tabaco e
partículas minúsculas em suspensão no ar da
sala. Previne também o desenvolvimento de
bactérias e viroses retidas por este filtro.
(Pág. 21)
● DEODORIZING FILTER
Used to remove unpleasant odours and
deodorize the air in the room.
(Refer page 21)
●
FILTRO DESODORIZANTE
Anula odores indesejáveis e desodoriza o ar da
sala.
(Pág. 21)
● AUTO RESTART CONTROL
Automatically restart the unit after power failure.
(Refer page 25)
●
REARME AUTOMÁTICO DA OPERAÇÃO
A unidade volta a funcionar automaticamente,
após um corte de energia.
(Pág. 25)
Thank you for purchasing a Panasonic Room
Air Conditioner.
Obrigado por ter adquirido o nosso Aparelho de
Ar Condicionado Panasonic.
Note:
Before using your air-conditioner, please read
this operating instructions carefully and keep it
for future reference.
Nota:
Antes de usar o seu aparelho de ar
condicionado, leia estas instruções de uso com
muita atenção e tenha-as à mão para futuras
consultas.
3
Page 5
SAFETY PRECAUTIONS
OFF
RECOMENDAÇÕES DE SEGURANÇA
PORTUGUÊS
ENGLISH
Before operating, please read the following “Safety Precautions” carefully.
Antes de pôr em funcionamento este aparelho, leia atentamente as seguintes Recomendações de
Segurança.
To prevent personal injury, injury to others and property damage, the following instructions must be followed.
Para evitar danos pessoais, de terceiros ou danos materiais, deve seguir as seguintes instruções.
■ Incorrect operation due to failure to follow instructions will cause harm or damage, the seriousness of which is classified
as follows:
A operação incorrecta, devido ao incumprimento destas instruções, poderá causar danos ou avarias. A gravidade das
mesmas é classificada como se segue:
! Warning /
This sign warns of death or serious injury.
Este sinal significa perigo de morte ou de
ferimentos graves.
■ The instructions to be followed are classified by the following symbols:
As instruções que deve seguir estão classificadas conforme os símbolos seguintes:
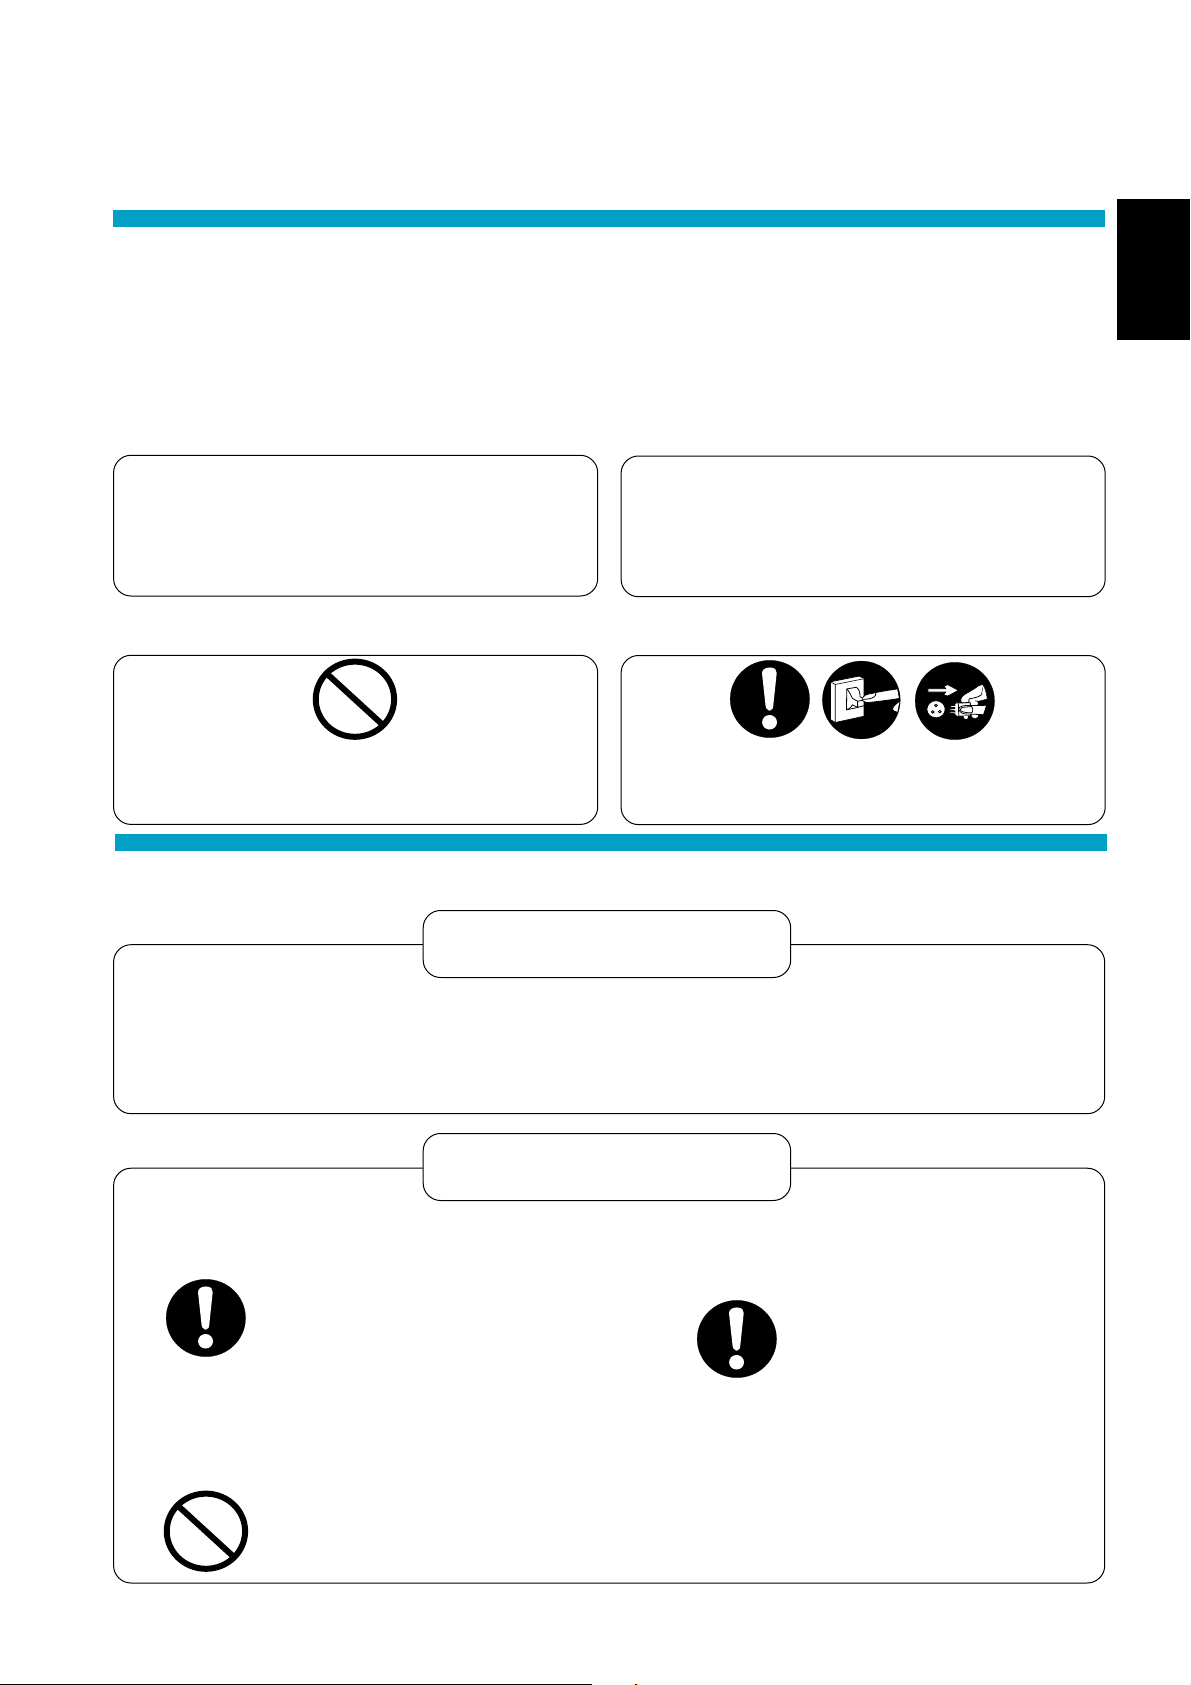
This symbol (with a white background) denotes
an action that is PROHIBITED.
Este símbolo (com um fundo branco) significa
uma acção PROÍBIDA.
PERIGO
! Caution /
This sign warns of damage to property.
Este sinal significa perigo de danificar o aparelho
These symbols (with a black background)
denote actions that are COMPULSORY.
Estes símbolos (com um fundo negro)
significam acções OBRIGATÓRIAS.
CUIDADO
● Installation Precautions /
! Warning /
■ Do not install, remove and reinstall the unit yourself.
Improper installation will cause leakage, electric shock or fire. Please consult an authorized dealer or specialist for
the installation work.
■
Não instale, não remova nem reinstale a unidade.
A instalação inadequada poderá causar fugas, choques eléctricos ou risco de incêndio. É favor consultar um
representante autorizado, ou um técnico especializado para proceder a estes trabalhos.
! Caution /
■ This room air conditioner must be earthed.
Este aparelho de ar condicionado deve ser ligado a
uma tomada com ligação à terra.
Improper grounding could cause electric
shock.
A ligação inadequada poderá causar risco
de choque eléctrico
■ Do not install the unit in a place where there may
be explosive gas leaks.
Não instale a unidade num local onde possam
ocorrer fugas de gás explosivo
Recomendações de Instalação
PERIGO
CUIDADO
■ Ensure that the drainage piping is connected
properly.
Certifique-se de que a tubagem de drenagem
está devidamente ligada.
Otherwise, water will leak out.
Caso contrário, poderá ocorrer uma
fuga de água.
Gas leaks near the unit could cause fires.
As fugas de gás próximo do aparelho
poderão causar risco de incêndio.
4
Page 6
●
Operation Precautions /
! Warning /
This sign warns of death or
serious injury.
Este sinal significa perigo de morte
ou de ferimentos graves.
PERIGO
Recomendações de Funcionamento
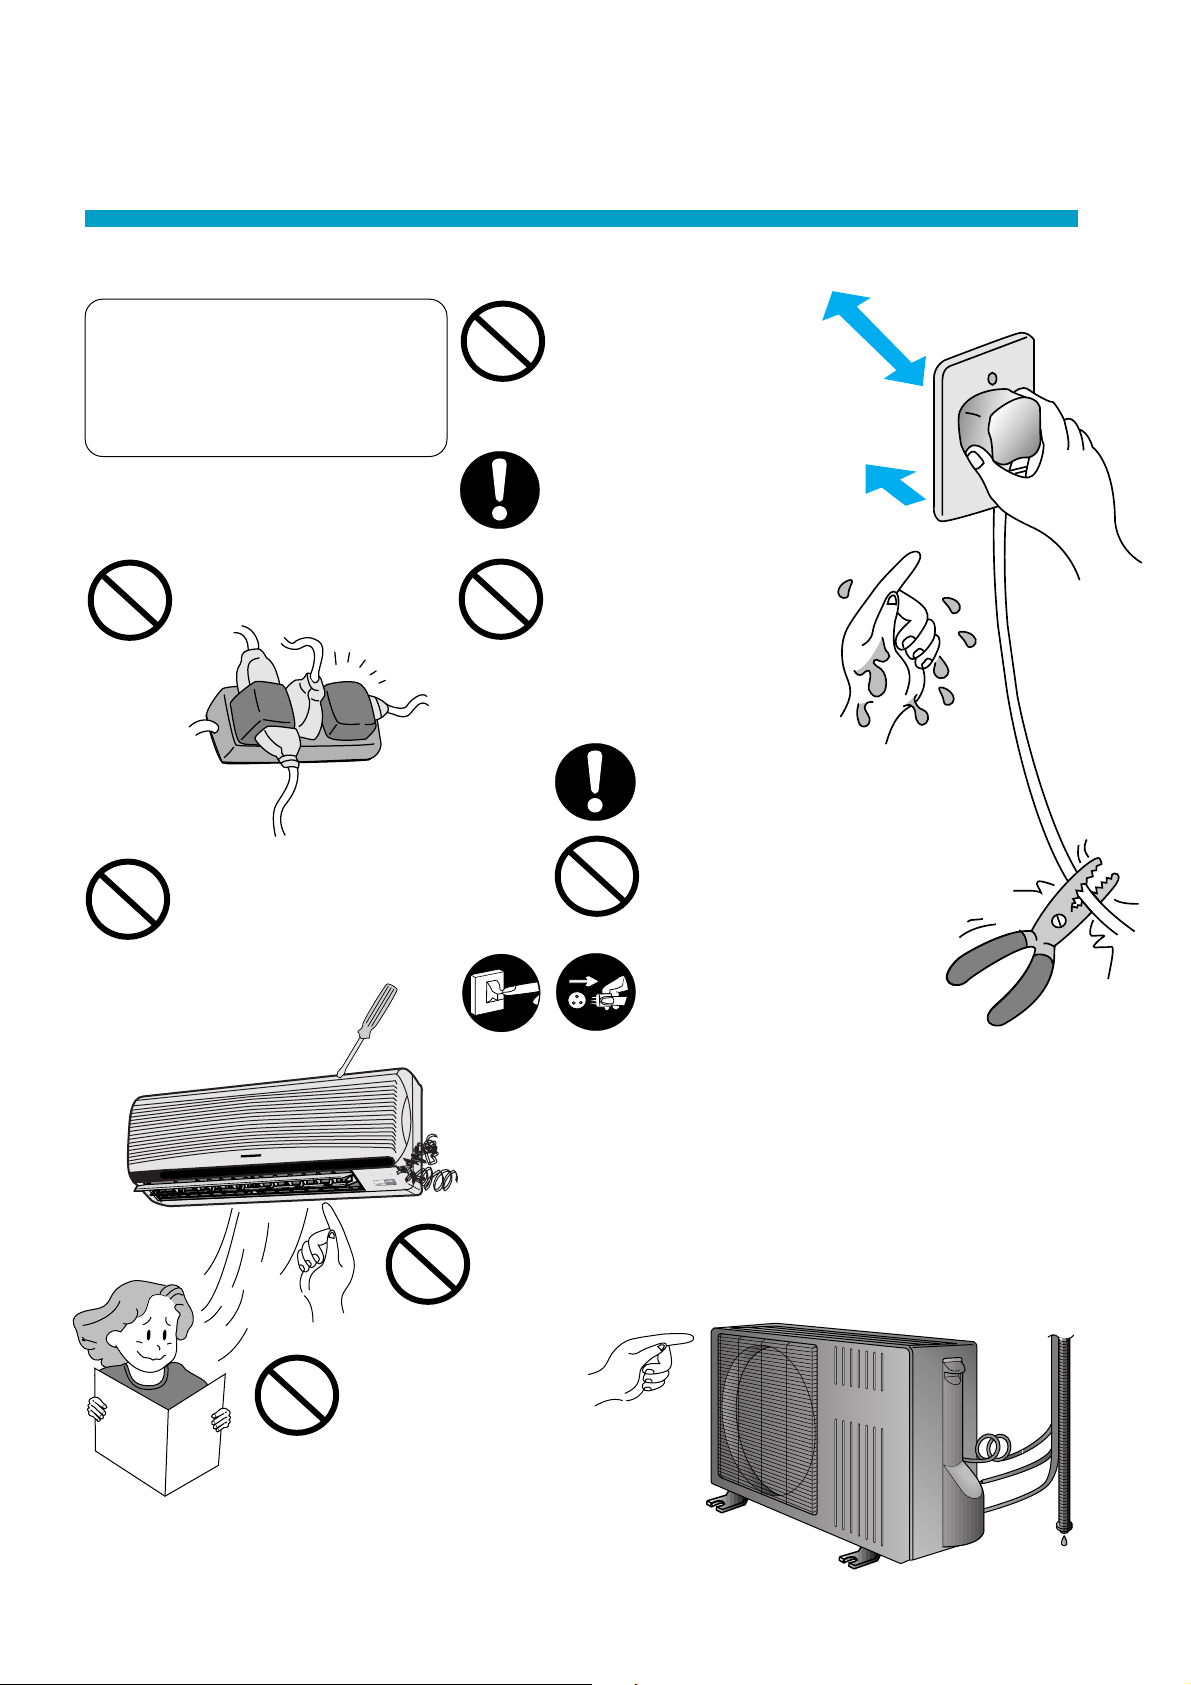
Do not insert plug to operate
the unit. Do not pull out plug
to stop the unit.
Não ligue nem desligue o
aparelho inserindo e
retirando a ficha da tomada.
Plug in properly.
Ligue a ficha devidamente.
Do not share outlet.
Não ligue outros aparelhos à
mesma tomada.
Do not repair by yourself.
Não tente reparar o aparelho.
TIMER
SLEEP
POWER
ECONOMY
POWERFUL
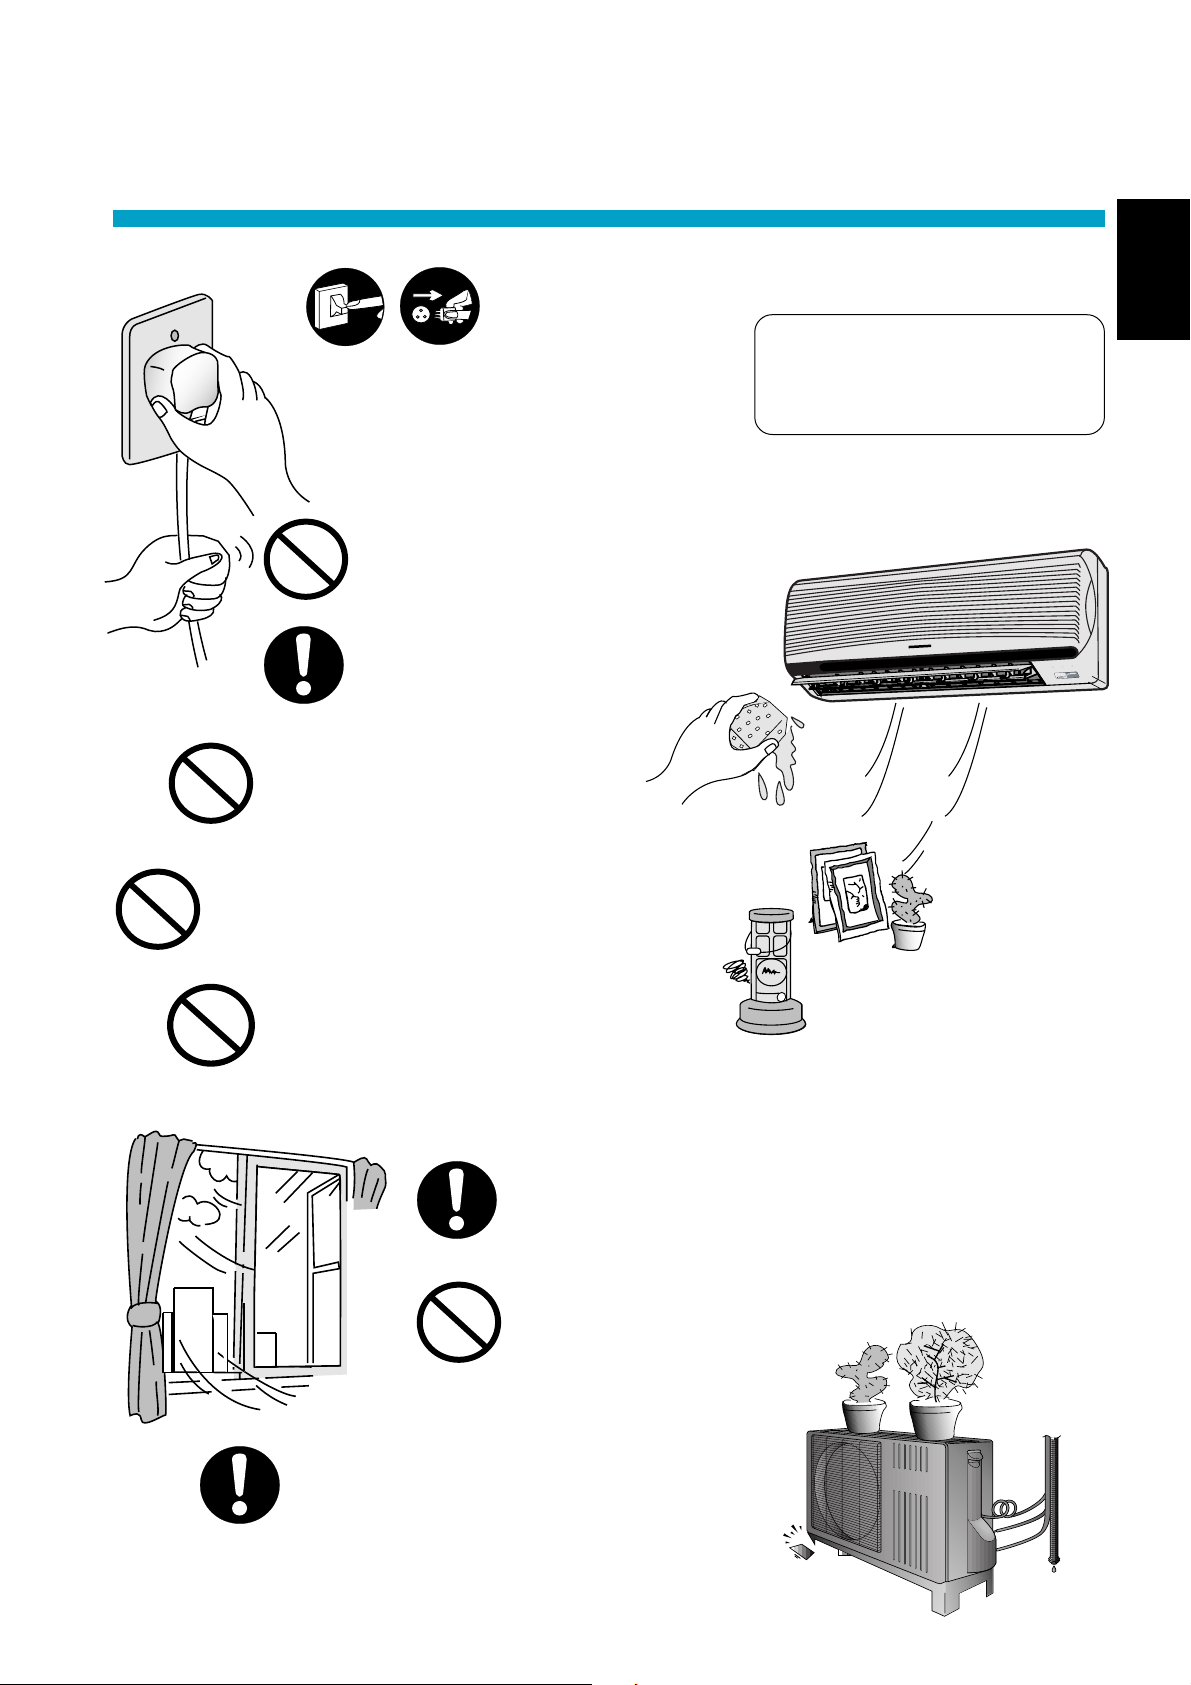
Do not operate with wet
hands.
Não ponha o aparelho em
funcionamento com as mãos
molhadas.
Use specified power cord.
Utilize o cabo de alimentação
especificado.
Do not damage or modify
the power cord.
Não danifique, nem altere, o
cabo de alimentação.
OFF
If abnormal condition (burnt smell, etc) occurs, switch off
and unplug the power supply.
Se ocorrer uma situação de funcionamento anormal
(cheiro a queimado, etc.), desligue o aparelho e retire a
ficha da tomada.
Do not insert finger or other objects into the indoor or
outdoor units.
Não introduza os dedos, nem outros objectos, nas
unidades interior ou exterior.
Do not exposed directly to cool air
for a long period.
Não se exponha directamente ao
ar frio durante um período
prolongado de tempo.
5
Page 7
PORTUGUÊS
POWER
ECONOMY
POWERFUL
SLEEP
TIMER
ENGLISH
OFF
Switch off the power supply if the unit is not
used for a long period.
Desligue a alimentação eléctrica do
aparelho, caso não tencione utilizá-lo por
um período de tempo prolongado.
Do not pull the cord to disconnect the plug.
Não puxe o cabo de alimentação para retirar a ficha
da tomada.
Switch off the power supply before cleaning it.
Desligue o aparelho antes de o limpar.
Do not wash the unit with water.
Não lave o aparelho com água.
Do not use for other purpose such as preservation or etc.
Não utilize o aparelho para outros fins, como por exemplo,
preservação de alimentos, etc.
! Caution /
This sign warns of injury.
Este sinal significa perigo
Cuidado
Do not use any combustible equipment at
airflow direction.
Não utilize qualquer equipamento combustível
na direcção do fluxo de ar do aparelho.
Ventilate the room regularly.
Ventile regularmente a sala.
Do not sit or place anything on the outdoor unit.
Não se sente nem coloque nenhum objecto em cima
da unidade exterior.
Pay attention as to whether the installation rack is
damaged due to long period of usage.
Verifique se a grelha de instalação está danificada,
de forma a detectar possíveis danos causados pela
utilização prolongada.
6
Page 8
NAME OF EACH PART
DESCRÍÇÃO DAS PEÇAS
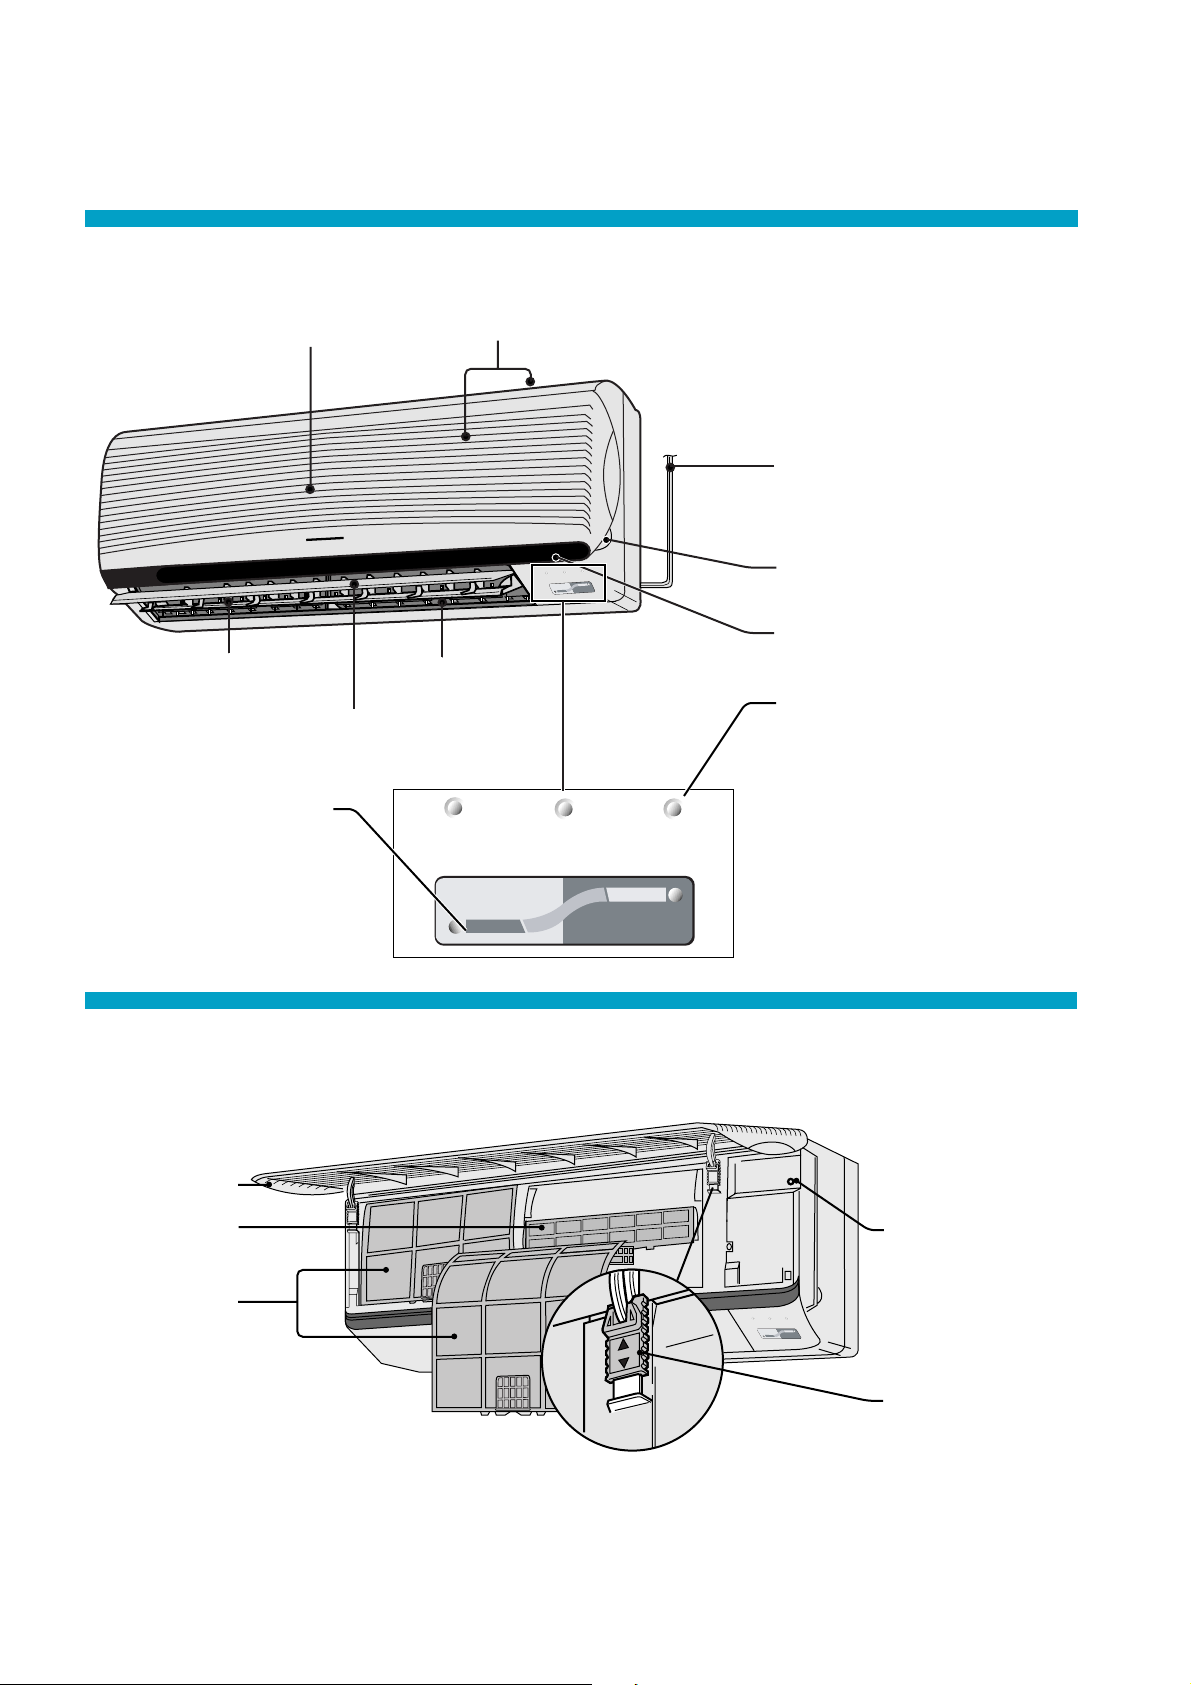
● Indoor Unit /
Front Panel
Painel Frontal
Horizontal Airflow Direction
Louver (Manually adjusted)
Deflector para Fluxo de Ar
Horizontal (ajustável
manualmente)
Economy/Powerful Indicators
Economy - Green
Powerful - Orange
Indicadores de Modo
Económico/Potente
Económico - Verde
Potente - Laranja
Unidade Interior
Air Intake Vent
Entrada de Ar
POWER
Air Outlet Vent
Saída de Ar
Vertical Airflow Direction
Louver
Deflector para Fluxo de Ar
Vertical
POWER
ECONOMY
SLEEP
TIMER
SLEEP
ECONOMY
POWERFUL
POWERFUL
TIMER
Power Supply Cord
Cabo de Alimentação
Panel Opener
Abertura do Painel
Signal Receptor
Receptor de Sinal
Operation Indicators
● POWER : Green
● SLEEP : Orange
● TIMER : Orange
Indicadores de Operação
●
POWER : Verde
(Alimentação)
●
SLEEP : Laranja
(Dormir)
●
TIMER : Laranja
(Temporizador)
■ When the front panel is opened
Quando o painel frontal está aberto
Front Panel
Painel Frontal
Air Purifying Filter
Filtro Purificador
do Ar
Air Filters
Filtros de Ar
Auto Operation Button
Botão de Operação
Automática
TIMER
POWER
SLEEP
ECONOMY
POWERFUL
Tab for Front Panel
Patilha para o Painel
Frontal
7
Page 9

PORTUGUÊS
ENGLISH
● Outdoor Unit /
(Side)
(Lado)
Air Outlet Vents
Saida de Ar
Unidade Exterior
Air Intake Vents
Entrada de Ar
Ground Terminal (Inside Cover)
Terminal de Terra (Cobertura Interior)
(Rear)
Parte de Trás
Connecting cable
Cabo de Ligação
Drain Hose
Mangueira de Dreno
Piping
Tubagem
● Accessories /
AUTO
COOL
TEMP
POWERFUL
Remote Control
Controlo Remoto
OFF/ON
Two RO3 dry-cell batteries or
equivalent
Duas pilhas secas RO3
ou equivalentes
Acessórios
Remote Control Holder
Soporte do controlo remoto
Remote Control Indication Sticker
Etiqueta Bilingue do Controlo Remoto
Air Purifying Filters
(Catechin Air Purifying Filters and
Deodorizing Filters)
Filtros Purificador Do Ar
(Filtros Purificador do Ar "Catechin" e
Filtros Desodorizante)
8
Page 10

● Remote Control /
OFF/ON Button
(self-illuminating Button)
Botão ON/OFF
(botão auto-iluminãvel)
Powerful Mode Operation Button
Botão de Operação do
Modo Potente
Controlo Remoto
Operation Display
Visor de Operação
AUTO
COOL
TEMP
POWERFUL
OFF/ON
Signal Transmitter
Emissor de Infravermelhos
Room Temperature
Setting Button
(self-illuminating Button)
Botão de Regulação da
Temperatura Ambiente
(botão auto-iluminãvel)
■ When the remote control cover is opened
Quando o controlo remoto está aberto
Operation Display
Visar de Operação
Fan Speed Selection Button
Botão de Selecção da
Velocidade do Ventilador
Manual Airflow Direction Selection Button
Botão de Selecção Manual da
Direcção do Fluxo de Ar
Time-Setting Button
Botão de Acerto da Hora
Sleep Mode Operation Button
Botão de Operação
do Modo Sleep
Timer Cancellation Button
Botão de Cancelamento do
Temporizador
OFF
SLEEP
ON
AM PM
3
CANCEL
SWING
AUTO
AM PM
2
AIR
1
SET
AUTO FAN
AIR SWING
MANUAL
TIMER
ON OFF
HEAT
COOL
AUTO
Operation Mode Selection Button
Botão de Selecção do Modo de Operação
Clock Button
Botão do Relógio
HI
AUTO
LO
DRY
MODE
ECONOMY
FAN SPEED
CLOCK
Economy Mode
Operation Button
Botão de Operação do
Modo Económico
Auto Airflow Direction Button
Botão de Selecção Automática
da Direcção do Fluxo de Ar
OFF-TIMER Button
Botão para Desligar o Temporizador
ON-TIMER Button
Botão para Ligar o Temporizador
Timer Set Button
Botão de Programação do Temporizador
9
Page 11

PORTUGUÊS
ENGLISH
■ How to use the remote control
Como utilizar o controlo remoto
POWER
SLEEP
TIMER
ECONOMY
POWERFUL
• Maximum distance : 10 m
• Make sure it is not obstructed.
• Distãncia máxima: 10 m
• Certifique-se de que não existe
nenhum obstáculo entre o comando
e o receptor de infravermelhos.
Notes /
• Do not throw or drop
• Do not get it wet
• Certain type of flourescent lamps may affect
signal reception. Consult your dealer.
• Não deixe cair nem atire ao chão o controlo
remoto.
• Não molhe o controlo remoto.
• Alguns tipos de lâmpadas fluorescentes
poderão afectar a recepção do sinal. Consulte
o seu revendedor.
Notas
Signal receptor
• Signal received sound.
One short beep or one long beep.
Receptor de sinais
• Som de recepção do sinal
Um Bip curto ou longo
• Aim at the signal receptor.
• Aponte o controlo remoto para o receptor de infravermelhos.
■ When the back cover is opened
Quando a tampa traseira está aberta
Reset points
• short to clear the
memory
Pontos de Reinício
• Feche para limpar
a memória
OPEN
10
Page 12

PREPARATION BEFORE OPERATION
PREPARAÇÃO ANTES DE UTÍLIZAR
● Indoor Unit
Unidade Interior
! Warning /
■ Ensure the power plug is securely inserted.
A loose plug may cause a fire or an electric shock.
■
Certifique-se de que a tomada está devidamente
ligada.
Uma tomada mal ligada poderá causar risco de
incêndio ou de choque eléctrico.
ATENÇÃO
1 Connect the power
supply cord to an
independent power
supply.
Ligue o cabo de
alimentaçáo a uma
fonte de alimentaçáo
independente.
2 Open the front panel
Abra o painel frontal
TIMER
SLEEP
POWER
ECONOMY
POWERFUL
3 Remove the air filters
Remova os filtros de ar
4
Insert the air purifying filters
Introduza os filtros
purificadores de ar
5
Insert the air filters
Introduza os filtros de ar
6
Close the front panel
Feche o painel frontal
■ Notes /
• If the unit is not going to be used for an extended period of time, turn off the main Power supply. If it is left at the ON
position, approximately 2.5 W of electricity will be used even if the indoor unit has been turned off with the remote control.
• If operation is stopped, then restart immediately, the unit will resume operation only after 3 minutes.
• Caso não tencione utilizar o aparelho por um período de tempo prolongado, desligue o interruptor de potência. Caso o
deixe na posição ON, irá consumir cerca de 2,5 W, mesmo que a unidade interior tenha sido desligada com o controlo
remoto.
• Caso interrompa o seu funcionamento e depois o ligue imediatamente, o aparelho só retomará o funcionamento
passados 3 minutos.
Use under the following conditions
DBT: Dry Bulb Temp
WBT:Wet Bulb Temp
Maximum Temperature
Temperature Máxima
Minimum Temperature
Temperatura Mínima
Notas
Utilizar nas seguintes condições
Temperatura de bolbo seco
Temperatura de bolbo húmido
DBT
32
16
Cooling /
Indoor
Interior
Arreficimento
WBT
23
11
DBT
43
16
Outdoor
Exterior
WBT
26
11
DBT
30
16
Heating /
Indoor
Interior
Aquecimento
WBT
_
_
(Unit in °C)
(Unidad en °C)
Outdoor
Exterior
DBT
24
-5
WBT
18
-6
11
Page 13

PORTUGUÊS
ENGLISH
● Remote Control /
Controlo Remoto
■ Inserting batteries
Instalar as pilhas
OPEN
1
2 Be sure the directions are correct
OPEN
* Set the current time (Clock) immediately to prevent battery exhaustion.
*
Acerte a hora actual (Relógio) imediatamente, para evitar desgaste das pilhas.
■ Setting the clock
Acertar o relógio
1 Press the clock button
Prima o botão do relógio.
Slide the cover to open
Empurre a tampa, para abrir.
Certifique-se de que a polaridade está
cor0recta.
• Open the remote control
cover and confirm the
PM
display 12:00 PM
is flashing.
• Abra a tampa do controlo
remoto e certifique-se de
que a indicação 12:00PM
está a piscar.
COOL
ECONOMY
FAN SPEED
AUTO
AIR SWING
1
2
CANCEL
MANUAL
TIMER
ON OFF
SET
PM
SLEEP
3
■ About the batteries /
• Can be used for approximately one year.
• Podem ser utilizadas durante cerca de um
ano.
CLOCK
MODE
Sobre as pilhas
PM
← flashes
Pisca
← lights up
Acende-se
2 Press to set the current time
Prima para acertar a hora actual.
Press continuously for fast forwarding.
Mantenha premido para avançar
rapidamente.
Press continuously for fast reversing.
Mantenha premido para retroceder
rapidamente.
3 Press the clock button
Prima o botão do
relógio.
Observe the following when replacing the batteries
• Replace with new batteries of the same type .
• Do not use rechargeable batteries (Ni-Cd).
• Remove the batteries if the unit is not going to
be used for a long period.
Siga as seguintes indicações, ao substituir as
pilhas.
• Substitua as pilhas antigas por outras novas do
mesmo tipo.
• Não utilize pilhas recarregáveis (Ni-Cd).
• Remova as pilhas, caso não tencione utilizar o
aparelho por um período de tempo prolongado.
← lights up
PM
← lights up
Acende-se
Acende-se
12
Page 14

HOW TO OPERATE
COMO UTILIZAR O APARELHO
● Automatic, Heating, Cooling, Soft Dry
Automático • Aquecimento • Arrefecimento
• Desumidificação Suave
Press to select the desired operation mode
When pressed, the display changes in this order.
Prima para seleccionar o modo de operação
pretendido.
Quando premido, o visor muda na seguinte sequência
a
Press to start the operation
POWER indicator LED (Green) on indoor unit will light up.
Press once more to stop operation.
Prima para iniciar a operação.
A luz indicadora POWER (Verde) da unidade interior
acende-se.
Prima novamente para parar a operação.
Press to select room temperature
Prima para seleccionar a temperatura ambiente.
• a Automatic Operation /
Display /
AUTO
AUTO
AUTO
• Heating, Cooling, Soft Dry operation
HEAT
Aquecimento, Arrefecimento, Desumidificação Suave de Operação
– The temperature can be set between 16°C and 30°C.
– A temperatura pode ser regulada entre os 16°C e os 30°C
– Recommended temperature /
HEAT
Visor
- Operation with 2°C higher than standard temperature.
HI
Operação com uma temperatura 2°C acima da
temperatura normal.
- Operation with standard temperature.
Operação com temperatura normal.
- Operation with 2°C lower than standard temperature.
Operação com uma temperatura 2°C abaixo da
LO
temperatura normal.
Press to increase temperature by 1°C.
Prima para aumentar a temperatura em 1°C
Press to decrease temperature by 1°C.
Prima para reduzir a temperatura em 1°C
For Heating /
For Cooling /
For Soft Dry /
lower than room temperature.
COOL
Para Aquecimento:
Para Arrefecimento:
Para Desumidificação Suave:
Display
Visor
Close the Cover
Feche a tampa
SLEEP
POWERFUL
3
1
2
CANCEL
COOL
AUTO
AIR SWING
MANUAL
TIMER
ON OFF
COOL
SET
OFF/ON
MODE
ECONOMY
FAN SPEED
TEMP
1
CLOCK
2
3
DRY
Operação Automática
DRYCOOL
Temperatura recomendada:
20°C - 24°C
26°C - 28°C
1°C - 2°C
1°C - 2°C abaixo da
temperatura ambiente.
■ Operation details /
Cooling Operation /
COOL
• To set room temperature to your preference of cooling
comfort.
• Para ajustar a temperatura ao seu gosto e para o seu
confort.
a – Automatic Operation /
• At the start of the automatic operation, Heating, Cooling or
Soft Dry is automatically selected according to the indoor
temperature.
• The operation mode changes every hour, when necessary.
• Temperature is not displayed on remote control during Auto
mode operation
• Ao iniciar-se o funcionamento automático, selecciona-se
automaticamente Aquecimento, Refrigeração ou Secagem
Suave de acordo com a temperatura interior.
• O modo de funcionamento muda de hora em cada hora se é
necessário.
• La temperatura no aparece en el mando a distancia durante
el modo de funcionamiento Automàtico.
Função de arrefecimento
Detalhes de Funcionamento
– Soft Dry Operation /
• A very gentle Cooling Operation. Consisting primarily of
• During Soft Dry operation, the indoor fan operates at Low fan
Operação Automática
• Uma operação de arrefecimento muito suave. Consiste,
• Funcionamento de secagem suave com baixa velocidade do
13
DRY
dehumidifying. It does not lower the room temperature.
speed.
principalmente, na desumidificação. Não reduz a temperatura
ambiente.
ventilador
Cooling Operation
Operação de
Setting
temperature
Temperatura
Programada
Arrefecimento
Switch to Soft Dry when setting temperature is reached.
Muda para a operação Desumidificação Suave quando a temperatura
programada é atingida.
Operação Desumidificação Suave
Soft Dry operation with Low fan speed
No funcionamento de secagem suave, o
ventilador interno funciona a baixa
velocidade
Page 15

● Adjusting Airflow Direction And F an Speed
Regular a Direcção do Fluxo de Ar e a V elocidade do
V entilador
Press to select Fan speed
• The display changes in this order
Prima para seleccionar a velocidade do ventilador
• O visor muda na seguinte sequência:
PORTUGUÊS
ENGLISH
SLEEP
3
CANCEL
AUTO FAN
1
2
COOL
AUTO
AIR SWING
MANUAL
TIMER
ON OFF
SET
MODE
ECONOMY
FAN SPEED
CLOCK
Automatic Low Medium High
Automático Baixo Médio Alta
Selecting Vertical Airflow Direction
Press AUTO,
Para seleccionar a Direcção de Fluxo de Ar Vertical
Prima AUTO.
Selecting Vertical Airflow Direction
Press AUTO,
• Cooling and Soft Dry – The louver swing up and down
automatically.
• Heating – When the discharge air temperature is low such
as at the start of heating operation, the air blows at
horizontal level. As the temperature rises, the hot air
blows in a downwards direction.
• To stop the automatic airflow direction operation,press
MANUAL button.
• Arrefecimento e desumidificação suave – As lâminas da
grelha da frente levantam-se e baixam se
automaticamente.
• Aquecimento – Quando a temperature do fluxo de ar é
baixa, no momento de arranque do aparelho, o ar frio
sopra em sentido horizontal. Quando sobe a temperatura,
o ar quente sopra para baixo.
• Para parar este funcionamento, prima o botão manual.
MANUAL
Press MANUAL
• Manual selection of Vertical Airflow Direction Louver.
• The display changes in this order,
Prima MANUAL
• Selecção manual da direcção de Fluxo de Ar Vertical
• O visor muda na seguinte sequência:
TIMER
POWER
SLEEP
ECONOMY
POWERFUL
Horizontal Airflow Direction
• Adjust it manually.
Direcção de Fluxo de Ar Horizontal
• Regule-a manualmente.
■ Operation details /
HEAT
– Heating Operation
•
Defrosing Operation
Depend on the outdoor temperature, the operation occasionally stops to melt
the frost on the outdoor unit.
• Heat is obtained from outdoor air to warm up the room. When the outdoor
ambient air temperature falls, the heating capacity of the unit might be
reduced.
We recommend that you use an additional heating device when the outdoor
ambient air temperature is low.
Automatic Airflow Volume
• The speed of the Indoor fan is adjusted automatically according to the
operation. The Indoor fan stops occasionally during cooling operation.
– Função de Aquecimento
HEAT
Detalhes de Funcionamento
• Função de descongelação
Dependendo da temperatura exterior, costuma parar o
funcionamento para fundir o gelo da unidade exterior.
• O calor obtém-se do ar exterior para aquecer a sala. Quando a
temperatura exterior baixa, poderia diminuir a capacidade de
aquecimento da unidade.
Volume de fluxo de ar automático.
• A velocidade do ventilador interior gradua-se automaticamente
conforme o funcionamento. Algumas vezes o ventilador interior para
durante a função de refrigeração.
Louver adjustment range
Gama de regulação do deflector
POWER
ECONOMY
Suave
Cooling
Arrefec.
Soft Dry
Desumid
Heating
Aquecimento
* Five stages of adjustments can be made in
this range.
*
Pode efectuar 5 fases de regulação, dentro
desta gama.
SLEEP
TIMER
POWERFUL
14
Page 16

SETTING THE TIMER
PROGRAMAR O TEMPORIZADOR
Ensure that the current time is correct before setting the timer. The timer cannot be set if the time display is flashing.
Certifique-se de que a hora actual está certa antes de programar o temporizador. O temporizador não poderá ser
programado se o visor estiver a piscar.
1 Press ON-TIMER
Prima ON-TIMER.
Flashes
ON
SLEEP
AM
3
1
2
CANCEL
COOL
AUTO
AIR SWING
MANUAL
TIMER
ON OFF
SET
MODE
ECONOMY
FAN SPEED
Pisca
CLOCK
Example: Set the ON-TIMER to 7:00AM
(Exemplo: Acertar o ON-TIMER para as 7:00)
2 Press to set the time
Prima para acertar o temporizador.
→
Increase by 10 minutes
Aumenta 10 minutos
Decrease by 10 minutes
Reduz 10 minutos
* Press continuously for quick setting.
*
Prima continuamente para atingir
rapidamente a hora pretendida.
AMON
3
■ Timer Cancellation Button
(To cancel the Timer)
Press the ON-TIMER or OFF-TIMER then press CANCEL.
* The timer indicator on the indoor unit will go off.
Botão de cancelamento do temporizador.
(Para cancelar o temporizador)
Prima ON-TIMER ou OFF-TIMER e depois prima CANCEL.
*
O indicador do temporizador, na unidade interior,
apaga-se.
Timer details /
• When the ON-Timer is set, operation will start before
the actual set time. This is to allow the room
temperature to reach the setting temperature by the
setting time (Cooling and Soft dry, 15 minutes in
advance. Heating and Automatic, 30 minutes in
advance).
• Once the ON-Timer is set, operation will start at the
setting time everyday.
Detalhes do Temporizador
Press SET
Prima SET.
Lights up →
Acende-se
* The timer indicator (orange) on
the indoor unit will light up.
*
O indicador do temporizador
(laranja) da unidade interior
acende-se.
AMON
■ To change the setting time, follow the above steps.
• Quando a função ON-TIMER está programada, a
• Após programar o temporizador, a operaçao iniciar-se-á
4 To set the OFF-TIMER
Press the OFF-TIMER then follow
steps 2 and 3 as above.
Para acertar o OFF-TIMER.
Prima OFF-TIMER e depois siga os
passos 2 e 3 acima.
Para alterar a hora programada, siga os passos
acima.
operação inicia-se antes da hora programada, de forma
a que a temperatura ambiente atinja a temperatura
programada à hora programada (Arrefecimento e
secagem Suave, 15 minutos antes. Aquecimento e
Automático, 30 minutos antes.).
todos os dias à hora programada.
15
Page 17

● Recommended Setting of Timer
Programação recomendada do temporizador
■ When you sleep
• Set the time at which you will go to sleep with the OFFTIMER. This prevent wastage of electricity.
■
Quando se deita
Good Night!
Boa Noite !
Good Morning!
Bom Dia!
RING...
RING...
• Programe a hora a que se deita com o OFF-TIMER.
Assim, evitará a perda de energia.
■ When you wake up
• Set the time at which you will wake up with the ONTIMER. You can start the new day at a comfortable
temperature.
■
Quando se levanta
• Programe a hora a que se levanta como ON-TIMER.
Pode iniciar o dia com uma temperatura confortável.
Note:
(The above is an example of how you can used the
OFF-TIMER and ON-TIMER mode. However it is
recommended to use the sleep mode function for sleeping)
Notas:
(El anterior es un ejemplo de cómo se puede usar el modo
OFF-TIMER y ON-TIMER. Sin embargo se recomienda
usar la función modo para dormir a la hora de acostarse.)
PORTUGUÊS
ENGLISH
Bye
Adeus
Hi! I’m home
Oá!
Já cheguei
Not at Home
Férias
■ When going out
• Set the time at which you will go out with the OFFTIMER. Set the time at which you will come back with
the ON-TIMER.
• This will prevent the air conditioner from being left on
while you are out, and the temperature will be pleasant
when you return.
■
Quando sai
• Programe a hora a que vai sair com o OFF-TIMER e a
hora a que vai regressar com o ON-TIMER.
• Assim, evitará que o ar condicionado fique a trabalhar
enquanto está fora, e a temperatura estará agradável
quando regressar.
■ When you return
• Set the time at which you will return with the ON-TIMER.
• This will make the temperature pleasant when you
return, and it will prevent the air conditioner from being
left on.
■
Quando regressa
• Programe a hora a que vai regressar com o ONTIMER.
• Assim, terá uma temperatura agradável quando
regressar e evitará que o ar condicionado fique a
funcionar enquanto está fora.
Timer details /
• The current time is not displayed when the timers are
set.
Detalhes do Temporizador
• A hora actual não poderá ser visualizada enquanto está
a programar o temporizador.
• When both timers are used together, the TIMER LED
on the indoor unit remains lit even if the operation is
stopped by the OFF-TIMER.
• Caso utilize os dois temporizadores, a luz indicadora do
Temporizador, na unidade interior, mantém-se acesa,
mesmo que a operação seja interrompida pelo OFFTIMER.
16
Page 18

CONVENIENCE OPERATION
UTILIZAÇÃO PRÁTICA
● Sleep Mode
Modo Sleep
This is to obtain a comfortable room temperature while sleeping.
Este modo permite atingir uma temperatura ambiente confortável enquanto dorme.
■ To set the sleep mode, press SLEEP.
* The sleep indicator on the indoor unit will
light up.
Para programar o modo Sleep, prima SLEEP.
*
O indicador da função Sleep, na unidade
interior, acende-se.
■ To cancel the sleep mode, press once more.
Para cancelar o modo Sleep, prima
novamente SLEEP.
SLEEP
3
1
2
CANCEL
COOL
AUTO
AIR SWING
MANUAL
TIMER
ON OFF
SET
CLOCK
MODE
ECONOMY
FAN SPEED
■ Operation details
Detalhes de Funcionamento
• When the room temperature reaches the setting temperature,
the airflow volume will automatically change to low.
• Sleep Mode Operation time is 8 hours.
• When used together with the timer, the timer has priority.
Temperature
TEMP.
Approx. 0.5°C increase.
Aumenta 0,5°C aprox.
temperatura
Programação de
Setting temperature
0-1 hour /
Sleep Operation button is
pressed.
Tecla SLEEP é pressionada
1 hour /
hora
• Cooling or Soft Dry Operation for sleep mode movement will
start to avoid overcooling.
• A Operação de Arrefecimento, ou de Desumidificação
Suave iniciarse-á durante o modo Sleep para evitar o
sobre-arrefecimento.
17
Approx. 0.5°C increase.
Aumenta 0,5°C aprox.
Approx. 8 hours after sleep shift
operation starts, stops
hora
Sleep shift operation starts.
Inicia-se o período de
funcionamento SLEEP
automatically.
Pára automaticamente aprox. 8
horas após ter iniciado o modo
SLEEP.
Time /
TEMPO
Setting temperature
• Quando a temperatura ambiente atingir a temperatura
programada, o volume do fluxo de ar passará
automaticamente para um nível inferior.
• O tempo de funcionamento do modo de dormir é de 8 horas.
• Quando se usa em conjunto com o temporizador, o
temporizador tem prioridade.
Sleep shift operation starts.
Temperature
TEMP.
0-1 hour /
temperatura
Programação de
Sleep Operation button is pressed.
Tecla SLEEP é pressionada
Función de conmutación
de descanso se activa.
hora
1 hour /
Approx. 2°C decrease.
Approx. 2°C de redução
hora
Approx. 8 hours after sleep
shift operation starts, stops
automatically.
Pára automaticamente aprox.
8 horas após ter iniciado o
modo SLEEP.
Approx. 3°C decrease.
Approx. 3°C de redução
Time /
TEMPO
• Heating operation for sleep mode movement will start to
avoid overheating.
• Será posto em marcha o funcionamento do aquecimento
para o movimento do modo de dormir com o fim de evitar
um excesso de aquecimento.
Page 19

● Economy or Powerful Mode
Modo Potente ou Económico
Economy and Powerful operation cannot be selected simultaneously.
A operação do Modo Económico e do Modo Potente não pode ser seleccionada em simultâneo.
Economy Mode
To save electrical power consumption.
However, please use this mode when the room have
reached your desired temperature.
• Press ECONOMY
* Economy indicator (Green) on indoor unit lights up.
• Press once more to cancel this operation.
Modo Económico
Para poupar energia.
No entanto, use este modo quando a sala atinja a
temperatura desejada.
• Prima ECONOMY.
*
O indicador do modo Económico (Verde) da unidade
interior acender-se-á.
• Prima novamente o botão para cancelar esta
operação.
Powerful Mode
To obtain the setting temperature quickly.
• Press POWERFUL
* Powerful indicator (Orange) on indoor unit lights up.
* Powerful mode will operate for 15 minutes only.
• To cancel this operation, press once more.
Modo Potente
Para atingir rapidamente a temperatura pretendida.
• Prima POWERFUL.
*
O indicador do modo Potente (laranja) da unidade
interior acender-se-á.
*
O modo Potente funciona apenas durante 15 minutos.
• Prima novamente o botão para cancelar esta
operação.
Cover is closed
Tampa fechada
POWERFUL
SLEEP
3
1
2
CANCEL
COOL
AUTO
AIR SWING
OFF/ON
MANUAL
TIMER
ON OFF
SET
CLOCK
MODE
ECONOMY
FAN SPEED
PORTUGUÊS
ENGLISH
■ Operation details
Detalhes de funcionamento
Economy operation
Operação Económica
Temperature
Temperatura
Cooling/Soft Dry
Arrefecimento/
Desumidificação Suave
Heating
Aquecimento
* • The changes of the temperature and airflow volume are automatic.
• The remote control display remain unchanged.
• If sleep button or operation mode button is pressed, economy or powerful operation is cancelled.
• During -Air circulation operation, the powerful and economy operation are not available.
• During Economy mode, indoor fan operates on and off at Low speed.
*
• As alterações da temperatura e do volume de fluxo de ar são automáticas
FAN
0.5°C higher than set temp.
0,5 °C que a temperatura
programada
0.5°C lower than set temp.
0,5°C por debaixo da
temperatura ajustada
Airflow volume
Volume de fluxo de ar
Low (on and off)
Baixo (ligado e desligado)
Low (on and off)
Baixo (ligado e desligado)
Temperature
Temperatura
3°C lower than set temp.
temperatura programada
3°C higher than set temp.
3°C acima da temperatura
• O visor do controlo remoto mantém-se inalterado.
• Caso o botão de Modo Sleep, ou de Modo de Operação, seja premido, a operação do modo económico ou do
modo potente será cancelada.
• Durante a operação de ventilação - circulação de ar, os modos económico e potente não estão disponíveis.
FAN
• Durante o modo Económico, o ventilador funciona a baixa velocidade, ligando e desligando.
Powerful operation
Operação Potente
3°C que a
ajustada
Airflow volume
Volume de fluxo de ar
Super High
Super Alto
Automatic
Automaticó
18
Page 20

CARE AND MAINTENANCE
CUIDADOS E MANUTENÇÃO
● Cleaning the Indoor Unit and Remote Control
Limpeza da Unidade Interior e do Controlo Remoto
• Wipe gently with a soft, dry cloth.
• Do not clean with water hotter than 40°C or with
polishing fluids.
• The front panel can be removed and cleaned with water.
• Limpe cuidadosamente, com um pano macio e seco.
• Não lave com água com temperatura superior a 40°C,
ou com líquidos de limpeza.
• O painel frontal pode ser removido e lavado com água.
TIMER
SLEEP
POWER
ECONOMY
POWERFUL
Switch OFF and unplug the power cord before cleaning
the air conditioner.
Desligue o aparelho e retire a ficha da tomada, antes
de proceder à limpeza do aparelho de ar condicionado.
!
Caution /
CUIDADO
● Cleaning the Air Filter /
(Recommendation:- If the unit is operated in a dusty environment, clean the filters every two weeks, continuous use of this
dirty filters will reduce cooling efficiency)
Recomendação: Caso o aparelho seja utilizado num ambiente com pó, deve limpar os filtros quinzenalmente. A utilização
contínua de filtros sujos irá reduzir a eficácia de arrefecimento.
1 Open the front grille and remove the two air
filters. Hold the tab, lift up slightly then pull down.
Abra a grelha frontal e remova os dois filtros de
ar. Prima a patilha, empurre-a ligeiramente para
cima e depois puxe para baixo.
Limpeza do Filtro de Ar
3 Wash back of the air filter
with water.
Lave a parte posterior
dos filtros de ar com
água.
4 If badly soiled, wash it
with soap or a mild
household detergent.
2 Remove dirt using a
vacuum cleaner.
Remova a sujidade
utilizando um aspirador.
Caso os filtros estejam
muito sujos, lave-os com
água e sabão ou com
uma solução suave de
detergente.
5 Let it dry and reinstall it.
Be sure the “FRONT” mark is facing you.
Deixe secar os filtros e reinstale-os. Certifique-se de que a
indicação “FRONT” está virada para si.
* Damaged air filter.
Consult the nearest authorized dealer.
Part No.: CWD00240.
*
Filtros de ar danificados
Consulte o revendedor da sua área. Ref.: CWD00240
Benzene
T
h
r
e
i
n
n
• Do not clean using benzene, thinner, scouring powder or cloths
soaked in caustic chemicals.
• Não limpe os filtros com benzina, solventes, pós abrasivos ou
substâncias químicas cáusticas.
19
Page 21

PORTUGUÊS
ENGLISH
● Cleaning the Front Panel /
(Must be removed before washing) /
• Stand on a level surface when
removing the front panel.
• Coloque-se numa superfície
nivelada para remover o painel
frontal.
■ Removing the front panel
Remover o painel frontal
1 Raise the front panel
to its full extent.
Levante totalmente o
painel frontal.
2 Slide the two tabs
(left and right) to the
UNLOCK position.
Deslize as duas
patilhas (direita e
esquerda) para a
posição UNLOCK
(desbIoqueada).
•
LOCK
UNLOCK
(Deve ser removido antes de lavar)
!
Caution /
• Do not touch the metal parts in the
indoor unit after removing the front
panel.
• Não toque nas partes metálicas da
unidade interior, após remover o
painel frontal.
3 Raise the front panel
to a position slightly
higher than horizontal
and pull to remove.
Levante o painel
frontal para uma
posição ligeiramente
acima da horizontal e
puxe para o remover.
Limpeza do P ainel frontal
CUIDADO
• Do not leave water on the panel
after cleaning. Dry thoroughly to
prevent electric shock.
• Não deixe água no painel frontal,
após a limpeza. Limpe
cuidadosamente para evitar o
risco de choque eléctrico
■ Fixing the front panel
Instalar o Painel Frontal
•
Protruding portion
TIMER
POWER
SLEEP
ECONOMY
POWERFUL
on indoor unit
Suporte da
unidade interior
1 Raise the front panel horizontally,
match the protruding portion on the
indoor unit to the fulcrum and push
into place.
Levante o painel frontal
Fulcrum
Saliente
horizontalmente, alinhe a secção
saliente da unidade interior com o
centro e empurre, para encaixar.
2 Slide the two tabs up to the Lock
LOCK
UNLOCK
TIMER
POWER
SLEEP
ECONOMY
POWERFUL
position. (Click sound)
Note:If the tabs are left in the
UNLOCK position, the front
panel will not close.
* If the panel does not close
completely, check the tabs
positions and try again.
Deslize as duas patilhas para a
posição de bloqueadas
(até ouvir um clique).
Nota: Caso as patilhas não fiquem
bloqueadas, o painel frontal não
poderá fechar.
*
Se o painel não fechar
completamente, verifique a
posição das patilhas e tente
novamente.
■ Cleaning the front panel /
• Gently wash with water and a sponge. (Do not use a scrubbing brush or other
hard cleaning aids).
• Do not press the front panel too hard when washing. (Excess pressure may
damage the panel).
• When cleaning with kitchen cleaning fluids (neutral detergents), rinse thoroughly.
(Do not use non neutral detergents)
• Do not dry the front panel in direct sunlight. (Exposure to direct sunlight may
discolor or deform the panel).
• Lave cuidadosamente com água e uma esponja. Não utilize um esfregão ou
outros acessórios de limpeza ásperos.
• Não pressione demasiado o painel frontal durante a limpeza (a pressão excessiva
poderá danificar o painel).
• Se utilizar detergentes de limpeza (neutros), enxagúe cuidadosamente (Não
utilize detergentes que não sejam neutros).
• Não seque o painel frontal à luz solar (a exposição à luz solar directa poderá
descolorir ou deformar o painel).
Limpeza do painel frontal
20
Page 22

● Replacing the Air Purifying Filters
Substituição dos Filtros Purificadores do Ar
(Once every 3 month)
• Do not reuse dirty filters. Consult the nearest authorized
dealer. (Air Purifying filter No. CZ-SFD50N)
• These filters function effectively for not more than three months.
• If the air conditioner operates with dirty filters:-
- Air is not purified
- Cooling capacity decreases
- Foul odours are emitted
• Note:
Catechin is natural brown element. The filter is coated
with catechin in order to prevent the growth of bacteria
and viruses.
■ Removing the air purifying filters
Remoção dos filtros purificadores do ar
(Trimestralmente)
• Não reutilize filtros sujos. Consulte o representante autorizado
da sua área
(Filtro Purificador do Ar N° CZ-SFD50N).
O tempo de utilização eficaz destes filtros é de três meses.
• Caso o ar condicionado tenha os filtros sujos:
- O ar não é purificado
- A capacidade de arrefecimento diminui.
- São libertados odores desagradáveis
• Nota:
"Catechin" é um elemento natural castanho. O filtro é coberto
por película de "catechin" por forma a prevenir o desenvolvimento
de bactérias e viroses.
1 Raise the front panel to its full extent.
Levante totalmente o painel frontal.
2 Remove the air filters (left and right).
• Lift up slightly then pull down
Remova os filtros de ar (esquerdo e direito).
• Levante ligeiramente e depois puxe para baixo.
3 Hold the tabs of the air purifying filters and pull.
Prima as patilhas dos filtros purificadores do ar e
depois puxe.
Caution - Be careful not to hurt your hands on metal parts.
!
Atenção - Tenha cuidado para não se entalar nas partes metálicas.
■ Reinstalling the air purifying filters
Reinstalação dos filtros purificadores do ar
1 Open the filter frame to insert the new filters.
Press here
Prima aqui
2 Insert the new air purifying filter.
3 Push until you hear a click.
4 Reinsert the air filters.
- Deodorizing Filter (Black in colour)
- Catechin Air Purifying Filter (Brown in colour)
Abra o caixilho dos filtros para instalar os novos filtros.
- Filtro Desodorizantes
- Filtro De Catequina Purificadores De Ar
(Castanho)
(Be sure the “FRONT” mark is facing you)
Introduza os novos filtros purificadores do ar.
(Certifique-se de que a indicação FRONTestá
virada para si).
Empurre até ouvir um clique.
Reintroduza os filtros de ar.
(Preto)
21
5 Close the front panel.
Feche o painel frontal.
Page 23

PORTUGUÊS
ENGLISH
● Pre-season Inspection /
• Is the discharge air cold
(warm)?
Operation is normal if, 15
minutes after the start of
operation, the temperature
difference between the air intake
and outlet vents is 8°C or above
for cooling and 14°C or above
for heating.
• O ar de saída é frio (quente)?
Será considerado
funcionamento normal se,
passados 15 minutos do início
do funcionamento, a diferença
entre a temperatura das
entradas de ar e a temperatura
das saídas de ar for de 8 °C, ou
superior, para arrefecimento e
14°C, ou superior, para
aquecimento.
●
When the Air Conditioner is Not Used For an Extended
Inspecção Pré-Temporada
• Are the air intake or outlet vents
of the indoor or outdoor units
obstructed?
• As entradas ou saídas de ar das
unidades interior e exterior estão
obstruidas?
• Are the remote control batteries weak?
If the remote control display appears weak, replace the
batteries (page 12).
• As pilhas do controlo remoto estão gastas?
Caso o visor do controlo remoto pisque, ou o visor pareça
fraco, substitua as pilhas (pág.12).
P eriod of Time
Quando o aparelho de ar condicionado não é utilizado
por um período de tempo prolongado
1To dry the internal parts of the indoor unit, operate the unit
for 2 - 3 hours using operation with 30°C setting
temperature.
Para secar as partes internas da unidade de interior, fazer
funcionar a unidade durante 2 ~ 3 horas em
aquecimento, graduando a temperatura a 30°C.
COOL
COOL
3Remove the remote control batteries.
Retire as pilhas do controlo remoto.
2Turn off the power switch and remove the power supply
plug.
Note: If the unit is not switched off by the remote
control, it will start operating when you plug in
(because a Auto Restart Control is provided).
Desligue o interruptor e retire a ficha da tomada.
Nota: Caso o aparelho não seja desligado pelo controlo
remoto, irá iniciar a operaçao assim que ligar a
tomada, devido à função de Reactivação Automática.
● Recommended Inspection /
• The unit will become dirty after use over several seasons, reducing performance.
Depending on the operation condition, a dirty unit may produce foul odours and dust may pollute the dehumidifying
drainage.
Seasonal inspection is recommended, in addition to regular cleaning. Consult an authorized dealer.
• A unidade ficará suja após a utilização durante várias temporadas, reduzindo consequentemente o desempenho.
Consoante as condições de funcionamento, uma unidade suja poderá causar maus odores e o pó poderá contaminar
a drenagem do desumidificador.
Assim, é recomendada uma inspecção sazonal, além da limpeza regular. Consulte o representante da sua área.
Inspecção Recomendada
22
Page 24

TROUBLESHOOTING
DETECÇÃO DE AVARIAS
● Normal Operation
Funcionamento Normal
Q - Is it okay? A - This is the answer.
P
- Será normal quando ... ?
Q - Air conditioner has been restarted, but does not operate for 3 minutes.
A - This is to protect the air conditioner. Wait until the air conditioner begins
operating.
P
- O aparelho de ar condicionado foi reactivado, mas não funciona durante
três minutos?
R
- Isso acontece para proteger o aparelho de ar condicionado. Aguarde até
que o aparelho inicie a operação.
R
- Esta é a resposta
Ssshh
Q - A sound like water flowing can
be heard.
A - This is the sound of refrigerant
flowing inside the air conditioner
unit.
P
- É audível um som semelhante a
água a correr?
R
- Esse som provém do refrigerante
que corre dentro do aparelho de ar
condicionado.
Q - It seems that fog is coming out
from the air conditioner.
A - Condensation occurs when the
airflow from the air conditioner
cools the room air.
P
- Parece que sai uma neblina do
aparelho de ar condicionado?
R
- A condensação ocorre quando o
fluxo de ar do aparelho de ar
condicionado arrefece o ar
ambiente.
HEATING OPERATION
(FUNÇÃO DE AQUECIMENTO)
Q - Operation stops for about 12 minutes during heating.
(The operation lamp blinks)
A - This is to melt the frost which has accumulated on the
outdoor unit (defrosting operation). This will take no
longer than about 12 minutes, so wait for operation.
(Frost accumulates on the outdoor unit when the
outdoor temperature is low and humidity is high.)
Water comes out from the outdoor unit.
P
- O funcionamento cessa durante 12 minutos
aproximadamente durante o aquecimento.
(A luz indicadora do funcionamento pisca.)
R
- Isto é para derreter o gelo que se acumulou na
unidade do exterior (Funcionamento de
Descongelação). Isto não demora mais de 12 minutos,
de modo que há que esperar. (O gelo acumulase na
unidade exterior quando a temperatura é muito fria e
há muita humidade.) Sai água da unidade exterior.
TIMER
SLEEP
POWER
ECONOMY
POWERFUL
Q - The room has a peculiar odour.
A - This may be a damp smell emitted by the walls, carpet,
furniture or clothing in the room.
P
- A divisão onde está o aparelho tem um odor estranho?
R
- Esse odor poderá ser da humidade libertada pelas
paredes, tapetes, móveis ou outros objectos da divisão.
AUTO FAN
(VENTILADOR AUTOMÁTICO)
Q - During Automatic Vertical Airflow setting, indoor fan
stops occasionally.
A - This is to remove the smell emitted by the
surroundings.
P
- Durante a programação de Caudal Automático de
Fluxo de Ar, o ventilador da unidade interior pára
ocasionalmente.
R
- Essa paragem serve para eliminar o cheiro libertado
pelo ambiente.
HEATING OPERATION
(FUNÇÃO DE AQUECIMENTO)
Q - During heating operation, indoor fan may run at on
and off conditions.
A - This to prevent undesired cooling effect during
heating operation.
P
- Na função de aquecimento, o ventilador interior pode
começar a funcionar na modalidade de ligado ou
desligado.
R
- O objectivo é prevenir o efeito indesejável de
arrefecimento durante a função de aquecimento.
23
Page 25

PORTUGUÊS
ENGLISH
● Abnormal Operation /
The air conditioner does not operate.
• Has a circuit breaker been tripped?
• Has the power plug been removed
from the wall outlet?
• Is the timer being used correctly?
O aparelho de ar condicionado não
funciona.
• O disjuntor saltou?
• A ficha foi retirada da tomada
• O temporizador está a ser
devidamente utilizado?
The air conditioner does not cool (warm) effectively.
• Has the temperature been set incorrectly?
• Are the filters dirty?
• Are the intake or outlet vents of the outdoor unit obstructed?
• Are all windows and doors closed?
O aparelho de ar condicionado não refresca de forma (quente) eficaz.
• A temperatura foi bem regulada?
• Os filtros estão sujos?
• As entradas ou saída de ar da unidade exterior estão obstruidas?
• As portas e janelas estão devidamente fechadas?
Funcionamento Anormal
Hmmm!
TIMER
SLEEP
POWER
ECONOMY
POWERFUL
Air conditioner operation noise too loud.
• Is the installation work slanted?
• Is the front grille closed properly?
O aparelho de ar condicionado faz
demasiado barulho durante o
funcionamento.
• A base de instalação está inclinada?
• A grelha frontal está devidamente fechada?
● Call the Dealer Immediately
Contactar o serviço de Assistência imediatamente
If the following conditions occur, immediately turn off the main power supply and unplug.
Caso ocorra algumas das seguintes situações, desligue imediatamente o interruptor (“O”) apagado e retire a ficha da
tomada.
• Abnormal noise is heard during
operation.
• São audíveis ruídos anormais durante
a operação.
• Water or foreign material gets
into the remote control by
mistake.
• Por distracção, entrou água
ou outro líquido no controlo
remoto.
• Water leaks from the indoor unit.
• Existe uma fuga de água na unidade
interior.
• Switches or buttons do not operate
properly.
• Os interruptores ou os botões não
funcionam correctamente.
• The circuit breaker switches
off frequently.
• O interruptor dispara com
frequência.
• Power supply cord and plug
become unusually warm.
• O cabo de alimentação e a ficha
aquecem demasiado.
24
Page 26

HELPFUL INFORMATION
INFORMAÇÕES ÚTEIS
Auto Operation Button
Botão de funcionamento automático
■ Automatic Operation
• If the remote control fails to function or misplaced,
press Auto Operation button for Automatic operation.
• The Automatic operation will be activated immediately once the Auto
operation button is pressed. However, temperature cannot be adjusted
in this operation.
• The power LED on the indoor unit blinks until the operation mode is
selected automatically.
• To cancel this operation, press once more.
■
Funcionamento automático
• Se o comando à distância deixa de funcionar ou não se consegue localizar,
aperte o botão de Auto Operation (funcionamento automático).
• O funcionamento automático activa-se ao premer o botão Auto de
TIMER
SLEEP
POWER
ECONOMY
POWERFUL
■ Remote Control Signal Receiving Sound
■
* Note: If you press this button continuously for 5 to 10 seconds, Test Run
*
funcionamento. Porém, a temperatura não pode ajustar-se nesta operação.
• O LED de ligação da unidade interior piscará até que se seleccione
automaticamente o modo de funcionamento.
• Para cancelar esta operação, prima outra vez.
• To switch off the beep (Signal Receiving Sound),
press this Auto Operation button for 10 seconds continuously or longer.
“Beep”, “beep” sound will be heard at the tenth seconds.
Note: “Beep” sound will be heard at the fifth seconds;
However please press continuously until you
• Repeat this, if you want to switch on the Signal Receiving Sound.
Som de recepção do sinal do comando à distância
• Para desactivar o apito (som de recepção do sinal) prima sem soltar o botão
• Repita a operação se quer activar o Som de Recepção de Sinal.
operation will be performed. A “beep” sound will be heard at the fifth seconds,
to identify the starting of Test Run operation.
(This is for Servicing purpose only.)
Nota: Se prime este botão sem soltá-lo entre 5 e 10 segundos, começará a ser
executada a operação de Test Run (comprovação automática). Aos 5 segundos
ouvir-se-á um som “bip”, para identificar o início da operação de Test Run. (Só
para fins de serviço técnico)
heard “beep” , “beep” sound.
de Auto Operation (funcionamento automático) durante 10 segundos ou
mais. O som “bip”, “bip” ouvir-se-á passados 10 segundos.
Nota: O som “bip” ouvir-se-á passados 5 segundos;
mas deve continuar a apertar até ouvir o som “bip”, “bip”.
POWER FAILURE
FALHA
ELÉCTRICA
Auto Restart Control
• If power is resumed after a power failure, the operation will restart automatically
after 3 - 5
• Operation will be automatically restart under the previous operation mode and
airflow direction when power is resumed as the operation is not stopped by remote
control.
1/2 minutes.
Controlo de Rearme Automático
•
Caso ocorra uma falha eléctrica, o aparelho retomará automaticamente o
funcionamento 3 a 5 1/2 minutos depois de ser reposta a alimentação eléctrica.
•
O funcionamento será retomado automaticamente no modo de operação e na
direcção de fluxo de ar anteriores, uma vez que a operação não foi interrompida
com o controlo remoto.
Timer Setting /
• When power failure occurs, the timer setting is cancelled. Once power is
resumed, reset the timer.
•
Em caso de falha eléctrica, a programação do temporizador será cancelada.
Assim que se restabelecer a electricidade, reprograme o temporizador.
Programação do Temporizador
Thunder and Lightning
• This air conditioner is equipped with a built-in surge protective device.
However, in order to further protect your air conditioner from being
damaged by abnormally strong lightning activity, you may switch off
the main power supply and unplug from power socket.
Trovoadas
•
Este acondicionador de aire está equipado con un mecanismo protector
incorporado de subidas de tensión. Sin embargo, para protegerlo de
daòos causados por una subida anormalmente del flujo elëctrico, se
puede apagar la fuente de alimentación y desenchufarlo de la red.
25
Page 27

ENERGY SAVING AND OPERATION HINTS
ESUGESTÕES PARA POUPAR ENERGIA E OBTER UM FUNCIONAMENTO MAIS EFICAZ
PORTUGUÊS
ENGLISH
Air Filter and Air Purifying Filter
Clean the air filter every 2 weeks and
Setting Temperature
Set the temperature 1°C higher
(Cooling operation) or 2°C
lower (Heating operation) than
actually desired.
Approximately 10% of electricity
costs can be saved.
Regulação da Temperatura
Regule a temperatura 1°C
acima do desejado. Assim,
poderá poupar cerca de 10%
no consumo de energia.
change the Air Purifying Filter every 3
months. Dirty filter may reduces cooling
or heating efficiency.
Filtro de Ar e Filtro Purificador do Ar
Limpe o filtro de ar quinzenalmente e
mude o filtro purificador de ar
trimestralmente. Os filtros sujos reduzem
a eficácia do arrefecimento
Keep All Doors and Windows Closed
Otherwise, cooling and heating
performance will be reduced and
electricity costs is wasted.
Mantenha as portas e janelas
fechadas
Evita a entrada de ar quente, bem
como as perdas de ar frio.
Outdoor Unit
Do not block the air outlet
vents. Otherwise, it will lower
the cooling or heating
performance.
Unidade Exterior
Não bloqueie as saídas de ar.
Caso contrário, reduzirá a
eficácia do arrefecimento.
Timer and Sleep Mode
To prevent wastage of
electricity, use sleep mode when
sleeping or Timer when going out
to save electricity cost.
Modo de Dormir e Temporizador
Para evitar o desperdício de
energia, utilize o modo de dormir
durante a noite ou o Temporizador
quando sair.
Avoid Direct Sunlight
Keep curtains or drapes closed to keep
out direct sunlight during cooling
operation.
Evite a luz solar directa
Mantenha os cortinados, ou persianas,
corridos de modo a evitar a luz solar
directa durante a operação de
arrefecimento.
26
Page 28

! Warning
1) This appliance must be earthed.
2) If the supply cord is damaged or need to be replaced, it must be replaced by the manufacturer or its service agent
or a similarly qualified person in order to avoid a hazard.
3) Remove power plug or disconnect from the mains before servicing this appliance.
4) Do not repair by yourself.
In case of malfunction of this appliance, do not repair by yourself.
Contact to the sales dealer or service dealer for a repair.
5) Do not use in an explosive atmosphere.
Do not use this appliance in a potentially explosive atmosphere.
6) Turn off the power (Isolation from main power supply).
Pull off the power plug from the receptacle, or switch off the breaker, or switch off the power disconnecting mean
to isolate the equipment from the main power supply in case of an emergency.
! Caution
DISCONNECT THE MAINS PLUG FROM THE SUPPLY SOCKET WHEN NOT IN USE, WHERE SUPPLY
CONNECTION IS VIA MAINS PLUG.
Airborne noise.
A-weighted sound pressure level of this appliance is less than 70 dB (A) under the JIS C 9612 test conditions.
Maximum cooling operation
1 m from the unit
IMPORTANT
The wires in this mains lead are coloured in accordance with the following code:
Green and Yellow : Earth
Blue : Neutral
Brown : Live
“As the colours of the wires in the mains lead of this appliance may not correspond with the coloured markings
identifying the terminals in your plug, proceed as follows:
The wire which is coloured green and yellow must be connected to the terminal in the plug which is marked by the
letter E or by safety earth symbol ! or coloured green or green and yellow.
The wire which is coloured blue must be connected to the terminal which is marked with letter N or coloured black.
The wire which is coloured brown must be connected to the terminal which is marked with letter L or coloured red.
27
Page 29

!
PERIGO
1) Este aparelho deve estar ligado à terra.
2) Caso o cabo de alimentação esteja danificado, ou tenha de ser reparado, deve ser substituído pelo fabricante, ou
por um representante autorizado, ou por um técnico devidamente qualificado, de forma a evitar situações de perigo.
3) Remova o cabo de alimentação, ou desligue-o da tomada, antes de proceder a qualquer acção de manutenção no
aparelho.
4) Não tente reparar o aparelho.
Em caso de avaria do aparelho, não tente repará-lo.
Contacte o seu revendedor, ou o representante autorizado, para que procedam à reparação.
5) Não utilize o aparelho numa atmosfera explosiva.
Não utilize este aparelho numa atmosfera potencialmente explosiva.
6) Desligue a alimentação eléctrica (Isolamento da corrente principal).
Em caso de emergência, retire a ficha da tomada, ou desligue o interruptor, ou desligue a fonte de alimentação de
forma a isolar o equipamento da corrente principal.
PORTUGUÊS
ENGLISH
!
CUIDADO
DESLIGUE A FICHA DA TOMADA SEMPRE QUE NÃO ESTEJA A UTILIZAR O APARELHO, NOS CASOS ONDE A
ALIMENTAÇÃO SEJA FEITA ATRAVÉS DE TOMADA.
Ruídos aéreos
O nível na escala A deste aparelho é inferior a 70 dB, sob as condições de teste JIS C 9612:
Operação máxima de arrefecimento
1 m do aparelho
IMPORTANTE
Os fios do cabo de alimentação têm cores que correspondem ao seguinte código
GVerde e Amarelo : Terra
Azul : Neutro
Castanho : Com corrente
“Dado que as cores do fios do cabo de alimentação deste aparelho poderão não corresponder às marcações coloridas
que identificam os terminais da sua ficha, proceda da seguinte forma:
O fio verde e amarelo deve ser ligado ao terminal da ficha que está marcado com a letra
E, ou com o símbolo de segurança de terra! ou de cor verde e amarela.
O fio azul deve ser ligado ao terminal marcado com a letra N, ou de cor preta.
O fio castanho deve ser ligado ao terminal com a letra L, ou de cor vermelha.
28
 Loading...