

Page 1
Operating Instructions
ИНСТРУКЦИЯ no ЭКСПЛУАТАЦИИ
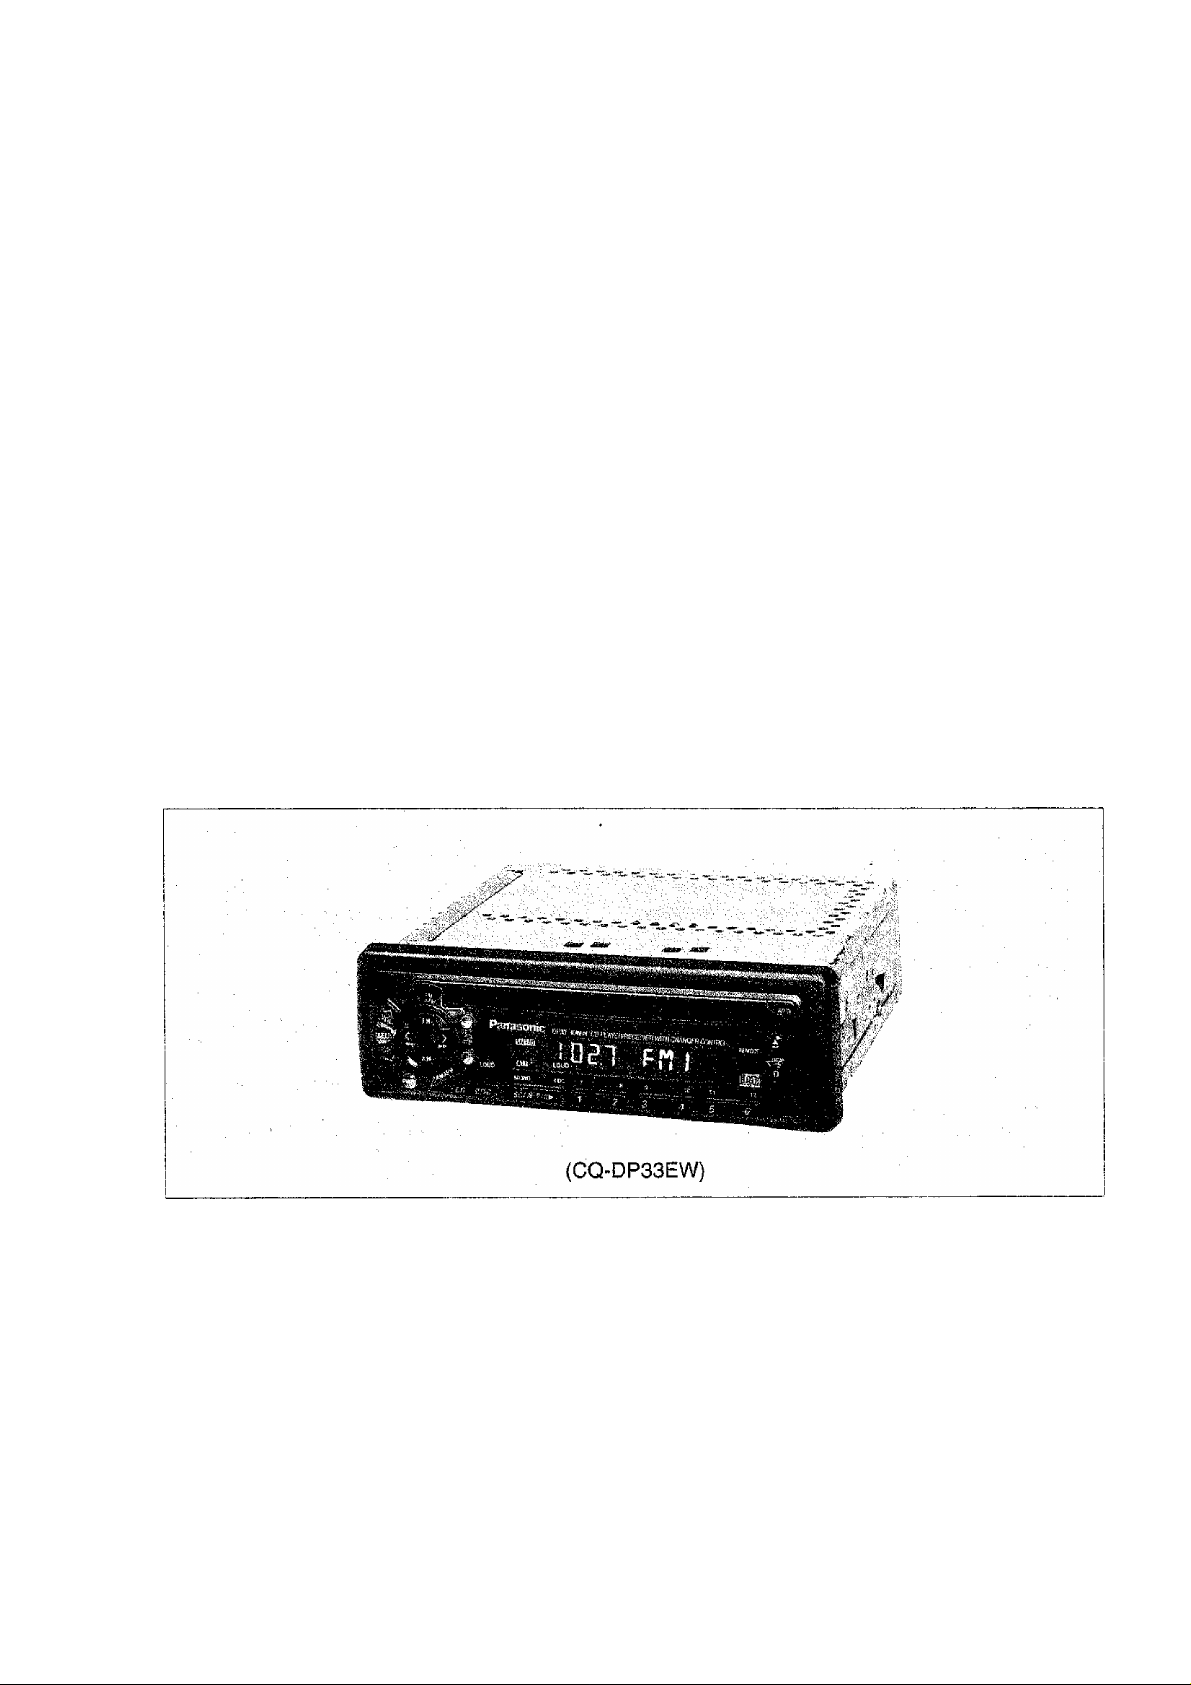
[CQ-DP33EW]
High-Power CD Player/Receiver with Changer Control
m CD
Высокомощньвй CD-плейер/приёмник с управлением ченджером
CQ-DP33EW
Panasonic
Before operating this set, please read these instructions completely.
Перед началом эксплуатации аппарата полностью прочитайте, пожалуйста, данную инструкцию.
Page 2

Contents
Precautions..............................................................2
Power and Sound Controis
Radio Basics........................................................... 7
Compact Disc Player Basics
CD Changer Basics
Clock Basics
Installation Guide...................................................15
..............................................
..........................................................
.....................................
...................................
11
14
Electrical Connection
5
9
Speaker Connections............................................20
Special Notes........................................................21
Fuse......................................................................21
Maintenance
Specifications
.........................................................
........................................................
............................................
Panasonic welcomes you to our ever growing family of electronic product owners. We know that
this product will bring you many hours of enjoyment Our reputation is built on precise electronic
and mechanical engineering, manufactured with carefully selected components and assembled by
people who take pride in their work. Once you discover the quality, reliability, and value we have
built into this product, you too will be proud to be a member of our family.
Precautions
Volume Level
For your driving safety, keep the volume level
low enough to be aware of road and traffic con
ditions.
Car Washing
To avoid electrical short circuits which may
cause fire or other damage, do not expose this
equipment {including the speakers and CDs) to
water or excessive moisture.
Service
This unit is made of precision parts. Do not at
tempt to disassemble or adjust any parts, For
repair, please consult your nearest authorized
Panasonic Service Center.
Power Supply
This equipment is designed to be used in a car
having 12-Volt negative ground battery system.
Disc Mechanism
Do not insert coins or any small objects. Keep
screwdrivers and other metallic objects away
from the disc mechanism and disc.
Car Ventilation
If your car is parked for sevearl hours in direct
sun-light, the temperature inside the car may
become very high. It is advisable to drive the
car for a while until the interior cools down be
fore switching the unit on.
About Preset Memory
The preset memory is cleared to return to the
original factory setting when the power connec
tor or battery is disconnected.
19
21
22
Optional Remote Control Unit is available to this unit.
CQ-DP33EW
Page 3
Power and Sound Controls
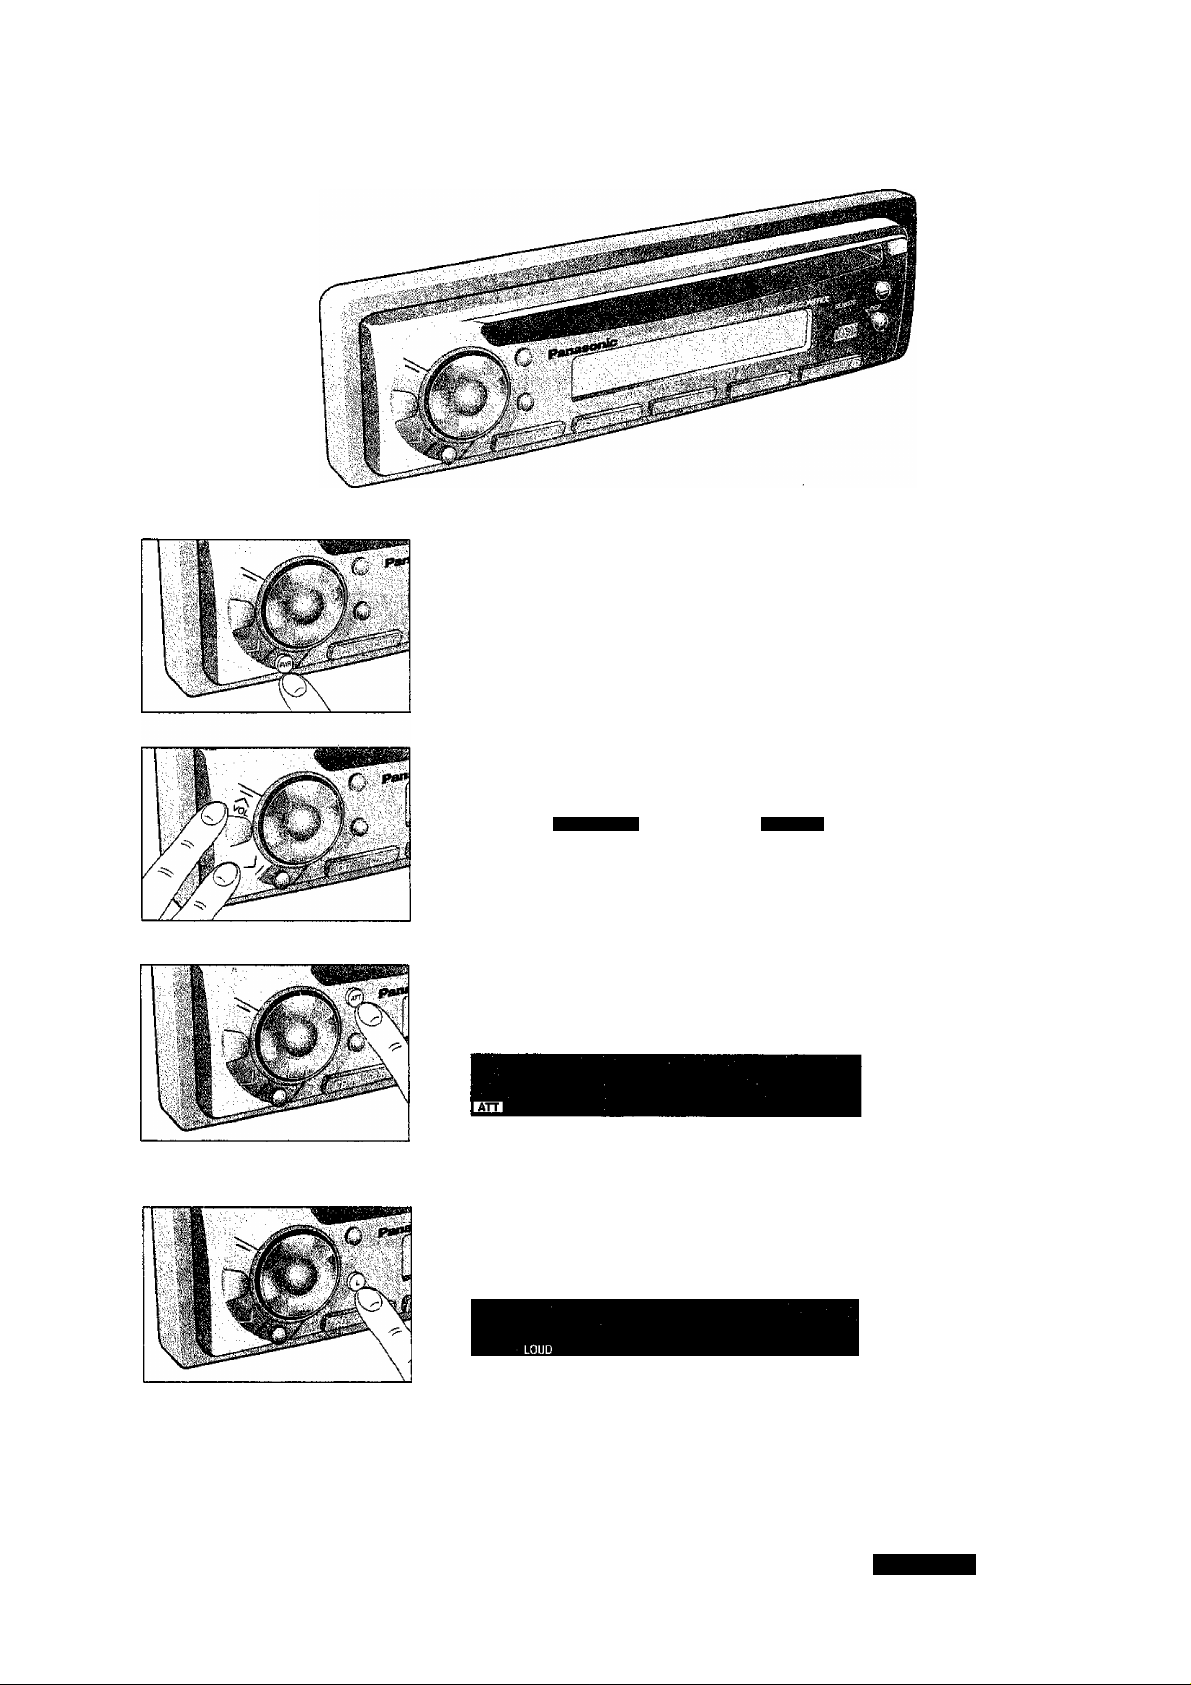
Power
If the car is not already running, turn the key in the ignition until
the accessory indicator iights.
Press [PWR] to switch on the power.
Press [PWR] again to switch off the power.
Note: When a CD is inserted with all power connected, the unit
power will automatically turn on and CD loading begins and plays.
Volume
• Press [A VOL] or [v VOL] to increase or decrease volume.
Jinf
U U L
Press [A VOL] or [v VOL] for more than 0.5 second to
change numeric levels on the display rapidly.
u n
t u
Volume Level
(0to40)
Attenuator
• Press [ATT]. Volume will decrease to about Vio of Its previous
level.
• Press [ATT] again to deactivate when listening at normal
volume.
Tone Enhancement
• Press LOUD [L] to enhance bass and treble tones when listen
ing at low or medium volume.
Press LOUD [L] again to deactivate.
Note; This unit is equipped with an anti-volume-blast circuit which serves as an automatic vol
ume level adjuster so that you will not be deafened sudden loud volume.
This system operates as follows. When [PWR] is switched on, the volume level is low. After
that, the volume level gradually returns to its previous level prior to switching off the unit.
CQ-DP33EW
Page 4
Power and Sound Controls
(continued)
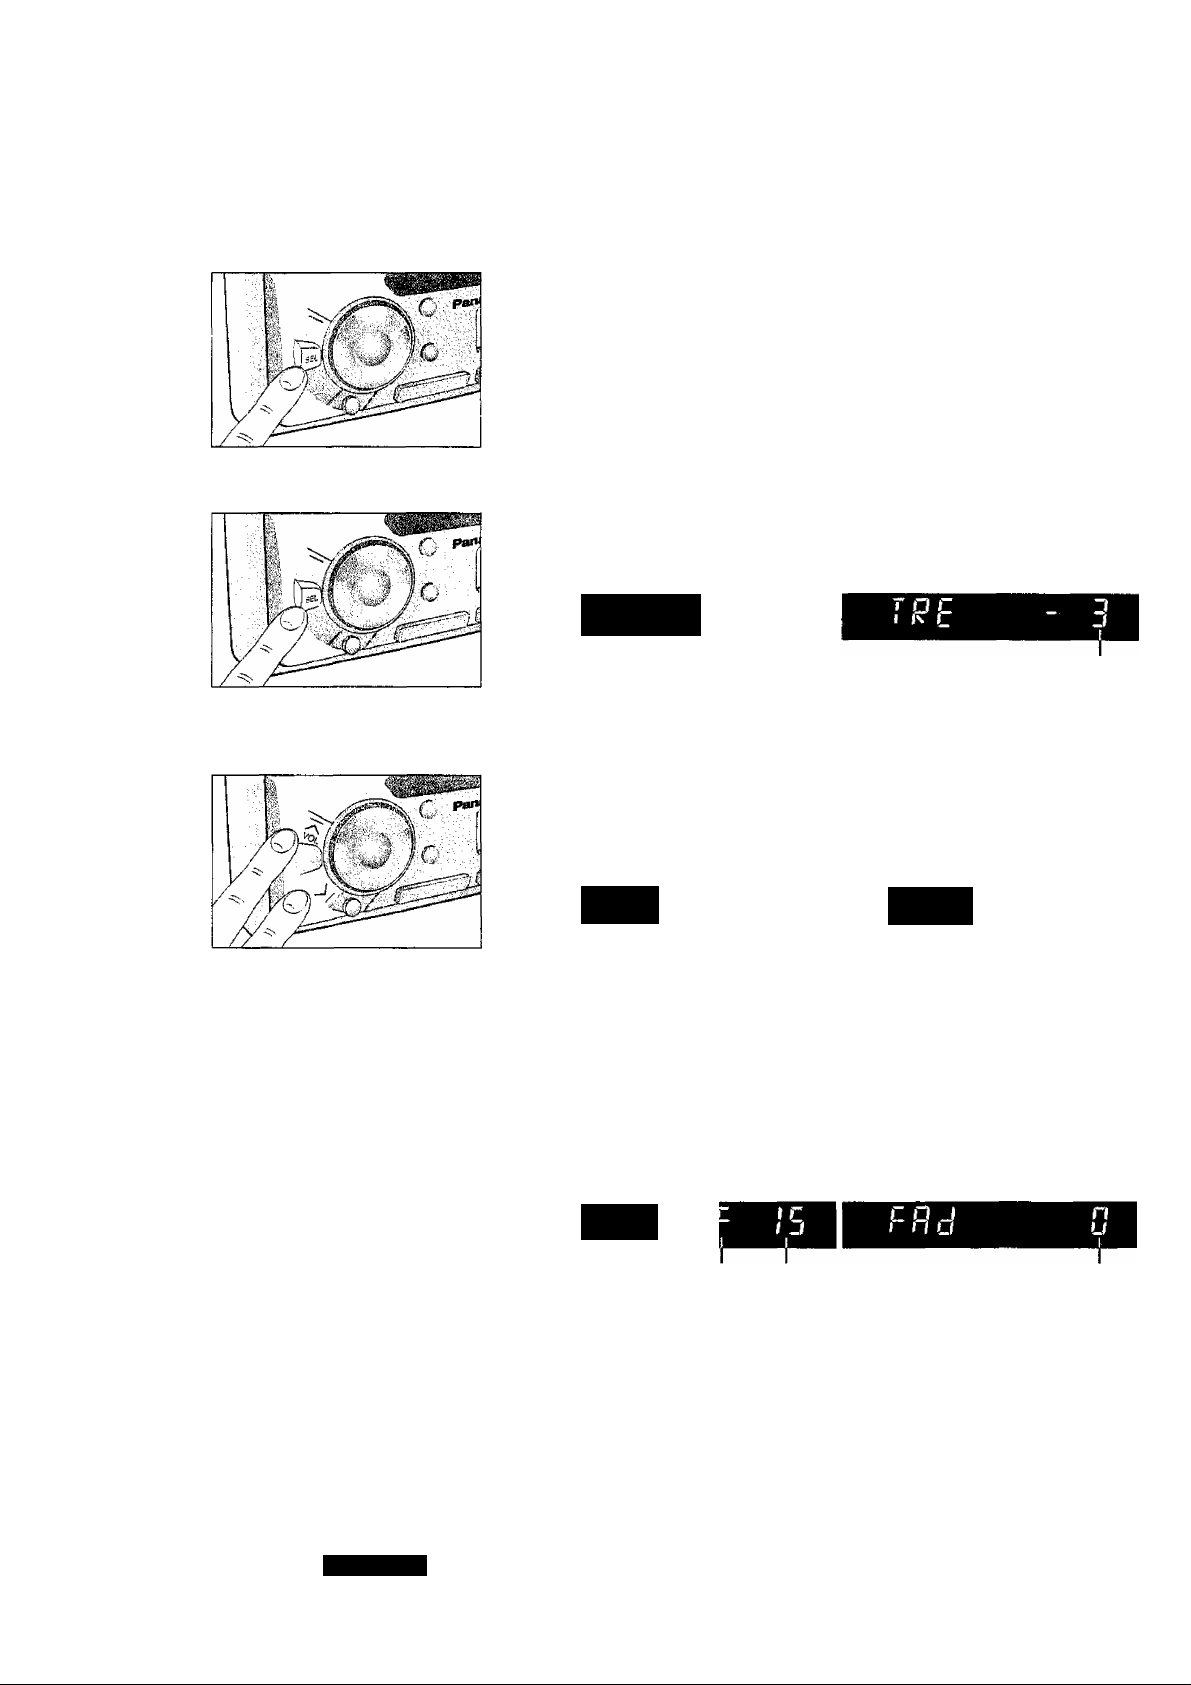
Changing Audio Modes
Press [SEL] to switch the audio mode in the following order.
VOLUME^BASS^TREBLE-^BALANCE-^FADER
t___________________________________________I
Bass and Treble
• Press [SEL] to select the BASS (TREBLE) mode. Press
[/\ VOL] or [V VOL] to increase or decrease the bass/treble
response.
3H5
-12to12 -12to12
• Press [/V VOL] or [v VOL] for more than 0.5 second to
change numeric levels on the display rapidly.
Balance
• Press [SEL] to select the BALANCE mode. Press [a VOL] or
[V VOL] to shift the sound volume to right or left speakers.
BRi
BRL
\ !
or L 1 to 15
♦ Press [A VOL] or [v VOL] for more than 0.5 second to
change numeric levels on the display rapidly.
Balance Center
Fader
• Press [SEL] to select the FADER mode. Press [a VOL] or
[V VOL] to shift the sound volume to the front or rear
speakers.
C Q J
rn a
or R 1 to 15 Balance Center
Press [A VOL] or [v VOL] for more than 0.5 second to
change numeric levels on the display rapidly.
Note: When a control mode (BAS/TRE/BALypAD) is selected but no operation is made within
5 seconds (2 seconds at volume mode), the display will return to the normal operation (Radio,
CD, etc) mode. In such a case, press [SEL] again to select the control mode.
CQ-DP33EW
Page 5
Radio Basics
To change Tuner Mode
You can select “FM” or “AM” directly.
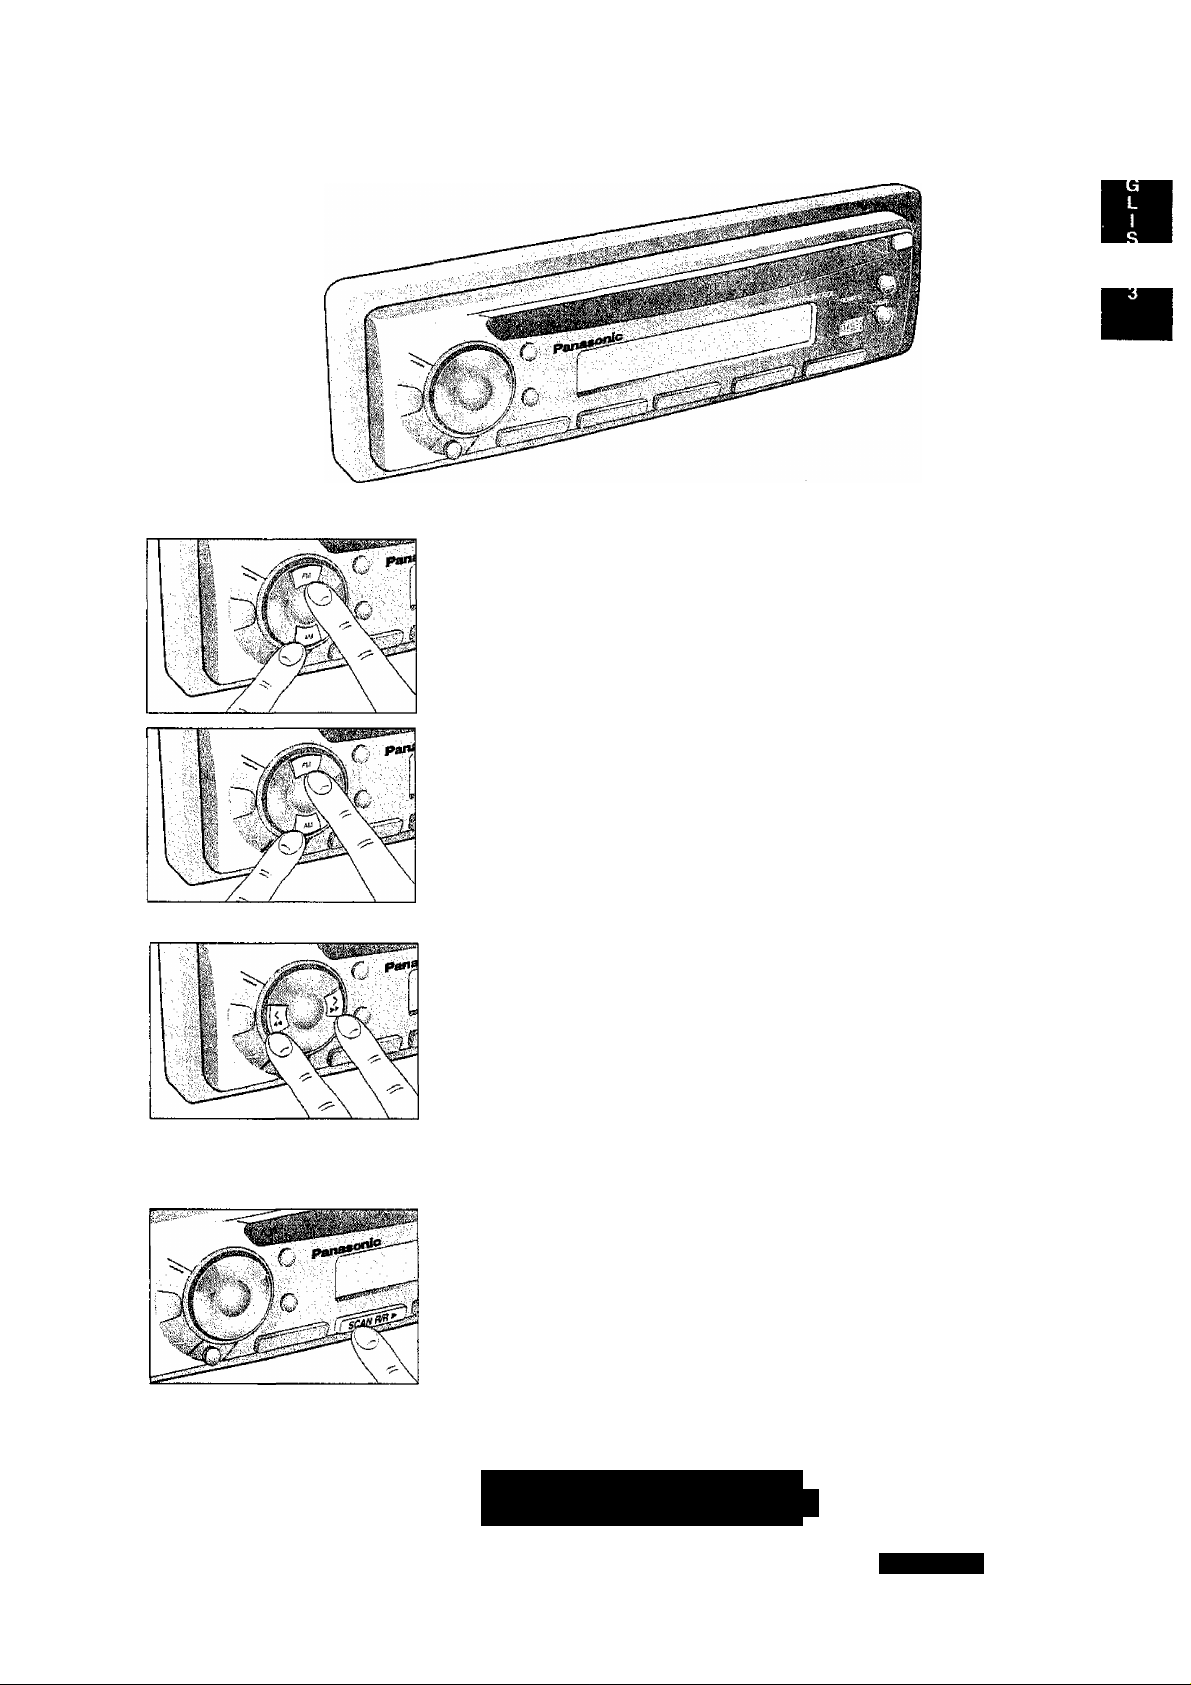
Selecting a Band
• Press [FM] to select the bands in the following order.
FM1^FM2-^FM3
“STEREO” indicator lights if the station is broadcasting in
stereo.
• Press [AM] to select the bands.
Manual Tuning
Press [> TUNE] or [< TUNE] to move to a higher or lower fre
quency.
Seek Tuning
Press and hold [> TUNE] or [< TUNE] for more than 0.5 sec
ond, then release. The radio automatically stops on the next
station.
MONO/LOCAL Selection
• Much interference is reduced during a weak FM stereo broad
casts when MONO is ON. {Only for FM mode)
• Searching stops automatically at a strong wave station only
when LOCAL is ON.
Press [MONO] to switch on or off the MONO mode as follows.
MONO OFF^MONO ON
Press [LOG] to switch on or off the LOCAL mode as follows.
LOCAL OFF^LOCAL ON
MONO
Q ~IC CM I
O I.J »Mi
LOCAL
CQ-DP33EW
Page 6
Radio Basics (continued)
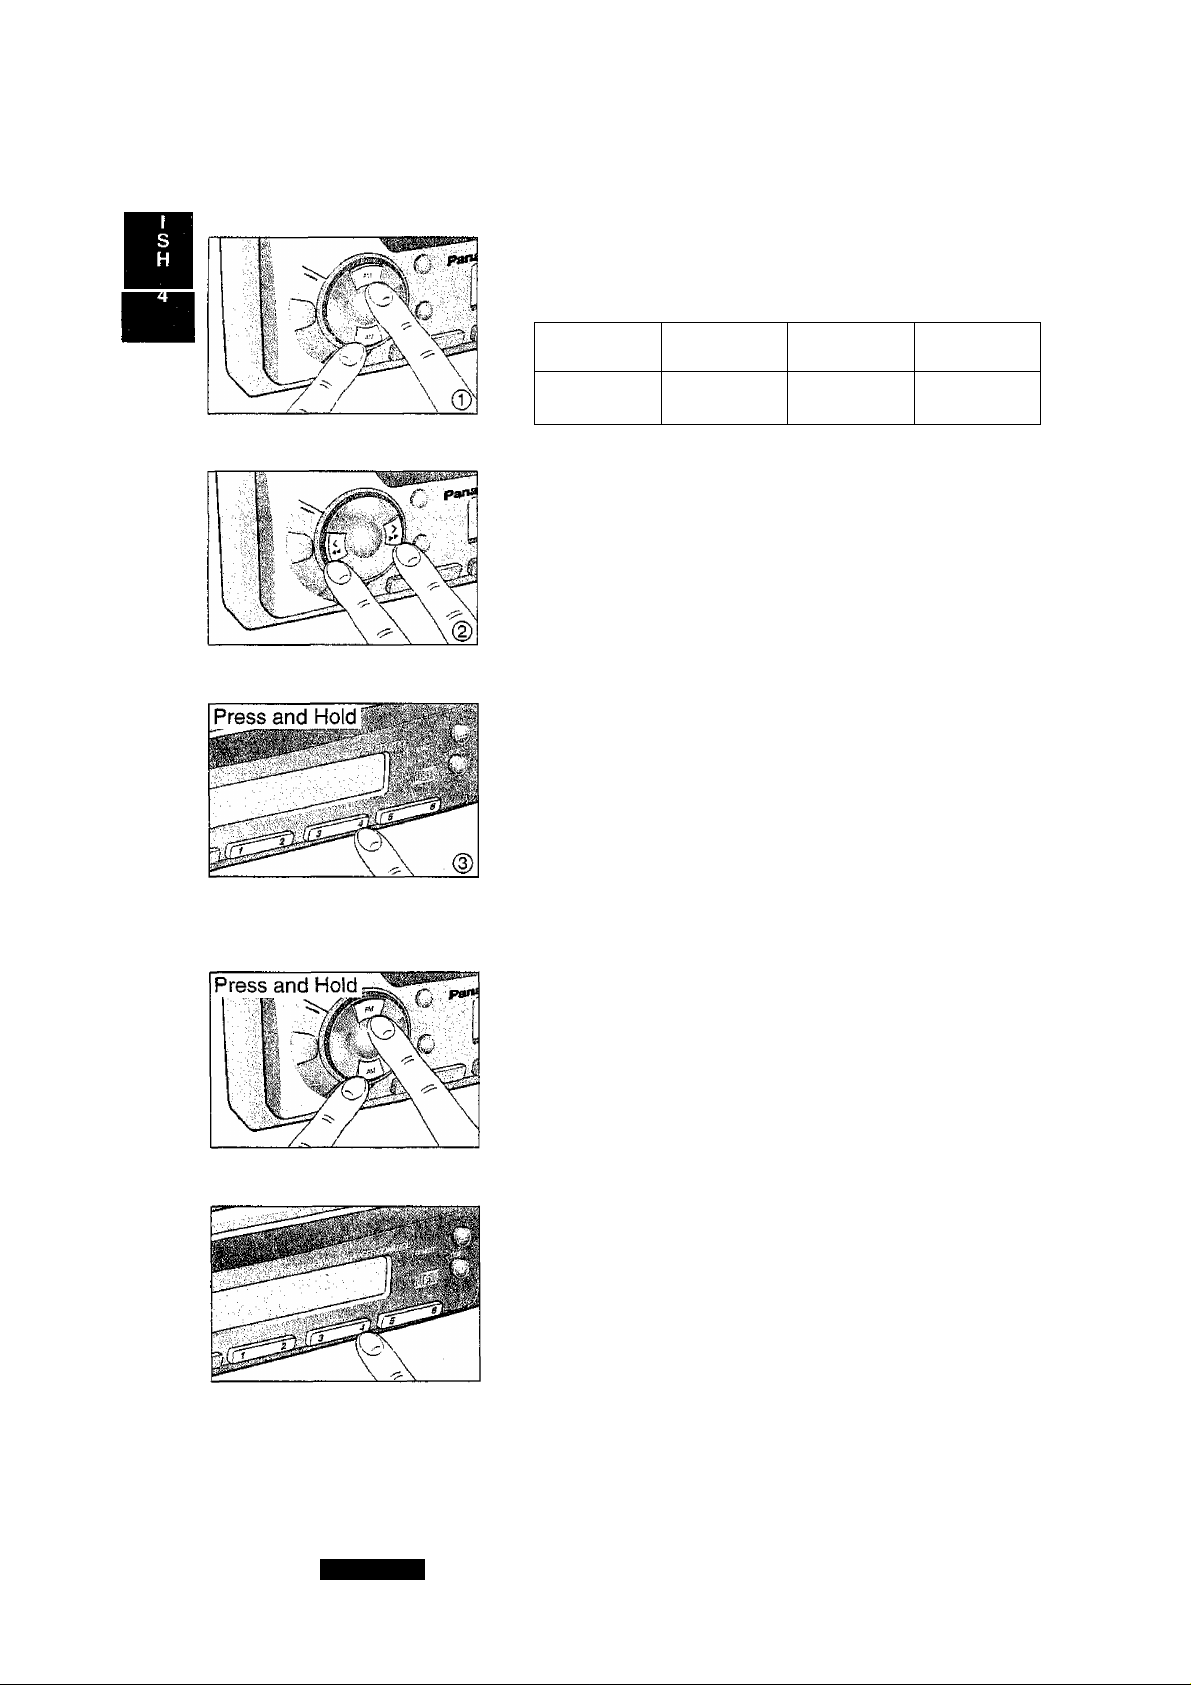
Preset Station Setting
Up to 24 stations can be preset in the station memory as follows:
FM1
6 stations
FM2
6 stations 6 stations
FM3
AM
6 stations
Manual Station Preset
0 Press [FM] or [AM] to select a desired band.
(2) Use manual or seek tuning to find a station that you want to
program into memory.
(3) Press and hold one of the station selector buttons [1] through
[6] until the display blinks.
Repeat the process to set other stations for the FM1 -3 and AM
bands.
Note: You can change the memory setting by repeating the
above procedure.
Tuning in a Preset Station
Press any of the buttons [1] through [6] to tune in the station pre
set by the above steps 0 to (з).
Auto Station Preset
Press and hold [FM АРМ] or [AM АРМ] for more than 2 seconds.
• The 6 strongest available stations will be automatically set in
memory preset buttons [1] through [6].
• Once set, the preset stations are sequentially scanned for
5 seconds.
• Press the appropriate preset button for the station you want to
hear.
Caution: For safety reasons, do not attempt to program while driving.
CQ-DP33EW
Page 7

Compact Disc Player Basics
Mode Selection
While the disc is inserted, press [CD] to select CD mode.
To start the CD Player
Insert the disc (label side up) and playback starts automatically.
I no J
L U » I U
“LOAd” will be displayed until the disc is loaded. Play starts from
first track.
nTl
u u
Playtime
Note: While the disc is inserted, “DISC” indicator will light. If you
press [CD] after the disc is ejected, the disc will be re-inserted.
TRACK
h Track number
I DISC
Stopping and Ejecting a Disc
Press [A] to stop CD play, and the disc will quietly eject from the
CD slot. (During disc ejection, “EJ” (EJECT) will be displayed.)
Selecting a Track
Press [►► TRACK] once to go to the next track. Press repeatedly
to step forward through all the tracks.
Press [◄◄ TRACK] once to play from the beginning of the track
you are listening to. Press twice to play the previous track. Press
repeatedly to step backward through all the tracks.
CQ-DP33EW
Page 8

Compact Disc Player Basics
(continued)
Searching a Track
Press and hold [» TRACK] or TRACK] for more than 0.5
second to activate fast forward or reverse through a track,
Release [►► TRACK] or [« TRACK] to resume the normal CD
play from that position.
Repeating a Track
Press [R/R ►] to repeat the current selection. “REP” indicator will
light.
/?!
The current selection will continue to repeat until you press
[R/R ►] again.
K k disc
TRACK
Random Selection
J
Press and hold [R/R ►] for more than 2 seconds. “R ►” indicator
will light. A random selection of music is played from all available
tracks.
n^rlj
LI UL
To turn off the random play feature, press and hold [R/R ►] again
for more than 2 seconds.
U
TRACK
I DISC
Scanning Tracks
Press [SCAN]. The display will blink and the first 10 seconds of
each track on the disc play in order.
10
To stop scanning and continue with the current track, press
[SCAN] again.
Selecting by Track Number
(Direct access)
• Press a number from [1] to [6] then the corresponding track will
start.
• Press and hold a number from [7] to [12] ([1] to [6]) for more
than 1 second and the corresponding track will start.
CQ-DP33EW
Page 9

CD Changer Basics
Note:
To start the CD Changer
While a disc magazine inserted in the CD Changer, press [CD-C]
to play starts from first track.
n i 3
u rJ
I _ n I
I U I
DISC TRACK
Selecting a Disc
■
(Direct Disc Access)
• Press a number from [1] to [6] then the corresponding disc will
start.
® Press and hold a number from [7] to [12] ([1] to [6]) for more
than 1 second and the corresponding disc will start.
Selecting a Track
• Press TRACK] once to go to the next track. Press repeat
edly to step forward through all the tracks.
• Press [◄◄ TRACK] once to play from the beginning of the cur
rent track. Press twice to play the previous track.
Press repeatedly to step backward through all the tracks.
Searching a Track
• Press and hold TRACK] or [« TRACK] for more than
0.5 second to activate fast forward or reverse through a track.
• Release TRACK] or [ « TRACK] to resume the normal
CD changer play from that position.
Repeating a Track
Press [R/R^-] to repeat the current selection. “REP” indicator will
light.
n I
m
REP
The current selection will continue to repeat until you press
[R/R^] again.
U I
TRACK
CQ-DP33EW
11
Page 10

CD Changer Basics
Random Selection
Press and hold [R/R^] for more than 2 seconds. “RK’ indicator
will light. A random selection of music is played from all available
tracks.
(continued)
n'O u
U L 1
To turn it off, press and hold [R/R^] for more than 2 seconds
again.
Note:
• When [R/R^] is pressed In the Random mode, the current
track will continue to repeat until pressing [R/R^] again.
• When [R/R^] is pressed again, repeat play stops and returns
to random play.
• Press and hold [R/R^] for more than 2 seconds again, random
play stops.
0 _ n C
L U O
Scanning Tracks
Press [SCAN]. The display blinks and the first 10 seconds of each
track on the discs play in order.
To stop scanning and continue with the current track, press
[SCAN] again.
Scanning Discs
Press and hold [SCAN] for more than 2 seconds. The 1st track of
all the discs in the magazine is piayed for 10 seconds each. Also,
disc number is displayed at the same time.
To stop scanning and continue with the current track, press and
hold [SCAN] for more than 2 seconds again.
12
Note: You cannot change the current display while Scan plays
in CD or CD Changer.
CQ-0P33EW
Page 11

Error Display Messages
□ CD
Displays when the compact disc is dirty or upside down. The disc eject automatically.
El
Displays when compact disc is scratched. The disc eject automatically.
Displays when the compact disc stops operating for some reason. Please turn off the
car engine (ACC off) and remove the fuse from yellow lead for 1 minute. Then
reinstall the fuse.
□ CD-Changer
Displays when the compact disc is dirty or upside down. Selects the next available
El
compact disc.
Displays when compact disc is scratched. Selects next available compact disc.
Displays when the unit stops operating for some reason. Press [RESET] on the CD
Changer (optional).
n jj n jj
Displays when there is no disc in the magazine.
CQ-DP33EW
13
Page 12

Clock Basics (The clock system is 12-hours.)
Initial Time Setting
0 Press DISP [D]. “AdJ” is displayed.
Press and hold DISP [D] again for
more than 2 seconds, “12” blinks indi
cating the time setting mode is acti
vated.
Q J i
n U U
(3)To set hours, press [> TUNE] or
[< TUNE].
0 Press DISP [D] again for minute
setting.
0To set minutes, press [> TUNE] or
[< TUNE].
Hold [> TUNE] or [< TUNE] to
change numbers rapidly.
©When you have set the time, press
DISP [D].
■toa
O- I c
O- IJ
Resetting the Time
When you want to reset the time, press and hold DISP [D] for
more than 2 seconds to activate the time setting mode. Then, re
peat steps © to © above.
14
Selecting the Clock Display
Press DISP [D] for clock display.
Press DISP [D] once again, the current audio display mode re
sumes.
Note: Before you leave your car that has no ACC, be sure
to switch power off.
CQ-DP33EW
Page 13

Installation Guide
Preparation:
• Before installation check the radio operation with antenna and speakers.
• Disconnect the cable from the negative {-) battery terminal (see caution below).
Caution:
For installation to cars with trip or navigational computer, all electronic memory settings previously
registered in the computer will be lost when the battery terminal is disconnected. For this type of car,
battery could not be disconnected. Therefore, extra care should be taken to prevent short circuitting.
In dash installation Installation Opening
In-dash installation can be done if the car’s dash
board has an opening for this unit as shown in Fig. 1.
The car’s dashboard should have a thickness of
4.5mm-6mm in order to make the installation of the
unit.
Installation Precautions
This equipment, if possible, should be installed by a professional installer.
In case oif difficulty, please consult your nearest authorized Panasonic Service Center.
1. This system is to be used only in a 12-volt, DC battery system (car) with negative ground.
2. Follow the electrical connection (page 19) carefully. Failure to do so may result in damage to
the unit.
3. Connect the power lead after other connections are made.
4. Be sure to connect the YELLOW lead to positive terminal (+) of the battery to fuse block (BAT) ter
minal.
5. Insulate all exposed wires to prevent short circuitting.
6. Secure all loose wires after installing the unit.
7. Please carefully read the operating and installation instructions of the respective equipment before
connecting it to this unit
182mm-
Fig. 1
T
53mm
1
□ Installation Hardware
No.
Mounting Collar
®
Hex. Nut (5 mm0)
Rear Support Strap
Tapping Screw
0
Itenft
Diagram
Qty
1
1
m
Mounting Bolt (5 mm0) 1
0
Power Connector 1
©
Item
Diagram Qty
1 Trim Plate 1
1
.
CQ-DP33EW
15
Page 14

Installation Guide
□ Installation Procedures
(continued)
1. Secure the Mounting Collar
Insert Mounting Collar 0 into the car’s dashboard, and bend mounting tabs out with a screwdriver.
0
.
2. Secure the rear of the unit.
a) Check the electrical connection by referring to this operating instructions.
b) Connect the Mounting Bolt (5), using a suitable wrench.
c) insert the unit into Mounting Collar 0 and push it in until “click” is heard.
d) Secure the rear of the unit to the car by either of the two recommended methods.
■ Using the Rear Support Strap ®
Affix one end of the Rear Support Strap (3) to the rear of the unit, and the other end to the Fire Wail of
Car, or some other metallic area.
0 Tapping Screw
(D Mounting Bolt
0 Mounting Collar
16
CQ-DP33EW
Fire Wail of Car
3 mm0
0) Hex. Nut
0 Rear Support Strap
Page 15

■ Using the Rubber Cushion (Optionai)
(If there is an existing Rear Support Bracket on the Fire Wall of Car.)
Cover Mounting Bolt (g) on the rear of the unit with Rubber Cushion (Optional), and mount it into exist
ing Rear Support Bracket.
Rear Support Bracket
(existing on the car)
Rubber Cushion (Optional)
d) Mounting Bolt
\ 0 Mounting Collar
3. a) Piug the Power Connector
b) Install the Trim Plate
©Trim Plate
Power Connector
4. After installation reconnect the negative (-) battery terminal.
To Remove the Unit
a) Remove the removable face plate. (^ Page 18.)
b) Remove the trim plate © with a screwdriver as
shown in the figure.
c) Puli out the unit while pushing the lock lever using a screwdriver.
d) Remove the unit pulling with both hands.
Lock Lever
17
Page 16

Installation Guide
(continued)
Anti-Theft System
To install the Removable Face Plate
0 Slide the left side of the removable face plate in place. Fig. 3)
@ Press the right end of the removable face plate until “click" is heard. (-* Fig. 4)
Plastic Tab
Removable Face Plate
Cutout
Caution:
1. Before rerhòving the removable facè plate, make sure the power is off.
2. This removable face plate is not
moisture.
3. Do not remove the removable face plate, while driving your car.
4. Do not place the removable face plate on the dashboard or nearby areas where the tempera
ture rises to high levels.
5. Do not touch the contacts on the removable face plate or on the main unit, since this may re
sult in poor electrical contacts.
6. If dirt or other foreign substances get on the contacts, wipe them with a clean, dry cloth.
Fig, 3
vvater^proof. Do not expose it to water ór excessive
1
18
CQ-DP33EW
Page 17

Electrical Connection
Caution:.' .
♦To prevent damage to the unit, be sure to follow the connection diagrann below.
• Remove the covering of the leads about 5 mm long from their end before connecting.
• Do not insert the power connector into the Unit until the wiring is connpleted.
♦Be sure to insulate any exposed wires from a possible short-circuit from tiie car chassis.
Bundle all cables and keep cable terminals free from touching any metal parts.
• This unit can be connected to an optional CD changer (CX-DP801EN). For details consult your
nearest Panasonic dealers.
• For connection to a CD changer, refer to the operating instructions of the CD Changer
(CX-DP801EN).
CX-DP801EN
^Ground lead
(To a clean, bare metallic
Extension Cord
(DIN/BATT/RCA/GND) I Black
(Yellow)
Fuse(3.15A) ^
Battery Lead
VL
Be sure to connect to a well grounded
metallic part of your car because
noises or troubles may occur.
part of your vehicle)
White w/Biack
Stripe
Gray w/Biack Stripe
LEFT SPEAKER RIGHT SPEAKER
(FRONT) (FRONT)
CD changer
Control Connector
DIN Extension Cord
PREAMP OUT
CONNECTOR
©Power Connector
Yellow
LEFT SPEAKER RIGHT SPEAKER
(REAR) (REAR)
BATTERY LEAD (To Battery of Car)
Connect to the "BAT terminal on the fuse
block of the car.
The power shoule be supplied continueously
to the yellow leads regardless of the on/oft po
sition of the ignition key.
POWER LEAD
Connect to the ‘radio” power line of the car or
to the "IGN" or “ACC” terminal of the fuss block.
GROUND LEAD
Connect to a welt grounded metallic part of
MOTOR ANTENNA RELAY CONTROL LEAD
(To Motor Antenna)(Max. 100mA) This lead is
not intended for use with switch actuated
power antenna.
AMP.RELAY CONTROL POWER LEAD
This lead is for connection to Panasonic power
amplifier.
CQ-DP33EW
19
Page 18

Speaker Connections
•Unit will be damaged if speakers (Front, Rear) are not connected properly.
RIGHT
Gray
w/Biack Stripe
•Do not connect more than one speaker to one set of speaker leads.
White rv
L±
RIGHT ““Iwhite. . WRONG
White ^
w^lack Stripe
Gray ^
R±
^rav ^
: Stripe
WRONG
Li
Ri
__ _
—n
___
—^
WRONG
C,
r
c
k
_ _
RI
1
1
20
CQ-DP33EW
Page 19

Special Notes
□ Notes on Compact Discs
ONLY USE DISCS CARRYING LABEL SHOWN ON THE RIGHT
• Dirt, dust, scratches and bending of disc will
cause misoperation.
• Do not place stickers or make scratches on
discs.
• Do not bend discs.
• Disc should always be kept in the case when
not in use to prevent from damaging.
• Do not place discs in the following places:
1. Direct sunlight.
2. Dirty, dusty and damp areas.
3. Near car heaters.
4. Seats or dashboard.
Disc Cleaning
Use a dry soft cloth to wipe the surface. If the disc
is quite dirty, use a soft cloth slightly dampened in
isopropyl (rubbing) alcohol. Never use solvents
such as benzine, thinner, conventional record
cleaner, or mopper as they may mar the surface
of the disc.
Label side
Do not bend.
Wipe the disc from center to
outside direction.
n COMPACT
DIGITAL AUDIO
Do not touch
the underside
of the disc.
□ Caution for use of a New Discs
A new disc may have rough edges on its inner
and outer perimeter. If a disc with rough edges is
used, proper setting will not be possible and the
CD player will not play the disc. Therefore, re
move the rough edges in advance by using a
ball-point pen or pencil as shown on right. To re
move the rough edges, press the side of the pen
or pencil against the inner and outer perimeter of
the disc.
Rough spots
on outer edge
A bail-point
pen or pencil
Rough spots
on inner edge
FUSE
Be sure to use a fuse of the specified rating (15A) when replacing a blown fuse. Fuses with higher ca
pacity ratings, use of any substitute, or connection without a fuse may result in a fire hazard or dam
age to the unit. If the replacement fuse fails, consult your nearest authorized Panasonic Service
Center.
Maintenance
To clean the exterior of this unit, use a soft cloth to wipe the surface. Do not use benzine, thinner, or
any other type of solvents.
CQ-DP33EW
21
Page 20

Specifications
General
Power Supply
Maximum Power Output
Power Output
Tone Action
Pre-Amp Output Voltage
Output Impedance
Current Consumption
Dimensions (WxHxD)
Weight
AM Radio
Frequency Range
Useable Sensitivity
FM stereo Radio
Frequency Range
Useable Sensitivity
Stereo Separation
CD Piayer ^
12 V DC {11 V-16 V),Test Voltage 14.4 V, Negative
ground
40 Wx4 channels at 400 Hz, Volume Control
maximum
14Wx4(DIN45 324, at 4Q)
Bass; ±12 dB at 100 Hz, Treble; ±12 dB at 10 kHz
2.0 V (CD Play Mode; 1 kHz 0 dB)
6000
Less than 1.7 A (CD Play Mode)
178(W)x50(H)x150(D)mm
1.4 kg
531-1,602 kHz
28 dB/|iV (25 |iV, S/N 20 dB)
87.5-108 MHz
6 dB/pV (S/N 30 dB)
42 dB at 1,000 Hz
Sampling Frequency
DA Converter
Error Correction System
Pick-Up Type
Light Source
Wavelength
Frequency Response
Signal/Noise Ratio
Total Harmonic Distortion
Wow and Flutter
Channel Separation
Note:
Specifications and design are subject to modification without notice due to improvements in technol
ogy.
32 times oversampling
MASH* 1 bit/4 DAC System
Panasonic Super Decoding Algorithm
Astigma 3-beam
Semiconductor laser
780 nm
20 Hz - 20,000 Hz, ±1 dB
96 dB
0.01% (1,000 Hz)
Below measurable limits
75 dB
22
CQ-DP33EW
 Loading...