

Panasonic CQ-DP101W, CQ-DP151 User Manual
≥Please read these instructions carefully before using this product and save this manual for future use.
<
VOL
SEL
BAND
TUNE
MUTE M/L
12
34
5
6
712
SOURCE
REP
CQ-DP151W
CD RECEIVER
45WX4
LOUD
RANDOM
PWR
811
910
TRACK
DISP
M
O
N
O
/L
O
C
REMOTE
S
C
A
N
/
A
P
M
(CQ-DP151W)
CD Player/Receiver
CQ-DP151/DP101W
Operating Instructions

C
H
I
N
E
S
E
CQ-DP151/DP101W
15
E
N
G
L
I
S
H
CQ-DP151/DP101W
14
Panasonic welcomes you to our ever growing family of electronic product owners. We know that this product will bring you many hours of enjoyment. Our reputation is built on precise electronic and mechanical
engineering, manufactured with carefully selected components and assembled by people who take pride in
their work. Once you discover the quality, reliability, and value we have built into this product, you too will
be proud to be a member of our family.
When Driving
Keep the volume level low enough to be aware of
road and traffic conditions.
When Car Washing
Do not expose the product, including the speakers
and CDs, to water or excessive moisture. This
could cause electrical shorts, fire, or other damage.
When Parked
Parking in direct sunlight can produce very high
temperatures inside your car. Give the interior a
chance to cool down before switching the unit on.
Use the Proper Power Supply
This product is designed to operate with a 12 V DC,
negative ground battery system.
Disc Mechanism
Do not insert coins or any small objects. Keep
screwdrivers and other metallic objects away from
the disc mechanism and disc.
Use Authorized Servicenters
Do not attempt to disassemble or adjust this precision product. Please refer to the Servicenter list including with this product for service assistance.
For Installation
This product should be installed in a horizontal position with the front end up at a convenient angle,
but not more than 30x.
❐ Use this Product Safely
≥Operating instructions .................................... 1
≥Installation hardware................1 set (➡ page 26)
≥Power connector ............................................ 1
≥Warranty card.................................................. 1
≥Remote control unit ........................................ 1
≥Lithium battery (CR2025)................................ 1
❐ Components
Models
Features
CQ-DP151W CQ-DP101W
Pre-Amp output connector Rear, Front Rear
Remote control unit Included Not included
Note:
≥ This operating instruction manual is for 2 models CQ-DP151W and CQ-DP101W. All illustrations
throughout this manual represent model CQ-DP151W unless otherwise specified. The following table describes the differences between 2 models.
Only for CQ-DP151W
E
N
G
L
I
S
H
2
CQ-DP151/DP101W
19
Power and Sound Controls
E
N
G
L
I
S
H
1
CQ-DP151/DP101W
18
Remote Control Unit Preparation
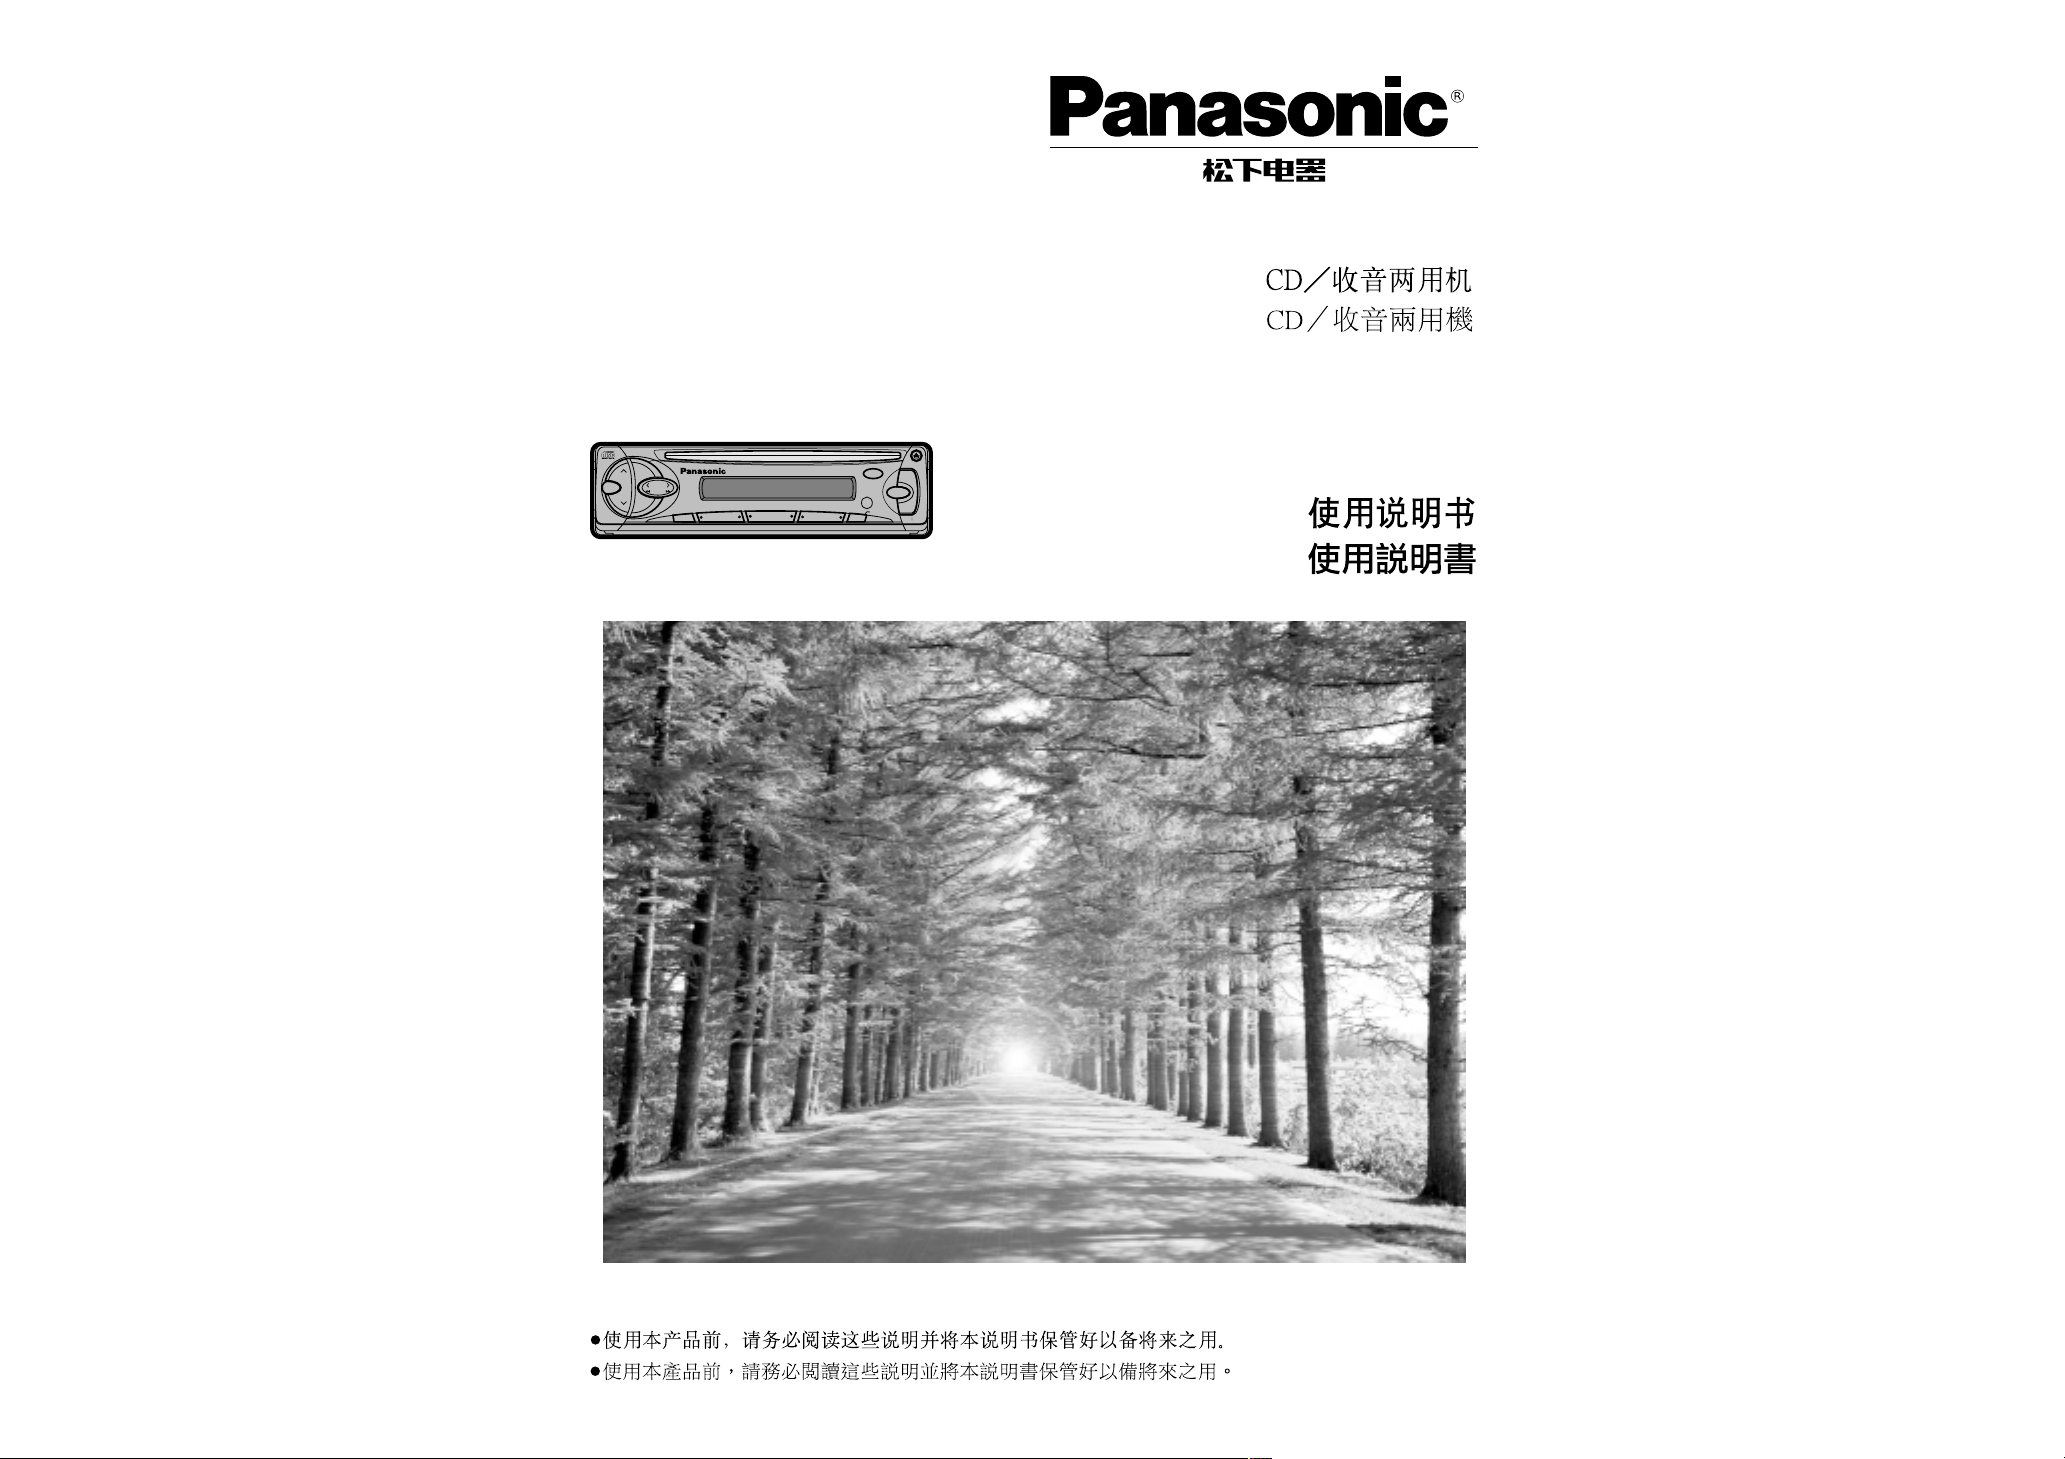
Battery Installation
1 Remove the battery holder.
Pull the holder by the position B while pushing position A in the direction indicated by the arrow.
2 Install the battery on the battery holder.
Set a new battery properly with its (i) side facing up
as shown in the figure.
3 Insert the battery holder.
Push in the battery holder back into its original position.
Battery Notes
Remove and dispose of an old battery immediately.
Battery Information:
≥Battery type: Panasonic lithium battery (CR2025) (included)
≥Battery life: Approximately 6 months with normal use (at room temperature)
Back side
Lithium battery
(included)
Battery holder Position A
Position B
≥Do not disassemble or short the battery. Do not throw a battery into a fire.
≥Keep batteries away from children to avoid the risk of accidents.
≥Be careful to the local disposal rules when you dispose of batteries.
Control Reference Guide
Buttons of the remote control function in the same way as the controls on the main unit of the reference page.
Point the remote control unit at the main unit’s sensor (REMOTE).
Mute button (MUTE)
(➡ page 19)
Volume control buttons
(VOL, " #
)
(➡ page 19)
Tune/Track buttons
(TUNE/TRACK, 6 5/% $)
(➡ pages 22, 25)
Mode button (MODE)
(➡ pages 22, 24)
Caution:
≥Improper use of batteries may cause overheating, an explosion or ignition, resulting in injury or a fire.
Battery leakage may damage the unit.
Band button (BAND)
(➡ page 22)
PWR
MODE
PRG
TUNE
TRACK
Car Audio
BAND/DISC UP
VOL
MUTE
(ATT)
Power button (PWR)
(➡ page 19)
Power
Turn the key in the ignition until the accessory indicator lights.
Power on: Press [SOURCE] (PWR).
Power off: Press [SOURCE] (PWR) again and hold.
Mute
Press [MUTE] to mute the sound completely.
Press [MUTE] again to cancel.
Volume
[" VOL]: Up
[# VOL]: Down
Press and hold for rapid adjustment.
Volume level (0 to 40)
Anti-volume-blast circuit:
When the power is switched off and on again, the volume slowly rises to the previous level.
The anti-volume-blast circuit will not work when the volume level is set lower than position 20 on the display.
MUTE
<
VOL
SEL
BAND
TUNE
MUTE M/L
12
34
5
6
712
SOURCE
REP
CQ-DP151W
CD RECEIVER
45WX4
LOUD
RANDOM
PWR
811
910
TRACK
DISP
MONO/LOC
REMOTE
SCAN/APM
Remote control signal sensor
Loudness
Press [LOUD] to enhance bass and treble
tones at low or medium volume.
Press [LOUD] again to cancel.
LOUD
AC
C
ON
Note:
≥Disc up button (DISC UP) cannot be used in this model.
Only for CQ-DP151W
E
N
G
L
I
S
H
4
CQ-DP151/DP101W
21
Clock Basics
E
N
G
L
I
S
H
3
CQ-DP151/DP101W
20
Power and Sound Controls (Continued)
<
VOL
SEL
BAND
TUNE
MUTE M/L
12
34
5
6
712
SOURCE
REP
CQ-DP151W
CD RECEIVER
45WX4
LOUD
RANDOM
PWR
811
910
TRACK
DISP
MONO/LOC
REMOTE
SCAN/APM
Audio Mode (Bass/Treble/Balance/Fader)
Regular Mode
Volume Bass Treble
BalanceFader
Bass:
Adjustable range: j12 to i12
Treble:
Adjustable range: j12 to i12
Balance:
R (right speaker) or L (left speaker)
Fader:
F (front speaker) or R (rear speaker)
Adjustable range: 1 to 15
Adjustable range: 1 to 15
<
VOL
SEL
BAND
TUNE
MUTE M/L
12
34
5
6
712
SOURCE
REP
CQ-DP151W
CD RECEIVER
45WX4
LOUD
RANDOM
PWR
811
910
TRACK
DISP
MONO/LOC
REMOTE
SCAN/APM
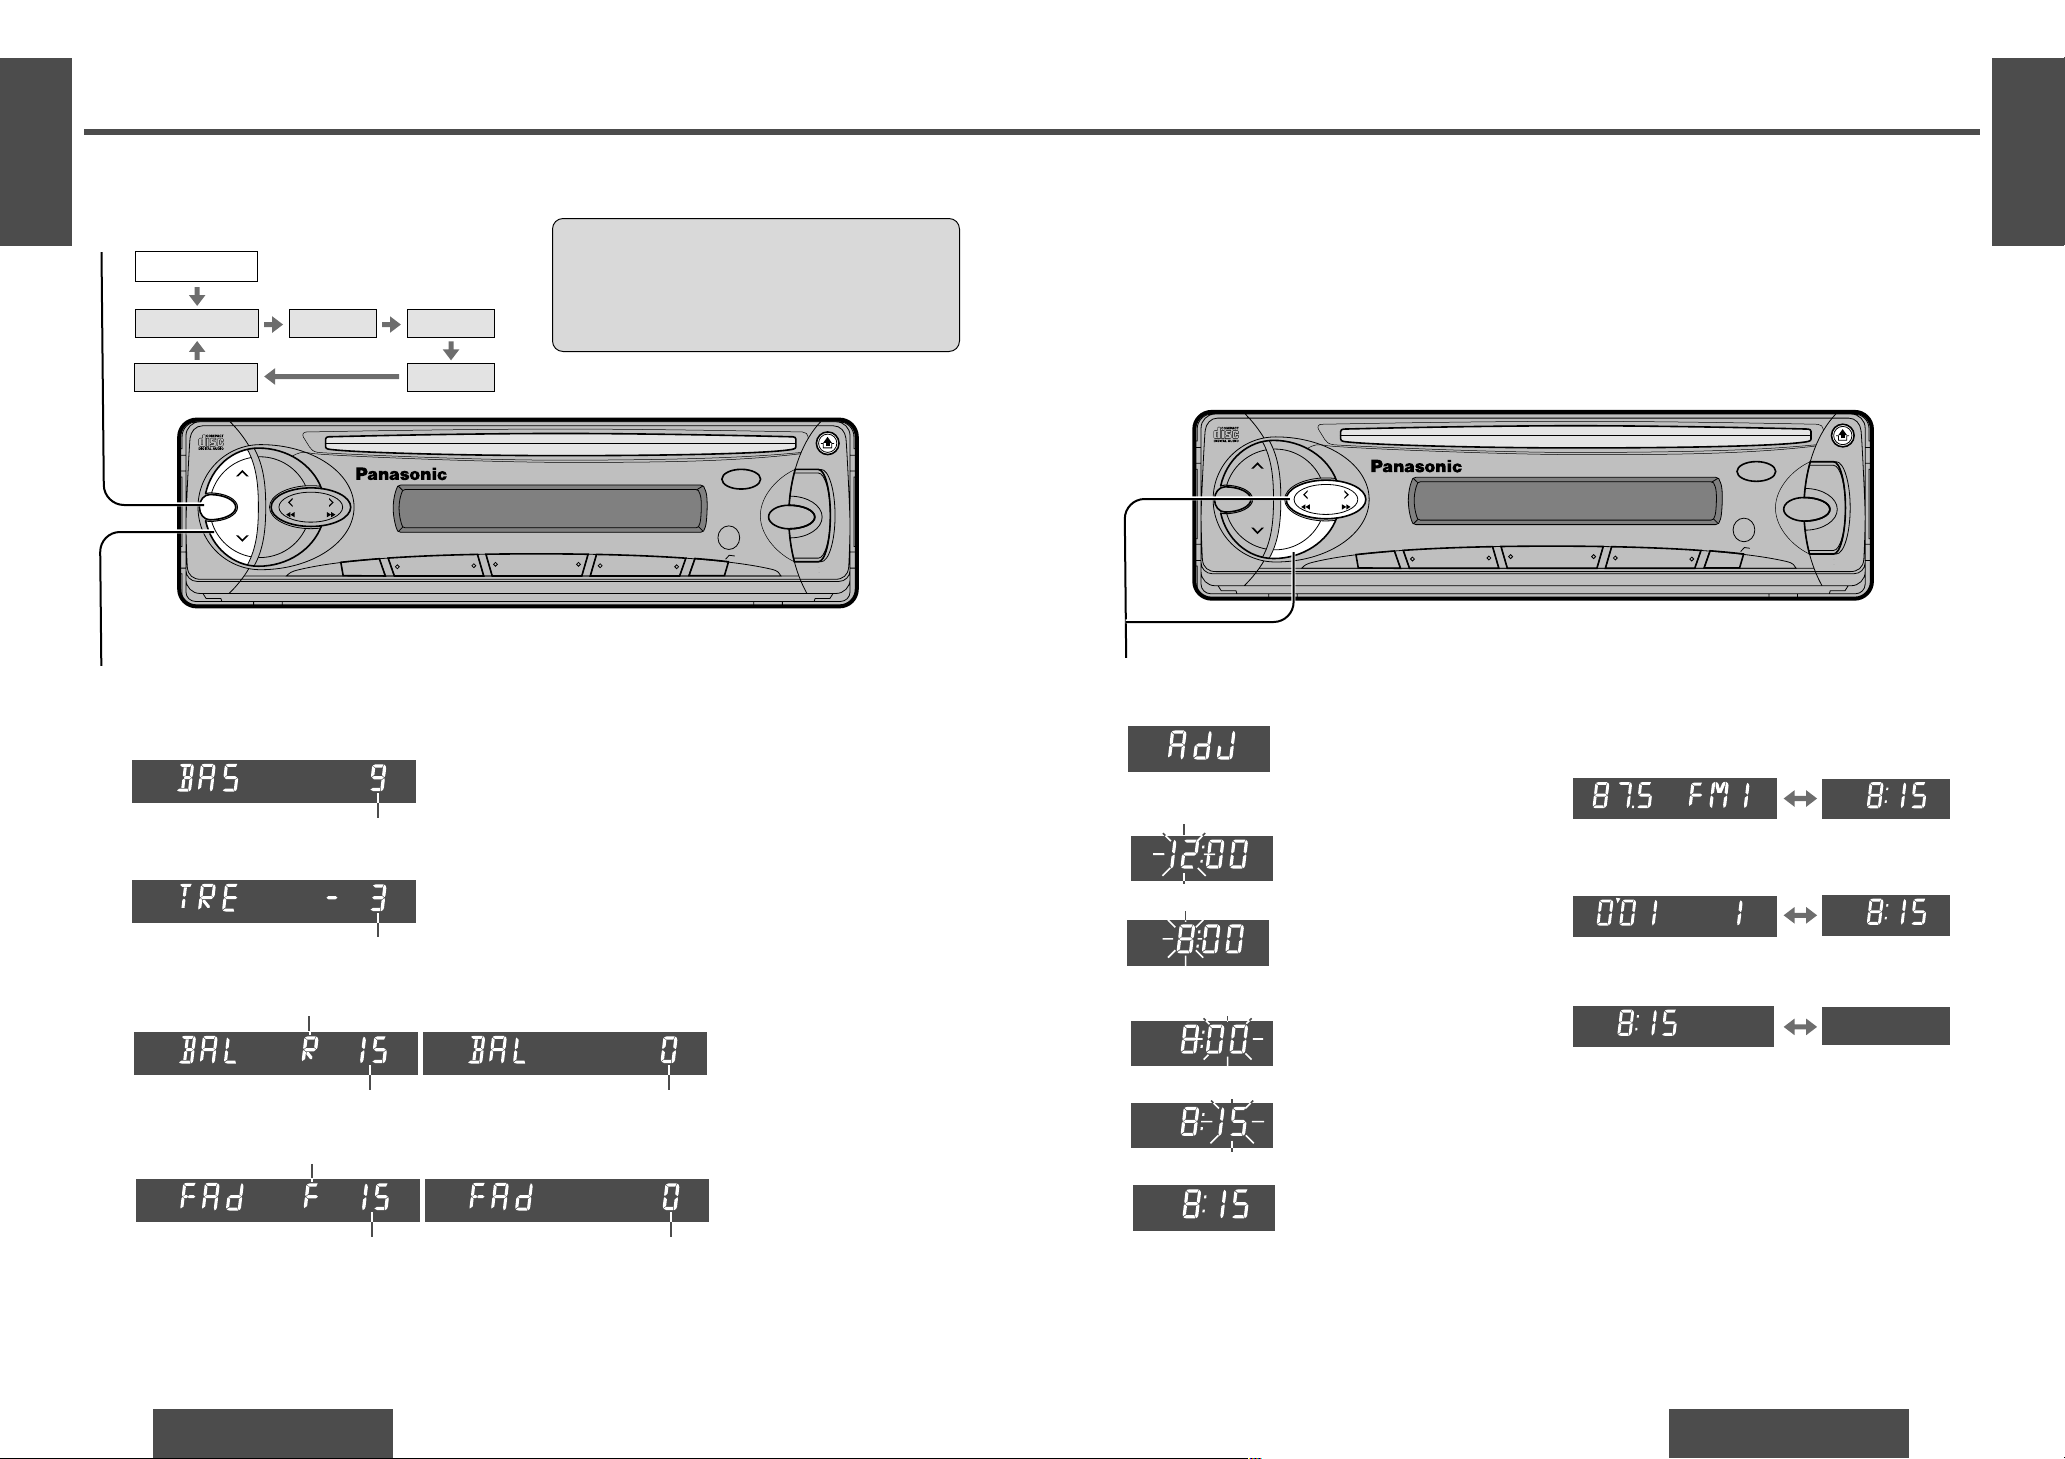
Initial Time
1 Press [DISP] (DISPLAY).
Hours
2 Press and hold [DISP] (DISPLAY).
3 Press [% TUNE]or [$ TUNE].
Minutes
4 Press [DISP] (DISPLAY).
5 Press [% TUNE]or [$ TUNE].
6 Press [DISP] (DISPLAY).
Note:
≥Press and hold [% TUNE] or [$ TUNE] to change
numbers rapidly.
Time Reset
Press and hold [DISP] (DISPLAY) for more than
2 seconds to activate the time setting mode to reset
the time.
Then, repeat steps 3 to 6.
Clock Display
Press [DISP] (DISPLAY) to switch to the clock display.
(Hours blink.)
(Hours set.)
(Minutes blink.)
(Minutes set.)
(End.)
Note:
≥The [DISP] (DISPLAY) button will not work while
the CD player is set to the scan play mode.
Cancel the scan play mode before pressing
[DISP] (DISPLAY).
The 24-hour system is used for the clock.
Balance center
Fader center
Press [SEL] to select the audio mode.
1
Broadcast station Clock display
Playing time Clock display
In CD player mode:
In tuner mode:
When the power is off:
No displayClock display
DISC
TRACK
Note:
≥If no operation takes place for more than
5 seconds in audio mode (2 seconds in volume mode), the display returns to the regular
mode.
Press [" VOL] or [# VOL] to change each
level.
2
 Loading...