

Page 1
AAC WMA MP3 CD Player/Receiver
Operating Instructions
Manuel d’instructions
Manual de Instrucciones
Operating Instructions
Manuel d’instructions
Manual de Instrucciones
TEXT
Récepteur/lecteur CD avec lecture AAC/WMA/MP3
Reproductor de CD, AAC, WMA y MP3/receptor
Model: CQ-C7205U/C7105U
(CQ-C7205U)
¡Please read these instructions (including “Limited Warranty” and “Customer Services Directory”) carefully before using this product
and keep this manual for future reference.
¡Prière de lire attentivement ces instructions (y compris la “Garantie limitée” et le “Répertoire des services à la clientèle”) avant d’utiliser ce
produit et conserver ce
¡Lea con atención estas instrucciones antes de utilizar el producto y guarde este manual para poderlo consultar en el futuro.
manuel d’utilisation
pour s’y référer ultérieurement.
Page 2
Safety Information
■
Read the operating instructions for the unit and all other components of your car audio system carefully before using the
system. They contain instructions about how to use the system in a safe and effective manner. Panasonic assumes no
responsibility for any problems resulting from failure to
observe the instructions given in this manual.
This pictograph intends to alert you to the presence of important operating instructions and
Warning
installation instructions. Failure to heed the
instructions may result in severe injury or death.
Warning
Observe the following warnings when using
this unit.
❑
The driver should neither watch the display nor
operate the system while driving.
Watching the display or operating the system will distract
the driver from looking ahead of the vehicle and can cause
accidents. Always stop the vehicle in a safe location and use
the parking brake before watching the display or operating
the system.
❑
Use the proper power supply.
This product is designed for operation with a negative
grounded 12 V DC battery system. Never operate this product with other battery systems, especially a 24 V DC battery
system.
❑
Keep batteries and insulation film out of reach of
infants.
Batteries and insulation film can be ingested, so keep them
out of the reach of infants. If an infant ingests a battery or
insulation film, please seek immediate medical attention.
❑
Protect the Deck Mechanism.
Do not insert any foreign objects into the slot of this unit.
❑
Do not disassemble or modify the unit.
Do not disassemble, modify the unit or attempt to repair the
product yourself. If the product needs to be repaired, consult
your dealer or an authorized Panasonic Servicenter.
❑
Do not use the unit when it is out of order.
If the unit is out of order (no power, no sound) or in an
abnormal state (has foreign objects in it, is exposed to
water, is smoking, or smells), turn it off immediately and
consult your dealer.
❑
The remote control unit should not lie about in the
car.
If the remote control unit lies about, it could fall on the floor
while driving, get wedged under the brake pedal, and lead to
a traffic accident.
❑
Refer fuse replacement to qualified service personnel.
When the fuse blows out, eliminate the cause and have it
replaced with the fuse prescribed for this unit by a qualified
service engineer. Incorrect replacement of the fuse may lead
to smoke, fire, and damage to the product.
■
This manual uses pictographs to show you how to use the
product safely and to alert you to potential dangers resulting
from improper connections and operations. The meanings of
the pictographs are explained below. It is important that you
fully understand the meanings of the pictographs in order to
use this manual and the system properly.
This pictograph intends to alert you to the presence of important operating instructions and
Caution
installation instructions. Failure to heed the
instructions may result in injury or material damage.
Observe the following warnings when
installing.
❑
Disconnect the lead from the negative (–) battery
terminal before installation.
Wiring and installation with the negative (–) battery terminal
connected may cause electrical shock and injury due to a
short circuit.
Some cars equipped with the electrical safety system have
specific procedures of battery terminal disconnection.
FAILURE TO FOLLOW THE PROCEDURE MAY LEAD TO THE
UNINTENDED ACTIVATION OF THE ELECTRICAL SAFETY
SYSTEM RESULTING IN DAMAGE TO THE VEHICLE AND
PERSONAL INJURY OR DEATH.
❑
Never use safety-related components for installation, grounding, and other such functions.
Do not use safety-related vehicle components (fuel tank,
brake, suspension, steering wheel, pedals, airbag, etc.) for
wiring or fixing the product or its accessories.
❑
Installing the product on the air bag cover or in a
location where it interferes with airbag operation is
prohibited.
❑
Check for piping, gasoline tank, electric wiring, and
other items before installing the product.
If you need to open a hole in the vehicle chassis to attach or
wire the product, first check where the wire harness, gasoline tank, and electric wiring are located. Then open the hole
from outside if possible.
❑
Never install the product in a location where it interferes with your field of vision.
❑
Never have the power cord branched to supply other
equipment with power.
❑
After installation and wiring, you should check the
normal operation of other electrical equipment.
The continuation of their using in abnormal conditions may
cause fire, electrical shock or a traffic accident.
❑
In the case of installation to an airbag equipped car,
confirm warnings and cautions of the vehicle manufacturer before installation.
❑
Make sure the leads do not interfere with driving or
getting in and out of the vehicle.
❑
Insulate all exposed wires to prevent short circuiting.
2
CQ-C7205U/C7105U
Page 3
Caution
Observe the following cautions when using this
unit.
❑
Keep the sound volume at an appropriate level.
Keep the volume level low enough to be aware of road and
traffic conditions while driving.
❑
Do not insert or allow your hand or fingers to be
caught in the unit.
To prevent injury, do not get your hand or fingers caught in
moving parts or in the disc slot. Especially watch out for
infants.
❑
This unit is designed for use exclusively in automobiles.
❑
Do not operate the unit for a prolonged period with
the engine turned off.
Operating the audio system for a long period of time with the
engine turned off will drain the battery.
❑
Do not expose the unit to direct sunlight or excessive heat.
Otherwise these will raise the interior temperature of the
unit, and it may lead to smoke, fire, or other damage to the
unit.
❑
Do not use the product where it is exposed to water,
moisture, or dust.
Exposure of the unit to water, moisture, or dust may lead to
smoke, fire, or other damage to the unit. Make especially
sure that the unit does not get wet in car washes or on rainy
days.
Observe the following cautions when
installing.
❑
Refer wiring and installation to qualified service
personnel.
Installation of this unit requires special skills and experience.
For maximum safety, have it installed by your dealer.
Panasonic is not liable for any problems resulting from your
own installation of the unit.
❑
Follow the instructions to install and wire the product.
Not following the instructions to properly install and wire the
product could cause an accident or fire.
❑
Take care not to damage the leads.
When wiring, take care not to damage the leads. Prevent
them from getting caught in the vehicle chassis, screws, and
moving parts such as seat rails. Do not scratch, pull, bend or
twist the leads. Do not run them near heat sources or place
heavy objects on them. If leads must be run over sharp
metal edges, protect the leads by winding them with vinyl
tape or similar protection.
❑
Use the designated parts and tools for installation.
Use the supplied or designated parts and appropriate tools
to install the product. The use of parts other than those supplied or designated may result in internal damage to the unit.
Faulty installation may lead to an accident, a malfunction or
fire.
❑
Do not block the air vent or the cooling plate of the
unit.
Blocking these parts will cause the interior of the unit to
overheat and will result in fire or other damage.
❑
Do not install the product where it is exposed to
strong vibrations or is unstable.
Avoid slanted or strongly curved surfaces for installation. If
the installation is not stable, the unit may fall down while
driving and this can lead to an accident or injury.
❑
Installation Angle
The product should be installed in a horizontal position with
the front end up at a convenient angle, but not more than
30˚.
The user should bear in mind that in some areas there may
be restrictions on how and where this unit must be installed.
Consult your dealer for further details.
❑
Wear gloves for safety. Make sure that wiring is
completed before installation.
❑
To prevent damage to the unit, do not connect the
power connector until the whole wiring is completed.
❑
Do not connect more than one speaker to one set of
speaker leads. (except for connecting to a tweeter)
Observe the following cautions when handling
the battery for the remote control unit.
●
Use only specified battery (CR2025).
●
Match the polarity of the battery with the (+) and (–) marks
in the battery case.
●
Replace dead battery as soon as possible.
●
Remove the battery from the remote control unit when not
using it for an extended period of time.
●
Insulate the battery (by placing them in a plastic bag or covering them with vinyl tape) before disposal or storage.
●
Dispose of the battery according to the local regulations.
●
Do not disassemble, recharge, heat or short the battery. Do
not throw a battery into a fire or water.
In case of battery leakage
●
Thoroughly wipe the battery liquid off the battery case and
insert new battery.
●
If any part of your body or clothing comes into contact with
battery liquid, wash it with plenty of water.
●
If battery liquid comes into contact with your eyes, wash
them with plenty of water and get immediate medical attention.
English
Safety Information
CQ-C7205U/C7105U
3
Page 4
Safety Information (continued)
Caution
THIS PRODUCT IS A CLASS ILASER PRODUCT.
USE OF CONTROLS OR ADJUSTMENTS OR PERFORMANCE
OF PROCEDURES OTHER THAN THOSE SPECIFIED HEREIN
MAY RESULT IN HAZARDOUS RADIATION EXPOSURE.
DO NOT OPEN COVERS AND DO NOT REPAIR BY YOURSELF.
REFER SERVICING TO QUALIFIED PERSONNEL.
The following applies only in the U.S.A.
Part 15 of the FCC Rules
FCC Warning:
Any unauthorized changes or modifications to this
equipment would void the user's authority to operate
this device.
Notice
This product contains a CR Coin Cell Lithium Battery
which contains Perchlorate Material – special handling
may apply.
See www.dtsc.ca.gov/hazardouswaste/perchlorate.
Before Reading These Instructions
Panasonic welcomes you to our constantly growing family of electronic products owners.
We endeavor to give you the advantages of precise electronic and mechanical engineering, manufactured with carefully
selected components, and assembled by people who are proud of the reputation their work has built for our company. We
know this product will bring you many hours of enjoyment, and after you discover the quality, value and reliability we have
built into it, you too will be proud to be a member of our family.
This operating instruction manual is for 2 models CQ-C7205U and CQ-C7105U.
The difference between these models’ are mentioned below.
All screens and main body illustrations in this book represent CQ-C7205U unless otherwise specified.
Features
The instruction manual consists of 2 books. One is “Operating Instructions” describing the operations of the main
unit. The other is “System Upgrade Guidebook” describing the optional devices such as CD changer.
Models
CQ-C7105UCQ-C7205U
2.5 V (200 Ω)5 V (60 Ω)Subwoofer-output
2.5 V (200 Ω)5 V (60 Ω)Preout
Differences between 2 Models
4
CQ-C7205U/C7105U
Page 5
Before Reading These Instructions (continued)
XXXXXXXXXXXXXXX
XXXXXXXXXXXXXXXXX
XXXXXXXXXXXXXX
XXXXXXXXXXXXXXXX
OO-OOOOO
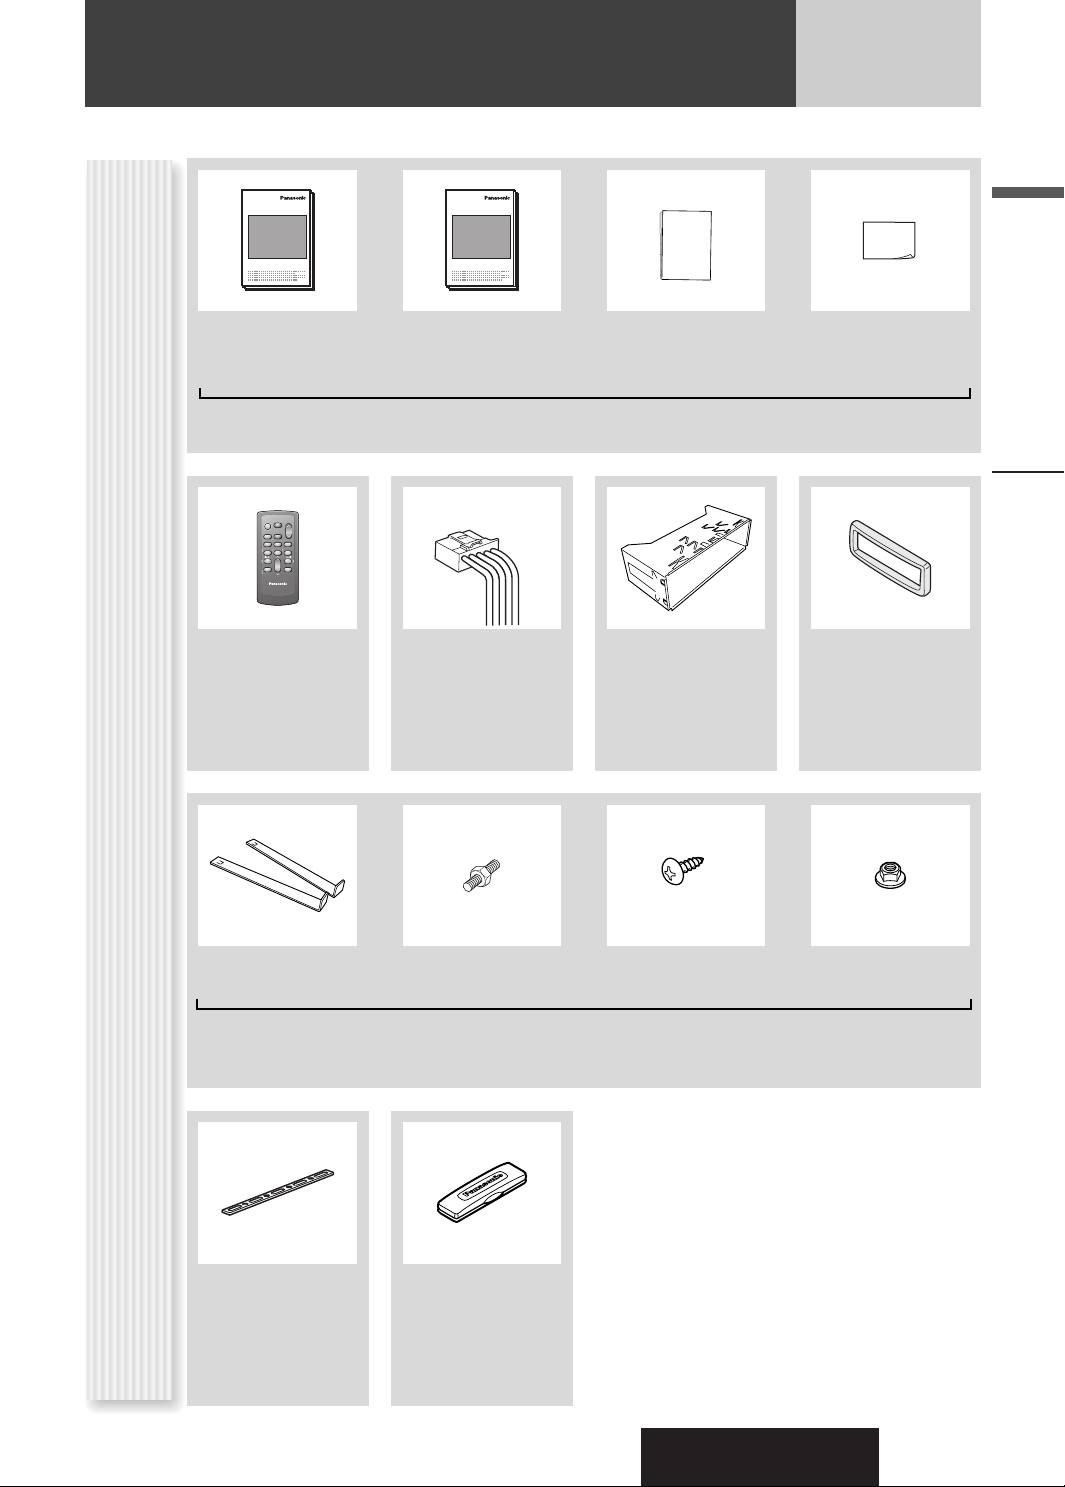
Operating
Instructions
(YFM284C662CA)
POWER
SOURCE
MENU
SEL
SEL
SRC
SRC
VOL
VOL
SET
BAND MUTE
BAND MUTE
2 31
231
RANDOM
SCAN REPEAT
5
64
5
64
97
97
8
8
TUNE TUNE
0
0
DISP
DISP
#
#
NUMBER
CAR AUDIO
Remote Control Unit
(including a battery)
(CR2025)
(EUR7641010)
Q'ty: 1
XXXXXXXXXXXXXXX
XXXXXXXXXXXXXXXXX
XXXXXXXXXXXXXX
XXXXXXXXXXXXXXXX
OO-OOOOO
System Upgrade
Guidebook
(YFM284C663CA)
(YGAJ021009)
Q'ty: 1
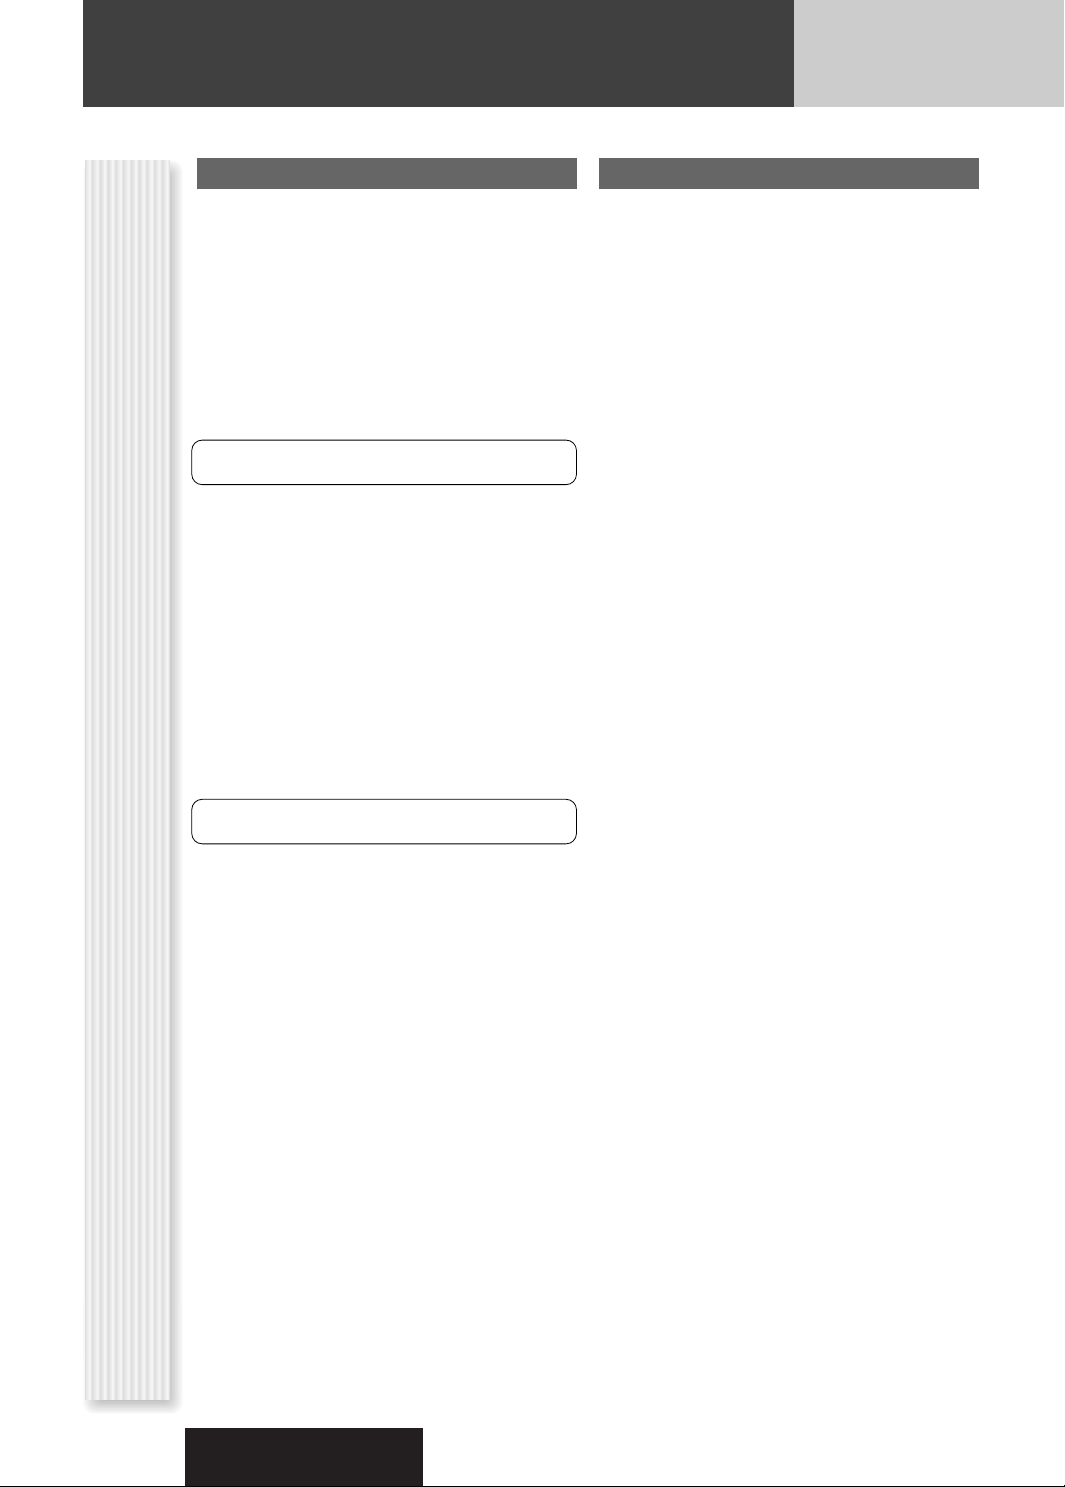
Installation
Instructions
(YFM294C091CA)
Instruction kit
Q'ty: 1 set
Mounting Collar
(FX0214C384ZB)
Q'ty: 1
English
Owners
Information Card
Trim PlatePower Connector
(YEFC051013)
Q'ty: 1
Accessories
Lock Cancel Plate Mounting Bolt Tapping Screw
Rear Support Strap
(YFG044C002ZA)
Q'ty: 1
Removable Face
Plate Case
(YFC054C089CA)
Q'ty: 1
Hex. Nut
(5 mmø x 16 mm)
(5 mmø)
(YEP0FZ5739)
Q'ty: 1 set
Notes:
¡ The number in parenthesis underneath each accessory
part name is the part number for maintenance and
service.
¡ Accessories and their parts numbers are subject to
modification without prior notice due to improvements.
¡ Mounting Collar and Trim Plate are mounted on the
main unit at shipment.
Safety Information, Before Reading These Instructions
CQ-C7205U/C7105U
5
Page 6
Before Reading These Instructions (continued)
U.S.A.
Obtain Product Information and Operating Assistance;
locate your nearest Dealer or Servicenter; purchase
Parts and Accessories; or make Customer Service and
Literature requests by visiting our Web Site at:
http://www.panasonic.com/support
or, contact us via the web at:
http://www.panasonic.com/contactinfo
You may also contact us directly at:
1-800-211-PANA (7262),
Monday-Friday 9 am-9 pm; Saturday-Sunday 10 am-7
pm, EST.
For hearing or speech impaired TTY users,
TTY : 1-877-833-8855
Accessory Purchases:
Purchase Parts, Accessories and Instruction Books
online for all Panasonic Products by visiting our Web
Site at:
http://www.pasc.panasonic.com
or, send your request by E-mail to:
npcparts@panasonic.com
You may also contact us directly at:
1-800-332-5368 (Phone) 1-800-237-9080 (Fax Only)
(Monday-Friday 9 am to 8 pm, EST.)
Panasonic Services Company
20421 84th Avenue South, Kent, WA 98032
(We accept Visa, MasterCard, Discover Card, American
Express, and Personal Checks)
For hearing or speech impaired TTY users,
TTY : 1-866-605-1277
CANADA
WARRANTY SERVICE
FOR PRODUCT OPERATION ASSISTANCE, please contact:
Our Customer Care Centre:
Telephone #: (905) 624-5505
1-800 #: 1-800-561-5505
Fax #: (905) 238-2360
Email link: “Contact Us” on
www.panasonic.ca
FOR PRODUCT REPAIRS, please locate your nearest
Authorized Servicentre at www.panasonic.ca:
TM
Link : “Servicentres
port”
IF YOU SHIP THE PRODUCT TO A SERVICENTRE
Carefully pack and send prepaid, adequately insured and
preferably in the original carton.
Include details of the defect claimed, and proof of date
of original purchase.
locator” under “Customer sup-
Service in Puerto Rico
Matsushita Electric of Puerto Rico, Inc.
Panasonic Sales Company
Customer Services Directory
Factory Servicenter:
Ave. 65 de Infantería, Km. 9.5, San Gabriel Industrial
Park,
Carolina, Puerto Rico 00985
Phone (787) 750-4300, Fax (787) 768-2910
6
CQ-C7205U/C7105U
Page 7
Limited Warranty
U.S.A.
PANASONIC CONSUMER ELECTRONICS COMPANY,
DIVISION OF MATSUSHITA ELECTRIC CORPORATION OF AMERICA
One Panasonic Way, Secaucus, New Jersey 07094
PANASONIC SALES COMPANY,
DIVISION OF MATSUSHITA ELECTRIC OF PUERTO RICO, INC.
Ave. 65 de infanteria, Km. 9.5, San Gabriel Industrial Park
Carolina, Puerto Rico 00985
PANASONIC AUTO PRODUCTS
LIMITED WARRANTY
LIMITED WARRANTY COVERAGE
If your product does not work properly because of defects in materials and workmanship.
Panasonic Consumer Electronics Company or Panasonic Sales
Company (collectively referred to as “the warrantor”) will, for the
length of the period indicated in the chart below, which starts with
the date of original purchase (“warranty period”), at its option either
(a) repair your product with new or refurbished parts, or (b) replace
it with a new or refurbished product. The decision to repair or
replace will be made by the warrantor.
Categories Parts Labor
Audio Components (except items listed
below)
MXE Series Audio Components (except
items listed below)
Speakers
Defective Car Audio Speakers under warranty must be exchanged at the place of
purchase. Contact your Dealer for details.
Accessories (in exchange for defective
items)
During the “Labor” warranty period, there will be no charge for
labor. During the “Parts” warranty period, there will be no charge for
parts. You must carry in or mail in your product prepaid during the
warranty period. If non rechargeable batteries are included, they are
not warranted. This warranty only applies to products purchased and
serviced in the United States or Puerto Rico. This warranty is
extended only to the original purchaser of a new product which was
not sold “as is”. A purchase receipt or other proof of the original
purchase date is required for warranty service.
CARRY-IN OR MAIL-IN SERVICE
For Carry-In or Mail-In Service in the United States, call 1-800-211PANA (7262) or visit
Panasonic Web Site: http://www.panasonic.com
For assistance in Puerto Rico, call Panasonic Sales Company (787)750-4300 or fax (787)-768-2910.
LIMITED WARRANTY LIMITS AND EXCLUSIONS
This warranty ONLY COVERS failures due to defects in materials and
workmanship, and DOES NOT COVER normal wear and tear or cosmetic damage. The warranty ALSO DOES NOT COVER damages
which occurred during shipment, failures which are caused by products not supplied by the warrantor, failures which result from accident, misuse, abuse, neglect, bug infection, mishandling, misapplication, alteration, faulty installation, set-up adjustment, maladjustment of consumer control, improper maintenance, improper antenna, inadequate signal reception or pickup, power line surge, improper voltage supply, lightning, modification, commercial use (such as
use in hotels, offices, restaurants, or other business uses) or rental
use of the product, or service by anyone other than the technician
from Factory Servicenter or other authorized service centers, or
damage that is attributable to acts of God.
THERE ARE NO EXPRESS WARRANTIES EXCEPT AS LISTED
UNDER “LIMITED WARRANTY COVERAGE”. THE WARRANTOR IS
NOT LIABLE FOR INCIDENTAL OR CONSEQUENTIAL DAMAGES
RESULTING FROM THE USE OF THIS PRODUCT, OR ARISING OUT
OF ANY BREACH OF THIS WARRANTY. (As examples, this excludes
damages for lost time, cost of having someone remove or re-install
an installed unit if applicable, travel to and from the sevicer, and loss
One (1) Year One (1) Year
Two (2) Years Two (2) Years
One (1) Year Not Applicable
Ninety (90) Days Not Applicable
of media, data or other memory contents. The items listed are not
exclusive, but are for illustration only.) ALL EXPRESS AND IMPLIED
WARRANTIES, INCLUDING THE WARRANTY OF MERCHANTABILITY, ARE LIMITED TO THE PERIOD OF THE LIMITED WARRANTY.
Some states do not allow the exclusion or limitation of incidental or
consequential damages, or limitations on how long an implied warranty lasts, so the exclusions may not apply to you.
This warranty gives you specific legal rights and you may also have
other rights which vary from state to state. If a problem with this
product develops during or after the warranty period, you may contact your dealer or Servicenter. If the problem is not handled to your
satisfaction, then write to warrantor’s Consumer Affairs Department
at the addresses of the warrantor.
PARTS AND SERVICE WHICH ARE NOT COVERED BY THIS LIMITED
WARRANTY ARE YOUR RESPONSIBILITY.
Customer’s Record
Model
No.
Serial
No.
Dealer’s
No.
Code
No.
Dealer’s
Address
Date of
Purchase
CANADA
Panasonic Canada Inc.
5770 Ambler Drive, Mississauga Ontario L4W 2T3
PANASONIC PRODUCT LIMITED WARRANTY
Panasonic Canada Inc. warrants this product to be free from defects
in materials and workmanship and agrees to remedy any such defect
for a period as stated below from the date of original purchase.
CAR AUDIO PRODUCT – ONE (1) YEAR, PARTS AND LABOUR
(The labour to install or remove the product is not warranted)
ACCESSORIES - NINETY (90) DAYS, (IN EXCHANGE FOR DEFECTIVE ITEMS)
LIMITATIONS AND EXCLUSIONS
This warranty does not apply to products purchased outside Canada
or to any product which has been improperly installed, subjected to
usage for which the product was not designed, misused or abused,
damaged during shipping, or which has been altered or repaired in
any way that affects the reliability or detracts from the performance,
nor does it cover any product which is used commercially. Dry cell
batteries are also excluded from coverage under this warranty.
This warranty is extended to the original end user purchaser only. A
purchase receipt or other proof of the original purchase date is
required before warranty service is performed.
THIS EXPRESS, LIMITED WARRANTY IS IN LIEU OF ALL OTHER
WARRANTIES, EXPRESS OR IMPLIED, INCLUDING ANY IMPLIED
WARRANTIES OF MERCHANTABILITY AND FITNESS FOR A PARTICULAR PURPOSE.
IN NO EVENT WILL PANASONIC CANADA INC. BE LIABLE FOR ANY
SPECIAL, INDIRECT OR CONSEQUENTIAL DAMAGES.
In certain instances, some jurisdictions do not allow the exclusion or
limitation of incidental or consequential damages, or the exclusion of
implied warranties, so the above limitations and exclusions may not
be applicable.
English
Before Reading These Instructions
CQ-C7205U/C7105U
7
Page 8
Features
Compatible with the AAC format
This unit has newly become compatible with AAC-formatted
files in addition to the existing MP3 and WMA files.
Note: Some of AAC files (such as SD-Jukebox type) are not
playable.
Hands-Free Phone System
Connection of the optional Hands-Free Phone System (HandsFree Kit featuring Bluetooth
users to talk on a handsfree cellular phone if the phone
supports Bluetooth.
Note: This unit is designed only for receiving calls. It cannot
send calls.
Bluetooth
The Bluetooth word mark and logo are owned by the
Bluetooth SIG, Inc. and any use of such marks by
Matsushita Electric Industrial Co.,Ltd. is under license.
Other trademarks and trade name are those of their
respective owners.
®
®
technology: CY-BT100U) allows
Expansion Module (hub unit)
Connection of the Expansion Module (hub unit, CY-EM100U)
allows users to connect up to 4 optional devices shown below.
Even simultaneous connection of the Sirius Satellite Radio and
XM Satellite Radio is feasible.
Note: A hub unit is not required to connect only one optional
component.
Sound Control
SQ (Sound Quality)
You have six preset modes (FLAT, ROCK, POP, VOCAL, JAZZ,
CLUB). You can customize your settings for these and save
them for instant recall.
SQ7
This is 7-band equalizer with 60, 160, 400, 1 k, 3 k, 6 k, and 16
kHz. Each band is adjustable between –12 dB and 12 dB in
steps of 2 dB.
D·M (Direct Memory)
You can assign your favorite broadcasting station to the
[D·M] button. As the result of doing that, your favorite
broadcasting station can be received even if the unit is in
the CD mode or other modes.
(a page 20)
Customize
Initially stored moving images and still images are editable to
taste. IMAGE STUDIO* allows you to process images from a
digital camera or other devices without difficulty. (a page 31)
* This software is downloadable from Panasonic Web site
(http://panasonic.co.jp/pas/en/software/customize/index.html)
W
ide array of components for system upgrade
Various optional components allow users to obtain availability
of wide range of system upgrade. Upgrading the system
delivers relaxed AV space in a car. For further information, refer
to the separate System Upgrade Guidebook.
¡ DVD Changer
The optional adapter (Conversion Cable for DVD/CD
Changer: CA-CC30U) allows you to connect the optional Panasonic DVD changer unit (CX-DH801U).
¡ CD Changer
The optional adapter (Conversion Cable for DVD/CD
Changer: CA-CC30U) allows you to connect the optional Panasonic CD changer unit (CX-DP880U).
®
¡ iPod
The optional adapter (Direct Cable for iPod: CA-DC300U)
allows you to connect the optional iPod series.
iPod is a trademark of Apple Computer, Inc., registered in
the U.S. and other countries.
¡ XM Satellite Radio
You can connect the optional XM receiver (XMD-1000)
with optional Digital Adapter. For details, refer to the
operating instructions for the XM receiver.
¡ Sirius Satellite Radio
You can connect the optional Sirius Satellite radio
receiver (SIR-PAN1).
8
CQ-C7205U/C7105U
Page 9
Contents
English 2
¡Safety Information 2
¡Before Reading These Instructions 4
¡Features 8
¡Controls Layout 10
Français 40
Español 78
Common
Each
As Needed
¡Preparation (Clock adjustment etc.) 12
¡General 14
¡Sound Control 18
¡Radio 20
¡CD Player 22
Source
¡MP3/WMA/AAC Player 24
¡Audio Setting 28
¡Function Setting (Security Function Setting etc.) 29
¡Display Setting 30
¡Customize the Display (Customize Function) 31
¡Troubleshooting 33
¡Error Display Messages 37
¡Notes on Discs 38
¡Maintenance/Fuse 38
¡Specifications 39
CQ-C7205U/C7105U
9
Page 10

Controls Layout
Note: This instruction manual explains operations for use with the buttons on the main unit. (Different operations excluded)
SQ Sound Quality (a page 18)
MENU (a page 29, 30)
TUNE
(a page 20)
TRACK (FILE)
(a page 22, 24)
VOL
(a page 15)
Main Unit
PUSH SEL Select
(a page 28)
SOURCE Source
PWR Power
(a page 14, 16)
DIM Dimmer (a page 17)
u OPEN (eject)
(a page 15)
TILT
(a page 15)
Remote Control
Sensor
Opens
MUTE (a page 15)
SBC-SW Super Bass
Control-Subwoofer
(a page 19)
P-SET Preset (a page 21)
DISC (a System Upgrade
Guidebook, page 8, 10)
FOLDER (a page 24)
LIST (a System Upgrade
Guidebook, page 12)
D·M Direct Memory
(a page 20)
DISP Display
(a page 17)
(a page 14)
BAND (a page 20)
/5Pause/Play
y
(a page 22, 24)
APM Auto Preset Memory
(a page 21)
Disc slot
Release
10
When Face Plate
CQ-C7205U/C7105U
Page 11
0
T
R
Number Buttons
0 to 9
9
–
SEL Select
#
Number
NUMBE
RANDOM
4
SCAN
5
RANDOM
SCAN
POWER
SRC (SOURCE)
BAND
REPEA
REPEAT
6
7
9
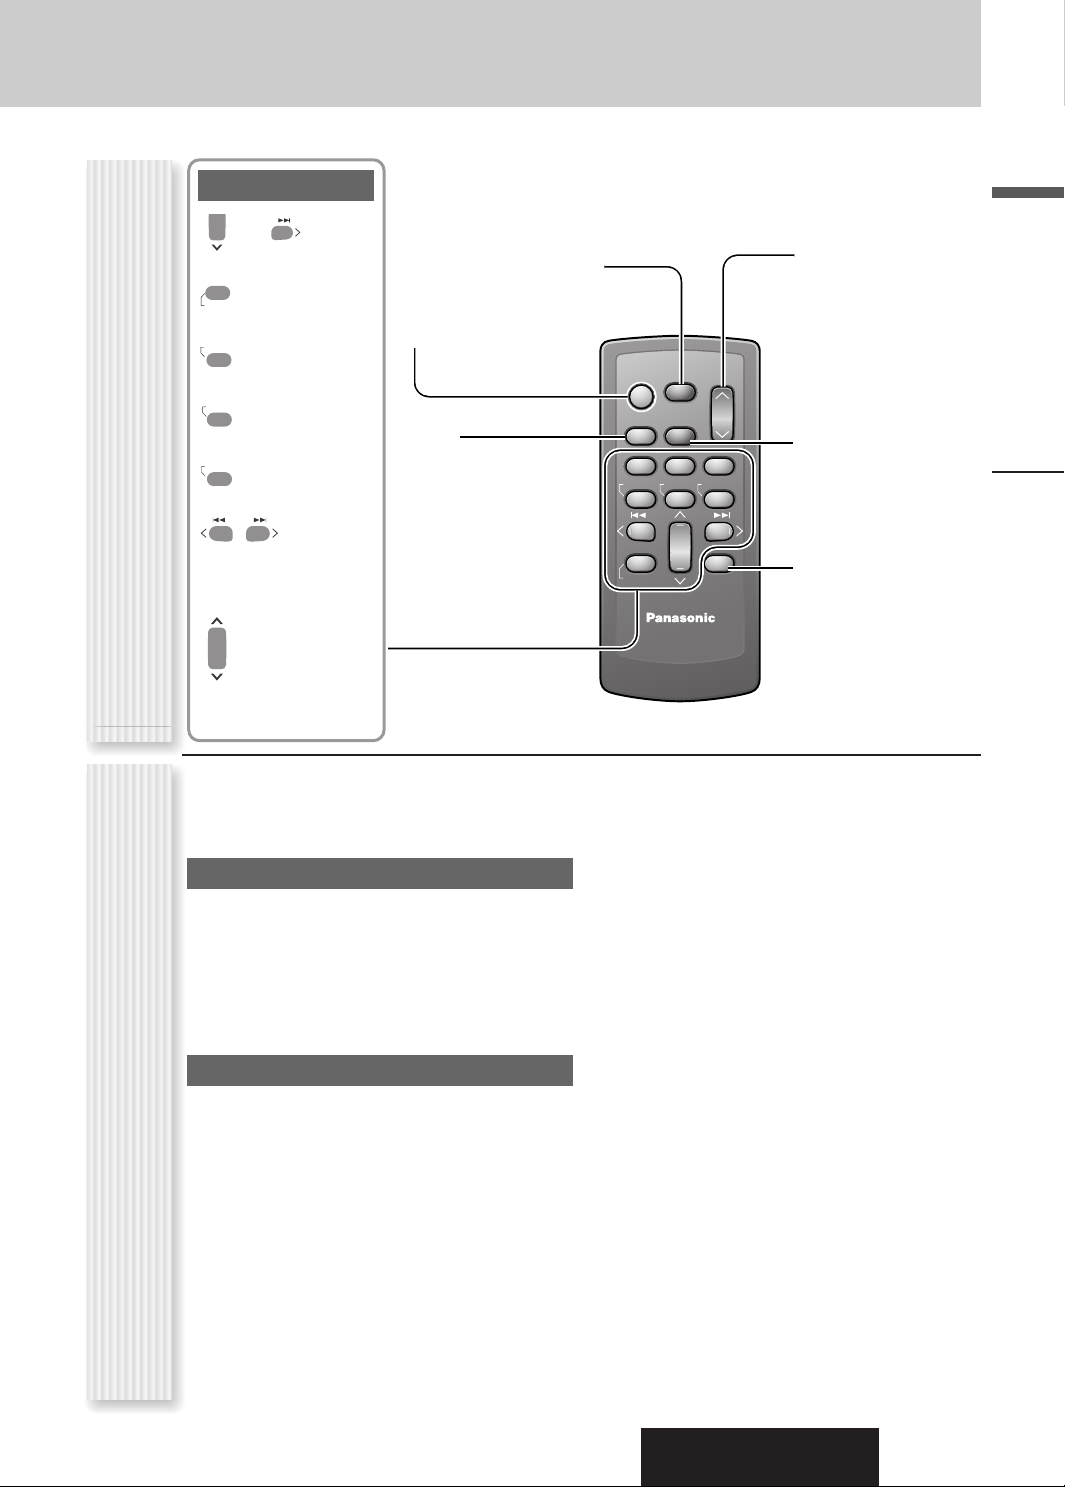
Remote Control UnitOperations executable only with main unit/
TUNE
Pause/Play
SET
Auto Preset
APM
Memory
TRACK (FILE)
MENU
POWER
SOURCE
MENU
SEL
SEL
SRC
SRC
SET
BAND MUTE
BAND MUTE
RANDOM
TUNE TUNE
#
#
NUMBER
VOL
VOL
2 31
231
SCAN REPEAT
5
64
5
64
97
97
8
8
0
0
DISP
DISP
VOL Volume
}:Up
{:Down
MUTE
SBC-SW Super Bass
Control-Subwoofer
DISP Display
English
8
0
(Preset)
P·SET
DISC (FOLDER)
Although most of the functions of this unit are executable
with both the main unit and remote control, the following
functions are excluded.
Operations executable only with main uni
t
¡ Face panel’s opening, closing, tilting, and removal
actions (a page 15)
¡ Disc ejection (a page 15)
¡ Dimmer (a page 17)
¡ SQ on, off, and adjustment (a page 18)
¡ Direct memory setting and calling (a page 20)
Operations executable only with remote control
¡Preset station calling with one-touch operation
(a page 21)
¡ Direct access to tracks on CDs (a page 23, 25)
¡ Random and repeat play with one-touch operation
(a page 23, 25)
¡ Scan playback (a page 23, 25)
CAR AUDIO
Controls Layout
operations executable only with remote control
CQ-C7205U/C7105U
11
Page 12
Preparation
q
w
2
3
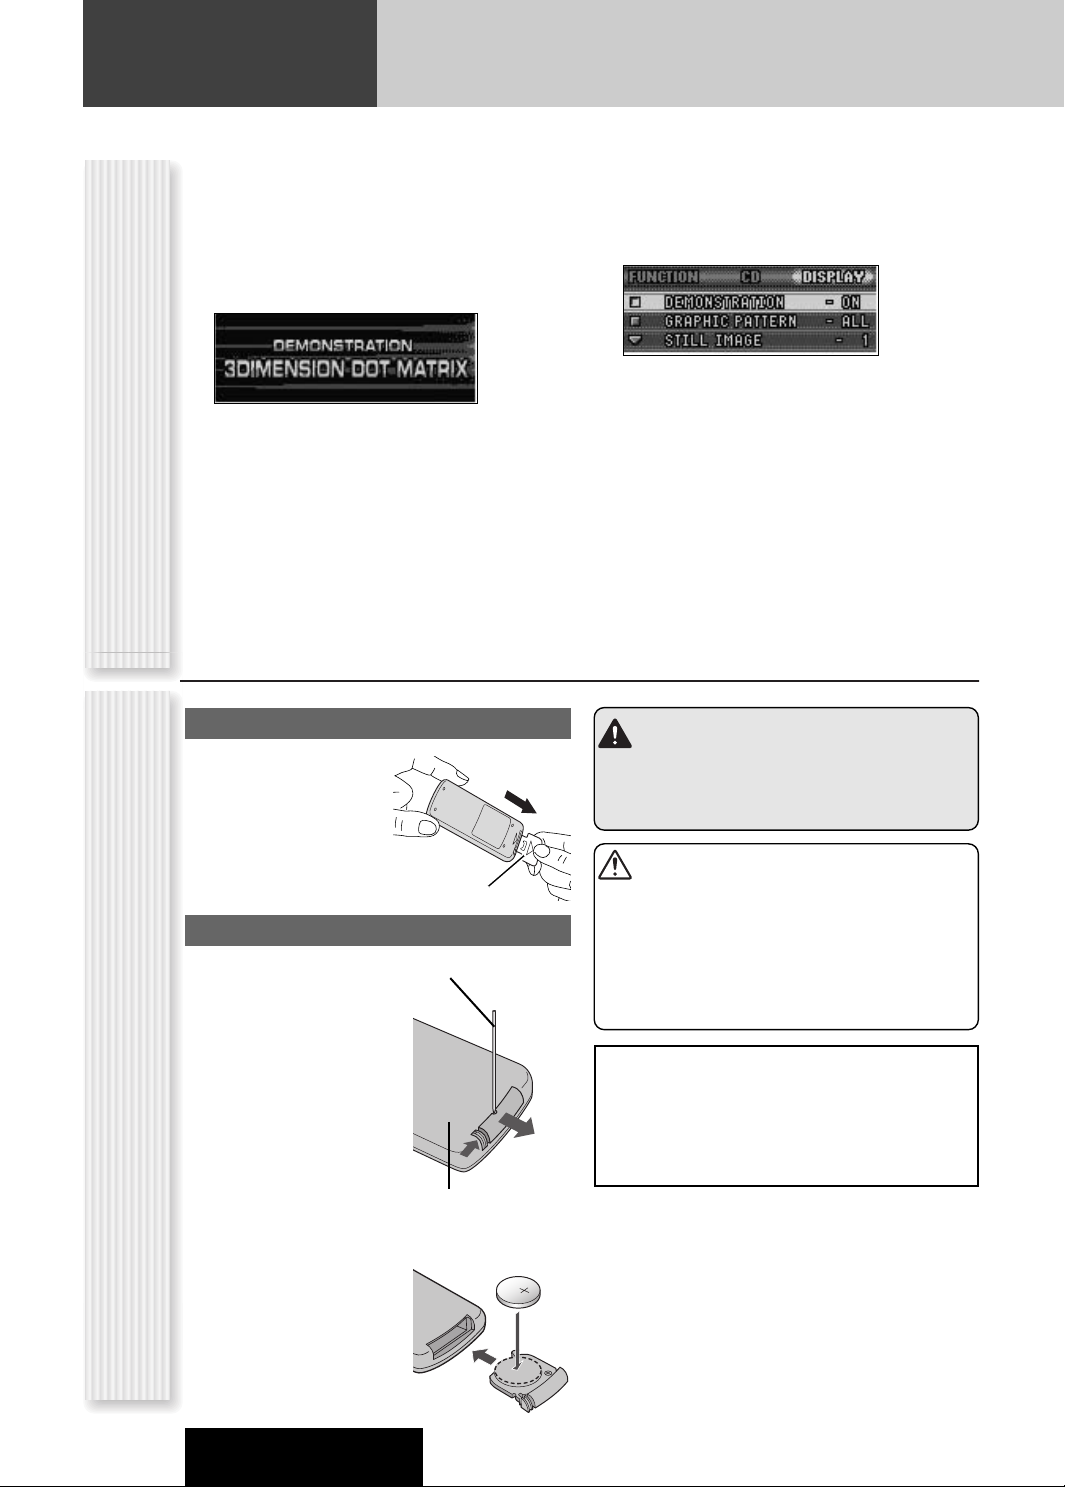
For the first use, the following screen may appear
repeatedly.
Set your car’s ignition switch to the ACC
1
or On position.
The demonstration screen appears.
Press [SOURCE] (PWR: POWER).
2
Press [MENU] to display the menu
3
display.
For using the remote control, hold down [SEL]
(MENU) for 2 sec. or more.
Press []] or [[] to display the
Cancellation of demonstration screenRemote Control Preparation
4
DISPLAY menu.
Preparation Before Initial Use
Pull the insulation film out
from the backside of
remote control gently.
Turn [VOL] to select
5
“DEMONSTRATION”.
For using the remote control, use [}] or [{].
Press [PUSH SEL] to select “OFF”.
6
For using the remote control, use [BAND] (SET).
Press [MENU] to close the menu
7
screen.
For using the remote control, hold down [SEL]
(MENU) for 2 sec. or more.
Note: This unit is operable as usual even if the
demonstration screen is activated. The demonstration
screen automatically appears if no operation is executed
for 1 minute.
Warning
Keep batteries and insulation film out of reach of
infants. If an infant ingests a battery, please seek
immediate medical attention.
12
Battery Replacement
q Remove the battery holder
with the remote control unit
placed on a flat surface.
q Stick your thumbnail into
the groove, and push the
holder in the direction of
the arrow, and at the
same time.
w Pull it out in the direction
of the arrow using a
tough pointed object.
w Put a battery in the case with
(+) side facing up.
e Put the case back.
CQ-C7205U/C7105U
Insulation film
Tough pointed object
Back side
Cautions
¡Remove and dispose of an old battery immediately.
¡Do not disassemble, heat or short a battery. Do not
throw a battery into a fire or water.
¡Follow local regulations when disposing of a battery.
¡Improper use of a battery may cause overheating, an
explosion or ignition, resulting in injury or a fire.
Notice
This product contains a CR Coin Cell Lithium
Battery which contains Perchlorate Material – special handling may apply.
See www.dtsc.ca.gov/hazardouswaste/perchlorate.
Note: Battery Information:
Battery Type: Panasonic lithium battery (CR2025)
(Included in the remote control)
Battery Life: Approximately 6 months under normal use
(at room temperature)
Page 13
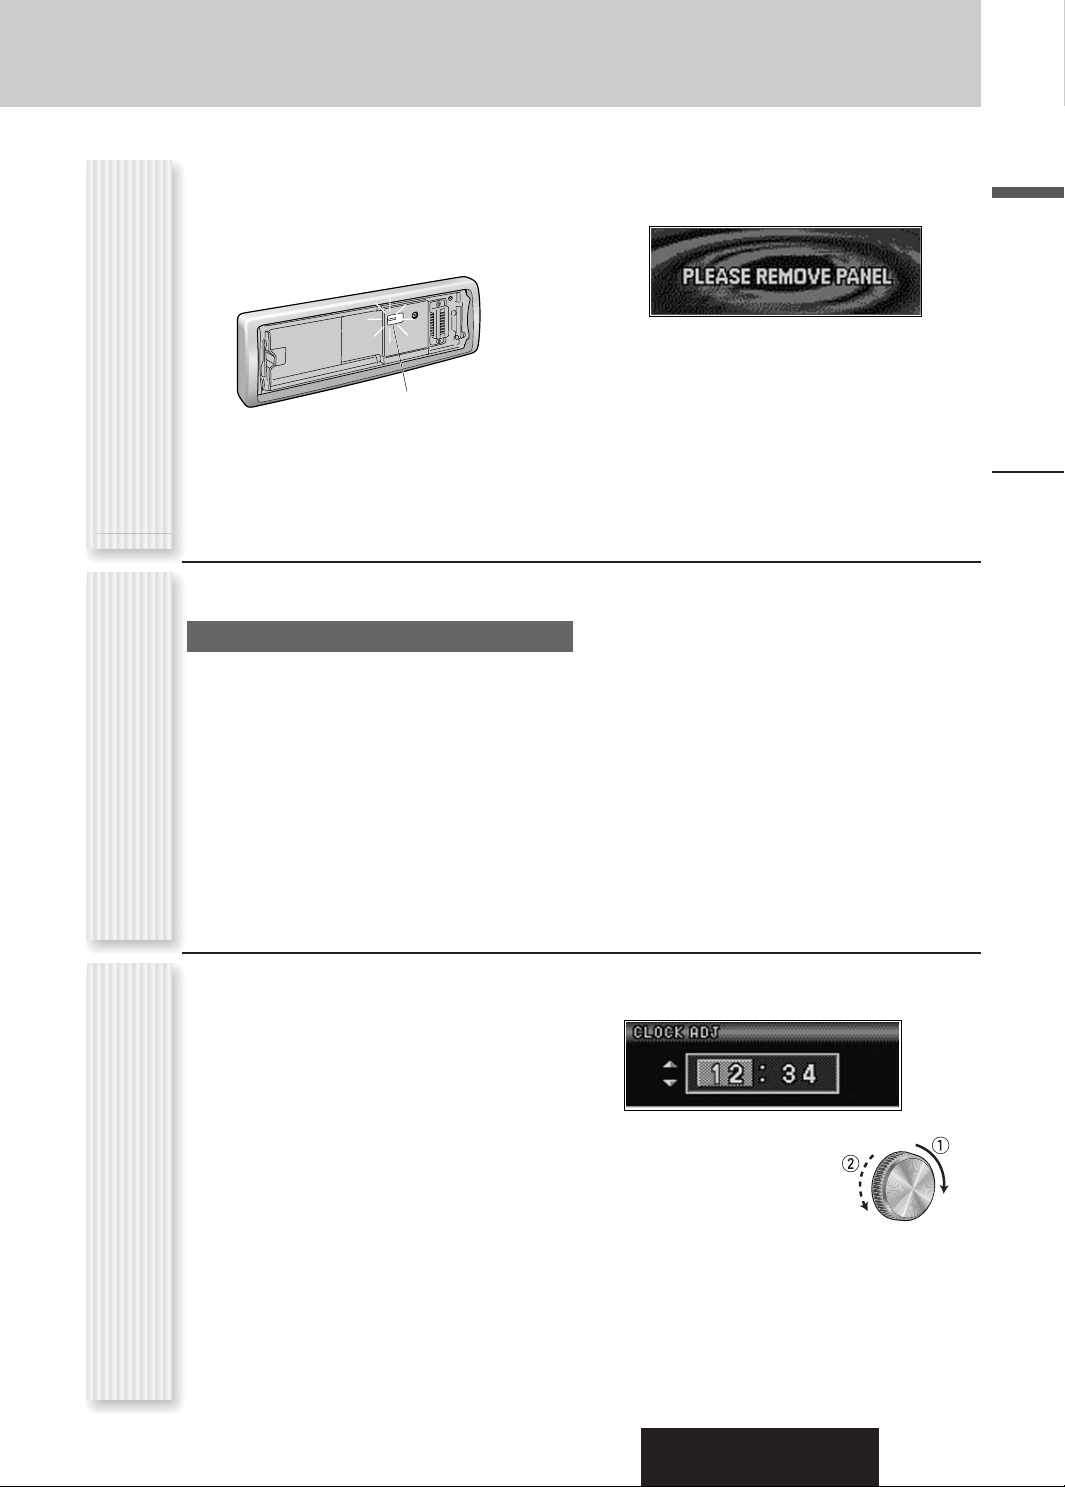
The following functions are activated when the Security
Function is ON. (a page 29)
¡ The security indicator lights up when removing the
face plate.
Security Function SettingOther SettingsClock adjustment
You may need to set the following depending on the
devices to be connected.
Using Subwoofer
¡ Subwoofer level adjustment (a page 28)
¡ Subwoofer low pass filter (a page 28)
¡ The alarm sounds and the message appears on the
screen to warn you to remove the face plate at ACC
off.
English
Security Indicator
Preparation
Note: Other settings are required when a Sirius receiver,
an XM receiver, or a Hands-Free Phone System is
connected. (a System Upgrade Guidebook)
Note: Adjust the clock when “ADJUST” appears on the
display.
Press [MENU] to display the menu
1
display.
For using the remote control, hold down [SEL]
(MENU) for 2 sec. or more.
Press []] or [[] to display the
2
DISPLAY menu.
Turn [VOL] to select “CLOCK ADJ”.
3
For using the remote control, use [}] or [{].
Press [PUSH SEL], and the clock
4
adjustment screen appears.
For using the remote control, use [BAND] (SET).
Adjust the setting value.
5
[[]
:
Adjusting minutes
[]]
:
Adjusting hours
q
:
Forward
w
:
Backward
Press [PUSH SEL], and the menu
6
screen resumes.
For using the remote control, use [BAND] (SET).
Press [MENU] to close the menu
7
screen.
For using the remote control, hold down [SEL]
(MENU) for 2 sec. or more.
CQ-C7205U/C7105U
13
Page 14
General
This chapter explains how to turn on or off the power, how to adjust the volume, etc.
Power on
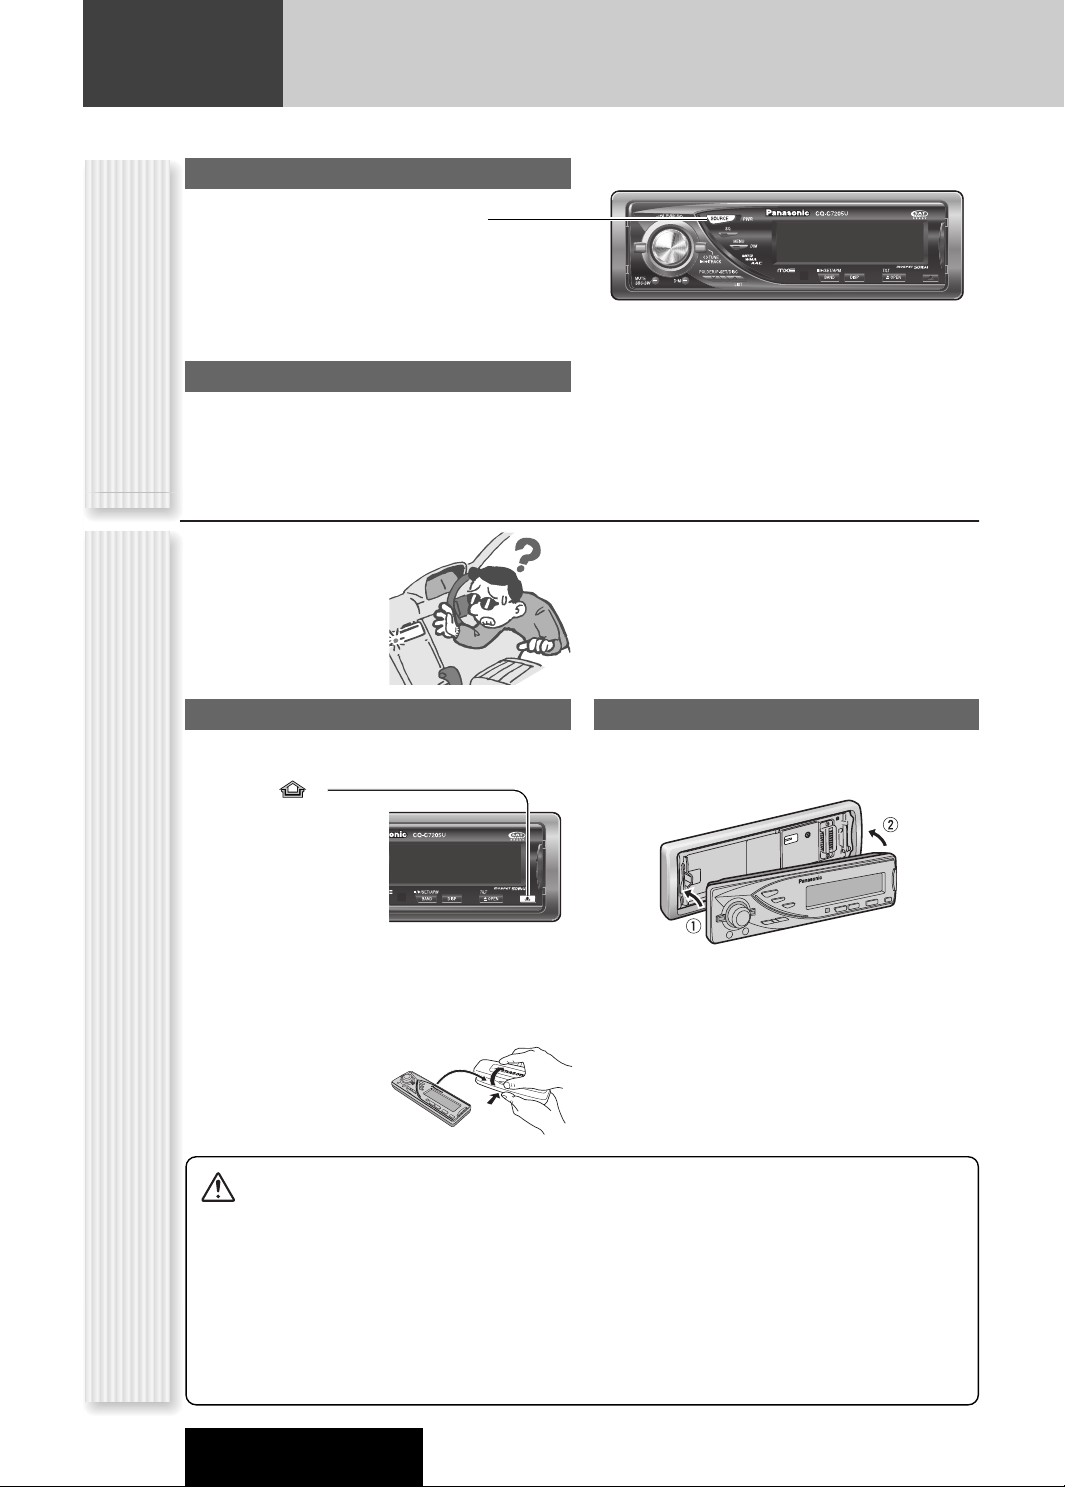
Press [SOURCE] (PWR: POWER).
Power off
(PWR: POWER)
Power On/off
Hold down [SOURCE] (PWR: POWER) until
you hear a beep, then release it.
You can remove the face
plate to prevent it from
being stolen.
Removing
Turn off the power (a page 14)
1
Press []
2
(Release).
(The face plate disengages with a click
when it is removed.)
The face plate automatically closes after a lapse of 5
seconds while it is open.
The power is automatically turned off while the unit
is active.
(ANTI-THEFT SYSTEM)
Put the face
3
plate in the case.
Face Plate Removing/Mounting
Cautions
¡ It is recommended to remove or mount the face
plate when the plate is at the closed position.
Do not remove or mount the face plate when the
plate is in motion.
¡ This face plate is not waterproof. Do not expose it to
water or excessive moisture.
¡ Do not remove the face plate while driving your car.
Mounting
Slide the left side of the face plate in
1
place.
Press the right end of the face plate
2
until “click” is heard.
¡ Do not place the face plate on the dashboard or
nearby areas where the temperature rises to high
levels.
¡ Do not touch the contacts on the face plate or on the
main unit, since this may result in poor electrical
contacts.
¡ If dirt or other foreign substances get on the con-
tacts, wipe them off with clean and dry cloth.
¡ To avoid damaging the face plate, do not push it
down or place objects on it while it is open.
14
CQ-C7205U/C7105U
Page 15
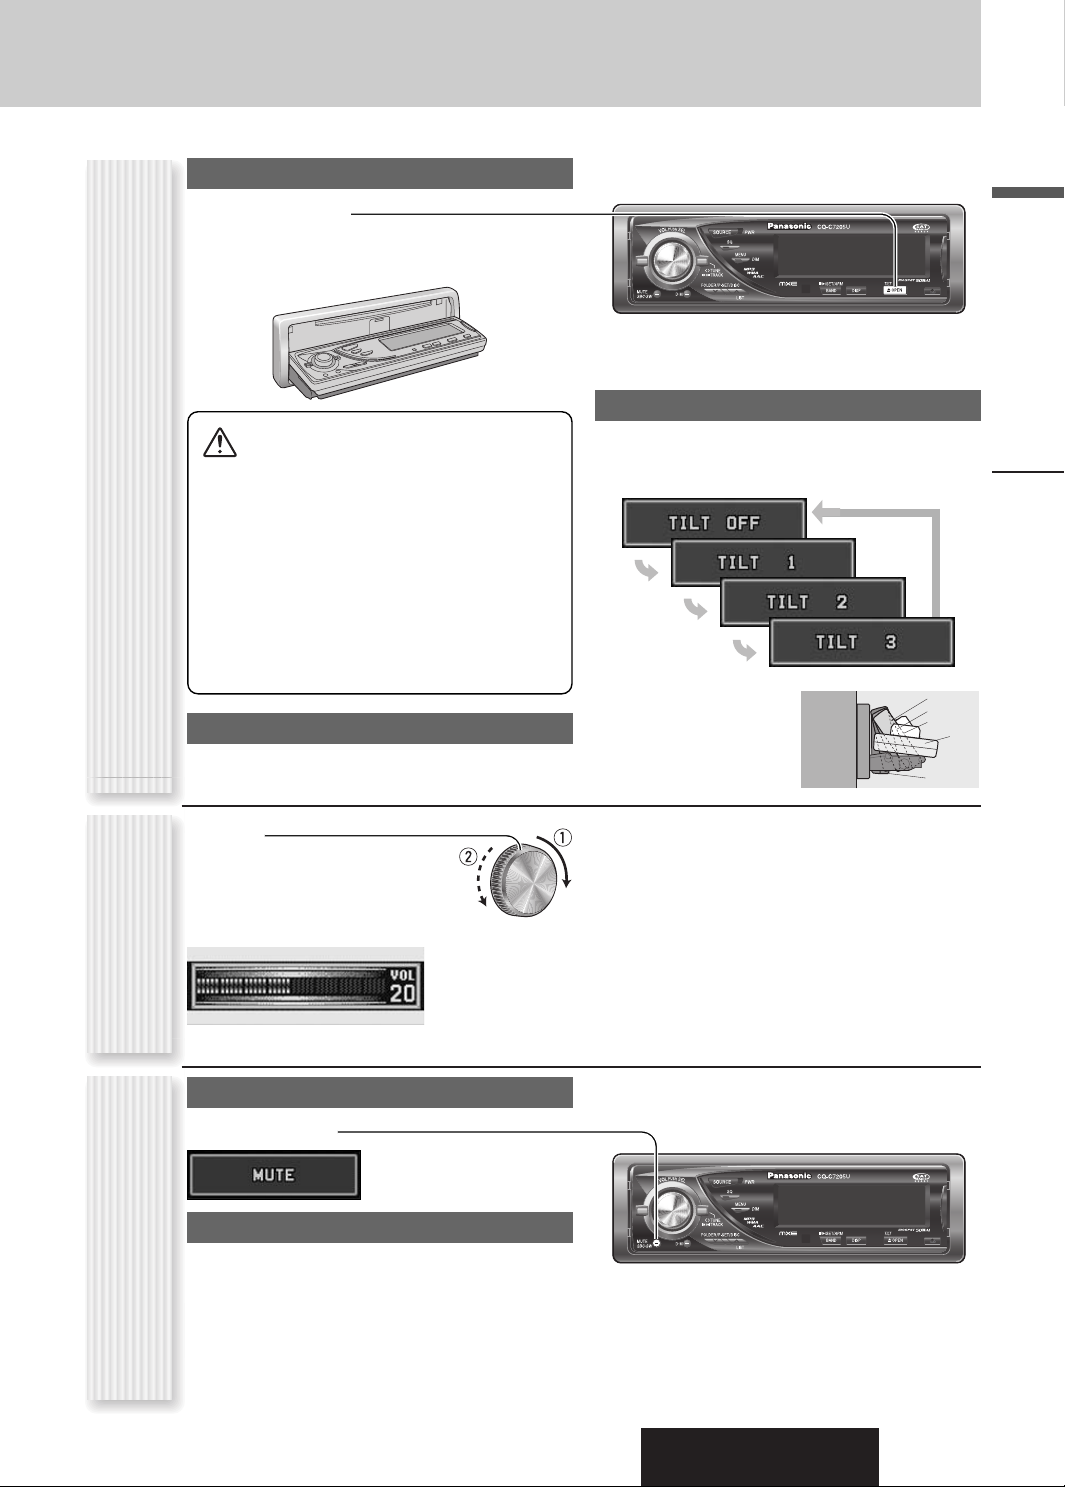
Open/Eject
Press [uOPEN].
When a disc is already loaded, the disc will automatically
be ejected.
¡ To avoid damaging the face plate, do not push it
down or place objects on it while it is open.
¡ Do not pinch your finger or hand in the face plate.
(OPEN/CLOSE, TILT)
¡ Do not insert foreign objects into the disc slots.
¡ For the following cases, the face plate automatical-
ly closes. Use caution not to catch your finger.
Face Plate Motion (Open/Close, Tilt)
Close
Cautions
¡ After a lapse of 20 seconds
¡ When a disc is inserted
¡ When the face plate is removed (a page 14)
¡ When ACC is set to off
Tilt
The display angle changes among 4 levels as follows
every time you hold down [uOPEN] (TILT) for 1 sec.
or more and release.
Note: The last selected
angle is memorized even
after turning off the power.
TILT 1
TILT 2
TILT 3
English
General
OPEN
Press [uOPEN].
q Up
w Down
Setting Range: 0 to 40
Default: 18
(VOLUME)
Volume Adjustment
Volume off (down)
Press [MUTE].
Cancel
Press [MUTE] again.
Note:
MUTE (ATT: ATTENUATION)
Volume-down range can be specified.
(apage 29)
TILT OFF
Notes:
¡ The volume level can be set independently for each
source. (For radio, one volume setting for AM, one
volume setting for all FMs)
¡ The volume is not adjustable while an error or the
menu screen is present on the monitor.
¡ This unit memorizes individual volume levels for each
source. Make volume adjustments of each source
appropriately to prevent large volume fluctuation when
the source is changed.
Temporary Volume Off (Down)
CQ-C7205U/C7105U
15
Page 16
General (continued)
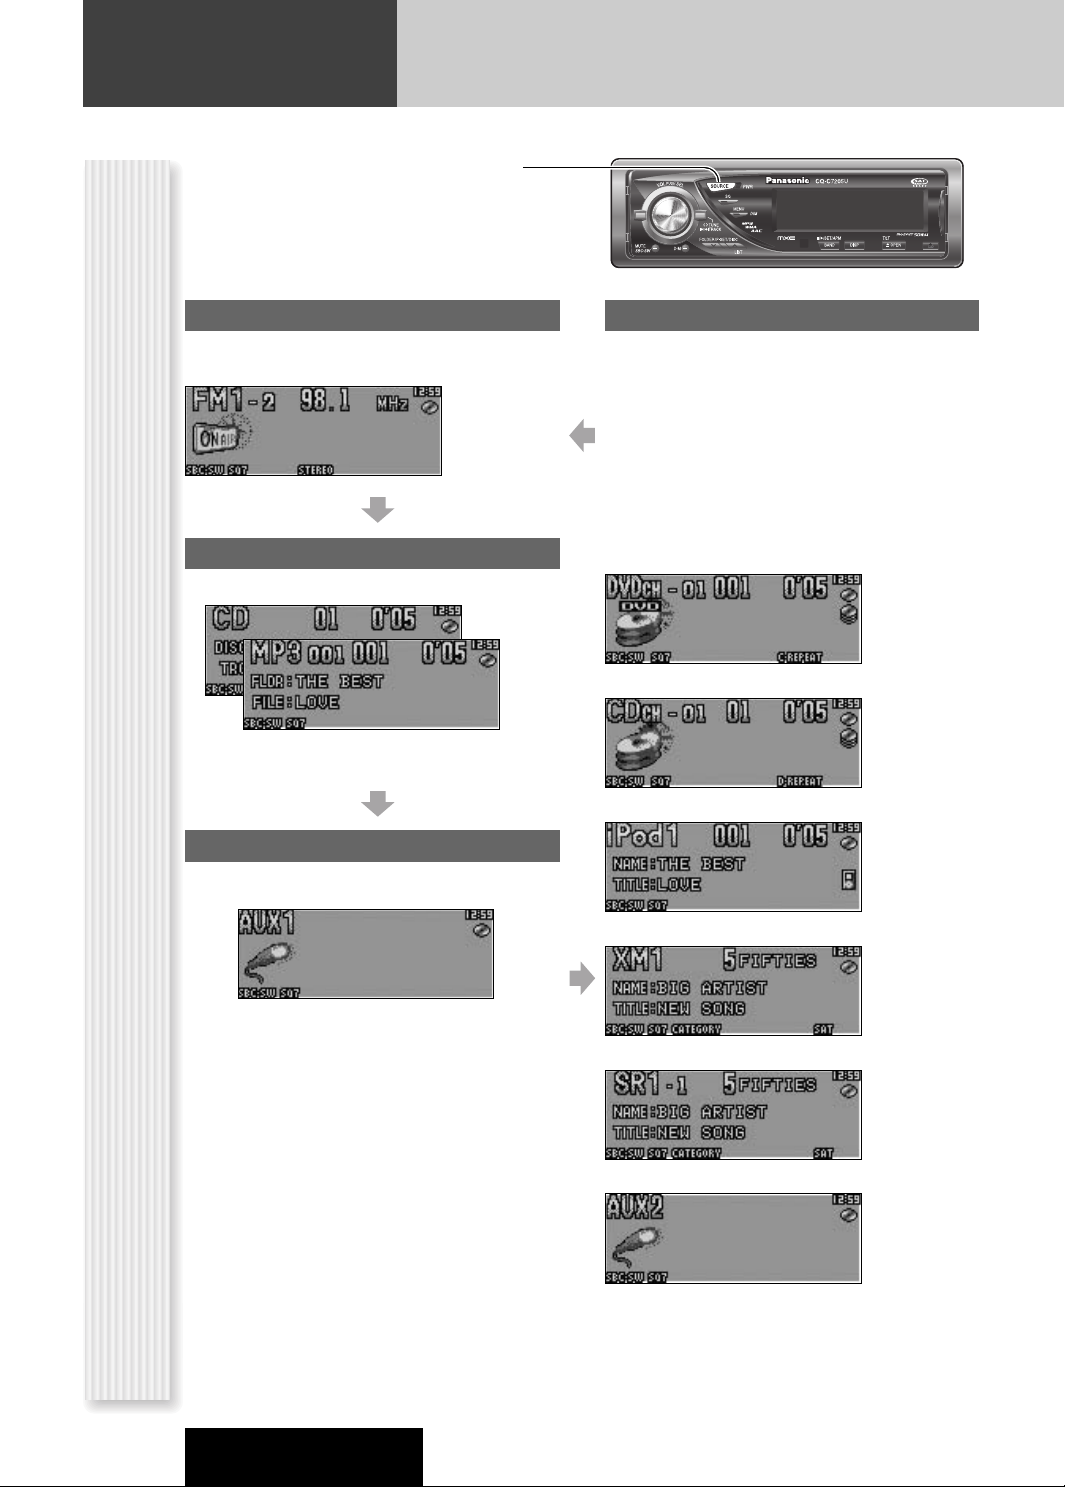
The source changes as follows every time
[SOURCE] is pressed.
Radio
FM1, FM2, FM3, AM (a page 20)
Player
When loading CD (a page 22)
When loading a disc containing compressed
audio files (a page 24)
(SOURCE)
AUX 1
Source Selection
Device connected to the AUX terminal of the this unit
System-up Connector
Device connected to the System-up Connector of this
unit
When optional devices are connected:
Shift to connected devices
When an expansion module is connected:
The devices connected to the ports 1 to 4 are activated
in sequence after shifting to AUX2 (devices connected
to the AUX terminal of the expansion module).
When connecting DVD Changer
When connecting CD Changer
When connecting iPod
16
When connecting XM Receiver
When connecting Sirius Receiver
When connecting Expansion Module
Note: For information about connectable devices, refer
to the System Upgrade Guidebook or the instruction
manual for each device.
CQ-C7205U/C7105U
Page 17
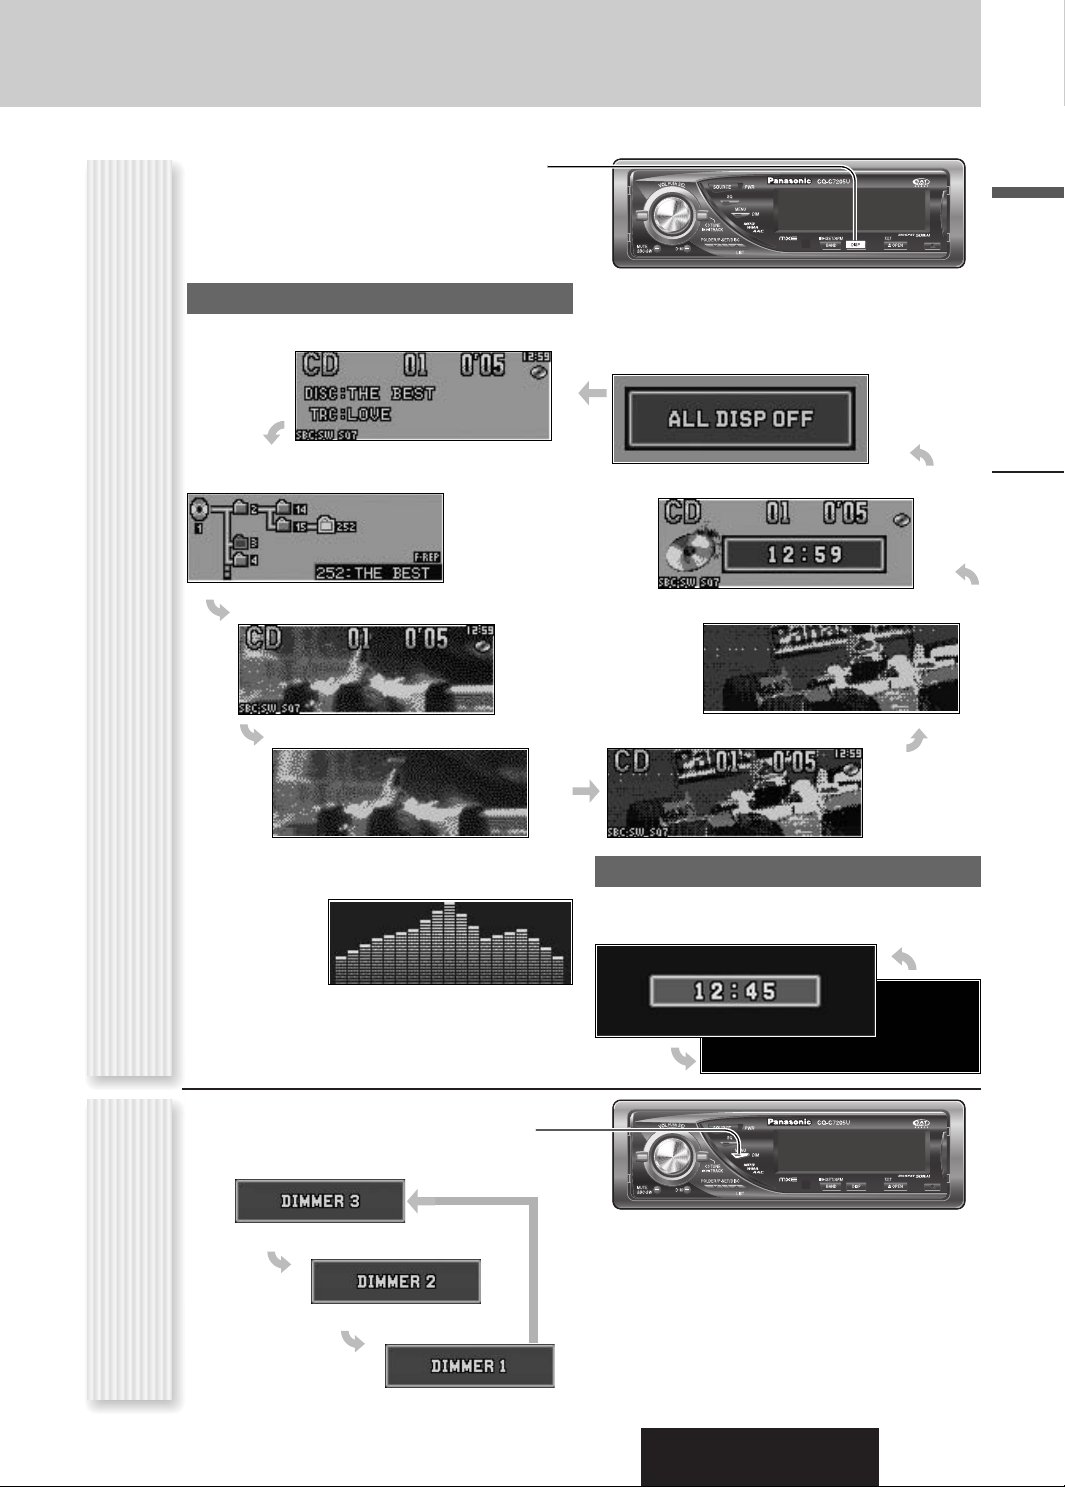
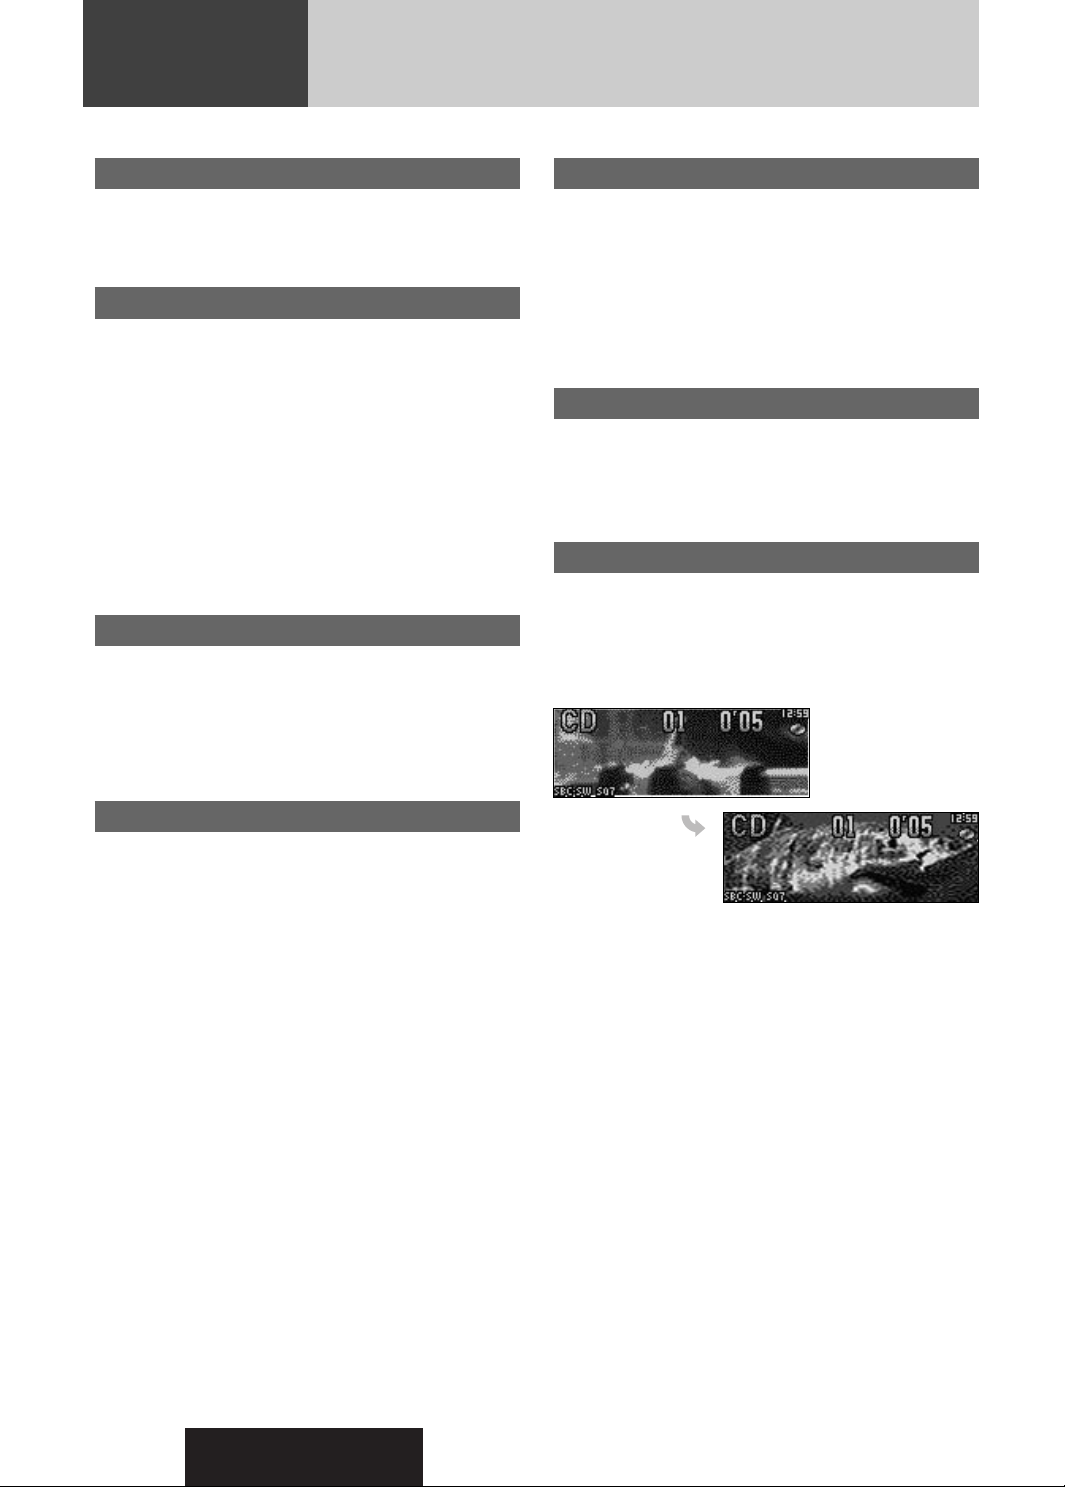
The display changes as follows every time [DISP:
DISPLAY] is pressed.
Note: The graphic pattern and still image are selectable.
(a page 30)
At power-on:
Folder hierarchy (Compressed Audio Player mode only.)
Ordinary display + graphic pattern
(DISP: DISPLAY)
Display Change
Only graphic pattern
Note: The graphic equalizer of 19 bands (S.A.) is
selectable when selecting a graphic pattern.
Mode
English
Display OFF
All displays disappear in 5 seconds.
Ordinary display + clock
General
Only still image
Ordinary display + still image
At power-off:
The dimmer level changes as follows every time you hold
down [MENU] (DIM: DIMMER) for 2 sec. or more.
Brighter (default)
(DIM: DIMMER)
Dimmer Control
Medium
Darker
Clock display (default)
Off
Note: This setting is not adjustable with the remote
control.
CQ-C7205U/C7105U
17
Page 18
Sound Control
The equalizer curve is selectable from among preset 6
types (FLAT, ROCK, POP, VOCAL, JAZZ, and CLUB)
depending on your listening category.
SQ changeover
The SQ category is changed every time [SQ] (Sound
Quality) is pressed.
Note: Setting of SQ, bass/treble and volume are
influenced one another. If the influence mentioned above
causes distortion to the audio signal, readjust bass/treble
or volume. (a page 28)
(SQ: SOUND QUALITY)
SQ Selection Based on Genre
SQ is adjustable in accordance with your taste.
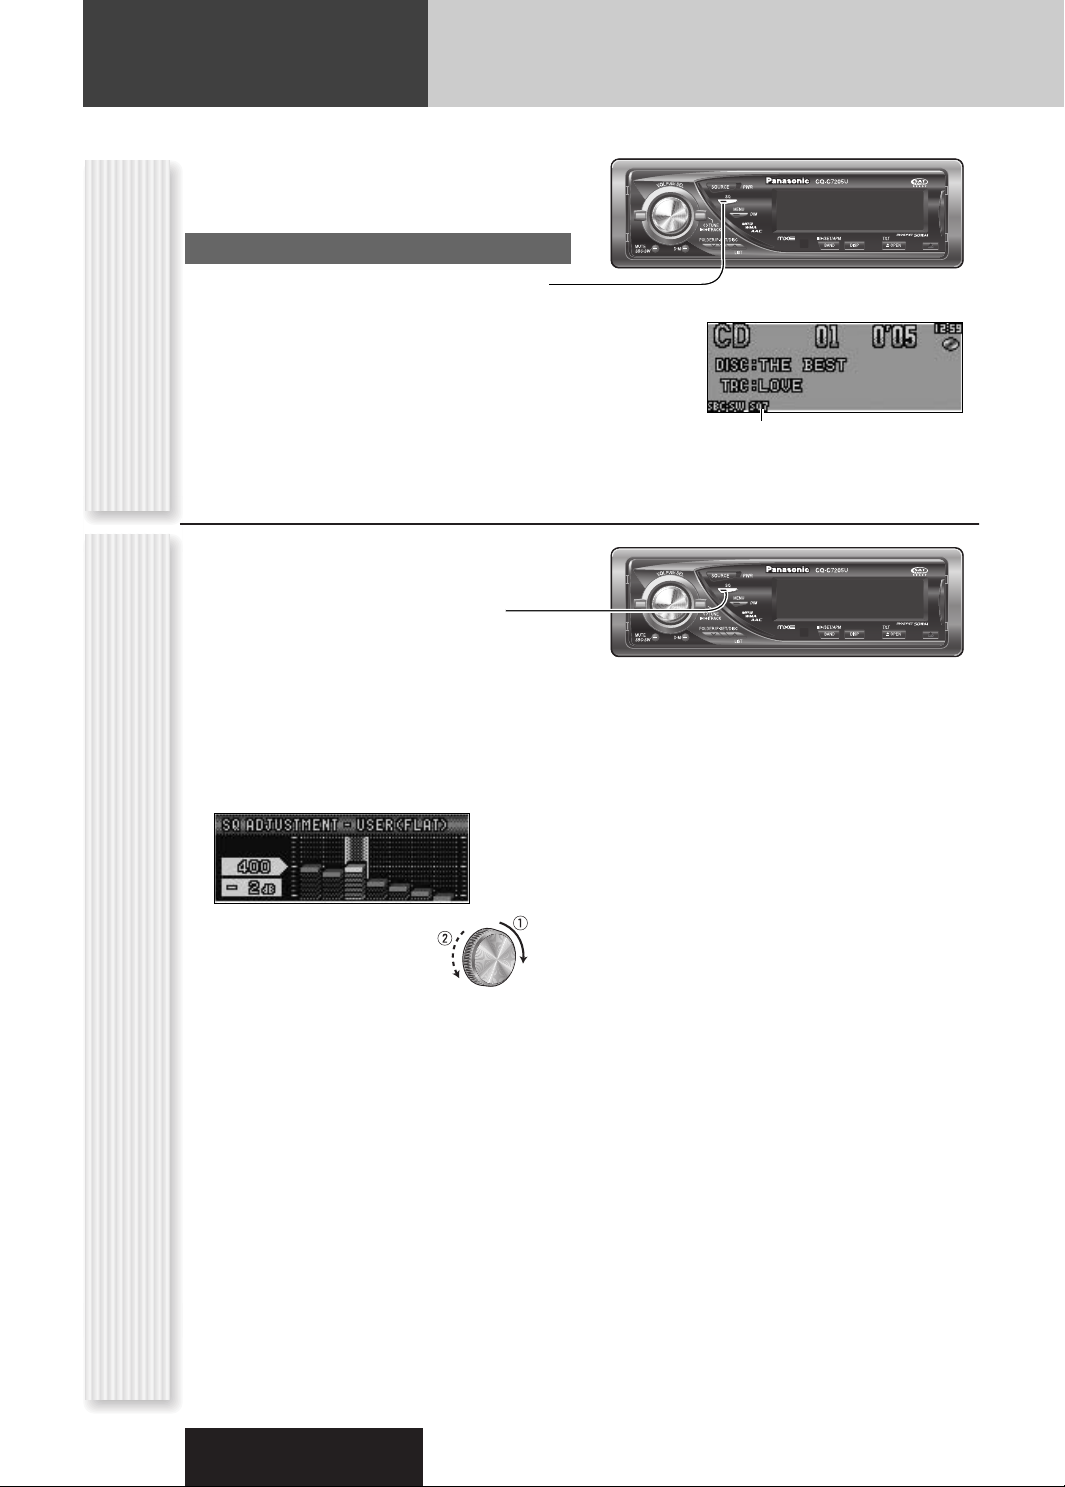
Hold down [SQ] (Sound Quality) for 2
1
sec. or more to display “SOUND
QUALITY MENU”.
Lights when SQ is activated.
Press [PUSH SEL].
2
The targeted SQ preset appears.
For using the remote control, use [BAND] (SET).
Adjust each band.
3
Band: 60, 160, 400, 1 k, 3 k, 6 k, 16 k (Hz)
[]] [[] : Band selection
qw: Level up/down
(USER)
“USER” appears in the category name after
SQ adjustment
adjustment.
Note: If [PUSH SEL] is held down for 2 sec. or
more on the “SQ ADJUSTMENT” display, the preset
data that is called up can be turned into the default.
Press [PUSH SEL].
4
The screen of Step 1 appears again.
For using the remote control, use [BAND] (SET).
Press [DISP: DISPLAY].
5
The regular screen appears again.
18
CQ-C7205U/C7105U
Page 19
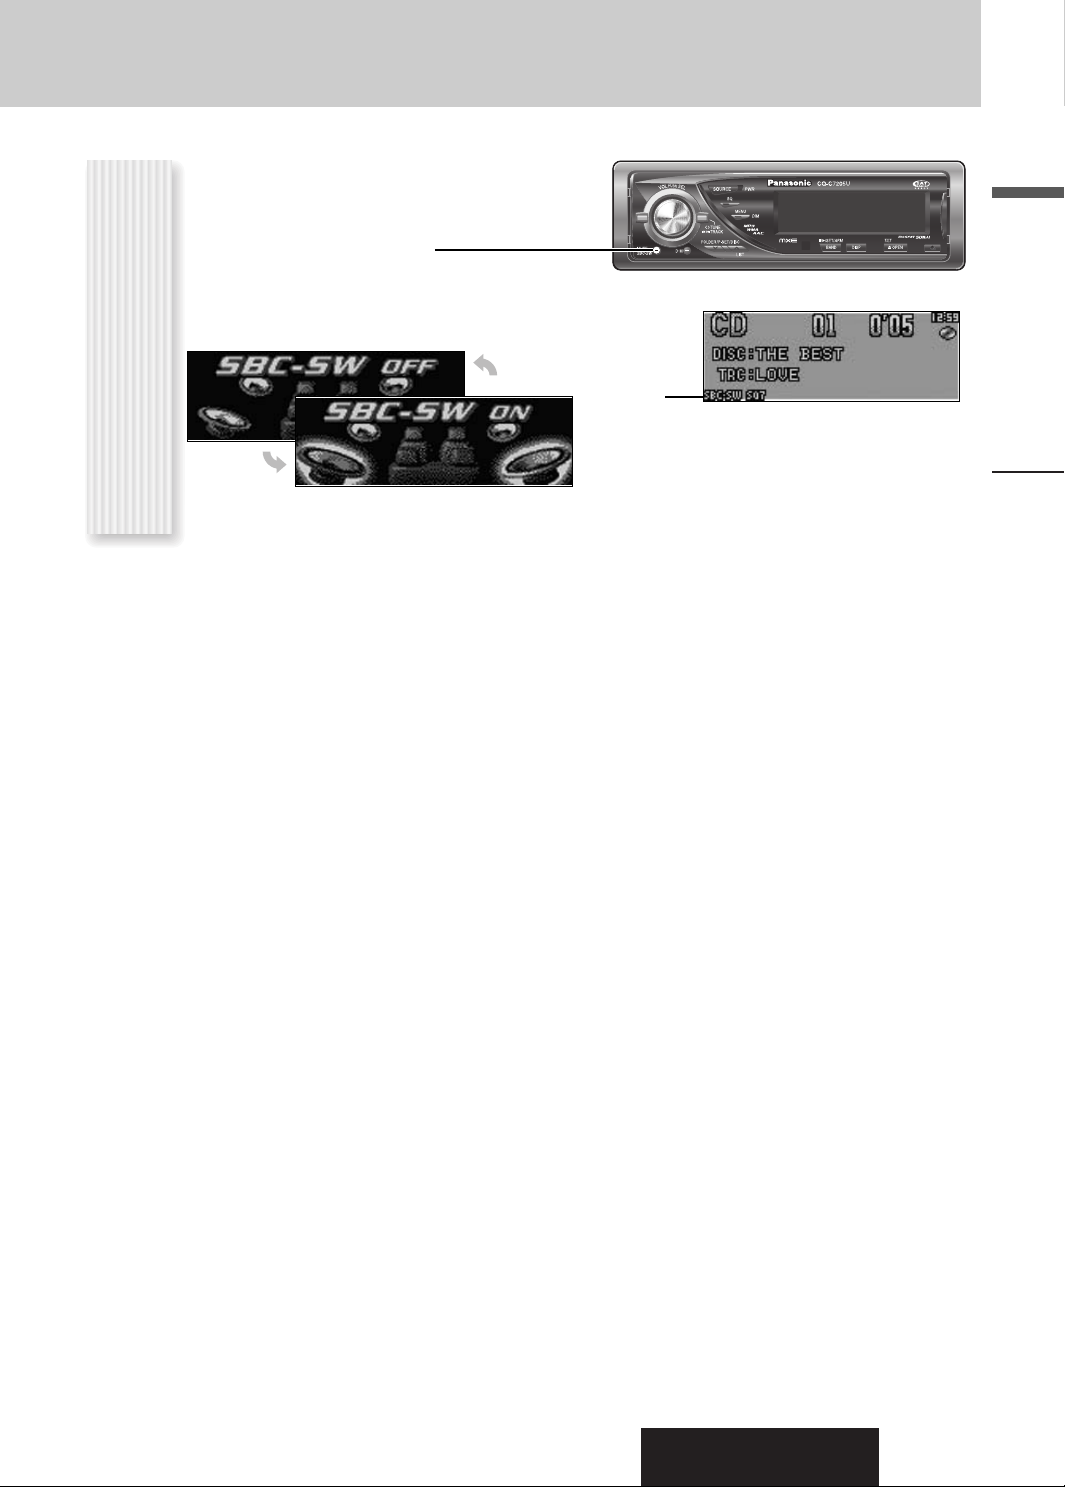
The rear speaker can be used as a substitutional
subwoofer when a subwoofer is not connected.
Holding down [SBC-SW] for 2 sec. or more
toggles SBC-SW on and off.
English
Off (default)
Substitutional Subwoofer
(SBC-SW: SUPER BASS CONTROL-SUBWOOFER)
Lights when
SBC-SW is
activated.
Notes:
¡ If ON is selected, the settings of subwoofer level
adjustment and subwoofer low pass filter are activat-
On
ed. (a page 28)
Sound Control
CQ-C7205U/C7105U
19
Page 20
Radio
This chapter explains how to listen to the radio.
Press [SOURCE] to select the radio
1
mode.
Press [BAND] to select a band.
2
Select a station.
3
Operation Flow
Frequency adjustment
[]] (TUNE): Lower
[[] (TUNE): Higher
Note: Hold down for 0.5 sec. or more and release
for station search.
Preset station selection
[{] (P-SET: Preset): Lower preset number
[}] (P-SET: Preset): Higher preset number
Notes:
¡ Direct selection can be executed with [1] to [6]
buttons on remote control.
¡ A preset station is selectable by turning [VOL]
while the preset list screen is present on the monitor.
¡ The volume is not adjustable while the preset list
screen is present on the monitor.
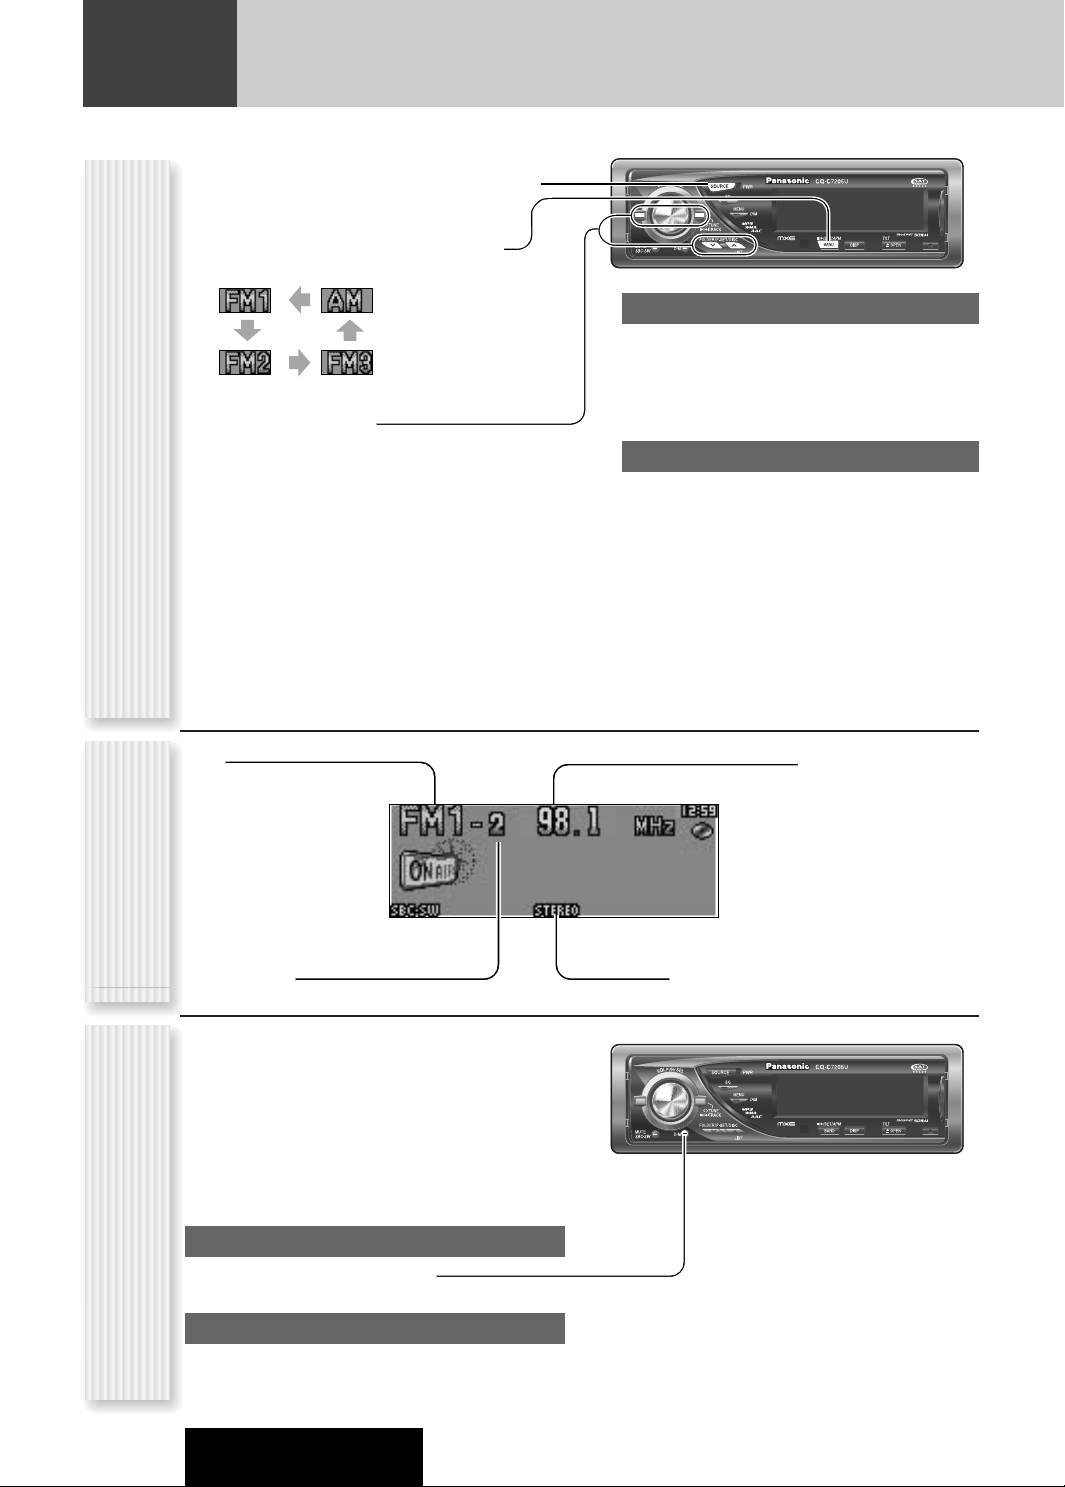
Band
Radio Mode Display
Preset Number
You can assign your favorite broadcasting station to
the [D·M] button. As the result of doing that, your
favorite broadcasting station can be received even if
the unit is in the CD mode or other modes. (Default:
FM 87.9 MHz)
Note: For the use of an FM transmitter, it is useful
for users to register applicable frequencies on D.M
(Direct Memory).
D.M station Calling
Direct Memory
Press [D.M] (DIRECT MEMORY).
D.M station Setting
q Select a station you would like to preset.
w Hold down [D.M] (DIRECT MEMORY) for 2 sec.
or more.
Frequency
Lights while receiving an FM stereo signal.
Note: If the unit is turned off during receiving a broadcasting station via D·M, the unit starts again receiving
the broadcasting station via D·M by turning on the unit.
20
CQ-C7205U/C7105U
Page 21
Up to 6 stations can be preset in AM, FM1, FM2, and FM3
respectively.
Preset stations can be simply called up by pressing [}]
(P-SET) or [{] (P-SET).
Notes:
¡ Direct selection can be executed with [1] to [6] but-
tons on remote control.
¡ You can switch between 6 and 18 for FM presetting
stations. (EACH BAND/ALL BAND)
¡ Preset stations are changeable. (Preset Swap)
Auto Preset Memory (APM)
Stations with good receiving conditions automatically
preset.
Select a band.
1
Hold down
Station Preset
2
[BAND] (APM)
for 2 sec. or
(APM: AUTO PRESET MEMORY, P·SET: PRESET)
more.
The preset stations under best receiving conditions
are received for 5 sec. each after presetting the stations (SCAN). To stop scanning, press [}] or [{].
Note: New stations overwrite existing saved stations.
Manual station preset
Tune in to a station.
1
Hold down [}] or [{] for 2 sec. or
2
more.
Turn [VOL] to select a preset number.
3
Hold down [PUSH SEL] for 2 sec. or
4
more, and the frequency is stored at the
selected preset number.
Notes:
¡ In step 2, a station can be registered by holding down
the numeric button [1] to [6] for 2 sec. or more.
To stop presetting stations, press
¡
¡ The operation above allows users to replace the cur-
rent station with the station preset in the selected
number while selecting a preset station. (Preset Swap)
[DISP]
(DISPLAY).
English
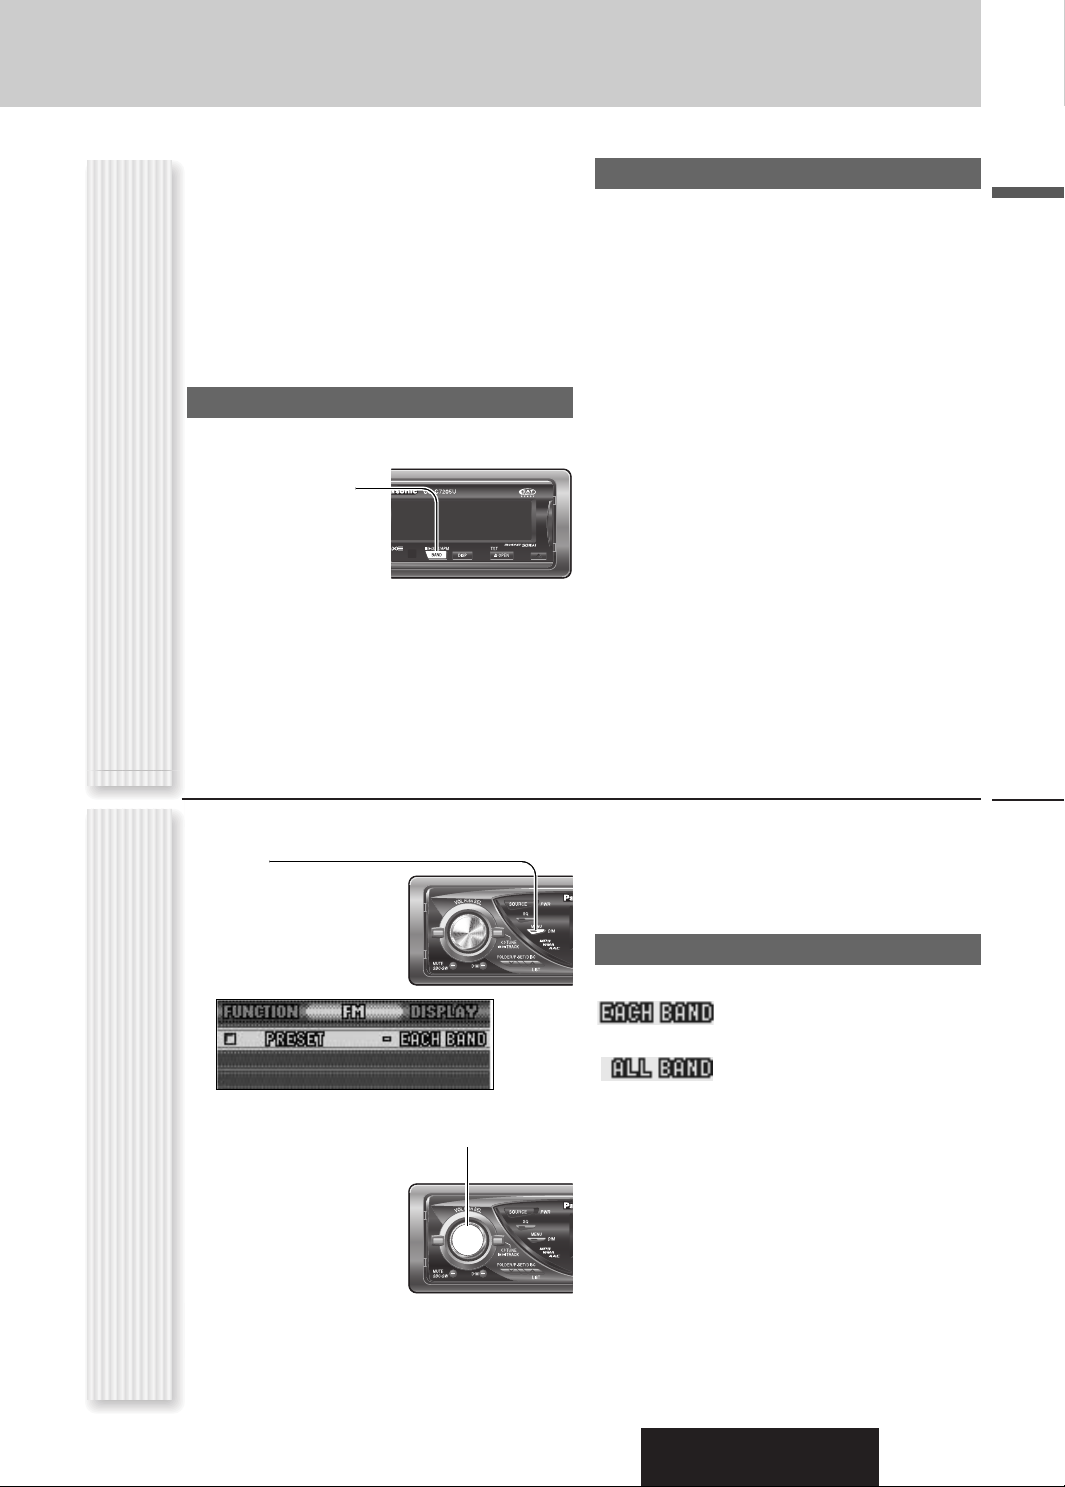
Press [MENU] to display the menu dis-
1
play.
For using the remote
control, hold down
[SEL] (MENU) for 2
sec. or more.
Press [PUSH SEL] to adjust.
2
For using the remote
control, use [BAND]
Radio Menu Display
(SET).
Press [MENU] to close the menu
3
screen.
For using the remote control, hold down [SEL]
(MENU) for 2 sec. or more.
PRESET
Preset range for FM bands
: Individual setting for FM1-3 each
(default)
: Setting of FM1-3 together
Radio
CQ-C7205U/C7105U
21
Page 22

CD Player
Cautions
¡ This unit does not support 8 cm (3”) discs.
¡ Do not use irregularly shaped discs. (a page 38)
¡ Do not use discs that have a seal or label attached.
¡ To avoid damaging the face plate, do not push it down or
place objects on it while it is open.
¡ Do not pinch your finger or hand in the face plate when the
face plate is in motion.
¡ Do not insert foreign matter into the disc slots.
When a disc is already loaded, press [SOURCE] to
select the CD mode.
Press [uOPEN] to open the face plate.
1
When a disc is already loaded ( lights), the disc
will automatically be ejected.
Load a disc with the printed side facing
2
up.
The face plate closes automatically, and the unit recognizes the disc and starts playing automatically,
too.
Printed side
Operation FlowCD Mode Display
¡ Refer to the section on “Notes on CD/CD Media (CD-ROM,
CD-R, CD-RW)” (a page 38).
¡ This unit does not support a MIX mode CD (a CD containing
both CD-DA and compressed audio data). In case of using
such a CD, problems may occur such as anacoustic playback.
Select a desired portion.
3
Track selection
[7] (TRACK): Next track
[6] (TRACK): Preceding track (press twice)
Note: Hold down for fast forward/reverse.
Pause
Press [BAND] (
Press again to cancel.
Press [uOPEN] to eject the disc.
4
Note: The panel automatically closes after 20 sec-
onds.
).
5
/
h
22
Track number Time
CD-TEXT display
Notes:
¡ For scrolling text, hold down [DISP: DISPLAY] for 2
sec. or more.
¡ “NO TEXT” is displayed when there is no information
on the disc.
CQ-C7205U/C7105U
Play Mode indicators
Lights when each mode is
activated.
Lights when the disc is
loaded.
Page 23

Random and Repeat play can be set.
Press [MENU] to display the menu dis-
1
play.
For using the remote
control, hold down
[SEL] (MENU) for 2
sec. or more.
Turn [VOL] to select a function to be
2
adjusted.
For using the remote
control, use [}] or
[{].
RANDOM
: Off (default)
: Random playback
REPEAT
: Off (default)
: Playing the current track repeatedly
English
(RANDOM, REPEAT)
Press [PUSH
3
SEL] to adjust.
For using the remote control, use [BAND] (SET).
Press [MENU] to close the menu
4
screen.
For using the remote control, hold down [SEL]
(MENU) for 2 sec. or more.
Play Mode Selection
One-touch operation is available for selecting a track
playing style by use of [RANDOM] or [REPEAT].
RANDOM
Press [RANDOM].
Press again to cancel.
REPEAT
Press [REPEAT].
Press again to cancel.
TEXT (CD-TEXT)
: Enabled (default)
: Disabled
SCAN play
You can find your favorite track by playing first 10-sec. of
each track.
Press [SCAN].
Press again to cancel.
Direct Access
A track can be directly selected.
Example: track number 5
Press [#] (NUMBER).
1
Press [5].
2
Press [SET].
3
Note: To suspend direct
selection, press [DISP] (DISPLAY).
CD Player
Functions Only by Remote Control Unit Random, Repeat Play (CD Menu Display)
CQ-C7205U/C7105U
23
Page 24

MP3/WMA/AAC Player
This unit can play MP3, WMA, and AAC files.
When a disc is already loaded, press [SOURCE] to
select the compressed audio mode.
Press [uOPEN] to open the face plate.
1
When a disc is already loaded ( lights), the disc
will automatically be ejected.
Load a disc with the printed side facing
2
up
The face plate closes automatically, and the unit recognizes the disc and starts playing automatically,
too. (It may take several minutes to start for a disc
that has a lot of files.)
Select a desired portion.
3
Folder selection
[}] (FOLDER): Next folder
[{] (FOLDER): Preceding folder
Operation Flow
File number
Folder number
File type indicator
Printed side
File selection
[7] (TRACK): Next file
[6] (TRACK): Preceding file (press twice)
Note: Hold down for fast forward/reverse.
Pause
Press [BAND] (
Press again to cancel.
Press [uOPEN] to eject the disc.
4
Note: The panel automatically closes after 20 sec-
onds.
).
5
/
h
Time
24
Information Display
Notes:
¡ For scrolling text, hold down [DISP: DISPLAY] for 2
sec. or more.
¡ “NO TEXT” is displayed when there is no information
on the disc.
Compressed Audio Player Mode Display
CQ-C7205U/C7105U
Play Mode indicators
Lights when each mode is
activated.
(Folder Random)
(Folder Repeat)
(Folder Scan)
Lights when the disc is
loaded.
Page 25

Notes:
¡ Refer to the pages 26 and 27 for cautions.
¡ This unit does not support a MIX mode CD (a CD containing both CD-DA and compressed audio files). In case of using such a
CD, problems may occur such as anacoustic playback.
Random and Repeat play can be set.
Press [MENU] to display the menu dis-
1
play.
For using the remote
control, hold down
[SEL] (MENU) for 2
sec. or more.
Turn [VOL] to select a function to be
2
adjusted.
For using the remote
control, use [}] or
[{].
Press [PUSH
3
SEL] to adjust.
For using the remote control, use [BAND] (SET).
(RANDOM, REPEAT)
Press [MENU] to close the menu
4
screen.
For using the remote control, hold down [SEL]
(MENU) for 2 sec. or more.
RANDOM
: Off (default)
: Random playback (disc)
FOLDER RANDOM
: Off (default)
: Random playback (folder)
REPEAT
: Off (default)
: Playing the current file repeatedly
FOLDER REPEAT
: Off (default)
: Playing the current folder repeatedly.
TEXT
: Folder name/File name (default)
Album/Title/Artist (tag information)
:
: No display
RE-MASTER
The high-range signal lost through MP3/WMA/AAC compression is
reproduced to more closely recreate the pre-compressed sound.
Notes:
At high bit rates, the Re-master function may have little effect.
¡
¡ The Re-master function is only effective for playback
of MP3/WMA/AAC data.
Random, Repeat Play (Compressed Audio Player Menu Display)
: Digital sound enhancer activated (default)
: Digital sound enhancer inactivated
English
Play Mode Selection
One-touch operation is available for selecting a file
playing style by use of [RANDOM] or [REPEAT].
RANDOM, REPEAT
Press the button. Press again to cancel.
FOLDER RANDOM, FOLDER REPEAT
Hold down the button for 2 sec. or more. Hold
down again to cancel.
SCAN play
Functions Only by
You can find your favorite file by playing first 10-sec. of
each file.
Remote Control Unit
SCAN (All files)
Press [SCAN]. Press again to cancel.
FOLDER SCAN (1st file in each folder)
Hold down [SCAN] for 2 sec. or more. Hold down
again to cancel.
Direct Access
A file in the current folder can be directly selected.
Example: file number 5
Press [#] (NUMBER).
1
Press [5].
2
Press [SET].
3
Notes:
¡ For folder selection, enter a number after pressing [#]
(NUMBER) twice.
To suspend direct selection, press [DISP] (DISPLAY).
¡
CQ-C7205U/C7105U
MP3/WMA/AAC Player
25
Page 26

MP3/WMA/AAC Player (continued)
Each of MP3 (MPEG Audio Layer-3), WMA (Windows Media™ Audio), and AAC (Advanced Audio Coding) is a format
for compressed audio file. These formats allow users to save all the files contained in approximately 10 pieces of
existing CDs on one piece of CD-R/RW.
Note: Each of encoding software is not included with this unit.
Setting at file making
Common
¡ High bit rate and high sampling frequency are recom-
mended for high quality sounds.
¡ Selecting VBR (Variable Bit Rate) is not recommended
because playing time is not displayed properly and
sound may be skipped.
¡
The playback sound quality differs depending on the encoding circumstances. For details, refer to the user manual of
your own encoding software and writing software.
¡
Be sure to put an extension compatible with the format.
MP3
¡ It is recommended to set the bit rate to “128 kbps or
more” and “fixed”.
Compression formats
Cautions as to compressed audio files
* WMA 9 Professional/LossLess/Voice are not supported.
WMA
¡ It is recommended to set the bit rate to “64 kbps or
more” and “fixed”.
¡ Do not set the copy protect attribute on the WMA file
to enable this unit to play back.
AAC
¡ It is recommended to set the bit rate to “128 kbps or
more” and “Stereo”.
¡ Files with the extension of “.m4a” encoded using
iTunes version 6 are playable on this unit. Some of the
files using other encoders are not playable.
¡ Files encoded using Apple Lossless Encoder are not
playable.
¡ Files with copyright protection are not playable.
Sampling frequencyVBRBit rateCompression method
32, 44.1, 48 kHzYes32 k – 320 kbpsMPEG 1 audio layer 3 (MP3)
16, 22.05, 24 kHzYes8 k – 160 kbpsMPEG 2 audio layer 3 (MP3)
12, 11.205, 8 kHzYes8 k – 160 kbpsMPEG 2.5 audio layer 3 (MP3)
32, 44.1, 48 kHzYes32 k – 192 kbpsWindows Media Audio Ver. 2, 7, 8, 9*
Yes24 k – 320 kbpsMPEG 4 AAC LC
8, 11.205, 12, 16, 22.05,
24, 32, 44.1, 48 kHz
26
Caution
Never put an extension indicating compressed audio (such as “.mp3”, “.wma”, and “.m4a”) to
files other than compressed audio files. This may not only produce noise from the speaker
damage, but also damage your hearing.
Display Information
¡ Common
Folder name,
File name
¡ MP3
Album name,
Title name/artist name
(ID3 tag)
¡ WMA
Album name,
Title name/artist name
(WMA tag)
¡ AAC
Album name,
Title name/artist name
(AAC tag)
this unit
Displayable characters
¡ Displayable length of file name/folder name: within 64
characters. (Unicoded file and folder names are
Cautions as to the display of
reduced by half in the number of displayable characters.)
¡ Name files and folders in accordance with the stan-
CQ-C7205U/C7105U
dard of each file system. Refer to the instructions of
writing software for details.
¡ ASCII character set and special characters in each lan-
guage can be displayed.
ASCII character set
A to Z, a to z, digits 0 to 9, and the following symbols:
(space) ! ” # $ % & ’ ( ) * + , - . / : ; < = > ? @ [ \ ] ˆ
_ ` { | } ~
Notes:
¡ Characters may be garbled depending on encoding
software to be used.
¡ Undisplayable characters and symbols will be convert-
ed into an asterisk (
).
*
Page 27

Compressed audio file writing
¡ Do not save an audio file (CD-DA file) and a com-
pressed audio file on the same disc. Failure to
observe this may result in difficulty in playing.
¡ If compressed audio files formatted with two or
more types are saved on the same disc, each format
shall have a different folder.
¡ Do not write files other than compressed audio files.
¡ Playability may depend on the combination of writing
software and disc writer to be used.
¡ This unit does not support the play list function.
¡ Write files in a disc-at-once manner unless otherwise
needed.
¡ You can shorten the duration between data read and
playback by decreasing the quantity of files or folders,
or the depth of the hierarchy.
Supported file systems
ISO 9660 Level 1/Level 2/Level 3, Joliet, Romeo
Note: Apple HFS, UDF 1.50, Mix CD and CD Extra are
not supported.
Cautions as to disc making
Folder selection order/file playback order
Maximum number of files/folders
¡ Maximum number of files: 511 (files + folders)
¡ Maximum number of files in one folder: 255
¡ Maximum depth of trees: 8
¡ Maximum number of folders: 255 (Root folder is
included.)
2
3
Root Folder
(Root Directory)
q
4
w
5
6
7
e
r
8
Folder Selection
File Selection
q
t
y
18
–In the order
–In the order
y
(Max.)
1
Tree 1 Tree 2 Tree 3 Tree 4 Tree 8
Notes:
¡ This unit counts the number of folders irrespective of
the presence or absence of a compressed audio file.
¡ If the selected folder does not contain any com-
pressed audio file, the nearest compressed audio file
in the order of playback will play.
¡ Playback order of this unit may be different from that
of other compressed audio players even if the same
disc is used
¡ “ROOT” appears when displaying the root folder
name.
English
Copyright
It is prohibited by copyright laws to copy, distribute and
deliver copyrighted materials such as music without the
approval of copyright holder except enjoying yourself
personally.
No warranty
Above description complies with our investigations as of
October 2006. It has no warranty for reproducibility and
Common
displayability of MP3/WMA/AAC.
iTunes is a trademark of Apple Computer, Inc., registered in the U.S. and other countries/regions.
Windows Media, and the
Windows logo are trademarks or registered
trademarks of Microsoft
Corporation in the United
States and/or other
countries/regions.
MPEG Layer-3 audio coding technology licensed from
Fraunhofer IIS and Thomson.
CQ-C7205U/C7105U
MP3/WMA/AAC Player
27
Page 28

Audio Setting
Adjustment to each speaker and an optional subwoofer
Press [PUSH SEL:
1
SELECT] to display
the AUDIO menu display.
For using the remote control,
use [SEL] (MENU).
Press [PUSH SEL: SELECT] to select a
2
mode to be adjusted.
For using the remote control, use [SEL] (MENU).
Turn [VOL] clockwise or counterclock-
3
wise to adjust.
For using the remote
control, use [VOL }]
or [VOL {].
VOLUME
Main volume adjustment
(Setting range: 0 to 40, Default: 18)
q : Up
w : Down
BALANCE/FADER
Balance adjustment
(Setting range: L (left)15 to R (right) 15 and Center,
Default: Center)
q : Right enhanced
w : Left enhanced
BALANCE/FADER
Fader adjustment
(Setting range: R (rear) 15 to F (front) 15 and Center,
Default: Center)
q : Front enhanced
w : Rear enhanced
SUB WOOFER
Subwoofer level adjustment
(Setting range : mute (-∞), -6 dB to +6 dB, 2 dB Step,
Default: 0
q : Up
w : Down
dB
)
28
AUDIO Menu Display
BASS/TREBLE
Bass adjustment
-
(Setting range:
Bass 0 dB)
q : Up
w : Down
BASS/TREBLE
Treble adjustment
(Setting range:
Treble 0 dB)
q : Up
w : Down
Note: Do not activate SQ and Bass/Treble at same time
to avoid causing sound distortion.
CQ-C7205U/C7105U
12 dB to +12 dB, 2 dB Step, Default:
-
12 dB to +12 dB, 2 dB Step, Default:
LPF
Subwoofer Low Pass Filter
(Setting range: 80 Hz, 120 Hz, 160 Hz, Default: 80 Hz)
q : Up
w : Down
Subwoofer output range
Other speakers output ranges
HPF
High Pass Filter
(Setting range: Filter OFF, 90 Hz, 135 Hz, 180 Hz, 225 Hz,
Default: Filter OFF)
q : Up
w : Down
Page 29

Function Setting
Adjustment to display on the FUNCTION menu
Press [MENU] to display the menu dis-
1
play.
For using the remote
control, hold down
[SEL] (MENU) for 2
sec. or more.
Press []] or [[] to display the FUNC-
2
TION menu.
Turn [VOL] to select a function to be
3
adjusted.
For using the remote
control, use [}] or
[{].
Press [PUSH
4
SEL] to adjust.
For using the remote control, use [BAND] (SET).
MUTE KEY
Setting [MUTE] buttons’ functions
: Volume off (Default)
: Volume down by 10 steps
: Volume down by 5 steps
SECURITY
Setting the security function (a page 13)
: ON (Default)
: OFF
BUILT-IN AMP
You can toggle the integrated amplifier on and off.
: Amplifier on (Default)
: Amplifier off (when the external amplifier is used)
English
Press [MENU] to close the menu
5
screen.
For using the remote control, hold down [SEL]
(MENU) for 2 sec. or more.
FUNCTION Menu Display
Lights when disactivated.
Audio Setting, Function Setting
CQ-C7205U/C7105U
29
Page 30

Display Setting
Adjustment to display on the DISPLAY menu
Press [MENU] to display the menu
1
display.
For using the remote
control, hold down
[SEL] (MENU) for 2
sec. or more.
Press []] or [[] to display the
2
DISPLAY menu.
Turn [VOL] to select a function to be
3
adjusted.
For using the remote
control, use [}] or
[{].
Press [PUSH
4
SEL] to adjust.
For using the remote control, use [BAND] (SET).
Adjust the setting value.
5
Press [PUSH SEL].
6
For using the remote control, use [BAND] (SET).
GRAPHIC PATTERN
(Default: All)
Turn [VOL] to make a selection.
All: Sequential display from pattern A to C.
Pattern A-C
S.A.: 19-band display (Spectrum analyzer)
STILL IMAGE PATTERN
(Default: All)
Turn [VOL] to make a selection.
All: Sequential display from pattern 1 to 10
No.1-10
CONTRAST
(Setting range: 1 to 5, Default: Contrast 3)
: Tilting up view angle
q
: Tilting down view angle
w
30
Press [MENU] to close the menu
DISPLAY Menu Display
7
screen.
For using the remote control, hold down [SEL]
(MENU) for 2 sec. or more.
DEMONSTRATION
Switching by [PUSH SEL].
ON: Demonstration screen at no operation
(default)
OFF: Regular screen
CQ-C7205U/C7105U
CLOCK ADJ
Note: Adjust the clock when “ADJUST” appears on the
display.
[[] : Adjusting minutes
[]] : Adjusting hours
q : Forward
w : Backward
Notes:
¡ The graphic pattern and still image are changeable.
(a page 31)
¡ If corrupted data is selected, “DISPLAY FILE INCOM-
PLETE” appears. (a page 32)
Page 31

Customize the Display (Customize Function)
You can edit the moving images and still images that are initially stored in the unit. You also can use the data that is downloaded from
the Panasonic Web site and the data that is stored with a digital camera or other devices and processed with exclusive software,
IMAGE STUDIO. See “Notes on Customize Function” (a page 32) as well.
Note: Visit Panasonic Web site (http://panasonic.co.jp/pas/en/software/customize/index.html) for details.
Preparation:
Put the CD-R/RW that contains data to
be customized in hand.
If there is a disc inside, take out the
1
disc.
Press [SOURCE]
2
to select the CD
mode.
Hold down [PUSH SEL] for 4 sec. or
3
more to display the menu screen.
Load a CD-R/RW that contains data.
4
Notes:
¡ It may take time for the unit to identify the CD-
R/RW.
¡ Discs recorded by the packet writing software are
not supported.
Select an item to be customized.
5
Select a file.
6
qw[]][[]: Select
[PUSH SEL]: Confirm
Notes:
¡ Files are automatically identified by their exten-
sions, and target files are displayed.
¡ If “BACK” is selected, the screen of step 5
appears.
For a moving image file or still image
7
file, select where to save the file.
qw[}][{]: Select
[PUSH SEL]: Confirm
Notes:
¡ New data overwrites existing data.
¡ If “BACK” is selected, the screen of step 6
appears.
English
CUSTOMIZE Menu Display
qw: Select
[PUSH SEL]: Confirm
Note: To exit the customize menu, hold down
[PUSH SEL] for 4 sec. or more.
GRAPHIC PATTERN
Moving image (graphic pattern) data (a page 30)
STILL IMAGE
Still image data (a page 30)
OPENING MESSAGE
Moving image at power on
CLOSING MESSAGE
Moving image at power off
Confirm the changed item.
8
qw: Select
[PUSH SEL]: Confirm
Customization is performed. Do not turn off the
power in mid-operation. (It takes approx. 1 minutes
to complete this operation for a 168 kB moving
image.) After completion of this operation, the
screen of step 5 appears.
Note: If “NO” is selected, the screen of step 5
appears.
Press [uOPEN] to eject the disc.
9
Hold down [PUSH SEL] for 4 sec. or
10
more.
The CD mode comes back.
CQ-C7205U/C7105U
Display Setting, Customize the Display (Customize Function)
31
Page 32

Customize the Display (Customize Function) (continued)
Note on Download Service
The download service may be suspended or stopped
without advance notice. The download service is not
available in some areas. Please visit the site below for
further information.
Panasonic Web site:
(http://panasonic.net)
Notes on IMAGE STUDIO
¡ This download service is not available in some areas.
For details, please access the Panasonic website.
¡ IMAGE STUDIO is available only by downloading from
the address below. It is not bundled with this unit.
¡ Refer to the downloaded operating manual for how to
use IMAGE STUDIO.
Notes on File
¡ The customize-specific file is downloadable from the
URL below. You can create exclusive files stored with
a digital camera or other devices by using exclusive
software, IMAGE STUDIO that can be accessed from
the same URL.
¡ Do not change the extension. Otherwise, the data can-
not be recognized.
At Customizing
¡ If customizing is interrupted on account of turning off
the power, stopping the engine, removing the face
plate or other reasons, you may lose the data. In such
a case, try customizing again.
¡ The default image exists on the Panasonic Web site. If
you would like to restore it, download the image from
the site.
Download site:
http://panasonic.co.jp/pas/en/software/
customize/index.html
Error Display Messages
NO FILES DETECTED
No customize-specific data on the disc
a Load a disc that contains customize-specific
data.
CUSTOMIZING FAILED
Customize failed
a Check to see whether or not the extension is cor-
rect and file contents are appropriate.
At Disc Making
¡ Save only customize-specific data.
¡ Save all data in the root directory. Files contained in a
folder cannot be recognized.
¡ Follow the table below with regard to the number of
Notes on Customize Function
files that are saved to a disc. Files beyond the specified capacity are not readable.
¡ Discs recorded by the packet writing software are not
supported.
Type Extension Max. number
GRAPHIC PATTERN .pfm 10
STILL IMAGE .pfs 15
OPENING MESSAGE .pfo 5
CLOSING MESSAGE .pfe 5
DISPLAY FILE INCOMPLETE
Intended moving image or still image is damaged.
a Customize it again and overwrite the file with
new one.
32
CQ-C7205U/C7105U
Page 33

Troubleshooting
If You Suspect Something Wrong
Check and take steps as described below.
If the described suggestions do not solve the problem, it is
recommended to take the unit to your nearest authorized Panasonic
Servicenter. The product should be serviced only by qualified personnel.
Please refer the checking and the repair to professionals. Panasonic
shall not be liable for any accidents arising out of neglect of checking the
unit or your own repair after your checking.
Never take measures especially for those other than indicated by italic letters in “Possible Solution” described below because those are
too dangerous for users to handle themselves.
Problem
No power to the
unit
Sound is not
generated.
The power cord (battery, power and ground) is connected in the wrong way.
a Check the wiring.
Fuse blows out.
a Eliminate the cause of fuse blowout and replace the fuse with new one.
Consult your dealer.
MUTE is set to ON.
a Set MUTE to OFF.
The wiring of speaker lines are not correct, or a break or poor contact arises.
a Check the wiring in accordance with the wiring diagram. (Installation
Instructions)
Possible causeaPossible solution
Warning
¡ Do not use the unit in an irregular condition, for
example, without sound, or with smoke or a foul
smell, which can cause ignition or electric shock.
Immediately stop using the unit and consult your
dealer.
¡ Never try to repair the unit by yourself because it is
dangerous to do so.
English
Common
Noise
Noise is made in
step with engine
revolutions.
There is an electromagnetic-wave generator such as a cellular phone near the unit or
its electrical lines.
a Keep an electromagnetic-wave generator such as a cellular phone away from
the unit and the wiring of the unit. In case that noise cannot be eliminated
due to the wiring harness of the car, consult your dealer.
The contact of the ground lead is poor.
a Make sure that the ground lead is connected to an unpainted part of the chas-
sis securely.
Alternator noise comes from the car.
a Change the wiring position of the ground lead.
a Mount a noise filter on the power supply.
Customize the Display, Troubleshooting
CQ-C7205U/C7105U
33
Page 34

Troubleshooting
(continued)
Problem
Some operations
are not executable.
No sound from
speaker(s)
The speaker
channels are
reversed between
right and left.
The sound field is
not clear in the
stereo mode.
Central sound does
not settled.
Possible causeaPossible solution
Some operations are not executable in particular modes such as menu mode.
a Read the operating instructions carefully and cancel the mode. If the unit is
still out of order, consult your dealer.
BALANCE/FADER setting is not appropriate.
a Readjust BALANCE/FADER.
There is a break, a short circuit, poor contact or wrong wiring regarding the speaker
wiring.
a Check the speaker wiring.
The speaker wiring is confused between right and left.
a Perform the speaker wiring in accordance with the wiring diagram.
The plus and minus terminals at right and left channels of speakers are connected
reversely.
a Perform the speaker wiring in accordance with the wiring diagram.
The power fails
unintentionally.
Poor reception or
noise
The number of auto
preset stations is
Radio Common (continued)
less than 6.
Preset stations
cannot be stored.
The safety device works.
a Consult your dealer, or your nearest Panasonic Servicenter.
Antenna installation or wiring of antenna cable is faulty.
a Check whether the antenna mounting position and its wiring are correct. In
addition, check to see whether the antenna ground is securely connected to
the chassis.
No power is supplied to the antenna amplifier (when using a film antenna, etc.).
a Check the wiring of the antenna battery lead.
The number of receivable stations is less than 6.
a Move to an area where receivable stations number is maximum, and try pre-
setting.
The contact of the battery lead is poor, or the battery lead is not always powered.
a Make sure that the battery lead is connected securely, and preset stations
again.
34
CQ-C7205U/C7105U
Page 35

Problem
No playback or
disc ejected
Possible causeaPossible solution
The disc is inserted upside down.
a Insert a disc correctly.
There is a flaw or foreign material on the disc.
a Remove the foreign material, or use a flawless disc.
English
CD
Sound skipping or
noise
Sound skipping
due to vibration
Disc unejectable
No playback or
disc ejected
The CD-R/RWs that
are playable on
other devices are
not playable on
this unit.
There is a flaw or foreign material on the disc.
a Remove the foreign material, or use a flawless disc.
The unit is not sufficiently secured.
a Secure the unit to the console box.
The unit is tilted at over 30˚ in the front-to-end direction.
a Make the angle 30˚ or less.
Something such as a peeled label obstructs the disc coming out.
a Press and hold the [
open (disc forced ejection). In case that the disc forced ejection does not
work, consult your dealer.
The microcontroller in the unit operates abnormally due to noise or other factors.
a Unplug the power cord and plug it again. In case the unit is still out of order,
consult your dealer.
The disc has unplayable formatted data.
a Check the file format.
The playability of some CD-R/RWs may depend on the combination of media,
recording software and recorder to be used even if these CD-R/RWs are playable on
other devices such as a PC.
a Make CD-R/RWs in different combination of media, recording software and
recorder after referring to the description about the compressed audio player.
u
OPEN] for more than 2 seconds when the face plate is
Troubleshooting
Sound skipping or
noise
Compressed audio
Noise is heard with
“RE-MASTER” at
“ON”
There is a flaw or foreign material on the disc.
a Remove the foreign material, or use a flawless disc.
Playing VBR (Variable Bit Rate) files may cause sound skipping.
a Play Non-VBR files.
With some CDs, noise may be heard in the treble range when playing compressed
audio files into which the CD tracks were encoded with “RE-MASTER” enabled.
a If noise is heard, set “RE-MASTER” to “OFF”.
CQ-C7205U/C7105U
35
Page 36

Troubleshooting (continued)
Problem
No response to
pressing buttons
Remote control unit
Possible causeaPossible solution
The battery is inserted in the wrong direction. A wrong battery is inserted.
aInsert a correct battery in the correct direction.
The battery is weak.
aReplace the battery with new one.
The aiming direction of the remote control unit is wrong.
aAim the remote control unit at the sensor of the unit and press buttons.
The sensor is exposed to direct sunlight. (The remote control unit may not be
operable when the sensor is exposed to direct sunlight. In such a case, the
system is not faulty.)
aBlock off sunlight to the sensor.
36
CQ-C7205U/C7105U
Page 37

Error Display Messages
Display
CD/Compressed Audio
(After 5 seconds)
To next file automatically
Possible causeaPossible solution
The disc is dirty, or is upside down.
a Check the disc.
The disc has scratches.
a Check the disc.
No operation by some cause.
a Unplug the power cord and plug it again. In case the unit is still out of order,
consult your dealer. (a Installation Instructions)
The player for some reason cannot read the file you are trying to play. (File recorded
in an unsupported file system, compression scheme, data format, file name extension, damaged data, etc.)
a Select a file that the player can read. Check the type of data recorded on the
disc. Create a new disc if necessary.
A WMA file can be copyrighted.
a The file protected by copyright is not playable.
EnglishEnglish
Error Display Messages
No disc.
Note: Refer to the System Upgrade Guidebook for error messages regarding optional products.
Troubleshooting,
CQ-C7205U/C7105U
37
Page 38

Notes on Discs
TEXT
If you use commercial CDs, they must have
either of these labels shown at right.
Some copy-protected music CDs are not
playable.
How to hold the disc
¡ Do not touch the underside of the disc.
¡ Do not scratch on the disc.
¡ Do not bend the disc.
¡ When not in use, keep the disc in a case.
Do not leave discs in the following places:
¡ In direct sunlight
¡ Near car heaters
¡ Dirty, dusty and damp areas
¡ On seats and dashboards
Disc cleaning
Use a dry, soft cloth to wipe from the center outward.
<Wrong><Correct>
Notes on CD/CD Media (CD-ROM, CD-R, CD-RW)
Do not write on the disc label with a ballpoint
pen or other hard-point pens.
Labels created by a printer,
Protective films or sheets
Printed side
Disc with adhered
stickers or tape
Irregularly shaped discs
Discs with cracks,
scratches or parts missing
¡ You may have trouble playing back some CD-R/RW discs recorded on CD recorders (CD-R/RW drives), either due
to their recording characteristics or dirt, fingerprints, scratches, etc. on the disc surface.
¡ CD-R/RW discs are less resistant to high temperatures and high humidity than ordinary music CDs. Leaving them
inside a car for extended periods may damage them and make playback impossible.
¡ Some CD-R/RWs can not be played back successfully thanks to incompatibility among writing software, a CD
recorder (CD-R/RW drive) and the discs.
Notes on
¡ This player cannot play the CD-R/RW discs if the session is not closed.
¡ This player cannot play the CD-R/RW discs which contains other than CD-DA or compressed audio data.
CD-Rs/RWs
¡ Be sure to observe the instructions of CD-R/RW disc for handling it.
Maintenance/Fuse
Your product is designed and manufactured to ensure the minimum of maintenance. Use a soft cloth for
routine exterior cleaning. Never use benzine, thinner, or other solvents.
Unit
Cleaning the
If the fuse blows out, consult your dealer, or your nearest authorized Panasonic Servicenter.
38
Fuse
Warning
¡Use fuses of the same specified rating (15 A). Using substitutes or fuses with higher ratings, or connecting the
unit directly without a fuse could cause fire or damage to the unit. If the replaced fuse fails, contact your
nearest authorized Panasonic Servicenter.
CQ-C7205U/C7105U
Page 39

Specifications
Power Supply DC 12 V (11 V – 16 V), Test Voltage 14.4 V, Negative Ground
Tone Controls (Bass/Treble)
Equalizer Center Frequency
Variable Range of Equalizer
Current Consumption Less than 2.2 A (CD mode, 0.5 W 4-Speaker)
Maximum Power Output
Speaker Impedance 4 – 8 Ω
Pre-amp output voltage
General
CD Player
Subwoofer-output voltage
Pre-amp output impedance
Subwoofer-output impedance
Dimensions (Main Unit)
Weight (Main Unit) 1.6 kg {3 lbs. 8 oz}
Sampling Frequency 8 times oversampling
DA Converter 4 DAC System
Pick-Up Type Astigma 3-beam
Light Source Semiconductor laser
Wavelength 790 nm
Frequency Response 20 Hz – 20 kHz (±1 dB)
Signal to Noise Ratio 96 dB
Total Harmonic Distortion
Wow and Flutter Below measurable limits
Channel Separation 85 dB
Bass; ±12 dB at 60 Hz, Treble; ±12 dB at 16 kHz
60, 160, 400, 1 k, 3 k, 6 k, 16 k Hz
–12 dB to 12 dB (2 dB step)
50 W x 4 (at 1 kHz)
5 V (CQ-C7205U), 2.5 V (CQ-C7105U) (CD mode, 1 kHz, 0 dB)
5 V (CQ-C7205U), 2.5 V (CQ-C7105U) (CD mode, 1 kHz, 0 dB)
60 Ω (CQ-C7205U), 200 Ω (CQ-C7105U)
60 Ω (CQ-C7205U), 200 Ω (CQ-C7105U)
178(W) x 50(H) x 155(D) mm {7” x 1 15/16”x 6 1/8”}
0.01 % (1 kHz)
English
English
FM
Frequency Range 87.9 MHz – 107.9 MHz
Usable Sensitivity 10.2 dBf (0.9 µV, 75Ω)
50 dB quieting Sensitivity
Frequency Response 30 Hz – 15 kHz (±3 dB)
Alternate channel selectivity
Stereo Separation 30 dB (at 1 kHz)
Image response ratio 55 dB
IF response ratio 100 dB
Stereo Radio
Power Output:
18 W RMS x 4 Channels at 4 Ω and ≤ 1%
THD+N
Signal to Noise Ratio:
85 dBA (reference: 1 W into 4 Ω)
Signal to noise ratio 62 dB
AM
Frequency Range 530 kHz – 1 710 kHz
Usable Sensitivity 27 dB/µV (S/N 20 dB)
15.2 dBf (1.6 µV, 75Ω)
75 dB
Notes on discs, Maintenance/Fuse, Specifications
Above Specifications comply with EIA standards.
Notes:
¡Specifications and design are subject to modification
without notice due to improvements.
¡Some figures and illustrations in this manual may be
different from your product.
CQ-C7205U/C7105U
39
Page 40

Memorandum
114
CQ-C7205U/C7105U
Page 41

Memorandum
CQ-C7205U/C7105U
115
Page 42

Panasonic Consumer
Electronics Company,
Division of Panasonic
Corporation of North America
One Panasonic Way, Secaucus,
New Jersey 07094
http://www.panasonic.com
© 2006 Matsushita Electric Industrial Co., Ltd. All Rights Reserved
Panasonic Sales Company,
Division of Panasonic Puerto
Rico, Inc. (“PSC”)
Ave. 65 de Infanteria, Km. 9.5
San Gabriel Industrial Park,
Carolina, Puerto Rico 00985
http://www.panasonic.com
YFM284C662CA NY1006-1116 Printed in China
Panasonic Canada Inc.
5770 Ambler Drive,
Mississauga, Ontario
L4W 2T3
http://www.panasonic.ca
Imprimé en Chine
Impreso en China
Page 43

WARNING/AVERTISSEMENT/ADVERTENCIA
❐ This installation information is designed for professional installers with knowledge of automobile electrical safety systems and is not
intended for non-technical, do-it-yourself individuals. It does not contain instructions on the electrical installation and avoidance of
potential harm to air bag, anti-theft and ABS braking or other systems necessary to install this product. Any attempt to install this
product in a motor vehicle by anyone other than a professional installer could cause damage to the electrical safety system and could
result in serious personal injury or death.
❐ If your car is equipped with air bag and/or anti-theft systems, specific procedures may be required for connection and disconnection
of the battery to install this product. Before attempting installation of this electronic component against the manufacturer’s
recommendation, you must contact your car dealer or manufacturer to determine the required procedure and strictly follow their
instructions.
FAILURE TO FOLLOW THE PROCEDURE MAY RESULT IN THE UNINTENDED DEPLOYMENT OF AIR BAGS OR ACTIVATION OF THE ANTI-THEFT
SYSTEM RESULTING IN DAMAGE TO THE VEHICLE AND PERSONAL INJURY OR DEATH.
❐ Les informations concernant cette installation sont destinées aux techniciens professionnels, compétents dans le domaine des
systèmes de sécurité électrique pour automobiles et ne sont pas destinées aux bricoleurs ou aux personnes non professionnelles.
Elles ne contiennent pas d’instructions sur les installations électriques ni d’avertissements sur les dangers potentiels des coussins
gonflables, du système antivol et du système de freinage ABS ou autres systèmes d’avertissement qui sont indispensables pour
installer cet appareil. Toute tentative d’installer cet appareil dans un véhicule par une personne autre qu’un installateur professionnel
pourrait endommager le système de sécurité électrique, et pourrait provoquer des blessures physiques graves, voire la mort.
❐ Si votre voiture est équipée de coussins gonflables et(ou) du système antivol, des procédures spécifiques sont parfois requises pour
la connexion et la déconnexion de la batterie pour installer cet appareil. Avant de tenter malgré tout l’installation de ce composant
électronique contrairement aux recommandations du fabricant, vous devez entrer en contact avec votre concessionnaire ou votre
fabricant automobile pour déterminer la procédure requise et vous conformer strictement à leurs instructions.
LE FAIT DE NE PAS SUIVRE CETTE PROCÉDURE PEUT PROVOQUER UN DÉPLOIEMENT DES COUSSINS GONFLABLES OU L’ACTIVATION DU
SYSTÈME ANTIVOL POUVANT ENDOMMAGER LE VÉHICULE OU PROVOQUER DES BLESSURES PHYSIQUES, VOIRE LA MORT.
❐ La información de instalación va dirigida a instaladores profesionales con conocimientos de los sistemas de seguridad eléctricos de
los automóviles y no se ha preparado para individuos sin conocimientos técnicos. No contiene instrucciones sobre la instalación
eléctrica ni advertencias relacionadas con los posibles daños en los airbag, sistema antirrobo y de frenos ABS, ni otros sistemas, que
pueden causarse al intentar instalar este producto. Cualquier intento de instalar este producto en un vehículo motorizado por parte de
una persona que no sea un instalador cualificado podrá causar daños en los sistemas eléctricos de seguridad, pudiendo causar
heridas graves o incluso la muerte.
❐ Si su automóvil está provisto de sistemas de airbags y/o antirrobo, pueden resultar necesarios unos procedimientos específicos
para conectar y desconectar la batería a fin de instalar este producto. Antes de intentar instalar este componente electrónico en
contra a las recomendamos del fabricante, deberá ponerse en contacto con el concesionario o fabricante de su automóvil para
determinar el procedimiento requerido y deberá seguir estrictamente sus instrucciones.
SI NO SIGUE EL PROCEDIMIENTO INDICADO PUEDE RESULTAR EN QUE SE INFLEN ACCIDENTALMENTE LOS AIRBAG O SE ACTIVE EL SISTEMA
ANTIRROBO, RESULTANDO EN DAÑOS EN EL VEHÍCULO Y HACIÉNDOLE CORRER EL PELIGRO DE HERIDAS PERSONALES O DE MUERTE.
(CQ-C7205U)
AAC WMA MP3 CD Player/Receiver
Récepteur/lecteur CD avec lecture AAC/WMA/MP3
Reproductor de CD, AAC, WMA y MP3/receptor
Model: CQ-C7205U/C7105U
Installation Instructions
Installation Instructions
Instructions d’installation
Instructions d’installation
Instrucciones de instalaciInstrucciones de instalación
Instrucciones de instalación
EnglishFrançaisEspañol
Before Installation/Avant l’installation/
Antes de la instalación
Consult a professional for installation.
●Verify the radio using the antenna and speakers before
installation.
Prenez contact avec un spécialiste pour le montage.
●Vérifiez l’autoradio avant de procéder au montage.
Para realizar la instalación consulte a un profesional.
●Verifique el funcionamiento de la radio empleando la antena y los
altavoces antes de realizar la instalación.
●Mounting angle right to left : horizontal
front to rear : 0 – 30°
●Angle de montage latéral : horizontal
longitudinal : 0 à 30°
●
Ángulo de montaje Lado a lado
Delante a atrás : 0 – 30°
: horizontal
30°
Dashboard/Tableau de bord/Tablero de instrument
THICKNESS/ÉPAISSEUR/GROSOR
MIN. 4.75 mm {3/16”}/{3/16 po}/{3/16”}
MAX. 5.56 mm {7/32”}/{7/32 po}/{7/32”}
53 mm {2 3/32”}
{2 3/32 po}
{2 3/32”}
182 mm {7 5/32”}
{7 5/32 po}
{7 5/32”}
Before Wiring/Avant le câblage/
Antes de realizar las conexiones
Please refer to the “WARNING” statement above.
Exclusively operated with 12 V battery with
negative (–) ground.
Connect the power lead (red) last.
Connect the battery lead (yellow) to the positive (+) terminal of
the battery or fuse block terminal (BAT).
Strip about 5 mm {1/4”} of the lead ends for connection.
Apply insulating tape to bare leads.
Reportez-vous à l’ “AVERTISSEMENT” ci-dessus.
Alimentez l’appareil exclusivement avec une batterie de 12 V
avec sa polarité négative (–) mise à la masse.
Raccordez le fil d'alimentation (rouge) en dernier.
Connectez le fil (jaune) à la borne positive (+) de la batterie ou à
la borne (BAT) de la boîte à fusibles.
Dénudez les extrémités de fil de 5 mm {1/4 po} environ
pour la connexion.
Recouvrez les fils nus d’un ruban isolant.
Consulte el apartado “ADVERTENCIA” arriba mencionado.
Conecte exclusivamente una alimentación de batería
de 12 V con el negativo (–) a tierra.
Conecte el cable de la alimentación (rojo) en último lugar.
C
onecte el cable de la batería (amarillo) al terminal positivo
(+) de la batería o al terminal (BAT) del bloque de fusibles.
Pele unos 5 mm {
la conexión.
Ponga cinta aislante en los cables desnudos.
1/4”} de los extremos del cable para efectuar
TEXT
●
Please read these instructions carefully before using this product and keep this manual for future reference.
●
Prière de lire ces instructions attentivement avant d’utiliser l’appareil et garder ce manuel pour l’utilisation ultérieure.
●
Lea con atención estas instrucciones antes de utilizar el producto y guarde este manual para poderlo consultar en el futuro.
Supplied Hardware/Matériel d’installation/Accesorios suministrados
No.
Mounting Collar
Cadre de montage
Collar de montaje
Mounting Bolt (5 mm ø)
Boulon de fixation (5 mm ø)
Perno de montaje (5 mm ø)
Lock Cancel Plate
Plaque anti-blocage
Placa de cancelación de bloqueo
Tapping Screw (5 mm ø x 16 mm)
Vis taraudeuse (5 mm ø x 16 mm)
To r nillo de autoenrosque (5 mm ø x 16 mm)
Panasonic Consumer
Electronics Company,
Division of Panasonic
Corporation of North America
One Panasonic Way, Secaucus,
New Jersey 07094
http://www.panasonic.com
© 2006 Matsushita Electric Industrial Co., Ltd. All Rights Reserved
Item No. Diagram
FX0214C384ZB ✽
Diagram
✽
✽
✽
Panasonic Sales Company,
Division of Panasonic Puerto
Rico, Inc. (“PSC”)
Ave. 65 de Infanteria, Km. 9.5
San Gabriel Industrial Park,
Carolina, Puerto Rico 00985
http://www.panasonic.com
Q'ty
1
1
2
1
Item
Hex. Nut (5 mm ø)
Écrou hexagonal (5 mm ø)
Tuerca hexagonal (5 mm ø)
Power Connector
Connecteur d’alimentation
Conector de alimentación
Tr im Plate
Plaque de garniture
Placa de guarnición
Rear Support Strap
Plaque-support arrière
Regleta de soporte trasera
✽ w ,e ,r and t consist of a set. (YEP0FZ5739)
✽ w ,e ,r et t constituent un jeu. (YEP0FZ5739)
✽ w ,e ,r y t forman un juego. (YEP0FZ5739)
Panasonic Canada Inc.
5770 Ambler Drive,
Mississauga, Ontario
L4W 2T3
http://www.panasonic.ca
YFM294C091CA NY1206-1116 Printed in China
YGAJ021009
YEFC051013
YFG044C002ZA
Q'ty
1
1
1
1
Imprimé en Chine
Impreso en China
Installation/Montage/Instalación
How to install the unit/Mode de montage de l’appareil/Instalación de la unidad
Caution
● Wear gloves for safety.
● Make sure that wiring is completed before
installation.
Précaution
● Portez des gants à des fins de sécurité.
● Assurez-vous que le câblage est terminé avant
l'installation.
Precaución
● Póngase guantes para mayor seguridad.
● Asegúrese de haber completado todas las conexiones
eléctricas antes de realizar la instalación.
w
4
4
Securing to fire wall
Fixation au tablier
Fijación a la pared cortafuegos
Utilisation de la bague en caoutchouc (en option)
Empleo del buje de goma
Rubber Bushing
Bague en caoutchouc (en option)
Buje de goma (opcional)
Rear support bracket
(supplied with car)
Support arrière
(fourni avec votre voiture)
Ménsula de soporte trasera
(suministrada con el vehículo)
(Optional)
(opcional)
(Optional)
Mounting Bolt w
Boulon de fixation w
Perno de montaje w
To the unit
Côté appareil
A la unidad
Using the rear support strap
Utilisation de la plaque-support arrière
Empleo de la regleta de soporte trasera
3 mm
Hexagonal nut t
Écrou hexagonal t
Tuerca hexagonal t
Tapping screw
Vis taraudeuse
Tor nillo de autoenrosque
Rear support strap
Plaque-support arrière
Regleta de soporte trasera i
4
iUsing the rubber bushing
i
i
r
r
r
i
i
Mounting Bolt w
Boulon de fixationw
Perno de montaje w
To the unit
Côté appareil
A la unidad
Remove the cable from the battery negative terminal.
Retirez le câble de la borne négative de la batterie.
1
Extraiga el cable del terminal negativo de la batería.
Mounting collar q insertion. Bend mounting tabs.
Insertion du cadre de montage q. Pliez les languettes de
2
fixation.
Inserción del collar de montaje q. Doble las lengüetas
de montaje.
Connection of power connector y.
3
Raccordement du connecteur d'alimentation y.
Conexión del conector de la alimentación y.
4
q
4
e
4
Clank!
Tr im plate u mounting
Installation de la plaque de
5
5
Snapping point
Point d’encliquetage
Punto de acoplamiento
garniture u
Montaje de la placa de
guarnición u
6
Battery Cable reconnection
Raccordement du câble
6
Reconexión de cables
Main unit securing
Fixation de l'appareil
principal
Fijación de la
unidad principal
Bend appropriate tabs to secure the unit
without backlash.
Repliez les languettes de fixation
appropriées pour immobiliser l'appareil
sans contrecoup.
Doble las lengüetas
apropiadas para fijar la
unidad sin
contragolpe.
q Screw the mounting bolt w into the main unit.
w Secure to the fire wall.
e
Snap the right and left springs into each hole.
q Vissez le boulon de fixation w dans l'appareil
principal.
w Fixez au tablier.
e
Engager les ressorts gauche et droit dans chaque
trou.
q Enrosque el perno de montaje w en la unidad
principal.
w Fíjelo a la pantalla cortafuegos.
e
Acople los resortes derecho e izquierdo en cada
orificio.
Caution
When this unit is installed in dashboard,
ensure that there is sufficient air flow
around the unit to prevent damage from
overheating, do not block any ventilation
holes on the unit.
Précaution
Lorsque cet appareil est installé dans le
tableau de bord, assurez-vous qu'il y a une
circulation d'air suffisante autour de
l'appareil afin d'éviter tout endommagement
provoqué par une surchauffe et qu'aucun
trou d'aération de l'appareil n'est obturé.
Precaución
Cuando instale esta unidad en el tablero de
instrumentos, asegúrese de que haya
suficiente ventilación de aire en torno a la
unidad para evitar daños debidos al
sobrecalentamiento, y no obstruya ningún
orificio de ventilacion de la unidad.
How to remove the unit/Retrait de l’appareil/
Extracción de la unidad
q
w
e
1
2
q
w
q
3
w
4
Remove the face plate.
Retirez le panneau
avant.
Extraiga el panel frontal.
Remove the trim plate
Enlevez la plaque de
garniture
Extraiga la placa de
guarnición
Lock release
q Insert the lock cancel plate
w Pull the main unit.
Libération du verrouillage
q Introduisez la plaque anti-
w Dégagez l'appareil principal.
Desbloqueo
q
w Tire de la unidad principal.
Pull out the unit with
both hands.
Retirez l’appareil à deux
mains.
Extraiga la unidad con
ambas manos.
u.
u.
e until you hear a click.
blocage e jusqu’à entendre
un clic.
Inserte la placa de
cancelación de bloqueo
hasta oír un sonido seco de
confirmación.
u.
e
Page 44

Wiring/Câblage/Conexiones eléctricas
Fuse (15 A) Refer fuse replacement to your nearest authorized Panasonic
Servicenter. Do not try fuse replacement by yourself.
Fusible (15 A) Confiez le remplacement de fusible au centre de service
après-vente Panasonic agréé le plus proche. N’essayez pas de
remplacer le fusible tout(e) seul(e).
Fusible (15 A) Solicite el reemplazo del fusible al centro de servicio
Panasonic autorizado que le quede más cerca. No trate de reemplazar
Antenna
Antenne
Antena
System-up Connector
Connecteur de mise à niveau de système
Conector de mejora del sistema
usted mismo el fusible.
Caution
To prevent damage to the unit, do not connect the power connector
until the whole wiring is completed.
Précaution
Ne raccordez pas le connecteur d’alimentation à l’appareil avant
d’avoir effectué tous les raccordements pour éviter d’endommager
l'appareil.
Precaución
Para evitar daños en la unidad, no conecte el conector de alimentación
hasta haber completado todas las conexiones.
ACC
(Red)/(Rouge)/(Rojo)
Power Lead (ACC or IGN) To ACC power, +12 V DC.
Fil d’alimentation (ACC ou IGN) à l’alimentation ACC, +12 V CC.
Cable de la alimentación (ACC o IGN) A la alimentación de ACC, +12 V CC.
(
)/(
Rouge
(
(
)/(
Rouge
(R)/(D)/(Der.)
(L)/(G)/(Izq.)
)/(
Rouge
(R)/(D)/(Der.)
)/(
Rouge
(
)/(
)/(D)/(Der.)
R
)/(G)/(Izq.)
L
)/(
Rojo
)/(
(
)/(G)/(Izq.)
L
)/(
)/(D)/(Der.)
R
(
)/(G)/(Izq.)
L
Rojo
Rojo
Rojo
Red
S.W-OUT
(White)/(Blanc)/(Blanco)
(
Red
AUX1-IN
(White)/(Blanc)/(Blanco)
(
Red
PRE-OUT REAR
(White)/(Blanc)/(Blanco)
(
Red
PRE-OUT FRONT
(White)/(Blanc)/(Blanco)
Subwoofer Output Connector
)
The RCA cord of an external power amplifier should be
connected.
Connecteur de sortie des extrêmes-graves.
Le cordon RCA d’un amplificateur de puissance extérieur
doit être raccordé.
Conector de salida de altavoz de subgraves
Deberá conectarse el cable RCA de un amplificador de
potencia externo.
)
AUX Input Cord
Cordon d’entrée AUX
Cable de entrada AUX
)
Preamp Out Connector (Rear)
Connecteur de sortie de préamplificateur (Arrière)
Conector de salida de preamplificador (Trasero)
)
Preamp Out Connector (Front)
Connecteur de sortie de préamplificateur (Avant)
Conector de salida de preamplificador (Delantero)
FRONT SP
BATTERY 15A
(Black)/(Noir)/(Negro)
Ground Lead To a clean, bare metallic part of the car chassis.
Fil de mise à la masse à une partie métallique propre découverte du châssis de voiture.
Cable de toma de tierra A una parte metálica limpia y desnuda del chasis del vehículo.
(Yellow)/(Jaune)/(Amarillo)
Battery Lead To the car battery, continuous +12 V DC.
Fil de batterie à la batterie de voiture, alimentation continue de +12 V CC.
Cable de la batería A la batería del vehículo, +12 V CC continuos.
(Blue w/white stripe)/(Bleu rayé blanc)/(Azul con franja blanca)
External Amplifier Control Power Lead To an external amplifier. (Max. 100 mA)
Fil d'alimentation de commande d'amplificateur externe à un amplificateur externe. (100 mA max.)
Cable de alimentación de control de amplificador externo A un amplificador externo (Máx. 100 mA)
(Blue)/(Bleu)/(Azul)
Motor Antenna Relay Control Lead To Motor Antenna. (Max. 100 mA)
(This lead is not intended for use with a switch actuated power antenna)
Fil de commande de relais d’antenne motorisée à l’antenne motorisée (100 mA max.)
(Ce fil n’est pas conçu pour l’usage avec l’antenne
commandée par interrupteur.)
Cable de control del relé de la antena del motor. A la antena motorizada.
(Máx. 100 mA) (Este cable no sirve para emplear con una antena
eléctrica accionada con un interruptor)
System Upgrade Example: Connecting with the CD changer/Exemple de mise à niveau de système: Raccordement à un changeur
de disque CD/Ejemplo de mejora del sistema: Conectando un cambiador de discos CD
CQ-C7205U/C7105U
Conversion Cable for
DVD/CD Changer
Câble de conversion de
changeur DVD/CD
Cable de conversión para el
cambiador de discos DVD/CD
CA-CC30U
(Optional)
(En option)
(Opcional)
System-up Connector
Connecteur de mise à
niveau de système
Conector de mejora
del sistema
CHANGER IN
(R)/(D)/(Der.)
(
)/(
Red
Rouge
DIN Cord
Cordon DIN
Cable DIN
(White)/(Blanc)/(Blanco)
)/(G)/(Izq.)
(
L
)/(
)
Rojo
CX-DP880U
(Optional)
(En option)
(Opcional)
Ground Lead
Fil de masse
Cable de masa
Battery Lead
Fil de batterie
Cable de batería
RCA Cord
Cordon RCA
Cable RCA
Rear Left + (Green)
+
Arrière gauche + (Vert)
Trasero izquierdo + (Verde)
Rear Left – (Green w/black stripe)
-
Arrière gauche – (Vert rayé noir)
Trasero izquierdo – (Verde con franja negra)
Rear Right + (Violet)
+
Arrière droit + (Violet)
Trasero derecho + (Violeta)
Rear Right – (Violet w/black stripe)
-
Arrière droit – (Violet rayé noir)
Trasero derecho – (Violeta con franja negra)
REAR SP
Front Left + (White)
+
Avant gauche + (Blanc)
Delantero izquierdo + (Blanco)
Front Left – (White w/black stripe)
-
Avant gauche – (Blanc rayé noir)
Delantero izquierdo – (Blanco con franja negra)
Front Right + (Gray)
+
Avant droit + (Gris)
Delantero derecho + (Gris)
Front Right – (Gray w/black stripe)
-
Avant droit – (Gris rayé noir)
Delantero derecho – (Gris con franja negra)
Final Installation/Installation finale/
Instalación final
Lead Connections
Connect all wires, making sure that each connection is insulated and
secure. Bundle all loose wires and fasten them with tape so they will not
fall down later. Now insert the unit into the mounting collar.
Congratulations! After making a few final checks, you’re ready to enjoy
your new auto stereo system.
Câblage
Raccordez tous les fils en prenant soin qu’ils soient tous bien isolés et
solidement connectés. Enroulez toute longueur excédentaire de fil et
fixez-la en place avec une bande adhésive. Installez l’appareil dans son
câdre de montage.
Félicitations! Après avoir effectué quelques vérifications finales, vous êtes
prêt à profiter pleinement de votre nouveau système autoradio.
Conexiones de cables
Conecte todos los cables, asegurándose de que cada conexión queda
aislada y segura. Agrupe todos los cables sueltos y fíjelos con cinta para
que no queden colgando. Inserte entonces la unidad en el collar de
montaje.
¡Enhorabuena! Después de realizar algunas comprobaciones finales,
estará preparado para disfrutar de su nuevo sistema estéreo para
automóvil.
Final Check/Vérifications finales/
Comprobación final
1. Make sure that all wires are properly connected and insulated.
2. Make sure that the main unit is securely held in the mounting collar.
3. Turn on the ignition to check the unit for proper operation.
If you have difficulties, consult your nearest authorized professional
installer for assistance.
1. Assurez-vous que tous les fils sont bien raccordés et isolés.
2. Assurez-vous que l’appareil est solidement en place dans son collier de
montage.
3. Faites démarrer la voiture et vérifiez le fonctionnement de l’appareil.
En cas de difficulté, consultez un installateur professionnel.
1. Asegúrese de que todos los cables estén correctamente conectados y
aislados.
2. Asegúrese de que la unidad principal quede fijada con seguridad en el
collar de montaje.
3. Conecte el encendido para comprobar el correcto funcionamiento de la
unidad.
Si tiene alguna dificultad, consulte al instalador profesional que le quede
más cerca para que le ayude.
Speaker Connection/Raccordement des haut-parleurs/Conexión de los altavoces
Connect as follows.
Raccordez les haut-parleurs comme suit.
Conecte de la forma siguiente.
L
R
●Use ungrounded speakers only.
Allowable input: 50 W or more
Impedance: 4 – 8 Ω
●Use of speakers which do not match the specifications can cause
burning, smoking or damage of the speakers.
●Distance between speaker and amplifier: 30 cm {12”} or more
●Utilisez uniquement des haut-parleurs non reliés à la masse.
Puissance d’entrée admissible : 50 W ou davantage
Impédance : 4 – 8 Ω
●L’ utilisation de haut-parleurs non appariés aux spécifications
peuvent engendrer une inflammation, de la fumée voire
endommager les haut-parleurs.
●Distance entre le haut-parleur et l’amplificateur : 30 cm {12 po} ou
davantage
●Emplee solamente altavoces sin toma de tierra.
Entrada permisible: 50 W o más
Impedancia: 4 - 8 Ω
●El empleo de altavoces que no satisfacen las especificaciones
puede causar quemaduras, humo, o daños en los altavoces.
●Distancia entre el altavoz y el amplificador: 30 cm {12”} o más
Caution
●Do not connect more than one speaker to
one set of speaker leads. (except for connecting to
a tweeter)
Précaution
●Ne raccordez pas plus d'un haut-parleur à un
ensemble de fils de haut-parleur. (Sauf lors du
raccordement à un haut-parleur des aigus)
Precaución
●No conecte más de un altavoz a un juego
de cables de altavoz. (excepto para la
conexión a un altavoz de agudos)
●Do not use a 3-wire type speaker system
having a common earth lead.
●N’utilisez pas de système de haut-parleur
de type à 3 fils ayant un fil de mise à la masse
commun.
●No emplee sistemas de altavoz del tipo de 3 cables
con cable de masa común.
Page 45

System Upgrade Guidebook
Guide pratique de mise à niveau de système
Guía de mejora del sistema
Model: CQ-C7205U/C7105U
¡ For upgrading your system, read this manual carefully before use. This manual should be retained for future reference after
read.
¡ Veuillez lire attentivement ce mode d'emploi avant toute utilisation pour faire la mise à niveau du système. Conserver ce
manuel dans un endroit sûr pour toute consultation ultérieure.
¡ Para efectuar la mejora de su sistema, lea detenidamente este manual antes de la utilización. Después de su lectura, deberá
guardar este manual para poderlo consultar en el futuro.
Page 46

Safety Information
■
Read the operating instructions for the unit and all other components of your car audio system carefully before using the
system. They contain instructions about how to use the system in a safe and effective manner. Panasonic assumes no
responsibility for any problems resulting from failure to
observe the instructions given in this manual.
This pictograph intends to alert you to the presence of important operating instructions and
Warning
installation instructions. Failure to heed the
instructions may result in severe injury or death.
Warning
Observe the following warnings when using
this unit.
❑
The driver should neither watch the display nor
operate the system while driving.
Watching the display or operating the system will distract
the driver from looking ahead of the vehicle and can cause
accidents. Always stop the vehicle in a safe location and use
the parking brake before watching the display or operating
the system.
❑
Use the proper power supply.
This product is designed for operation with a negative
grounded 12 V DC battery system. Never operate this product with other battery systems, especially a 24 V DC battery
system.
❑
Keep batteries and insulation film out of reach of
infants.
Batteries and insulation film can be ingested, so keep them
out of the reach of infants. If an infant ingests a battery or
insulation film, please seek immediate medical attention.
❑
Protect the Deck Mechanism.
Do not insert any foreign objects into the slot of this unit.
❑
Do not disassemble or modify the unit.
Do not disassemble, modify the unit or attempt to repair the
product yourself. If the product needs to be repaired, consult
your dealer or an authorized Panasonic Servicenter.
❑
Do not use the unit when it is out of order.
If the unit is out of order (no power, no sound) or in an
abnormal state (has foreign objects in it, is exposed to
water, is smoking, or smells), turn it off immediately and
consult your dealer.
❑
The remote control unit should not lie about in the
car.
If the remote control unit lies about, it could fall on the floor
while driving, get wedged under the brake pedal, and lead to
a traffic accident.
❑
Refer fuse replacement to qualified service personnel.
When the fuse blows out, eliminate the cause and have it
replaced with the fuse prescribed for this unit by a qualified
service engineer. Incorrect replacement of the fuse may lead
to smoke, fire, and damage to the product.
■
This manual uses pictographs to show you how to use the
product safely and to alert you to potential dangers resulting
from improper connections and operations. The meanings of
the pictographs are explained below. It is important that you
fully understand the meanings of the pictographs in order to
use this manual and the system properly.
This pictograph intends to alert you to the presence of important operating instructions and
Caution
installation instructions. Failure to heed the
instructions may result in injury or material damage.
Observe the following warnings when
installing.
❑
Disconnect the lead from the negative (–) battery
terminal before installation.
Wiring and installation with the negative (–) battery terminal
connected may cause electrical shock and injury due to a
short circuit.
Some cars equipped with the electrical safety system have
specific procedures of battery terminal disconnection.
FAILURE TO FOLLOW THE PROCEDURE MAY LEAD TO THE
UNINTENDED ACTIVATION OF THE ELECTRICAL SAFETY
SYSTEM RESULTING IN DAMAGE TO THE VEHICLE AND
PERSONAL INJURY OR DEATH.
❑
Never use safety-related components for installation, grounding, and other such functions.
Do not use safety-related vehicle components (fuel tank,
brake, suspension, steering wheel, pedals, airbag, etc.) for
wiring or fixing the product or its accessories.
❑
Installing the product on the air bag cover or in a
location where it interferes with airbag operation is
prohibited.
❑
Check for piping, gasoline tank, electric wiring, and
other items before installing the product.
If you need to open a hole in the vehicle chassis to attach or
wire the product, first check where the wire harness, gasoline tank, and electric wiring are located. Then open the hole
from outside if possible.
❑
Never install the product in a location where it interferes with your field of vision.
❑
Never have the power cord branched to supply other
equipment with power.
❑
After installation and wiring, you should check the
normal operation of other electrical equipment.
The continuation of their using in abnormal conditions may
cause fire, electrical shock or a traffic accident.
❑
In the case of installation to an airbag equipped car,
confirm warnings and cautions of the vehicle manufacturer before installation.
❑
Make sure the leads do not interfere with driving or
getting in and out of the vehicle.
❑
Insulate all exposed wires to prevent short circuiting.
2
CQ-C7205U/C7105U
Page 47

Caution
Observe the following cautions when using this
unit.
❑
Keep the sound volume at an appropriate level.
Keep the volume level low enough to be aware of road and
traffic conditions while driving.
❑
Do not insert or allow your hand or fingers to be
caught in the unit.
To prevent injury, do not get your hand or fingers caught in
moving parts or in the disc slot. Especially watch out for
infants.
❑
This unit is designed for use exclusively in automobiles.
❑
Do not operate the unit for a prolonged period with
the engine turned off.
Operating the audio system for a long period of time with the
engine turned off will drain the battery.
❑
Do not expose the unit to direct sunlight or excessive heat.
Otherwise these will raise the interior temperature of the
unit, and it may lead to smoke, fire, or other damage to the
unit.
❑
Do not use the product where it is exposed to water,
moisture, or dust.
Exposure of the unit to water, moisture, or dust may lead to
smoke, fire, or other damage to the unit. Make especially
sure that the unit does not get wet in car washes or on rainy
days.
Observe the following cautions when
installing.
❑
Refer wiring and installation to qualified service
personnel.
Installation of this unit requires special skills and experience.
For maximum safety, have it installed by your dealer.
Panasonic is not liable for any problems resulting from your
own installation of the unit.
❑
Follow the instructions to install and wire the product.
Not following the instructions to properly install and wire the
product could cause an accident or fire.
❑
Take care not to damage the leads.
When wiring, take care not to damage the leads. Prevent
them from getting caught in the vehicle chassis, screws, and
moving parts such as seat rails. Do not scratch, pull, bend or
twist the leads. Do not run them near heat sources or place
heavy objects on them. If leads must be run over sharp
metal edges, protect the leads by winding them with vinyl
tape or similar protection.
❑
Use the designated parts and tools for installation.
Use the supplied or designated parts and appropriate tools
to install the product. The use of parts other than those supplied or designated may result in internal damage to the unit.
Faulty installation may lead to an accident, a malfunction or
fire.
❑
Do not block the air vent or the cooling plate of the
unit.
Blocking these parts will cause the interior of the unit to
overheat and will result in fire or other damage.
❑
Do not install the product where it is exposed to
strong vibrations or is unstable.
Avoid slanted or strongly curved surfaces for installation. If
the installation is not stable, the unit may fall down while
driving and this can lead to an accident or injury.
❑
Installation Angle
The product should be installed in a horizontal position with
the front end up at a convenient angle, but not more than
30˚.
The user should bear in mind that in some areas there may
be restrictions on how and where this unit can be installed.
Consult your dealer for further details.
❑
Wear gloves for safety. Make sure that wiring is
completed before installation.
❑
To prevent damage to the unit, do not connect the
power connector until the whole wiring is completed.
❑
Do not connect more than one speaker to one set of
speaker leads. (except for connecting to a tweeter)
Observe the following cautions when handling
the battery for the remote control unit.
●
Use only specified battery (CR2025).
●
Match the polarity of the battery with the (+) and (–) marks
in the battery case.
●
Replace dead battery as soon as possible.
●
Remove the battery from the remote control unit when not
using it for an extended period of time.
●
Insulate the battery (by placing them in a plastic bag or covering them with vinyl tape) before disposal or storage.
●
Dispose of the battery according to the local regulations.
●
Do not disassemble, recharge, heat or short the battery. Do
not throw a battery into a fire or water.
In case of battery leakage
●
Thoroughly wipe the battery liquid off the battery case and
insert new battery.
●
If any part of your body or clothing comes into contact with
battery liquid, wash it with plenty of water.
●
If battery liquid comes into contact with your eyes, wash
them with plenty of water and get immediate medical attention.
English
Safety Information
Refer to safety information of optional devices as well.
CQ-C7205U/C7105U
3
Page 48

Before Reading These Instructions
About
this Book
This book is an instruction manual that explains how to
operate your purchased head unit and its remote control
as an accessory when the head unit is connected to
optional devices.
(Remote Control Unit a Operating Instructions)
XM Satellite Radio Receiver
XMD-1000: manufactured
by XM Satellite Radio
(a Page 14)
Sirius Satellite Radio
Receiver
SIR-PAN1: manufactured
by Sirius Satellite Radio
(a Page 17)
DVD Changer
CX-DH801U
(Option) (a Page 8)
Headrest Monitor: CY-V7100U (Option)
Head Unit
CQ-C7205U/C7105U
Head units to be targeted
¡ CQ-C7205U/C7105U
All illustrations throughout this manual represent model
CQ-C7205U unless otherwise specified.
Head Unit: CQ-C7205U/C7105U
iPod (a Page 12)
Hands-Free Phone System:
CY-BT100U (Option)
(a Page 20)
Expansion Module (hub unit):
CY-EM100U (Option) (a Page 6)
CD Changer
(CX-DP880U, option)
System Upgrade Sample
Expansion Module
(CY-EM100U, option)
Notes:
¡ Refer to individual instruction and instal-
lation manuals for each device for detailed
installation and wiring.
¡ A hub unit is not required to connect only
one optional component.
System-up
Connector
Only 1 unit
Up to
4 units
Conversion Cable for DVD/CD
Changer
(CA-CC30U, option)
Direct Cable for iPod
(CA-DC300U, option)
CY-BT100U
CY-BT100U
Hands-Free Kit featuring
Bluetooth
(CY-BT100U, option)
You can connect the optional
XM receiver (XMD-1000) with
optional Digital Adapter.
®
technology
iPod
Cellular Phone
XM Satellite Radio
Receiver
(XMD-1000)
XMD 1000
L/C
1144XXXXXX
XM RADIO ID : XXXXXXXX
Sirius Satellite Radio
Receiver
(SIR-PAN1)
4
CQ-C7205U/C7105U
Page 49

Contents
English 2
¡Safety Information 2
¡Before Reading These Instructions 4
Français 24
Español 46
¡General 6
¡Disc Changer 8
¡iPod Control 12
¡XM Receiver 14
¡Sirius Satellite Radio Receiver 17
¡Hands-Free Phone System 20
Each Source
¡Troubleshooting 22
As Needed Common
CQ-C7205U/C7105U
5
Page 50

General
DVD Changer
The optional adapter (Conversion Cable for DVD/CD
Changer: CA-CC30U)
Panasonic DVD changer unit (CX-DH801U). For details,
refer to the operating instructions for the DVD changer
unit. (a page 8, 10)
allows you to connect the optional
CD Changer
The optional adapter (Conversion Cable for DVD/CD
Changer: CA-CC30U)
Panasonic CD changer unit (CX-DP880U). For details,
refer to the operating instructions for the CD changer
unit. (a page 8)
®
iPod
The optional adapter
allows you to connect the optional iPod series. (a page 12)
The iPod equipped with a dock connector is exclusively
connectable. Further information about the controllable
iPod is described below.
Controllable iPod/software version
¡ 3rd generation iPod/ver. 2.3
¡ 4th generation iPod/ver. 3.1.1
¡ 5th generation iPod/ver. 1.1.2 (Video playback is
not supported.)
¡ iPod Photo/ver. 1.2.1
¡ iPod mini/ver. 1.4.1
¡ iPod nano/ver. 1.2
* Operation check has been completed with software
available at the end of October, 2006. We do not
guarantee the operation with our future products or
upgraded software.
iPod is a trademark of Apple Computer, Inc., registered in
Connectable Devices
the U.S. and other countries.
XM Satellite Radio
You can connect the optional XM receiver (XMD-1000)
with optional Digital Adapter. For details, refer to the
operating instructions for the XM receiver.
(a page 14)
¡Toll free number
XM Tuner P/N: XMD-1000
Call 1-800-XM-RADIO(96-72346)
Extension cord P/N:
Call 1-800-942-TERK(8375)
Use the Panasonic-specific connecting cord (Digital
¡
Adapter). Please feel free to contact us at the above
phone number or your dealer if you have any question.
About XM
The direct satellite-to-receiver broadcasting technology is
used to provide listeners with crystal clear sound
smoothly from coast to coast. XM is over 130 channels
of sheer variety: digital-quality music, news, sports,
comedy, traffic & weather, talk, children’s programs, and
more.
The XM name and related logos are trademarks of XM
Satellite Radio Inc.
allows you to connect the optional
(Direct Cable for iPod: CA-DC300U)
Sirius Satellite Radio
You can connect the optional Sirius Satellite radio
receiver (SIR-PAN1). (a page 17)
Sirius Satellite Broadcast service
The Sirius Satellite coverage is only for the United States
except Hawaii and Alaska. There is no Sirius Satellite
coverage in Canada. The instruction of Satellite Operation
Controls in the Operating Instructions and Guide will not
be applied.
Hands-Free Phone System
You can connect the optional Hands-Free Phone System
(Hands-Free Kit featuring Bluetooth
CY-BT100U). For details, refer to the operating
instructions for the Hands-Free Phone System.
(a page 20)
Note: This unit is designed only for receiving calls.
It cannot send calls.
Bluetooth
The Bluetooth word mark and logo are owned by the
Bluetooth SIG, Inc. and any use of such marks by
Matsushita Electric Industrial Co.,Ltd. is under
license. Other trademarks and trade name are those
of their respective owners.
®
®
technology:
Expansion Module (hub unit)
You can connect the optional Expansion Module (hub
unit) (CY-EM100U). Connection of the Expansion Module
allows you to simultaneously connect optional devices
mentioned before as well as other AV devices. For
details, refer to the operating instructions for the
Expansion Module.
Connectable devices
¡ CD changer (max. 1)
¡ iPod (max. 2)
¡ XM Satellite Radio (max. 1)
¡ Sirius Satellite Radio (max. 1)
¡ Hands-Free Phone System (max. 1)
Note: Market conditions regarding optional devices vary
with countries and regions. For further information,
consult your dealer.
6
CQ-C7205U/C7105U
Page 51

The source changes as follows every time
[SOURCE] is pressed.
Radio
FM1, FM2, FM3, AM (a Operating Instructions)
Player
When loading CD (a Operating Instructions)
When loading a disc containing compressed
audio files (a Operating Instructions)
(SOURCE)
AUX 1
Source Selection
Device connected to the AUX terminal of the this unit
System-up Connector
Device connected to the System-up Connector of this
unit
¡ When optional devices are connected:
Shift to connected devices
¡ When an expansion module is connected:
The devices connected to the ports 1 to 4 are
activated in sequence after shifting to AUX2 (devices
connected to the AUX terminal of the expansion
module).
When connecting DVD Changer (a page 8, 10)
When connecting CD Changer (a page 8)
When connecting iPod (a page 12)
English
General
When connecting XM Receiver (a page 14)
When connecting Sirius receiver (a page 17)
When connecting Expansion Module
CQ-C7205U/C7105U
7
Page 52

Disc Changer
Connected an optional CD changer or an optional DVD changer can be controlled by this unit.
Load a magazine (discs).
1
When a magazine is already loaded, press
[SOURCE] to select the CD changer mode.
The unit recognizes the magazine and starts playing
automatically.
(When CDs or MP3 discs are loaded)
Select a desired portion.
2
Disc selection
[}] (DISC): Next disc
[{] (DISC): Preceding disc
Folder up/Down
Only for DVD Changer
Hold down for 2 sec. or more.
[}] (FOLDER): Next folder
Operation FlowCD Changer Mode Display
[{] (FOLDER): Preceding folder
Track/File selection
[7]: Next track/file
[6]: Preceding track/file (press twice)
Note: Hold down for fast forward/reverse.
Track/file
Disc number
Changer indicator
(CD changer)
(DVD changer)
Pause
Press [BAND] (y / 5).
Press again to cancel.
Play Mode indicators
lights when each mode is
activated.
(Disc Random, Only for CD changer)
(Disc Repeat)
(Disc Scan, Only for CD changer)
(Folder Repeat, Only for MP3 files)
Time
lights when the changer is
connected.
8
CQ-C7205U/C7105U
Page 53

Notes:
¡ When CX-DP880U or CX-DH801U is connected, a CD-RW
disc is playable.
¡ Trouble may occur while playing CD-Rs. Refer to the section
on “Notes on CD/CD Media (CD-ROM, CD-R, CD-RW)”.
(a Operating Instructions)
¡ This unit does not support the following through the CD
changer.
¡MP3 playback.
English
Random and Repeat play can be set.
Press [MENU] to display the menu dis-
1
play.
For using the remote
control, hold down
[SEL] (MENU) for 2
sec. or more.
RANDOM
¡ CD-DA
RANDOM playback of the selected disc (DVD changer)
RANDOM playback of all discs in the magazine (CD
changer)
¡ MP3 disc
RANDOM playback of the selected folders
: Off (default)
: Random playback
DISC RANDOM (Only for CD changer)
: Off (default)
Turn [VOL] to select a function to be
2
adjusted.
(RANDOM, REPEAT)
Random, Repeat Play (Disc Changer Menu Display)
For using the remote
control, use [}] or
[{].
Press [PUSH
3
SEL] to adjust.
For using the remote control, use [BAND] (SET).
Press [MENU] to close the menu
4
screen.
For using the remote control, hold down [SEL]
(MENU) for 2 sec. or more.
: Random playback (from selected disc)
REPEAT
: Off (default)
: Playing the current track/file repeatedly
DISC REPEAT (Only for CD-DA disc)
: Off (default)
: Playing the current disc repeatedly
FOLDER REPEAT (Only for MP3 disc)
: Off (default)
: Playing the current folder repeatedly
Play Mode Selection
One-touch operation is available for selecting a track
playing style by use of [RANDOM] or [REPEAT].
RANDOM, REPEAT
Press the button. Press again to cancel.
DISC RANDOM, DISC REPEAT, FOLDER REPEAT
Hold down the button for 2 sec. or more.
Hold down again to cancel.
SCAN play
Functions Only by
You can find your favorite file by playing first 10-sec. of
each file.
Remote Control Unit
SCAN (CD changer: All tracks, DVD changer:
from selected disc)
Press [SCAN]. Press again to cancel.
DISC SCAN (1st file in each disc, only for CD
changer)
Hold down [SCAN] for 2 sec. or more. Hold down
again to cancel.
Direct Access
A disc can be directly selected.
Example: disc number 5
Press [#] (NUMBER).
1
Press [5].
2
Press [SET].
3
Note: To suspend direct
selection, press [DISP] (Display).
CQ-C7205U/C7105U
Disc Changer (When CDs or MP3 discs are loaded)
9
Page 54

Disc Changer
Connected an optional DVD changer (CX-DH801U) can be controlled by this unit.
Load a magazine (discs).
1
When a magazine is already loaded, press
[SOURCE] to select the DVD changer mode.
The unit recognizes the magazine and starts playing
automatically.
Notes:
¡ For DVD operations other than the above (i.e. DVD
menu, closed caption, etc.), use the remote control unit supplied with the DVD changer.
¡ The remote control unit supplied with the DVD
changer does not work properly when you aim it
at this unit.
Operation FlowDVD Changer Mode Display
¡ When using the remote control unit supplied with
the DVD changer, aim it at the monitor display
(CY-V7100U).
(When DVDs or VCDs are loaded)
2
Select a desired portion.
Disc selection
[}] (DISC): Next disc
[{] (DISC): Preceding disc
Chapter/Track selection
[7]: Next chapter/Next track
[6]: Preceding chapter/ Preceding track
(press twice)
Note: Hold down for fast forward/reverse.
Pause
Chapter number
Disc number
Changer indicator
Disc type
Press [BAND] (y / 5).
Press again to cancel.
Play Mode indicators
lights when each mode is
activated.
(Disc Repeat)
(Chapter Repeat)
(Title Repeat)
Time
lights when the changer is
connected.
10
CQ-C7205U/C7105U
Page 55

Repeat play can be set.
Press [MENU] to display the menu dis-
1
play.
For using the remote
control, hold down
[SEL] (MENU) for 2
sec. or more.
Turn [VOL] to select a function to be
2
adjusted.
For using the remote
control, use [}] or
(RANDOM, REPEAT)
Random, Repeat Play (DVD Changer Menu Display)
[{].
Press [PUSH
3
SEL] to adjust.
For using the remote control, use [BAND] (SET).
Press [MENU] to close the menu
4
screen.
For using the remote control, hold down [SEL]
(MENU) for 2 sec. or more.
For a DVD insertion
¡
CHAPTER REPEAT
: Off (default)
: Playing the current chapter repeatedly
TITLE REPEAT
: Off (default)
: Playing the current title repeatedly
Note: The unit may not operate for some DVDs.
For a VCD insertion
¡
REPEAT
: Off (default)
: Playing the current track repeatedly
DISC REPEAT
: Off (default)
: Playing the current disc repeatedly
Notes:
¡ The unit may not operate for some VCDs.
¡ The unit may not operate for a disc with the play back
function activated.
English
Play Mode Selection
One-touch operation is available for selecting a chapter
playing style by use of [REPEAT].
CHAPTER REPEAT, REPEAT
Press the button. Press again to cancel.
TITLE REPEAT, DISC REPEAT
Hold down the button for 2 sec. or more. Hold
down again to cancel.
Functions Only by Remote Control Unit
Direct Access
A disc can be directly selected.
Example: disc number 5
Press [#] (NUMBER).
1
Press [5].
2
Press [SET].
3
Note: To suspend direct selection, press [DISP]
(DISPLAY).
CQ-C7205U/C7105U
Disc Changer (When DVDs or VCDs are loaded)
11
Page 56

iPod Control
Connection of the optional direct cable for iPod (CA-DC300U) allows users to operate the iPod including file selection and file
sequence change with the buttons on this unit.
Connect the iPod.
1
Press [SOURCE] to select the iPod
2
mode. Playback starts.
Note: If playback does not start, press [BAND]
(y / 5).
Select a desired portion.
3
File Selection
Operation FlowPlaying Mode selectioniPod Mode Display
[7]: Next file
[6]: Beginning of the current file
For the previous file, press twice.
Note: Hold down for fast forward/reverse.
The type with which playback data is classified is
selectable.
Press [}] (LIST) to call up the play
1
mode selection screen.
Turn [VOL] to select the play mode.
2
: Playback by playlist
: Playback by artist
: Playback by album
For using the remote control, use [}] or [{].
Note: When the []] button is pressed, the regular
screen appears.
Press [PUSH SEL] to determine the
3
selection.
For using the remote control, use [BAND] (SET).
Pause
Press [BAND] (y / 5).
Press again to cancel.
Press [PUSH SEL] to determine the
5
selection.
For using the remote control, use [BAND] (SET).
Note: Files without an album name or an artist
name are not playable in the playing mode of the
album or artist display respectively.
12
Turn [VOL] to select the portion to play.
4
Notes:
¡ For selecting ARTIST, the ALBUM selection
screen appears after selecting an artist name.
¡ When the []] button is pressed, the previous
screen appears.
Current file
iPod number
(iPod 1)
(iPod 2)
Play Mode indicators
lights when each mode is activated.
(Random)
(Repeat)
CQ-C7205U/C7105U
Time
lights when the direct cable
for iPod (CA-DC300U) is
connected.
*Even when the iPod itself
is not connected, this
indicator will also light.
This indicates that the main
unit normally operates.
(Album Random)
Page 57

Notes:
¡ The iPod equipped with a dock connector is exclusively
connectable. Further information about the controllable
iPod is described below.
Controllable iPod/software version
¡3rd generation iPod/ver. 2.3
¡4th generation iPod/ver. 3.1.1
¡5th generation iPod/ver. 1.1.2
¡iPod Photo/ver. 1.2.1
¡iPod mini/ver. 1.4.1
¡iPod nano/ver. 1.2
* Operation check has been completed with software available at
the end of October, 2006. We do not guarantee the operation
with our future products or upgraded software.
(Video playback is not supported.)
¡ The shuffle function of iPod corresponds to the RANDOM
function of this unit.
¡ Please make sure to detach the iPod after turning off the car
engine (turning the ACC to OFF). The iPod may not shut down
while still connected, which may result in battery depletion.
¡ Please do not connect iPod accessories such as an iPod
remote control or headphones while connecting iPod with
the unit. The unit may not operate correctly.
¡ Connect this unit after turning down the volume of the iPod.
¡ “NO iPod” appears until the iPod is recognized after con-
necting the iPod, turning on the power of the main unit, or
performing source selection on the main unit side. This indicates there is nothing wrong with the main unit.
¡ We do not guarantee all the operations of connectable devices.
English
Random and Repeat play can be set.
Press [MENU] to display the menu dis-
1
play.
For using the remote
control, hold down
[SEL] (MENU) for 2
sec. or more.
Turn [VOL] to select a function to be
2
adjusted.
(RANDOM, REPEAT)
For using the remote
control, use [}] or
[{].
Press [PUSH
3
SEL] to adjust.
For using the remote control, use [BAND] (SET).
Press [MENU] to close the menu
Random, Repeat Play (iPod Menu Display)
4
screen.
For using the remote control, hold down [SEL]
(MENU) for 2 sec. or more.
RANDOM (Shuffle)
: Off
: From all available files
ALBUM RANDOM
: Off
: From files in the selected album
REPEAT
: Off
: Playing the current file repeatedly
Note: All files are played back even at REPEAT-off
setting. (ALL REPEAT)
TEXT
Text display
: Name/Title (default)
: Album/Title
: Disabled
Note: The title may not be displayed correctly if it is
longer than 250 alphanumeric characters.
iPod Control
Play Mode Selection
One-touch operation is available for selecting a track
playing style by use of [RANDOM] or [REPEAT].
RANDOM, REPEAT
Press the button. Press again to cancel.
ALBUM RANDOM
Hold down the button for 2 sec. or more. Hold
Functions Only by
down again to cancel.
Remote Control Unit
CQ-C7205U/C7105U
13
Page 58

XM Receiver
Connecting XM receiver
¡Connect the optional XM receiver (XMD-1000) with
optional Digital Adapter.
Getting Started
It is required to sign up to become an XM Satellite Radio
subscriber. After checking your XM Satellite Radio ID,
sign up on the XM’s website or by calling them.
Check of XM Satellite Radio ID
1
¡ Write down the ID indicated on the lower right of your
XM receiver (XMD-1000).
XMD 1000
1144XXXXXX
L/C
XM RADIO ID : XXXXXXXX
¡ Check the ID shown by tuning your XM Radio to
channel 0. (Refer to “Channel Selection” on page 15.)
XM RADIO ID
RADIO ID display
Preparation
Activate the XM Satellite Radio
2
Select either of the below to sign up.
¡ Web site: http://www.xmradio.com/activation
¡ Phone number: 1-800-852-9696
14
CQ-C7205U/C7105U
Page 59

Press [SOURCE] to select the XM
1
Satellite Radio mode.
Press [BAND] to select a band.
2
Notes:
¡ Connect the optional XM receiver (XMD-1000).
¡ To connect the XM receiver (XMD-1000), it is
required to use an optional extension cord that is
produced by XM exclusively for Panasonic prod-
Operation FlowChannel Preset
ucts.
¡ “RADIO ID” is displayed with channel 0.
¡ “UPDATING” is displayed during the update of the
identification code.
¡ “LOADING” is displayed during the acquisition of
audio data or information.
Select a channel.
3
Channel selection
[]] (TUNE): Preceding channel
[[] (TUNE): Next channel
Preset channel selection
[{] (P-SET: Preset): Lower preset channel
[}] (P-SET: Preset): Higher preset channel
Notes:
¡ Direct selection can be executed with [1] to [6]
buttons on remote control.
¡ A preset station is selectable by turning [VOL]
and pressing [PUSH SEL] while the preset list
screen is present on the monitor.
¡ The volume is not adjustable while the preset list
screen is present on the monitor.
English
Preset Number
Band
XM Receiver
Mode Display
Artist name/Song title
Up to 6 channels can be preset in XM1 to XM3
respectively.
Preset
channels
(P-SET) or [{] (P-SET).
Note: Direct selection can be executed with [1] to [6]
buttons on remote control.
Tune into a channel.
1
Hold down [}] or [{] for 2 sec. or
2
more.
Turn [VOL] to select a preset number.
3
(P-SET: PRESET)
can be simply called up by pressing [}]
Channel number/name
indicates the satellite
receiver is ready.
Hold down [PUSH SEL] for 2 sec. or
4
more, and the channel is written on the
selected preset number.
Preset number/channel number blinks once.
Notes:
¡ In step 2, a channel can be registered by holding
down the numeric button [1] to [6] for 2 sec. or more.
¡ To stop presetting channels, press [DISP: DISPLAY].
¡ The operation above allows users to replace the cur-
rent channel with the channel preset in the selected
number while selecting a preset channel.
¡ The channel may be different between when the chan-
nel is preset and when the channel is called up
because channel preset is performed using Service ID.
XM Receiver
CQ-C7205U/C7105U
15
Page 60

XM Receiver (continued)
You can toggle the category on and off every time you
hold down [BAND] for 2 sec. or more. If the category is
set to on, the unit operates as follows for each button:
Do not set Category to ON while receiving Channel 1.
Failure to observe this disables channel change.
Channel selection
[]] (TUNE): Preceding channel in current category
[[] (TUNE): Next channel in current category
Selection by CategoryFunctions Only by
Category selection
[{] (P-SET: Preset): Preceding category
[}] (P-SET: Preset): Next category
Press [MENU] to display the menu dis-
1
play.
For using the remote
control, hold down
[SEL] (MENU) for 2
sec. or more.
Press [PUSH SEL] to adjust.
2
For using the remote
control, use [BAND]
(SET).
lights when category is set to on.
TEXT
Text display
: Enabled (default)
: Disabled
16
Press [MENU] to close the menu
3
TEXT Setting (XM Receiver Menu Display)
screen.
For using the remote control, hold down [SEL]
(MENU) for 2 sec. or more.
Direct Access
A channel can be directly selected.
Example: channel number 5
Press [#] (NUMBER).
1
Press [5].
2
Press [SET].
3
Note: To suspend direct selection, press [DISP]
(DISPLAY).
Remote Control Unit
CQ-C7205U/C7105U
Page 61

Sirius Satellite Radio Receiver
Over 120 channels of the best entertainment and completely commercial-free
music for your car, home or office.
Only SIRIUS has more than 65 original music channels,
from today’s hits to R&B oldies to classical masterpieces. From authentic Country and real Bluegrass to
cool Jazz, hot Latin, Reggae, Rock and many more. Best
of all, it’s all completely commercial-free.
SIRIUS also has more than 55 channels of world-class
sports, news and entertainment. Included as part of your
subscription, you get up to 16 NFL games a week, up to
40 NBA games a week and up to 40 NHL games a week.
(Games are broadcasted during their respective seasons.) Coupled with great sports news from ESPN, the
SIRIUS sports offering is unrivaled. And don’t forget a
What is Sirius Satellite Radio?Preparation
host of other great news and entertainment, like NPR,
CNBC, Fox News, Radio Disney and E!Entertainment
Radio.
Connecting Sirius receiver
¡ Connect the optional Sirius receiver (SIR-PAN1).
Note: It is required to sign up to become a Sirius
Satellite Radio subscriber. After checking your Sirius
Satellite Radio ID, sign up on the Sirius’s website or by
calling them.
With SIRIUS, the emphasis is on the music and entertainment you want. The music is hosted by SIRIUS
Jockeys, who are true experts. They back-up the music
with compelling information about the song being played,
and they understand that sometimes it’s best to just let
the music speak for itself.
Rely on SIRIUS rocket science for superior
coverage.
Only SIRIUS has three powerful satellites that fly directly
over the U.S. ensuring coast-to-coast coverage with high
elevation angles. This gives the satellites a “clear line of
sight” to your car or home, with much less concern for
buildings, trees or other objects that might block conventional satellite signals.
Once you experience more than 120 channels of digital
entertainment, you’ll never want to leave your car. For
more information, visit www.sirius.com.
Activate the Sirius Satellite Radio
2
Select either of the below to sign up
¡ Web site: http://home.sirius.com/webCUWI
¡ Phone number: 1-888-539-SIRIUS (7474)
English
Getting Started
Check of Sirius Satellite Radio ID
1
¡ Check the ID shown by tuning your Sirius Satellite
Radio to channel 0. (Refer to “Channel Selection” on
next page.)
RADIO ID display
Preset Number
Band
Display
Sirius Receiver Mode
NAME: Artist name/Composer name
TITLE: Song title
Channel number/name
XM Receiver, Sirius Satellite Radio Receiver
indicates the satellite
receiver is ready.
CQ-C7205U/C7105U
17
Page 62

Sirius Satellite Radio Receiver (continued)
Press [SOURCE] to select the Sirius
1
Satellite Radio mode.
Press [BAND] to select a band.
2
Preset channel selection
[{] (P-SET: Preset): Lower preset channel
Notes:
“– – – –” is displayed when there is no information.
¡
¡ “UPDATING” is displayed when channel informa-
tion is updated.
Operation FlowSelection by Category
Select a channel.
3
Channel selection
[]] (TUNE): Preceding channel
[[] (TUNE): Next channel
Note: When you select a locked channel, hold down
[#] on the remote control for 2 sec. or more. PASS-
CODE entering display will appear.
[}] (P-SET: Preset): Higher preset channel
Notes:
¡ Direct selection can be executed with [1] to [6]
buttons on remote control.
¡ A preset station is selectable by turning [VOL]
and pressing [PUSH SEL] while the preset list
screen is present on the monitor.
¡ The volume is not adjustable while the preset list
screen is present on the monitor.
Up to 6 channels can be preset in SR1 to SR3
respectively.
Preset
channels
[}] (P-SET) or [{] (P-SET).
Note: Direct selection can be executed with [1] to [6]
buttons on remote control.
Tune into a channel.
1
Hold down [}] or [{] for 2 sec. or
2
(P-SET: PRESET)
Channel Preset
more.
Turn [VOL] to select a preset number.
3
Hold down [PUSH SEL] for 2 sec. or
4
more, and the channel is written on the
selected preset number.
You can toggle the category on and off every time you
hold down [BAND] for 2 sec. or more. If the category is
set to on, the unit operates as follows for each button:
Channel selection
[]] (TUNE): Preceding channel in current category
[[] (TUNE): Next channel in current category
can be simply called up by pressing
Preset number/channel number blinks once.
Notes:
¡ In step 2, a channel can be registered by holding
down the numeric button [1] to [6] for 2 sec. or more.
¡ To stop presetting channels, press
(DISPLAY).
¡ The operation above allows users to replace the cur-
rent channel with the channel preset in the selected
number while selecting a preset channel.
[DISP]
18
Category selection
[{] (P-SET: Preset): Preceding category
[}] (P-SET: Preset): Next category
CQ-C7205U/C7105U
lights when activated.
Page 63

Press [MENU] to display the menu dis-
1
play.
For using the remote
control, hold down
[SEL] (MENU) for 2
sec. or more.
SIRIUS ID
This shows the ID required for having contact with
SIRIUS Satellite Radio.
PARENTAL LOCK
If this function is set to ON, the selected channel is
locked and turns inaudible. If this function is set to OFF,
all channels can be received but UNLOCK/LOCK settings
for each channel can be still saved. (Default: On)
1
Turn [VOL] to select a function to be
2
adjusted.
For using the remote
control, use [}] or
[{].
Press [PUSH
3
SEL] to determine
the selection.
For using the remote control, use [BAND] (SET).
Adjust the setting value.
4
Press [MENU] to close the menu
5
screen.
For using the remote control, hold down [SEL]
(MENU) for 2 sec. or more.
TEXT Setting (Sirius Receiver Menu Display)
Note: [0] - [9] on the remote control shall be used
to enter a channel number and a pass code.
2
LOCK/UNLOCK
Channels to be locked are selectable.
1
2
3
4
PASSCODE
The pass code is changeable. (Default: 1111)
1
2
3
TEXT
Text display
: Enabled (default)
: Disabled
Enter the pass code.
Press [PUSH SEL] to toggle between
ON and OFF.
Enter the pass code.
Press [PUSH SEL].
Turn [VOL] to select a channel to be set.
Press [PUSH SEL] to toggle between
LOCK and UNLOCK.
Enter the current pass code and press
[PUSH SEL].
Enter the new pass code and press
[PUSH SEL].
Enter the new pass code and press
[PUSH SEL] again.
Note: When [DISP] is held down for 10 sec. or
more, PASSCODE returns to “1111”.
(PASSCODE BOX)
English
Sirius Satellite Radio Receiver
Direct Access
A channel can be directly selected.
Example: channel number 5
Press [#] (NUMBER).
1
Press [5].
2
Press [SET].
3
Functions Only by
Note: To suspend direct selection, press [DISP]
Remote Control Unit
(DISPLAY).
CQ-C7205U/C7105U
19
Page 64

Hands-Free Phone System
Be sure to read “Safety Information” in the Operating Instructions for the Hands-Free Phone System before use.
Connecting Hands-Free Phone System
Connect the Hands-Free Phone System (CY-BT100U) and
establish the pairing. Refer to the instruction manual for
the Hands-Free Phone System for further information.
Note: This unit is designed only for receiving calls.
It cannot send calls.
Switch Unit
Status indicator (Blue LED)
lights: Call waiting/Talking
stays out: Not connected
blinks rapidly: Receiving a call
blinks slowly:
Pairing/Reconnecting
Preparation
Press [Hang-on] on the Hands-Free
1
Phone System and pick up the phone.
The phone is in the incoming state.
Adjust the volume if necessary.
2
Press [Hang-up] on the Hands-Free
3
Phone System and hung up the phone.
Adjust the ring volume
The ring volume is adjustable from this unit.
(Setting range: OFF/LOW/MID/HIGH, Default: MID)
[}]:
up
[{]:
down
Operation Flow
Notes:
¡ The ring volume is adjustable only when receiving
calls.
¡ The ring volume is adjustable only when the phone
ring comes out of the main unit.
¡ The ring volume is also adjustable by turning [VOL].
[Hang-on]/Blue LED
[Hang-up]/Red LED
Reject calls
Pressing [Hang-up] allows users to reject a call when
the call is coming in.
Bluetooth disconnection/reconnection
Pressing [Hang-up] allows users to temporarily
disconnect when the phone is in the waiting state.
Pressing [Hang-up] allows users to reconnect when the
Bluetooth unit is temporarily disconnected.
20
CQ-C7205U/C7105U
Page 65

Notes:
¡ This item is not selectable by pressing [SOURCE], but
activated by receiving an incoming call.
¡ Only outline is described here. Refer to the operating
instructions for the Hands-Free Phone System for further
information.
Note: Speaker output is adjustable only when receiving
calls.
¡ The mute function is automatically canceled when receiving
a call even at mute-on setting.
¡ This unit is not operable when receiving a call at power-off
setting.
¡ We do not guarantee all the operations of connectable
devices.
English
Press [
1
SEL
to display the
AUDIO menu
display.
For using the remote
control, use [BAND] (SET).
Press [PUSH SEL
2
mode to be adjusted.
For using the remote control, use [BAND] (SET).
Turn [VOL]
3
clockwise or
counterclockwise
to adjust.
For using the remote
Speaker Setting
(Hands-Free Phone System Menu Display)
control, use [}] or
[{].
Note: If no operation takes place for more than 10 sec-
onds in the audio menu (2 sec. in Main volume adjustment), the display returns to the regular mode.
PUSH
: SELECT]
: SELECT]
to select a
Hands-Free SPEAKER
Speaker selection
: Sound from both speakers (default)
: Sound from left speaker
: Sound from right speaker
Note: Sound comes only from the front speakers.
Hands-Free Phone System
CQ-C7205U/C7105U
21
Page 66

Troubleshooting
If You Suspect Something Wrong
Check and take steps as described below.
If the described suggestions do not solve the problem, it is
recommended to take the unit to your nearest authorized Panasonic
Servicenter. The product should be serviced only by qualified personnel.
Please refer the checking and the repair to professionals. Panasonic
shall not be liable for any accidents arising out of neglect of checking the
unit or your own repair after your checking.
Never take measures especially for those other than indicated by italic letters in “Possible Solution” described below because those are
too dangerous for users to handle themselves.
Display
Display
(After 5 seconds)
To next disc automatically
The disc is dirty, or is upside down.
The disc has scratches.
a Eject the magazine.
¡Check the disc.
¡Load the disc again.
No operation by some cause.
a Eject the magazine. If failure persists, press the reset switch on the disc
changer. If normal operation is not restored, consult your dealer or the nearest Panasonic Servicenter to ask for repairs.
Possible causeaPossible solution
Possible causeaPossible solution
Warning
¡ Do not use the unit in an irregular condition, for
example, without sound, or with smoke or a foul
smell, which can cause ignition or electric shock.
Immediately stop using the unit and consult your
dealer.
¡ Never try to repair the unit by yourself because it is
dangerous to do so.
DISC ChangeriPod Control
Note: Messages in the action and display sections of the error chart vary with changers. Refer to the operating
instructions for the Disc changer for details.
An error arises in the DVD changer.
a Check the DVD changer. (“REGION ERROR” etc.)
No disc is in the CD Changer (magazine).
a Insert discs into the changer (magazine).
The changer has become disconnected from the unit in the changer mode.
a Verify the wiring.
The iPod cable was disconnected in the iPod mode.
a Reconnect the iPod cable.
Your iPod has no playable music.
a Download playable music to your iPod.
22
CQ-C7205U/C7105U
Page 67

Display
Possible causeaPossible solution
Display
Sirius Satellite RadioXM Receiver
Cannot receive Sirius Satellite Radio
a Verify the wiring.
Hardware error messages.
a Check the hardware.
Sirius antenna unconnected.
a Connect the Sirius antenna.
User’s registration has not been carried out.
a Complete user’s registration.
A channel that is not included in the agreement was selected.
a Select a channel that is included in the agreement. Refer to the operating
instructions for Sirius receiver with regard to the agreement.
The selected channel is invalid.
a Select a channel which can be received instead.
The selected channel is locked.
a Make certain that the channel is on parental lock.
The channel data is being updated.
a Please wait for a while.
The subscription information was updated.
a Wait for 3 minutes in the Sirius mode.
Possible causeaPossible solution
English
Problem
Channel
unselectable
Your location is out of receivable areas (e.g. in a tunnel), or the unit is decoding a
selected broadcast. The display appears also while the connections are being
checked after the power has been turned on.
a Wait until getting out of the unreceivable area or completing the decoding.
Cannot receive XM satellite radio.
a Verify the wiring.
XM antenna unconnected.
a Connect the XM antenna.
XM broadcasts unreceivable because of poor receiving conditions.
a Move to an area where XM broadcasts can be received well.
Channel not in service
a This channel is not currently in service. Tune to another channel.
Possible causeaPossible solution
No contact with XM Satellite radio Inc.
a Refer to page 14 of this book and the XM’s website to sign up for XM Radio
service.
Troubleshooting
CQ-C7205U/C7105U
23
Page 68

System Upgrade Guidebook
Panasonic Consumer
Electronics Company,
Division of Panasonic
Corporation of North America
One Panasonic Way, Secaucus,
New Jersey 07094
http://www.panasonic.com
© 2006 Matsushita Electric Industrial Co., Ltd. All Rights Reserved
Panasonic Sales Company,
Division of Panasonic Puerto
Rico, Inc. (“PSC”)
Ave. 65 de Infanteria, Km. 9.5
San Gabriel Industrial Park,
Carolina, Puerto Rico 00985
http://www.panasonic.com
YFM284C663CA NY1006-1116 Printed in China
Panasonic Canada Inc.
5770 Ambler Drive,
Mississauga, Ontario
L4W 2T3
http://www.panasonic.ca
Imprimé en Chine
Impreso en China
 Loading...