

Page 1

Printed in Japan
LCD Monitor/LCD-Monitor/
Monlteur LCD/
Model No. / Modell-Nr. /
Numéro de modèle /
品番
液晶モニター
CF-VDL03U
DFQW5341ZB SS0710-0
ENGLISH
DEUTSCH
FRANÇAIS
OPERATING INSTRUCTIONS
Introduction ................................................................. 5
Names and Functions of Parts .................................. 6
Mounting the LCD Monitor ......................................... 7
Starting Up/Shutting Down ........................................ 9
Touchscreen .............................................................. 10
Adjusting the LCD Monitor ...................................... 13
Troubleshooting ........................................................ 17
Specications ............................................................ 19
BEDIENUNGSANLEITUNG
Einleitung ................................................................... 23
Bezeichnungen und Funktionen der Teile .............. 24
Montage des LCD-Monitors ..................................... 25
Hochfahren/Herunterfahren ..................................... 27
Touchscreen .............................................................. 28
Einstellen des LCD-Monitors ................................... 31
Störungsbeseitigung ................................................ 35
Technische Daten ..................................................... 37
INSTRUCTIONS D’UTILISATION
Introduction ............................................................... 41
Noms et fonctions des pièces ................................. 42
Montage du Moniteur LCD ....................................... 43
Mise en marche/Arrêt................................................ 45
Écran tactile ............................................................... 46
Réglage du Moniteur LCD ........................................ 49
Dépannage ................................................................. 53
Spécications ............................................................ 55
E
D
F
日本語 取扱説明書
保証書付き
● 取扱説明書をよくお読みのうえ、正しく安全にお
使いください。
●
ご使用の前に「安全上のご注意」( 56ページ)を
必ずお読みください。
● 保証書は「お買い上げ日・販売店名」などの記入を
確かめ、取扱説明書とともに大切に保管してくだ
さい。
(日本国内向け)
安全上のご注意
はじめに
............................................................................ 60
各部の名称と働き
液晶モニターを設置する
起動
/
シャットダウン
タッチパネル
液晶モニターを調整する
困ったときのQ&
仕様
................................................................................74
保証とアフターサービス
.................................................................56
..............................................................61
.....................................................62
...........................................................64
.....................................................................65
.....................................................68
A .............................................................72
..................................................... 75
J
Page 2
ENGLISH
Information on Disposal for Users of Waste Electrical & Electronic
Equipment (private households)
This symbol on the products and/or accompanying documents means that used electrical
and electronic products should not be mixed with general household waste.
Please dispose of this item only in designated national waste electronic collection
E
The unit is to be installed by a qualied installation professional.
For Used in Motor Vehicle
Warning: An LCD monitor may be installed in a motor vehicle and visible to the driver only if used to
support vehicle related functions such as vehicle information, system control, rear or side observation
and navigation. If used for entertainment purpose, such as television reception or video play, it must
be installed to the rear of the driver’s seat where it will not be visible, directly or indirectly, to the
operator of the motor vehicle. Check with individual state/provincial laws to determine lawful use of
this product while operating within a motor vehicle.
This LCD monitor has a high level of brightness. Adjust the brightness so your view is not blocked.
schemes, and not in the ordinary dust bin.
For business users in the European Union
If you wish to discard electrical and electronic equipment, please contact your
dealer or supplier for further information.
Information on Disposal in other Countries outside the European Union
This symbol is only valid in the European Union.
If you wish to discard this product, please contact your local authorities or dealer
and ask for the correct method of disposal.
36-M-1
CAUTION
To avoid risk of serious injury or possible violation of laws, make sure that the monitor is placed visible
to the driver for no other purpose than navigational or with the use of rear view camera only.
When Driving
The driver must not operate the LCD monitor.
(Operating the LCD monitor while driving is a distraction and may lead to an accident.)
As a safety factor, driving with the television, video or DVD player is prohibited.
Keep the unit at an appropriate sound level. Driving with the sound at a level that prevents
you from hearing sounds outside and around the car may cause an accident.
2
Page 3

For U.S.A.
NOTE: This equipment has been tested and found to comply with the limits for a Class A digital
device, pursuant to Part 15 of the FCC Rules. These limits are designed to provide reasonable
protection against harmful interference when the equipment is operated in a commercial environment.
This equipment generates, uses, and can radiate radio frequency energy and, if not installed and used
in accordance with the instruction manual, may cause harmful interference to radio communications.
Operation of this equipment in a residential area is likely to cause harmful interference in which
case the user will be required to correct the interference at his own expense.
For Canada
This Class A digital apparatus complies with Canadian ICES-003.
For Europe
Declaration of Conformity (DoC)
“Hereby, Panasonic declares that this LCD Monitor is in compliance with
the essential requirements and other relevant provisions of EU Council
Directives.”
Authorised Representative:
Panasonic Testing Centre
Panasonic Marketing Europe GmbH
Winsbergring 15, 22525 Hamburg, Germany
18-E-0
E
Warning
This is a class A product. In a domestic environment this product may cause radio
interference in which case the user may be required to take adequate measures.
3
Page 4

Precautions
When Car Washing
Do not expose the LCD monitor to water
or excessive moisture. This could cause
electrical shorts, re or other damage.
When Parked
Parking in direct sunlight can produce very
high temperatures inside your car. Let
the interior of the car cool down before
switching the unit on.
Do not watch the LCD monitor with
the engine off. It will consume battery
E
power and may prevent the engine from
starting.
Use Panasonic Technical Support
Do not attempt to disassemble or adjust
this precision product. Contact Panasonic
Technical Support.
For Installation
Be sure to install the LCD monitor in a
position that does not obstruct the driver’s
vision.
If the LCD monitor has been installed
for the rear seat passengers, they must be
careful to prevent injury by hitting their
heads on the LCD monitor in case of an
accident.
Do not expose the LCD monitor to direct
sunlight or excessive heat.
Be sure not to install the LCD monitor in
a location at which it is exposed to water,
hot air such as near heater duct, or where
it may stepped on.
Do not install the LCD monitor in an area
where it would obstruct the operation of
an air bag.
Ask a trained technician to install the unit.
Installation and wiring require training and
experience.
To be safe, ask the sales outlet where you
purchased the unit to perform the installation.
When Operating
Make sure the LCD monitor is rmly secured
and protected from strong impact, because this
may cause a malfunction or possible re.
4
If a Malfunction or Trouble Occurs,
Immediately Stop Use
If a Malfunction Occurs, Immediately
Unplug the Car Plug and Remove
the Unit From This Product
This product is damaged
•
A foreign object is inside this product
•
Smoke is emitted
•
An unusual smell is emitted
•
Unusually hot
•
Continuing to use this product while any of
the above conditions are present may result
in re or electric shock.
If a ma lfu nct ion or trouble occurs,
•
immediately unplug the Car plug and remove
the unit from this product. Then, contact your
technical support ofce for repair.
Do Not Place Containers of Liquid or
Metal Objects on Top of This Product
If water or other liquid spills, or if paper
clips, coins, or foreign matter get inside this
product, re or electric shock may result.
If foreign matter has found its way inside,
•
immediately unplug the Car plug and
remove the unit from this product. Then
contact your technical support ofce.
Do Not Place This Product on
Unstable Surfaces
If balance is lost, this product may fall over
or drop, resulting in an injury.
Do Not Keep This Product Wherever
There is a Lot of Water, Moisture,
Steam, Dust, Oily Vapors, etc.
Otherwise, possibly resulting in fire or
electric shock.
Use Only the Specied Car Adaptor
With This Product
Using a Car adaptor other than the one supplied
(supplied with the unit or one sold separately
as an accessory) may result in a re.
Take a Break Of 10-15 Minutes Every Hour
Using this product for long periods of time
may have detrimental health effects on the
eyes or hands.
Page 5

Introduction
Thank you for purchasing the LCD Monitor for the Panasonic notebook computer series.
This LCD monitor features a touchscreen function, which makes computer operation possible
by simply touching the surface of the LCD monitor and pressing keys – even when the
computer is not being held.
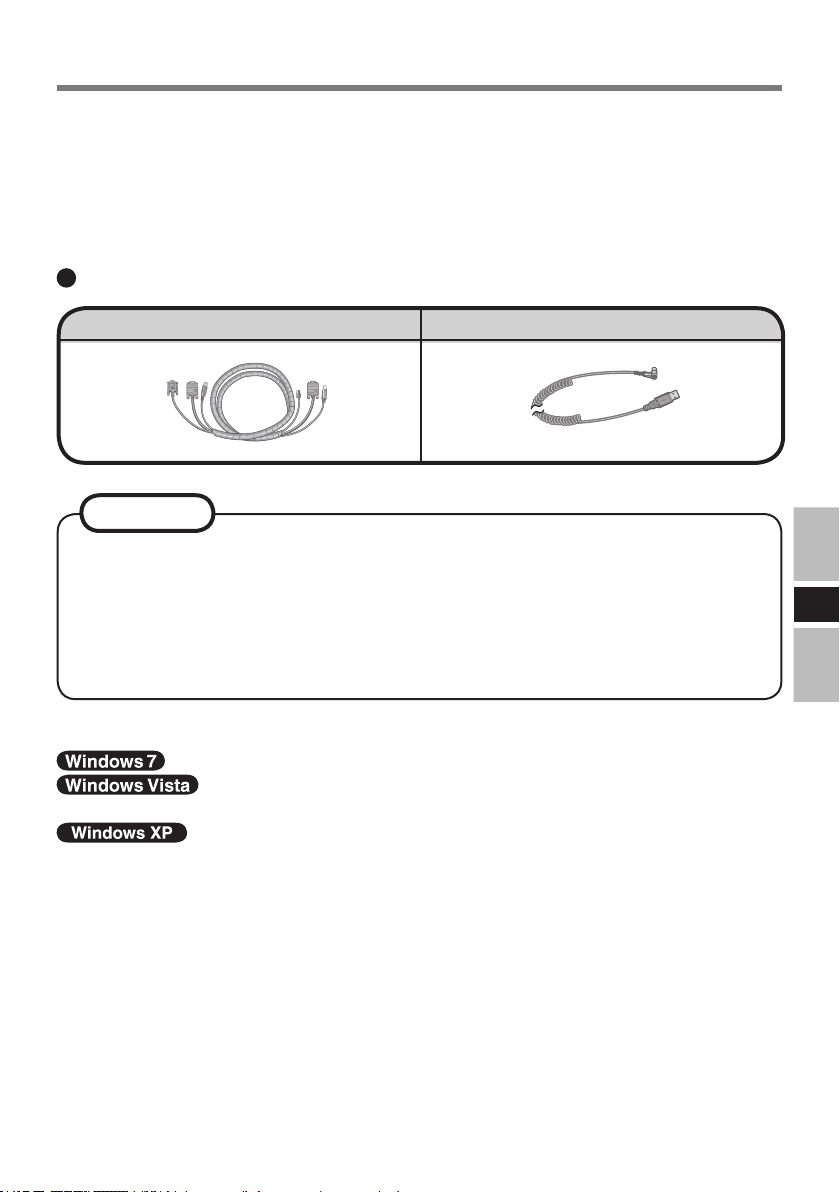
Accessories
RGB/Serial/USB Cable .................1
USB Cable ....................................1
NOTE
A Port Replicator with a display port (Analog RGB), serial port, and USB port
is required for computers without these ports. For more information, refer to the
computer’s Reference Manual.
This manual explains the procedure for default settings. The procedure may differ
according to the settings.
[Illustration in this manual]
: Information for Genuine Windows® 7 Professional users.
: Information for Genuine Microsoft® Windows® Vista® Business users.
: Information for Genuine Microsoft® Windows® XP Professional and
Genuine Windows® XP Tablet PC Edition users.
Windows 7 screens are used in this manual when no specic OS notes are required.
Microsoft® and Windows® are registered trademarks of Microsoft Corporation of the United
States and/or other countries.
E
5
Page 6
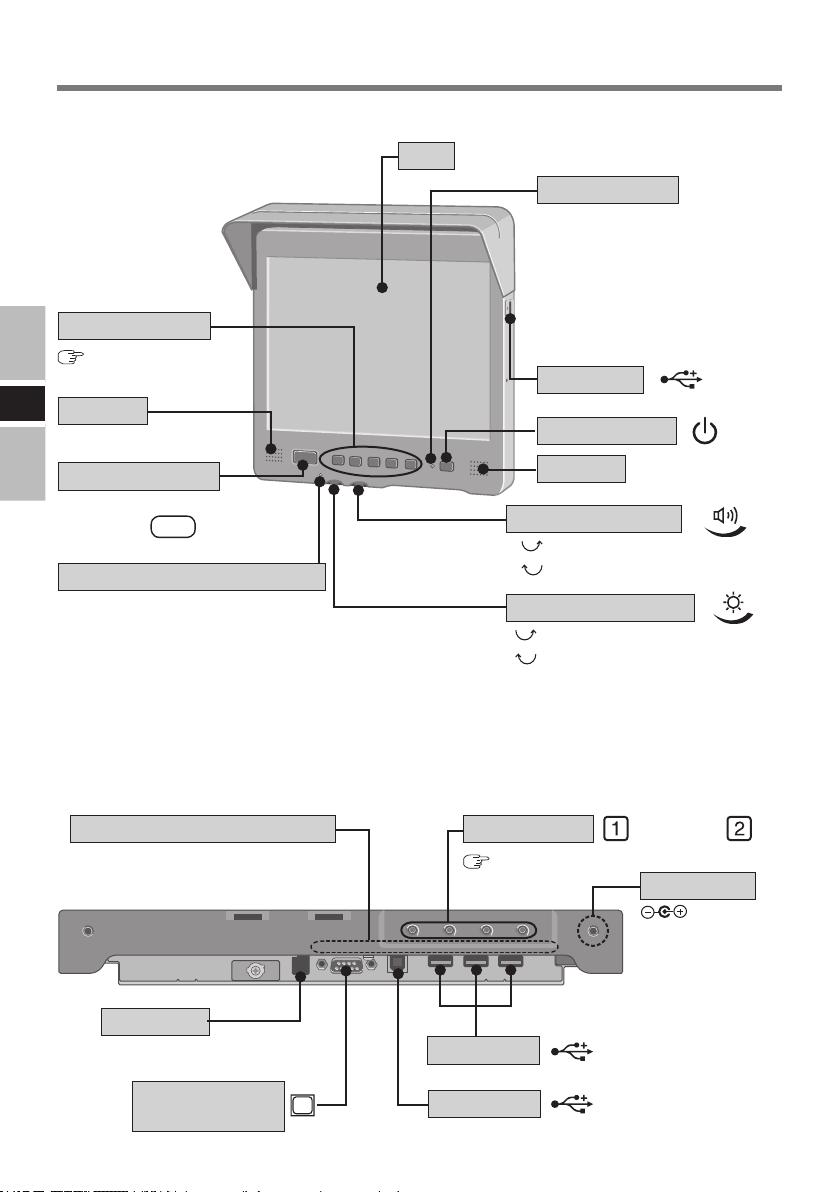
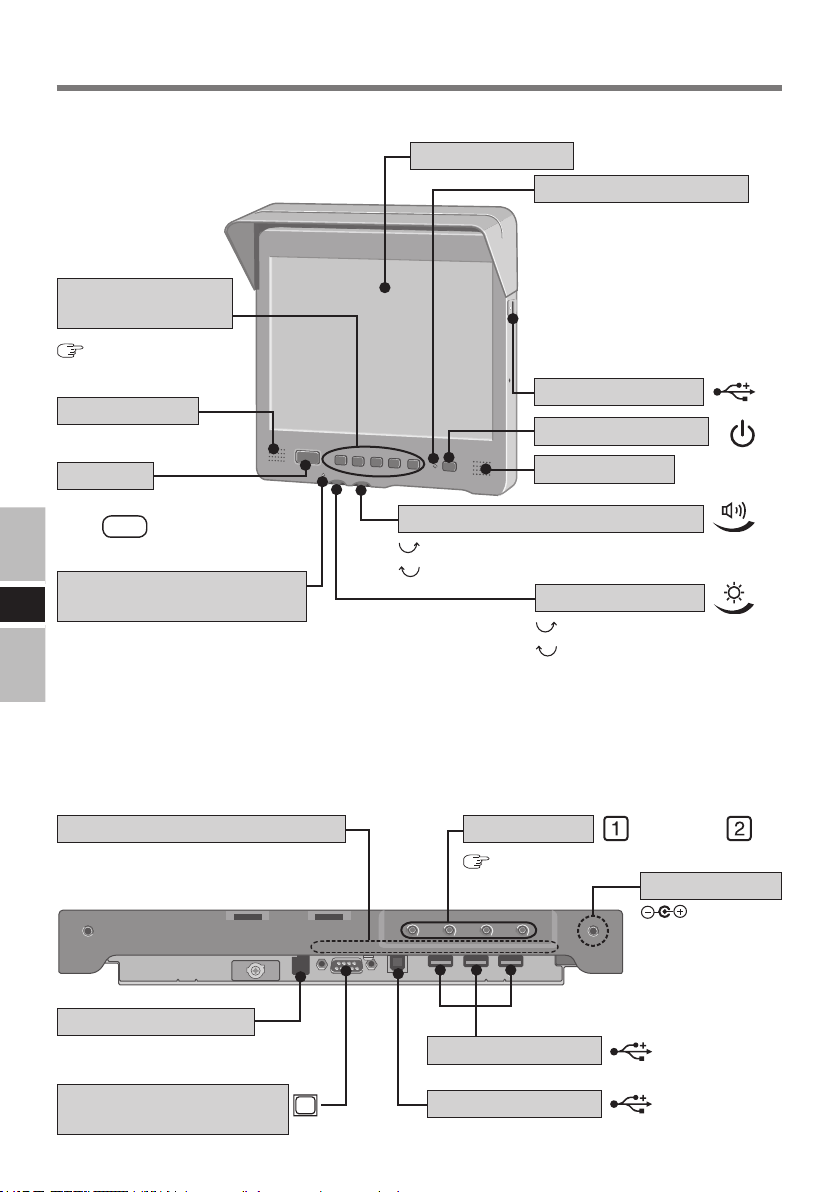
Names and Functions of Parts
<Front>
LCD
LED Indicator
Green: power on
Orange: power on but no
Function Keys
page 15
E
Speaker
Blinking green/Blinking orange:
While shutting down
USB Port
Power Switch
analog RGB Signal
or the cable is not
connected.
Emergency Key
The application software
allocated to
Temperature LED Indicator
Green : Normal
The brightness can be adjusted freely.
Orange : Drops the brightness automatically due to
an increase in the internal temperature.
Red : The backlight goes OFF automatically due
to an increase in the internal temperature.
Holes for xing the cables
Pass the banding band, etc. through
these holes to x the cables.
Serial Port
SERIAL I/F (Special CN)
is started up.
F11
<Bottom>
USB Ports
Speaker
Speaker Volume
up
down
Brightness Volume
up
down
OSD buttons
page 13
/– /
DC-IN Jack
DC-IN 15.6 V /16V
+
Display Port
(Analog RGB)
6
USB Port
For connecting to the computer.
Page 7
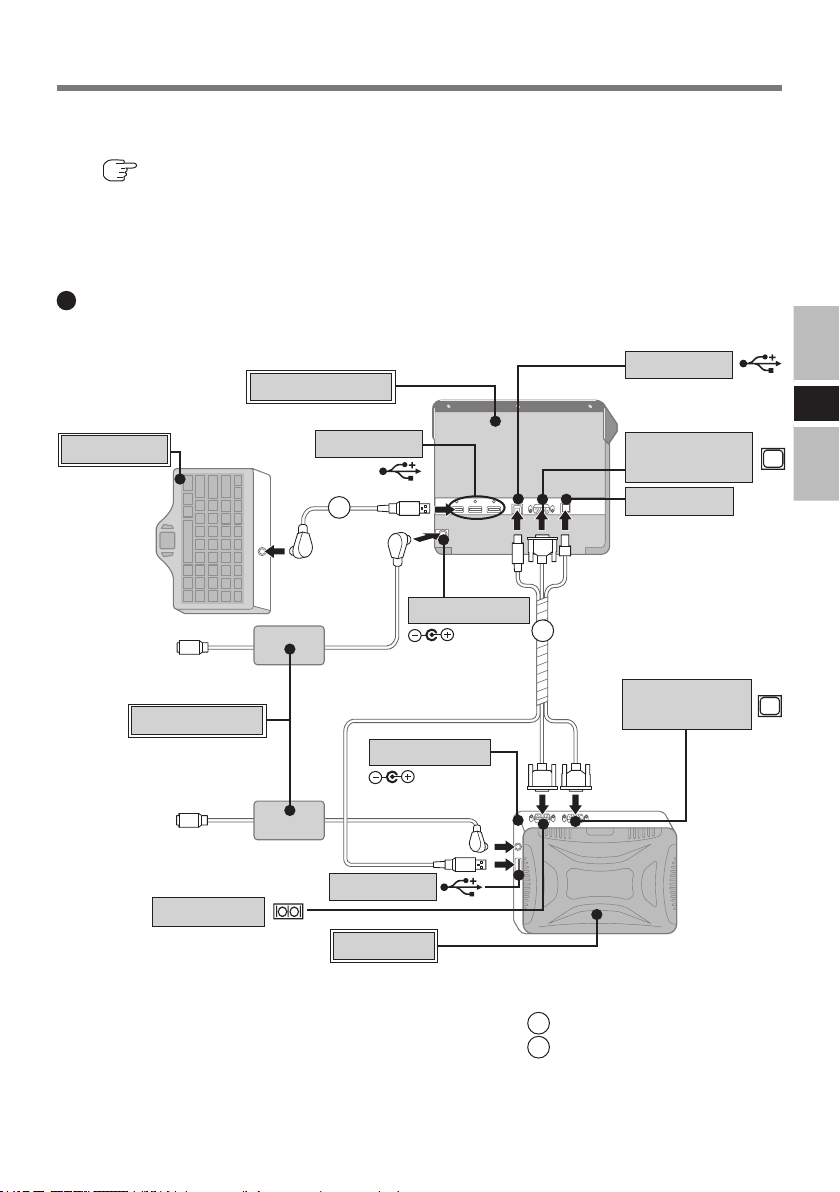
Mounting the LCD Monitor
1 <Only for models without a display port, serial port, and USB port>
Connect your computer to the port replicator or car mounter.
( Operating Instructions of the port replicator/car mounter)
2 Connect the LCD Monitor to your computer via the connection cables
(included).
Example of connection
<Rear View>
USB Port
Keyboard
(Model no.
CF-VKBL01/
CF-VKBL02/
CF-VKBL03/
CF-VKBL03A)
LCD Monitor
<Top View>
USB Port
B
DC-IN Jack
A
DC-IN 15.6 V /16V
For connecting to
the computer.
Display Port
(Analog RGB)
Serial Port
E
Car Adaptor
(commercially
available product)
Serial Port
DC-IN Jack
DC-IN 15.6 V /16V
USB Port
Computer
External
Display Port
<Top View>
A
RGB/Serial/USB cable
B
USB cable
7
Page 8

8mm
Mounting the LCD Monitor
3 Mount the LCD Monitor.
Use these M4 screw holes to mount the LCD Monitor.
E
CAUTION
Make sure that the screws are not
inserted into this unit with greater
than 8 mm deep while mounting.
When installing the LCD monitor,
locate the monitor under the
dashboard as shown in the gure
to prevent the monitor from
interrupting the sight of the driver
and to prevent the monitor from
being hit by direct sunlight.
8
Page 9
Starting Up/Shutting Down
Starting Up
1 Press the power switch of the LCD Monitor.
The LCD Monitor will turn on.
2 Turn your computer on. ( Operating Instructions of the computer)
NOTE
Some computers will turn on automatically when the LCD Monitor is turned on.
3 Select your application.
You are able to start working on your computer.
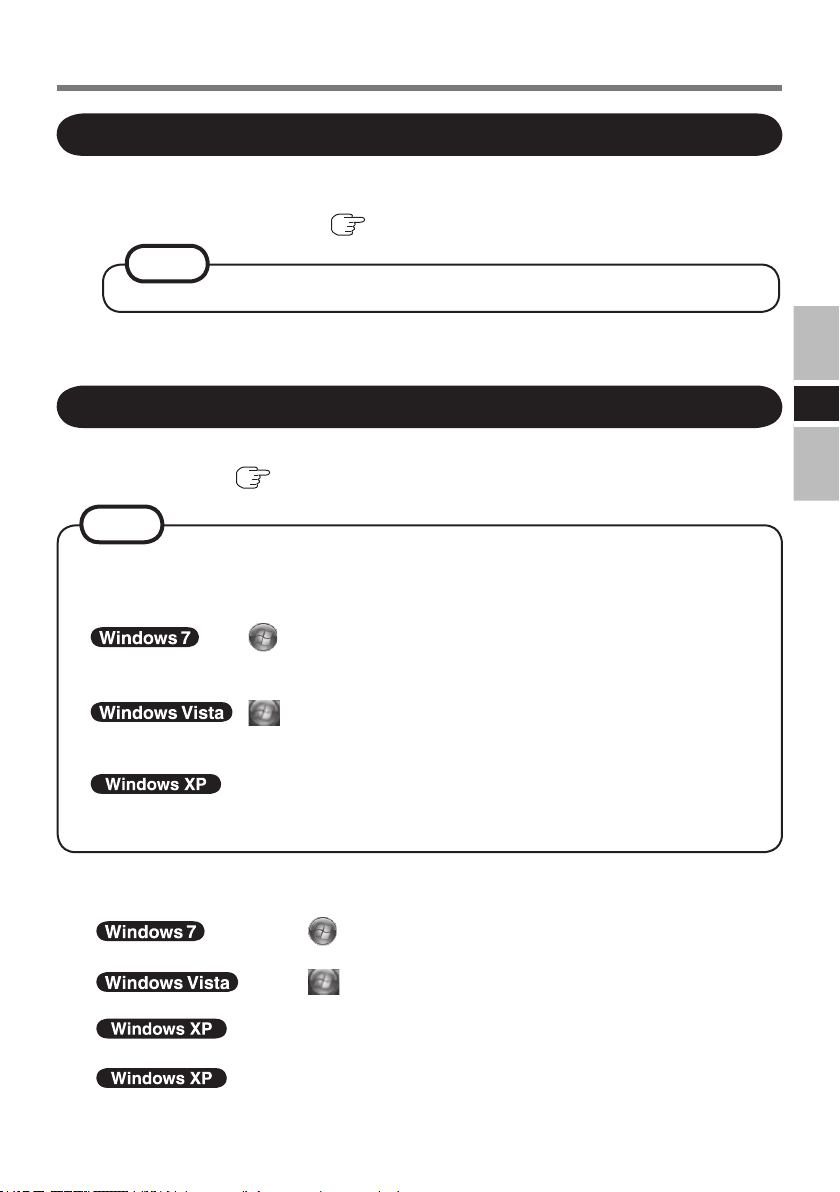
Shutting Down (power off your computer)
This procedure is for shutting down the computer without using the Sleep (standby) or
hibernation function. ( Reference Manual of the computer)
NOTE
Some computers will shut down automatically when the LCD Monitor is turned off
according to power switch settings.
You can modify power switch settings on the following menus.
: (Start) - [Control Panel] - [System and Security] - [Power
Options] - [Choose what the power button does] - [When I press
the power button]
: (Start) - [Control Panel] - [System and Maintenance] -
[Power Options] - [Choose what the power button does] - [When
I press the power button]
: [start] - [Control Panel] - [Performance and Maintenance] -
[Power Options] - [Advanced] - [When I press the power button
on my computer]
1 Save important data and close each application.
2 Display the shut down screen.
: Select (Start) - [Shut Down]
The computer will power off automatically.
: Select (Start) - [Shut Down]
The computer will power off automatically.
: Select [start] - [Turn Off Computer].
3 Conrm shut down.
: Select [Turn Off].
4 Press the power switch of the LCD Monitor.
The LCD Monitor will turn off after the computer is shut down completely.
E
9
Page 10

Touchscreen
The LCD Monitor is equipped with a touchscreen function allowing you to perform the
same operations as the touch pad or mouse by touching the surface of the display with the
nger or stylus.
Moving the cursor
E
Double-clicking
CAUTION
When the operation of panning is performed with the display mode larger than XGA,
the touchscreen function will not work properly.
If a change is made to the screen resolution, or the cursor can not be pointed correctly
with the nger or stylus, be sure to perform calibration.
The touchscreen function can not be used when using the full screen in [Command
Prompt].
Cursor
Two quick
taps
Clicking
Dragging
One tap
Touch
and hold the
object (i. e. le or icon),
move the nger or stylus
on the surface (dragging
the object to the desired
location), then release
the nger or stylus.
First-time Operation
To use the touchscreen, you rst need to install the touchscreen driver.
A Access the Web Site below.
http://pc-dl.panasonic.co.jp/itn/drivers/VDL03U.html
B Follow the on-screen instructions.
The calibration screen appears during installation. Touch each of the “” target marks
one by one. If the screen is closed, run [Touch Panel Settings] from the start menu, and
perform [Calibration] ( page 11).
10
Page 11

Handling the Touchscreen
Do not place any object on the surface or press down forcefully with sharp-pointed objects
(e.g., nails), hard objects that can leave marks (e.g., pencils and ball point pens).
Do not apply pressure within 5 mm of the perimeter of the display panel. The cursor may
move to the edge of the display.
Do not operate the computer when such things as dust are on the screen, or allow contact
with substances that could dirty the touchscreen, such as oil. The cursor may not work
properly in such cases.
When the touchscreen becomes dirty:
Use a dry soft cloth such as a gauze to clean the dirty areas.
•
Do not use benzene, thinner, or disinfectant- type alcohol.
•
Conguring the Touchscreen
When needed, the touchscreen can be congured using the following steps.
1
Click (Start) - [All Programs] - [Touch Panel Utility] - [Touch Panel
Settings].
Click (Start) - [All Programs] - [Touch Panel Utility] - [Touch Panel
Settings].
Click [start] - [All Programs] - [Touch Panel Utility] - [Touch Panel Settings].
E
The following screen will be displayed.
Devices
Congure
the device controller.
Settings
Set the general settings and
functions. (e.g. “double-click”
settings)
Advanced
Set the advanced settings.
Calibration
Dene the calibration setup.
Use when the cursor can not be
pointed correctly with the nger
or stylus. (Needed if the alignment
of the touchscreen with the visual
image change or adjust the display
resolution).
Version
Display the version number of the touchscreen
driver installed.
Others
Set the selective suspend function and parameters
settings.
11
Page 12

Touchscreen
2 Make necessary changes.
3 Select [OK].
NOTE
For more information, refer to [Help].
Adjustments can be made when double-click operations are assumed by the computer
although single-click operations are intended, by clicking [Settings] from the display
shown in the previous page and decreasing the value for [Double click speed].
Perform calibration immediately when the calibration point is changed.
It is also possible to change the double click speed for [Tap and Buttons]*1.
E
*1
: in (Start) - [Control Panel] - [Hardware and Sound] -
[Mouse].
: in (Start) - [Control Panel] - [Hardware and Sound] -
: in [start] - [Control Panel] - [Printers and Other Hardware]
<Only for the models with the Display Rotation Tool>
Rotate the display to landscape mode (0 degrees) before performing the calibration.
[Mouse].
- [Mouse].
12
Page 13

Adjusting the LCD Monitor
Main menu
Scree n
Con f i
gu r at i o n
Mis ce l l ane ou s
Infor mat io n
Rese t A l l
S et t ings
1 :Ex i t 2 :S el ec t
Fine adjustment on the display size, position, and so on, may be necessary since the signal
timing differs depending on the computer.
1 Press .
The OSD main menu is displayed.
/– /
+
NOTE
If there is no analog RGB signal, the cable is not connected or the OSD button is
locked, the OSD main menu is not displayed.
The OSD window may not be displayed properly when pressing . In this case,
press again after waiting for about 10 seconds.
When OSD is not activated and you press for 3 seconds while pressing , the
OSD button will be locked. To unlock, press for 3 seconds again while pressing
.
If you do not perform the OSD button operations for more than 15 seconds while the
OSD menu is displayed, the OSD menu display will disappear automatically.
<OSD main menu>
ICON FUNCTION DESCRIPTION
Screen
Conguration
Miscellaneous
Adjust screen settings
Adjust key settings
Miscellaneous settings
E
Information
Reset All
Settings
Display system information
Return to default settings
13
Page 14

Con tr as t
0
H-Po so tio n
3
-
V-Po so tio n
0
Pha se
1 7
Aut o Adjust
Re se t Po sit io n/P ha se
Exe cute ?
Adjusting the LCD Monitor
2 Select the item by pressing /– or /+, then press .
Screen
The [Screen] menu item allows the adjustment of the contrast, H-position, V-position,
Phase.
Contrast
Adjust the contrast. (minimum: -31, maximum: +31,
default: 0)
Adjust by pressing /– or /+, then press .
H-Position
Adjust the horizontal image position manually.
E
Adjust by pressing
V-Position
Adjust the vertical image position manually.
Adjust by pressing /– or /+, then press .
Phase
Adjust the phase of ADC sample pixel clock.
(minimum: 0, maximum: +31)
Adjust by pressing
Auto Adjust
Automatically adjusts H-position, V-position and
Phase in the Screen menu. After Auto Adjust, press
to save the settings.
/– or /+
/– or /+
, then press .
, then press .
NOTE
To cancel, press .
14
Page 15
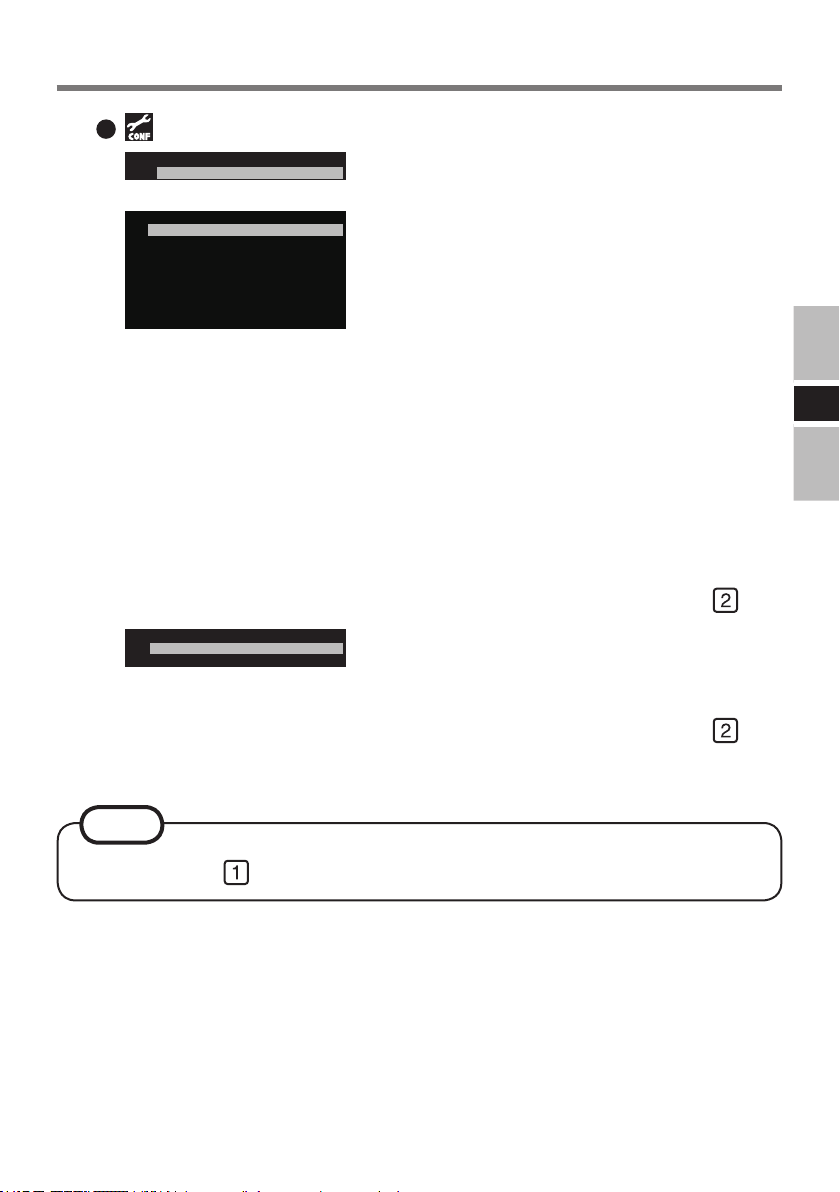
Conguration
F u n c t i o n K e
y s
E me rge ncy Ke
y
F u nct i o n Ke
ys
F6-F10
D is a b le F n Ke
ys
B righ tn e s s C on t r ol
F 1 :T ur n o f f Mo n it o r
F 2 : Mi n .B r igh tn e ss
F 3 : Lo w B righ tn e ss
F 4 : Mi d .B r igh tn e ss
F 5 : Max .B r igh tn e ss
F1-F5
Eme rgency Ke
y
E na b le
D i s ab le
The [Configuration] menu consists of [Function
Keys] and [Emergency Key].
Function Keys
You can assign some functions to the Function Keys
of this LCD monitor.
[F1-F5]: The Function Keys function as F1 - F5
•
keys of the keyboard. (default)
[F6-F10]: The Function Keys function as F6-F10
•
keys of the keyboard.
[Disable Fn Keys]: The Function Keys do not
•
work.
[Brightness Control]: You can assign these
•
functions below to the Function Keys.
F1: Turn off Monitor
F2: Min.Brightness
F3: Low Brightness
F4: Mid.Brightness
F5: Max.Brightness
Select by pressing /– or /+, then press .
Emergency Key
Set Emergency key Enable/Disable.
When [Enable] is selected, Emergency Key has same
functions as F11 key of the keyboard.
Select by pressing /– or /+, then press .
E
NOTE
To cancel, press .
15
Page 16
Adjusting the LCD Monitor
Br i
ght ne s s
M od e
Tu rn on A ut oma ti cal l y
F or ce P C Of f
Br i
gh t n ess M o d e
N or m al
H igh
Tu rn on A ut om at ic al l
y
Enab l e
Dis ab le
For ce PC Of f
Exe cute ?
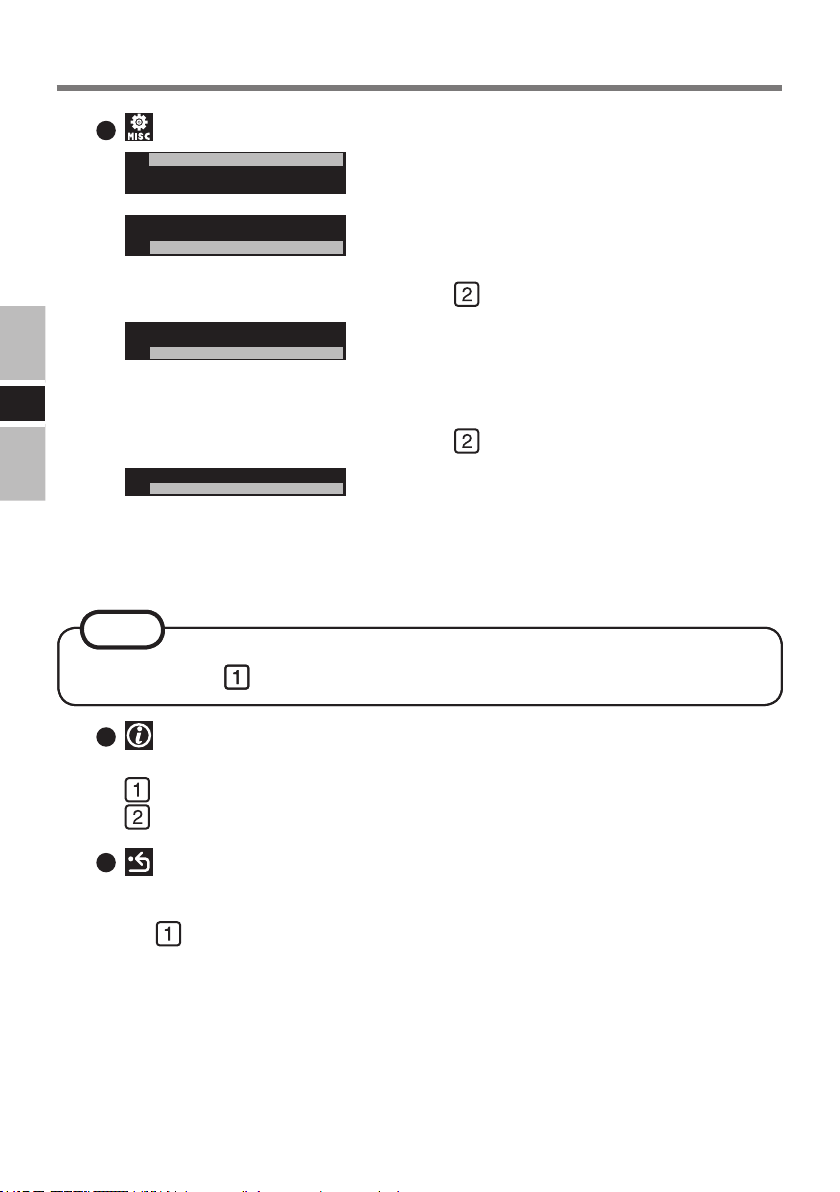
Miscellaneous
[Miscellaneous] menu consists of [Brightness Mode],
[Turn on Automatically] and [Force PC Off].
Brightness Mode
Adjust the brightness.
Select [Normal] or [High] by pressing /– or /+,
then press .
Turn on Automatically
When this function is enabled, the LCD monitor
automatically turns on when power is supplied to
E
NOTE
NOTE
DC-IN Jack.
Select [Enable] or [Disable] by pressing /– or /+,
then press .
Force PC Off
When this function is executed, the computer will
forcibly shut down and unsaved data will be lost.
For some models of computers, this function may
not be used.
To cancel, press .
To cancel, press .
Information
Display information about the system. The OSD window is displayed.
: The information window is closed and the main menu is displayed.
: The information window is switched.
Reset All Settings
Set OSD items to the default values.
3 Press .
The OSD main menu disappears.
16
Page 17
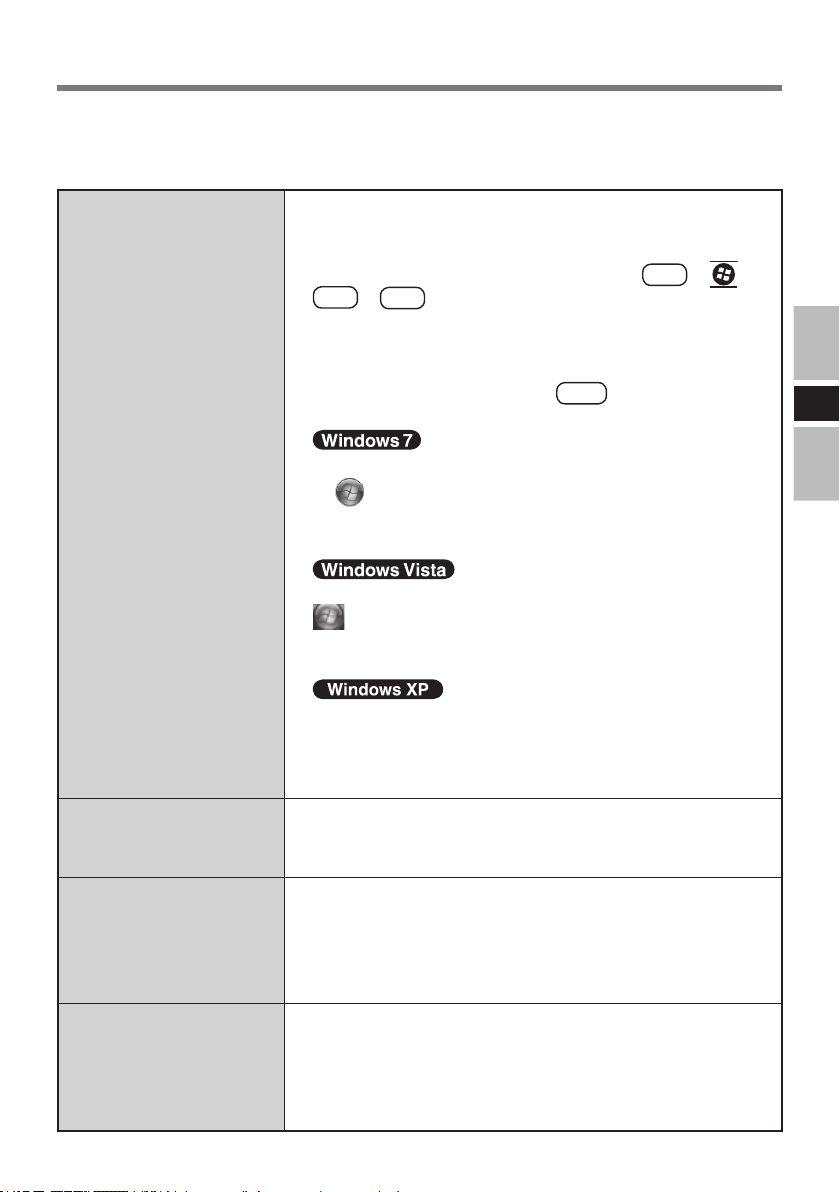
Troubleshooting
When a problem occurs, refer to this page. If a problem appears to be related to a software
application, read the software related manual. If you still cannot troubleshoot the problem,
contact Panasonic Technical Support.
No display after
powering on
or
“No Signal” is
displayed
Check the cable connection for the car adaptor.
Check the cable connection to the LCD Monitor.
Check the brightness of the LCD Monitor.
If the LCD of the computer is ON, press
Fn
Has the computer been set to the power-saving mode?
To resume operation of your computer from the condition
the power of the display is OFF (for energy conservation
purposes), press any key (like
Set the power-saving mode to disable.
Set [Turn off the display] and [Put the computer to sleep]
in (Start) - [Control Panel] - [System and Security]
- [Power Options] - [Choose when to turn off the display]
to [Never].
Set [Turn off the display] and [Put the computer to sleep] in
- [Power Options] - [Choose when to turn off the display]
to [Never].
F3
+
(Start) - [Control Panel] - [System and Maintenance]
.
).
Ctrl
+ *1 or
Fn
E
An input lag appears
There are red, green, or
blue dots on the screen,
or display defects
(always-on pixels or
always-off pixels)
The sound is not heard
Set [Turn off monitor], [System standby] and [System
hibernates] in [start] - [Control Panel] - [Performance and
Maintenance] - [Power Options] to [Never].
*1
Windows 7 only
If an image is displayed for a prolonged period of time, an
input lag may appear. This is not a malfunction. The input
lag will disappear when a different screen is displayed.
The color LCD employs high-precision technology and
has effective pixels of 99.998% or more, however, pixel
defects of 0.002% or less may be present.
Check the cable connection to the LCD Monitor.
Check the volume setting of the computer and the LCD
Monitor.
Check the selected sound device of sound properties if
sound is heard from the speaker of the computer.
17
Page 18
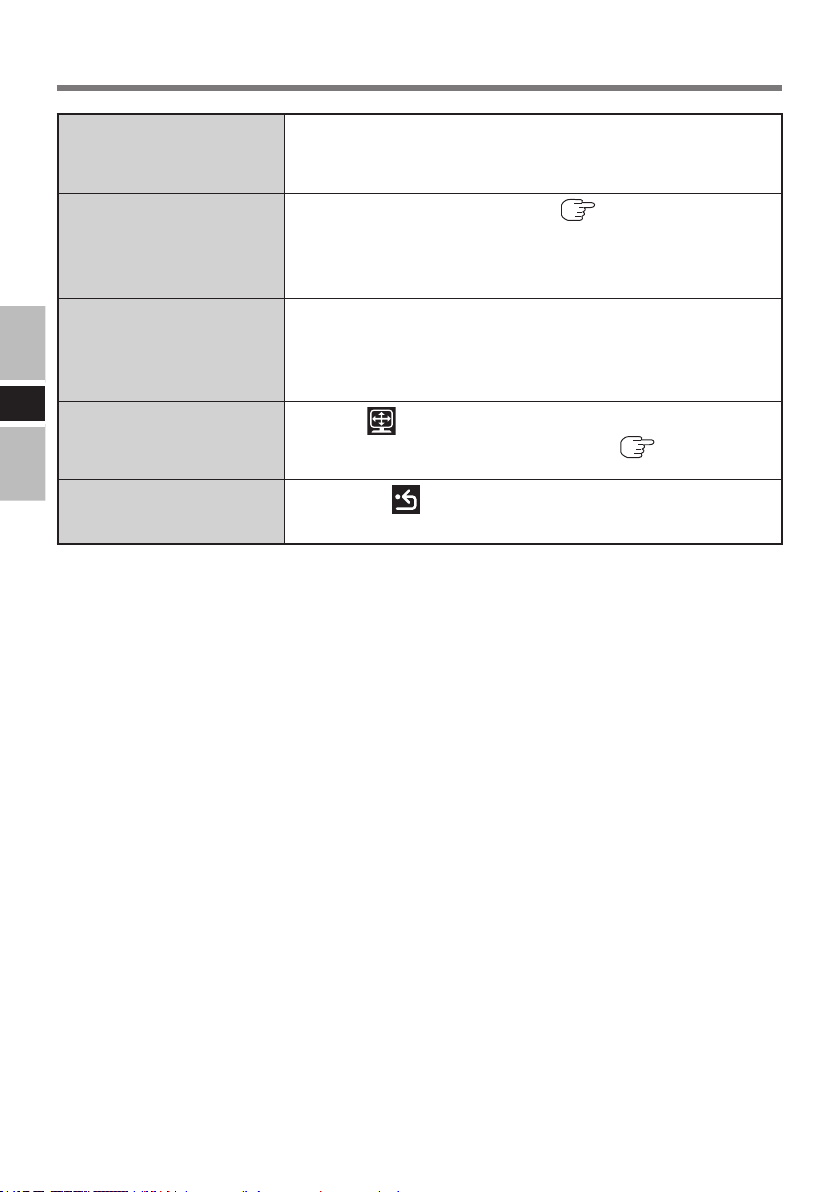
Troubleshooting
“Input Not Supported”
is displayed
Unable to input by
touching the display
The display is affected
E
The screen is shifted
horizontally or
vertically.
The display does not
display properly
The mode not supported is has been selected.
Set the display mode to 640 × 480 60 Hz, 800 × 600 60 Hz
or 1024 × 768 60 Hz.
Install the touchscreen driver. ( page 10)
Check the cable connection to the LCD Monitor.
Conrm that the [USB Port] has not been set to [Disable]
in the Setup Utility.
The mode not supported has been selected.
Set the display mode to 640 × 480 60 Hz, 800 × 600 60 Hz
or 1024 × 768 60 Hz.
Check the cable connection to the LCD Monitor.
Select [Screen] on the OSD main menu and perform
[H-Position] or [V-Position] settings. ( page 14)
Perform [Reset All Settings] on the OSD main
menu.
18
Page 19

Specications
Model No. CF-VDL03U
Input Interface Analog RGB Signal
LCD Type 12.1 type TFT Color Active Matrix LCD
Display Area 247.2 mm × 185.7 mm
Resolution 1024 × 768 dots
Color 262,144 (simulated 16,194,277) Colors
Pixel Pitch 0.24 mm × 0.24 mm
Brightness 1600 cd/m2 (typ)
Display Modes XGA 1024 × 768 60 Hz
WSVGA 1024 × 600 60 Hz
SVGA 800 × 600 60 Hz
VGA 640 × 480 60 Hz
Touchscreen Resistive
Interface Display Port Dsub 15-pin female
USB Port USB 2.0 IN × 1, OUT × 4
Power Sync Serial (Special CN)
Switch
Speaker Stereo Speaker 1W × 2 (built in)
DC-IN Input DC 15.6 V, 3.85 A / DC 16.0 V, 3.75 A
Power Consumption 60 W
Physical Dimensions
(W X H X D)
Weight Approx. 1.9 kg {4.2 lb.} (except the cable)
Environment Temperature 5 °C to 35 °C {41 °F to 95 °F}
Humidity 10 % to 90 % RH (No condensation)
Guaranteed Computer
*1
A 16,194,277 color display is achieved by using the dithering function.
*2
Contact Panasonic Technical Support for further details.
*2
Power Switch, OSD buttons, Function Keys,
Emergency (F11)
280 mm × 265 mm × 30 mm
{11.0" × 10.4" × 1.2"} (except the cable)
CF-18 series, CF-19 series, CF-29 series,
CF-30 series, CF-31 series, CF-U1 series
*1
E
19
Page 20

DEUTSCH
Benutzerinformationen zur Entsorgung von elektrischen und elektronischen
Geräten (private Haushalte)
Entsprechend der grundlegenden Firmengrundsätzen der Panasonic-Gruppe wurde ihr
Produkt aus hochwertigen Materialien und Komponenten entwickelt und hergestellt, die
recycelbar und wieder verwendbar sind.
Dieses Symbol auf Produkten und/oder begleitenden Dokumenten bedeutet, dass
elektrische und elektronische Produkte am Ende ihrer Lebensdauer vom Hausmüll getrennt
entsorgt werden müssen.
Bringen Sie bitte diese Produkte für die Behandlung, Rohstoffrückgewinnung und
Recycling zu den eingerichteten kommunalen Sammelstellen bzw.
Wertstoffsammelhöfen, die diese Geräte kostenlos entgegennehmen.
Die ordnungsgemäße Entsorgung dieses Produkts dient dem Umweltschutz und
verhindert mögliche schädliche Auswirkungen auf Mensch und Umwelt, die sich aus einer
unsachgemäßen Handhabung der Geräte am Ende Ihrer Lebensdauer ergeben könnten.
Genauere Informationen zur nächstgelegenen Sammelstelle bzw. Recyclinghof erhalten
Sie bei Ihrer Gemeindeverwaltung.
D
Für Geschäftskunden in der Europäischen Union
Bitte treten Sie mit Ihrem Händler oder Lieferanten in Kontakt, wenn Sie elektrische und
elektronische Geräte entsorgen möchten. Er hält weitere Informationen für sie bereit.
Informationen zur Entsorgung in Ländern außerhalb der Europäischen Union
Dieses Symbol ist nur in der Europäischen Union gültig.
Bitte treten Sie mit Ihrer Gemeindeverwaltung oder Ihrem Händler in Kontakt, wenn Sie
dieses Produkt entsorgen möchten, und fragen Sie nach einer Entsorgungsmöglichkeit.
36-G-1
Dieses Gerät muss von einem Fachmann installiert werden.
Für Verwendung in Kraftfahrzeugen
Warnung: Ein LCD-Monitor darf nur dann in einem Kraftfahrzeug installiert werden und
für den Fahrer sichtbar sein, wenn er zur Unterstützung von Funktionen im Zusammenhang
mit dem Betrieb des Fahrzeugs eingesetzt wird, z. B. zur Anzeige von Informationen über
das Fahrzeug, Systemsteuerung, hintere oder seitliche Überwachung des Äußeren oder zu
Navigationszwecken. Bei Einsatz lediglich zu Unterhaltungszwecken, z. B. Fernsehempfang
oder Wiedergabe von Videos, muss der Monitor hinter dem Fahrersitz an einer Position
installiert werden, an der der Bildschirm weder direkt noch indirekt für den Betreiber des
Fahrzeugs sichtbar ist. Überprüfen Sie die einschlägigen gesetzlichen Vorschriften, um den
zulässigen Gebrauch dieses Produkts während des Betriebs innerhalb eines Kraftfahrzeugs
zu ermitteln.
Dieser LCD-Monitor arbeitet mit einer hohen Helligkeitsstufe. Stellen Sie die Helligkeit so
ein, dass die Sicht nicht behindert ist.
20
Page 21

ACHTUNG
Zur Vermeidung der Gefahr schwerer Verletzungen oder einer Übertretung von
gesetzlichen Vorschriften ist sicherzustellen, dass der Monitor für den Fahrer zu keinen
anderen als Navigationszwecken oder in Verbindung mit dem Betrieb einer Heckkamera
sichtbar ist.
Während der Fahrt
Der Fahrer darf den LCD-Monitor nicht bedienen.
(Eine Bedienung des LCD-Monitors beim Lenken des Fahrzeugs kann die
Aufmerksamkeit des Fahrers ablenken und einen Verkehrsunfall verursachen.)
Als Sicherheitsmaßnahme ist das Fahren während des Betriebs eines Fernsehgerätes,
Videogerätes oder DVD-Players streng verboten.
Sorgen Sie stets für einen geeigneten Lautstärkepegel. Wenn die Lautstärke während
der Fahrt auf einen zu hohen Pegel eingestellt ist, verhindert dies eine Wahrnehmung
von Verkehrsgeräuschen, was einen Unfall zur Folge haben kann.
Für Europa
Konformitätserklärung (DoC)
“Hiermit erklärt Panasonic, dass sich dieser LCD-Monitor mit den
grundlegenden Anforderungen und anderen relevanten Vorschriften der
Richtlinien des Europäischen Rates in Übereinstimmung bendet.”
Autorisierte Vertretung:
Panasonic Testing Centre
Panasonic Marketing Europe GmbH
Winsbergring 15, 22525 Hamburg, Germany
18-G-0
D
Warnung
Dies ist ein Produkt der Klasse A. In einer Wohnumgebung kann dieses Produkt
Funkstörungen verursachen, so dass der Benutzer angehalten ist, entsprechende
Abhilfemaßnahmen zu ergreifen.
21
Page 22

Vorsichtshinweise
Beim Waschen des Fahrzeugs
Setzen Sie den LCD-Monitor weder Wasser noch
übermäßiger Feuchtigkeit aus. Anderenfalls
kann ein Kurzschluss, Brandausbruch oder
eine andere Beschädigung verursacht werden.
Während des Parkens
Beim Parken in praller Sonne können sich sehr hohe
Temperaturen im Fahrzeuginneren entwickeln. Vergewissern
Sie sich stets, dass sich der Innenraum ausreichend
abgekühlt hat, bevor Sie das Gerät einschalten.
Bei ausgeschaltetem Motor darf der LCD-Monitor
nicht betrieben werden. Dies führt zu einer
Entladung der Fahrzeugbatterie, so dass sich der
Motor möglicherweise nicht mehr starten lässt.
Panasonic-Kundendienst
Bitte versuchen Sie auf keinen Fall, dieses
Präzisionsprodukt zu zerlegen oder zu justieren.
Überlassen Sie jegliche Wartungsarbeiten
qualiziertem Panasonic-Kundendienstpersonal.
Hinweise zur Installation
Achten Sie unbedingt darauf, den LCD-
D
Monitor in einer Position zu installieren, in
der er die Sicht des Fahrers nicht behindert.
Bei Installation des LCD-Monitors für
Passagiere auf den Rücksitzen müssen
diese geeignete Maßnahmen treffen, um zu
verhindern, dass sie bei einem Unfall mit
dem Kopf gegen den LCD-Monitor stoßen.
Setzen Sie den LCD-Monitor weder direkter
Sonneneinstrahlung noch übermäßiger Wärme aus.
Vermeiden Sie eine Installierung des LCD-
Monitors an einem Ort, an dem er Wasser
oder heißer Luft ausgesetzt ist, die aus einem
Heizungsauslass strömt, oder wo Personen
versehentlich auf das Gerät treten können.
Der LCD-Monitor darf nicht in einem
Bereich installiert werden, in dem er den
Betrieb eines Airbag behindern würde.
Beauftragen Sie unbedingt einen Fachmann
mit der Installation dieses Gerätes.
Installation und Verdrahtung erfordern spezielle
technische Kenntnisse und Erfahrung.
Zur Sicherheit empehlt es sich, die Installation
von Ihrem Fachhändler ausführen zu lassen.
Vor dem Betrieb
Überzeugen Sie sich, dass der LCD-Monitor sicher befestigt
und gegen starke Stöße geschützt ist, da anderenfalls eine
Funktionsstörung oder ein Brandausbruch auftreten kann.
22
Bei Auftreten einer Fehlfunktion oder
Störung unmittelbar den Betrieb einstellen
Entfernen Sie beim Auftreten einer
Fehlfunktion unverzüglich den AutoNetzstecker von trennen Sie die Verbindung
zwischen dem Gerät und diesem Produkt
Dieses Produkt ist beschädigt
•
Innerhalb des Produkts bendet sich ein Fremdobjekt
•
Rauchentwicklung
•
Ungewöhnlicher Geruch
•
Außergewöhnlich heiß
•
Bei Weiterverwendung dieses Produkts unter
den oben aufgeführten Bedingungen besteht
Brand- oder Stromschlaggefahr.
Entfernen Sie beim Auftreten einer Fehlfunktion
•
unverzüglich den Auto-Netzstecker von trennen Sie
die Verbindung zwischen dem Gerät und diesem
Produkt. Bitte wenden Sie sich anschließend zur
Reparatur an den technischen Kundendienst.
Stellen Sie keine Behälter mit Flüssigkeit
oder Metallobjekte auf diesem Produkt ab
Falls Wasser oder sonstige Flüssigkeiten, Büroklammern,
Münzen oder Fremdkörper in dieses Produkt geraten,
besteht Brand- und Stromschlaggefahr.
Wenn Fremdkörper hineingelangen sollten, entfernen
•
Sie den Auto-Netzstecker sofort und entfernen Sie
das Gerät von diesem Produkt. Wenden Sie sich
anschließend an den technischen Kundendienst.
Stellen Sie dieses Produkt nicht auf
instabilen Oberächen ab
Wenn dieses Produkt aus dem Gleichgewicht
gerät, kann es umkippen oder herunterfallen,
was zu Verletzungen führen kann.
Bringen Sie dieses Produkt nicht in die
Umgebung von Wasser, Feuchtigkeit,
Dampf, Staub, öligen Dämpfen usw
Dies kann zu Bränden oder elektrischen Schlägen führen.
Verwenden Sie nur den angegebenen
Auto-Adapter für dieses Produkt
Die Verwendung eines anderen Auto-Adapters als des
mitgelieferten (mit dem Gerät mitgeliefert oder separat
als Zusatzteil verkauft) kann zu einem Brand führen.
Machen Sie jede Stunde eine Pause
von 10-15 Minuten
Die Arbeit mit diesem Produkt über längere
Zeit kann schädliche Auswirkungen auf die
Gesundheit von Augen oder Händen haben.
Page 23
Einleitung
Wir danken Ihnen für das Vertrauen, dass Sie Panasonic mit dem Kauf dieses LCD-Monitors
für die Panasonic-Serie von Notebook-Computern ausgesprochen haben.
Dieser LCD-Monitor verfügt über eine Touchscreen-Funktion, die eine bequeme Bedienung
des Computers durch einfaches Berühren der Bildschirmoberäche und Drücken von Tasten
selbst dann gestattet, wenn der Computer nicht vom Benutzer gehalten wird.
Zubehor
RGB/serielles/USB-Kabel .............1
USB-Kabel ....................................1
HINWEIS
Ein Port-Replikator mit einem Display-Anschluss (Analoges RGB-Signal), einem
seriellen Anschluss und einem USB-Anschluss wird bei Verwendung eines Computers
benötigt, der nicht mit diesen Anschlüssen ausgestattet ist. Weitere Einzelheiten
hierzu nden Sie im Reference Manual Ihres Computers.
In diesem Handbuch werden die Bedienungsverfahren bei Verwendung der
Standardeinstellungen beschrieben. Bei Verwendung anderer Einstellungen können
unterschiedliche Bedienungsschritte erforderlich werden.
[Abbildung in dieser Anleitung]
: Informationen für Benutzer von Genuine Windows® 7 Professional
: Informationen für Benutzer von Genuine Microsoft® Windows® Vista®
Business
: Informationen für Benutzer von Genuine Microsoft® Windows® XP
Professional und Genuine Windows® XP Tablet PC Edition
Wenn keine für ein anderes Betriebssystem spezischen Anweisungen im Text gegeben
werden, zeigen die Abbildungen von Bildschirmanzeigen in diesem Handbuch grundsätzlich
Windows 7 als Beispiel.
Bei Microsoft® und Windows® handelt es sich um eingetragene Marken der Microsoft
Corporation in den Vereinigten Staaten und/oder anderen Ländern.
D
23
Page 24
Bezeichnungen und Funktionen der Teile
<Frontplatte>
LCD-Bildschirm
LED-Betriebsanzeige
Grün: Das Gerät ist eingeschaltet.
Orangefarben: Das Gerät ist
eingeschaltet, aber momentan
Funktionstasten
(Function Keys)
Seite 33
wird kein Analoges RGBSignal zugeleitet, oder das
Kabel ist abgetrennt.
Blinkt grün/blinkt orangefarben:
Beim Herunterfahren
Lautsprecher
Nottaste
Diese Taste dient zum Starten
der
Anwendungssoftware.
LED-Temperaturanzeige
D
(Temperature LED Indicator)
Grün: Normal
Orangefarben: Aufgrund eines Anstiegs der Innentemperatur wird
Rot:
Löcher für Kabelbefestigung
Führen Sie das Kabelband usw. durch diese
Löcher, um die Kabel zu befestigen.
zugeordneten
F11
Die Helligkeit kann wunschgemäß eingestellt werden.
die Helligkeit automatisch verringert.
Aufgrund eines starken Anstiegs der Innentemperatur wird
die Bildschirmbeleuchtung automatisch ausgeschaltet.
Lautsprecher-Lautstärkeregler
Erhöhen
Verringern
<Unterseite>
USB-Anschluss
Ein/Aus-Schalter
Lautsprecher
Helligkeitsregler
Erhöhen
Verringern
OSD-Tasten
Seite 31
/– /
DC-IN-Buchse
DC-IN 15.6 V /16V
+
Serieller Anschluss
SERIAL I/F (Besondere CN)
Display-Anschluss
(Analoges RGB-Signal)
24
USB-Anschlusse
USB-Anschluss
Hier wird der Computer angeschlossen.
Page 25

Montage des LCD-Monitors
1 <Nur für Modelle ohne Display-Anschluss, seriellen Anschluss und
USB-Anschluss>
Schließen Sie den Port-Replikator oder Autohalterung an den Computer an.
( Bedienungsanleitung des Port-Replikators/Automontage-Vorrichtung)
2 Schließen Sie den LCD-Monitor über die Verbindungskabel (mitgeliefert)
an den Computer an.
Beispiel der Anschlüsse
<Rückansicht>
USB-
Anschluss
Hier wird der Computer
angeschlossen.
Display-Anschluss
(Analoges RGB-Signal)
Tastatur
LCD-Monitor
<Draufsicht>
USB-
Anschluss
(Modell-Nr.
CF-VKBL01/
CF-VKBL02/
CF-VKBL03/
CF-VKBL03A)
Auto-Adapter
(im Fachhandel
erhältlich)
Serieller Anschluss
B
DC-IN-Buchse
DC-IN 15.6 V /16V
DC-IN-Buchse
DC-IN 15.6 V /16V
USB-Anschluss
Computer
Serieller
Anschluss
A
Anschluss
für externes
Display
<Draufsicht>
A
RGB/serielles/USB-Kabel
B
USB-Kabel
D
25
Page 26

8mm
Montage des LCD-Monitors
3 Befestigen Sie den LCD-Monitor.
Verwenden Sie die M4-Schraubenlöcher zur Montage
des LCD-Monitors.
ACHTUNG
Achten Sie bei der Montage
darauf, dass die Schrauben nicht
bis zu einer Tiefe von mehr als 8
mm in dieses Gerät eingeschraubt
werden.
D
26
Der LCD-Monitor muss wie in
der Abbildung gezeigt unterhalb
des Armaturenbretts installiert
werden, um zu verhindern, dass
er die Sicht des Fahrers behindert
oder direkter Sonneneinstrahlung
ausgesetzt ist.
Page 27

Hochfahren/Herunterfahren
Hochfahren
1 Drücken Sie den Ein/Aus-Schalter des LCD-Monitors.
Der LCD-Monitor schaltet sich ein.
2 Schalten Sie den Computer ein. ( Bedienungsanleitung des Computers)
HINWEIS
Bestimmte Computermodelle schalten sich beim Einschalten des LCD-Monitors
automatisch gleichzeitig ein.
3 Starten Sie die gewünschte Anwendung.
Jetzt können Sie mit Ihrer Arbeit am Computer beginnen.
Herunterfahren (Ausschalten des Computers)
Das nachstehend beschriebene Verfahren dient zum Herunterfahren des Computers ohne Verwendung
der Funktion energie sparen (Standby) oder Ruhezustand. ( Reference Manual des Computers)
HINWEIS
Bestimmte Computermodelle werden gemäß den Netzschalter-Einstellungen beim
Ausschalten des LCD-Monitors automatisch heruntergefahren.
Sie können die Netzschalter-Einstellungen in den folgenden Menüs ändern:
:
(Start) - [Systemsteuerung] - [System und Sicherheit]
- [Energieoptionen] - [Auswählen, was beim Drücken des
Netzschalters geschehen soll] - [Beim Drücken des Netzschalters]
:
(Start) - [Systemsteuerung] - [System und
- [Energieoptionen] - [Auswählen, was beim Drücken des
Netzschalters geschehen soll] - [Beim Drücken des Netzschalters]
:
[start] - [Systemsteuerung] - [Leistung und Wartung] - [Energieoptionen]
- [Advanced] - [Beim Drücken des Netzschalters am Computer]
Wartung
]
D
1
Speichern Sie wichtige Daten, und beenden Sie alle laufenden Anwendungen.
2 Rufen Sie den Bildschirm für das Herunterfahren auf.
: Wählen Sie (Start) - [Herunterfahren]
Der Computer wird automatisch ausgeschaltet.
: Wählen Sie (Start) - [Herunterfahren]
Der Computer wird automatisch ausgeschaltet.
: Wählen Sie [start] - [Ausschalten].
3 Vergewissern Sie sich, dass der Computer heruntergefahren worden ist.
: Wählen Sie [Ausschalten].
4 Drücken Sie den Ein/Aus-Schalter des LCD-Monitors.
Nach vollständigem Herunterfahren des Computers schaltet sich der LCD-Monitor aus.
27
Page 28

Touchscreen
Dieser LCD-Monitor ist mit einer Touchscreen-Funktion ausgestattet, die es Ihnen ermöglicht,
die gleichen Bedienungsvorgänge wie mit dem Touchpad oder der Maus auszuführen, indem
Sie die Oberäche des Bildschirms mit einem Finger oder Stift berühren.
Bewegen des Cursors
Cursor
Doppelklicken
D
ACHTUNG
Wenn ein Panning-Vorgang in einem Anzeigemodus mit einer größeren Auösung
als XGA ausgeführt wird, arbeitet die Touchscreen-Funktion nicht einwandfrei.
Wenn die Bildschirmauösung geändert wurde oder sich der Cursor mit dem Finger oder
Stift nicht korrekt positionieren lässt, muss eine Neukalibrierung ausgeführt werden.
zweimal
schnell
nacheinander
antippen
Klicken
Ziehen und Ablegen
einmal
antippen
Berühren
Sie das Objekt
(z. B. eine Datei oder
ein Symbol) mit dem
Finger oder Stift, bewegen
Sie den Finger bzw. Stift über
die Bildschirmoberäche (um
das Objekt an die gewünschte
Position zu ziehen), und
entfernen Sie dann den
Finger bzw. Stift vom
Bildschirm.
Bei Wahl der Anzeige in voller Bildschirmgröße unter [Eingabeaufforderung] steht
die Touchscreen-Funktion nicht zur Verfügung.
Erstmalige Inbetriebnahme
Der Touchscreen-Treiber muss installiert werden, bevor von der Touchscreen-Funktion
Gebrauch gemacht werden kann.
A Führen Sie einen Zugriff auf die nachstehend angegebene Website aus:
http://pc-dl.panasonic.co.jp/itn/drivers/VDL03U.html
B Folgen Sie den Anweisungen, die auf dem Bildschirm erscheinen.
Der Kalibrierungs-Bildschirm erscheint während der Installation. Berühren Sie jede der
Zielmarkierungen „“ der Reihe nach. Wenn dieser Bildschirm nicht automatisch erscheint,
wählen Sie [Touch Panel Settings] im Start-Menü, und führen Sie dann [Calibration] aus
( seite 29).
28
Page 29

Handhabung des Touchscreen
Platzieren Sie keinerlei Gegenstände auf der Oberäche des Bildschirms, und vermeiden Sie
ein starkes Drücken mit einem spitzen Gegenstand (z. B. einem Nagel) oder einem harten
Gegenstand, der Kratzer verursachen kann (z. B. einem Bleistift oder Kugelschreiber).
Üben Sie keinen Druck auf den Bereich innerhalb von 5 mm vom Bildschirmrand aus.
Anderenfalls springt der Cursor möglicherweise an den Bildschirmrand.
Vermeiden Sie einen Betrieb des Computers, wenn sich Staub usw. auf dem Bildschirm angesammelt hat,
und sorgen Sie dafür, dass keine Substanzen in Kontakt mit dem Bildschirm geraten, die eine Verschmutzung
verursachen können, z. B. Öl. Anderenfalls arbeitet der Cursor möglicherweise nicht einwandfrei.
Bei Verschmutzung des Touchscreen:
Entfernen Sie die Schmutzecken mit einem trockenen, weichen Tuch oder einem Stück Gaze.
•
Verwenden Sie auf keinen Fall Benzol, Farbverdünner oder alkoholhaltige Lösungen
•
wie Desinfektionsmittel.
Kongurieren des Touchscreen
Bei Bedarf kann das Touchscreen anhand der folgenden Schritte konguriert werden.
1
Klicken Sie auf (Start) - [Alle Programme] - [Touch Panel Utility]
- [Touch Panel Settings].
Klicken Sie auf (Start) - [Alle Programme] - [Touch Panel Utility]
- [Touch Panel Settings].
Klicken Sie auf [start] - [Alle Programme] - [Touch Panel Utility] - [Touch Panel Settings].
D
Daraufhin erscheint der nachstehend abgebildete Bildschirm.
Devices
Hier können Sie den
Geräte-C ont roller
kongurieren.
Settings
Hier können Sie allgemeine
Einstellungen vornehmen und
verschiedene grundlegende
Funktionen wunschgemäß
einstellen (z. B. die Einstellung
für das Doppelklicken).
Advanced
Hier können Sie weiterführende
Einstellungen vornehmen.
Version
Hier wird die Versionsnummer des installierten
Touchscreen-Treibers angezeigt.
Others
Hier können Sie die selektive Unterbrechungsfunktion
und verschiedene andere Parameter einstellen.
Calibration
Hier können Sie das KalibrierungsSetup festlegen.
Verwenden Sie diese Funktion, wenn
sich der Cursor mit dem Finger oder
Stift nicht korrekt positionieren lässt
(beispielsweise nach einer Änderung
der Ausrichtung des Touchscreen auf
das angezeigte Bild oder nach einer
Änderung der Anzeigeauösung).
29
Page 30

Touchscreen
2 Nehmen Sie die erforderlichen Änderungen vor.
3 Wählen Sie [OK].
HINWEIS
Weitere Informationen hierzu nden Sie unter [Help].
Wenn der Computer Einzelklicks als Doppelklicks beurteilt, können die Einstellungen
richtig vorgenommen werden, indem Sie auf dem auf der vorigen Seite gezeigten
Bildschirm auf [Settings] klicken und dann den unter [Double click Speed]
angezeigten Wert verringern.
Führen Sie die Kalibrierung unmittelbar nach einer Änderung des Kalibrierungspunkts
aus.
Die Doppelklick-Geschwindigkeit für [Tap and Buttons]*1 kann ebenfalls geändert werden.
*1
: Unter (Start) - [Systemsteuerung] - [Hardware und Sound]
- [Maus].
: Unter (Start) - [Systemsteuerung] - [Hardware und
: Unter [start] - [Systemsteuerung] - [Drucker und andere
<Nur für Modelle mit Anzeigedrehungs-Tool>
D
Drehen Sie die Anzeige in das Querformat (0 Grad), bevor Sie die Kalibrierung ausführen.
Sound] - [Maus].
Hardware] - [Maus].
30
Page 31

Einstellen des LCD-Monitors
Main menu
Scree n
Con f i
gu r at i o n
Mis ce l l ane ou s
Infor mat io n
Rese t A l l
S et t ings
1 :Ex i t 2 :S el ec t
Abhängig vom Signaltakt des jeweiligen Computers kann eine Feineinstellung von Größe
und Position der Anzeige auf dem Bildschirm usw. erforderlich werden.
1 Drücken Sie .
Daraufhin erscheint das OSD-Hauptmenü
auf dem Bildschirm.
/– /
+
HINWEIS
Wenn kein analoges RGB-Signal vorhanden ist, das Kabel nicht angeschlossen ist
oder die OSD-Taste verriegelt ist, erscheint das OSD-Hauptmenü nicht.
Nach Drücken von kann es vorkommen, dass das OSD-Fenster nicht richtig
angezeigt wird. Bitte warten Sie in einem solchen Fall ca. 10 Sekunden, und drücken
Sie dann erneut.
Wenn die OSD-Funktion nicht aktiviert ist und Sie 3 Sekunden lang drücken,
während Sie gedrückt halten, wird die OSD-Taste verriegelt. Um die Verriegelung
aufzuheben, drücken Sie erneut 3 Sekunden lang, während Sie gedrückt halten.
Wenn bei Anzeige des OSD-Menüs innerhalb von 15 Sekunden keine Betätigung der
OSD-Taste stattndet, verschwindet das OSD-Menü automatisch vom Bildschirm.
<OSD-Hauptmenü>
SYMBOL
FUNKTION BESCHREIBUNG
Screen
Conguration
Miscellaneous
Für Bildschirm-Einstellungen
Für Tasteneinstellungen
Für sonstige Einstellungen
D
Information
Reset All
Settings
Di e s e s M e n ü d i e n t z u r
Anzeige von verschiedenen
Informationen über das System
Für Wiederherstellung der
Standardeinstellungen
31
Page 32

Con tr as t
0
H-Po so tio n
3
-
V-Po so tio n
0
Pha se
1 7
Aut o Adjust
Re se t Po sit io n/P ha se
Exe cute ?
Einstellen des LCD-Monitors
2 Betätigen Sie /– oder /+ zur Wahl des gewünschten Eintrags, und
drücken Sie dann .
Screen
Der Menüeintrag [Screen] ermöglicht eine Einstellung von Kontrast,
Horizontalposition, Vertikalposition und Phase.
Contrast
Der Menüeintrag Contrast dient zur Einstellung
des Kontrasts. (Mindestens: –31, Maximal: +31,
Standardeinsellung:0)
Betätigen Sie /– oder /+ zur Einstellung des
gewünschten Wertes, und drücken Sie dann .
H-Position
Der Menüeintrag H-Position dient zur manuellen
Einstellung der horizontalen Bildposition.
Betätigen Sie /– oder /+ zur Einstellung des
gewünschten Wertes, und drücken Sie dann .
V-Position
Der Menüeintrag V-Position dient zur manuellen
Einstellung der vertikalen Bildposition.
Betätigen Sie /– oder /+ zur Einstellung des
D
gewünschten Wertes, und drücken Sie dann .
Phase
Der Menüeintrag Phase dient zur Einstellung
der Phase des ADC-Musterpixel-Taktgebers.
(Mindestens: 0, Maximal: +31)
Betätigen Sie /– oder /+ zur Einstellung des
gewünschten Wertes, und drücken Sie dann .
HINWEIS
Um die Einstellung abzubrechen, drücken Sie .
32
Auto Adjust
Der Menüeintrag Auto Adjust dient zur automatischen
Einstellung der Einträge H-Position, V-Position und
Phase des Menüs Screen. Drücken Sie nach
Abschluss der automatischen Einstellung, um die
neuen Einstellungen zu speichern.
Page 33

Conguration
F u n c t i o n K e
y s
E me rge ncy Ke
y
F u nct i o n Ke
ys
F6-F10
D is a b le F n Ke
ys
B righ tn e s s C on t r ol
F 1 :T ur n o f f Mo n it o r
F 2 : Mi n .B r igh tn e ss
F 3 : Lo w B righ tn e ss
F 4 : Mi d .B r igh tn e ss
F 5 : Max .B r igh tn e ss
F1-F5
Eme rgency Ke
y
E na b le
D i s ab le
Das Menü [Configuration] umfasst die Einträge
[Function Keys] und [Emergency Key].
Function Keys
Den Funktionstasten dieses LCD-Monitors können
verschiedene Funktionen zugewiesen werden.
[F1-F5]: Die Funktionstasten besitzen die gleichen
•
Funktionen wie die Tasten F1 bis F5 der Tastatur
(Standardeinstellung).
[F6-F10]: Die Funktionstasten besitzen die
•
gleichen Funktionen wie die Tasten F6 bis F10
der Tastatur.
[Disable Fn Keys]: Die Funktionstasten arbeiten
•
nicht.
[Brightness Control]: Den Funktionstasten
•
können die nachstehend aufgeführten Funktionen
zugewiesen werden.
F1: Ausschalten des Monitors
F2: Minimale Helligkeit
F3: Niedrige Helligkeit
F4: Mittlere Helligkeit
F5: Maximale Helligkeit
Betätigen Sie /– oder /+ zur Wahl der gewünschten
Einstellung, und drücken Sie dann .
D
HINWEIS
Um die Einstellung abzubrechen, drücken Sie .
Emergency Key
Dieser Eintrag dient zum Freigeben und Sperren der
Nottaste.
Bei Wahl der Einstellung [Enable] besitzt die Nottaste
die gleiche Funktion wie die Taste F11 der Tastatur.
Betätigen Sie /– oder /+ ur Wahl der gewünschten
Einstellung, und drücken Sie dann .
33
Page 34

Einstellen des LCD-Monitors
Br i
ght ne s s
M od e
Tu rn on A ut oma ti cal l y
F or ce P C Of f
Br i
gh t n ess M o d e
N or m al
H igh
Tu rn on A ut om at ic al l
y
Enab l e
Dis ab le
For ce PC Of f
Exe cute ?
Miscellaneous
Das Menü [Miscellaneous] umfasst die Einträge
[Brightness Mode], [Turn on Automatically] und [Force
PC Off].
Brightness Mode
Der Eintrag Brightness dient zur Einstellung der
Helligkeit.
Betätigen Sie
oder [High], und drücken Sie dann .
Turn on Automatically
Wenn diese Funktion aktiviert ist, schaltet sich der
LCD-Monitor automatisch ein, wenn der DC-INBuchse Strom zugeleitet wird.
Betätigen Sie /– oder /+, zur Wahl der
gewünschten Einstellung, und drücken Sie dann
. Um die Einstellung abzubrechen, drücken Sie .
Force PC Off
Bei Ausführung dieser Funktion wird der Computer
D
zwangsweise heruntergefahren, und alle nicht vorher
abgespeicherten Daten gehen verloren.
Bei bestimmten Computermodellen steht diese
Funktion nicht zur Verfügung.
/–
oder
/+
zur Wahl von [Normal]
HINWEIS
Um die Einstellung abzubrechen, drücken Sie .
Information
Dieses Menü dient zur Anzeige von verschiedenen Informationen über das System.
Das OSD-Fenster erscheint auf dem Bildschirm.
: Schließt sich das Informationsfenster, und das Hauptmenü wird angezeigt.
: Das Informationsfenster wird umgeschaltet.
Reset All Settings
Der Eintrag [Reset All Settings] dient zur Rückstellung aller OSD-Einträge auf ihre
Standardwerte.
3 Drücken Sie .
Das OSD-Hauptmenü verschwindet vom Bildschirm.
34
Page 35

Störungsbeseitigung
Bitte schlagen Sie bei Auftreten einer Funktionsstörung in dieser Tabelle nach. Wenn ein
Problem im Zusammenhang mit einer Software-Anwendung auftritt, schlagen Sie bitte
im Benutzerhandbuch der betreffenden Software nach. Falls sich die Störung anhand der
Hinweise der nachstehenden Tabelle nicht beseitigen lässt, setzen Sie sich bitte mit der
technischen Unterstützung von Panasonic in Verbindung.
Keine Anzeige nach
Einschalten
oder
„No Signal“ wird
angezeigt.
Überprüfen Sie den Kabelanschluss des Auto-Adapters.
Überprüfen Sie den Kabelanschluss an den LCD-Monitor.
Überprüfen Sie die Helligkeit des LCD-Monitors.
Wenn der LCD-Bildschirm des Computers eingeschaltet
ist, drücken Sie
Ist der Energiesparmodus des Computers aktiviert?
Um den Betrieb des Computers aus dem Zustand fortzusetzen,
indem sein Display ausgeschaltet ist (zur Energieeinsparung),
drücken Sie eine beliebige Taste (z. B.
Deaktivieren Sie den Energiesparmodus.
Stellen Sie die Einträge [Bildschirm ausschalten] und
[Energiesparmodus nach] unter (Start) - [Systemsteuerung]
- [System und Sicherheit] - [Energieoptionen] - [Beim
Drücken des Netzschalters] - [Zeitpunkt für das Ausschalten
des Bildschirms auswählen] auf [Niemals] ein.
Stellen Sie die Einträge [Bildschirm ausschalten] und
[Energiesparmodus nach] unter (Start) - [Systemsteuerung]
- [System und Wartung] - [Energieoptionen] - [Beim
Drücken des Netzschalters] - [Zeitpunkt für das Ausschalten
des Bildschirms auswählen] auf [Niemals] ein.
+ *1 oder
Fn
Fn
+
Strg
F3
.
).
D
Ein Nachbild erscheint
Rote, grüne oder
blaue Punkte oder
Anzeigedefekte (Pixel,
die entweder ständig
oder überhaupt nicht
leuchten) erscheinen
auf dem Bildschirm.
Stellen Sie die Einträge [Monitor ausschalten], [Standby]
und [Ruhezustand] unter [start] - [Systemsteuerung] [Leistung und Wartung] - [Energieoptionen] auf [Nie] ein.
*1
Nur Windows 7
Wenn ein Bild lange Zeit über auf dem Bildschirm verbleibt,
kann ein Nachbild erscheinen. Dabei handelt es sich nicht
um eine Funktionsstörung. Das Nachbild verschwindet,
sobald auf eine andere Anzeige gewechselt wird.
Bei diesem Farb-Flüssigkristallbildschirm (LCD) ndet eine
Hochpräzisions-Technologie Anwendung, die gewährleistet,
dass 99,998 % der Pixel effektiv sind; Defekte von maximal
0,002 % der Bildpunkte sind jedoch möglich.
35
Page 36

Störungsbeseitigung
Keine Tonausgabe
„Input Not Supported“
wird angezeigt.
Eingabe durch
Berühren des
Bildschirms ist nicht
möglich.
Die Anzeige ist gestört.
D
Die Anzeige ist in
horizontaler oder
vertikaler Richtung
auf dem Bildschirm
verschoben.
Es ist überhaupt keine
einwandfreie Anzeige
mehr möglich.
Überprüfen Sie den Kabelanschluss an den LCD-
Monitor.
Überprüfen Sie die Lautstärkeeinstellungen am Computer
und am LCD-Monitor.
Wenn der Ton über den Lautsprecher des Computers
wiedergegeben wird, überprüfen Sie das unter den KlangEigenschaften gewählte Gerät.
Ein nicht unterstützter Anzeigemodus wurde gewählt.
Stellen Sie den Anzeigemodus auf 640 × 480 60 Hz,
800 × 600 60 Hz oder 1024 × 768 60 Hz ein.
Installieren Sie den Touchscreen-Treiber. ( Seite 28)
Überprüfen Sie den Kabelanschluss an den LCD-
Monitor.
Prüfen Sie nach, dass [USB Port] im Setup Utility nicht
auf [Disable] eingestellt ist.
Ein nicht unterstützter Anzeigemodus wurde gewählt.
Stellen Sie den Anzeigemodus auf 640 × 480 60 Hz,
800 × 600 60 Hz oder 1024 × 768 60 Hz ein.
Überprüfen Sie den Kabelanschluss an den LCD-
Monitor.
Wählen Sie [Screen] im OSD-Hauptmenü, und ändern
Sie die Einstellung des Eintrags [H-Position] bzw. [VPosition] ( Seite 32).
Führen Sie die Funktion [Reset All Settings] im OSD-
Hauptmenü aus.
36
Page 37

Technische Daten
Modell-Nr. CF-VDL03U
Eingabeschnittstelle Analoges RGB-Signal
LCD-Typ 12,1-Zoll-TFT-Farb-Aktivmatrix-
Flüssigkristallbildschirm
Anzeigebereich 247,2 mm × 185,7 mm
Auösung 1024 × 768 Bildpunkte
Anzahl Farben 262.144 (16.194.277 simulierte) Farben
Pixelabstand 0,24 mm × 0,24 mm
Helligkeit 1600 cd/m2 (typ.)
Anzeigemodi
XGA 1024 × 768 60 Hz
WSVGA 1024 × 600 60 Hz
SVGA 800 × 600 60 Hz
VGA 640 × 480 60 Hz
Touchscreen Widerstandsbehaftet
Schnittstellen
Display-Anschluss
USB-Anschlüsse
Spannungssynchronisation
15-polige Dsub-Steckbuchse
USB 2.0 IN × 1, OUT × 4
Seriell (Besondere CN)
Schalter Ein/Aus-Schalter, OSD-Tasten,
Funktionstasten, Nottaste (F11)
Lautsprecher Stereo-Lautsprecher 1 W × 2 (eingebaut)
DC-IN
Eingangsbuchse
15,6 V Gleichstrom, 3,85 A /
16,0 V Gleichstrom, 3,75 A
Leistungsaufnahme 60 W
Abmessungen
(B x H x T)
280 mm × 265 mm × 30 mm
(ausschließlich Kabel)
Masse Ca. 1,9 kg (ausschließlich Kabel)
Umgebung Temperatur 5 °C bis 35 °C
Luftfeuchtigkeit 10 % bis 90 % rel. Feuchte (ohne Kondensatbildung)
Garantierte Computer
*2
Serie CF-18, Serie CF-19, Serie CF-29,
Serie CF-30, Serie CF-31, Serie CF-U1
*1
Eine Anzeige von 16.194.277 Farben ist mit Hilfe der Dithering-Funktion möglich.
*2
Bitte wenden Sie sich für weitere Einzelheiten an die technische Unterstützung von Panasonic.
*1
D
37
Page 38

FRANÇAIS
Informations relatives à l’évacuation des déchets, destinées aux utilisateurs
d’appareils électriques et électroniques (appareils ménagers domestiques)
Lorsque ce symbole gure sur les produits et/ou les documents qui les accompagnent,
cela signie que les appareils électriques et électroniques ne doivent pas être jetés avec les
ordures ménagères.
Pour que ces produits subissent un traitement, une récupération et un recyclage appropriés,
E
D
envoyez-les dans les points de collecte désignés, où ils peuvent être déposés gratuitement.
Dans certains pays, il est possible de renvoyer les produits au revendeur local en cas d’achat
d’un produit équivalent.
En éliminant correctement ce produit, vous contribuerez à la conservation des ressources
vitales et à la prévention des éventuels effets négatifs sur l’environnement et la santé humaine
qui pourraient survenir dans le cas contraire.
An de connaître le point de collecte le plus proche, veuillez contacter vos autorités
locales.
Des sanctions peuvent être appliquées en cas d’élimination incorrecte de ces déchets,
conformément à la législation nationale.
Utilisateurs professionnels de l’Union européenne
Pour en savoir plus sur l’élimination des appareils électriques et électroniques,
contactez votre revendeur ou fournisseur.
Informations sur l’évacuation des déchets dans les pays ne faisant
pas partie de l’Union européenne
Ce symbole n’est reconnu que dans l’Union européenne.
Pour supprimer ce produit, contactez les autorités locales ou votre revendeur an
de connaître la procédure d’élimination à suivre.
3
6-F-1
L’appareil doit être installé par un installateur professionnel agréé.
F
Pour L’utilisation Dans Un Véhicule Motorisé
Avertissement : Le Moniteur LCD peut être installé dans un véhicule motorisé et dans le
champ de vision du conducteur uniquement en tant que dispositif d’aide aux fonctions du
véhicule, comme par exemple pour fournir des informations sur le véhicule, comme dispositif
de contrôle de système, pour l’observation à l’arrière ou sur les côtés du véhicule, ainsi que
pour fournir de l’information routière. Pour toute utilisation à n de divertissement, comme
par exemple pour regarder la télévision ou jouer à des jeux vidéo, il doit être installé à l’arrière
J
du siège du conducteur, en un emplacement où il ne sera pas visible, ni directement ni
indirectement, pour le conducteur du véhicule motorisé. Vériez les lois fédérales et nationales
qui régissent l’utilisation légale de cet appareil à l’intérieur d’un véhicule motorisé.
Le niveau de luminosité de ce moniteur LCD est très élevé. Régler la luminosité de manière
à ce qu’elle ne gêne pas la vue.
38
Page 39

ATTENTION
Pour éviter de se blesser gravement ou d’enfreindre la loi, veiller à placer le moniteur à
une position visible du conducteur uniquement pour la navigation ou avec l’utilisation
de la caméra à vision arrière uniquement.
Lors de la conduite
Le conducteur ne doit pas actionner le Moniteur LCD.
(Actionner le Moniteur LCD lorsque l’on conduit est une distraction et peut entraîner
un accident).
En guise de sécurité, il est interdit de conduire avec la télévision, le lecteur vidéo ou
DVD en marche.
Maintenir le volume de l’appareil à un niveau raisonnable. La conduite avec le son
poussé à un niveau empêchant d’entendre les bruits extérieurs autour du véhicule
peut causer un accident.
Pour le Canada
Cet appareil numérique de la classe A est conforme à la norme NMB-003 du Canada.
Pour l’Europe
Déclaration de conformité (DoC)
« Par le présent document Panasonic déclare que cet Moniteur LCD est
conforme aux conditions fondamentales et aux autres dispositions applicables
de la Directives des la Commission Européenne. »
E
D
Représentant homologué :
Panasonic Testing Centre
Panasonic Marketing Europe GmbH
Winsbergring 15, 22525 Hamburg, Germany
18-F-0
Avertissement
Il s’agit d’un produit de classe A. Dans un environnement domestique, ce produit risque
de provoquer des interférences radio, auquel cas l’utilisateur pourra se voir obligé de
prendre des mesures adéquates.
F
J
39
Page 40

Précautions
Lors du lavage du véhicule
Ne pas exposer le Moniteur LCD à l’eau
ou à une humidité excessive. Ceci pourrait
provoquer des courts-circuits, un incendie
ou d’autres dégâts.
En stationnement
Un stationnement en plein soleil peut générer
des températures très élevées dans le véhicule.
Laisser l’intérieur de la voiture refroidir avant
de mettre en marche le moniteur.
Ne pas regarder le Moniteur LCD avec le
E
moteur arrêté. Il consomme la puissance
de la batterie et peut empêcher le moteur
de démarrer.
Recours au Support technique
Panasonic
Ne pas essayer de démonter ou de régler ce
produit de précision. Contacter le Support
technique Panasonic.
Pour l’installation
D
Veiller à installer le Moniteur LCD à
une position qui ne gêne pas la vision du
conducteur.
Si le Moniteur LCD a été installé pour les
passagers arrière, recommander à ceux-ci
d’éviter de se cogner la tête sur le moniteur
en cas d’accident.
Ne pas exposer le moniteur à la lumière directe
du soleil ou à une chaleur excessive.
Ne pas installer le moniteur à une position
F
exposée à l’eau, à de l’air chaud tel qu’une
canalisation de chauffage ou à un endroit
où il risque d’être piétiné.
Ne pas installer le Moniteur LCD à
une position qui empêcherait le bon
fonctionnement d’un coussin d’air.
Faire installer l’appareil par un technicien
qualié. L’installation et le câblage exigent
des compétences particulières.
Pour plus de sécurité, demander au vendeur
de l’appareil d’effectuer l’installation.
J
En fonctionnement
S’assurer que le Moniteur LCD est fermement
xé et protégé contre les risques d’impact qui
peuvent entraîner un mauvais fonctionnement
ou causer un incendie.
40
En cas de dysfonctionnement ou de
problème, cesser immédiatement l’utilisation
En cas de dysfonctionnement, débrancher
immédiatement la che voiture et
déconnecter l’unité de ce produit
Ce produit est endommagé
•
Un corps étranger est entré dans ce produit
•
Émission de fumée
•
Émission d’une odeur inhabituelle
•
Ce produit est anormalement chaud
•
Continuer à utiliser ce produit si l’une des
conditions ci-dessus est remplie peut provoquer
un incendie ou une décharge électrique.
En cas de dysfonctionnement ou de problème,
•
débrancher immédiatement la che voiture et retirer
l’unité de ce produit. Contacter ensuite l’assistance
technique pour faire réparer le produit.
Ne pas placer d’objets métalliques
ou contenant du liquide au-dessus
de ce produit
Si de l’eau ou d’autres liquides se déversent
ou si des trombones, des pièces ou des corps
étrangers pénètrent dans ce produit, un incendie
ou une décharge électrique sont possibles.
Si un corps étranger a pénétré dans ce
•
produit, débrancher immédiatement la
che voiture et retirer l’unité de ce produit.
Contacter ensuite l’assistance technique.
Ne pas placer ce produit sur des
surfaces instables
S’il est déséquilibré, ce produit risque de
tomber et d’entraîner des blessures.
Ne pas mettre ce produit en présence
d’eau, d’humidité, de vapeur, de
poussière, de vapeurs graisseuses, etc.
Sinon, un incendie ou une décharge électrique
sont possibles.
N’utiliser que l’adaptateur voiture
spécié pour ce produit
Utiliser un adaptateur voiture autre que
celui fourni (fourni avec l’appareil ou acheté
séparément comme accessoire) risque de
provoquer un incendie.
Faire une pause de 10 à 15 minutes
par heure.
Utiliser ce produit pendant une période prolongée
peut źtre néfaste pour les yeux ou les mains.
Page 41

Introduction
Nous vous remercions pour votre achat du Moniteur LCD de la série informatique Notebook
de Panasonic.
Ce Moniteur LCD comporte une fonction d’écran tactile qui permet d’actionner l’ordinateur
en touchant simplement la surface du moniteur et en appuyant sur des touches – même lorsque
l’on ne tient pas l’ordinateur dans les mains.
Accessoires
Câble RGB/série/USB ...................1
Câble de USB ...............................1
REMARQUE
Un duplicateur de ports comprenant un port d’écran (RVB analogique), un port série
et un port USB est nécessaire si l’ordinateur n’est pas équipé desdits ports. Pour plus
d’informations, consultez le Manuel de référence de l’ordinateur.
Ce instructions d’utilisation explique la procédure en fonction des réglages d’usine.
La procédure peut être différente suivant les réglages effectués.
[Illustration dans ce manuel]
:
Information pour les utilisateurs de Genuine Windows® 7 Professionnel.
:
Information pour les utilisateurs de Genuine Microsoft
: Information pour les utilisateurs de Genuine Microsoft® Windows® XP
Professionnel et Genuine Windows® XP Édition Tablet PC.
Les écrans qui sont représentés dans ce manuel, lorsqu’ aucune remarque spécique sur
les écrans afchés n’est nécessaire, sont ceux de Windows 7.
Microsoft® et Windows® sont des marques déposées de Microsoft Corporation aux EtatsUnis et/ou dans d’autres pays.
®
Windows® Vista® Business.
E
D
F
41
J
Page 42

Noms et fonctions des pièces
<Devant>
LCD
Témoin à DEL
Vert : Appareil en marche
Orange :
Appareil en marche mais
absence de signal RVB
analogique ou de connexion
Touches de fonction
(
Function Keys
page 51
)
du câble
Clignotement en vert/Clignotement en orange :
Pendant la fermeture
Port USB
E
Haut-parleur
Urgence
Le logiciel d’application
attribué à
Témoin de température à DEL
(Temperature LED Indicator)
D
Vert : Normal
La brillance peut être réglée librement.
Orange :
Rouge :
est lancé.
F11
Réduction automatique de la brillance en raison
d’une augmentation de la température interne
Arrêt automatique du rétroéclairage en raison
d’une augmentation de la température interne
F
Trous de xation des câbles
Faites passer la bande de regroupement des câbles,
etc. à travers ces trous pour xer les câbles.
<Dessous>
Commutateur
d’alimentation
Haut-parleur
Volume
Haut
Bas
Niveau de brillance
Haut
Bas
Boutons OSD
page 49
/– /
Fiche pour
alimentation C.C.
DC-IN 15.6 V /16V
+
J
42
Port série
SERIAL I/F (Spécial CN)
Port d’écran
(RVB analogique)
Ports USB
Port USB
Pour raccorder le moniteur à l’ordinateur
Page 43

Montage du Moniteur LCD
1 <Uniquement pour les modèles sans port d’écran, sans port série et
sans port USB>
Connectez l’ordinateur au duplicateur de port ou support voiture.
( Instructions d’utilisation du duplicateur de port/Auto monter)
2 Connecter le Moniteur LCD à l’ordinateur au moyen des câbles de
connexion (fourni).
Exemple de raccordement
<Vue arrière>
Clavier
(no de modèle
CF-VKBL01/
CF-VKBL02/
CF-VKBL03/
CF-VKBL03A)
Adaptateur de
voiture
(produit disponible
dans le commerce)
Port série
Moniteur LCD
<Vue de dessus>
Port USB
B
Fiche pour
alimentation
DC-IN 15.6 V /16V
Fiche pour
alimentation C.C.
DC-IN 15.6 V /16V
Port USB
Ordinateur
C.C.
Port USB
Pour raccorder le
moniteur à l’ordinateur
Port d’écran
(RVB analogique)
Port série
E
D
A
Port pour
écran externe
F
<Vue de dessus>
A
Câble RGB/série/USB
B
Câble de USB
J
43
Page 44

8mm
Montage du Moniteur LCD
3 Montez le Moniteur LCD.
Montez le Moniteur LCD à travers ces trous pour vis M4.
E
D
ATTENTION
Lors du montage, s’assurer que
les vis ne sont pas insérées dans
cet appareil à une profondeur
supérieure à 8 mm.
Lors de l’installation du Moniteur
LCD, placer l’écran sous le tableau
de bord comme cela est illustré
pour empêcher qu’il ne gêne le
F
champ de vision du conducteur et
pour protéger l’appareil contre les
rayons directs du soleil.
J
44
Page 45

Mise en marche/Arrêt
Mise en marche
1 Appuyez sur le commutateur d’alimentation du Moniteur LCD
Le Moniteur LCD s’allume.
2 Allumez l’ordinateur ( Instructions d’utilisation de l’ordinateur)
REMARQUE
Certains ordinateurs s’allument automatiquement lorsque l’on allume le Moniteur LCD.
3 Sélectionnez l’application
Vous pouvez maintenant commencer à travailler sur votre ordinateur.
Arrêt (mise hors tension de l’ordinateur)
Cette procédure consiste à arrêter l’ordinateur sans utiliser la fonction de suspension ou de
veille (mettre en veille). ( Manuel de référence de l’ordinateur)
REMARQUE
Certains ordinateurs s’éteignent automatiquement lorsque le Moniteur LCD est éteint
conformément aux réglages de la fonction de gestion de l’alimentation.
Les menus suivants permettent de modier les réglages de la fonction de gestion de l’alimentation.
:
1
Enregistrez les données importantes et fermez chacune des applications.
2 Afchez l’écran d’arrêt.
: Sélectionnez (Démarrer) - [Arrêter]
L’ordinateur s’arrêtera automatiquement.
L’ordinateur s’arrêtera automatiquement.
3 Conrmez l’arrêt.
4 Appuyez sur le commutateur d’alimentation du Moniteur LCD.
Le Moniteur LCD s’éteindra après l’arrêt complet de l’ordinateur.
(Démarrer) - [Panneau de conguration] - [Système et sécurité]
- [Options d’alimentation] - [Choisir l’action du bouton d’alimentation]
- [Lorsque j’appuie sur le bouton d’alimentation]
:
(Démarrer) - [Panneau de conguration] - [Système et
maintenance] - [Options d’alimentation] - [Choisir l’action du bouton
d’alimentation] - [Lorsque j’appuie sur le bouton d’alimentation]
:
[démarrer] - [Panneau de conguration] - [Performances et
maintenance]
j’appuie sur le bouton de mise sous tension]
: Sélectionnez (Démarrer) - [Arrêter]
: Sélectionnez [démarrer] - [Arrêter l’ordinateur].
: Sélectionnez [Arrêter].
- [Options d’alimentation] - [Avancé] - [Lorsque
45
E
D
F
J
Page 46

Écran tactile
Le Moniteur LCD est doté d’une fonction d’écran tactile qui permet d’effectuer les mêmes
opérations qu’en utilisant le clavier ou la souris en touchant la surface du moniteur avec le
doigt ou le stylo.
Déplacement du curseur
Curseur
E
Double cliquage
D
ATTENTION
Lors de l’utilisation du panoramique avec un mode d’afchage plus grand que XGA,
la fonction d’écran tactile n’opère pas correctement.
Si l’on change la résolution de l’écran ou si l’on n’arrive pas à pointer correctement
sur le curseur avec le doigt ou le stylo, étalonner l’appareil.
F
La fonction d’écran tactile est inutilisable avec le plein écran sous [Invite de
commandes].
Deux
tapotements
rapides
Cliquage
Déplacement
Tapotement
simple
Touchez
l’objet (c.-à-d. un
chier ou une icône)
sans retirer le doigt ou
le stylo et déplacez-le
sur la surface (ceci faisant
glisser l’objet jusqu’à
l’emplacement voulu),
puis retirez le doigt ou
le stylo.
Première utilisation
Pour utiliser l’écran tactile, vous devez d’abord installer le pilote d’écran tactile.
A Accédez au site Web ci-dessous.
J
46
http://pc-dl.panasonic.co.jp/itn/drivers/VDL03U.html
B Suivez les instructions à l’écran.
L’écran d’étalonnage apparaît pendant l’installation. Touchez chacune des marques de
cible “”, une à la fois. Si l’écran est fermé, exécutez [Touch Panel Settings] depuis le
menu de démarrage, et effectuez [Calibration] ( page 47).
Page 47

Manipulation de l’écran tactile
Ne pas placer d’objets sur la surface de l’écran et ne pas appuyer avec force avec des
objets pointus (p. ex., des clous), ou des objets durs susceptibles de laisser des marques
(p. ex., crayons et stylos).
Ne pas exercer de pression en deçà des 5mm de périphérie du panneau d’afchage. Le
curseur risque de se déplacer jusqu’au bord de l’afchage.
Ne pas utiliser l’ordinateur quand de la poussière séjourne sur l’écran et éviter le contact
de toute substance salissante, telle que de l’huile, sur l’écran tactile. Le curseur risque
alors de ne pas fonctionner correctement.
Quand l’écran tactile est sale :
Nettoyer les parties souillées au moyen d’un chiffon doux sec tel que de la gaze.
•
Ne pas utiliser de benzène, de diluant ou d’alcool du type désinfectant.
•
Conguration de l’écran tactile
S’il y a lieu, vous pouvez congurer l’écran tactile comme suit:
1
Cliquer sur (Démarrer) - [Tous les programmes] - [Touch Panel
Utility] - [Touch Panel Settings].
Cliquer sur (Démarrer) - [Tous les programmes] - [Touch Panel
Utility] - [Touch Panel Settings].
Cliquer sur [démarrer] - [Tous les programmes] - [Touch Panel Utility]
- [Touch Panel Settings].
E
D
L’écran suivant s’afche :
Devices
Congure le contrôleur
de périphérique.
Settings
Congure les paramètres
généraux et fonct ions
(pa r amèt res “Do uble
cliquage”).
Advanced
Congure les paramètres évolués.
Calibration
D éf i ni t l a c on f i g ur a ti o n
d’étalonnage.
A utiliser si vous n’arrivez pas à
pointer correctement sur le curseur
avec le doigt ou le stylo. (Ceci
est nécessaire si l’alignement de
l’écran tactile avec l’image visuelle
change ou pour régler la résolution
d’afchage).
Version
Afche le numéro de version du pilote d’écran
tactile installé.
Others
Règle la fonction d’interruption sélective et
dénit les paramètres.
F
J
47
Page 48

Écran tactile
2 Effectuez les changements nécessaires
3 Sélectionnez [OK]
REMARQUE
Pour de plus amples informations, consultez [Aide].
On peut procéder ŕ des changements quand l’ordinateur suppose des opérations ŕ
double-cliquage alors que des opérations ŕ cliquage simple sont prévues en cliquant
sur [Settings] sur la vue montrée ŕ la page précédente et en diminuant la valeur du
[Double click speed].
Effectuez l’étalonnage immédiatement lorsque le point d’étalonnage est modié.
Il est également possible de modier la vitesse de double cliquage pour [Tap and
E
Buttons]*1.
*1
: Dans (Démarrer) - [Panneau de conguration] - [Matériel et
audio] - [Souris].
: Dans (Démarrer) - [Panneau de conguration] - [Matériel et
: Dans [démarrer] - [Panneau de conguration] - [Imprimantes et
D
<Uniquement pour les modèles avec Outil de rotation de l’écran>
Faites pivoter l’écran en mode paysage (0 degré) avant d’effectuer l’étalonnage.
audio] - [Souris].
autres périphériques] - [Souris].
F
J
48
Page 49

Réglage du Moniteur LCD
Main menu
Scree n
Con f i
gu r at i o n
Mis ce l l ane ou s
Infor mat io n
Rese t A l l
S et t ings
1 :Ex i t 2 :S el ec t
Un réglage n de la taille, la position, etc. du moniteur s’avérera peut-être nécessaire en
raison des différences de synchronisation des signaux entre les ordinateurs.
1 Appuyez sur .
Le menu principal OSD s’afche.
/– /
+
REMARQUE
Le menu principal OSD ne s’afche pas s’il n’y a pas de signal RVB analogique, si
le câble n’est pas connecté ou si la touche OSD est verrouillée.
Il est possible que la fenêtre OSD ne s’afche pas correctement lorsque l’on appuie
sur . Dans ce cas, attendre environ 10 secondes et appuyer à nouveau sur .
La touche OSD se verrouille si vous appuyez sur pendant 3 secondes tout en
appuyant sur alors que l’afchage OSD n’est pas activé. Pour déverrouiller,
appuyez de nouveau sur pendant 3 secondes tout en appuyant sur .
Si vous n’effectuez aucune commande à l’aide de la touche OSD pendant plus de 15
secondes alors que le menu OSD s’afche, ce dernier disparaît automatiquement.
<Menu principal OSD>
ICONE FONCTION DESCRIPTION
Screen
Conguration
Miscellaneous
Ajuste les réglages d’écran
Ajuste les réglages de touche
Réglages divers
E
D
F
Information
Reset All
Settings
Ce menu sert à afcher les
informations au sujet du
système
Rétablit les valeurs par défaut
des réglages
J
49
Page 50

Con tr as t
0
H-Po so tio n
3
-
V-Po so tio n
0
Pha se
1 7
Aut o Adjust
Re se t Po sit io n/P ha se
Exe cute ?
Réglage du Moniteur LCD
2 Sélectionnez l’option en appuyant sur /– ou /+, puis appuyez sur .
Screen
La menu [Settings] permet de régler le contraste, la position H, la position V et la
phase.
Contrast
L’option de menu Contrast sert ŕ régler le contraste.
(minimum: -31, maximum: +31, défaut: 0)
Réglez le contraste en appuyant sur /– ou /+,
puis appuyez sur .
H-Position
E
D
Position H permet de régler manuellement la position
horizontale de l’image.
Réglez en appuyant sur /– ou /+, puis appuyez
sur .
V-Position
Position V permet de régler manuellement la position
verticale de l’image.
Réglez en appuyant sur /– ou /+, puis appuyez
sur .
Phase
Le réglage de phase sert ŕ régler la phase de l’horloge
d’échantillonnage des éléments d’image ADC.
(minimum: 0, maximum: +31)
Réglez en appuyant sur /– ou /+, puis appuyez
sur .
F
REMARQUE
J
50
Pour annuler, appuyez sur .
Auto Adjust
L’option Réglage automatique permet de régler
automatiquement la position H, la position V et
la phase dans le menu à l’écran. Après le réglage
automatique, appuyez sur pour sauvegarder les
réglages.
Page 51

Conguration
F u n c t i o n K e
y s
E me rge ncy Ke
y
F u nct i o n Ke
ys
F6-F10
D is a b le F n Ke
ys
B righ tn e s s C on t r ol
F 1 :T ur n o f f Mo n it o r
F 2 : Mi n .B r igh tn e ss
F 3 : Lo w B righ tn e ss
F 4 : Mi d .B r igh tn e ss
F 5 : Max .B r igh tn e ss
F1-F5
Eme rgency Ke
y
E na b le
D i s ab le
Le menu [Conguration] comprend [Function Keys]
et [Emergency Key].
Function Keys
Vous pouvez attribuer certaines fonctions aux touches
de fonction de ce moniteur LCD.
[F1-F5] : Les touches de fonction remplissent les
•
mêmes fonctions que les touches F1 à F5 sur le
clavier. (valeur par défaut)
[F6-F10] : Les touches de fonction remplissent
•
les mêmes fonctions que les touches F6 à F10 sur
le clavier.
[Disable Fn Keys] : Les touches de fonction sont
•
inopérantes.
[Brightness Control] : Vous pouvez attribuer les
•
fonctions ci-dessous aux touches de fonction.
F1: Turn off Monitor
F2: Min.Brightness
F3: Low Brightness
F4: Mid.Brightness
F5: Max.Brightness
Réglez le contraste en appuyant sur /– ou /+,
puis appuyez sur .
Emergency Key
Cette option sert à activer et désactiver la touche
Emergency (Urgence).
Lorsque [Enable] est sélectionné, la touche Emergency
remplit la même fonction que la touche F11 de le
clavier.
Réglez le contraste en appuyant sur /– ou /+,
puis appuyez sur .
E
D
F
REMARQUE
Pour annuler, appuyez sur .
J
51
Page 52

Réglage du Moniteur LCD
Br i
ght ne s s
M od e
Tu rn on A ut oma ti cal l y
F or ce P C Of f
Br i
gh t n ess M o d e
N or m al
H igh
Tu rn on A ut om at ic al l
y
Enab l e
Dis ab le
For ce PC Of f
Exe cute ?
Miscellaneous
Le menu [Miscellaneous] comprend [Brightness
Mode], [Turn on Automatically] et [Force PC Off].
Brightness Mode
L’option de menu Brillance sert ŕ régler la brillance.
Un curseur indique la valeur de brillance en cours.
Sélectionnez [Normal] ou [High] en appuyant sur
/– ou /+, puis appuyez sur .
Turn on Automatically
Lorsque cette fonction est activée, le moniteur LCD
E
D
s’allume automatiquement dès qu’il est alimenté par
la prise DC-IN.
Réglez le contraste en appuyant sur /– ou /+,
puis appuyez sur .
Force PC Off
Lors de l’exécution de cette fonction, l’ordinateur
sera fermé impérativement et les données non
sauvegardées seront perdues.
Pour certains modèles d’ordinateur, il se peut que
cette fonction ne soit pas disponible.
REMARQUE
Pour annuler, appuyez sur .
F
J
52
Information
Ce menu sert à afcher les informations au sujet du système. La fenêtre OSD
s’afche.
: La fenêtre d’information se ferme et le menu principal s’afche.
: La fenêtre d’information est commutée.
Reset All Settings
L’option Rétablir tous les réglages sert à rétablir les valeurs par défaut pour toutes
les options d’afchage OSD.
3 Appuyez sur .
Le menu principal OSD disparaît.
Page 53

Dépannage
En cas de problème, référez-vous à cette page. Si le problème semble lié à une application
logicielle, lisez le manuel se rapportant au logiciel. Si vous n’arrivez toujours pas à remédier
au problème, contactez le Support technique Panasonic.
Aucun afchage après
la mise sous tension
ou
“No Signal” s’afche
Vériez la connexion de câble de l’adaptateur de voiture.
Vériez la connexion de câble allant au Moniteur LCD.
Vériez la brillance du Moniteur LCD.
Si l’afchage à cristaux liquides de l’ordinateur est activé,
Ctrl
Fn
).
appuyez sur
L’ordinateur est-il en mode d’économie d’énergie ?
Pour quitter le mode d’arrêt d’alimentation de l’ordinateur
(permettant l’économie d’énergie), appuyez sur n’importe
quelle touche (comme
Désactivez le mode d’économie d’énergie.
Réglez [Éteindre l’écran] et [Mettre l’ordinateur en veille]
sur (Démarrer) - [Panneau de conguration] - [Système
et sécurité] - [Options d’alimentation] - [Choisir quand
éteindre l’écran] sur [Jamais].
+ *1 ou
Fn
+
F3
.
E
Une image latente
apparaît
Il y a des points rouges,
verts ou bleus sur
l’écran, ou des défauts
d’afchage (des pixels
toujours allumés ou
toujours éteints)
Réglez [Éteindre l’écran] et [Mettre l’ordinateur en veille]
sur (Démarrer) - [Panneau de conguration] - [Système
et maintenance] - [Options d’alimentation] - [Choisir quand
éteindre l’écran] sur [Jamais].
Réglez [Extinction du moniteur], [Mise en veille] et
[Mise en veille prolongée] sur [démarrer] - [Panneau de
conguration] - [Performances et maintenance] - [Options
d’alimentation] sur [Jamais].
*1
Windows 7 uniquement
Si une image est afchée pendant une période de temps
prolongée, il est possible qu’une image latente apparaisse.
Ceci n’est pas une anomalie de fonctionnement. L’image
latente disparaîtra quand une autre vue sera afchée.
Le moniteur LCD couleur utilise une technologie de grande
précision et 99,998% ou plus des pixels y sont efcaces ; il peut
toutefois y avoir 0,002% ou moins de pixels défectueux.
D
F
J
53
Page 54

Dépannage
Il n’y a pas de son
“Input Not Supported”
s’afche
Saisie impossible en
touchant l’afchage
E
L’afchage est affecté
L’écran est inversé
horizontalement ou
D
verticalement.
L’afchage n’afche
plus correctement
Vériez la connexion de câble allant au Moniteur LCD.
Vériez le réglage de volume de l’ordinateur et le Moniteur
LCD.
Si le son est émis par les haut-parleurs de l’ordinateur,
vérifiez les propriétés sonores du dispositif de son
sélectionné.
Le mode non supporté a été sélectionné.
Réglez le mode d’afchage sur 640 × 480 60 Hz, 800 ×
600 60 Hz ou 1024 × 768 60 Hz.
Installez le pilote d’écran tactile. ( page 46)
Vériez la connexion de câble allant au Moniteur LCD.
Assurez-vous que le [USB Port] n’a pas été réglé sur
[Disable] dans le Setup Utility.
Le mode non supporté a été sélectionné.
Réglez le mode d’afchage sur 640 × 480 60 Hz, 800 × 600
60 Hz ou 1024 × 768 60 Hz.
Vériez la connexion de câble allant au Moniteur LCD.
Sélectionnez du menu principal OSD et effectuez
[H-Position] ou [V-Position] réglages. ( page 50)
Exécutez [Reset All Settings] sur le menu principal
OSD.
F
J
54
Page 55

Spécications
N° de modèle CF-VDL03U
Interface d’entrée Signal RVB analogique
Type d’afchage à cristaux
liquides
Surface d’afchage 247,2 mm × 185,7 mm
Résolution 1024 × 768 points
Couleur 262.144 (16.194.277 simulé) couleurs
Pas des éléments d’image 0,24 mm × 0,24 mm
Brightness 1600 cd/m2 (typ.)
Modes
d’afchage
XGA 1024 × 768 60 Hz
WSVGA 1024 × 600 60 Hz
SVGA 800 × 600 60 Hz
VGA 640 × 480 60 Hz
Écran tactile Résistif
Interface
Port d’afchag
Port USB USB 2.0 IN × 1, OUT × 4
Puissance Sync
Commutateur
Haut-parleur Haut-parleur stéréo (intégré) 1W × 2 (built in)
Entrée C.C. Entrée DC 15,6 V, 3,85 A / DC 16,0 V, 3,75 A
Consommation de puissance 60 W
Dimensions physiques (L x P x H)
Poids 1,9 kg environ (sans le câble)
Conditions Température 5 °C à 35 °C
Humidité 10 % à 90 % (humidité relative)
Ordinateurs garantis
*1
Un afchage de 16.194.277 couleurs est rendu possible grâce à l’utilisation de la fonction
de tramage.
*2
Contactez le Support technique Panasonic pour plus d’informations.
*2
Écran LCD couleur à matrice active
TFT de 12,1 pouces
*1
Femelle 15 broches D
Série (Spécial CN)
Commutateur d’alimentation, Boutons OSD,
Touches de fonction, Urgence (F11)
*1
280 mm × 265 mm × 30 mm (sans le câble)
(sans condensation)
Série CF-18, Série CF-19, Série CF-29,
Série CF-30, Série CF-31, Série CF-U1
E
D
F
J
55
Page 56

日本語
安全上のご注意
人への危害、財産の損害を防止するため、必ずお守りいただくことを説明しています。
誤った使い方をしたときに生じる危害や損害の程度を区分して、説明しています。
■
E
警告
注意
お守りいただく内容を次の図記号で説明しています。
■
してはいけない内容です。
「死亡や重傷を負うおそれがある内容」です。
「傷害を負うことや、財産の損害が発生するおそれがあ
る内容」です。
必ずお守りください
D
実行しなければならない内容です。
警告
異常・故障時には直ちに使用を
やめる
F
異常が起きたらすぐにカープラ
グを抜き、本体から取り外す
破損した
・
内部に異物が入った
・
煙が出ている
・
異臭がする
・
異常に熱い
・
そのまま使用すると、火災・感電の原
J
因になります。
すぐにカープラグを抜き、本体から
●
取り外してください。その後、販売
店に修理についてご相談ください。
56
本機の上に水などの液体が入
った容器や金属物を置かない
水などの液体がこぼれた
り、クリップ、コインな
どの異物が中に入ったり
禁止
内部に異物が入った場合は、すぐに
●
電源プラグを抜き、本体を本機から
取り外してください。その後、販売
店にご相談ください。
すると、火災・感電の原
因になります。
Page 57

注意
必ず指定のカーアダプターを使
用する
指定(本体に付属および
指定の別売り商品)以外
のカーアダプターを使用
すると、火災の原因にな
ることがあります。
不安定な場所に置かない
バランスがくずれて倒れ
たり、落下したりして、
けがの原因になることが
禁止
あります。
1時間ごとに10 ~ 15分間の
休憩をとる
長時間続けて使用すると、
目や手などの健康に影響
を及ぼすことがあります。
水、湿気、湯気、ほこり、油煙
などの多い場所に置かない
火災・感電の原因になる
ことがあります。
禁止
57
J
Page 58

ヨーロッパ連合以外の国の廃棄処分に関する情報
この記号はヨーロッパ連合内でのみ有効です。
本製品を廃棄したい場合は、日本国内の法律等に従って廃棄処理をして
ください。
自動車でご使用の場合
注意:液晶モニターは、自動車の補助的機能(車両情報表示、システムコントロール、
横や後方の監視、ナビゲーションなど)の目的でご使用になる場合のみ、運転手の
E
視界に入る位置に取り付けてください。テレビやビデオを観たりするなどの娯楽目的
で液晶モニターをご使用になる場合は、運転手の視界に入る位置に液晶モニターを
取り付けないでください。モニターを自動車で使用する際の詳しい法律などは各自
でお調べください。
本液晶モニターは輝度が非常に明るいため、視界を妨げないよう輝度を調整してく
ださい。
本機の設置は専門業者に依頼してください。
D
お願い
36-J-1
重大な事故や違法行為を避けるため、ナビゲーションや後方監視カメラとしてモ
ニターを使用する場合のみ、運転手の視界に入る位置にモニターを設置してく
ださい。
運転中
F
液晶モニターの操作をしないでください。
(運転中のモニター操作は、運転の妨げになり重大な事故を招く恐れがあります)
安全のため、運転中のテレビ、ビデオまたはビデオプレイヤーのご使用は禁
止されています。
液晶モニターの音量は、適正にしておいてください。車外の音が聞こえない
ような音量にして運転していると、事故を起こす恐れがあります。
J
58
Page 59

安全にお使いいただくために
洗車時
液晶モニターを水や過度の湿度にさらさないでください。ショートや火災、または
故障の原因になります。
駐車中
直射日光のあたる場所に車を駐車していると、車内が高温になります。車内の温
度が下がるまで、液晶モニターの電源を入れないでください。
車のエンジンを切っているときは、液晶モニターを使用しないでください。バッテ
リーが消費され、エンジンがかからなくなる場合があります。
ご相談窓口のご利用
本機を分解したり修理したりせず、お客様相談窓口にご相談ください。
取り付け時
運転手の視界を遮る位置に液晶モニターを取り付けないでください。
リア席に取り付けた場合、液晶モニターで頭を打たないようにご注意ください。
直射日光のあたる場所や高温の環境に液晶モニターを取り付けないでください。
ヒーターの近くなど、水や熱い空気にさらされる位置に液晶モニターを取り付け
ないでください。
エアーバックの操作の妨げになる位置に液晶モニターを取り付けないでください。
設置については専門のスタッフにおたずねください。お買い上げになった販売店
またはご相談窓口にご相談ください。
操作中
液晶モニターはしっかりと固定し、強い衝撃を与えないようにしてください。
安全に設置されていないと、故障や火災の原因になります。
この装置は、クラス A 情報技術装置です。この装置を家庭環境で使用すると電
波妨害を引き起こすことがあります。この場合には使用者が適切な対策を講ずる
よう要求されることがあります。
VCCI-A
1-J-2
J
59
Page 60

はじめに
このたびは、パナソニック製品をお買い上げいただき、まことにありがとうございます。
液晶モニターのタッチパネル機能を使うと、画面に触れるだけでパソコンの操作が
できます。
同梱品
RGB/Serial/USB ケーブル .............1
USB ケーブル .................................1
E
お知らせ
パソコンにディスプレイポート(アナログ RGB)、シリアルポート、USB ポート
がない場合は、これらのポートのあるポートリプリケーターが必要です。詳し
い説明は、パソコンの 『取扱説明書 操作マニュアル』をご覧ください。
本書では工場出荷時の設定を用いて説明しています。設定の変更によって操
D
F
作が異なる場合があります。
[ 表記について ]
は Windows® 7 Professional 正規版を指します。
は Microsoft® Windows® Vista® Business 正規版を指します。
は Microsoft® Windows® XP Professional 正規版と Windows® XP
Tablet PC Edition 正規版を指します。
本書では、特に注記がないかぎり Windows7 の画面を表示しています。
Microsoft とそのロゴ、Windows、Windows ロゴは、米国 Microsoft Corporation
の米国およびその他の国における登録商標です。
J
60
Page 61

各部の名称と働き
ファンクションキー
(Function Keys)
ページ
70
スピーカー
< 前面 >
LCD
状態表示ランプ
緑 :電源オン
オレンジ : 電源は入ってい
るが、アナログ
RGB 信 号また
はケーブルが接
続されていない
状態です。
緑点滅 / オレンジ点滅:
電源オフ途中
USB ポート
電源スイッチ
エマージェンシーキー
キーに設定されている
F11
アプリケーションソフトウェア
が起動されます。
温度状態表示ランプ
(Temperature LED Indicator)
緑 :常温
オレンジ : 内部の温度の上昇により、自動的に
輝度が下がります。
赤 : 内部の温度の上昇により、自動的に
バックライトが消えます。
< 底面 >
ケーブル固定用の穴
この穴に結束バンドなどを通して
ケーブルを固定します。
シリアルコネクター
SERIAL I/F(専用 CN)
OSD ボタン
68 ページ
USB ポート
スピーカー
音量調節
上げる
下げる
輝度調節
上げる
下げる
/– /
+
DC-IN Jack
DC-IN 15.6 V /16V
J
ディスプレイコネクター
(アナログ RGB)
USB ポート
パソコンとの接続用です。
61
Page 62

液晶モニターを設置する
1
< ディスプレイポート、シリアルポート、USB ポートがないモデルのみ >
パソコンをポートリプリケーターまたはカーマウンターに接続する。
( ポートリプリケーターまたはカーマウンターの取扱説明書をご覧ください)
2
ケーブル(付属)で液晶モニターとパソコンを接続する。
接続例
USB ポート
E
液晶モニター
< 背面 >
パソコンとの接続用です。
ディスプレイコネクター
(アナログ RGB)
シリアルコネクター
D
カーアダプター
(別売り)
F
シリアルコネクター
J
62
電源端子
DC-IN 15.6 V /16V
電源端子
DC-IN 15.6 V /16V
USB ポート
コンピューター
A
外部ディスプレイ
コネクター
< 天面 >
A
RGB/Serial/USB ケーブル
Page 63

3
8mm
液晶モニターを取り付ける。
M4 のビス穴を使って、液晶モニターを取り付けます。
お願い
取り付けの際は、本機の中にビ
スが 8mm 以上入らないように
注意してください。
運転者の視界を遮ったり、直射
日光があたったりしないように、
液晶モニターはダッシュボード
の下に取り付けてください。
J
63
Page 64

起動 / シャットダウン
起動する
1
液晶モニターの電源スイッチを押す。
液晶モニターの電源がオンになります。
2
パソコンの電源を入れる。( パソコンの『取扱説明書 基本ガイド』をご覧ください)
お知らせ
パソコンの機種によっては、液晶モニターの電源を入れると自動的にパ
ソコンの電源が入る場合があります。
3
アプリケーションを選択する。
パソコンの操作ができます。
E
シャットダウン(パソコンの電源を切る)
スリープ(スタンバイ)や休止状態機能を使わずにパソコンの電源を切るための手
順です。 ( パソコンの 『取扱説明書 操作マニュアル』をご覧ください)
お知らせ
パソコンの機種によっては、電源スイッチ設定により、液晶モニターの電源を
D
F
切ると自動的にパソコンの電源もオフになる場合があります。
電源スイッチ設定は下記の方法で変更できます。
: (スタート)- [ コントロールパネル ] - [ システムとセキュ
リティ] - [ 電源オプション ] - [電源ボタンの動作の選択] - [電
源ボタンを押したときの動作 ] をクリックする。
: (スタート)- [ コントロールパネル ] - [ システムとメンテ
ナンス] - [電源オプション] - [電源ボタンの動作の選択 ] - [電
源ボタンを押したときの動作 ] をクリックする。
: [ スタート ]- [ コントロールパネル ] - [ パフォーマンスとメン
テナンス ] - [ 電源オプション ] - [ 詳細 ] - [ コンピュータの電
源ボタンを押したとき ] をクリックする。
1
必要なデータを保存し、アプリケーションを閉じる。
2
シャットダウン画面を表示する。
: (スタート) - [ シャットダウン ] をクリックする。
パソコンが自動的にシャットダウンします。
: (スタート) - [ シャットダウン ] をクリックする。
J
64
パソコンが自動的にシャットダウンします。
: [ スタート ] - [ シャットダウン ] をクリックする。
3
シャットダウンすることを確認する。
: [ シャットダウン ] をクリックする。
4
液晶モニターの電源スイッチを押す。
パソコンの電源が完全に切れてから液晶モニターの電源が切れます。
Page 65

タッチパネル
液晶モニターでは、タッチパネル機能を使ってフラットパッドやマウスと同様の操作
ができます。指やスタイラスペンで画面に触れてください。
カーソル移動
カーソル
ダブルクリック
すばやく
2 回たたく
クリック
1 回たたく
ドラッグ
対象(ファイルや
アイコンなど)に指また
はスライスペンを置いて
そのまま画面をなぞって
から、指またはスライス
ペンを離す
お願い
XGA を超えるディプレイモードで画面を上下左右に移動させると、タッチパネ
ル機能が正常に動作しない場合があります。
解像度を変更したときや、指やスタイラスペンでカーソルの位置を正しく表示
できないときは、タッチパネルの補正(キャリブレーション)を行ってください。
[ コマンドプロンプト ] を全画面表示にしているときは、タッチパネル機能は使
えません。
はじめて使うとき
タッチパネルをお使いになるには、最初にタッチパネルドライバーをインストール
する必要があります。
A
下記のウェブサイトにアクセスしてドライバーをダウンロードする。
http://askpc.panasonic.co.jp/s/download/install/VDL03U.html
B
画面の指示に従って操作する。
インストールの途中で、キャリブレーション画面が表示されます。画面上に
クが表示されるので、順番に触れてください。画面が閉じてしまった場合は、スター
トメニューから [Touch Panel の設定 ] を起動し、[ キャリブレーション設定 ] を実行
してください( 66 ページ)。
“”
マー
J
65
Page 66

タッチパネル
タッチパネルのお手入れについて
タッチパネルの上に物を置いたり、先のとがった物(つめなど)や傷をつけるよう
な硬い物(鉛筆やボールペンなど)で強く押したりしないでください。
ディスプレイパネルの境界線 5mm 以内の範囲を押さないでください。カーソルが
ディスプレイの端に移動することがあります。
ほこりなどでタッチパネルが汚れているときは操作をしないでください。また、油
など、タッチパネルの汚れの原因になる物は近づけないでください。カーソルが
正常に機能しなくなる場合があります。
タッチパネルが汚れたら
•
ガーゼなどの柔らかい布を乾いた状態で使用し、汚れている部分をふいてください。
•
ベンジン、シンナー、抗菌タイプのアルコールなどを使用しないでください。
E
タッチパネルの設定
必要に応じて、下記の手順でタッチパネルの設定が行えます。
1
(スタート) - [ すべてのプログラム ] - [Touch Panel Utility] - [Touch
Panel の設定 ] をクリックする。
D
(スタート) - [ すべてのプログラム ] - [Touch Panel Utility] - [Touch
Panel の設定 ] をクリックする。
[ スタート ] - [ すべてのプログラム ] - [Touch Panel Utility] - [Touch Panel の
設定 ] をクリックする。
以下の画面が表示されます。
デバイス設定
インストー ルされて
F
いるデバイスの詳細
を表示します。
基本設定
J
タッチパネルの基本的な設定
(ダブルクリックのスピード
など)を行います。
高度設定
タッチパネルの詳細設定を行います。
66
キャリブレーション設定
タッチパネルの補正(キャリ
ブレーション)を行います。
指やスタイラスペンでカー
ソルの位 置を正確に示せ
なくなった場合にお使いく
ださい。(解像度を変更し
たときなども、キャリブレー
ションが必要です)
バージョン情報
インストールされているタッチパネル
ドライバーのバージョンを表示します。
その他
セレクティブサスペンド機能と
設定情報複製ファイルの設定を行います。
Page 67

2
必要項目を設定する
3
[OK] をクリックする。
お知らせ
詳しくは [ ヘルプ ] をご覧ください。
シングルクリック操作をしようとしているのに、パソコンの認識ミスによりダブ
ルクリック操作になってしまう場合は、[ 基本設定 ] をクリックし、[ ダブルクリッ
クの速度 ] の数値を下げて調整してください。
キャリブレーションポイントを変更したときは、すぐにキャリブレーションを実行
してください。
[ タップとボタン ] *1でダブルクリックスピードを変更することもできます。
*1
: (スタート) - [ コントロールパネル ] – [ ハードウェア
とサウンド ] – [ マウス ] をクリックする。
: (スタート) - [ コントロールパネル ] – [ ハードウェア
: [ スタート ] - [ コントロールパネル ] – [ プリンターとその
< 画面回転ツール搭載モデルのみ >
タッチパネルの補正を実行する前に、画面を横(プライマリ)に戻しておいてください。
とサウンド ] – [ マウス ] をクリックする。
他のハードウェア ] – [ マウス ] をクリックする。
67
J
Page 68

液晶モニターを調整する
Main menu
Scree n
Con f i
gu r at i o n
Mis ce l l ane ou s
Infor mat io n
Rese t A l l
S et t ings
1 :Ex i t 2 :S el ec t
パソコンの機種によって信号タイミングが異なるので、ディスプレイのサイズや位置
の調整が必要になります。
1
を押す。
メインメニューが表示されます。
E
お知らせ
アナログ RGB 信号またはケーブルが接続されていない場合や、OSD ボタン
がロックされている場合は、メインメニューは表示されません。
を押してもメインメニューが表示されないことがあります。その場合は、
D
10 秒ほど待ってから再度 を押してください。
OSD が起動していない状態で、 を押しながら を 3 秒間押すと、OSD
ボタンがロックされます。ロックを解除する場合は、再度 を押しながら
を 3 秒間押してください。
OSD メニューの表示中に、OSD ボタンの操作を 15 秒以上行わないと、自動
的に OSD メニューの表示が消えます。
< メインメニュー >
F
アイコン
/– /
+
機能 説明
Screen 画面の設定を行う
Conguration
Miscellaneous
キーの設定を行う
その他の設定を行う
J
68
Information
Reset All
Settings
システムに関する情報を
表示する
工場出荷時の設定に戻す
Page 69

2
Con tr as t
0
H-Po so tio n
3
-
V-Po so tio n
0
Pha se
1 7
Aut o Adjust
Re se t Po sit io n/P ha se
Exe cute ?
/– または /+ を押して項目を選択し、 を押す。
Screen
[Screen] メニューは、画面のコントラスト、水平位置、垂直位置、Phase を
調整します。
Contrast
コントラストを調整します。(最小値:-31、最大
値:+31、デフォルト値:0)
/– または /+ を押して調整し、 を押してく
ださい。
H-Position
画像の水平位置を調整します。/– または /+
を押して調整し、 を押してください。
V-Position
画像の垂直位置を調整します。/– または /+
を押して調整し、 を押してください。
Phase
ADC サンプルピクセルクロックを調整します。
(最小値:0、最大値:+31)/– または /+
を押して調整し、 を押してください。
Auto Adjust
この機能を実行すると、[H-position]、[V-position]、
[Phase] の各項目が自動調整されます。自動調
整後に を押して設定を保存してください。
お知らせ
変更をキャンセルする場合は、 を押してください。
J
69
Page 70

F u n c t i o n K e
y s
E me rge ncy Ke
y
F u nct i o n Ke
ys
F6-F10
D is a b le F n Ke
ys
B righ tn e s s C on t r ol
F 1 :T ur n o f f Mo n it o r
F 2 : Mi n .B r igh tn e ss
F 3 : Lo w B righ tn e ss
F 4 : Mi d .B r igh tn e ss
F 5 : Max .B r igh tn e ss
F1-F5
Eme rgency Ke
y
E na b le
D i s ab le
液晶モニターを調整する
Conguration
E
D
[Configuration] メニューは、[Function Keys] と
[Emergency Key] の項目で構成されます。
Function Keys
液晶モニターのファンクションキーに特定の機
能を割り当てることができます。
•
[F1-F5]:ファンクションキーはキーボードの
F1-F5 キーとして動作します(初期設定)。
•
[F6-F10]:ファンクションキーはキーボードの
F6-F10 キーとして動作します。
•
[Disable Fn Keys]:ファンクションキーは無効
になります。
•
[Brightness Control]:ファンクションキーに以
下のような輝度調節の機能を割り当てること
ができます。
F1: Turn off Monitor (バックライトオフ)
F2: Min.Brightness (最低輝度)
F3: Low Brightness (低輝度)
F4: Mid.Brightness (中輝度)
F5: Max.Brightness (最高輝度)
/– または /+を押して選択し、 を押してく
ださい。
F
お知らせ
変更をキャンセルする場合は、 を押してください。
J
70
Emergency Key
エマージェンシーキーの有効 / 無効を設定しま
す。
[ 有効 ] を選択した場合、エマージェンシーキー
はキーボードの F11 キーと同じ働きをします。
/– または /+ を押して選択し、 を押してく
ださい。
Page 71

Miscellaneous
Br i
ght ne s s
M od e
Tu rn on A ut oma ti cal l y
F or ce P C Of f
Br i
gh t n ess M o d e
N or m al
H igh
Tu rn on A ut om at ic al l
y
Enab l e
Dis ab le
For ce PC Of f
Exe cute ?
お知らせ
[Miscellaneous] メ ニ ュ ー は、[Brightness
Mode]、[Turn on Automatically]、[Force PC
Off] の項目で構成されます。
Brightness Mode
輝度メニューで輝度の調整ができます。/– ま
たは /+ を押して [Normal] または [High] を選
択し、 を押してください。
Turn on Automatically
この機能を有効にすると、電源端子に電気が供
給されたときに、自動的に液晶モニターの電源
が入ります。/– または /+ を押して [Enable]
または [Disable] を選択し、 を押してくださ
い。
Force PC Off
この機能を実行すると、接続しているパソコン
が強制終了します。(保存されていないデータ
は失われます。)
接続しているパソコンの機種によっては、この
機能が働かない場合があります。
変更をキャンセルする場合は、 を押してください。
Information
システムに関する情報が表示されます。
:インフォメーションウインドウが閉じてメインメニューが表示されます。
:インフォメーションウインドウを切り替えます。
Reset All Settings
OSD 項目のすべての設定を工場出荷時の状態に戻します。
3
を押す。
メインメニューの表示が消えます。
J
71
Page 72

困ったときの Q & A
トラブルが発生した場合はこのページを参照してください。ソフトウェアに関する問
題については、各ソフトウェアの取扱説明書をご覧ください。それでも解決しない場
合は、ご相談窓口にご相談ください。
電源を入れても画面に
何も表示されない
または、
“No Signal”と表示さ
れる
E
D
F
カーアダプターのケーブル接続を確認してください。
液晶モニターのケーブル接続を確認してください。
液晶モニターの輝度を確認してください。
パソコンの LCD がオンになっている場合は、
*1
または
パソコンが省電力モードに設定されていませんか?
電力の消費を抑えるため、ディスプレイの電源がオ
フになります。いずれかのキーを押し(例:
省電力モードを無効にしてください。
(スタート)- [ コントロールパネル ] - [ システム
とセキュリティ ] - [ 電源オプション ] - [ ディスプレイの
電源を切る時間の指定 ] をクリックし、[ ディスプレイ
の電源を切る ] と [ コンピューターをスリープ状態に
する ] を [ なし ] に設定する。
(スタート)- [ コントロールパネル ] - [ システム
とメンテナンス ] - [ 電源オプション ] - [ ディスプレイ
の電源を切る時間の指定 ] をクリックし、[ ディスプレ
イの電源を切る ] と [ コンピューターをスリープ状態
にする ] を [ なし ] に設定する
[ スタート ]- [ コントロールパネル ] - [ パフォーマンス
とメンテナンス ] - [ 電源オプション ] をクリックし、[ モ
ニタの電源を切る ]、[ システム スタンバイ ]、[ シス
テム休止状態 ] を [ なし ] に設定する。
*1
Windows 7 のみ。
Fn
+
を押してください。
F3
Fn
Ctrl
+
)、
残像が表示される 長時間画像が表示されていた場合、画像が残ること
画面に赤、緑、青など
の点がある、または画
J
面に欠陥がある(ピク
セルの常時点灯または
常時消灯)
72
がありますが、これは故障ではありません。 異なる
スクリーンを表示すると、残像は消えます。
カラー液晶ディスプレイは非常に精度の高い技術で
作られており、99.998 % 以上の有効画素があります
が、0.002 % 以下の画素欠け等がある場合がありま
すので、ご了承ください。
Page 73

音が聞こえない 液晶モニターのケーブル接続を確認してください。
パソコンと液晶モニターのそれぞれの音量設定を確
認してください。
パソコンのスピーカーから音が聞こえたら、サウンド
のプロパティで選択したサウンドのデバイスを確認し
てください。
“Input Not Supported”
が表示される
ディスプレイに触れて
も入力できない
画面が乱れる サポートしていないモードが選択されていないか確認
画面が水平方向または
垂直方向にずれている
画面が正しく表示され
ない
サポートしていないモードが選択されています。
ディスプレイモードを 640 × 480 60Hz、800 × 600
60Hz または 1024 × 768 60Hz に設定してください。
タッチパネルドライバーをインストールしてください。
( 65 ページ )
液晶モニターのケーブル接続を確認してください。
セットアップユーティリティの「USB ポート」が「無効」
に設定されていないか確認してください。
してください。
640 × 480 60Hz、800 × 600 60Hz または 1024 ×
768 60Hz のいずれかのディスプレイモードに設定し
てください。
液晶モニターのケーブル接続を確認してください。
メインメニューで [Screen] を選択し、[H-Position]
または [V-Position] の設定を調整してください。
( 69 ページ )
メインメニューで [Reset All Settings] を実行して
ください。
73
J
Page 74

仕様
品番 CF-VDL03U
入力 アナログ RGB 信号
LCD 12.1 型 TFT カラー液晶
表示領域
解像度 1024 × 768 ドット
カラー 262,144 (約 1619 万) 色
ピクセル
輝度
表示モード XGA
E
WSVGA
SVGA
VGA
タッチパネル 抵抗膜方式
インターフェース
ディスプレイ
コネクター
USB ポート
D
Power Sync シリアル (専用 CN)
スイッチ 電源スイッチ , OSD ボタン ,
スピーカー
電源端子 入力
消費電力
外形寸法
F
( 幅 × 高さ × 奥行き )
質量
使用環境条件 温度
湿度
対応パソコン
*1
J
ディザリング機能を使用して実現しています。
*2
詳しくは、ご相談窓口にご相談ください。
*2
247.2 mm × 185.7
0.24 mm × 0.24
1600
(公称)
2
cd/m
1024 × 768 60
1024 × 600 60
800 × 600 60
640 × 480 60
アナログ VGA D-sub 15 ピン
Universal Serial Bus 2.0 準拠 IN × 1, OUT × 4
ファンクションキー , エマージェンシー(F11)
ステレオスピーカー 1W × 2(内蔵)
DC 15.6 V, 3.85 A / DC 16.0 V, 3.75
W
60
280 mm × 265 mm × 30 mm
(ケーブルを除く)
約 1.9 kg (ケーブルを除く)
5 °C ~ 35
°C
10 % ~ 90 % RH (結露なきこと)
CF-18 シリーズ , CF-19 シリーズ ,
CF-29 シリーズ , CF-30 シリーズ ,
CF-31 シリーズ , CF-U1 シリーズ
mm
*1
mm
Hz
Hz
Hz
Hz
A
74
Page 75

保証とアフターサービス
パソコン本体の『取扱説明書 基本ガイド』をご覧ください。
75
J
Page 76

MEMO
76
Page 77

77
Page 78

Panasonic Corporation
Panasonic Solutions Company
3 Panasonic Way, Panazip 2F-5,
Secaucus, NJ 07094
Panasonic Canada Inc.
5770 Ambler Drive Mississauga,
Ontario L4W 2T3
Importer’s name & address pursuant to the EU GPSD
(General Product Safety Directive) 2001/95/EC Art.5
Panasonic Computer Products Europe, Panasonic Marketing Europe
GmbH
Hagenauer Straße 43
65203 Wiesbaden
Germany
Web Site : http://panasonic.net
/
パナソニック株式会社 IT プロダクツビジネスユニット
〒570-0021 大阪府守口市八雲東町一丁目 10 番 12 号
© Panasonic Corporation 2010
Page 79

(切り取り線)
〈無料修理規定〉
1.
取扱説明書、本体貼付ラベル等の注意書に従った使用状態で保証期間
内に故障した場合には、無料修理をさせていただきます。
( イ )
無料修理をご依頼になる場合には、商品に取扱説明書から切り離
した本書を添えていただきお買い上げの販売店にお申しつけくだ
さい。
( ロ )
お買い上げの販売店に無料修理をご依頼にならない場合には、お
近くの修理ご相談窓口にご連絡ください。
2.
ご転居の場合の修理ご依頼先等は、お買い上げの販売店またはお近く
の修理ご相談窓口にご相談ください。
3.
ご贈答品等で本保証書に記入の販売店で無料修理をお受けになれない
場合には、お近くの修理ご相談窓口へご連絡ください。
4.保証期間内でも次の場合には原則として有料にさせていただきます。
( イ )
使用上の誤り及び不当な修理や改造による故障及び損傷
( ロ )
お買い上げ後の輸送、落下などによる故障及び損傷
( ハ )
火災、地震、水害、落雷、その他天災地変及び公害、塩害、ガス
害(硫化ガスなど)、異常電圧、指定外の使用電源(電圧、周波数)
などによる故障及び損傷
( ニ )
車両、船舶等に搭載された場合に生ずる故障及び損傷
( ホ )
本書のご添付がない場合
( へ )
本書にお買い上げ年月日、お客様名、販売店名の記入のない場
合、あるいは字句を書き替えられた場合
( ト )
持込修理の対象商品を直接修理窓口へ送付した場合の送料等はお
客様の負担となります。また、出張修理を行った場合には、出張
料はお客様の負担となります。
5.本書は日本国内においてのみ有効です。
6.本書は再発行いたしませんので大切に保管してください。
7.
お近くのご相談窓口はパソコン本体の取扱説明書の「保証とアフター
サービス」をご参照ください。
修理メモ
※
お客様にご記入いただいた個人情報(保証書控)は、保証期間内の無
料修理対応及びその後の安全点検活動のために利用させていただく場
合がございますのでご了承ください。
※
この保証書は、本書に明示した期間、条件のもとにおいて無料修理を
お約束するものです。従ってこの保証書によって、保証書を発行して
いる者(保証責任者)、及びそれ以外の事業者に対するお客様の法律
上の権利を制限するものではありませんので、保証期間経過後の修理
についてご不明の場合は、お買い上げの販売店またはお近くの修理ご
相談窓口にお問い合わせください。
※
保証期間経過後の修理や補修用性能部品の保有期間についてはパソコ
ン本体の取扱説明書の「保証とアフターサービス」をご覧ください。
※ThiswarrantyisvalidonlyinJapan.
Page 80

(切り取り線)
持込修理
液晶モニター保証書
本書はお買い上げの日から下記期間中故障が発生した場合には本
書裏面記載内容で無料修理を行うことをお約束するものです。ご
記入いただきました個人情報の利用目的は本票裏面に記載してお
ります。お客様の個人情報に関するお問い合わせは、お買い上げ
の販売店にご相談ください。詳細は裏面をご参照ください。
品 番
保証期間
※
お買い上げ日
※
ご住所
お
客
お名前
様
電 話
※
お買い上げ日から
( ) ー
CF-VDL03U
本体1年間
年 月 日
様
住所・販売店名
販
売
店
( ) ー
電話
パナソニック株式会社 IT プロダクツビジネスユニット
〒 570-0021 大阪府守口市八雲東町一丁目 10 番 12 号 TEL(06)6908-1001
ご販売店様へ ※印欄は必ず記入してお渡しください。
 Loading...