

Page 1
Panasonic®
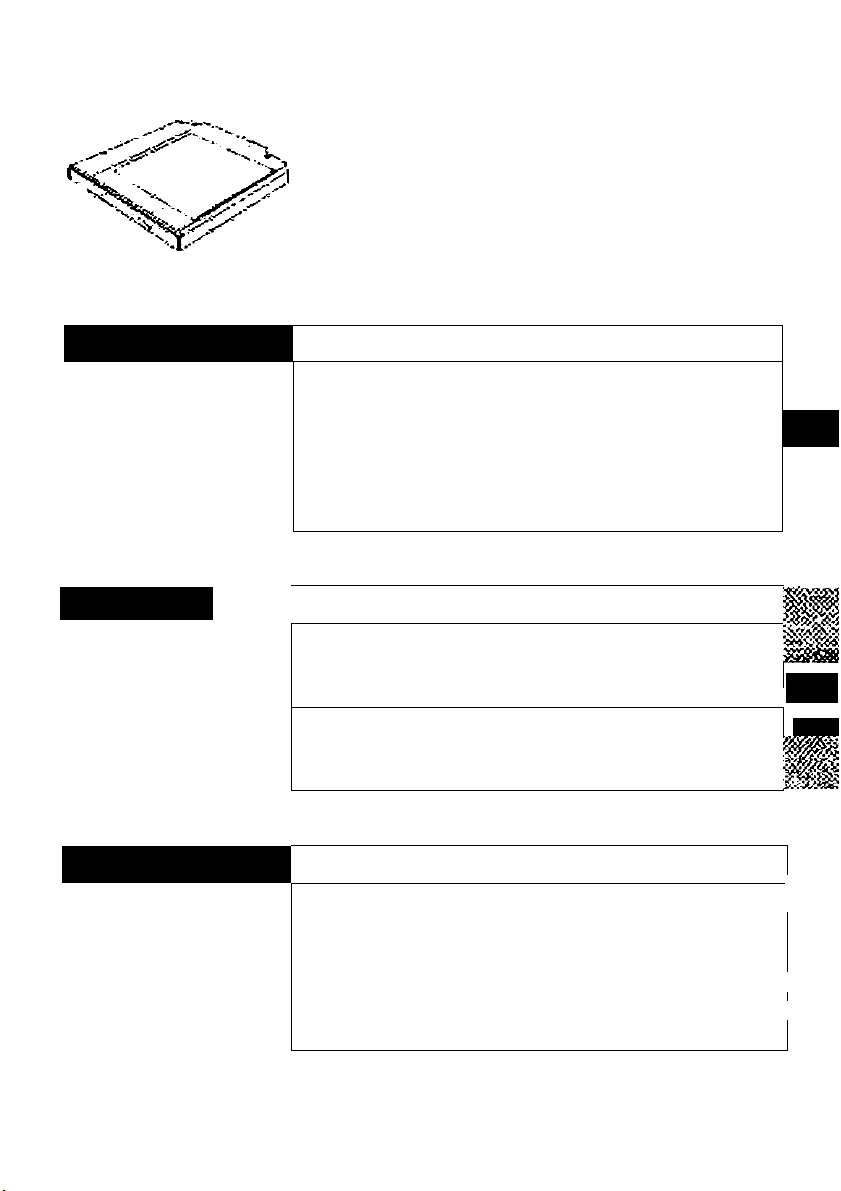
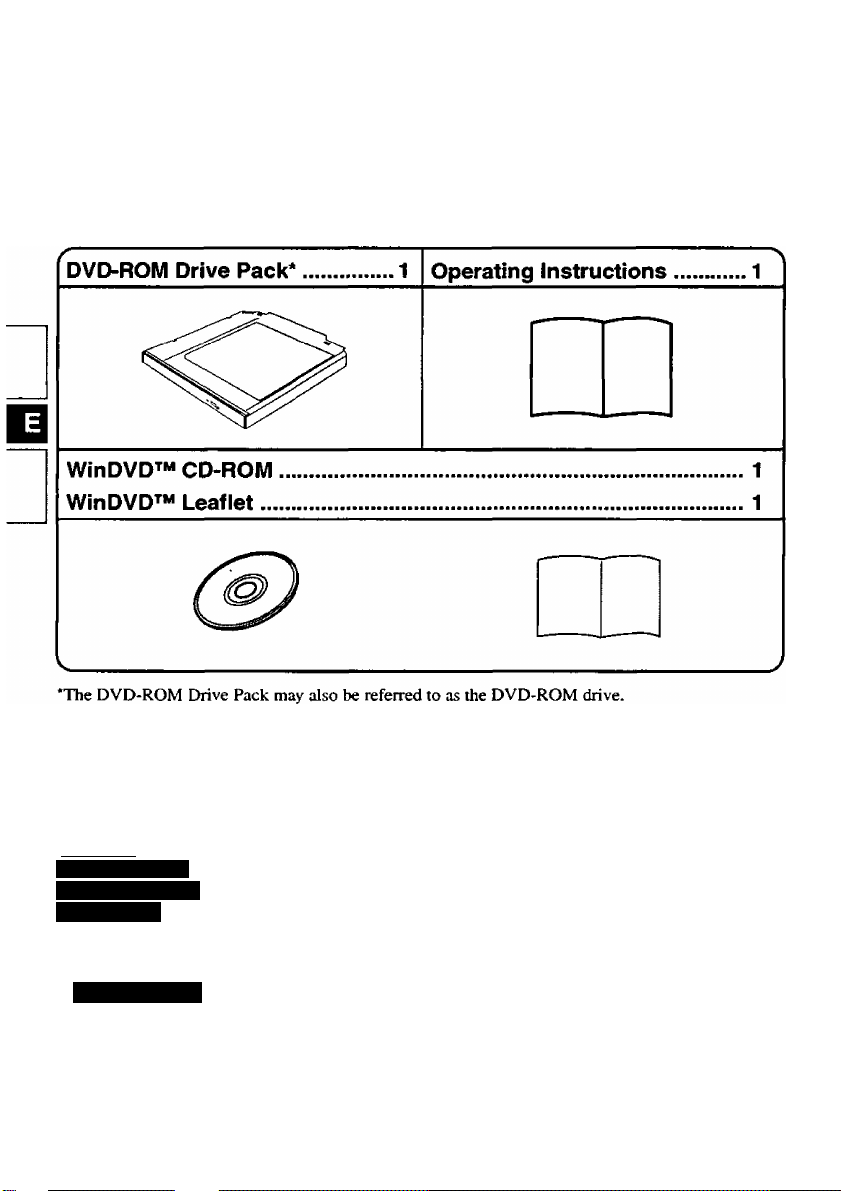
DVD-ROM Drive Pack
CF-^VDDTaS
ENGLISH
DEUTSCH
OPBRATiNG tNSTRUCTiONS
lntro<iuction
Ussge Precautions
Using th$ Qrivç .i.«.»«.«.»«»«.d
Troubleshooting
1
BBDJBNUNGSANLBiTUNG
Einführung
Vor$icht${7i9ßnahrnen zum Gehrduch 13
Gebrauch des Laufwerks
Störungsbehebung.
Technische Daten
..........................................
..................................
. . . . . . . . . . . . . . . . . . . . . . . . . . . . . ... . . . . . . .
. . . . . . . . . . . . . . . . . . . . . . . . . . . . . . . . . .
FRANÇAIS MODE D'EMPLOI
introduction.,...
Précautions d'utilisation
Utilisation du lecteur
oébàrîriôge 2$
Spécifications
. . . . . . . . . . . . . . . . . . . . . . . . . . . . . . . . . . . . . . . . . . . . .
. . . . . . . . . . . . . . . . . . . . . . . . . . . . . . . . . . . . . . . .
. . . . . . . . . . . . . . . . . . . . . . . . . . . . . . . . . . . . . . . . . . . .. 27 h
.
.................................
«... 10
I
.
. . . . . . .
. . . . . . . . . . . . . . . . . . . . . . . . . .
. . . . . . .
...20
. . . . . . . . . . . . . . . . . . . . . . . . . . . . . . . . . . . .21 I
12
19
2 5
4
5
Id
T
9
wM
:
'Wife
E
D
M
Page 2
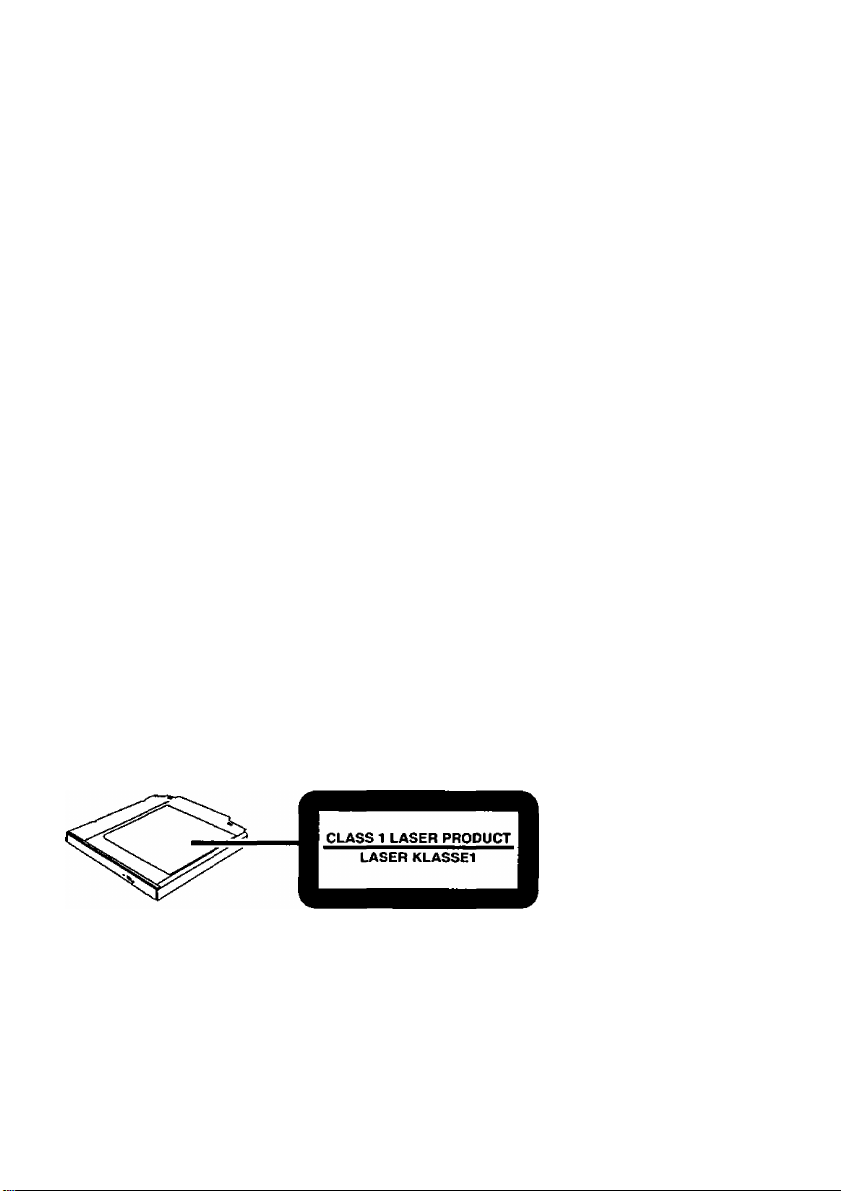
CAUTION!
THIS PRODUCT UTILIZES A LASER.
USE OF CONTROLS, ADJUSTMENTS OR PERFORMANCE OF PROCEDURES
OTHER THAN THOSE SPECIFIED HEREIN MAY RESULT IN HAZARDOUS RA
DIATION EXPOSURE.
DO NOT OPEN COVERS AND DO NOT REPAIR YOURSELF.
REFER SERVICING TO QUALIHED PERSONNEL.
WARNUNG!
DIESES PROUKT ERZEUGT LASERSTAHLUNG.
DURCHFÜHRUNG ANDERER VORGÄNGE ALS DER HIER ANGEGEBENEN KANN
ZU GEFÄHRLICHER STRAHLUNG FÜHREN.
REPARATUREN DÜRFEN NUR VON QUALIFIZIERTEM FACHPERSONAL
DURCHGEFÜHRT WERDEN.
AVERTISSEMENT!
CET APPAREIL UTILISE UN LASER.
L'UTILISATION DE COMMANDES OU DE RÉGLAGES OU L’EXÉCUTION DE
PROCÉDURES AUTRES QUE CELLES SPÉCIFIÉES ICI PEUVENT PROVOQUER UNE
EXPOSITION À DES RADIATIONS DANGEREUSES.
NE PAS OUVRIR LES COUVERCLES NI ESSAYER DE RÉPARER SOI-MÊME.
CONFIER TOUT TRAVAIL D'ENTRETIEN À UN PERSONNEL QUALIFIÉ.
VARNING
Om apparaten används pâ annat sait an i denna bruksanvisnig specificerats, kan användaren
utsättas for osynlig laserstraining, som överskrider gränsen for laserklass 1.
Page 3

For U.S.A.
Federal Communications Commission Radio Frequency Interference
Statement
Note: This equipment has been tested and found to comply with the limits for a Class B
digital device, pursuant to Part 15 of the FCC Rules. These limits are designed to provide
reasonable protection against harmful interference in a residential installation. This equip
ment generates, uses and can radiate radio frequency energy and, if not installed and used in
accordance with the instmctions, may cause harmful interference to radio communications.
However, there is no guarantee that interference will not occur in a particular installation. If
this equipment does cause harmful interference to radio or television reception, which can
be determined by turning the equipment off and on, the user is encouraged to try to correct
the interference by one or more of the following measures:
• Reorient or relocate the receiving antenna.
• Increase the separation between the equipment and receiver.
• Connect the equipment into an outlet on a circuit different from that to which the receiver
is connected.
• Consult the Panasonic Service Center or an experienced radio/TV technician for help.
Warning
To assure continued compliance, use only shielded interface cables when connecting to a
computer or peripheral. Also, any changes or modifications not expressly approved by the
party responsible for compliance could void the user's authority to operate this equipment.
This device complies with Part 15 of the FCC Rules. Operation is subject to the following
two conditions:
(1) This device may not cause harmful interference, and
(2) This device must accept any interference received, including interference that may cause
undesired operation.
Responsible Party:
Matsushita Electric Corporation of America
One Panasonic Way
Secaucus, NJ 07094
Tel No:l-800-LAPrOP-5 (1-800-527-8675)
For Canada
This Class B digital apparatus complies with Canadian ICES-003.
Cet appareil numérique de la classe B est conforme à la norme NMB-003 du Canada.
Page 4
Introduction
Thank you for purchasing the DVD-ROM Drive Pack for the Panasonic CF-72 notebook
computer series.
The DVD-ROM Drive Pack connects to the computer through the Multimedia Pocket.
Store this manual in a safe place after reading it.
[Illustration in this manual]
€WtntioiS?sT2000l
4WtnBows>XF3i
4Wintlow5l98l
Xnote)-
tWinSows^XRi
The procedure in this manual uses the method or view of the Windows XP default
setting (not Classic View or Classic Start menu etc.).
Microsoft®, MS-DOS* and Windows* are registered trademarks of Microsoft Corporation in the United
States and/or other countries.
t indicates Microsoft® Windows® 2000 Professional Operating System,
indicates Microsoft* Windows® XP Professional Operating System,
indicates Microsoft* Windows* 98 Second Edition Operating System.
1
Page 5
Usage Precautions
• Do not place items other than discs on the tray.
• Do not leave the tray in the open position or touch the lens area. Should the lens
become soiled by dust or dirt, the unit may not read discs properly.
• Under some conditions, dust may build up on the optical lens or disc, possibly resulting in
malfunction.
• Do not apply excessive force to the tray in the open position, doing so could damage the
tray.
• Do not open the DVD-ROM drive or move the computer while the DVD-ROM drive is
being accessed. Doing so could cause it to malfunction. In addition, after running an
application involving access to a disc, do not open the DVD-ROM drive or remove the
disc until after the application has been closed.
• After closing the tray, do not attempt to access a disc until the MP indicator ((^) disap
pears.
• Do not expose the DVD-ROM Drive Pack to oily or tobacco smoke. Doing so could
shorten the service life of the lens.
• Cleaning the DVD-ROM drive using a CD lens cleaner (except a liquid type cleaner) is
recommended if it malfunctions.
• Never insert foreign objects such as paper clips into the DVD-ROM Drive Pack.
• Do not use discs that have become deformed (warped, not completely round, etc.).
• The playback of CDs containing moving pictures (Video CDs. CDs including MPEG
data, etc.) may not be smooth.
• For AutoPlay CDs:
• If an AutoPlay CD does not start after the computer resumes from the standby or hiber
nation mode, we recommend reinserting the CD again after a 15-second wait.
• An AutoPlay CD may start during the access of a file.
To avoid damaging discs:
• Do not touch the surface as it can cause the disc to become dirty or scratched.
• Do not allow discs to become dirty or scratched.
• Do not place or store discs in locations exposed to heat, direct sunlight, humidity or dust.
• Do not write on the surface of the disc with a bail-point pen or other writing instrument.
• If the disc is brought from a cold into a warm environment, moisture may form on the disc.
Wipe this moisture off with a soft, dry, lint-free cloth before using the disc,
• Do not drop, bend, or place heavy objects on top of discs.
• Cleaning the disc using a CD cleaner is recommended once every 2 or 3 months.
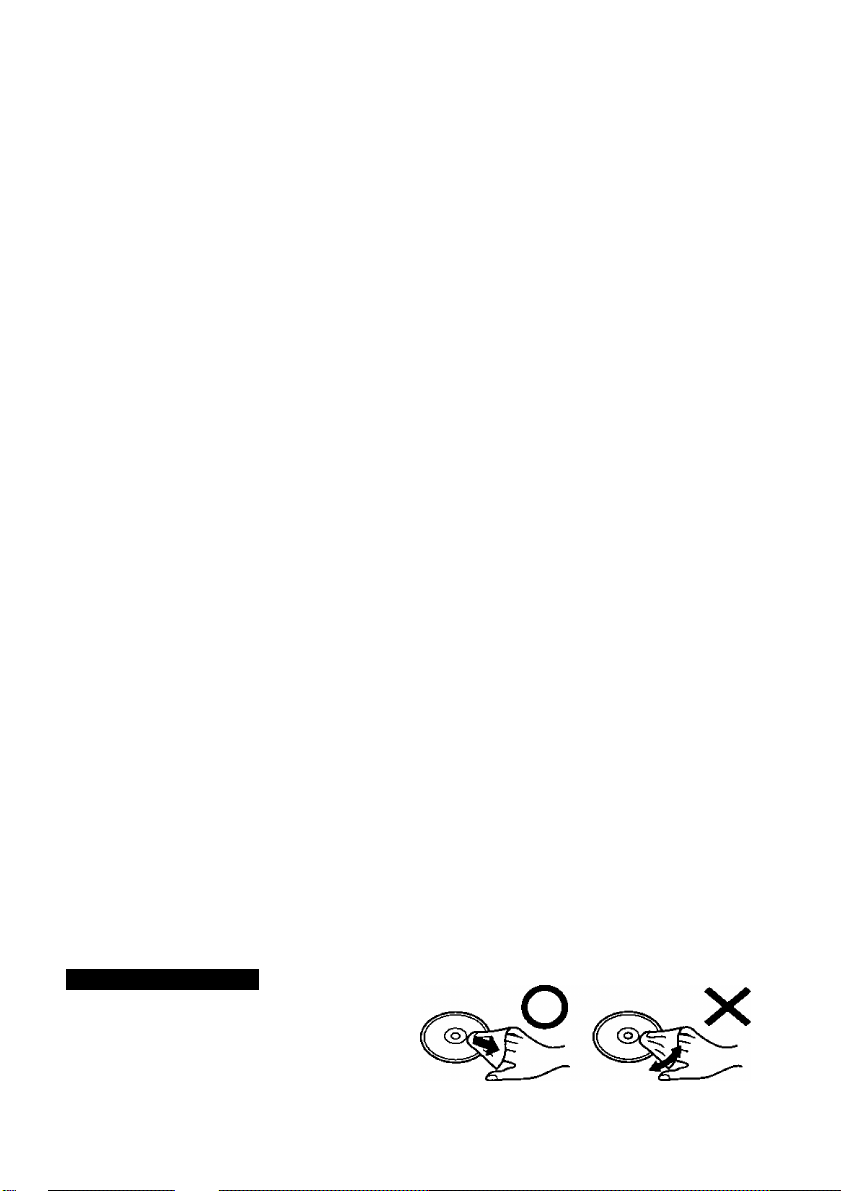
If the disc gets dirty
After wiping the disc with a moist, soft
cloth, wipe it with a dry cloth. Always
wipe from the center toward the edge.
Page 6

Using the Drive
Installing/Removing a Drive
Refer to the Reference Manual included with your computer on how to install/remove the
drive.
Be sure to turn the computer off before installing/removing the drive.
Page 7

Preparations
4WindoS20(Kw
Confirm that [Transfer Mode] is set to [DMA if available] in [Start] - [Settings] - [Control
Panel] - [System] - [Hardware] - [Device Manager] - [IDE ATA/ATAPI controllers] - [Sec
ondary IDE Channel] - [Advanced Settings] - [Device 0]. Perform this setting if it has not
yet been made.
mnmmpi
Confirm that [Transfer Mode] is set to [DMA if available] in [Start] - [Control Panel] [Performance and Maintenance] - [System] - [Hardware] - [Device Manager] - [IDE ATA/
ATAPI controllers] - [Secondary IDE Channel] - [Advanced Settings] - [Device 0]. Per
form this setting if it has not yet been made.
iWindow^SSI
Confirm the following contents in [Start] - [Settings] - [Control Panel] - [System] - [Device
Manager] - [CDROM] - [MATSHITA DVD-ROM SR-****] - [Settings]. Make the settings
if they have not yet been made.
* Add a check mark for [DMA].
• Set both [Start drive letter] and [End drive letter] in [Reserved drive letters] to [L:].
Xnote>
<Using PC Cards>
If the PC Card does not work, there may be no intenrupt request (IRQ) line available.
Deactivate unnecessary equipment using in the Setup Utility.
To play DVD-Video or MPEG2 files, install the DVD playback software (included).
For information on how to install the software, refer to the manual of the software.
The region code has been set to the following:
<For U.S.A. and Canada> Set to “1”
<For Europe> Set to “2”
Use of another region code or alteration of the region code invalidates the warranty.
For more information, contact Panasonic Technical Support.
If commercially available DVD playback software asks you the region code, set to
the following;
<For U.S.A. and Canada> Set to “1”
<For Europe> Set to “2”
Page 8

Using the Drive
Setting a Disc
1 Power on your computer
Label side up
2 Open the disc tray
Press the eject button and slowly pull out the tray.
3 Place a disc
Place the disc with the label facing upward in the
drive and push down until the center holder clicks.
<Removing a diso
Place a finger on the center holder and lift up on the
edge of the disc.
4 Close the disc tray
Close the tray without touching the eject button.
Xnote>
If the vibration of the drive is excessively high, use the Setup Utility to reduce the
drive speed by setting it to [Low].
Power-saving Mode
If the DVD-ROM Drive Pack has not been accessed within 90 seconds, the drive motor will
automatically shut down to reduce the power consumption. When the DVD-ROM Drive
Pack is accessed once again, the power of the drive motor is turned on. However, approxi
mately 30 seconds are required until data is actually read from the disc.
Page 9

Using the Drive in the MS-DOS Mode
To use the drive in the MS-DOS mode, configure the drive following the steps below after
performing the preparations page 7). If the steps listed below are performed with
out completing the preparations first, the drive will not operate properly.
y Click the [Start] button then select [Shut Down],
^ Select [Restart in MS-DOS mode] and click [OK].
3 Open the “CONFIG.SYS” file for editing by issuing the following commands:
cd\( Enter I
edit config.sys C Enter I
4 Move the cursor to the line containing “OAKCDROM.SYS” and delete the characters
“rem” at the beginning of the line. {Deleting “rem" causes the item to become valid.)
DEVICEHIGH=C:\WlNDOWS\COMMAND\OAKCDROM.SYS /D:MSCDOOO
(If this line is missing, add it.)
5 Press( Alt ] -f( F ) . thenC^ to save the file. Then press ( Alt ) +C F ). thenC X ] to
exit the Edit program.
6 Follow the same steps to edit the “AUTOEXEC.BAT’ file,
edit autoexec.bat ( Enter)
7 Move the cursor to the line containing “MSCDEX.EXE” and delete the characters “rem”
at the beginning of the line. (Deleting “rem” causes the item to become valid.)
LOADHIGH C:\WINDOWS\COMMANDVMSCDEX.EXE /DiMSCDOOO /L:L
(If this line is missing, add it.)
3 Press ( Alt ) +CHD , thenC S )to save the file. Then press CliD+CD , then CD to
exit the Edit program.
9 Restart the computer.
Page 10

Troubleshooting
The computer does not rec
ognize the drive.
The MP indicator (@) does
not light.
Cannot play disc or read data
from it.
Cannot eject disc.
A blue background appears
on the screen with the
MPEG image.
The disc tray does not close.
Cannot access file for the
DVD-ROM drive.
• Check the settings by following the instructions in
“Preparations”.
• Is the drive properly mounted in the multimedia pocket?
Is the disc loaded on the tray correctly?
Is the disc bent, scratched, or dirty?
Is the computer powered on?
To remove a disc when the computer is powered off, in
sert a sharp object such as the bent-out tip of a pap>er clip
into the emergency hole. Pushing it completely to the end
will free the tray so that it can be pulled out.
Emergency Hole
Did you open the drive or remove the disc while it was
operating?
Re-insert the disc and close the drive. Press t Enter 1.
Did you touch the eject button when you close the tray?
When the DVD-ROM drive is replaced after the CD-R/
RW drive has been installed in the Multimedia Pocket,
files inside the drive sometimes cannot be accessed.
In this case, execute [Scan for hardware changes] using
the following procedure.
1 Select [Device Manager] in [start] - [Control Panel] -
[Performance and Maintenance] - [System] - [Hard
ware],
2 Select the drive displayed under [DVD/CD-ROM
drives] (e.g., MATSHITA****), then select [Action] -
[Uninstall] from the menu and select [OK],
3 Select [Action] - [Scan for hardware changes] from the
menu. (Microsoft Corp. has reported that the above
noted problem occurs.)
10
Page 11

Specifications
Item Description
Operating voltage range DC 5 V ± 0.25 V
Drive 8x DVD-ROM Drive max. speed
24x/20x*' CD-ROM Drive max. speed
DVD-ROM
CD-ROM
Cache memory 256 KB
Interface Conforms to enhanced IDE (ATARI) standard
Dimensions {width x depth x
height)
Weight Approx. 255 g (0.56 lb.}
Operating temperature/
Humidity range
Data Capacity
Data transfer rate*^
Access Time 220 ms (8x Speed, DVD-9, 1/3 Stroke*^)
Supports DVD-5, DVD-9, DVD-10, DVD-R*^(3.95 GB,
Data Capacity
Data transfer rate*^
Access Time
Supports CD-Audio, CD-ROM, CD-R*\ Photo CD,
4.7 GB(DVD-5), 8.5 GB(DVD-9), 9.4 GB(DVD-IO)
88.64 Mbit/s{10816 KB/s) 8x Speed (Max.)
4.7 GB), DVD-RAM*“*5 (2.6 GB, 4.7 GB)
656 MB
3600 KB/s 24x speed (Max.)
3000 KB/s 20x speed (Max.)*^
135 ms (24x Speed, 1/3 Stroke*")
138 ms (20x Speed, 1/3 Stroke*")*'
Video CD, Enhanced Music CD, CD-RW*^
CD-TEXT
132 nun X 147.1 mm x 15.3 mm
{5.2 " X 5.8 " X 0.6 "}
5 °C to 35 °C {41 °F to 95 °F}/30 % RH to
80 % RH (no condensation)
When using CF-72N3— series.
If an unbalanced disc (e.g., a disc with which the balance has been displaced from the
center) is inserted, the speed may become slower if there are large vibrations while the
disc is rotating.
Stroke: Indicates the amount of movement the lens (pickup) of the DVD-ROM Drive Pack
must make in order to read data.
Read only.
If the case of DVD-RAM, only non-cartridge discs or removable cartridge discs can be
used.
11
Page 12

Einführung
Wir freuen uns, daß Sie sich für den Kauf eines DVD-ROM-Laufwerk-Pack für Ihr
Panasonic-Notebook CF-72 entschieden haben.
Das DVD-ROM-Laufwerk-Pack wird über das Multimedia Pocket an den Computer
angeschlossen.
Sie sollten diese Bedienungsanleitung an einer sicheren Stelle verwahren.
Das DVD-ROM-Laufwerk-Pack wird DVD-ROM-Laufwerk in diesem Buch abgekürzt gennant,
sowie es keine Not gibt.
[Illustration im Manual]
steht für das Microsoft® Windows* 2000 Professional Betriebssystem,
steht für das Microsoft* Windows® XP Professional Betriebssystem,
steht für das Microsoft® Windows® 98 Second Edition Betriebssystem.
X HINWEIS >
Die Verfahren in dieser Bedienungsanleitung verwenden die Methoden oder Anzeigen
der Windows XP Vorgabeeinstellungen (nicht das Classic View- oder das Classic StartMenü usw.).
Microsoft®, MS-DOS* und Windows® sind eingetragene Warenzeichen von Microsoft Corporation in
den USA und/oder anderen Ländern.
12
Page 13

Vorsichtsmaßnahmen zum Gebrauch
• Legen Sie nur Discs in das DVD-ROM-Laufwerk ein.
• Lassen Sie das Fach nicht offen und berühren Sie die Abtastoptik nicht mit den
Fingern. Bei Verschmutzung der Optik können Lesefehler auftreten.
• Unter bestimmten Bedingungen kann sich Staub auf der Abtasterlinse oder Disc
ansanuneln, wodurch Fehlfunktionen verursacht werden können.
• Achten Sie darauf, das geöffnete Fach nicht zu stark zu belasten, es könnte dabei beschädigt
werden.
• Während des Zugriffs auf das DVD-ROM-Laufwerk sollten Sie das Laufwerk keinesfalls
öffnen oder den Computer bewegen. Andernfalls können Fehlfunktionen auftreten.
Außerdem sollte das DVD-ROM-Laufwerk nicht geöfffnet bzw. die Disc entfernt werden,
solange eine Anwendung läuft, die darauf zugegriffen hat.
• Versuchen Sie nach Schließen des Fachs auf keinen Fall, einen Zugriff auf die Disc
auszuführen, bevor die MP-Anzeige (|^) erloschen ist.
• Verwenden Sie das DVD-ROM-Laufwerk-Pack nicht in Räumen, in denen stärkere
Konzentrationen von Ölnebel oder Tabakrauch auftreten. Die Nutzungsdauer der Optik
könnte sonst verkürzt werden.
• Bei Funktionsstörungen empfehlen wir die Reinigung des DVD-ROM-Laufwerkes, wozu
ein CD-Linsenreiniger (außer Flüssigkeitsreiniger) zu verwenden ist.
• Führen Sie in das Gerät keine Fremdkörper wie z.B. Büroklammern ein.
• Verwenden Sie keine Discs, die deformiert sind (durchgebogen oder nicht völlig rund usw.).
• Bei CDs, die Laufbilder enthalten (Video-CDs, CDs mit MPEG-Daten usw.), ist keine
einwandfreie Wiedergabe gewährleistet.
• Hinweise zu AutoPlay-CDs:
• Falls die Wiedergabe einer AutoPIay-CD nicht startet, nachdem der Computer den Betrieb
aus dem Standby- oder Stilllegungs-Modus wieder aufgenommen hat, wird empfohlen,
etwa 15 Sekunden lang zu warten und die CD dann erneut einzulegen.
• Die Wiedergabe einer AutoPlay-CD startet u.U. während eines Zugriffs auf eine Datei.
Beachten Sie zum Schutz der Discs die folgenden Punkte;
• Berühren Sie die Oberfläche der Disc nicht, damit diese nicht schmutzig oder verkratzt wird.
• Halten Sie Ihre Discs sauber und frei von Kratzern.
• Verwahren Sie Ihre Discs nicht an einem Ort, wo sie zu hohen Temperaturen, direkter
Sonneneinstrahlung, Feuchtigkeit oder Staub ausgesetzt sind.
• Die Oberfläche der Disc darf nicht beschriftet werden.
• Wenn Discs aus kalten in warme Räume gebracht werden, kann auf ihnen Feuchtigkeit
kondensieren. Diese muß mit einem weichen, nicht fusselnden Tuch entfernt werden,
bevor Sie die Disc in das Laufwerk einlegen können.
• Discs dürfen weder fallengelassen noch verbogen oder durch schwere Gegenstände belastet
werden.
• Wir empfehlen, daß die Disc alle 2-3 Monate unter Verwendung eines CD-Reinigers
gereinigt wird.
Discs reinigen
Reinigen Sie die disc mit einem weichen,
feuchten Tuch, und wischen Sie mit einem
trockenen Tuch nach. Wischen Sie immer
von der Mitte gerade nach außen.
richtig
falsch
13
Page 14

Gebrauch des Laufwerks
Installieren/Entfernen eines Gerätes
Einzelheiten zum Installieren/Entfernen des DVD-ROM-Laufwerk finden Sie im ReferenzHandbuch Ihres Notebooks.
Achten Sie darauf, das Notebook auszuschalten, bevor Sie das Laufwerk installieren/
entfernen.
14
Page 15

Vorbereitungen
4WindöwsF2000l
Vergewissern Sie sich, dass [Übertragungsmodus] unter [Start] - [Einstellungen] [Systemsteuerung] - [System] - [Hardware] - [Geräte-Manager] - [IDE ATA/ATAPI-Controller] - [Sekundärer IDE-Kanal] - [Erweiterte Einstellungen] - [Gerät 0] auf [DMA, wenn
verfügbar] eingestellt ist. Falls nicht, nehmen Sie diese Einstellung vor.
mmöimxpj
Vergewissern Sie sich, dass [Übertragungsmodus] unter [Start] - [Systemsteuerung] [Leistung und Wartung] - [System] - [Hardware] - [Geräte-Manager] - [IDE ATA/ATAPIController] - [Sekundärer IDE-Kanal] - [Erweiterte Einstellungen] - [Gerät 0] auf [DMA,
wenn verfügbar] eingestellt ist. Falls nicht, nehmen Sie diese Einstellung vor.
iWind6ws]98l
Überprüfen Sie den folgenden Inhalt in [Start] - [Einstellungen] - [Systemsteuerung] [System] - [Geräte-Manager] - [CDROM] - [MATSHITA DVD-ROM SR-****] -
[Einstellungen]. Nehmen Sie ggf. die folgenden Einstellungen vor:
• Markieren Sie das kontrollkästchen [DMA].
•Stellen Sie sowohl [Erster Buchstabe] und [Letzter Buchstabe] unter [Reservierte
Laufwerkbuchstaben] auf [L:] ein.
HINWEIS)-
<Verwendung der PC Cards>
Wenn die Karte nicht funktioniert, steht möglicherweise keine Unterbrechungs
anforderungsleitung zur Verfügung. Deaktivieren Sie unnötige Geräte, wenn Sie
Setup-Dienstprogramm verwenden.
Um DVD Video-Discs oder MPEG2-Dateien abzuspielen, installieren Sie die DVDWiedergabe-Software (im Lieferumfang). Informationen zur Installation der Soft
ware Enden Sie in deren Bedienungsanleitung.
Der Länder Code ist wie folgt eingestellt worden:
<Für die USA und Kanada> Der Länder Code lautet „ 1 “.
<Für Europa> I>er Länder Code lautet „2“.
Die Verwendung eines anderen Länder Codes oder seine Änderung hat den
Verfall der Garantie zur Folge. Bezüglich weiterer Informationen wenden Sie
sich bitte an den Panasonic-Kundendienst.
Falls die optionale DVD Wiedergabesoftware nachfragt wie der Regionalcode gesetzt
ist, ermitteln Sie ihn wie folgt:
<Für die USA und Kanada> Steht auf 1.
<Für Europa> Steht auf 2.
15
Page 16

Gebrauch des Laufwerks
Einlegen einer Disc
1 Schalten Sie das Notebook ein
Etikettseite nach oben
2 Öffnen Sie das Laufwerkfach
Drücken Sie die Auswurftaste und ziehen Sie das
Laufwerk vorsichtig heraus.
3 Einstecken einer Disc
Legen Sie die Disc mit der Beschriftung nach oben in
das Laufwerk ein. Drücken Sie die Disc nach unten,
bis sie in den Zentrierring einrastet.
<Auswerfen einer Diso
Legen Sie einen Finger auf den Zentrierring und ziehen
Sie die Disc nach oben, indem Sie sie am Rand halten.
Aus wurftaste
Zentrierring
4 Schließen Sie das Fach
Achten Sie beim Schließen des Laufwerkfachs darauf,
eine Berührung der Auswurftaste zu vermeiden.
HINWEIS^
Falls das Laufwerk zu stark vibriert, verringern Sie die Drehzahl, indem Sie im Setup-
Dienstprogramm die Einstellung der Laufwerkdrehzahl auf [Low] ändern.
Energiesparfunktiorig
90 Sekunden nach dem letzten Zugriff auf das DVD-ROM-Laufwerk-Pack wird
der Laufwerksmotor ab ge schaltet, um die Leistungsaufnahme zu reduzieren. Bei einem
erneuten Zugriff auf das Laufwerk wird der Motor wieder eingeschaltet. Das Hochlaufen
dauert etwa 30 Sekunden, erst danach können wieder Daten von der Disc gelesen werden.
16
Page 17

Einsatz des Laufwerks im MS-DOS-Modus@|iis»^
Um das Laufwerk im MS-DOS-Modus zu verwenden, konfigurieren Sie das Laufwerk anhand
des nachstehend beschriebenen Verfahrens, nachdem Sie die erforderlichen Vorbereitungen
getroffen haben ((^ Seite 15). Werden die folgenden Schritte ausgefiihrt, bevor die
Vorbereitungen abgeschlossen worden sind^ so arbeitet das Laufwerk nicht einwandfrei.
1 Klicken Sie auf [Start] und dann auf [Beenden].
2 Wählen Sie [Im MS-DOS-Modus neu starten] und klicken Sie auf [OK].
3 Ölfnen Sie die Datei „CONFIG.SYS“ durch die folgenden Befehle:
cd\|^^
edit config.sys [[ <—'I
4 Bringen Sie den Cursor in die Zeile, in der „OAKCDROM.SYS“ steht, und löschen Sie
die Buchstaben ,oem“ am Anfang der Zeile (dadurch wird diese Befehlszeile wirksam).
DEVICEHIGH=C:\WINDOWS\COMMAND\OAKCDROM.SYS /D:MSCDOOO
(Fügen Sie die Zeile ein, falls Sie in der Datei fehlt.)
5 Drücken CÜD +CS) und dann CID , um die Datei zu sichern. Durch Drücken von
CM) +CqD und CB können Sie den Editor verlassen.
3 Die Datei, AUTOEXEC .B AT“ editieren Sie auf dieselbe Weise,
edit autoexec.bat i| ■«—'I
7 Bringen Sie den Cursor in die Zeile, in der „MSCDEX.EXE“ steht, und löschen Sie die
Buchstaben ,a'em“ am Anfang der Zeile (dadurch wird diese Befehlszeile wirksam).
LOADHIGH C:\WINDOWS\COMMAND\MSCDEX.EXE /D:MSCDOOO /L:L
(Fügen Sie die Zeile ein, falls Sie in der Datei fehlt.)
3 Drücken ( Alt ) + ( D ) und dann CB , um die Datei zu sichern. Durch Drücken von
CM) +Cd) und Cb) können Sie den Editor verlassen.
9 Starten Sie das Notebook neu.
17
Page 18

Störungsbehebung
Das Notebook erkennt das
Laufwerk nicht.
Die MP-Anzeige (@)
leuchtet nicht.
Eine Disc kann nicht
abgespielt oder gelesen
werden.
Die Disc wird nicht
ausgeworfen.
Eine blaue Darstellung mit
den MPEG-Daten taucht
plötzlich auf.
Das Fach schließt nicht Haben Sie versehentlich die Auswurftaste beim Schließen
Zugriff auf eine Datei auf
dem DVD-ROM-Laufwerk
ist nicht möglich.
18
• Überprüfen Sie die Einstellungen anhand der
Anweisungen im Abschnitt „Vorbereitungen“ .
• Ist das Laufwerk einwandfrei in das Multimedia-Pocket
eingesetzt?
Ist die Disc konekt in das Laufwerkfach eingelegt?
Ist die Disc verbogen, zerkratzt oder schmutzig?
Ist das Notebook eingeschaltet?
Um die Disc bei ausgeschaltetem Notebook zu entfernen,
müssen Sie einen spitzen Gegenstand (aufgebogene
Büroklammer o.ä.) in das Locb der manuellen Auswurfvor
richtung schieben.
Gegenstand so weit wie möglich einführen (bis zum
Anschlag). Dadurch wird die Lade entriegelt und kann
herausgezogen werden.
Loch der manuellen Auswurfvorrichtung
Haben Sie die Disc aus dem Laufwerk herausgenommen?
Lesen Sie die Disc wieder ein und drücken Sie | <—'||.
des Laufwerkfachs berührt?
Wenn das DVD-ROM-Laufwerk nach Installation des CD-
R/RW-Laufwerks im Multimedia-Pocket ausgewechselt
wurde, ist manchmal kein Zugriff auf Dateien auf diesen
Laufwerken möglich.
In einem solchen Fall führen Sie [Nach geänderter Hard
ware suchen] anhand des folgenden Verfahrens aus:
7 Wählen Sie [Geräte-Manager] unter [Start] -
[Systemsteuerung] - [Leistung und Wartung] - [System]
- [Hardware] aus.
2 Wählen Sie das unter [DVD/CD-ROM Laufwerk] angezeigte
Laufwerk (z.B. MATSHITA****), wählen Sie dann [Aktion] [Deinstallieren] im Menü aus und klicken Sie dann auf [OK].
3 Wählen Sie [Aktion] - [Nach geänderter Hardware
suchen] im Menü aus.
(Microsoft Corporation hat berichtet, dass das obige
Problem manchmal auftritt.)
Page 19

Technische Daten
Gegenstand Beschreibung
Betriebsspannung
Laufwerk 8 mal max DVD-ROM-Laufwerk
DVD-ROMDaten kapazität
Datentransrate*^ 88,64Mbit/s(10816KB/s){8mal max.)
Zugrifftszeit 220 ms (8 mal max, DVD-9, 1/3 Hub*^)
Unterstützte Formate DVD-5, DVD-9, DVD-10, DVD-R*^(3,95 GB,
CD-ROM
Cache-Speicher 256KB
Schnittstelle
Abmes^ngen {Breite x Tiefe x Höhe) 132 mm X 147,1 mm x 15,3 mm
Gewicht
Zulässige Umgebungsbedingungen
Temperatur/Luftfeuchtigkeit
Daten kapazität 656 MB
Datentransrate‘2
Zugrifftszeit 135 ms (Drehzahl 24 fach, 1/3 Hub*^)
Unterstützte Formate CD-Audio, CD-ROM, CD-R‘^ Photo CD,
DC 5 V ± 0.25 V
24 ma!/20 mal*’ max CD-ROM-Laufwerk
4,7GB(DVD-5), 8,5 GB(DVD-9), 9,4GB(DVD-10)
4,7 GB), DVD-RAM*“*= (2,6 GB, 4,7 GB)
3600 KB/s (24 mal max.)
3000 KB/s (20 mal max.)*’
138 ms (Drehzahl 20 fach, 1/3 Hub*^)*’
Video CD, Enhanced Music CD, CD-RW*^
CD-TEXT
Entspricht der Norm für IDE-Erweiterungen (ATARI)
Ca. 255 g
5 °C bis 35 °C/30 % RH bis 80 % RH
(ohne Kondensation)
*’ Bei Verwendung der Serien CF-72N3**".
Falls eine Form-Disc oder eine Disc mit großer Unwucht (Schwerpunkt der Disc liegt
außerhalb der Mitte) eingelegt wird, die bei der Rotation stark vibriert, kann die
Geschwindigkeit geringer sein.
Hub:Weg der Abtastoptik im DVD-ROM-Laufwerk bis zur Leseposition.
** Nur Lesen.
Es können nur DVD-RAM-Discs ohne Cartridge bzw. mit entfembarer Cartridge verwendet
werden.
19
Page 20

Introduction
Merci d'avoir choisi le Lecteur DVD-ROM pour l'ordinateur portable Panasonic CF-72.
Le lecteur DVD-ROM se connecte à l'ordinateur par l'intermédiaire du Multimedia Pocket.
Conservez précieusement ce manuel après l'avoir lu.
[Illustrarions de ce manuel]
|Winclow$T20009
4WÎntlôwslXEl
4Wintlôws!98l
représente le système d'exploitation Microsoft* Windows* 2000 Professional,
représente le système d'exploitation Microsoft® Windows® XP Professional,
représente le système d'exploitation Microsoft® Windows® 98 Second Edition.
X REMARQUE >■
iWinâôws^XRi
Dans ce mode d’emploi, les méthodes et l’affichage utilisées pour la description des
procédures correspondent au réglage par défaut de Windows XP (il ne s’agit ni de
l’affichage Classique ni de l’affichage du menu Démarrer Classique, etc.).
Microsoft®, MS-DOS® et Windows* sont des marques déposées de Microsoft Corporation aux ÉtatsUnis et/ou dans d’autres pays.
20
Page 21

Précautions d’utilisation
• Ne placez pas d'objets autres que des disques dans le tiroir.
• Ne laissez pas le tiroir ouvert et ne touchez pas la zone de la lentille. Si la lentille est
maculée de poussière ou de saletés, l'appareil ne pourra pas lire les disques correctement.
• Dans certaines conditions, de la poussière peut s'accumuler sur la lentille ou sur le disque
et éventuellement entraîner un mauvais fonctionnement.
• N'appliquez pas de force excessive sur le tiroir lorsqu'il est ouvert, cela pourrait
l'endommager.
• N’ouvrez pas le lecteur de DVD-ROM et ne déplacez pas l'ordinateur pendant l’accès au
lecteur de DVD-ROM, cela pourrait entraîner un mauvais fonctionnement. De plus, après
avoir fait fonctionn une application qui requiert un accès au disque, n'ouvrez le lecteur de
DVD-ROM et ne retirez le disque qu'une fois l’application fermée.
• Après avoir fermé le tiroir, n'essayez pas d'accéder à un disque avant que le témoin d'accès
((^) ne soit éteint.
• N’exposez pas le lecteur de DVD-ROM à la fumée dégagée par de l’huile ou par du tabac.
Cela pourrait réduire la durée de vie de la lentille.
• En cas de mauvais fonctionnement, le nettoyage du lecteur de DVD-ROM à l’aide d'un
nettoyant pour lentilles (à l'exception des nettoyants de type liquide) est recommandé.
• Ninsérez jamais de corps étrangers tels que des trombones dans le lecteur de DVD-ROM.
• N’utilisez pas de disques déformés ou endommagés.
• La lecture de CD contenant des images animées (CD Vidéo, CD comportant des données
MPEG, etc.) peut ne pas être régulière.
• Pour les CD AutoPlay:
• Si un CD AutoPlay ne démarre pas après que l'ordinateur reprend depuis le mode de
veille ou d'hibernation, nous recommandons de réinsérer le CD après une attente de 15
secondes.
• Un CD AutoPlay peut démarrer pendant l'accès à un fichier.
Afin d’éviter d’endommager les disques:
• Ne touchez pas la surface du disque pour éviter de la salir ou de la rayer.
• Faites en sorte que les disques demeurent propres et sans égratignure.
• Ne posez pas et ne rangez pas les disques dans un endroit exposé à la chaleur, à la lumière
directe du soleil, à l'humidité ou à la poussière.
• N'écrivez pas sur l'étiquette du disque avec un stylo à bille ou tout autre crayon à peinte
dur.
• Si le disque est déplacé d'un endroit froid à un endroit plus chaud, de l'humidité risque de
se déposer sur le disque.
Essuyez l'humidité avec un chiffon doux, sec et sans peluches avant d'utiliser le disque.
• Prenez garde de ne pas tomber ou plier les disques, et de ne pas placer d’objet lourd sur les
disques.
• Le nettoyage du disque à l'aide d’un nettoyant pour CD est recommandé à intervalles de 2
ou 3 mois.
Si le disque est sale
Après avoir nettoyé le disque avec un chif
fon doux et humide, essuyez-le avec un chif
fon sec. Essuyez-le toujours du centre vers
l’extérieur.
21
Page 22

utilisation du lecteur
Installation/Retrait d’un périphérique
Reportez-vous au manuel de référence fourni avec votre ordinateur pour la manière d'installer/
retirer le lecteur.
AlînENmiQN
r
(L
Arrêtez toujours l’ordinateur avant d'installer/désinstaller le lecteur.
..y
22
Page 23

Préparatifs
4Windöwsr20Q0l
Vérifiez que [Mode de transfert] est réglé sur [DMA si disponible] dans [Démarrer] [Paramètres] - [Panneau de configuration] - [Système] - [Matériel] - [Gestionnaire de
périphériques] - [Contrôleurs AT A/AT API IDE] - [Canal IDE secondaire] - [Paramètres
avancés] - [Périphérique 0]. Exécutez ce réglage si ce n'est pas déjà fait.
iWindôwsrXRi
Vérifiez que [Mode de transfert] est réglé sur [DMA si disponible] dans [Démarrer] - [Panneau
de configuration] - [Performances et maintenance] - [Système] - [Matériel] - [Gestionnaire
de périphériques] - [Contrôleurs AT A/AT API IDE] - [Canal IDE secondaire] - [Paramètres
avancés] - [Périphérique 0]. Exécutez ce réglage si ce n'est pas déjà fait.
4WindQW^981
Confirmez la configuration suivante dans [Démarrer] - [Paramètres] - [Panneau de configu
ration] - [Système] - [Gestionnaire de périphériques] - [CDROM] - [MATSHITA DVDROM SR-****) - [Paramètres]. Effectuez les réglages si ce n’est pas déjà fait.
• Choisissez un canal de [DMA],
• Réglez sur [L:] la [Lettre de lecteur de début] et la [Lettre de lecteur de fin] dans [Lettres de
lecteur réservées].
Xremarque>
<Utilisation des cartes PC>
Si la carte PC ne fonctiorme pas, il se peut qu’il n'y ait pas d’IRQ (interrupt request)
disponible. Désactivez les composants non nécessaires en utilisant “Setup Utility”.
Pour lire un DVD-Vidéo ou des fichiers MPEG2, installez le logiciel de lecture de
DVD (fourni). Pour plus d'informations sur la manière d’installer le logiciel, reportezvous au manuel du logiciel.
Le code de zone a été fixé comme suit :
<Pour les Etats-Unis et le Canada> Le code de zone est “1”
<Pour l’Europe> Le code de zone est “2”.
L'utilisation d’un autre code de zone ou le changement du code de zone annule la
garantie. Pour plus d'informations, veuillez-vous adresser au Support technique
Panasonic.
Si les logiciels de lecteur DVD disponibles sur le marché vous demandent le code
région, veuillez suivre les indications suivantes :
<Pour les Etats-Unis et le Canada> Indiquez le code I.
<Pour l’Europe> Indiquez le code 2.
23
Page 24

utilisation du lecteur
Mise en place d’un disque
1 Allumez Tordinateur
2 Ouvrez le tiroir de disque
Appuyez sur le bouton d'éjection puis tirez lentement
le tiroir.
3 Insertion d’un disque
Placez le disque dans le lecteur avec l’étiquette sur
le dessus, puis enfoncez-Ie jusqu'à ce que le déclic
du support central se fasse entendre.
<Retrait d’un disque>
Posez un doigt sur le support central puis soulevez
le disque par les bords.
4 Fermez le tiroir de disque.
Fermez le tiroir sans toucher au bouton d’éjection.
Face de l’étiquette
vers le haut
XremarqÜe)-
Si le lecteur vibre de façon excessive, utilisez Setup Utility pour réduire la vitesse du
lecteur en la réglant sur [Low].
pMode d-économie d-énergie-]
S'il n’y a pas eu d'accès au lecteur de DVD-ROM pendant 90 secondes, le moteur du
lecteur sera automatiquement arrêté pour réduire la consommation d’énergie. Lorsque l'on
accède de nouveau au lecteur de DVD-ROM, l'alimentation du moteur du lecteur est rétablie.
Il faut toutefois environ 30 secondes pour que les données du disque soient effectivement
lues.
24
Page 25

utilisation du Lecteur en mode MS-DOS
Pour utiliser le lecteur en mode MS-DOS, effectuez la configuration du lecteur en effectuant
les opérations ci-dessous après avoir terminé les préparatifs page 23). Si vous effectuez
les opérations indiquées ci-dessous sans avoir tout d^abord terminé les préparatifs, le
lecteur ne fonctionnera pas correctement.
1 Cliquez sur la touche [Démarrer] puis sélectionnez [Arrêter].
2 Sélectionnez [Redémarrer en mode MS-DOS] puis cliquez sur [OK].
3 Ouvrez le fichier “CONFIG.SYS” pour l'éditer en effectuant les commandes qui suivent :
cd\f Entrée^
edit config.sys ( Entrée J
4 Déplacez le curseur jusqu’à la ligne qui contient “OAKCDROM.SYS” et effacez les lettres
“rem” au début de la ügne. (L’effacement de “rem” rend l’option valide.)
DEVICEHIGH=C:\WINDOWS\COMMAND\OAKCDROM.SYS /D:MSCDOOO
(Si cette ligne n'apparaît pas, ajoutez-la.)
5 Appuyez sur( Alt ) puis sur(^)pour enregistrer le fichier.
Appuyez ensuite sur ( Alt ) -i- , puis sur ( Q ) pour quitter le programme Éditeur.
6 Suivez les mêmes étapes pour éditer le fichier “AUTOEXEC.BAT”,
edit autoexec.bat ( Entrée )
7 Déplacez le curseur jusqu’à la ligne qui contient “MSCDEX.EXE” et effacez les lettres
“rem” au début de la ligne. (L'effacement de “rem” rend l’option valide.)
LOADHIGH C:\WINDOWS\COMMAND\MSCDEX.EXE /D:MSCDOOO /L;L
(Si cette ligne n’apparaît pas, ajoutez-la.)
Ô Appuyez sur ( Alt F ), puis sur( E ) pour enregistrer le fichier. Appuyez ensuite sur
CSD+CB puis sur C5) pour quitter le programme Éditeur.
3 Redémarrez l’ordinateur.
25
Page 26

Dépannage
L’ordinateur n'identifie pas
le lecteur
Le témoin d'accès
s’allume pas.
Impossible de lire le disque
ou d’accéder à ses données.
Le disque ne peut pas être
éjecté.
Un arrière-plan apparaît en
bleu sur l’écran avec l’image
MPEG.
Le tiroir de disque ne se
ferme pas.
AWinciôwsyXRil
L'accès au fichier n’est pas
possible sur le lecteur DVDROM.
ï) ne
• Vérifiez les réglages en suivant les instructions de la
section “Préparatifs”.
• Le lecteur est-il correct-ement monté dans le Multime
dia Pocket?
Le disque est-il inséré correctement dans le tiroir de disque?
Le disque est-il plié, égratigné ou sale?
L'ordinateur est-il allumé?
Pour retirer un disque lorsque l'ordinateur est éteint, insérez
un objet pointu tel que le bout d’un trombone dans l'orifice
d’urgence. En l’insérant complètement, vous dégagerez le
tiroir qui pourra alors être sorti complètement.
Orifice d’urgence
Avez-vous ouvert le lecteur ou retiré le disque pendant le
fonctionnement du lecteur?
Réinsérez le disque et fermez le lecteur. Appuyez sur
C Entrée ^.
Avez-vous touché le bouton d'éjection en fermant le tiroir
de disque?
Lorsque le lecteur DVD-ROM est remplacé après
l'installation du lecteur CD-R/RW dans le Multimedia
Pocket, les fichiers qui se trouvent dans les lecteurs sont
parfois inaccessibles.
Dans ce cas, suivez la procédure suivante pour exécuter
[Rechercher les modifications sur le matériel].
1 Sélectionnez [Gestionnaire de périphériques] dans [démarrer]
- [Panireau de configuration] - [Performances et maintenance]
- [Systènre] - [Matériel].
2 Sélectionnez le lecteur affiché dans [Lecteurs DVD/CD-
ROM] (par exemple, MATSHITA****) puis
sélectionnez [Action] - [Désinstaller] dans le menu et
sélectionnez [OK].
3 Sélectiormez [Action] - [Rechercher les modifications sur
le matériel] dans le menu. (L'apparition des problèmes
notés ci-dessus a été signalée par Microsoft Corp.)
26
Page 27

Spécifications
Article
Tension de fonctionnement
Lecteur
DVD-ROM
CD-ROM
Mémoire cache
Interface
Dimensions
(largeur x profondeur x hauteur)
Poids
Température en fonctionnement/
taux d’humidité
Capacité des données
Vitesse de transfert
des données*^
Temps d’accès
Supports
Capacité des données
Taux de transfert
des données*^
Temps d’accès
Supports
Description
CC 5 V ± 0,25 V
lecteur de DVD-ROM Sx (vitesse max.)
lecteur de CD-ROM 24x/20x*^ (vitesse max.)
4,7 Go(DVD-5), 8,5 Go(DVD-9), 9,4 Go(DVD-IO)
88,64 Mbit/s(10816 Ko/s) vitesse 8x (max.)
220 ms (vitesse Sx, DVD-9,1/3 de déplacemente*^)
DVD-5, DVD-9, DVD-10, DVD-R*^(3,95 Go,
4,7 Go), DVD-RAM*-**" (2,6 Go, 4,7 Go)
656 Mo
3600 Ko/s vitesse 24x (max.)
3000 Ko/s vitesse 20x (max.)*^
135 ms (vitesse 24x, 1/3 de déplacements*^)
138 ms (vitesse 20x, 1/3 de déplacements*^)*^
CD-Audio, CD-ROM, CD-R*^ Photo CD, CD
Vidéo, Enhanced Music CD, CD-RW*-*, CD-TEXT
256 Ko
Conforme au standard EIDE (ATARI)
132 mm X 147,1 mm x 15,3 mm
Environ 255 g
5 “C à 35 °C/30 % HR à 80 % HR
(sans condensation)
Lors de l’utilisation de la série CF-72N3****.
L’utilisation d’un disque déséquilibré (c’est-à-dire un disque sur lequel les données sont
excentrées) risque de ralentir la vitesse de transfert des données en cas de vibrations
innportantes pendant la rotation.
Déplacements : indique le mouvement nécessaire à la lentille du lecteur de DVD-ROM
pour lire les données.
Lecture uniquement.
Dans le cas d’un DVD-RAM, vous ne pouvez utiliser que des disques sans chargeur ou
des disques à chargeur amovible.
27
Page 28

©Matsushita Electric Industrial Co., Ltd. 2002
Printed in Japan
FJ0502-0
DFQX5324ZA
II
 Loading...