

Page 1

Panasonic
®
CD-R/RW Drive Pack
for CF-72
Personal Computer Series
CF-VCW721
ENGLISH
DEUTSCH
FRANÇAIS
OPERATING INSTRUCTIONS
Introduction
Usage Precautions...........................................
Software Preparation
Setting a Disc...................................................
Troubleshooting
Specifications...................................................
......................................................
.......................................
...............................................
...........
...........
...........
...........
.........
.........
10
11
BEDIENUNGSANLEITUNG
Einführung..................................................................12
Vorsichtsmaßnahmen zum Gebrauch
Installation der Software
Einlegen der Disc.......................................................16
Störungsbehebung
Technische Daten......................................................19
............................................
....................................................
......................
13
14
18
MODE D^EMPLOI
Introduction
Précautions d’utilisation...
Préparation du logiciel
Mise en place d’un disque
Dépannage
Spécifications
.............................
............
............................
.........................
4
5
6
8
20
21
22
24
26
27
Page 2
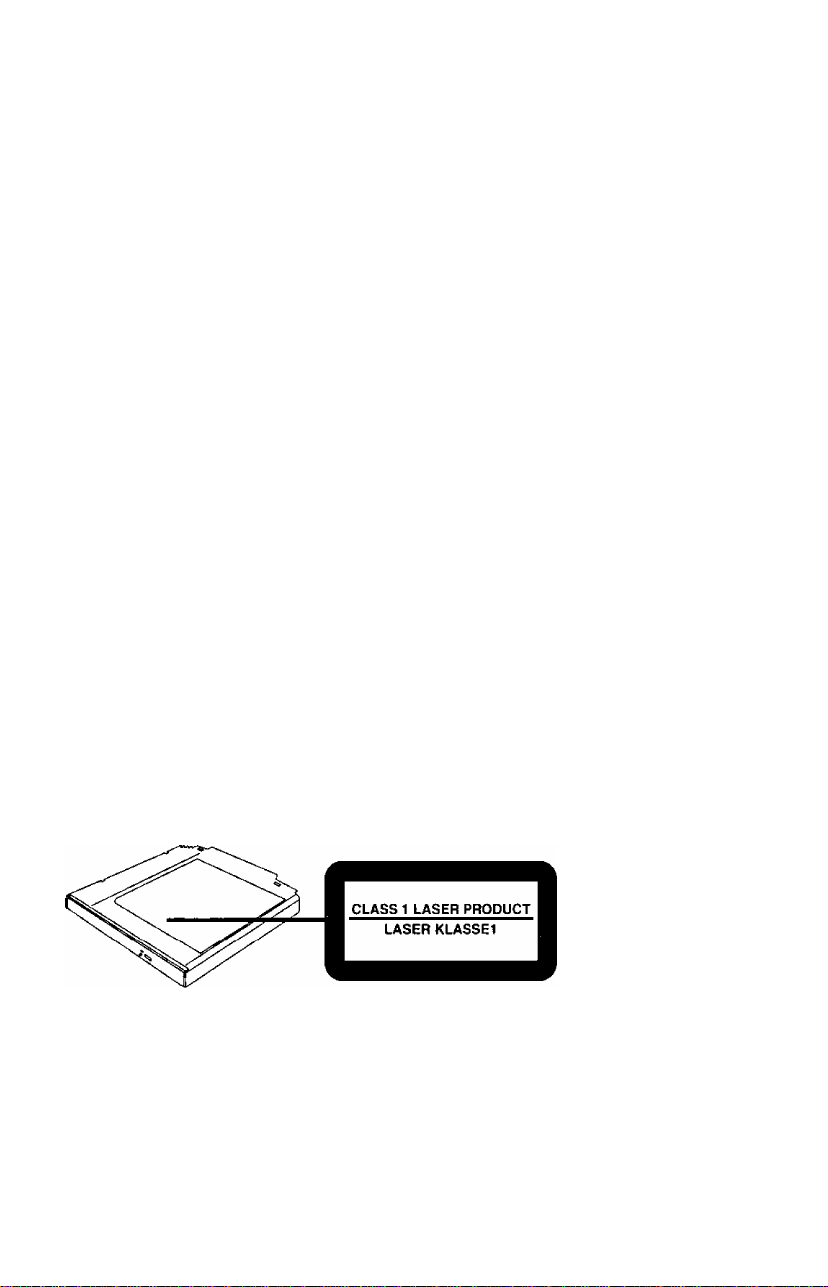
CAUTION!
THIS PRODUCT UTILIZES A LASER.
USE OF CONTROLS, ADJUSTMENTS OR PERFORMANCE OF PROCEDURES
OTHER THAN THOSE SPECIFIED HEREIN MAY RESULT IN HAZARDOUS RA
DIATION EXPOSURE.
DO NOT OPEN COVERS AND DO NOT REPAIR YOURSELF.
REFER SERVICING TO QUALIFIED PERSONNEL
WARNUNG!
DIESES PROUKT ERZEUGT LASERSTAHLUNG.
DURCHFÜHRUNG ANDERER VORGÄNGE ALS DER HIER ANGEGEBENEN KANN
ZU GEFÄHRLICHER STRAHLUNG FÜHREN.
REPARATUREN DÜRFEN NUR VON QUALIFIZIERTEM FACHPERSONAL
DURCHGEFÜHRT WERDEN.
AVERTISSEMENT!
CET APPAREIL UTILISE UN LASER.
L’UTILISATION DE COMMANDES OU DE RÉGLAGES OU L'EXÉCUTION DE
PROCÉDURES AUTRES QUE CELLES SPÉCIFIÉES ICI PEUVENT PROVOQUER UNE
EXPOSITION À DES RADIATIONS DANGEREUSES.
NE PAS OUVRIR LES COUVERCLES NI ESSAYER DE RÉPARER SOI-MÊME.
CONFIER TOUT TRAVAIL D’ENTRETIEN À UN PERSONNEL QUALIFIÉ.
VARNING
Om apparaten används pâ annat sait an i denna bruk.sanvisnig specificerats, kan anvandaren
utsättas for osyniig laserstraining, som overskrider gränsen for laserklass 1.
Page 3

For U.S.A.
Federal Communications Commission Radio Frequency Interference Statement
Note: This equipment has been tested and found to comply with the limits for a Class B
digital device, pursuant to Part 15 of the FCC Rules. These limits are designed to provide
reasonable protection against harmful interference in a residential installation. This equip
ment generates, uses and can radiate radio frequency energy and, if not installed and used in
accordance with the instructions, may cause harmful interference to radio communications.
However, there is no guarantee that interference wall not occur in a particular installation. If
this equipment does cause harmful interference to radio or television reception, which can
be determined by turning the equipment off and on, the user is encouraged to try to correct
the interference by one or more of the following measures;
• Reorient or relocate the receiving antenna.
• Increase the separation between the equipment and receiver.
• Connect the equipment into an outlet on a circuit different from that to which the receiver
is connected.
• Consult the Panasonic Service Center or an experienced radio/TV technician for help.
Warning
To assure continued compliance, use only shielded interface cables when connecting to a
computer or peripheral. Also, any changes or modifications not expressly approved by the
party responsible for compliance could void the user’s authority to operate this equipment.
This device complies with Part 15 of the FCC Rules. Operation is subject to the following
two conditions:
(1) This device may not cause harmful interference, and
(2) This device must accept any interference received, including interference that may cause
undesired operation.
Responsible Party;
Matsushita Electric Corporation of America
One Panasonic Way
Secaucus, NJ 07094
Tel No:l-800-LAPTOP-5 (1-800-527-8675)
For Canada
This Class B digital apparatus complies with Canadian ICES-003,
Cet appareil numérique de la classe B est conforme à la norme NMB-003 du Canada.
Page 4

Introduction
Thank you for purchasing the CD-R/RW Drive Pack for the Panasonic CF-72 notebook
computer series.
The CD-R/RW Drive Pack connects to the computer through the Multimedia Pocket.
Store this manual in a safe place after reading it.
—
CD-R/RW Drive Pack*
.....................
1
operating Instructions....................1
Easy CD Creator™ 4/DirectCD™ 3
CD-ROM
.....................................
Easy CD Creator™ 4/DirectCD™ 3
leaflet..........................................1
1
\
_________________________________
* The CD-R/RW Drive Pack may also be referred to as the CD-R/RW drive.
Refer to the section about the Multimedia Pocket in the Reference Manual included with
your computer on how to install/remove the CD-R/RW Drive Pack.
• Be sure to turn the computer off before installing/renioving the CD-R/RW Drive i
Pack. I
o Before using the CD-R/RW Drive Pack for the first time, remove the protective sheet ■
from the lens area.
v.._
[Illustration in this manual]
4Window§[98i
iWindowSINTM
4Windo^2000l
Microsoft®, MS-DOS® and Windows® are registered trademarks of Microsoft Corporation in the United
States and/or other countries.
Adaptec, the Adaptec logo. Easy CD Creator and DirectCD are trademarks of Adaptec, Inc. which
may be registered in some jurisdictions.
indicates Microsoft® Windows® 98 Operating System,
indicates Microsoft® Windows NT® Workstation Version 4.0.
indicates Microsoft® Windows® 2000 Professional Operating System.
)
Page 5
Usage Precautions
• Do not leave the tray in the open position or touch the lens area. Should the lens
become soiled by dust or dirt, the unit may not read discs properly.
• Do not apply excessive force to the tray in the open position, doing so could damage the
tray.
• Do not place items other than discs on the tray.
• Under some conditions, dust may build up on the optical lens or disc, possibly resulting in
malfunction.
• Do not expose the CD-R/RW drive to oily or tobacco smoke. Doing so could shorten the
service life of the lens.
• Do not use discs that have become deformed (warped, not completely round, etc.).
• Never insert foreign objects such as paper clips into the slot in the CD-R/RW drive.
• Do not open the CD-R/RW drive or move the computer while the CD-R/RW drive is
being accessed. Doing so eould cause it to malfunction. In addition, after running an
application involving access to a disc, do not open the CD-R/RW drive or remove the disc
until after the application has been closed.
• After closing the tray, do not attempt to access a disc until the MP indicator (@) goes off.
• Cleaning the CD-R/RW drive using a disc lens cleaner (except a liquid type cleaner) is
recommended if it malfunctions.
• When the CD-R/RW Drive Pack is installed, do not use an external CD-ROM drive or
DVD-ROM drive.
To avoid damaging discs:
• Do not allow discs to become dirty or scratched.
• Do not place or store discs in locations exposed to heat, direct sunlight, humidity or dust.
• If the disc is brought from a cold into a warm environment, moisture may form on the disc.
Wipe this moisture off with a soft, dry, lint-free cloth before using the disc.
• Do not touch the data surface (the side opposite the side with the title printed on it) as it can
cause the disc to become dirty or scratched.
• Do not write on the surface of the disc with a bail-point pen or other writing instrument.
• Do not drop, bend, or place heavy objects on top of discs.
• Cleaning the disc using a disc cleaner is recommended once every 2 or 3 months.
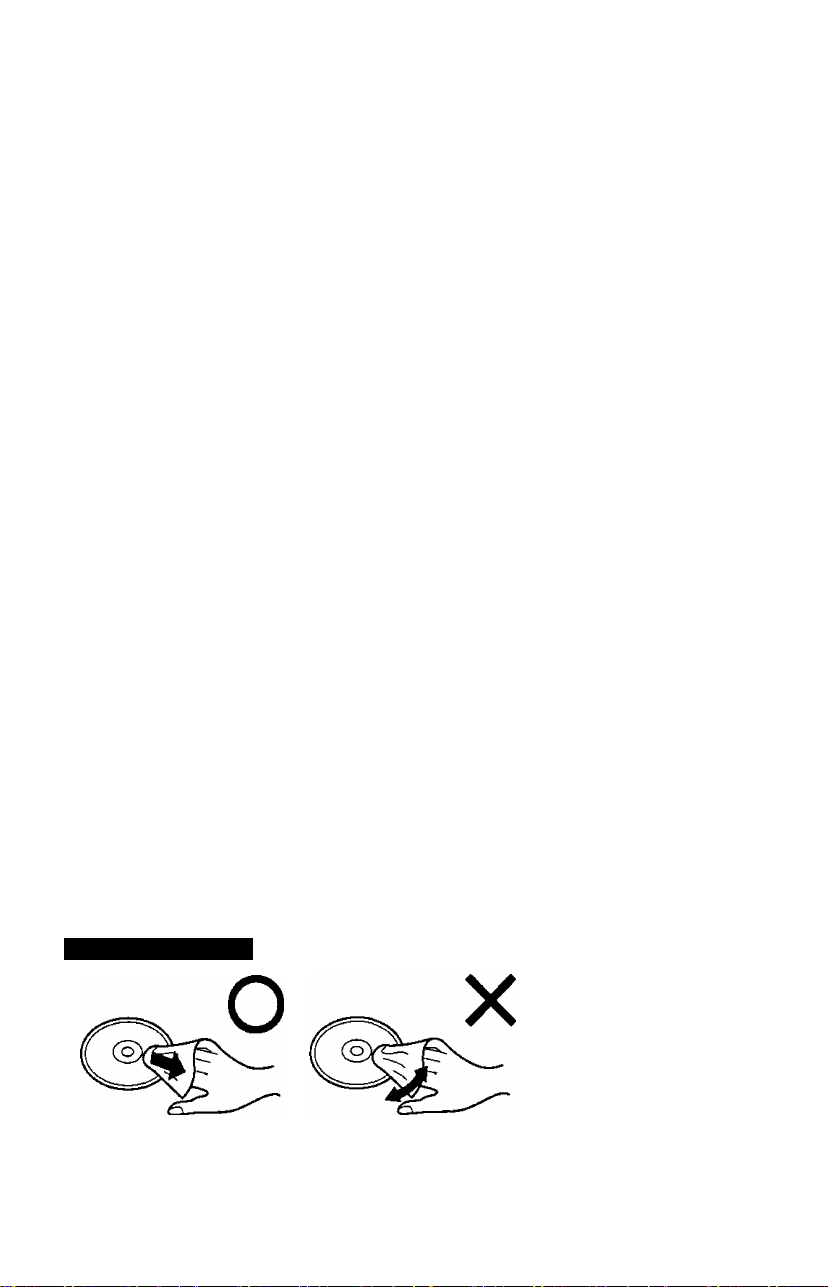
If the disc gets dirty
After wiping the disc with a moist, soft cloth, wipe it with a dry
cloth. Always wipe from the center toward the edge.
Page 6

Software Preparation (first time only)
CWjndo^SSI
Confirm the following contents in [Start] - [Settings] - [Control Panel] - [System] - [Device
Manager] - [CD-ROM] - [MATSHlTA UJDA'''^** ] - [properties]-[Settings] Make the
settings if they have not yet been made
© Add a check mark for [DMA]
• Set both [Start dnve letter] and [End dnve letter] in [Reserc'ed drive letters] to [L ]
Confirm that [Transfer Mode] is set to [DMA if available] in [Start] - [Settings] - [Control
Panel] - [System] - [Hardware] - [Device Manager] - [IDE ATA/ATAPl controllers] - [Sec
ondary IDE Channel] - [Advanced Settings] - [Device 0] Perform this setting if it has not
yet been made
Using the CD-R/RW Drive Pack in the MS-DOS Mode
iWJnao№98l
To use the CD-R/RW Dnve Pack m the MS-DOS mode* configure the dnve following the
steps below after performing the above preparations If the steps listed below are performed
without completing above preparations first, the drive will not operate properly.
* In the MS-DOS mode, onlj CD-ROM discs arc readable
1 Select [Start] then select [Shut Down)
2 Select [Restart in MS-DOS mode] then click [OK]
3 Open the ' CONFIG SYS” file for editing by issuing the following commands
cd \( Enter)
edit config sys (Enter)
4 Move the cursor to the line coniaming “OAKCDROM SYS” and delete the characters
“rem” at the beginning ot the line (Deleting “rem ' causes the item to become valid )
DEVICEHIGH=C \WINDOWS\COMMAND\OAKCDROM SYS /D MSCDOOO
(If this line IS missing, add it)
5 Press[ Alt) +Cf) , thenC S j to save the file Then press ( Alt) +CE), then (X) to
exit the Edit program
S Follow the same steps to edit the “AUTOEXEC BAT” file
edit autoexec bat i Enter )
7 Move the cursor to the line containing “MSCDEX EXE and delete the characters “rem '
at the beginning of the line (Deleting “rem ’ causes the item to become valid )
LOADHIGH C \WINDOWS\COMMAND\MSCDEX EXE/D MSCDOOO/L L
(If this line IS missing add it)
Page 7

Q Press CM)+(Z) , then QD to save the tile Then press (SD+CD , then cs to
exit the Edit program
Q Restart the computer
Writing to GD-R/RW Dises
Using the included CD-ROM “Easy CD Creator^f"’ 4/DirectCD™ 3“, install the application
software on your computer with the following procedure
iWindo.ws
If the product number of your computer is CF-72N3'*''^^'^^, be sure to carry out the toll ow
ing procedure before starting the installation of “Easy CD Creator'll T/DirectCDi^i^i 3'’
Confirm that the drive letter for the CD-R/RW Drive Pack is “L
Confirm the BaySwap version
(1) Right-chck the BaySwap icon on the taskbar, then select (Abouti
(2) Confirm that the version shown following “BaySwap fTM)“ is “1 1 2 8“, then
click [OK]
If the version is “I 1 2 8”, update BaySwap with the following steps
(I) Select [Start] - [Settings] - [Control Panel] - [Add/Remove Programs)
Select [Phoenix BaySwap] then select [Add/Remove]
(2)
At the [Confirm File Deletion] screen, select [Yes]
(3)
When the completion screen is displayed, select [OK]
(4)
At the confirmation scieen, select [OK]
(5)
Close the [Add/Remove Programs] screen and restart the computer
(6)
Set the Easy CD Creator™ 4/DirectCD’^’^* 3 CD-ROM m the CD-R/RW drive
il)
When the installation screen is displayed, click [X]
(8)
in [Start] - [Run] input ‘L \BaySwap\SETUP EXE“, then select [OK]
(9)
(10) in [Start] - [Run], input ‘C \UTIL\BAYSWAP2\SETUP EXE", then select [OK]
Follow the on-screen instructions
(II) When the setup process completes, remove the CD-ROM and restart the com
I
puter
1 Set the Easy CD Creator^''* 4 CD-ROM in the CD-R/RW drive
For more detailed information, refer to the “Easy CD Creator'^’^ 4/DirectCD^^ 3’
Page 8

Setting a Disc
7 Open the disc tray
Press the eject button and slowly pull out the tray
Label side up
2 Place a disc
Place the disc with the label facing upward in the
drive and push down until the center holder clicks
<Removing a diso
Place a finger on the center holder and lift up on the
edge of the disc
3 Close the disc tray
Close the tray without touching the eject button
• Do not apply excessive force to the tray in the open position, doing so could damage
the tray I
• <Using PC Cards> '
If the PC Card does not work, tliere may be no interrupt request (IRQ) line available j
Deactivate unnecessary equipment using m the Setup Utility J
/<note>
References to “CD" in the Setup Utility will not change when the CD-R/RW Drive
Pack IS installed
If the vibration of the CD-R/RW drive is excessively high, set [CD Drive Speed] m
the Setup Utility to [Low]
Page 9

Information for the-6D-R/RW Drive
Using the included CD-ROM "Easy CD Creator’’^^ 4/DirectCD'’^’ 3", install the application
software on your computer with the following procedure.
® If you are using CD-R or CD-RW discs, read the descriptions written on the packages of
the discs.
• CD-RW discs cannot be read with a drive* unable to accommodate CD-RW discs.
* Consult with the manufacturer of the drive.
<When writing to or writing over CD-R/RW discs>
® Using the included CD-ROM “Easy CD Creator'™4/DirectCD'^^^3”, install the applica
tion software on your computer. For information on how to install the software, refer to
the included “Easy CD Creator^^‘4/DirectCD''^3”.
• Be sure to use discs conforming to the proper write speeds.
CD-R write speed 300 KB/s (2x speed)
600 KB/s (4x speed)
1200 KB/s (8x speed)
CD-RW write speed 300 KB/s (2x speed)
600 KB/s (4x speed)
This CD-R/RW Drive Pack cannot write to High-Speed CD-RW discs.
If the write operation is to involve a long period of time, be sure to connect the AC
adaptor. If the battery power runs low and the power of the computer is cut, the write
operation may end in failure.
Depending on the disc, the quality of the write operation may not be so good. We recom
mend using any of the following discs.
Recommended Discs:
<CD-R>
• TAIYOYUDEN Co., Ltd.
o MITSUI CHEMICALS, Inc.
o RICOH Co., Ltd.
• MITSUBISHI CHEMICAL Co., Ltd.
• TDK Co., Ltd.
• HITACHI MAXELL, Ltd.
<CD-RW>
• RICOH Co., Ltd.
• MITSUBISHI CHEMICAL Co., Ltd.
Page 10

Troubleshooting
The computer does not recognize the
CD-R/RW Drive Pack
The MP indicator {^) does not light Is the disc loaded on the tray correctly'^
Cannot play disc or read data from it Is the disc bent, scratched, or dirty‘s
Cannot eject disc Is the computer powered on'^
A blue background appears on the screen
with the MPEG image
The disc tray does not close
The computer hangs or reboots is an external CD-ROM drive or DVD-
Check the settings by following the instruc
tions in “Software Preparation’
® Is the CD-R/RW Drive Pack properly
mounted in the multimedia pocket‘d
To remove a disc when the computer is pow
ered off, insert a sharp object such as the bentout tip of a paper clip into the emergency hole
Pushing It completely to the end will free the
tray so that it can be pulled out
Did you open the CD-R/RW dnve or remove
the MPEG disc while it was operating‘s
Re-insert the MPEG disc and close the CD-R/
RW dnve Press ( Enter)
Did you
the tray‘s
/e Kress r timer j
touch the eject button when you close
?
ROM dnve connected^
When the CD-R/RW Drive Pack is in
stalled, do not use an external CD-ROM
drive or DVD-ROM dnve
Was the computer turned otf before the installation/removal of the CD-R/RW Drive
Pack‘d
The computer needs to be off so that the
CD-R/RW Dnve Pack can properly mitial-
ize dunng Windows startup
10
• Has BaySwap been updated'^
Page 11

Specifications
Item Description
Operating voltage range
CD-ROM read
Data
transfer
rate
Supports CD-Audio, CD-ROM, CD-R, Photo CD, Video
Access Time 150 ms (24x Speed, 1/3 Stroke
Cache memory 2 MB
Interface Conforms to enhanced IDE (ATARI) standard
Dimensions (width x depth x height) 132 mm X 147 1 mm x 15 3 mm
Weight Approx 345 g {0 76 Ib }
Operating temperature /
Humidity range
*' [l an unbalanced disc (eg a disc wiih which the balance has been displaced from the center) is inserted the
speed mav become slower if there arc large vibrations while the disc is rotating
*' This CD*R/RW Drive Pack cannot write to High-Speed CD-RW discs
Stroke Indicates the amount ol movement the lens (pickup) of the CD-R/R W Drive Pack must make in order
CD-R write
CD-RW write
to read data
DC 5 V ± 0 25 V
3600 KB/s 24x speed (Max )*'
300 KB/s 2x speed
600 KB/s 4x speed
1200 KB/s 8x speed
300 KB/s 2x speed
600 KB/s 4x speed
CD, Enhanced Music CD, CD-RW=^^ CD-TEXT
{52"x58"x06"}
5 °C to 35 °C {41 °F to 95 °F} /30 % RH to
80 % RH (no condensation)
11
Page 12

Einführung
Wir freuen uns, daß Sie sich für den Kauf eines CD-R/RW-Laufwerk-Pack für Ihr
Panasonic-Notebook CF-72 entschieden haben.
Das CD-R/RW-Laufwerk-Pack wird über das Multimedia Pocket an den Computer
angeschlossen.
Sie sollten diese Bedienungsanleitung an einer sicheren Stelle verwahren.
Bedienungsanleitung...........1
CD-ROM “Easy CD Creator™ 4/
DirectCD™ 3”
Beilageblatt für “Easy CD Creator^“ 4/
DirectCD™ 3”
Das CD-R/RW-Laufwerk-Pack wird CD-R/RW-Laufwerk in diesem Buch abgekürzt gennanl, sowie
es keine Not gibt.
......................
......................
1
1
Einzelheiten zum Einsetzen und Entfernen des CD-R/RW-Laufwerk-Packs finden Sie im
Abschnitt über das Multimedia Pocket des Benutzerhandbuchs Ihres Computers.
-.....................................-........................................................................-.............................................................................................................^
. • Achten Sie darauf, den Computer auszuschalten, bevor Sie das CD-R/RW-Laufwerk- \
Pack installieren/entfernen. i
' • Entfernen Sie die Schutzhülle vom Linsenbereich, bevor Sie das CD-R/RW-Laufwerk- ;
^ Pack zum ersten Mal verwenden. ;
[Illustration im Manual]
tWindÖv^981
iWindowSINTA
tWinaôw5i20001
Microsoft®, MS-DOS® und Windows® sind eingetragene Warenzeichen von Microsoft Corporation in
den USA und/oder anderen Ländern.
Adaptec, das Adaptec-Logo, Easy CD Creator und DirectCD sind Warenzeichen von Adaptec
Inc., die in einigen Zuständigkeitsbereichen eingetragene Warenzeichen sein können.
steht für das Microsoft® Windows® 98 Betriebssystem,
steht für die Microsoft® Windows NT® Workstation Version 4.0,
steht für das Microsoft® Windows® 2000 Professional Betriebssystem.
12
Page 13

Vofsichtsmaßnahmein zym Gebraydn
o Legen Sie nur Discs in das CD-R/RW-Laufwerk ein.
o Lassen Sie das Fach nicht offen und berühren Sie die Abtastoptik nicht mit den
Fingern. Bei Verschmutzung der Optik können Lesefehler auftreten.
o Unter bestimmten Bedingungen kann sich Staub auf der Abtasterlinse oder Disc
ansammeln, wodurch Fehlfunktionen verursacht werden können,
o Achten Sie darauf, das geöffnete Fach nicht zu stark zu belasten, es könnte dabei beschädigt
werden.
o Während des Zugriffs auf das CD-R/RW-Laufwerk sollten Sie das Laufwerk keinesfalls
öffnen oder den Computer bewegen. Andernfalls können Fehlfunktionen auftreten.
Außerdem .sollte das CD-R/RW-Laufwerk nicht geöfffnet bzvv. die Disc entfernt werden,
solange eine Anwendung läuft, die darauf zugegriffen hat,
o Versuchen Sie nach dem Schließen des Disc-Fachs nicht, auf die Disc zuzugreifen, bis die
MP-Anzeige {(^) erloschen ist.
o Verwenden Sie das CD-R/RW-Laufwerk-Pack nicht in Räumen, in denen stärkere
Konzentrationen von Ölnebel oder Tabakrauch auftreten. Die Nutzungsdauer der Optik
könnte sonst verkürzt werden.
o Bei Funktionsstörungen empfehlen wir die Reinigung des CD-R/RW-Laufwerkes, wozu
ein CD-Linsenreiniger (außer Flüssigkeitsreiniger) zu verwenden ist.
o Führen Sie in das Gerät keine Fremdkörper wie z.B. Büroklammern ein.
o Verwenden Sie keine Discs, die deformiert sind (durchgebogen oder nicht völlig rund usw.).
o Verwenden Sie kein externen CD-ROM- oder DVD-ROM-Laufwerk, wenn das CD-R/
RW-Laufwerk-Pack installiert ist.
Beachten Sie zum Schutz der Discs die folgenden Punkte:
o Berühren Sie nicht die Datenfläche der Disc (d. h, die Seite, die der bedruckten Seite
gegenüberliegt), da die Disc dadurch verschmutzt oder zerkratzt werden könnte,
o Halten Sie Ihre Discs sauber und frei von Kratzern.
o Verwahren Sie Ihre Discs nicht an einem Ort, wo sie zu hohen Temperaturen, direkter
Sonneneinstrahlung, Feuchtigkeit oder Staub ausgesetzt sind,
o Die Oberfläche der Disc darf nicht beschriftet werden.
o Wenn Discs aus kalten in warme Räume gebracht werden, kann auf ihnen Feuchtigkeit
kondensieren. Diese muß mit einem weichen, nicht fusselnden Tuch entfernt werden,
bevor Sie die Disc in das Laufwerk einlegen können,
o Discs dürfen weder fallengelassen noch verbogen oder durch .schwere Gegenstände belastet
werden.
o Wir empfehlen, daß die Disc alle 2-3 Monate unter Verwendung eines CD-Reinigers
gereinigt wird.
Discs.reinigeh.
Reinigen Sie die disc mit einem weichen, feuchten Tuch, und wischen Sie mit einem
trockenen Tuch nach. Wischen Sie immer von der Mitte gerade nach außen.
richtig
falsch
13
Page 14

Dnstallation der Software (nur bei der Erstinstallation)
(WJndo^981
Überprüfen Sie den folgenden Inhalt in [Start] - [Einstellungenl - [Systemsteuerung] [System] - [Geräte-Manager] - [CD-ROM] - [MATSHITA UJDA****] - [Eigenschaften] -
[Einstellungen]. Nehmen Sie ggf. die folgenden Einstellungen vor:
® Markieren Sie das kontrollküstchen [DMA].
©Stellen Sie sowohl [Erster Buchstabe] und [Letzter Buchstabe] unter [Reservierte
Laufwerkbuchstaben] auf [L:] ein.
!lWJndQW»200.01
Vergewissern Sie sich, dass [Übertragungsmodusj unter [Start] - [Einstellungen] -
[Systemsteuerung] - [System] - [Hardware] - [Geräte-Manager] - [IDE ATA/ATAPl-Controller] - [Sekundärer IDE-Kanal] - [Erweiterte Einstellungen] - [Gerat 0] auf [DMA, wenn
verfügbar] eingestellt ist. Falls nicht, nehmen Sie diese Einstellung vor.
Einsatz des CD-R/RW-Laufwerk-Pack im WIS-DOS-Modus
(W.i пЭош9$
Wenn Sie das CD-R/RW-Laufwerk-Pack im MS-DOS-Modus* nutzen wollen, konfigurieren
Sie es anhand der nachstehenden Schritte, nachdem Sie die obigen Vorbereitungen ausgeführt
haben. Wenn die nachstehenden Schritte ausgeführt werden, bevor die obigen
Vorbereitungen abgeschlossen worden sind, arbeitet das Laufwerk nicht einwandfrei.
* Ini MS-DOS-Modus können nur CD-ROM-Discs gelesen werden.
1 Klicken Sie auf [Start] und dann auf [Beenden].
2 Wählen Sie [Im MS-DOS-Modus neu starten] und klicken Sie auf [ОК].
3 Öffnen Sie die Datei “CONFIG.SYS” durch die folgenden Befehle:
cd\ 1^
edit config.sys
4 Bringen Sie den Cursor in die Zeile, in der “OAKCDROM.SYS” steht, und löschen Sie
die Buchstaben “rem” am Anfang der Zeile (dadurch wird diese Befehlszeile wirksam).
DEV1CEH1GH=C:\W1NDOWS\COMMAND\OAKCDROM.SYS*/D:MSCDOOO
(Fügen Sie die Zeile ein, falls Sie in der Datei fehlt.)
5 Drücken CSD +CB und dann (S) , um die Datei zu sichern. Durch Drücken von
fÄID +CD und können Sie den Editor verlassen.
6 Die Datei “AUTOEXEC.BAT” editieren Sie auf dieselbe Weise,
edit autoexec.bat [i <—'!]
7 Bringen Sie den Cursor in die Zeile, in der “MSCDEX.EXE” steht, und löschen Sie die
Buchstaben “rem” am Anfang der Zeile (dadurch wird diese Befehlszeile wirksam).
LOADHIGH C:\W1NDOWS\COMMAND\MSCDEX.EXE/D:MSCDOOO/L:L
(Fügen Sie die Zeile ein, falls Sie in der Datei fehlt.)
8 Drücken ( Alt) + CD) und dann CE) , um die Datei zu sichern. Durch Drücken von
CSD +CE und CE können Sie den Editor verlassen.
9 Starten Sie den Computer neu.
14
Page 15

Beschreiben von CD-R/RW-Discs
Verwenden Sie die mitgelieferte CD-ROM "Easy CD Creator^'* 4/DirectCD'^‘ 3" und
installieren Sie die Anwendungssoftware unter Durehfuhrung des folgenden Verfahrens aut
Ihrem Computer
Falls die Produktnummer Ihres Computers CF-72N3****"'' ist fuhren Sie zuerst das
folgende Veifahien durch, bevor Sie mit der Installation von "Easy CD CieatoP^* 4/
DirectCD™ 3 ’ beginnen
1 Vergewissern Sie sich, dass der Laufwerk-Buchstabe für das CD-R/RW-Laufwerk-
Pack "L ’ ist
2 Uberpruten Sie die BaySwap-Version
(1) Klicken Sie mit der rechten Maustaste aut das BaySwap-Piktogramm im
Autgabenbalkcn, und wählen Sie dann [Into)
(2) Vergewissern Sie sich, dass die nach "BaySwap (TM) ’ angezeigte Version die
Nummer ‘I 12 8’ aufweist, und klicken Sie dann aut [OK)
3 Falls die Version die Nummer "112 8” aufweist, aktualisieren Sie BaySwap unter
Durchführung der folgenden Schritte
(1) Wahlen Sie [Start] - [Einstellungen] - [Systemsteuerung) - [Software]
(2) Wahlen Sie [Phoenix BaySwap] und dann )Hin/ufugen/Entteinen)
(3) Im Bildschirm [Confirm File Deletion] wählen Sie [Ja]
(4) Wenn der Abschluss-Bildschirm ange/eigt wird, wählen Sie [OK]
(5) Im Bestatigungsbildschirm wählen Sie ]OK]
(6) Schließen Sie den Bildschirm [Eigenschaften von Software] und fuhren Sie einen
Neustart des Computers durch
(7) Legen Sie die CD-ROM ‘Easy CD Creatoi™ 4/DiiectCDTM 3’ ,n das CD-R/
RW-Lautwerk ein
(8J Wenn der Installationsbildschirm angczeigt wird klicken Sie auf [X)
(9) In IStart] - [Ausfuhren] geben Sie "L \BaySwap\SETUP EXE" em und wählen
Sie dann ¡OK]
(lOj In [Start] - [Ausfuhren] geben Sie "C \UTIL\BAYSWAP2\SETUP EXE” ein
und wählen Sie dann [OK]
Befolgen Sie die auf dem Bildschirm angezeigten Anleitungen
(11) Wenn der Einrichtungsvorgang abgeschlossen ist, entfernen Sie die CD-ROM
und fuhren Sie einen Neustart des Computers durch
□
1
Legen Sie die CD-ROM ‘ Easy CD Creator'^’ 4 ’ in das CD-R/RW-Laufwerk ein
Für ausführlichere Informationen lesen Sie die Bedienungsanleitung der CD-ROM "Easy
CD Creator^M 4/DlrectCD■f^^ 3”
15
Page 16

Einlegen der Disc
1 öffnen Sie das Laufwerkfach
Drucken Sie die CD-R/RW-Auswurftaste und ziehen
Sie das Fach vorsichtig heraus
Etikettier Seite nach
oben
2 Einstecken einer Disc
Legen Sie die Disc inil dei Beschriitung nach üben
in das Laufwerk ein Drucken Sie die Disc nach
unten, bis sie in den Zentriemng einrastet
<Auswerfen einer Diso
Legen Sie einen Finger auf den Zentrierring und
ziehen Sie die Disc nach oben, indem Sie sie am
Rand halten
3 Schließen Sie das Fach
Achten Sie darauf, daß Ihre Hand die CD-R/RWAuswurftaste nicht berühret
• Achten Sie darauf das geöffnete Fach nicht zu stark zu belasten es konnte dabei
beschädigt werden
9 <Verwendung der PC Cards>
Wenn die Karte nicht lunktioniert steht möglicherweise keine Unterbrechungsanforderungsleitung zur Veifugung Deaktivieren Sie unnötige Gerate wenn Sie
Setup-Dienstprogramm verwenden
CD-R/RW
Auswurftaste
Zentriemng
^Hinweis)-
O Die Anzeige ' CD ' im Setup-Dienstprogramm wird nicht auf “CD-R/RW* geändert,
wenn das CD-R/RW-Laufwerk-Pack installiert wird
9 Wenn das CD-R/RW-Laufwerk zu stark vibriert, vemngem Sie die Laufwerkdrehzahl,
stellen Sie [CD Drive Speed) in * Setup Utility ’ auf (Low)
16
Page 17

Informationen zum CD-R/RW-Laufwerk
Verwenden Sie die mitgelieferte CD-ROM “Easy CD Creator’’^^' 4/DirectCD*^^ 3” und
installieren Sie die Anwendungssoftware unter Durchführung des folgenden Verfahrens
auf Ihrem Computei
O Falls Sie CD-R- oder CD-RW-Discs verwenden, lesen Sie bitte die Anleitungen auf den
Verpackungen der Discs
® CD-RW-Discs können nicht von einem Laufwerk* gelesen werden, das nicht für die
Verwendung von CD-RW-Discs ausgelegt ist
* Wenden Sie sich an den Laufwerk-Hersteller
<Beim Schreiben oder Uberschreiben von CD-R/CD-RW-Discs>
9 Verwenden Sie die mitgelieferte CD-ROM “Easy CD Creator™ 4/DirectCD^^ 3" und
installieren Sie die Anwendungssoftware auf Ihrem Computer Informationen /ur In
stallation dei Software finden Sie m der Bedienungsanleitung der CD-ROM “Easy CD
Creator'^* 4/DirectCD^^ 3”
• Verwenden Sie nur Discs, die die folgenden geeigneten Schreibgeschwindigkeiten
aufweisen
CD-R-Schreibgeschwindigkeit
CD-RW-Schreibgeschwindigkeit 300 KB/s (2x Geschwindigkeit)
Dieses CD-R/RW-Laufwerk-Pack kann nicht auf CD-RW-Hochgeschwindigkeitsdiscs
schreiben
® Falls der Schreibvorgang eine lange Zeit in Anspruch nehmen soll, schließen Sie immer
den Net/adapter an Falls sich die Batterie erschöpft und die Stromversorgung des
Computers deshalb ausfallt, kann es zu einem Ausfall beim Schreibvorgang kommen
• Je nach der verwendeten Disc kann die Qualität des Schreibvorgangs unzureichend sein
Daher empfehlen wir die Verwendung der folgenden Discs
Recommended Discs
300 KB/s (2x Geschwindigkeit)
600 KB/s (4x Geschwindigkett)
1200 KB/s (8x Geschwindigkeit)
600 KB/s (4x Geschwindigkeit)
Q
<CD-R>
• TAIYOYUDEN Co . Ltd
• MITSUI CHEMICALS, Inc
• RICOH Co . Ltd
• MITSUBISHI CHEMICAL Co , Ltd
• TDK Co, Ltd
• HITACHI MAXELL, Ltd
<CD-RW>
• RICOH Co Ltd
• MITSUBISHI CHEMICAL Co , Ltd
17
Page 18

Störungsbehebung
Der Computer erkennt das
CD-R/RW-Laufwerk
Pack nicht
Die MP-Anzeige {®)
leuchtet nicht
Die CD-R/RW kann nicht
gelesen werden
Die CD-R/RW wird nicht
ausgeworfen
O Überprüfen Sie die Einstellungen anhand der
Anweisungen im Abschnitt ‘ Installation der Software
• Ist das CD-R/RW-Laufwerk-Pack richtig in das Multi
media-Pocket eingesetzt“^
Wurde das CD-R/RW korrekt in die Lade gelegt“^
Ist die CD-R/RW verbogen, zerkratzt oder schmutzig“^
Ist der Computer eingeschaltet*^
Um die Disc bei ausgeschaltetein Computer zu entfernen,
müssen Sie einen spitzen Gegenstand (aufgebogene
Büroklammer o a ) in das Loch der manuellen
Auswurfvornchtung schieben
Gegenstand so weit wie möglich einfuhren (bis zum
Anschlag) Dadurch wird die Lade entriegelt und kann
herausge/ogen werden
Loch der manuellen Auswurfvornchtung
Eine blaue Darstellung
mit den MPEG-Daten
13
taucht plötzlich auf
Das Fach schließt nicht Hat Ihre Hand die CD-R/RW-Auiwurftaste nicht berührt als
Der Computer hangt oder
bootet neu
Haben Sie die Disc mit den MPEG-Daten aus dem CD-R/
RW-Laufwerk herausgenommen“^
Legen Sie die Disc wieder ein und drucken Sie
Sie das Fach geschlossen haben
1st ein externes CD-ROM- oder DVD-ROM-Laufwerk
angeschlossen
Verwenden Sie kein externen CD-ROM- oder DVD-
ROM-Laufwerk, wenn das CD-R/RW-Laufwerk-Pack
installiert ist
Wurde der Computer vor dem Installations-/
Entfernungsvorgangs des CD-R/RW-Laufwerk-Packs
ausgeschaltet ^
Der Computer muss ausgeschaltet sein, damit das CD-R/
RW-Laufwerk-Pack wahrend des Hochfahrens von Win
dows richtig initialisiert werden kann
Stellen Sie [CD Dnve Speed] in “Setup Utility“ auf [Low]
iWindö^SlBl
• Wurde BaySwap aktualisiert“^
[I *—'IJ
18
Page 19

Technische Daten
Gegenstand
Betriebsspannung
CD-ROM lesen
CD-R schreiben
Daten tra ns rate
CD-RW schreiben
Unterstut7te Formate
Zugnffts/eit
Cache-Speicher
Schnittstelle
Abmessungen (Breite x. Tiefe x Hohe)
Gewicht
Zulässige Umgebungsbedingungen
Temperatur / Luftfeuchtigkeit
*' Falls eine Form-Disc oder eine Disc mit großer Uimueht (Schwerpunkt der Disc liegt außerhalb der Mittel
eingelegt wird die bei der Rotation stark vibriert kann die Geschwindigkeit geringer sein
Dieses CD-R/RW-Lautwerk-Pack kann nicht aut CD-RW-Hochgeschwmdigkeitsdiscs schreiben
Hub Weg der Abtastoptik iin CD-R/RW-Laufwerk bis zur Lcseposition
DC 5 V ± 0 25 V
3600 KB/s 24x mal (Max )*'
300 KB/s 2x mal
600 KB/s 4x mal
1200 KB/s 8x mal
300 KB/s 2x mal
600 KB/s 4x mal
CD-Auclio, CD-ROM. CD-R, Photo CD, Video
CD, Enhanced Music CD, CD-RW^\ CD-TEXT
150 ms (24 mal max, 1/3 Hub*^)
2 MB
Entspricht der Norm für IDE-Erweiterungen
(ATARI)
132 mm X 147,1 mm x 15,3 mm
Ca 345 g
5 °C bis 35 °C 1 30 % RH bis 80 % RH
(ohne Kondensation)
Beschreibung
19
Page 20

Introduction
Merci d’avoir choisi le Lecteur CD-R/RW pour l’ordinateur portable Panasonic CF-72.
Le lecteur CD-R/RW se connecte à l’ordinateur par l’intermédiaire du Multimedia Pocket.
Conservez précieusement ce manuel après l’avoir lu.
Mode d’emploi
..............................
1
CD-ROM “Easy CD Creator™ 4/
DirectCD™ 3”..........................1
Brochure Easy CD Creator™ 4/
DirectCD™ 3..................................1
* Lecteur CD-R/RW peut également être parfois appelé lecteur de CD-R/RW.
Vous pouvez également vous référer à la section sur le Multimedia Pocket dans le Manuel
de Référence fourni avec votre ordinateur pour installer/désinstaller le lecteur CD-R/RW.
ATiTiENiTilON
Arrêtez toujours l’ordinateur avant d’installer/désinstaller le lecteur CD-R/RW. |
Avant d’utiliser le lecteur CD-R/RW pour la première fois, retirez la feuille de protection de la lentille. ^
V..
[Illu.strations de ce manuel]
€WtnciÔ^98i
tWinîiôÿîülNTâ
.4Wina5w§i2000j)
5
représente le système d’exploitation Microsoft® Windows® 98.
représente le système d'exploitation Microsoft® Windows NT* Workstation Ver
sion 4,0.
représente le système d'exploitation Microsoft® Windows® 2000 Professional.
j
Microsoft®, MS-DOS® et Windows® sont des marques déposées de Micro.soft Corporation aux ÉtatsUnis et/ou dans d’autres pays.
Adaptec, le logo Adaptec, Easy CD Creator et DirectCD sont des marques commerciales de
Adaptec, In c . qui peuvent être déposées dans certaines juridictions.
20
Page 21

Précautions d’utilisation
O Ne placez pas d'objets autres que des disques dans le tiroir
O Ne laissez pas le tiroir ouvert et ne touchez pas la zone de la lentille. Si la lentille est
maculée de poussière ou de saletés, l’appareil ne pourra pas lire les disques correctement
O Dans certaines conditions, de la poussière peut s’accumuler sur la lentille ou sur le disque
et éventuellement entraîner un mauvais fonctionnement
O N’appliquez pas de force excessive sur le tiroir lorsqu’il est ouvert, cela pourrait
l’endommager
O N'ouvrez pas le lecteur de CD-R/RW et ne déplace/ pas l’ordinateur pendant l’accès au
lecteur de CD-R/RW, cela pourrait entraîner un mauvais fonctionnement De plus, après
avoir fait fonctionner une application qui requiert un accès au disque, n’ouvrez le lecteur
de CD-R/RW et ne retirez le disque qu’une fois l'application fermée
O Après avoir fermé le tiroir, n’essayez pas d'accéder à un disque avant que le témoin MP
éteigne
O N exposez pas le lecteur de CD-R/RW à la fumée dégagée par de l’huile ou par du tabac
Cela pourrait réduire la durée de vie de la lentille
O En cas de mauvais fonctionnement, le nettoyage du lecteur de CD-R/RW à l’aide d’un
nettoyant pour lentilles (à l’exception des nettoyants de type liquide) est recommandé
e N’insérez jamais de corps étrangers tels que des trombones dans le lecteur de CD-R/RW
e N’utilisez pas de disques déformés ou endommagés
O Lorsque le lecteur CD-R/RW est installé, n’utilisez pas de lecteur CD-ROM ou de lecteur
DVD-ROM externe
Afin d’éviter d’endommager les disques:
e Ne touchez pas la surface des données (le côté opposé à celui où le titre est imprimé) car
cela peut salir ou rayer le disque
O Faites en sorte que les disques demeurent propres et sans égratignure
• Ne posez pas et ne rangez pas les disques dans un endroit exposé à la chaleur, à la
lumière directe du soleil, à l’humidité ou a la poussière
• N’écnvez pas sur l'étiquette du disque avec un stylo à bille ou tout autre crayon à peinte dur
• Si le disque est déplacé d’un endroit froid à un endroit plus chaud, de l’humidité risque de
se déposer sur le disque
Essuyez l’humidité avec un chiffon doux, sec et sans peluches avant d’utiliser le disque
• Prenez garde de ne pas tomber ou plier les disques, et de ne pas placer d’objet lourd sur
les disques
• Le nettoyage du disque à l’aide d’un nettoyant pour CD est recommandé à intervalles de
2 ou 3 mois
Si le disque est sale
Après avoir nettoyé le disque avec un chiffon doux et humide, essuyez-le avec un
chiffon sec Essuyez-le toujours du centre vers l’extérieur
21
Page 22

Préparation du logiciel (untquemem pour la première utilisation)
tÎÎiïïQôwSKSI
Confinnez la configuration suivante dans IDémarrer] - [Paramètres] - [Panneau de configu
ration] - [Système] - [Gestionnaire de périphériques] - [CD-ROM] - [MATSHITA
UJDA****] - [Propiétés] - (Paramètres] Effectuez les réglages si ce n’est pas déjà fait
O Choisissez un canal de [DMA]
• Réglez sur [L ] la [Lettre de lecteur de début] et la [Lettre de lecteur de fin] dans [Lettres
de lecteur réservées]
|VVJr^GW^2l)lQ.0l
Vérifiez que [Mode de transfert] est réglé sur [DMA si disponible] dans [Démarrer] [Paramètres] - [Panneau de configuration] - [Système] - [Matériel] - [Gestionnaire de
périphériques] - [Contrôleurs ATA/ATAPl IDE) - [Canal IDE secondaire] - [Paramètres
avancés] - [Périphérique 0] Exécutez ce réglage si ce n’est pas déjà fait
Utilisation du Lecteur CD-R/RW en mode MS-DOS
Pour utiliser le lecteur de CD-R/RW en mode MS-DOS*, effectuez la configuration du
lecteur en suivant les étapes ci-dessous après avoir complété les préparatifs ci-dessus Si les
étapes ci-dessous sont suivies sans avoir d'abord complété les préparatifs ci-dessus, le
lecteur ne fonctionnera pas correctement.
♦En mode MS-DOS, seuls des disques CD-ROM sont lisibles
1 Cliquez sur la touche [Démarrer] puis sélectionnez [Arrêter]
2 Sélectionnez [Redémarrer en mode MS-DOS] puis cliquez sur [OK]
3 Ouvrez le fichier “CONFIG SYS” pour l’éditer en effectuant les commandes qui suivent
cd \( Entrée )
edit config sys Î Entrée )
4 Déplacez le curseur |usqu’a la ligne qui contient ‘OAKCDROM SYS” et effacez les
lettres “rem” au début de la ligne (L’efiacement de “rem” rend l’option valide )
DEVICEHIGH=C \WlNDOWS\COMMAND\OAKCDROM SYS* /D MSCDOOÜ
(Si cette ligne n’apparaît pas ajoutez-la )
5 Appuyez sur ÎAiD+fF) , puis sur CD pour enregistrer le fichier
Appuyez ensuite sur( Alt ] -t-CF"), puis sur( Q )pour quitter le programme Éditeur
6 Suivez les mêmes étapes pour éditer le fichier ‘ AUTOEXEC BAT
edit autoexec bat ( Entrée )
7 Déplacez le curseur jusqu’à la ligne qui contient “MSCDEX EXE” et effacez les lettres
“rem’ au début de la ligne (L’effacement de “rem ’ rend F option valide ]
LOADHIGH C \WINDOWS\COMMAND\MSCDEX EXE/D MSCDOOO/L L
(Si cette ligne n’apparaît pas, ajoutez-la )
8 Appuyez sur ( Alt ]-f-fF). puis surC~Ë~) pour enregistrer le fichier Appuyez ensuite sur
eSD +CD puis sur CS) pour quitter le programme Éditeur
9 Redémarrez l’ordinateur
22
Page 23

Ecriture sur des disques CD-R/RW
Utilisez le CD-ROM * Easy CD Creator^^* 4/DirectCD'^'* 3” fourni pour installer le logiciel
d’application sur votre ordinateur en procédant comme suit
^(¿5FûaMlSRl) -
tW.indo.ws.
Si le numéro de produit de votre ordinateur est CF-72N3exécutez toujours la
procédure suivante avant de commencer l'installation de ‘ Easy CD Creator’’^* 4/
; DirectCD>'^3’
I 1 Vérifiez que la lettre de lecteur pour le lecteur CD-R/RW est “L ’
I 2 Vérifiez la version BaySwap
I (1) Faites un clic droit sur l'icône BaySwap ^ sur la barre de tâches puis
j sélectionnez [A propos de]
(2) Vérifiez que la version indiquée après "BaySwap (TM)’ est 1 1 2 S" puis cliquez
sur [OKJ
1 3 Si la version est "1 12 8 mettez BaySwap à jour en effectuant les opérations
I suivantes
(I) Sélectionnez [Démairer]- [Paramètres] - [Panneau de configuration] - (Ajout/
i
' (2j Sélectionnez [Phoenix BaySwap] puis sélectionnez [Ajout/Soppression]
J (3) Sur l’écran [Confirmer de suppression des fichier] sélectionnez [Oui]
I (5) Sur l’écran de confirmation, sélectionnez [OK]
1 (8) Lorsque l’écran d’installation est affiché, cliquez sur [X] '
'
'
nO) Dans [Démarrer] - [Exécuter], tapez "C \UT1L\BAYSWAP2\SETUP EXE", puis
Suppression de programmes]
(4) Lorsque l’écran de fermeture est affiché, sélectionnez [OK|
(6) Fermez l’écran [Ajout/Soppression de programmes] et redémarrez ! ordinateur
(7) Placez le CD-ROM Easy CD Creator^^’ 4/DirectCD^'^ 3 dans le lecteur de CD-
R/RW
(9) Dans [Démarrer] - [Exécuter], tapez "L \BaySwap\SETUP EXE', puis |
sélectionnez [OK]
sélectionnez [OK]
Suivez les instructions qui apparaissent sur l'écran |
(II) Lorsque le processus d installation est tei miné, retirez le CD-ROM et redémarrez j
l'ordinateur ^
.....
^
j
j
j
7 Placez le CD-ROM Easy CD Creator'^* 4 dans le lecteur de CD-R/RW
Pour des informations plus détaillées, reportez-vous à la brochure "Easy CD Creator4/
DirectCD™ 3"
23
Page 24

Mise en place d’un disque
7 Ouvrez le tiroir de disque
Appuyez sur le bouton d’éjection puis tirez lentement
le tiroir.
Face de l’étiquette
vers le haut
2 Insertion d’un disque
Placez le disque dans le lecteur avec l’étiquette sur
le dessus, puis enfoncez-le jusqu’à ce que le déclic
du support central se fasse entendre.
<Retrait d’un disque>
Posez un doigt sur le support central puis soulevez
le disque par les bords.
Support
3 Fermez le tiroir de disque. Bouton
Fermez le tiroir sans toucher au bouton d’éjection, d’éjection
--------------------------------------------------------------------------
> • N’exercez pas une force excessive sur le tiroir lorsqu’il est ouvert, cela pourrait
j
l’endommager.
I • <UtUisation des cartes PC>
j
Si la carte PC ne fonctionne pas, il se peut qu’il n’y ait pas d’IRQ (interrupt request)
j
disponible. Désactivez les composants non nécessaires en utilisant “Setup Utility’’.
central
^remarque)-
© Les références au “CD” dans Setup Utility ne varient pas lorsque le lecteur de CD-R/
RW est installé.
• Si le lecteur de CD-R/RW vibre de façon excessive, réglez [CD Drive Speed] dans
“Setup Utility” sur [Low].
24
* •
Page 25

Informations concernant le lecteur CD-R/RW
Utilisez le CD-ROM “Easy CD Creator^^* 4/DirectCD^^' 3” fourni pour installer le logiciel
d’application sur votre ordinateur en procédant comme suit.
• Si vous utilisez des disques CD-R ou CD-RW, lisez les descriptions qui se trouvent sur
les emballages des disques.
• Les disques CD-RW ne peuvent pas être lus avec un lecteur* incapable d’accepter des
disques CD-RW.
• Consultez le fabricant du lecteur.
<Pour écrire ou réécrire sur des disques CD-R/RW>
• Utilisez le CD-ROM “Easy CD Creator™ 4/DirectCDT^^ 3” fourni pour installer le logiciel
d’application sur votre ordinateur. Pour plus d’informations sur la manière d’installer le
logiciel, reportez à la brochure “Easy CD Creator"*^^ 4/DirectCD™ 3” fournie.
• Veillez à utiliser des disques conformes aux vitesses d’écriture correctes.
Vitesse d’écriture
Vitesse d’écriture CD-RW 300 KB/s (vitesse 2x)
Ce lecteur CD-R/RW ne peut pas écrire sur des disques CD-RW haute vitesse.
Si l’opération d’écriture doit prendre longtemps, branchez toujours l’adaptateur CA. Si
la charge de la batterie baisse et que l’alimentation de l’ordinateur est coupée, l’opération
d’écriture peut se terminer par un échec.
Selon le disque, la qualité de l’opération d’écriture peut ne pas être très bonne. Nous
recommandons d’utiliser les types de disques suivants.
300 KB/s (vitesse 2x)
600 KB/s (vitesse 4x)
1200 KB/s (vitesse 8x)
600 KB/s (vitesse 4x)
Disques recommandés :
<CD-R>
• TAIYOYUDEN Co., Ltd.
• MITSUI CHEMICALS, Inc.
• RICOH Co., Ltd.
• MITSUBISHI CHEMICAL Co., Ltd.
e TDK Co., Ltd.
• HITACHI MAXELL, Ltd.
<CD-RW>
• RICOH Co., Ltd.
• MITSUBISHI CHEMICAL Co., Ltd.
25
Page 26

Dépannage
L’ordinateur n’identifie
pas le lecteur de CD-R/
RW.
Le témoin d’accès (@)ne
s’allume pas.
Impossible de lire le
disque ou d’accéder à ses
données.
Le disque ne peut pas être
éjecté.
Un arrière-plan apparaît
en bleu sur l’écran avec
l’image MPEG.
Le tiroir de disque ne se
ferme pas.
L’ordinateur se bloque ou
se réinitialise.
Vérifiez les réglages en suivant les instructions de la sec
tion “Préparation du logiciel”.
Le lecteur de CD-R/RW est-il correct-ement monté dans
le Multimedia Pocket?
Le disque est-il inséré correctement dans le tiroir de disque?
Le disque est-il plié, égratigné ou sale?
L’ordinateur est-il allumé?
Pour retirer un disque lorsque l’ordinateur est éteint, insérez
un objet pointu tel que le bout d’un trombone dans l’orifice
d’urgence. En l’insérant complètement, vous dégagerez le
tiroir qui pourra alors être sorti complètement.
Avez-vous ouvert le lecteur de CD-R/RW ou retiré le disque
MPEG pendant le fonctionnement du lecteur?
Réinsérez le disque MPEG et fermez le lecteur CD-R/RW.
Appuyez sur C Entrée ).
Avez-vous touché le bouton d’éjection en fermant le tiroir
de disque?
Un lecteur CD-ROM ou DVD-ROM externe est-il
raccordé ?
Lorsque le lecteur CD-R/RW est installé, n’utilisez pas
de lecteur CD-ROM ou de lecteur DVD-ROM externe.
L’ordinateur était-il arrêté avant l’installation/
désinstallation du lecteur CD-R/RW ?
L’ordinateur doit être arrêté de .sorte que le lecteur CD-R/
RW puisse s’initialiser correctement pendant le démarrage
de Windows.
Réglez [CD Drive Speed] dans “Setup Utility” sur [Low],
iWirîîlwsîÎSl
BaySwap a été mis à jour ?
26
Page 27

Spécifications
Article
Tension de fonctionnement
Lecteur CD-ROM
Vitesse de
transfert des
données
Supports
Temps d’accès
Mémoire cache
Interface
Dimensions (laideur x profondeur x hauteur)
Poids
Température en fonctionnement/
taux d’humidité
*' L’utilisation d'un disque déséquilibré (c’est-à-dire un disque sur lequel les données sont excentrées) risque
de ralentir la vitesse de transfert des données en cas de vibrations importantes pendant la rotation.
Ce lecteur CD-R/RW ne peut pas écrire sur des disques CD-RW haute vitesse,
*■’ Déplacements ; indique le mouvement nécessaire à la lentille du lecteur de CD-R/RW pour lire les données.
Ecriture CD-R
Ecriture CD-RW 300 KB/s 2x vitesse
CC 5 V ± 0,25 V
3600 KB/s 24x vitesse (Max.)*'
300 KB/s 2x vitesse
600 KB/s 4x vitesse
1200 KB/s Sx vitesse
600 KB/s 4x vitesse
CD-Audio, CD-ROM, CD-R, Photo CD, CD
Vidéo, Enhanced Music CD, CD-RW*^ CD-TEXT
150 ms (vitesse 24x, 1/3 de déplacements*^)
2 Mo
Conforme au standard EIDE (ATAPI)
132 mm x 147,1 mm x 15,3 mm
Environ 345 g
5 °C à 35 “C / 30 % HR à 80 % HR
(sans condensation)
Description
27
Page 28

©Matsushita Electric Industrial Co , Ltd 2001
Printed in Japan
FJ0401-0
DFQX52602A
 Loading...