

Page 1
®
CD-R/RW Drive Pack
Printed in Japan
ENGLISH
DEUTSCH
CD-R/RW
ドライブパックドライブパック
ドライブパック
ドライブパックドライブパック
CF-VCW283
FJ0403-0
DFQX5392ZA
OPERATING INSTRUCTIONS
Introduction........................................................... 4
Usage Precautions ............................................... 5
Using the Drive ..................................................... 6
Troubleshooting ................................................. 10
Specifications ..................................................... 11
BEDIENUNGSANLEITUNG
Einführung........................................................... 12
Vorsichtsmaßnahmen zum Gebrauch .............. 13
Gebrauch des Laufwerks ................................... 14
Störungsbehebung ............................................. 18
Technische Daten ............................................... 19
E
D
FRANÇAIS
日本語日本語
日本語
日本語日本語
保証書付き (日本国内向け)
・ この取扱説明書と保証書をよくお
読みのうえ、正しくお使いくださ
い。そのあと保存し、必要なとき
にお読みください。
・ 保証書は「お買い上げ日・販売店
名」などの記入を必ず確かめ、販
売店からお受け取りください。
MODE D’EMPLOI
Introduction......................................................... 20
Précautions d’utilisation .................................... 21
Utilisation du lecteur .......................................... 22
Dépannage .......................................................... 26
Spécifications ..................................................... 27
取扱説明書取扱説明書
取扱説明書
取扱説明書取扱説明書
はじめにはじめに
はじめに
はじめにはじめに
安全上のご注意安全上のご注意
安全上のご注意
安全上のご注意安全上のご注意
使用上のお願い使用上のお願い
使用上のお願い
使用上のお願い使用上のお願い
ドライブを使うドライブを使う
ドライブを使う
ドライブを使うドライブを使う
困ったときの困ったときの
困ったときの
困ったときの困ったときの
仕様仕様
仕様
仕様仕様
保証とアフターサービス保証とアフターサービス
保証とアフターサービス
保証とアフターサービス保証とアフターサービス
..........................................................................
.....................................
..........................................................................
..............................................................
...............................
..............................................................
..............................................................
...............................
..............................................................
..............................................................
...............................
..............................................................
..........................................................
Q&A
.............................
..........................................................
..................................................................................
.........................................
..................................................................................
..............................................
.......................
..............................................
28
29
30
31
35
36
37
F
J
Page 2
CAUTION!
THIS PRODUCT UTILIZES A LASER.
USE OF CONTROLS, ADJUSTMENTS OR PERFORMANCE OF PROCEDURES
OTHER THAN THOSE SPECIFIED HEREIN MAY RESULT IN HAZARDOUS RADIATION EXPOSURE.
DO NOT OPEN COVERS AND DO NOT REPAIR YOURSELF.
REFER SERVICING TO QUALIFIED PERSONNEL
WARNUNG!
DIESES PROUKT ERZEUGT LASERSTAHLUNG.
DURCHFÜHRUNG ANDERER VORGÄNGE ALS DER HIER ANGEGEBENEN KANN
ZU GEFÄHRLICHER STRAHLUNG FÜHREN.
REPARATUREN DÜRFEN NUR VON QUALIFIZIERTEM FACHPERSONAL
DURCHGEFÜHRT WERDEN.
AVERTISSEMENT!
CET APPAREIL UTILISE UN LASER.
L’UTILISATION DE COMMANDES OU DE RÉGLAGES OU L’EXÉCUTION DE
PROCÉDURES AUTRES QUE CELLES SPÉCIFIÉES ICI PEUVENT PROVOQUER UNE
EXPOSITION À DES RADIATIONS DANGEREUSES.
NE PAS OUVRIR LES COUVERCLES NI ESSAYER DE RÉPARER SOI-MÊME.
CONFIER TOUT TRAVAIL D’ENTRETIEN À UN PERSONNEL QUALIFIÉ.
VARNING
Om apparaten används på annat sätt än i denna bruksanvisnig specificerats, kan användaren
utsättas för osynlig laserstrålning, som överskrider gränsen for laserklass 1.
CLASS 1 LASER PRODUCT
LASER KLASSE1
2
Page 3

For U.S.A.
Federal Communications Commission Radio Frequency Interference
Statement
Note: This equipment has been tested and found to comply with the limits for a Class B
digital device, pursuant to Part 15 of the FCC Rules. These limits are designed to provide
reasonable protection against harmful interference in a residential installation. This equipment generates, uses and can radiate radio frequency energy and, if not installed and used in
accordance with the instructions, may cause harmful interference to radio communications.
However, there is no guarantee that interference will not occur in a particular installation. If
this equipment does cause harmful interference to radio or television reception, which can
be determined by turning the equipment off and on, the user is encouraged to try to correct
the interference by one or more of the following measures:
Reorient or relocate the receiving antenna.
Increase the separation between the equipment and receiver.
Connect the equipment into an outlet on a circuit different from that to which the receiver
is connected.
Consult the Panasonic Service Center or an experienced radio/TV technician for help.
Warning
To assure continued compliance, use only shielded interface cables when connecting to a
computer or peripheral. Also, any changes or modifications not expressly approved by the
party responsible for compliance could void the user’s authority to operate this equipment.
This device complies with Part 15 of the FCC Rules. Operation is subject to the following
two conditions:
(1) This device may not cause harmful interference, and
(2) This device must accept any interference received, including interference that may cause
undesired operation.
Responsible Party: Matsushita Electric Corporation of America
One Panasonic Way
Secaucus, NJ 07094
Tel No:1-800-LAPTOP-5 (1-800-527-8675)
For Canada
This Class B digital apparatus complies with Canadian ICES-003.
Cet appareil numérique de la classe B est conforme à la norme NMB-003 du Canada.
3
Page 4
Introduction
Thank you for purchasing the CD-R/RW Drive Pack for the Panasonic CF-28 notebook
computer series.
This drive connects to the computer through the Multimedia Pocket.
Store this manual in a safe place after reading it.
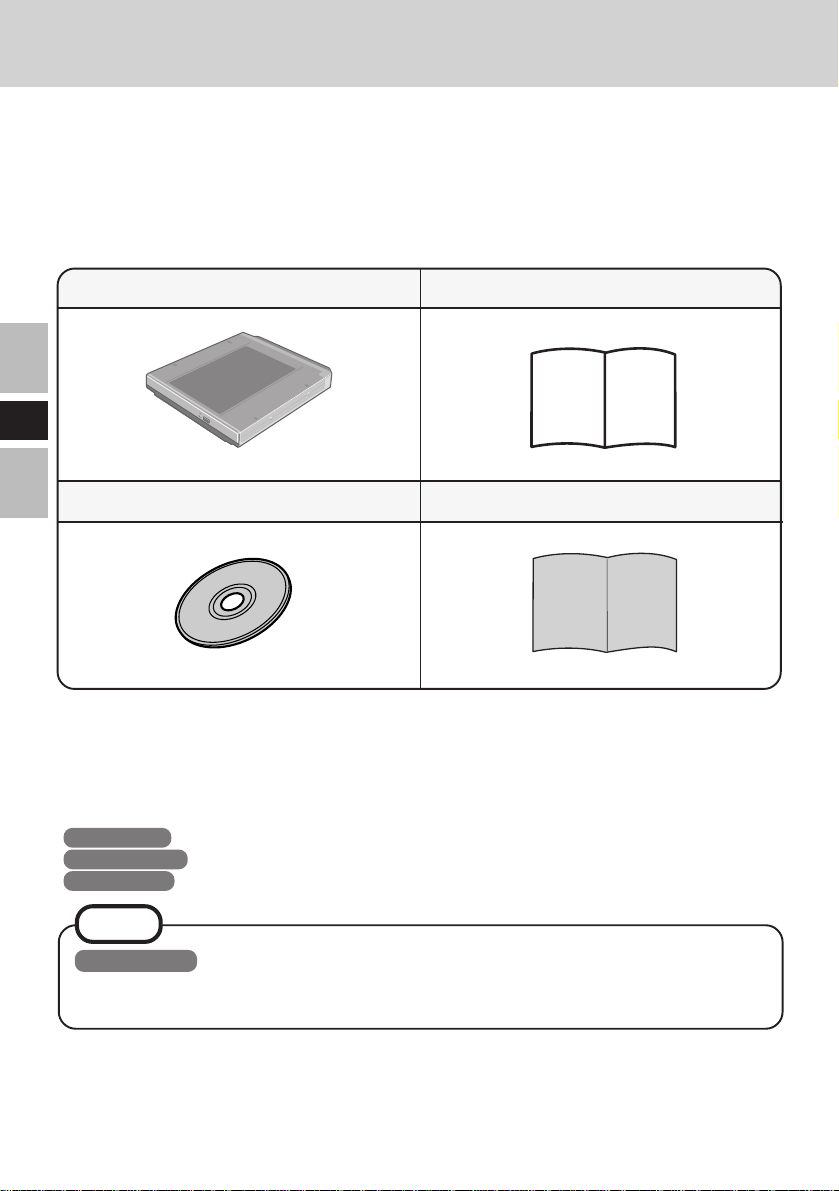
CD-R/RW Drive Pack*................1
Operating Instructions .............. 1
E
Easy CD Creator™ 5 Basic CD-ROM ...... 1
* The CD-R/RW Drive Pack may also be referred to as the drive.
[Illustration in this manual]
Windows 98 indicates Microsoft® Windows® 98 Second Edition Operating System.
Windows 2000 indicates Microsoft® Windows® 2000 Professional Operating System.
Windows XP indicates Microsoft® Windows® XP Professional Operating System.
Easy CD Creator™ 5 Basic Leaflet .. 1
NOTE
Windows XP
This manual explains the procedure for default settings. The procedure may differ
according to the settings.
Microsoft®, MS-DOS® and Windows® are registered trademarks of Microsoft Corporation in the United
States and/or other countries.
Roxio, the Roxio logo, Easy CD Creator and DirectCD are trademarks of Roxio, Inc. which may be
registered in some jurisdictions.
4
Page 5
Usage Precautions
Do not place items other than discs on the tray.
Do not leave the tray in the open position or touch the lens area. Should the lens
become soiled by dust or dirt, the unit may not read discs properly.
Under some conditions, dust may build up on the optical lens or disc, possibly resulting in
malfunction.
Do not apply excessive force to the tray in the open position, doing so could damage the
tray.
Do not open the drive or move the computer while the drive is being accessed. Doing so
could cause it to malfunction. In addition, after running an application involving access to
a disc, do not open the drive or remove the disc until after the application has been closed.
After closing the tray, do not attempt to access a disc until the MP indicator ( ) disappears.
Do not expose the drive to oily or tobacco smoke. Doing so could shorten the service life
of the lens.
If the drive malfunctions, we recommend cleaning the lens with a blower used for camera
lenses. (Do not use strong, cleaning sprays.)
Never insert foreign objects such as paper clips into the drive.
Do not use discs that have become deformed (warped, not completely round, etc.).
When the drive is installed, do not use an external drive (CD-ROM drive, DVD-ROM
drive, etc.).
For AutoPlay CDs:
• If an AutoPlay CD does not start after the computer resumes from the standby or hibernation mode, we recommend reinserting the CD again after a 15-second wait.
• An AutoPlay CD may start during the access of a file.
To avoid damaging discs:
Do not touch the surface as it can cause the disc to become dirty or scratched.
Do not allow discs to become dirty or scratched.
Do not place or store discs in locations exposed to heat, direct sunlight, humidity or dust.
Do not write on the surface of the disc with a ball-point pen or other writing instrument.
If the disc is brought from a cold into a warm environment, moisture may form on the disc.
Wipe this moisture off with a soft, dry, lint-free cloth before using the disc.
Do not drop, bend, or place heavy objects on top of discs.
Cleaning the disc using a CD cleaner is recommended once every 2 or 3 months.
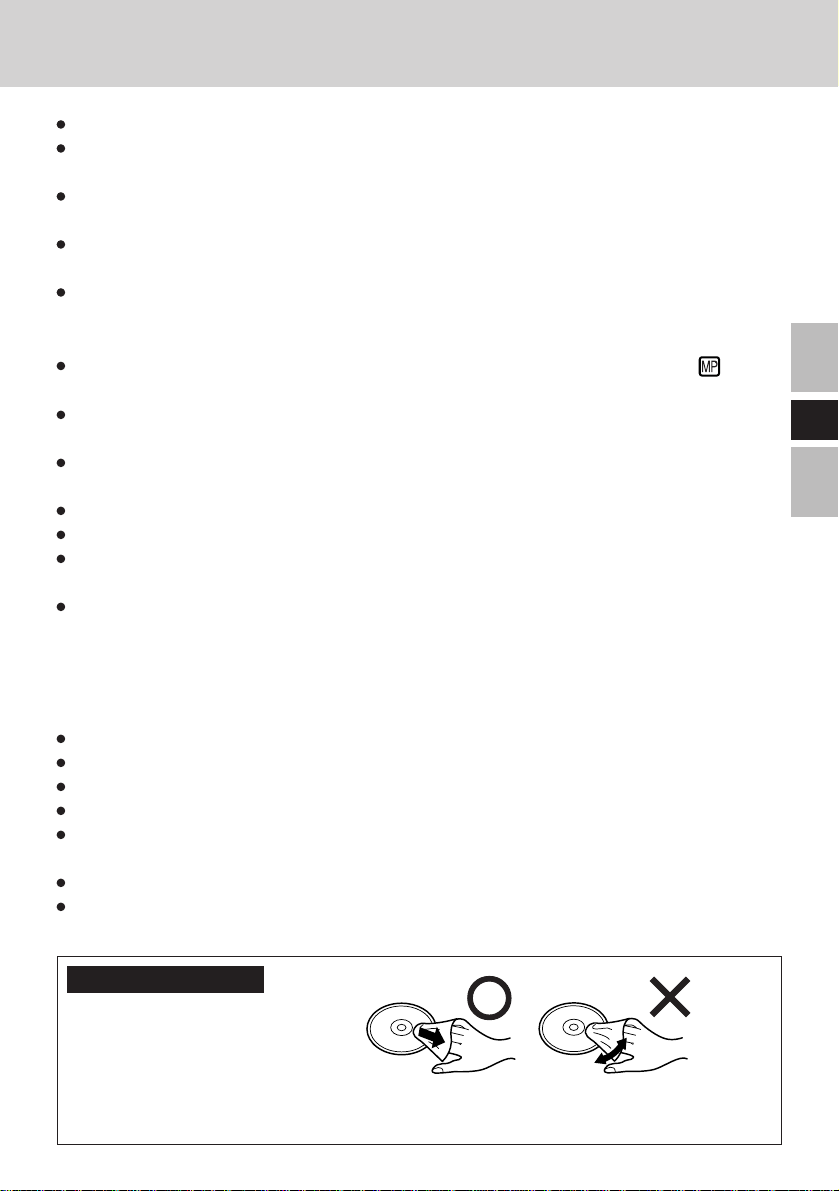
If the disc gets dirty
After wiping the disc with a moist, soft cloth, wipe it with a dry cloth. Always wipe from
the center toward the edge.
5E5
Page 6

Using the Drive
Installing/Removing a Drive
Refer to the Reference Manual included with your computer on how to install/remove the drive.
CAUTION
Be sure to turn the computer off before installing/removing the drive.
Preparations
Windows 98
E
Confirm the following contents in [Start] - [Settings] - [Control Panel] - [System] - [Device
Manager] - [CDROM] - [MATSHITA UJDA***] - [Properties] - [Settings]. Make the settings if they have not yet been made.
• Add a check mark for [DMA].
• Set both [Start drive letter] and [End drive letter] in [Reserved drive letters] to [L:].
Windows 2000
Confirm that [Transfer Mode] is set to [DMA if available] in [Start] - [Settings] - [Control
Panel] - [System] - [Hardware] - [Device Manager] - [IDE ATA/ATAPI controllers] - [Secondary IDE Channel] - [Advanced Settings] - [Device 0]. Perform this setting if it has not
yet been made.
Windows XP
Confirm that [Transfer Mode] is set to [DMA if available] in [start] - [Control Panel] [Performance and Maintenance] - [System] - [Hardware] - [Device Manager] - [IDE ATA/
ATAPI controllers] - [Secondary IDE Channel] - [Advanced Settings] - [Device 0]. Perform
this setting if it has not yet been made.
NOTE
<Using PC Cards>
If the PC Card does not work, there may be no interrupt request (IRQ) line available.
Deactivate unnecessary equipment using in Setup Utility.
6
Page 7
Setting a Disc
1 Power on your computer
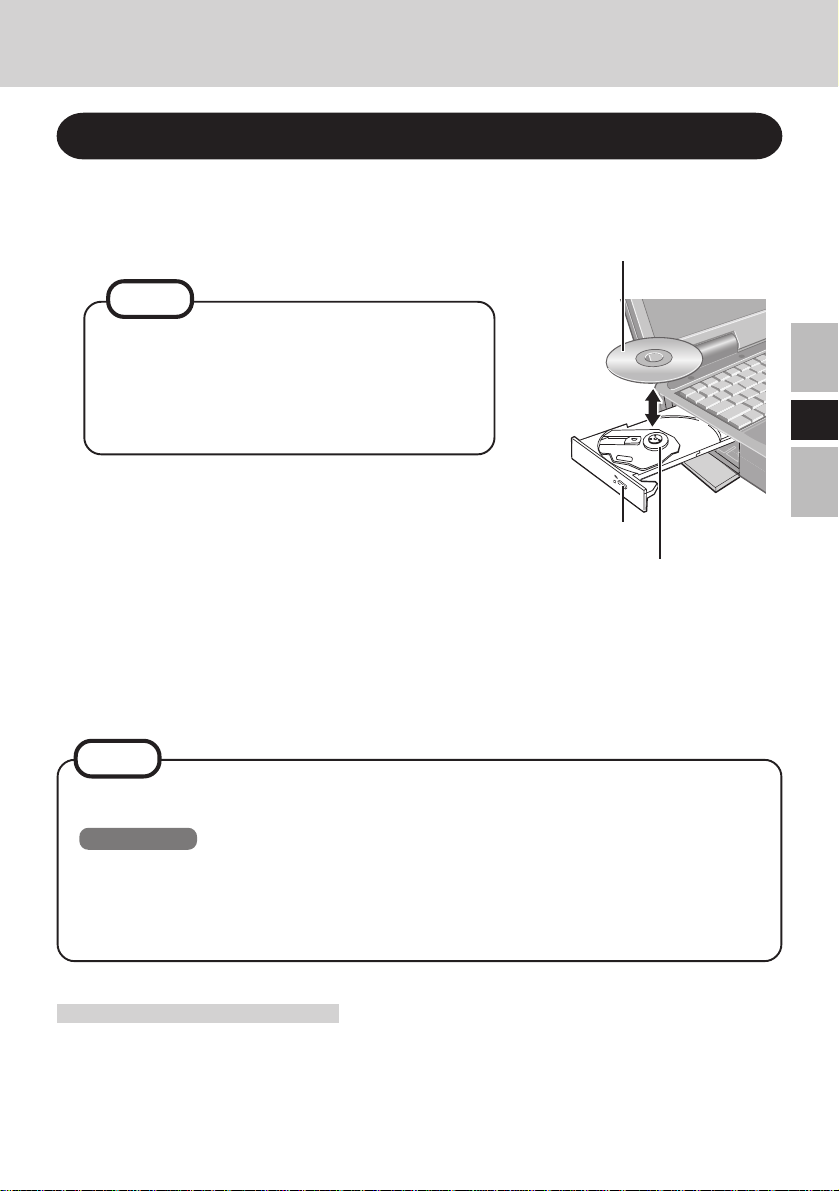
2 Open the disc tray
Press the eject button and slowly pull out the tray.
NOTE
Before using the drive for the first time, remove the protective sheet from the lens area.
The protective sheet inside the drive delays
the opening of the drive by about ten seconds.
This delay is not a problem.
Label side up
3 Place a disc
1 Place the disc with the label facing upward in the
drive.
2 Push down until the center holder clicks.
<Removing a disc>
Place a finger on the center holder and lift up on the
edge of the disc.
Eject Button
Center Holder
4 Close the disc tray
Close the tray without touching the eject button.
NOTE
If the vibration of the drive is excessively high, use the Setup Utility to reduce the
drive speed by setting it to [Low].
Windows 98
In the following cases, the drive speed may not be set to [Low]. At a time like this,
restart your computer.
• When operation is resumed from the standby or hibernation mode
• When a drive has been installed while the power was still on
E
Power-saving Mode
If the drive has not been accessed within 30 seconds, the drive motor will automatically shut
down to reduce the power consumption. When the drive is accessed once again, the power
of the drive motor is turned on. However, approximately 30 seconds are required until data
is actually read from the disc.
7
Page 8
Using the Drive
Using the Drive in the MS-DOS Mode
Windows 98
To use the drive in the MS-DOS mode*, configure the drive following the steps below after
performing the preparations ( page 6). If the steps listed below are performed with-
out completing the preparations first, the drive will not operate properly.
* In the MS-DOS mode, discs can only be read.
1 Select [Start], then select [Shut Down].
2 Select [Restart in MS-DOS mode], then select [OK].
E
3 Open the “CONFIG.SYS” file for editing by issuing the following commands:
cd \ Enter
edit config.sys Enter
4 Move the cursor to the line containing “OAKCDROM.SYS” and delete the characters
“rem” at the beginning of the line. (Deleting “rem” causes the item to become valid.)
DEVICEHIGH=C:\WINDOWS\COMMAND\OAKCDROM.SYS /D:MSCD000
(If this line is missing, add it.)
5 Press Alt + F (File),then S (Save) to save the file. Then press Alt + F , then
X (Exit) to exit the Edit program.
6 Follow the same steps to edit the “AUTOEXEC.BAT” file.
edit autoexec.bat Enter
7 Move the cursor to the line containing “MSCDEX.EXE” and delete the characters “rem”
at the beginning of the line. (Deleting “rem” causes the item to become valid.)
LOADHIGH C:\WINDOWS\COMMAND\MSCDEX.EXE /D:MSCD000 /L:L
(If this line is missing, add it.)
8 Press Alt + F , then S to save the file. Then press Alt + F , then X to exit
the Edit program.
9 Restart the computer.
8
Page 9

When writing to CD-R/RW discs
When using CD-R or CD-RW discs, read the descriptions on the disc packages.
CD-RW discs cannot be read with other drives* unable to accommodate CD-RW discs.
* Consult with the manufacturer of each drive.
Using the CD-ROM of the CD-R/RW writer software (included), install the application
software on your computer. For information on how to install the software, refer to the
included manual of the CD-R/RW writer software.
Be sure to use discs conforming to the proper write speeds. ( page 11)
If the write operation is to involve a long period of time, be sure to connect the AC
adaptor. If the battery power runs low and the power of the computer is cut, the write
operation may end in failure.
Depending on the disc, the quality of the write operation may not be so good. We recommend using any of the following discs.
Recommended Discs:
<CD-R>
HITACHI MAXELL, Ltd.
MITSUBISHI CHEMICAL Co., Ltd.
MITSUI CHEMICALS, Inc.
RICOH Co., Ltd.
TAIYOYUDEN Co., Ltd.
<CD-RW/High Speed CD-RW>
MITSUBISHI CHEMICAL Co., Ltd.
RICOH Co., Ltd.
E
9
Page 10

Troubleshooting
The computer does not recognize
the drive
The MP indicator ( ) does not light
Cannot play disc or read data from it
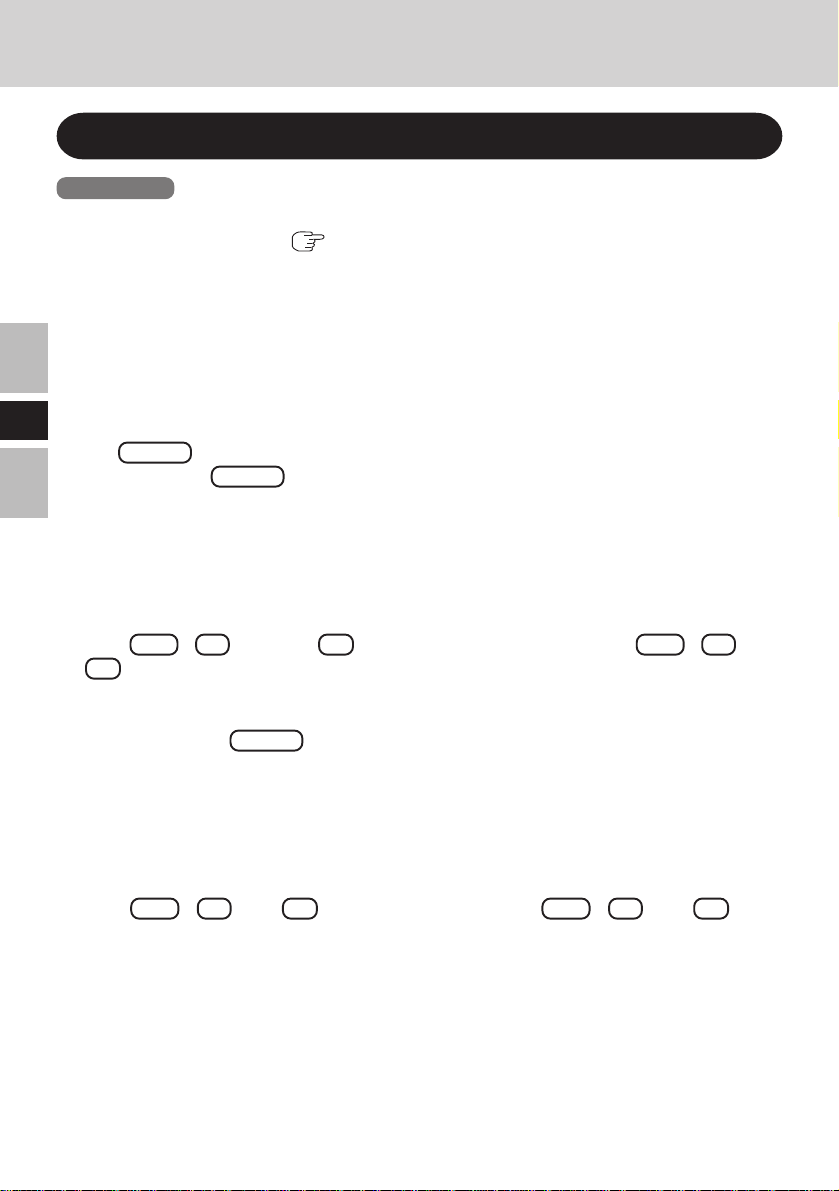
Cannot eject disc
E
A blue background appears on the
screen with the MPEG image
The disc tray does not close
The computer hangs or restarts
Windows XP
Cannot access file for CD-ROM
drive or DVD-ROM drive
10
Check the settings by following the instructions
in “Preparations” ( page 6).
Is the drive properly mounted in the multimedia pocket?
Is the disc loaded on the tray correctly?
Is the disc bent, scratched, or dirty?
Is the computer powered on?
To remove a disc when the
computer is powered off, insert a pointed object such as
the bent-out tip of a paper clip
into the emergency hole.
Pushing it completely to the
end will free the tray so that it
can be pulled out.
Did you open the drive or remove the disc while it
was operating?
Re-insert the disc and close the drive. Press
Enter .
Did you touch the eject button when you close the tray?
Is an external drive (CD-ROM drive, DVD-ROM
drive, etc.) connected?
When the drive is installed, do not use an external
drive (CD-ROM drive, DVD-ROM drive, etc.).
Was the computer turned off before the instal-
lation/removal of the drive?
The computer needs to be off so that the drive
can properly initialize during Windows startup.
When the CD-ROM drive or DVD-ROM drive is
replaced after the CD-R/RW drive has been installed in the Multimedia Pocket, files inside the
drive sometimes cannot be accessed.
In this case, execute [Scan for hardware changes]
using the following procedure.
1 Select [Device Manager] in [start] - [Control
Panel] - [Performance and Maintenance] - [Sys-
tem] - [Hardware] .
2 Select the drive displayed under [DVD/CD-
ROM drives] (e.g., MATSHITA****), then se-
lect [Action] - [Uninstall] from the menu and
select [OK].
3 Select [Action] - [Scan for hardware changes]
from the menu. (Microsoft Corp. has reported
that the above noted problem occurs.)
Emergency Hole
Page 11
Specifications
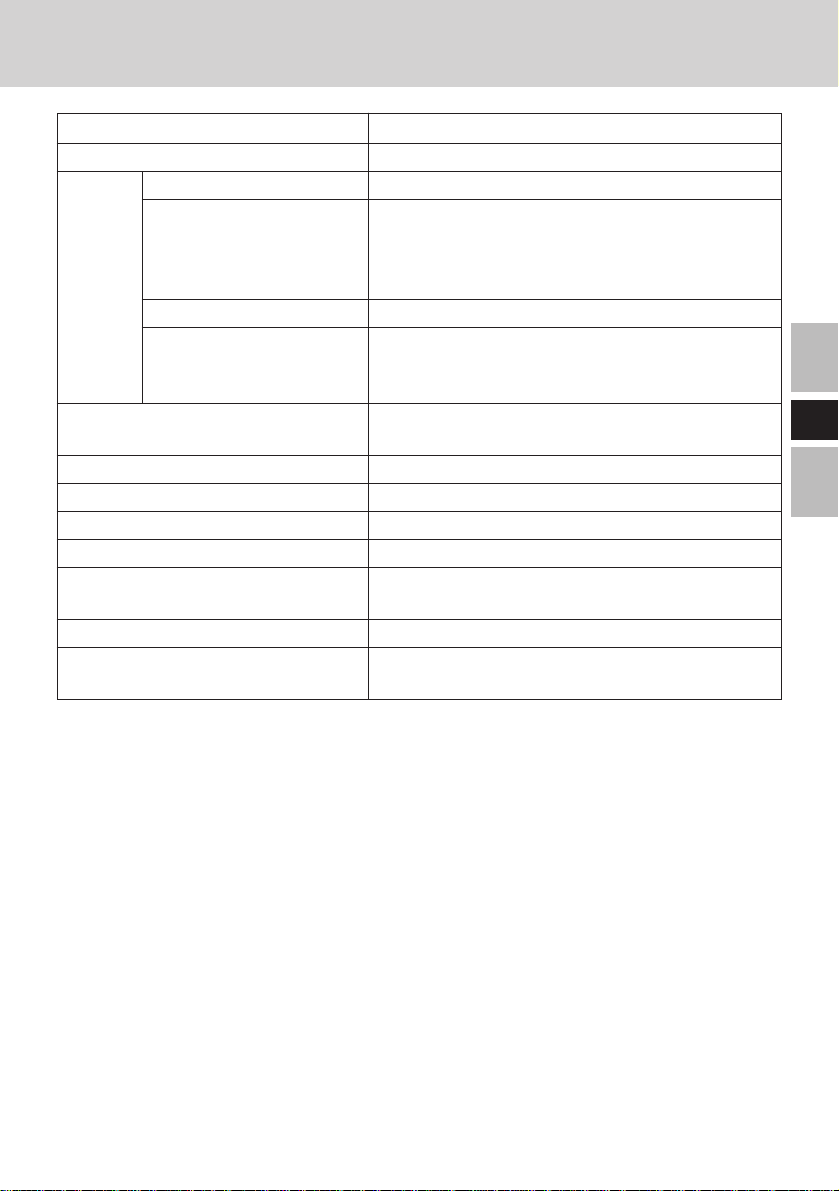
Item
Operating voltage range
CD-ROM read
CD-R write*
1
Data
transfer
rate
CD-RW write
High-Speed
CD-RW write
Supports
Buffer underrun error prevention function
Access Time
Cache memory
Interface
Dimensions (width × depth × height)
Weight
Operating temperature/
Humidity range
Description
DC 5 V ± 0.25 V
3600 KB/s 24x speed (Max.)*
2
600 KB/s 4x speed
1200 KB/s 8x speed
2400 KB/s 16x speed (Max.)
3600 KB/s 24x speed (Max.)
600 KB/s 4x speed
600 KB/s 4x speed
1200 KB/s 8x speed
1500 KB/s 10x speed
CD-Audio, CD-ROM, CD-R, Photo CD, Video
CD, Enhanced Music CD, CD-RW, CD-TEXT
Supported
130 ms (24x Speed, 1/3 Stroke*3)
2 MB
Conforms to enhanced IDE (ATAPI) standard
130 mm × 150 mm × 23.7 mm
{5.1" × 5.9" × 0.9"}
Approx. 365 g {0.8 lb.}
5 °C to 35 °C {41 °F to 95 °F}/30 % RH to
80 % RH (no condensation)
E
1
*
Depending on the disc, the writing speed may become slower.
2
*
If an unbalanced disc (e.g., a disc with which the balance has been displaced from the center) is
inserted, the speed may become slower if there are large vibrations while the disc is rotating.
3
*
Stroke:Indicates the amount of movement the lens (pickup) of the drive must make in order to
read data.
11
Page 12

Einführung
Wir freuen uns, daß Sie sich für den kauf eines CD-R/RW-Laufwerk-Pack für Ihr
Panasonic-Notebook CF-28 entschieden haben.
Das Laufwerk wird über das Multimedia Pocket an das Notebook angeschlossen.
Sie sollten diese Bedienungsanleitung an einer sicheren Stelle verwahren.
CD-R/RW Laufwerk Pack* .........1
CD-ROM „Easy CD Creator™ 5 Basic“ ....
Bedienungsanleitung ................1
Beilageblatt für „Easy CD Creator™ 5 Basic“......
1
D
* Das CD-R/RW-Laufwerk-Pack wird Laufwerk in diesem Buch abgekürzt gennant, sowie es keine
Not gibt.
[Illustration im Manual]
Windows 98 steht für das Microsoft® Windows® 98 Second Edition Betriebssystem.
Windows 2000 steht für das Microsoft® Windows® 2000 Professional Betriebssystem.
Windows XP steht für das Microsoft® Windows® XP Professional Betriebssystem.
1
HINWEIS
Windows XP
Diese Anleitung erläutert das Verfahren für die Standardeinstellungen. Das Verfahren
kann je nach den Einstellungen verschieden sein.
Microsoft®, MS-DOS® und Windows® sind eingetragene Warenzeichen von Microsoft Corporation in
den USA und/oder anderen Ländern.
Roxio, das Roxio Logo, Easy CD Creator und DirectCD sind Warenzeichen von Roxio, Inc., die in
einigen Ländern eingetragen sein können.
12
Page 13

Vorsichtsmaßnahmen zum Gebrauch
Legen Sie nur Discs in das Laufwerkfach ein.
Lassen Sie das Fach nicht offen und berühren Sie die Abtastoptik nicht mit den
Fingern. Bei Verschmutzung der Optik können Lesefehler auftreten.
Unter bestimmten Bedingungen kann sich Staub auf der Abtasterlinse oder Disc
ansammeln, wodurch Fehlfunktionen verursacht werden können.
Achten Sie darauf, das geöffnete Fach nicht zu stark zu belasten, es könnte dabei
beschädigt werden.
Während des Zugriffs auf das Laufwerk sollten Sie das Laufwerk keinesfalls öffnen
oder das Notebook bewegen. Andernfalls können Fehlfunktionen auftreten. Außerdem
sollte das Laufwerk nicht geöffnet bzw. die Disc entfernt werden, solange eine Anwendung
läuft, die darauf zugegriffen hat.
Versuchen Sie nach Schließen des Fachs auf keinen Fall, einen Zugriff auf die Disc
auszuführen, bevor die MP-Anzeige ( ) erloschen ist.
Verwenden Sie das Laufwerk nicht in Räumen, in denen stärkere Konzentrationen von Ölnebel
oder Tabakrauch auftreten. Die Nutzungsdauer der Optik könnte sonst verkürzt werden.
Bei Funktionsstörungen des Laufwerks empfehlen wir die Reinigung der Linse mit einem Gebläse,
das für Kameraobjektive verwendet wird. (Verwenden Sie zum Reinigen keine starken Sprays.)
Führen Sie in das Laufwerk keine Fremdkörper wie z.B. Büroklammern ein.
Verwenden Sie keine Discs, die deformiert sind (durchgebogen oder nicht völlig rund usw.).
Verwenden Sie kein externes Laufwerk (CD-ROM-Laufwerk, DVD-ROM-Laufwerk
usw.), wenn das Laufwerk installiert ist.
Hinweise zu AutoPlay-CDs:
• Falls die Wiedergabe einer AutoPlay-CD nicht startet, nachdem das Notebook den
Betrieb aus dem Standby- oder Stilllegungs-Modus wieder aufgenommen hat, wird
empfohlen, etwa 15 Sekunden lang zu warten und die CD dann erneut einzulegen.
• Die Wiedergabe einer AutoPlay-CD startet u.U. während eines Zugriffs auf eine Datei.
Beachten Sie zum Schutz der Discs die folgenden Punkte:
Berühren Sie die Oberfläche der Disc nicht, damit diese nicht schmutzig oder verkratzt wird.
Halten Sie Ihre Discs sauber und frei von Kratzern.
Verwahren Sie Ihre Discs nicht an einem Ort, wo sie zu hohen Temperaturen, direkter
Sonneneinstrahlung, Feuchtigkeit oder Staub ausgesetzt sind.
Die Oberfläche der Disc darf nicht beschriftet werden.
Wenn Discs aus kalten in warme Räume gebracht werden, kann auf ihnen Feuchtigkeit
kondensieren. Diese muß mit einem weichen, nicht fusselnden Tuch entfernt werden,
bevor Sie die Disc in das Laufwerk einlegen können.
Discs dürfen weder fallengelassen noch verbogen oder durch schwere Gegenstände belastet werden.
Wir empfehlen, daß die Disc alle 2-3 Monate unter Verwendung eines CD-Reinigers gereinigt wird.
D
Discs reinigen
Reinigen Sie die disc mit einem weichen,
feuchten Tuch, und wischen Sie mit einem
trockenen Tuch nach. Wischen Sie immer
von der Mitte gerade nach außen.
richtig
falsch
13
Page 14

Gebrauch des Laufwerks
Installieren/Entfernen eines Gerätes
Einzelheiten zum Installieren/Entfernen des Laufwerk finden Sie im Referenz-Handbuch
Ihres Notebooks.
VORSICHT
Achten Sie darauf, das Notebook auszuschalten, bevor Sie das Laufwerk installieren/entfernen.
Vorbereitungen
Windows 98
Überprüfen Sie den folgenden Inhalt in [Start] - [Einstellungen] - [Systemsteuerung][System] - [Geräte-Manager] - [CDROM] - [MATSHITA UJDA***] - [Eigenschaften] [Einstellungen]. Nehmen Sie ggf. die folgenden Einstellungen vor:
• Markieren Sie das kontrollkästchen [DMA].
• Stellen Sie sowohl [Erster Buchstabe] und [Letzter Buchstabe] unter [Reservierte
Laufwerkbuchstaben] auf [L:] ein.
Windows 2000
Vergewissern Sie sich, dass [Übertragungsmodus] unter [Start] - [Einstellungen] -
D
[Systemsteuerung] - [System] - [Hardware] - [Geräte-Manager] - [IDE ATA/ATAPIController] - [Sekundärer IDE-Kanal] - [Erweiterte Einstellungen] - [Gerät 0] auf [DMA,
wenn verfügbar] eingestellt ist. Falls nicht, nehmen Sie diese Einstellung vor.
Windows XP
Vergewissern Sie sich, dass [Übertragungsmodus] unter [Start] - [Systemsteuerung] [Leistung und Wartung] - [System] - [Hardware] - [Geräte-Manager] - [IDE ATA/ATAPIController] - [Sekundärer IDE-Kanal] - [Erweiterte Einstellungen] - [Gerät 0] auf [DMA,
wenn verfügbar] eingestellt ist. Falls nicht, nehmen Sie diese Einstellung vor.
HINWEIS
<Verwendung der PC Cards>
Wenn die Karte nicht funktioniert, steht möglicherweise keine Unterbrechungsanforderungsleitung zur Verfügung. Deaktivieren Sie unnötige Geräte, wenn Sie SetupDienstprogramm verwenden.
14
Page 15

Einlegen einer Disc
1 Schalten Sie das Notebook ein
2 Öffnen Sie das Laufwerkfach
Drücken Sie die Auswurftaste und ziehen Sie das
Laufwerk vorsichtig heraus.
HINWEIS
Achten Sie vor der erstmaligen Inbetriebnahme des
Laufwerks darauf, die Schutzfolie von der Abtastoptik
zu entfernen. Diese Schutzfolie im Inneren des
Laufwerks verzögert das ursprüngliche Öffnen des
Laufwerkfachs um ca. 10 Sekunden. Dabei handelt es
sich jedoch nicht um eine Funktionsstörung.
3 Einstecken einer Disc
1 Legen Sie die Disc mit der Beschriftung nach oben in
das Laufwerk ein.
2 Drücken Sie die Disc nach unten, bis sie in den
Zentrierring einrastet.
<Auswerf en einer Disc>
Legen Sie einen Finger auf den Zentrierring und ziehen
Sie die Disc nach oben, indem Sie sie am Rand halten.
4 Schließen Sie das Fach
Achten Sie beim Schließen des Laufwerkfachs darauf, eine
Berührung der Auswurftaste zu vermeiden.
Etikettseite nach oben
Zentrierring
Auswurftaste
D
HINWEIS
Falls das Laufwerk zu stark vibriert, verringern Sie die Drehzahl, indem Sie im SetupDienstprogramm die Einstellung der Laufwerkdrehzahl auf [Low] ändern.
Windows 98
In den folgenden Situationen wird die Laufwerkdrehzahl u.U. nicht auf [Low]
eingestellt. In einem solchen Fall führen Sie einen System-Neustart aus.
• Wenn der Betrieb aus dem Standby- oder Stilllegungs-Modus wieder aufgenommen
wird.
• Wenn ein Laufwerk bei eingeschaltetem Notebook installiert wurde.
15
Page 16

Gebrauch des Laufwerks
Energiesparfunktion
30 Sekunden nach dem letzten Zugriff auf das Laufwerk wird der Laufwerksmotor
automatisch abgeschaltet, um die Leistungsaufnahme zu reduzieren. Bei einem
erneuten Zugriff auf das Laufwerk wird der Motor wieder eingeschaltet. Das Hochlaufen
dauert etwa 30 Sekunden, erst danach können wieder Daten von der Disc gelesen werden.
Einsatz des Laufwerks im MS-DOS-Modus
Windows 98
Um das Laufwerk im MS-DOS-Modus* zu verwenden, konfigurieren Sie das Laufwerk anhand
des nachstehend beschriebenen Verfahrens, nachdem Sie die erforderlichen Vorbereitungen
getroffen haben ( Seite 14). Werden die folgenden Schritte ausgeführt, bevor die
Vorbereitungen abgeschlossen worden sind, so arbeitet das Laufwerk nicht einwandfrei.
* Im MS-DOS-Modus können Discs nur gelesen werden.
1 Wählen Sie [Start] und dann [Beenden].
2 Wählen Sie [Im MS-DOS-Modus neu starten] und dann [OK].
3 Öffnen Sie die Datei „CONFIG.SYS“ durch die folgenden Befehle:
cd \
D
edit config.sys
4 Bringen Sie den Cursor in die Zeile, in der „OAKCDROM.SYS“ steht, und löschen Sie
die Buchstaben „rem“ am Anfang der Zeile (dadurch wird diese Befehlszeile wirksam).
DEVICEHIGH=C:\WINDOWS\COMMAND\OAKCDROM.SYS /D:MSCD000
(Fügen Sie die Zeile ein, falls Sie in der Datei fehlt.)
5 Drücken Alt + D (Datei) und dann S (Speichern), um die Datei zu sichern. Durch
Drücken von Alt + D und B (Beenden) können Sie den Editor verlassen.
6 Die Datei „AUTOEXEC.BAT“ editieren Sie auf dieselbe Weise.
edit autoexec.bat
7 Bringen Sie den Cursor in die Zeile, in der „MSCDEX.EXE“ steht, und löschen Sie die
Buchstaben „rem“ am Anfang der Zeile (dadurch wird diese Befehlszeile wirksam).
LOADHIGH C:\WINDOWS\COMMAND\MSCDEX.EXE /D:MSCD000 /L:L
(Fügen Sie die Zeile ein, falls Sie in der Datei fehlt.)
8 Drücken Alt + D und dann S , um die Datei zu sichern. Durch Drücken von
Alt + D und B können Sie den Editor verlassen.
9 Starten Sie das Notebook neu.
16
Page 17

Beim Schreiben CD-R/CD-RW-Discs
Falls Sie CD-R- oder CD-RW-Discs verwenden, lesen Sie bitte die Anleitungen auf den
Verpackungen der Discs.
CD-RW-Discs können nur mit einem anderen Laufwerk* gelesen werden, wenn dieses
mit CD-RW-Discs kompatibel ist.
* Einzelheiten hierzu erfahren Sie vom Hersteller des jeweiligen Laufwerks.
Verwenden Sie die CD-ROM der CD-R/RW-Schreib-Software (im Lieferumfang), um
die Anwendungs-Software auf Ihrem Notebook zu installieren. Informationen zur Installation der CD-R/RW-Schreib-Software finden Sie in deren Bedienungsanleitung.
Verwenden Sie nur Discs, die die folgenden geeigneten Schreibgeschwindigkeiten
aufweisen. ( Seite 19)
Falls der Schreibvorgang eine lange Zeit in Anspruch nehmen soll, schließen Sie immer
den Netzadapter an. Falls sich die Batterie erschöpft und die Stromversorgung des
Notebooks deshalb ausfällt, kann es zu einem Ausfall beim Schreibvorgang kommen.
Je nach der verwendeten Disc kann die Qualität des Schreibvorgangs unzureichend sein.
Daher empfehlen wir die Verwendung der folgenden Discs.
Empfohlene Discs:
<CD-R>
HITACHI MAXELL, Ltd.
MITSUBISHI CHEMICAL Co., Ltd.
MITSUI CHEMICALS, Inc.
RICOH Co., Ltd.
TAIYOYUDEN Co., Ltd.
<CD-RW/Hochgeschwindigkeits-CD-RW>
RICOH Co., Ltd.
MITSUBISHI CHEMICAL Co., Ltd.
D
17
Page 18

Störungsbehebung
Das Notebook erkennt das
Laufwerk nicht
Die MP-Anzeige ( ) leuchtet nicht
Eine Disc kann nicht abgespielt
oder gelesen werden
Die Disc wird nicht
ausgeworfen
Eine blaue Darstellung mit den
MPEG-Daten taucht plötzlich auf
Das Fach schließt nicht
Das Notebook hängt oder
bootet neu
D
Windows XP
Zugriff auf eine Datei auf dem
CD-ROM-Laufwerk oder
DVD-ROM-Laufwerk ist nicht
möglich
18
Überprüfen Sie die Einstellungen anhand der Anweisungen
im Abschnitt „Vorbereitungen“ ( Seite 14).
Ist das Laufwerk einwandfrei in das Multimedia-
Pocket eingesetzt?
Ist die Disc korrekt in das Laufwerkfach eingelegt?
Ist die Disc verbogen, zerkratzt oder schmutzig?
Ist der Computer eingeschaltet?
Um die Disc bei ausgeschaltetem Computer
zu entfernen, müssen Sie einen spitzen
Gegenstand (aufgebogene Büroklammer
o.ä.) in das Loch der manuellen Auswurfvorrichtung schieben.
Gegenstand so weit wie möglich
einführen (bis zum Anschlag).
Dadurch wird die Lade entriegelt und
kann herausgezogen werden.
Haben Sie die Disc aus dem Laufwerk herausgenommen?
Legen Sie die Disc wieder ein und drücken Sie .
Haben Sie versehentlich die Auswurftaste beim
Schließen des Laufwerkfachs berührt?
Ist ein externes Laufwerk (CD-ROM-Laufwerk,
DVD-ROM-Laufwerk usw.) angeschlossen?
Wenn dieses Laufwerk installiert ist, darf kein
externes Laufwerk (CD-ROM-Laufwerk, DVD-
ROM-Laufwerk usw.) verwendet werden.
Wurde das Notebook vor dem Installations-/
Entfernungsvorgangs des Laufwerks ausgeschaltet?
Das Notebook muss ausgeschaltet sein, damit das
Laufwerk während des Hochfahrens von Windows
richtig initialisiert werden kann.
Wenn das CD-ROM- oder DVD-ROM-Laufwerk nach
Installation des CD-R/RW-Laufwerks im MultimediaPocket ausgewechselt wurde, ist manchmal kein Zugriff
auf Dateien auf diesen Laufwerken möglich.
In einem solchen Fall führen Sie [Nach geänderter Hardware suchen] anhand des folgenden Verfahrens aus:
1 Wählen Sie [Geräte-Manager] unter [Start] -
[Systemsteuerung] - [Leistung und Wartung] - [System] - [Hardware] aus.
2 Wählen Sie das unter [DVD/CD-ROM Laufwerk]
angezeigte Laufwerk (z.B. MATSHITA****),
wählen Sie dann [Aktion] - [Deinstallieren] im Menü
aus und klicken Sie dann auf [OK].
3 Wählen Sie [Aktion] - [Nach geänderter Hardware
suchen] im Menü aus.
(Microsoft Corporation hat berichtet, dass das obige
Problem manchmal auftritt.)
Loch der manuellen
Auswurfvorrichtung
Page 19

Technische Daten
Gegenstand
Betriebsspannung
CD-ROM lesen
CD-R schreiben*
Datentransrate
CD-RW schreiben
Hochgeschwindigkeits-
CD-RW schreiben
Unterstützte Formate
Zwischenspeicher-UnterlauffehlerVerhütungsfunktion
Zugrifftszeit
Cache-Speicher
Schnittstelle
Abmessungen (Breite × Tiefe × Höhe)
Gewicht
Zulässige Umgebungsbedingungen
Temperatur / Luftfeuchtigkeit
Beschreibung
DC 5 V ± 0,25 V
3600 KB/s 24x mal (Max.)*
1
600 KB/s 4x mal
2
1200 KB/s 8x mal
2400 KB/s 16x mal (Max.)
3600 KB/s 24x mal (Max.)
600 KB/s 4x mal
600 KB/s 4x mal
1200 KB/s 8x mal
1500 KB/s 10x mal
CD-Audio, CD-ROM, CD-R, Photo CD, Video
CD, Enhanced Music CD, CD-RW, CD-TEXT
Unterstützt
130 ms (24 mal max, 1/3 Hub*3)
2 MB
Entspricht der Norm für IDE-Erweiterungen
(ATAPI)
130 mm × 150 mm × 23,7 mm
Ca. 365 g
5 °C bis 35 °C / 30 % RH bis 80 % RH
(ohne Kondensation)
D
*1Je nach der Disc kann die Schreibgeschwindigkeit abnehmen.
2
Falls eine Form-Disc oder eine Disc mit großer Unwucht (Schwerpunkt der Disc liegt außerhalb
*
der Mitte) eingelegt wird, die bei der Rotation stark vibriert, kann die Geschwindigkeit geringer
sein.
3
Hub:Weg der Abtastoptik im Laufwerk bis zur Leseposition.
*
19
Page 20

Introduction
Merci d’avoir choisi le Lecteur CD-R/RW pour l’ordinateur portable Panasonic CF-28.
Le lecteur se connecte à l’ordinateur par l’intermédiaire du Multimedia Pocket.
Conservez précieusement ce manuel après l’avoir lu.
Lecteur CD-R/RW* ..................... 1
CD-ROM “Easy CD Creator™ 5 Basic” ...
* Lecteur CD-R/RW peut également être parfois appelé lecteur.
[Illustrations de ce manuel]
Windows 98 représente le système d’exploitation Microsoft® Windows® 98 Second Edition.
F
Windows 2000 représente le système d’exploitation Microsoft® Windows® 2000 Professional.
Windows XP représente le système d’exploitation Microsoft® Windows® XP Professional.
Mode d’emploi............................ 1
Brochure Easy CD Creator™ 5 Basic ....
1
1
REMARQUE
Windows XP
Ce mode d’emploi explique la procédure en fonction des réglages d’usine. La procédure
peut être différente suivant les réglages effectués.
Microsoft®, MS-DOS® et Windows® sont des marques déposées de Microsoft Corporation aux ÉtatsUnis et/ou dans d’autres pays.
Roxio, le logo Roxio, Easy CD Creator et DirectCD sont des marques de Roxio,Inc., qui peuvent être
déposées dans certaines juridictions.
20
Page 21

Précautions d’utilisation
Ne placez pas d’objets autres que des disques dans le tiroir.
Ne laissez pas le tiroir ouvert et ne touchez pas la zone de la lentille. Si la lentille est
maculée de poussière ou de saletés, l’appareil ne pourra pas lire les disques correctement.
Dans certaines conditions, de la poussière peut s’accumuler sur la lentille ou sur le disque
et éventuellement entraîner un mauvais fonctionnement.
N’appliquez pas de force excessive sur le tiroir lorsqu’il est ouvert, cela pourrait
l’endommager.
N’ouvrez pas le lecteur et ne déplacez pas l’ordinateur pendant l’accès au lecteur, cela
pourrait entraîner un mauvais fonctionnement. De plus, après avoir fait fonctionn une
application qui requiert un accès au disque, n’ouvrez le lecteur et ne retirez le disque
qu’une fois l’application fermée.
Après avoir fermé le tiroir, n’essayez pas d’accéder à un disque avant que le témoin
d’accès ( ) ne soit éteint.
N’exposez pas le lecteur à la fumée dégagée par de l’huile ou par du tabac. Cela pourrait
réduire la durée de vie de la lentille.
Si le lecteur ne fonctionne pas bien, le nettoyage de la lentille à l’aide d’une soufflante pour
lentille d’appareil photo est recommandé. (N’utiliser aucun produit puissant de type vaporisateur.)
N’insérez jamais de corps étrangers tels que des trombones dans le lecteur.
N’utilisez pas de disques déformés ou endommagés.
Lorsque le lecteur est installé, n’utilisez pas de lecteur externe (lecteur CD-ROM, lecteur
DVD-ROM, etc.).
Pour les CD AutoPlay:
• Si un CD AutoPlay ne démarre pas après que l’ordinateur reprend depuis le mode de veille
ou d’hibernation, nous recommandons de réinsérer le CD après une attente de 15 secondes.
• Un CD AutoPlay peut démarrer pendant l’accès à un fichier.
Afin d’éviter d’endommager les disques:
Ne touchez pas la surface du disque pour éviter de la salir ou de la rayer.
Faites en sorte que les disques demeurent propres et sans égratignure.
Ne posez pas et ne rangez pas les disques dans un endroit exposé à la chaleur, à la lumière
directe du soleil, à l’humidité ou à la poussière.
N’écrivez pas sur l’étiquette du disque avec un stylo à bille ou tout autre crayon à peinte dur.
Si le disque est déplacé d’un endroit froid à un endroit plus chaud, de l’humidité risque de
se déposer sur le disque.
Essuyez l’humidité avec un chiffon doux, sec et sans peluches avant d’utiliser le disque.
Prenez garde de ne pas tomber ou plier les disques, et de ne pas placer d’objet lourd sur
les disques.
Le nettoyage du disque à l’aide d’un nettoyant pour CD est recommandé à intervalles de 2
ou 3 mois.
F
Si le disque est sale
Après avoir nettoyé le disque avec un chiffon doux et humide, essuyez-le avec un chiffon sec. Essuyez-le toujours du centre vers
l’extérieur.
21
Page 22

Utilisation du lecteur
Installation/Retrait d’un périphérique
Reportez-vous au manuel de référence fourni avec votre ordinateur pour la manière d’installer/
retirer le lecteur.
ATTENTION
Arrêtez toujours l’ordinateur avant d’installer/désinstaller le lecteur.
Préparatifs
Windows 98
Confirmez la configuration suivante dans [Démarrer] - [Paramètres] - [Panneau de configuration] - [Système] - [Gestionnaire de périphériques] - [CDROM] - [MATSHITA UJDA***]
- [Propiétés] - [Paramètres]. Effectuez les réglages si ce n’est pas déjà fait.
• Choisissez un canal de [DMA].
• Réglez sur [L:] la [Lettre de lecteur de début] et la [Lettre de lecteur de fin] dans [Lettres
de lecteur réservées].
Windows 2000
Vérifiez que [Mode de transfert] est réglé sur [DMA si disponible] dans [Démarrer] [Paramètres] - [Panneau de configuration] - [Système] - [Matériel] - [Gestionnaire de
périphériques] - [Contrôleurs ATA/ATAPI IDE] - [Canal IDE secondaire] - [Paramètres
avancés] - [Périphérique 0]. Exécutez ce réglage si ce n’est pas déjà fait.
Windows XP
Vérifiez que [Mode de transfert] est réglé sur [DMA si disponible] dans [démarrer] - [Panneau
de configuration] - [Performance et entretien] - [Système] - [Matériel] - [Gestionnaire de
périphériques] - [Contrôleurs ATA/ATAPI IDE] - [Canal IDE secondaire] - [Paramètres
F
avancés] - [Périphérique 0]. Exécutez ce réglage si ce n’est pas déjà fait.
REMARQUE
<Utilisation des cartes PC>
Si la carte PC ne fonctionne pas, il se peut qu’il n’y ait pas d’IRQ (interrupt request)
disponible. Désactivez les composants non nécessaires en utilisant “Setup Utility”.
22
Page 23

Mise en place d’un disque
1 Allumez l’ordinateur
2 Ouvrez le tiroir de disque
Appuyez sur le bouton d’éjection puis tirez lentement
le tiroir.
REMARQUE
Avant d’utiliser le lecteur pour la première fois,
retirez la feuille de protection de la zone de la
lentille. La feuille de protection à l’intérieur du
lecteur retarde son ouverture d’environ dix
secondes. Ce retard n’est pas un
dysfonctionnement.
Face de l’étiquette
vers le haut
3 Insertion d’un disque
1 Placez le disque dans le lecteur avec l’étiquette sur
le dessus.
2 Enfoncez-le jusqu’à ce que le déclic du support cen-
tral se fasse entendre.
<Retrait d’un disque>
Posez un doigt sur le support central puis soulevez le
disque par les bords.
Bouton d’éjection
Support
central
4 Fermez le tiroir de disque.
Fermez le tiroir sans toucher au bouton d’éjection.
REMARQUE
Si le lecteur vibre de façon excessive, utilisez Setup Utility pour réduire la vitesse du
lecteur en la réglant sur [Low].
Windows 98
Dans les cas suivants, il se peut que la vitesse du lecteur ne soit pas réglée sur [Low].
Redémarrez alors l’ordinateur.
• Si le fonctionnement est rétabli depuis le mode de veille ou d’hibernation.
• Si un lecteur a été installé alors que l’appareil était encore sous tension.
F
23
Page 24

Utilisation du lecteur
Mode d’économie d’énergie
S’il n’y a pas eu d’accès au lecteur pendant 3 0 secondes, le moteur du lecteur sera
automatiquement arrêté pour réduire la consommation d’énergie. Lorsque l’on accède de
nouveau au lecteur, l’alimentation du moteur du lecteur est rétablie. Il faut toutefois environ
30 secondes pour que les données du disque soient effectivement lues.
Utilisation du Lecteur en mode MS-DOS
Windows 98
Pour utiliser le lecteur en mode MS-DOS*, effectuez la configuration du lecteur en effectuant
les opérations ci-dessous après avoir terminé les préparatifs ( page 22). Si vous effectuez
les opérations indiquées ci-dessous sans avoir tout d’abord terminé les préparatifs, le
lecteur ne fonctionnera pas correctement.
* En mode MS-DOS, seule la lecture des disques est possible.
1 Sélectionnez [Démarrer] puis sélectionnez [Arrêter].
2 Sélectionnez [Redémarrer en mode MS-DOS] puis sélectionnez [OK].
3 Ouvrez le fichier “CONFIG.SYS” pour l’éditer en effectuant les commandes qui suivent :
cd \ Entrée
edit config.sys Entrée
4 Déplacez le curseur jusqu’à la ligne qui contient “OAKCDROM.SYS” et effacez les
lettres “rem” au début de la ligne. (L’effacement de “rem” rend l’option valide.)
DEVICEHIGH=C:\WINDOWS\COMMAND\OAKCDROM.SYS /D:MSCD000
(Si cette ligne n’apparaît pas, ajoutez-la.)
5 Appuyez sur Alt + F (Fichier), puis sur E (Enregistrer) pour enregistrer le fichier.
Appuyez ensuite sur Alt + F , puis sur Q (Quitter) pour quitter le programme
F
Éditeur.
6 Suivez les mêmes étapes pour éditer le fichier “AUTOEXEC.BAT”.
edit autoexec.bat Entrée
7 Déplacez le curseur jusqu’à la ligne qui contient “MSCDEX.EXE” et effacez les lettres
“rem” au début de la ligne. (L’effacement de “rem” rend l’option valide.)
LOADHIGH C:\WINDOWS\COMMAND\MSCDEX.EXE /D:MSCD000 /L:L
(Si cette ligne n’apparaît pas, ajoutez-la.)
8 Appuyez sur Alt + F , puis sur E pour enregistrer le fichier. Appuyez ensuite sur
Alt + F , puis sur Q pour quitter le programme Éditeur.
9 Redémarrez l’ordinateur.
24
Page 25

Pour écrire sur des disques CD-R/RW
Si vous utilisez des disques CD-R ou CD-RW, lisez les descriptions qui se trouvent sur
les emballages des disques.
Les disques CD-RW ne peuvent pas être lus sur un lecteur* qui ne prend pas en charge les
disques CD-RW.
* Informez-vous auprès du fabricant des lecteurs respectifs.
Utilisez le CD-ROM du logiciel scripteur CD-R/RW (fourni) pour installer le logiciel
d’application sur votre ordinateur. Pour plus d’informations sur la manière d’installer le
logiciel, reportez-vous au manuel du logiciel scripteur CD-R/RW fourni.
Veillez à utiliser des disques conformes aux vitesses d’écriture correctes. ( page 27)
Si l’opération d’écriture doit prendre longtemps, branchez toujours l’adaptateur CA. Si
la charge de la batterie baisse et que l’alimentation de l’ordinateur est coupée, l’opération
d’écriture peut se terminer par un échec.
Selon le disque, la qualité de l’opération d’écriture peut ne pas être très bonne. Nous
recommandons d’utiliser les types de disques suivants.
Disques recommandés :
<CD-R>
HITACHI MAXELL, Ltd.
MITSUBISHI CHEMICAL Co., Ltd.
MITSUI CHEMICALS, Inc.
RICOH Co., Ltd.
TAIYOYUDEN Co., Ltd.
<CD-RW/CD-RW rapide>
RICOH Co., Ltd.
MITSUBISHI CHEMICAL Co., Ltd.
25
F
Page 26

Dépannage
L’ordinateur n’identifie pas le
lecteur
Le témoin d’accès ( ) ne s’allume pas.
Impossible de lire le disque ou
d’accéder à ses données.
Le disque ne peut pas être éjecté.
Un arrière-plan apparaît en bleu sur
l’écran avec l’image MPEG.
Le tiroir de disque ne se ferme pas.
L’ordinateur se bloque ou se
réinitialise.
Windows XP
L’accès au fichier n’est pas possible
F
sur le lecteur CD-ROM ou sur le
lecteur DVD-ROM.
Vérifiez les réglages en suivant les instructions
de la section “Préparatifs” ( page 22).
Le lecteur est-il correct-ement monté dans le
Multimedia Pocket?
Le disque est-il inséré correctement dans le tiroir de disque?
Le disque est-il plié, égratigné ou sale?
L’ordinateur est-il allumé?
Pour retirer un disque lorsque
l’ordinateur est éteint, insérez
un objet pointu tel que le bout
d’un trombone dans l’orifice
d’urgence. En l’insérant
complètement, vous
dégagerez le tiroir qui pourra
alors être sorti complètement.
Avez-vous ouvert le lecteur ou retiré le disque pendant le fonctionnement du lecteur?
Réinsérez le disque et fermez le lecteur. Appuyez
sur Entrée .
Avez-vous touché le bouton d’éjection en fermant
le tiroir de disque?
Y a-t-il un lecteur externe (lecteur CD-ROM,
lecteur DVD-ROM, etc.) raccordé ?
Lorsque le lecteur est installé, n’utilisez pas de lecteur
externe (lecteur CD-ROM, lecteur DVD-ROM, etc.).
L’ordinateur était-il arrêté avant l’installation/
désinstallation du lecteur?
L’ordinateur doit être arrêté de sorte que le lecteur
puisse s’initialiser correctement pendant le
démarrage de Windows.
Lorsque le lecteur CD-ROM ou le lecteur DVD-ROM
est remplacé après l’installation du lecteur CD-R/RW dans
le Multimedia Pocket, les fichiers qui se trouvent dans les
lecteurs sont parfois inaccessibles.
Dans ce cas, suivez la procédure suivante pour exécuter
[Rechercher les modifications sur le matériel].
1 Sélectionnez [Gestionnaire de périphériques] dans
[démarrer] - [Panneau de configuration] - [Performances et maintenance] - [Système] - [Matériel].
2
Sélectionnez le lecteur affiché dans [Lecteurs DVD/CDROM] (par exemple, MATSHITA****) puis sélectionnez
[Action] - [Désinstaller] dans le menu et sélectionnez [OK].
3
Sélectionnez [Action] - [Rechercher les modifications sur
le matériel] dans le menu. (L’apparition des problèmes
notés ci-dessus a été signalée par Microsoft Corp.)
Orifice d’urgence
26
Page 27

Spécifications
Article
Tension de fonctionnement
CD-ROM
Ecriture CD-R*
Vitesse de
transfert des
données
Ecriture CD-RW
Ecriture High Speed
CD-RW
lecteur
CC 5 V ± 0,25 V
3600 Ko/s vitesse 24x (max.)*
1
600 KB/s vitesse 4x
1200 KB/s vitesse 8x
2400 KB/s vitesse 16x (max.)
3600 KB/s vitesse 24x (max.)
600 KB/s vitesse 4x
600 KB/s vitesse 4x
1200 KB/s vitesse 8x
Description
2
1500 KB/s vitesse 10x
Supports
CD-Audio, CD-ROM, CD-R, Photo CD,
Vidéo
CD,
Enhanced Music CD, CD-RW, CD-TEXT
Fonction de prévention de sous-
Prise en charge
utilisation de la mémoire tampon
Temps d’accès
Mémoire cache
Interface
Dimensions (largeur × profondeur × hauteur)
Poids
Température en fonctionnement/
taux d’humidité
*1Suivant le disque utilisé, il se peut que la vitesse d’écriture diminue.
*2L’utilisation d’un disque déséquilibré (c’est-à-dire un disque sur lequel les données sont excentrées)
risque de ralentir la vitesse de transfert des données en cas de vibrations importantes pendant la
rotation.
3
Déplacements : indique le mouvement nécessaire à la lentille du lecteur pour lire les données.
*
130 ms (vitesse 24x, 1/3 de déplacements*3)
2 Mo
Conforme au standard EIDE (ATAPI)
130 mm × 150 mm × 23,7 mm
Environ 365 g
5 °C à 35 °C/30 % HR à 80 % HR
(sans condensation)
27
F
Page 28

はじめに
このたびは、パナソニックCD-R/RWドライブパックをお買い上げいただき、まこ
とにありがとうございました。
CD-R/RWドライブパックは、CF-28シリーズのマルチメディアポケットに取り付
けてお使いいただけます。
本書は、お読みになったあとも、大切に保管してください。
取扱説明書(本書)取扱説明書(本書)
取扱説明書(本書)
CD-R/RW
Easy CD Creator™ 5 Basic
* 本書では、CD-R/RWドライブパックのことをドライブと表記しています。
[[
[表記上の規則
[[
Windows 98 Microsoft® Windows® 98 Second Editionについての説明です。
Windows 2000 Microsoft® Windows® 2000 Professionalについての説明です。
Windows XP Microsoft® Windows® XP Professionalについての説明です。
ドライブパックドライブパック
ドライブパック* ..... 1
ドライブパックドライブパック
のの
のCD-ROM ...
のの
]]
]
]]
取扱説明書(本書)取扱説明書(本書)
個個
個
個個
枚枚
1
枚
Easy CD Creator™ 5 Basic
枚枚
..............
....... 1
..............
のご案内のご案内
のご案内
のご案内のご案内
........
.... 1
........
冊冊
冊
冊冊
冊冊
冊
冊冊
お知らせお知らせ
お知らせ
お知らせお知らせ
Windows XP
本書では、工場出荷状態の設定での手順で説明しています。設定によっては、
手順が異なることがあります。
J
Microsoftとそのロゴ、MS、MS-DOS、Windowsは、米国Microsoft Corporation
の米国及びその他の国における登録商標です。
Roxio、Roxioのロゴ、Easy CD Creator、DirectCDはRoxio, Inc. の商標です。
JustLinkは、株式会社リコーの登録商標です。
28
Page 29

安全上のご注意
お使いになる人や他の人への危害、財産への損害を未然に防止するため、必ずお
守りいただくことを、次のように説明しています。
■表示内容を無視して誤った使い方をした時に生じる危害や障害の程度を、次の
表示で区分し、説明しています。
必ずお守りください
注意
■お守りいただく内容の種類を、次の絵表示で、説明しています。
この表示の欄は、「傷害を負う可能性または物質的損害の
みが発生する可能性が想定される」内容です。
この絵表示は、してはいけない「禁止」内容です。
注意
CD-R/RWドライブの内部を
のぞきこまない
内部のレーザー光源を直
視すると、視力障害の原因
禁止
内部の点検・調整・修理は、販売店
にご相談ください。
になることがあります。
ひび割れたり変形したりした
CDは使用しない
高速で回転するため、飛び
散ってけがの原因になるこ
禁止
とがあります。
円形でない CD や、接着剤などで
補修したCD も同様に危険ですの
で、使用しないでください。
29
J
Page 30

使用上のお願い
トレイにディスク以外のものを載せないでください。
トレイを開けたままで放置したり、レンズの部分に手を触れたりしないでくださ
い。ごみやほこりがレンズに付着し、データを読み取れなくなる場合があります。
また、使用環境によっても、ほこりがレンズに付着することがあります。
トレイが開いているときに、トレイに無理な力をかけないでください。故障の原
因になります。
ドライブアクセス中は、ドライブを開けたり、コンピューターを動かしたりしな
いでください。故障の原因になります。
また、ディスクにアクセスするアプリケーションソフトを起動した後は、そのア
プリケーションソフトを終了するまでドライブを開けたり、ディスクを取り出さ
ないでください。
トレイを閉じた後、ドライブのアクセスランプ( )が消えるまで、ドライブに
アクセスしないでください。
油煙やたばこの煙の多いところでは使用しないでください。レンズの寿命が短く
なることがあります。
ドライブのレンズのクリーニングには、カメラ用のレンズブロアーの使用をおす
すめします。(スプレー式の強力なものは使わないでください。)
ドライブのすき間部分にゼムクリップなどの異物が入らないようにしてください。
変形したディスク(曲がったり、円形でないもの)は使用しないでください。
本ドライブを取り付けているときは、外付けのCD-ROM、DVD-ROMドライブ
などを使用しないでください。
自動実行のディスクの場合
・ スタンバイや休止状態からのリジューム後、自動実行のディスクを挿入しても
実行されない場合は、15 秒以上待ってからディスクを入れ直してください。
・ ディスクの状態によっては、ファイルへのアクセス中に自動実行が開始される
ことがあります。
ディスクの取り扱い
ディスクの汚れや損傷の原因になりますので、再生面(タイトルのない面)に触
れないでください。
汚したり、傷つけたりしないでください。
ゴミやほこりの多い場所、温度や湿度の高い場所、直射日光の当たる場所に置か
ないでください。
ボールぺンなどで表面に字を書いたり、紙を貼ったりしないでください。
温度差の激しい場所に置かないでください。(結露が生じます)
急に暖かい室内に持ち込んだときなどに露がついたら、乾いた柔らかい布でふい
てください。
落としたり、曲げたり、重い物をのせないでください。
2〜3か月に1回程度、ディスクのクリーニングをしてください。クリーニング
には、CDディスククリーナーを使用してください。
J
汚れをとるには
乾いた柔らかい布で、中心から外の方向
へ軽くふきます。
30
Page 31

ドライブを使う
取り付け/取り外し
コンピューター本体の『操作マニュアル』「マルチメディアポケット」をご覧く
ださい。
お願い
ドライブの取り付け/取り外しを行う前に、コンピューターの電源を切って
ください。
ドライブの設定を行う
Windows 98
[スタート] - [設定] - [コントロールパネル] - [システム] - [デバイスマネー
ジャ] - [CD-ROM] - [MATSHITA UJDA***] - [プロパティ] - [設定]で、下記
の設定を確認してください。
・[DMA]の左にチェックマークを付ける。
・ [予約ドライブ文字]の[開始ドライブ文字]と[終了ドライブ文字]を[L:]にす
る。
Windows 2000
[スタート] - [設定] - [コントロールパネル] - [システム] - [ハードウェア] [デバイスマネージャ] - [IDE ATA/ATAPIコントローラ]の[セカンダリIDEチャ
ンネル] - [詳細設定]で、「デバイス 0」の「転送モード」が[PIOのみ]になっ
ているときは、[DMA(利用可能な場合)]に設定してください。
Windows XP
[スタート] - [コントロールパネル] - [パフォーマンスとメンテナンス] - [シ
ステム] - [ハードウェア] - [デバイスマネージャ] - [IDE ATA/ATAPI コント
ローラ]の[セカンダリIDEチャンネル] - [詳細設定]で、「デバイス0」の「転
送モード」が[PIOのみ]になっているときは、[DMA(利用可能な場合)]に設定
してください。
お知らせお知らせ
お知らせ
お知らせお知らせ
ドライブを取り付けてPCカードが動作しなくなったときは、使用できる割り
込み要求(IRQ)が不足している場合があります。セットアップユーティリ
ティで不要なポートを無効に設定してください。
J
31
Page 32

ドライブを使う
ディスクのセット/取り出し
1 本体の電源を入れる。
2 ディスク取り出しボタンを押す。
トレイが少し出ますので、手でゆっくり引き出してくださ
い。
お知らせ
ドライブをお使いになる前に、ディスク取り出し
ボタンを押して、トレイ上の保護シート(レンズ
保護用の厚紙)を取り除いてください。保護シー
トが入っていると、トレイを開けるなどのドライ
ブの動作が約10秒遅くなります。
3
ディスク
1 タイトル面を上にして、ディスクの端から斜めに
挿入します。
2 ディスクの中心部をカチッと音がするまで押して
しっかりとセットします。
をセットする。
タイトル面
センター
ホルダー
ディスク取り出し
ボタン
<
ディスク
センターホルダーに指を添え、ディスクの端を浮かせ
ながら取り出します。
4 トレイを閉じる。
ディスク取り出しボタンは押さないでください。
お知らせ
ドライブの振動が大きい場合は、セットアップユーティリティでドライブの
速度を「中速」に設定してください。
Windows 98
以下の場合「中速」にならないことがあります。そのときは、コンピュー
J
32
ターを再起動してください。
・ スタンバイ・休止状態からリジュームしたとき
・ 電源オンの状態でドライブを取り付けたとき
を取り出すとき >
Page 33

省電力モードについて
約30秒間ドライブにアクセスがないと、省電力のために自動的にドライブ
モーターの電源が切れます。ドライブにアクセスがあるとドライブモーター
の電源が入ります。電源が入った後、ディスクからデータが実際に読めるよ
うになるまで、約30秒かかります。
MS-DOSモードでドライブを使う
Windows 98
MS-DOSモードでドライブを使う場合*は、31ページの「ドライブの設定を行う」
の設定を確認した後、以下の手順でドライバーを組み込んでください。
設定を行わずに以下の手順を行うと、正常に動作しません。
* MS-DOSモードでは、ディスクの読み込みのみ可能です。
11
1
[スタート] - [Windowsの終了]を選ぶ。
11
22
2
[MS-DOSモードで再起動する]を選び、[OK]を選ぶ。
22
33
3
CONFIG.SYSファイルを修正する。
33
cd ¥Enter
edit config.sys
44
4
カーソルを以下の行に移動し、行頭のremを削除する。
44
(remを削除するとその項目が有効になります。)
DEVICEHIGH= C:¥WINDOWS ¥COMMAND¥OAKCDROM.SYS /D:MSCD000
(この行がない場合は追加してください。)
Enter
55
5
Alt、
55
し、
66
6
同様にAUTOEXEC.BATファイルを修正する。
66
77
7
カーソルをMSCDEX.EXEのドライバーが記載されている行に移動し、行
77
頭のremを削除する。
(remを削除するとその項目が有効になります。)
LOADHIGH C:¥WINDOWS¥COMMAND¥MSCDEX.EXE /D:MSCD000 /L:L
(この行がない場合は追加してください。)
88
8
Alt、
88
て、
99
9
コンピューターを再起動する。
99
F(ファイル)を順に押して、
Alt、
edit autoexec.batEnter
Xを押して終了する。
Fを順に押して、
Fを順に押して、
S(上書き保存)を押して保存
X(終了)を押して終了する。
Sを押して保存し、
Alt、
Fを順に押し
J
33
Page 34

ドライブを使う
CD-R、CD-RWディスクに書き込みや書き換えを行う
CD-RディスクやCD-RWディスクは、包装に記載されている内容をよく読ん
でお使いください。
CD-RWに対応していない他のドライブでは、CD-RWの読み出しが行えませ
ん。詳しくは、各ドライブのメーカーにお問い合わせください。
付属の「Easy CD Creator™ 5」の CD-ROM を使って、専用アプリケーショ
ンソフトをコンピューターにインストールしてください。インストールの方法
については、付属の「Easy CD Creator™ 5」のご案内をご覧ください。
書き込みや書き換え速度に応じたディスクをご使用ください。( 36ページ)
書き込み作業が長時間におよぶ場合は、ACアダプターを接続しておいてくださ
い。作業中にバッテリー切れが起こると書き込みに失敗する場合があります。
推奨ディスクをお使いください。
<推奨ディスク>
CD-R :日立マクセル(株)製、三菱化学(株)製、三井化学(株)製、(株)リコー
製、太陽誘電(株)製
CD-RW/High Speed CD-RW:三菱化学(株)製、(株)リコー製
J
34
Page 35

困ったときのQ&A
ドライブを認識し
ていない
アクセスランプ
( )が点灯しない
ディスクの再生や読
み出しができない
ディスクが取り出
せない
突然、MPEG画像が
残った青い画面に
なった
トレイが閉じない
コンピューターが
ハングアップす
る、または再起動
する
Windows XP
CD-ROMドライブ
またはDVD-ROM
ドライブに交換す
ると、ディスク上
のファイルが読み
込めない
「ドライブの設定を行う」
設定を確認してください。
ドライブを取り付け直してください。
ディスクは正しくトレイにセットされていますか?
ディスクが変形していたり、傷や汚れが付いていません
か?
コンピューターの電源が入ってい
ますか?
電源が入っていない状態でディス
クを取り出すには、ゼムクリップ
を引き伸ばしたものなどをエマー
ジェンシーホールに挿し込んで、
トレイを引き出してください。
再生中にドライブから、MPEGのディスクを取り出しませ
んでしたか?
ディスクをセットしてEnterを押してください。
トレイを閉じるとき、ディスク取り出しボタンを押しま
せんでしたか?
外付けのCD-ROM、DVD-ROMドライブ などを取り
付けていませんか?
本ドライブを取り付けているときは、外付けのCD-ROM、
DVD-ROMドライブなどを使用しないでください。
コンピューターの電源を切った状態でドライブの取り
付け/取り外しを行いましたか?
コンピューターの電源を切らずにドライブを取り付けると、
ドライブが正しく初期化されない場合があります。
マルチメディアポケットにCD-R/RWドライブを取り付けた
後、CD-ROMドライブまたはDVD-ROMドライブに交換する
と、ディスク上のファイルが読み込めない場合があります。
その場合は、以下の手順で「ハードウェア変更のスキャン」
を実行してください。
1 [コントロールパネル]‑[パフォーマンスとメンテナン
ス]‑[システム]‑ [ハードウェア]‑[デバイスマネー
ジャ]を選ぶ。
2
[DVD-ROM/CD-ROMドライブ]の下に表示されているドラ
イブ(例:MATSHITA****など)を選び、メニューから[操
作]‑[削除]を選んで[OK]を選ぶ。
3 メニューから[操作]‑[ハードウェア変更のスキャン]
を選ぶ。
(上記の問題が起こることが、マイクロソフト社より
報告されています。)
( 31 ページ)を参照し、
エマージェンシー
ホール
J
35
Page 36

仕様
項 目
動作保証電圧
転送速度 読み込み
CD-R書き込み*
CD-RW書き換え
High Speed CD-RW書き換え
使用可能ディスク
バッファアンダーランエラー防止機能
アクセス時間
キャッシュメモリー
インターフェース
外形寸法(幅×奥行き×高さ)
質量
使用環境条件 温度/湿度
1
内 容
DC5 V ± 0.25 V
3600Kバイト/秒(最大24倍速*2)
600Kバイト/秒(4倍速)
1200Kバイト/秒(8倍速)
2400Kバイト/秒(最大16倍速)
3600Kバイト/秒(最大24倍速)
600Kバイト/秒(4倍速)
600Kバイト/秒(4倍速)
1200Kバイト/秒(8倍速)
1500Kバイト/秒(10倍速)
CD-Audio、CD-ROM、CD-R、
Photo CD、Video CD、
CD Extra、CD-RW、CD-TEXT
JustLink™対応
130ms(24倍速、1/3ストローク*3)
2Mバイト
拡張IDE(ATAPI)準拠
約130mm×150mm×23.7mm
約365g
5 ℃〜35℃/30%〜80%RH
(結露なきこと)
*1
使用するディスクによって、書き込み速度が遅くなることがあります。
*2
偏重心のCD(重心が中央にないCD)を使用すると、振動が大きくなり速度
が遅くなることがあります。
*3
ストロークとは、ドライブのレンズ(ピックアップ部分)がデータを読み取る
ときの移動量を表します。
J
36
Page 37

保証とアフターサービス
コンピューター本体の『取扱説明書』をご覧ください。
松下電器産業株式会社 ITプロダクツ事業部
〒570-0021大阪府守口市八雲東町一丁目10番12号
© Matsushita Electric Industrial Co., Ltd. 2003
J
37
Page 38

メモ
38
Page 39

〈無料修理規定〉
1. 取扱説明書、本体貼付ラベル等の注意書に従った使用状態で保証期間内に故
障した場合には、無料修理をさせていただきます。
(イ) 無料修理をご依頼になる場合には、商品に取扱説明書から切り離した
本書を添えていただきお買い上げの販売店にお申しつけください。
(ロ) お買い上げの販売店に無料修理をご依頼にならない場合には、ご相談
2. ご転居の場合の修理ご依頼先等は、お買い上げの販売店またはご相談窓口に
3. ご贈答品等で本保証書に記入の販売店で無料修理をお受けになれない場合に
4. 保証期間内でも次の場合には原則として有料にさせていただきます。
︵
切
り
取
り
5. 本書は日本国内においてのみ有効です。
6. 本書は再発行いたしませんので大切に保管してください。
7. ご相談窓口はコンピューター本体の取扱説明書の「修理ご相談窓口」をご参
線
︶
窓口にご連絡ください。
ご相談ください。
は、ご相談窓口へご連絡ください。
(イ) 使用上の誤り及び不当な修理や改造による故障及び損傷
(ロ) お買い上げ後の輸送、落下などによる故障及び損傷
(ハ) 火災、地震、水害、落雷、その他天災地変及び公害、塩害、虫害、ガス
害(硫化ガスなど)、異常電圧、指定外の使用電源(電圧、周波数)な
どによる故障及び損傷
(ニ) 車両、船舶等に搭載された場合に生ずる故障及び損傷
(ホ) 本書のご提示がない場合
(へ) 本書にお買い上げ年月日、お客様名、販売店名の記入のない場合、ある
いは字句を書き替えられた場合
(ト) 持込修理の対象商品を直接修理窓口へ送付した場合の送料等はお客様
の負担となります。また、出張修理を行った場合には、出張料はお客
様の負担となります。
照ください。
修理メモ
※ この保証書は、本書に明示した期間、条件のもとにおいて無料修理をお約束す
るものです。従ってこの保証書によって、お客様の法律上の権利を制限するも
のではありませんので、保証期間経過後の修理についてご不明の場合は、お買
い上げの販売店またはお近くのご相談窓口にお問い合わせください。
※ 保証期間経過後の修理や補修用性能部品の保有期間についてはコンピュー
ター本体の取扱説明書の「保証とアフターサービス」をご覧ください。
※ This warranty is valid only in Japan.
Page 40

持込修理持込修理
持込修理
持込修理持込修理
CD-R/RW ドライブパック保証書
本書はお買い上げの日から下記期間中故障が発生した場合には本書裏
面記載内容で無料修理を行うことをお約束するものです。詳細は裏面
をご参照ください。
品番
保証期間
※
お買い上げ日
※
ご住所
お
年 月 日
お買い上げ日から
CF-VCW283U
本体1年間
客
お名前
様
電話
※
住所・販売店名
( ) ー
販
売
店
電話( ) ー
松下電器産業株式会社松下電器産業株式会社
松下電器産業株式会社
松下電器産業株式会社松下電器産業株式会社
〒570-0021大阪府守口市八雲東町一丁目10番12号 TEL (06)6908-1001
ご販売店様へ ※印欄は必ず記入してお渡しください。
IT
ププ
プ
ププ
ロロ
ロ
ロロ
ダダ
ダ
ダダ
クク
ク
クク
ツツ
ツ
ツツ
事事
事
事事
業業
業
業業
部部
部
部部
様
︵
切
り
取
り
線
︶
 Loading...