

Panasonic Auto-Logic KX-T1720 Operating Instructions Manual

nllitfifiil"tl [RrEi][F"
GtuJuuJ
[tgJuJl]L!
Panasonic
"
Operoting
Instructions
TONE
REMOTE
CONTROL
AUTOMATIC
TELEPHONE
ANSWERING
SYSTEM
Mode,No
KX-T1720
'E
EASA-eHoNE
ig
Thank
you
for
purchasing
the Panasonic
Telephone
Answering
System.
j
:l
t
I
iO
!t
an
'o
,o
[.
q{
Contents
Please
read
belore
use.
Location
of Controls.
lnitial
Preparation.
. .
Connections
Basic
Operation
How
to Record
Outgoing
Message (OGM)
Setting Prior
lo
Leaving
Listening
to
Messages
OtherFJature"
..L....
:.. : :.
-
Detailed
Operation
How
to
Adjust
Time
How
lo
Operale
f rom
Remote
Phone
General
Information
Liquid
Crystal
Display
Announcements
bythe Unit
Cassette
Tapes
.
13
Maintenance
14
Others
........
14
Troubleshooting
Guide ...... .. 15
lmportant
Information
........
i6
Accessory
Order
Information
17
Tarjeta
de Referencia
Rapida
Servicenter
Directory
Warranty
Accessories
1
1
2
3
4
8
12
12
18
21
22
La tarjeta
de
referencia
rdpida
en
espafior
puede
encontrarse
en ras
p6ginas
18-20.
(Spanish
quick
reference
card
can
be found
on
pages
1g_20.)
AC
Adaptor
(KX-A1
1)
1
Outgoing
MessageTape........
1
Incoming
MessageTape........
1
TelephoneCord
(4-wired)
...... 1
TelephoneCord
(2-wired)
...... 1
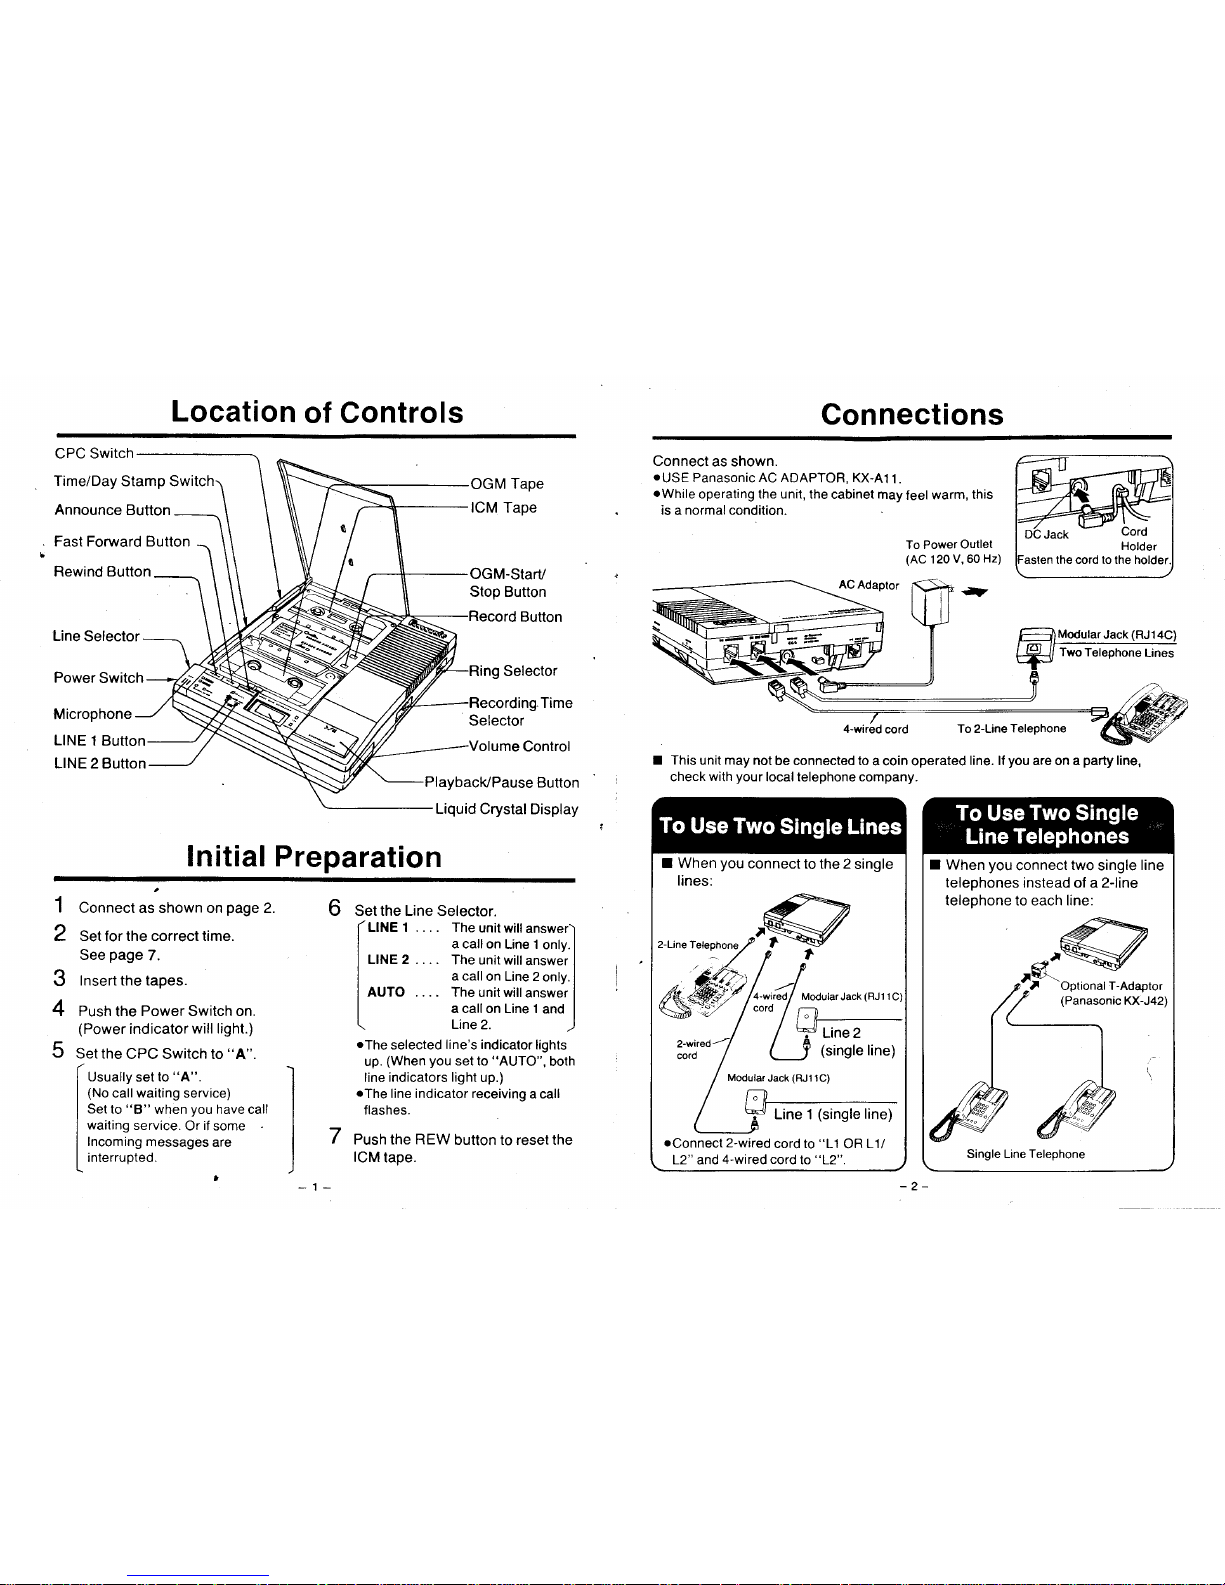
CPC Switch
fime/Day
Stamp Switch
Announce
Button
Fast Forward Button
Rewind Button
Line
Selector.
Power
Switch
Microphone
LINE
1 Button
LINE 2 Button
Location
of Controls
Connections
Connect
as shown.
oUSE
Panasonic AC ADAPTOR,
KX-A1
l.
.While
operating the unit,
the cabinet may
feel
warm,
this
is a normal condition.
To Power
Outlet
(AC
1 20
V, 60
Hz)
I This unit may
not be connected to
a coin operated
line. lf
you
are on a
party
line,
check
with
your
local telephone company.
OGM
Tape
ICM Tape
OGM-StarV
Stop Button
Record
Button
ng Selector
Time
Selector
Control
Playback/Pause
Button
Liquid
CrystalDisplay
Initial Preparation
6 S"t tn" Line Selector.
rLINE
1 .... Theunitwiflanswer)
I
a call on
Line 1
onty.
I
lL|NE2....
Theunitwill
answerl
,
I
a
call on Line 2
onty.
| ]
I
AUTO . . . . The
unil will
answer
I
I l.call
on Line 1
and
I
\
Line
2.
)
.The
selected
line's indicator
lights
up.
(When
you
set to
"AUTO",
both
line indicators
light
up.)
oThe
line indicator receiving
a call
flashes.
1
2
3
4
5
Connect "r'"no*n on
page
2.
Set for the correct time.
See
page
7.
Insert the tapes.
Push
the
Power Switch on.
(Power
indicator
will light.)
Set the
CPC Switch to
"A".
I
Usually
set
to
"A".
|
(No
call waiting service)
I
Set to
"8"
when
you
have call
I
waiting
service.
Or
if
some
I
Incoming
messages
are
L
interrupted.
7
Pusfr the REW
button to reset the
ICM
tape.
aslen the cord to the holder
I When
you
connect
to the 2
single
lines:
Line 1
(single
line)
.Connect
2-wired
cord to
"L1
OR
L1/
L2" and
4-wired cord
to
"L2".
ModularJack
(RJ1
1C)
I
When
you
connect
two
single
line
telephones
instead of a 2-line
telephone to each line:
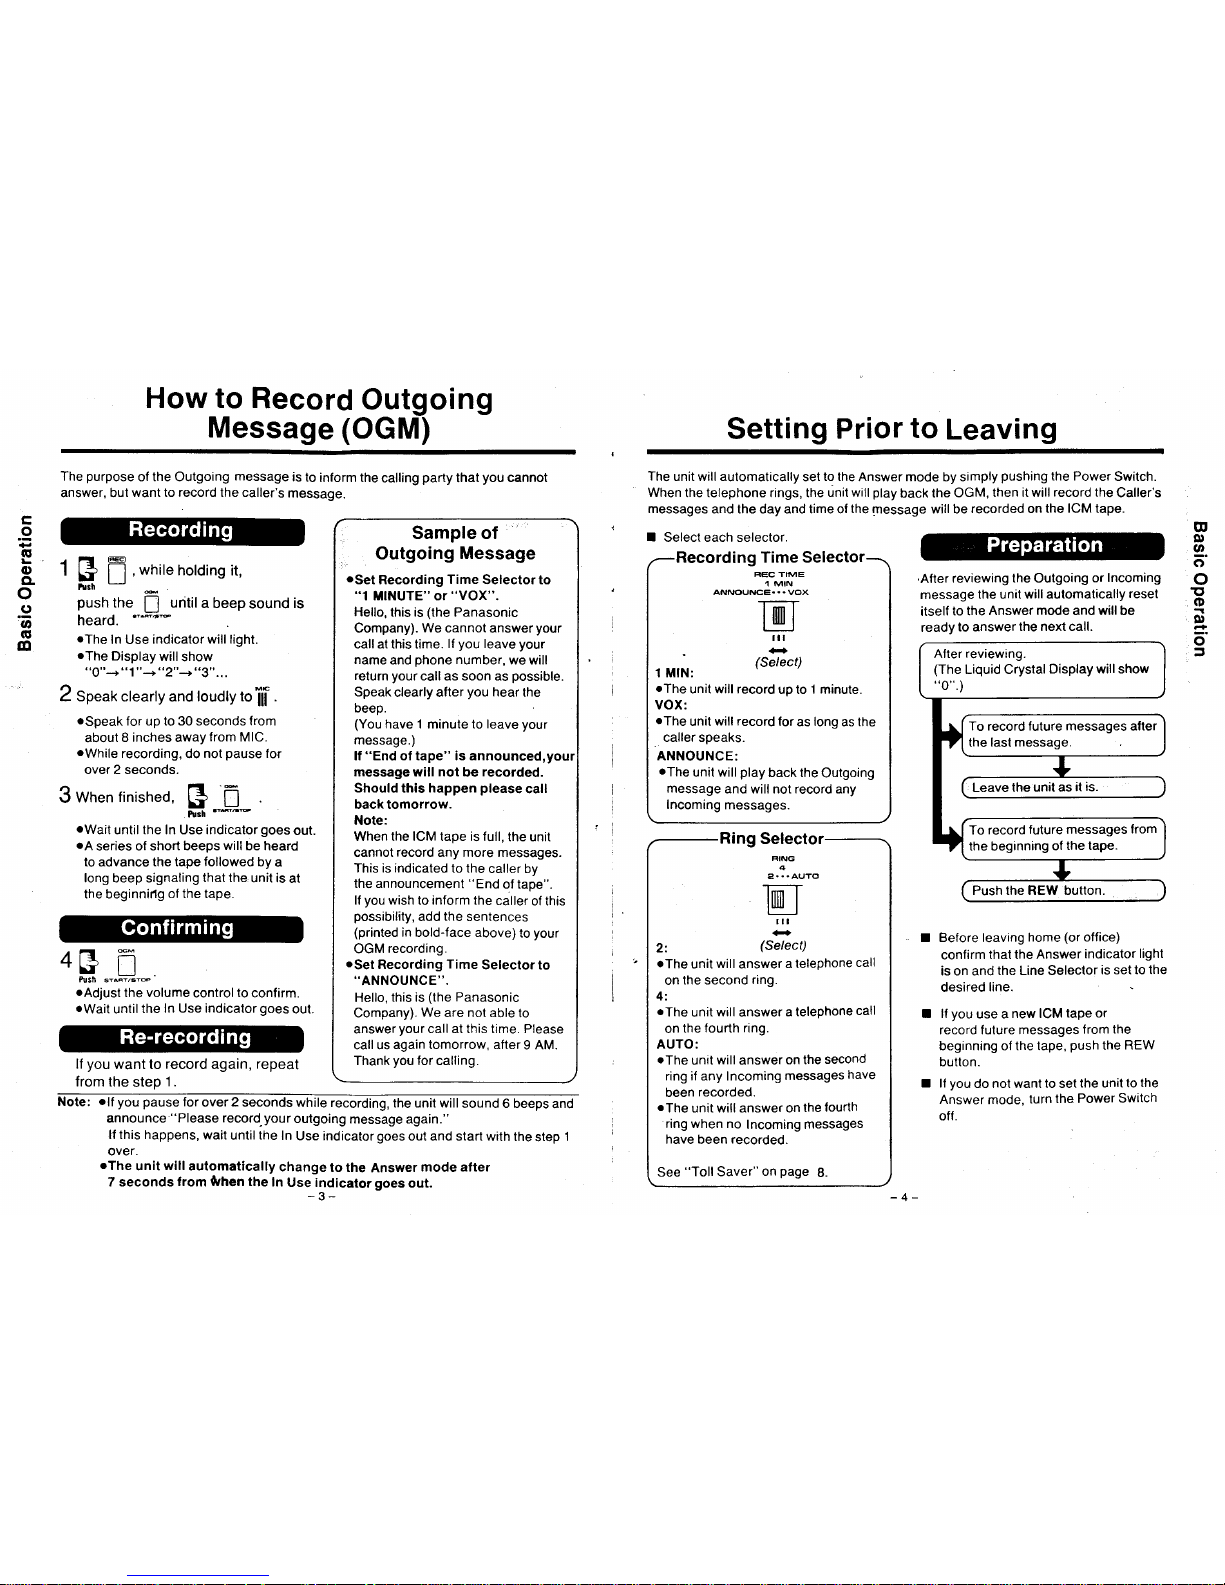
How to
Record
Outgoing
Message
(OGM)
The
purpose
of the Outgoing
message
is
to
inform the
calling
party
that
you
cannot
answer, but
want to record the caller's
message.
Setting
Prior
to
Leaving
The
unit will automatically
set
to the
Answer mode by simply
pushing
the Power
Switch.
When
the telephone rings, the
unit
will play
back the
OGM,
then it will
record
the
Caller's
messages
and the day and time ol
the
gessage
will be
recorded on
the ICM tape.
@
o'
12.
o
o
E
o
q,
f.
o
3
tr
o
E
o
CL
o
.9
lt,
tu
o
I
I
I
rFlE
|
!l | |
,
whire
hording ir,
h.h
-
push
the
fl
until
a beep
sound
is
heard.
.The
In Use
indicator will liqht.
.The
Display
will
show
"O"+"1"+"2"+
"3"...
2 Speat<
clearly and
loudty to
iif
.
rSpeak
for up to 30 seconds from
about
8 inches away
from MlC.
oWhile
recording,
do
not
pause
lor
over 2 seconds.
^l!
5
When
finished,
l|
!
turh
"-"-
.Wait
until the In Use indicator
goes
out.
.A
series of short
beeps
will
be heard
to advance
the tape followed by
a
long beep signaling
that the,
unit is
at
the beginnidg
of the tape.
Sample of
Outgoing
Message
.Set
Recording
Time
Selector to
"1
lrlNUTE" or
"VOX".
Hello,
this is
(the
Panasonic
Company).
We
cannot answer
youl
call at this time.
l{
you
leave
your
name
and
phone
number,
we will
return
your
call as soon as
possible
Speak
clearly after
you
hear
the
beeo.
(You
have 1 minute to
leave
your
message.)
lf
"End
of tape" is announced,
message will
not
be
recorded.
Should
this
happen
please
call
back tomorrow.
Note:
When the ICM tape is full,
the unit
cannot record any more messages.
This is indicated to the
caller by
the announcement
"End
of tape".
lf
you
wish to inform the
caller
of this
possibility,
add
the
sentences
(printed
in bold-face above)
to
your
OGM
recording.
oSet
Recording
Time
Selector
to
..ANNOUNCE'"
Hello,
this is
(the
Panasonic
Company).
We
are nol able
to
answer
your
call at this time. Please
call us
again tomorrow, after
9 AM.
Thank
you
for calling.
I
Select each selector
Recording Time Selector
reC
TIME
1 MIN
ANrcUrcE...VOX
ltr
.
.+
(Select)
l MIN:
rThe
unit will record
up to 1 minute.
VOX:
rThe
unit
will record
for
as
lono
as the
caller speaks.
ANNOUNCE:
rThe
unit will
play
back the
Outgoing
message
and will not record any
lncoming
messages.
tIl
-
2:
(Select)
.The
unit
will
answer
a telephone
call
on
the second
ring.
4:
.The
unit
will
answer
a telephone
call
on
the
fourth ring.
AUTO:
oThe
unit
will
answer
on the
second
ring if any Incoming
messages
have
been
recorded.
oThe
unit will answer on
lhe
fourth
ring when no
Incoming messages
have been
recorded.
See
"Toll
Saver"
on
page
8.
After
reviewing the Outgoing
or
Incoming
message
lhe unit will automatically
reset
itself
to the
Answer mode and will be
ready
to answer
the next call.
I Before leaving
home
(or
office)
confirm
that the
Answer
indicator
light
is on and
the Line Selector
is set to the
desired
line.
I lf
you
use a
new ICM
tape or
record fulure messages
f rom
the
beginning of the tape,
push
the
REW
button.
I lf
you
do not want to set
lhe unit to
the
Answer
mode,
lurn
the Power
Switch
ofl.
4r1 fi
'Nr
tl
Pvsh s-"iiZ-*'
.Adjust
the volume
control
to
confirm.
.Wait
until
the
In Use indicator
qoes
out.
'',
I
I
I
lf
you
want to
record
again,
repeat
from the
steD
1.
Note:
.lf
you
pause
for
over 2 seconds while
recording,
the unit will
sound 6 beeps
and
announce
"Please
record
your
outgoing
message again."
lf this happens,
wait
until
the
In
Use indicator
goes
out and start with
the
step
1
over.
oThe
unit
will
automatically
change
to the
Answer
mode after
7 seconds from fvhen the
In
Use indicator goes
out.
-J-
After reviewing.
(The
Liquid Crystal
Display will show
"0".)
To
record
future messages
after
the last message.
Leave
the unit as
it
is.
To
record
future messages
from
the beginning
of
the tape.
Push the REW button.
 Loading...