

Panasonic 96NKX TG2730 User Manual

2.4GHz Multi-Handset Cordless Phone System
Model No. KX-TG2730S
Pulse-or-tone-dialing capability
Operating Instructions
Charge the battery for about 15 hours before initial use.
PLEASE READ BEFORE USE AND SAVE.
Contents:
Location of Controls 2
Connections 5
Battery Installation/Battery Charge 6
Recording a Greeting Message 7
Making/Answering calls with the Handset 8
Making/Answering calls with the Base Unit 9
Caller ID Service 9
Automatic Answering Operation 10
Listening to Messages 10
Important Safety Instructions 11
FCC and Other Information 13
–2–
Please read IMPORTANT SAFETY
INSTRUCTIONS on page 11 before use.
Read and understand all instructions.
Location of Controls
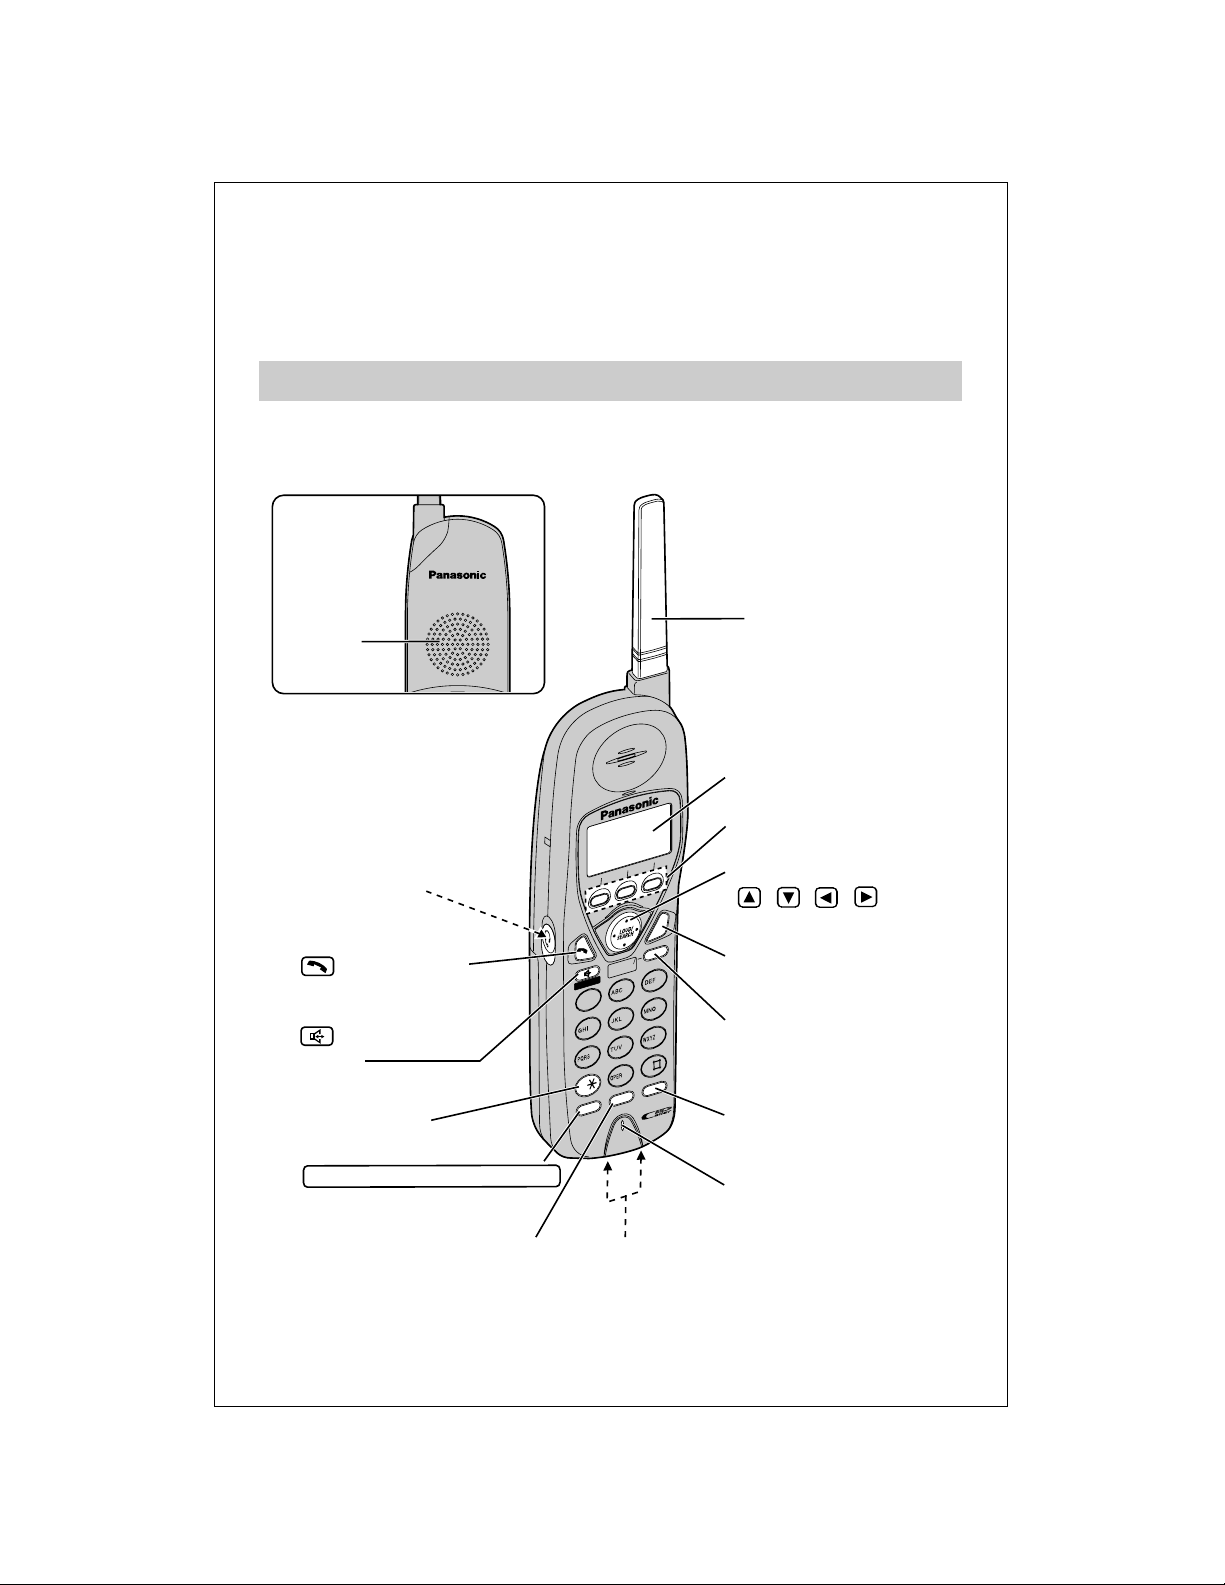
■ Handset
INTERCOM
T
R
A
N
S
F
E
R
CLEAR
SP
-
PHONE
H
O
L
D
F
U
N
C
T
IO
N
REDIAL
C
A
L
L
W
A
IT
2
1
3
4
5
6
7
8
T
O
N
E
0
9
CONF
T
A
L
K
OFF
F
L
A
S
H
PAUSE
Back side
Speaker
Headset Jack
(TONE) Button
(TALK) Button
(Speakerphone)
Button
Button
CONF (Conference)/FUNCTION
Microphone
Charge Contacts
Antenna
Display
(OFF) Button
(HOLD/CLEAR)/
(INTERCOM/TRANSFER)
Button
(PAUSE/REDIAL)
Button
Soft Keys
Navigator Key
( , , , )
(FLASH/CALL!WAIT)
Button
–3–
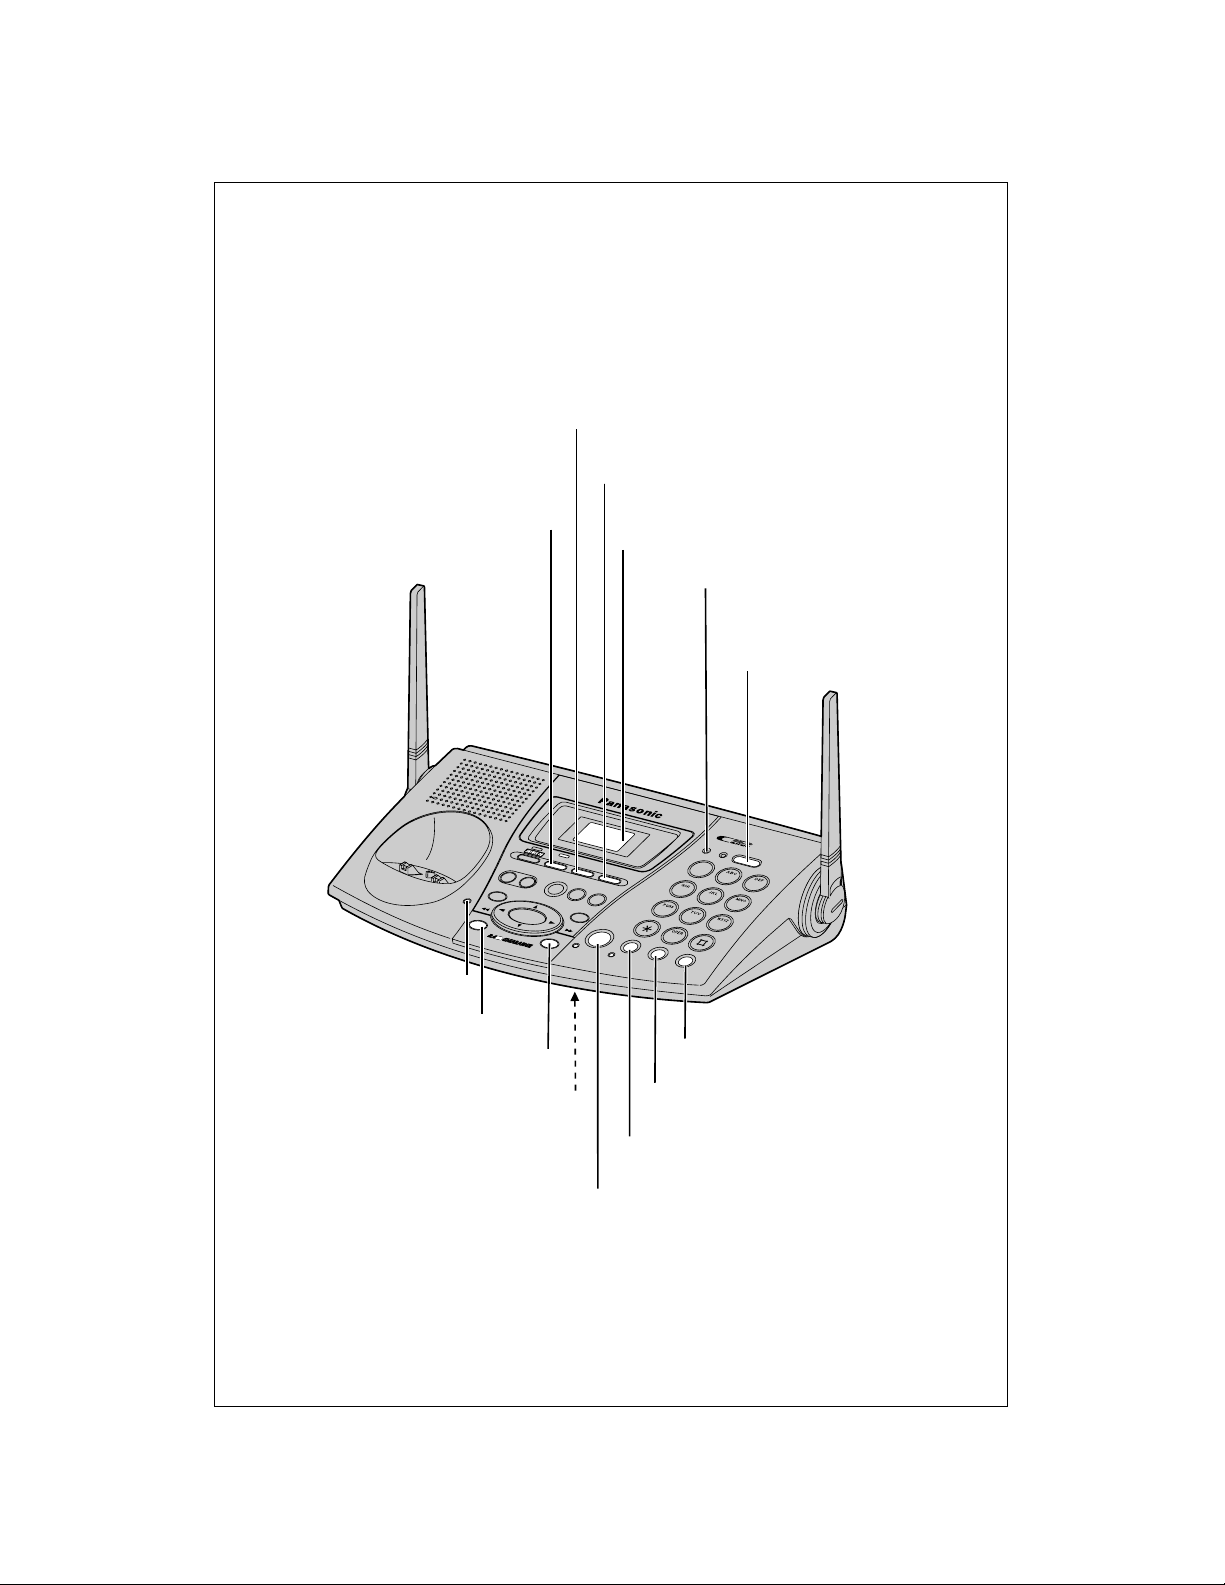
■ Base unit
1
2
3
E
R
A
S
E
STOP
H
O
L
D
C
O
N
F
N
E
W
M
E
S
S
A
G
E
/
S
L
O
W
T
A
L
K
M
A
I
L
B
O
X
M
I
C
D
I
G
I
T
A
L
S
P
R
E
A
D
S
P
E
C
T
R
U
M
C
H
A
R
G
E
M
U
L
T
I H
A
N
D
S
E
T
0
REDIAL
/
PAUSE
MUTE
TONE
D
IG
IT
A
L
S
P
P
H
O
N
E
FLASH/
CALL WAIT
1
3
2
4
5
6
8
7
9
TRANSFER
IN
T
E
R
C
O
M
P
R
I
V
A
C
Y
M
E
M
O
G
R
E
E
T
IN
G
PR
OG
RAM
RING
ER/
AUTO
R
I
N
G
E
R
LOUD/
R
O
O
M
M
O
N
I
T
O
R
IN
U
S
E
Display
MIC (Microphone)
CHARGE Indicator
(PROGRAM) Button
(RINGER/AUTO) Button
(DIGITALÒSP-PHONE) Button and
Indicator
(MUTE) Button and Indicator
(FLASH/CALLÒWAIT) Button
(REDIAL/PAUSE) Button
IN USE Indicator
(INTERCOM/TRANSFER)
Button
(PRIVACY) Button and Indicator
(HOLD) Button
(CONF) (Conference)
Button
–4–
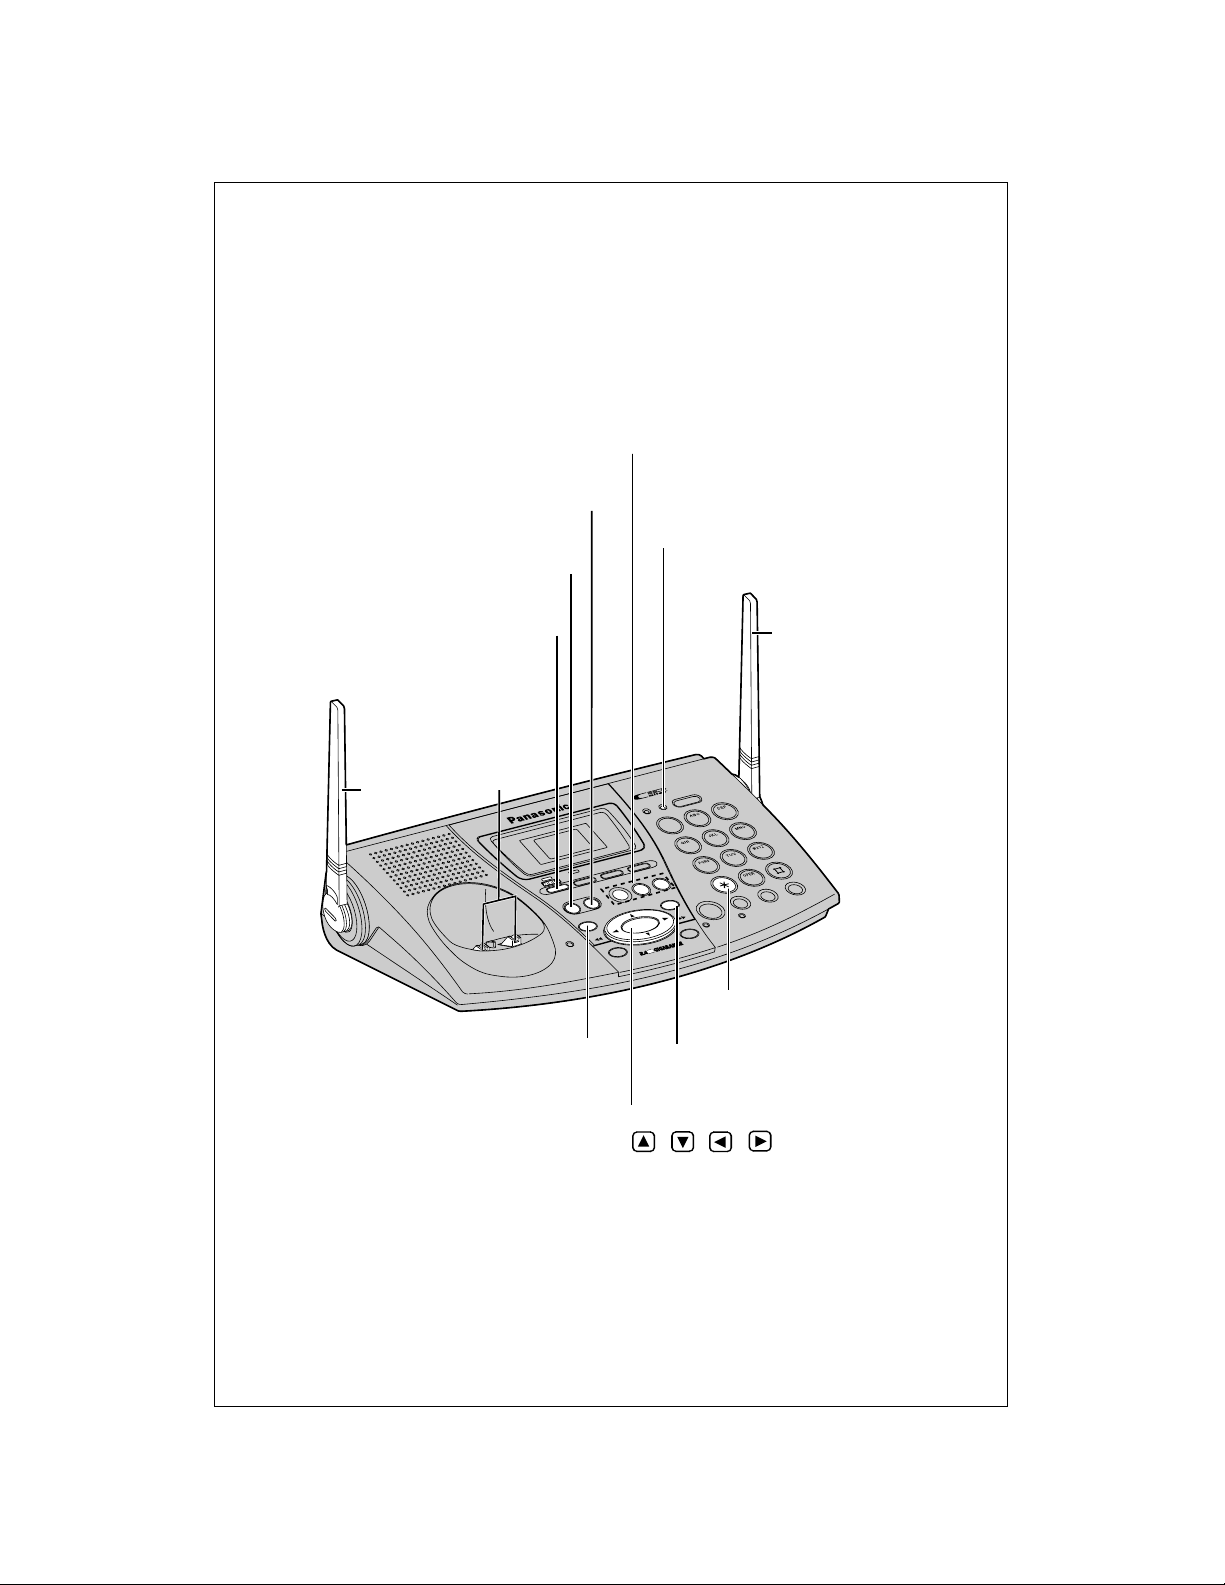
■ Base unit
M
IC
C
HAR
GE
ERASE
STO
P
MULTI HANDSET
1
2
3
N
E
W
M
E
S
S
A
G
E
/
S
L
O
W
T
A
L
K
M
A
I
L
B
O
X
H
O
L
D
C
O
N
F
REDIAL
/
PAUSE
M
UTE
TO
NE
D
IG
IT
A
L S
P
P
H
O
N
E
FLASH/
CALL WAIT
D
I
G
I
T
A
L
S
P
R
E
A
D
S
P
E
C
T
R
U
M
TRANSFER
IN
T
E
R
C
O
M
0
1
3
2
4
5
6
8
7
9
P
R
I
V
A
C
Y
R
IN
G
E
R
L
O
U
D
/
MEMO
GREETING
P
R
O
G
R
A
M
R
IN
G
E
R
/
A
U
T
O
R
O
O
M
M
O
N
I
T
O
R
IN
U
S
E
(ERASE) Button
(STOP) Button
(GREETING) Button
(ANSWERÒON) Button
and Indicator
(MEMO) Button
ROOM MONITOR/INTERCOM
Indicator
Antenna
(TONE) Button
Antenna
Charge
Contacts
(MAILBOX) Buttons
Navigator Key
( , , , )
–5–
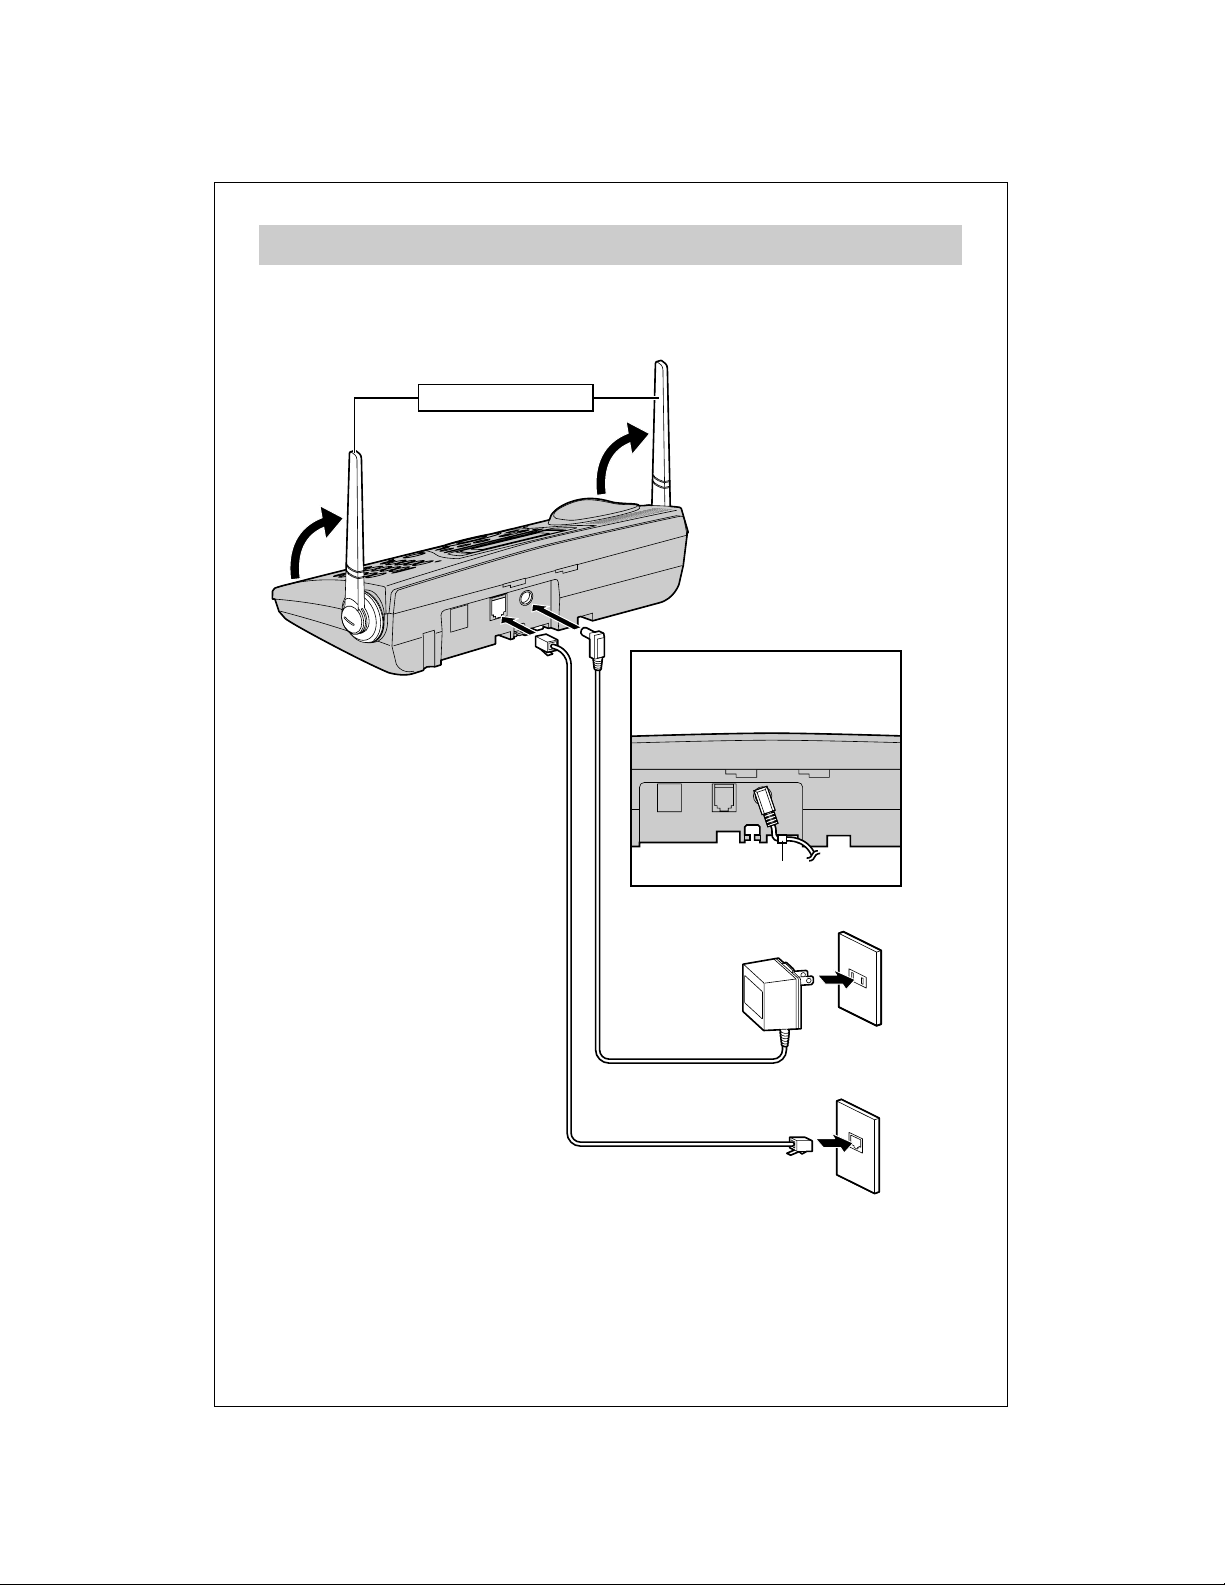
Connections
■ Connect the AC adaptor and the telephone line cord.
• USE ONLY WITH Panasonic AC ADAPTOR PQLV10.
• The AC adaptor must remain connected at all times. (It is normal for the
adaptor to feel warm during use.)
Hook
Telephone Line Cord
AC Adaptor
Power Outlet (AC 120 V, 60 Hz)
Single-Line Telephone Jack (RJ11C)
Fasten the AC adaptor cord to
prevent it from being
disconnected.
Raise the antennas.
 Loading...