

Panasonic 96NKX TG2356 Users Manual
2.4GHz Digital Cordless Answering System
Pulse-or-tone dialing capability
Model No.
KX-TG2356S
PLEASE READ BEFORE USE AND SAVE.
Charge the battery for about 6 hours before initial use.
Contents:
Location of Controls 2
Connections 4
Battery Installation/Battery Charge 5
Recording a Greeting Message 6
Making/Answering Calls with the Handset 7
Making/Answering Calls with the Base Unit 8
Caller ID Service 10
Phone Book 10
Automatic Answering Operation 11
Listening to Messages 11
openLCR Service for Caller IQ Feature 12
Important Safety Instructions 13
FCC and Other Information 15
Operating Instructions
Caller ID Compatible
– 2 –
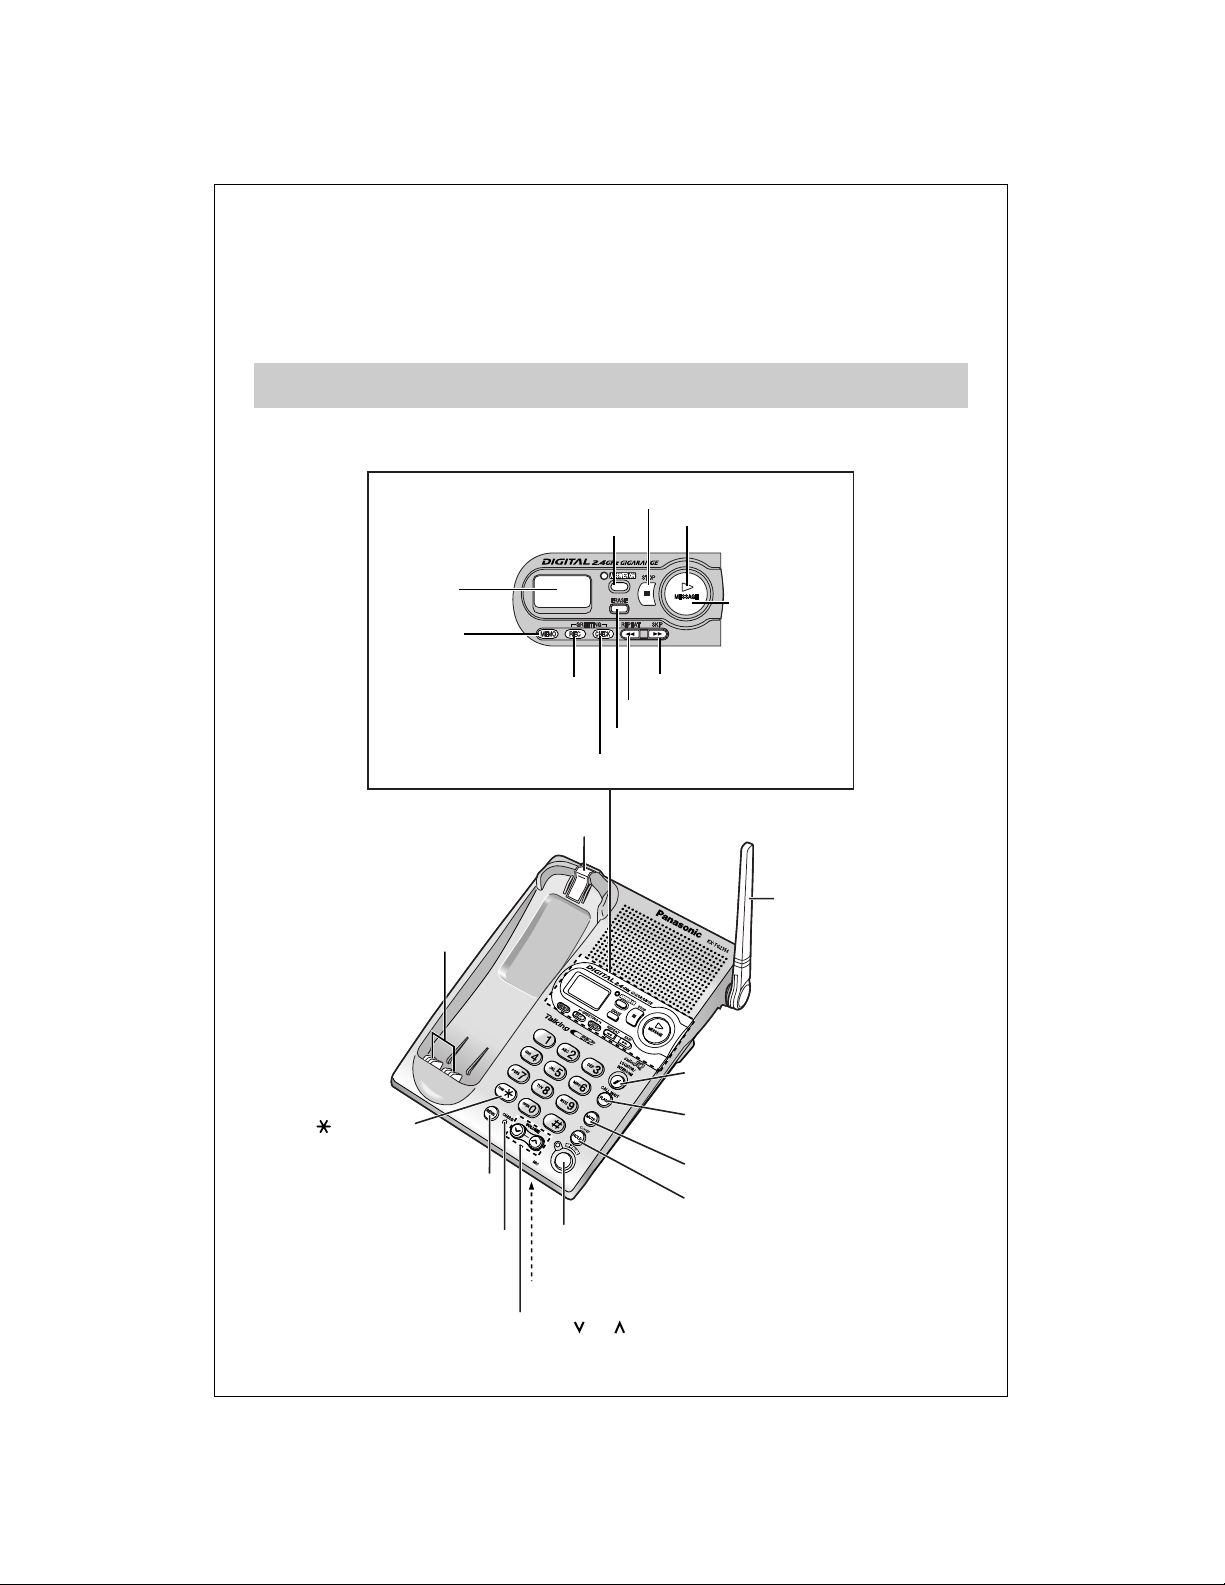
Location of Controls
Please read IMPORTANT SAFETY
INSTRUCTIONS on pages 13 before use.
Read and understand all instructions.
∫Base unit
[SP-PHONE] (Speakerphone)
and Indicator
[REDIAL]
[FLASH/CALL WAIT]
[MUTE]
VOLUME [ ], [ ]
[HOLD/CONF] (Conference)
CHARGE Indicator
[LOCATOR/INTERCOM]
Antenna
Display
Charge Contacts
[ ] (TONE)
[MESSAGE]
[STOP]
[SKIP]
[MEMO]
[ERASE]
[GREETING CHECK]
[REPEAT]
[ANSWER ON] and Indicator
MIC (Microphone)
NEW MESSAGE
Indicator
[GREETING REC]
(Record)
Hook
– 3 –
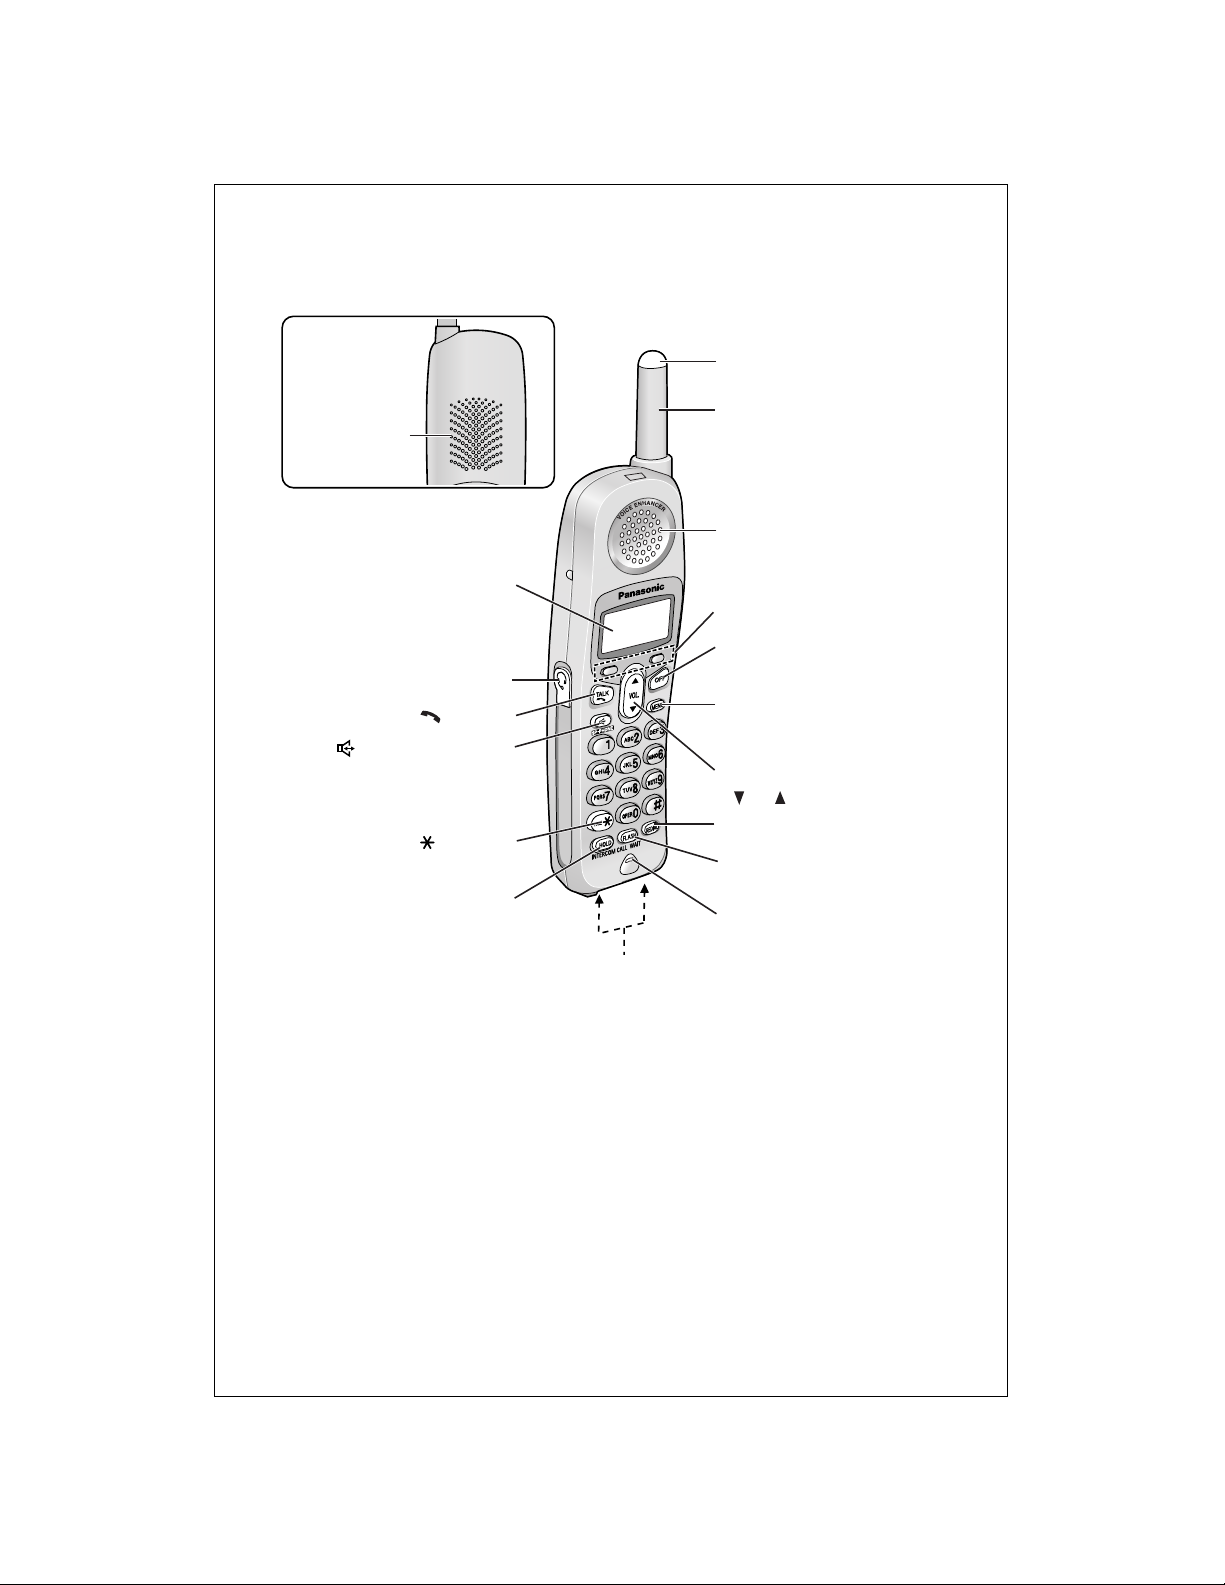
∫Handset
[OFF]
Display
[MENU]
[HOLD/INTERCOM]
[ ] (TALK)
[FLASH/CALL WAIT]
[ ] (Speakerphone)
Antenna
Headset Jack
[REDIAL]
Charge Contacts
[ ] (TONE)
Receiver
Ringer Indicator
Soft Keys
Back side
Speaker
Microphone
Navigator Key
([ ], [ ])
– 4 –
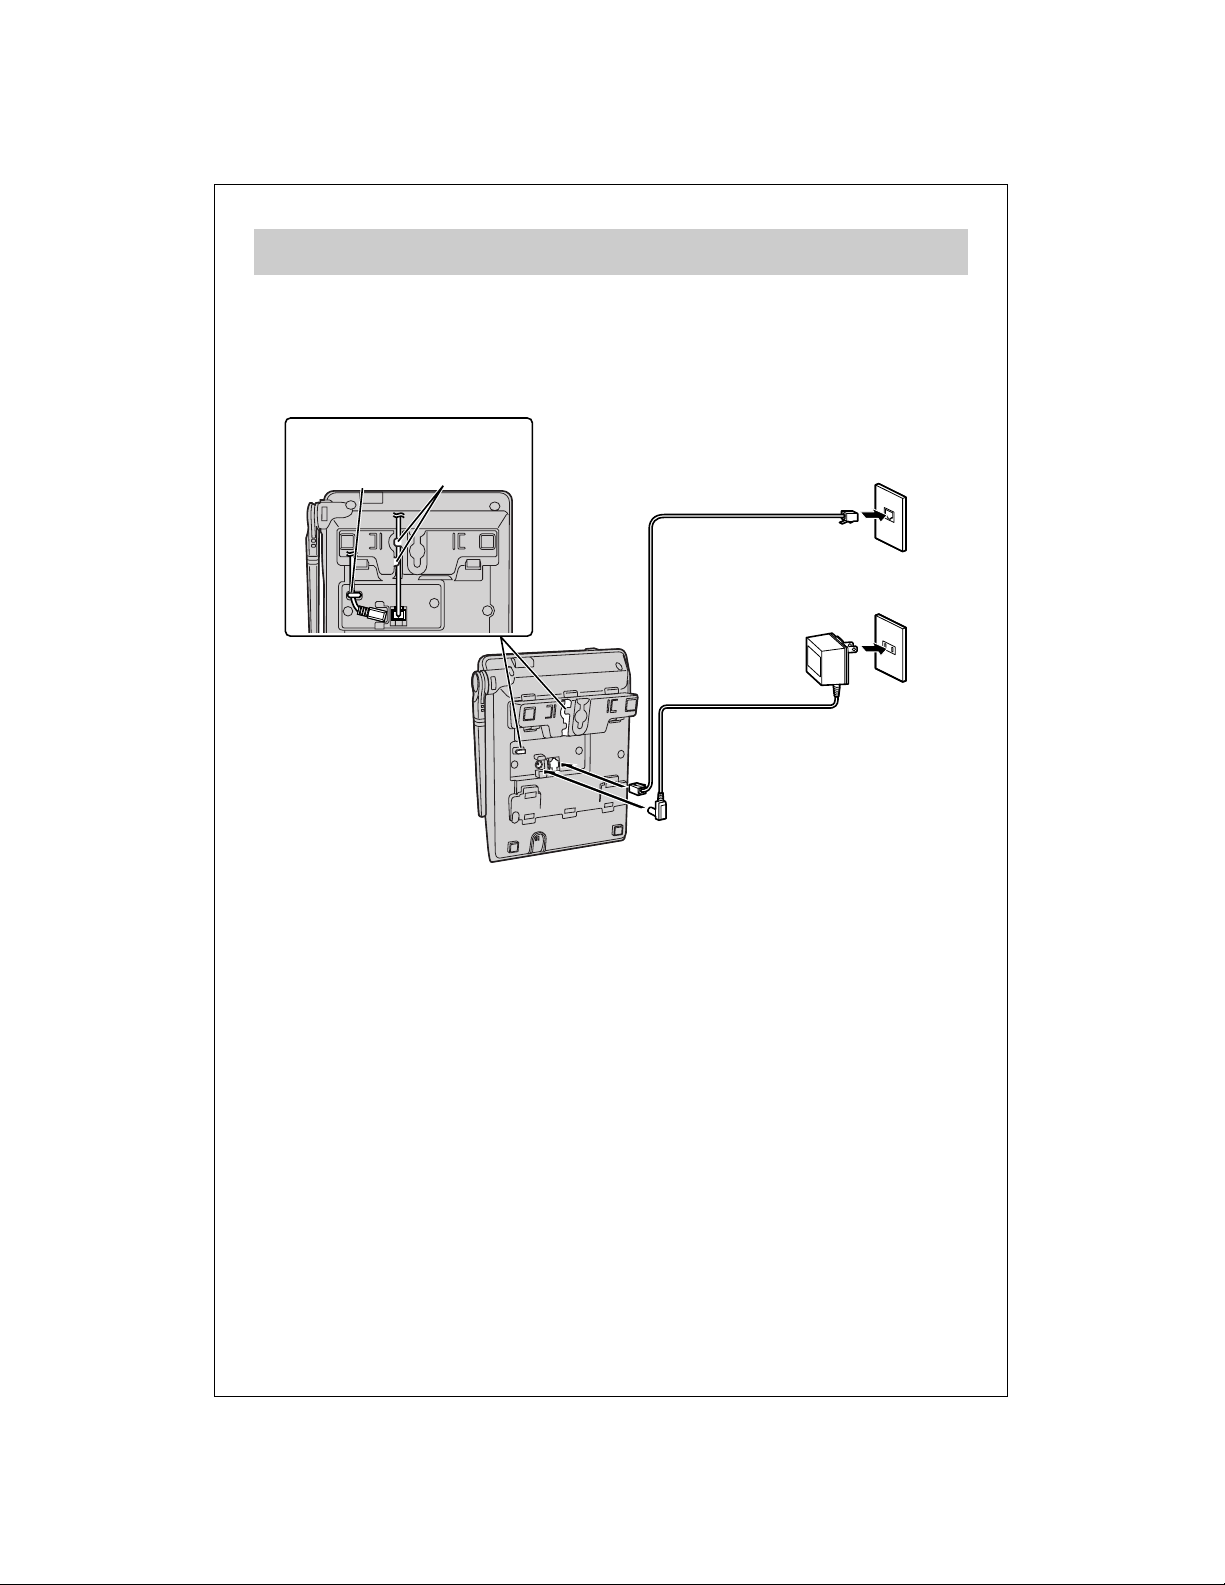
Connections
≥Use only with Panasonic AC adaptor PQLV1 (Order No. PQLV1Z).
≥The AC adaptor must remain connected at all times. (It is normal for the adaptor to feel
warm during use.)
≥If your unit is connected to a PBX which does not support Caller ID services, you
cannot access those services.
≥The unit will not work during a power failure. If you want to connect a standard
telephone to the same telephone jack, use the Panasonic KX-J66 T-adaptor.
Single-Line Telephone Jack (RJ11C)
Power Outlet
(AC 120 V, 60 Hz)
AC Adaptor
Telephone Line Cord
Fasten the cords.
Hook
Hooks
∫Connect the AC adaptor and the telephone line cord.
– 5 –
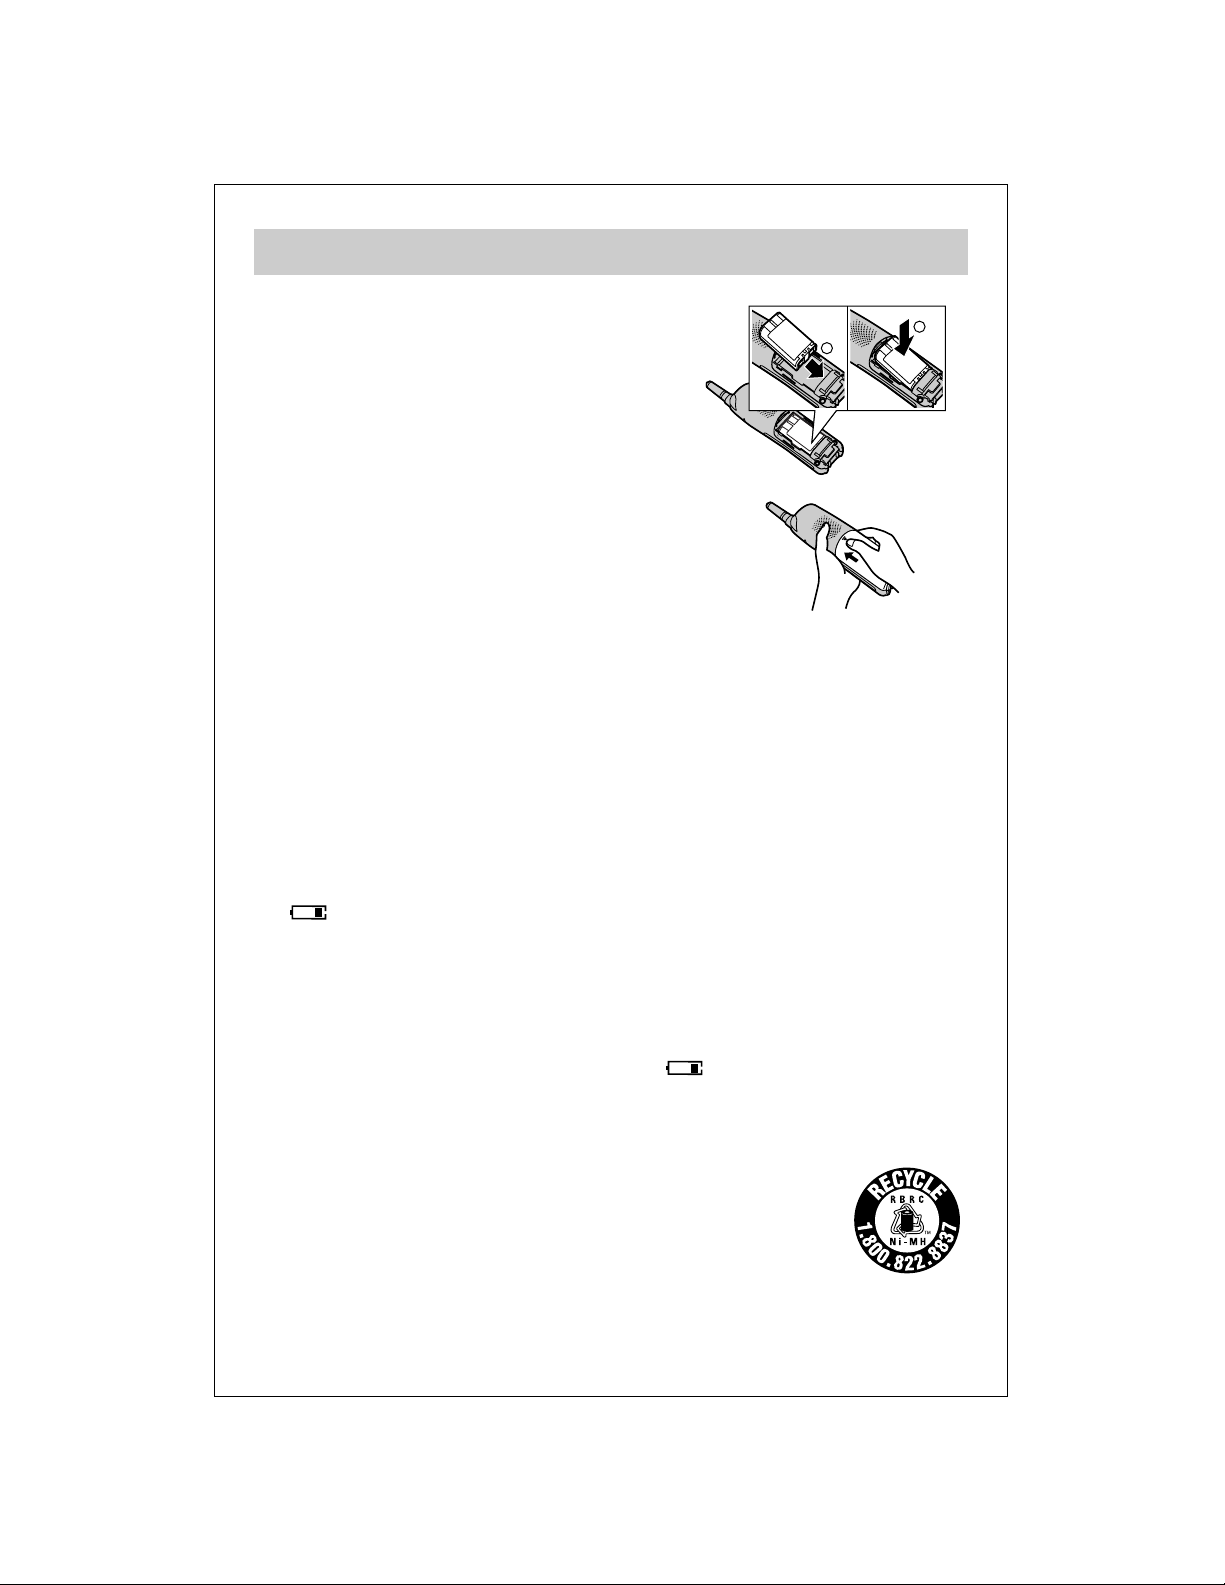
Battery Installation/Battery Charge
∫Battery installation
1 Install the battery in the handset.
2 Close the handset cover.
∫Battery Charge
To power the handset, charge the battery.
Place the handset on the base unit and charge for about 6 hours before initial
use.
≥The unit beeps once, the CHARGE indicator lights, and “Charging” is displayed.
≥When the battery is fully charged, “Charge completed” is displayed.
∫Recharge
Recharge the battery when:
—“Recharge battery” is displayed on the handset,
—“ ” flashes, or
—the handset beeps intermittently while it is in use.
≥Clean the handset and the base unit charge contacts with a soft, dry cloth once a
month. Clean more often if the unit is subject to grease, dust or high humidity. If
not, the battery may not charge properly.
≥If the battery is fully charged, you do not have to place the handset on the base unit
until “Recharge battery” is displayed and/or “” flashes. This will maximize the
battery life.
≥The battery cannot be overcharged.
A nickel metal hydride battery that is recyclable powers the
product you have purchased. Please call 1-800-8-BATTERY for
information on how to recycle this battery.
1
2

– 6 –
Recording a Greeting Message
1 Press [GREETING REC].
≥“To record greeting, press RECORD again” is heard.
2 Within 10 seconds, press [GREETING REC] again to record your greeting.
3 After the long beep, talk clearly, about 20 cm (8 inches) away from the MIC
(microphone).
≥The base unit display shows the elapsed recording time.
≥If you record for over 2 minutes, the unit will automatically stop recording.
4 When finished, press [GREETING REC] or [STOP].
≥To change the message, start again from step 1.
You can record a personal greeting message of up to 2 minutes. If you do not
record your own message, one of two pre-recorded greetings will be played for
callers.
All messages (greeting, incoming and voice memo) are stored in digital
memory. The total recording time is about 16 minutes. We recommend you
record a brief greeting message in order to leave more time for recording new
messages.
 Loading...