

Page 1

Sprint PCS® Service
Sprint PCS VisionSM Smart Device
Treo™ 650 by palm
www.sprint.com
© Sprint Nextel. All rights reserved. No reproduction in whole
or in part without prior written approval. Sprint, the "Going
Forward" logo and other trademarks are trademarks of Sprint
Nextel.
Printed in the U.S.A.
PN: 406-10149-03
Page 2

CI_Treo650_080705
Page 3

Table of Contents
Welcome to Sprint . . . . . . . . . . . . . . . . . . . . . . . . . . . . . . . . . . . . . . . . . . . . . . . . . . . i
How to Use This Guide . . . . . . . . . . . . . . . . . . . . . . . . . . . . . . . . . . . . . . . . . . . . . . . . ii
Where to Learn More . . . . . . . . . . . . . . . . . . . . . . . . . . . . . . . . . . . . . . . . . . . . . . . . iii
Section 1: Getting Started . . . . . . . . . . . . . . . . . . . . . . . . . . . . . . . . . . . . . . . . . . . . .1
1A. Setting Up Your Sprint PCS VisionSM Smart Device Treo™ 650 by Palm®
Software Installation CD . . . . . . . . . . . . . . . . . . . . . . . . . . . . . . . . . . . . . . . . . . . . . . 3
What You Need . . . . . . . . . . . . . . . . . . . . . . . . . . . . . . . . . . . . . . . . . . . . . . . . . . . . . . . . . . . . . . . . . . . . . . . 4
Inserting the Battery . . . . . . . . . . . . . . . . . . . . . . . . . . . . . . . . . . . . . . . . . . . . . . . . . . . . . . . . . . . . . . . . . . 5
Charging the Battery . . . . . . . . . . . . . . . . . . . . . . . . . . . . . . . . . . . . . . . . . . . . . . . . . . . . . . . . . . . . . . . . . . 6
1B. Setting Up Service . . . . . . . . . . . . . . . . . . . . . . . . . . . . . . . . . . . . . . . . . . . . . . . . . . 11
Getting Started With Sprint PCS Service . . . . . . . . . . . . . . . . . . . . . . . . . . . . . . . . . . . . . . . . . . . . . . 12
Setting Up Your Voicemail . . . . . . . . . . . . . . . . . . . . . . . . . . . . . . . . . . . . . . . . . . . . . . . . . . . . . . . . . . . .13
Sprint PCS Account Passwords . . . . . . . . . . . . . . . . . . . . . . . . . . . . . . . . . . . . . . . . . . . . . . . . . . . . . . . . 14
Getting Help . . . . . . . . . . . . . . . . . . . . . . . . . . . . . . . . . . . . . . . . . . . . . . . . . . . . . . . . . . . . . . . . . . . . . . . . . 15
1C. Connecting to Your Computer . . . . . . . . . . . . . . . . . . . . . . . . . . . . . . . . . . . . . . . . 19
Preparing Your Computer . . . . . . . . . . . . . . . . . . . . . . . . . . . . . . . . . . . . . . . . . . . . . . . . . . . . . . . . . . . . 20
Connecting Your Treo 650 to Your Computer . . . . . . . . . . . . . . . . . . . . . . . . . . . . . . . . . . . . . . . . . . 22
Installing the Synchronization Software on Your Computer . . . . . . . . . . . . . . . . . . . . . . . . . . .24
Section 2: Your Sprint PCS Vision Smart Device . . . . . . . . . . . . . . . . . . . . . . . . .27
2A. Learning the Basics . . . . . . . . . . . . . . . . . . . . . . . . . . . . . . . . . . . . . . . . . . . . . . . . . 29
Your New Sprint PCS Vision Smart Device . . . . . . . . . . . . . . . . . . . . . . . . . . . . . . . . . . . . . . . . . . . . .30
Page 4

Turning Your Device’s Phone On and Off . . . . . . . . . . . . . . . . . . . . . . . . . . . . . . . . . . . . . . . . . . . . . .35
Moving Around the Treo 650 Screen . . . . . . . . . . . . . . . . . . . . . . . . . . . . . . . . . . . . . . . . . . . . . . . . . . 37
Using the Keyboard . . . . . . . . . . . . . . . . . . . . . . . . . . . . . . . . . . . . . . . . . . . . . . . . . . . . . . . . . . . . . . . . . .42
Opening Applications . . . . . . . . . . . . . . . . . . . . . . . . . . . . . . . . . . . . . . . . . . . . . . . . . . . . . . . . . . . . . . . .47
2B. Using Your Device’s Phone Features . . . . . . . . . . . . . . . . . . . . . . . . . . . . . . . . . . 51
Making Calls . . . . . . . . . . . . . . . . . . . . . . . . . . . . . . . . . . . . . . . . . . . . . . . . . . . . . . . . . . . . . . . . . . . . . . . . . 52
Receiving Calls . . . . . . . . . . . . . . . . . . . . . . . . . . . . . . . . . . . . . . . . . . . . . . . . . . . . . . . . . . . . . . . . . . . . . . . 57
Signal Strength and Phone Status . . . . . . . . . . . . . . . . . . . . . . . . . . . . . . . . . . . . . . . . . . . . . . . . . . . . 59
Managing Active Calls . . . . . . . . . . . . . . . . . . . . . . . . . . . . . . . . . . . . . . . . . . . . . . . . . . . . . . . . . . . . . . . .62
Controlling Your Roaming Experience . . . . . . . . . . . . . . . . . . . . . . . . . . . . . . . . . . . . . . . . . . . . . . . .66
Internal Phone Book . . . . . . . . . . . . . . . . . . . . . . . . . . . . . . . . . . . . . . . . . . . . . . . . . . . . . . . . . . . . . . . . .67
Defining Favorite Buttons . . . . . . . . . . . . . . . . . . . . . . . . . . . . . . . . . . . . . . . . . . . . . . . . . . . . . . . . . . . .71
Using a Phone Headset . . . . . . . . . . . . . . . . . . . . . . . . . . . . . . . . . . . . . . . . . . . . . . . . . . . . . . . . . . . . . . .75
Connecting to Devices With Bluetooth® Wireless Technology . . . . . . . . . . . . . . . . . . . . . . . . . 77
Using Dial-up Networking on Your Treo 650 . . . . . . . . . . . . . . . . . . . . . . . . . . . . . . . . . . . . . . . . . .82
2C. Using Your Device’s Organizer Features . . . . . . . . . . . . . . . . . . . . . . . . . . . . . . . 87
Calendar . . . . . . . . . . . . . . . . . . . . . . . . . . . . . . . . . . . . . . . . . . . . . . . . . . . . . . . . . . . . . . . . . . . . . . . . . . . . .88
Tasks . . . . . . . . . . . . . . . . . . . . . . . . . . . . . . . . . . . . . . . . . . . . . . . . . . . . . . . . . . . . . . . . . . . . . . . . . . . . . . . .99
Memos . . . . . . . . . . . . . . . . . . . . . . . . . . . . . . . . . . . . . . . . . . . . . . . . . . . . . . . . . . . . . . . . . . . . . . . . . . . . .103
Listening to Music . . . . . . . . . . . . . . . . . . . . . . . . . . . . . . . . . . . . . . . . . . . . . . . . . . . . . . . . . . . . . . . . . .104
World Clock . . . . . . . . . . . . . . . . . . . . . . . . . . . . . . . . . . . . . . . . . . . . . . . . . . . . . . . . . . . . . . . . . . . . . . . . .111
Calculator . . . . . . . . . . . . . . . . . . . . . . . . . . . . . . . . . . . . . . . . . . . . . . . . . . . . . . . . . . . . . . . . . . . . . . . . . .114
Looking Up Contacts and Other Information . . . . . . . . . . . . . . . . . . . . . . . . . . . . . . . . . . . . . . . . .117
Beaming Information . . . . . . . . . . . . . . . . . . . . . . . . . . . . . . . . . . . . . . . . . . . . . . . . . . . . . . . . . . . . . . .120
Page 5

2D. Managing Applications . . . . . . . . . . . . . . . . . . . . . . . . . . . . . . . . . . . . . . . . . . . . .123
Synchronizing Contacts and Other Information . . . . . . . . . . . . . . . . . . . . . . . . . . . . . . . . . . . . . .124
Installing Applications . . . . . . . . . . . . . . . . . . . . . . . . . . . . . . . . . . . . . . . . . . . . . . . . . . . . . . . . . . . . . .127
Removing Applications . . . . . . . . . . . . . . . . . . . . . . . . . . . . . . . . . . . . . . . . . . . . . . . . . . . . . . . . . . . . . .130
Viewing Application Information . . . . . . . . . . . . . . . . . . . . . . . . . . . . . . . . . . . . . . . . . . . . . . . . . . . .132
Using Expansion Cards . . . . . . . . . . . . . . . . . . . . . . . . . . . . . . . . . . . . . . . . . . . . . . . . . . . . . . . . . . . . . .133
2E. Customizing Your Device . . . . . . . . . . . . . . . . . . . . . . . . . . . . . . . . . . . . . . . . . . .139
Phone Settings . . . . . . . . . . . . . . . . . . . . . . . . . . . . . . . . . . . . . . . . . . . . . . . . . . . . . . . . . . . . . . . . . . . . . .140
System Sound Settings . . . . . . . . . . . . . . . . . . . . . . . . . . . . . . . . . . . . . . . . . . . . . . . . . . . . . . . . . . . . . .145
Display and Appearance . . . . . . . . . . . . . . . . . . . . . . . . . . . . . . . . . . . . . . . . . . . . . . . . . . . . . . . . . . . . .147
Applications Settings . . . . . . . . . . . . . . . . . . . . . . . . . . . . . . . . . . . . . . . . . . . . . . . . . . . . . . . . . . . . . . . .149
Button Settings . . . . . . . . . . . . . . . . . . . . . . . . . . . . . . . . . . . . . . . . . . . . . . . . . . . . . . . . . . . . . . . . . . . . .151
Date and Time Settings . . . . . . . . . . . . . . . . . . . . . . . . . . . . . . . . . . . . . . . . . . . . . . . . . . . . . . . . . . . . .153
Power Preferences . . . . . . . . . . . . . . . . . . . . . . . . . . . . . . . . . . . . . . . . . . . . . . . . . . . . . . . . . . . . . . . . . .155
Locking Your Device and Information . . . . . . . . . . . . . . . . . . . . . . . . . . . . . . . . . . . . . . . . . . . . . . . .156
Additional Features . . . . . . . . . . . . . . . . . . . . . . . . . . . . . . . . . . . . . . . . . . . . . . . . . . . . . . . . . . . . . . . . .163
Accessories for Your Device . . . . . . . . . . . . . . . . . . . . . . . . . . . . . . . . . . . . . . . . . . . . . . . . . . . . . . . . . .165
Section 3: Sprint PCS Service Features . . . . . . . . . . . . . . . . . . . . . . . . . . . . . . . 167
3A. Sprint PCS Service Features—The Basics . . . . . . . . . . . . . . . . . . . . . . . . . . . . . . 169
Using Voicemail . . . . . . . . . . . . . . . . . . . . . . . . . . . . . . . . . . . . . . . . . . . . . . . . . . . . . . . . . . . . . . . . . . . .170
Call Waiting . . . . . . . . . . . . . . . . . . . . . . . . . . . . . . . . . . . . . . . . . . . . . . . . . . . . . . . . . . . . . . . . . . . . . . . .172
Call Forwarding . . . . . . . . . . . . . . . . . . . . . . . . . . . . . . . . . . . . . . . . . . . . . . . . . . . . . . . . . . . . . . . . . . . . .173
Three-Way Calling . . . . . . . . . . . . . . . . . . . . . . . . . . . . . . . . . . . . . . . . . . . . . . . . . . . . . . . . . . . . . . . . . .174
Sprint PCS Voice Command
TTY Use With Sprint PCS Service . . . . . . . . . . . . . . . . . . . . . . . . . . . . . . . . . . . . . . . . . . . . . . . . . . . . .176
SM
. . . . . . . . . . . . . . . . . . . . . . . . . . . . . . . . . . . . . . . . . . . . . . . . . . . . . . . .175
Page 6

3B. Sprint PCS VisionSM—The Basics . . . . . . . . . . . . . . . . . . . . . . . . . . . . . . . . . . . .179
Getting Started With Sprint PCS Vision . . . . . . . . . . . . . . . . . . . . . . . . . . . . . . . . . . . . . . . . . . . . . .180
Sprint PCS Vision Features . . . . . . . . . . . . . . . . . . . . . . . . . . . . . . . . . . . . . . . . . . . . . . . . . . . . . . . . . . .181
Accessing Sprint PCS Vision . . . . . . . . . . . . . . . . . . . . . . . . . . . . . . . . . . . . . . . . . . . . . . . . . . . . . . . . .183
3C. Sending and Receiving Email . . . . . . . . . . . . . . . . . . . . . . . . . . . . . . . . . . . . . . . . 185
Setting Up an Account . . . . . . . . . . . . . . . . . . . . . . . . . . . . . . . . . . . . . . . . . . . . . . . . . . . . . . . . . . . . . .186
Creating and Sending Messages . . . . . . . . . . . . . . . . . . . . . . . . . . . . . . . . . . . . . . . . . . . . . . . . . . . . .191
Receiving and Viewing Messages . . . . . . . . . . . . . . . . . . . . . . . . . . . . . . . . . . . . . . . . . . . . . . . . . . . .195
Managing Your Messages . . . . . . . . . . . . . . . . . . . . . . . . . . . . . . . . . . . . . . . . . . . . . . . . . . . . . . . . . . .197
Customizing Your Email Settings . . . . . . . . . . . . . . . . . . . . . . . . . . . . . . . . . . . . . . . . . . . . . . . . . . . .199
Working With Microsoft Exchange ActiveSync® . . . . . . . . . . . . . . . . . . . . . . . . . . . . . . . . . . . . . .204
Sprint PCS Business Connection
SM
Personal Edition . . . . . . . . . . . . . . . . . . . . . . . . . . . . . . . . . . .205
3D. Messaging . . . . . . . . . . . . . . . . . . . . . . . . . . . . . . . . . . . . . . . . . . . . . . . . . . . . . . . . 207
Creating and Sending Messages . . . . . . . . . . . . . . . . . . . . . . . . . . . . . . . . . . . . . . . . . . . . . . . . . . . . .208
Receiving Messages . . . . . . . . . . . . . . . . . . . . . . . . . . . . . . . . . . . . . . . . . . . . . . . . . . . . . . . . . . . . . . . . .213
Chatting With Messaging . . . . . . . . . . . . . . . . . . . . . . . . . . . . . . . . . . . . . . . . . . . . . . . . . . . . . . . . . . .215
Managing Your Messages . . . . . . . . . . . . . . . . . . . . . . . . . . . . . . . . . . . . . . . . . . . . . . . . . . . . . . . . . . .216
Customizing Your Messaging Settings . . . . . . . . . . . . . . . . . . . . . . . . . . . . . . . . . . . . . . . . . . . . . . .218
3E. Browsing the Web . . . . . . . . . . . . . . . . . . . . . . . . . . . . . . . . . . . . . . . . . . . . . . . . . 221
Viewing Web Pages . . . . . . . . . . . . . . . . . . . . . . . . . . . . . . . . . . . . . . . . . . . . . . . . . . . . . . . . . . . . . . . . .222
Working With Bookmarks . . . . . . . . . . . . . . . . . . . . . . . . . . . . . . . . . . . . . . . . . . . . . . . . . . . . . . . . . . .227
Customizing Your Web Browser Settings . . . . . . . . . . . . . . . . . . . . . . . . . . . . . . . . . . . . . . . . . . . .230
3F. Using Your Device’s Built-in Camera . . . . . . . . . . . . . . . . . . . . . . . . . . . . . . . . . 233
Taking Pictures and Videos . . . . . . . . . . . . . . . . . . . . . . . . . . . . . . . . . . . . . . . . . . . . . . . . . . . . . . . . . .234
Page 7

Viewing Pictures and Videos . . . . . . . . . . . . . . . . . . . . . . . . . . . . . . . . . . . . . . . . . . . . . . . . . . . . . . . .238
Organizing Pictures and Videos . . . . . . . . . . . . . . . . . . . . . . . . . . . . . . . . . . . . . . . . . . . . . . . . . . . . . .240
Customizing Your Camera Settings . . . . . . . . . . . . . . . . . . . . . . . . . . . . . . . . . . . . . . . . . . . . . . . . . .242
Using Your Online Album . . . . . . . . . . . . . . . . . . . . . . . . . . . . . . . . . . . . . . . . . . . . . . . . . . . . . . . . . . .244
Viewing Pictures and Videos on Your Computer . . . . . . . . . . . . . . . . . . . . . . . . . . . . . . . . . . . . . .246
Section 4: Help . . . . . . . . . . . . . . . . . . . . . . . . . . . . . . . . . . . . . . . . . . . . . . . . . . . . 247
4A. Help . . . . . . . . . . . . . . . . . . . . . . . . . . . . . . . . . . . . . . . . . . . . . . . . . . . . . . . . . . . . . .249
Getting Help . . . . . . . . . . . . . . . . . . . . . . . . . . . . . . . . . . . . . . . . . . . . . . . . . . . . . . . . . . . . . . . . . . . . . . . .250
Upgrading from Another Palm Powered Device . . . . . . . . . . . . . . . . . . . . . . . . . . . . . . . . . . . . . .251
Resetting Your Treo 650 . . . . . . . . . . . . . . . . . . . . . . . . . . . . . . . . . . . . . . . . . . . . . . . . . . . . . . . . . . . . .258
Replacing the Battery . . . . . . . . . . . . . . . . . . . . . . . . . . . . . . . . . . . . . . . . . . . . . . . . . . . . . . . . . . . . . . .261
Troubleshooting . . . . . . . . . . . . . . . . . . . . . . . . . . . . . . . . . . . . . . . . . . . . . . . . . . . . . . . . . . . . . . . . . . . .263
Errors . . . . . . . . . . . . . . . . . . . . . . . . . . . . . . . . . . . . . . . . . . . . . . . . . . . . . . . . . . . . . . . . . . . . . . . . . . . . . . .283
Making Room On Your Treo 650 . . . . . . . . . . . . . . . . . . . . . . . . . . . . . . . . . . . . . . . . . . . . . . . . . . . . .285
Voice Quality . . . . . . . . . . . . . . . . . . . . . . . . . . . . . . . . . . . . . . . . . . . . . . . . . . . . . . . . . . . . . . . . . . . . . . .286
4B. Glossary . . . . . . . . . . . . . . . . . . . . . . . . . . . . . . . . . . . . . . . . . . . . . . . . . . . . . . . . . .287
Section 5: Safety and Terms and Conditions . . . . . . . . . . . . . . . . . . . . . . . . . . 291
5A. Safety . . . . . . . . . . . . . . . . . . . . . . . . . . . . . . . . . . . . . . . . . . . . . . . . . . . . . . . . . . . . 293
Getting the Most Out of Your Reception . . . . . . . . . . . . . . . . . . . . . . . . . . . . . . . . . . . . . . . . . . . . .294
Maintaining Safe Use of and Access to Your Device . . . . . . . . . . . . . . . . . . . . . . . . . . . . . . . . . . .296
Caring for the Battery . . . . . . . . . . . . . . . . . . . . . . . . . . . . . . . . . . . . . . . . . . . . . . . . . . . . . . . . . . . . . . .299
Acknowledging Special Precautions and the FCC Notice . . . . . . . . . . . . . . . . . . . . . . . . . . . . . .301
Consumer Information on Wireless Phones . . . . . . . . . . . . . . . . . . . . . . . . . . . . . . . . . . . . . . . . . .304
Using Your Phone with a Hearing Aid Device . . . . . . . . . . . . . . . . . . . . . . . . . . . . . . . . . . . . . . . . .324
Page 8

Owner’s Record . . . . . . . . . . . . . . . . . . . . . . . . . . . . . . . . . . . . . . . . . . . . . . . . . . . . . . . . . . . . . . . . . . . . .326
User’s Guide Proprietary Notice . . . . . . . . . . . . . . . . . . . . . . . . . . . . . . . . . . . . . . . . . . . . . . . . . . . . .327
5B. Terms and Conditions . . . . . . . . . . . . . . . . . . . . . . . . . . . . . . . . . . . . . . . . . . . . . .329
Terms and Conditions of Services . . . . . . . . . . . . . . . . . . . . . . . . . . . . . . . . . . . . . . . . . . . . . . . . . . . .330
Specifications . . . . . . . . . . . . . . . . . . . . . . . . . . . . . . . . . . . . . . . . . . . . . . . . . . . . . . . . . . . . . . . . . . . . . . .341
Index . . . . . . . . . . . . . . . . . . . . . . . . . . . . . . . . . . . . . . . . . . . . . . . . . . . . . . . . . . . . . 343
Page 9

Welcome to Sprint
We are committed to bringing you the best wireless technology available. With
Sprint, all your services work the same wherever you go on the network. We built
our network right from the start, so no matter where you are on the network, all
your services – whether it’s Voicemail, Caller ID, email, or Picture Mail – will work
the same.
This guide will familiarize you with our technology and your new Sprint PCS
Vision Smart Device through simple, easy-to-follow instructions. Go to Section 1:
Getting Started to set up your new device and Sprint PCS Service, then get ready
to explore all the advanced features of your Sprint PCS Vision
Treo™ 650 by Palm.
Welcome and thank you for choosing Sprint.
SM
Smart Device
i
Page 10

How to Use This Guide
We know you’re eager to start using your device right away, and the sections of
this guide are designed to help you do just that.
⽧ Section 1: Getting Started guides you through setting up your new Sprint PCS
Vision Smart Device, your Sprint PCS Service, and your computer.
⽧ Section 2: Your Sprint PCS Vision Smart Device shows you the basics of your
device and service with quick, easy-to-follow instructions. This section also
guides you through using the built-in, full-featured, Palm Powered™ organizer
that gives you instant access to your Calendar, Tasks, Memos, RealPlayer®,
Calculator, and more.
⽧ Section 3: Sprint PCS Service Features shows you how to use the Sprint PCS
service features, such as voicemail, call waiting, and call forwarding, as well as
the how to use Sprint PCS Vision features, including Sprint PCS Picture Mail
Web browsing, Messaging, and email.
⽧ Section 4: Help answers frequently asked questions and shows you what to do
if something goes wrong. It also includes a helpful glossary of terms.
⽧ Section 5: Safety and Terms and Conditions outlines recommended safety
and maintenance guidelines and displays the terms and conditions of your
Sprint PCS Service and your device warranty information.
SM
,
ii
Page 11
Where to Learn More
A quick introduction to your new Treo 650:
⽧ Quick Tour teaches you how to use many features of your Treo 650. It is
already installed on your Treo device and you can open it any time (see
“Opening the Quick Tour” on page 250).
⽧ Additional Tips and Shortcuts for Keyboard Navigation provides a list of time-
saving shortcuts, tips, and tricks. This handy booklet is included in the box with
your Treo 650.
While using your Treo 650:
⽧ Tips for getting the most out of your Treo 650 are available in many of the built-
in applications. To view these tips, open an application, open the menus ,
select Options, and then select Tips.
⽧ Information is available in many dialog boxes that have a Tips icon in the
upper-right corner. Select the Tips icon to learn about the tasks you can
perform in that dialog box.
If you need more information:
⽧ Books on Palm OS® devices, such as “Now You Know Treo,” are available at local
or online book retailers (look in the computers section), or visit
www.palm.com.
iii
Page 12

⽧ Online forums let you consult online user discussion groups to swap
information and learn about areas you may not find elsewhere. Visit
www.palm.com for details.
⽧ Sprint Customer Service is where you go with questions about your mobile
account or Sprint PCS Service and to contact Sprint for the latest information
and help. Visit
www.sprint.com for instant access to new Sprint PCS Service
features and information.
iv
Page 13

Getting Started
Section 1
Page 14

2
Page 15

Section 1A
Setting Up Your Sprint PCS VisionSM Smart Device
Treo™ 650 by Palm® Software Installation CD
In This Section
⽧ What You Need
⽧ Inserting the Battery
⽧ Charging the Battery
Setting Up Software
Section 1A: Setting Up Software 3
Page 16

What You Need
You should have received all of the following components in the Treo 650 box:
Hardware
䢇 Treo han dse t
䢇 AC adapter charger
䢇 USB sync cable
䢇 Headset
䢇 Sprint® charger adapter
Documentation
䢇 Before You Start Using Your Sprint PCS Vision Smart Device
䢇 User’s Guide (this book)
䢇 Additional Tips & Shortcuts for Keyboard Navigation
Software
䢇 Palm Software Installation CD (includes desktop synchronization software
and bonus software for your device)
Other
As you work through the instructions in this section, you’ll also need the
following items:
䢇 An electrical outlet
䢇 The computer with which you will synchronize your personal information
4 Section 1A: Setting Up Software
Page 17

Inserting the Battery
1. Press the Battery Door Release button and slide the battery door downward
to remove it from your Treo 650.
2. Align the metal contacts on the battery with the contacts inside the battery
compartment.
3. Insert the battery into the compartment at a 45 degree angle, and then
press it into place.
4. Slide the battery door onto the back of the device until it clicks into place.
5. When the Welcome screen appears, follow the onscreen instructions to set
up your Treo 650.
Setting Up Software
Battery Door Release
Notch
Section 1A: Setting Up Software 5
Battery
Contacts
Phone
Contacts
Page 18

Charging the Battery
You must charge your Treo 650 fully before using it. It may not turn on at all when
you first remove it from the box.
1. Plug the AC charger into a wall outlet.
2. Connect the charger cable to the bottom of the Treo device. Make sure
the arrow on the connector is facing up, towards your Treo screen.
3. Wait for the indicator light to turn solid green. This may take up to
four hours.
Indicator Light
6 Section 1A: Setting Up Software
Page 19
Important:
It is vital that you use only Sprint-approved AC adapter chargers, car
chargers, and replacement batteries. Use of unauthorized accessories
could damage your device and invalidate your warranty.
Check the indicator light to make sure your Treo 650 is charging. If the battery is
fully drained, it may take a few moments for the indicator light to turn on while
charging. When your Treo 650 is connected to a power source, the indicator light
glows solid (versus flashing), and the color of the light indicates the following:
䢇 Red indicator light: battery is charging.
䢇 Green indicator light: battery is fully charged.
䢇 Indicator light off: battery is not charging. Check the cable connection and the
outlet to which it is connected.
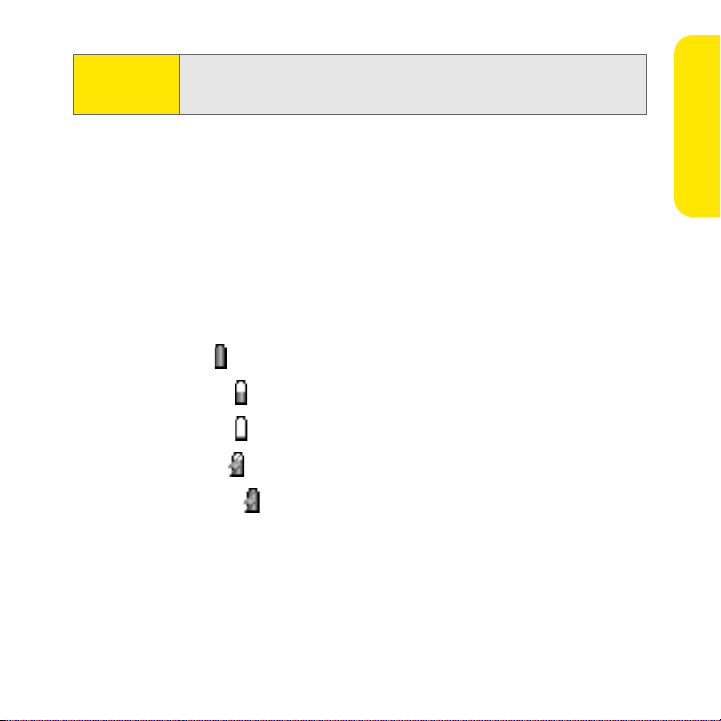
After you set up your Treo, the onscreen battery icon displays power status:
䢇 Full battery icon : battery is charged.
䢇 Partial battery icon : battery has some power but is not fully charged.
䢇 Empty battery icon : battery needs charging immediately.
䢇 Red lightning bolt : battery is charging.
䢇 Green lightning bolt : battery is fully charged.
Using a Sprint Charger Adapter
If the connector on your Sprint-approved 1 Amp AC charger or vehicle charger
doesn’t fit into the connector on the bottom of your Treo device, use the included
Sprint charger adapter.
Setting Up Software
Section 1A: Setting Up Software 7
Page 20

War nin g:
Use only with 1 Amp AC adapters distributd by Sprint for Treo 650. Using
any unapproved AC adapter may destroy the AC adapter and cause fire.
1. Plug the charger to a power source.
2. Connect the Sprint charger adapter to
the bottom of the Treo 650.
3. Connect the charger cable to the
Sprint charger adapter.
Sprint charger adapter
4. Charge your Treo 650 as described
earlier.
Battery life
Battery life depends on individual use. Consumption factors include signal
strength, speakerphone use, and whether calls are data or voice calls.
When your device’s phone is on, the Treo battery provides up to 4.5 hours of talk
time on the Sprint PCS 1900 MHz band. Talk time is slightly lower when roaming
on the cellular 800 MHz band.
If the battery drains to the point where your Treo 650 doesn’t turn on, the Treo
device stores your information safely until you recharge the battery. To avoid
draining the battery, we recommend that you charge and synchronize your
Treo 650 every day, especially if you use the wireless features of your device often.
Note:
Using your device’s phone has an effect on the battery life. You can extend the
battery life by turning off your device’s phone while using the organizer
features. In any case, regular charging is recommended for optimal
performance.
8 Section 1A: Setting Up Software
Page 21

Maximizing battery life
You can increase the life of your Treo 650 battery by following a few easy
guidelines. Remember that battery life depends on how you use your Treo device.
䢇 Charge your Treo 650 whenever you’re at your desk, or charge it overnight
each day. The Lithium Ion (Li-Ion) battery has a much longer useful life when
it is topped off frequently, rather than charging it after it is fully drained.
䢇 The wireless features of your Treo 650 (phone, email, messaging, and Web)
consume more power than its organizer features. However, if you spend a lot
of time using the camera (if included), games, media players, eBooks, or other
Palm OS® applications, keep an eye on the battery level and charge when
necessary.
䢇 If you don’t plan to use the wireless features on your Treo 650 for awhile, you
may want to turn off your device (see “Turning Your Device’s Phone On and
Off” on page 35). You can forward calls to a different number or let all calls be
picked up by voicemail (see “Call Forwarding” on page 173).
䢇 As with any mobile phone, if you are in an area with no wireless coverage,
your Treo 650 searches for a signal, which consumes power. If you cannot
move to an area of better coverage, you may wish to temporarily turn off your
device’s phone (see “Turning Your Device’s Phone On and Off” on page 35).
䢇 Turn down the screen brightness (see “Adjusting the Brightness” on
page 147).
䢇 Decrease the Auto-off setting in Power Preferences (see “Power Preferences”
on page 155). This turns off your screen automatically after a shorter period
of inactivity.
Setting Up Software
Section 1A: Setting Up Software 9
Page 22

10 Section 1A: Setting Up Software
Page 23

Section 1B
Setting Up Service
In This Section
⽧ Getting Started With Sprint PCS Service
⽧ Setting Up Your Voicemail
⽧ Sprint PCS Account Passwords
⽧ Getting Help
Setting up service on your new Sprint PCS VisionSM Smart Device Treo™ 650 is quick
and easy. This section walks you through the necessary steps to unlock your
device, set up your voicemail, establish passwords, and contact Sprint for
assistance with your Sprint PCS Service.
Section 1B: Setting Up Service 11
Setting Up Service
Page 24

Getting Started With Sprint PCS Service
Determining if Your Device’s Phone is Already Activated
If you received your device in the mail or purchased it at a Sprint Store, it probably
has already been activated. All you need to do is unlock it.
If your phone is not activated, please call Sprint at 1-888-211-4PCS (4727).
Unlocking Your Device
To unlock your device, follow these easy steps:
1. Press and hold the Power/End button to turn the phone on.
2. Press Center.
3. Enter your four-digit lock code. (For security purposes, the code is not visible
as you type.)
Note:
12 Section 1B: Setting Up Service
If you can’t recall your lock code, try using the last four digits of either your
Social Security number or Sprint PCS Phone Number or try 0000. If none of
these work, call Sprint Customer Service at 1-888-211-4PCS (4727).
Page 25
Setting Up Your Voicemail
All unanswered calls to your Sprint PCS Vision Phone are automatically
transferred to your voicemail, even if your phone is in use or turned off. Therefore,
you will want to set up your voicemail and personal greeting as soon as your
device’s phone is activated.
To set up your voicemail:
1. Press and hold .
2. Follow the system prompts to:
䡲 Create your password
䡲 Record your greeting
䡲 Record your name announcement
䡲 Choose whether or not to activate Skip Pass Code (a feature that lets
you access your voicemail simply by pressing and holding ,
bypassing the need for you to enter your password)
Setting Up Service
Note:
The voicemail setup process may vary in certain Affiliate areas.
For more information about using your voicemail, see “Using Voicemail” on
page 170.
Section 1B: Setting Up Service 13
Page 26

Sprint PCS Account Passwords
As a Sprint PCS customer, you enjoy unlimited access to your personal account
information, your voicemail account, and your Sprint PCS Vision account. To
ensure that no one else has access to your information, you will need to create
passwords to protect your privacy.
Account Password
If you are the account owner, you'll have an account password to sign on to
www.sprint.com and to use when calling Sprint Customer Service. Your default
account password is the last four digits of your Social Security number. If you are not
the account owner (if someone else pays for your Sprint PCS Service), you can get
a sub-account password at
Voicemail Password
You'll create your voicemail password when you set up your voicemail. See
“Setting Up Your Voicemail” on page 13 for more information on your voicemail
password.
Sprint PCS Vision Password
If you have a Sprint PCS Vision Phone, you can set up a Sprint PCS Vision
Password. This optional password may be used to authorize purchase of Premium
Services content and to protect personal information on multi-phone accounts.
For more information or to change your passwords, sign on to
call Sprint Customer Service at 1-888-211-4PCS (4727).
www.sprint.com.
www.sprint.com or
14 Section 1B: Setting Up Service
Page 27
Getting Help
Visit Our Website
You can get up-to-date information on Sprint PCS Services and Options by signing
onto our Website at
When you visit us online, you can
䢇 Review coverage maps
䢇 Learn how to use voicemail
䢇 Access your account information
䢇 Purchase accessories
䢇 Add additional options to your service plan
䢇 Check out frequently asked questions
䢇 And more
Reaching Sprint Customer Service
You can reach Sprint Customer Service many different ways:
䢇 Dial , and then press Phone/Send on your Sprint PCS Phone
䢇 Sign on to your account at www.sprint.com
䢇 Call us toll-free at 1-888-211-4727 (Consumer customers),
䢇 Write to us at Sprint Customer Service, P.O. Box 8077, London, KY 40742
*
–or–
1-888-788-4727 (Business customers)
www.sprint.com.
Setting Up Service
Section 1B: Setting Up Service 15
Page 28

Receiving Automated Invoicing Information
For your convenience, your phone gives you access to invoicing information on
your Sprint PCS Account. This information includes balance due, payment
received, invoicing cycle, and the number of minutes used since your last
invoicing cycle. (Normal airtime usage will apply.)
To access automated invoicing information:
䊳 Press , and then press Phone/Send .
Note:
*
This service may not be available in all Affiliate areas.
Sprint PCS Directory Assistance
You have access to a variety of services and information through Sprint PCS
Directory Assistance, including residential, business, and government listings;
assistance with local or long-distance calls; movie listings; and hotel, restaurant,
shopping, and major local event information. There is a per-call charge and you
will be billed for airtime.
To call Sprint PCS Directory Assistance:
䊳 Press , and then press Phone/Send .
Sprint PCS Operator Services
Sprint PCS Operator Services provides assistance when placing collect calls or
when placing calls billed to a local telephone calling card or third party.
16 Section 1B: Setting Up Service
Page 29
To access Sprint PCS Operator Services:
䊳 Press , and then press Phone/Send .
0
For more information or to see the latest in products and services, visit us online
at
www.sprint.com.
Note:
Sprint PCS Operator Services may not be available in all Affiliate areas.
Section 1B: Setting Up Service 17
Setting Up Service
Page 30

18 Section 1B: Setting Up Service
Page 31

Connecting to Your Computer
Section 1C
In This Section
⽧ Preparing Your Computer
⽧ Connecting Your Treo 650 to Your Computer
⽧ Installing the Synchronization Software on Your Computer
Section 1C: Connecting to Your Computer 19
Computer Connection
Page 32

Preparing Your Computer
Synchronization allows you to enter information on your computer in an
application called Palm® Desktop software or in Microsoft Outlook and then
efficiently transfer that information to your Sprint PCS Vision
Treo™ 650. At the same time, changes you make on the Treo 650 are transferred
to Palm Desktop or to Microsoft Outlook. Even if you manage all your contacts on
your Treo 650, synchronization is a great way to back up your information.
Before you can synchronize, you need to install the desktop synchronization
software on your computer. Even if you already own a Palm Powered™ device and
have installed a previous version, you need to install the Software Installation CD
that comes with your Treo 650.
We strongly recommend that you install the desktop synchronization software
soon after you start using your Treo 650 and that you synchronize your device and
computer frequently to keep your information up-to-date (and backed up) in
both locations.
System Requirements
Your computer should meet the following minimum system profiles for Windows
or Mac computers.
Windows computers
䢇 Windows 2000 or XP*
䢇 32MB of available memory (RAM)
䢇 170MB of free hard disk space
䢇 CD drive
SM
Smart Device
20 Section 1C: Connecting to Your Computer
Page 33

䢇 Available USB port
䢇 USB sync cable (included with your Treo 650)
Mac computers
䢇 Mac OS X 10.2 –10.3*
䢇 128MB of total memory (RAM)
䢇 190MB of free hard disk space
䢇 CD drive
䢇 Available USB port
䢇 USB sync cable (included with your Treo 650)
* Later versions may also be supported
Computer Connection
Section 1C: Connecting to Your Computer 21
Page 34

Connecting Your Treo 650 to Your Computer
Important:
If you’re upgrading from another Palm Powered device, follow the
upgrade steps on page 251 before you set up your computer for your new
Tre o 65 0
.
1. Plug the AC charger into a wall outlet.
2. Plug the USB sync cable into an available USB port or a powered USB hub on
your computer.
3. Connect the sync cable to the Multi-connector on the bottom of your
Treo 650 with the HotSync® button facing up. Do not press the HotSync
button until you are instructed to do so.
22 Section 1C: Connecting to Your Computer
Page 35

4. Connect the charger cable to the Multi-connector on the sync cable.
Multi-connector
Section 1C: Connecting to Your Computer 23
Computer Connection
Page 36

Installing the Synchronization Software on Yo u r Co m p u t e r
Your computer needs to have all its resources available to install the software.
Follow these guidelines for a successful installation:
Note:
If you are installing on a computer at work, make sure your company
allows you to install new software. Contact your company’s IT
department for help.
1. Exit any applications that are currently running on your computer, including
those running in the background.
2. Insert the Software Installation CD that came with your Treo 650 into the CD
drive on your computer. (If you are installing on a Mac, double-click the CD
icon on the desktop, and then double-click the palmOneSoftware.pkg icon.)
3. Follow the onscreen instructions of the installation program. During the
installation process, you will be prompted to synchronize for the first time.
To synchronize, press the HotSync button on the Multi-connector.
24 Section 1C: Connecting to Your Computer
Page 37

HotSync
Button
Section 1C: Connecting to Your Computer 25
Computer Connection
Page 38

26 Section 1C: Connecting to Your Computer
Page 39

Section 2
Your Sprint PCS Vision Smart Device
Page 40

28
Page 41

Learning the Basics
In This Section
⽧ Your New Sprint PCS Vision Smart Device
⽧ Turning Your Device’s Phone On and Off
⽧ Moving Around the Treo 650 Screen
⽧ Using the Keyboard
⽧ Opening Applications
Section 2A
The Basics
Section 2A: Learning the Basics 29
Page 42

Your New Sprint PCS Vision Smart Device
Your Device’s Features: Front View
1. Indicator
Light
10. Volume
Button
9. Side
Button
8. Phone/Send Button
7. Calendar Button
2. Earpiece
3. 5-way
Navigator
4. Power/End
Button
5. Messaging
Button
6. Microphone
1. Indicator Light provides status information for your Treo 650 based on the
color of the light and the blink state.
2. Earpiece serves as the handset speaker on your Treo 650.
3. 5-way Navigator lets you move around the Treo 650 screen and select
options.
4. Power/End Button turns the device’s phone on and off, wakes up and turns
off the screen, and hangs up calls.
30 Section 2A: Learning the Basics
Page 43

5. Messaging Button opens the Messaging application. If you downloaded and
installed Business Connection, this button opens Business Connection.
6. Microphone serves as the mouthpiece on your device’s phone.
7. Calendar Button opens the Calendar application.
8. Phone/Send Button opens the Phone application and dials when a phone
number is selected.
9. Side Button performs context sensitive actions, such as playing or pausing
MP3 files in the RealPlayer® application. You can also reassign this button to
open your favorite application.
10. Vol ume But ton adjusts the earpiece, speaker, and ringer volume levels.
The Basics
Section 2A: Learning the Basics 31
Page 44

Your Device’s Features: Back View
11. Camera
Lens
17. Speaker
16. Vibrating
Alarm
12. Self-portrait
Mirror
13. Battery Door
Release
14. Headset
Jack
15. Multi-connector
11. Camera Lens enables you to take pictures using the built-in camera (if
included). There are two models of the Treo™ 650: one comes with a camera
and the other does not come with a camera. The packaging for your
Treo 650 identifies whether a camera is included.
12. Self-portrait mirror enables you to take a picture of yourself (if your device
includes a camera).
13. Battery Door Release opens the battery compartment.
32 Section 2A: Learning the Basics
Page 45

14. Headset Jack enables you to connect a hands-free headset. Use only
headsets that are compatible with your device.
15. Multi-connector enables you to attach the USB sync cable and AC charger to
your device.
16. Vibrating Alarm notifies you when you receive a call or message, or when an
alarm goes off and the ringer is set to silent.
17. Speaker plays ringtones and alarms and serves as the speaker for the
speakerphone feature.
The Basics
Note:
Section 2A: Learning the Basics 33
The Treo 650 speaker includes a large magnet, so be sure not to store your Treo
device near credit cards or other items that could become demagnetized.
Page 46

Your Device’s Features: Top View
18. Ringer Switch
22. Stylus 21. Expansion Card Slot
19. Infrared (IR) Port
20. Antenna
18. Ringer Switch controls the ringer setting. See “System Sound Settings” on
page 145 for details on changing the settings. Silencing the ringer turns off
all system sounds, including alarms.
19. Infrared (IR) Port uses infrared technology to transmit information to and
receive information from other infrared-enabled devices that use
compatible software.
20. Antenna receives and sends wireless communication signals. The antenna
does not telescope out of your device.
21. Expansion Card Slot allows you to expand the capabilities of your device
using a MultiMediaCard, Secure Digital (SD), or SDIO card. See “Using
Expansion Cards” on page 133 for details on using expansion cards.
22. Stylus allows you to tap options on your device’s screen. To use the stylus,
slide it out of the slot and hold it as you would a pen or pencil.
34 Section 2A: Learning the Basics
Page 47

Turning Your Device’s Phone On and Off
You can use the Palm OS® features of your Treo 650 independently of the wireless
features and applications. Therefore, the screen phone and device are designed to
be turned off and on separately.
Turning Your Device’s Phone ON
When you turn on your device’s phone, it connects to the Nationwide Sprint PCS
Network so that you can make and receive phone calls and use other wireless
services.
䊳 Press and hold the Power/End button to turn on your phone. (You will
hear a series of ascending tones and see a “Welcome” screen. After your
device locates a signal, you can begin making and receiving calls and using
the Internet features, if supported by the local network.)
The Basics
Tip:
The indicator light flashes green when your device is on and you are inside a
Nationwide Sprint PCS Network coverage area. If you are outside a coverage
area, the indicator light flashes amber.
Turning Your Device’s Phone OFF
When your device’s phone is off, it is not connected to the Nationwide Sprint PCS
Network. You can still use its other Palm OS features. This is ideal for airplane
flights and for maximizing battery life.
䊳 Press and hold Power/End to turn off your phone. (You will hear a series
of descending tones and see a “Powering off” screen.)
Section 2A: Learning the Basics 35
Page 48

Waking Up the Screen
To use the Palm OS features when your phone is off, you need to wake up the
screen. You can also turn off your device’s screen without turning off your device’s
wireless features.
1. Press Power/End to wake up the screen.
2. Press Power/End again to turn off the screen.
Note:
You can also press any of the application buttons on the front of your device to
wake up the screen and to go directly to the application associated with that
button.
36 Section 2A: Learning the Basics
Page 49

Moving Around the Treo 650 Screen
To move around the Treo 650 screen, you can use the 5-way navigator or tap
items on the screen with the stylus. With use, you will find your own favorite way
to scroll, highlight, and select menu items.
The Basics
Note:
The 5-way navigator includes Right , Left , Up , Down , and Center
buttons.
Section 2A: Learning the Basics 37
Some third-party applications may not work with the 5-way navigator and
you must use the stylus instead. In this guide, we use arrow icons to indicate
directions on the 5-way navigator. These arrows are different from any
onscreen scroll arrows or pick list arrows.
Up
Left
Down
Center
Right
Page 50

Scrolling Through Screens
As on a computer, you scroll on the Treo 650 to move from field to field, or page to
page, or in some cases, to highlight an item or option in a list. There are several
methods of scrolling:
䢇 Press the 5-way on the front of the Treo 650. Pressing Right , Left , Up
, and Down moves to the next field, button, or action in that direction.
䢇 Press and hold Up to quickly scroll to the top of a list, or press and hold
Down to quickly scroll to the bottom of a list.
䢇 Tap an onscreen scroll arrow:
䢇 When viewing a list screen, such as the Memo list:
䡲 Press Up and Down to scroll one screen at a time.
䡲 Press Center and then press Up and Down to scroll between
line items.
䡲 Press Left to switch from item scrolling to screen scrolling.
䢇 Press Option and Up and Down to scroll to the next page of
information within the current record.
䢇 When inside a text field, press Right and Left to scroll to the character or
word, and press Up and Down to scroll between lines.
38 Section 2A: Learning the Basics
Page 51

䢇 Drag the slider of an onscreen scroll bar.
Highlighting Items
The 5-way lets you highlight items before opening or selecting them.
Experiment with using the 5-way to highlight different screen elements.
䢇 When an onscreen button (OK, Cancel, etc.) or pick list is
highlighted, the button acquires a glow around its border.
䢇 When a phone number, email address, or Web
link is highlighted on a Web page or in a
message, the text appears in reverse type
(light text on a dark background).
䢇 When an entire text entry field is highlighted, you can press Center to edit the
text. After you edit the text, press Center again to highlight the entire field.
䢇 You can also use the stylus to highlight text on the screen. When text is
highlighted it appears in reverse type. You can highlight text in three
different ways:
䡲 Drag the stylus across the text you want to highlight.
䡲 Double-tap a word to highlight it.
䡲 Triple-tap a line of text to highlight it.
Accessing Command Buttons
Command buttons, such as New, OK, and Details, appear at the bottom of the
screen. In many cases you can jump directly to these buttons instead of scrolling
to them.
䢇 From a list screen, such as the Contacts list, press Right to jump to the
first button.
The Basics
Section 2A: Learning the Basics 39
Page 52

䢇 From a screen where you create or edit entries, such as Edit Contacts, press
Center to jump to the first button.
䢇 From a dialog box, such as Edit Categories, press Up or Down to scroll to
the buttons.
Selecting or Activating Items
After highlighting an item with the 5-way , you can select or activate it by
pressing Center. You can also select an item by tapping it with the stylus.
Selecting Menu Items
Many applications have menus to provide access to
additional features. These menus are usually hidden
from view, but they appear when you press Menu
. To get the most out of your Treo 650, it’s a good
idea to familiarize yourself with the additional
features available through the various application
menus.
1. Press Menu to open an application’s
menus.
2. Press Right and Left to switch between menus.
3. Press Up and Down to highlight a menu item.
4. Press Center to select the menu item or press Menu to close the menu
and cancel your selection.
40 Section 2A: Learning the Basics
Page 53

Tip:
Menu shortcuts appear next to the commands in most menus. To use a menu
shortcut, press Menu plus the menu shortcut letter. You don’t have to see the
menu item to use the menu shortcut.
Selecting Options in a Pick List
A range of options is often presented in a type of menu called a pick list, which
can be identified by a downward-pointing arrow to the left of the currently
selected choice. You can select an option from a pick list by doing one of the
following:
䢇 Use the 5-way to highlight the pick list and press Center to display the
items in the list. Press Up and Down to highlight the item you want and
press Center to accept your selection. To exit the pick list and cancel your
selection, press Left or Right .
䢇 Use your stylus to tap the pick list, and then tap the item you want from
the list.
The Basics
Tip:
You can jump to an item in a pick list by using the keyboard to enter the first
letter of the item you want to select.
Pick list
Section 2A: Learning the Basics 41
Page 54

Using the Keyboard
When using the keyboard, most people find it easiest to hold the Treo 650 with
two hands and use the tips of both thumbs to press the keys.
Applications
Option
Shift/Find
Space
Alt
Menu
Backspace
Return
Right Shift
Using the Keyboard Backlight
The Treo 650 includes a keyboard backlight for low light conditions. The keyboard
backlight activates automatically when the screen turns on. It turns off
automatically when the screen turns off and when an active call lasts longer
than a minute.
Entering Lowercase and Uppercase Letters
䢇 To enter lowercase letters, press the desired keys.
42 Section 2A: Learning the Basics
Page 55

䢇 To enter an uppercase letter, press Shift/Find or Right Shift , and
then enter a letter. You don’t need to press and hold Shift while entering
uppercase letters.
䢇 To turn Caps Lock on, press Shift/Find or Right Shift twice. To turn it
off, press Shift/Find or Right Shift again. When Caps Lock is on, this
symbol appears in the lower right:
Entering Numbers, Punctuation, and Symbols that Appear Above
the Letters on the Keys
䢇 Press Option , and then press the key with the desired character shown
above the letter. You don’t need to press and hold Option while pressing
the second key.
䢇 To turn Option Lock on, press Option twice. To turn it off, press Option
again. When Option Lock is on, this symbol appears in the lower right:
The Basics
Tip:
Some application views automatically default to Option Lock, such as the Dial
Pad of the Phone application, or the Calculator. In this case, you do not have to
press and hold Option to enter numbers.
Entering Other Symbols and Accented Characters
1. Enter the character that corresponds to the symbol or accented character
you want. (See the table on the next page.)
2. Press Alt .
3. Press Up or Down to highlight the desired character.
Section 2A: Learning the Basics 43
Page 56

4. Press Center to insert the character, or just continue entering the next
character.
Tip:
In many applications you can view a list of all the alternate characters. Open
the Edit menu, and then select Keyboard Help. The alternate characters are
grouped according to their similarity to the corresponding key. For example,
the alternate characters available for the e key are é, è, ë, ê and €.
44 Section 2A: Learning the Basics
Page 57

Other Symbols and Accented Characters
Enter …
a
A
b or B
c
C
d
D
e
E
f or F
i
I
l or L
m or M
n
N
o
…then press to
select…
á à ä â ã å æ
Á À Ä Â Ã Å Æ
ß
ç ¢ © ^ ˆ
Ç ¢ © ^ ˆ
† ‡
† ‡ Ð
è é ë ê
È É Ë Ê
ƒ
ì í ï î
Ì Í Ï Î
£
µ
ñ
Ñ
ò ó ö ô
œ õ ø
Enter …
U
x or X
y
Y
0
1
2
3
.
,
!
?
:
'
"
$
+
…then press to
select…
Ù Ú Ü Û
פ
ý ÿ ¥
Ý Ÿ ¥
% ‰ º
¹ ¼ ½
²
³ ¾
? ! …
‚‚
¡
¿
; :-) :-( ;-) :-D
‘ ’ ‹ › ~ `
“ ” « »
£ ¥ ¢
&
The Basics
Section 2A: Learning the Basics 45
Page 58

Enter …
O
p or P
r or R
s
S
t or T
u
…then press to
select…
Ò Ó Ö Ô Œ Õ Ø
% ¶
®
ß š §
ß Š §
~ ™ † ‡
ù ú ü û
Enter …
-
/
#
(
)
…then press to
select…
_ ~ • = – —
% \ ÷ ¦
=
< [ { ‹
> ] } ›
46 Section 2A: Learning the Basics
Page 59

Opening Applications
There are three application buttons on the front of the Treo 650. The fourth
button turns your device on and off, wakes up the screen, and controls the
keyguard. Each application button can be used to open two applications. To
access a button’s primary application, simply press the button. To access a
button’s secondary application, press Option , and then press the
application button.
Phone/Send Calendar Messaging Power/End
Button Primary Application Secondary Application
Phone/Send
Calendar
+ Web browser
+ World Clock
The Basics
Section 2A: Learning the Basics 47
Page 60

Button Primary Application Secondary Application
Messaging
Power /End
+ VersaMail
+ Keyguard
®
Note:
The Messaging button opens Sprint PCS Business Connection if you
downloaded and installed Sprint PCS Business Connection on your device. You
can also customize the buttons yourself. See “Button S ettings” on page 151 for
details.
You can access all available applications through the Applications view.
To access applications through the Applications view:
1. Press Applications .
2. Use the 5-way navigator to highlight the application you want to open.
3. Press Center to open the selected application as described in “Moving
Around the Treo 650 Screen” on page 37.
48 Section 2A: Learning the Basics
Page 61

In Applications, you can also do any of the following:
䢇 Press Applications repeatedly to cycle through different categories of
applications.
䢇 Enter the first few letters of the application’s name to highlight it. For
example, if you enter “p,” the device highlights Phone; if you then enter “r,”
it highlights Prefs. If you pause and then enter “r,” it highlights the first
application that starts with “r.”
The Basics
Section 2A: Learning the Basics 49
Page 62

50 Section 2A: Learning the Basics
Page 63

Section 2B
Using Your Device’s Phone Features
In This Section
⽧ Making Calls
⽧ Receiving Calls
⽧ Signal Strength and Phone Status
⽧ Managing Active Calls
⽧ Controlling Your Roaming Experience
⽧ Internal Phone Book
⽧ Defining Favorite Buttons
⽧ Using a Phone Headset
⽧ Connecting to Devices With Bluetooth® Wireless Technology
⽧ Using Dial-up Networking on Your Treo 650
Section 2B: Using Your Device’s Phone Features 51
Phone Features
Page 64

Making Calls
Your Sprint PCS VisionSM Smart Device Treo™ 650 offers several options for making
phone calls. As you get familiar with your Treo 650, you’ll find the method
you prefer.
Important:
Before making a call, make sure your device is on (see steps on page 35).
If No Service appears in the upper-left, you are out of a wireless coverage
area. If you believe you are in a wireless coverage area and this problem
persists, contact Sprint for assistance.
Dialing Using the Onscreen Dial Pad
Note:
If you selected Show Wallpaper in the General Preferences dialog box of
the Phone application (see “Selecting Wallpaper for the Phone Screen”
on page 144), you can still access the Dial Pad. From the Main view of the
Phone application, press
Phone/Send
, and then select
Dial Pad
.
1. Press the Phone/Send button.
2. Tap the numbers on the onscreen Dial Pad.
3. Press Phone/Send to dial.
52 Section 2B: Using Your Device’s Phone Features
Page 65

Tip:
You can also paste numbers directly into the Dial Pad view. Copy a
number from another application, and then switch to Dial Pad view.
Open the
Edit
menu, and then select
Paste
. Press
Phone/Send
to dial.
Dialing With the Keyboard
1. Press Phone/Send .
2. Using the numbered keys on the keyboard, start dialing a phone number.
(You don’t need to press Option to enter numbers when dialing.)
3. Press Phone/Send to dial.
Tip:
If you make a mistake while dialing, press Backspace to erase one digit
at a time or select Cancel to start over.
Dialing by Contact Name
Before you can dial a call by contact name, you must
create some contacts (see “Adding a Contact” on
page 67), or import them from your computer by
synchronizing (see “Synchronizing Contacts and
Other Information” on page 124).
1. Press Phone/Send .
2. Select the Contacts favorite button.
3. Using the keyboard, begin entering one of the following for the contact:
Section 2B: Using Your Device’s Phone Features 53
Phone Features
Page 66

䡲 First initial and last name
䡲 First name
䡲 Last name
4. Select the number you want to call and press Phone/Send to dial.
Tip:
To see more details about a contact, highlight the name and press
. To start a new search, press
Center
select Cancel to return to the
Main
Backspace
view.
to delete letters or
Dialing With a Favorite Button
Favorite buttons can be used as shortcuts for dialing
phone numbers and performing other common tasks.
You can use the built-in favorite buttons or see
“Defining Favorite Buttons” on page 71 to create
some of your own.
1. Press Phone/Send .
2. Use the 5-way navigator to access Favo rites .
3. Highlight the desired favorite button.
4. Press Center to dial.
Tip:
To view more favorite buttons, highlight the bottom row of favorites, and
then press
Down
.
54 Section 2B: Using Your Device’s Phone Features
Page 67

Dialing From a Web Page
The Treo 650 recognizes most phone numbers that
appear in Web pages. If you can’t highlight and dial a
phone number on a Web page using the 5-way or
stylus, it means that the Treo 650 does not recognize
it as a phone number.
1. Use the 5-way to highlight the phone
number you want to dial in the Web page or
message.
2. Press Center to open the Dial dialog box.
3. Press Phone/Send to dial.
Dialing From Messages
The Treo 650 recognizes most phone numbers that appear in email, text, and
Picture Mail messages. If you can’t use the 5-way or stylus to highlight and dial a
phone number from a message, it means that the Treo 650 does not recognize it
as a phone number.
1. Use the 5-way to scroll to the text box.
2. Press Center to select the text box.
3. Press Up to highlight the phone number.
4. Press Center to open the Dial dialog box.
5. Press Phone/Send to dial.
Phone Features
Section 2B: Using Your Device’s Phone Features 55
Page 68

Redialing the Last Number You Called
䊳 From the Main view in the Phone application, press and hold Phone/Send .
–or–
To display a list of your most recently dialed numbers, press Phone/Send ,
select the number you want to call, and then press Phone/Send again
to dial.
Tip:
To view all your recent incoming and outgoing calls in chronological
order, select the Call Log favorite button, or press
then select
from the recent call list.
Call Log
Phone/Send
and
56 Section 2B: Using Your Device’s Phone Features
Page 69

Receiving Calls
To receive calls, your device’s phone must be on. This is different from having just
the screen turned on (see “Turning Your Device’s Phone On and Off” on page 35).
Answering Calls
To answer a call, do one of the following:
䊳 Press Phone/Send .
–or–
Use the 5-way navigator to select the onscreen Answer button.
–or–
If the headset is attached, press the headset button.
Phone Features
Tip:
To prevent calls from accidentally being answered while the device is in a
pocket or briefcase, you can disable the screen’s touch-sensitive feature
when an incoming call arrives (see “Auto-Keyguard and Touchscreen
Lockout” on page 157).
Sending Calls to Voicemail
To ignore a call and send it to voicemail, do one of the following:
䊳 Press Power/End .
–or–
Use the 5-way to select the onscreen Ignore button.
Section 2B: Using Your Device’s Phone Features 57
Page 70

Note:
Do not press
both the call in progress and the incoming call. Use the 5-way method
instead.
Power/ End
to ignore a call waiting alert; this hangs up
Silencing the Ring of an Incoming Call
To silence the ringer while your device is ringing:
䊳 Press the volume button or any key on your Treo except Phone/Send
Power/ End , or the 5-way .
–or–
To immediately silence all system sounds including the ringer, slide the
ringer switch to Sound Mode Off (see “System Sound Settings” on
page 145).
When you silence the ringer, you can either answer the call or let it ring through
to voicemail.
If music is playing through the internal speaker or headset, and a call arrives, you
can still hear the device ringing softly. The music continues playing, but you won’t
hear it during your call. To pause the music, press the Side button on the side of
your Treo 650.
58 Section 2B: Using Your Device’s Phone Features
Page 71

Signal Strength and Phone Status
You can monitor the status of your device’s signal strength and several other
items, using icons at the top of the Phone screen.
Phone Status Icons
Phone Features
Network
name
Displays Sprint when your device is on and you’re inside the Nationwide
Sprint PCS Network. Displays Roaming if you roam outside the
Nationwide Sprint PCS Network. If you’re outside a coverage area, No
service appears, and when you turn off your device, it displays Phone Off.
Appears with a red slash when location privacy is on and without the
slash when location privacy is off.
Appears when call forwarding is active.
Appears when TTY/TDD Mode is active.
Appears when you have new voicemail messages. You can select this icon
to retrieve your messages.
Appears when roaming is active.
Appears in gray when Bluetooth® wireless technology is off. Appears in
blue when Bluetooth wireless technology is on. Appears in reverse blue
when your device is communicating with other devices using Bluetooth
wireless technology. To quickly access the Bluetooth Preferences panel,
tap the Bluetooth icon.
Replaces the Bluetooth icon when your device is connected to a headset
that is enabled with Bluetooth wireless technology.
Section 2B: Using Your Device’s Phone Features 59
Page 72

Appears with gray arrows when your device is on and connected to the
Sprint PCS Vision network. You can still receive calls. Appears with green
arrows when your device is connected to the Sprint PCS Vision network
and a data session is active (for example, when you are browsing the
Web). You cannot receive calls.
Displays the signal strength. The stronger the signal, the more bars
appear. If you are outside a coverage area, no bars appear.
Displays the battery charge status. When the battery drains to 20% of its
capacity, the icon changes from blue to red. At 10% of its capacity, you
begin to receive warning messages, and at 5% of its capacity, the device
beeps and the icon changes from red to clear.
Appears when your Treo 650 battery is charging . The lightening bolt turns
from red to green when the battery is fully charged and your device
remains connected to the AC charger.
Appears when your Treo 650 battery is fully charged.
Indicates the number of unread Picture and SMS messages. You can
select this indicator to go to the Messaging application to read your
messages.
Indicates the number of unread email messages. You can select this
indicator to go to the VersaMail® application to read your email.
Displays the current (or next) event from the Calendar application. If you
have an event conflict during the current time period, a red bar appears
next to the event description. To jump to the current event in the
Calendar application, select the Cal endar status line (see “Displaying Your
Calendar” on page 88 for details).
Tip:
To display the remaining battery power, tap the battery icon at the top of
the screen.
60 Section 2B: Using Your Device’s Phone Features
Page 73

Finding Your Phone Number
1. Make sure your device’s phone is on (see “Turning Your Device’s Phone On
and Off” on page 35).
2. Press Phone/Send .
3. Open the menus .
4. Select Options, and then select Phone Info. (If your phone number isn’t listed,
consult Sprint to confirm your device is activated.)
Look here for your
phone number
Section 2B: Using Your Device’s Phone Features 61
Phone Features
Page 74

Managing Active Calls
When you make or receive a call, the Active Call view appears. To toggle between
the Active Call view and the Main view, press Phone/Send .
Use the 5-way navigator to access the onscreen buttons in this view and to
manage an active call. The following screen appears on your device during an
active call:
Current duration
of call
Caller’s
name and
number
The following is a list of available options during an active call:
Ends the call immediately.
Switches to the personal speakerphone. The personal speakerphone makes it
easy for you to use other features, such as checking your calendar, during a call.
62 Section 2B: Using Your Device’s Phone Features
Dial Pad
Mute
Page 75

Returns to handset mode when the speakerphone feature is active.
Switches from a headset with Bluetooth wireless technology to the built-in
earpiece. This button replaces the Spkr-phone button when a headset with
Bluetooth wireless technology is attached.
Places the current call on hold.
Lets you place another call while keeping the first call active. This button
replaces the Hold button when a call is on hold.
Opens the Dial Pad so you can enter extra digits or dial another number.
Dials any extra digits (such as a password or extension) that you assigned to a
Speed Dial favorite button. This button replaces the Dial Pad button during
outbound calls to numbers that include pre-defined extra digits. See “Creating a
Speed Dial Favorite Button” on page 72 for details on creating a Speed Dial
favorite button.
Mutes the Treo 650 microphone so that you cannot be heard.
Phone Features
Tip:
To avoid accidentally pressing onscreen buttons while holding the device
to your ear, you can disable the screen’s touch-sensitive feature during
active calls (see “Auto-Keyguard and Touchscreen Lockout” on page 157).
Ending a Call
Do one of the following to end a call:
Section 2B: Using Your Device’s Phone Features 63
Page 76

䢇 Press Power/End .
䢇 Select Hang Up.
䢇 Press the headset button (if the headset is attached).
Tip:
When a call lasts longer than one minute, the screen turns off. Press any
key except
to hang up the call. Be careful not to press
screen as this will accidentally end the call.
Power/E nd
to wake up the screen, and then press
Power/End
to wake up the
Power/ End
Returning to an Active Call From Another Application
You can use many other applications on your Treo 650 while holding a phone
conversation, including the organizer and text messaging features. You cannot
browse the Web or send and receive email while on an active call.
䊳 From any application, press Phone/Send to return to the Active Call view.
Making a Second Call
You can make a second call while your first call is
still active.
1. After dialing the first number, use the 5-way
to select Hold.
2. Use the 5-way to select Add Call.
3. Dial the second number using Favor ites, Contacts,
Dial Pad, Call Log, or Redial list (see “Making Calls”
on page 52).
4. Press Power/End to end both calls.
64 Section 2B: Using Your Device’s Phone Features
Page 77

Tip:
The
Active Call
one of the calls. You can join the two calls in a conference call, but you
cannot switch between the two calls.
view now includes two status lines, each representing
Phone Features
Section 2B: Using Your Device’s Phone Features 65
Page 78

Controlling Your Roaming Experience
Your device is digital dual-band, which means you can make and receive calls
while on the Nationwide Sprint PCS Network and you can also roam on other
digital networks where we’ve implemented roaming agreements with other
carriers.
When you roam outside the Nationwide Sprint PCS Network, the Roaming icon
appears at the top of the screen. Additional charges may apply if you use your
Treo 650 while roaming.
To learn more about roaming, visit
Setting Your Device’s Roam Mode
1. Press Phone/Send .
2. Open the menus .
3. Select Options, and then select Phone Preferences.
4. Check the Digital Roaming box.
5. Select OK.
Feature Availability
䢇 You can make and receive calls while roaming.
䢇 You will have access to voicemail while roaming.
䢇 Other features which are standard on the Nationwide Sprint PCS Network,
such as Call Waiting, Sprint PCS Voice Command, and Sprint PCS Vision are
unavailable while roaming.
www.sprint.com.
66 Section 2B: Using Your Device’s Phone Features
Page 79

Internal Phone Book
The internal phone book is located in the Contacts application. If you are familiar
with other Palm Powered™ devices, Contacts replaces the Address Book on
previous devices.
If you have several contacts to enter, it’s more efficient to use Palm® Desktop
software or Microsoft
information between the Treo 650 and your computer. For more information, see
“Synchronizing Contacts and Other Information” on page 124.
Adding a Contact
1. Press Phone/Send .
2. Select the Contacts favorite button.
Outlook on your computer and then synchronize
Phone Features
Tip:
You can also open
Applications
and select
Contacts
from the
Contacts
Applications
.
view. Go to
3. Select New Contact.
4. Use the 5-way navigator to move between
fields as you enter information. [Be sure to
correctly label your contact’s mobile number(s).
The Messaging application (see “Messaging” on
page 207) only looks up Mobile numbers and
email addresses.]
Section 2B: Using Your Device’s Phone Features 67
Page 80

5. To add a Caller ID picture that displays when that person calls, select the
Picture box. Select Photos to add an existing picture to this contact entry, or
if your device includes a camera, you can also select Camera to take a picture
and add it to this contact entry when you save the picture.
6. To place the entry in a category or mark it private, select Details.
7. To add a note to an entry, select Note .
8. To display additional fields for this contact, select Plus .
9. After you enter all the information, select Done.
Viewing or Changing Contact Information
1. In the Contacts list, begin entering one of the following for the contact you
want to view or edit:
䡲 First initial and last name
䡲 First name
䡲 Last name
2. Select the name of the entry you want to open.
3. Select Edit.
4. Make changes to the entry as necessary, and then select Done.
68 Section 2B: Using Your Device’s Phone Features
Page 81

Deleting a Contact
1. Open the contact you want to delete.
2. Open the menus .
3. Select Record, and then select Delete Contact.
4. Select OK.
Saving Phone Numbers
After you complete an incoming call from a number (with Caller ID) that is not in
your Contacts list, you are prompted to add the number to your Contacts list.
Select one of the following options:
䢇 To add the number, select Ye s .
䢇 To decline adding the number, select No.
䢇 To permanently disable the Add New Contact prompt, check the Never ask me
to add new Contacts box when the prompt appears.
If you don’t add a number right away, follow these steps to add it later:
1. In the Call Log (see “Redialing the Last Number You Called” on page 56),
highlight the number you want to save.
2. Select Add Contact. The Add Contact button appears only if the phone
number does not already exist in your Contacts list.
3. Enter the information for the entry.
4. Select Done.
Phone Features
Section 2B: Using Your Device’s Phone Features 69
Page 82

Defining Your Business Card
1. Create a new contact using the information on your business card.
2. From Contact Edit view, open the menus .
3. Select Record, and then select Select Business Card.
Now you can beam your business card to other Palm Powered devices. In any
Phone view, open the menus , select Record, and then select Beam
Business Card.
70 Section 2B: Using Your Device’s Phone Features
Page 83

Defining Favorite Buttons
The Treo 650 provides approximately 70 programmable favorite buttons for quick
access to the following common tasks:
䢇 Dialing a phone number (speed dial).
䢇 Accessing your Call Log.
䢇 Accessing the onscreen Dial Pad.
䢇 Opening an application.
䢇 Accessing a Web page.
䢇 Addressing a message (text, email or Picture Mail).
䢇 Accessing voicemail (preset on Treo).
For each favorite button, you can also set up a Quick
Key that gives you instant access to the phone
number or corresponding screen. Quick Keys are
optional and can be letters or numbers, but you can’t
use both the letter and number for the same key. For
example, the Voicemail Quick Key is 1. The letter
equivalent for that key is E, so you cannot assig n E as a
Quick Key to another favorite button.
Phone Features
Tip:
If you’re upgrading from a previous Treo, your favorite buttons are
transferred along with your other info. However, you may need to
rearrange the order in which your favorite buttons appear by opening
Edit
the
menu, and then selecting
Edit Favorites Pages
.
Section 2B: Using Your Device’s Phone Features 71
Page 84

Creating a Speed Dial Favorite Button
1. Press Phone/Send .
2. Use the 5-way navigator to access Favo rites .
3. Select a blank button.
Tip:
If there are no blank favorite buttons on the current Favorites page,
press
Down
or
to scroll through the other pages.
Right
4. Select the Typ es pick list and select Speed Dial.
5. Enter a label for the favorite.
䡲 If the entry is for an existing contact, select Lookup. Start entering the
contact’s last name, and then select the contact when it appears in the
lookup list.
䡲 If the entry is for a new contact, enter the Label, press Down and
enter the Number.
6. (Optional) Enter a Quick Key. (When you are in
the Main, Dial Pad, or Favorite s view of the Phone
application, press and hold the Quick Key to
instantly open the favorite.)
7. (Optional) Select the Ringtone pick list and select
a special ringtone for incoming calls from that
contact.
72 Section 2B: Using Your Device’s Phone Features
Page 85

8. (Optional) Select More, and then select
advanced options:
䡲 Extra Digits lets you define additional digits
to dial, such as a password or extension.
䡲 Dial Extra Digits Automatically dials pre-
defined Extra Digits immediately after
dialing the phone number, when checked.
9. Select OK.
Phone Features
Tip:
To view all the contact numbers for the selected person or business,
highlight the favorite button, and then press Space.
Creating Other Types of Favorite Buttons
1. Press Phone/Send .
2. Use the 5-way to access Favo rites .
3. Select a blank button.
4. Select the Typ es pick list and select Call Log, Dial Pad, Contacts, Application,
Message, Email, or Web Link.
5. Enter a label for the favorite and any other necessary information on
the screen.
Tip:
When creating a Message or Email favorite you can enter multiple
addresses; simply separate each address with a comma. This is an easy
way to send messages to a group of people.
Section 2B: Using Your Device’s Phone Features 73
Page 86

6. (Optional) Enter a Quick Key. (When you are in the Main, Dial Pad, or Fa vorite s
view of the Phone application, press and hold the Quick Key to instantly
open the favorite.)
7. Select OK.
Editing or Deleting an Existing Favorite Button
You can edit or delete most favorite buttons. Note that you cannot edit or delete
the preset voicemail button, but you can add Extra Digits or move the voicemail
button to a different position.
1. Press Phone/Send .
2. Use the 5-way to access Favo rites .
3. Highlight the favorite button you want to edit or delete.
4. Open the menus .
5. Select Edit, and then select Edit Favorites Button.
6. Make the desired changes. (For example, add a Quick Key shortcut to any
favorite. When you are in the Main, Dial Pad, or Favor ites view of the Phone
application, press and hold the Quick Key to instantly open the favorite.
7. To delete the entry, select Delete.
8. Select OK.
Tip:
74 Section 2B: Using Your Device’s Phone Features
You can also organize your favorite buttons on different pages. Open the
Edit menu, and then select Edit Favorites Pages. To scroll through
your Favorites pages, repeatedly press Right to see the next page and
to see the previous page.
Left
Page 87

Using a Phone Headset
You can connect a phone headset for hands-free operation. If you need to use
your device while driving and this is permitted in your area, we recommend using
a phone headset (sold separately).
You can press the headset button to perform any of the following tasks:
䢇 Answer an incoming call or a call-waiting call.
䢇 Switch between two active calls (if the second call was incoming).
䢇 Join two calls in a 3-way conference (if the second call was outgoing).
䢇 Transfer an outgoing call to a compatible headset enabled with Bluetooth
wireless technology (headset with Bluetooth wireless technology required,
sold separately)
䢇 Hang up all calls.
Phone Features
Section 2B: Using Your Device’s Phone Features 75
Page 88

Tip:
If you’re using a headset enabled with Bluetooth wireless technology
and you want to return to the handset during a call, select
the Active Call screen.
Cancel
on
Headset Specifications
Your Treo 650 uses a 2.5 mm, 3-pin headset connector. In addition to the headset
that came with your Treo, you can use other third-party headsets that are
designed for this type of connector. When in doubt, ask the third-party headset
manufacturer if their product is compatible with Treo smart devices. If you hear a
headset buzz or poor microphone performance, your headset may be
incompatible with Treo 650.
Your Treo 650 is also compatible with headsets enabled with Bluetooth 1.1
wireless technology. This includes most of the headsets currently available with
Bluetooth® wireless technology, as many of these headsets support both
Bluetooth 1.1 and 1.2 wireless technology. Check the specifications for your
headset to confirm compatibility. Please note, however, that you cannot use a
headset with Bluetooth wireless technology to listen to MP3 files.
If you want to listen to music through the headset jack in stereo, use a stereo
adapter or other accessory.
Visit
www.palm.com for more information on audio accessories and the most
current compatibility information.
Note:
The headset designed for Treo™ 180, 270 and 300 is not compatible with
Treo 650. Standard headsets sold with other Sprint phones are
compatible with Treo 650.
76 Section 2B: Using Your Device’s Phone Features
Page 89

Connecting to Devices With Bluetooth® Wireless Technology
With your device’s built-in Bluetooth wireless technology, you can connect to a
number of devices enabled with Bluetooth wireless technology, such as a
headset, car kit, printer, or GPS receiver, as well as to other phones and handhelds
with Bluetooth wireless technology. If your computer is enabled with Bluetooth
wireless technology, you can also synchronize wirelessly.
Once you set up a connection with a device with Bluetooth wireless technology,
you can communicate with that device whenever it is within range (about
30 feet). Be sure to check your battery level before establishing a connection; if
the battery level is low, you can’t make a Bluetooth wireless connection.
Connecting to Headset or Car Kit With Bluetooth Wireless Technology
1. Go to Applications and select
Bluetooth .
2. Select On.
3. Enter a Device Name for your Treo 650. (This is
the name other devices with Bluetooth wireless
technology see when they connect to your
Treo 650.)
4. Select the Discoverable pick list and select one of
the following:
Section 2B: Using Your Device’s Phone Features 77
Phone Features
Page 90

䡲 Ye s automatically establishes connections with devices with which
you’ve created a trusted pair. New devices can request a connection
which you can accept or refuse.
䡲 No enables devices with which you’ve already formed a trusted pair to
find your device. New devices cannot request a connection.
Note:
Both your device and the
to be discoverable.
Bluetooth
setting must be On for your device
5. Select Setup Devices.
6. Select Hands-free Setup.
7. Follow the onscreen instructions to create a
trusted pair with the specific device. (In some
cases you may need to perform setup steps
on the other device before you can complete
this step.)
8. After you finish setting up the device, close the
Bluetooth application.
Tips for Handsfree Devices With Bluetooth Wireless Technology
䢇 If you’re using a handsfree device with Bluetooth wireless technology, the
Treo 650 automatically routes all calls to that device. When a call comes in,
your Treo 650 rings and the headset beeps. However, even if you pick up the
call on your Treo, the call goes to the headset.
䢇 If a headset with Bluetooth wireless technology is paired and within range
when you place a call, the call is routed to the headset, not the handset.
78 Section 2B: Using Your Device’s Phone Features
Page 91

䢇 To transfer a call from a headset with Bluetooth wireless technology to your
Treo (handset) during a call, select from the Active Call view.
䢇 To set up advanced features, such as auto-answer and voice tags, go to
Applications and select Prefs . Select Handsfree, and then configure
the settings. Note that your handsfree device with Bluetooth wireless
technology must support voice tags to use that feature.
䢇 Your Treo does not support Bluetooth wireless connections to stereo headsets
or keyboards.
Creating Trusted Pairs
After you set up a Bluetooth wireless connection with your computer or other
accessory devices, you may want to set up other trusted devices, such as a friend’s
handheld. When your Treo 650 recognizes a trusted device, it automatically
accepts communication, bypassing the discovery and authentication process.
1. Go to Applications and select Bluetooth .
2. Select Setup Devices.
3. Select Tru sted Devices.
4. Select Add Device. (The Discovery icon appears to indicate that the discovery
process is active.)
5. Select the device you want to add as a trusted device. (If the device you
want to add isn’t on the discovery results list, select Find More to
search again.)
6. Enter the same passkey on your device and the other device.
Phone Features
Section 2B: Using Your Device’s Phone Features 79
Page 92

7. Select if the device is a headset or a car kit and then select OK.
Important:
Some devices with Bluetooth wireless technology have a built-in
passkey; others let you select the passkey. In either case you must use
the same passkey on both the other device and your Treo 650. See the
documentation for the device with Bluetooth wireless technology for
additional information.
8. Select Done.
Note: Make sure you close the Bluetooth application after you set up devices
and trusted pairs.
Sending Information Over a Bluetooth Wireless Connection
You can send an individual entry or a category. When you send a category, the
items within the category appear as unfiled items on the receiving device.
1. Open an application.
2. Select the entry or category you want to send.
3. Open the menus .
4. Select Send on the leftmost menu.
5. Select Bluetooth, and then select OK.
6. Select the receiving device on the Discovery Results screen, and then
select OK.
80 Section 2B: Using Your Device’s Phone Features
Page 93

Sending an Application Over a Bluetooth Wireless Connection
1. Go to Applications .
2. Open the menus .
3. Select Send on the App menu.
4. Select the Send From pick list and select whether the application you want
to send is located on your Treo or an expansion card.
5. Select the application you want to transfer. (It cannot have a lock next
to it.)
6. Select Send.
7. Select Bluetooth, and then select OK.
8. Select the receiving device on the Discovery Results screen, and then
select OK.
Receiving Information Over a Bluetooth Wireless Connection
1. Go to Applications and select Bluetooth .
2. Select On.
3. If you already created a trusted pair with the other device, your Treo 650 is
ready to receive the information. If you do not have a trusted pair with the
other device, select the Discoverable pick list and select Ye s.
4. When the Send dialog box appears, select a category or expansion card.
5. Press Up to receive the information or press Down to refuse it.
Phone Features
Section 2B: Using Your Device’s Phone Features 81
Page 94

Using Dial-up Networking on Your Treo 650
If your computer is enabled with Bluetooth wireless technology, you can use your
Treo 650 as a wireless modem to access the Internet from your computer. Dial-up
networking (DUN) is the feature that converts your smart device into a wireless
modem.
Note:
To use DUN, you must have a data services plan.
To configure DUN, complete the procedures in this section:
䢇 “Creating a Trusted Pair Between Your Treo 650 and Your Computer” on
page 82
䢇 “Enable or Install DUN on Your Computer” on page 84
䢇 “Enabling DUN on Your Treo 650” on page 84
䢇 “Accessing the Internet From Your Computer” on page 85
Creating a Trusted Pair Between Your Treo 650 and Your Computer
After creating the trusted pair, you can use your Treo 650 as a modem any time it
is within range of your computer, bypassing the discovery and authentication
process. You need to do this only once.
82 Section 2B: Using Your Device’s Phone Features
Page 95

1. Make sure that your computer’s Bluetooth setting is on and that your
computer is discoverable. Check the documentation that came with your
computer to find and change these settings.
Tip:
If your computer is not enabled with Bluetooth wireless technology,
you may be able to purchase a wireless Bluetooth adapter accessory for
your computer.
2. On your Treo 650, go to Applications and select Bluetooth .
3. Select On if it is not selected, and then select Setup Devices.
4. Select Tru sted Devices.
5. Select Add Device. The discovery icon appears, indicating that the discovery
process is active.
6. Select your computer from the Trusted De vices list, and then select OK.
7. Enter a passkey on the Bluetooth Security screen, and then select OK. The
passkey can be any number you choose. We recommend that you use at
least four digits in your passkey.
Phone Features
Section 2B: Using Your Device’s Phone Features 83
Page 96

8. Enter the same passkey number on your computer when prompted.
9. Select Done, and then select Done again to return to the Bluetooth screen.
Enable or Install DUN on Your Computer
Dial-up networking must be enabled or installed on your computer. Follow the
instructions from the manufacturer of your Bluetooth adapter to enable DUN.
Enabling DUN on Your Treo 650
You must enable DUN on your Treo 650 each time you wish to use your device as
a wireless modem.
1. Go to Applications and select Bluetooth
.
2. Select the Dial-up Networking pick list, and then
select On. When DUN is successfully enabled,
the DUN icon appears.
3. Select OK on the warning screen that appears.
This screen reminds you to disable DUN when
you want to stop the Internet session on your computer.
Note:
When DUN is on, you cannot pair with another device or discover
another device. You can also not send or receive information wirelessly
directly from your smart device, browse the Web, or send or receive email
messages. You can use all the other features of your Treo 650, including
the Phone application.
84 Section 2B: Using Your Device’s Phone Features
Page 97

Accessing the Internet From Your Computer
The steps for accessing the Internet on your computer may vary depending on
your operating system and how Bluetooth wireless technology is set up on your
computer—for example, if it is built in versus if you are using a wireless
Bluetooth adapter. If the following procedure does not work with your computer,
check your computer’s documentation for how to set up Bluetooth technology to
access the Internet using a DUN connection.
Before you begin, verify that DUN is enabled on both your computer and your
Treo 650.
1. Open the Bluetooth panel on your computer and look for the option for
paired devices. Check your computer’s documentation for how to bring up
this screen and the name of the paired devices option.
2. Double-click the icon or option representing your Treo 650. Your computer
connects to your Treo 650 and shows that DUN services are available.
3. Double-click the DUN service icon.
4. Leave the username and password fields blank.
You do not need to enter a separate username
and password.
5. Enter the following in the Dial field:
#777
6. Click Dial. Once the connection is successfully
established, you can browse the Internet on
your computer or download your email.
Phone Features
Section 2B: Using Your Device’s Phone Features 85
Page 98

To verify that you are connected, look for a network connection icon in the task
bar at the bottom of your computer screen. To check the status of the connection,
right-click the Bluetooth network icon.
Note:
Tip:
Keeping DUN enabled drains your Treo 650’s battery more quickly. Be
sure to turn off DUN on your Treo 650 when your Internet session is
finished.
You may need to use a virtual private network (VPN) to access corporate
email. Check with your system administrator for information.
Terminating an Internet Session
To terminate an Internet session, first disconnect from DUN on your computer,
and then turn DUN off on your Treo 650.
1. On your computer, right-click the icon or option representing your Treo 650,
and then click Disconnect.
2. On your Treo 650, go to Applications and select Bluetooth .
3. Select the Dial-up Networking pick list, and then select Off. When the
Bluetooth status icon reappears at the top of the screen, you have
successfully switched off DUN.
86 Section 2B: Using Your Device’s Phone Features
Page 99

Using Your Device’s Organizer Features
Section 2C
In This Section
⽧ Calendar
⽧ Tas k s
⽧ Memos
⽧ Listening to Music
⽧ World Cl ock
⽧ Calculator
⽧ Looking Up Contacts and Other Information
⽧ Beaming Information
Section 2C: Using Your Device’s Organizer Features 87
Organizer Features
Page 100

Calendar
Calendar is a powerful organizer application that helps you manage your
schedule.
Displaying Your Calendar
Do any of the following:
䢇 Press the Calendar button repeatedly to cycle through
the various views:
䡲 Agenda View shows your daily schedule and any items on your Tasks list
that are overdue or due today. If there’s room, Agenda view also shows
your schedule for the next dates that have events scheduled.
䡲 Day View shows your daily schedule one day at a time.
䡲 Week Vie w shows your schedule for an entire week. The timeframes are
based on the Start Time and End Time settings in Calendar Preferences.
䡲 Month View shows your schedule for a whole month.
䢇 From any Calendar view, open the Options menu and select Ye ar View to view a
calendar for an entire year.
䢇 From Day view, Wee k view, Month view, or Ye ar view use the 5-way navigator
to move to another day, week, month, or year (based on the
current view).
䢇 From Day view, Wee k view, Month view, or Ye ar view select Go To, and then
select a date from the calendar.
88 Section 2C: Using Your Device’s Organizer Features
 Loading...