

Ozito BLL-036, PXCBLK-018 Instruction Manual

CORDLESS
BLOWER
36V Lithium Ion
INSTRUCTION MANUAL
SPECIFICATIONS
Voltage: 36V
Battery: 3.0Ah Li-ion
Charge Time: 3 Hours
No Load Speed: 10,000-16,000/min
Max. Air Speed: 252km/hr
Weight with Battery: 4kg
BLL- 036
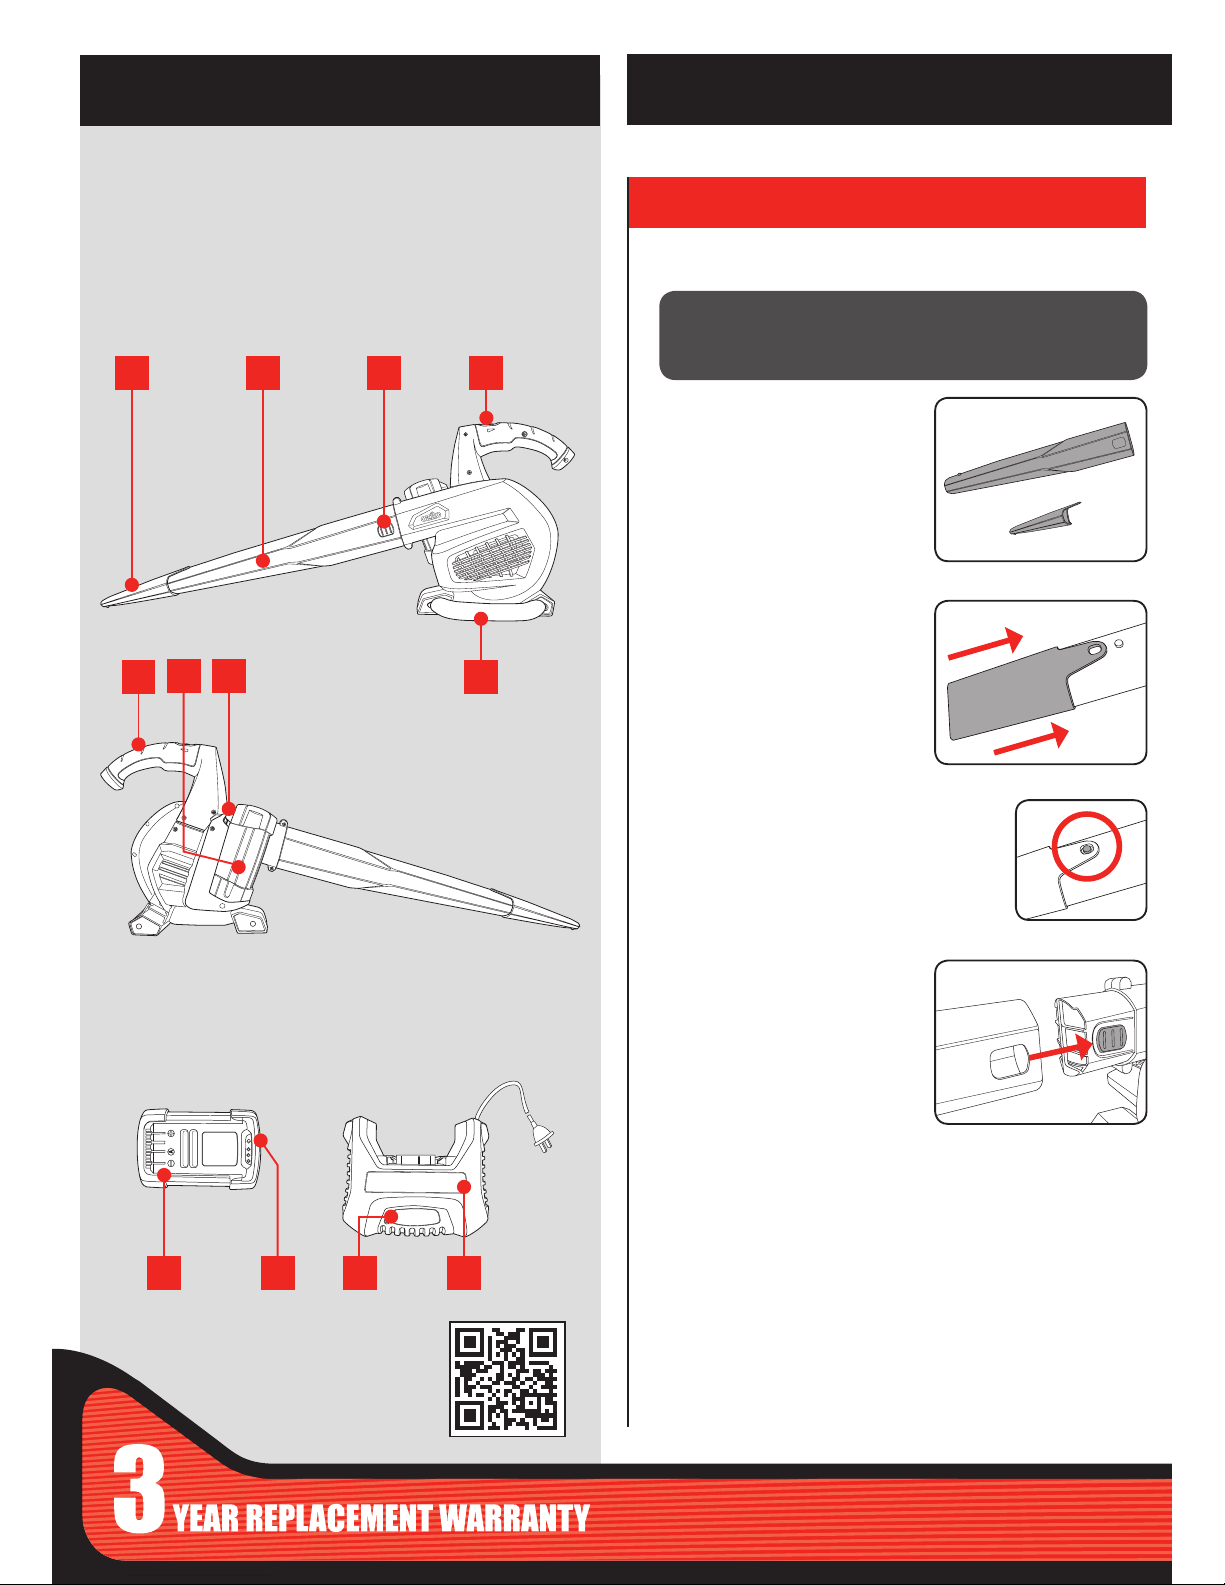
WHAT’S IN THE BOX
ozito.com.au
Blower
Blower Tube
Blower Nozzle
Battery Pack
Battery Charger
3
ONLINE MANUAL
Scan this QR Code with your
mobile device to take you to
the online manual.
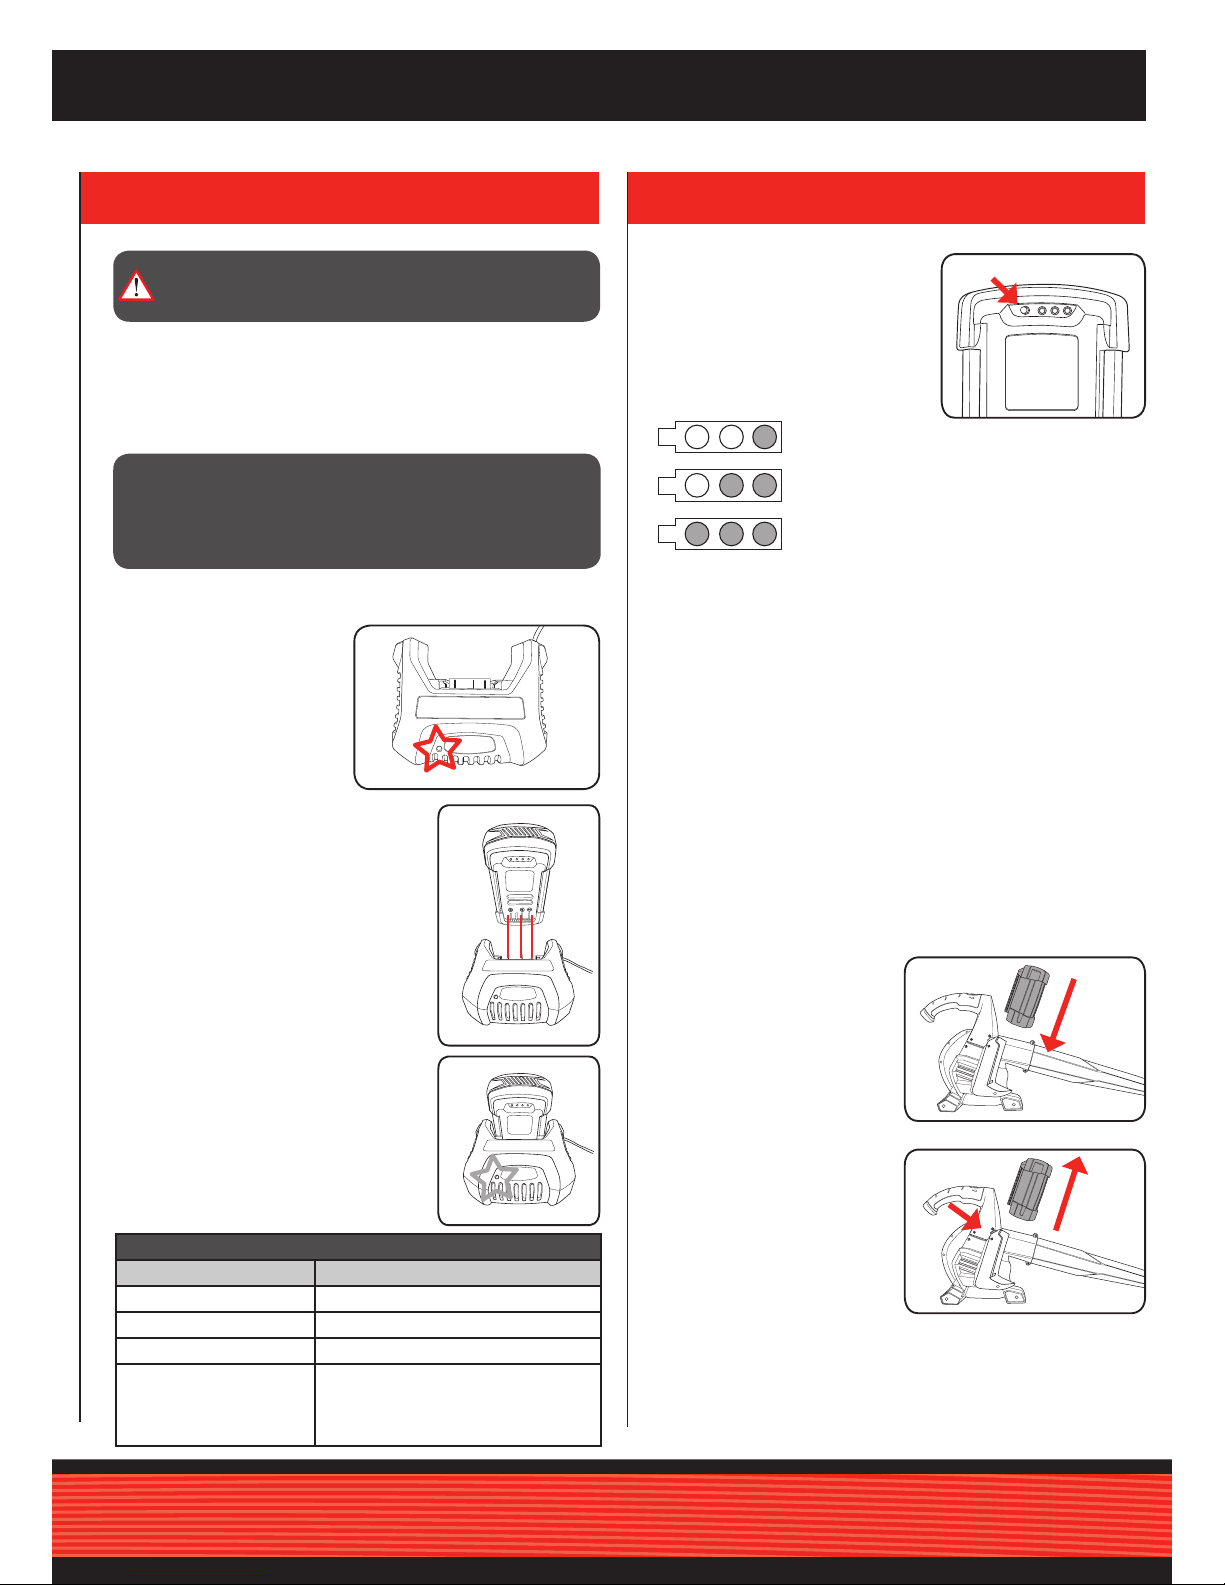
Attaching the blow tube and direction nozzle
1. Unpack the blow tube and
direction nozzle.
2. Slide the larger end of the direction
nozzle onto the smaller end of the
blow tube.
3. Ensure that the button on the blow tube sits in
the hole in the direction nozzle.
4. Connect the blow tube to the blower
housing, ensuring that the blow tube
tab clicks into the hole in the blow
tube.
1 Direction Nozzle
2 Blow Tube
3 Blow Tube Release Tab
4 ON/OFF Switch/
Adjustable Speed Dial
5 Upper Handle
6 Battery
7 Battery Release Tab
8 Lower Handle
9 Battery
10 Charge Indicator Button
11 Battery Charger LED
12 Battery Charger
CORDLESS BLOWER
ACCESSORIES
KNOW YOUR PRODUCT
1. ASSEMBLY
SETUP & PREPARATION
9 1110
1
5
6 7
2 3
8
4
12
CAUTION! ENSURE THE TOOL IS OFF & THE BATTERY
REMOVED BEFORE PERFORMING ANY OF THE
FOLLOWING OPERATIONS.
Battery Charge Indicator
The blower battery is equipped with a
battery charge indicator to show the
state of the battery charge.
Press the charge indicator button and
look to see which LED lights illuminate.
1 GREEN LED
indicates that the battery requires immediate
charging.
2 GREEN LEDs indicate that the battery has only
a low charge and requires charging soon.
3 GREEN LEDs
indicate that the battery is fully
charged.
Note: The battery should to be removed from the blower to check the
state of charge.
Battery protection system
The tool is equipped with the battery protection system, which helps to
ensure a long service life.
The output power automatically cuts off during operation when the tool
and/or battery are placed under the following situations:
• When the tool is overloaded:
If this occurs, release the trigger switch and remove causes of
overload, then pull the switch trigger again to restart.
• When the remaining battery capacity becomes low:
Recharge the battery pack.
Note: The battery protection system does not in any way damage the
tool.
Note: The indicated capacity may be lower than the actual level during
use or immediately after using the tool.
Inserting the battery pack
Align the raised ribs on the
battery with grooves on the
blower. Slide the battery into the
blower. Ensure the latch on the
bottom of the battery clicks in
place and that it is fully seated
and secure.
Removing the battery pack
1. Push in the battery release
button.
2. Lift the battery from its
position.
2. BATTERY & CHARGING
Charging your lithium ion battery
The hedge trimmer’s battery has been shipped in a low charge
condition, and requires charging prior to use. Allow several cycles of
charging and discharging (through use of the hedge trimmer) for the
battery to reach its optimum performance / runtime.
1. Connect the charger into a power outlet.
2. The charger LED will
illuminate red, showing
power is being supplied to
the charger.
3. With the charger sitting at on a bench/
table, align the raised ribs on the battery
with the recess in the charger and
slide onto the charger ensuring a rm
connection.
4. The charger LED will ash green signifying
that the battery is charging.
5. The charger LED will stop ashing and
illuminate green once the battery is fully
charged. A battery takes up to 3 hours to
become fully charged.
CAUTION! IF THE BATTERY IS TOO HOT OR TOO
COLD WHEN INSERTED INTO THE CHARGER, THE
CHARGING LED WILL FLASH RED. CHARGING WILL
AUTOMATICALLY BEGIN ONCE THE BATTERY REACHES
THE CORRECT CHARGING TEMPERATURE.
Charger LED Indicator
LED Indicator Situation
RED (illuminated) Stand by (no battery pack is inserted)
GREEN (Flashing) Battery is charging
GREEN (Illuminated) Battery is fully charged
RED (Flashing) Battery pack is too hot or too cold
(charging will begin automatically
when battery reaches correct charging
temperature).
CAUTION: THE POWER SUPPLY FOR THIS CHARGER
SHOULD BE PROTECTED BY A RESIDUAL CURRENT
DEVICE (RATED AT 30MA OR LESS).
 Loading...