

Output Solutions PS40T User Manual

PPSS4400TT
Usseerr
U
M
M
a
a
n
n
u
u
all
a
Rev. 003

®® CCooppyyrriigghhtt 22000011 OOuuttppuutt TTeecchhnnoollooggyy CCoorrppoorraattiioonn
TT hhiiss mm aannuuaall rreeffeerrss ttoo vvaarr ii oouuss ccoo mmppaanniieess aanndd pprroodduuccttss bbyy tthheeiirr ttrraa ddee nnaammeess.. IInn mm ooss tt ooff tthhee ccaass eess,, tthheess ee
ddeess iiggnnaattiioo nnss aarree ccll aaiimmeedd aass ttrraa ddeemmaa rrkkss oorr rreeggiiss tteerreedd ttrraaddeemm aarrkkss bbyy tthheeii rr rr eessppeeccttiivvee ccoomm ppaanniieess..
33880088 NN.. SSuulllliivvaann RRooaadd
BBuuiillddiinngg 33
SSPPOOKKAANNEE,, WWAA 9999221166
TTeell.. ((550099)) 553366--00446688
IInntteerrnneett AAddddrreessss:: hhttttpp::////wwwwww..oouuttppuutt..ccoomm
00666600559900000000
RReevv.. AA

TTaabbllee ooff CCoonntteennttss
Table of Contents..................................................iii
Printer Presentation...............................................1
Unpacking the Printer............................................3
Printer Parts............................................................4
Front View...........................................................4
Rear View ............................................................5
Printer Installation..................................................6
Choosing a Suitable Location............................6
Installing the Paper Stand ................................7
Installing the Power Cable..............................10
Installing the Ribbon Cartridge......................12
Paper Handling.....................................................14
Loading Paper ...................................................14
Loading Cut Sheet and Multiparts .............14
Loading Fanfold Paper .................................17
The Operator Panel..............................................20
Function keys .................................................... 20
Leds .................................................................... 23
Software Driver Selection ...................................24
Connection to the Host........................................25
Setting the Interface Parameters...................26
Parallel Interface ..........................................26
Serial Interface..............................................26
Printing a Test Page............................................. 28
Printer Setup......................................................... 31
Printing the Printer Setup Forms..................31
Filling in the Printer Setup Forms ................ 34
Reading the Preprinted Forms.......................34
Printer Setup Flow Chart ...............................35
Setup Parameters............................................. 36
Offset Adjustments...........................................48
Troubleshooting................................................... 52
Clearing Paper Jams........................................ 52
Print Quality Problems.................................... 55
Hexadecimal Dump..........................................56
Paper Specifications............................................ 57
Cut Sheets......................................................... 55
Fanfold Paper.................................................... 59
Technical Specifications ..................................... 60
FCC Notes............................................................. 63
Canadian D.O.C. Radio Interference
Regulation............................................................. 63
EEC Regulations..................................................63
iii


PPrriinntteerr PPrreesseennttaattiioonn
This dot-matrix printer is a multi-purpose printer for counter applications. Its compact structure
is designed to be integrated in an ergonomic environment. The printer provides a high level of
reliability, form -handling accuracy and data integrity. Its main features are:
• Printing on different types paper : cut sheets, multipart and fanfold paper
• High print pressure for multipart documents: 1 original plus 8 copies in accurate printing
• High print quality supplied by a 24 wire print head
• High reliability paper handling
The straight paper path allows the printing on particular documents such as multipart forms.
• Automatic paper thickness adjustment
The print head detects automatically the paper thickness for correct printing on any type of
document.
• Easy paper handling
The cut sheets are placed on the front table by the operator and the printer loads it without any
other user intervention. The paper ejection towards the front or the rear of the printer allows an
easy access to the printed document.
For the fanfold paper the printer offers the zero tear -off feature, which allows a paper handling
without waste of paper, and the paper parking feature.
• Automatic switching between cut sheets and fanfold paper
If the paper path is empty (i.e. the fanfold paper is in the first line position), when inserting a
cut sheet into the printer, it is automatically loaded after the printer automatically parked the
fanfold paper. The fanfold paper can then be loaded again simply pressing the LOAD/PARK key.
1

• Automatic document alignment feature
The printer checks automatically the alignment of the top margin and the left margin of the
document and adjusts it, if necessary. The printout is therefore performed correctly
independently from the paper loading position.
• Storage of four complete configurations for instant recall
• Standard parallel and serial interface and automatic switch -over function.
• Easy printer setup
• Supported emulations: IBM Proprinter XL24E, XL24E AGM, 2390+ and Epson 570
• Bar code reader in both horizontal and vertical print mode (factory installable option).
2
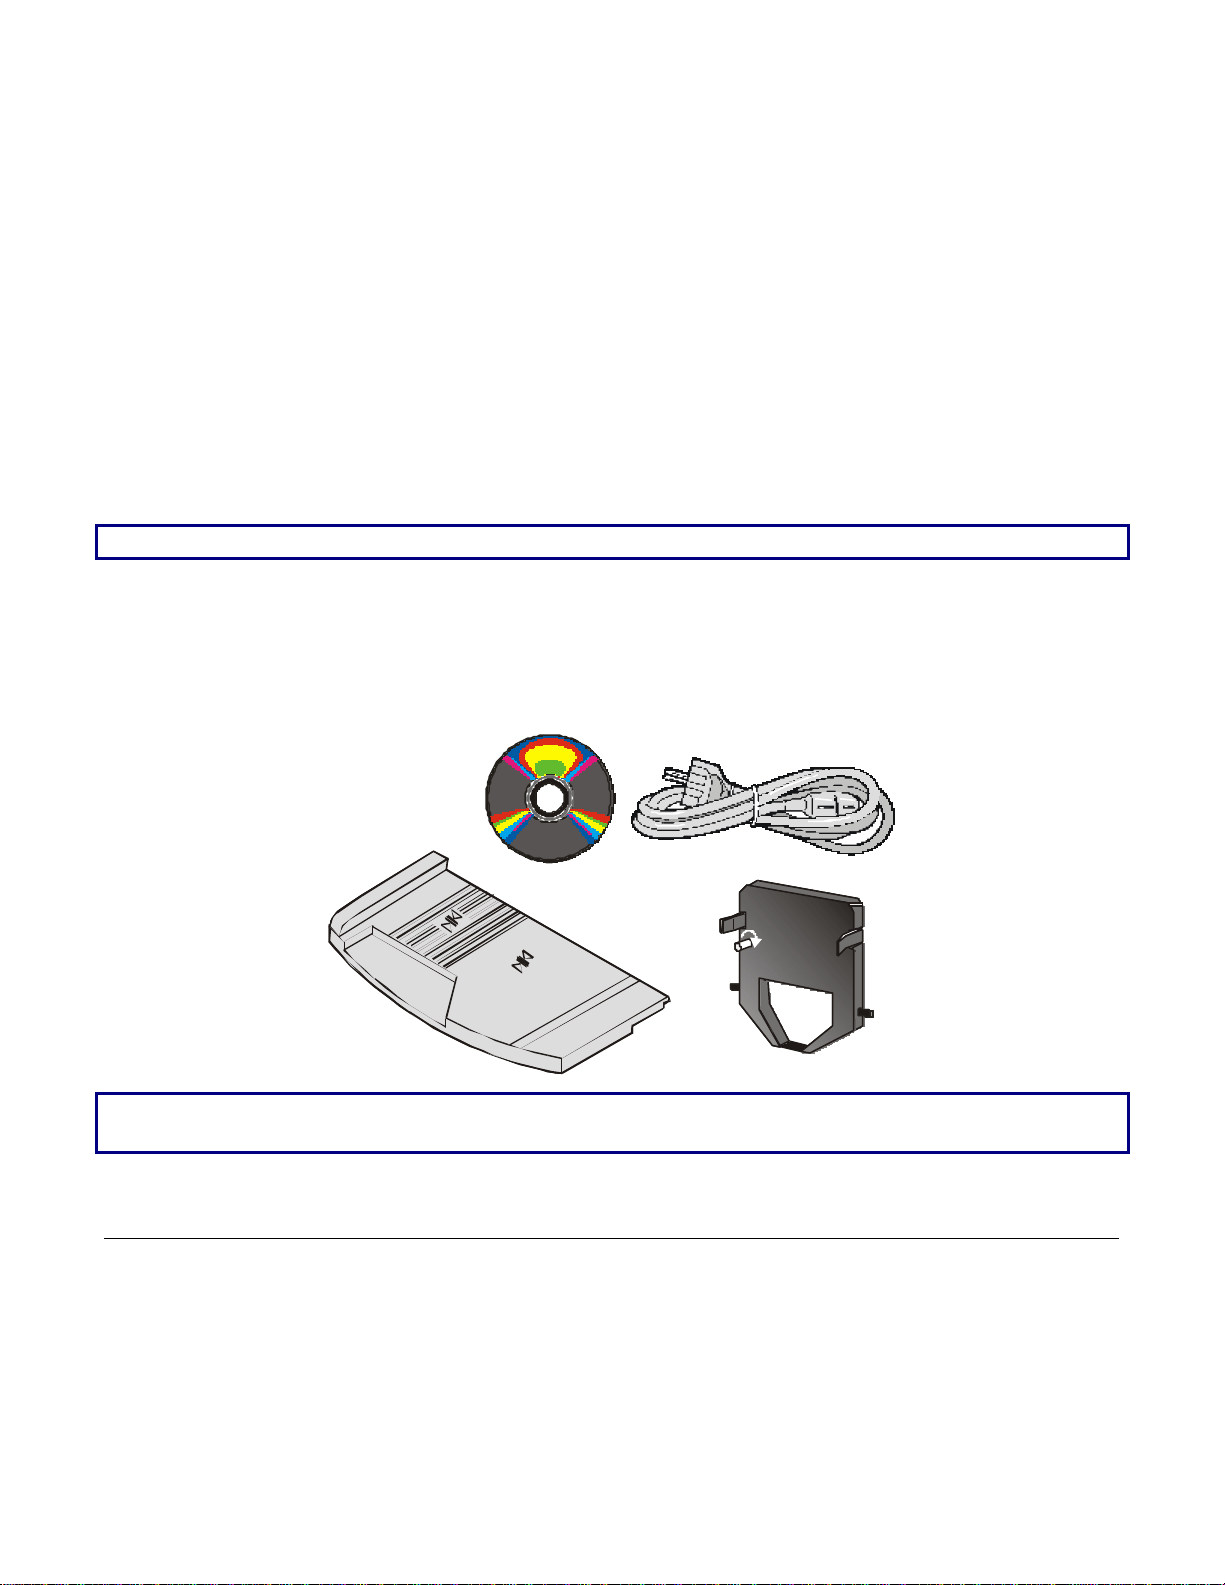
UUnnppaacckkiinngg tthhee PPrriinntteerr
Together with the printer the following items are included in the shipment box:
Notify any damage to your supplier.
• Paper stand
• Ribbon cartridge
• Power cable
• CD-ROM with the printer documentation and drivers.
Always keep the packing material in a safe place as you must repack the printer into it, when
you need to move it.
3
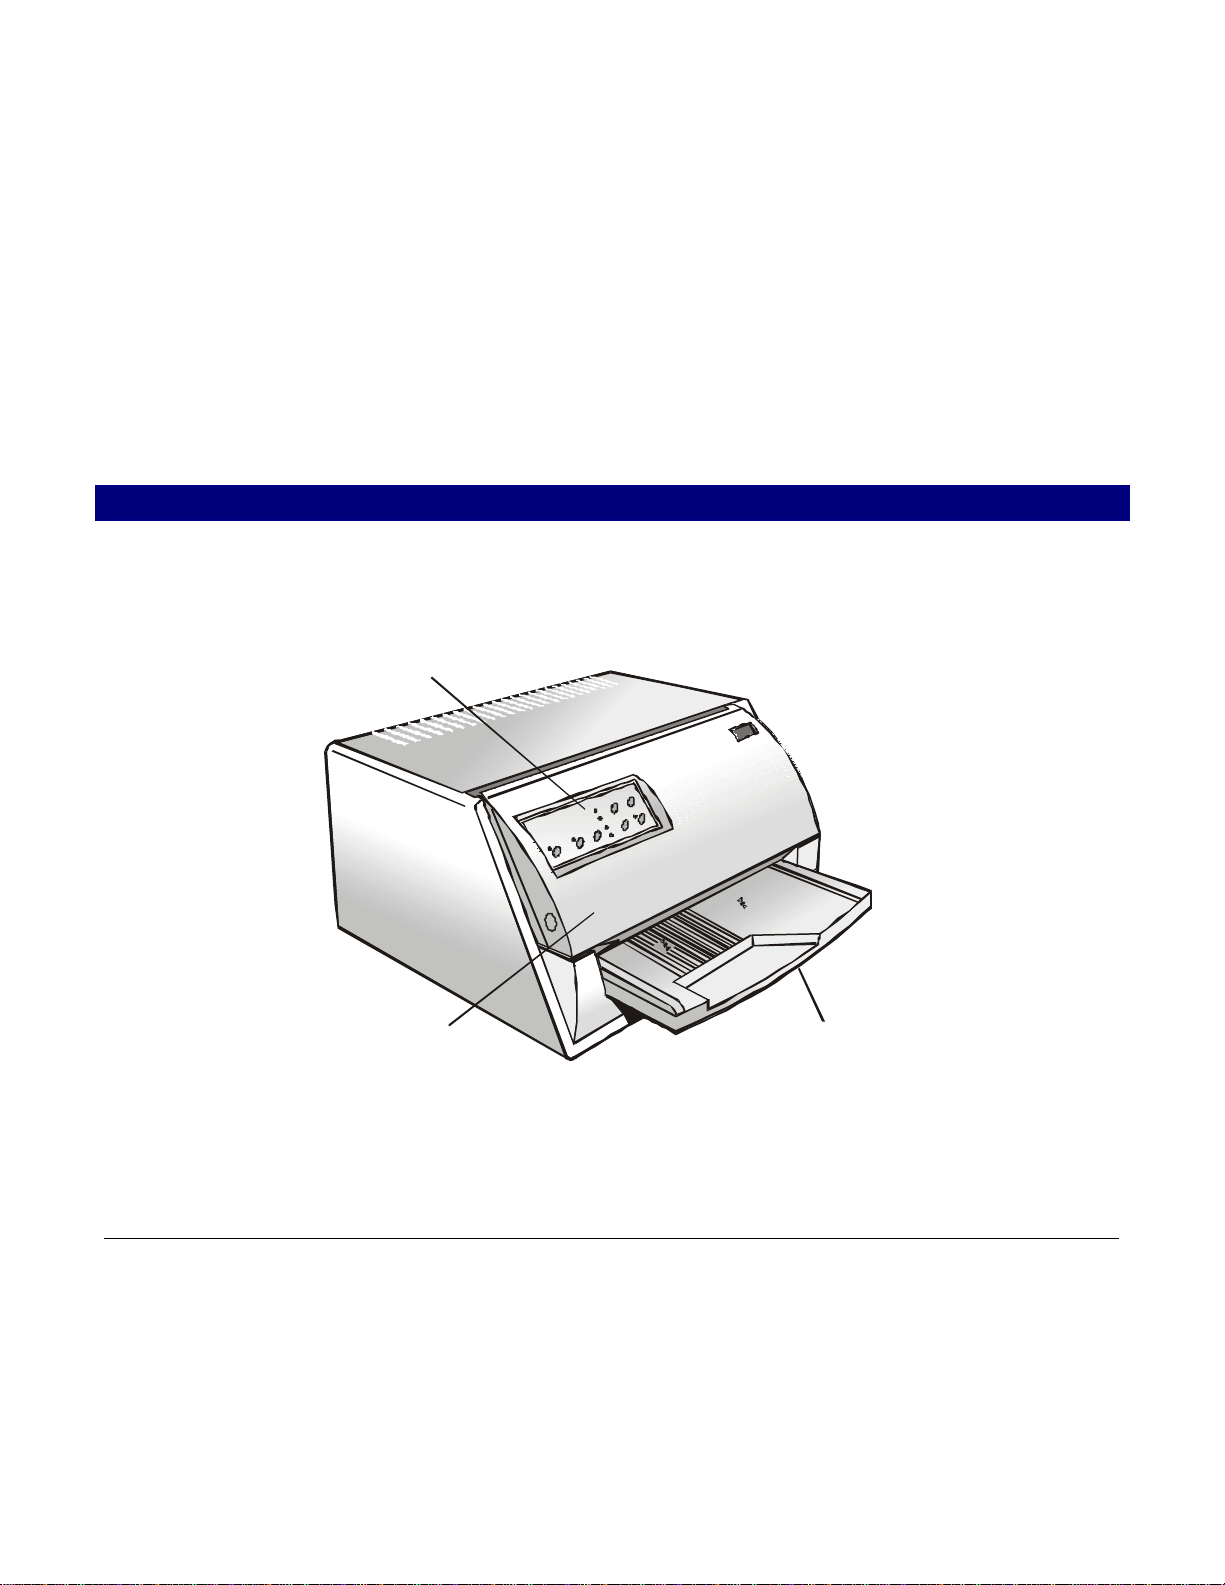
PPrriinntteerr PPaarrttss
Operator Panel
Never remove any printer part unless it is expressly indicated in this manual.
FFrroonntt VViieeww
Printer Cover
Paper Stand
4

RReeaarr VViieeww
Rear cover
5

PPrriinntteerr IInnssttaallllaattiioonn
CChhoooossiinngg aa SSuuiittaabbllee LLooccaattiioonn
Consider the following points when you choose the location for your printer:
• The distance between the printer and the host computer must not exceed the length of the
interface cable;
• The location must be sturdy, horizontal and stable;
• Your printer must not be exposed to direct sunlight, extreme heat, cold, dust or humidity;
• You need an AC power outlet compatible with the plug of the printer’s power cord. The voltage
of the outlet must match the voltage shown on the printer’s Name Plate;
• When printing on standard paper formats, the paper is partially ejected on the rear side of the
printer. Make sure that behind the printer there is sufficient clearance to correctly move the
paper;
• Make sure that behind the printer there is sufficient clearance to easily load the fanfold paper;
• Make sure that the power and interface cables do not hamper the fanfold paper while it is
loaded into the printe r.
6
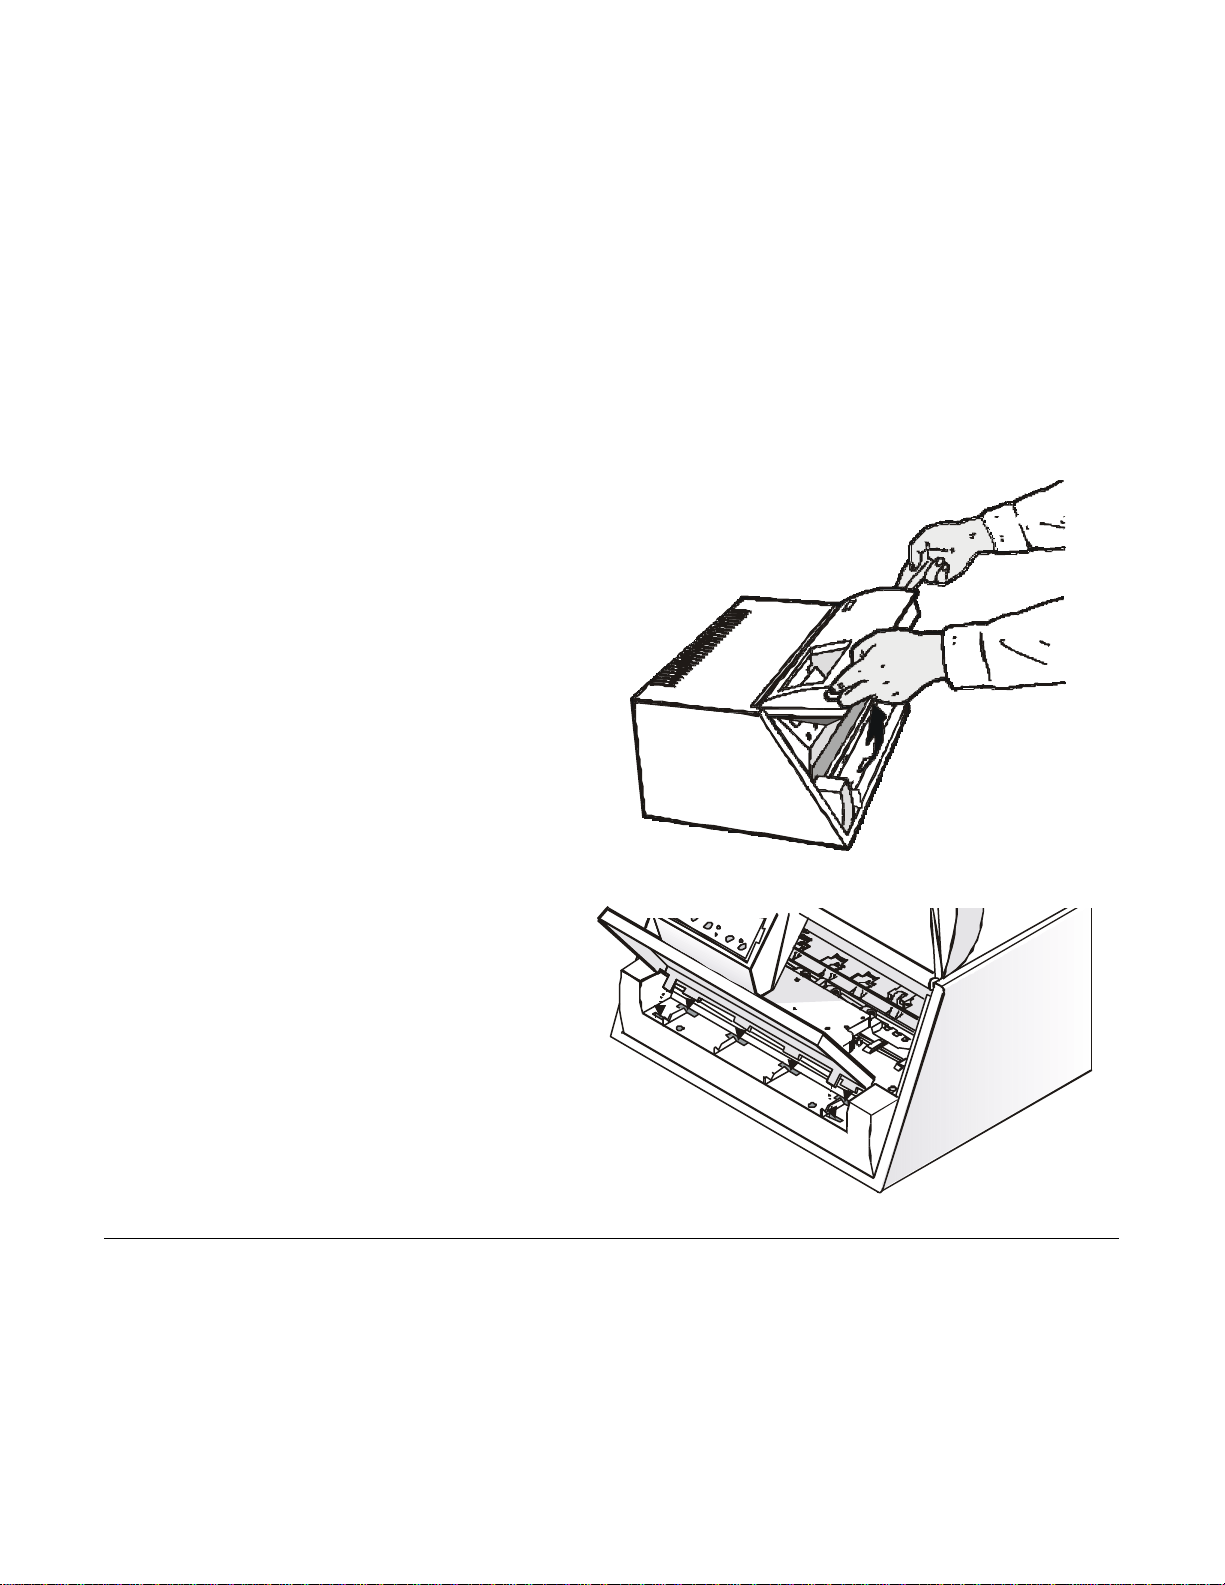
IInnssttaalllliinngg tthhee PPaappeerr SSttaanndd
Match the hooks on the lower side of the
paper stand with the clefts on the printer
1. Open the printer cover.
2.
front part.
7

8 9
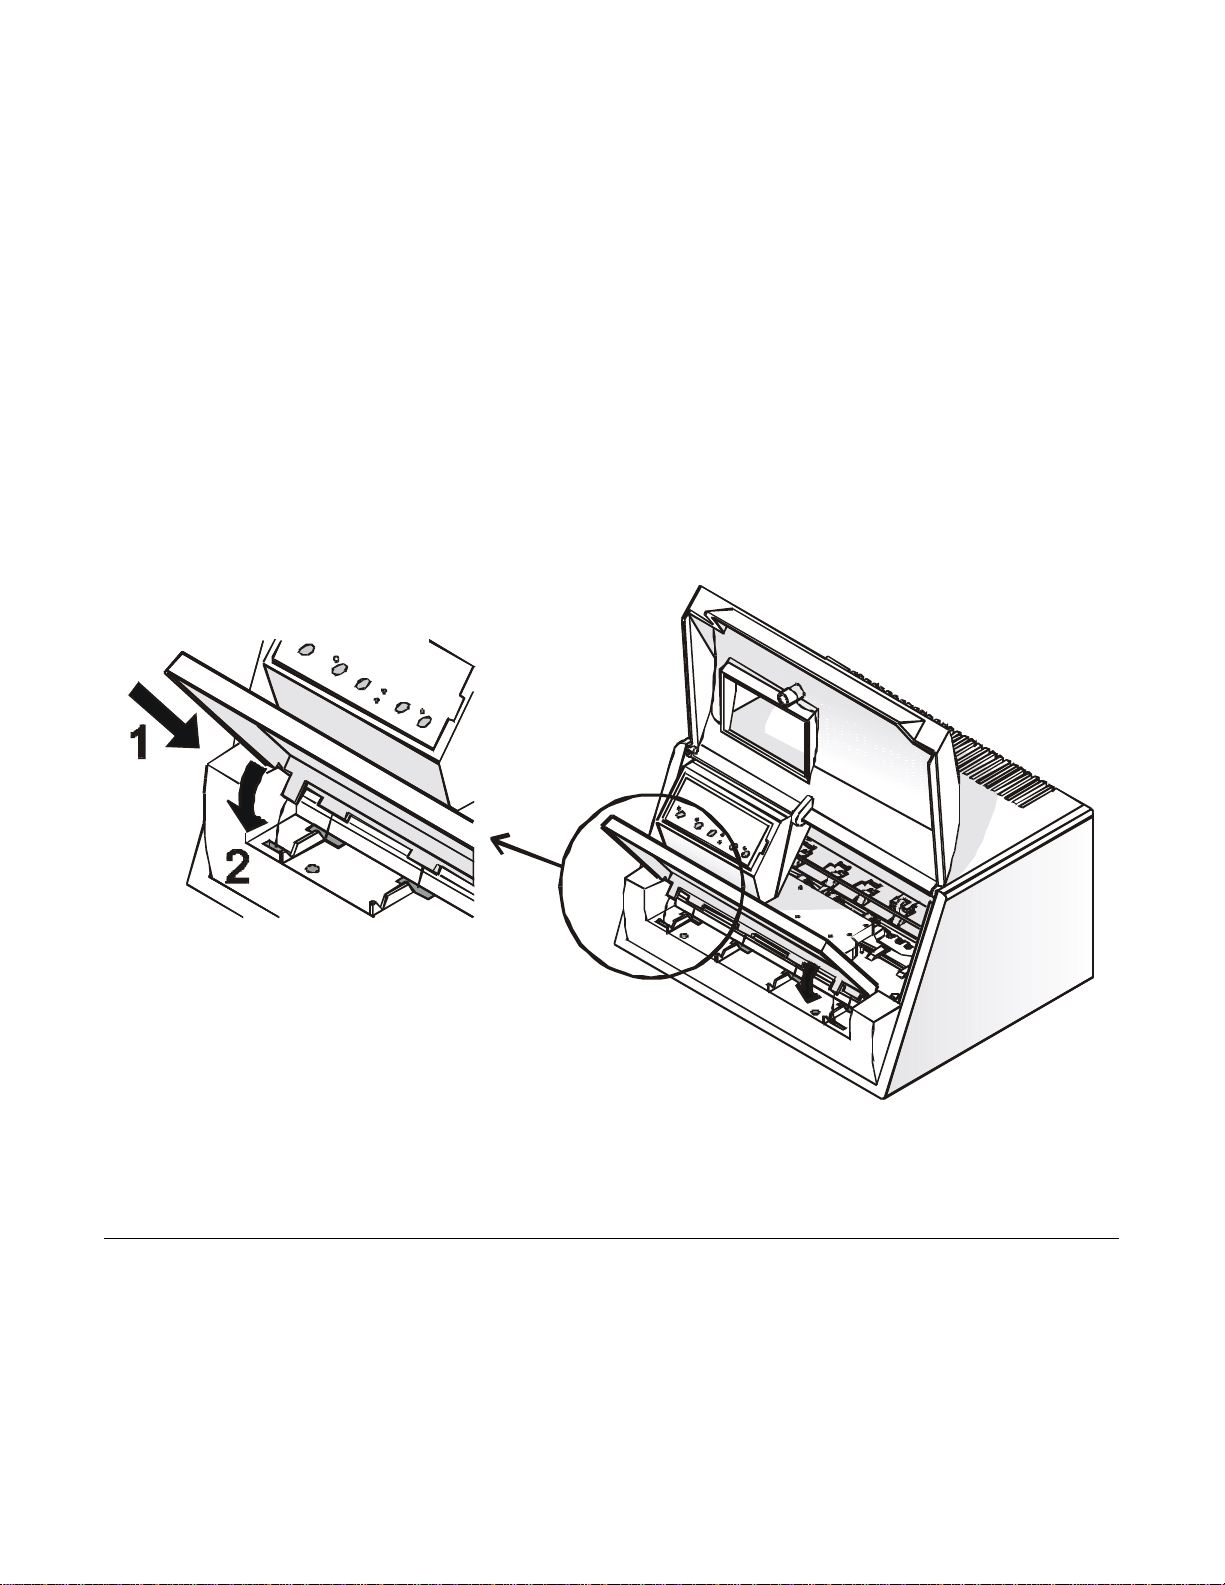
3. Holding the paper stand oblique insert the hooks into the printer clefts.
4. Lower the paper stand to horizontal position making sure that the two holders on both sides are
correctly inserted into the corresponding slots. Press the paper stand down until it clips into
place.
5. Close the printer cover.
connector on the printer and the other
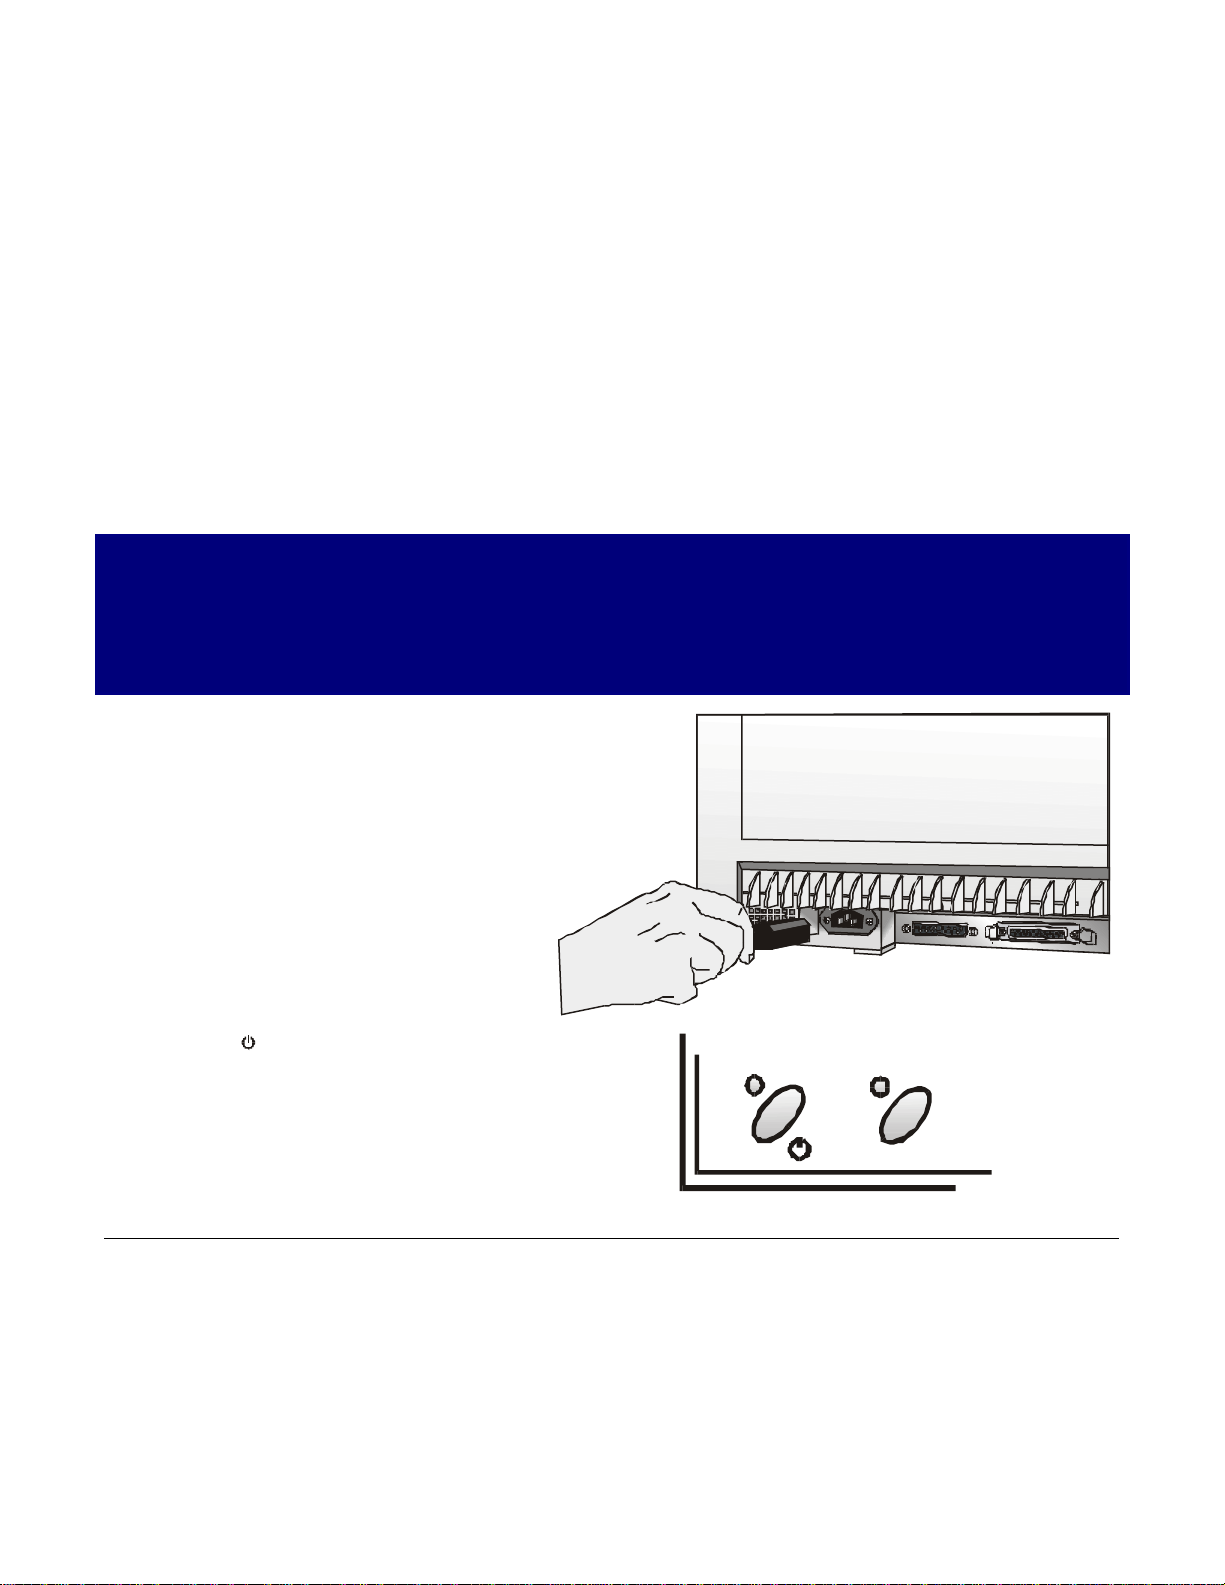
IInnssttaalllliinngg tthhee PPoowweerr CCaabbllee
1. Find the power cable connector and the rating plate on the rear side of the printer.
Make sure that your power supply matches the power rating of the printer.
In case the power rating does not correspond DO NOT CONNECT THE PRINTER TO THE
MAINS. Consult your dealer for help.
2. Insert the power cable into the
end into a convenient mains outlet.
Always use a grounded outlet.
3. Press the key on the operator panel
to power the printer on.
10
LQ

11 12
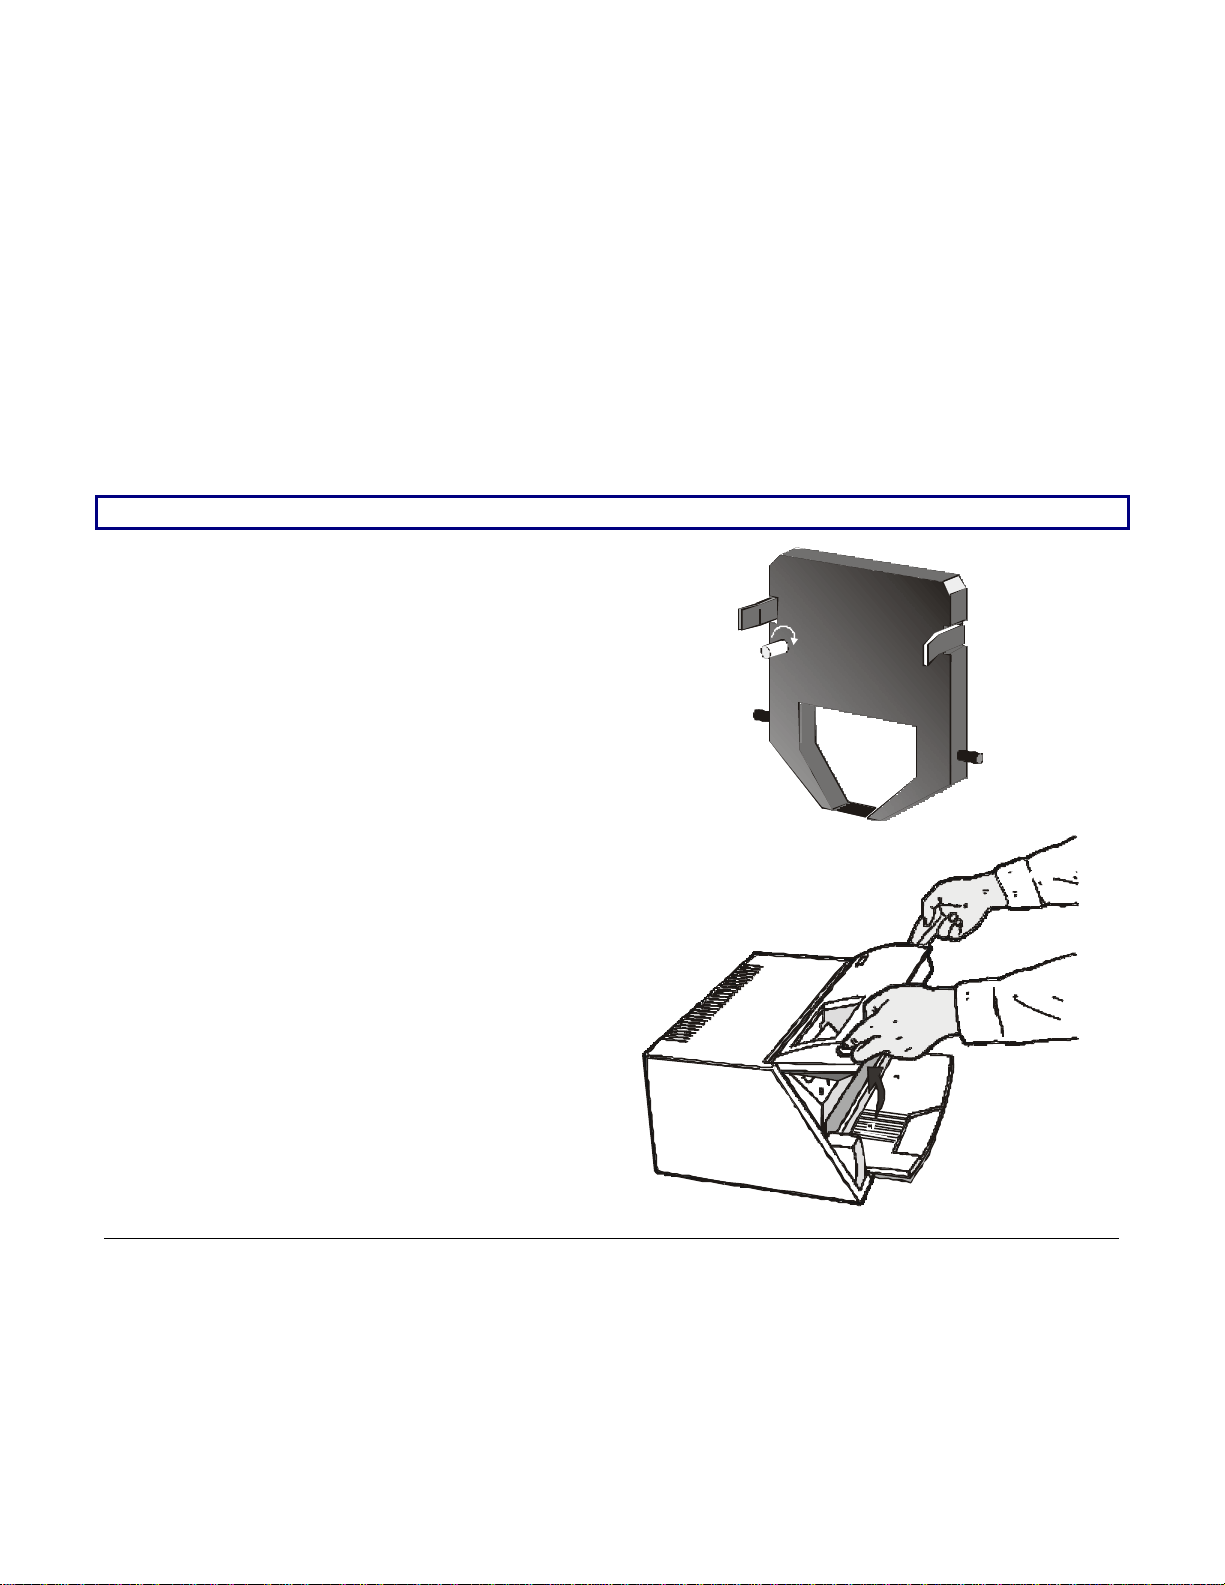
Remove the cartridge from its bag. Turn
the tension knob in the direction of the
Open the printer cover, the print head
IInnssttaalllliinngg tthhee RRiibbbboonn CCaarrttrriiddggee
To install the ribbon cartridge, the printer must be powered on.
1.
arrow to tighten the ribbon.
2.
moves to the ribbon installation position.
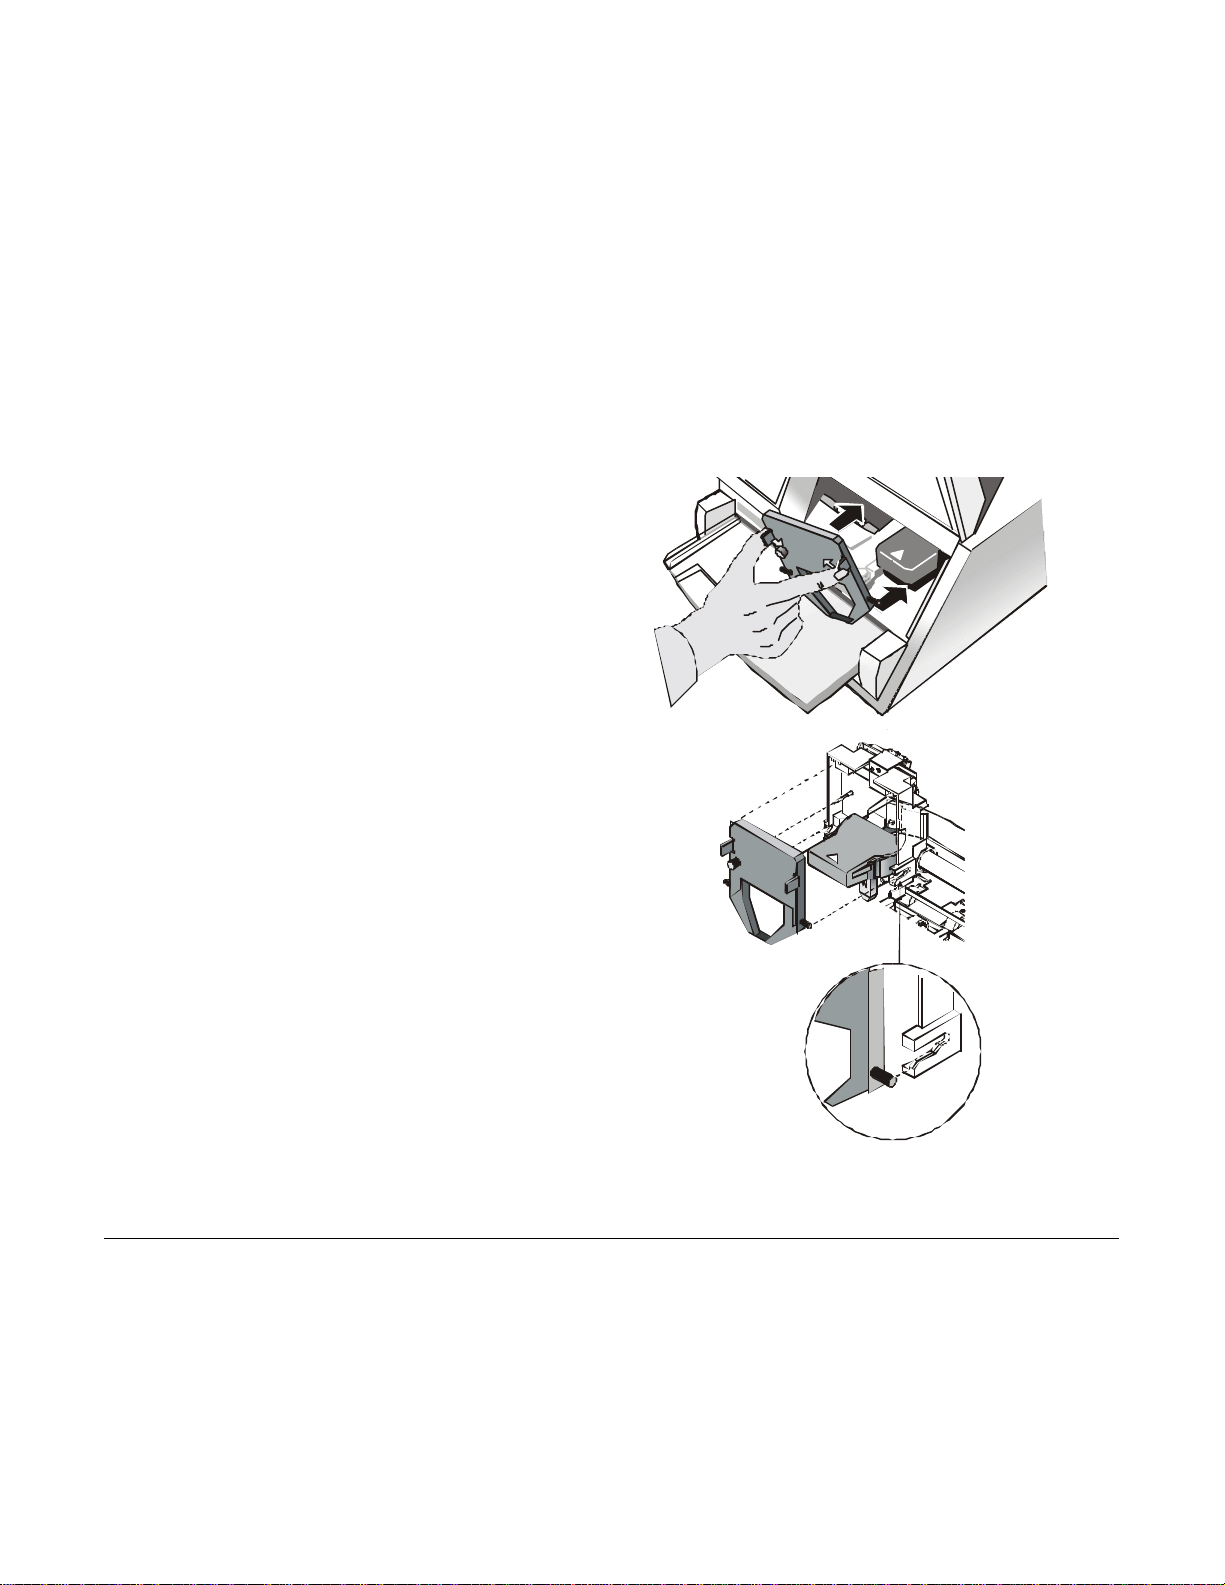
3. Hold th
e ribbon cartridge slightly inclined
with the ribbon mask in front of the print
Insert the ribbon cartridge into the print
head carriage, leading the cartridge pins
into the fixing guides. In this way you
front of the print head. Push the cartridge
onto the print carriage until it clicks into
head.
4.
assure the correct ribbon mask position in
place.
5. Turn the tension knob in the direction of the arrow to tighten the ribbon.
6. Close the printer cover.
13
PPaappeerr HHaannddlliinngg
Fold
material
This printer is designed for versatile an reliable paper handling. The flat-bed mechanism allows
the handling of special documents, such as multiple invoices, postcards, labels and tickets.
The print head detects the paper edges automatically, the sheet can therefore be inserted in any
position w ithin the detection area according to the rules described in the following paragraph.
The paper alignment sensors determine the alignment of the upper and left paper margins,
adjusting them if necessary.
The print head determines the thickness of the docum ents and matches its position.
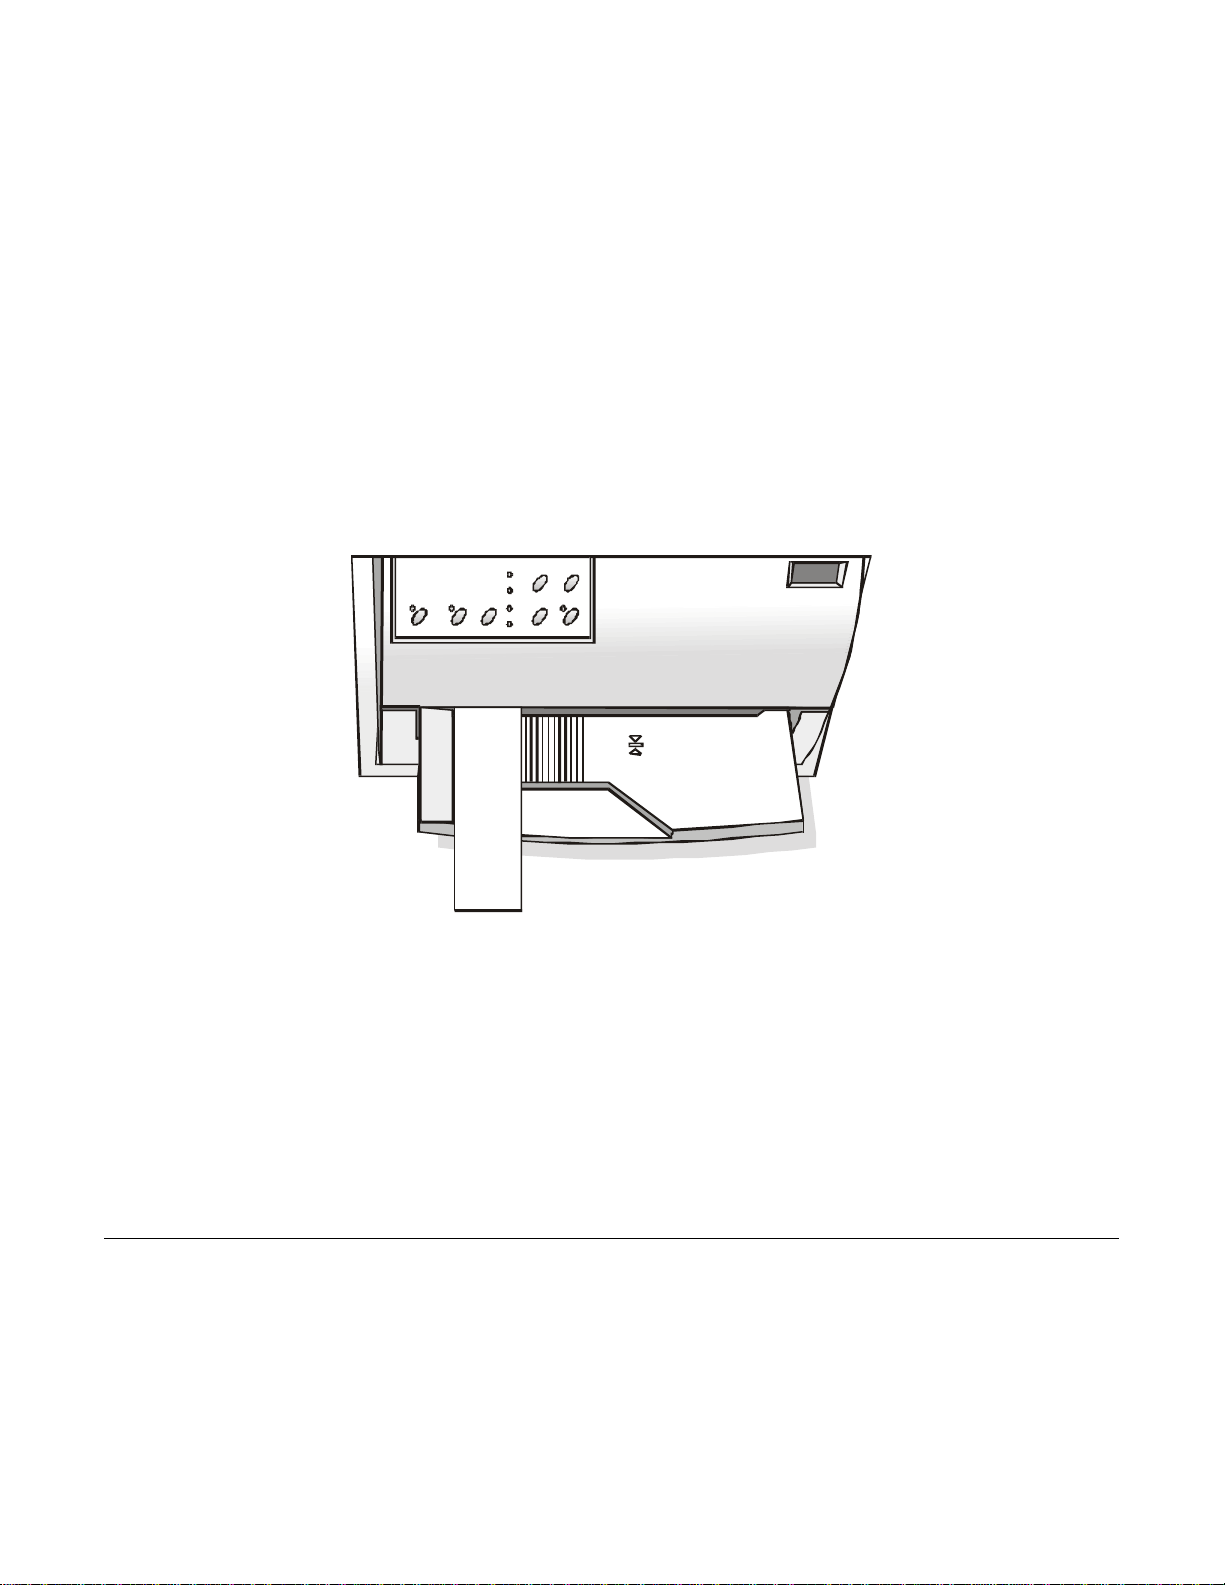
LLooaaddiinngg PPaappeerr
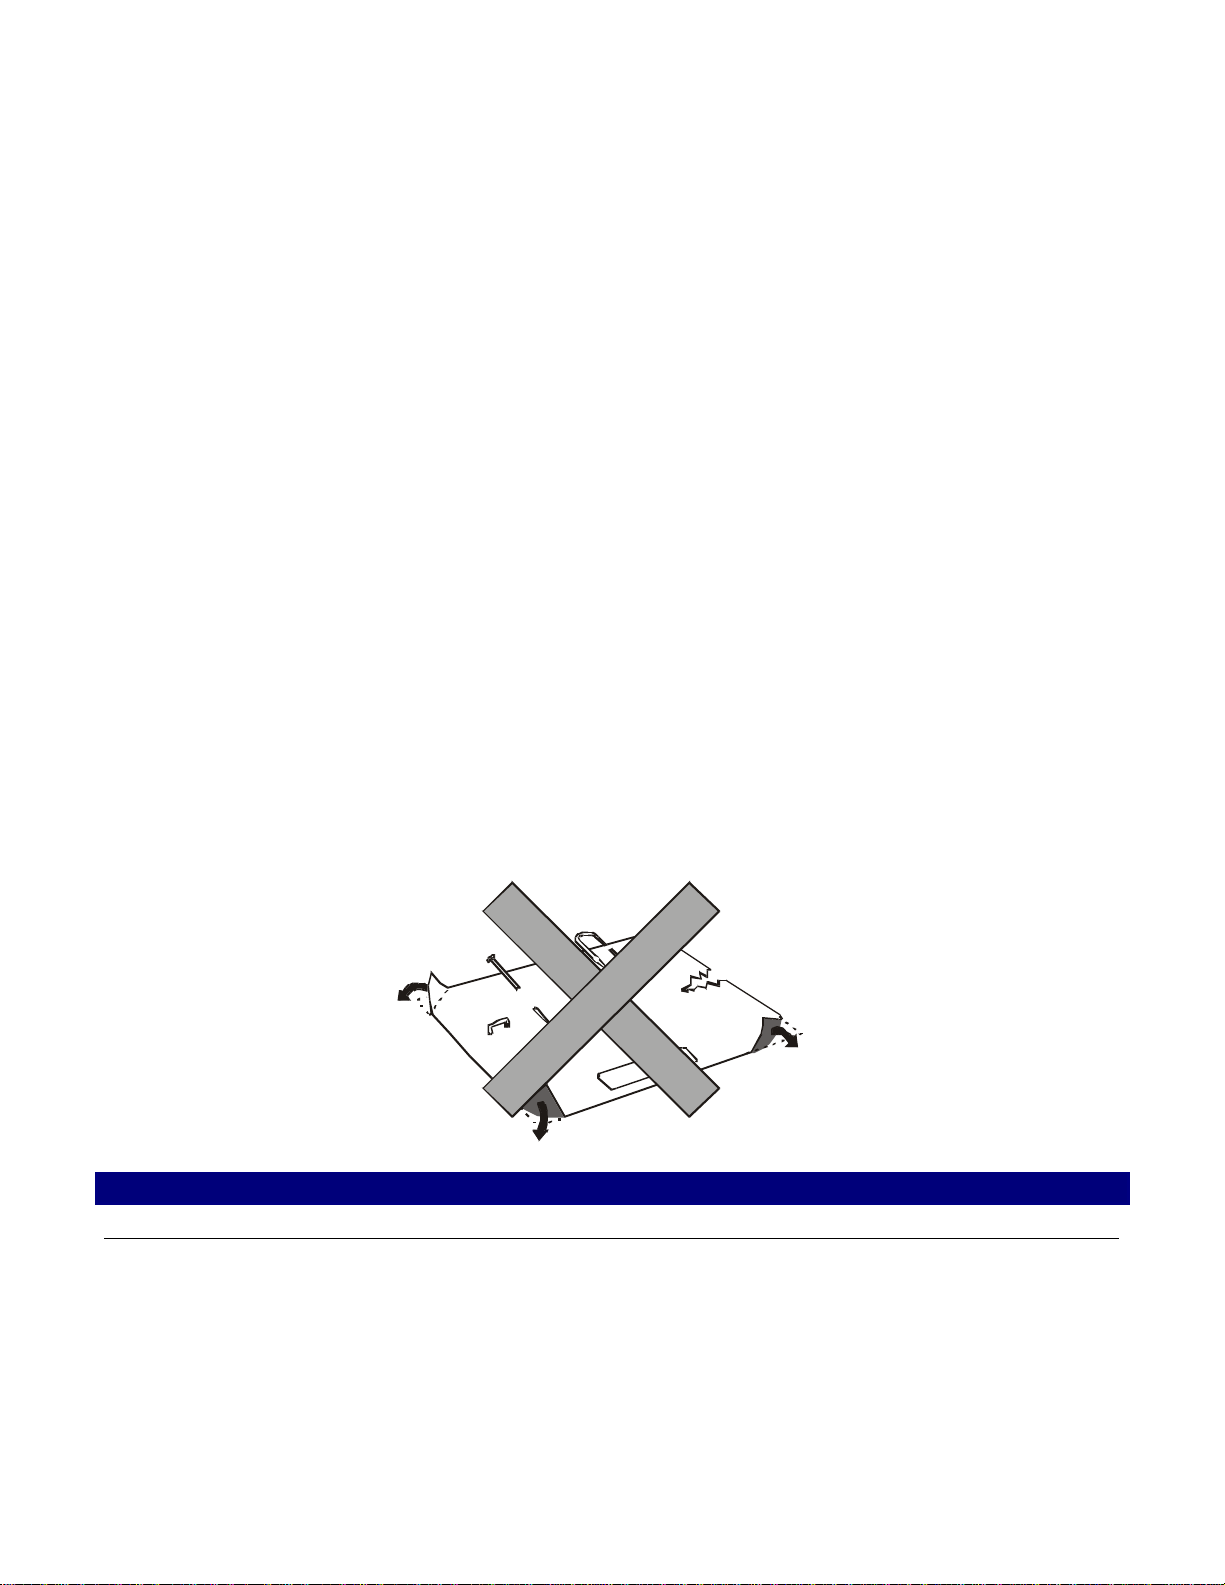
LLooaaddiinngg CCuutt SShheeeett aanndd MMuullttiippaarrttss
• The inserted documents must not have folds, tears, pins, clips, staples or any foreign material.
If you insert damaged documents or paper with foreign material, you can seriously damage the printer.
Clip
Pin
Staple
Foreign
14
Tear
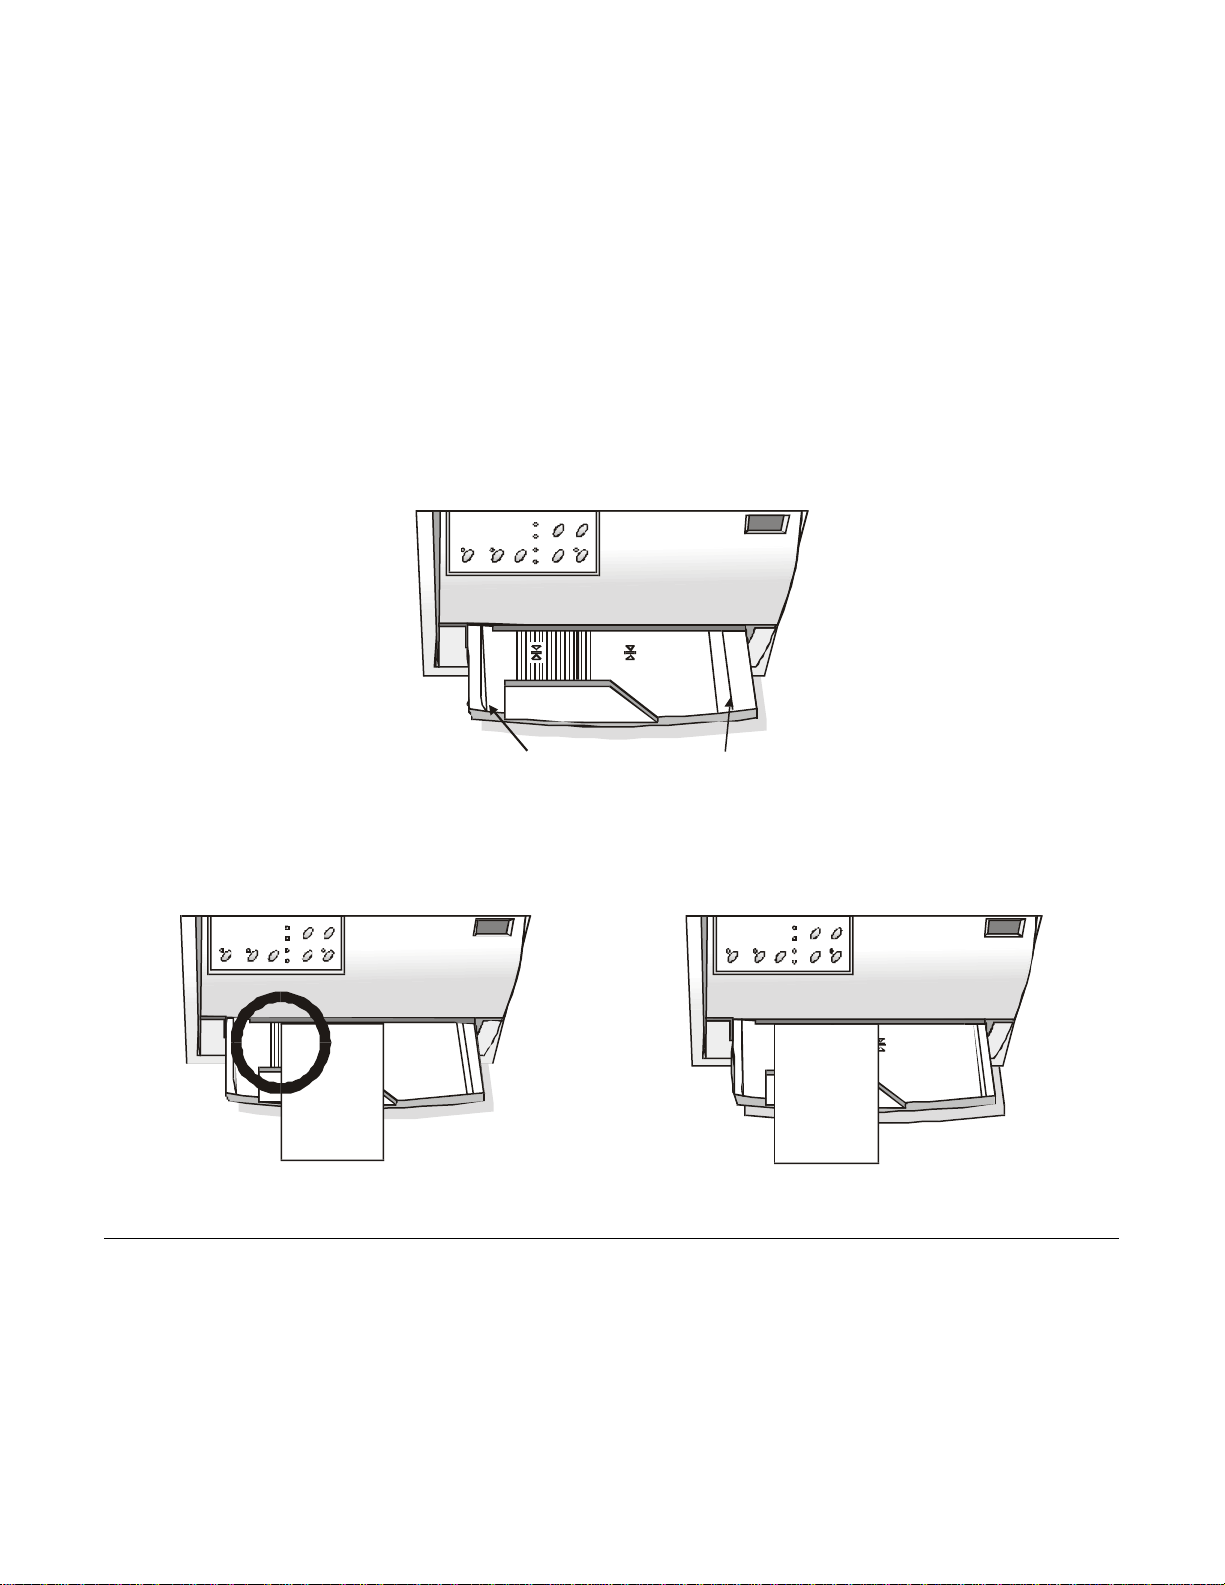
When inserting the paper into the printer, keep the following points in mind:
• The document may not exceed the limits of the paper stand.
Left Limit
• The documents having a width of at least 90 mm must be inserted on the left hand side over the
grooved area on the paper stand.
The documents must cover the whole grooved area, otherwise the printer will not accept the
paper.
NO
15
Right Limit
OK
• To load the documents having a width of less than 90 mm:
− make sure that in the program menu the MANUAL LOADING item is enabled.
− hold the paper against the left paper guide of the paper support while inserting it into the
printer
16
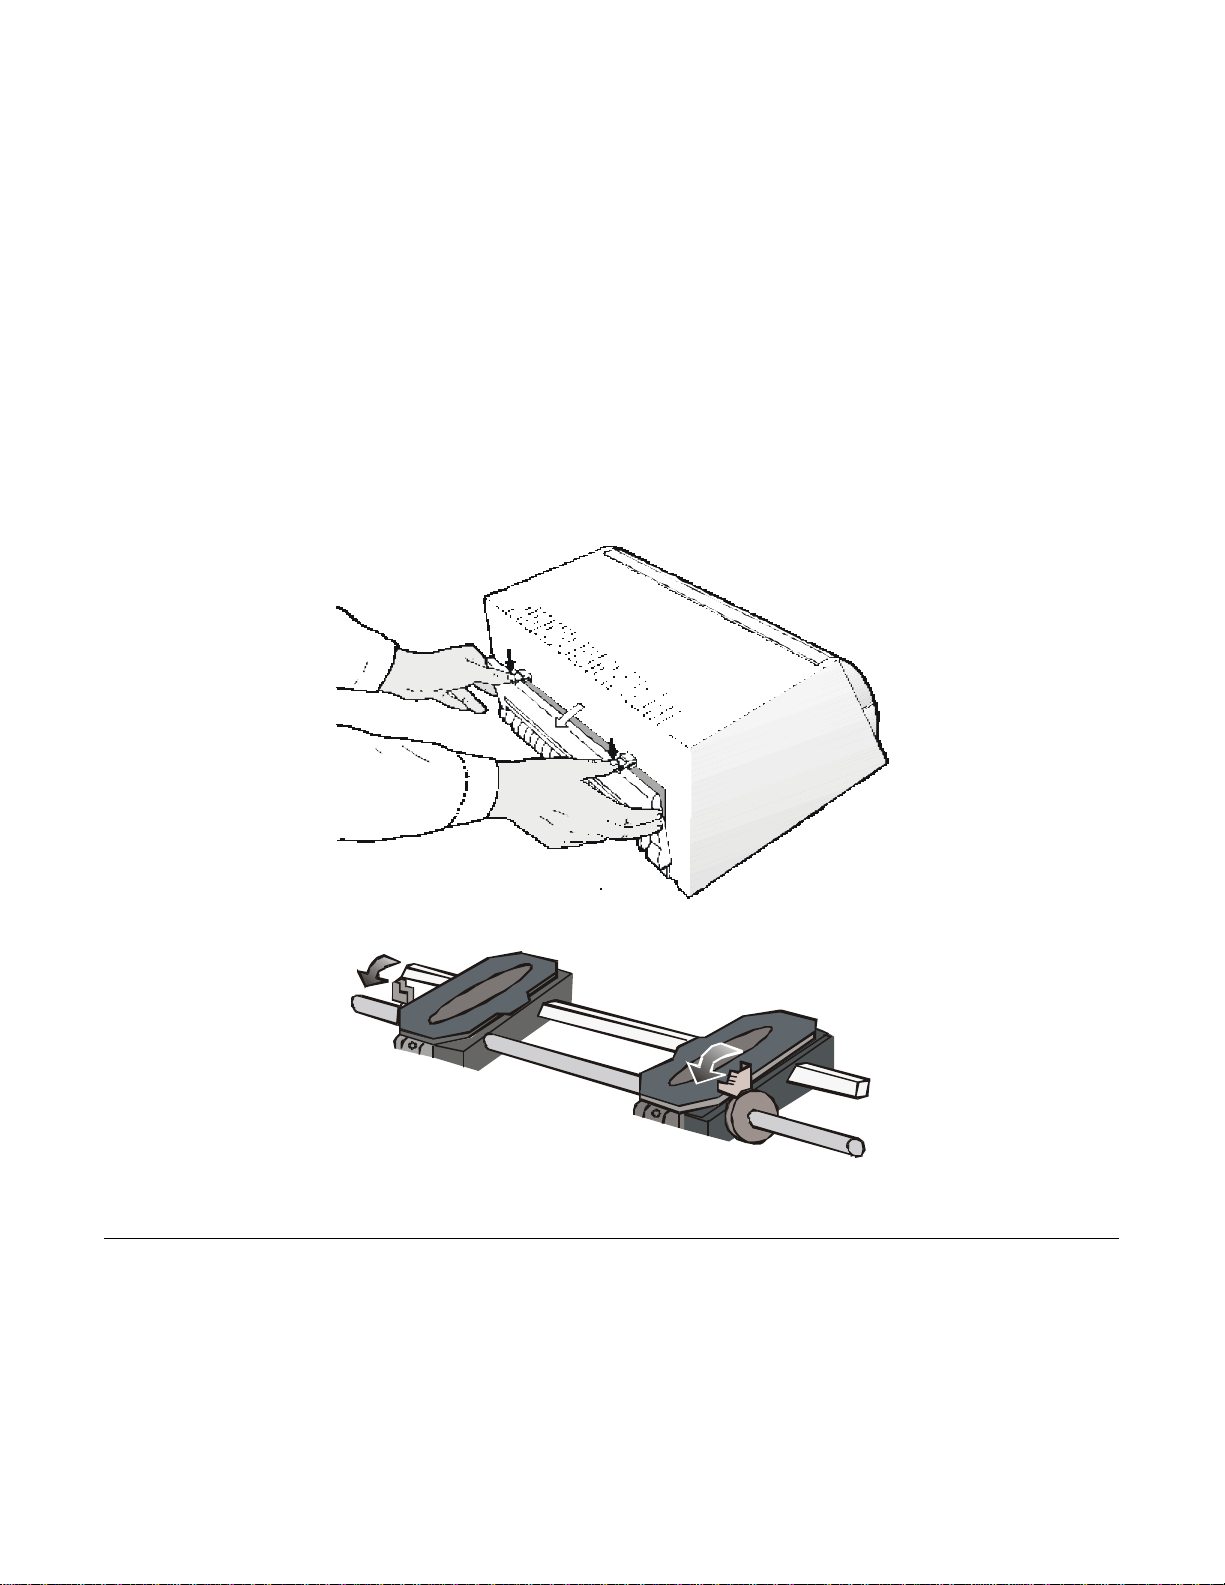
LLooaaddiinngg FFaannffoolldd PPaappeerr
The fanfold paper is loaded form the rear of the printer.
1. Lower the two levers of the rear printer cover and unhook it from the printer.
2. Unhook the right tractor moving the tractor lever towards the outside of the printer.
17
 Loading...