

Output Solutions KP-180 User Manual

1. GENERAL SPECIFIC ATION......................................1
1-1. KP-180 DATA TERMINAL.................................................... 1
1-2. HARDWARE ........................................................................... 1
1-3. POWER................................................................................... 1
1-4. PRINT......................................................................................2
1-5. STARTUP...............................................................................2
2. OPERATION MODE....................................................2
2-1. KMC WAY............................................................................... 2
2-1-1. FORM CHOICE................................................................................................2
2-1-2. VARIABLE SETTING.......................................................................................3
2-1-3. PRINT QUANTITY...........................................................................................3
2-1-4. PRINT JOB END..............................................................................................3
2-2. PMC WAY............................................................................... 4
2-2-1. FORM CHOICE................................................................................................4
2-2-2. VARIABLE SETTING.......................................................................................4
2-2-3. PRINT QUANTITY...........................................................................................4
2-2-4. PRINT JOB END..............................................................................................4
3. SETUP MODE..............................................................5
4. DOWNLOAD FORM TO KP........................................5
4-1. ADD FORM............................................................................. 6
4-2. DELETE FORM ..................................................................... 6
4-3. ERASE MEMORY.................................................................. 7
5. TROUBLE SHOOTING................................................7
APPENDIX A. CAN WORK WITH..................................7
APPENDIX B. CONNECT................................................7
1
1. GENERAL SPECIFICATION
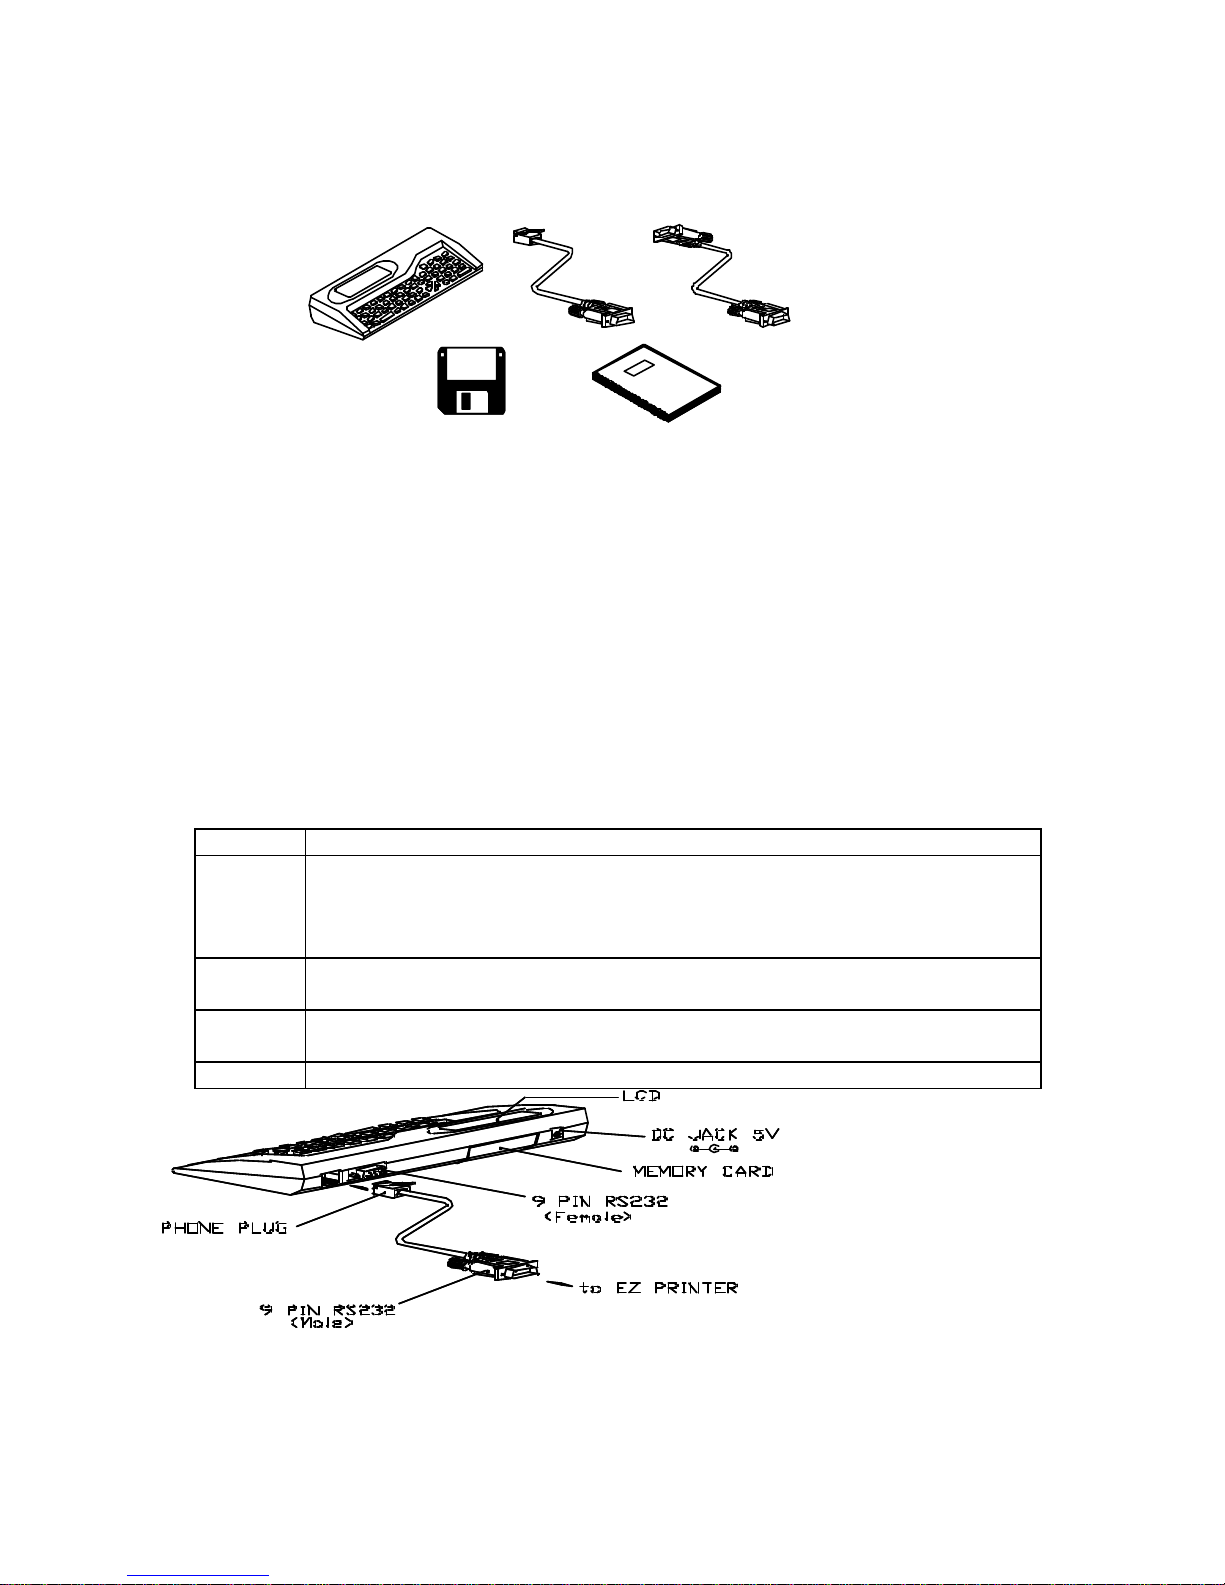
1-1. KP-180 DATA TERMINAL
Software
Download CableRs232 Cable
KP-180
User's Manual
Figure 1.1.1
?? In order to help users print labels with no PC computer connected, KP-180 has been
elaborately developed and works smoothly with EZ-2P, EZ-4P, and EZ-4TT barcode printers.
When working, KP-180 prints either the label forms stored in KP-180’s built-in memory card or
those stored in the printer’s external memory card.
?? KP-180 allows user to make necessary change of the formats and parameters in the label
contents when working on produc tion line. Moreover, a CCD barcode scanner can be connected
to KP-180, to save user a lot of time and labor in case of input of serial number, variable, or file
names.
?? EZ-4TT with firmware version earlier than V1.60 and EZ-2P/4P with firmware version earlier than
V1.52 are incompatible with KP-180.
?? For further information about compatibility of printer, specification of CCD scanner, and external
memory card of printer, please read Chapter 6. Appendix.
1-2. HARDWARE
LCD ?? 2-line display, up to 20 characters a line.
Memory
card
?? 8K bytes, standard built-in. 2K distributed to variable storage, 6K to form
storage.
?? Total 10 forms acceptable, each form up to 1024 bytes, total within 6K
bytes.
9-pin
RS-232
?? 4800,N,8,1, input serial port. To connect with CCD scanner, or to download
label format
9-pin
phone plug
?? 9-pin RS -232 (9600,N,8,1), input/output serial port,
?? to connect with EZ-2P/4P or EZ-4TT
DC Jack ?? Optional external adapter, DC 5V, 400mA
Figure 1.2.1
1-3. POWER
To run KP-180, two sources of electricity are considered:
To share power with the printer through the printer’s RS -232 cable. Normally, KP-180 requires
2
power of 5V DC 60mA. In case a CCD (barcode scanner) is connected, KP-180’s power
requirement increases, including that of CCD’s.
To use independent power through 5V 400mA adapter connected to KP-180’s DC Jack. When
using an independent power, KP-180 automatically stops power from the printer through RS -232
cable. The 5V DC 400mA adapter is a piece of optional equipment provided by GODEX.
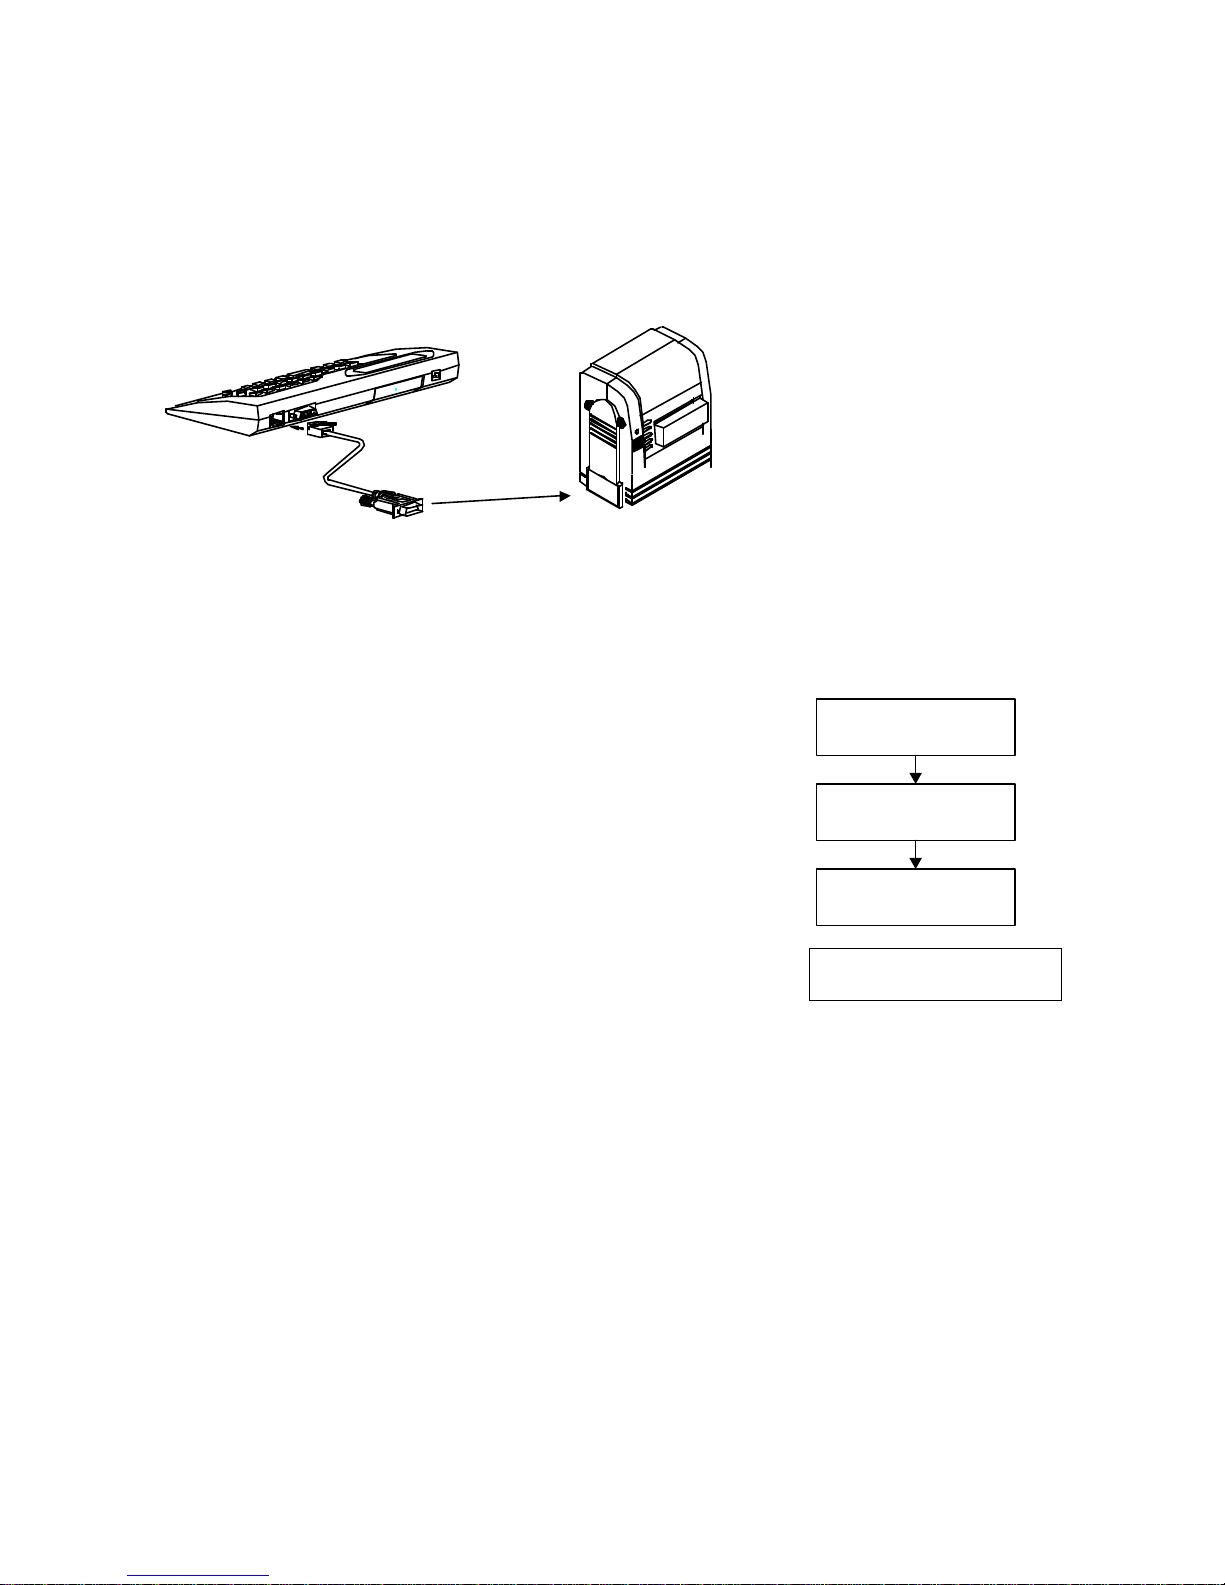
1-4. PRINT
Be sure KP-180 has been connected to printer’s RS -232 port (see figure 1.4.1).
EZ-2P/4P/4TT
to RS232
(RS232 cable)
Figure 1.4.1
Be sure the flash memory card has been put into the printer’s slot if your want to print label forms in
the card. KP-180 has its own 8K built-in memory card, which can store some simple forms. In case
of big forms or graphic, printer’s external flash memory cards are suggested.
1-5. STARTUP
Power on printer, KP-180 begins self-test, and LCD shows messages
like right flowchart. Then LCD shows name of printer in about 2
seconds, if printer, EZ-4TT for example, is connected correctly.
If printer connected improperly, LCD keeps showing “Searching
Printer”, with cursor flashing. If LCD goes this way for a long time,
please reconnect printer.
As printer correctly connected, LCD begins to check if an external
memory card has been installed into printer.
DATA TERMINAL
KP-180 VX.X
Searching Printer
>>>>>
Your device is
EZ-4TT
[1] KMC WAY
[2] PMC WAY
If installed, LCD shows message like right screen.
Press 1 to go to paragraph 2-1, to print label forms stored in KP-180’s
built-in memory card.
Press 2 to go to paragraph 2-2, to print label forms stored in Printer’s External Memory Card (this
is an optional product).
2. OPERATION MODE
2-1. KMC WAY
2-1-1. Form choice
When entering KMC WAY, KP-180 begins to check whether any form has been downloaded into
the built-in memory card.
 Loading...