

Page 1
––– F
User Manual
Manual de Instrucciones
Manuel d’Instructions
MODEL/MODELO
MODÈLE
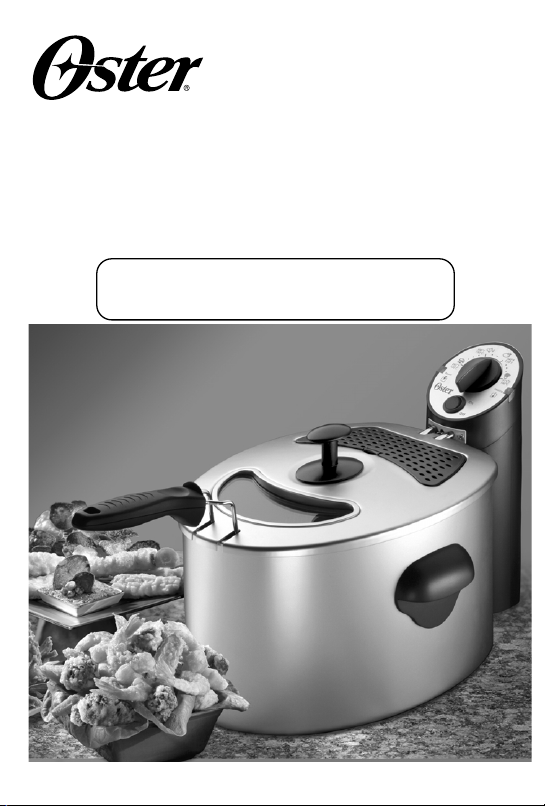
Deep Fryer
Freidora
Friteuse
ODF540
Visit us at www.oster.com
P.N. 111855
Page 2

IMPORTANT SAFEGUARDS
READ ALL INSTRUCTIONS BEFORE USE
– Failure to follow these warnings and safety instructions may result in burns or
COOKING. Extreme caution must be used when moving an appliance containing
hot oil.
or while the oil is still hot. Ensure the cord is not loose nor presents the possibility
of someone tripping over it.
when this or any other appliance is used near children.
when handling hot surfaces; and allow metal parts to cool before cleaning.
before putting on or taking off parts, and before cleaning the appliance.
See detailed instructions.
– Failure to follow these warnings and safety instructions may result in fire:
ARNING
malfunctions, or has been damaged in any manner. Return appliance to the nearest
authorized service facility or contact Customer Service at 1-800-334-0759 for
examination, repair or adjustment.
English-1 English-5English-4 English-6
Page 3

• Do not place any items on top or next to this appliance at any time. To prevent
a fire, keep this appliance clear of contact with any flammable materials including
curtains, draperies, walls, plastic materials, etc., at all times.
• Do not place any flammable materials in or close to the Deep Fryer, such as paper,
cardboard, plastic or flammable substances.
•
Oversized foods must not be inserted into the Deep Fryer as they may create a fire.
ARNING
– Failure to follow these warnings and safety instructions may result in electric
W
shock and may result in death or personal injury.
• Disconnect the Deep Fryer from the wall outlet when the unit is not in use
and before cleaning. Note: To disconnect, turn the control to OFF, then remove plug
from wall unit.
• Do not immerse the appliance or plug in water or any other liquid.
• Do not use attachments not recommended by the manufacturer.
• Do not use outdoors or for commercial purposes.
• Do not use this appliance for other than intended use.
• Do not clean with metal scouring pads or any abrasive materials. (Pieces can break
off the pad and touch electrical parts resulting in the risk of electrical shock).
P
OLARIZEDPLUGINFORMATION
This appliance has a polarized plug (one blade is wider than the other). To reduce
the risk of electric shock this plug will fit into a polarized outlet only one way.
If the plug does not fit fully into the outlet, reverse it. If it still does not fit, contact
a qualified electrician. Do not attempt to defeat this safety feature by modifying the
plug in any way.
SAVE THESE INSTRUCTIONS
THIS UNIT IS FOR HOUSEHOLD USE ONLY
ELCOME
W
Congratulations on your purchase of an OSTER®Deep Fryer!
about OSTER
following technology and features:
• Immersion heater for faster heating than conventional deep fryers.
• Fryer Basket allows you to raise and lower the basket from the oil and keep food
• Fryer Basket Handle provides a safe way to remove the basket from the Deep Fryer.
• Fully removable, stainless steel Cooking Pot and immersion heater for easy cleaning.
®
products, visit us at www.oster.com.
warm without further cooking.
To learn more
Your Deep Fryer includes the
Page 4

EATURES OFYOURDEEPFRYER
L
ID
R
EMOVABLE
C
ONTROLBOX
WITH
A
TTACHED
I
MMERSION
H
EATER
A
DJUSTABLE
T
EMPERATURE
IAL
D
P
OWER
L
IGHT
P
OWER
S
WITCH
S
AFETYTHERMOSTAT
R
ESETBUTTON
M
AGNETICDETACHABLE
P
OWER-SUPPLYCORD
ILTER
F
EMOVABLE
R
C
OOKINGPOT
F
P
L
C
OVER
REHEAT
IGHT
C
OOL-TOUCH
LIDH
B
ASKET
C
OOL-TOUCH
H
ANDLE
IEWING
V
INDOW
W
B
ASKETHANDLE
(L
OCKEDPOSITION
B
ASKETHOOK
(
INSIDE
ANDLE
M
AINBODY
)
)
AUTOMATIC SAFETY SWITCH
The automatic safety switch ensures that the unit will not operate unless the control box
has been inserted correctly into the stainless steel base.
RESETTING THE SAFETY THERMOSTAT
•
Resetting the safety thermostat may be necessary if unit will not turn on at start up
(power switch “ON” and temperature dial set to selected temperature) or if unit
appears to have stopped working.
• Unplug the unit from the wall electric outlet.
• Allow the unit to cool down.
• Check the oil level in your unit. If it is below the minimum level, oil should be added
before resetting the unit and resuming cooking cycle.
• Remove the control box with heater.
Using a narrow slotted screwdriver, press the recessed reset button on the front
•
control box, located about midway along the mounting slide rails to the left and
behind the heat tube.
• Replace the control box with heater onto the main body.
English-3English-2
of the
Page 5

OPERATING THE BASKET HANDLE
• If handle is loose and not connected to the basket; hold
handle upside down and squeeze the ends together of the
metal rods. While squeezing, bring ends between the two
metal loops at the front of the basket and release the ends
allowing them to engage the loops. Now you can fold up
the handle into the locked position. (See Figure 1)
• Lift handle from the storage position and pull back until
handle is easily locked into position. The handle will not
be able to be moved forward if it is locked properly.
(See Figure 2)
•
To store the basket, the basket handle can be moved back
into the storage
forward until it has snapped out of the locked position.
It will rest upside down on the basket floor. (See Figure 2)
• It is very important that you lock the handle into place
before using the Fry Basket.
BEFORE USING FOR THE FIRST TIME
• Read all the sections of this fold-out manual carefully.
• Remove the fryer from the packaging.
• Open the lid by lifting up on the lid handle.
• Remove all accessories and printed documents from the basket.
• Take out the basket.
• Take out the control box (with heater) by grasping and sliding upward.
• Clean the lid, filter cover, metal mesh filter, basket, cooking pot and the main body
with hot water, a little dishwashing liquid and a sponge or put these parts into the
dishwasher to clean.
• Clean the heater with hot water.
Dry thoroughly, being careful not to bend wires leading to thermostat.
FILLING THE COOKING POT WITH OIL
• Make sure the cooking pot is correctly positioned in the main body.
• Fill pot with oil. The oil level must be maintained between the minimum
and maximum level marks indicated on the inside of the pot. Check the level before
each use and add oil if necessary.
• For healthier, crispier fried foods, we recommend you use a good quality
vegetable oil, pure corn oil, sunflower oil or canola oil.
• Wipe inside of viewing window with a small amount of vegetable oil to help prevent
condensation which can obstruct your view through the window while cooking.
RE-HEATING
P
ARNING
W
from curtains and similar fittings. Never leave the appliance unattended while in use.
This appliance is not intended to be used by children.
• During the first use, the fryer may give off a slight odor. This is normal and is due to
the newness of the product.
• Always check before each use that the oil level is between the MINIMUM and
MAXIMUM lines on the inside of the non-stick pot.
• Do not use the fryer without the cooking pot, without oil or with an insufficient level
(below the minimum level).
position by pushing the black handle
Never immerse the control box in water.
:
For your safety, do not use your fryer under wall cupboards and keep away
FIGURE 1
LOCKED POSITION
STORAGE POSITION
F
2
IGURE
Page 6

• Always unplug the fryer when not in use.
Put the control box on the main body. Grasp the control box and slide down the tracks
•
at the back of the main body. The heater will be positioned in bottom of cooking pot.
• Cover the cooking pot with the lid. Make sure filter is in place.
• Attach magnetic cord to back of control box and plug into outlet. The proper position
is with the cord angled upward where it attaches at the control box.
in place magnetically. Turn on the power switch on the control box.
The power indicator red light will come on.
•
Turn the thermostat knob to the desired frying temperature. (265°F, 300°F, 340°F, 375°F)
The amber pre-heat indicator light will come on.
• When the oil temperature has risen to the desired setting, the amber pre-heat
indicator light will go out. Pre-heating takes approximately 10-12 minutes.
• Fill the basket with food. DO NOT FILL THE BASKET MORE THAN 2/3 FULL
FROM BOTTOM OF BASKET.
The cord is held
FRYING FOODS
• Remove lid by grasping the cool touch handle and slowly lower
the basket with food into the oil and begin to fry the food.
W
they may be hot.
• Replace the lid on the cooking pot.
• Always use the basket to fry foods.
• The preheat indicator light will cycle on and off during use.
NOTE
This is normal.
:
ARNING
Do not touch any metal parts of the fryer as
: During frying, you may hear a slight clicking noise.
FRYING POSITION
AT THE END OF THE COOKING TIME
When the frying time is up, lift the basket up slowly and
•
out of the oil. Place the basket support clip (at the base of
the basket handle) onto the Basket-hook in the cooking pot
to allow excess oil to drain from the food.
• Let the food drain for a minute, remove basket and lay
food out onto a paper towel lined baking sheet to allow
any remaining oil to drain away.
• For best results, if you are frying more than one load,
you will want to give the oil a chance to heat up to the
proper temperature before placing another load into
the fryer. The pre-heat indicator light will go out.
• Always turn off the power switch and turn the
adjustable temperature dial all the way to the left, or
until you hear a click, or the preheat light goes out.
Unplug the deep fryer when you have finished frying.
• Let the fryer cool completely (1 to 2 hours) before
storing or cleaning.
• Never carry or move the deep fryer with hot oil inside.
DRAINING POSITION
ASKET HOOK
B
FILTERING AND CHANGING THE OIL
• Make sure the fryer is unplugged and the oil has cooled down before cleaning
or storing your fryer.
Page 7

•
The oil does not need to be changed after each use. On average, oil can be used for 8 to
12 uses. You will need to change it more often when frying fish or heavily battered foods.
• We recommend filtering the oil if you see any food debris left in the oil or on the
bottom of the pot. You may do this by performing the following:
• Remove the basket. Carefully pour the clear oil into another large pot or saucepan
(minimum of 3 to 5 liters), leaving food debris in bottom of cooking pot. Discard this
small amount of oil with food debris.
HOW TO CLEAN
• Prior to washing, wipe oil residue and food debris from cooking pot with paper towels.
• Wipe heater with dry paper towels until it is free from oily residue. Take care not to
bend thermostat wires on heater.
• To clean the control box and heater, use a damp dishcloth that has been dipped in
water and mild dish soap. Completely wipe down all parts of the control box. Wipe
off all residual dish soap with a damp cloth. Do not reassemble the deep fryer until
all the parts are thoroughly dry.
• To remove metal mesh filter, push back on filter cover locking tab and lift up on cover.
• Clean the lid, filter cover, metal mesh filter, basket, bowl and the main body with hot
water, a little dishwashing liquid and a sponge or put these parts into the dishwasher
to clean. The filter can be soaked in warm water with dishwashing liquid. Be sure to
rinse well and allow to dry completely.
Place the bowl as vertically as possible in the dishwasher, while ensuring it will not
hinder the spray arms. Dry thoroughly before reassembling all parts.
TORING YOUR APPLIANCE
S
• Do not store appliance that still contains oil in the oil tank or that has not been
cleaned and dried thoroughly.
• For best results in storing your appliance, fold fry basket handle back into basket,
also, place the control box on the stainless steel base and oil tank.
• Store metal mesh filter under filter cover on lid.
• Store in a dry area. Unit can be stored in its box. Do not place heavy items on top
of the deep fryer or the box, as this could result in damage to your appliance.
COOKING GUIDE
The frying times given in this chart are only a guide and should be adjusted accordingly
to suit the quantity fried.
PPROXIMATE
A
C
F
OOD
T
EMPERATURE
Mushrooms 300°F / 150°C 3 – 4
Breaded Chicken 350°F / 175°C 15 – 21
Chicken Strips 350°F / 175°C 3 – 4
Shrimp 350°F / 175°C 4 – 5
Fish Cakes or Balls 300°F / 150°C 4 – 6
Fish Fillets 375°F / 190°C 6 – 7
Fish Fillets in batter 375°F / 190°C 4 – 6
French Fries, thin 375°F / 190°C 4 – 6
French Fries, thick 350°F / 175°C 8 – 10
OOKINGTIME
(MINUTES)
–––
Page 8

One-Year Limited Warranty
S
unbeam Products, Inc., or if in Canada, Sunbeam Corporation (Canada) Limited (collectively “Sunbeam”)
warrants that for a period of one year from the date of purchase, this product will be free from defects
material and workmanship. Sunbeam, at its option, will repair or replace this product or any component
the product found to be defective during the warranty period. Replacement will be made with a new
remanufactured product or component. If the product is no longer available, replacement may be made
with a similar product of equal or greater value. This is your exclusive warranty.
This warranty is valid for the original retail purchaser from the date of initial retail purchase and is not
transferable. Keep the original sales receipt. Proof of purchase is required to obtain warranty performance.
Sunbeam dealers, service centers, or retail stores selling Sunbeam products do not have the right to alter,
modify or any way change the terms and conditions of this warranty.
This warranty does not cover normal wear of parts or damage resulting from any of the following:
negligent use or misuse of the product, use on improper voltage or current, use contrary to the operating
instructions, disassembly, repair or alteration by anyone other than Sunbeam or an authorized Sunbeam
service center. Further, the warranty does not cover: Acts of God, such as fire, flood, hurricanes and tornadoes.
What Are the Limits on Sunbeam’s Liability?
Sunbeam shall not be liable for any incidental or consequential damages caused by the breach of any express,
implied or statutory warranty or condition.
Except to the extent prohibited by applicable law, any implied warranty or condition of merchantability
or fitness for a particular purpose is limited in duration to the duration of the above warranty.
Sunbeam disclaims all other warranties, conditions or representations, express, implied, statutory or otherwise.
Sunbeam shall not be liable for any damages of any kind resulting from the purchase, use or misuse of, or
inability to use the product including incidental, special, consequential or similar damages or loss of profits, or for
any breach of contract, fundamental or otherwise, or for any claim brought against purchaser by any other party.
Some provinces, states or jurisdictions do not allow the exclusion or limitation of incidental
or consequential damages or limitations on how long an implied warranty lasts, so the above limitations
or exclusion may not apply to you.
This warranty gives you specific legal rights, and you may also have other rights that vary from province
to province, state to state or jurisdiction to jurisdiction.
How to Obtain Warranty Service
In the U.S.A. –
If you have any question regarding this warranty or would like to obtain warranty service,
please call 1.800.334.0759 and a convenient service center address will be provided to you.
In Canada –
If you have any question regarding this warranty or would like to obtain warranty service,
please call 1.800.667.8623 and a convenient service center address will be provided to you.
In the U.S.A., this warranty is offered by Sunbeam Products, Inc., located in Boca Raton, Florida 33431.
In Canada, this warranty is offered by Sunbeam Corporation (Canada) Limited, located at 5975
Falbourne Street
, Mississauga, Ontario L5R 3V8.
in
of
or
PLEASE DO NOT RETURN THIS PRODUCT TO ANY OF
THESE ADDRESSES OR TO THE PLACE OF PURCHASE.
English-7
Page 9

For product questions contact:
Sunbeam Consumer Service
USA : 1.800.334.0759
Canada : 1.800.667.8623
www.oster.com
©2003 Sunbeam Products, Inc. All rights reserved.
®
is a registered trademark of Sunbeam Products, Inc.
OSTER
Distributed by Sunbeam Products, Inc., Boca Raton, FL 33431
Pour les questions de produit:
Sunbeam Consumer Service
États-Unis : 1.800.334.0759
Canada : 1.800.667.8623
www.oster.com
©2003 Sunbeam Products, Inc. Tous droits réservés.
OSTER®est une marque déposée de Sunbeam Products, Inc.
Distribué par Sunbeam Products, Inc., Boca Raton, Florida 33431
Para preguntas sobre los productos llame:
Sunbeam Consumer Service
EE.UU. : 1.800.334.0759
Canadá : 1.800.667.8623
www.oster.com
©2003 Sunbeam Products, Inc. Todos los derechos reservados.
OSTER®es una marca registrada de Sunbeam Products, Inc.
Distruibido por Sunbeam Products, Inc., Boca Raton, FL 33431
Printed in China Imprimé en Chine Impreso en China
 Loading...