

Page 1
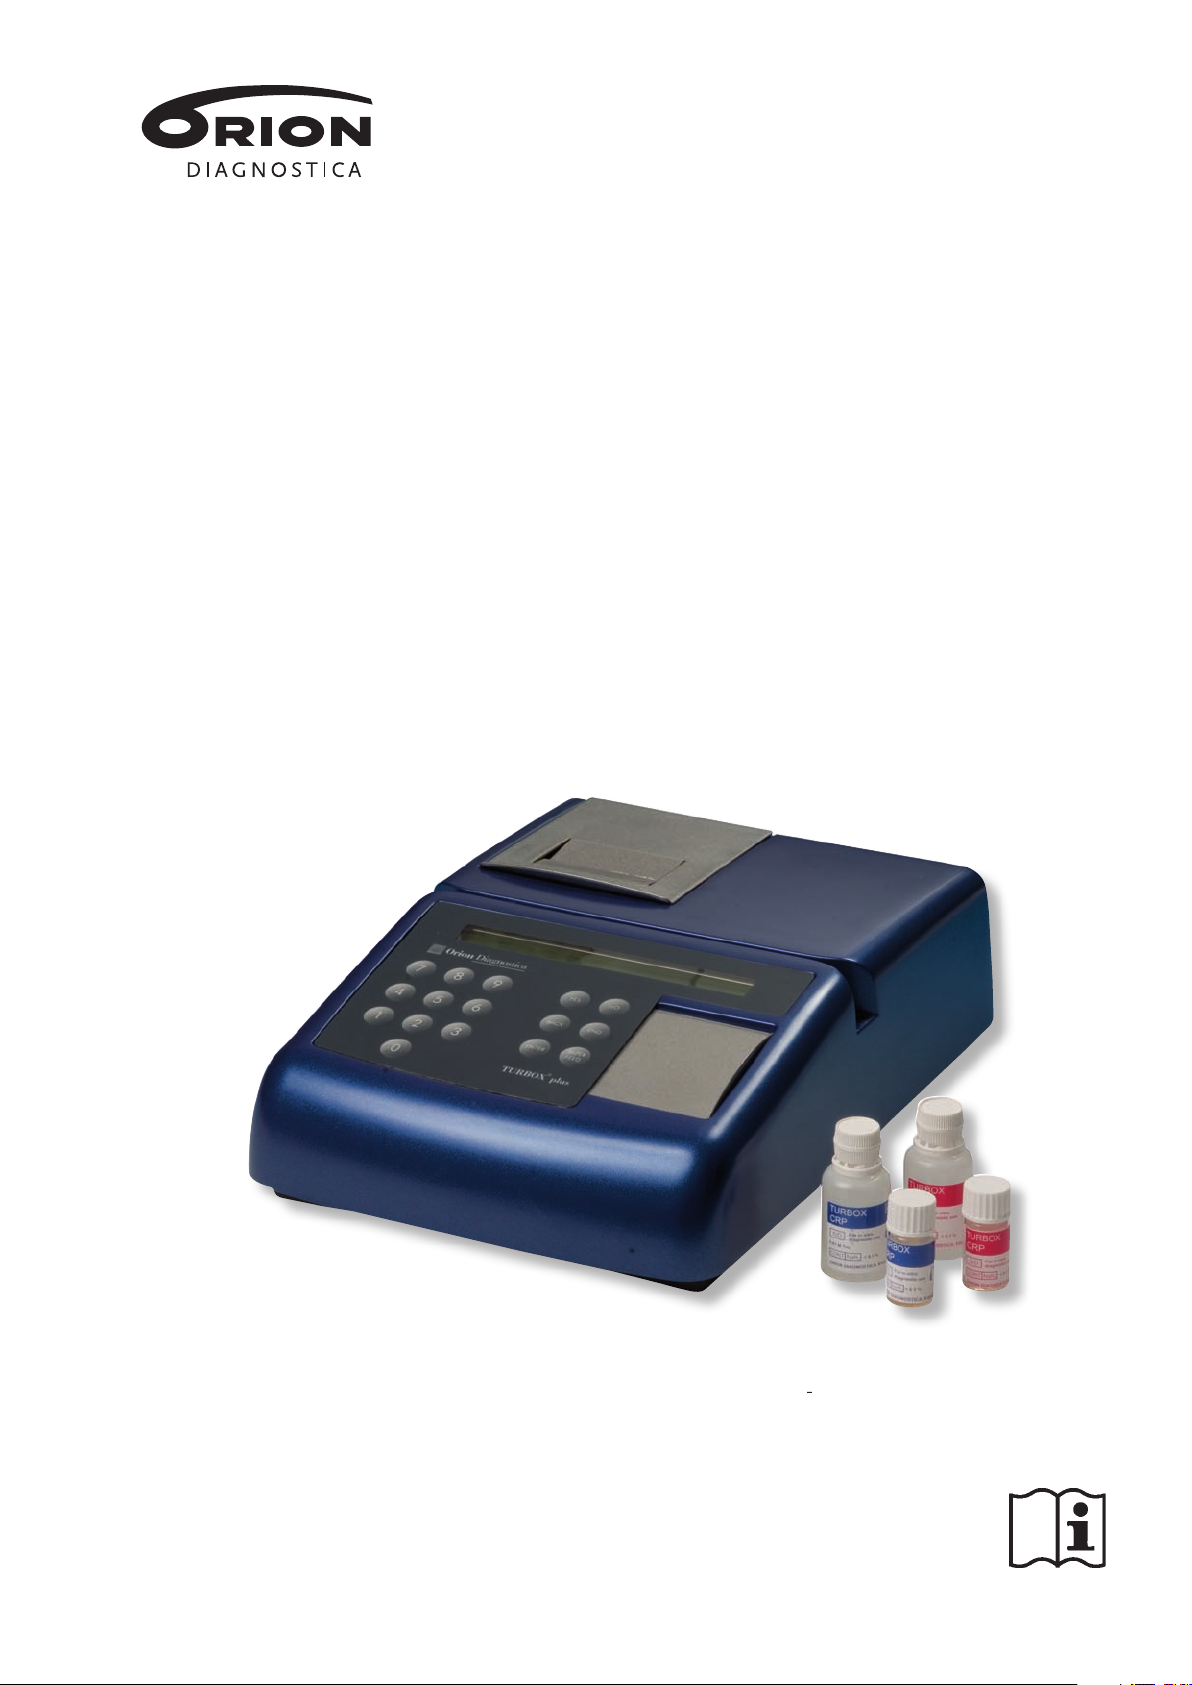
TURBOX® plus
Protein Analyser
User’s Manual
39931-8 GB
Cat. No. 67977
Page 2

2
Page 3

3
TURBOX® plus Protein Analyser
User’s Manual
CONTENTS Page
1 INTRODUCTION .......................................................................4
2 IDENTIFICATION OF MAIN PARTS OF TURBOX PLUS ..........5
3 SETTING UP .............................................................................6
3.1 Unpacking .....................................................................6
3.2 Location .........................................................................6
3.3 Selecting the Voltage .....................................................6
3.4 Connecting the Power Cable .........................................6
3.5 Paper Loading ...............................................................6
4 INSTRUMENT SPECIFICATIONS .............................................7
4.1 Nephelometer ................................................................7
4.2 Dimensions and Power Requirements ..........................7
5 SELF-TESTS .............................................................................7
6 OPERATION ..............................................................................7
6.1 Introduction ....................................................................7
6.2 Switching On .................................................................7
6.3 Assay Selection and Calibration ....................................8
6.4 Conducting an Assay ...................................................11
7 DATA OUTPUT ........................................................................13
7.1 Internal Printer .............................................................13
7.1.1 Printout during Measurements ....................................13
7.1.2 Printout of Measurement Summary .............................13
7.2 Serial Interface ............................................................14
8 ERROR MESSAGES ...............................................................15
8.1 Introduction ..................................................................15
8.2 Error Messages ...........................................................15
9 USER MAINTENANCE ............................................................17
9.1 Replacing the Ribbon Cassette ...................................17
9.2 Paper Loading .............................................................17
9.3 Software replacement .................................................17
9.4 Lithium battery .............................................................17
10 DECLARATION OF CONFORMITY .........................................17
11 WARRANTY .............................................................................17
APPENDIX 1: Assay Procedure .......................................................18
APPENDIX 2: Software replacement................................................19
Page 4

4
1 INTRODUCTION
The Orion Diagnostica Turbox plus Protein Analyser system is intended for measurement
of specic serum and urine proteins important for medical diagnosis and patient monitoring.
The system consists of the Turbox plus Protein Analyser and associated assay kits.
The Turbox plus system is based on nephelometry, which utilises the light-scattering property
of antibody-antigen complexes (immunoprecipitates). The light source is a light-emitting
diode (LED). The intensity of the scattered light is related to the amount of complex formed,
and it is detected by opto-electronics.
Integral software converts the light-scattering units, LSU to concentration units of the protein
analysed. The results are automatically presented on a print-out.
Each assay kit contains of two Buffer solutions (Test Buffer, Blank Buffer), Reagent,
Calibrator and Calibration Card. The card incorporates a magnetic strip carrying encoded
lot-specic parameters which dene the overall assay calibration curve. This information is
transferred to Turbox plus by passing the card through the instrument’s card reader. Turbox
plus is then ready for use.
An extensive range of assays is available for use with the Turbox plus nephelometer.
Each assay comes complete with an instruction booklet giving full details of the assay
principle, performance and procedures involved. A current list of the range of assays
available can be obtained from your Orion Diagnostica Turbox plus distributor.
Page 5
5
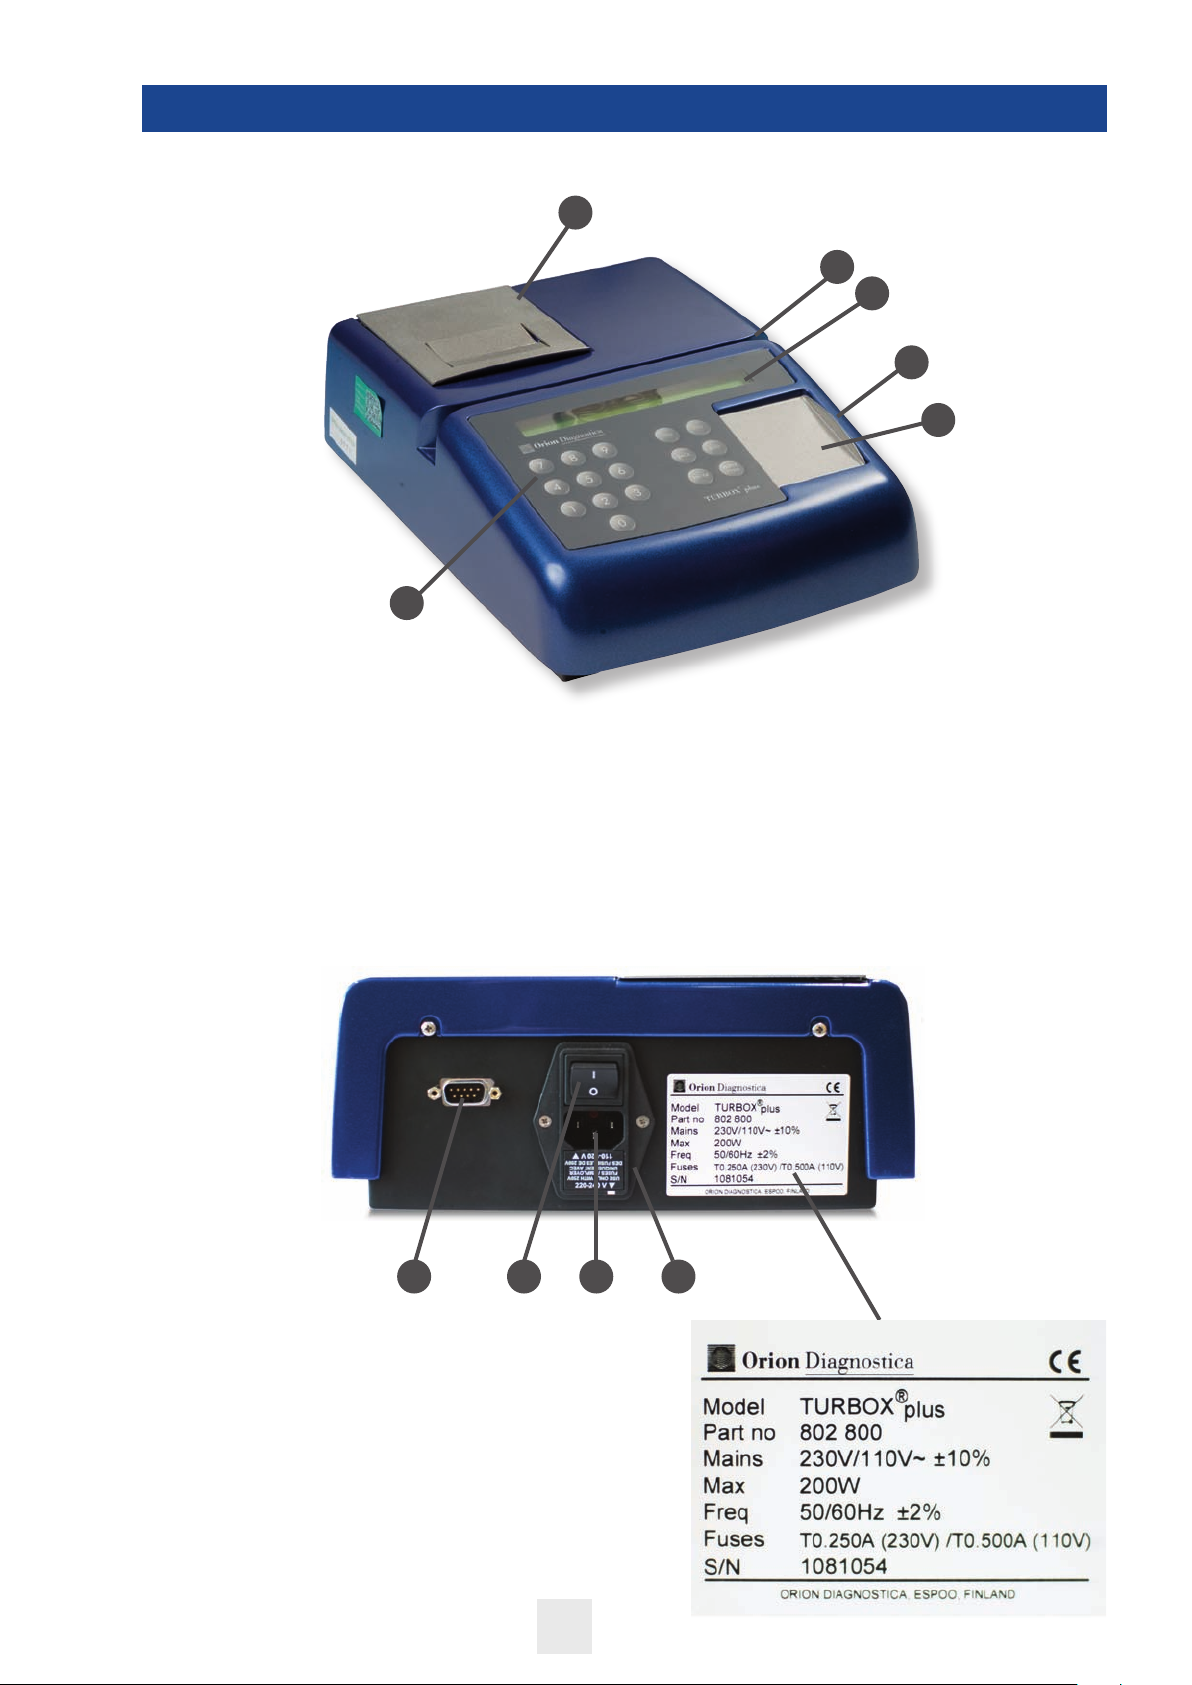
2 IDENTIFICATION OF MAIN PARTS OF TURBOX PLUS
Figure 1
Figure 2
7 Power ON/OFF Switch
8 Power Cord
9 Fuse
10 Serial Port
10
8
7
9
6
1
4
2
3
5
1 Card Reader Slot
2 Display
3 Keyboard
4 Measurement compartment
5 Lid of the measurement compartment
6 Printer compartment
Page 6

6
3 SETTING UP
3.1 Unpacking
When unpacking your Turbox plus Protein Analyser, check you have received the following
items:
● Turbox plus Protein Analyser
● Power cable
● User’s Manual
● A printer roll
Check the instrument carefully. If there are signs of damage, notify your Turbox plus
distributor.
3.2 Location
The instrument should be placed indoors, on a clean, horizontal surface, and the following
points should be observed:
1. The ambient temperature must be between +5°C and +40°C.
2. The relative humidity must be less than 80 % with temperature ≤ +31°C,
decreasing linearly to 50 % relative humidity at +40°C.
3. Do not place the instrument in direct sunlight.
4. Do not place near X-ray machinery.
5. Store magnetic cards away from strong magnetic elds.
The instrument is convection cooled; the ventilation slots are on the underside of the casing.
When operating Turbox plus, ensure that the external circulation of air is not restricted and
that the ventilation slots are not obstructed.
3.3 Selecting the Voltage
The Turbox plus is delivered with 230 V selected. To change the voltage between 230 V and
110 V, remove the fuse cartridge from the back panel (see Fig. 2), place the desired voltage
in the lower right corner of the cartridge and reinstall the cartridge.
3.4 Connecting the Power Cable
Turbox plus is supplied with a power cable. At one end of the cable is an IEC plug which
should be inserted into the IEC socket at the rear of the instrument and the other end to a
grounded AC power source.
Place the Turbox plus instrument on such place where the power switch is easily reachable
and the power cable is not bent.
3.5 Paper Loading
The printer uses 57.5 ± 0.5 mm wide paper which may be obtained from your local Citizen
distributor or other ofce equipment supplier.
To load the paper:
● Open the printer cover by lifting it from the front
● cut the leading edge of the new paper roll so that it is parallel to the roll shaft
● align the paper so that it is straight and insert it into the paper inlet
● press <PAPER FEED> until the leading edge of the paper is able to pass the
paper cutter
● slide the paper through the paper cutter and close the printer cover
Page 7

7
4 INSTRUMENT SPECIFICATIONS
4.1 Nephelometer
● Light source: light-emitting diode (635 mm)
● Two detectors for scattered light (LSU – light scattering units)
4.2 Dimensions and Power Requirements
● Weight: 5.3 kg
● Size: 10 cm (H) x 23 cm (W) x 32 cm (L)
● Power requirements: 230/110 V (± 10 %), 50/60 Hz (± 2 %)
● Power consumption 200 W
● Fuses 250 mA (230 V) / 500 mA (110 V)
● Overvoltage category: II
● Pollution degree: 2
5 SELF-TESTS
Turbox plus Protein Analyser automatically performs a series of self-test after the power is
switched on. These check that the printer, display, keyboard, card reader, optical path etc.
are functioning correctly.
If any faults are found, please inform your TURBOX plus distributor.
6 OPERATION
6.1 Introduction
Turbox plus is extremely easy to use. You will be guided through the assay procedure
bymessages and prompts on the display. The instrument is operated by single keystrokes.
As the instrument analyses samples in rapid succession, make sure all the cuvettes are
prepared and ready for analysis before starting. Check that there is sufcient paper
in the printer and load a new roll if necessary (see 3.5 Paper Loading).
6.2 Switching On
Switch on the instrument with the ON/OFF switch on the back panel (see Fig. 2).
Turbox plus v1.072 – 29.7.2008
Performing selftest
will appear on the display – showing the current software version and date.
The message will be followed by the question
is 29.7.2008 the correct date?
Yes / no
If you answer YES (by pressing the <YES> key on the keyboard), you may move on to
Section 6.3.
Page 8

8
If the date is not correct, you may change it by rst pressing <NO>. The following prompt
will appear on the display:
Please give a new date
dd mm yyyy
Enter the correct day of the month (two digits) and press <ENTER>.
Then enter the number of the month (two digits) and press <ENTER>.
Finally enter the correct year (four digits) and press <ENTER>.
6.3 Assay Selection and Calibration
Once you have entered the correct date, Turbox plus will prompt you to insert the Calibration
Card:
Read the card
By pressing <END> after this prompt, you will receive a printout of all stored calibration
data.
Warning: Only use the calibration card marked Turbox plus, provided with the assay kit.
Read calibration card by drawing it through the Card Reader Slot, with the printed side
facing you and the magnetic stripe downwards.
Should Turbox plus fail to read the card, you will be prompted to try again:
Error while reading card
Please try again
When the card has been read successfully, the assay details are automatically printed out:
Apo B lot FN 29
Expiry date 1.4.2010
Please compare the lot number on the printout with that shown on the reagent carton.
Warning: If the lot numbers differ, do not use that particular Calibration Card for the assay,
as it will generate incorrect results.
Kit should not be used beyond the expiry date printed on the assay kit.
Turbox plus will now search its memory for calibration data relating to the same assay and
lot number.
Page 9

9
The results of this search will be:
EITHER 1. No relevant calibration data are found in memory, in which case
the following message will be displayed and printed out:
No stored calibration
and Turbox plus will automatically begin the calibration sequence.
OR 2. Relevant calibration data are found in memory, in which case you
will see, for example, the following message:
Lot calibration from
29.7.2008
showing the date when this assay was last calibrated.
You can choose either to use the stored data or to recalibrate. Turbox plus will ask:
Use Stored Calibration
Yes / No
If there has been no calibration in the memory or if you do not wish to use the stored
calibration, Turbox plus will ask you to enter the number of calibrator replicates:
Number of calibrator replicates
(Max. 4)
It is recommended to carry out the calibration at least in duplicate. Enter the selected number
of calibrator replicates and press <ENTER>. The following text will appear:
Calibrator blank LSU
Ready for blank
Place the blank calibrator in the measurement compartment and close the lid. This activates
the reading mechanism. Turbox plus will automatically begin measuring, and the display will
change e.g. to:
Calibrator blank LSU 10
Remove blank
Having measured the calibrator blank, remove the blank from the measurement compartment.
The following message will be displayed:
Calibrator LSU
Ready for replicate 1
Page 10

10
Place the cuvette containing Replicate 1 in the measurement compartment and close the
lid. Turbox plus will immediately perform the measurement after which e.g. the following text
will appear:
Calibrator LSU 220
Remove replicate 1
After removing Replicate 1 repeat the same procedure with other calibrator replicate(s).
After measuring the last replicate the Turbox plus will ask you:
Store calibration date
Yes / No
If you reply <YES>, Turbox plus will store the calibration data for future use with the same
assay and lot number. The instrument has sufcient memory to store one set of calibration
measurements for each type of assay, and any previous calibration data for the same assay
will be over-written.
If you not wish to store the data, press <NO>. If there is an old calibration in memory,
Turbox plus will ask you whether this old calibration should be used instead:
Use old calibration?
Answering <YES> ignores the new calibration, and the old calibration is used.
Answering <NO> means that the new calibration is used but not stored in memory when
the instrument is switched off. Any previous existing calibration data for the same assay will
be retained in memory.
The calibration of Turbox plus for this specic assay is now completed, and you will obtain
a printout of the calibration data, e.g.:
Apo B
Blank
LSU
10
Mean
CV%
By pressing <BACK STEP> at any stage during, or immediately after the calibrator
measurements, you can return to the beginning of the procedure and re-measure the data.
The following prompt will be displayed:
lot FN29
Test
LSU
220
214
217
1.85
Number of calibrator replicates
(Max. 4)
When you see this prompt, continue as described above.
Page 11

11
6.4 Conducting an Assay
Turbox plus automatically begins the assay protocol sequence once it has been calibrated.
You now have to tell the instrument how many replicates of each sample you will be
measuring. The rst prompt you will see is:
Number of sample replicates
(Max. 4)
Press e.g. <1> and then <ENTER>. Wait until you see the following text on the display:
Sample 1 LSU
Ready for blank
Place the blank for the rst sample in the measurement compartment and close the lid.
Turbox plus will perform the measurement and the display will change to e.g.:
Sample 1 blank LSU 88
Remove blank
Remove the blank. The following text will appear:
Sample 1 LSU
Ready for replicate 1
Turbox plus is now ready to measure the rst replicate of Sample 1.
Place the cuvette containing Replicate 1 in the measurement compartment and close the lid.
Turbox plus will perform the measurement and the display will change to e.g.:
Sample 1 LSU 427
Remove replicate
Remove the cuvette. If you have selected to measure more than one replicate of each sample,
Turbox plus will prompt you to place the second replicate of Sample 1 in the measurement
compartment:
Sample 1 LSU
Ready for replicate 2
Continue the procedure as for Replicate 1 above.
After the blank and all the replicates have been measured, the results will beprinted out
automatically, e.g.:
#
1
The blank LSU values have already been subtracted from the sample LSU readings.
blank
LSU
11
Mean
test
LSU
243
243
conc.
g/l
0.97
Page 12

12
After completing Sample 1, Turbox plus is ready for Sample 2, and the display will change
to:
Sample 2 LSU
Ready for blank
Measure all the samples in the same way as Sample 1. The results will be continuously
printed, e.g.:
2
3
4
5
After completing all the samples, press <END> without closing the lid.
After pressing <END>, you may close the lid, and the Turbox plus will not attempt to perform
another measurement.
The following text will appear:
End of sample run
5
Mean
40
Mean
2
Mean
88
Mean
207
207
399
399
5
5
427
427
0.77
2.08
0.08 <
2.33
Followed by:
Summarize results
Yes / No
Selecting <YES> will create the following printout:
Summary of results
29.7.2008
Apo B lot FN29
Lot calibration from
29.7.2008
Sample
1
2
3
4
5
Concentration
0.97
0.77
2.08
0.08 <
2.33
Page 13

13
7 DATA OUTPUT
7.1 Internal Printer
Turbox plus reports the measurements on the Calibrator in Light-Scattering Units (LSU) and
measurements on Samples in both LSUs and concentration units. The concentration unit to
be used is specied on the Reagent Calibration Card. LSUs are arbitrary units representing
the intensity of light scatter measured. As there are no internationally recognised units
for light scattering, these values have been provided to enable you to note the Calibrator
and Sample results. As you become familiar with the general order of magnitude of the
readings, LSU values should help you to readily identify suspect results or assays.
All measurements are recorded on a printed copy (see Section 7.1.1), and a summary of
results can be compiled at the end of the assays, showing the measured protein concentration
for each sample (see Section 7.1.2).
7.1.1 Printout during Measurements
APO B
Expiry date
#
1
2
blank
LSU
44
Mean
6
Mean
lot: FN29
1.4.2010
test
LSU
213
213
204
204
7.1.2 Printout of Measurement Summary
Summary of results
29.7.2008
APO B lot FN29
Lot calibration from
29.7.2008
conc.
g/l
0.79
0.74
Sample
1
2
Turbox plus compares the readings against criteria encoded on the Reagent Calibration
Card. Any suspect data are agged by three asterisks.
A list of possible Error Messages and their meanings is provided in Chapter 8.
Concentration
0.79
0.74
Page 14

14
7.2 Serial Interface
Turbox plus is tted with a serial interface port, to enable data transfer to a computer system.
The signals conform the RS-232 standard. The handshaking protocol is disabled.
The serial port is a 9-pin, D9-type connector located on the back panel (see Fig. 2).
The pin connections are:
Pin 2 Receive data
Pin 3 Transmit data
Pin 5 Ground
Cabling for connecting Turbox plus to a PC using a D9-connector:
Turbox plus PC
2 —————————————— 3
3 —————————————— 2
5 —————————————— 5
Cabling for connecting Turbox plus to a PC or a serial printer using a D25-connector:
Turbox plus PC / Printer
2 —————————————— 2
3 —————————————— 3
5 —————————————— 7
The communication protocol is as follows:
Baud Rate 9600 bps
Parity None
Word Length 8 bits
Stop bits 1 stop bit
In the assay mode, the following information is echoed to the serial port:
Assay Name
Lot Number
Expiry Date
Current Date
Calibrator Blank/Replicate LSU Values
Calibrator Mean LSU and Coefcient of Variation
Sample Blank/Replicate LSU and Concentration Values
Sample Concentration Mean
Page 15

15
8 ERROR MESSAGES
8.1 Introduction
Turbox plus performs a variety of checks on both the data input and the data produced.
If it considers any of the values to be suspect, an Error Message will appear, either on the
display and/or on the printout.
8.2 Error Messages
Lot nn has expired
Expiry date xxyyzzzz
The calibration card also contains information about the expiry date of the lot. When the
expiry date is earlier than the current date keyed in this message will appear:.
Warning: Do not use assay kits after the expiry date.
Error while reading card
Please try again
Turbox plus was unable to read the information on the calibration card passed through
the card reader. Pass the card through the card reader slot once again. Ensure that the
magnetic strip is facing the front of the instrument. Draw the card slowly through the entire
length of the slot from left to right and then remove it.
If the problem persists, contact your Turbox plus distributor.
Blank Too High
The blank value agged lies above a specied range encoded on the Calibration Card.
***
Should the sample LSU value be above the measurement range of Turbox plus, *** will be
printed after the LSU value and no concentration is given. Dilute the sample (e.g. 1:4 = 1+3),
then remeasure it, and multiply the result with the dilution factor (4).
Poor Calibration
Please run again
This message is generated when the value for a Blank or the Calibrator is suspect.
Turbox plus should be recalibrated and the assay recommenced.
Page 16

16
Bad Replicates
At the end of a measurement sequence, the values for each replicate are compared with the
mean for the entire sequence. This Error Message occurs when the reading obtained for any
one replicate differs from the mean by an unacceptable amount.
Calibrator Too High
Please run again
The value lies outside the specic range for the assay.
Kits should not be used beyond the expiry date printed on the assay kit.
Persistent errors of this kind may indicate that the instrument is faulty. If this is suspected,
arrange for Turbox plus to be inspected by your Distributor.
Calibrator Too Low
Please run again
The value lies outside the specic range for the assay.
Kits should not be used beyond the expiry date printed on the assay kit.
Persistent errors of this kind may indicate that the instrument is faulty. If this is suspected,
arrange for Turbox plus to be inspected by your Distributor.
Error in self-check
Please call service
Turbox plus has detected an error during the self-test procedure. Switch the power off and
on again. If the message still occurs, contact the Turbox plus service.
Incorrect date
Please try again
See Section 6.2. Switching On for the correct way of entering the date.
Error in memory
Please call the service
Turbox plus has detected an error in memory. Switch the power off and on again. If the
message still occurs, please contact the Turbox plus service.
Result above (“>”) or below (“<”)
the measurement range
Each assay has a specic measurement range. Should the test result fall above or below
this range, the result will be marked “>” or “<” accordingly.
Readings above the measurement range call for reanalysis using a prediluted sample and
multiplying the result with the (additional) dilution factor. Readings below the measurement
range have reduced accuracy. If required, the measurement may be repeated using e.g.
double sample volume and dividing the result by 2.
Page 17

17
9 USER MAINTENANCE
9.1 Replacing the Ribbon Cassette
Switch the power off and then remove the printer cover. Remove the old cassette by pressing
and gently lifting it towards yourself. Install the new cassette by pressing it downwards while
inserting the ribbon between the printing head and the platen. Wind up the ribbon slack by
turning the knob on the left side on the top of the cassette clockwise.
To obtain new cassettes, contact your local Citizen distributor or other ofce equipment
supplier. Two ribbon cassettes, models IR-91B and IR-91P, may be used.
9.2 Paper Loading
See 3.5 Paper Loading.
9.3 Software replacement
See Appendix 2.
9.4 Lithium battery
The lithium battery located inside of the Turbox plus instrument should be replaced only with
same type of battery. This should be performed only by a trained service person.
Important: Removing the cover of Turbox plus may only be performed when the service
person has an adjustment jig available. This is an absolutely necessary tool when installing
the cover back to its place.
10 DECLARATION OF CONFORMITY
The Turbox plus instrument is both CE and CB certied and conforms to all relevant
Directives.
11 WARRANTY
The manufacturer’s warranty for the Turbox plus Instrument covers defects in materials and
workmanship for a period of one year from the date of purchase.
The manufacturer agrees to repair or replace the instrument if it becomes inoperative due to
the failure of any internal part of the instrument. The warranty does not cover any damage
caused by use not in accordance with instructions. The manufacturer is under no obligation
to modify or update the instrument once it has been manufactured, unless a manufacturing
defect has been identied.
In the event of instrument malfunction, contact your local supplier to obtain service during
the one-year limited warranty period.
Page 18

18
APPENDIX 1
ASSAY PROCEDURE
1
2
Dispense the sample and reagent
into the Turbox cuvette according
to the kit instructions.
Incubate at room temperature for
30 ± 5 minutes.
Program the Turbox plus by reading
the magnetic card including the
lot-specic calibration data.
3
4
Place the cuvette in the cuvette
compartment and close the lid.
Measurement occurs automatically.
After measurement, the results are
printed out on the internal printer.
Page 19

19
APPENDIX 2
SOFTWARE REPLACEMENT
1 5
Disconnect the power cord. Take the new software cassette
and connect it to the cable interface.
2 6
Place Turbox plus upside down on a
soft base.
3 7
Loosen the two screws (you don’t
have to unfasten them) xing the
software cassette compartment
cover.
4 8
Take care that the slots of the
interface meet the clamps on the
cassette when connecting them
together.
Put the software cassette connected
with the cable interface back to the
software cassette compartment.
Install the compartment cover back
on its place and fasten the two
screws.
Disconnect the software cassette
from the cable interface by rst lifting
the two clamps holding the cassette
and cable interface together.
Reconnect the power cord, switch on
power. Check that you receive on the
display the following text:
Turbox plus v 1.072 – dd.mm.yyyy
Performing selftest.
Page 20

Printed
9/2009
Turbox® is a registered trademark of Orion Diagnostica Oy.
Manufactured for
Orion Diagnostica Oy
P.O.Box 83, FI-02101 Espoo, Finland
Telephone +358 10 4261
Telefax +358 10 426 2794
www.oriondiagnostica.com
CE (89/336/EEC)
20
 Loading...