

Oregon Scientific WS-1400 DRAFT Instruction Manual

Page
1. Inventory of contents································································································2
2. Feature.······················································································································2
3. Set up guide···············································································································2
3.1 Battery install··································································································· 2
3.2 Mounting ··········································································································3
4. LCD overview ············································································································ 4
4.1 LCD overview·································································································· 4
4.2 Weather forecasting ·······················································································5
4.3 Weather tendency indicator ···········································································5
4.4 Examples of changing weather icons··························································· 5
4.5 Storm warning indicator ················································································ 5
5. Program modes········································································································· 5
5.1 Quick display mode························································································ 6
5.2 Setting mode··································································································· 6
5.3 Alarm mode····································································································· 6
5.4 Min/Max mode································································································· 7
6. Problems and interference with operation ·····························································8
7. Specification·············································································································· 8
This Operation Manual is part of this product and should be kept in a safe place for
future reference. It contains important notes on setup and operation.
- 1 -
WIRELESS WEATHER STATION
INSTRUCTION MANUAL
WS-1400 DRAFT

- 2 -
1. Inventory of contents
1) Base station
2) One remote sensor with mounting bracket
3) Instruction manual
2. Feature
1) Wireless outdoor and indoor humidity (%RH)
2) Wireless outdoor and indoor temperature (°F or °C)
3) Records min. and max. humidity
4) Records min. and max. temperature
5) Barometric pressure 24-hour history graph (inHg or hPa)
6) Weather forecast tendency arrow
7) Forecast icons based on changing barometric pressure
8) Time and date by manual setting
9) DCF radio controlled time and date with manual setting (WH1170 )
10) Automatically updates for daylight saving time based onGermany DST system (WH1170)
11) 12 or 24-hour time display
12) Perpetual calendar
13) Time alarm with snooze
14) Can receive one sensor
15) LED backlight
16) Wall hanging or free standing
17) Included transmitter
18) Low battery indicator
19) Synchronized instant reception
3. Set up Guide
3.1 Battery install
Note: To avoid operating problems, please take note of battery polarity before/when inserting any
Alkaline Batteries (permanent damaged could be introduced by inserting the battery in wrong
direction). Use good quality Alkaline Batteries and avoid rechargeable batteries.
1) Insert two AAA batteries into the remote sensor
2) Insert three AA batteries into the weather station.
3) Wait 3 minutes or until the outdoor temperature is displayed in the weather station. Do not press any
keys before outdoor sensor data received .
4) Mount the units, ensuring that the receiver can still pick up the signal from the transmitter. To
measure outdoor temperature, place the transmitter outdoors. It will transmit the temperature from its
location.
Every time the remote sensor is powered up (for example after a change of batteries), a random security
code is transmitted and this code must be synchronized with the base station to receive weather data.
Thus if battery change happened on transmitter side, then the receiver must be power up again to
re-learn the transmitter.
After the remote sensor is powered up, the sensor will transmit weather data every 8s for 16 times. After
this learning period is over, then the transmitter will transmit every 48s.
When the base station is powered up, a short beep will sound and all LCD segments will light up for about
3 seconds before it enters into learning mode to learn the sensors security code. After the learning mode,
the base station will start the DCF radio controlled time reception. The receiver will start RCC time
reception period (maximum 10 minutes), and no weather data will be received during this period of time.
If RCC signal can’t be found within1 minutes, the signal search will be cancelled and will automatically
resume every two hours until the signal is successfully captured. Regular RF link will be established once
RCC reception routine is finished.
Note: DO NOT PRESS ANY KEY during the first 3 minutes learning period. After both indoor and
outdoor data are displayed you can place your remote sensor outdoors and set your time (if no RCC
reception is possible). If there is no temperature reading in the indoor station, make sure the units are
within range of each other or repeat the battery installation procedure. If a key is pressed before the
weather station receives the temperature signal, you will need to follow the battery installation procedure
again.
Please wait 10seconds before re-insert the battery again to make a proper reset for both
transmitter and receiver.
Note for Radio Controlled Time:
The time and date display is based on the signal provided by the highly accurate government operated
atomic clock. The base station will continue to scan for the radio controlled time signal each day despite it
being manually set. If reception has been unsuccessful, then the radio controlled time icon will not appear
but reception will still be attempted continually. If reception has been successful, the received time and
date will overwrite the manually set time and date.
Note:
When batteries require replacement for the base station, the low battery indicator will light up on the LCD.
Please participate in the preservation of the environment by properly disposing of all used-up
batteries and accumulators at designated disposal points. Neve r d i s po s e of b a t t e r i e s i n a f i r e as this
may cause explosion, risk of fire or leakage of dangerous chemicals and fumes
3.2 Mounting
1) Base station
With one foldable legs at the back of the unit, the base station can be placed onto any flat surface or wall
mounted at the desired location by the hanging holes also at the back of the unit. It is important to check
that the radio signal can be received before permanently mounting any of the units
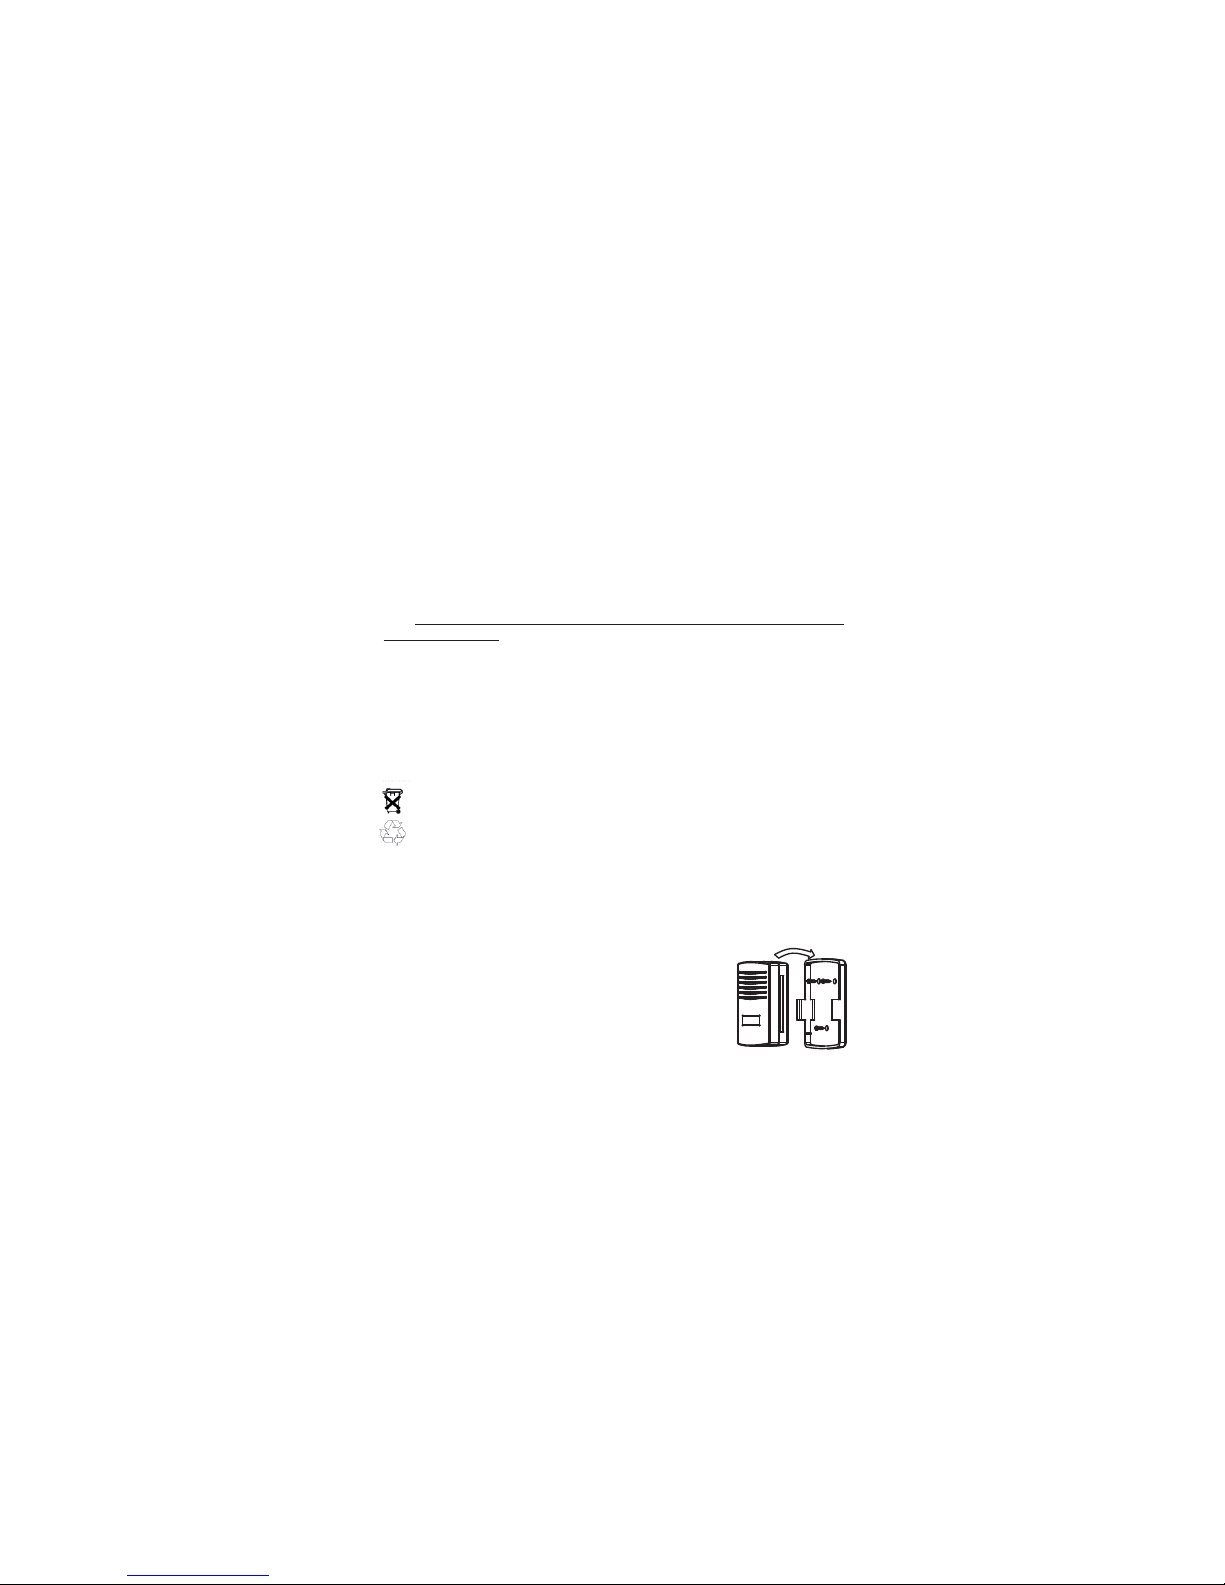
2) Remote sensor
Note: To achieve a true temperature reading, avoid mounting remote sensor
in direct sunlight. We recommend that you mount the remote sensor on an
outside North-facing wall; obstacles such as walls, concrete, and large metal
objects will reduce the range.
To wall mount, use 3 screws to affix the wall bracket to the desired wall, plug
in the remote sensor to the bracket.
- 3 -
Remote Sensor
Wall Bracket
 Loading...