

Page 1
SET CLOCK
■
Press the + button to advance clock time
(hold button for quick advance).
■
Press the – button to reverse clock time
(hold button for quick reverse).
START TIME
■
Press the + button to advance start time
(hold button for quick advance).
■
Press the – button to reverse start time
(hold button for quick reverse).
HOW LONG
Set watering duration from 1 to 240 minutes
using the + and – buttons.
HOW OFTEN
Set watering frequency as every 6 hrs, 12 hrs,
or from 1 to 7 days using the + and – buttons.
1 is every day, 2 is every other day etc.
up to 7 days.
AUTO
Timer waters according to programmed time,
station, duration, and frequency.
RAIN DELAY
■
When in AUTO, press + button for 24 hrs,
48 hrs, or 72 hrs.
■
Screen will flash between clock and hours
remaining before programmed cycle
resumes.
■
To remove rain delay, turn dial to OFF
and then back to AUTO.
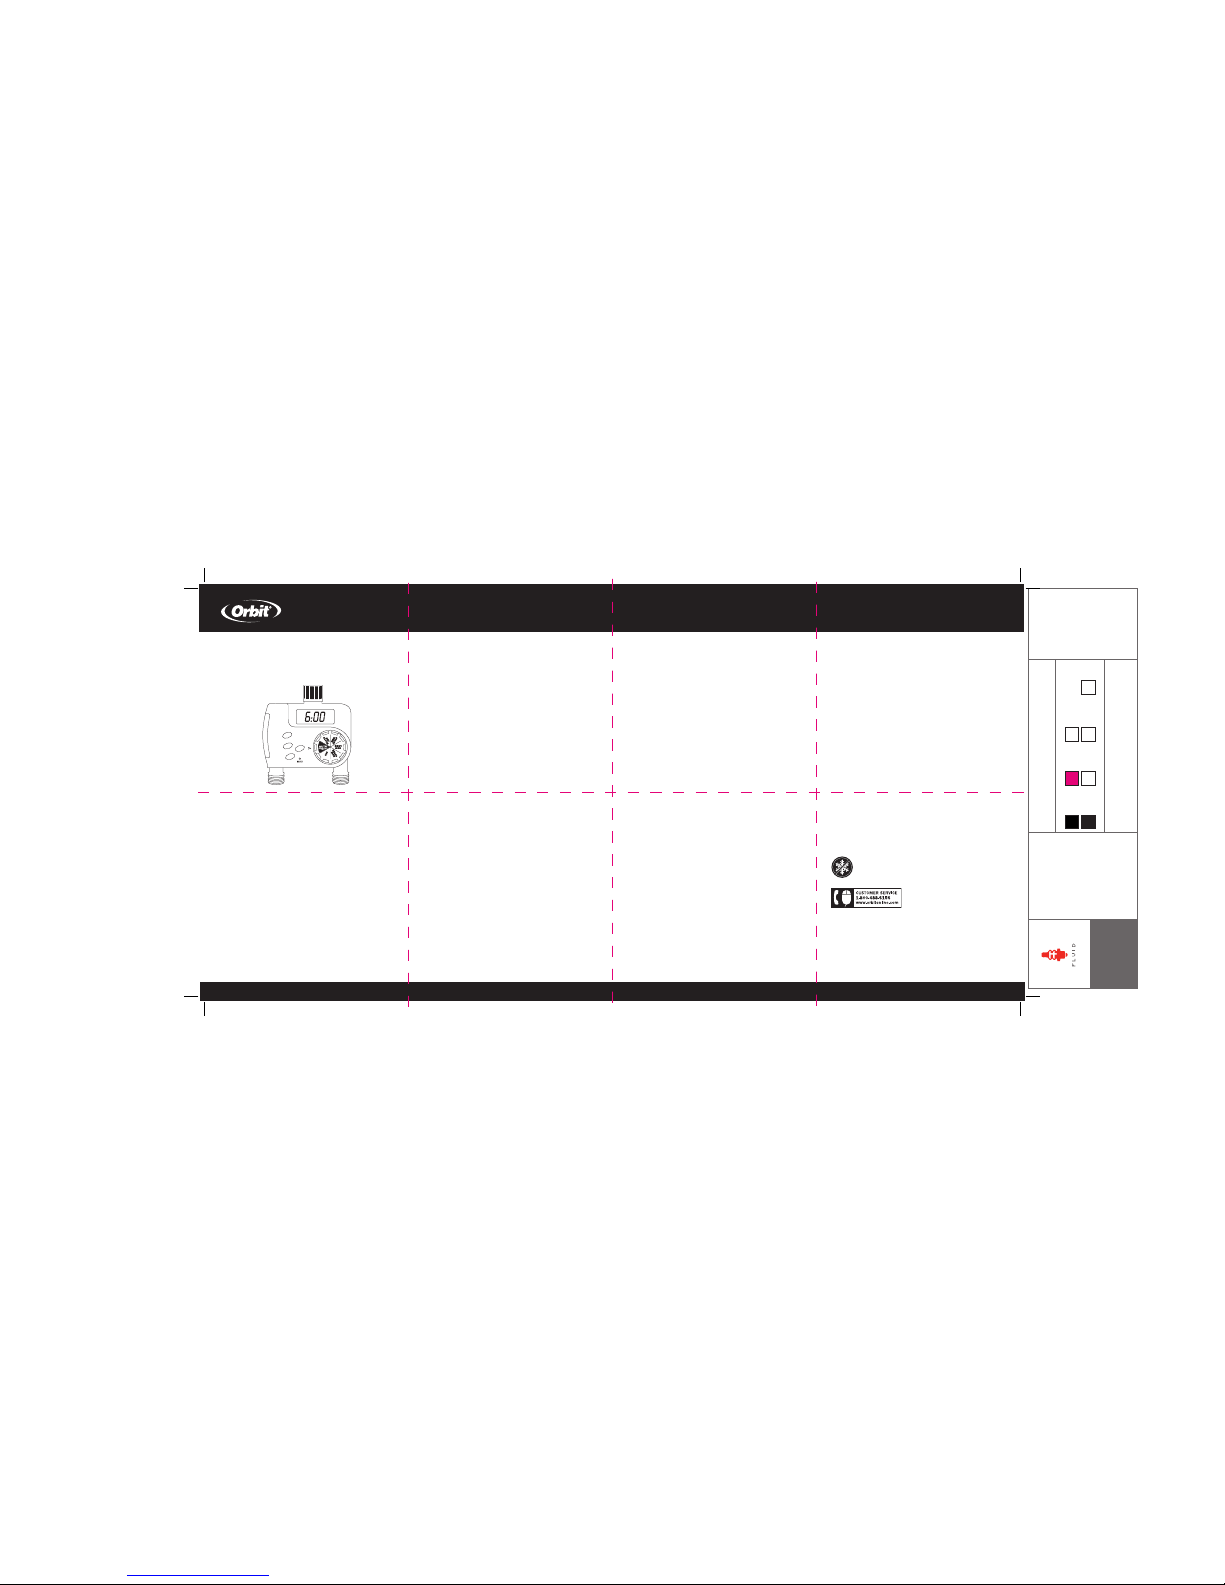
INSTALLING THE BATTERIES
■
Remove the tray on the back of the timer
by sliding it out.
■
Insert two AA (1.5V) alkaline batteries
(not included) and replace the tray.
■
Replace batteries when low battery
icon appears.
INSTALLATION
■
Attach timer to an outdoor hose faucet
and turn on after programming.
PROGRAMMING THE TIMER
■
Rotate the dial to positions indicated
or setup.
■
Press station button to switch between
station 1 and 2 for all programming.
PN 27133-24 rC
dual-Outlet dIGItal tImer
■
PROGRAMMING FOR THE
DIGITAL OUTLET OF THE TIMER
MANUAL/HAND WATERING
To water without interrupting the set cycle,
press [MANUAL] button and then use + and –
buttons to set from 1 to 240 minutes.
■
To remove manual watering (turn off),
turn dial to OFF.
■
To resume programmed cycle turn the
dial back to AUTO.
TROUBLESHOOTING
Water does not come on at desired time.
Check if:
■
Clock is set to correct time including
AM and PM.
■
Start time is set to desired time including
AM and PM.
■
Rain Delay is on.
Timer does not water.
Check if:
■
Timer is set to AUTO.
■
Hose faucet is on.
■
Batteries are low.
■
Clock is set to correct time including
AM and PM.
■
Rain Delay is on.
Water won’t turn off.
Check if:
■
Watering duration is set to desired time.
■
Start times begin after previous
watering cycle has run through all
stations and set durations.
WHEN EXPECTING FREEZING TEMPERATURES, TIMERS
SHOULD BE REMOVED FROM THE HOSE BIB TO AVOID
POTENTIAL FREEZE DAMAGE.
p 801 295 9820
f 801 951 5815
www.fluid-studio.net
1065 South 500 West
Bountiful, Utah 84010
proof no: 2
date: 08.29.11
des: SH spck: SH
job no: N/A
client:
ORBIT
sku: 27133
upc: N/A
file name: 27133-24 rC.indd
software: InDesign CS5
colors
additional instructions:
· Font sizes cannot be smaller than 7 pt.
·
· Proofing Code: LB486038
color non
printing
Die
PMS
???
color non
printing
Glue Area
color non
printing
Product Position
PMS
???
Registration
Black
Printers are responsible for
meeting print production
requirements. Any changes
must be approved by the
client and Fluid Studio.
printed piece must meet
designated specifications
on this form.
dimensions:
flat: w: 12.0" h: 6.0"
finished: w 3.0" d: 0 h 3.0"
© 2011 Fluid Studio. This
work is the property of Fluid
Studio, and cannot be used,
reproduced or distributed
in any way without their
express permission.
© 2011 Orbit Irrigation Products, Inc.
All rights reserved. All trade names are
registered trademarks of respective
manufacturers listed.
Orbit® Irrigation Products, Inc.
North Salt Lake, UT 84054
Page 2
tempOrIzadOr dIGItal
de puertO dOble
■
PROGRAMACIÓN DEL PUERTO DIGITAL
DEL TEMPORIZADOR
■
Presione el botón de estación para
cambiar de la estación 1 a la 2 en toda la
programación.
AJUSTE DEL RELOJ
■
Presione el botón + para avanzar la hora del
reloj (mantenga presionado el botón para
avanzar rápido).
■
Presione el botón – para retroceder la hora
del reloj (mantenga presionado el botón
para retroceder rápido).
HORA DE INICIO
■
Presione el botón + para avanzar la hora de
inicio (mantenga presionado el botón para
avanzar rápido).
■
Presione el botón – para retroceder la hora
de inicio (mantenga presionado el botón
para retroceder rápido).
DURACIÓN
Programe la duración de riego de 1 a 240
minutos utilizando los botones + y –.
FRECUENCIA
Programe la frecuencia de riego cada 6 ó 12
horas, o cada 1 a 7 días utilizando los botones
+ y –.1 es todos los días, 2 es dejando un día,
etc. hasta 7 días.
AUTO (AUTOMÁTICO)
El temporizador activa el riego de acuerdo
a la hora, estación, duración y frecuencia
programadas.
INSTALACIÓN DE LAS BATERÍAS
■
Retire la bandeja posterior del temporizador
deslizándola hacia fuera.
■
Inserte 2 baterías alcalinas AA (1,5 V)
(no incluidas) y vuelva a colocar la bandeja.
■
Cambie las baterías cuando aparezca en
pantalla el ícono de batería baja.
INSTALACIÓN
■
Conecte el temporizador a un grifo para
manguera exterior y enciéndalo una vez
que lo haya programado.
PROGRAMACIÓN DEL TEMPORIZADOR
■
Gire el dial a la posición que se indica para
la configuración.
RAIN DELAY (RETARDO POR LLUVIA)
■
Cuando esté en modo AUTO, presione el
botón + para cambiar entre 24, 48 ó 72
horas.
■
La pantalla cambiará entre el reloj y el
número de horas que faltan para que se
reanude el ciclo programado.
■
Para desactivar el retardo por lluvia, gire el
dial a OFF y después regréselo a AUTO.
RIEGO MANUAL
Para regar sin interrumpir el ciclo
programado, presione el botón [MANUAL] y
luego utilice los botones + y – para establecer
una duración de entre 1 a 240 minutos.
■
Para desactivar el regado manual
(apagarlo), gire el dial a la posición OFF.
■
Para reanudar el ciclo programado, regrese
el dial a la posición AUTO.
SOLUCIÓN DE PROBLEMAS
El agua no sale a la hora deseada.
Revise si:
■
El reloj está programado a la hora correcta
incluso en AM y PM.
■
La hora de inicio está programada a la hora
correcta incluso en AM y PM.
■
Está activado el retardo por lluvia.
El temporizador no activa el riego.
Revise si:
■
El temporizador está en modo AUTO.
■
El grifo para la manguera está abierto.
■
Las baterías están bajas.
■
El reloj está programado a la hora correcta
incluso en AM y PM.
■
Está activado el retardo por lluvia.
El agua no se corta.
Revise si:
■
La duración del riego está establecida en el
tiempo deseado.
■
Las horas de inicio comienzan después de
que el ciclo de riego anterior ha pasado
por todas las estaciones y la duración
configurada.
CUANDO SE ESPERAN TEMPERATURAS DE CONGELAMIENTO,
SE DEBEN RETIRAR LOS TEMPORIZADORES DEL GRIFO DE LA
MANGUERA PARA EVITAR DAÑOS POTENCIALES DEBIDO AL
CONGELAMIENTO.
 Loading...