


DIAL—Rotate the d ial to customize your
watering schedule.
+/- Buttons—Use these bu ttons to adjust
time and progra m. While in AUTO press + to
activate Rain De lay.
ARROW—Moves cur sor around the screen
during programming.
STATI ON—Moves b etween Station 1
and Station 2.
MANUAL/CLEAR—Press to water manually o r
to clear programming.
RE SET—Pr ess to reset back to fa ctory settings.
AUTO—Timer waters accor ding to your
customized schedule.
SET CLOCK—Set the time of day.
START TIME—Select what time you would
like to start waterin g.
HOW LONG—Determine how long to wate r
HOW OFTEN—Choose how often yo u will water
OFF—Turn o all watering.
Installing the Batteries
1. Re move the tray on the back of the timer by
sliding or pul ling it out.
2. Inser t two AA (1 .5V) alkaline batteries (n ot
included) and r eplace the tray.
Note: Firmly repla ce the battery tray to ensure
water resistan ce and increase battery life . You
will know the batter y tray is fully inserted if
it does not pull o ut easily. Used up or de ad
batteries must b e removed from the timer
and dispose d of properly. Repla ce batteries
when low batter y icon appears on display. Do
not dispose of bat teries in fire. B atteries may
explode or leak.
Timer Features
Programming the Timer
Set Clock and Day
1. Turn dial to SE T CLOCK.
2. Using the +/- buttons , set the time of day,
including AM an d PM. Timer advances faster
if button is held down.
3. Press the ARROW bu tton to set current day.
4. Press the +/- buttons to move bet ween and
select the curre nt day of the week. Press the
ARROW button to toggle b ack to the time
of da y.
5. Turn dial to save changes
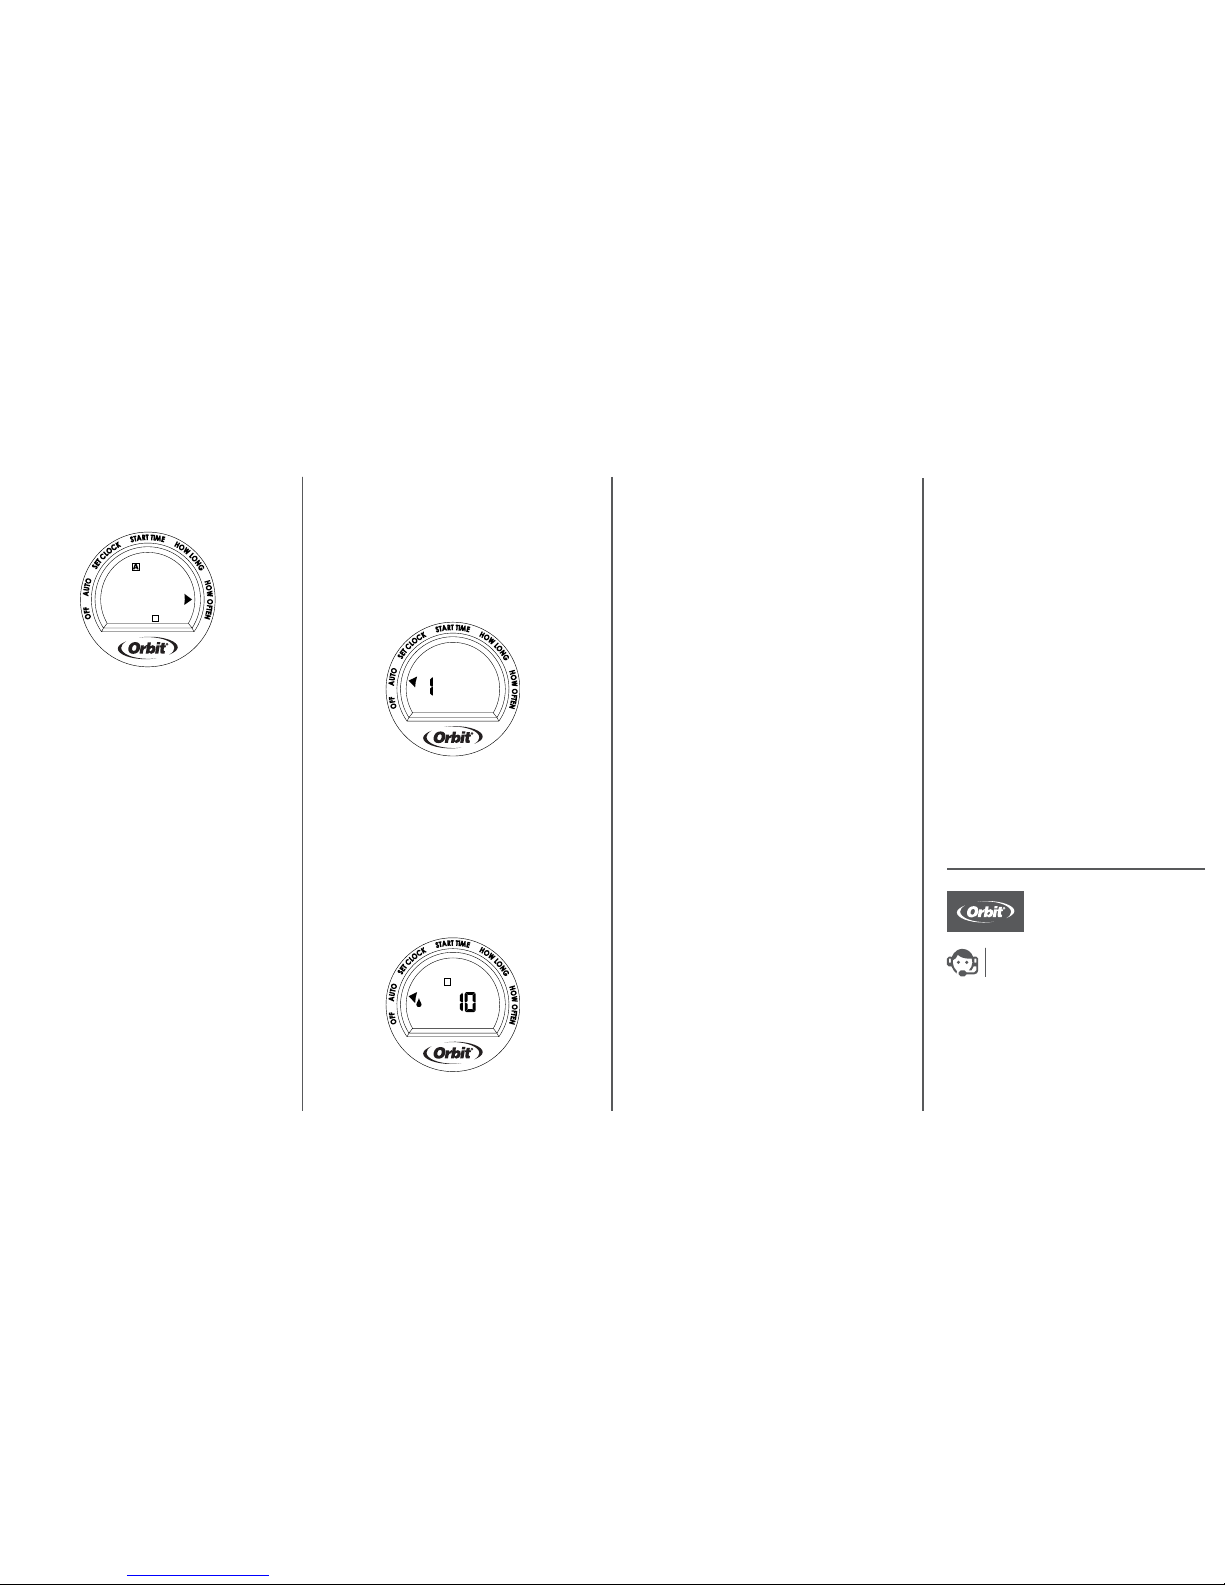
Start Time
A start time is th e time of day that the timer
will begin to water. This tim er features three
start times.
1. Turn dial to S TART TIME.
2. Press the AR ROW button to move throug h
and select a st art time; A , B, and/or C.
For Rain Delay Press + in Auto
HOSE TAP
CONNECTION
OUTLET 1
MANUAL/
CLEAR
FILT ER
DIAL
RESET
LOW
BATTERY
INDICATOR
T
PM
Timer
When expec ting freezing temp eratures,
timers sho uld be removed from t he
hose faucet a nd stored indoor s to avoid
potential fr eeze damage.
Filter traps d irt particles, p rolonging
life of timer. Cle an filter regular ly and
replace if w orn.
Important, please read!
+/
BUTTONS
ARROW
3. Using the + / - but tons, set your firs t start
time, includin g AM and PM. Timer advances
faster if button is h eld down. A box is placed
around each programmed start time.
Note: To remove a start time pr ess CLEAR.
4. Press the STATION button to move th rough
stations; 1 or 2 .
5. Press th e + / - buttons to toggle th e stations
on/o .
Note: All stations a re automatically selected
when a start time is added.
Press the - button to to ggle a station o.
6. Repeat steps 2 - 5 to p rogram additional
start times.
7. Turn dial to save chan ges.
Note: Only one sta rt time is requi red.
How Long
1. Turn dial to HOW LO NG.
2. Press the S TATION button to move through
and select a st ation; 1 or 2.
3. Using the +/- buttons, se lect watering
duration from 1 to 360 m inutes for each
desired station. Timer advances faster if
button is held down .
Note: To remove a watering duration
press CLEAR .
4. Turn dial to save changes .
1 Dial 2 Outlet
Hose Faucet Timer
START TIME
STATION
AM
B C
1 2
STATION
MINS
1 2
STATIO N
OUTLET 2
MINS
AM
PM
Timer does not water.
Check if:
• Tim er is set to AUTO.
• Hos e faucet is on.
• Bat teries are low.
• Cloc k is set to correct tim e,
including AM and PM.
• Rain Delay is on.
Water won’t turn o.
Check if:
• HOW LON G is set to desired time.
• HOW OF TEN is set to desired
interval hour or day.
Working water press ure:
• Min imum: 10 psi
• Maximum: 100 psi
Working temperature:
• Maximum: Do not exceed 1 20°F
• Min imum: Keep from fre ezing
Warnings:
For outdoor use wit h cold water only.
Not for use with app liances.
This feature allows you to water without
interrupting your set schedule. To access thi s
feature, follow th e steps below.
1. There a re two ways to water: all stations as
programmed or selected stations.
To water all stations as prog rammed:
• With th e dial on AUTO, press the
MANUAL button.
• “ALL” will be displaye d and the timer will
water all stations as programmed.
To water specific statio ns or durations:
• With th e dial on AUTO, press the
MANUAL button.
• Pre ss the STATION button to select
desired station.
• Using the +/- buttons, selec t watering
duration from 1 to 360 m inutes.
Note: There may be a s light delay bet ween the
time the manua l button is press ed and when
watering begins.
2. Screen wi ll flash betwe en clock and
time remainin g before automatic
programming resumes.
3. To stop manual watering , turn the dial
to O FF.
4. Turn the dial back to AUTO to resum e your
programmed watering schedule.
Troubleshooting
Water does not come o n at desired time.
Check if:
• Clock is set to correct ti me,
including AM and PM.
• Dial is set to “Auto”
• Start time is set to de sired time,
including AM and PM.
• Rain Delay is on.
Congratulations!
Your timer is now programmed. Turn your
dial to AUTO to allow your timer to water
according to prog rammed time , station,
duration, and frequency.
Additional Features
Rain Delay
Rain delay allows yo u to postpone water ing for
a set period of tim e. To access the rain delay,
follow the steps be low.
1. W ith the dial on AUTO, pre ss the + button to
select a delay of 1 to 7 days.
2. Screen w ill flash between clock and ho urs
remaining before programmed cycle
resumes.
3. To remove rain delay, turn di al to OFF and
then back to AUTO.
Manual/Hand Watering
How Often
1. Turn dial to HOW O FTEN.
2. Press the ARROW button to move through
and select a st art time A , B, and/or C.
3. Press + or – butto n to move the cursor
down to select Days of th e Week or Interv al
watering frequency.
4. There are two ways to set your watering
frequency for each start t ime; Days of the
Week or Interva l.
Days of the week - Sele ct specific days you
want to water:
• Using the ARROW button move to t he
des ire d day.
• Pre ss the + / - buttons to toggle the day
of the week on/o.
• Se lect any combination of days.
Interval - Sel ect an interval period you want
to water:
• Using the ARROW button move to I NT.
• Pre ss the + / - buttons to cycle through each
interval . You may choose to interva l water
every 1 hour, 2 hours , 4 hours, 6 hours, 12
hours, or 1 to 7 days .
5. Repeat steps 2 a nd 4 to program wateri ng
frequency for additional start times.
6. Turn dial to save changes .
STATION
MINS
1 2
© 2015 Orbit Ir rigation Pro ducts, I nc.
All rights re served . All trade na mes are
registered trademarks of respective
manufacturers listed.
Orbit® Irrigation Products, Inc.
North Salt L ake, UT 84054
PN 24713-24 r B
Customer Service
1-800-488-6156
orbitonline.com
DAYS
RAIN
DELAY
S M T W T F S INT
B C
 Loading...