

ORANGE MF60 Quick Start Manual

1
quick start guide
MF60
Mobile WiFi Modem
32
your device LED indicators
Mobile WiFi Modem is a 3G/2G mobile hotspot device, working in GSM/GPRS/EDGE/
WCDMA/HSPA/ HSPA+ network. This device enables USB or Wi-Fi conection and
supports data and SMS services, enabling you to communicate anytime and anywhere.
1
4 5
6
2
3
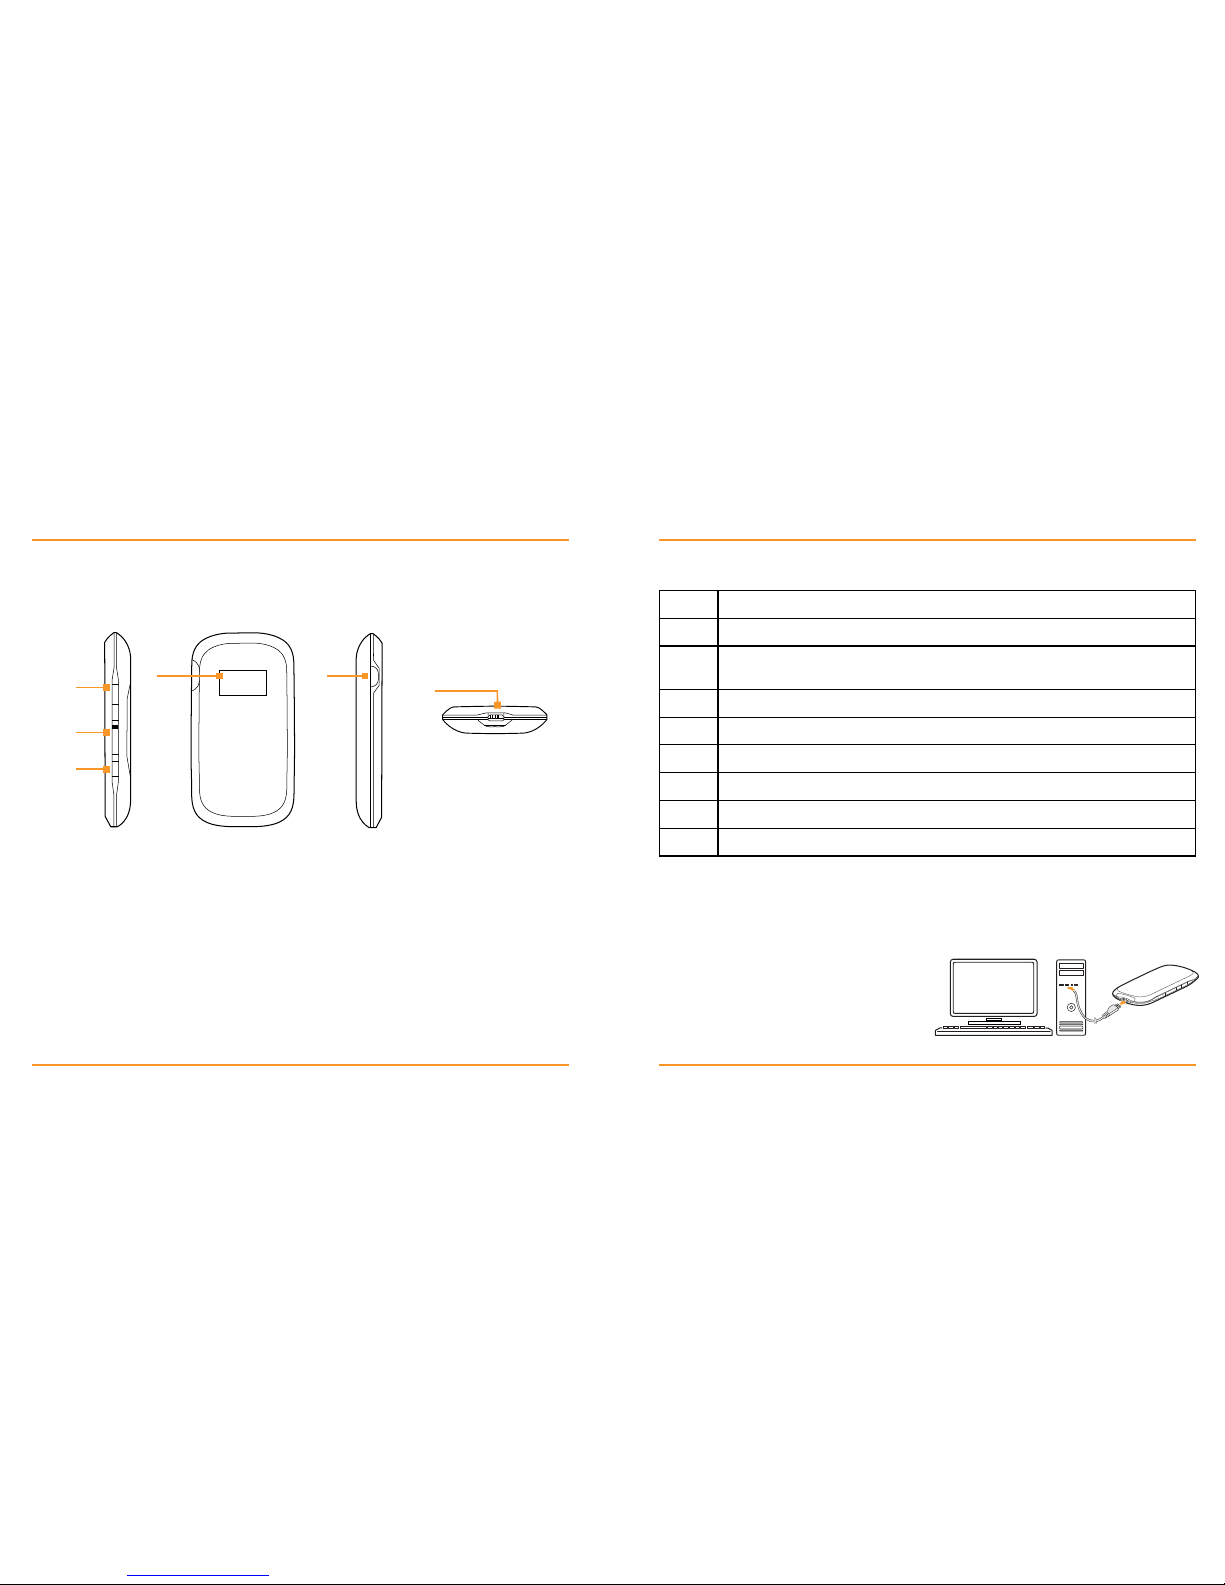
1 Power - Hold the Powe r button to switch on/off the device
2 Memory card slot (mi croSD c ard)
3 WPS - This button is used to star t/end Wi-Fi Protected Setup authentication process
and enable/disable the Wi-Fi function.
Hold it for 3 seconds to activate the WPS function. When the WPS function is available,
press i t to deactivate the WPS function. Press it to enable/disable Wi-Fi function.
4 LED Screen Indicator
5 External Antenna Connector - Connect external antenna to enhance the signal strength.
6 Charger/USB port - Charg e your device.
Connect the client to your device via the USB cable.
Icon Indication
Network signal strength.
Network type. 2G or 3G icon will appear on the LED screen according
to the network being connected.
Connect to the Internet automatically.
Connect to the Internet manually.
Roaming network indication.
New message received.
Wi-Fi Status and number of the connecting users.
Battery power indication.
When th e device is powe red on, the following icons will appear on th e LED screen:
Note
You can only us e USB cable
or Wi-Fi to connect this devic e.
If you want to use Wi-Fi, make sure
the client supports the Wi-Fi function.
Connection Scenario
The following picture is the application example. All of the
client devices can surf on the Internet at the same time.
54
getting started
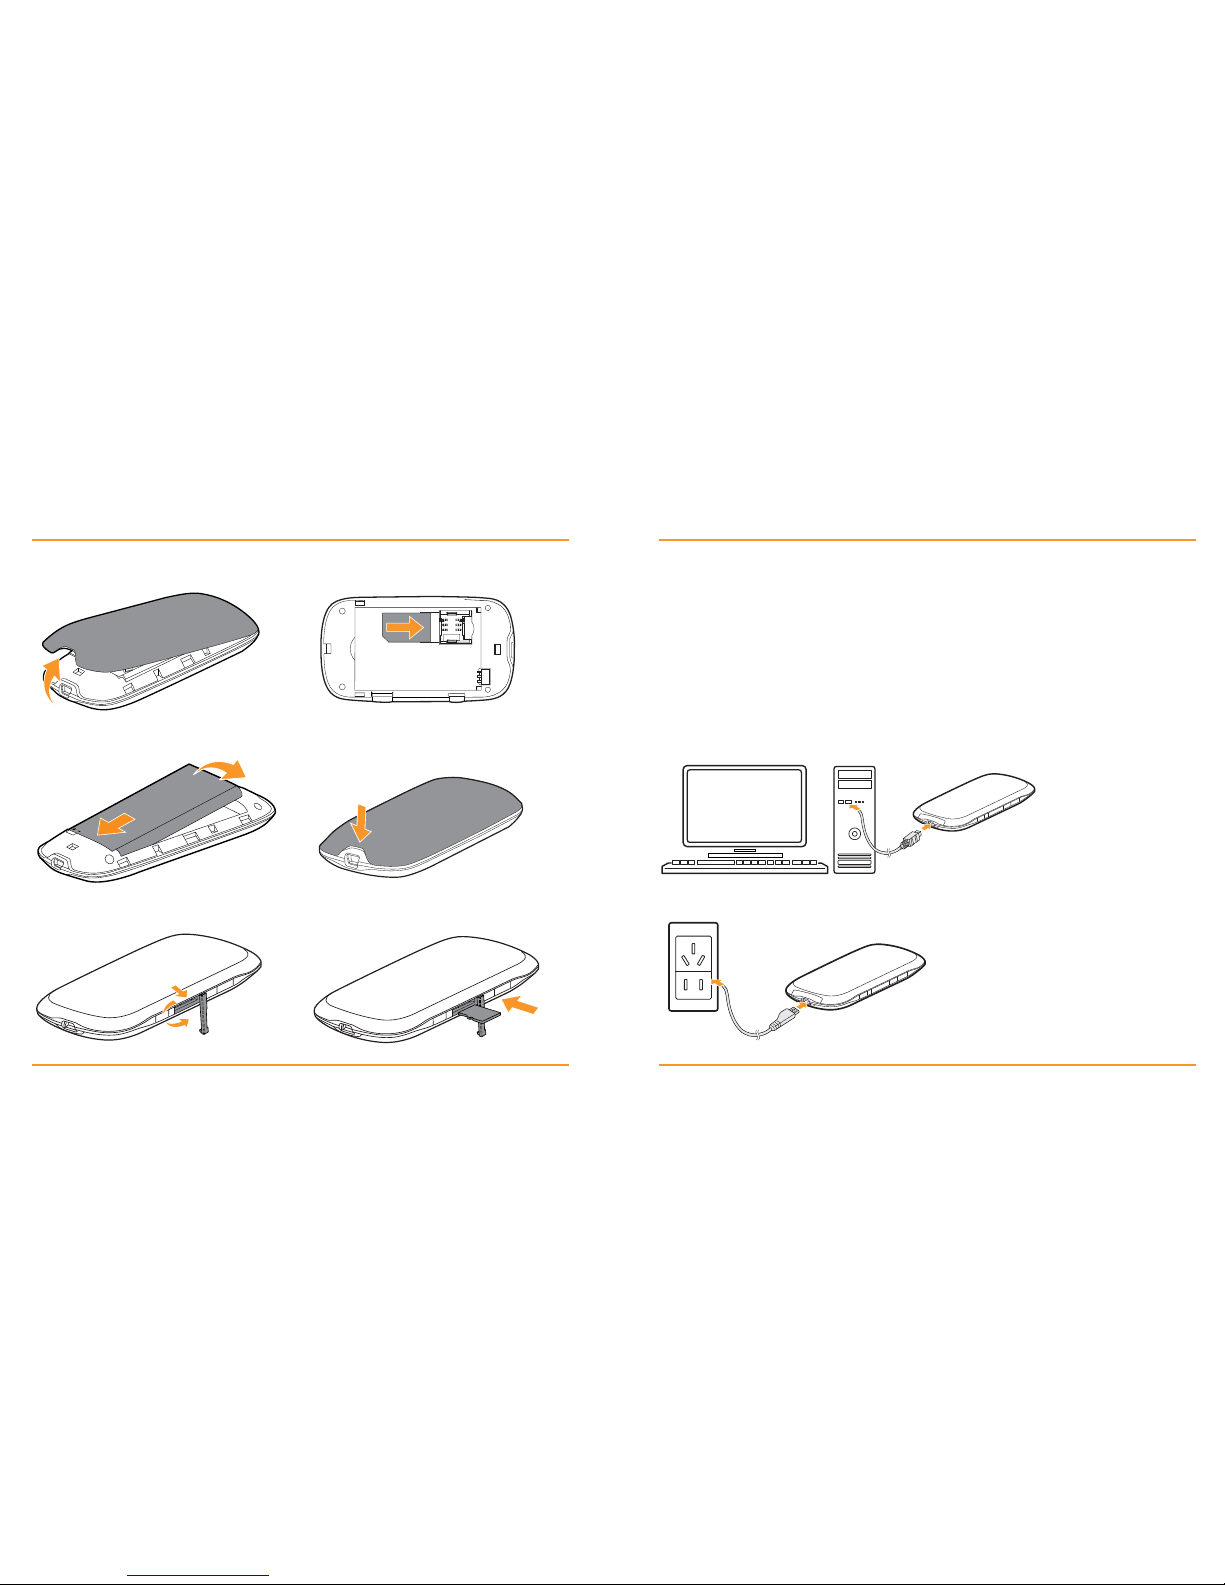
1 Remove the back c over.
5 Inser t the microSD card.
4 Close the back cover.
3 Inser t the batter y.
2 Inser t the SIM card.
powering on/off your device
Press the Power button to sw itch on /off the device.
Notes
Hold the WPS and Powe r buttons simultaneous ly unti l the LED screen turns of f,
and then release the buttons. The device will res tart automatically and restore to
the factory default settings.
Please use the original external antenna if necessary.
Charging Your Device
You can charge your device by using the USB cable or adapter
Use the USB cabl e to connect your device and PC directly.
Use the ad apter and USB cable to connect the wall outlet and your devic e.
Note
The plug only fits one way to connect
your dev ice. Do not use excessi ve force
to inser t the plug.
76
connecting to your device via Wi-Fi
1 Power on your device directly.
It will take 1~2 minutes to initialize.
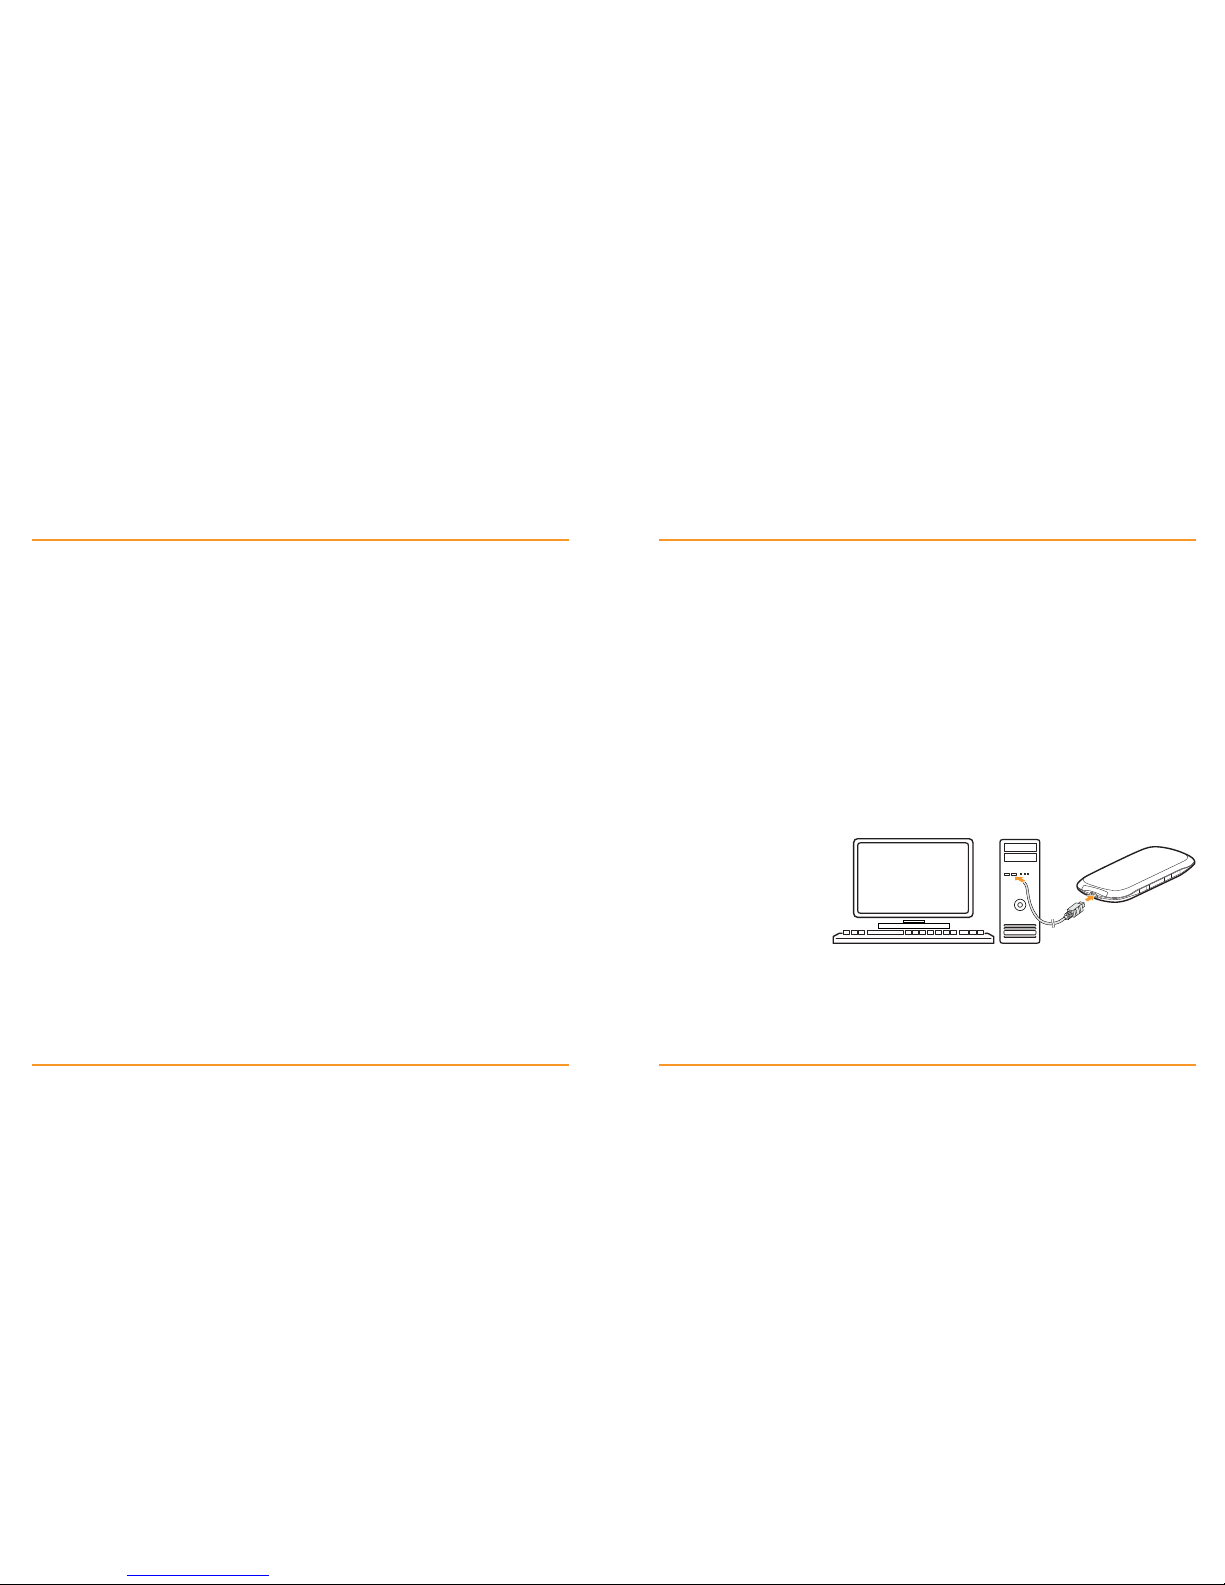
Via USB Cable
1 Connect to the device.
2 Power on your device.
3 Follow the system
prompts to complete the
software installation.
4 Wait a mom ent,
and then the client
will connect to your
device successfully.
3 Select the SSID of your device,
and then click Connect.
4 Input the password, and then
click Connect.
5 Wait a mom ent, and then the client will
connect to your device successfully.
2 Use your normal Wi-Fi application on
the client to search the
available wireless network.
Note
There may require the password for Wi-Fi
connection, please check the label on
your dev ice to get the default.
Note
Please set the client to obtain an IP addre ss
automatically, and the client will get a n IP
address like “192.168.1.100”.default.
 Loading...