

Page 1
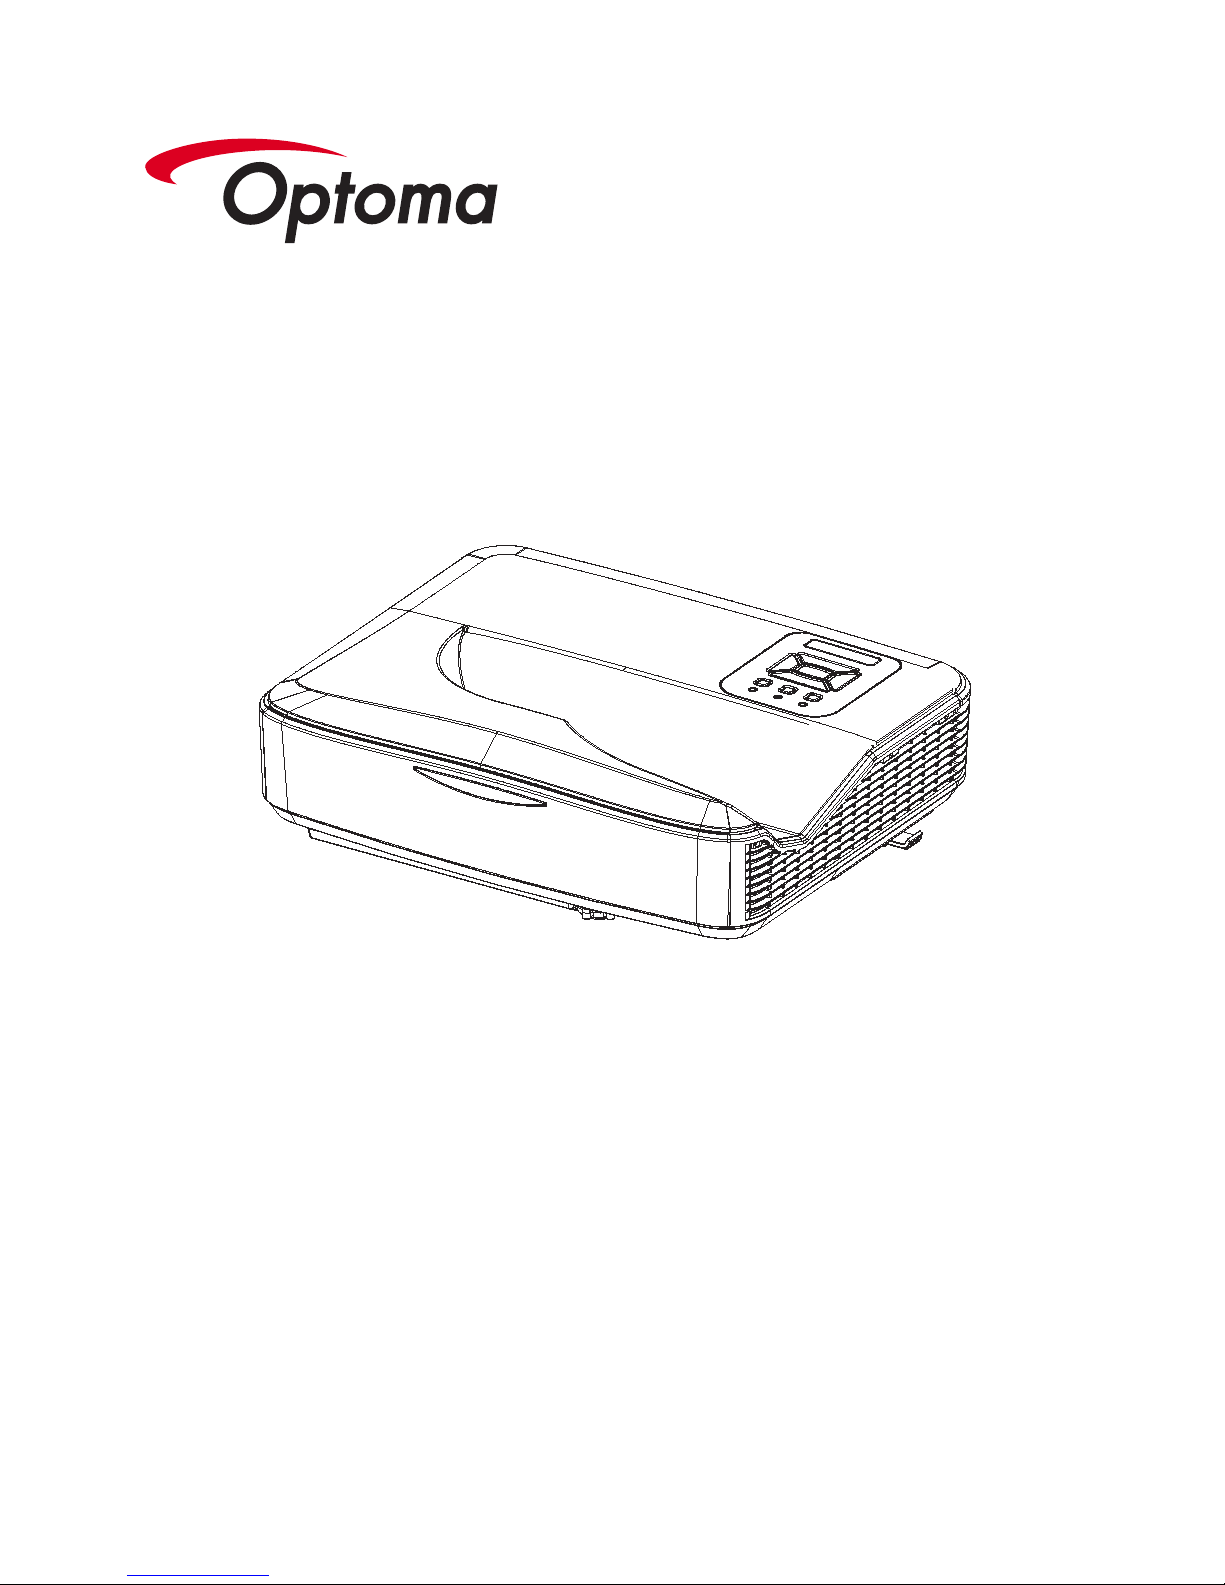
User’s Manual
LCT100
Laser Ultra Short-Throw Projector
Page 2

2
English
Table of Contents ............................2
Usage Notice ...................................3
Safety Information ...............................3
Precautions .........................................4
Introduction ......................................7
Packaging Overview ...........................7
Product overview ................................8
Main Unit .............................................. 8
Control Panel ....................................... 9
Input/Output Connections .................. 10
Remote Control .................................. 11
Installation .....................................12
Connect to the projector ...................12
Connect to computer/notebook .......... 12
Connect to Video Sources ................. 13
Powering On/Off the Projector ..........14
Powering On the Projector ................. 14
Powering off the projector .................. 15
Warning Indicator ............................... 15
Adjusting the Projected Image ..........16
Adjusting the Projector’s Height......... 16
Adjusting the focus of the projector ...17
Adjust the best picture of projected
image (diagonal) ................................ 18
User Controls ................................19
Control Panel & Remote Control ......19
Control Panel ..................................... 19
Remote Control .................................. 20
OSD Menu Operation .......................21
Appendices ....................................24
Install and Clean Filter Net ...............24
Regulation & Safety Notices .............25
Trademarks .......................................28
Table of Contents
Page 3
3
English
Usage Notice
Safety Information
The lightning ash with arrow head within an equilateral triangle is
intended to alert the user to the presence of uninsulated “dangerous
voltage” within the product’s enclosure that may be of sufcient
magnitude to constitute a risk of electric shock to persons.
The exclamation point within an equilateral triangle is intended to alert
the user to the presence of important operating and maintenance
(servicing) instructions in the literature accompanying the appliance.
WARNING: TO REDUCE THE RISK OF FIRE OR ELECTRIC SHOCK, DO
NOT EXPOSE THIS APPLIANCE TO RAIN OR MOISTURE. DANGEROUS
HIGH VOLTAGES ARE PRESENT INSIDE THE ENCLOSURE. DO NOT
OPEN THE CABINET. REFER SERVICING TO QUALIFIED PERSONNEL
ONLY.
Class B emissions limits
This Class B digital apparatus meets all requirements of the Canadian
Interference-Causing Equipment Regulations.
Important Safety Instruction
1. Do not block any ventilation openings. To ensure reliable operation
of the projector and to protect from over heating, it is recommended
to install the projector in a location that does not block ventilation.
As an example, do not place the projector on a crowded coffee
table, sofa, bed, etc. Do not put the projector in an enclosure such
as a book case or a cabinet that restricts air ow.
2. Do not use the projector near water or moisture. To reduce the risk
of re and/or electric shock, do not expose the projector to rain or
moisture.
3. Do not install near heat sources such as radiators, heaters, stoves
or any other apparatus such as ampliers that emits heat.
4. Clean only with dry cloth.
5. Only use attachments/accessories specied by the manufacturer.
6. Do not use the unit if it has been physically damaged or abused.
Physical damage/abuse would be (but not limited to):
Unit has been dropped.
Power supply cord or plug has been damaged.
Liquid has been spilled on to the projector.
Projector has been exposed to rain or moisture.
Something has fallen in the projector or something is loose
inside.
Do not attempt to service the unit yourself. Opening or removing
covers may expose you to dangerous voltages or other hazards.
7. Do not let objects or liquids enter the projector. They may touch
dangerous voltage points and short out parts that could result in re
or electric shock.
8. See projector enclosure for safety related markings.
9. The unit should only be repaired by appropriate service personnel.
Page 4

4
English
Usage Notice
Precautions
Please follow all warnings, precautions and maintenance as recommended in this user’s guide.
▀■ Warning - Do not look into the projector’s lens when the LED is on.
The bright light may hurt your eyes.
▀■ Warning - To reduce the risk of fire or electric shock, do not expose
this projector to rain or moisture.
▀■ Warning - Please do not open or disassemble the projector as this
may cause electric shock.
▀■ Warning - Allowing the proper amount of space on the top, sides,
and rear of the projector cabinet is critical for proper air
circulation and cooling of the unit.
Page 5
5
English
Usage Notice
Do:
Turn off and unplug the power plug from the AC outlet before
cleaning the product.
Use a soft dry cloth with mild detergent to clean the display
housing.
Disconnect the power plug from AC outlet if the product is
not being used for a long period of time.
Do not:
Block the slots and openings on the unit provided for
ventilation.
Use abrasive cleaners, waxes or solvents to clean the unit.
Use under the following conditions:
- In extremely hot, cold or humid environments.
Ensure that the ambient room temperature is within
5°C ~ 40°C.
Relative humidity is 10% ~ 85%.
- In areas susceptible to excessive dust and dirt.
- Near any appliance generating a strong magnetic eld.
- In direct sunlight.
Viewing 3D projection using the 3D function
IMPORTANT SAFETY INFORMATION. READ THE FOLLOWING
WARNINGS BEFORE YOU OR YOUR CHILD USE THE 3D
FUNCTION.
Warning
Children and teenagers may be more susceptible to health
issues associated with viewing in 3D and should be closely
supervised when viewing these images.
Photosensitive Seizure Warning and Other Health Risks
Some viewers may experience an epileptic seizure or
stroke when exposed to certain ashing images or lights
contained in certain Projector pictures or video games. If you
suffer from, or have a family history of epilepsy or strokes,
please consult with a medical specialist before using the 3D
function.
Page 6

6
English
Usage Notice
Even those without a personal or family history of epilepsy or
stroke may have an undiagnosed condition that can cause
photosensitive epileptic seizures.
Pregnant women, the elderly, sufferers of serious medical
conditions, those who are sleep deprived or under the
inuence of alcohol should avoid utilizing the unit’s 3D
functionality.
If you experience any of the following symptoms, stop viewing
3D pictures immediately and consult a medical specialist:
(1) altered vision; (2) light-headedness; (3) dizziness; (4)
involuntary movements such as eye or muscle twitching; (5)
confusion; (6) nausea; (7) loss of awareness; (8) convulsions;
(9) cramps; and/ or (10) disorientation. Children and
teenagers may be more likely than adults to experience these
symptoms. Parents should monitor their children and ask
whether they are experiencing these symptoms.
Watching 3D projection may also cause motion sickness,
perceptual after effects, disorientation, eye strain and
decreased postural stability. It is recommended that users
take frequent breaks to lessen the potential of these effects. If
your eyes show signs of fatigue or dryness or if you have any
of the above symptoms, immediately discontinue use of this
device and do not resume using it for at least thirty minutes
after the symptoms have subsided.
Watching 3D projection while sitting too close to the screen
for an extended period of time may damage your eyesight.
The ideal viewing distance should be at least three times the
screen height. It is recommended that the viewer’s eyes are
level with the screen.
Watching 3D projection while wearing 3D glasses for an
extended period of time may cause a headache or fatigue.
If you experience a headache, fatigue or dizziness, stop
viewing the 3D projection and rest.
Do not use the 3D glasses for any other purpose than for
watching 3D projection. Wearing the 3D glasses for any
other purpose (as general spectacles, sunglasses, protective
goggles, etc.) may be physically harmful to you and may
weaken your eyesight.
Viewing in 3D projection may cause disorientation for some
viewers. Accordingly, DO NOT place your 3D PROJECTOR
near open stairwells, cables, balconies, or other objects that
can be tripped over, run into, knocked down, broken or fallen
over.
Page 7
7
English
Introduction
Due to different
applications
in each
country, some
regions may
have different
accessories.
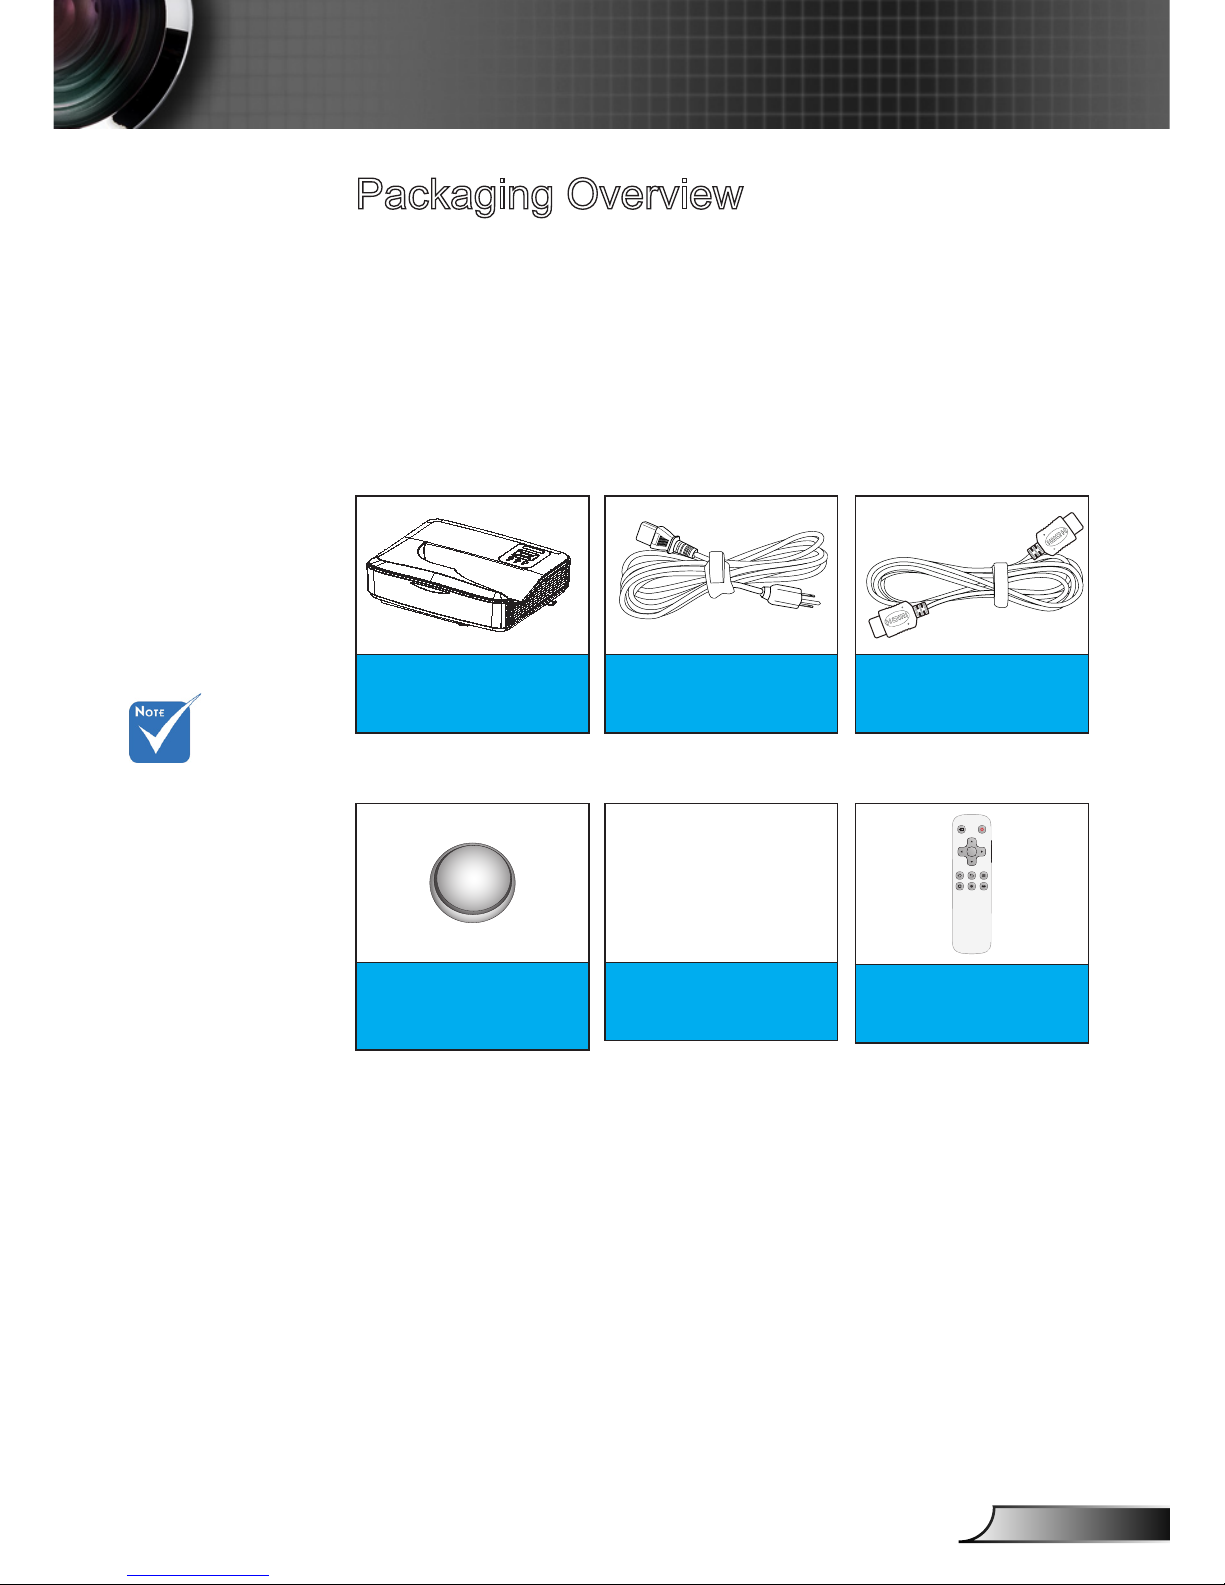
Packaging Overview
Unpack and inspect the box contents to ensure all parts
listed below are in the box. If something is missing,
please contact the nearest customer service center.
Projector
1 battery of CR2025
(Inserted in Remote
Control)
Power Cord
User Manual
CD-ROM
Documentation
HDMI
OK
Remote Control
Page 8
8
English
Introduction
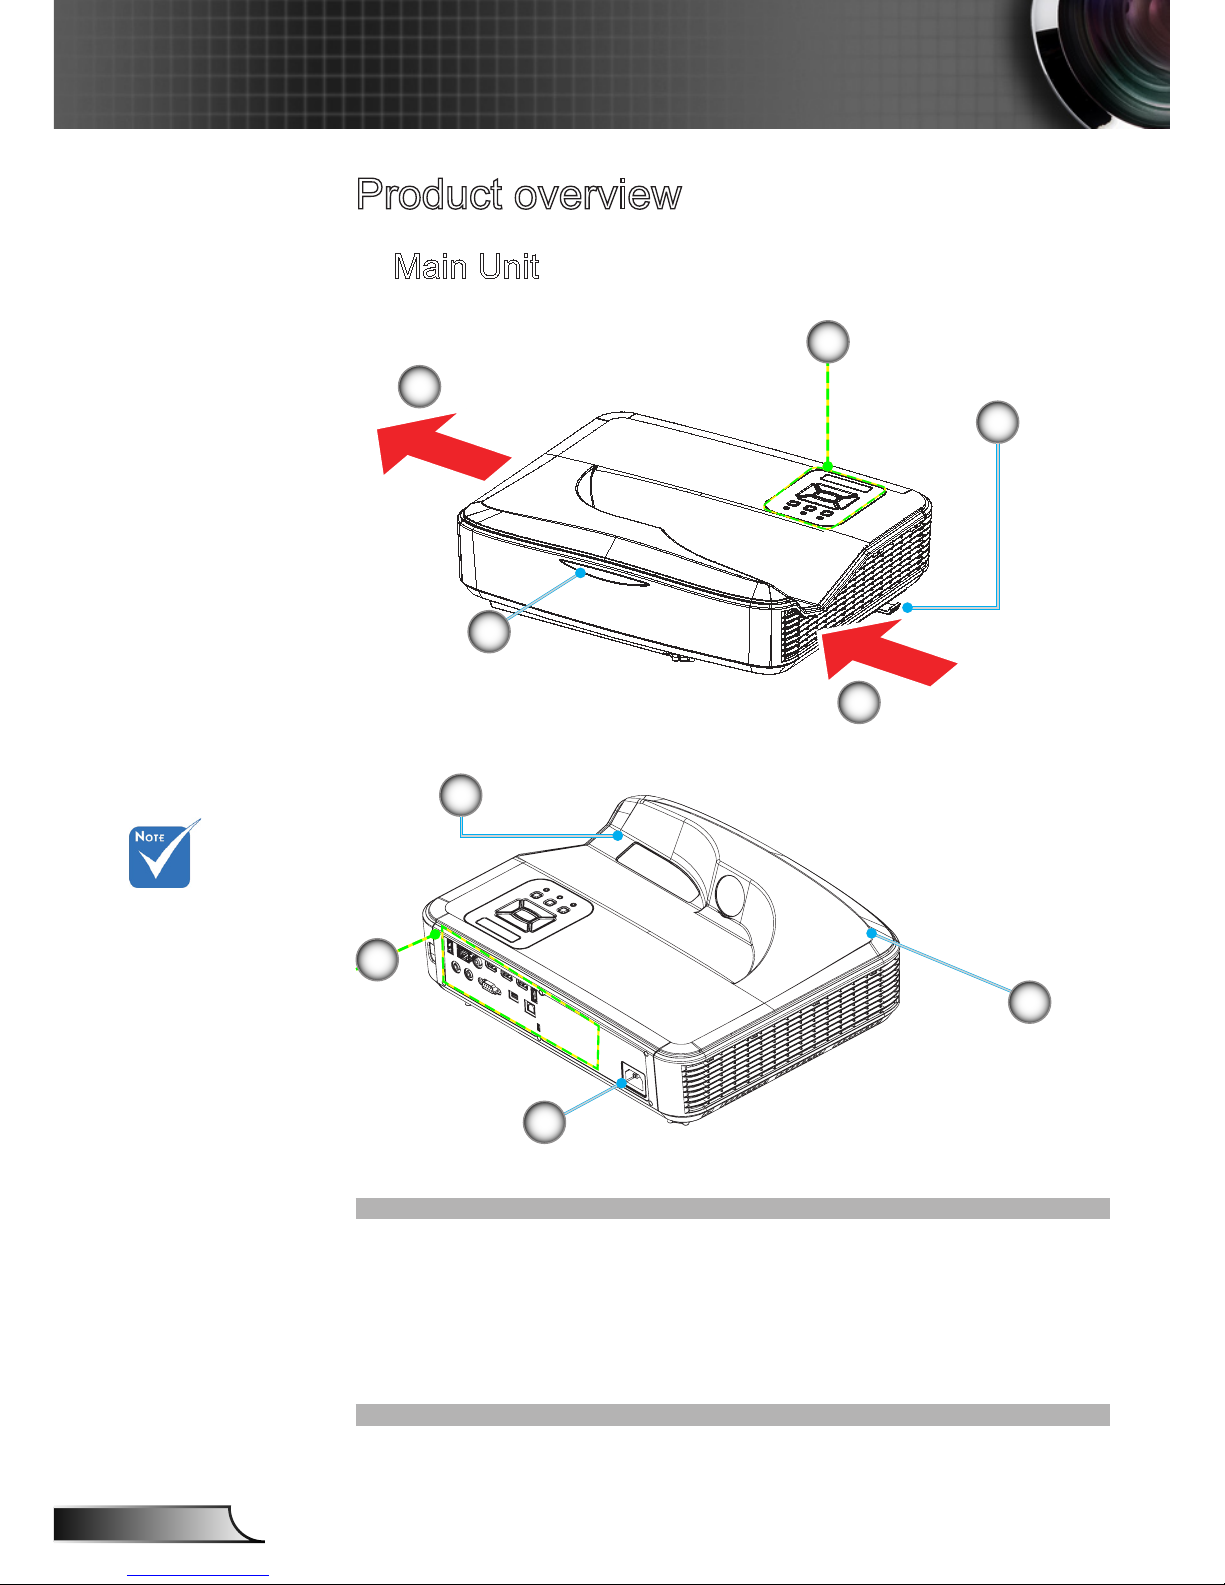
Product overview
Control Panel1.
Focus Ring2.
Ventilation (inlet)3.
Infrared Receiver4.
Ventilation (outlet)5.
Loudspeaker6.
Power Socket7.
Interface8.
Lens9.
Main Unit
The interface
is subject to
model’s specications.
6
7
8
9
4
2
5
3
1
Page 9
9
English
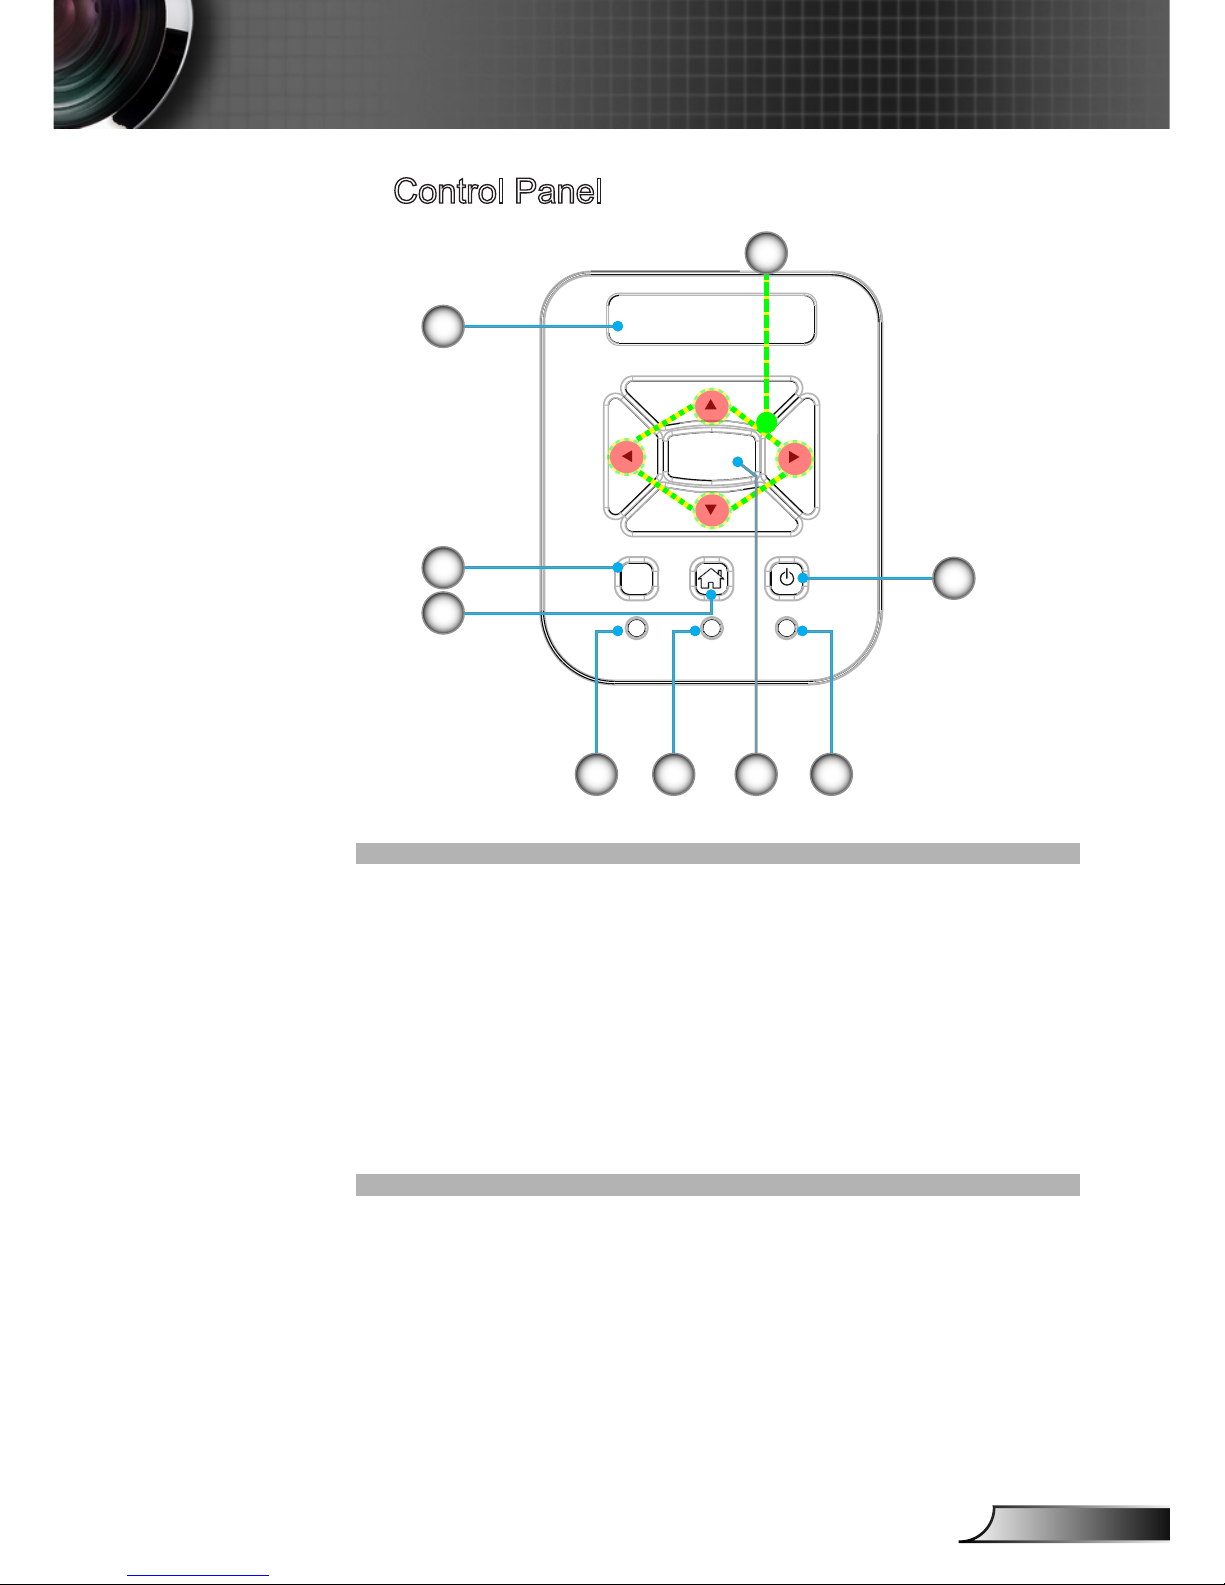
Introduction
Control Panel
Power LED1.
Conrm2.
Temperature LED3.
Lamp LED4.
Home Page5.
Input6.
Four-direction Keys7.
Power/Standby Button8.
Infrared Receiver9.
LAMP
TEMP
ON (B)
STANDBY(R)
Enter
INPUT
3
6
9
8
7
2 14
5
Page 10

10
English
Introduction
Input/Output Connections
USB 2.0 (optional)1.
RJ45 (optional)2.
Video in3.
HDMI 1 Input Connector4.
HDMI 2 Input Connector5.
HDMI 3 / MHL (optional)6.
USB 3.0 (optional)7.
Power Socket8.
Audio Input Connector (3.5 mm Mini Jack)9.
Audio Output Connector (3.5 mm Mini Jack)10.
Service Connector 111.
Service Connector 212.
Digital Audio Output13.
8
1 2
4 5 637
9 10 11 12 13
Page 11

11
English
Introduction
Power1.
Up2.
Right3.
Down4.
Menu5.
3D mode6.
Mute7.
Signal Source8.
Left9.
OK10.
Back11.
MEMC mode12.
Volume +13.
Volume -14.
Remote Control
OK
8
9
4
12
2
13
14
1
3
5
6
11
7
10
Page 12

12
English
Installation
E62405SP
R
6
7
1
2
9
3 4
5
8
Due to the differ-
ence in applications for each
country, some
regions may have
different accessories.
(*) Options
Connect to computer/notebook
1............................................................Wi Dongle/USB ash disc (optional)
2.............................................................................................. RJ45 (optional)
3.................................................................................Composite Video Cable
4................................................................................................... HDMI Cable
5............................................................Wi Dongle/USB ash disc (optional)
6................................................................................................... Audio Cable
7....................................................................................... Audio Output Cable
8..................................................................................................SPDIF Cable
9....................................................................................................Power Cord
Audio Output
Connect
to wireless
network
Connect to cable router/
network switch
Connect to the projector
Page 13

13
English
Installation
E62405SP
R
1
2
3
6
4 5
Connect to Video Sources
Due to the
difference in
applications for
each country,
some regions may
have different
accessories.
(*) Options
1................................................................................................... Audio Cable
2.................................................................................Composite Video Cable
3................................................................................................... HDMI Cable
4.............................................................................. Audio Input/Output Cable
5..................................................................................................SPDIF Cable
6....................................................................................................Power Cord
Audio Input
DVD Player, STB (Set-top
Box), HDTV Receiver
Audio Output
Page 14

14
English
Installation
1
Powering On/Off the Projector
First turn on the
power of the
projector, and
then select signal
source.
Powering On the Projector
1. Securely connect the power cord and signal cable. When
connected, the POWER/STANDBY LED will turn Orange.
2. Turn on the projector by pressing “ ” button either on the
projector or on the remote. At this moment, the POWER/
STANDBY LED will now turn Blue.
3. Turn on the power (computer, laptop, video player, etc.) of
the signal source that you want to display on the screen.
The projector will automatically detect the signal source.
In case of connecting multiple sources at the same time,
you can press “Input” button on the control panel or the
Signal Source button on the remote to switch input.
Power/Standby
LAMP
TEMP
ON (B)
STANDBY(R)
Enter
INPUT
Page 15

15
English
Installation
Please contact
the nearest
service center
if the projector
appears
such failure
phenomenon.
Powering off the projector
1. Turn off the power of the projector by pressing the “ ”
button on remote control or on control panel, the cooling
system will start to operate and meanwhile the device will
shut down.
2. Cooling fans will process heat dissipation after continually
running about 4 seconds, power LED will turn red after
ashing blue.
If you want to turn the projector back on, you have to wait
until the projector has completed the cooling cycle and
has entered standby mode. Once in standby mode, simply
press “ ” button to restart the projector.
3. Unplug the power cord from the power socket and the
projector.
Warning Indicator
When the warning indicator (as described below) turns on, the
projector will automatically turn off:
“LAMP” LED indicator is lit red.
“TEMP” LED indicator ashes red.
“TEMP” LED indicator is lit red, this indicates the projector
has overheated. Under normal conditions, the projector can
be switched back on.
Unplug the power cord from the projector, wait for 30 seconds
and try again. If the warning indicator is still lit, please contact
the nearby service center for help.
Page 16

16
English
Installation
Adjusting the Projected Image
Adjusting the Projector’s Height
The projector is equipped with elevator feet for adjusting
the image height.
1. Find the adjustable foot that you want to apply to x the
height of the projector.
2. Rotate the adjustable ring clockwise to raise the projector
or counterclockwise to lower it. Repeat with the remaining feet as needed.
Tilt-Adjustment Feet
Tilt-Adjustment Ring
Page 17

17
English
Installation
Adjusting the focus of the projector
To focus on the image, slide the focus ring to the left or to the
right until the image is clear.
The focusing range of projector is 1.443 ~ 1.887 feet (0.437
~ 0.572 meters).
Focus Ring
Page 18

18
English
Installation
Adjust the best picture of projected image
(diagonal)
The focusing range of projector is 87 ~ 102 inches.
Image Diagonal Dimension
16
9
Offset
Distance from Image
to Rear Cover
LO – Distance from Image to Rear Cover
Offset (table top) – Distance from Image bottom to projector bottom.
Model
Image
Diagonal
Dimension
L0
(mm)
Offset (de-
fault) (mm)
Offset (+ 3%
error) (mm)
Offset (- 3%
error) (mm)
1080P
87” 232.7 288.6 321.1 256.0
90” 249.4 296.3 329.9 262.7
95” 277.3 309.3 344.8 273.8
100” 305.2 322.2 359.6 284.9
102” 316.3 327.4 365.5 289.3
This form is only for user reference
Page 19

19
English
User Controls
Using the Control Panel
Power
Refer to “Powering On/Off the Projector” on Page
14-15
Enter Press “Enter” to conrm your item selection.
Input Press “Input” to choose an input signal source.
Home Page Return to the home page.
Four-direction Keys
Select items or adjust the selected contents by
using .
Lamp LED
Refer to the LED indicator of the projector light
source status.
Temp LED
Refer to the LED indicator of the projector temperature status.
Power/Standby
LED
Refer to the LED indicator of the projector power
status.
Control Panel
Control Panel & Remote Control
LAMP
TEMP
ON (B)
STANDBY(R)
Enter
INPUT
Page 20

20
English
User Controls
Remote Control
Using the Remote Control
Power
Powering On/Off the Projector
Signal
Source
Select signal based on the signal source
OK
OK
Conrm the selected items
Back
Back to Channel
Menu
Enable screen display (OSD) menu by
pressing “Menu”. Press “ Back ” to exit OSD
MEMC mode
MEMC mode selection
3D mode
3D mode selection
OK
Page 21

21
English
User Controls
1. Connect the power cord, and press “ power” key to start, you will see the start-
up screen as below:
2. To enter the OSD menu, press “ Menu” button on the remote control.
3. When displaying OSD, use the
button to select an item on the main menu, and
press the “
OK
OK” button to enter the sub menu.
4. Use the
button to select the item required to be adjusted in the sub menu,
and press the “
OK
OK” button to see more settings.
5. To exit, press the “
Back” button. The OSD menu will be closed, and the
projector will automatically save the new settings.
A. Image Setting
Image settings like "Image Mode", "Zoom Mode", "Image Denoising", "Dynamic
Noise Reduction", "Dynamic light source adjustment", and "Dynamic brightness
adjustment" are available.
Image Mode includes seven modes including standard, bright, movie, game,
computer, sports, and user. In the user mode, users can adjust settings by
themselves, such as screen contrast, brightness, colo
r, sharpness, saturation,
light source, MEMC and Color temperature.
Main menu
Sub menu
OSD Menu Operation
Page 22

22
English
User Controls
B. Audio Setting
Settings like "Horn switch" and "SPDIF output" are available.
Page 23

23
English
User Controls
C. 3D Setting
Settings like "3D automatic detection", "3D format conversion" and "Left and
right exchange" are available.
D. System Setting
Settings like "Vertical keystone correction", "Menu display time", "Ceiling
installation", "High altitude mode" and "Language change" are available.
"Light Source Hours" - To display the total operation hours of projector.
"Test Picture" - The test picture can be used to adjust the screen for the initial
installation of projector.
"Restore Default Values" - To restore default values.
Page 24

24
English
Appendices
Install and Clean Filter Net
If you use the projector in a dusty environment, we
recommend that you clean dust lter once or clean it more
frequently every 500-hour operation.
Dust lter should
be applied in a
dusty environment.
If the lter net is
installed, proper
maintenance
operation
can prevent
overheating and
faulures in the
projector.
The dust lter is
optional.
The specic
interfaces are
selected in terms of
the specications
of types.
Cleaning Procedures of Air Filter Net:
1. Turn off the power of the projector by pressing the “ ” button.
2. Unplug the power cord.
3. Pull out the dust lter, as shown in the illustration. 1
4. Carefully remove the dust lter. Then clean or change the lter. 2
To install the lter, reverse the previous steps.
5. Turn on the projector after the replacement of dust lter.
1
1
2
2
Page 25

25
English
Appendices
Regulation & Safety Notices
This appendix lists the general notices of your projector.
FCC notice
This device has been tested and found to comply with the
limits for a Class B digital device pursuant to Part 15 of the
FCC rules. These limits are designed to provide reasonable
protection against harmful interference in a residential
installation. This device generates, uses and can radiate radio
frequency energy and, if not installed and used in accordance
with the instructions, may cause harmful interference to radio
communications.
However, there is no guarantee that interference will not
occur in a particular installation. If this device does cause
harmful interference to radio or television reception, which can
be determined by turning the device off and on, the user is
encouraged to try to correct the interference by one or more of
the following measures:
• Reorient or relocate the receiving antenna.
• Increase the separation between the device and
receiver.
• Connect the device into an outlet on a circuit different
from that to which the receiver is connected.
• Consult the dealer or an experienced radio/television
technician for help.
Notice: Shielded cables
All connections to other computing devices must be made
using shielded cables to maintain compliance with FCC
regulations.
Caution
Changes or modications not expressly approved by the
manufacturer could void the user’s authority, which is
granted by the Federal Communications Commission, to
operate this projector.
Page 26

26
English
Appendices
Disposal instructions
Do not throw this electronic device into the
trash when discarding. To minimize pollution
and ensure utmost protection of the global
environment, please recycle it.
Operation conditions
This device complies with CCC Rules. Operation is subject to
the following two conditions:
1. This device may not cause harmful interference.
2. This device must accept any interference received, including
interference that may cause undesired operation.
Notice: Canadian users
This Class B digital apparatus complies with Canadian ICES-
003.
Remarque à l’intention des utilisateurs
canadiens
Cet appareil numerique de la classe B est conforme a la
norme NMB-003 du Canada.
Declaration of Conformity for EU countries
• EMC Directive 2004/108/EC (including amendments)
• Low Voltage Directive 2006/95/EC
• R & TTE Directive 1999/5/EC (if product has RF function)
Page 27

27
English
Appendices
WARNING
Safety notice
- This projector is a Class 2 laser device that conforms with IEC 60825-1:2007
and CFR 1040.10 and 1040.11.
- Class 2 laser product, Do Not Stare Into Beam.
- This projector has built-in Class 4 laser module. Disassembly or modication
is very dangerous and should never be attempted.
- Any operation or adjustment not specically instructed by the user’s guide creates the risk of hazardous laser radiation exposure.
- Do not open or disassemble the projector as this may cause damage by the
exposure of laser radiation.
- Do not stare into beam when the projector is on. The bright light may result in
permanent eye damage.
- Without following the control, adjustment or operation procedure may cause
damage by the exposure of laser radiation.
- Adequate instructions for assembly, operation, and maintenance, including
clear warnings concerning precautions to avoid possible exposure to laser and
collateral radiation in excess of the accessible emission limits in Class 2.
Page 28

28
English
Appendices
Trademarks
DLP is trademark or registered trademark of Texas •
Instruments.
IBM is a trademark or registered trademark of International •
Business Machines Corporation.
Macintosh, Mac OS X, iMac, and PowerBook are trademarks •
of Apple Inc., registered in the U.S. and other countries.
Microsoft, Windows, Windows Vista, Internet Explorer and •
PowerPoint are either a registered trademark or trademark
of Microsoft Corporation in the United States and/or other
countries.
HDMI, the HDMI Logo and High-Denition Multimedia •
Interface are trademarks or registered trademarks of HDMI
Licensing LLC.
Other product and company names mentioned in this user’s •
manual may be the trademarks or registered trademarks of
their respective holders.
 Loading...