

Page 1

PPoocckkeett PPCC PPHHLL 55000000 sseerriieess
QQuuiicckk SSttaarrtt
BBaarr ccooddee ssccaannnneerr iinnffoorrmmaattiioonn
1
Page 2

Reading bar codes_______________________________________ 3
Scanner settings menu ___________________________________ 3
Icon bar code scanner information _______________________ 3
Tab Options ________________________________________4
Tab Barcodes _______________________________________ 5
Tab Menu codes _____________________________________ 6
Reading instructions_____________________________________ 7
2
Page 3
Reading bar codes
The PHL 5100 pocket PC is equipped with a built-in laser scanner for bar
code reading, called scanner and/or reader. Bar code reading is used to
identify bar code labels and decode the information to data that can be
processed in the application. The built-in laser scanner can read popular
types of bar code labels at varying distances.
The bar code scanner is mounted in the top of the pocket PC. Default the bar
code scanner is enabled and default it will be triggered by the left button.
The properties and button definition can be customized in the settings menu.
Scanner settings menu
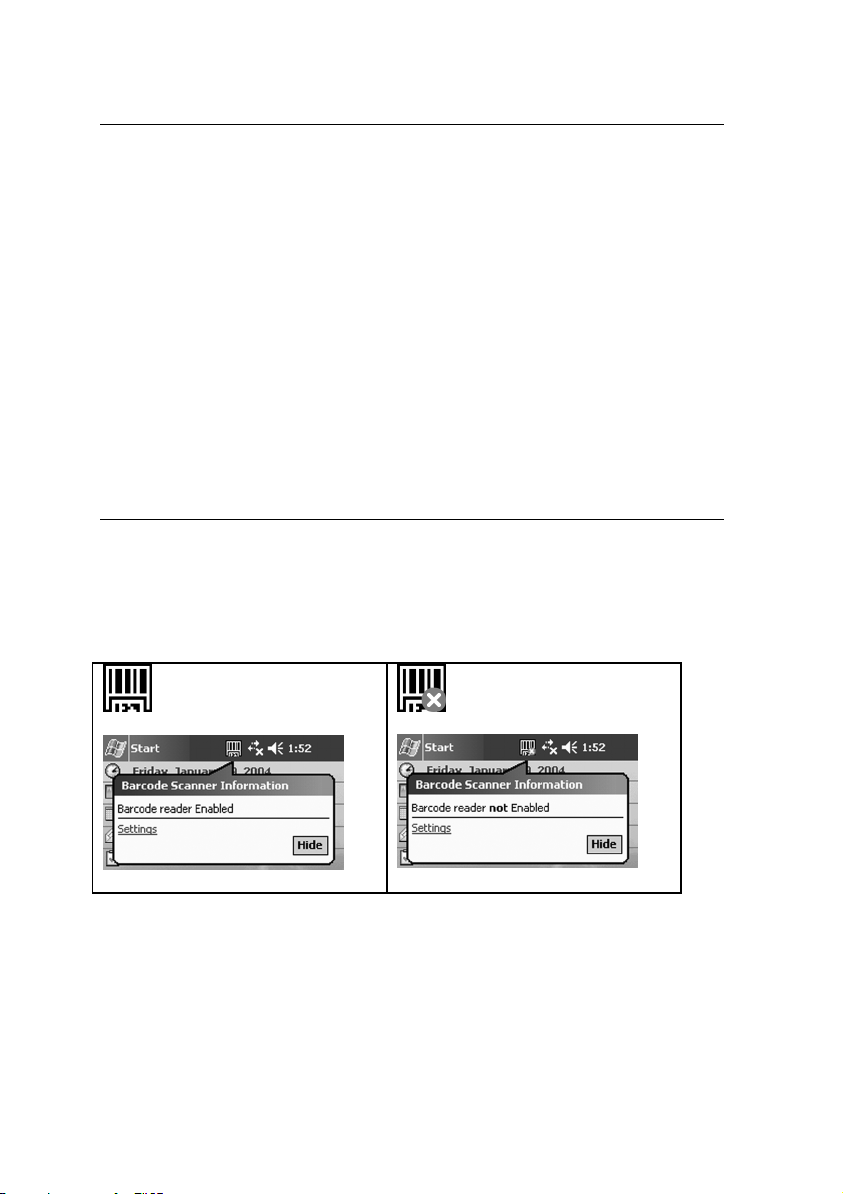
The bar code icon in the status bar indicates if the bar code scanner is
enabled. Clicking the icon will display bar code scanner information.
Icon bar code scanner information
bar code reader enabled
Clicking on “Settings” will start the scanner settings menu. The settings
menu contains 4 tabs:
bar code reader not enabled
3
Page 4

Options: set bar code scanner properties
Barcodes: set bar code label types
Menu codes: set customized configuration
About: read scanner software version and Opticon contact information
Tab Options
Default
The default settings are as displayed in
the Tab Options Image .
For other settings notify the following
descriptions.
Barcode reader
Tick on the box to set the scanner to
enabled or not enabled.
Read mode
The following read modes are
available:
Single read When a bar code has been decoded, the reader will be turned
OFF. The reader must be triggered again to read another label.
Multiple read: When a bar code has been decoded, the reader will stay ON
for 2 seconds after the last action. In this reading time different labels can
be scanned. The same label can only be decoded again after the label has
not been detected for a number of scans.
Buzzer
Tick on the box to set the “Goodread” sound ON or OFF.
Default two sounds are available. If other sounds are loaded on the pocket
PC, they will be recognised in the scanner settings menu and can be selected.
4
Page 5

Trigger key
The trigger key activates the laser scanner. There are 5 buttons available to
define as trigger key.
Launch button 1 = recording button
Launch button 2 = right ‘today screen’ hot key
Launch button 3 = left ‘contact’ hot key
Launch button 4* = right button
Launch button 5* = left button
* Note: button 4 and 5 can not be defined
for the GSM/GPRS models
Tab Barcodes
Tick on the box to set the label type ON or OFF.
The following bar code label types are supported:
Type Default setting
CODABAR
CODE-39
CODE-93
CODE-128
EAN
IATA
Industrial 2 of 5
Interleaved 2 of 5
Leatus
MSI PLESSEY
Matrix 2 of 5
Scode
Telepen
UK PLESSEY
UPC
ON
ON
ON
ON
ON
ON
ON
ON
ON
ON
ON
ON
ON
ON
ON
All addons OFF
5
Page 6

Tab Menu codes
Some specific configuration
possibilities can be inserted and stored
in the menu codes field. The menu
codes are taken from the Opticon
Universal Menubook (download on
www.opticon.com
).
All codes are stored together in one
line. For example menu code <RZ>
and <1M> are stored as RZ1M.
NOTE: The menu codes field is meant
for typing AND for storage! When
deleting all codes in the field the
application will remove the custom
setting and return to factory default.
Insertion order
We advice to add menu codes one by one and check for acceptance.
Type the menu code behind the current text in the menu codes field.
Tap the OK button.
When the code is not
accepted an error box
appears:
When the code is accepted no message appears. You can proceed to enter
the next menu code behind the current text.
Totally 256 characters can be stored.
6
Page 7

Reading instructions
The bar code scanner is a Class I laser product conforming to the strictest
laser safety standards. However, we recommend that you avoid looking
directly into the laser beam emitter, or pointing the laser beam directly into
someone's eyes.
Point the bar code scanner to the bar code and press the applicable key to
activate the laser beam.
Fit the bar code in the laser beam from margin to margin and pass the
scanner to the bar code, as shown in the scan position illustration.
The bar code will be read and an effectively recognised and decoded bar
code will be indicated by a “Goodread sound”.
When the bar code can not be read, try the following:
Check that the width of the bar code label does not exceed the width of
the light beam.
Change the angle between the bar code and the product.
Change the distance between the bar code and the product.
Is the reading window of the product clean?
Are the bar code labels damaged?
Check if the error also occurs with other bar code labels.
7
 Loading...