

Page 1
Opticon Article Code O0220000410
OPL 972X
CRD 972X
USER'S
MANUAL
OPL972X/CRD972X OPTICON - 1
Page 2

Version 3, printed 03/2004
CAUTION: This information is subject to change
without prior notice.
Copyright 2003, Opticon Sensors Europe B.V.
All rights reserved.
This manual may not, in whole or in part, be
copied, photocopied, reproduced, translated or
converted to any electronic or machine readable
form without prior written consent of Opticon
Sensors Europe.
THE GENERAL USE AND FUNCTIONING OF
THE BAR CODE DATA COLLECTOR TOGETHER
WITH THE CRADLE IS DESCRIBED IN THIS
MANUAL. THE EXACT BEHAVIOUR OF THE BAR
CODE DATA COLLECTOR DEPENDS ON THE
USER APPLICATION THAT IS RUNNING. FOR
INSTRUCTIONS ABOUT APPLICATIONS
CONSULT THE DOCUMENTATION OF THAT
SOFTWARE.
LIMITED WARRANTY AND
DISCLAIMERS
BY OPENING THE PACKAGE OF THIS PRODUCT YOU
AGREE TO BECOME BOUND BY THE LIABILITY AND
WARRANTY CONDITIONS AS DESCRIBED BELOW.
UNDER ALL CIRCUMSTANCES THIS MANUAL
SHOULD BE READ ATTENTIVELY, BEFORE
INSTALLING AND OR USING THE PRODUCT.
Serial number
A serial number appears on all Opticon products.
This official registration number is strictly related to
the device purchased. Make sure that the serial
number appearing on your Opticon device has not
been removed. Removing the serial number might
affect the warranty conditions and liability
disadvantageously, so please be strict at
maintaining the label with serial number on the
Opticon product.
Warranty / Warranty period / Liability
Unless otherwise agreed in a contract, all Opticon
products are warranted for the period of one year
after purchase, covering defects in material and
workmanship. Opticon will repair or, at its opinion,
replace products that prove to be defective in
material or workmanship under proper use during
the warranty period. Opticon will not be liable in
cases where modifications are made by the
customer. In such case the standard repair charge
will be applicable. The standard charge for repair
will also be applicable in cases where no defect is
found at all. These rules also apply for products
that are still under warranty. Under no
circumstance will Opticon Sensors Europe, be
liable for any direct, indirect, consequential or
incidental damages arising out of use or inability to
use both the hardware and software, even if
Opticon has been informed about the possibility of
such damages.
2 - OPTICON OPL972X/CRD972X
Packaging
We recommend that you save all packing material,
as it should be used whenever you need to
transport your scanner (eg. for service). Damage
caused by improper repacking is not covered by
the warranty.
Trademark
Trademarks used are property of their respective
owners.
Page 3

CONTENTS
1 INTRODUCTION .................................4
1.1 Unpacking............................................5
1.2 Detailed view .......................................6
1.2.1 Barcode data collector details..............6
1.2.2 cradle details........................................7
1.3 Handling instructions ...........................8
2 GET STARTED....................................9
2.1 Fix Hand strap ...................................10
2.2 Battery instructions ............................10
2.2.1 How to charge the battery..................10
2.2.2 How to (re)place the battery ..............11
2.3 Installation instructions ......................12
2.3.1 Connect charging cradle....................12
2.3.2 Connect RS232 cradle.......................13
2.3.3 Connect RS232 multicradle ............... 14
2.3.4 Connect USB to windows PC ............15
2.3.5 Connect RS485 multicradle network .16
2.6 Communication ................................. 20
2.6.1 RS32 interface .................................. 20
2.6.2 USB interface.................................... 20
2.6.3 multicradle single communication ..... 20
2.6.4 Bluetooth bar code data collector...... 20
3 READING BAR CODES ................... 21
4 TROUBLE SHOOTING ..................... 22
4.1 Communication malfunctioning ......... 22
4.2 Read operation malfunctioning ......... 23
4.3 Barcode data collector
malfunctioning................................... 23
2.4 DIP Switch settings............................17
2.5 Bluetooth installation..........................18
2.5.1 Set or search Bluetooth device
address:18
2.5.2 Security..............................................19
OPL972X/CRD972X OPTICON - 3
Page 4

1
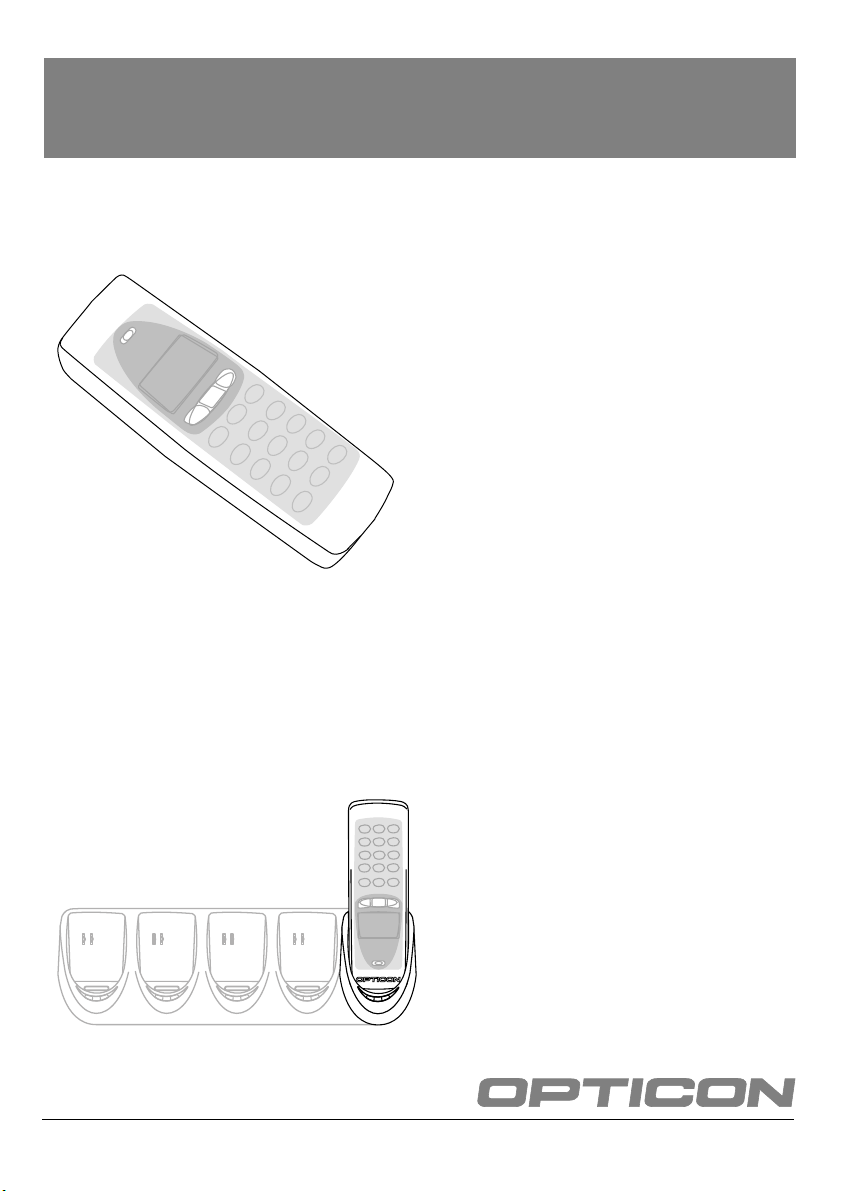
1 INTRODUCTION
The bar code data collector
The cradle
The cradle provides functionality for charging and/
or communication in several combinations. The
combinations are supported in different models:
• Charging cradle: A charging station for the bar
code data collector that charges the
rechargeable battery as soon as the bar code
data collector is placed.
• Single cradle: A regular communication and
charging station. It charges the rechargeable
battery as soon as the bar code data collector is
placed. Data will be transmitted to the host
through RS232 or USB.
The OPL972X is a range of handheld bar code
data collectors, that are well suited for a variety of
portable applications. Using a built-in laser scanner
they can read all popular types of bar code labels
at varying distances. There are several models to
meet a variety in use. All models are equipped with
data memory to collect the scanned data.
User's applications can be downloaded to the bar
code data collector to adapt it to the user's
situation. As a tool to develop an application
Opticon can supply a compiler and a development
kit.
Operating power is supplied by the rechargeable
battery. For recharging there are several cradles
available. A single cradle can charge one data
collector. A multi cradle can charge up to 5 data
collectors.
For communication the IrDA interfaced models can
communicate through a communication station. In
common the cradle supports communication for
one bar code data collector. There is also a model
available that supports communication up to 5 bar
code data collectors.
• Multicradle, single communication, multiple
charging: A multi cradle equipped with 5 slots to
keep up to 5 data collectors. One slot supports
communication, data will be transmitted to the
host through RS232 or USB. All slots charges the
rechargeable battery as soon as the bar code
data collector is placed.
• Multicradle, multiple communication, multiple
charging: A multi cradle equipped with 5 slots to
keep up to 5 data collectors, extended with
RS485 connection. All slots have the same
functionality. They charge the rechargeable
battery as soon as the bar code data collector is
placed. Data will be transmitted to the host
through RS232 or USB. The RS485 feature
enables to create a network of multicradles.
The Bluetooth model can communicate with the
SIG certified Bluetooth devices. The SPP and DUN
profile are supported.
4 - OPTICON OPL972X/CRD972X
Page 5
A
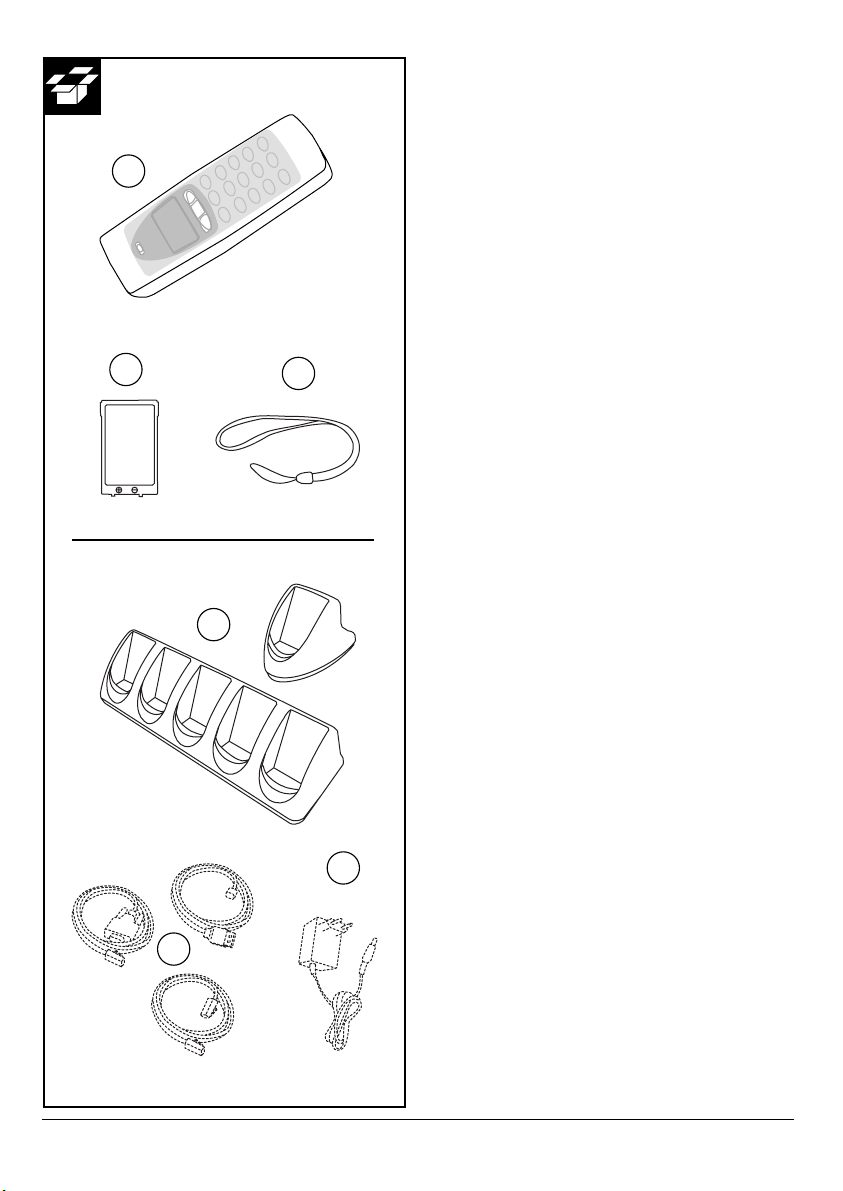
1.1 UNPACKING
When you remove the packing, please check for
any physical damage. We recommend that you
save all packing material, as it should be used
whenever you need to ship your barcode data
collector (eg. for service). Damage due to improper
repacking is not covered by the warranty.
Apart from the bar code data collector, charger or
cradle, additional items might be ordered and
supplied. If there are any missing parts please
contact your supplier.
B
C
a
OPL972X contents:
• Bar code data collector: model applicable as
supplied (A)
• Battery (B)
• Hand strap (C)
CRD972X contents:
• Cradle: model applicable as supplied (a)
CRD972X accessories
• Interface cable(s): model applicable as supplied,
can be supplied as separate item (b)
• Power supply, supplied as separate item (c)
Do not remove the product label!
On the back of every unit you will find a product
label. This is attached by the manufacturer and
includes product information and serial number. Do
not remove it.
c
b
OPL972X/CRD972X OPTICON - 5
Page 6
1
1
2
3
4
5
6
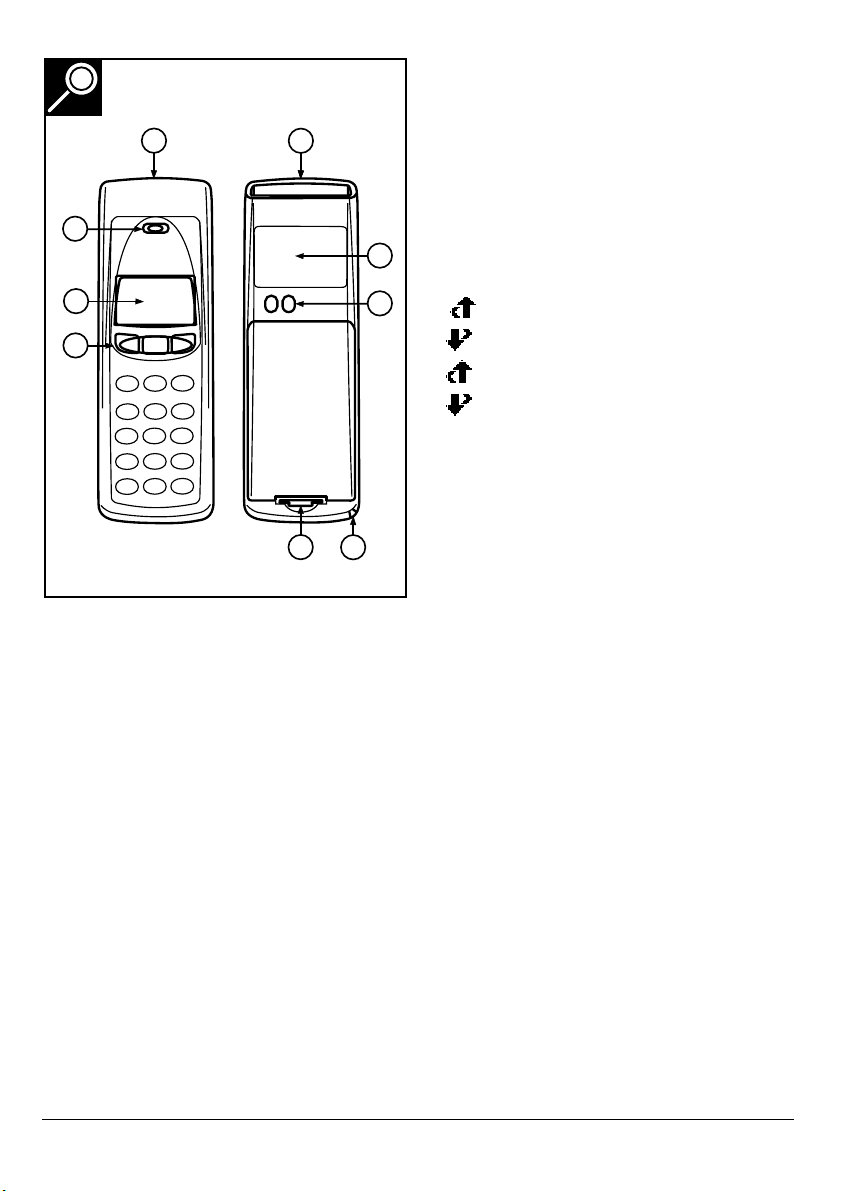
1.2 DETAILED VIEW
1.2.1 BARCODE DATA COLLECTOR DETAILS
• 1-key model:
Typical use as trigger key to switch laser beam on
for bar code reading
• other models:
Typical use of middle key as trigger key to switch
laser beam on for bar code reading.
Typical use of left and right key as menu scroll
keys or yes/no input
• keyboard:
8
7
Typical use of top middle key as trigger key to
switch laser beam on for bar code reading.
Typically basic functions for data input, as below:
: scroll up
: scroll down
+ SHIFT : scroll left
+ SHIFT: scroll right
BS : Back space
CLR : Cancel input
ENT : (Enter) to confirm input
The standard appearance of the alphanumeric
keys is the numeric value. Together with the
SHIFT key the alpha characters appear.
5. Battery case cover
For housing battery
6. Hand strap pillar
For attaching hand strap
Depending on the supplied model, the following
options are applicable:
1. Reading window / Optical window
For the emission of laser beam for bar code
reading / optical data transmission
2. Indicator
LED indicator or buzzer can be used to indicate
results, for example bar code reading / status of
communication / status of charging
3. LCD Display
For displaying information
4. Operating key(s)
Definable by application
6 - OPTICON OPL972X/CRD972X
7. Charging contacts
For power supply from cradle to bar code data
collector
8. Product label
Contains product information and serial number.
Do not remove it!
Page 7

3
1
2
3 4
1
2
5
6
7
8
9
6
5
1.2.2 CRADLE DETAILS
Depending on the supplied model, the following
options are applicable:
1. DC input socket
Input for AC power supply
2. RS 232-C socket
Left connector (RS232C-1): for connection to PC
through Opticon RS232 cable
Right connector (RS232C-2): for optional
connection to second device
3. USB socket
For connecting to PC, through Opticon USB cable
4. RS 485 socket
For connection of cradle network
5. Product label
Contains product information and serial number.
Do not remove it!
6. DIP switches
Set parameters of the optical communication
interface, do not change unnecessary.
7. Electrical contacts
If the OPL972X bar code data collector is inserted
the battery will automatically be charged.
8. Optical window
Optical communication interface for data
transmission
9. LED indicator
Show current status. Read more at the installation
instructions.
OPL972X/CRD972X OPTICON - 7
Page 8

!
A
o
+ 40 C
o
0 C
C
D
EB
1.3 HANDLING INSTRUCTIONS
To avoid malfunctioning and to ensure years of
trouble free operation, pay attention to the
following:
A. Temperature conditions
Use in area's between 0 and 40 °C.
Do not expose the scanner for a long time to
extreme conditions - like direct sunlight, near a
heater, or in a car - or in areas that are very cold,
humid, moisturized or dusty.
Do not expose the product to rain or water splash.
Avoid temperature changes. Sudden temperature
changes can cause condensation to form on the
bar code data collector. Using the bar code data
collector while condensation is present can cause
malfunction. Always wait until the condensation
clears naturally before attempting operation.
8 - OPTICON OPL972X/CRD972X
B. Shock
Do not subject the product to very strong impact,
do not throw or drop the bar code data collector
from large heights.
Do not allow a mechanical shock to the product.
Do not leave the bar code data collector in an area
where static charge is accumulated, or near
devices where electromagnetic emission is
generated.
Do not place any objects on top of the bar code
data collector. Do not lay the bar code data
collector face down. Doing so can cause accidental
operation of the key(s).
C. Use of the cradle
Do not place any product other than the OPL972Xtype bar code data collector in the CRD972X
cradle.
Page 9

D. Cleaning instructions
Clean the reading window periodically with a soft
dry cloth.
Clean the exterior by wiping it with a soft, dry cloth.
Do not use thinner, white spirit or other solvents.
These can discolour the case and the keys and has
a negative effect on the lifetime of the keys.
Clean the electrical contacts of the bar code data
collector and the cradle with a soft dry cloth, or
cotton bud.
Avoid touching the contacts The contacts must stay
as clean as possible to maintain optimal charging
capacity.
Do not use water when cleaning the cradle. This
can cause malfunction.
2
2 GET STARTED
Fix hand strap to bar code data collector.
Use the hand strap properly to avoid drop.
Read instructions in this manual.
Insert battery.
To be sure of proper operation, it is advised to start
with a fully charged battery. First charge the bar
code data collector for 8 hours.
Read instructions in this manual.
Place the cradle in normal office conditions.
Avoid a place under strong light. Otherwise infra
red communication may be disturbed.
Read instructions in this manual.
Use properly.
Take notice that the CRD972X cradle is designed
for the OPL972X bar code data collector.
E. Maintenance
There are no user-serviceable parts inside the bar
code data collector or the cradle. So do not try to
take it apart. The manufacturer will not be liable for
any damage caused by the customer. In case of
serious malfunction, please consult your supplier.
OPL972X/CRD972X OPTICON - 9
Page 10

1
2.2 BATTERY INSTRUCTIONS
FOLLOW THE INSTRUCTIONS FOR
INSTALLING, CHARGING AND REMOVING THE
BATTERIES VERY STRICTLY.
2
3
2.1 FIX HAND STRAP
Instructions
1. Fix the small thin cord of the strap around the
pillar of the bar code data collector. (ref. 1)
2. Insert the handle cord of the strap into the thin
loop in order to fix the hand strap. (ref. 2)
TO AVOID DROP HOLD THE HAND STRAP
AROUND THE WRIST WHEN CARRYING THE
BAR CODE DATA COLLECTOR. (REF. 3)
DO NOT SWING THE BAR CODE DATA
COLLECTOR AROUND. (REF. 4)
4
WRONG USE OF BATTERIES MIGHT CAUSE
SERIOUS DAMAGE TO THE BAR CODE DATA
COLLECTOR OR TO THE CRADLE.
THE PRODUCTS ARE NOT WARRANTED FOR
DAMAGE, DEFECTS, MALFUNCTION OR LOSS
OF DATA, RESULTING FROM INCORRECT USE
OF BATTERIES.
Never remove the battery while the bar code
data collector is turned on.
Doing so can cause data in the bar code data
collector to be deleted. If you have data stored,
make sure the data is transmitted to the host
system.
Use proper battery
Only use the Opticon rechargeable battery as
specified from Opticon.
Insert the battery correctly.
The bar code data collector may be damaged by
wrong insertion. Handle properly and do not force.
Use the cradle to charge battery
The battery of Opticon can only be charged inside
the bar code data collector.
2.2.1 HOW TO CHARGE THE BATTERY
If the bar code data collector with the battery is
placed in the cradle, the voltage and the required
charging time will be automatically determined and
the cradle will charge for a maximum of 8 hours.
The charging procedure is fully automated.
10 - OPTICON OPL972X/CRD972X
Page 11

2
3
4
1
2.2.2 HOW TO (RE)PLACE THE BATTERY
Unlock battery case cover: (ref. 1 and 2)
• Unlatch the case cover by lifting first into the
direction of the nose and then lift up the case.
Install Opticon battery: (ref. 3.)
• Remove old battery. Insert new battery as
instructed on the battery. Do not use force.
Lock battery case cover: (ref. 4 and 5)
• Position the case cover into the savings and latch
it by pressing slightly.
5
OPL972X/CRD972X OPTICON - 11
Page 12

2.3 INSTALLATION INSTRUCTIONS
EXERCISE CAUTION AT ALL TIMES WHEN
WORKING WITH AC-POWERED EQUIPMENT.
TURN OFF YOUR DEVICES BEFORE
INSTALLATION.
BECAUSE OF THE SPECIAL PIN-OUT OF THE
CONNECTORS, USE THE CABLES SUPPLIED
BY THE MANUFACTURER.
When you need another cable for a certain device,
that is not supplied, contact your supplier to
purchase the right cable.
2.3.1 CONNECT CHARGING CRADLE
Start
Switch off the power of the host computer.
(ref. 1.) Choose proper place
Place the cradle in normal office conditions, avoid a
place under strong light.
(ref. 2.) Connect power
Connect the power supply.
End
Switch on the power of the host computer.
Place the bar code data collector in the cradle.
LED indicator
Typical LED indication:
red: power is on
12 - OPTICON OPL972X/CRD972X
1
2
Page 13

2.3.2 CONNECT RS232 CRADLE
Start
Switch off the power of the host computer.
(ref. 1.) Choose proper place
Place the cradle in normal office conditions, avoid a
place under strong light.
(ref. 2.) Set DIP switch
Set the required DIP switches for baud rate. For
(default) settings notice DIP switch table in the next
chapter.
(ref 3.) Connect interface cable
Connect the cable between the cradle and the host
computer.
(ref. 4.) Connect power
Connect the power supply.
End
Switch on the power of the host computer.
Place the bar code data collector in the cradle.
LED indicator
Typical LED indications are:
red: power is on
flashing green: collector sends to host
flashing yellow: host sends to collector
1
2
3
ON
1 2 3 4 5 6
FOR CONNECTING A NETWORK OF CRADLES
SEE RS485 DESCRIPTION.
4
OPL972X/CRD972X OPTICON - 13
Page 14

2.3.3 CONNECT RS232 MULTICRADLE
Start
Switch off the power of the host computer.
(ref. 1.) Choose proper place
Place the multicradle in normal office conditions,
avoid a place under strong light.
(ref. 2.) Set DIP switch
Set the required DIP switches for baud rate. For
(default) settings notice DIP switch table in the next
chapter.
(ref 3.) Connect interface cable
Connect the cable between the multicradle and the
host computer.
For RS232 interface use the left RS232 connector
(RS232C-1).
(ref. 4.) Connect power
Connect the power supply.
End
Switch on the power of the host computer.
Place the bar code data collector(s) in the
multicradle.
2
3
1
1 2 3 4 5 6
ON
LED indicator
Typical LED indications are:
red: power is on
flashing green: collector sends to host
flashing yellow: host sends to collector
FOR CONNECTING A NETWORK OF
MULTICRADLES SEE RS485 DESCRIPTION.
14 - OPTICON OPL972X/CRD972X
4
Page 15

2.3.4 CONNECT USB TO WINDOWS PC
Get USB driver
• Download the USB driver from the software
download section on the Opticon website.
(The USB driver can be found as software for
either CRD972X or OPL972X)
• Place the file on your hard disk in a separate
directory and unpack the contents of the file.
Choose proper place
Place the cradle in normal office conditions, avoid a
place under strong light.
Connect interface cable
Connect the cable between the cradle and the host
computer.
Connect power
Connect the power supply.
Add New Hardware
If the wizard for new hardware is not started
automatically, go to ‘Control Panel’ – ‘Add
Hardware’.
• Select the option to search for the best driver for
your device. Browse for the directory where you
put the contents of the downloaded USB driver
file.
• Windows should recognize the USB cradle as
‘USB High Speed Serial Converter’
• Possibly (depending on Windows version) the
system will ask for the ‘ftdiport.cat’ file. This can
be skipped (‘Skip File’ button).
• Finish the installing procedure. A message will
pop-up that new hardware is found, recognized
as USB Serial Port.
• Possibly (depending on Windows version) the
system asks to insert a disk labeled ‘FTDI USB
Drivers Disk’, click on OK and in the next screen
skip this action.
• When the USB driver is installed, you can check
on ‘Control Panel’ – (‘System’) – ‘System
Properties’ (‘Hardware’) – ‘Device Manager’menu if the ‘USB High Speed Serial Converter’ is
recognized.
• Check at properties for the COMport: ‘USB Serial
Port (COMn). This information might be needed
for application loading.
Cradle installed
Place the bar code data collector in the cradle
LED indicator
Typical LED indications are:
red: power is on
flashing green: collector sends to host
flashing yellow: host sends to collector
OPL972X/CRD972X OPTICON - 15
Page 16

2.3.5 CONNECT RS485 MULTICRADLE
NETWORK
THIS PART DESCRIBES THE NETWORK
DETAILS. FOR CONNECTION DETAILS REFER
TO PREVIOUS PAGE.
TAKE NOTICE OF THE NECESSARY
PRECAUTIONS THAT NEEDS BE MADE TO
ESTABLISH A PROPER NETWORK
CONNECTION AS DESCRIBED BELOW.
Set DIP switch settings
For (default) settings notice DIP switch table in the
next chapter.
• All multicradles in the network need to be set to
RS232/RS485 connection.
• All multicradles need to have the same baud rate
to be set by DIP switch.
• The first and the last multicradle in the network
must have the termination resistors set.
Connect RS232
Only 1 multicradle in the network will be connected
to the PC through one RS232 cable. For RS232
interface use the left RS232 connector (RS232C-
1). Through this connection all multicradles can
communicate to the PC.
Connect RS485
A maximum of 16 multicradles can be connected in
a network through RS485 cables.
MASTER
RS232/RS485
SLAVE
RS232/RS485
TERMINATE
LED indicator
Typical LED indications are:
red: power is on
flashing green: collector sends to host
flashing yellow: host sends to collector
SLAVE
RS232/RS485
TERMINATE
1 2 3 4 5 6
ON
16 - OPTICON OPL972X/CRD972X
Page 17

2.4 DIP SWITCH SETTINGS
Open the cover of the DIP switches on the bottom
of the cradle in order to reach the DIP switches.
• Turn the DIP switch ON by moving it upwards.
• Turn the DIP switch OFF by moving it downwards.
Single cradle DIP switch settings:
DIP
ON OFF
Switch
SW 1 Baud rate * Baud rate *
SW 2 Baud rate * Baud rate *
SW 3 Baud rate * Baud rate *
SW 4 Spare
SW 5 Spare
SW 6 Auto-baud
rate (PCcontrolled)
SW 1, 2, 3
determines
baud rate.
Multicradle DIP switch settings:
DIP
ON OFF
Switch
* Set baud rate as in table below.
** In typical use keep cascade switch SW5 off.
User baud rate settings:
*) Baud rate SW1SW2SW
3
2400 ON OFF OFF
4800 OFF ON OFF
9600 (default) ON ON OFF
19200 OFF OFF ON
38400 ON OFF ON
57600 OFF ON ON
115200 ON ON ON
SW 1 Baud rate * Baud rate *
SW 2 Baud rate * Baud rate *
SW 3 Baud rate * Baud rate *
SW 4 RS232/
RS232 only
RS485
SW 5 Cascade **
SW 6 RS485
termination
ON
RS485
Termination
OFF
SW 7 Factory
setting
SW 8 Factory
setting
OPL972X/CRD972X OPTICON - 17
Page 18

2.5 BLUETOOTH INSTALLATION
In the bar code collector with Bluetooth interface some settings can be made in the system menu.
Get system menu Press all 3 keys at the same time to get the system menu.
To navigate downwards use the right key [Q2] and to navigate
upwards use the left key [Q1]. Confirm or select with the middle
[Trigger]key.
Cancel operation When an operation needs to be cancelled, press all 3 keys at the
same time to cancel the current option and get the system menu.
2.5.1 SET OR SEARCH BLUETOOTH DEVICE ADDRESS:
To enable the bar code data collector with Bluetooth interface to communicate to another Bluetooth device,
the Bluetooth address of the device needs to be set in the system menu of the bar code data collector.
Start the system menu
Select option Input address.
Set Bluetooth address
To set by manual entry, select Manual.
To search for Bluetooth device address, select Discovery.
18 - OPTICON OPL972X/CRD972X
Manual entry
The address shown is either 000000000000, or the address that
was entered before.
The Bluetooth address can be found on the other device. Mostly it
is displayed on the product label as a 12 digits number or a number
with 6 hex digit pairs. (e.g. 0050f27d78c5).
The digits can be selected one by one by the block marker.
Change the digit by pressing the left key [Q1]. Every time the left
key [Q1] is pressed the value of the digit is incremented by one
hexadecimal value. When the proper value is displayed move the
marker to the next digit with the right key [Q2].
When the setting of the device address is done, confirm with the
middle [Trigger]key.
Page 19

Discovery
The discovery method is a more automated method. The bar code
data collector will try to discover all Bluetooth devices in range (up
to a maximum of 10 devices).
The address and the name of each Bluetooth device is shown one
by one in the display.
Navigate downwards by the right key [Q2] and navigate upwards
by the left key [Q1].
When device that should be used for communication is found,
select it by the middle [Trigger]key.
2.5.2 SECURITY
To provide additional security connections, the Bluetooth specification allows you to enable a special
security setting, so that a PIN-code is required from the barcode data collector in order to establish a
connection.
If you want to use 'unsecured' connections, do not set the PIN-code.
Start the system menu.
Select option Input PIN-code.
Select option Input PIN-code.
Set PIN-code
The code shown is either ……………., or the code that was
entered before.
The PIN-code is a code of 1 to 16 digits. Any personal combination
of numeric values can be set.
The digits of the address can be selected one by one by the block
marker.
Change the digit by pressing the left key [Q1]. Every time the left
key [Q1] is pressed the value of the digit is going up with one
numeric value. When the proper value is displayed move the
marker to the next digit with the right key [Q2]. When the setting of
the code is done, confirm by the middle [Trigger]key.
Delete PIN-code
The PIN-code is seen as not set when all digits are set to none
(…………….)
OPL972X/CRD972X OPTICON - 19
Page 20

2.6 COMMUNICATION
2.6.1 RS32 INTERFACE
Check if the chosen COM port matches the COM
port in the user’s application program.
Check if the baud rate of the cradle and the host
computer match.
2.6.2 USB INTERFACE
Check if the defined COM port in Windows
matches the COM port in the user’s application
program.
Check if the baud rate of the cradle and the host
computer match.
2.6.3 MULTICRADLE SINGLE
COMMUNICATION
When using the multicradle type with single
communication, note that the model has only one
slot that supports communication. To transmit data
to the host, place the bar code data collector in the
right slot of the cradle seen from the front side.
2.6.4 BLUETOOTH BAR CODE DATA
COLLECTOR
The Bluetooth bar code data collector model will
communicate with the SIG certified Bluetooth
devices. The choice in profile (SPP or DUN) that
needs to be supported must be set in the user’s
application program.
20 - OPTICON OPL972X/CRD972X
Page 21

3
3 READING BAR CODES
TAKE CARE OF THE 'HANDLING
INSTRUCTIONS' AND 'GET STARTED'
PRECAUTIONS.
Instructions
Point the bar code data collector to the bar code
and press the trigger key.
Fit the bar code in the laser beam from margin to
margin and pass the scanner to the bar code, as
shown in the scan position illustration.
The bar code will be read and the reading results
will be indicated.
A "Good Read" means that the scanner has
effectively recognised and decoded the bar code.
In most cases, the application program will provide
an indicator signal or a buzzer signal to indicate a
good read to the user.
The bar code data collector is a Class I laser
product conforming to the strictest laser safety
standards. However, we recommend that you avoid
looking directly into the laser beam emitter, or
pointing the laser beam directly into someone's
eyes.
X
X
Barcode reading problems
When the barcode can not be read, try the
following:
• Check that the width of the bar code label does
not exceed the width of the light beam.
• Change the angle between the bar code and the
scanner.
XX
• Change the distance between the bar code and
the scanner.
X
X
OPL972X/CRD972X OPTICON - 21
Page 22

4
4 TROUBLE SHOOTING
This chapter contains information on solving
problems you may encounter when using the
barcode data collector and/or cradle. If problems
occur, first carry out some general checks, before
verifying the problem with the descriptions in this
chapter.
General checks:
• Make sure the product is installed properly.
• Check the power supply of all devices
• Is the reading window of the product clean?
• Are the bar code labels damaged?
• Check if the error also occurs with other bar code
labels.
Product does not operate:
• Check if the battery requires charging.
If you can not solve the problem:
If the equipment still does not work after these
checks have been performed, please verify if one
of the problems described in this chapter applies to
the problem you have with the scanner.
22 - OPTICON OPL972X/CRD972X
4.1 COMMUNICATION MALFUNCTIONING
No communication from the cradle to the
device, or data is corrupted.
? Power indicator of the cradle is not red.
• Check the connection of the power supply to the
cradle.
• Check if the mains socket has power.
? No data transmitted, or corrupted data.
• Check if the interface cable is undamaged, and
properly connected to the cradle and the host
computer.
• Check the COM port and baud rate settings, and
try again.
Page 23

4.2 READ OPERATION MALFUNCTIONING
Laser stays off, when pressing the trigger key.
When the barcode data collector has a problem
with reading the label:
? General tips.
• Change the angle of the bar code data collector
relative to the bar code.
• Change the distance between the bar code and
the bar code data collector.
? The label consists of small bars with small
spaces (high-resolution label).
• Decrease the distance between the bar code and
the bar code data collector.
? The bar code is larger than the laser beam.
• Try moving the bar code data collector a bit
further away from the bar code.
? The reading window is dirty.
• Clean the reading window of the bar code data
collector.
? The type of the bar code label is not enabled.
• If applicable, enable the bar code symbology in
the application program.
? The error occurs consistently with a certain batch
of labels.
• Verify the barcode. If you use a barcode printer it
is advised to use also a barcode verifier.
? Trigger key has no scan function.
• If your bar code data collector has a display,
check in your display if the scan menu is
selected. When an other menu is selected switch
to the scan menu.
? Laser temperature has become too high.
• The laser is switched off automatically, when the
laser temperature becomes above 50°C. Wait
until the temperature has dropped.
Barcode data collector does not work, when
pressing the trigger key.
? The battery is empty.
• Charge the barcode data collector in the cradle.
Bar code data collector can be used only for a
short time after recharging.
? The main battery is not properly charged.
• Check if the charging contacts of the bar code
data collector and the cradle are clean. If
needed, clean the charging contacts.
• Check the cradle for power by checking the power
supply and/or the mains socket.
• Check if the bar code data collector is properly
placed on the cradle.
4.3 BARCODE DATA COLLECTOR
MALFUNCTIONING
Barcode data collector does not respond to key
presses, while the display stays on.
? Message “Application halted” or “No application
installed” is shown.
• There is no proper user’s application loaded in
the bar code data collector. Contact your
supplier.
When the product needs to be repaired:
The label with serial number should be present. If
returning the product, please use the original
packaging to minimise the chance of damage.
OPL972X/CRD972X OPTICON - 23
 Loading...