

Opel R15 BT USB, NAVI 50 IntelliLink, R16 BT USB, CD16 BT USB, NAVI 80 IntelliLink Infotainment Manual
...Page 1

Infotainment Manual
Page 2

Page 3

Contents
Introduction .................................... 4
Radio ........................................... 47
CD Player .................................... 56
AUX input ..................................... 60
USB port ...................................... 62
Bluetooth music ........................... 65
External devices .......................... 71
Navigation .................................... 73
Voice recognition ....................... 102
Phone ........................................ 105
Index .......................................... 122
Page 4

4 Introduction
Introduction
General information ....................... 4
Control elements overview ............ 6
Theft-deterrent feature ................. 29
Usage .......................................... 30
Touch operation overview ........... 38
Tone settings ............................... 39
Volume settings ........................... 41
System settings ........................... 42
General information
The Infotainment system provides
state-of-the-art in-car information and
entertainment.
The radio is equipped with assignable
channel presets for FM, AM and also
DAB wavebands (depending on
version).
The audio player can play audio CDs,
MP3 CDs and also WMA CDs
(depending on version).
External data storage devices, e.g.
iPod, MP3 player or USB stick, or a
portable player can be connected to
the Infotainment system. External
audio sources can also be connected
via Bluetooth.
The digital sound processor provides
several preset equalizer modes for
sound optimisation.
The navigation system's dynamic
route planning will reliably guide you
to your destination and can help avoid
traffic jams and other traffic problems.
Optionally, the Infotainment system
can be operated using controls on the
steering column or via the voice
recognition system.
In addition, the Infotainment system
can be equipped with a handsfree
phone system.
The well-thought-out design of the
controls and the clear displays enable
you to control the system easily and
intuitively.
Note
This manual describes all options
and features available for the
various Infotainment systems.
Certain descriptions, including those
for display and menu functions, may
not apply to your vehicle due to
model variant, country
specifications, special equipment or
accessories.
Important information on operation and traffic safety
9 Warning
Drive safely at all times when
using the Infotainment system.
If in doubt, stop the vehicle before
operating the Infotainment
system.
Page 5

Introduction 5
Radio reception
Radio reception may be disrupted by
static, noise, distortion or loss of
reception due to:
● changes in distance from the
transmitter
● multi-path reception due to
reflection
● shadowing
In case of poor radio reception the
volume will automatically drop as to
minimize the disturbance effect.
Using this manual
● This manual describes features
that may or may not be on your
specific vehicle, either because
they are optional or due to
changes subsequent to the
printing of this manual. Please
refer to the purchase
documentation to confirm each of
the features found on the vehicle.
● Certain controls and
descriptions, including symbols,
displays and menu functions may
not apply to your vehicle due to
model variant, country
specifications, special equipment
or accessories.
● The table of contents at the
beginning of this manual and
within each section shows where
the information is located.
● The index will enable you to
search for specific information.
● The vehicle display screens may
not support your specific
language.
● Display messages and interior
labelling are written in bold
letters.
● The operations given within this
manual refer to Infotainment
system controls. For equivalent
steering column controls, refer to
the control elements overview
3 6.
Warnings and cautions
9 Warning
Text marked 9 Warning provides
information on risk of accident or
injury. Disregarding this
information may lead to injury.
Caution
Text marked Caution provides
information on possible damage to
the vehicle. Disregarding this
information may lead to vehicle
damage.
Symbols
Page references are indicated with 3.
3 means "see page".
Page 6

6 Introduction
Control elements overview
R15 BT USB
Page 7

Introduction 7
1 m - Press: Switch on/off ........ 30
Press: Mute/unmute .............. 30
Turn: Adjust volume .............. 30
2 SETUP - Short press:
Settings menu ....................... 30
Display radio text
information ............................ 52
Long press: Automatic
station storing ........................ 51
3 Mute/unmute ......................... 30
4 3 - Radio, Short press:
Search for next radio
frequency .............................. 49
Long press: Automatic
station search ........................ 49
5 RADIO - Change audio
source, waveband ................. 47
6 / - Return to previous
menu, cancel an action ......... 30
7 MEDIA - Change audio
source ................................... 57
8 OK rotary knob ...................... 30
Press: Confirm an action ....... 30
Turn: Access display
menu options ........................ 30
Turn: Change radio
frequency .............................. 49
9 TEL - Telephone menu ....... 105
10 M USB port ............................ 62
11 AUX input .............................. 60
12 Station buttons 1...6 .............. 49
Short press: Select station .... 49
Long press: Save station ...... 49
13 2 - Radio, Short press:
Search for previous radio
frequency .............................. 49
Long press: Automatic
station search ........................ 49
Page 8

8 Introduction
R16 BT USB
Page 9

Introduction 9
1 m - Press: Switch on/off ........ 30
Turn: Adjust volume .............. 30
2 Station buttons 1...6 .............. 49
Short press: Select station .... 49
Long press: Save station ...... 49
3 RADIO - Change audio
source, waveband ................. 47
4 MEDIA - Change audio
source ................................... 57
5 Rotary knob ........................... 30
Short press: Confirm an
action .................................... 30
Turn: Access display
menu options ........................ 30
6 / - Return to previous
menu, cancel an action ......... 30
7 3 - Radio, Short press:
Search for next radio
frequency .............................. 49
Long press: Automatic
station search ........................ 49
Audio/MP3/WMA CD,
Short press: Skip track
forwards ................................ 57
Long press: Fast forward ...... 57
8 M USB port ............................ 62
9 SETUP - Short press:
Settings menu ....................... 30
10 TEL - Telephone menu ....... 105
11 2 - Radio, Short press:
Search for previous radio
frequency .............................. 49
Long press: Automatic
station search ........................ 49
12 TEXT - Display radio text
information ............................ 52
13 AUX input .............................. 60
Page 10
10 Introduction
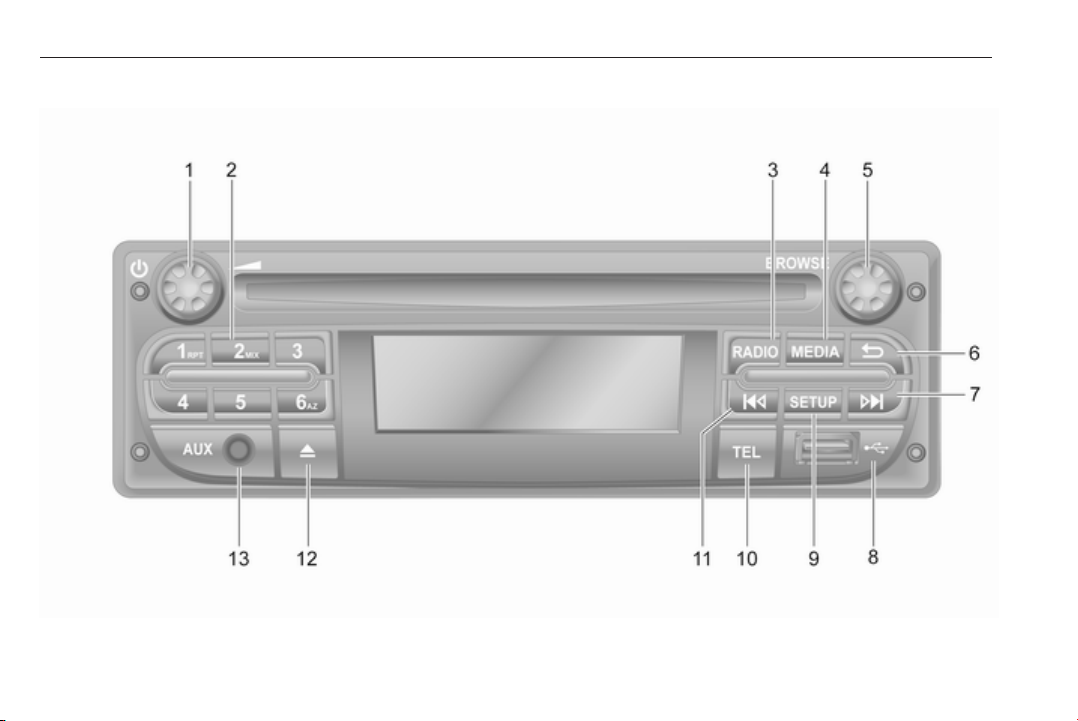
CD16 BT USB
Page 11

Introduction 11
1 m - Press: Switch on/off ........ 30
Turn: Adjust volume .............. 30
2 Station buttons 1...6 .............. 49
Short press: Select station .... 49
Long press: Save station ...... 49
RPT: Repeat a track ............. 57
MIX: Random playback ......... 57
3 RADIO - Change audio
source, waveband ................. 47
4 MEDIA - Change audio
source ................................... 57
5 Rotary knob ........................... 30
Short press: Confirm an
action .................................... 30
Turn: Access display
menu options ........................ 30
6 / - Return to previous
menu, cancel an action ......... 30
7 3 - Radio, Short press:
Search for next radio
frequency .............................. 49
Long press: Automatic
station search ........................ 49
Audio/MP3/WMA CD,
Short press: Skip track
forwards ................................ 57
Long press: Fast forward ...... 57
8 M USB port ............................ 62
9 SETUP - Short press:
Settings menu ....................... 30
10 TEL - Telephone menu ....... 105
11 2 - Radio, Short press:
Search for previous radio
frequency .............................. 49
Long press: Automatic
station search ........................ 49
Audio/MP3/WMA CD,
Short press: Skip track
backwards ............................. 57
Long press: Fast rewind ....... 57
12 d - CD ejection ..................... 57
13 AUX input .............................. 60
Page 12

12 Introduction
CD18 BT USB
Page 13

Introduction 13
1 m - Press: Switch on/off ........ 30
Turn: Adjust volume .............. 30
2 OK rotary knob ...................... 30
Short press: Confirm an
action .................................... 30
Turn: Access display
menu options ........................ 30
3 / - Return to previous
menu, cancel an action ......... 30
4 TEXT - Display radio text
information ............................ 52
5 d - CD ejection ..................... 57
6 M USB port ............................ 62
7 Station buttons 1...6 .............. 49
Short press: Select station .... 49
Long press: Save station ...... 49
RPT: Repeat a track ............. 57
MIX: Random playback ......... 57
8 3 - Radio, Short press:
Search for next radio
frequency .............................. 49
Long press: Automatic
station search ........................ 49
Audio/MP3/WMA CD,
Short press: Skip track
forwards ................................ 57
Long press: Fast forward ...... 57
9 SETUP - Short press:
Settings menu ....................... 30
10 2 - Radio, Short press:
Search for previous radio
frequency .............................. 49
Long press: Automatic
station search ........................ 49
Audio/MP3/WMA CD,
Short press: Skip track
backwards ............................. 57
Long press: Fast rewind ....... 57
11 AUX input .............................. 60
12 TEL - Telephone menu ....... 105
13 MEDIA - Change audio
source ................................... 57
14 RADIO - Change audio
source, waveband ................. 47
Page 14
14 Introduction
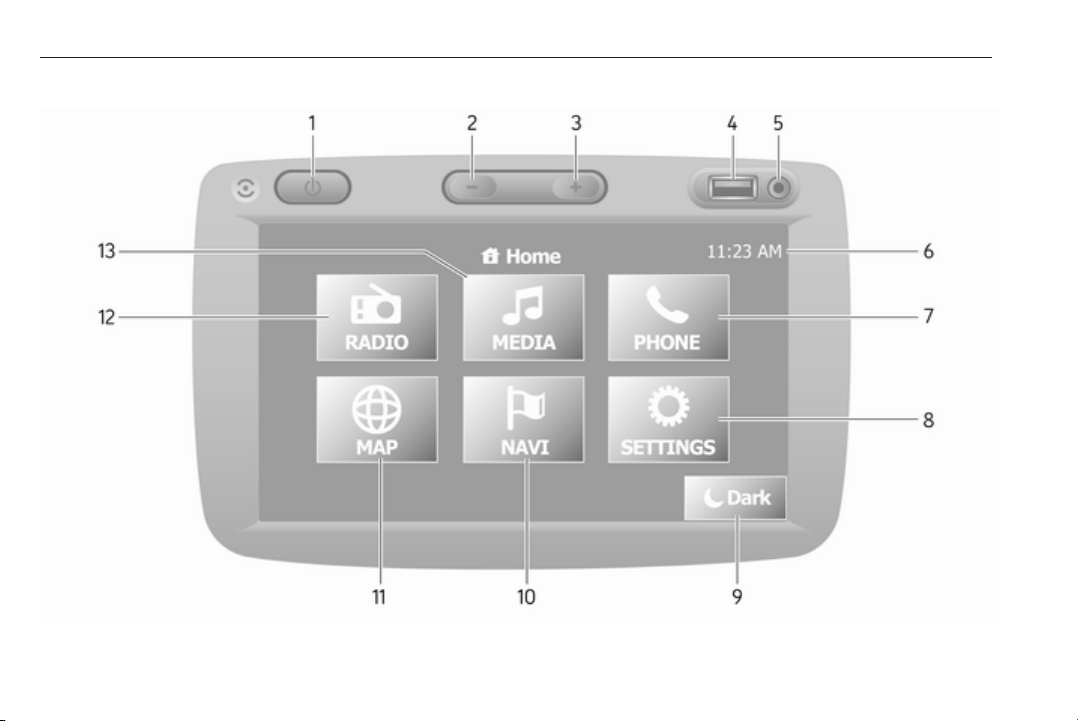
NAVI 50 IntelliLink (Type A)
Page 15

Introduction 15
1 m: Switch on/off .................... 30
2
]: Decrease volume ............. 30
3
<: Increase volume ............... 30
4 M USB port ............................ 62
5 AUX input .............................. 60
6 Clock ..................................... 30
7 yPHONE: Telephone
menu ................................... 105
8 ÿSETTINGS: Audio
settings, e.g. "Tone
settings" ................................ 39
"Volume settings" .................. 41
Bluetooth settings ................. 30
Display settings ..................... 30
System settings ..................... 42
9 æDark: Darken screen
(only clock and audio
system information are
displayed) .............................. 30
10 yNAVI: Navigation menu ...... 73
11 sMAP: View map ................. 73
12 èRADIO: Change audio
source to radio ...................... 47
13 tMEDIA: Change audio
source - USB, iPod ............... 62
BT (Bluetooth) ....................... 65
AUX ....................................... 60
Page 16
16 Introduction
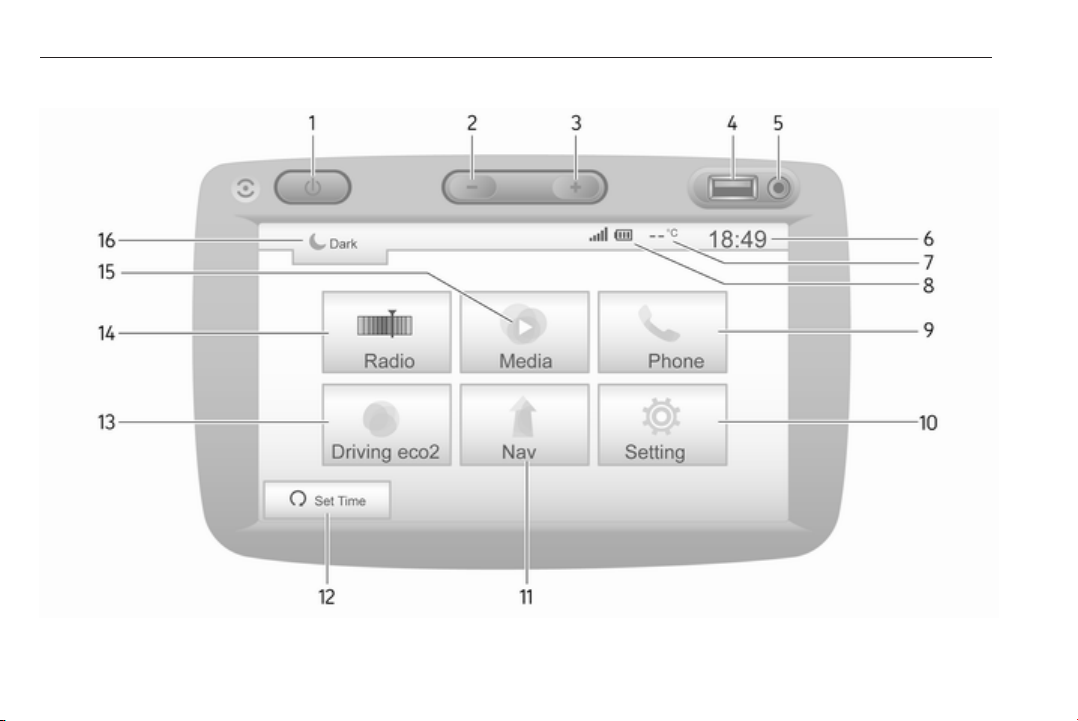
NAVI 50 IntelliLink (Type B)
Page 17

Introduction 17
1 m: Switch on/off .................... 30
2
]: Decrease volume ............. 30
3
<: Increase volume ............... 30
4 M USB port ............................ 62
5 AUX input .............................. 60
6 Clock ..................................... 30
7 Outside temperature
(depending on version) ......... 30
8 Ý: Phone reception
(when connected) ............... 105
Ü: Phone battery life
(when connected) ............... 105
9 yPhone: Telephone menu . 105
10 ÿSetting: Audio settings,
e.g. "Tone settings" ............... 39
"Volume settings" .................. 41
Bluetooth settings ................. 30
Display settings ..................... 30
System settings ..................... 42
11 ýNav: Navigation menu ........ 73
12 yMAP: View map .................. 73
13 ñRadio: Change audio
source to radio ...................... 47
14 üMedia: Change audio
source - USB, iPod ............... 62
BT (Bluetooth) ....................... 65
AUX ....................................... 60
15 æ: Darken screen (only
clock and audio system
information are displayed) ....30
Page 18
18 Introduction
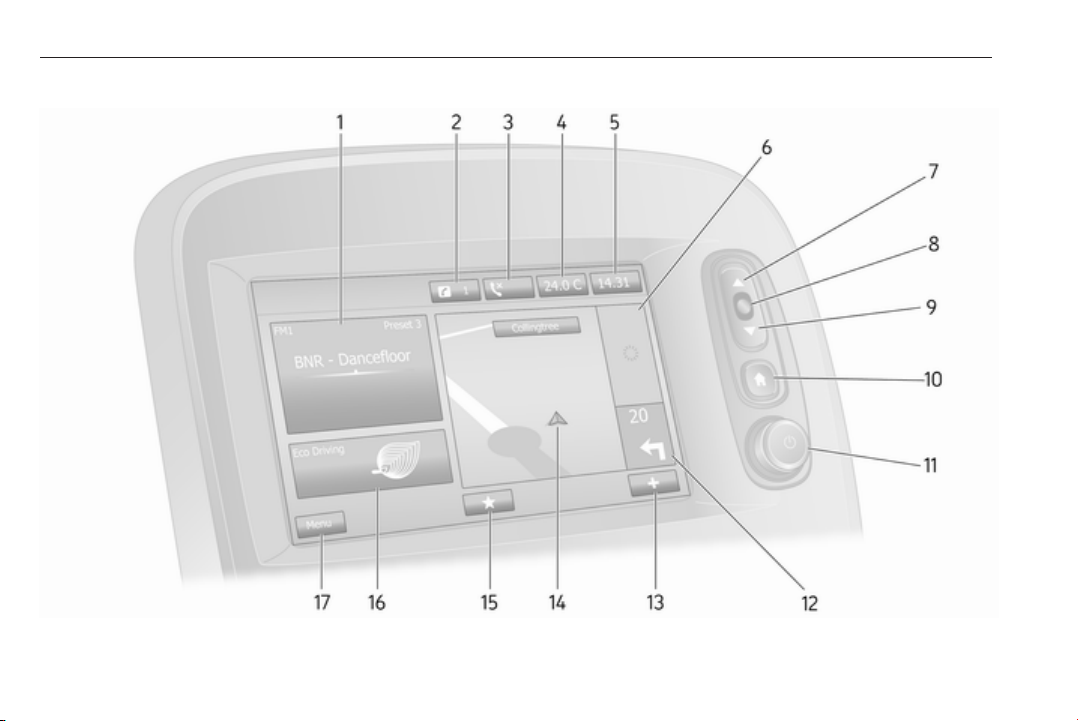
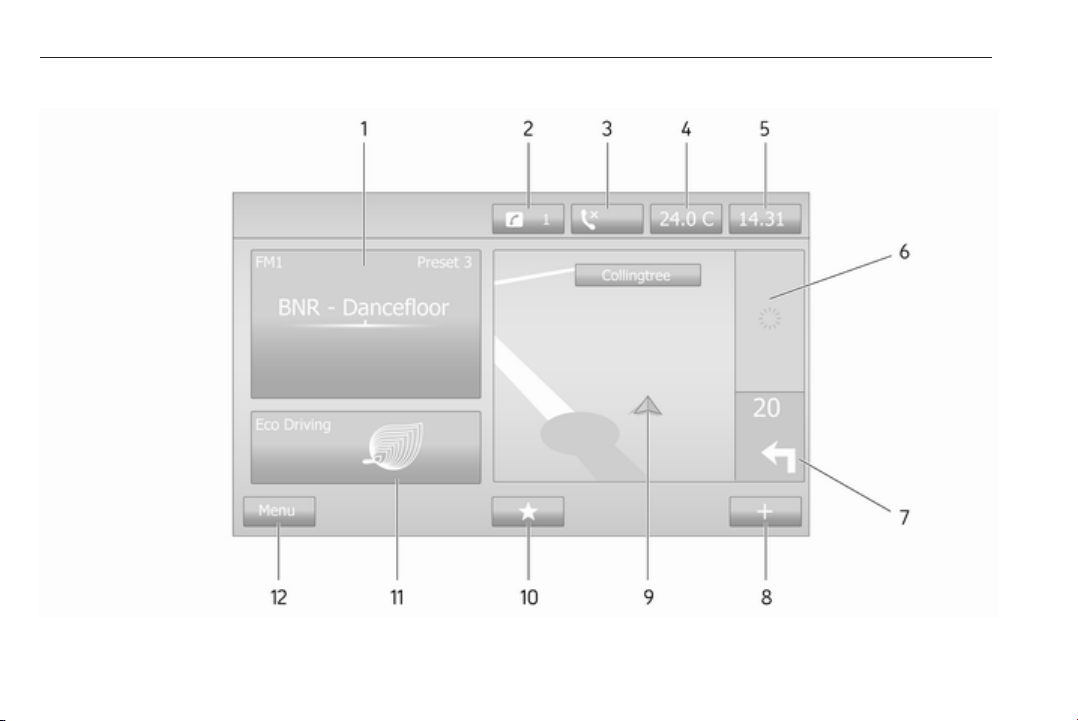
NAVI 80 IntelliLink (Type A)
Page 19

Introduction 19
1 Audio information, e.g.
Radio ..................................... 47
Auxiliary devices ................... 60
M USB devices ...................... 62
Bluetooth music .................... 65
2 H: System notifications (if
equipped) .............................. 30
3 y: Telephone status ........... 105
Call log ................................ 113
4 Outside temperature ............. 30
5 Clock ..................................... 30
6 Traffic information (if
applicable) ............................. 94
7 R: Display lists - Scroll up ....30
Map: Change scale ............... 94
8 Enter menus, confirm
actions ................................... 30
9 S: Display lists - Scroll
down ..................................... 30
Map: Change scale ............... 94
10 ;: Home page ...................... 30
11 m - Press: Switch on/off ........ 30
Turn: Change volume ........... 30
12 Navigation: Direction and
distance to next change of
direction ................................ 73
13
<: Pop-up menu ................... 30
14 Navigation display ................. 73
Map ....................................... 94
15 f: Favourites, e.g. for
Navigation ⇑ ......................... 73
Media t (e.g. Radio) ............ 47
Phone g .............................. 105
Services N ........................... 76
16 Driving economy (Eco
Driving) .................................. 30
17 Menu: Access Main menu ..... 30
Page 20
20 Introduction
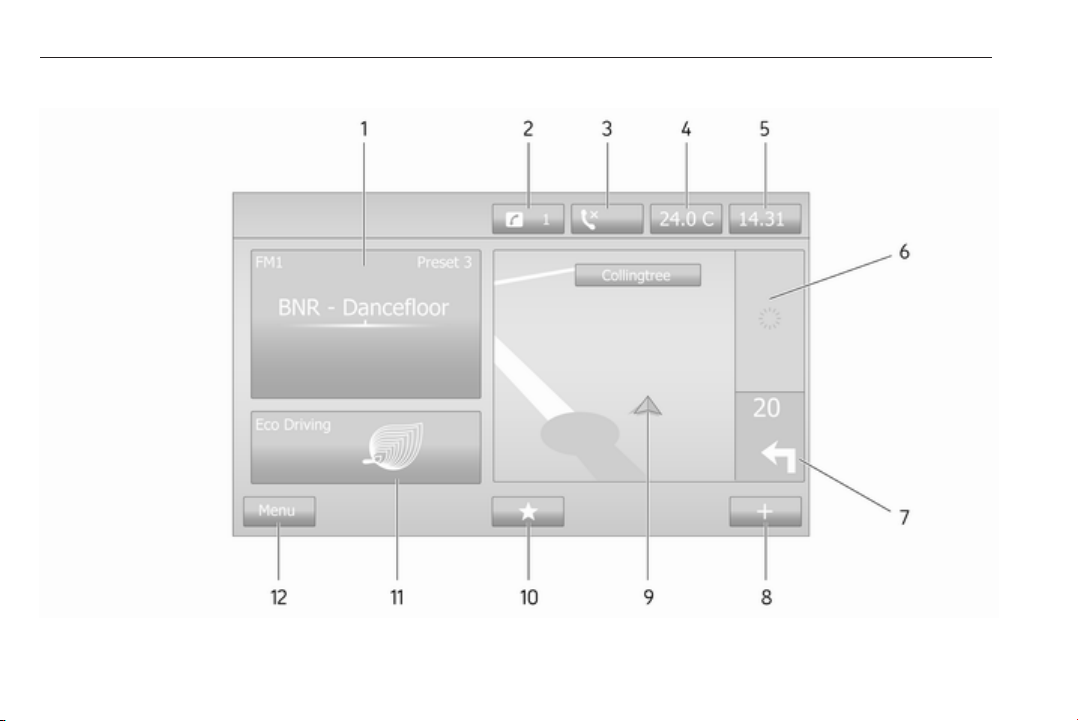
NAVI 80 IntelliLink (Type B)
Page 21

Introduction 21
1 Audio information, e.g.
Radio ..................................... 47
Auxiliary devices ................... 60
M USB devices ...................... 62
Bluetooth music .................... 65
2 H: System notifications (if
equipped) .............................. 30
3 y: Telephone status ........... 105
Call log ................................ 113
4 Outside temperature ............. 30
5 Clock ..................................... 30
6 Traffic information (if
applicable) ............................. 94
7 Navigation: Direction and
distance to next change of
direction ................................ 73
8
<: Pop-up menu ................... 30
9 Navigation display ................. 73
Map ....................................... 94
10 f: Favourites, e.g. for
Navigation ⇑ ......................... 73
Media t (e.g. Radio) ............ 47
Phone g .............................. 105
Services N ........................... 76
11 Driving economy (Eco
Driving) .................................. 30
12 Menu: Access Main menu ..... 30
Page 22
22 Introduction
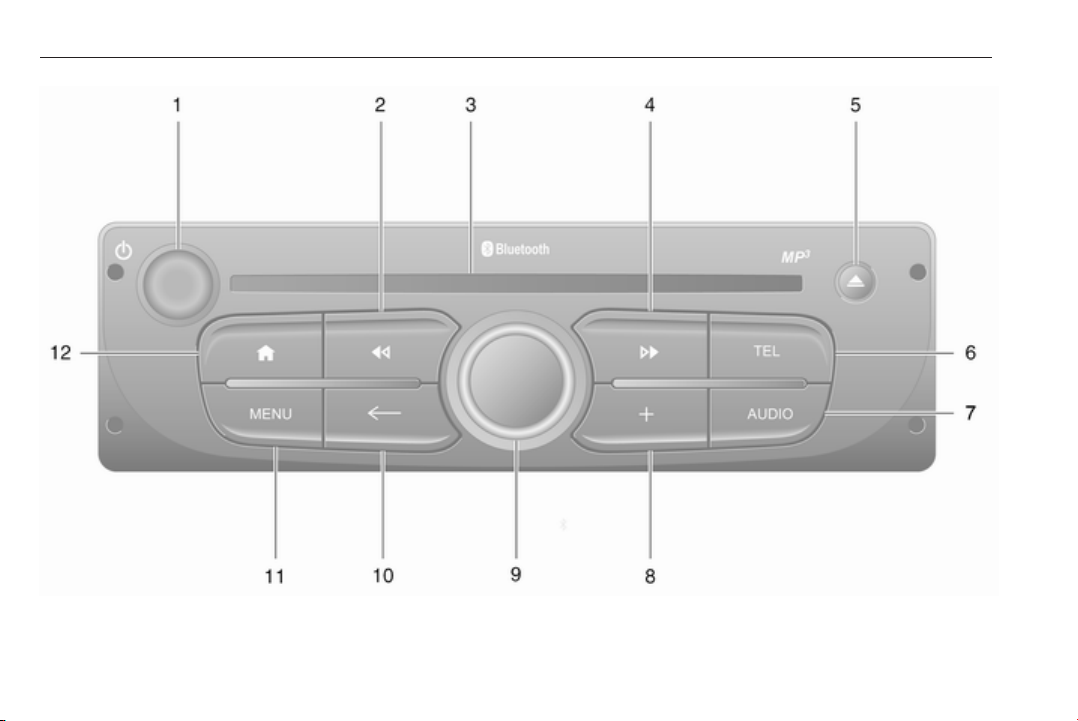
Page 23

Introduction 23
1 m - Press: Switch on/off ........ 30
Turn: Change volume ........... 30
2 2 - Radio, Short press:
Search for previous radio
frequency .............................. 49
Long press: Automatic
station search ........................ 49
Audio/MP3/WMA CD,
Short press: Skip track
backwards ............................. 57
Long press: Fast rewind ....... 57
3 CD slot .................................. 57
4 3 - Radio, Short press:
Search for next radio
frequency .............................. 49
Long press: Automatic
station search ........................ 49
Audio/MP3 CD, Short
press: Skip track forwards ..... 57
Long press: Fast forward ...... 57
5 d - CD ejection ..................... 57
6 TEL - Telephone menu ....... 105
7 AUDIO - Change audio
source ................................... 57
8
<: Pop-up menu ................... 30
9 Central rotary knob ............... 30
Press: Confirm an action ....... 30
Turn: Access display
menu options ........................ 30
Turn: Access the stored
radio station list ..................... 47
Turn: Select next/previous
station ................................... 49
Turn: Change CD/MP3
track ...................................... 57
10 r - Return to previous
menu, cancel an action ......... 30
11 MENU: Access Main menu ...30
12 7: Go to Home page ............ 30
Page 24
24 Introduction
NAVI 80 IntelliLink (Type C)
Page 25

Introduction 25
1 Audio information, e.g.
Radio ..................................... 47
Auxiliary devices ................... 60
M USB devices ...................... 62
Bluetooth music .................... 65
2 H: System notifications (if
equipped) .............................. 30
3 y: Telephone status ........... 105
Call log ................................ 113
4 Outside temperature ............. 30
5 Clock ..................................... 30
6 Traffic information (if
applicable) ............................. 94
7 Navigation: Direction and
distance to next change of
direction ................................ 73
8
<: Pop-up menu ................... 30
9 Navigation display ................. 73
Map ....................................... 94
10 f: Favourites, e.g. for
Navigation ⇑ ......................... 73
Media t (e.g. Radio) ............ 47
Phone g .............................. 105
Services N ........................... 76
11 Driving economy (Eco
Driving) .................................. 30
12 Menu: Access Main menu ..... 30
Page 26
26 Introduction
Page 27
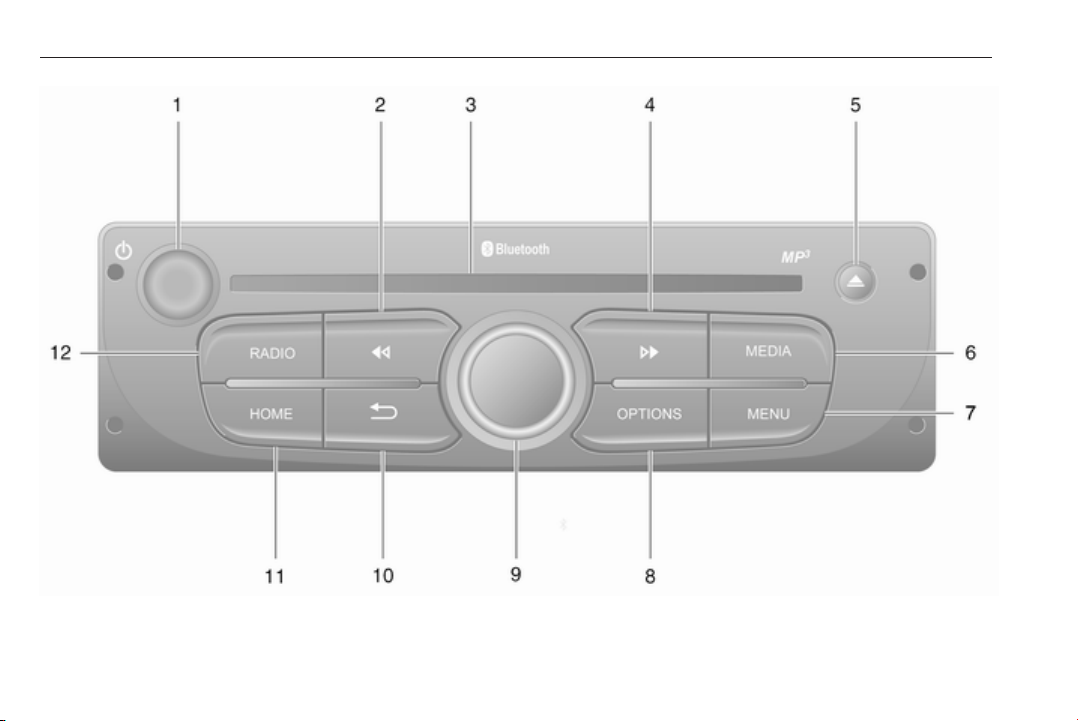
Introduction 27
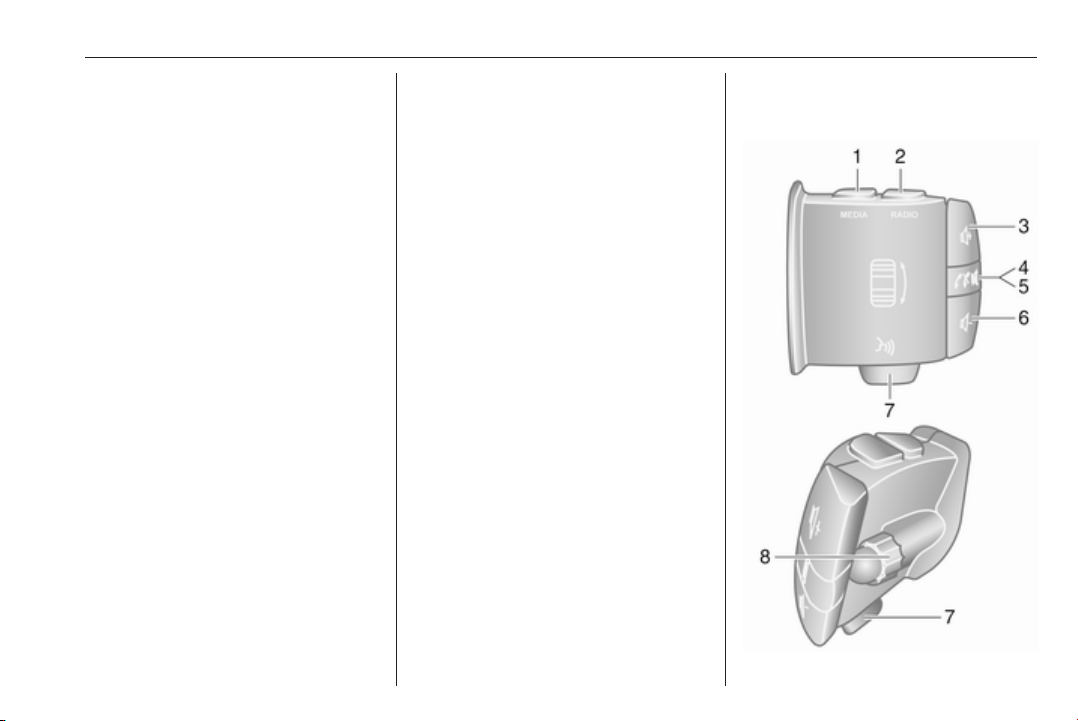
1 m - Press: Switch on/off ........ 30
Turn: Change volume ........... 30
2 2 - Radio, Short press:
Search for previous radio
frequency .............................. 49
Long press: Automatic
station search ........................ 49
Audio/MP3/WMA CD,
Short press: Skip track
backwards ............................. 57
Long press: Fast rewind ....... 57
3 CD slot .................................. 57
4 3 - Radio, Short press:
Search for next radio
frequency .............................. 49
Long press: Automatic
station search ........................ 49
Audio/MP3 CD, Short
press: Skip track forwards ..... 57
Long press: Fast forward ...... 57
5 d - CD ejection ..................... 57
6 MEDIA - Change audio
source ................................... 57
7 MENU: Access Main menu ...30
8 OPTIONS: Pop-up menu ...... 30
9 Central rotary knob ............... 30
Press: Confirm an action ....... 30
Turn: Access display
menu options ........................ 30
Turn: Access the stored
radio station list ..................... 47
Turn: Select next/previous
station ................................... 49
Turn: Change CD/MP3
track ...................................... 57
10 / - Return to previous
menu, cancel an action ......... 30
11 HOME: Access Main menu ... 30
12 RADIO - Change audio
source, waveband ................. 47
Steering column controls Type A
Page 28
28 Introduction
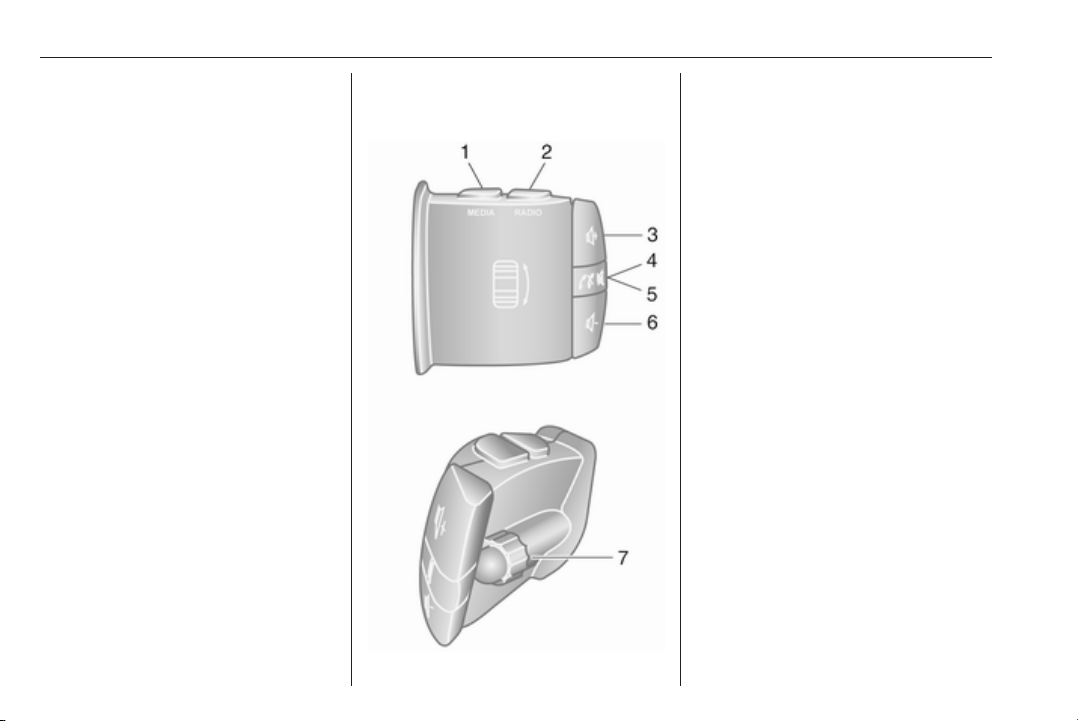
1 MEDIA - Change audio
source ................................... 30
2 RADIO - Change radio
waveband .............................. 47
3 ! - Increase volume ............. 30
4 @ - Mute/unmute ................... 30
5 78 - Take/end phone call ..113
6 # - Decrease volume ............ 30
7 5 - Voice recognition ........... 104
8 Turn: Move up/down in
display menus, select
next/previous radio
preset / radio frequency /
audio track ........................... 49
Press: Confirm actions .......... 47
Steering column controls Type B
1 MEDIA - Change audio
source ................................... 30
2 RADIO - Change radio
waveband .............................. 47
3 ! - Increase volume ............. 30
4 @ - Mute/unmute ................... 30
5 78 - Take/end phone call ..113
6 # - Decrease volume ............ 30
7 Turn: Move up/down in
display menus, select
next/previous radio
preset / radio frequency /
audio track ........................... 49
Press: Confirm actions .......... 47
Page 29

Introduction 29
Steering column controls Type C
1 SOURCE/AUDIO -
Change audio source ............ 30
2 78 ...................................... 105
Take/end phone call ........... 113
@ - Mute/unmute ................... 30
3 ! - Increase volume,
mute/unmute ......................... 30
4 # - Decrease volume,
mute/unmute ......................... 30
5 MODE/OK - Confirm
actions, change audio
mode ..................................... 47
Take/end phone call ........... 113
6 Turn: Access display
menu options, next/
previous radio preset /
radio frequency / audio
track ..................................... 47
Note
If equipped, the voice recognition
button 5 may be located on the
steering wheel or on the steering
column controls.
Theft-deterrent feature
Depending on Infotainment system,
an electronic security system is
included for the purpose of theft
deterrence. The Infotainment system
functions only in your vehicle and is
therefore worthless to a thief.
The security code (supplied
separately) must be entered upon
first use of the system and after
prolonged interruptions to the power
supply.
Note
The security code is not required for
R16 BT USB, CD18 BT USB.
Entering the security code
When first switching on the
Infotainment system, an enter
security code message, e.g. Radio
code followed by 0000 appears on the
Page 30

30 Introduction
display screen. Depending on
Infotainment system, the message
may only appear after a brief delay.
To enter first digit of security code,
press numbered button 1 on the unit
repeatedly until desired number is
displayed. Enter second, third and
fourth digits using buttons 2, 3 and 4
in the same way.
When the full code is displayed, press
and hold button 6 until an audible
signal sounds. The system is
unlocked when the correct code has
been entered.
NAVI 50 IntelliLink,
NAVI 80 IntelliLink: Enter the security
code using numbered buttons 0 to 9
on the touchscreen display. The
system is unlocked when the correct
code has been entered.
Incorrect code entered
Depending on Infotainment system,
when the security code has been
entered incorrectly, an incorrect code
message, e.g. Error code followed by
a countdown value, e.g. Wait 100 is
displayed.
Wait until the countdown has expired,
then enter the correct code. Each
time the code is entered incorrectly,
the countdown time may be doubled,
depending on Infotainment system.
Changing the geographical area
When the security code is entered,
depending on Infotainment system
you may be prompted to choose a
geographical area, for example:
● Europe
● Asia
● Arabia
● America
Switch off the Infotainment system,
then simultaneously press button 1
and 5 and m. Then press _ or 6 until
desired area is highlighted on the
display screen and set with button 6.
Usage
Infotainment controls
The Infotainment system is operated
via buttons, rotary knobs and/or
display menus.
Inputs are made via:
● the central control unit in the
instrument panel 3 6, or
● the controls on the steering
column 3 6
● the voice recognition system (if
available) 3 102
● the touchscreen
(NAVI 50 IntelliLink,
NAVI 80 IntelliLink) 3 38
Note
Only the most direct ways for menu
operation are described in the
subsequent chapters. In some
cases, there may be other options.
Switching the Infotainment system on or off
Press X to switch the Infotainment
system on.
The previously used audio source is
active.
Press X (or, depending on
Infotainment system, press and hold)
to switch the Infotainment system off.
Page 31

Introduction 31
Note
The clock and/or outside
temperature may be displayed when
the Infotainment system is switched
off (depending on version).
NAVI 50 IntelliLink:
The Infotainment system
automatically switches on/off when
the ignition is switched on/off. Press
X instead, if required.
NAVI 80 IntelliLink:
The Infotainment system switches on
automatically when the ignition is
switched on (depending on version).
Press X instead, if required.
The following options may be
displayed (depending on version):
● Change settings (to authorise or
reject data sharing)
Note
When data sharing is switched off,
certain features may not operate
correctly.
● Language (to change the system
language)
● Done (to continue to the Home
page)
The Infotainment system
automatically switches off when the
ignition is switched off and the driver's
door is opened. Press X instead, if
required.
Automatic switch-off
With the ignition off, if the
Infotainment system is switched on
with X, it will switch-off automatically
a short period after the last user input.
Depending on Infotainment system,
automatic switch-off occurs after
approx. 5 to 20 minutes.
Pressing X again will allow the
Infotainment system to remain on for
a further 5 to 20 minutes, depending
on Infotainment system.
Setting the volume
Turn X/volume rotary knob, or press
< or ].
Alternatively (with the steering
column controls), press ! or #.
NAVI 50 IntelliLink:
Depending on version, it is possible to
set various volume levels individually
(including audio players, traffic
announcements, navigation
instructions, phone calls and
ringtone).
From the Home page, touch
ÿSetting(s) then Audio followed by
Sound.
Refer to (NAVI 50 IntelliLink) "Volume
settings" 3 41.
NAVI 80 IntelliLink:
To set various volume levels
individually (e.g. navigation
instructions, traffic announcements,
phone calls) from the Home page,
touch MENU then System followed by
Sound.
Refer to (NAVI 80 IntelliLink) "System
settings" 3 42.
Stored volume
When the Infotainment system is
switched off, the current volume is
stored.
Speed dependent volume
When speed dependent volume
(3 42) is activated, the volume is
adapted automatically to compensate
for road and wind noise.
Page 32

32 Introduction
Mute
To mute the current audio source
(depending on Infotainment system),
press X briefly or turn knob fully
anticlockwise.
Alternatively (with the steering
column controls), press @ or 8 or
press ! and # simultaneously.
Unmute
To unmute (depending on
Infotainment system), briefly press
X again or turn clockwise.
Alternatively (with the steering
column controls): Press @ again or
press ! and # simultaneously again.
Note
When a traffic announcement is
broadcast, the system is
automatically unmuted.
For further information, refer to
"Radio data system" 3 52.
Display screen operation
R15 BT USB, R16 BT USB,
CD16 BT USB, CD18 BT USB Display screen operation
● To move up/down in the display:
Turn OK.
● To confirm actions: Press OK.
● To cancel actions (and return to
previous menu): Press /.
NAVI 50 IntelliLink - Display screen operation
Use the touchscreen for the following
displayed menus as described in
each section:
● è/ñRADIO
Refer to "Radio" section 3 47.
● t/üMEDIA
Refer to "USB port" section
3 62.
● yPHONE
Refer to "Phone" section 3 105.
● sMAP / yMap
Refer to "Navigation" section
3 73.
● yNAVI / ýNav
Refer to "Navigation" section
3 73.
● ÿSETTING(S)
Refer to (NAVI 50 IntelliLink)
"Tone settings" 3 39, "Volume
settings" 3 41 and "System
settings" 3 42.
Note
Depending on software version, the
menus available on the display
screen may differ from those listed
above.
When the Home page 7 is displayed,
it is possible to hide these menus from
the display (only clock and audio
system information may be shown) by
touching æ. Touch anywhere on the
screen to display these menus again.
NAVI 80 IntelliLink - Display screen operation
Use the touchscreen for the following
displayed menus as described in
each section.
Page 33
Introduction 33
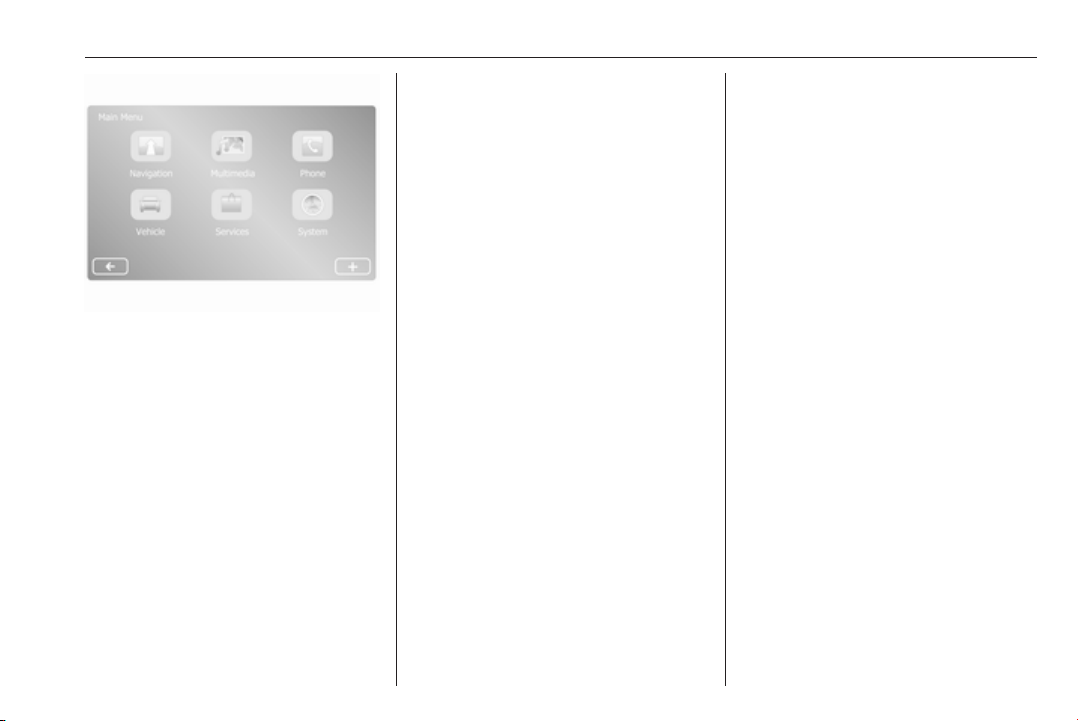
On the Home page, touch MENU to
access the Main menu. The following
menus and controls are displayed:
● ⇑ Navigation
Refer to "Navigation" 3 73.
● ª Multimedia:
● Radio: Refer to "Radio"
3 47.
● Media:
CD (only available with Type
B and C): Refer to "CD
player" 3 57.
USB: Refer to "USB port"
3 62.
SD: Operation is similar to
those for the CD player
3 57.
Auxiliary: Refer to "AUX
input" 3 60.
Bluetooth: Refer to
"Bluetooth music" 3 65.
● Pictures: Refer to "Displaying
pictures" in the "External
devices" section 3 71.
● Video: Refer to "Playing
movies" in the "External
devices" section 3 71.
● Settings: Refer to
"Multimedia settings" in the
(NAVI 80 IntelliLink) "System
settings" section 3 42
● g Phone
Refer to "Phone" 3 105.
● J Vehicle
Touch to open Eco Driving,
Onboard computer and Settings
menus.
Refer to (NAVI 80 IntelliLink)
"Modes of operation" below.
● ¯ Services
Touch to open Navigation
services and Settings menus.
Refer to (NAVI 80 IntelliLink)
"Modes of operation" below.
● ± System
Refer to (NAVI 80 IntelliLink)
"System settings" 3 42.
Note
Depending on software version, the
menus on the display screen may
differ from the illustrations shown.
● I/←: Move to previous page
● j/→: Move to next page
● ↑: Display lists; Scroll up
● ↓: Display lists; Scroll down
●
<: Open pop-up menu
● r: Return to previous menu
The display screen can also be
operated using the controls on the
Infotainment system fascia.
Page 34

34 Introduction
Note
Depending on version, some
controls available on the
Infotainment system fascia do not
operate the features on the display
screen.
Note
Depending on vehicle, operation of
the touchscreen may be restricted
during driving.
Modes of operation
Radio
To change the audio source to radio:
Depending on Infotainment system,
press RADIO, RADIO/CD or
AUDIO/SOURCE.
NAVI 50 IntelliLink:
To access the radio menu at any time,
touch 7 followed by è/ñRadio.
NAVI 80 IntelliLink:
To access the radio menu from the
Home page, touch MENU then
Multimedia followed by Radio.
Detailed description of the radio
functions 3 47.
Audio players
To change the audio source to CD,
USB, AUX, Bluetooth or iPod (where
applicable): Depending on
Infotainment system, touch MEDIA,
RADIO/CD or AUDIO/SOURCE.
NAVI 50 IntelliLink: To access the
menu for connected auxiliary devices
(USB, iPod, BT (Bluetooth) or AUX) at
any time, touch 7 followed by t/
üMedia. Touch S in top left corner
and select auxiliary source.
NAVI 80 IntelliLink: To access the
menu for auxiliary devices (e.g. Audio
CD, USB, SD card, AUX input,
Bluetooth) from the Home page,
touch MENU then Multimedia
followed by Media. Select auxiliary
source from the display list.
R15 BT USB, R16 BT USB
Detailed descriptions of:
● AUX input functions 3 60
● USB port functions 3 62
● Bluetooth music operation
3 65
CD16 BT USB, CD18 BT USB
Detailed descriptions of:
● CD player functions 3 57
● AUX input functions 3 60
● USB port functions 3 62
● Bluetooth music operation
3 65
NAVI 50 IntelliLink
Detailed descriptions of:
● AUX input functions 3 60
● USB port (including iPod)
functions 3 62
● Bluetooth music operation
3 65
NAVI 80 IntelliLink
Detailed descriptions of:
● CD functions (Type B and C only)
3 57
● AUX input functions 3 60
● USB port functions 3 62
● Bluetooth music operation
3 65
Page 35

Introduction 35
Navigation, Map (NAVI 50 IntelliLink, NAVI 80 IntelliLink)
Detailed description of the Navigation
system 3 73, Browse map 3 94.
Phone
Use the display options in the
following menus to connect mobile
phones, make telephone calls, create
contacts lists and adjust various
settings.
Detailed description of the handsfree
phone system functions 3 105.
R15 BT USB, R16 BT USB,
CD16 BT USB, CD18 BT USB Phone
To access the Phone menu: Press
6 or TEL.
To access the phone settings menu:
Press TEL and select Phone settings.
NAVI 50 IntelliLink - Phone
To access the Phone menu at any
time: Touch 7 followed by yPhone.
NAVI 80 IntelliLink - Phone
To access the Phone menu from the
Home page, touch MENU followed by
Phone.
Vehicle information (NAVI 80 IntelliLink)
To access the Vehicle menu from the
Home page, touch MENU followed by
Vehicle.
Depending on vehicle, the following
menus are displayed:
● Eco Driving
● Onboard computer
● Settings
Eco Driving
The following features are available:
● Trip report
Displays the following data from
the last journey:
Average fuel consumption,
average speed, total fuel
consumption, total distance.
Within the trip report, Eco
scoring provides an overall score
out of 100 for driving economy.
Higher figures indicate better
driving economy. Ratings are
also given for average
environmental driving
performance (Acceleration),
gearchanging efficiency
(Gearbox) and brake control
(Anticipation).
To save journey data: Touch
'Save' then select the journey
type from the following list:
Home/work, holiday/vacation,
weekend, trip/tour, personal.
To reset journey data: Touch
'Reset'. Confirm or cancel with
'Yes' or 'No'.
Touch < to open pop-up menu
where trip reports can be
compared or to show/hide
reports after the completion of a
journey.
● My preferred trips
Displays changes in your driving
style (when journey data has
been saved).
The 'Summary' tab for each
journey type (e.g. Home/work)
displays the following: Total route
distance, distance covered, date
of information update and
average driving economy rating
out of 100.
Page 36

36 Introduction
The 'Detailed report'/'Details' tab
displays journey record
information.
● Eco-coaching
Displays advice for reducing fuel
consumption.
Scroll through the pages and
familiarise yourself with the
advice.
Onboard computer
Displays the following information
since the last reset:
● start date of calculation
● total distance
● average speed
● average fuel consumption
● total fuel consumption
To reset onboard computer and
instrument panel trip computer
information, touch Reset then Yes to
confirm.
For further information, refer to "Trip
computer" in the Owner's Manual.
Settings
The following settings can be
changed:
● Park Assist
● Depending on vehicle, touch
Front park assist or Rear
park assist to switch on/off
(box is checked/unchecked).
Touch Done/Confirm to save
changes.
● Volume:
Touch < or ] alongside the
volume bar to change volume
of the ultrasonic parking
assist system. For further
information, refer to "Parking
assist" in the Owner's
Manual.
● Rear camera view settings
(available depending on
version):
Select to switch rear view
camera on/off, change
guidelines (static/dynamic)
and adjust image settings
(e.g. brightness, saturation
and contrast).
Touch Done to save
changes. For further
information, refer to "Rear
view camera" in the Owner's
Manual.
●
< (pop-up menu):
Touch < in the Park Assist
menu or submenus followed
by Reset to the default
values to restore default
factory settings for all or
current Park Assist options.
● Image settings (available
depending on version)
To adjust e.g., brightness,
saturation and contrast.
● The following options (depending
on vehicle) can also be adjusted:
● Automatically fold in the
exterior mirrors to the parking
position upon locking the
vehicle (switch on/off).
● Door lock while driving
(switch on/off).
● Activate rear window wiper
when selecting reverse gear
(switch on/off).
Page 37

Introduction 37
● Daytime running lights
(switch on/off).
● Unlock the driver's door only
when opening the door
(switch on/off).
● Easy access (switch on/off).
● Driving style indicator (fuel
economy gauge) (switch on/
off).
● Eco score (switch on/off).
● Show report after trip (switch
on/off).
After the settings are changed, touch
Done to confirm.
Services (NAVI 80 IntelliLink)
To access the Services menu from
the Home page, touch MENU
followed by Services.
The following menus are displayed:
● Navigation services
● Settings
Navigation services
In addition to the navigation services
(e.g. traffic information, fixed speed
cameras), extra features can be
added by subscribing to LIVE
services.
Refer to (NAVI 80 IntelliLink) "LIVE
services" in the "Navigation" section
3 76.
Settings
The following menus are displayed:
● Applications manager
Select to manage Bluetooth
auxiliary devices.
● Navigation services
Select to access navigation
related features, e.g. traffic,
speed cameras, local search,
My TomTom LIVE, weather.
Refer to (NAVI 80 IntelliLink)
"LIVE services" in the
"Navigation" section 3 76.
Note
A compatible SD card must be
inserted to access LIVE services.
● Update applications
Select to update current
applications.
● Data sharing settings
Select to switch data sharing on/
off.
Note
When data sharing is switched off,
certain features may not operate
correctly.
Favourites (NAVI 80 IntelliLink)
When the Home page is displayed,
touch f to view, add or delete
favourites for the following features:
● ⇑ Navigation 3 73.
● ª Multimedia - refer to "Radio"
3 47.
● g Phone 3 105.
● ¯ Services 3 76.
Navigation favourites
Select an empty slot in the display or
touch < (to open a pop-up menu),
then select Add Favourite.
Choose from the displayed list to add
a saved destination to the favourites.
Page 38

38 Introduction
For further information, refer to
(NAVI 80 IntelliLink) "Destination
input" in the "Navigation" section
3 88.
Multimedia favourites
Select an empty slot in the display or
touch < (to open a pop-up menu),
then Add Favourite.
Choose from the displayed list to add
a preset FM radio station to the
favourites.
Phone favourites
Select an empty slot in the display or
touch < (to open a pop-up menu),
then Add Favourite.
Choose from the displayed list to add
a phone contact to the favourites.
For further information, refer to
(NAVI 80 IntelliLink) "Phonebook" in
the "Phone" section 3 113.
Services favourites
Select an empty slot in the display or
touch < (to open a pop-up menu),
then Add Favourite.
Choose from the displayed list to add
a service item to the favourites.
Delete favourites
Touch < and select Remove all
Favourites or Remove a Favourite.
Then select a favourite from the
displayed list. A confirmation
message is displayed. Touch Delete
and confirm if prompted.
Additional features (NAVI 50 IntelliLink)
Depending on version, rear camera
view settings are available.
Rear camera view settings
When the rear camera view is shown
on the display, touch ÿSetting(s) to
open the settings menu.
The following settings can be
updated:
● Switch the rear camera view
display Off/On.
● Colours
Touch ]/< to adjust level.
● Brightness
Touch ]/< to adjust level.
● Contrast
Touch ]/< to adjust level.
For further information, refer to "Rear
view camera" section in the vehicle
Owner's Manual.
Touch operation overview
The Infotainment system display
(NAVI 50, NAVI 80 IntelliLink) has a
touch-sensitive surface that allows
direct interaction with the displayed
menu controls.
Caution
Do not use pointed or hard items
like ballpoint pens, pencils or
similar for touchscreen operation.
Selecting or activating a screen button or menu item
Touch a screen button or menu item.
● A short touch activates the
selected item.
● Touch and hold to save a
selected item.
The corresponding system function is
activated, a message is shown, or a
submenu with further options is
displayed.
Page 39

Introduction 39
Note
In subsequent chapters, the
operating steps for selecting and
activating a screen button or menu
item via the touch screen will be
described as "...select <button
name>/<item name>".
Scrolling lists
If there are more items available than
presentable on the screen, the list
must be scrolled.
To scroll through a list of menu items,
touch S or R at the top and at the
bottom of the scroll bar.
Touch and hold S or R to fast scroll
through a list.
Note
In subsequent chapters, the
operating steps for scrolling to a list
item via the touch screen will be
described as "...scroll to <item
name>".
Scrolling within a map
Touch anywhere on the map. The
cursor indicates the current position.
To scroll within the map, drag the map
in the required direction.
Note
Constant pressure must be applied
and the finger must be moved at
constant speed.
Pop-up menus
To open pop-up menus with
additional options, touch <.
To exit a pop-up menu without
accessing any options or making any
changes, touch any part of the screen
outside the pop-up menu.
Tone settings
R15 BT USB, R16 BT USB,
CD16 BT USB, CD18 BT USB Tone settings
In the audio settings menu, the tone
characteristics can be set.
Press SETUP to access the settings
menu.
Select Audio settings, then Sound
and turn OK until the desired setting
is selected from:
● BASS (bass)
● TREBLE (treble)
● FADER (front/rear balance)
● BALANCE (left/right balance)
The display indicates the type of
setting followed by the adjustment
value.
Set the desired value by turning OK
and press the knob to confirm
selections.
To exit the audio settings menu,
press /.
Note
If there is no activity, the system will
exit the audio settings menu
automatically.
Setting bass and treble
Select Bass or Treble.
Set the desired value by turning OK
and press the knob to confirm setting.
Depending on version,
BASS BOOST setting is also
available.
Setting the volume distribution between right - left
Select Balance.
Set the desired value by turning OK
and press the knob to confirm setting.
Page 40

40 Introduction
Setting the volume distribution between front - rear
Available depending on version.
Select Fader.
Set the desired value by turning OK
and press the knob to confirm setting.
NAVI 50 IntelliLink - Tone settings
To access the settings menu at any
time, touch 7 followed by
ÿSetting(s).
The following settings submenus are
displayed at the bottom of the screen:
● Audio
See "Audio settings" below.
● Display
Refer to (NAVI 50 IntelliLink)
"System settings" 3 42.
● Bluetooth
Refer to (NAVI 50 IntelliLink)
"System settings" 3 42.
● System
Refer to (NAVI 50 IntelliLink)
"System settings" 3 42.
Audio settings
Select Audio to display the following
options:
● Vol/Speed (Off/1/2/3/4/5)
Speed dependent volume control
- refer to (NAVI 50 IntelliLink)
"Volume settings" 3 41.
● Loudness (On/Off)
Switch loudness on to increase
bass and treble levels.
● BAL/FAD
Depending on version, touch l
to open the volume distribution
balance and tone settings
submenu.
On the left side of the display,
adjust the right/left balance with
k/l and the front/rear balance
with R/S (if available).
On the right side of the display,
adjust the Bass, Mid and Treble
tone characteristics (between
-5 to +5) with k/l.
Touch OK to confirm changes.
● Sound
Depending on version, touch l
to open the volume distribution
balance and tone settings
submenu.
On the left side of the display,
adjust the right/left balance with
k/l and the front/rear balance
with R/S (if available).
On the right side of the display,
adjust the Bass, Mid and Treble
tone characteristics (between
-5 to +5) with k/l.
Touch OK to confirm changes.
For other versions of the sound
submenu (where volumes can be
set individually for a list of audio
types), refer to
(NAVI 50 IntelliLink) "Volume
settings" 3 41.
NAVI 80 IntelliLink - Tone settings
Refer to (NAVI 80 IntelliLink) "System
settings" 3 42.
Page 41

Introduction 41
Volume settings
R15 BT USB, R16 BT USB,
CD16 BT USB, CD18 BT USB Volume settings
Press SETUP to access the settings
menu.
Select Audio settings, then Speed
vol. and turn OK until the desired
setting is selected.
NAVI 50 IntelliLink - Volume settings
To access the settings menu at any
time, touch 7 followed by
ÿSetting(s).
The following settings submenus are
displayed:
● Audio
See "Audio settings" below.
● Display
Refer to (NAVI 50 IntelliLink)
"System settings" 3 42.
● Bluetooth
Refer to (NAVI 50 IntelliLink)
"System settings" 3 42.
● System
Refer to (NAVI 50 IntelliLink)
"System settings" 3 42.
Audio settings
Select Audio to display the following
options:
● Vol/Speed (Off/1/2/3/4/5)
The volume increases when
vehicle speed increases, to
compensate for wind and road
noise.
Speed compensated volume can
be switched off or the degree of
volume adaptation can be set.
● Loudness (On/Off)
Switch loudness on to increase
bass and treble levels.
● BAL/FAD
Refer to (NAVI 50 IntelliLink)
"Tone settings" 3 39.
● Sound
Touch l to open the audio
preferences submenu.
Depending on version, the
volume of different audio types
can be set independently, e.g.
audio, traffic announcements
(TA), navigation instructions,
handsfree phone system and
ringtone levels. Touch ]/< to
adjust volume of each audio type.
If required, touch Reset to
defaults to return all volumes to
the factory settings.
For other versions of the sound
submenu, refer to
(NAVI 50 IntelliLink) "Tone
settings" 3 39.
NAVI 80 IntelliLink - Volume settings
Refer to (NAVI 80 IntelliLink) "System
settings" 3 42.
Page 42

42 Introduction
System settings
R15 BT USB, R16 BT USB,
CD16 BT USB, CD18 BT USB System settings
Press SETUP and access the
settings menu by turning and
pressing OK.
When system setting adjustments
have been made, press SETUP to
exit the menu and save changes. The
system also saves and exits
automatically after a delay.
Set clock
To set the system clock and the time
display format, select Clock. Select
the required setting by turning and
pressing OK.
Change system language
Change the display language by
accessing the Language menu.
Select a language from the list by
turning and pressing OK.
Restore default system settings
To restore system settings to their
default values, select Default
settings by turning and pressing OK.
Confirm modification when prompted
by pressing OK again.
NAVI 50 IntelliLink - System settings
To access the settings menu at any
time, touch 7 followed by
ÿSetting(s).
The following settings submenus are
displayed at the bottom of the screen:
● Audio:
Refer to (NAVI 50 IntelliLink)
"Tone settings" 3 39 and
"Volume settings" 3 41.
● Display: See below.
● Bluetooth: See below.
● System: See below.
Display
Select Display to display the following
options:
● Brightness (Low/Mid/High)
● Map mode (Auto/Day/Night)
● Auto: Day and night mode
are changed automatically.
● Day: The map screen is
always displayed with bright
colours.
● Night: The map screen is
always displayed with dark
colours.
● Background (Dark/Light)
Available depending on version.
Switch between a dark or light
display mode (available
depending on vehicle).
Bluetooth
Select Bluetooth to display the
following options:
● View Bluetooth device list
● Search for Bluetooth device
● External device authorisation
Page 43

Introduction 43
● Change passkey (for pairing of
Bluetooth devices with the
Infotainment system)
● Smartphone
Available depending on version.
For help with activating and
operating voice controls - refer to
"Voice recognition" 3 102.
For further information on Bluetooth
settings, refer to (NAVI 50 IntelliLink)
"Bluetooth music" 3 65 and
"Bluetooth connection" in the "Phone"
section 3 109.
System
Select System to display the following
options:
● Language
Change display language and
voice instruction language for
Navigation system. Press OK to
confirm selection.
● Clock/units
The following settings can be
changed:
● Time Format (12h/24h)
● Units/Nav Units (km/mls)
● Time Setting
Press l to open the Time
set submenu containing the
following options:
Auto/Manual
If Auto time setting is
selected, the time is set
automatically by GPS.
If Manual time setting is
selected, adjust as
appropriate.
Note
Navigation maps for the current
country must be installed on the
system to ensure the local time is
correct.
● Factory settings
The following settings can be
reset to the factory default:
● All
● Phone
● Navigation
● Audio-Media-Radio-System
● Navigation (On/Off)
● System version (displays
Infotainment system software
version number)
When system setting adjustments
have been made, touch 7 (and select
another menu on the display) to exit
the settings menu and save changes.
The system also saves and exits
automatically after a delay.
NAVI 80 IntelliLink - System settings
To access the system settings menu
from the Home page, touch MENU
followed by System.
The following settings submenus are
displayed:
● Language
● Display
● Sound
● Clock
● Safety warnings
● Home screen
● Keyboards
● Set units
Page 44

44 Introduction
● Status & Information
● Remove SD-card
● Restore factory settings
After system settings are changed,
touch Done to confirm.
Language
To change Infotainment system
language then voice type (depending
on version).
Display
The following settings are displayed:
● Daytime brightness: Change
screen brightness to suit external
light levels (daylight).
During low external light levels,
the display screen is easier to
view when the display is not too
bright.
● Nighttime brightness/Night
brightness: Change screen
brightness to suit external light
levels (night light).
During low external light levels,
the display screen is easier to
view when the display is not too
bright.
● Automatic day/night mode/
Switch to night mode at night: To
activate automatic switching
between daytime/night
brightness.
Night mode is activated during
low external light levels and when
the headlights are switched on.
● Force night mode/Use night
mode: To activate night mode.
Sound
The following settings submenus are
displayed:
● Sound levels: To change volume
and sounds for the main volume,
handsfree phone system, phone
ringtone, navigation instructions,
system/computer voice, traffic
information, and park assist
(depending on version).
● Alerts: To adjust alert volume,
and switch on/off alerts when
display screen is switched off.
● Speed sensitivity volume: To set
volume adjustment based on
vehicle speed.
● Voice output settings: Adjust
types of information to be given
by the Infotainment system voice
(e.g. "Read aloud motorway lane
instructions").
● Voice: Change the voice used by
the Infotainment system (if
available).
Clock
To set the system clock and the time
display format.
Keeping the automatic time
adjustment setting switched on is
recommended.
Safety warnings
To switch on/off various alerts
provided by the Infotainment system
(e.g. "Warn when driving faster than
allowed"). Check appropriate boxes
to switch on.
Home screen
To change the home page
configuration.
Select from list of options to see a
preview of each home page layout.
Page 45

Introduction 45
Keyboards
To change first the alphabet type (e.g.
Latin, Greek) then the keyboard type
(e.g. Qwerty, ABCD).
Set units
To change the units of measurement,
for e.g. distance (km/miles), coordinates (degrees, minutes,
seconds), temperature (℃, ℉) and
barometric units (if available).
Status & Information
To display system information, e.g.
version, GPS status, network status,
licences and copyright information.
Remove SD-card
To eject the SD card safely.
Restore factory settings
To delete all Infotainment system
information. Follow the instructions
on the display.
Note
Afterwards, the Infotainment system
will restart in English by default. If
necessary, select Language in the
System menu to change language.
Multimedia settings
To access the Multimedia settings
menu from the Home page, touch
MENU then Multimedia, followed by
Settings.
The following settings submenus are
displayed:
● Sound
● Radio
● Media
● Pictures
● Video
After settings have been changed,
touch Done to confirm.
Sound
The following sound settings can be
updated:
● 'Balance':
Set the sound distribution in the
vehicle.
● 'Bass Treble':
Set the sound option, e.g.
'Neutral' or 'Pop-rock', 'Classical',
'Jazz' (if available). Select
'Manual' to manually set the
treble and bass levels.
Press Done to save changes.
● 'Demo arkamys' (if available):
Select to trial Arkamys mode.
● 'Bass Boost Arkamys':
Switch bass amplification on/off.
Radio
The following radio settings can be
updated:
● switch searching for Alternative
Frequencies (AF) on/off
● switch i-traffic (Traffic program
information) on/off
● switch programme type (PtY) on/
off
● switch Simulcast on/off
● display i-announcement
information (e.g. Area weather
information, Event information)
● update list of saved radio stations
For further information, refer to
(NAVI 80 IntelliLink) "Radio" 3 47.
Page 46

46 Introduction
Media
The following media settings can be
updated:
● switch Repeat (a track) on/off
● switch Shuffle on/off
● switch Display album cover on/off
● configure Manage Bluetooth
devices
For further information, refer to
(NAVI 80 IntelliLink) "Bluetooth
music" 3 65.
Pictures
The following photo settings can be
updated:
● set display time for photos during
a slideshow ("Slide show delay")
● switch from normal to full screen
display ("Default view")
For further information, refer to
"Displaying pictures" 3 71.
Video
The following video settings can be
updated:
● set display type for videos (if
available)
● switch from normal to full screen
display
For further information, refer to
"Playing movies" 3 71.
Page 47

Radio 47
Radio
Usage .......................................... 47
Station search .............................. 49
Autostore lists .............................. 51
Radio data system (RDS) ............ 52
Digital audio broadcasting ........... 54
Usage
Radio reception
Radio reception may be disrupted by
static, noise, distortion or loss of
reception due to:
● changes in distance from the
transmitter
● multi-path reception due to
reflection
● shadowing
R15 BT USB, R16 BT USB,
CD16 BT USB, CD18 BT USB Controls
The most important buttons for
control of the radio are:
● RADIO: Activate radio, change
waveband
● 2 3: Station search
● OK: Change frequency
● Station buttons 1...6: Preset
station buttons
● SETUP: System settings,
automatic station storing
● TEXT: Display radio text
information
Activating the radio
Press RADIO to switch the audio
source to radio.
The station previously selected will be
received.
Selecting the waveband
Press RADIO repeatedly to switch
between the available wavebands
(e.g. FM1, FM2, AM).
The station previously selected in that
waveband will be received.
NAVI 50 IntelliLink - Controls
Use the touchscreen to operate the
radio.
The main controls are:
● FM/AM/DAB (depending on
version): Switch between FM and
AM wavebands.
● l/m: Start automatic search
for next/previous radio station.
Page 48

48 Radio
● k/l: Change to next/previous
frequency in increments of 0.5.
● R/S: Scroll through a list of
stations.
Activating the radio
To activate the radio at any time,
touch 7 followed by è/ñRadio.
The station previously selected will be
received.
The following submenus are
displayed at the bottom of the screen:
● Main: Radio station/frequency is
displayed.
● List: Displays an alphabetical list
of available radio stations
(maximum 50 stations).
Note
Radio stations without RDS: Only
the frequency is displayed. These
stations appear at the end of the list.
● Presets: Displays stored
favourite radio stations.
● Options:
The following settings can be
changed, depending on selected
waveband:
● RDS (On/Off)
● TA (On/Off)
● Region (On/Off)
● News (On/Off)
● AM (On/Off)
● Update list (Start)
For further information, refer to
(NAVI 50 IntelliLink) "Radio data
system (RDS)" 3 52.
Selecting the waveband
Touch S alongside FM/AM/DAB (if
available) in the top left corner of the
display and select FM, AM or DAB
waveband.
The station previously selected in that
waveband will be received.
Note
AM waveband can be switched off
via the Options menu.
Refer to "Digital audio broadcasting"
3 54.
NAVI 80 IntelliLink - Controls
Use the touchscreen to operate the
radio.
The main controls are:
● FM/AM/DR: Switch between FM,
AM and DR (digital radio)
wavebands.
● Y/Z: Start automatic search for
next/previous radio station.
● </>: Change to next/previous
frequency in increments.
● ↑/↓: Scroll through a list of
stations.
Activating the radio
To access the Radio from the Home
page, touch MENU then Multimedia,
followed by Radio.
The following modes are available:
● Preset:
Displays stored favourite radio
stations.
● List:
Displays an alphabetical list of
available radio stations
(maximum 50 stations).
Page 49

Radio 49
Note
Radio stations without RDS: Only
the frequency is displayed. These
stations appear at the end of the list.
● Frequency:
Search manually or automatically
by scanning the selected range
of frequencies.
Selecting the waveband
Touch FM/AM/DR tab in top left
corner of the display to switch
between wavebands.
The station previously selected in that
waveband will be received.
Station search
Automatic station search
R15 BT USB, R16 BT USB,
CD16 BT USB, CD18 BT USB Automatic station search
Briefly press 2 or 3 to search for
the next receivable station in the
current waveband.
If no station is found, automatic
searching continues until 2 or 3 is
pressed again.
NAVI 50 IntelliLink - Automatic station search
Touch l or m to search for the next
receivable station in the current
waveband.
If no station is found, automatic
searching continues until l or m is
touched again.
NAVI 80 IntelliLink - Automatic station search
Touch Y or Z to search for the next
receivable station in the current
waveband.
If no station is found, automatic
searching continues until Y or Z is
touched again.
Manual station search
R15 BT USB, R16 BT USB,
CD16 BT USB, CD18 BT USB Manual station search
Select the desired waveband then
press and hold 2 or 3 to scan the
selected waveband.
Release the button when close to the
required frequency. An automatic
search is then made for the next
receivable station and it is played
automatically.
Turn OK to change the frequency in
increments.
Stored station search
This allows you to recall radio stations
that you have previously stored.
To store a station, select the desired
waveband and station then press
station button 1...6 until an audible
signal sounds, confirming that the
station has been stored to the
appropriate station button. Six
stations per waveband can be stored.
Recalling a stored station
To recall a station, select the desired
waveband then briefly press station
button 1...6.
Search radio station name (FM only)
Select the FM waveband then
highlight the station name in the
display using _ or 6.
Page 50

50 Radio
Press 1 or 4 repeatedly to manually
search for the required station name.
The frequency may be displayed
instead if the station name is
unavailable.
The alphabetical list contains up to
60 FM radio stations with the best
reception. This list can be updated at
any time. Autostore lists 3 51.
NAVI 50 IntelliLink - Manual station search
Select the desired waveband then
touch k or l to change to next/
previous frequency in increments of
0.5.
Stored station search
This allows you to recall radio stations
that you have previously stored.
To store a station, select the desired
waveband and station then touch
Presets to display the stored
favourites.
Touch and hold on the desired
location. The frequency or name of
the radio station appears on the
favourite location, confirming that the
station has been stored (i indicates
the currently received station).
Note
12 stations per waveband can be
stored.
Recalling a stored station
To recall a station, select the desired
waveband then touch Presets to
display the stored favourites, then
select the desired favourite radio
station.
Touch k/l to move to the previous/
next page of favourites.
Search radio station name (FM and
DAB only)
Select waveband FM or DAB (if
available) then touch List to display
an alphabetical list of available radio
stations.
Touch S or R to manually search for
the required station name. The
frequency may be displayed instead
if the station name is unavailable.
Select a list item to receive the
selected station (i indicates the
currently received station).
The alphabetical list contains up to 50
radio stations with the best reception.
This list can be updated at any time,
refer to "Autostore lists" 3 51.
NAVI 80 IntelliLink - Manual station search
Select the desired waveband then
touch < or > to change to next/
previous frequency in increments.
Stored station search
This allows you to recall radio stations
that you have previously stored.
To store a station, select the desired
waveband and station then touch
Preset to display the stored
favourites.
Touch and hold on the desired
location until a beep is heard. The
frequency or name of the radio station
appears on the favourite location,
confirming that the station has been
stored. 6 stations per waveband can
be stored.
Alternatively, select the desired
waveband and station, then select
Frequency or List. Touch < to open a
pop-up menu, then select Save as
preset. Touch and hold on the desired
location until a beep is heard.
Page 51

Radio 51
Recalling a stored station
To recall a station, select the desired
waveband then touch Preset to
display the stored favourites, then
select the desired favourite radio
station.
Search radio station name (FM only)
Select the FM waveband then touch
List to display an alphabetical list of
available radio stations.
Touch ↑ or ↓ to manually search for
the required station name. The
frequency may be displayed instead
if the station name is unavailable.
The alphabetical list contains up to
50 radio stations with the best
reception. This list can be updated at
any time, refer to "Autostore lists"
3 51.
Autostore lists
The stations with the best reception in
a waveband can be searched for and
stored automatically via the autostore
function.
Automatic station storing
R15 BT USB, R16 BT USB,
CD16 BT USB, CD18 BT USB Automatic station storing
The FM waveband has an autostore
list (AST), on which six stations can
be stored.
While listening to the radio, press and
hold RADIO: The six stations with the
strongest reception will be
automatically stored on AST.
Note
Due to signal strength, it is possible
that less than six stations will be
stored.
Recalling a station
R15 BT USB, R16 BT USB,
CD16 BT USB, CD18 BT USB Recalling a station
Select the desired waveband, then
briefly press station button 1...6 to
recall a stored station.
To recall a station on the autostore list
(AST), while listening to the radio
briefly press SETUP to activate AST
mode. The station previously
selected will be received. Briefly
press station button 1...6 to recall
another stored station on the
autostore list.
Updating stations list manually
Stations can also be stored manually
in the autostore list.
Note
Only available with
NAVI 50 IntelliLink,
NAVI 80 IntelliLink.
To update the list of stations and
obtain the most recent ones, activate
the system update manually.
Depending on Infotainment system,
the sound may be muted during a
manual update.
NAVI 50 IntelliLink - Updating stations list manually
Touch Options, scroll down to
Update List then select Start;
Updating ... appears on the display
until the update is complete.
Note
If DAB is available, it is
recommended to update the DAB
stations list manually when the
system is switched on.
Page 52

52 Radio
NAVI 80 IntelliLink - Updating stations list manually
From the Home page, touch MENU
then Multimedia, followed by
Settings. Select Radio and scroll
down to Update radio list.
Alternatively (depending on version),
select Multimedia followed by Radio,
and choose any the following modes:
● Preset
● List
● Frequency
Then touch < to open a pop-up menu,
and select Update radio list.
Radio data system (RDS)
RDS is an FM station service that
helps you find the desired station and
ensures its fault-free reception.
Advantages of RDS
● The programme name of the
chosen station appears on the
display screen instead of its
frequency.
● During an automatic station
search, the Infotainment system
tunes into RDS stations only.
● The Infotainment system always
tunes into the best receivable
broadcasting frequency of the
chosen station, by means of AF
(Alternative Frequency).
R15 BT USB, R16 BT USB,
CD16 BT USB, CD18 BT USB RDS functions
Configuring RDS
Press SETUP and turn OK to access
the RDS menu. Press knob to select.
Turn the rotary knob to select RDS
SETUP.
Switching RDS on and off
Press Options on the display screen.
The following settings can be
changed:
Switch on/off RDS-AF by pressing
OK. AF is shown on the display
screen when RDS is active.
Text information (Radio text)
Certain FM radio stations issue text
information relating to the broadcast
program (e.g. song name).
Press SETUP and turn OK to access
the Radio texts menu.
Turn the rotary knob to select Radio
and press the knob to see this
information.
NAVI 50 IntelliLink - RDS functions
Configuring RDS
Select Options. The following settings
can be changed:
● RDS (On/Off)
Switch off if not required.
● TA (On/Off)
See below.
● Region/AF (On/Off)
See below.
Page 53

Radio 53
● News (On/Off)
See below.
● AM (On/Off)
Switch off if not required.
● Update list (Start)
Refer to (NAVI 50 IntelliLink)
"Autostore lists" 3 51.
TA (Traffic announcements)
If TA is switched on:
● Traffic announcements from
certain FM radio stations (and
DAB stations, if available) are
broadcast automatically.
● Radio and auxiliary audio source
playback is interrupted for the
duration of the traffic
announcement.
Note
Automatic broadcasting of traffic
announcements is deactivated if
waveband is set to AM.
Region/AF
If the RDS function is activated and
Region/AF is switched on:
The frequency of certain FM radio
stations may change depending on
the geographical area.
Poor reception can sometimes cause
erratic and unwelcome changes in
frequency. Switch off Region/AF if
necessary.
News
If News is switched on:
● News announcements from
certain FM radio stations (and
DAB stations, if available) are
broadcast automatically.
● Radio and auxiliary audio source
playback is interrupted for the
duration of the traffic
announcement.
Text information (Radio text)
Certain FM radio stations (and DAB
stations, if available) issue text
information relating to the broadcast
program (e.g. song name).
NAVI 80 IntelliLink - RDS functions
Configuring RDS
To access the Radio settings menu
from the Home page, select MENU
then Multimedia, followed by
Settings then Radio.
Depending on version, touch < to
open a pop-up menu, and access the
'Radio settings' option.
The following radio settings can be
updated:
● switch searching for Alternative
Frequencies (AF) on/off
● switch i-traffic (Traffic program
information) on/off
● switch programme type (PtY) on/
off
● switch Simulcast on/off
● display i-announcement
information (e.g. Area weather
information, Event information)
● update list of saved radio stations
Page 54

54 Radio
Alternative Frequency (AF)
Switch on the RDS-AF function to
always tune into the best receivable
broadcasting frequency of the chosen
station
Poor reception can sometimes cause
erratic and unwelcome changes in
frequency. Switch off RDS-AF
function if necessary.
i-traffic (Traffic program information)
Radio traffic service stations are FM
RDS stations that broadcast traffic
news.
Switch on I-Traffic to automatically
receive traffic bulletins when they are
broadcast.
Programme type search (PtY)
Switch on PtY to display the type of
programme (e.g. news, sport)
currently being broadcast
Update radio list
Refer to (NAVI 80 IntelliLink)
"Autostore lists" 3 51.
Simulcast
Switch on the Simulcast function to
automatically change from a DR
(digital radio) station to the same
station on the FM waveband in the
event of a loss of reception.
i-announcement
Select to display information such as
weather or events in the vicinity.
Text information (Radio text)
Certain FM radio stations issue text
information relating to the broadcast
program (e.g. song name).
To check for text information, from
any radio mode (e.g. Preset, List,
Frequency) touch < to open a pop-up
menu, and access the text
information option, by selecting e.g.
"Show radio text".
Digital audio broadcasting
Digital audio broadcasting (DAB) is
an innovative and universal
broadcast system.
General information
● DAB stations are indicated by the
programme name instead of the
broadcasting frequency.
● With DAB, several radio
programmes (services) can be
broadcast on a single frequency
(ensemble).
● Besides high-quality digital audio
services, DAB is also able to
transmit programme-associated
data and a multitude of other data
services including travel and
traffic information.
● As long as a given DAB receiver
can pick up the signal sent out by
a broadcasting station (even if
the signal is very weak), sound
reproduction is ensured.
● There is no fading (weakening of
the sound) that is typical of AM or
FM reception. The DAB signal is
reproduced at a constant volume.
● Interference caused by stations
that are on nearby frequencies (a
phenomenon that is typical of AM
and FM reception) does not
occur with DAB.
Page 55

If the DAB signal is too weak to
be picked up by the receiver, the
system switches over to the
same programme on another
DAB or FM station.
● If the DAB signal is reflected by
natural obstacles or buildings,
the reception quality of DAB is
improved, whereas AM or FM
reception is considerably
impaired in such cases.
● When DAB reception is enabled,
the FM tuner of the Infotainment
system remains active in the
background and continually
searches for the best receivable
FM stations.
Radio 55
Page 56

56 CD Player
CD Player
General information ..................... 56
Usage .......................................... 57
General information
The Infotainment system's CD player
can playback audio CDs, MP3 CDs
and also WMA CDs (depending on
version).
CD16 BT, CD18 BT: AAC and WAV
formats can also be played.
Important information about audio CDs and MP3/WMA CDs
Caution
Under no circumstances place
DVDs, single-CDs with a diameter
of 8 cm or shaped CDs in the audio
player.
You must not put any stickers on
CDs. These discs can get jammed
in the CD drive and ruin the drive.
An expensive replacement of the
device will then be necessary.
● Audio CDs with copy protection,
which are not in compliance with
the audio CD standard, may not
play correctly or not at all.
● Self-recorded CD-Rs and CDRWs and WMA files with Digital
Rights Management (DRM) from
online music shops may not play
correctly or not at all.
● On mixed mode CDs
(combinations of audio and data,
e.g. MP3), only the audio tracks
will be detected and played.
● Self-recorded CD-Rs and CDRWs are more vulnerable to
mishandling than prerecorded
CDs. Correct handling,
especially in the case of selfrecorded CD-Rs and CD-RWs,
must be ensured; see below.
● Avoid leaving fingerprints when
you change CDs.
● Put CDs back in their sleeves
immediately after removing them
from the CD player, in order to
protect them from dirt and
damage.
● Dirt and liquids on CDs can
smear the lens of the audio
player inside the device and
cause faults.
Page 57

CD Player 57
● Protect CDs from heat and direct
sunlight.
● The following restrictions apply
for MP3/WMA CDs:
Only MP3 files and WMA files
can be read.
Maximum folder structure depth:
11 levels.
Maximum number of MP3 and/or
WMA files that can be saved:
1000 files.
Applicable playlist
extensions: .m3u, .pls.
Playlist entries must be in the
form of relative paths.
● The operation of MP3 and WMA
files is identical. When a CD with
WMA files is loaded, MP3-related
menus are displayed.
Usage
CD16 BT USB, CD18 BT USB CD player usage
Starting CD playback
Switch on the Infotainment system
(by pressing m) and push the CD with
the printed side up into the CD slot
until it is pulled in: CD playback starts
automatically.
If there is already a CD in the unit,
press MEDIA repeatedly to select the
desired audio source: CD playback is
started.
Note
Depending on the data stored on the
audio CD or MP3 CD, differing
information about the CD and the
current music track will be shown on
the display.
Selecting an album or track
Turn BROWSE to select an album or
track from the list.
Press the knob to select.
Skipping to the next track or previous track
Briefly press 2 or 3 once or
several times.
Fast forward or rewind
Press and hold 2 or 3 to fast
forward or rewind the current track.
Repeat
During CD playback, press and hold
the numbered button 1 (from the
Station buttons 1...6) to repeat the
current track.
RPT appears on the display when
repeat is active.
Press and hold the numbered button
1 again to deactivate.
RPT disappears from the display.
Random playback
During CD playback, press and hold
the numbered button 2 (from the
Station buttons 1...6) to activate
random playback.
MIX appears on the display when
random playback is active.
Page 58
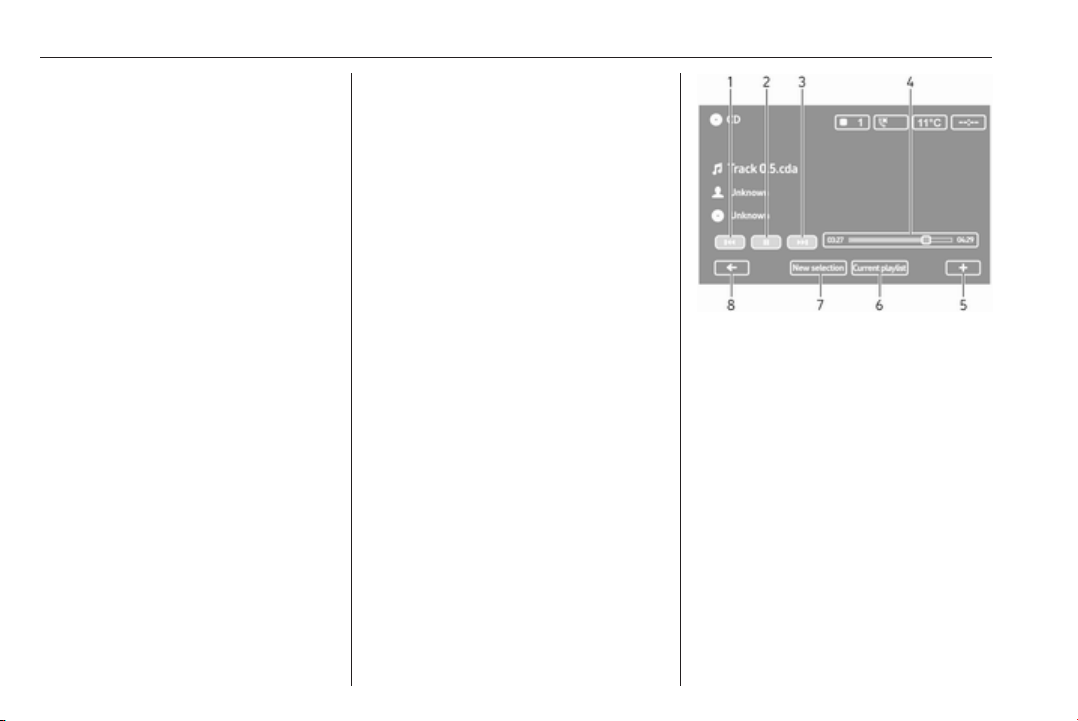
58 CD Player
Note
On an MP3 CD, the random
playback function applies only to the
current album.
Press and hold the numbered button
2 again to deactivate.
MIX disappears from the display.
Random playback can also be
deactivated by ejecting the CD.
Note
Random playback is not deactivated
when the audio system is switched
off or the source changed.
Pause
Briefly press m, @ or both ! and #
simultaneously to interrupt CD/MP3
CD playback. Press again to resume
playback.
The pause function is deactivated
automatically when the volume is
adjusted, the audio source is
changed or automatic information
messages are issued.
Displaying additional text information (CD-Text or ID3 tag)
After selecting a track or album,
briefly press TEXT to access the text
information available on the CD (e.g.
artist name, album name or song
name).
To display all text information at once,
press and hold TEXT.
To exit the display, press /.
Removing a CD
Press d: The CD is pushed out of the
CD slot.
If the CD is not removed after
ejection, it will be drawn back in again
automatically after a few seconds.
NAVI 80 IntelliLink (Type B and C)
- CD player usage
When CD player is selected, the
display includes the following options:
1. t: Move to previous track.
2. =: Pause track.
3. v: Move to next track.
4. Scroll bar for time elapsed: Scroll
through tracks.
5.
<: Open pop-up menu; To
change the audio source or
access the track settings (e.g.
switch on/off shuffle or repeat,
show current track details, and
access sound settings).
6. Current playlist: Access the
current playback list.
Page 59

CD Player 59
7. New selection: Choose another
track from the connected audio
source.
8. r: Return to previous screen.
Starting CD playback
Switch on the Infotainment system
(by pressing m) and push the CD with
the printed side up into the CD slot
until it is pulled in: CD playback starts
automatically.
If there is already a CD in the unit,
touch S in top left corner and select
CD, or press MEDIA or AUDIO
repeatedly to select the desired audio
source: CD playback is started.
Note
Depending on the data stored on the
audio CD or MP3 CD, differing
information about the CD and the
current music track will be shown on
the display.
Selecting an album or track
Touch New selection or
Current playlist, or turn the central
rotary knob to select an album or track
from the list.
Skipping to the next track or previous track
Briefly touch 2 or 3 once or
several times.
Fast forward or rewind
Touch and hold 2 or 3 to fast
forward or rewind the current track.
Repeat
Touch <, or press Options on the
central control unit to access the
settings menu, then select Repeat to
activate.
Random playback
Touch <, or press Options on the
central control unit to access the
settings menu, then select Shuffle to
activate.
Note
On a CD MP3/WMA, the random
playback function applies to the
current album, then moves on to the
next album.
Pause
Briefly touch =, or press the volume
rotary knob, @ or both ! and #
simultaneously to interrupt CD/MP3
CD playback. Press again to resume
playback.
The pause function is deactivated
automatically when the volume is
adjusted, the audio source is
changed or automatic information
messages are issued.
Displaying additional text information (CD-Text or ID3 tag)
Touch < and then select
Track details to access the text
information available on the CD (e.g.
artist name, album name or song
name).
Removing a CD
Touch < and then select Eject, or
press d: The CD is pushed out of the
CD slot.
If the CD is not removed after
ejection, it will be drawn back in again
automatically after a few seconds.
Page 60
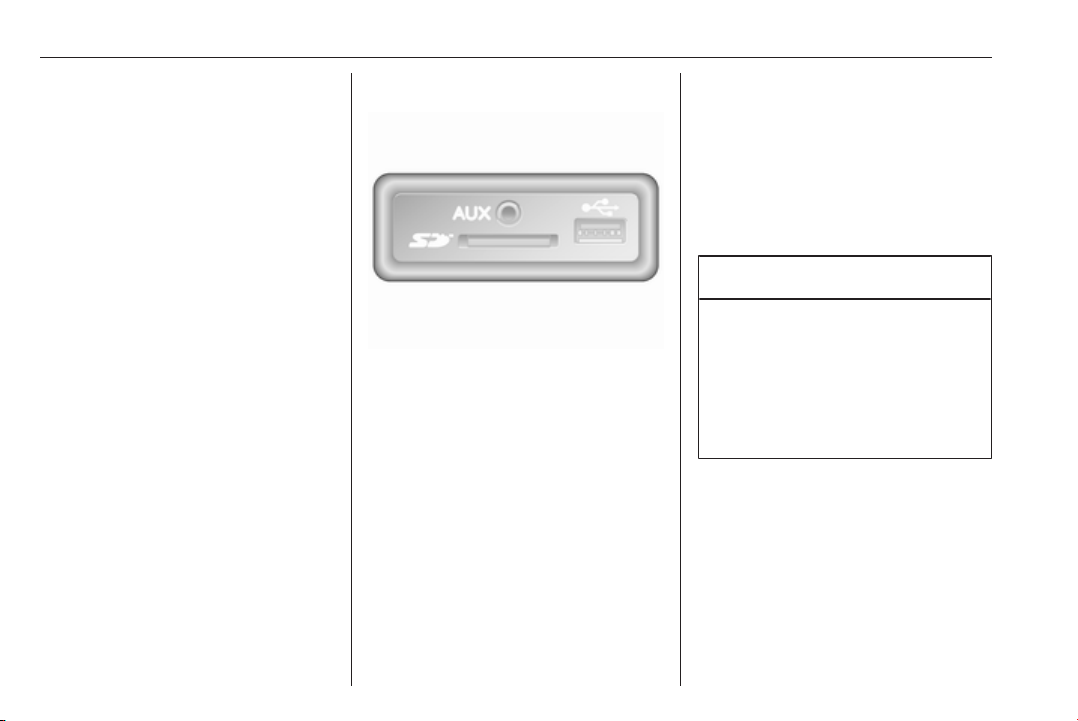
60 AUX input
AUX input
General information ..................... 60
Usage .......................................... 60
General information
Depending on version, in the
Infotainment unit (or on the
instrument panel) there is an AUX
socket for the connection of external
audio sources.
Note
The socket must always be kept
clean and dry.
It is possible, for example, to connect
a portable CD player with a 3.5 mm
jack plug to the AUX input.
Usage
An audio source that is connected to
the AUX input can only be operated
via the controls on the audio source,
i.e. not via the Infotainment system.
Only select a track directly on the
audio source when the vehicle is
stationary.
Caution
Before connecting or
disconnecting an auxiliary device,
e.g. a portable CD player, switch
off the player and the Infotainment
system, to avoid sound quality
issues and possible damage to the
equipment.
Upon connection via the jack plug, the
system detects the audio source
automatically. Depending on the
recording volume, there may be a
delay before the audio source is
heard.
The artist or track name are not
shown on the display screen.
Page 61

AUX input 61
Note
Ensure the auxiliary device is
securely stowed during driving.
Vehicle occupants could be injured
by objects being thrown around in
the event of hard braking, a sudden
change in direction or an accident.
R15 BT USB, R16 BT USB,
CD16 BT USB, CD18 BT USBAUX input usage
Press MEDIA or AUDIO/SOURCE to
change the audio source to AUX
mode, then switch on the auxiliary
device. AUX appears on the display
screen.
AUX settings
Press SETUP to access the settings
menu.
Select AUX IN and turn OK until the
desired setting is selected from:
● HI (300 mV)
● MID (600 mV)
● LO (1200 mV)
NAVI 50 IntelliLink - AUX input usage
To access the media menu at any
time, touch 7 followed by t/
üMEDIA.
To switch between auxiliary sources,
touch S in top left corner. The
following options are available:
● USB: Refer to
(NAVI 50 IntelliLink) "USB port"
3 62.
● iPod: Refer to
(NAVI 50 IntelliLink) "USB port"
3 62.
● BT: Refer to
(NAVI 50 IntelliLink) "Bluetooth
music" 3 65.
● AUX: Select to change the audio
source to AUX mode, then switch
on the auxiliary device.
NAVI 80 IntelliLink - AUX input usage
Change the audio source to AUX
mode to playback content from a
connected auxiliary device.
To access the media menu from the
Home page, touch MENU then
Multimedia, followed by Media.
Touch < to open a pop-up menu
(depending on version). The following
options are available:
● Auxiliary socket: Change the
audio source to AUX mode, then
switch on the auxiliary device.
● USB: Refer to
(NAVI 80 IntelliLink) "USB port"
3 62.
● Bluetooth connection: Refer to
(NAVI 80 IntelliLink) "Bluetooth
music" 3 65
● CD player: Refer to
(NAVI 80 IntelliLink) "CD player
usage" 3 57.
● SD card: Operation is similar to
those for the CD player 3 57.
Page 62
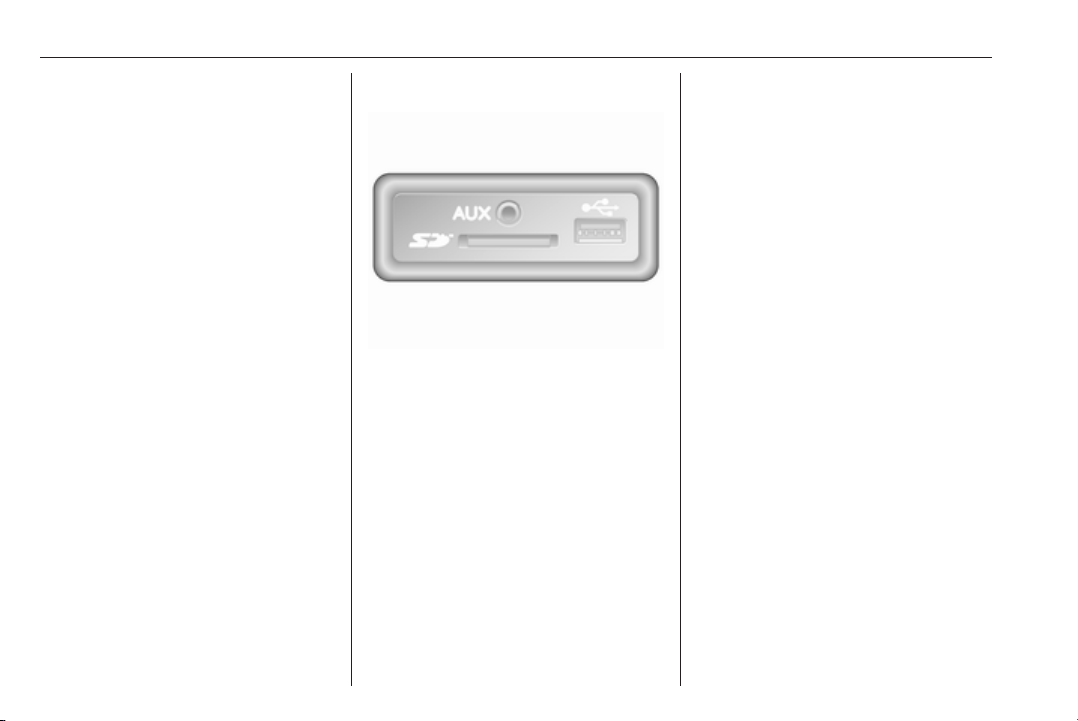
62 USB port
USB port
General information ..................... 62
Playing saved audio files ............. 63
General information
Depending on version, in the
Infotainment unit (or on the
instrument panel) there is a USB
socket M for the connection of external
audio sources.
Note
The socket must always be kept
clean and dry.
An MP3 player, USB drive, iPod or
smartphone can be connected to the
USB port.
These devices are operated via the
controls and menus of the
Infotainment system.
Important information
MP3 player and USB drives
● The MP3 players and USB drives
connected must comply with the
USB Mass Storage Class
specification (USB MSC).
● Only MP3 players and USB
drives with a sector size of
512 Bytes and a cluster size
smaller or equal to 32 kBytes in
the FAT32 file system are
supported.
● Hard disk drives (HDD) are not
supported.
● The following restrictions apply
for the data stored on an MP3
Player or USB device:
Only MP3 files, WMA and
(depending on Infotainment
system) ACC files can be read.
WAV files and all other
compressed files cannot be
played.
Maximum folder structure depth:
11 levels.
Maximum number of files that
can be saved: 1000 files.
Page 63

USB port 63
NAVI 50 IntelliLink: Minimum
recommended storage capacity
of USB drive is 4 GB.
Recommended maximum
storage capacity is 32 GB.
WMA files with Digital Rights
Management (DRM) from online
music shops may not play
correctly or not at all.
Applicable playlist
extensions: .m3u, .pls.
Playlist entries must be in the
form of relative paths.
Playing saved audio files
Once connected, it is only possible to
use the controls and menus of the
Infotainment system to operate the
audio device.
R15 BT USB, R16 BT USB,
CD16 BT USB, CD18 BT USB Playing music via USB socket
MP3 player / iPod / USB drives
The system detects the audio device
when a USB device is connected and
the current track is displayed
automatically.
When a new audio device is
connected, the first track in the first
folder is played automatically. When
reconnecting the device, the
previously played track is resumed.
Depending on the audio device
connected, select a folder (MP3
player, USB drive) or a playlist
(portable digital music player).
The operation of data sources
connected via USB is generally the
same as for an audio/MP3/WMA CD
3 57.
Selecting a track
To select tracks directly (and change
folders), first access the audio device
menu structure by pressing OK
during playback. Select tracks and
change folders by turning and
pressing the knob.
NAVI 50 IntelliLink - Playing music via USB socket
MP3 player / USB drives / iPod
The system detects the audio device
when a USB device is connected and
the current track is displayed
automatically. The device type (MP3
player/USB drive or iPod) is also
recognised and the relevant audio
source mode (USB or iPod) is
selected automatically.
When the t/üMEDIA menu is
active, the following submenus are
available:
● Main/Player
● List
● Options
To switch between audio sources,
touch S in top left corner. The
following options are available:
● USB: Select to change the audio
source to USB mode.
Note
During use, the battery of a
connected USB device is charged or
maintained.
● iPod: Select to change the audio
source to iPod mode.
● BT: Refer to
(NAVI 50 IntelliLink) "Playing
music via Bluetooth" - 3 65.
● AUX: Refer to
(NAVI 50 IntelliLink) "Aux input
usage" 3 60.
Page 64

64 USB port
Main/Player
Select to display the current track. In
this display screen, the following
options are available:
● l (skip to previous track, press
and hold to fast rewind)
● =/l (pause/play)
● m (skip to next track, press and
hold to fast forward)
List
Displays a list of the tracks in the
current album/folder. Select a
particular track to play it directly.
Note
By default, albums are listed in
alphabetical order.
If a USB drive is connected, all the
folders will be at the same level on
the tree structure.
To return to the previous level on the
folder tree structure, touch ò.
Options
Select to display the following
options:
● Repeat (Off/Track/Folder/All)
● Shuffle (On/Off)
NAVI 80 IntelliLink - Playing music via USB socket
MP3 player / USB drives
Change the audio source to USB
mode to playback files from a
connected USB device.
To access the media menu from the
Home page, select MENU then
Multimedia, followed by Media.
Touch < to open a pop-up menu
(depending on version). The following
options are available:
● USB: Change the audio source to
USB mode.
● Auxiliary socket: Refer to
(NAVI 80 IntelliLink) "AUX input"
3 60.
● Bluetooth connection: Refer to
(NAVI 80 IntelliLink) "Playing
music via Bluetooth" 3 65.
● SD card
● CD player: Refer to
(NAVI 80 IntelliLink) "CD player
usage" 3 57.
When USB mode is selected, the
display includes the following options:
● t or v: Move to previous/next
track.
● =: Pause track.
● Scroll bar for time elapsed: Scroll
through tracks.
● New selection: Choose another
track from the connected audio
source.
● Current playlist: Access the
current playback list.
● r: Return to previous screen.
●
<: Open pop-up menu; To
change the audio source or
access the track settings (e.g.
switch on/off shuffle or repeat,
show current track details, and
access sound settings).
Disconnecting from USB socket
Playback is stopped immediately
when the audio device is withdrawn
from the USB socket.
Page 65

Bluetooth music 65
Bluetooth music
General information ..................... 65
Operation ..................................... 65
General information
Bluetooth-enabled auxiliary audio
sources (e.g. music mobile phones,
MP3 players etc.), which support
Bluetooth music protocol A2DP, can
be connected wirelessly to the
Infotainment system.
Important information
● The Infotainment system only
connects to Bluetooth devices
that support A2DP (Advanced
Audio Distribution Profile).
Connection issues may arise with
early versions.
● The Bluetooth device must
support AVRCP (Audio Video
Remote Control Profile)
version 1.0 or higher. If the
device does not support AVRCP,
only the volume can be controlled
via the Infotainment system.
● Before connecting the Bluetooth
device to the Infotainment
system, become acquainted with
its operating instructions for
Bluetooth functions.
Operation
Prerequisites
The following prerequisites must be
met, in order to control a Bluetoothenabled audio device via the
Infotainment system:
● The Bluetooth function of the
Infotainment system must be
activated.
Refer to "Bluetooth connection"
in the "Phone" section 3 109.
● The Bluetooth function of the
Bluetooth-enabled auxiliary
audio source must be activated
(see audio device operating
instructions).
● Dependent upon the audio
source, it may be required to set
that device to "visible" (see audio
device operating instructions).
● The audio source must be paired
and connected to the
Infotainment system.
Page 66

66 Bluetooth music
R15 BT USB, R16 BT USB,
CD16 BT USB, CD18 BT USB Playing music via Bluetooth
Bluetooth connection
A connection must be set up between
the audio device and the Infotainment
system via Bluetooth, i.e. the device
must be paired to the vehicle before
using it.
Refer to "Bluetooth connection" in the
"Phone" section 3 109.
● A maximum of five audio devices
can be paired and saved in the
device list, but only one can be
connected at a time.
● If the device has both audio
player and telephone functions,
both functions will be paired.
Pairing a mobile phone 3 107.
● Phone functions will remain
active while the audio player is in
use, and audio playback will be
suspended during phone use.
Pairing an auxiliary audio device to the Infotainment system
To pair the audio device, press TEL
and select Pair device by turning and
pressing OK. The Ready to Pair
screen is displayed.
Then, on the audio device, search for
Bluetooth equipment in the vicinity of
the device.
Select My Radio (i.e. the name of the
system) from the list on the audio
device, then, if applicable, on the
audio device keypad enter the pairing
code shown on the Infotainment
system display screen.
Note
If the audio device does not have a
screen, enter the default pairing
code on the device, then on the
Infotainment system. Refer to the
operating instructions for this default
audio device pairing code, usually
0000. Depending on the device, the
pairing code may need to be entered
in reverse order, i.e. on the
Infotainment system first.
If pairing fails, the system returns to
the previous menu and a
corresponding message is displayed.
Repeat procedure if necessary.
When pairing is completed, a
confirmation message followed by the
name of the paired audio device is
shown on the Infotainment system
display screen.
Note
When a Bluetooth connection is
active, controlling the audio device
via the Infotainment system will
discharge the audio device battery
more rapidly.
Connecting an audio device
Audio devices are automatically
connected to the Infotainment system
after the pairing procedure is
completed.
To connect any audio device that has
been paired, or to connect to a
different paired audio device than the
current one, press TEL and select the
Select Device menu. The device list
shows the audio devices already
paired.
Page 67

Bluetooth music 67
Select the desired device from the list
and confirm by pressing OK. A
display message confirms
connection.
Disconnecting an audio device
To disconnect an audio device from
the Infotainment system, press TEL
(or SETUP) and select Bluetooth
connection. Select the desired device
from the device list then select
Disconnect the device by turning and
pressing OK. A display message
confirms disconnection.
Switching off the audio device or
deactivating the Bluetooth function on
the audio device also disconnects the
device from the Infotainment system.
Unpairing an auxiliary audio device from the Infotainment system
If the list of paired audio devices is full,
a new device can only be paired if an
existing device is unpaired.
To unpair, i.e. to delete an audio
device from the system memory,
press TEL and select Delete device.
Select the desired audio device from
the list and press OK to confirm
deletion when prompted.
Operation via Infotainment system
When paired and connected
wirelessly, audio playback begins
automatically.
The audio device can then be
operated via the Infotainment system
function buttons, rotary knobs and
display menus.
The range of accessible functions
that can be operated via the
Infotainment system depends on the
type of audio player.
The operation of the audio device
when connected wirelessly is similar
to the operations for the CD player
3 57.
NAVI 50 IntelliLink - Playing music via Bluetooth
Bluetooth connection
A connection must be set up between
the audio device and the Infotainment
system via Bluetooth, i.e. the device
must be paired to the vehicle before
using it.
Refer to (NAVI 50 IntelliLink)
"Bluetooth connection" in the "Phone"
section 3 109.
● A maximum of five audio devices
can be paired and saved in the
device list, but only one can be
connected at a time (depending
on version, up to eight audio
devices may be paired).
● If the device has both audio
player and telephone functions,
both functions will be paired.
Pairing a mobile phone 3 107.
● Phone functions will remain
active while the audio player is in
use, and audio playback will be
suspended during phone use.
Pairing an auxiliary audio device to the Infotainment system
To pair the audio device, touch 7
followed by ÿSETTING(S).
Select Bluetooth then either Search
for Bluetooth device or External
device authorisation.
On the audio device, search for
Bluetooth equipment in the vicinity of
the device.
Select the name of the Infotainment
system (e.g. MEDIA-NAV) from the
list on the audio device, then (if
required), on the audio device
Page 68

68 Bluetooth music
keypad, enter the pairing code shown
on the Infotainment system display
screen.
The default pairing code is 0000. To
change this pairing code before the
pairing procedure is started, select
Change passkey to update.
Note
If the audio device does not have a
screen, enter the default pairing
code on the device, then on the
Infotainment system. Refer to the
operating instructions for this default
audio device pairing code, usually
0000. Depending on the device, the
pairing code may need to be entered
in reverse order, i.e. on the
Infotainment system first.
If pairing fails, repeat procedure if
necessary.
Note
When a Bluetooth connection is
active, controlling the audio device
via the Infotainment system will
discharge the audio device battery
more rapidly.
Connecting an audio device
Audio devices are automatically
connected to the Infotainment system
after the pairing procedure is
completed.
To change the audio device
connected, touch 7 followed by
ÿSETTING(S).
Then select Bluetooth followed by
View Bluetooth device list. The device
list shows the audio devices already
paired.
Select the desired audio device from
the list and confirm by touching OK.
Disconnecting an audio device
Switching off the audio device or
deactivating the Bluetooth function on
the audio device disconnects the
device from the Infotainment system.
Unpairing an auxiliary audio device from the Infotainment system
If the list of paired audio devices is full,
a new device can only be paired if an
existing device is unpaired.
To unpair, i.e. to delete an audio
device from the system memory,
touch 7 followed by ÿSETTING(S).
Select Bluetooth then View Bluetooth
device list.
Select the desired audio device from
the list, then touch ë to delete the
device. If required, delete all devices
in the list by selecting Options
followed by Delete all. Confirm with
OK.
Operation via Infotainment system
When paired and connected
wirelessly, audio playback begins
automatically.
The audio device can then be
operated via the Infotainment system
display options.
The range of accessible functions
that can be operated via the
Infotainment system depends on the
type of audio player.
The operation of the audio device
when connected wirelessly is similar
to the operations for playing saved
audio files via the USB socket. Refer
to (NAVI 50 IntelliLink) "Playing music
via USB socket" in the "USB port"
section 3 63.
Page 69

Bluetooth music 69
NAVI 80 IntelliLink - Playing music via Bluetooth
Bluetooth connection
A connection must be set up between
the audio device and the Infotainment
system via Bluetooth, i.e. the device
must be paired to the vehicle before
using it.
● There is a maximum number of
audio devices that can be paired
and saved in the device list, but
only one can be connected at a
time.
● If the device has both audio
player and telephone functions,
both functions will be paired.
Pairing a mobile phone 3 107.
● Phone functions will remain
active while the audio player is in
use, and audio playback will be
suspended during phone use.
Pairing an auxiliary audio device to the Infotainment system
From the Home page, touch MENU
then Multimedia, followed by
Settings.
Select Media to access the media
settings menu, then select the
"Manage Bluetooth
devices"/"Configure Bluetooth
connection" option.
The pairing procedure is similar to
pairing a mobile phone. Refer to
(NAVI 80 IntelliLink) "Bluetooth
connection" in the "Phone" section
3 109.
Connecting an audio device
Audio devices are automatically
connected to the Infotainment system
after the pairing procedure is
completed.
At any time, change the audio source
to Bluetooth mode to playback files
from a connected Bluetooth device.
From the Home page, select MENU
then Multimedia, followed by Media.
Depending on version, touch < (to
open a pop-up menu). Select
Bluetooth/Bluetooth connection to
change the audio source to
Bluetooth.
Disconnecting an audio device
Switching off the audio device or
deactivating the Bluetooth function on
the audio device disconnects the
device from the Infotainment system.
Unpairing an auxiliary audio device from the Infotainment system
To unpair, i.e. to delete a device from
the system memory:
From the Home page, touch MENU
then Multimedia, followed by
Settings.
Select Media to access the media
settings menu, then select the
"Manage Bluetooth
devices"/"Configure Bluetooth
connection" option.
Press < to open a pop-up menu. The
following options are available:
● Disable Bluetooth: Select to
deactivate the Bluetooth function
on the Infotainment system.
● Set TomTom visible: Select to
make the Infotainment system
"visible" to other Bluetooth
devices, allowing them to be
paired to the system.
Page 70

70 Bluetooth music
● Disconnect all devices: Select to
disconnect all currently
connected devices from the
Infotainment system without
deleting/unpairing them.
● Delete device(s): Select to unpair
a device from the Infotainment
system.
The unpairing procedure is similar to
unpairing a mobile phone. Refer to
(NAVI 80 IntelliLink) "Bluetooth
connection" in the "Phone" section
3 109.
Operation via Infotainment system
When paired and connected
wirelessly, audio playback may begin
automatically.
The audio device can then be
operated via the Infotainment system
display options.
The range of accessible functions
that can be operated via the
Infotainment system depends on the
type of audio player.
The operation of the audio device
when connected wirelessly is similar
to the operations for playing saved
audio files via the USB socket. Refer
to (NAVI 80 IntelliLink) "Playing music
via USB socket" in the "USB port"
section 3 63.
Page 71

External devices 71
External devices
Displaying pictures ....................... 71
Playing movies ............................. 71
Using smartphone applications ...72
Displaying pictures
NAVI 80 IntelliLink - Displaying pictures
To access the "Pictures" menu from
the Home page, touch MENU then
Multimedia, followed by Pictures.
Note
Playback is only possible when the
vehicle is stationary.
Select the connected source device
(e.g. SD card, USB) to access
individual photos or present a
slideshow of all compatible photos on
the device.
The display includes the following
options:
● N or O: Move to previous/next
photo.
● Thumbnails: Switch between full
screen and minimised view.
● New selection: Choose another
photo from the connected source
device.
●
<: Open pop-up menu; To
change the source device or
access the photo settings.
When viewing a photo/
slideshow, the pop-up menu also
allows you to set zoom level and
display all photos in thumbnail
form.
Photo settings - refer to
(NAVI 80 IntelliLink) "System
settings" 3 42.
Playing movies
NAVI 80 IntelliLink - Playing movies
To access the "Videos" menu from
the Home page, touch MENU then
Multimedia, followed by Video.
Note
Playback is only possible when the
vehicle is stationary.
Select the connected source device
(e.g. SD card, USB) to access
individual or all compatible videos on
the device.
Page 72

72 External devices
The display includes the following
options:
● t or v: Move to previous/next
video.
● =: Pause video.
● Scroll bar for time elapsed: Scroll
through videos.
● New selection: Choose another
photo from the connected source
device.
● Full screen: Switch to full screen
display.
● r: Return to previous screen.
●
<: Open pop-up menu; To
change the source device or
access the video settings.
During video playback, the popup menu also allows you to return
to the list of videos.
Video settings - refer to
(NAVI 80 IntelliLink) "System
settings" 3 42.
Using smartphone applications
NAVI 80 IntelliLink - Phone projection
The phone projection application
Android™ Auto displays selected
apps from your smartphone on the
display screen and allows their
operation directly via the Infotainment
controls.
Check with the device's manufacturer
if this function is compatible with your
smartphone and if this application is
available in the country you are in.
Preparing the smartphone
Download the Android Auto app to
your smartphone from the Google
Play™ Store.
Activating phone projection
1. Connect the smartphone to the
USB port 3 62.
2. Accept the request on the display
screen.
3. Touch û on the display screen
and accept the confidentiality
clauses. As a first time user look
out for system requests on your
mobile device to continue.
4. Touch û again.
Phone projection can now be used.
Using phone projection
● Touch û on the display screen to
access the Android Auto menu of
the connected smartphone.
● Press and hold 5 on the steering
wheel or steering column
controls to access voice controls.
Note
While using navigation and music
applications via Android Auto,
similar applications integrated in
NAVI 80 IntelliLink will be replaced.
Returning to the Infotainment screen
Press ;.
Page 73

Navigation 73
Navigation
General information ..................... 73
Usage .......................................... 76
Destination input .......................... 88
Guidance ..................................... 94
Symbols overview ...................... 101
General information
9 Warning
The navigation system is an aid to
your navigational abilities and
does not replace them. Drive with
due care and attention and adopt
a safe, vigilant attitude.
If a navigation system instruction
contradicts traffic regulations, the
traffic regulations always apply.
The Navigation system will reliably
guide you to your chosen destination
without the need for physical road
maps.
If the Traffic info service is available
in your country or region, the current
traffic situation is also considered in
route calculations. The system
receives traffic messages in the
current reception area.
To receive the most up-to-date, realtime traffic information possible,
subscribe to the Live services facility.
Note
Only available with
NAVI 80 IntelliLink.
Functioning of the Navigation system
The position and movement of the
vehicle are detected by the
Navigation system using sensors.
The distance travelled is determined
by the vehicle's speedometer signal,
and turning movements on bends are
determined by a gyro sensor. The
position is determined by GPS
(Global Positioning System)
satellites.
By comparing these sensor signals
with the digital maps on the
Navigation system, it is possible to
accurately determine the position of
the vehicle.
When using the vehicle for the first
time, or after a ferry trip, etc., the
system will self-calibrate. It is,
therefore, normal if it does not provide
an exact location until the vehicle has
travelled for some distance.
Page 74

74 Navigation
After the entry of the destination
address or point of interest (nearest
petrol station, hotel, etc.) the route is
calculated from the current location to
the selected destination.
Route guidance is provided by voice
output and the display screen.
9 Warning
Areas such as one-way streets
and pedestrian zones are not
marked on the navigation system
map. In such areas, the system
may issue a warning that must be
accepted. Therefore, pay
particular attention to one-way
streets and other roads and
entrances that must not be driven
into.
Note
Depending on Infotainment system,
radio reception may be interrupted
during voice guidance and before
each change of direction.
USB memory stick (NAVI 50 IntelliLink)
A USB memory stick is required for
the Navigation system, to contain,
among other things, a digital map of
the towns and roads in your country.
Note
Use a USB memory stick, formatted
to FAT32 format, with a minimum
4 GB and maximum 32 GB of
storage capacity.
After driving the first 100 km, it is
possible to check for free digital map
updates within a period of 90 days.
Note
To avoid possible technical issues,
only use a compatible USB memory
stick for operating and updating the
Navigation system. Do not insert
USB memory stick in any other
device (e.g. digital camera, mobile
phone, etc.), or in another vehicle.
Software installation
To update the digital maps and to
benefit from exclusive downloadable
services, an account must be created
on the opel.naviextras.com website
and the free software must be
installed.
Creating an account
Create your internet account via the
opel.naviextras.com website. Select
e.g., the "Register" option on the web
page and enter the appropriate
details.
Installing the software
Install the software on your computer
by downloading from
opel.naviextras.com.
Follow the on-screen instructions to
install the software and launch the
online application.
Registering the Navigation system
The Navigation system must be
registered with your new internet
account.
Insert an empty USB memory stick in
the Navigation system's USB slot.
Touch 7 then select yNAVI / ýNav,
followed by Options then Map update.
Page 75

Navigation 75
To ensure all content is saved in the
Navigation system's memory, select
Options then Update. Wait for the
update to complete before ejecting
the USB memory stick.
Then insert the USB memory stick in
your computer's USB slot while
connected to the Internet. When the
online application is launched and the
USB memory stick is recognised, the
system (or software) name appears in
the application window. The
Navigation system is registered into
your user profile.
After the initial set-up, the USB
memory stick is automatically
recognised by the Navigation system
and by the online application.
Updating the USB memory stick and Navigation system
Updates are issued regularly, e.g. for
map and safety camera revisions.
Note
In certain countries it is illegal to
download and activate the camera
warning option and this could lead to
prosecution.
These updates are only available via
the online application catalogue,
which is accessed via the USB
memory stick.
Using the online application, it is
possible to:
● update the Navigation system
(maps, safety cameras etc.)
● upgrade to premium POI content
● add or delete data
● customise the system
The online application menus guide
you through these operations.
System update
To get the best from the Navigation
system, update it as often as
possible.
Insert the USB memory stick in the
Navigation system's USB slot.
Available updates on the USB
memory stick are recognised by the
Navigation system and the 'Update'
screen is displayed automatically.
Select Update to begin installing the
updates to the Navigation system.
Note
The Navigation system may restart
automatically during the update
process.
Note
Touch r to go back to the previous
screen.
Alternatively, touch 7 followed by
yNAVI / ýNav, Options then Map
update. Then select Options followed
by Update to install updates to the
Navigation system.
Wait for the update to complete
before performing any other
operation or ejecting the USB
memory stick.
SD card (NAVI 80 IntelliLink)
An SD card is supplied with the
Navigation system and contains,
among other things, a digital map of
the towns and roads in your country.
Consult a workshop to purchase a
new SD card with updated digital
map.
Page 76
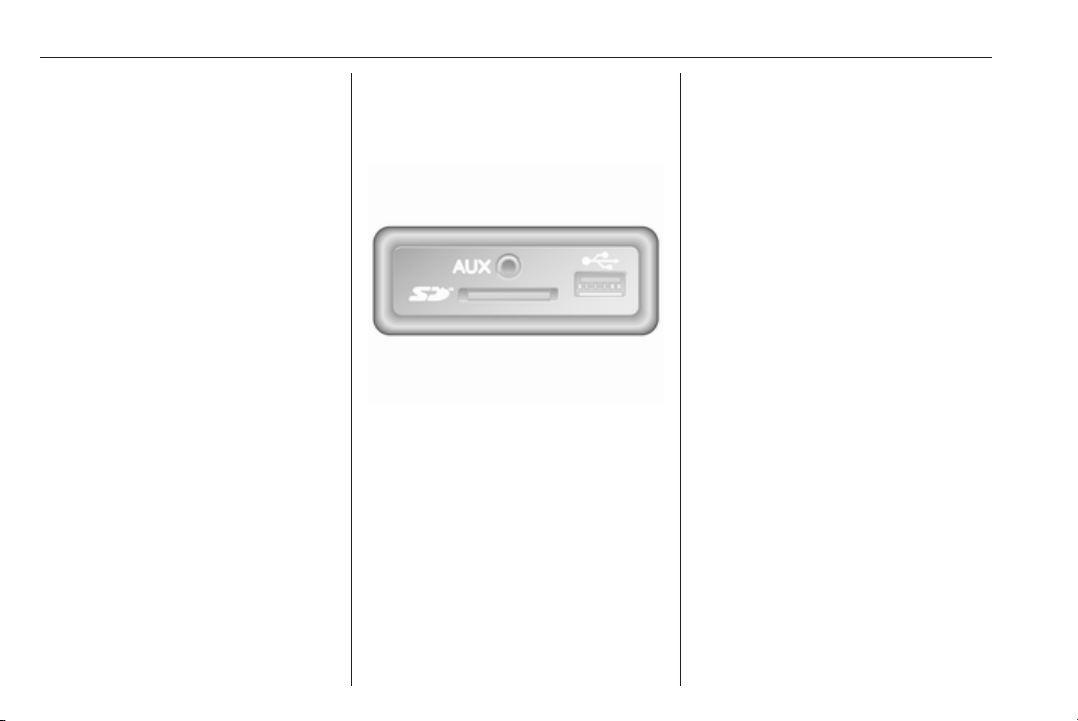
76 Navigation
Note
To avoid possible technical issues,
only use a compatible SD card for
operating the Navigation system. Do
not insert SD card in any other
device (e.g. digital camera, mobile
phone, etc.), or in another vehicle.
Usage
USB memory stick
NAVI 50 IntelliLink
Inserting the USB memory stick
Switch off the Navigation system and
insert the USB memory stick in the
USB slot on the Infotainment system
fascia. The USB memory stick is
fragile; treat it with care.
Removing the USB memory stick
Switch off the Navigation system and
remove the USB memory stick from
the USB slot on the Infotainment
system fascia.
SD card
NAVI 80 IntelliLink
Inserting the SD card
Switch off the Infotainment system
and insert the SD card in its slot
located on the instrument panel. The
SD card is fragile; do not bend it.
Ensure the SD card is inserted the
correct way. The orientation may
differ, depending on location of the
SD card slot in the vehicle.
Removing the SD card
To remove SD card from the
Infotainment system, on the Home
page touch MENU, then System
followed by Remove SD card; The SD
card can now be ejected safely from
its slot located on the instrument
panel.
To remove the SD card from its slot,
press on the card then release it. The
card is released slightly to enable it to
be withdrawn.
Note
To avoid possible technical issues,
only use a compatible SD card for
operating and updating the
Navigation system. Do not insert SD
card in any other device (e.g. digital
camera, mobile phone, etc.), or in
another vehicle.
Activating the Navigation system
Switching on
The Navigation system switches on
automatically when the ignition is
switched on. In other cases, press X.
With the ignition off, the Navigation
system can be used for upto
20 minutes. Press X to switch on the
Navigation system again. The system
will automatically switch off upto
20 minutes after the last user input.
Page 77
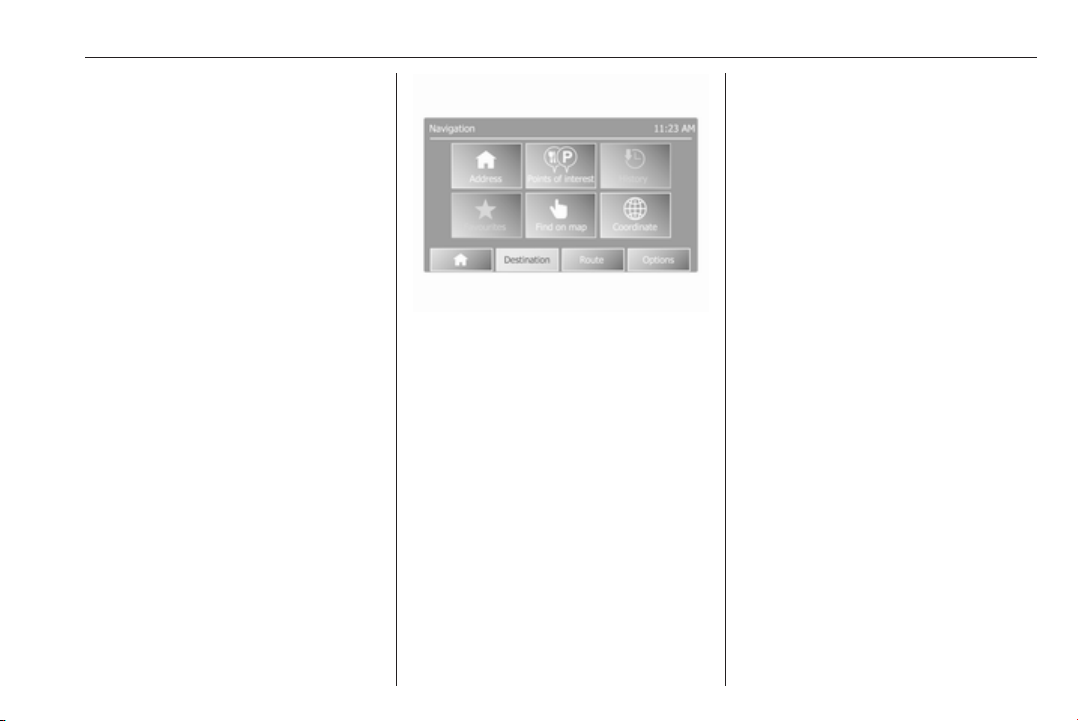
Navigation 77
Switching off
With the ignition off, the Navigation
system switches off automatically
when the driver's door is opened.
With the ignition on, press X to switch
off the Navigation system.
Switching between Navigation system and Infotainment system menus
NAVI 50 IntelliLink
With the Navigation system active,
touch 7 or touch and hold q/r to
return to the Infotainment system
Home page.
NAVI 80 IntelliLink
With the Navigation system active,
touch r (one or more times) to return
to the Infotainment system Home
page.
Information on the display
NAVI 50 IntelliLink (Type A) Information on the display
Menu screen
To access the Navigation menu
screen, touch 7 followed by yNAVI.
The Navigation menu screen
contains the following menus and
submenus:
● Destination
Refer to (NAVI 50 IntelliLink)
"Destination input" 3 88.
● Address
● Points of Interest
● History
● Favourites
● Find on Map
● Coordinate
● Route
Refer to (NAVI 50 IntelliLink)
"Route information" and "Edit
Itinerary" in the "Guidance"
section 3 94.
● Create Route/Edit Route
● Avoidances
● Overview
● Cancel Route
● Alternative Routes
● Itinerary
● Options
Refer to (NAVI 50 IntelliLink)
"Setting up the navigation
system" below.
● Warnings
● Route settings
● Map settings
● Voice settings
● Coordinate format
● GPS
● Map update
Map screen
To access the map screen without
route guidance, touch 7 followed by
sMAP. Refer to (NAVI 50 IntelliLink)
"Browse map" in the "Guidance"
section 3 94.
Page 78
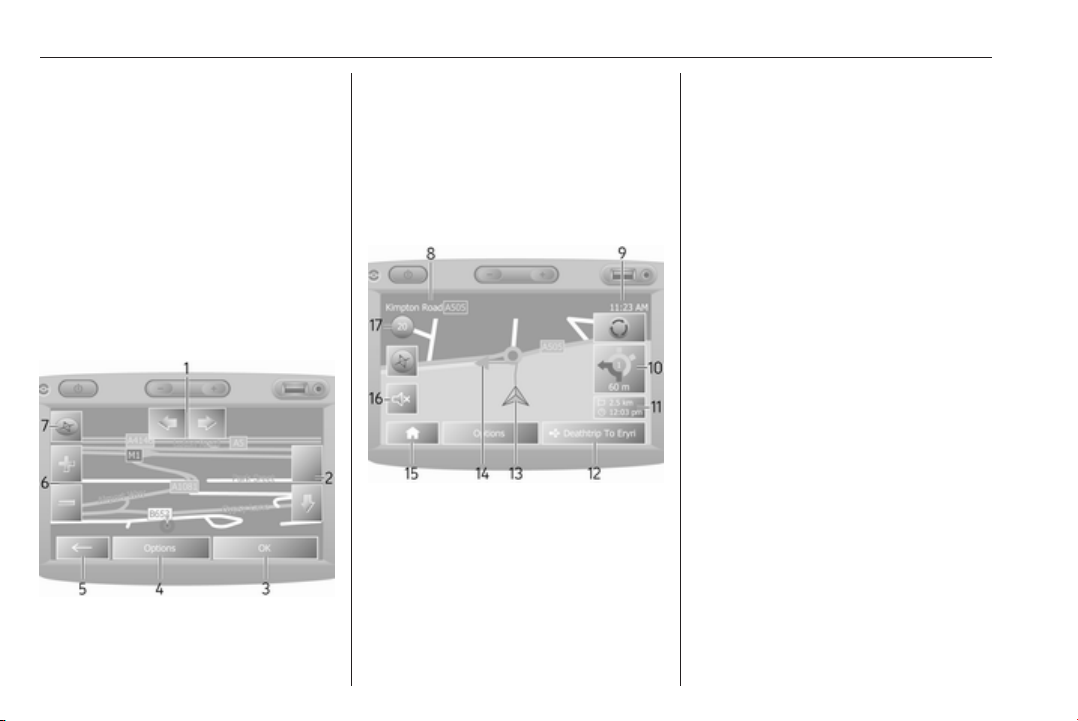
78 Navigation
Touch anywhere on the map. The
cursor indicates the current selected
position. To scroll within the map,
drag the cursor in the required
direction.
To access the map screen with route
guidance, touch 7 followed by
yNAVI and enter a destination. Refer
to (NAVI 50 IntelliLink) "Destination
input" 3 88.
The map screen (with or without route
guidance) contains the following
controls and information:
1. ⇦/⇨: Rotate map left/right
2. ⇧/⇩: Viewpoint (low/high view)
3. OK (with countdown timer):
Confirm actions
4. Options menu
5. r: Return to previous screen
6.
</]: Change scale (zoom in/out)
7. Compass (touch to switch
between 2D/3D map modes)
8. Name of the next major road or
road sign information, if
applicable
9. Current time
10. Direction and distance to next
change of direction
11. Journey information, e.g.
estimated arrival time, total
remaining distance
12. Audio system information
13. K: Current location
14. Route calculated and direction
changes
15. Home page
16. l/lx: Voice guidance on/off
17. Speed limit
Intersection view
During route guidance, before each
change of direction a close-up view of
the intersection is automatically
displayed. The normal view is
resumed after passing the
intersection.
Motorway view
During route guidance, before each
motorway junction a 3D view of the
junction is automatically displayed.
The normal view is resumed after
passing the junction.
Note
For some motorway junctions, only
a small turn arrow may appear on
the map.
Page 79
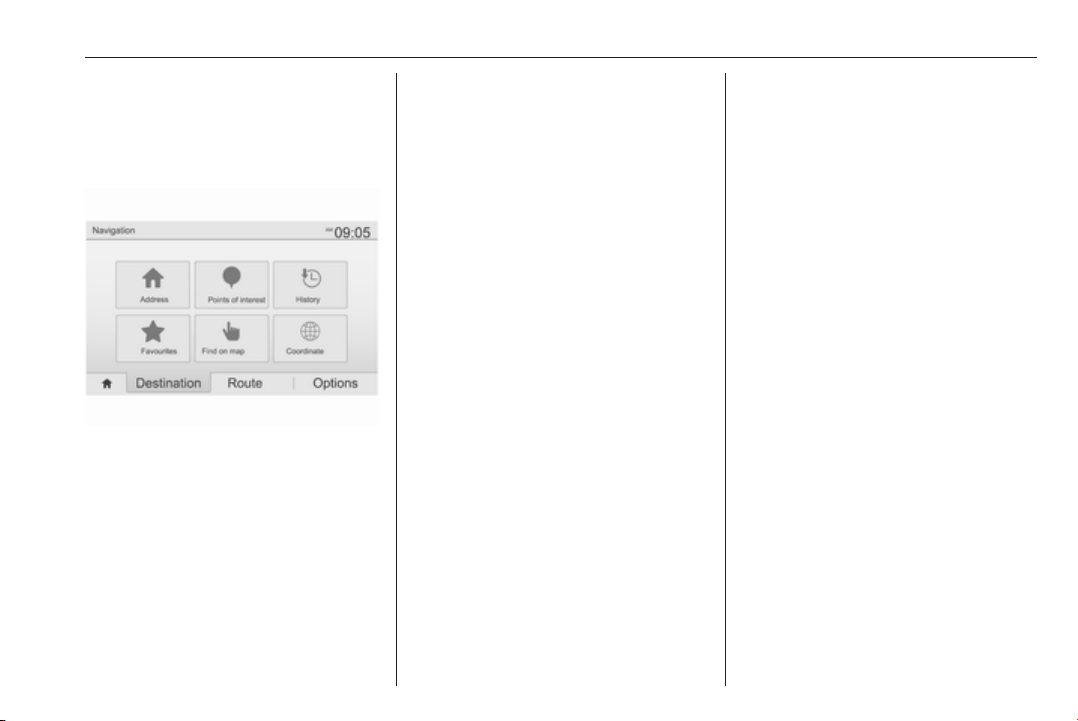
Navigation 79
NAVI 50 IntelliLink (Type B) Information on the display
Menu screen
To access the Navigation menu
screen, touch 7 followed by ýNav.
The Navigation menu screen
contains the following menus and
submenus:
● Destination
Refer to (NAVI 50 IntelliLink)
"Destination input" 3 88.
● Address
● Points of interest
● History
● Favourites
● Find on map
● Coordinate
● Route
Refer to (NAVI 50 IntelliLink)
"Route information" and "Edit
Itinerary" in the "Guidance"
section 3 94.
● Create Route/Edit Route
● Avoidances
● Overview
● Cancel Route
● Alternative routes
● Route
● Options
Refer to (NAVI 50 IntelliLink)
"Setting up the navigation
system" below.
● Warnings
● Route settings
● Map settings
● Voice settings
● Coordinate format
● GPS
● Map Update
● Traffic
Map screen
To access the map screen without
route guidance, touch 7 followed by
sMap (if available). Refer to
(NAVI 50 IntelliLink) "Browse map" in
the "Guidance" section 3 94.
Touch anywhere on the map. The
cursor indicates the current position.
To scroll within the map, drag the map
in the required direction. To return the
cursor to the current vehicle position
at any time, touch =.
To access the map screen with route
guidance, touch 7 followed by
ýNav and enter a destination. Refer
to (NAVI 50 IntelliLink) "Destination
input" 3 88.
Touch anywhere on the map. The
cursor indicates the current position.
To scroll within the map, drag the map
in the required direction.
The map screen (with or without route
guidance) contains the following
controls and information:
Page 80
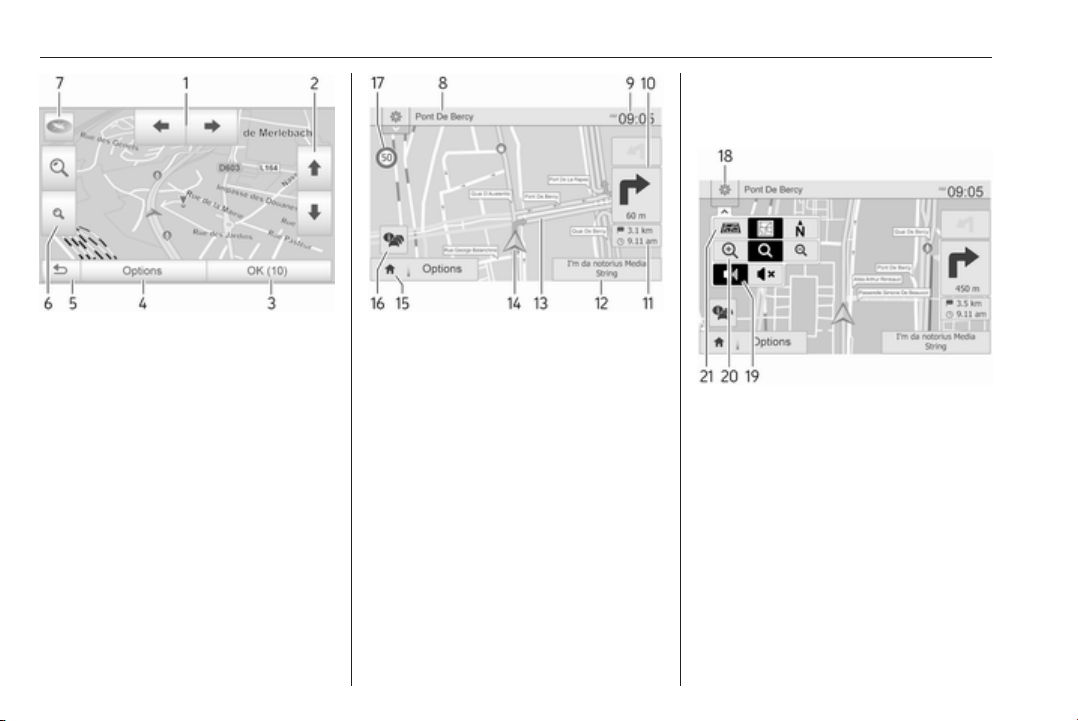
80 Navigation
16. Ö: Traffic information (TMC -
Traffic Message Channel)
17. Speed limit
1. ä/å: Rotate map left/right
2. â/ã: Viewpoint (low/high view)
3. OK (with countdown timer):
Confirm actions
4. Options menu (for route and map
settings)
5. q: Return to previous screen
6. ¼/¾: Change scale (zoom in/out)
7. Ô: Compass (touch to switch
between '2D', '3D' and '2D North'
map modes)
8. Name of the next major road or
road sign information, if
applicable
9. Current time
10. Direction and distance to next
change of direction
11. Journey information, e.g.
estimated arrival time, total
remaining distance
12. Audio system information (touch
to access audio source)
13. Route calculated and direction
changes
14. K: Current location
15. Home page
18. L: Settings pop-up menu (see
items below)
19. Ù/Ú: Voice guidance on/off
20. ¼/½/¾: Change scale (zoom in/
out)
21. N: Switch between '2D', '3D' and
'2D North' map modes
Intersection view
During route guidance, before each
change of direction a close-up view of
the intersection is automatically
Page 81
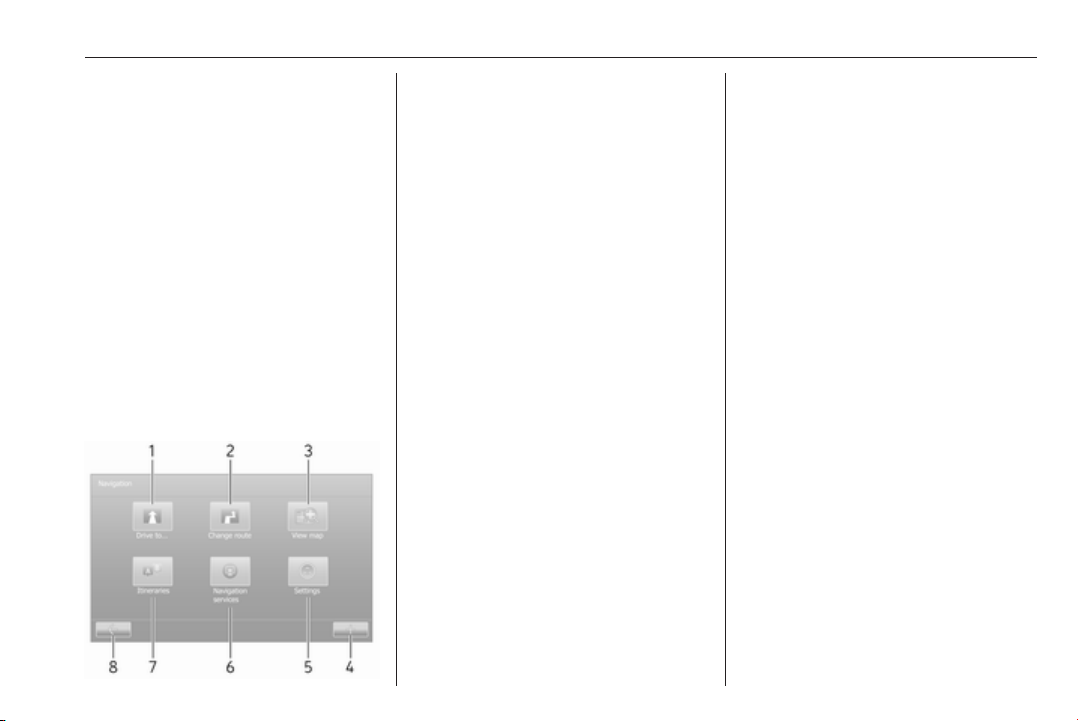
Navigation 81
displayed. The normal view is
resumed after passing the
intersection.
Motorway view
During route guidance, before each
motorway junction a 3D view of the
junction is automatically displayed.
The normal view is resumed after
passing the junction.
Note
For some motorway junctions, only
a small turn arrow may appear on
the map.
NAVI 80 IntelliLink - Information on the display
Menu screen
On the Home page, touch MENU
followed by Navigation to access the
Navigation menu.
The Navigation menu screen
contains the following menus,
submenus and controls:
1. DRIVE TO ...
Refer to (NAVI 80 IntelliLink)
"Destination input" 3 88.
● Home
● Saved locations
● Address
● Recent destinations
● Local search/TomTom
places
● Point of Interest
● Point on map
● Latitude Longitude
2. CHANGE ROUTE
Refer to (NAVI 80 IntelliLink) "Edit
Itinerary" in the "Guidance"
section 3 94.
● Calculate alternative
● Cancel route
● Travel via
● Avoid roadblock
● Avoid part of route
● Minimise delays
3. VIEW MAP
Refer to (NAVI 80 IntelliLink)
"Browse map" in the "Guidance"
section 3 94.
● Use this location to...
● Find
● Change the map details
● Add to saved locations
4.
<: Pop-up menu
5. SETTINGS
Refer to (NAVI 80 IntelliLink)
"Setting up the navigation system"
below.
● Turn off voice guidance
● Route planning
● Show POI on map
● Manage POIs
● Voice
● Set home location
● Manage saved locations
● Switch map
Page 82
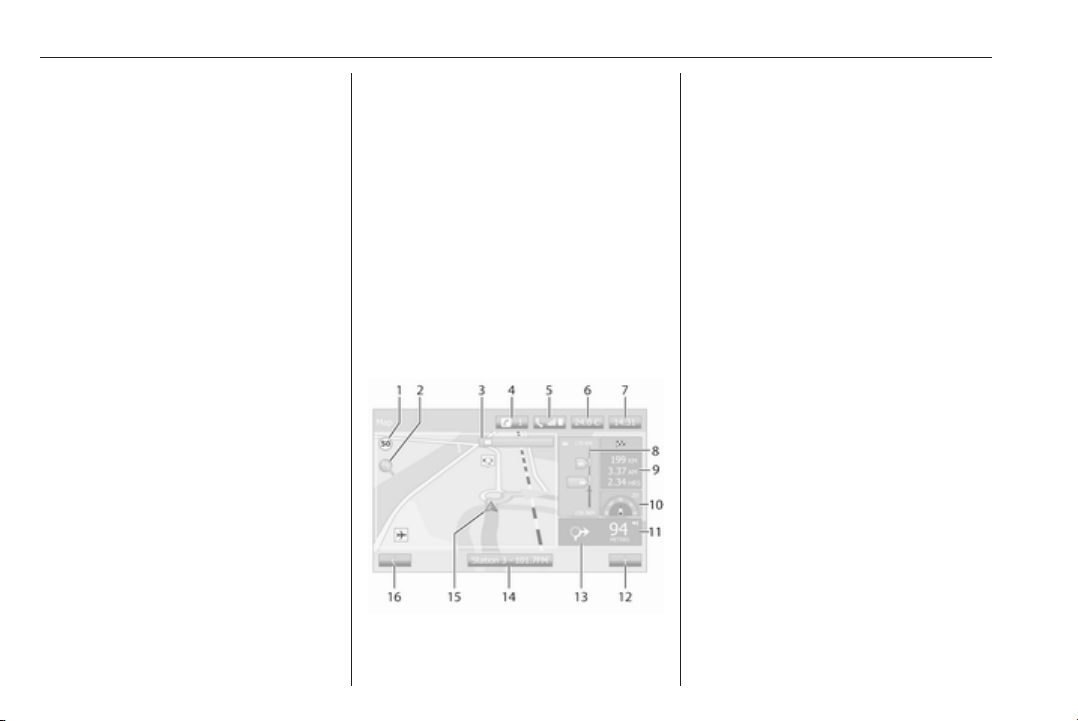
82 Navigation
● Change map colours
● Car symbol
● Advanced
6. NAVIGATION SERVICES
Refer to (NAVI 80 IntelliLink)
"LIVE services" below.
● Traffic
● Speed Cameras
● Local search/TomTom
places
● My TomTom live
● Weather
7. ITINERARIES
Refer to (NAVI 80 IntelliLink) "Edit
Itinerary" in the "Guidance"
section 3 94.
8. r: Return to previous screen
Map screen
To access the map screen without
navigation, on the Home page touch
MENU, then Navigation followed by
View Map.
Touch anywhere on the map. The
cursor indicates the current selected
position. To scroll within the map,
drag the cursor in the required
direction.
To access the map screen with
navigation, on the Home page touch
MENU followed by Navigation and
enter a destination. Refer to
(NAVI 80 IntelliLink) "Destination
input" 3 88.
The map screen (with or without route
guidance) contains the following
controls and information:
1. Speed limit (illuminates red and
flashes if speed limit is exceeded)
2. o: Change scale (zoom in/out)
3. Name of the next major road or
road sign information, if
applicable
4. H: System notifications (if
equipped)
5. g: Phone information
6. Outside temperature
7. Clock
8. Live services: Traffic information
(if applicable), e.g. route
incidents, reception indicator,
traffic map, speed camera
locations (if available) and
weather at destination.
9. Journey information, e.g.
estimated arrival time, total
remaining distance, journey
status (green flag/red flag)
Route summary
10. Compass (touch to switch
between 2D/3D map modes)
11. Change volume of guidance
instructions
Page 83

Navigation 83
12.
<: Pop-up menu
13. Direction and distance to next
change of direction
14. Audio system information
15. K: Current location (cursor)
Route calculated and direction
changes
16. r: Return to previous screen
Lane images
During route guidance, before each
major road change, a 3D view of the
junction (with a turn arrow and road
signs) is automatically displayed. The
normal view is resumed after passing
the junction.
To switch off the lane images view,
refer to (NAVI 80 IntelliLink)
"Advanced Settings" in "Setting up
the navigation system" below.
Automatic zoom
During route guidance, before each
change of direction a close-up view of
the junction is automatically
displayed. The normal view is
resumed after passing the junction.
To switch off the automatic zoom
feature, refer to (NAVI 80 IntelliLink)
"Advanced Settings" in "Setting up
the navigation system" below.
Operating keyboards in the display
NAVI 50 IntelliLink - Operating keyboards in the display
To move within and to enter
characters in both the alphabetical
and numerical keyboards, make the
appropriate selection by touching the
display screen.
● Select Options to change the
keyboard type (e.g. Qwerty,
ABC).
● Select 1^& to switch to numbers
and symbols.
● Select the drop down menu icon
ó to display a list of results for the
current operation (e.g.
destination input).
● Entries can be corrected during
input with the k keyboard
character.
● Touch r to stop using the
keyboard and return to the
previous screen.
Note
When making an entry, certain
letters and numbers are unavailable
for selection (greyed-out) based on
the information stored in the
Navigation system.
For further information, refer to
"Touchscreen operation" 3 38.
NAVI 80 IntelliLink - Operating keyboards in the display
To move within and to enter
characters in both the alphabetical
and numerical keyboards, make the
appropriate selection by touching the
display screen.
● Entries can be corrected during
input with the k keyboard
character.
● Touch r to stop using the
keyboard and return to the
previous screen.
Page 84

84 Navigation
For further information, refer to
"Touchscreen operation" 3 38.
Live services
NAVI 80 IntelliLink - Live services
In addition to the navigation services
(e.g. traffic information, fixed speed
cameras), extra features can be
added by subscribing to LIVE
services.
LIVE services include up-to-date
traffic information with "HD Traffic™",
updates and locations of fixed and
mobile speed cameras, local search,
weather forecast and the "My
TomTom LIVE" subscription status.
Note
LIVE services are not available in
some countries or regions.
From the Home page, touch MENU
then Navigation, followed by
Navigation Services.
The following menus are displayed:
● Traffic/HD Traffic
Select to receive up-to-date, real-
time traffic information.
Note
The HD Traffic service is named
Traffic if a subscription has not been
activated.
● Speed cameras
Displays alerts and location of
mobile speed cameras in realtime, fixed speed cameras and
accident blackspots.
Switch function off via the "Speed
Cameras" menu in "LIVE
services", if required.
Report speed camera location,
fixed or mobile.
Note
In certain countries it is illegal to
download and activate the camera
warning option and this could lead to
prosecution.
● Local search/TomTom places
This service allows you to use a
keyword to quickly find any Point
of Interest (POI) and set it as a
destination.
● My TomTom LIVE
Displays expiry date of
subscribed services.
● Weather
The weather forecast service
provides up to five days of
weather reports for your current
location and your chosen
destination.
Setting up the navigation system
NAVI 50 IntelliLink - Setting up the navigation system
Touch 7 followed by yNAVI / ýNav
then Options. This menu screen
allows you to check and update the
following map and navigation
settings:
● Warnings
● Route settings
● Map settings
● Voice settings
● Coordinate format
● GPS
● Map update
● Traffic (depending on version)
Page 85

Navigation 85
Warnings
Select Warnings to access the
following settings (switch off if not
required):
● Warn when speeding (On/Off)
● Speed limit always visible (On/
Off)
● Alert point warnings (On/Off)
● Pre-alert distance (0 m/200 m/
500 m)
Available depending on version.
Warn when speeding: The digital map
contains speed limits for certain
roads. Audio and/or visual warnings
are given when the vehicle exceeds
the speed limit.
Speed limit always visible: The speed
limit for certain roads is always visible
on the screen.
Alert point warnings: When the
vehicle passes an alert point
(permanent or temporary) - i.e. when
entering a hazardous section of road
requiring extra caution, or nearing a
speed camera location (depending on
country) - audio and visual warnings
are given.
Pre-alert distance: Select a distance
from which notifications of alert point
warnings should be given.
Note
Warnings may not be available for
some roads and regions.
Route settings
Select Route settings to update the
following settings for route
calculation:
● Route planning method (Fast/
Short/ECO)
● Motorways (On/Off)
● Period charge (On/Off)
● Per-use toll (On/Off)
● Ferries (On/Off)
● Carpool/HOV (On/Off)
● Unpaved roads (On/Off)
● Permits needed (On/Off)
(depending on version)
If necessary, touch Options then
Reset to defaults to set each of these
options back to the factory default
settings.
Alternatively, when the map is
displayed (no route guidance is
active), the Route settings menu can
be accessed by touching Options.
Refer to (NAVI 50 IntelliLink)
"Information on the display", "Map
screen" above for further information.
Route planning method: Select Fast
to set the fastest route to the
destination entered. This method
assumes the vehicle travels at or near
the speed limit on all roads.
Select Short to set the shortest route
and minimise the total distance to
travel to the destination entered.
Select Eco to set a compromise
between the fastest and the shortest
route planning methods. The route
provided may be shorter than the
fastest method, but not significantly
slower.
Motorways: To include or exclude
motorways from the route plan.
Turn off, e.g. when towing a vehicle,
or when motorway driving is not
permitted.
Page 86

86 Navigation
Note
Follow the regulations of the country
in which you are driving.
Period charge: To include or exclude
roads which require a special license
to be purchased for certain periods.
Per-use toll: To include or exclude
roads for which a toll must be paid to
use the road once only.
Ferries: To include or exclude the use
of ferries, ships and trains.
Carpool/HOV: To include or exclude
carpool lanes and high-occupancy
vehicle (HOV) lanes.
Unpaved roads: To include or
exclude the use of unpaved roads,
e.g. dirt, gravel roads.
Map settings
Select Map settings to access the
following:
● View mode (3D/2D/2D North)
2D North is available depending
on version.
● Viewpoint (Low/Normal/High)
● Motorway view (On/Off)
● POI markers
Alternatively, when the map is
displayed (no route guidance is
active), the Map settings menu can be
accessed by touching Options.
Refer to (NAVI 50 IntelliLink)
"Information on the display", "Map
screen" above for further information.
View mode: Select View mode to
change the default map mode
between a 2D top-down view, a 3D
perspective view and a 2D view with
North always facing upwards.
Alternatively, touch the Compass on
the map to switch between map view
modes.
Viewpoint: Select Viewpoint to raise
or lower the map view.
Alternatively, when the map is
displayed (no route guidance is
active), touch ⇧/⇩ to raise or lower the
map view. They are greyed-out when
the maximum position is reached.
Motorway view: Select Motorway
view to switch on/off the motorway
junction view for route guidance.
Refer to (NAVI 50 IntelliLink)
"Information on the display", "Map
screen" above for further information.
POI markers: Select l alongside POI
markers to display a list of Points of
Interest (POI) types.
Use this screen to switch on/off (show
or hide on map) certain POI type
markers on the map, e.g.
accommodation, airport, café or bar.
Select a POI type to open a list of its
subcategories and switch on/off
(show or hide) individual
subcategories.
Note
POIs are only visible on the map
depending on the zoom level.
Voice settings
Select Voice Settings to change voice
guidance language.
Scroll the list of languages by
touching R/S then select a language
and touch OK to confirm selection.
Coordinate format
Select Coordinate format to change
the format of co-ordinate entries to
one of the following options:
● DD.DDDDD
● DD MM.MMM
● DD MM SS.S
Page 87

Navigation 87
GPS
Select GPS to view the GPS
information, e.g. available satellites,
their location and signal strength.
Map update
Select Map update to display the
following digital map content and
latest update information:
● Alert Points
● Junction View
● Maps
● Places
● Traffic Service
● Address Points
Specific content or all map content
can be updated. Select one of the
options first or touch Options then
Update. Wait for the update to
complete.
Refer to "USB memory stick"
(NAVI 50 IntelliLink), "Updating the
USB memory stick and Navigation
system" in the "General information"
section 3 73.
Traffic
Select Traffic to change the following
traffic information settings:
● Traffic info (On/Off)
● Detour
● Event types
Traffic info: Warnings are given for
incidents that occur along the route.
Detour: Save time by using an
alternative route when a traffic jam or
an incident occurs along the current
route. Select 'On'/'Off' alongside
"Confirm offered route?" as required.
If necessary, update the time value
for the option "Offer detour if the
calculated route saves more than:"
(e.g. five minutes) by touching k/l.
Event types: Select the type of events
to be displayed during route
guidance, e.g. all events, traffic flow
events, closures and blockages,
accidents.
NAVI 80 IntelliLink - Setting up the navigation system
To access the Navigation settings
menu from the Home page, touch
MENU then Navigation, followed by
Settings. The following settings
submenus are displayed:
● Turn off voice guidance:
Switch on/off voice guidance
during navigation.
● Route planning:
Settings for route type, toll roads,
ferries, route summary, carpool
lanes and unpaved roads.
Select a planning preference
type; "Fastest route" is
recommended. The eco-route is
designed to save the most fuel.
Then switch on/off "iQ routes™"
as required. iQ routes™ enables
routes to be calculated according
to average traffic levels during a
particular day and time, and also
the best route according to actual
traffic speeds.
● Show POI on map:
Show or hide categories of POI
markers on the map.
Page 88

88 Navigation
● Manage POIs:
Add, change or delete POIs or
POI categories.
● Voice (depending on version):
Select synthesised voice or a
male or female human voice (for
the voice instructions) from the
available list.
Human voices provide more
simplified voice guidance
instructions and are not available
when using the Voice recognition
function 3 102.
● Set home location:
Change the home or most used
destination address.
● Manage saved locations:
Delete or rename saved
destination addresses.
To rename, select an address
from the displayed list, select
Rename then enter a new name.
TouchDone to confirm. To delete
a selected address, touch
Delete and confirm when
prompted.
● Switch map:
If more than one map is installed
on the SD card, use this option to
switch between the saved maps.
Select "Change map" then
choose the desired map from the
options available.
● Change map colours:
Change day and night colours
used on Navigation map
For downloaded new colours;
choose a new colour, select
additional colour scheme, then
choose the desired colour from
the options available.
● Car symbol:
Change the vehicle icon used on
the 3D navigation map.
● Advanced:
Select from the following
advanced options:
● Map information:
Show/hide information
displayed on the map, e.g.
address number before
street name, street names/
current street name, name of
street after current street.
● Map behaviour:
Change how the map
operates with the following
options:
Show lane images (e.g. at
motorway junctions), rotate
map with vehicle direction
(2D mode only), switch to 3D
mode automatically during
guidance, zoom
automatically (2D mode, 3D
mode).
● Traffic source:
Choose a traffic information
source from the available list.
Destination input
NAVI 50 IntelliLink - Destination input
Select a destination
Touch 7 followed by yNAVI / ýNav
then Destination.
Page 89

Navigation 89
The following menu options are
available for entering a destination:
● Address
Enter an address using the
keyboard.
● Points of Interest
Select Points of Interest (POI),
e.g. petrol station, restaurant,
parking.
● History
Select from a list of previous
destinations.
● Favourites
Select from a saved list of
favourite destinations.
● Find on map
Select a destination by using the
digital map.
● Coordinate
Enter the co-ordinates of the
destination.
After a destination has been entered,
wait for the ten second countdown to
expire or touch OK to begin route
guidance immediately.
Enter an address
Select Address and enter part or all of
an address, e.g.:
● Country
● Town or Postcode
● Street
● Number
● Intersecting street
Note
Full addresses can only be entered
if they are recognised by the
Navigation system.
When entering an address for the first
time, touch Country, then use the
keyboard to enter the name of the
country required. Alternatively, use
the drop down menu icon ó and select
from a list of suggested countries.
Note
When entering an address, certain
letters and numbers are unavailable
for selection (greyed-out) based on
the addresses recognised by the
Navigation system.
Proceed in the same way to enter
details for Town or Postcode, Street,
Number and Intersecting street.
Note
When entering a Postcode, insert a
space after the first part of the
postcode.
The address is automatically stored in
the memory, available for future
selection.
For keyboard operation, refer to
(NAVI 50 IntelliLink) "Operating
keyboards in the display" in the
"Usage" section 3 76.
Note
Number and Intersecting Street are
only available after a Street has
been entered.
When entering a Street, it is not
necessary to specify the type of road
(street, avenue, boulevard etc.).
Select Points of Interest (POI)
POIs can be selected as a destination
using the following search options:
● preset POI list
● POI categories
● quick search for POIs via the map
Page 90

90 Navigation
Preset POI list
Select Points of Interest to choose
from the frequently-used preset
categories list (e.g. petrol station,
parking, restaurant).
POI categories
Select Points of Interest followed by
Custom Search to select from the list
of categories and subcategories.
The search for POIs differs
depending on the current situation:
● If route guidance is active, Petrol
station and Restaurant POIs are
searched for along the route, and
Parking POIs are searched for
around the destination.
● If there is no active route
guidance, POIs are searched for
around the current position.
● If the current position is not
available (i.e. no GPS signal),
POIs are searched for around the
last known position.
The following options are available:
● In a Town
To search for a POI within a
selected town (the resulting list is
ordered by distance from the
town centre).
● Along Route
To search for a POI along the
current route (the resulting list is
ordered by length of the required
detour).
● Around My Position
To search for a POI around the
current position (the resulting list
is ordered by distance from this
position).
● Around Destination
To search for a POI around the
destination of the current route
(the resulting list is ordered by
distance from the destination).
When a list of POIs is displayed, they
can be sorted or displayed on the
map. Touch Options to display the
following:
● Sort by name
● Sort by distance
● Sort by detour (if route guidance
is active)
● Show all on map
Quick search for POIs
Touch anywhere on the map. The
cursor indicates the current selected
position. To scroll within the map,
drag the cursor in the required
direction.
Touch Options followed by Points of
Interest Around Cursor to show
nearby POI names and their distance
from the selected position on the
map.
Alternatively, touch Find and use the
keyboard to search for a destination
by name.
Select from previous destinations list
Select History to access a list of
previously entered destinations.
To sort the list, touch Options to
display the following:
● Sort by name
● Sort by distance
● Delete all
Alternatively, touch Find and use the
keyboard to search for a destination
by name.
Page 91

Navigation 91
Select from Favourites list
Select Favourites to access a list of
saved favourite destinations.
When the list of favourites is
displayed, they can be sorted or
displayed on the map. Touch
Options to display the following:
● Sort by name
● Sort by distance
● Show all on map
● Delete all
Alternatively, touch Find and use the
keyboard to search for a favourite by
name.
Select a destination by using the map
Select Find on Map to begin a search
for a destination by scrolling the map.
Touch anywhere on the map. The
cursor indicates the current selected
position. To scroll within the map,
drag the cursor in the required
direction.
Touch OK to select the position as a
destination.
Enter the co-ordinates of the
destination
Select Coordinate to begin a search
for a destination by entering its coordinates.
To change the format of the coordinates, touch Options and select
from the following:
● Latitude/Longitude
Values can be entered in any of
the following formats:
● decimal degrees
● degrees and decimal
minutes
● degrees, minutes and
decimal seconds
● UTM (Universal Transverse
Mercator)
Confirm the destination
When a destination has been
selected, the route appears on the
map. Touch OK and set as a New
route.
If route guidance is active, the
destination can be set as a
Waypoint along the route.
Add and save a favourite
When a destination has been
selected, touch Options to display the
following:
● Add to Favourites: Save the
destination in the favourites list.
● Current traffic: Provides
information on traffic incidents
(depending on version).
Refer to (NAVI 50 IntelliLink)
"Traffic information" in the
"Guidance" section 3 94.
● Info/News: Displays information
(e.g. address) for the selected
POI.
Shows the location (address) of
the position selected, provides
the GPS coordinates (latitude/
longitude) and also, if applicable,
displays the phone number of a
selected POI.
● Back to car: Return to current
vehicle location.
Before saving a favourite, the name
of the favourite can be changed by
using the keyboard.
Page 92

92 Navigation
For keyboard operation, refer to
(NAVI 50 IntelliLink) "Operating
keyboards in the display" in the
"Usage" section 3 76.
Delete a favourite
When a favourite has been selected,
touch Options before starting route
guidance followed by Delete
Favourite and confirm deletion.
To delete all favourite destinations,
select the menu Destination then
Favourites followed by Options then
Delete all and confirm deletion.
NAVI 80 IntelliLink - Destination input
Select a destination
From the Home page, touch MENU
then Navigation followed by Drive
to....
Select a destination from the
following options on the display:
● Home
● Saved locations
● Address
● Recent destinations
● Local search/TomTom places
● Point of Interest
● Point on Map
● Latitude Longitude
Home
Guides you to your home address.
To store the address of your home
location, from the Home page, touch
MENU then Navigation, followed by
Settings.
Select Set home location and enter
an address.
Refer to (NAVI 80 IntelliLink) "Setting
up the navigation system" in the
"Usage" section 3 76.
Saved locations
Select from a list of previously saved
destinations.
To delete or rename saved
destinations, from the Home page,
touch MENU then Navigation,
followed by Settings.
Then select Manage saved locations
and update the selected destination
as required.
Refer to (NAVI 80 IntelliLink) "Setting
up the navigation system" in the
"Usage" section 3 76.
Address
Enter part or all of an address using
the keyboard, e.g.:
● Country
● Postcode
● Town/City
● Street
● House number
Note
Full addresses can only be entered
if they are recognised by the
Navigation system.
When entering an address for the first
time, the country of the destination
will be requested. Use the keyboard
to enter the name of the country
required.
Suggestions may be shown on the
display during input. Touch to select
a destination shown in the display, or
touch List to access the full list for the
current part of the address.
Page 93

Navigation 93
Note
When entering an address, certain
letters and numbers are unavailable
for selection (greyed-out) based on
the addresses recognised by the
Navigation system.
Proceed in the same way to enter a
Postcode or enter details for Town/
City, Street and Number.
Note
When entering a Postcode, insert a
space after the first part of the
postcode.
The address is automatically stored in
the memory, available for future
selection.
For keyboard operation, refer to
(NAVI 80 IntelliLink) "Operating
keyboards in the display" in the
"Usage" section 3 76.
Recent destinations
Select from a list of previous
destinations that have been
automatically stored.
Local search/TomTom places
Select a nearby Point of Interest (POI)
by entering key words using the
keyboard.
Note
This feature is only available by
subscribing to LIVE services.
For further information, refer to
(NAVI 80 IntelliLink) "LIVE services"
in the "Usage" section 3 76.
Point of Interest
POIs can be selected as a destination
using the following search options:
● POI categories:
Select a POI category type (e.g.
petrol station, restaurant,
parking), then select a search
area (e.g. POI nearby, POI in
town, POI at home.
Enter a town/city name and touch
Done to confirm selection.
● POI names:
Enter name of a POI and select
to begin a search.
Point on Map
Select a destination by using the
digital map.
To scroll within the map, drag the
cursor in the required direction, then
confirm the position as a destination.
Latitude Longitude
Enter the co-ordinates of the
destination.
Confirm the destination
When a destination has been
selected, the route appears on the
map and a route summary is provided
in the y tab.
Select the LIVE tab to view real-time
traffic information. For further
information, refer to
(NAVI 80 IntelliLink) "LIVE services"
in the "Usage" section 3 76.
Touch Done to confirm the route.
Add and save a favourite
Add to saved locations
From the Home page, touch MENU
then Navigation followed by Drive
to....
Select Recent destinations and
choose a destination from the
displayed list.
Touch < (to open a pop-up menu)
then Add to saved locations, give a
name to the destination using the
keyboard, then touch Next.
Page 94

94 Navigation
A message is displayed asking if the
saved address should be set as the
Home address. Select Yes or No. A
message is displayed confirming that
the address has been saved.
Add Favourite
On the Home page, touch f to open
the favourites menu and select
Navigation.
To set a saved destination as a
favourite, touch < (to open a pop-up
menu), then Add Favourite.
Choose from the displayed list to add
a saved destination to the favourites.
For further information, refer to
(NAVI 80 IntelliLink) "Favourites" in
the "Introduction" section 3 30.
Delete a favourite
On the Home page, touch f to open
the favourites menu and select
Navigation.
Touch < and select Remove all
Favourites or select a favourite from
the displayed list then select Remove
a Favourite. A confirmation message
is displayed. Touch Delete to confirm.
For further information, refer to
(NAVI 80 IntelliLink) "Favourites" in
the "Introduction" section 3 30.
Guidance
Route information
NAVI 50 IntelliLink - Route information
To view the route before guidance
begins, touch 7 followed by yNAVI /
ýNav then Route after a destination
has been entered.
For the various methods of entering a
destination, refer to
(NAVI 50 IntelliLink) "Destination
input" 3 88.
The following options are available:
● Create Route/Edit Route
Refer to (NAVI 50 IntelliLink)
"Edit Itinerary" below.
● Avoidances
Refer to (NAVI 50 IntelliLink)
"Edit Itinerary" below.
● Overview
See below.
● Cancel Route
Refer to (NAVI 50 IntelliLink)
"Deactivating guidance" below.
● Alternative Routes
Refer to (NAVI 50 IntelliLink)
"Edit Itinerary" below.
● Itinerary
Refer to (NAVI 50 IntelliLink)
"Edit Itinerary" below.
Overview
When the Route screen is displayed,
touch Overview to get a detailed plan
for the current route and a bird's eye
view of the route on the map.
This menu option contains the
following information:
● name and/or address of the
destination
● total time of the route
● total distance of the route
● special points and sections of the
route (e.g. toll roads, motorways,
etc.)
● alternative routes (e.g. Short,
Fast, Economical)
Page 95

Navigation 95
When the Overview screen is
displayed, touch Options to access
the following submenus:
● Alternative routes
Refer to (NAVI 50 IntelliLink)
"Edit Itinerary" below.
● Itinerary
Refer to (NAVI 50 IntelliLink)
"Edit Itinerary" below.
● Route settings
Refer to (NAVI 50 IntelliLink)
"Setting up the Navigation
system" 3 76.
● Simulate navigation
See below.
Note
These options can also be accessed
during route guidance by touching
on the 'Journey information' (e.g.
estimated arrival time, total
remaining distance) area of the
display screen.
Refer to (NAVI 50 IntelliLink)
"Information on the display" in the
"Usage" section 3 76.
Simulate navigation
This function enables you to see a
rapid view of the suggested route.
The following options are available:
r
f
e
1x / 4x / 8x : Increase the speed of
r/q : Return to previous
NAVI 80 IntelliLink - Route information
To view the route before guidance
begins, touch < (to open a pop-up
menu), then select Route details after
a destination has been entered.
The following options are available:
● Display instructions:
Displays the route plan.
The following details are shown:
● direction change arrows
● road types
: Start or pause the route
simulation
: Move to previous
manoeuvre
: Move to next
manoeuvre
the route simulation
screen
● road names
● distance before a fork in the
road (km/miles)
● Display route map:
View a map of the route.
● Display route demo:
View a demonstration of the
route.
● Route summary:
Return to the previous screen.
The details of the journey time,
distance and the type of journey
are displayed. Refer to
(NAVI 80 IntelliLink)
"IQ routes™" in the "Destination
input" section 3 88.
● Display destination:
View changes in direction as
images.
● Display traffic on route:
Displays an overview of all traffic
incidents affecting the current
journey, with a detailed incident
by incident view.
With a subscription to LIVE
services, the "Live" tab provides
Page 96

96 Navigation
a more detailed overview of the
journey (e.g. traffic delays, fixed
and mobile speed cameras).
For further information, refer to
(NAVI 80 IntelliLink) "LIVE
services" in the "Usage" section
3 76.
Edit itinerary
NAVI 50 IntelliLink - Edit Itinerary
This function makes it possible to
view and change the route plan to the
destination entered.
To access at any time, touch 7
followed by yNAVI / ýNav then
Route. Select Itinerary.
The following information will appear:
● direction change arrows
● road number
● distance before a direction
change
Touch Options to change and sort the
details of the route.
The following options are available:
● Summary
Shows each waypoint and the
destination, including the
waypoint distance, time left to
next waypoint and arrival time.
● Normal
Shows each manoeuvre, with
street or place names, distance,
and route section numbers.
This option also shows signpost
information, access and
manoeuvre restrictions,
warnings and system preference
information.
● Road list
Shows only the main sections of
the route using road names/
numbers.
This option also shows the length
of each section, time left to next
section, arrival time and average
direction.
Alternatively, these itinerary/route
options can be changed by touching
the "Direction and distance to next
change of direction" tab on the display
during route guidance. Select
Options to change and sort the details
of the route.
Refer to (NAVI 50 IntelliLink)
"Information on the display", "Map
screen" in the Usage section 3 76.
Edit route
To edit the route by modifying the list
of waypoints, touch 7 followed by
yNAVI / ýNav, Route then Edit
Route on the display screen.
The following options are available:
Top <
Bottom <
ë
y
To change the order of the waypoints
in the list, touch Options followed by
Re-order then move the waypoints
up/down.
For the various methods of entering a
destination, refer to
(NAVI 50 IntelliLink) "Destination
input" 3 88.
: Add waypoint
: Add new destination
: Delete destination
: Change the route
departure address
(available depending on
version)
Page 97

Navigation 97
Avoidances
To edit the route by avoiding
particular sections, touch 7 followed
by yNAVI / ýNav, Route then
Avoidances.
Select a section from the list on the
display screen to be avoided. The
avoided section is highlighted in red.
Confirm the new route by touching
OK.
Alternative routes
To change the route planning
method, touch 7 followed by yNAVI /
ýNav, Route then Alternative routes.
The following options are available,
each with a distance and estimated
time:
● fast
● short
● eco
Select one of the options and confirm
the new route by touching r.
For further information, refer to
(NAVI 50 IntelliLink) "Setting up the
navigation system" in the "Usage"
section 3 76.
NAVI 80 IntelliLink - Edit Itinerary
Journeys can be planned in advance
by selecting both the starting point
and the destination.
From the Home page, touch MENU
then Navigation, followed by
Itineraries.
Select a point of departure in the
same way as entering a destination.
Refer to (NAVI 80 IntelliLink)
"Destination input" 3 88. Then select
a destination, choose the type of
route and confirm.
The system plans the route and
allows you to view the details.
Change route
To change the route during active
route guidance, from the Home page,
touch MENU then Navigation,
followed by Change route.
The following options are available:
● Calculate alternative
● Cancel route
● Travel via
● Avoid roadblock
● Avoid part of route
● Minimise delays
Calculate alternative
Select to calculate an alternative
route to the destination.
Cancel route
Select to stop the current route
guidance.
To restart guidance, touch Drive to..,
followed by Recent destinations and
select the route again.
Travel via (waypoints)
Select to change the calculated route
to your destination so that it includes
a particular location (waypoint).
The location to be included is entered
the same way as entering a
destination.
Select from the same list of options,
e.g. "Address", "Saved locations",
"Point of Interest", "Point on map".
Refer to (NAVI 80 IntelliLink)
"Destination input" 3 88.
Avoid roadblock
Select this option in the event a
roadblock is not currently indicated by
the Traffic information service.
Refer to (NAVI 80 IntelliLink) "Traffic
information" below.
Page 98

98 Navigation
Choose the distance (in metres) of
the route ahead to be avoided, e.g.
"100m", "500m", "2000m", "5000m".
The route is recalculated to avoid a
section of the route for the distance
selected.
Avoid part of route
Select to avoid a part of the route.
Choose the road to be avoided from
the list of roads along the route.
Minimise delays
Select to plan the route based on the
latest traffic information.
Deactivating guidance
NAVI 50 IntelliLink - Deactivating guidance
To stop route guidance when in
progress, touch 7 followed by
yNAVI / ýNav, Route then Cancel
Route.
NAVI 80 IntelliLink - Deactivating guidance
To stop guidance when in progress,
touch < followed by Delete route.
Browse map
NAVI 50 IntelliLink - Browse map
To access the map screen at any
time, touch 7 followed by sMAP.
Touch anywhere on the map. The
cursor indicates the current selected
position. To scroll within the map,
drag the cursor in the required
direction.
For further control operations, refer to
(NAVI 50 IntelliLink) "Map screen" in
the "Usage" section 3 76.
Options menu
When the map screen is displayed,
touch Options to display the following:
● Route settings:
Refer to (NAVI 50 IntelliLink)
"Setting up the navigation
system" in the "Usage" section
3 76.
● Map settings:
Refer to (NAVI 50 IntelliLink)
"Setting up the navigation
system" in the "Usage" section
3 76.
● Where am I?:
Refer to (NAVI 50 IntelliLink)
"HELP!" below.
NAVI 80 IntelliLink - Browse map
To access the map screen without
navigation, on the Home page touch
MENU, then Navigation followed by
View Map.
Touch anywhere on the map. The
cursor indicates the current selected
position. To scroll within the map,
drag the cursor in the required
direction.
When the map screen is displayed,
touch < to open a pop-up menu
containing the following options:
● Use this location to...
● Find
● Change the map details
● Add to saved locations
Page 99

Navigation 99
Use this location to...
Select this option to perform any of
the following actions:
● centre the map on the vehicle's
location
● navigate to a point on the map
● search for a point on the map
● add a point on the map to the
favourites
● add a point on the map to the POI
list
● correct the position of your
vehicle
Find
Select this option to centre the map
on:
● your home
● a saved address
● an address
● a recent destination
● a local search
● a point of interest
● current vehicle position
● a co-ordinate (latitude/longitude)
Change the map details
Select this option to switch on/off the
following map settings:
● traffic
● names
● points of interest (POI)
● satellite image map background
● GPS co-ordinates
Add to saved locations
Select this option to add the current
position on the map as a saved
destination. Use the keyboard to
enter a name or confirm the
suggested name.
For keyboard operation, refer to
(NAVI 80 IntelliLink) "Operating
keyboards in the display" in the
"Usage" section 3 76.
Help!
NAVI 50 IntelliLink - Help!
When the map screen is displayed,
touch Options followed by Where am
I? to check helpful information about
the current location and to search for
Points of Interest (POI) nearby.
To access the map screen at any
time, touch 7 followed by sMAP.
Where am I?
This menu option contains the
following information:
● current location (address)
● latitude
● longitude
● altitude
● GPS status
Touch Options to display the
following options:
● Add to favourites
Refer to (NAVI 50 IntelliLink)
"Destination input", "Add and
save a favourite" for further
information 3 88.
● Country information: Refer to
"Country information" below.
Country information
This function allows you to check
country information and legislation for
the current location.
When the Where am I? screen is
displayed, touch Options followed by
Country information.
Page 100

100 Navigation
This menu option contains the
following information:
● speed limits
● phone country code
(International dialling code, e.g.
+49)
● emergency number (e.g. 112)
● legal restrictions, e.g.:
● vehicle equipment
requirements, e.g. warning
triangle, first aid kit, fire
extinguisher, spare bulbs,
high-visibility jacket etc.
● headlights legislation
● maximum blood alcohol level
● snow chains legislation
● winter tyres legislation
Help Nearby
This function allows you to search for
assistance near your current location.
When the Where am I? screen is
displayed, touch Help Nearby.
This menu option contains the
following information:
● Car repair around here (Vehicle
repair services)
● Health around here (Medical and
emergency services)
● Police around here (Police
stations)
● Petrol station around here (Fuel
stations)
Select the appropriate option to
access a list of local Points of Interest
(POI).
For information on Points of Interest
(POI), refer to (NAVI 50 IntelliLink)
"Destination input" 3 88.
Traffic information
NAVI 50 IntelliLink - Traffic information
Available depending on version, upto-date traffic information from local
sources can be received. Information
is provided for the current route or for
the current vehicle location.
During route guidance, touch
Options then select Current traffic, or
touch the traffic icon Ö on the map
screen. Traffic incidents along the
route and estimated delay times are
displayed.
The following options are available:
● Event list: Select to change event
display settings.
● Offer detour: Create an
alternative route to the selected
destination.
● Options: Access traffic options.
To access these traffic options at any
time, touch 7 followed by yNAVI /
ýNav then Options. Then select
ÖTraffic.
Touch q to return to route guidance.
NAVI 80 IntelliLink - Traffic information
Allows up-to-date traffic information
from local sources to be received.
From the Home page, touch MENU
then Navigation, followed by
Navigation Services. Then select
Traffic/HD Traffic.
 Loading...