

Page 1

Contents
Introduction ................................ 1-1
Radio .......................................... 2-1
Audio player ............................... 3-1
Navigation .................................. 4-1
Mobile Phone Portal ................... 5-1
Index .......................................... 6-1
DVD800.book Page 1 Tuesday, August 26, 2008 1:51 PM
Page 2

DVD800.book Page 2 Tuesday, August 26, 2008 1:51 PM
Page 3

1 - 1Introduction
Introduction
Introduction
General information
The Infotainment system DVD 800
provides you with state-of-the-art
in-car infotainment.
For the FM and AM wavebands the
radio is equipped with twelve
automatically assignable channel
presets. Furthermore, 36 channels
can be allocated manually
(waveband-independent).
Using RDS-TMC you also always
have the latest information on the
current traffic situation.
The integrated audio player will
entertain you with audio CDs and
MP3 CDs, as well as with MP3 DVDs.
Furthermore, you can connect
external data storage devices (e.g.
iPod, MP3 player or USB stick) or a
portable player to the Infotainment
system as further audio sources.
The digital sound processor provides
you with several preset equalizer
modes for sound optimisation.
The navigation system with dynamic
route planning will guide you reliably
to your destination, and if desired will
automatically avoid traffic jams or
other traffic problems.
Optionally, the Infotainment system
can be operated using a steering
wheel remote control and a
multifunction unit between the front
seats.
In addition the Infotainment system
can be equipped with a mobile phone
portal.
The well thought-out design of the
control elements, the clear displays
and a large multifunction knob enable
you to control the system easily and
intuitively.
Introduction ......................... 1-1
Overview............................. 1-5
Operation ............................ 1-10
DVD800.book Page 1 Tuesday, August 26, 2008 1:51 PM
Page 4
1 - 2 Introduction
Use the Infotainment
instructions
You can gain a quick overview of
the many functions of the
Infotainment system complete with
an overview of all the control
elements in the section "Overview".
You will find a description of the
basic control steps of the
Infotainment system in the section
"Operation".
You can find your way around
using the list of contents at the
beginning of the operating
instructions and in the individual
sections.
You can find your way around by
way of the alphabetical index.
You will find detailed function
descriptions of your Infotainment
system in the individual sections.
Directions such as left, right, front
or rear are always relative to the
direction of travel.
Important information about
the content of these
instructions
Depending on the model variant,
country variant, integrated special
equipment and accessories, the
scope of equipment of your vehicle
can differ from the descriptions in
these operating instructions.
Special notations
Page references are marked with 3.
The 3 means "refer to page".
Display screens
Some on-screen displays depend on
the unit settings and on the vehicle
equipment and can therefore vary.
9 Danger, 9 Warning,
Caution
9 Danger
Texts that are marked 9 Danger
indicate a possible danger to life.
Non-compliance with the
instructions can cause danger to
life.
9 Warning
Texts marked 9 Warning indicate
possible dangers of accident and
injury. Non-compliance with the
instructions can cause injury.
Caution
Texts marked Caution indicate
possible damage to the vehicle.
Non-compliance with the
instructions can cause damage to
the vehicle.
DVD800.book Page 2 Tuesday, August 26, 2008 1:51 PM
Page 5
1 - 3Introduction
Important information for
operation and traffic safety
Theft protection
The Infotainment system is equipped
with an electronic security system for
the purpose of theft protection.
The Infotainment system therefore
functions only in your vehicle and is
worthless for a thief.
9 Warning
The usage of the navigation
system does not release the driver
from the responsibility for a correct,
vigilant attitude in road traffic. The
related traffic regulations must
always be followed.
The Infotainment system has to be
used so that the vehicle can be
steered safely at all times. If in
doubt stop your vehicle and
operate the Infotainment system
while the vehicle is stationary.
9 Warning
Only make entries (e.g. addresses)
with the vehicle stationary.
If a navigation instruction should
contradict traffic regulations, the
traffic regulations always apply.
In some areas one-way streets and
other roads and entrances (e.g.
pedestrian zones) that you are not
allowed to turn into are not marked
on the map. In such areas the
Infotainment system will issue a
warning that must be accepted.
Here you must pay particular
attention to one-way streets, roads
and entrances that you are not
allowed to drive into.
DVD800.book Page 3 Tuesday, August 26, 2008 1:51 PM
Page 6
1 - 4 Introduction
DVD800.book Page 4 Tuesday, August 26, 2008 1:51 PM
Page 7

1 - 5Introduction
Overview
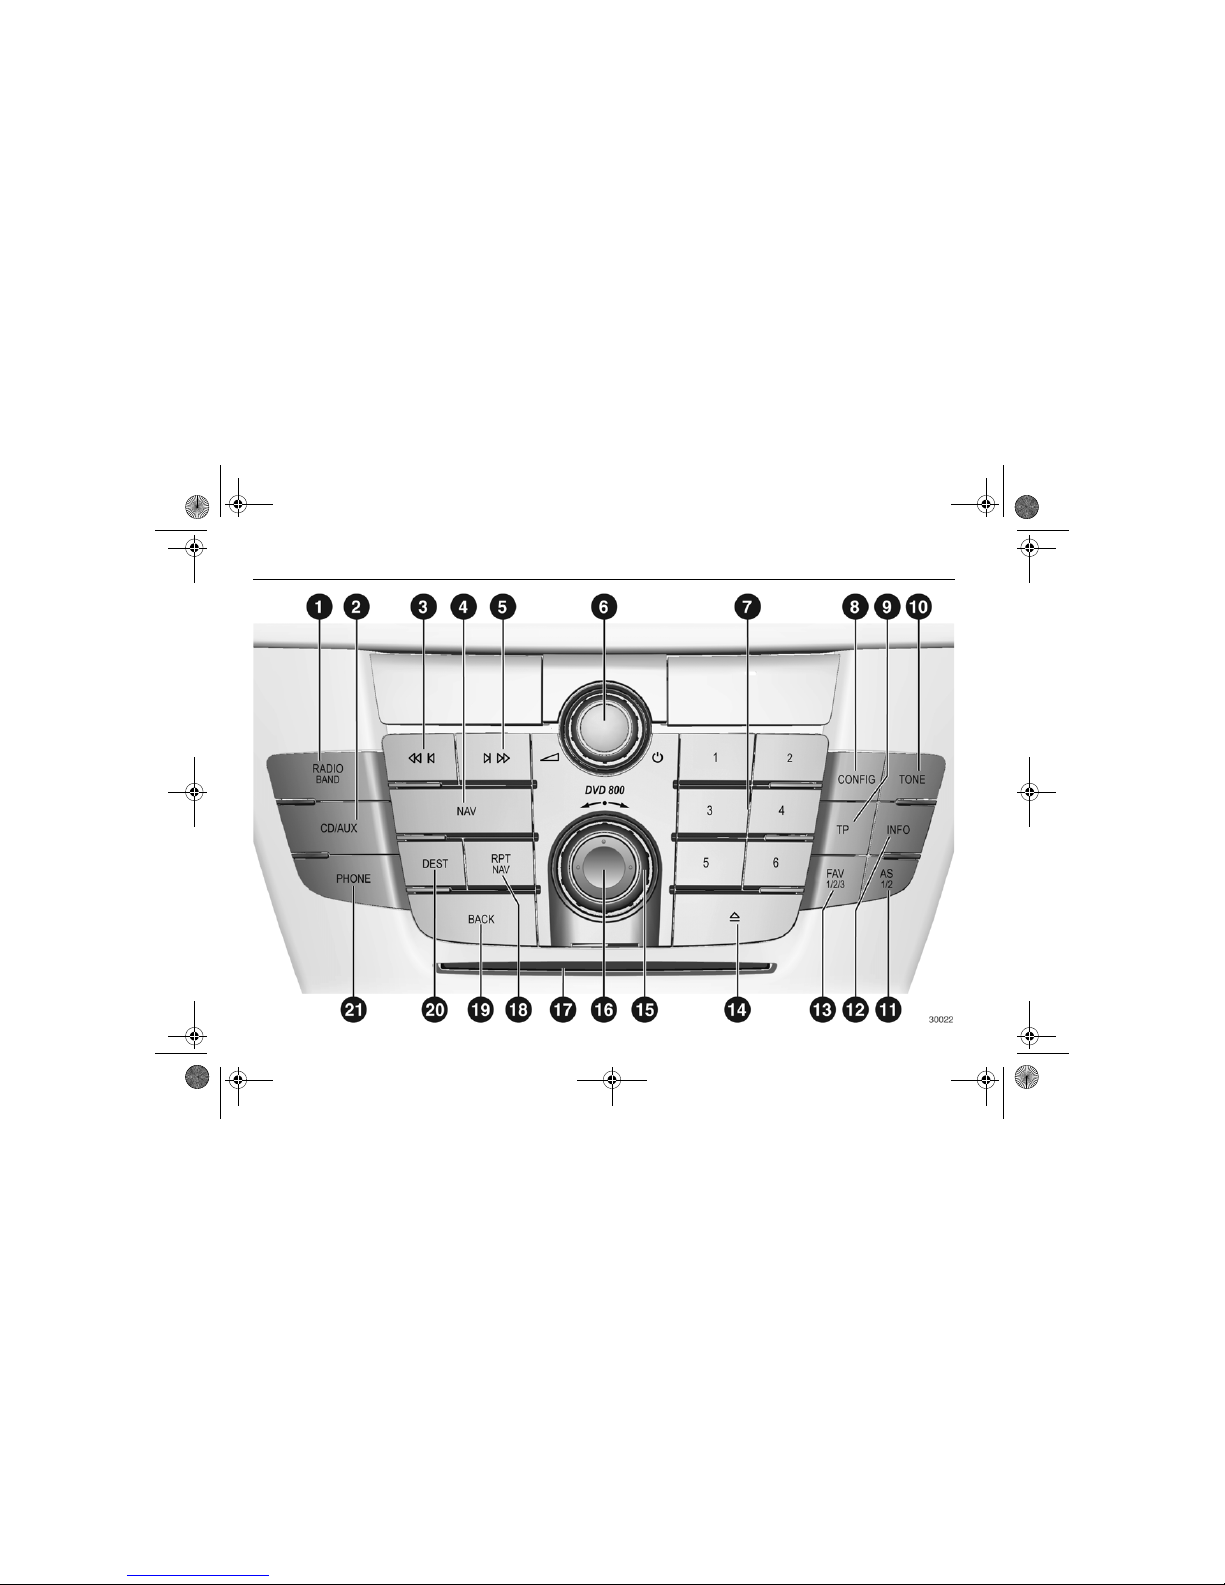
Control elements
1 RADIO (Band)....................... 2-1
Activate radio or
change waveband
2 CD/AUX ................................ 3-1
Start CD/MP3 replay
or change audio source
3 Search backward
Radio: search backward .......2-1
CD/MP3:
skip track backward ..............3-2
4 NAV.......................................4-3
Press once:
Display map
Press twice:
Navigation menu
5 Search forward
Radio: search forward...........2-1
CD/MP3: skip track forward ..3-2
6 Knob ................................1-10
Press: switch on/off
Infotainment system
Turn: adjust volume
7 Station buttons 1 ..6 ..............2-1
Long press: save station
Short press: select station
8 CONFIG ..............................1-15
System settings
9 TP ......................................... 2-5
Activate or deactivate
radio traffic service
0 TONE ..................................1-15
Tone settings
a AS (1/2).................................2-1
Automatic memory levels
Short press:
select autostore list
Long press:
save station automatically
b INFO
Additional, situation-dependent
information
c FAV (1/2/3)............................2-1
Favourite lists
d CD/DVD ejection
e Multifunction knob ...............1-11
Central control for
selection and navigation
in menus
f Eight-way switch ................... 4-9
Navigation:
move display window
in map view
g CD/DVD slot
h RPT (NAV) ..........................4-23
Repeat last navigation
message
i BACK .................................. 1-11
Menu: one level back
Input: delete last character or
entire entry
j DEST.....................................4-4
Navigation destination entry
k PHONE
Open telephone menu...........5-3
Activate mute ......................1-10
DVD800.book Page 5 Tuesday, August 26, 2008 1:51 PM
Page 8
1 - 6 Introduction
DVD800.book Page 6 Tuesday, August 26, 2008 1:51 PM
Page 9

1 - 7Introduction
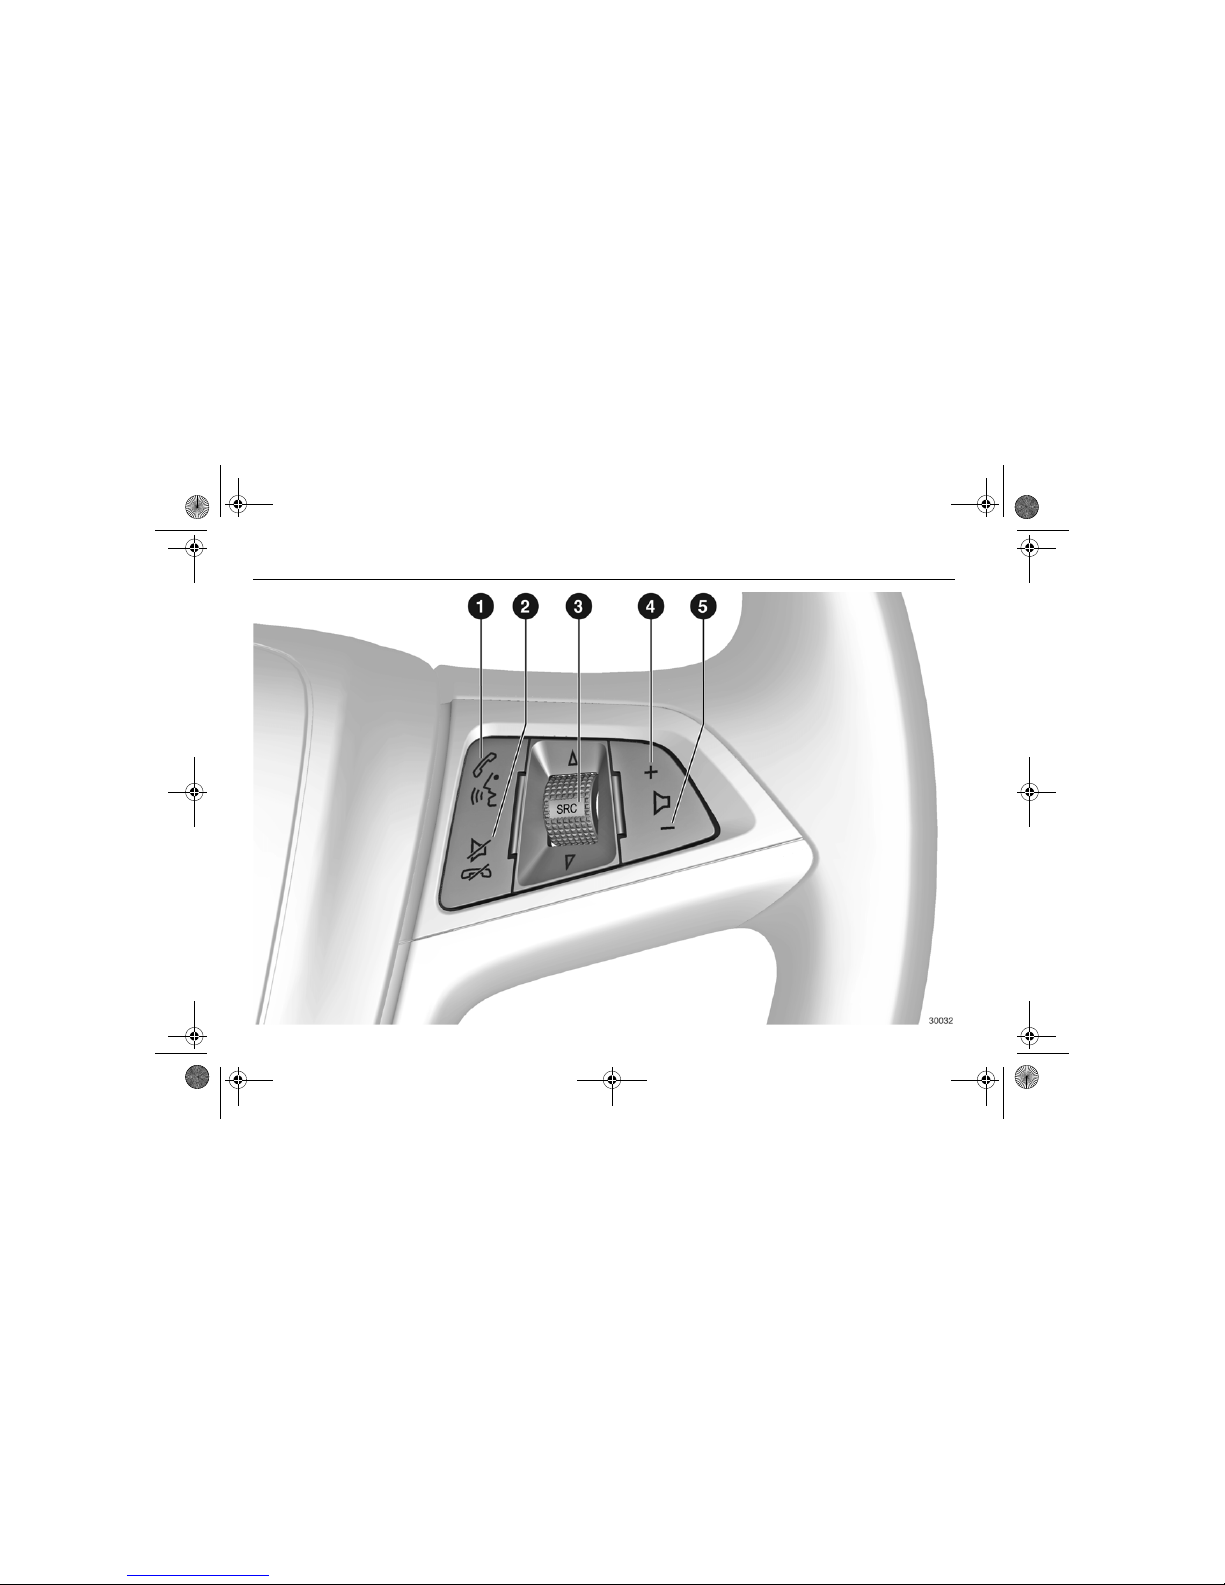
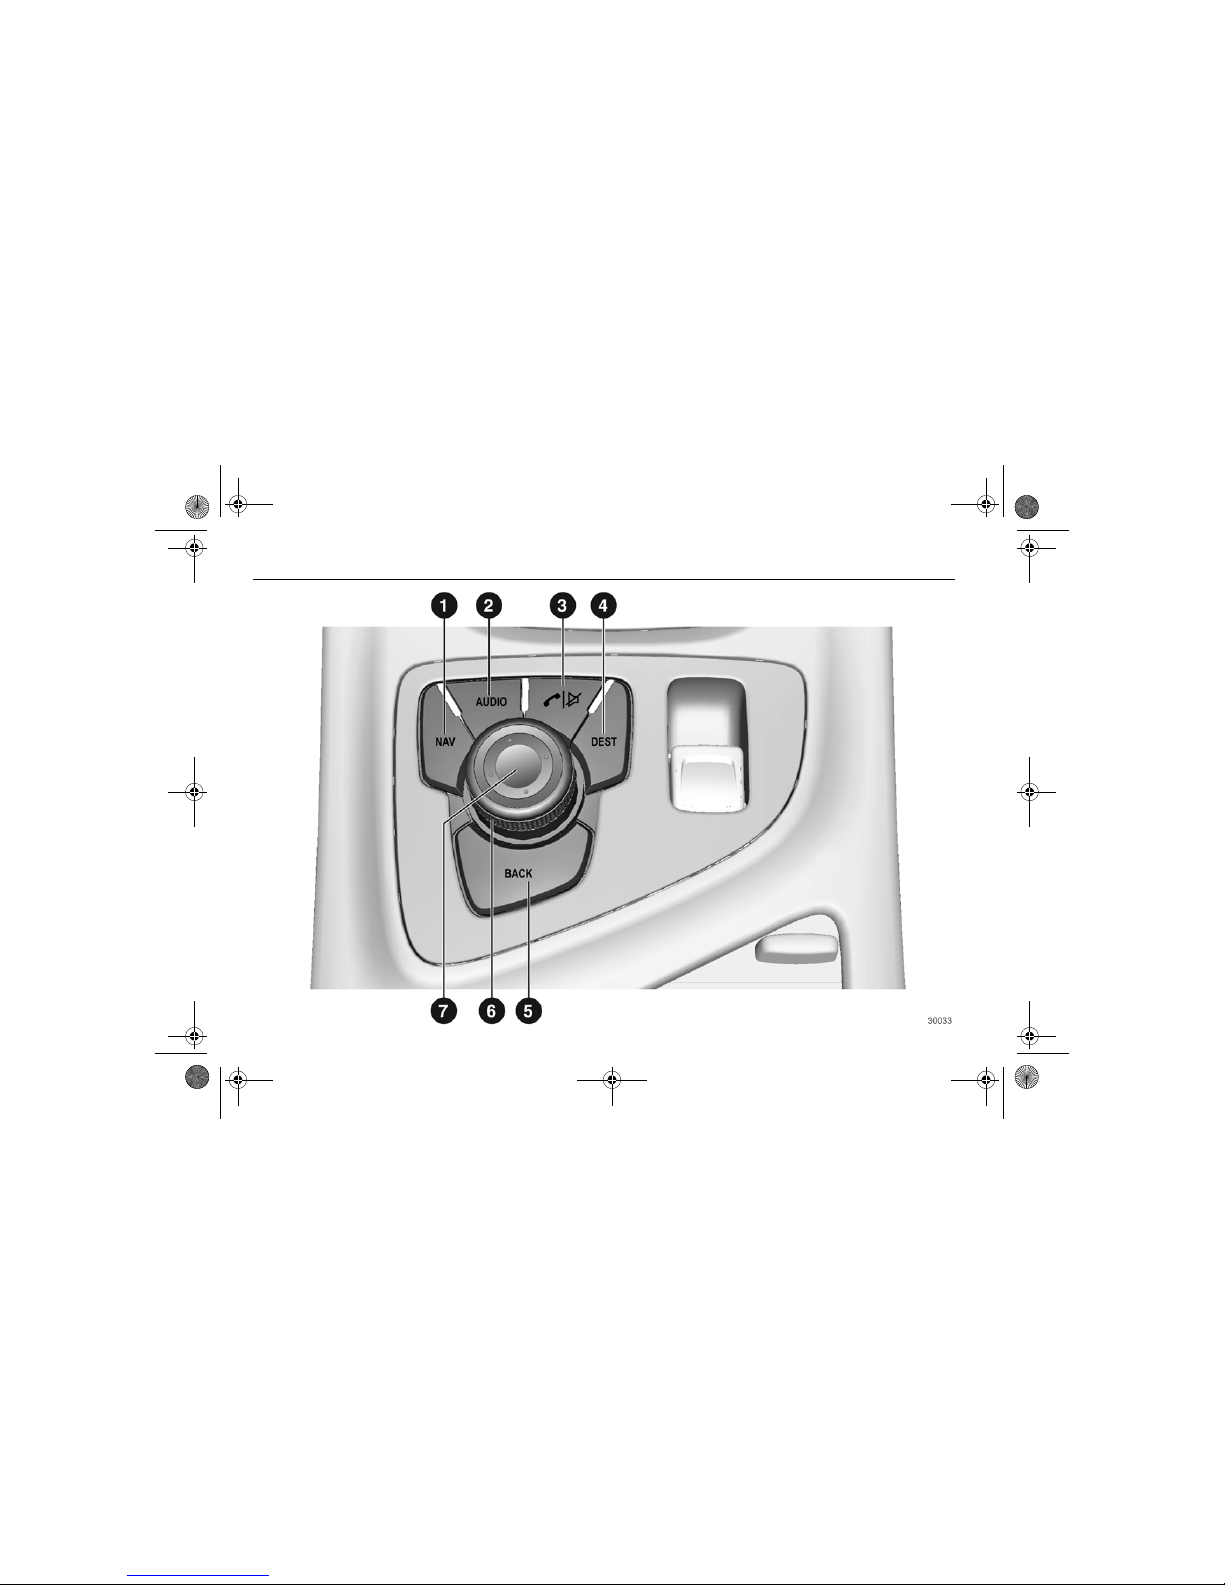
Steering wheel remote
control
1 Take call..............................5-10
Activate voice control ..........5-11
2 End call ............................... 5-10
Activate mute ...................... 5-10
3 SRC (Source)
Press:
Select audio source
Turn upwards: next
preset radio station
or next CD/MP3 title
Turn downwards: previous
preset radio station
or previous CD/MP3 title
4 Increase volume
5 Reduce volume
DVD800.book Page 7 Tuesday, August 26, 2008 1:51 PM
Page 10
1 - 8 Introduction
DVD800.book Page 8 Tuesday, August 26, 2008 1:51 PM
Page 11

1 - 9Introduction
Multifunction unit
1 NAV.......................................4-3
Press once:
Display map
Press twice:
Navigation menu
2 AUDIO
Change audio source
3 Take/end call.......................5-10
Activate
or deactivate mute
4 DEST .................................... 4-4
Navigation destination entry
5 BACK
Menu: one level back
Input: delete last character or
entire entry
6 Multifunction knob ...............1-11
Central control for selection
and navigation in menus
7 Eight-way switch ...................4-9
Navigation:
move display window
in map view
DVD800.book Page 9 Tuesday, August 26, 2008 1:51 PM
Page 12
1 - 10 Introduction
Operation
Control elements
The Infotainment system is operated
via function buttons, multifunction
knobs and menus that are shown on
the display.
Inputs are made optionally via:
the central control unit in the
instrument panel 3 1-5
the steering wheel remote control
3 1-7
the multifunction unit between the
front seats 3 1-9
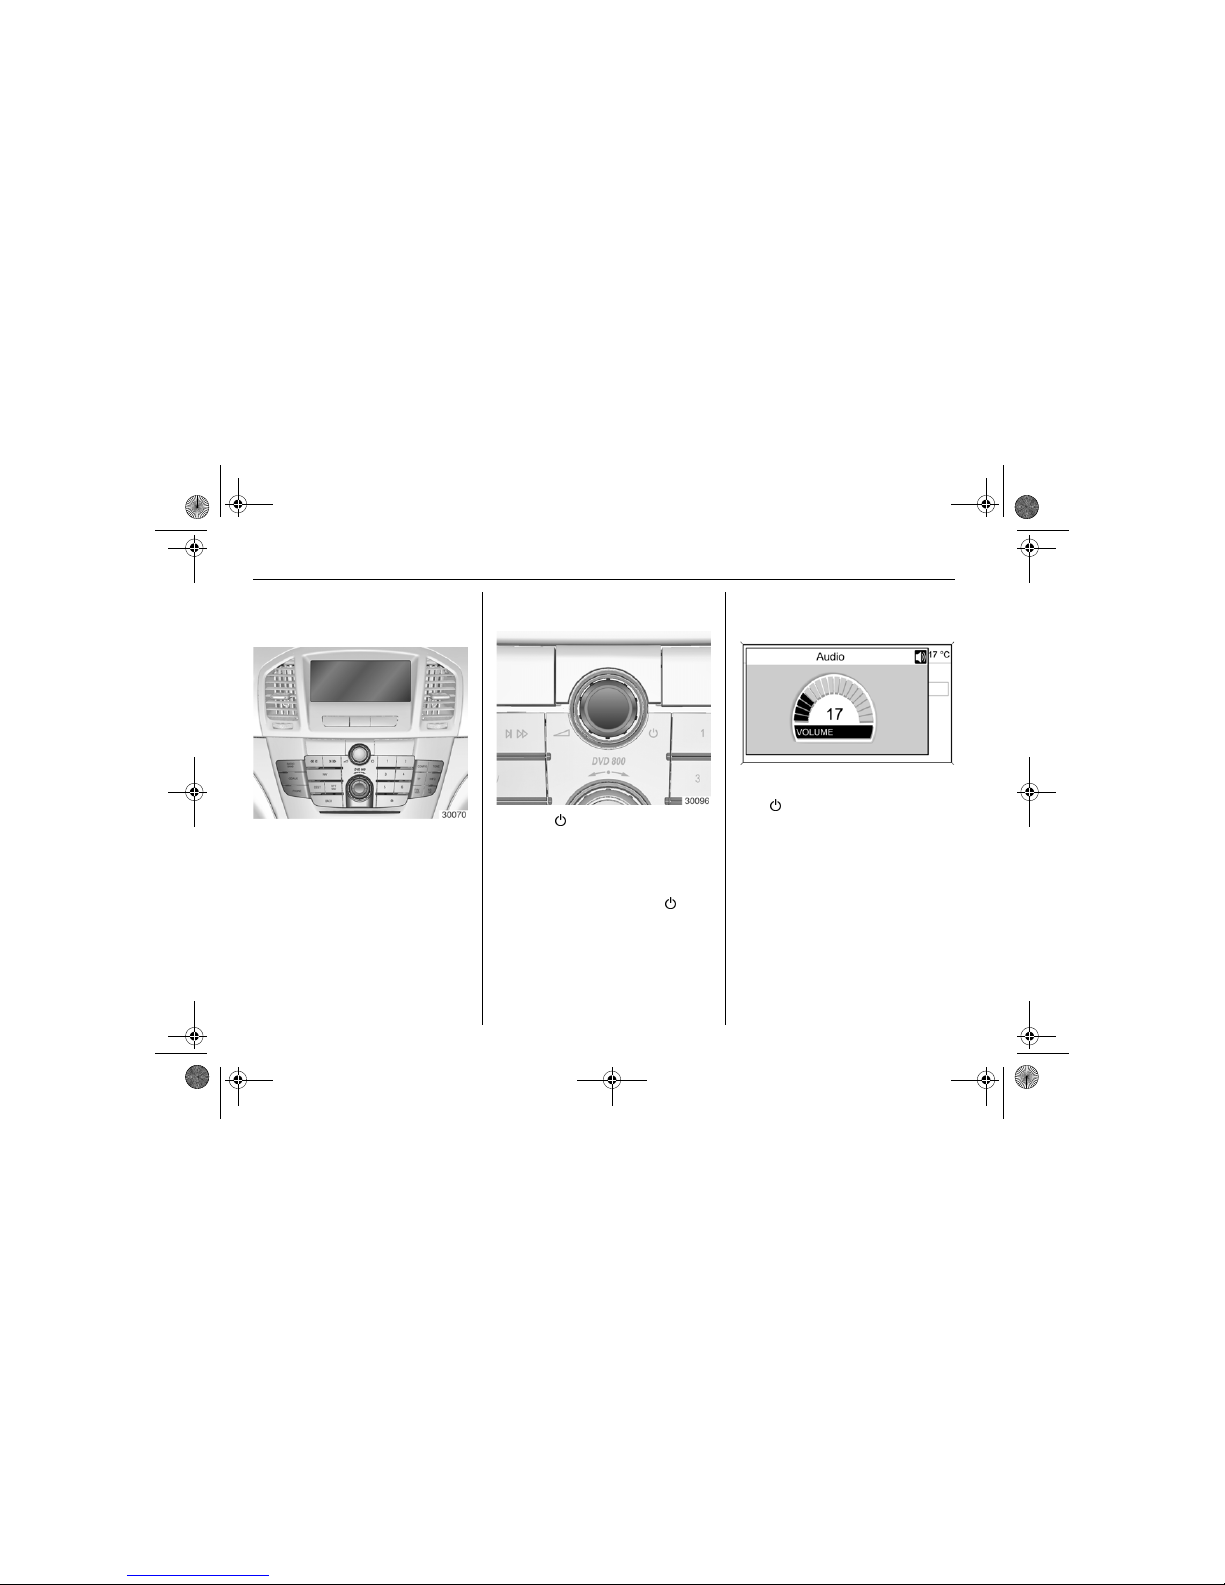
Switching the Infotainment
system on or off
Press the knob briefly. After
switching on the Infotainment source
last selected is active.
Automatic switch-off
If the Infotainment system has been
switched on by means of the knob
when the ignition was switched off,
it will switch off again automatically
30 minutes after the last user input.
Setting the volume
Turn knob. The current setting is
shown on the display.
When the infotainment system is
switched on, the volume last selected
is set.
If necessary, the volume is limited to
the factory-set maximum switch on
volume.
The following can be set separately:
the volume of the traffic
announcements 3 1-15
the volume of the navigation
messages 3 4-23
DVD800.book Page 10 Tuesday, August 26, 2008 1:51 PM
Page 13
1 - 11Introduction
Speed compensated volume
When speed compensated volume is
activated 3 1-15 the volume is
adapted automatically pro rata to the
vehicle speed to compensate for
engine and tyre noise.
Mute
Press the PHONE button for a few
seconds to switch the audio sources
to mute.
To cancel mute again: turn the
knob or press the PHONE button for
a few seconds again.
Function areas
Radio
Press the RADIO button to open the
radio main menu or to change
between the different wavebands.
Press the multifunction knob to open
a submenu with options for station
selection.
Detailed description of the radio
functions 3 2-1.
Audio player
Press CD/AUX button to open the
CD, USB, iPod
®
or AUX menu
(if available) or to change between
these menus.
Press the multifunction knob to open
a submenu with options for track
selection.
Detailed description of the audio
player functions 3 3-1.
Navigation
Press NAV button twice to open the
Navigation menu.
Detailed description of the navigation
system functions 3 4-1.
Mobile phone portal
Press the PHONE button to open the
telephone menu.
Press the multifunction knob to open
a submenu with options for the input
or selection of numbers.
Detailed description of the mobile
phone portal functions 3 5-1.
Handling the menus
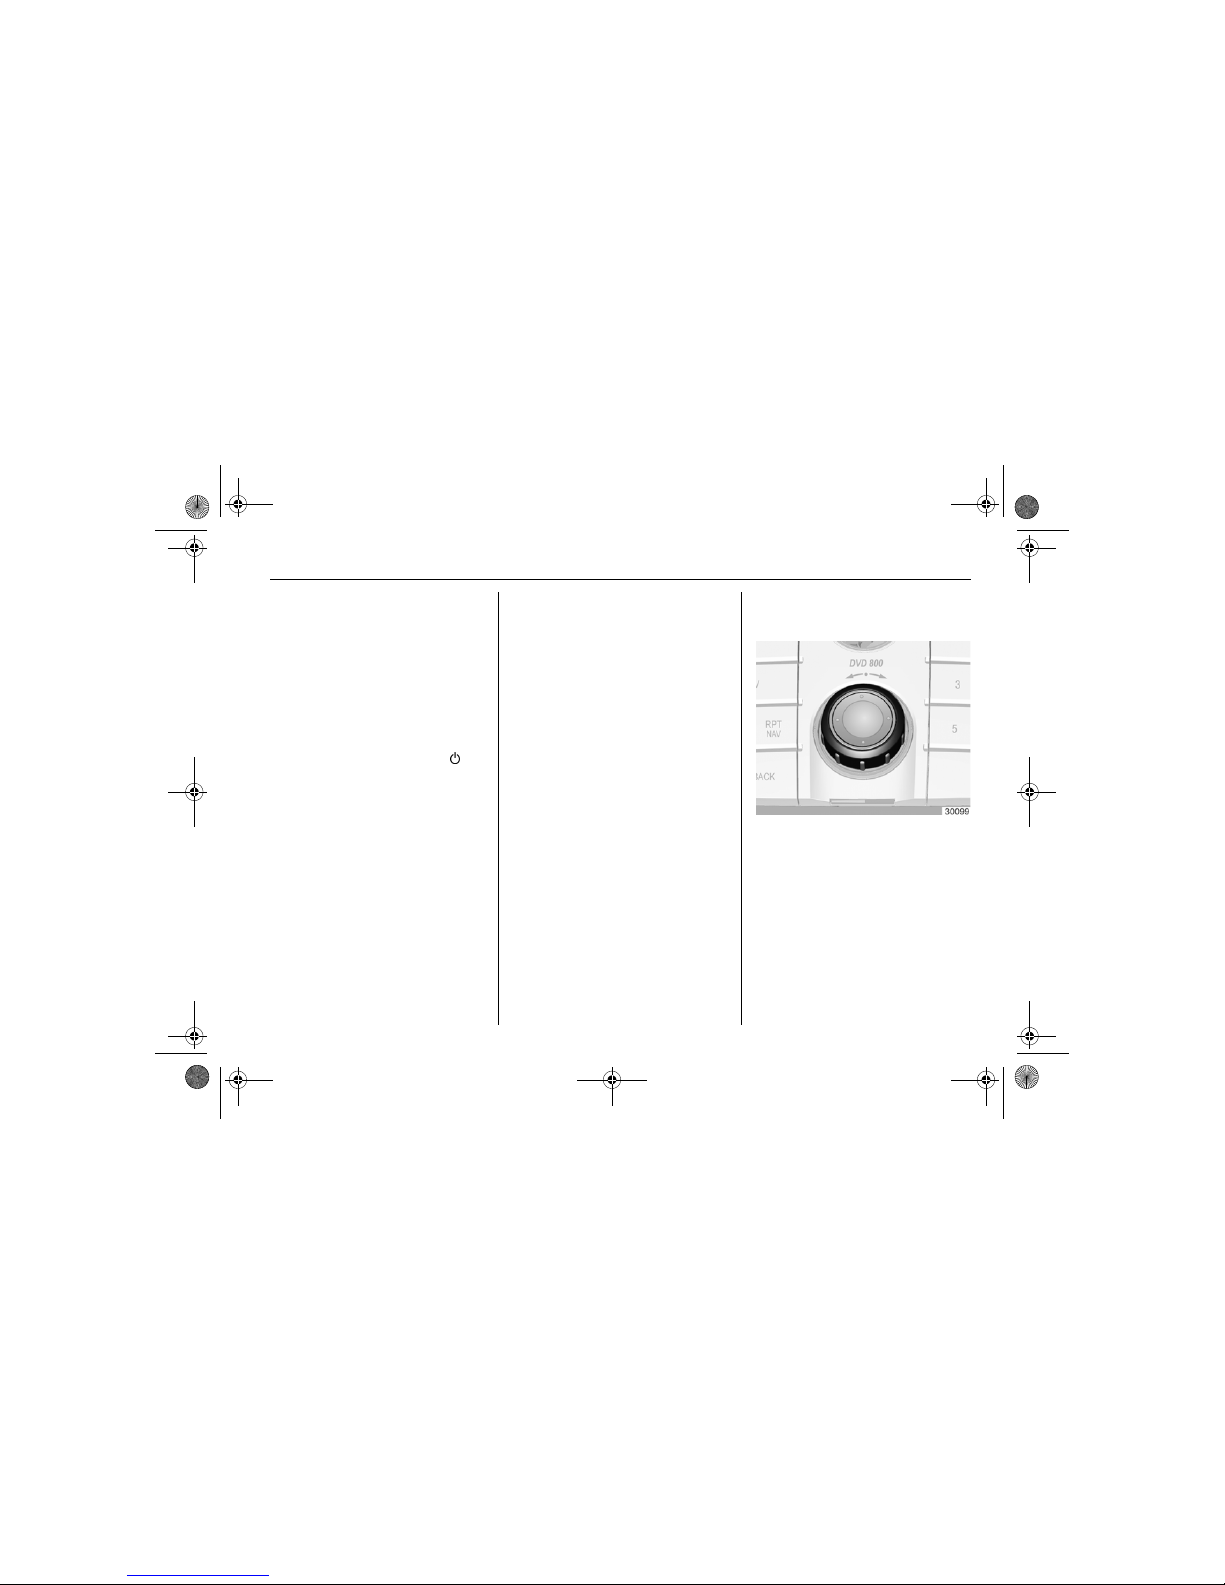
Multifunction knob
The multifunction knob is the central
control element for the menus.
Turn
To mark a menu option
To set a numeric value
Press (the outer ring)
To select or activate the marked
option
To confirm a set value
To switch a system function on/off
DVD800.book Page 11 Tuesday, August 26, 2008 1:51 PM
Page 14
1 - 12 Introduction
BACK button
Press the button briefly to:
exit a menu,
return from a submenu to the next
higher menu level,
delete the last character in a
character sequence.
Press the button for a few seconds to
delete the entire entry
Examples of menu operation
Selecting an option
Turn the multifunction knob to move
the cursor (= coloured background) to
the desired option.
Press the multifunction knob to select
the marked option.
Submenus
An arrow on the right-hand edge of
the menu indicates that after
selection of the option a submenu
with further options will be opened.
Activating a setting
Turn the multifunction knob to mark
the desired setting.
Press the multifunction knob to
activate the setting.
Setting a value
Turn the multifunction knob to change
the current value of the setting.
Press the multifunction knob to
confirm the set value.
DVD800.book Page 12 Tuesday, August 26, 2008 1:51 PM
Page 15
1 - 13Introduction
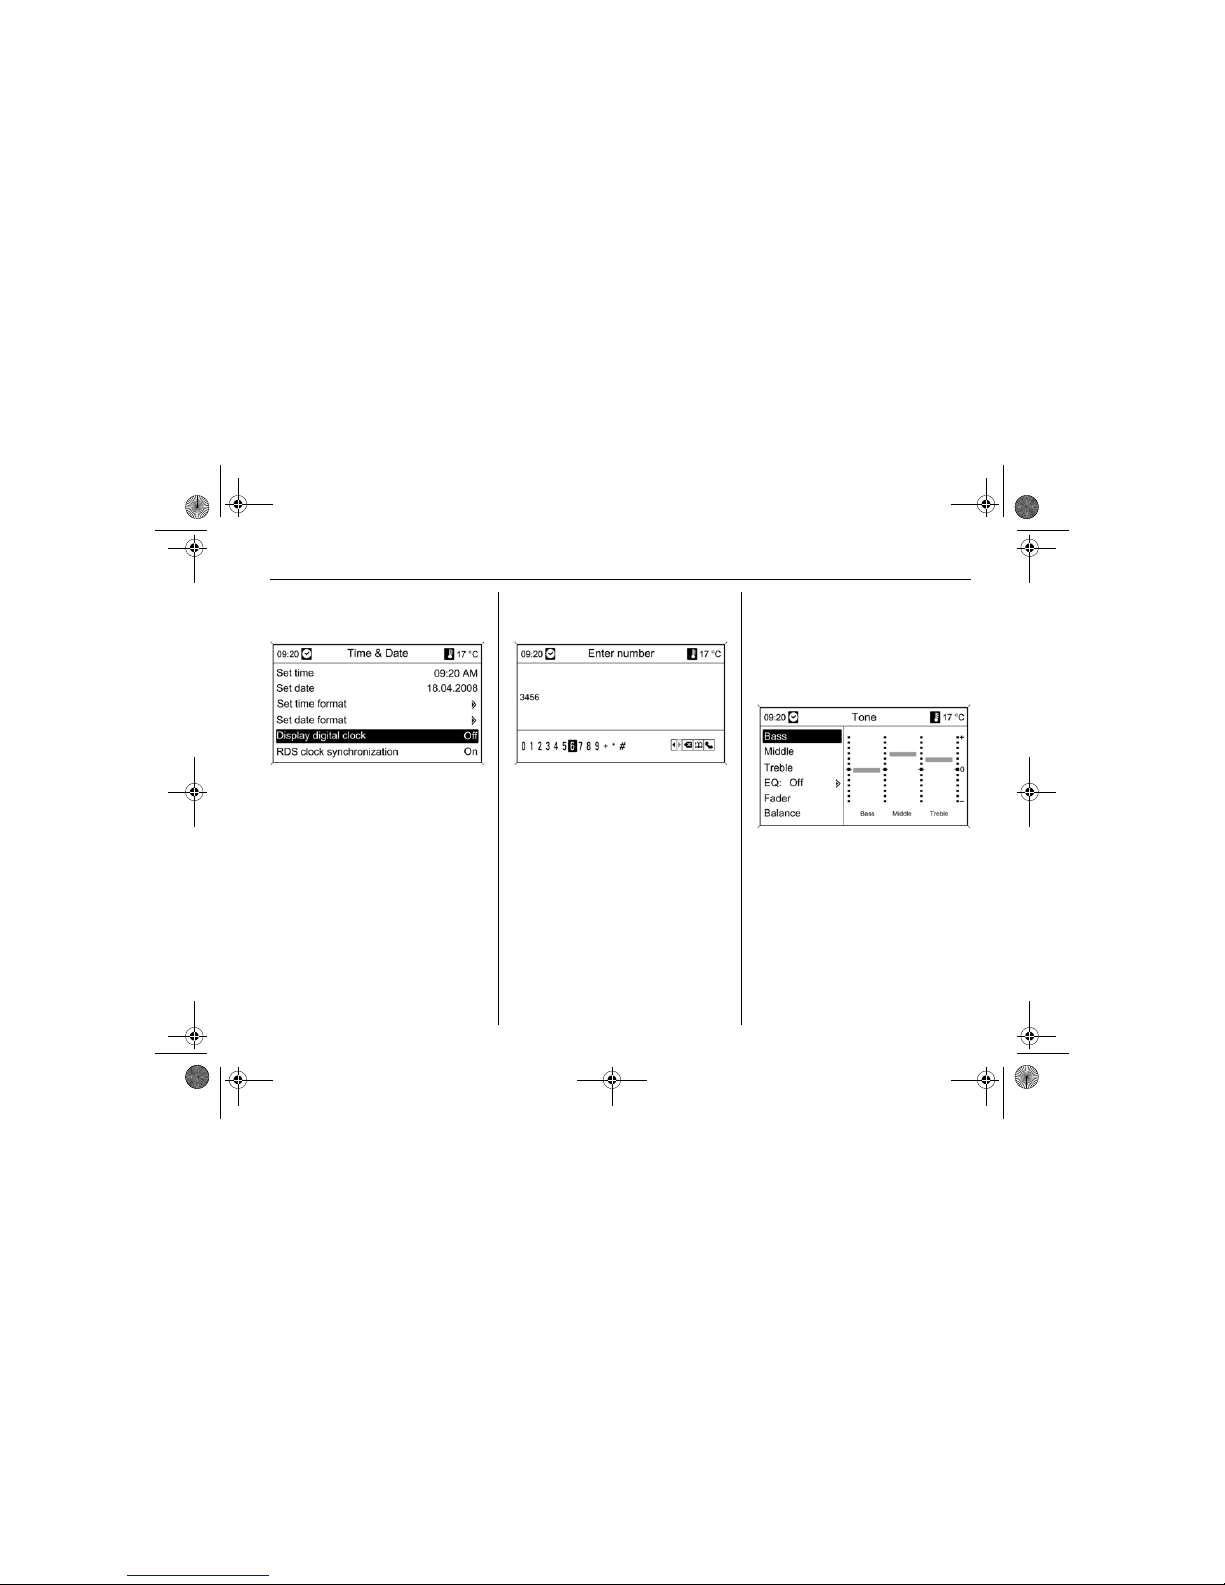
Switching a function on or off
Turn the multifunction knob to mark
the function to be switched on or off.
Press the multifunction knob to switch
between the settings On and Off.
Entering a character sequence
To enter character sequences,
e.g. telephone numbers or road
names:
Turn the multifunction knob to select
the desired character.
Press the multifunction knob to
confirm the selected character.
By means of the BACK button the
last character in the character
sequence can be deleted. A long
press deletes the entire entry.
Tone settings
In the tone settings menu the tone
characteristic can be set differently
for each radio waveband and each
audio player source.
Press the TONE button to open the
tone menu.
DVD800.book Page 13 Tuesday, August 26, 2008 1:51 PM
Page 16
1 - 14 Introduction
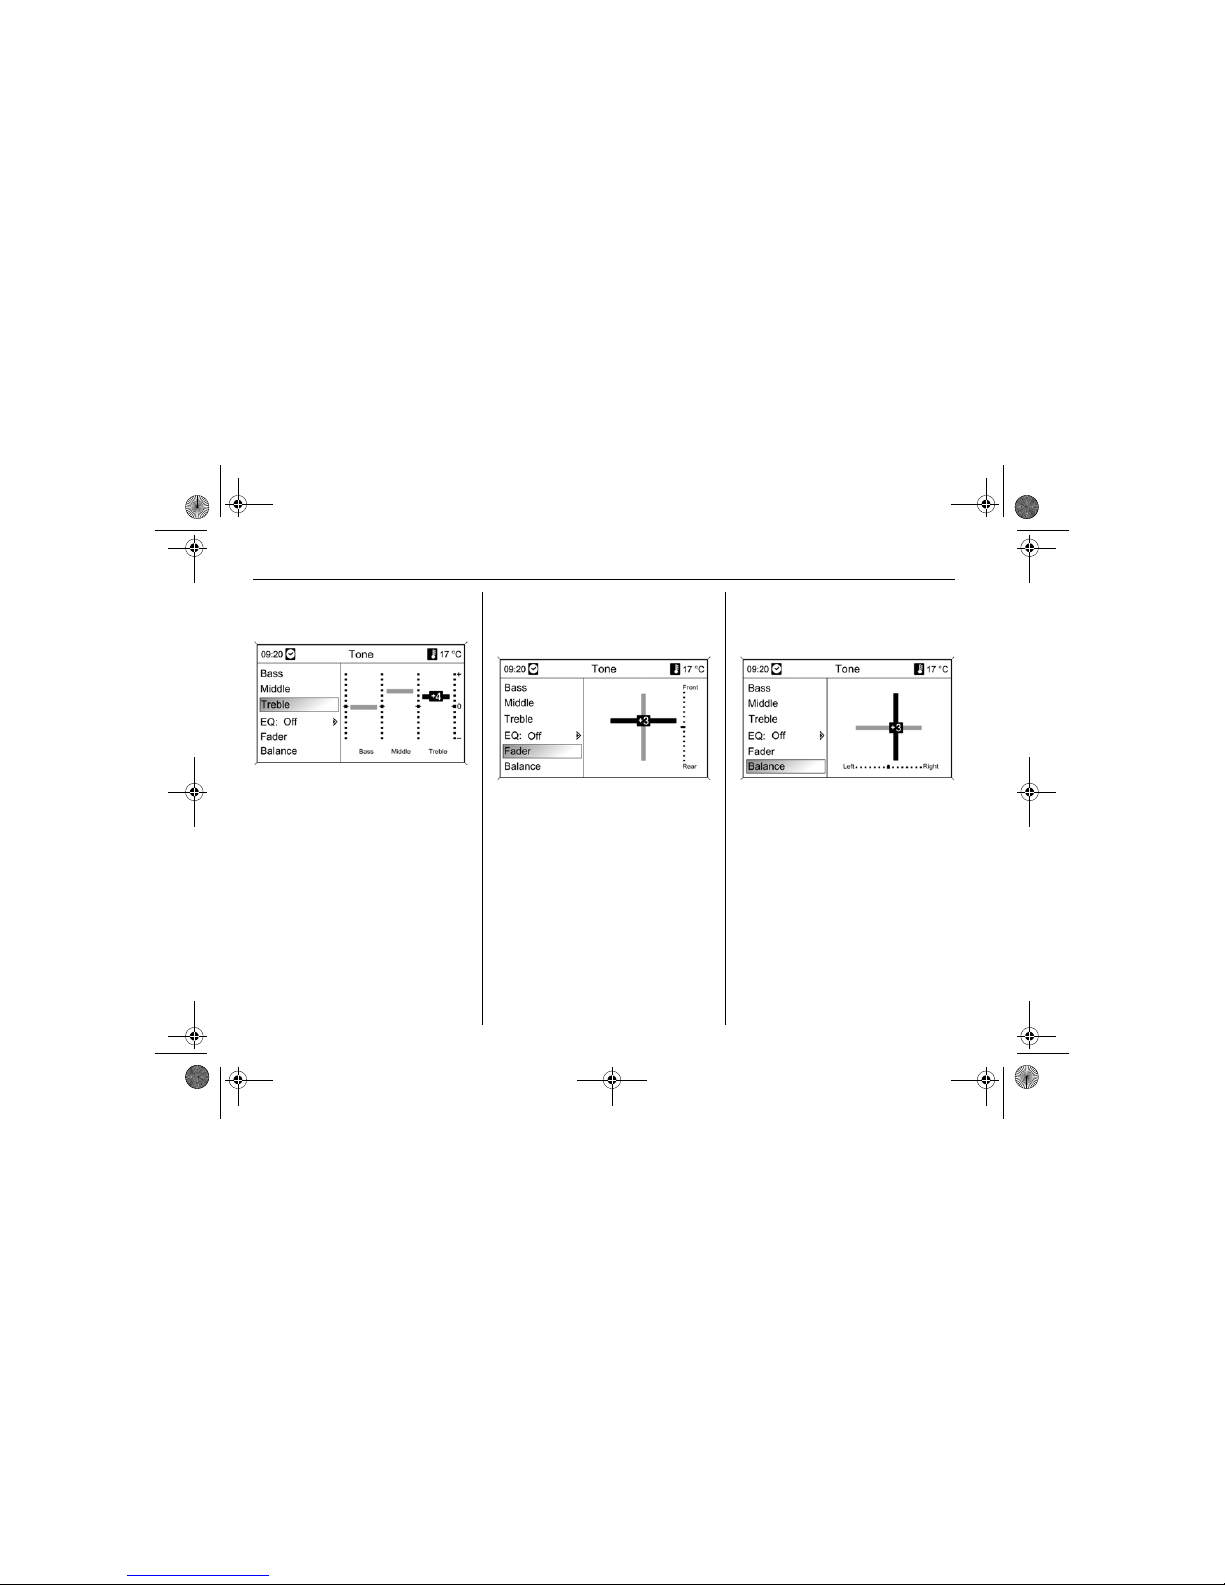
Setting bass, middle and treble
Select Bass, Middle or Treble.
Set the desired value for the option
selected.
Setting the volume distribution
between front - rear
Select Fader.
Set the desired value.
Setting the volume distribution
between right - left
Select Balance.
Set the desired value.
Setting individual setting to "0"
Select the desired option and press
the multifunction knob for a few
seconds.
Setting all settings to "0" or
"Off"
Press TONE button for a few
seconds.
DVD800.book Page 14 Tuesday, August 26, 2008 1:51 PM
Page 17
1 - 15Introduction
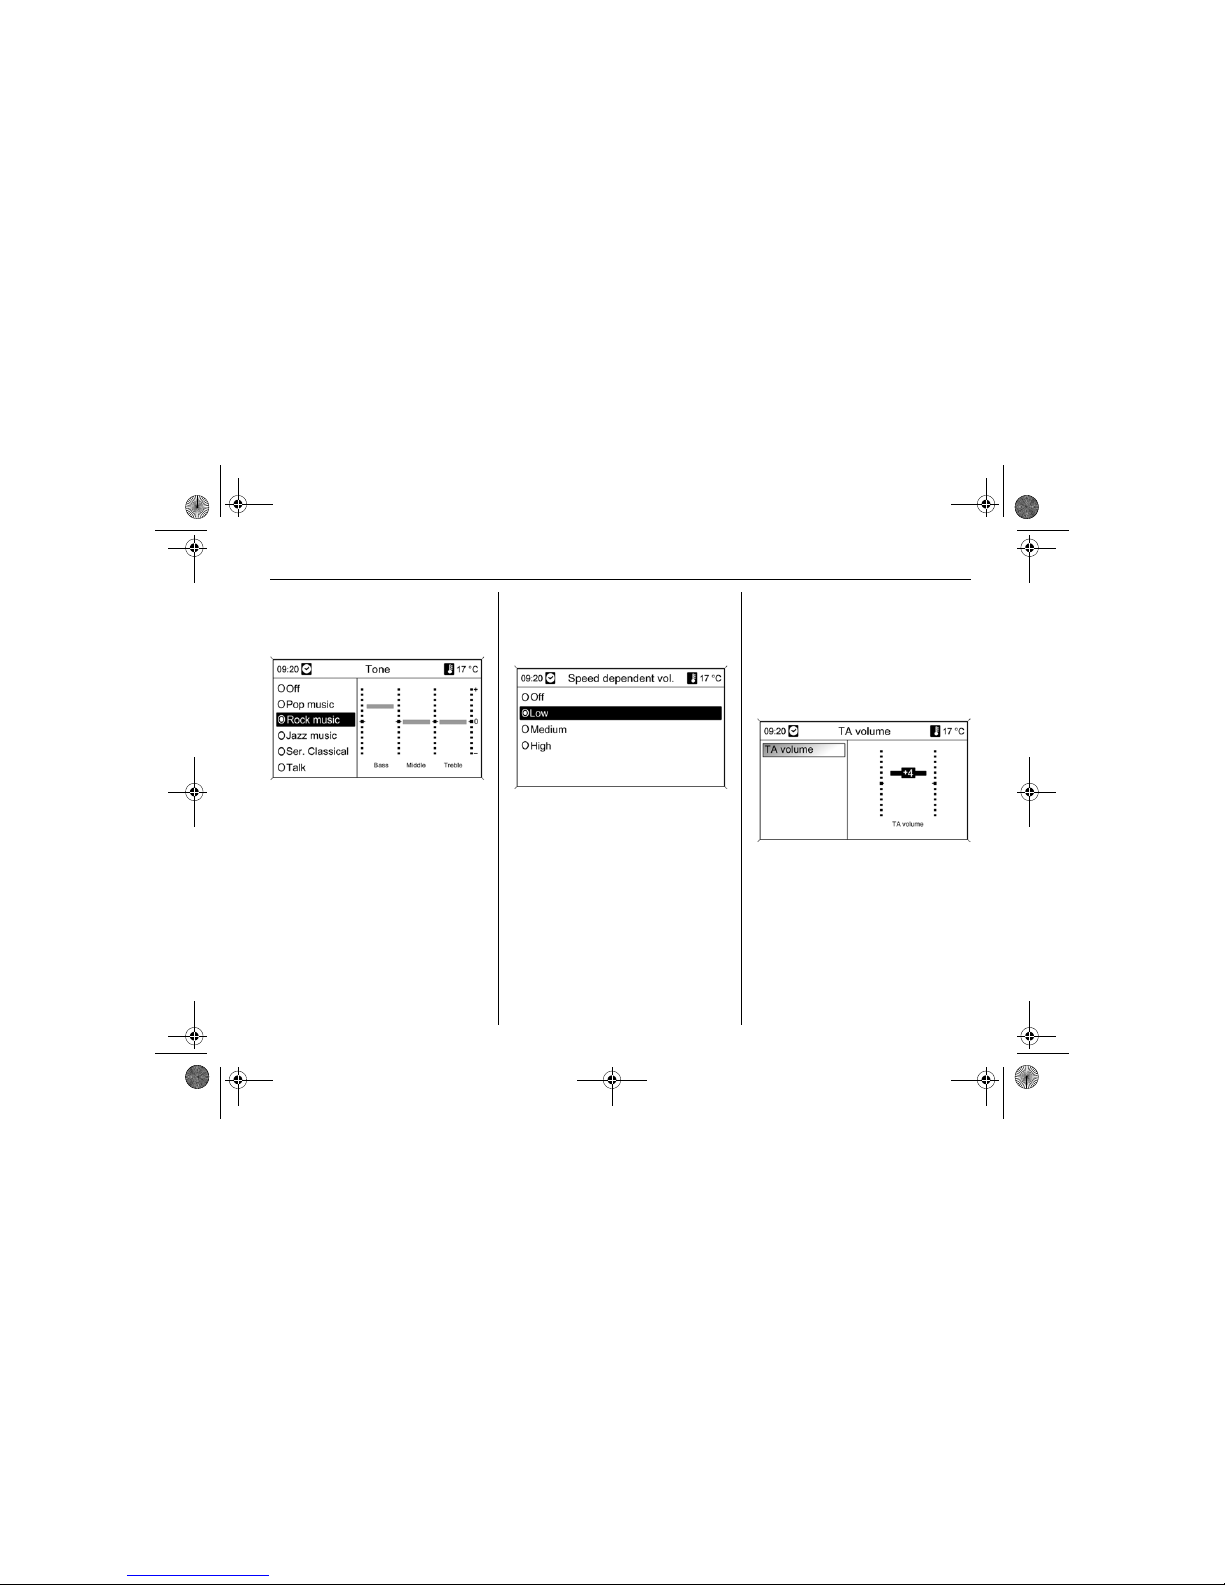
Optimising the tone for the
style of music
Select EQ (Equalizer).
The displayed options offer optimised
bass, middle and treble presettings
for the relevant style of music.
Select required option.
System settings
Diverse settings and adaptations for
the Infotainment system can be
performed at any time.
Press the CONFIG button to open the
system settings menu.
Volume settings
Speed compensated volume
Select Radio settings and then
Speed dependent volume.
Speed compensated volume can be
deactivated or the degree of volume
adaptation can be selected in the
menu displayed.
Select required option.
Volume of the traffic
announcements (TA)
The volume of the traffic
announcements can be increased or
reduced in comparison to the normal
audio volume.
Select Radio settings, RDS options
and TA volume one after the other.
Set the desired value.
DVD800.book Page 15 Tuesday, August 26, 2008 1:51 PM
Page 18
1 - 16 Introduction
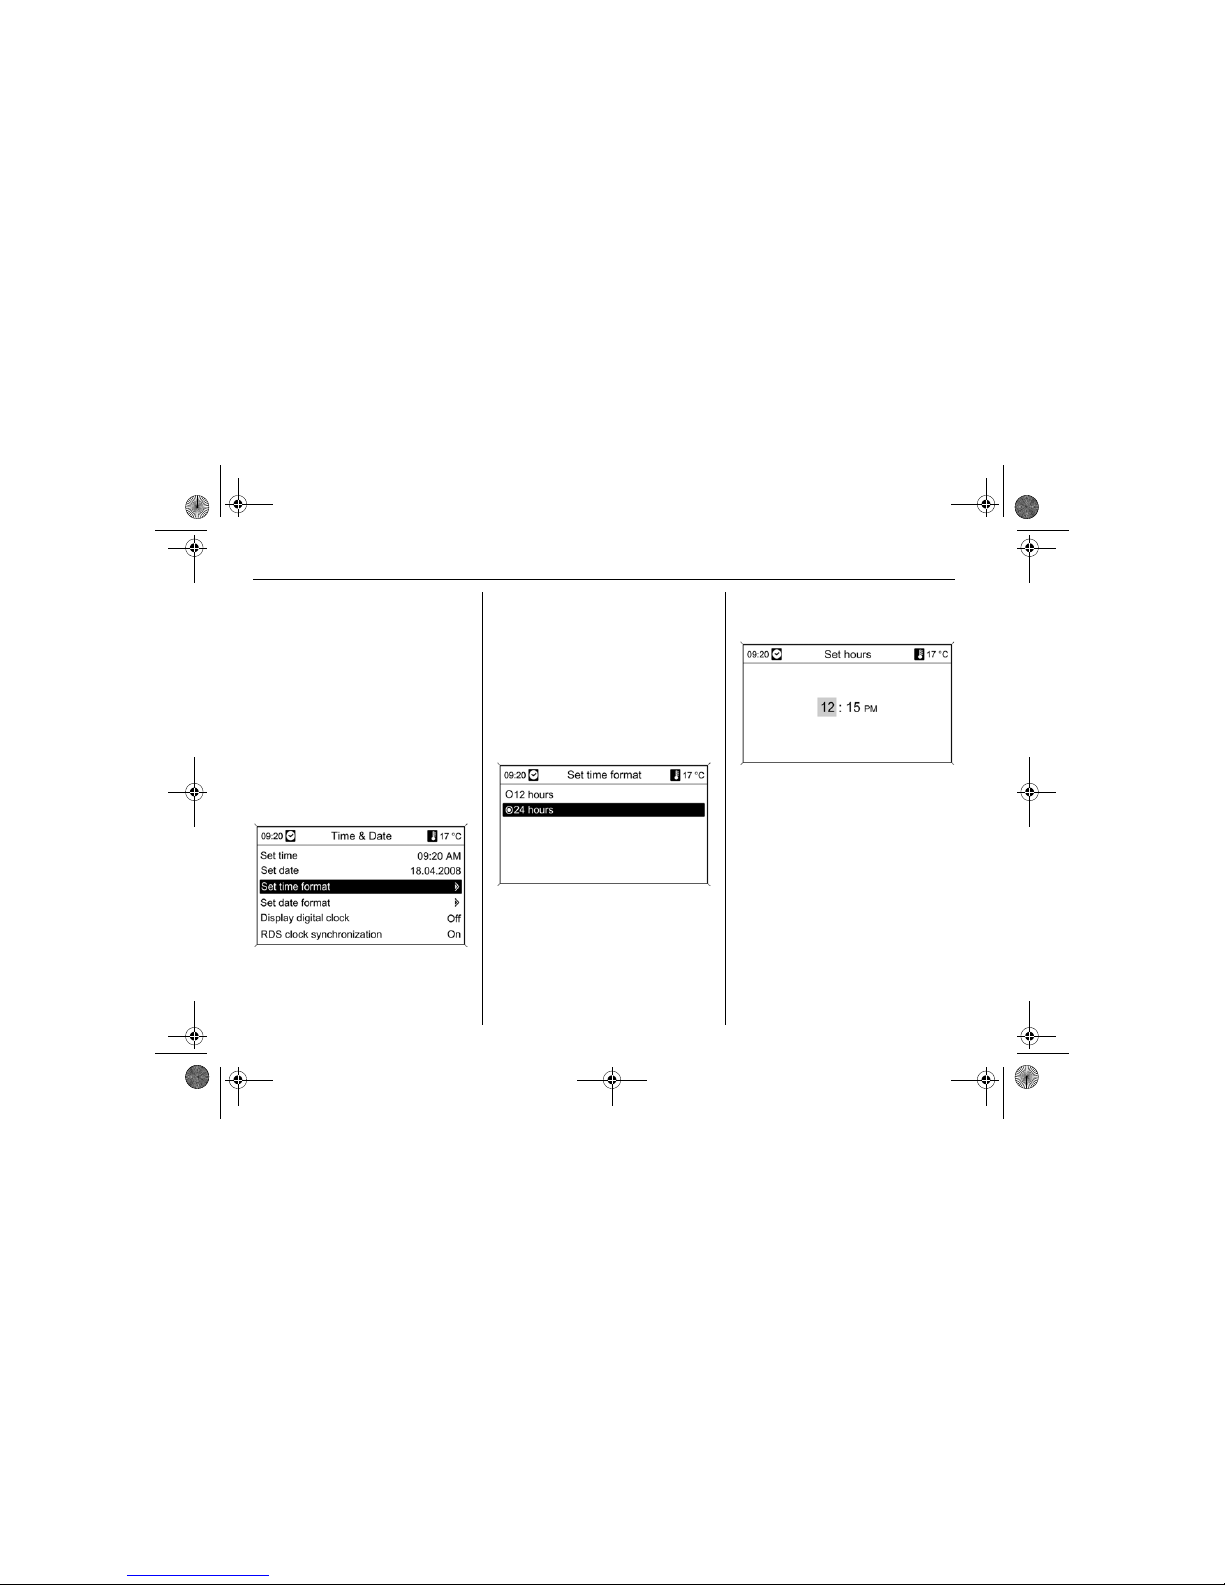
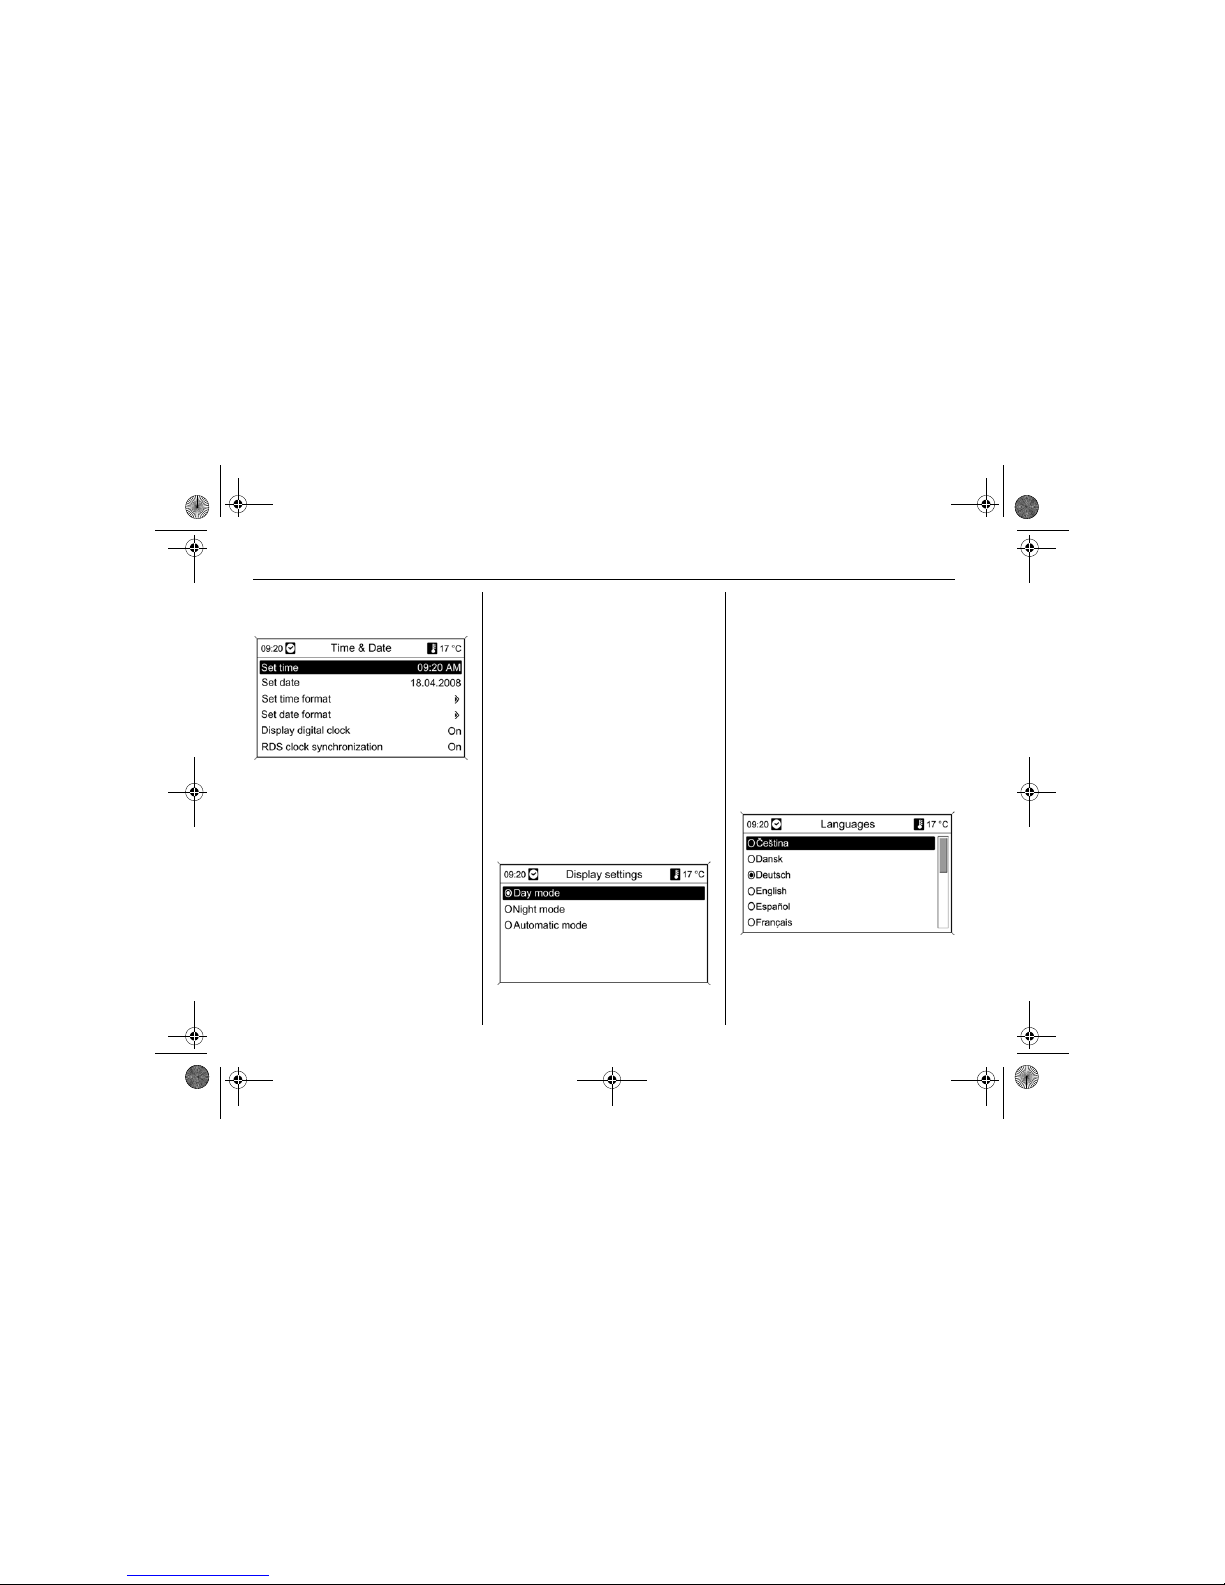
Setting the time and date
If the displays for time or date have to
be altered:
Select Time & Date.
Selectable setting options:
Set time: Changes the time shown
on the display.
Set date: Changes the date shown
on the display (with Infotainment
system switched off).
Set time format: Changes
indication of hours between
12 hours and 24 hours.
Set date format: Changes
indication of date between
MM/DD/YYYY and DD.MM.YYYY.
Display digital clock: Switches
on/off indication of time on the
display.
RDS clock synchronization: After
switching on this function the time
display is constantly updated
automatically via the time signal of
an RDS channel 3 2-6. RDS time
synchronisation can take a few
minutes.
Make the desired settings.
Selecting display mode
Select Display settings.
Selectable display settings:
Day mode: Optimisation of the
display for daylight conditions.
Night mode: Optimisation of the
display for darkness.
Automatic mode: The display
changes mode when the vehicle
lights are switched on/off.
Select required option.
Changing the language
DVD800.book Page 16 Tuesday, August 26, 2008 1:51 PM
Page 19

1 - 17Introduction
In case the language of the menu
displays, the navigation messages
and the voice output of the mobile
phone portal have to be changed:
Select Vehicle settings and then
Languages.
Select desired language.
DVD800.book Page 17 Tuesday, August 26, 2008 1:51 PM
Page 20
2 - 1 Radio
Radio
Operation
Control buttons
The most important buttons for
control of the radio are as follows:
RADIO: Activate radio
, : Station search
AS: Autostore lists
FAV: Favourite lists
1 ..6: Preset buttons
TP: Radio traffic service
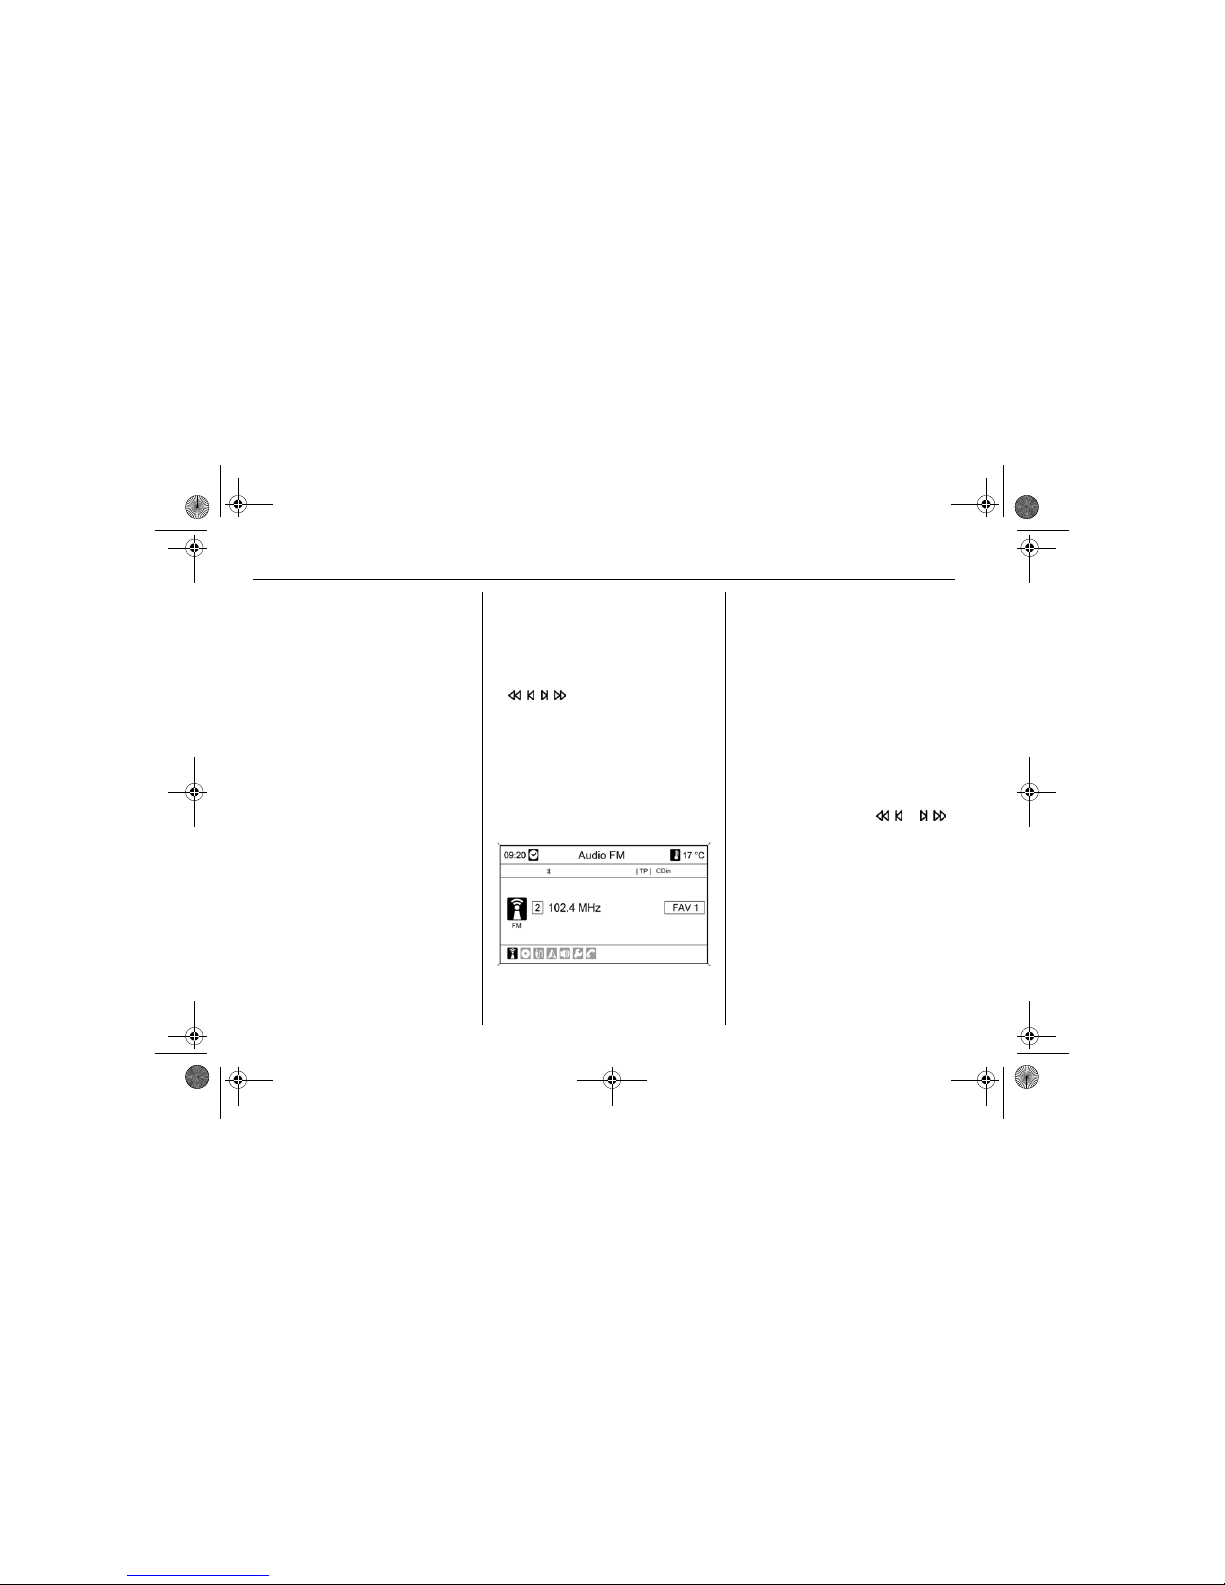
Activating the radio
Press the RADIO button to open the
radio main menu.
The station last played will be
received.
Selecting the waveband
Press the RADIO button to switch
between the AM and FM wavebands.
The last station received in the
waveband is played (if it can be
received).
Selecting station
Automatic station search
Briefly press the button or .
A search is made for the next station
that can be received and it is played
automatically.
A search can be made for all the
stations in the current waveband in
succession in this manner.
If the radio does not find a station, it
switches automatically to a more
sensitive search level. If it still does
not find a station, the frequency that
was last active is set again.
Operation............................. 2-1
RDS..................................... 2-6
DVD800.book Page 1 Tuesday, August 26, 2008 1:51 PM
Page 21
2 - 2Radio
If the RDS functionality is activated, a
search is only made for RDS stations
3 2-6, if radio traffic service is active
(TP) only for radio traffic service
stations 3 2-5.
If station frequency is known:
Press or button and keep
pressed. Release button when the
required frequency has almost been
reached on the frequency display.
A search is made for the next station
that can be received and it is played
automatically.
Manual station search
Turn the multifunction knob and set
the optimal reception frequency on
the popup frequency display.
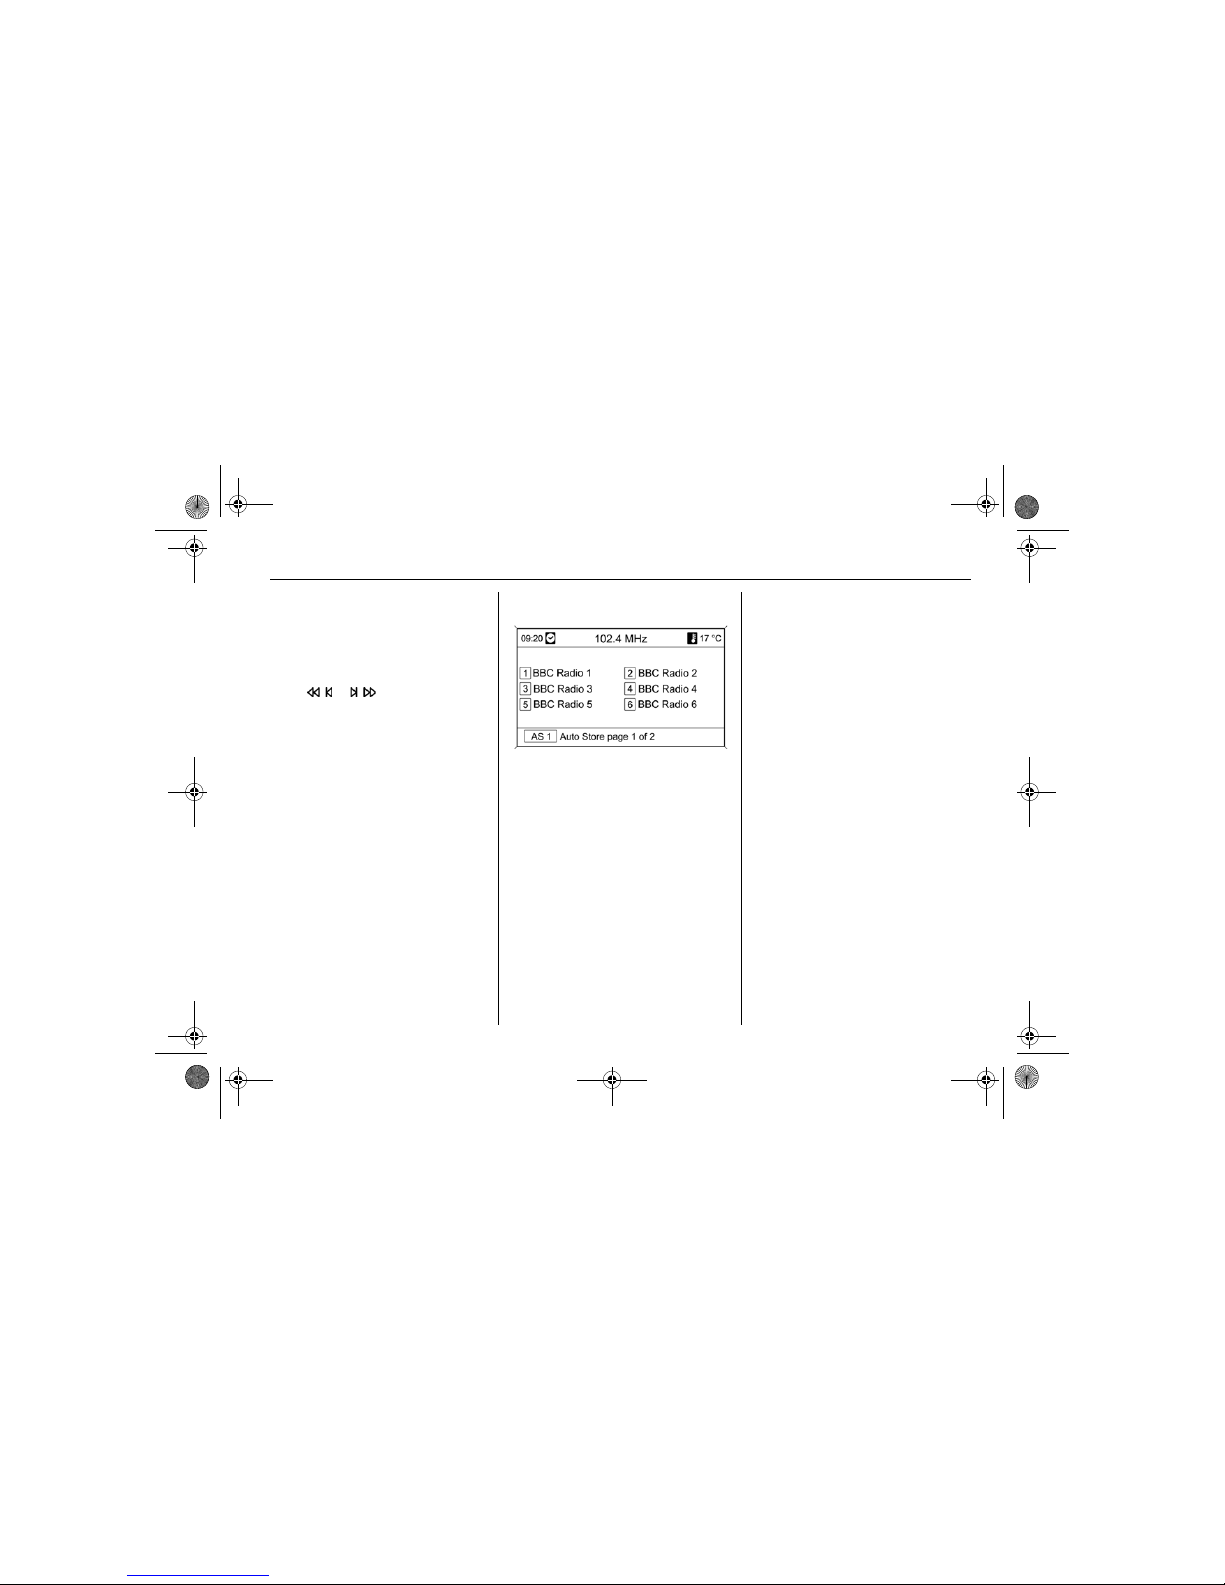
Autostore lists (AS)
The stations that can be received
best in a waveband can be searched
for and stored automatically via the
autostore function.
Each waveband has two autostore
lists (AS 1, AS 2), in each of which
6 stations can be stored.
Storing stations automatically
Keep the AS button pressed until
the menu Auto Store opens. The
12 strongest stations in the current
waveband will be stored in the two
autostore lists.
To abort the autostore procedure,
press the multifunction knob.
Saving stations manually
Stations can also be stored manually
in the autostore lists.
Set the station to be stored.
Briefly press the AS button to open
an autostore list or to switch to
another autostore list.
To save the station in a list position:
press related station button 1 ..6 for a
few seconds. A sound indicates that
the station has been saved.
Manually stored stations are
overwritten in an automatic station
storing process.
Retrieving a station
Briefly press the AS button to open
an autostore list or to switch to
another autostore list.
Briefly press one of the station
buttons 1 ..6, to open the station at
the related list position.
DVD800.book Page 2 Tuesday, August 26, 2008 1:51 PM
Page 22
2 - 3 Radio
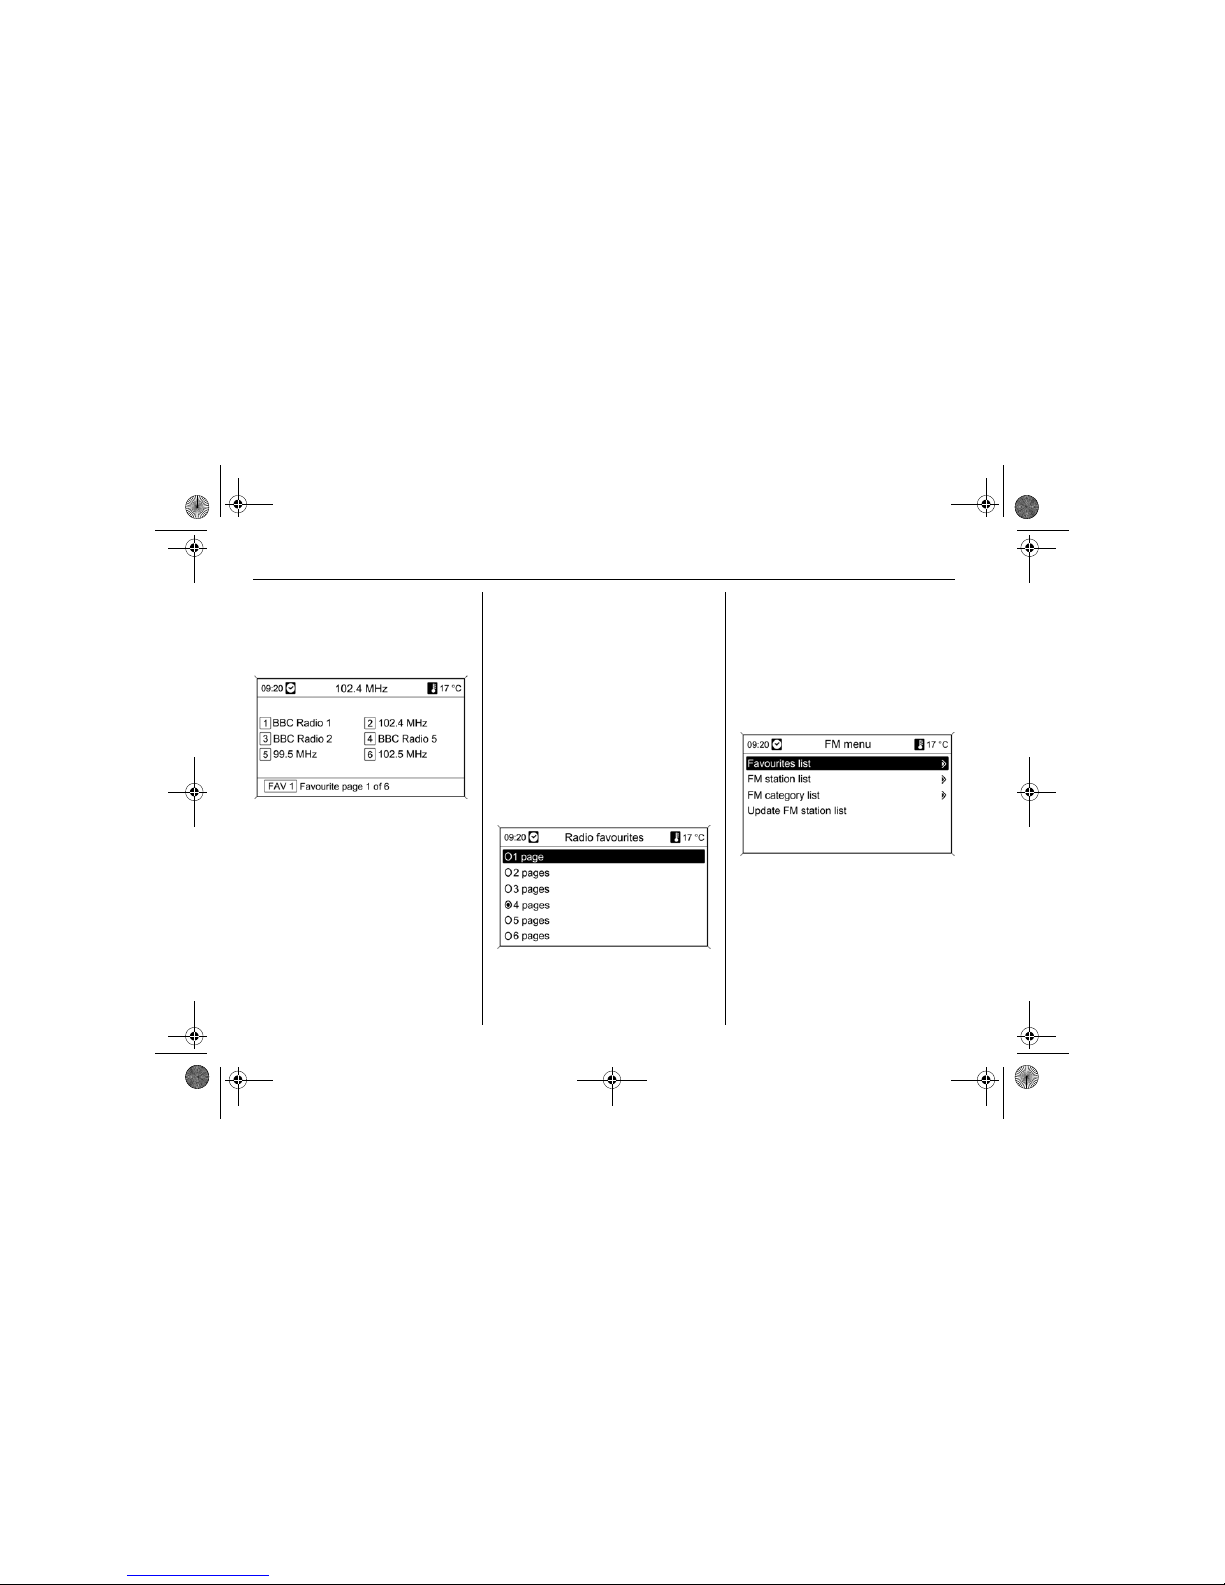
Favourite lists (FAV)
Stations of all wavebands can be
stored manually in the favourite lists.
6 stations can be stored in each
favourite list. The number of available
favourite lists can be configured
3 "Defining the number of favourite
lists".
Storing a station
Set the station to be stored.
Briefly press the FAV button to open
a favourite list or to switch to another
favourite list.
To save the station in a list position:
press related station button 1 ..6 for a
few seconds. A sound indicates that
the station has been saved.
Retrieving a station
Briefly press the FAV button to open
a favourite list or to switch to another
favourite list.
Briefly press one of the station
buttons 1 ..6, to open the station at
the related list position.
Defining number of favourite lists
The number of available favourite
lists can be configured.
Press CONFIG button.
Select Radio settings and then
Radio favourites.
Select the desired number of
available favourite lists.
Waveband menus
Alternative facilities for station
selection are available via the AM
and FM menu.
With the radio main menu active
press the multifunction knob to open
the relevant waveband menu.
DVD800.book Page 3 Tuesday, August 26, 2008 1:51 PM
Page 23
2 - 4Radio
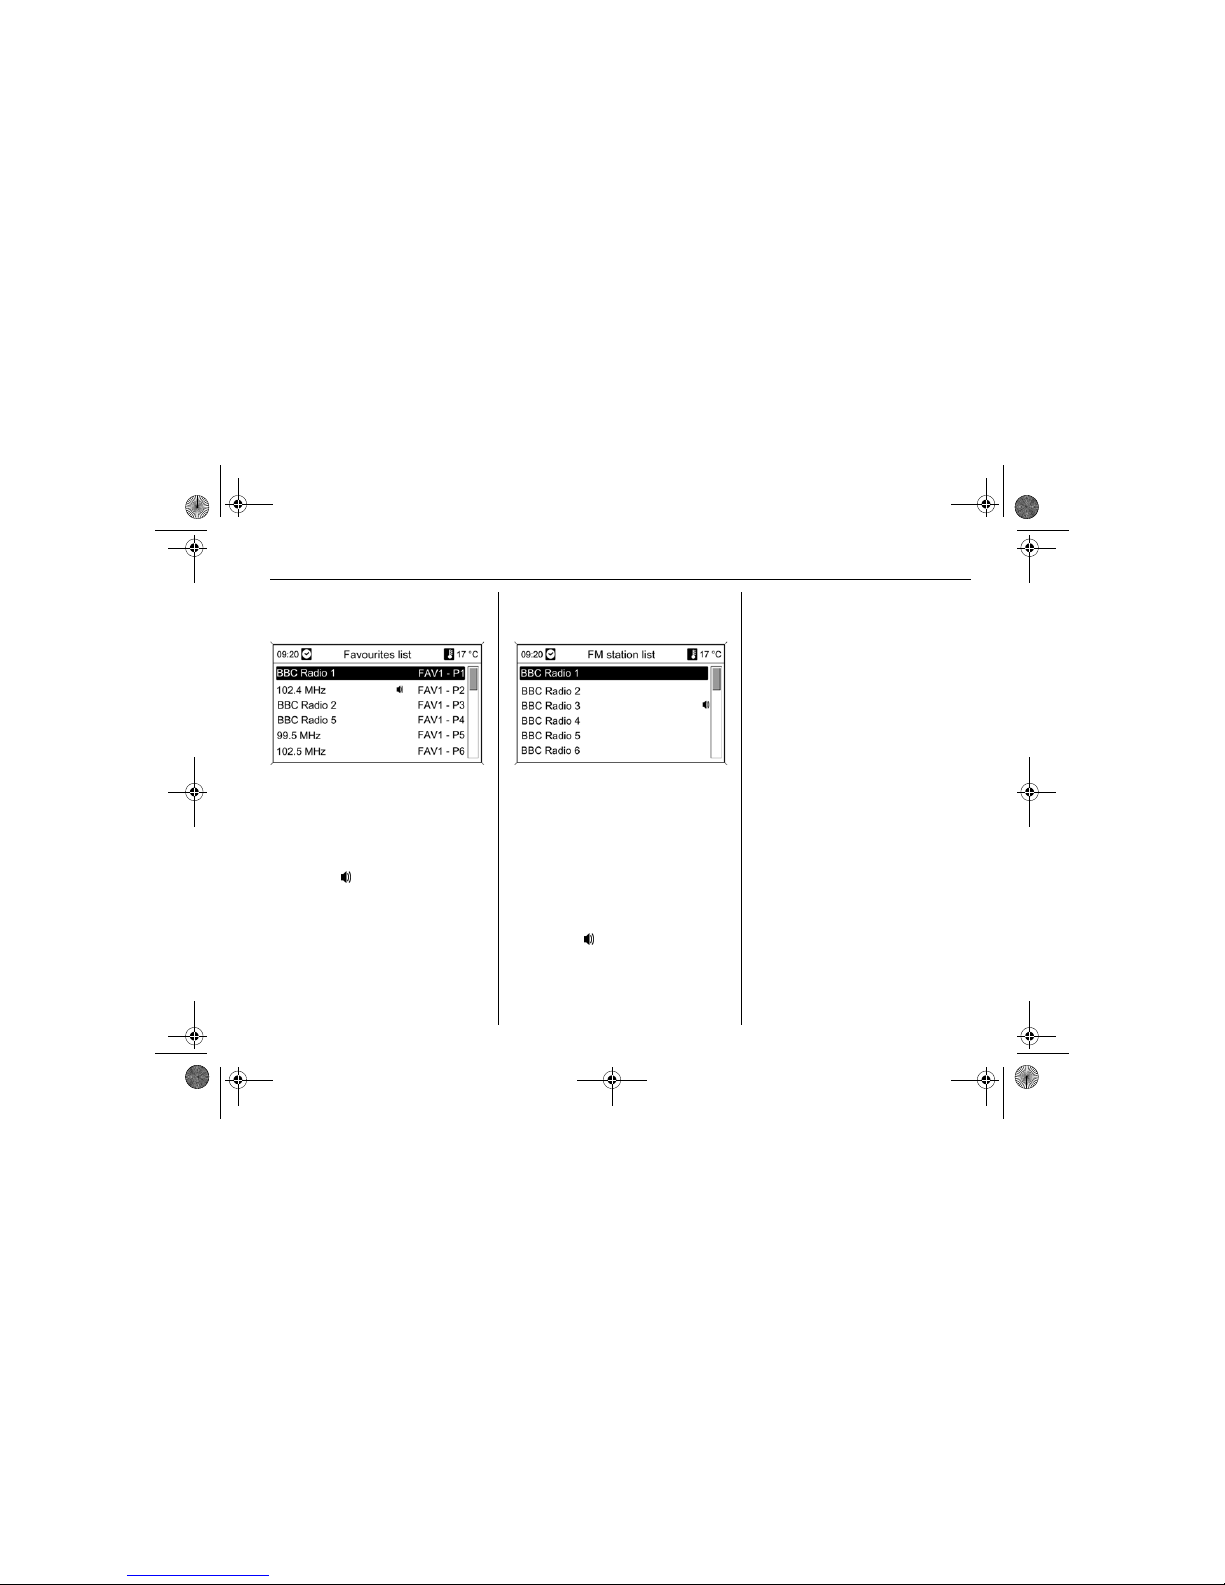
Favourites list
Select Favourites list.
All AM and FM stations saved in the
favourite lists are displayed.
Select required station.
The symbol marks the station
currently selected.
Station lists
Select AM or FM station list.
All receivable stations in the current
reception area are displayed.
If no station list has been created
beforehand, the Infotainment system
performs an automatic station
search.
Select required station.
The symbol marks the station
currently selected.
Updating stations lists
If the stations stored in the AM or FM
station list stations list can no longer
be received:
Select AM or Update FM station list.
A station search is started. Once the
search is finished, the station
previously selected is played.
To cancel the station search: press
multifunction knob
In the FM waveband the FM category
list is also updated.
Important information on updating
the station lists
The dual tuner in the Infotainment
system continuously updates the
station lists in the background. In this
way it is ensured that, e. g., the
station lists always contain the
stations that can be received in the
local area during a long motorway
journey. As the automatic updating
takes a certain amount of time, all
stations that can be received may not
be available at once in the station list
on a sudden change in reception
area. In such circumstances the
DVD800.book Page 4 Tuesday, August 26, 2008 1:51 PM
Page 24
2 - 5 Radio
updating of the station lists can be
accelerated using AM or Update FM
station list.
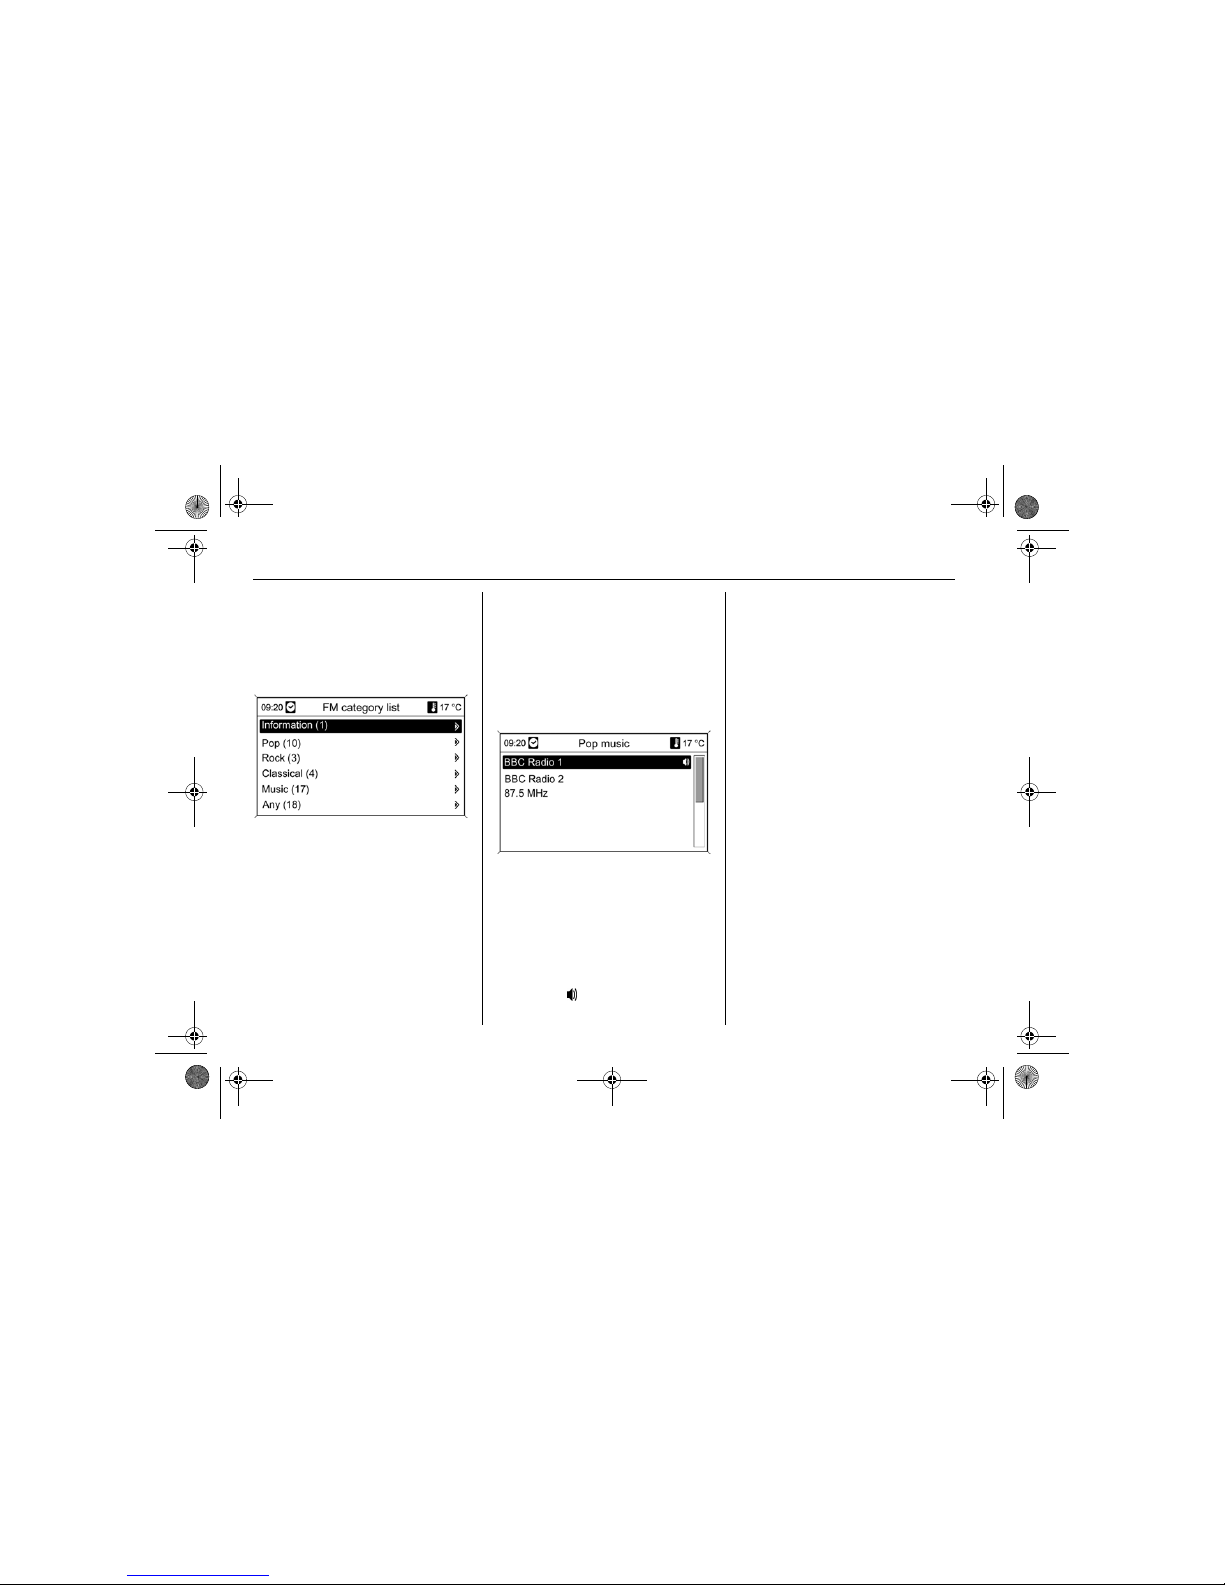
FM category list
Numerous RDS stations 3 2-6
broadcast a PTY code, which
specifies the type of programme
transmitted (e.g. news). Some
stations also change the PTY code
depending on the content currently
being transmitted.
The Infotainment system stores the
RDS stations, sorted by programme
type, in the FM category list.
To search for a programme type
determined by station:
Select FM category list.
A list of programme types available at
the moment is displayed.
Selected desired programme type.
A list of stations is displayed that
transmit a programme of the selected
type.
Select required station.
The FM category list is also updated
when the FM station list is updated.
The symbol marks the station
currently selected.
Radio traffic service
(TP = Traffic Programme)
Radio traffic service stations are RDS
stations 3 2-6 that broadcast traffic
news.
Switching the radio traffic
service on and off
To switch the traffic announcement
standby facility of the Infotainment
system on and off:
Press TP button.
If the radio traffic service is
switched on, [] is indicated on the
display in black (grey if radio traffic
service is switched off).
Only radio traffic service stations
are received.
If the current station is not a radio
traffic service station, a search is
started automatically for the next
radio traffic service station.
If a radio traffic service station has
been found, [TP] is indicated on the
display in black. If no radio traffic
service stations are found, TP is
displayed in grey.
DVD800.book Page 5 Tuesday, August 26, 2008 1:51 PM
Page 25
2 - 6Radio
Traffic announcements are played
at the preset TA volume 3 1-15.
If the radio traffic service is
switched on, the replay of CDs/
DVDs and of external sources is
interrupted for the duration of the
traffic announcement.
Listening to traffic
announcements only
Switch on the radio traffic service and
turn down fully the volume of the
Infotainment system.
Blocking out traffic
announcements
To block out a traffic announcement,
e.g. during CD/MP3 replay:
Press TP button or the multifunction
knob.
The traffic announcement is aborted,
but the radio traffic service remains
switched on.
EON (Enhanced Other
Networks)
With EON you can listen to radio
traffic announcements even if the
station you have set does not
broadcast its own radio traffic service.
If such a station is set, it is displayed
in black as for radio traffic service
stations TP.
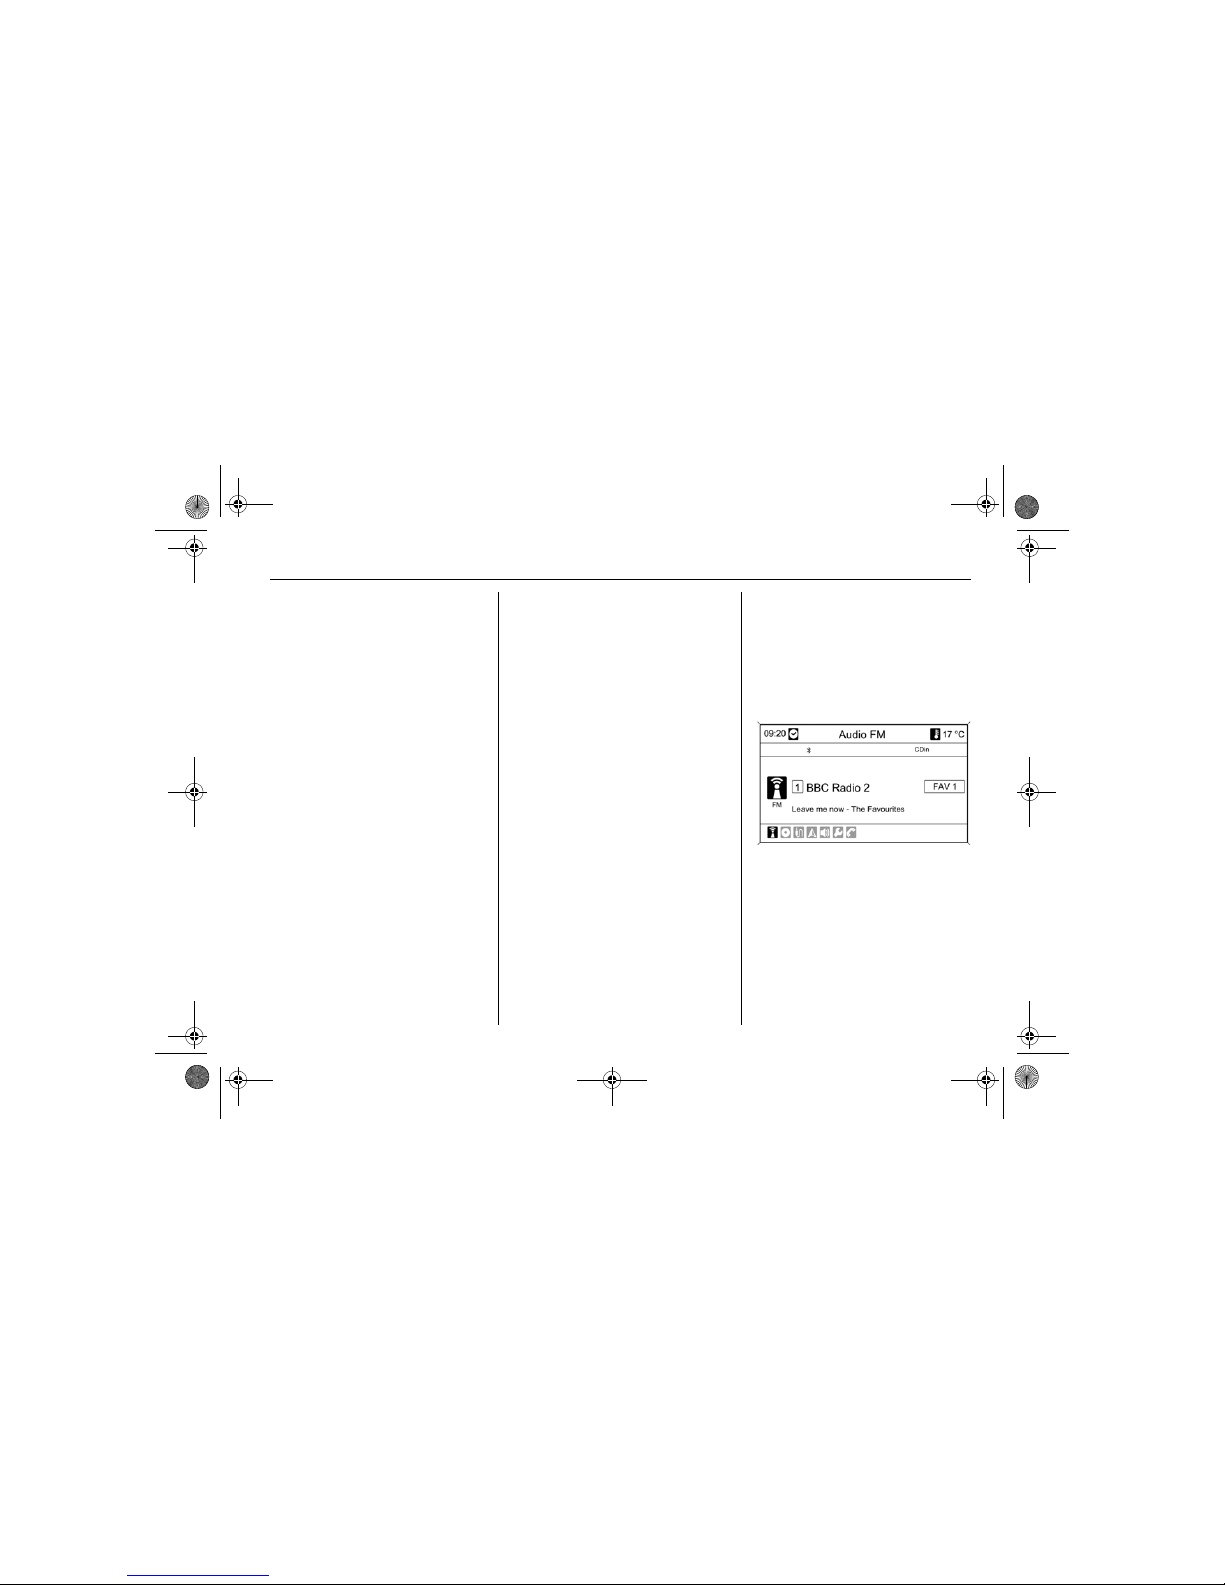
RDS
RDS (Radio Data System) is a
service of the FM stations that
considerably facilitates the finding of
the desired station and its fault-free
reception.
RDS stations are recognised by the
programme names rather than the
transmission frequency (if RDS is
activated 3 2-7).
DVD800.book Page 6 Tuesday, August 26, 2008 1:51 PM
Page 26
2 - 7 Radio
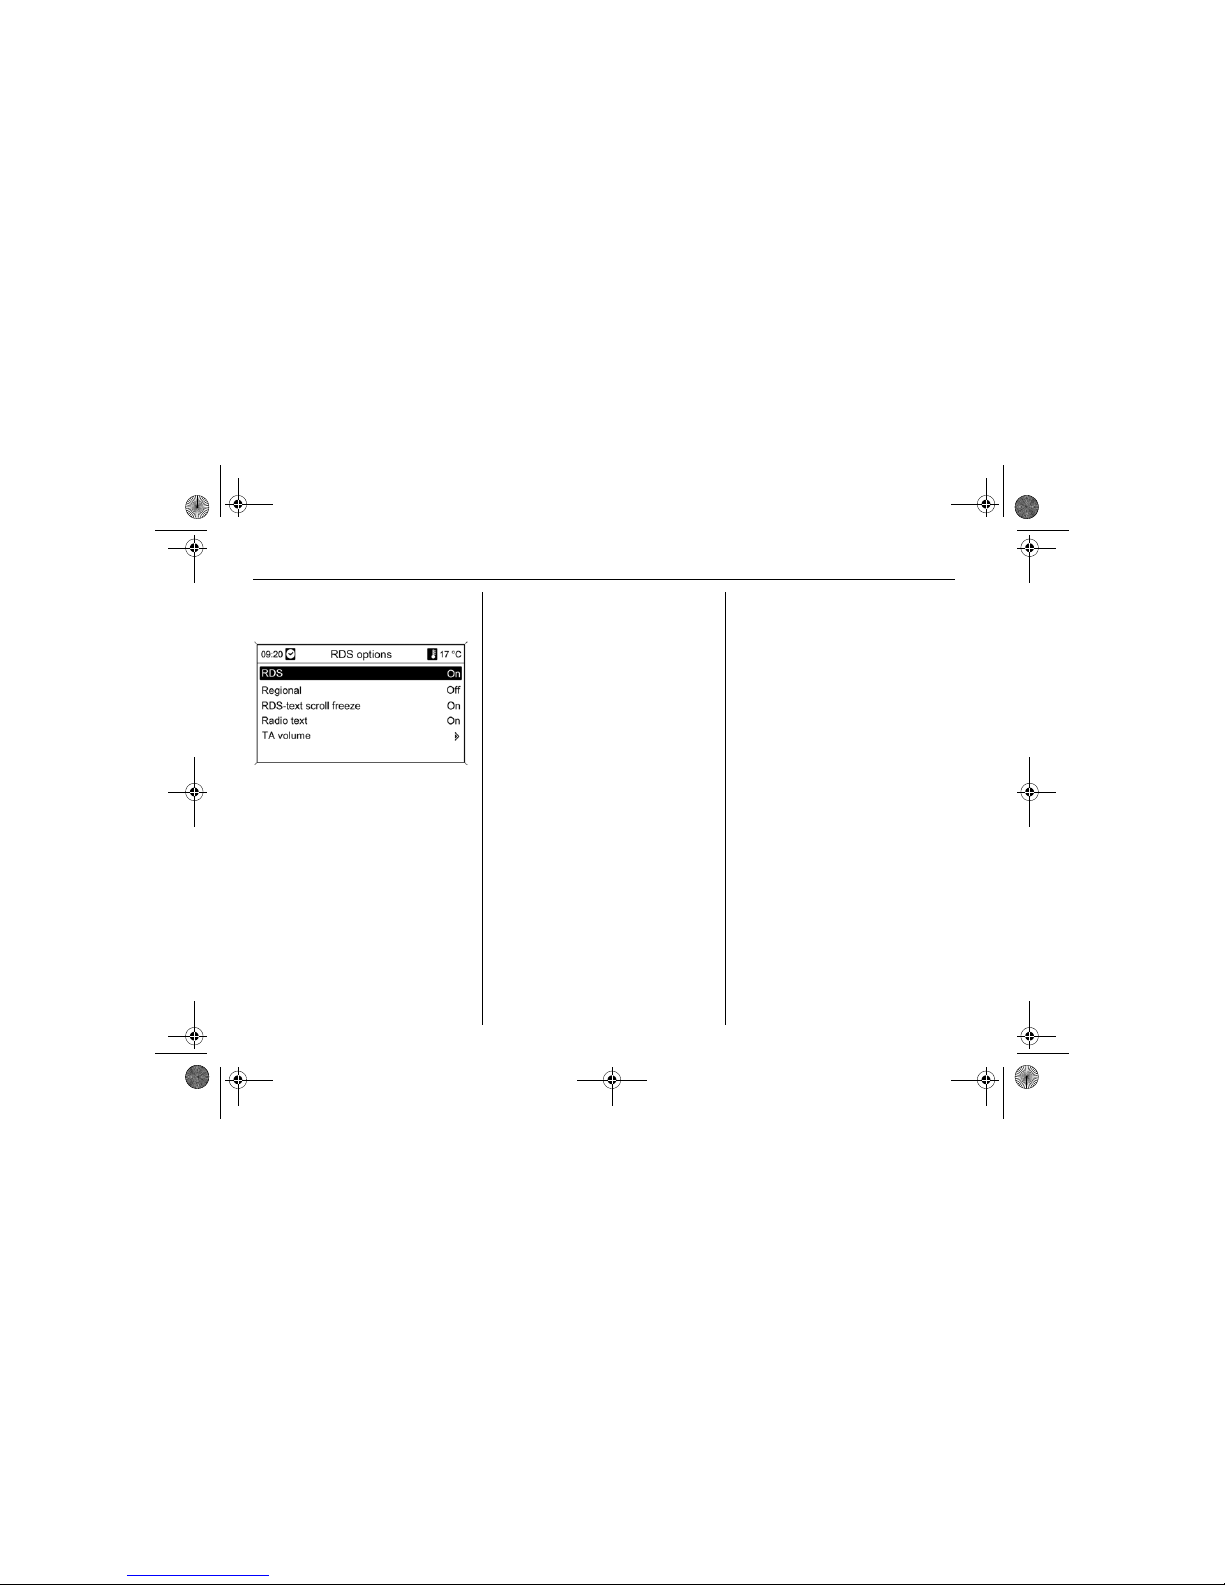
Configuring RDS
To open the menu for the RDS
configuration:
Press CONFIG button.
Select Radio settings and then RDS
options.
Switching RDS on and off
Set RDS to On or Off.
The following advantages result
through activating RDS:
On the display the programme
name of the set station appears
instead of its frequency
The Infotainment system always
tunes into the best receivable
broadcasting frequency of the set
station by means of AF (Alternative
Frequency) 3 "Regionalization".
Depending on the station that is
received the Infotainment system
displays radio text that can contain,
for example, information about the
current programme.
Switching regionalization on
and off
(RDS must be activated for
regionalization)
At certain times some RDS stations
broadcast regionally different
programmes on different
frequencies.
Set Regional to On or Off.
Only alternative frequencies (AF) with
the same regional programmes are
selected.
If regionalization is switched off,
alternative frequencies of the stations
are selected without regard to
regional programmes.
RDS scrolling text
Some RDS stations use the lines for
indicating the name of the
programme to also indicate additional
information. During this process the
programme name is hidden.
To block out the display of the
additional information:
Set RDS-text scroll freeze to On.
Radio text
If RDS and reception of an RDS
station are activated, information
about the programme that is currently
receivable and about the music track
being played at the moment are
displayed below the programme
name.
To show or hide the information:
Set Radio text to On or Off .
TA volume
The volume of the traffic
announcements (TA) can be preset
3 1-15.
DVD800.book Page 7 Tuesday, August 26, 2008 1:51 PM
Page 27

3 - 1Audio player
Audio player
CD player
The Infotainment system’s audio
player can replay audio CDs and
MP3 CDs as well as MP3 DVDs.
Important information
about audio CDs and MP3
CDs/DVDs
Audio CDs with copy protection,
which are not in compliance with
the audio CD standard, may not
play correctly or not at all.
Self-recorded CD-Rs and CD-RWs
are more vulnerable to mishandling
than prerecorded CDs. Correct
handling, especially in the case of
self-recorded CD-Rs and CD-RWs,
must be ensured; see below.
Self-recorded CD-Rs and CD-RWs
may not play correctly or not at all.
On mixed mode CDs (combinations
of audio and data, e.g. MP3), only
the audio tracks will be detected
and played.
Avoid leaving fingerprints when you
change CDs/DVDs.
Put CDs/DVDs back in their
sleeves immediately after
removing them from the audio
player in order to protect them from
damage and dirt.
Dirt and liquids on CDs/DVDs can
contaminate the lens of the audio
player inside the device and cause
faults.
Protect CDs/DVDs from heat and
direct sunlight.
Maximum folder structure depth on
an MP3 CD/DVD: 11 levels.
Maximum number of tracks that
can be saved on an MP3 CD/DVD:
1000.
CD player............................ 3-1
Connection of external
devices ............................. 3-4
Caution
Under no circumstances place
DVDs, single-CDs with a diameter
of 8 cm or shaped CDs in the audio
player.
There must not be any stickers on
the CDs/DVDs. These discs may
jam in the CD/DVD drive or
seriously damage the drive. An
expensive replacement of the
device will then be necessary.
DVD800.book Page 1 Tuesday, August 26, 2008 1:51 PM
Page 28
3 - 2 Audio player
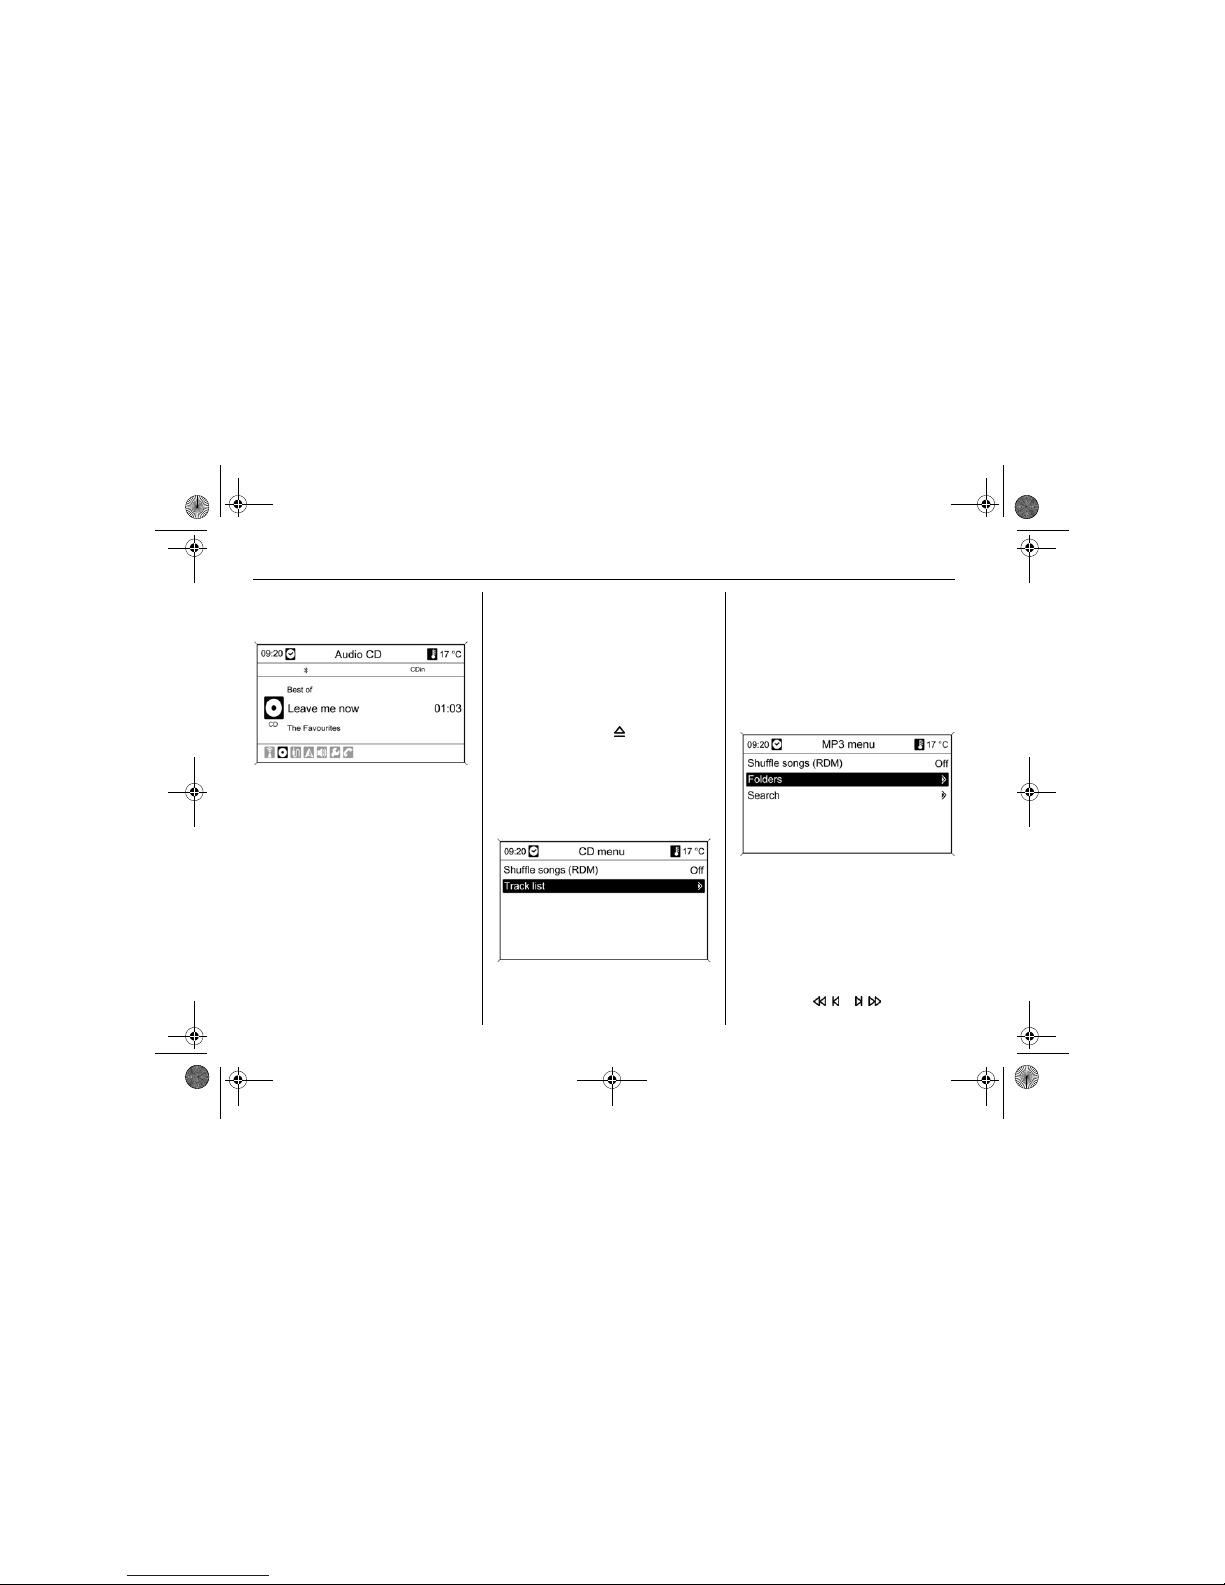
CD and MP3 replay
Push CD/DVD with the labelled side
upward into the CD/DVD slot until it is
pulled in.
CD/DVD replay starts automatically
and the AUDIO CD or AUDIO MP3
menu is displayed.
If there is already a CD/DVD in
the unit, but the AUDIO CD or
AUDIO MP3 menu is not active:
Press CD/AUX button.
The AUDIO CD or AUDIO MP3 menu
is opened and CD/DVD replay is
started.
Depending on the data stored on
the audio CD or MP3 CD/DVD
differing information about the
CD/DVD and the current music track
will be shown on the display.
If the AUDIO CD or
AUDIO MP3 menu does not appear
after pressing the CD/AUX button,
there is still a navigation DVD in the
CD/DVD slot. Press button to
remove the DVD.
Selecting a CD directly
During CD replay
Turn multifunction knob or
Press the multifunction knob and
then select Track list
to display a list of all the tracks on
the CD.
Select desired track.
During MP3 replay
Turn multifunction knob to display a
list of all tracks on the CD/DVD or
Press multifunction knob and then
Folders and select required folder.
Select desired track.
Skip track forward/backward
Briefly press or button once
or several times.
DVD800.book Page 2 Tuesday, August 26, 2008 1:51 PM
Page 29
3 - 3Audio player
Track search forward/track
search backward
Briefly press or button and
then press or button again
and keep pressed until the desired
track is displayed.
Playing tracks in random order
Press the multifunction knob and then
set Shuffle songs (RDM) to On.
RDM is deactivated if Folders or
Track list is selected.
Fast forward/rewind
Press the button or and
hold it down to forward wind or rewind
the current track.
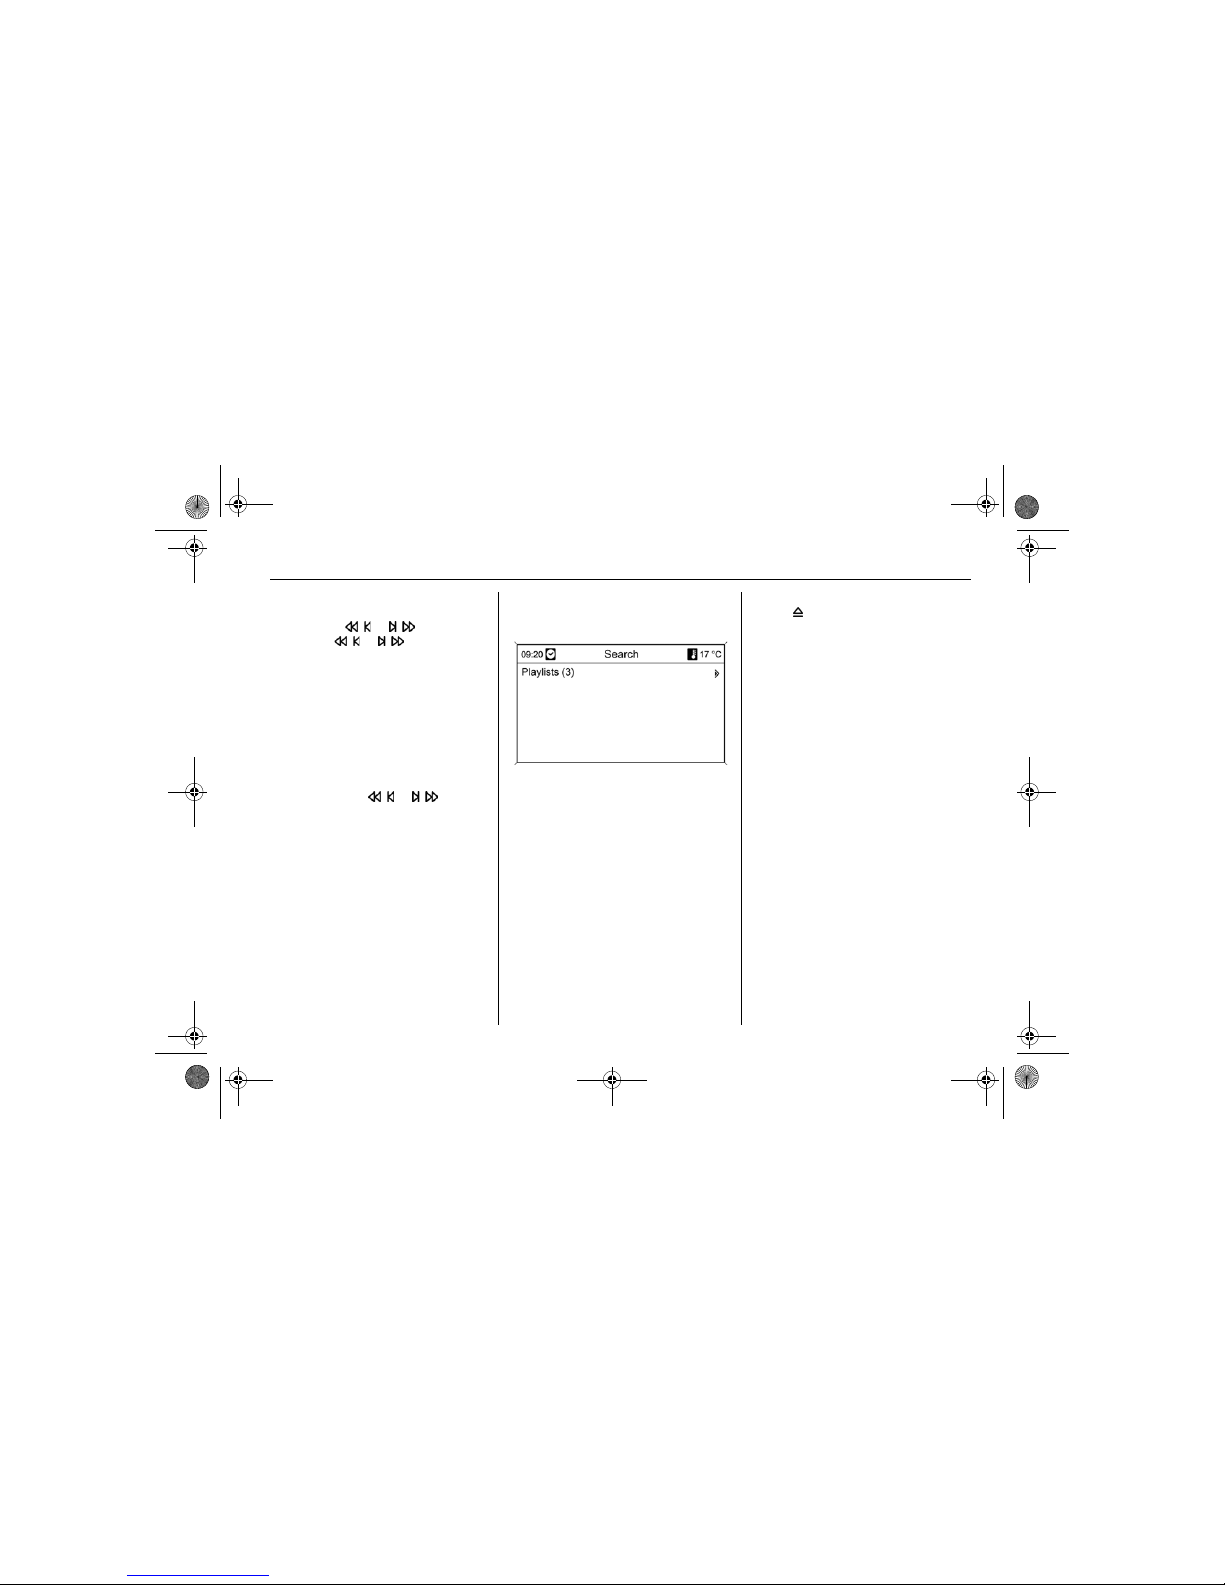
Selecting playlist
Press multifunction knob and select
Search and then Playlists.
Select desired playlist.
Important information
Only.pls and.m3u format playlists
are supported.
The list entries must be in the form
of relative paths.
Removing CD/DVD
Press button.
The CD/DVD is pushed out of the CD/
DVD slot.
If the CD/DVD is not removed after
ejection, it will be drawn back in again
automatically after a few seconds.
DVD800.book Page 3 Tuesday, August 26, 2008 1:51 PM
Page 30
3 - 4 Audio player
Connection of external
devices
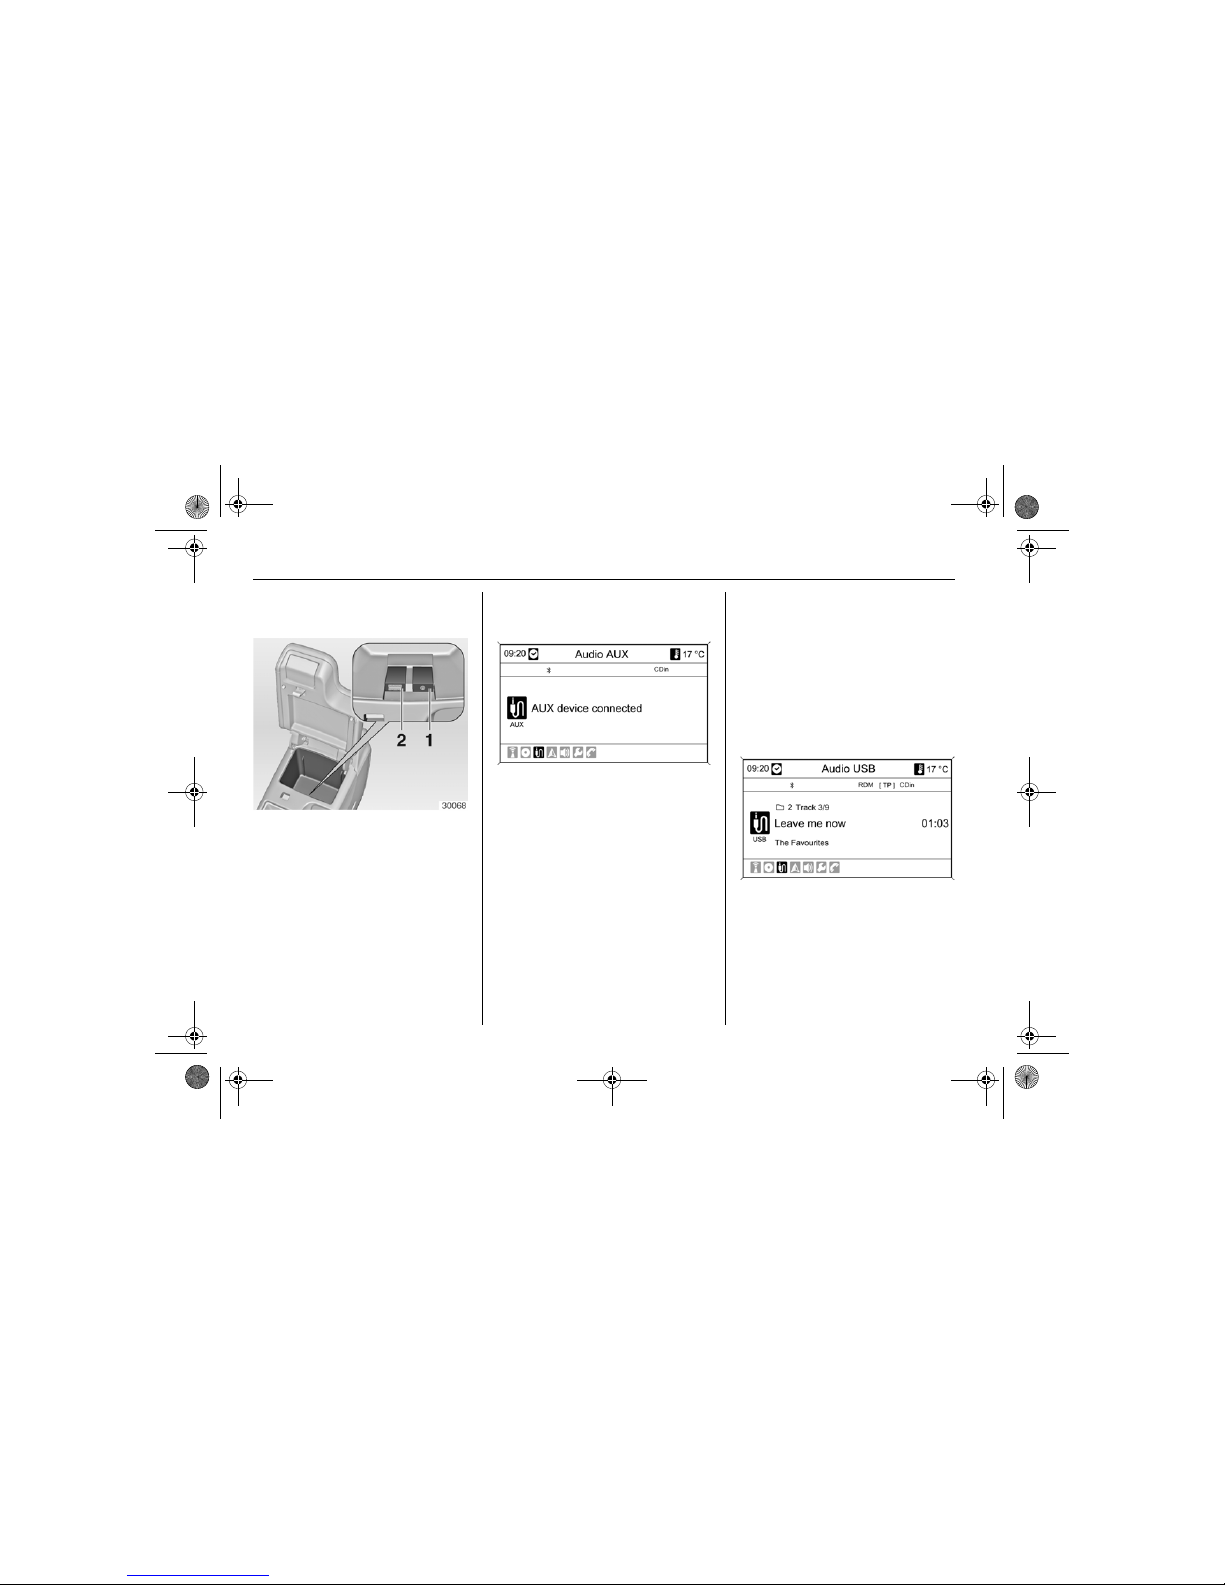
Under the cover on the centre
console there is an AUX socket and a
USB socket for the connection of
external audio sources.
The sockets must always be kept
clean and dry.
Aux input
It is possible, for example, to connect
to the AUX input
1 a portable
CD player with a 3.5 mm jack plug.
Operating an audio source
An audio source that is connected to
the AUX input can be operated only
via the control elements of the audio
source.
USB port
An MP3 player or a USB stick can be
connected to the USB port
2.
Important information
The MP3 players and USB sticks
connected must comply with the
USB Mass Storage Class
specification (USB MSC).
Only MP3 players and USB sticks
with a sector size of 512 bytes in
the FAT file system are supported.
The maximum length of the USB
stick is 70 mm. A longer stick would
be damaged on folding down the
armrest.
Operating a USB data source
The data sources connected via USB
are operated using the Infotainment
system; operation is the same as for
an audio MP3 CD/DVD 3 3-2.
DVD800.book Page 4 Tuesday, August 26, 2008 1:51 PM
Page 31
3 - 5Audio player
Removing data source from
USB port
To avoid the loss of data, the
following steps must be performed:
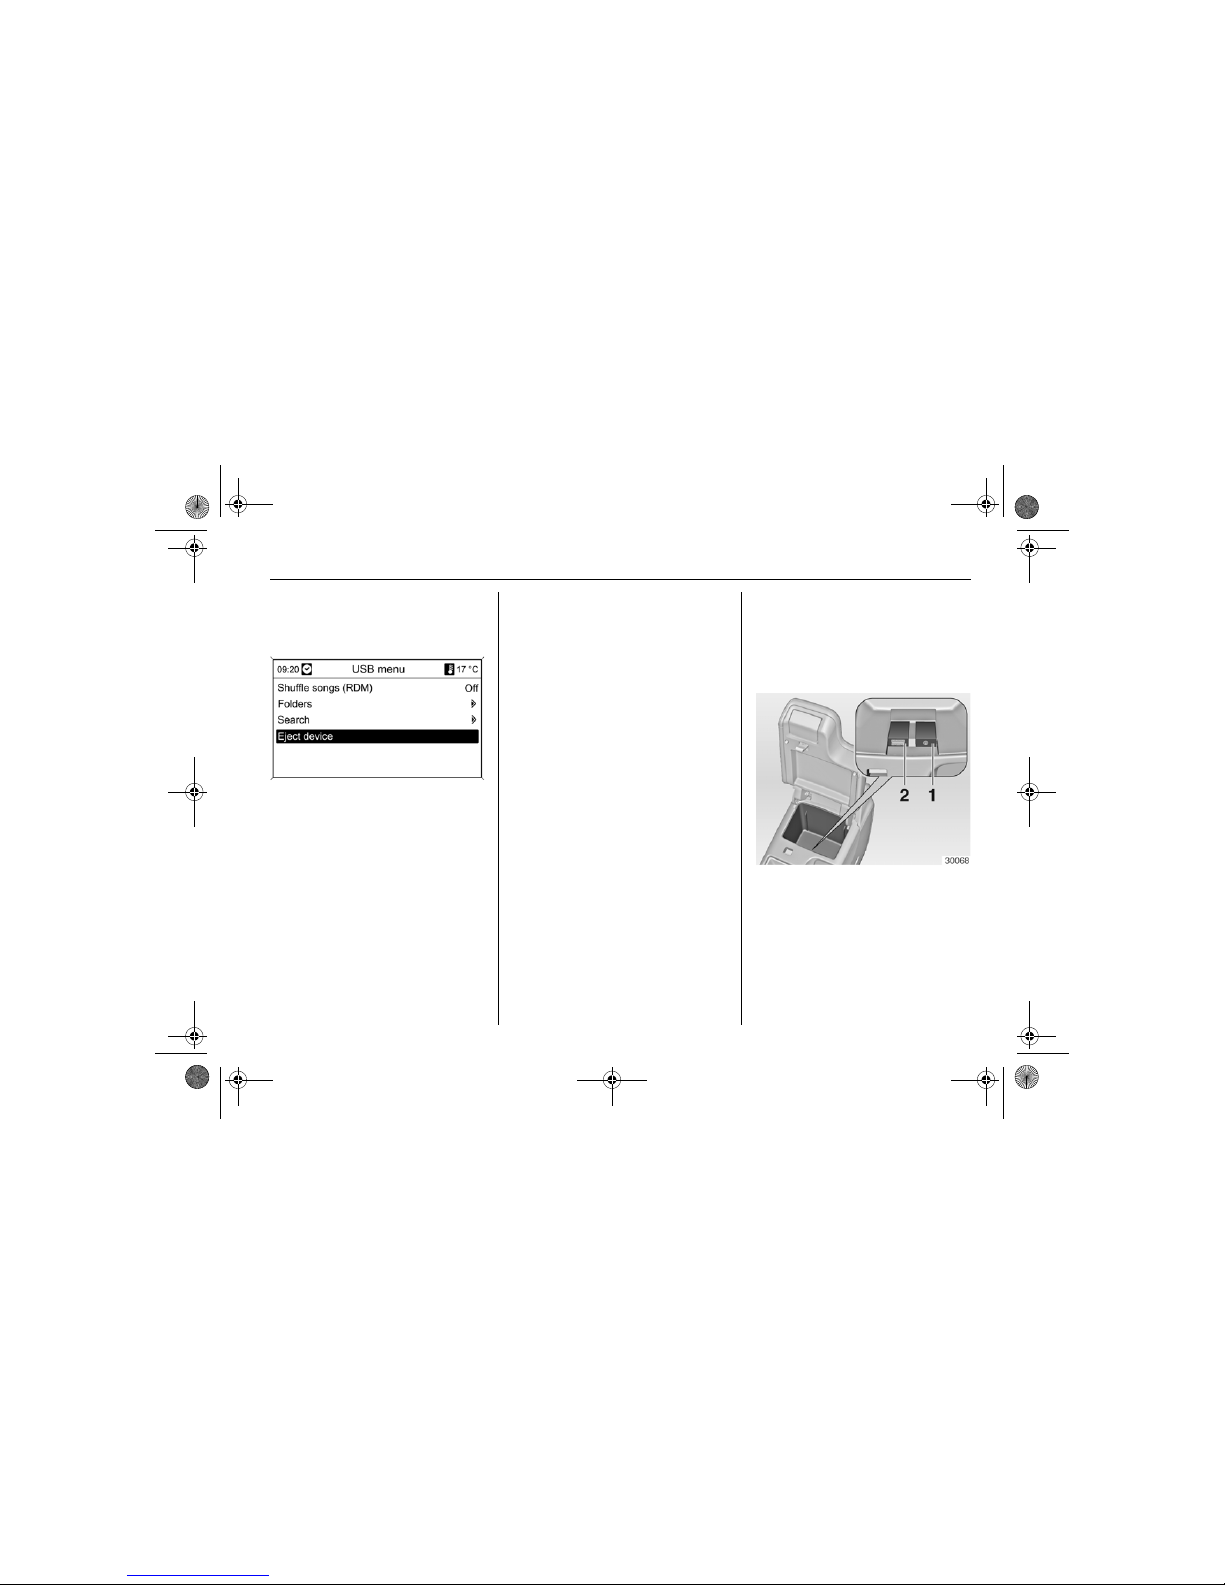
Press the multifunction knob and then
select Eject device.
The data source can be removed
from the USB port.
Connecting and
operating an iPod
An iPod can be connected to the
Infotainment system. The controls
and menus on the Infotainment
system are then used for operation.
iPod models supported
iPod
iPod nano (1st/2nd/3rd generation)
iPod with video (5th/5.5 generation)
iPod classic (6th generation)
iPod touch
There may be problems with
operation and function in the
following situations:
When connecting an iPod on which
a more recent version of the
firmware is installed than is
supported by the Infotainment
system.
When connecting an iPod on which
firmware from other providers
(e.g. Rockbox) is installed.
Connecting iPod
Prior to connecting the device the
volume on the iPod must be set to
around 90% to ensure optimal
volume control using the Infotainment
system.
Then connect the iPod headphones
output to the AUX input
1 using the
audio cable supplied (in the sleeve of
the navigation DVD).
Then connect the iPod USB cable to
the USB port
2.
DVD800.book Page 5 Tuesday, August 26, 2008 1:51 PM
Page 32
3 - 6 Audio player
Operating an iPod
The iPod connected via AUX and USB
is operated using the Infotainment
system; operation is largely the same
as for an audio MP3 CD/DVD 3 3-2.
In the following, only the aspects of
operation of the iPod that are
different/additional are described.
iPod functions
Depending on the data saved, there
are various options for selecting and
playing tracks.
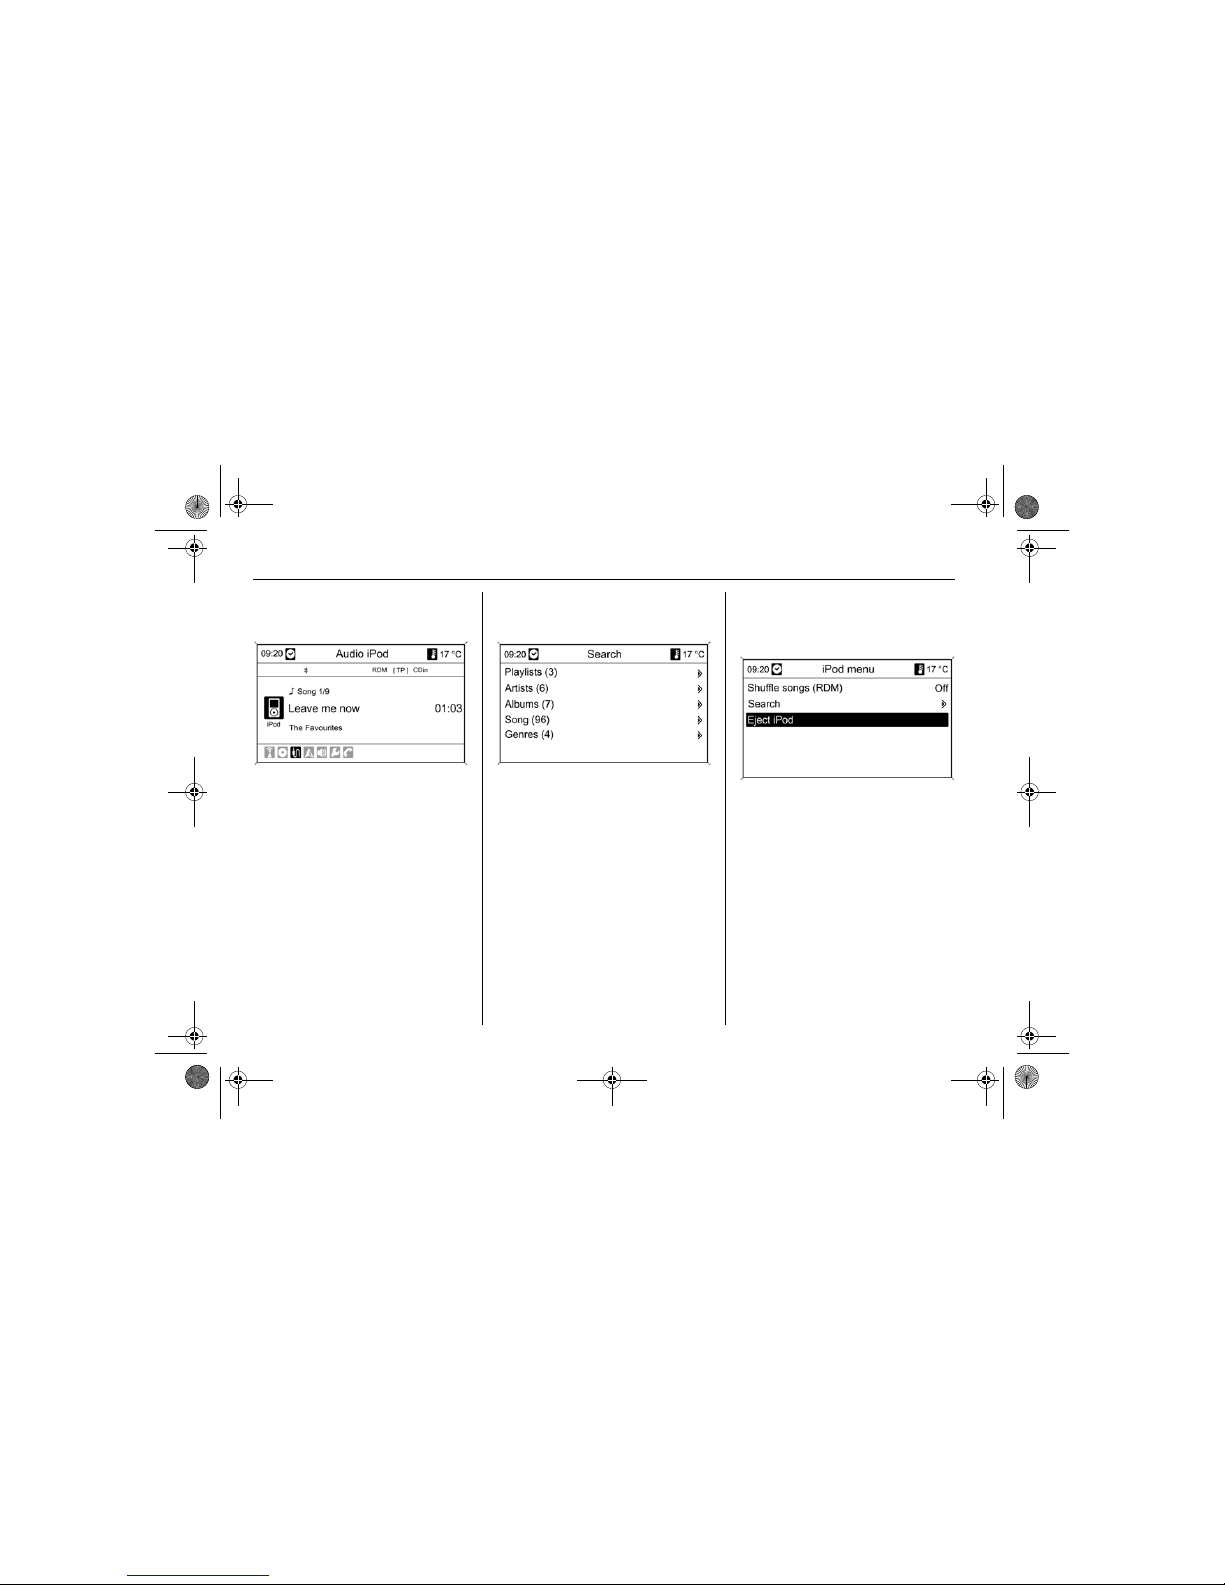
Press the multifunction knob and then
select Search to display the options
available.
Select desired option to display the
related submenu.
Removing an iPod from the
AUX and USB port
To avoid the loss of data, the
following steps must be performed:
Press the multifunction knob and then
select Eject iPod.
The iPod can be removed from the
AUX and USB port.
DVD800.book Page 6 Tuesday, August 26, 2008 1:51 PM
Page 33

4 - 1Navigation
Navigation
Introduction
The navigation system will reliably
guide you to your destination without
the need to read maps, even if you
have no local knowledge whatsoever.
The current traffic situation is taken
into account in the route calculation if
dynamic route guidance is used. For
this purpose the Infotainment system
receives traffic announcements in the
current reception area via RDS-TMC.
The navigation system cannot,
however, take into account traffic
incidents, traffic regulations changed
at short notice and hazards or
problems that arise suddenly (e.g.
road works).
Important information on
the function of the
navigation system
The position and movement of the
vehicle are detected by the
navigation system using sensors.
The distance travelled is determined
from the vehicle’s speedometer
signal, turning movements on bends
by a gyro sensor. The position is
determined using the GPS satellites
(Global Positioning System).
By comparing the sensor signals
with the digital maps on the
navigation DVD, it is possible to
determine the position with an
accuracy of approx. 10 m.
Introduction ......................... 4-1
Operation ............................ 4-3
Overview of the symbols..... 4-26
Caution
The usage of the navigation system
does not release the driver from the
responsibility for a correct, vigilant
attitude in road traffic. The related
traffic regulations must always be
followed. If a navigation instruction
should contradict traffic regulations,
the traffic regulations always apply.
DVD800.book Page 1 Tuesday, August 26, 2008 1:51 PM
Page 34

4 - 2 Navigation
The system will also work with poor
GPS reception, however, the
accuracy of the determination of the
position will be reduced, resulting in
incorrect position messages.
After the entry of the destination
address or points of interest (nearest
petrol station, hotel, etc.) the route is
calculated from the current location to
the destination selected.
The route guidance is provided by
voice output and an arrow, as well as
with the aid of a multi-colour map
display or a combination of two
displays.
TMC traffic information system
and dynamic route guidance
The TMC traffic information system
receives all current traffic information
from TMC radio stations. If dynamic
route guidance is active, this
information is included in the
calculation of the overall route.
During this process, the route is
planned such that traffic problems
related to pre-selected criteria 3 4-24
are avoided.
If there is a traffic problem during
active route guidance, depending on
the pre-setting a message appears
as to whether the route should be
changed.
TMC traffic information is displayed
in the route guidance display as
symbols or as detailed text on the
TMC messages menu.
To be able to use TMC traffic
information, the system has to
receive TMC stations in the related
region.
Dynamic route guidance only works if
traffic information is received via the
TMC traffic information system.
The dynamic route guidance function
can be deactivated 3 4-17.
Important information about
the map material on the DVD
The complete map material is too
extensive to load it into the system’s
memory.
For international navigation, insert
navigation DVD or load the related
data for the regions into the system
memory. The network of main roads
in Europe is loaded automatically.
It may be necessary to delete other
map material in the system memory.
Once the preferred map material has
been loaded, the DVD can be
removed so that the drive can be
used for playing music.
Map data add / remove 3 4-24.
DVD800.book Page 2 Tuesday, August 26, 2008 1:51 PM
Page 35
4 - 3Navigation
Important information on
using the menus
The central element for the operation
of the menus and the navigation
are the multifunction knob with
integrated eight-way switch, as well
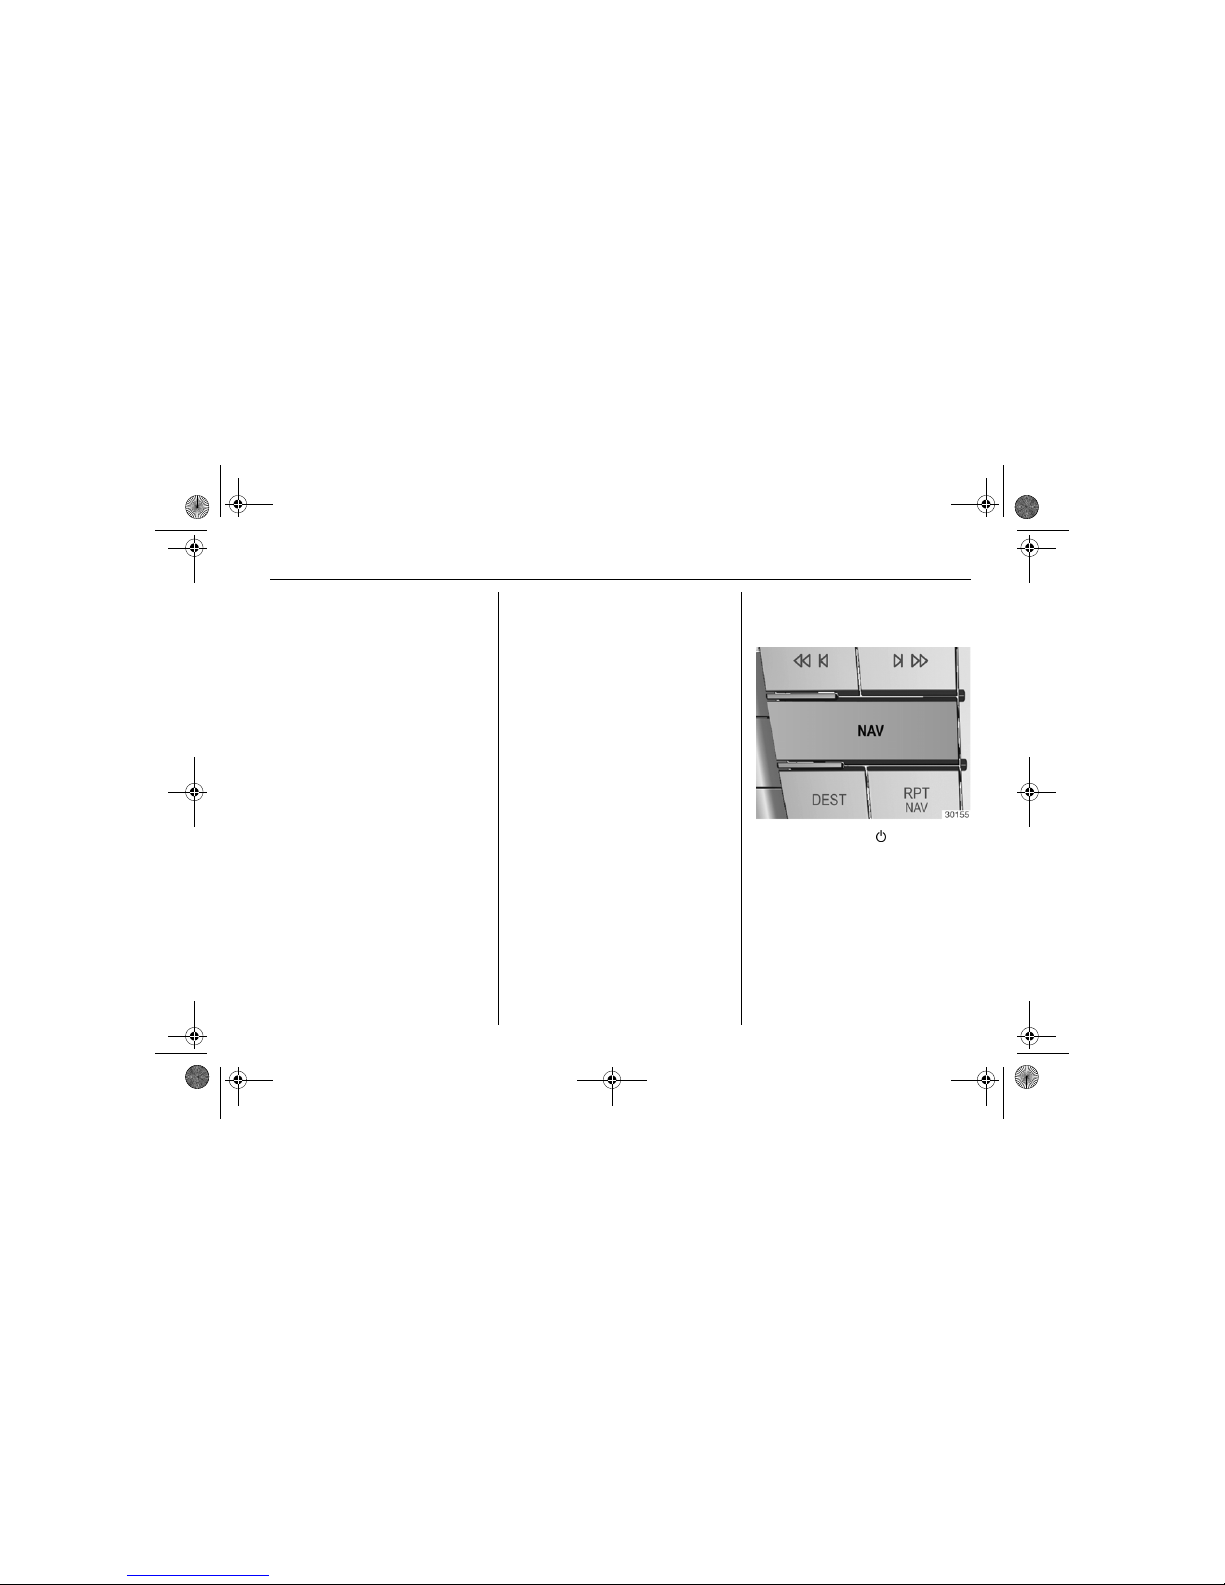
as the NAV, DEST, BACK buttons.
Turn multifunction knob: make a
selection on the menu. The
selection is marked in colour.
Change scale for map display.
All available options are displayed
in colour; options that are not
available are skipped.
Press multifunction knob: accept
selection marked, change to
another menu or activate a
function.
Press NAV button: navigation
main menu, all navigation functions
are selected from here.
Press DEST button: main menu
for entry of the destination.
All options for the entry of the
destination are selected from here.
Press BACK button: leave a
menu or jump back one menu level.
Press eight-way switch: move
map display. To select the
destination, press in the related
direction to position the crosswires
over a destination on the map.
Operation
Starting navigation
Switch on unit using button.
Press NAV button.
Every time the unit is switched on,
safety information on the usage of the
navigation system appears. Accept
information by pressing the
multifunction knob.
The map of the current location
appears on the display.
DVD800.book Page 3 Tuesday, August 26, 2008 1:51 PM
Page 36
4 - 4 Navigation
Entering destination
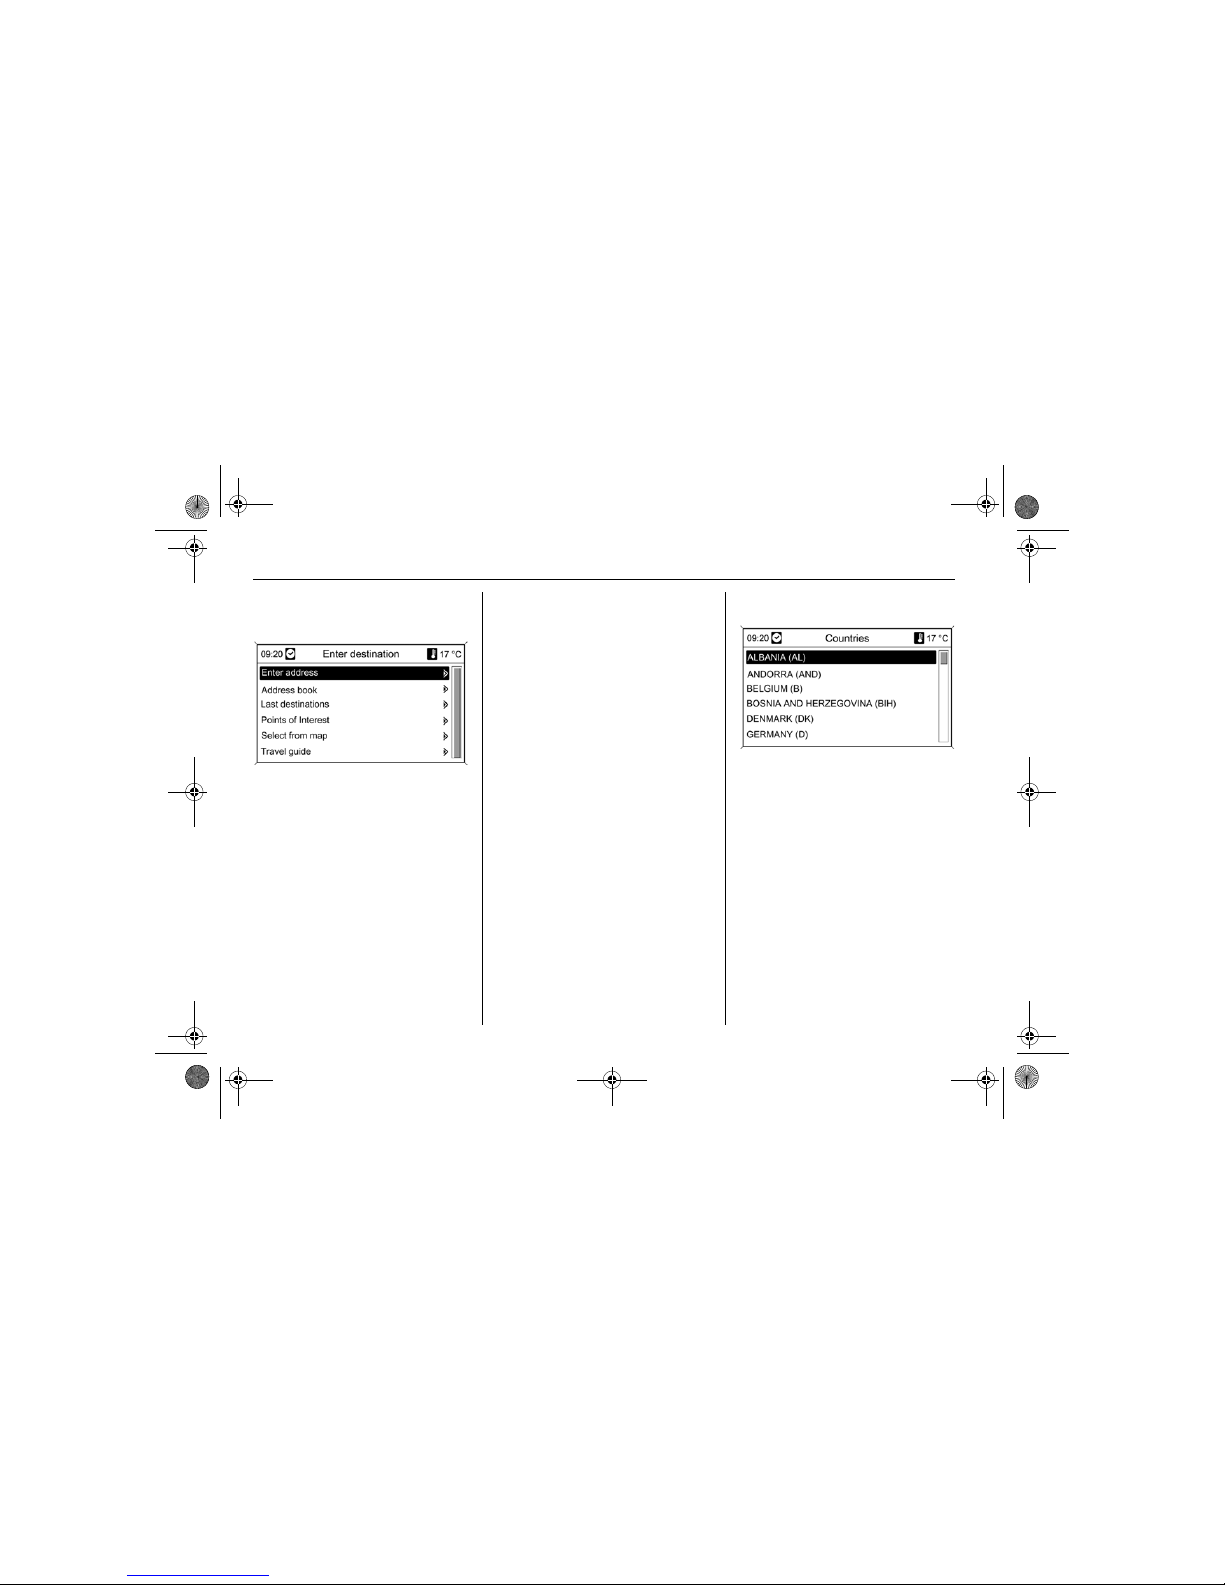
Press DEST button; the following
options are available on the Enter
destination menu:
Enter address: direct entry of a
destination address with country,
city, street and house number
3 4-4.
Address book: open an address
already entered in the address
book 3 4-5.
Last destinations: selection from
a list of recently selected
destinations 3 4-6.
Points of Interest: selection from
a list of points of interest
(restaurants, hotels, petrol stations,
etc.) near the current position, the
destination, other locations or
selection from the map, as well as
search by name 3 4-6.
Destination from Map: selection
of a destination using crosswires
directly from the map 3 4-9.
Travel guide: feature for
displaying points of interest based
on travel guide criteria (sights,
cultural centres, etc.) in a selected
place 3 4-10.
Address entry
Press DEST button and then select
Enter address.
Direct entry of an address using
the letter function:
Select Country category. Mark
desired country on the list and
accept.
Select City category. Using the
multifunction knob, successively
mark and accept the letters for the
city desired. During this process the
system will automatically add letters if
there is no other choice.
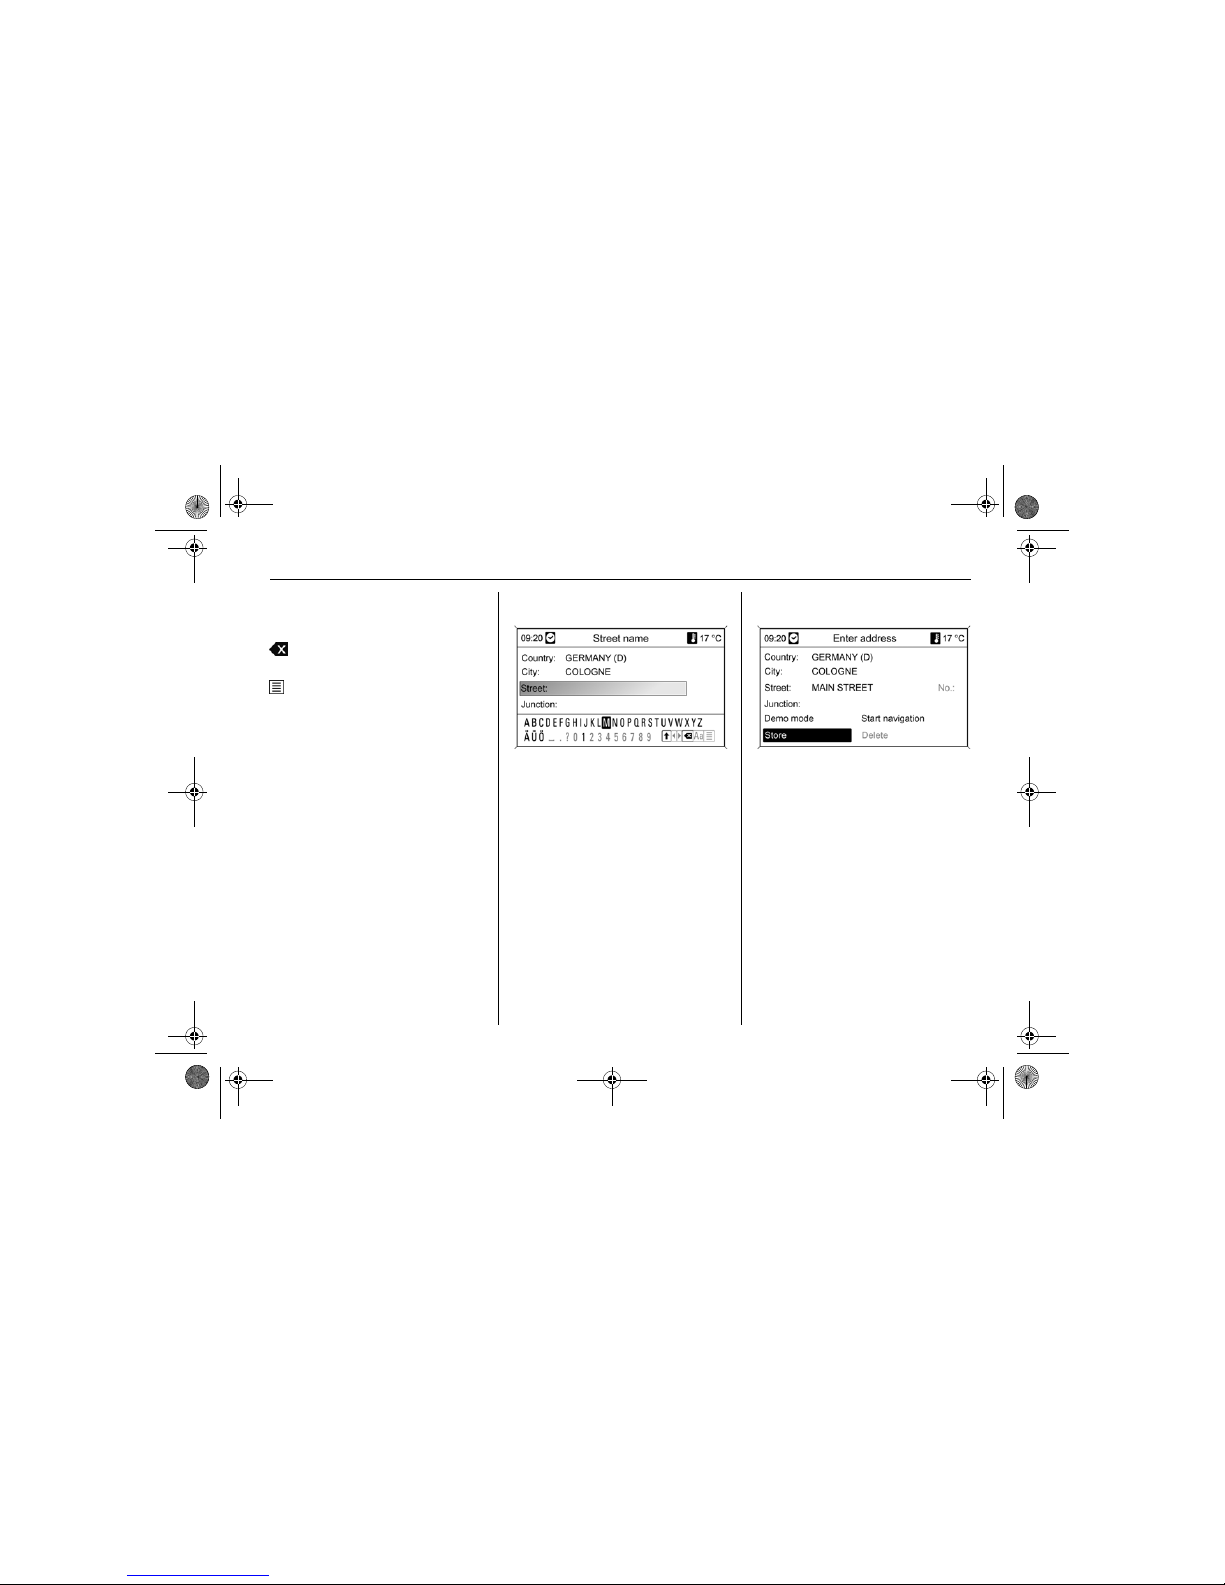
The following symbols can be
selected in the bottom line. The
symbols mean:
DVD800.book Page 4 Tuesday, August 26, 2008 1:51 PM
Page 37
4 - 5Navigation
Z Lists with special characters
appear in the bottom line.
< > Previous / next letter is marked.
Delete last character.
Aa Upper, lower case.
List function - once two letters
have been entered, all names
available with these letters are
displayed. The more letters that
are entered, the shorter the list.
OK Complete entry or accept search
term.
All letters and characters entered are
deleted from the related line with a
long press on the BACK button.
Repeat process for the "Street
name" and "No.:" or "Junction"
categories.
After complete entry of the address
Start navigation 3 4-13 or Store or
simulate route in the Demo mode.
Address book
Adding and saving an address in
the address book
Press DEST button and then select
Enter address.
Enter address as described in Direct
entry of an address.
By selecting Store the address is
saved in the address book. The
system uses the destination address
as the default name. In Edit name
the destination can be saved with a
specific name using the letter
function.
A maximum of 100 destinations can
be saved in the address book.
DVD800.book Page 5 Tuesday, August 26, 2008 1:51 PM
Page 38
4 - 6 Navigation
Opening an address from the
address book
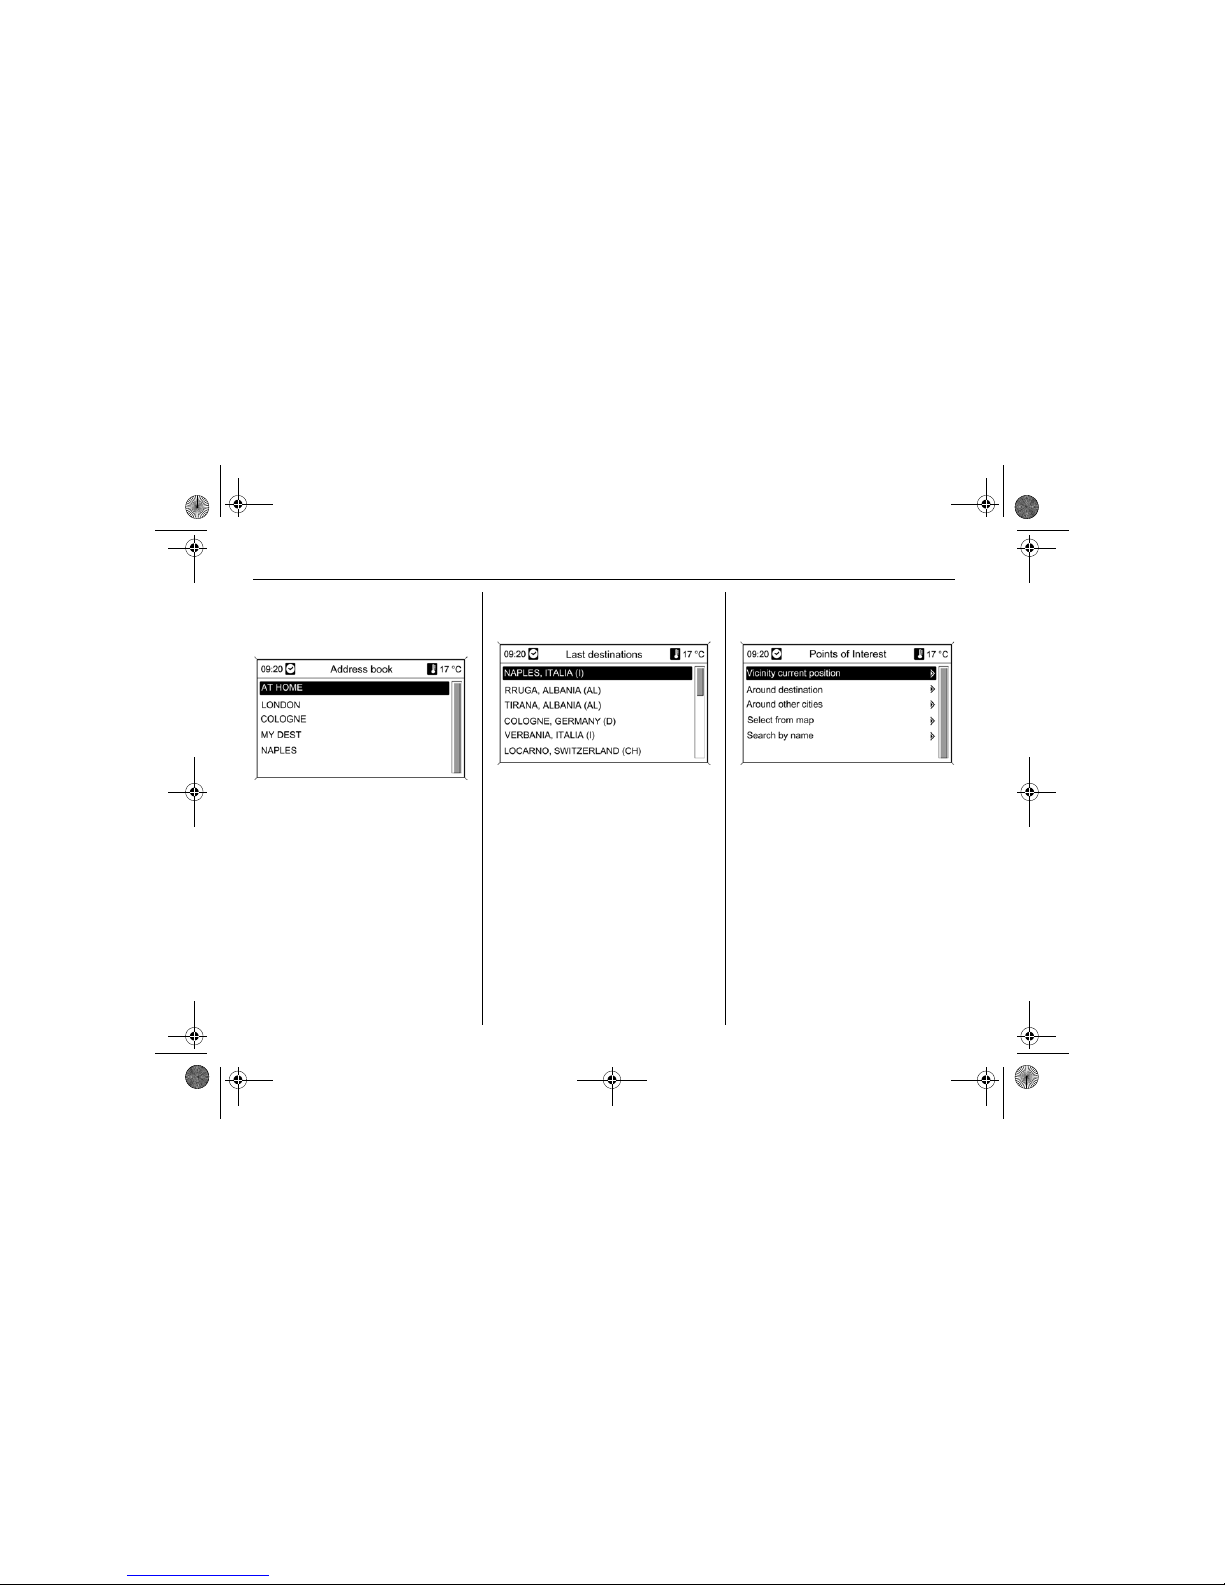
Press DEST button and then select
Address book.
Select desired address name in the
list and accept; the address is copied
to the route guidance.
Start navigation 3 4-13 or simulate
Demo mode or Edit name or delete
name from list.
Opening the last destinations
Press DEST button and then select
Last destinations.
A list of destinations entered recently
is displayed
Select desired destination in the list
and accept; the address is copied to
the route guidance.
Start navigation 3 4-13 or Store or
simulate route in Demo mode.
Opening points of interest
Press DEST button and then select
Points of Interest.
A list appears with the following
submenus on which the points of
interest are listed by category (e. g.
car, leisure, restaurants).
Around actual position
Display of points of interest around
the related position. For example,
you are looking for a restaurant.
Select Restaurant category.
A search window with further criteria
for restaurants appears. Make a
selection and refine search criteria.
DVD800.book Page 6 Tuesday, August 26, 2008 1:51 PM
Page 39
4 - 7Navigation
Return to search window using
BACK button. The number of
restaurants can be reduced by
selecting the criteria.
Accept Start search, a list of all
restaurants that meet the criteria in
the area appears with information on
distance.
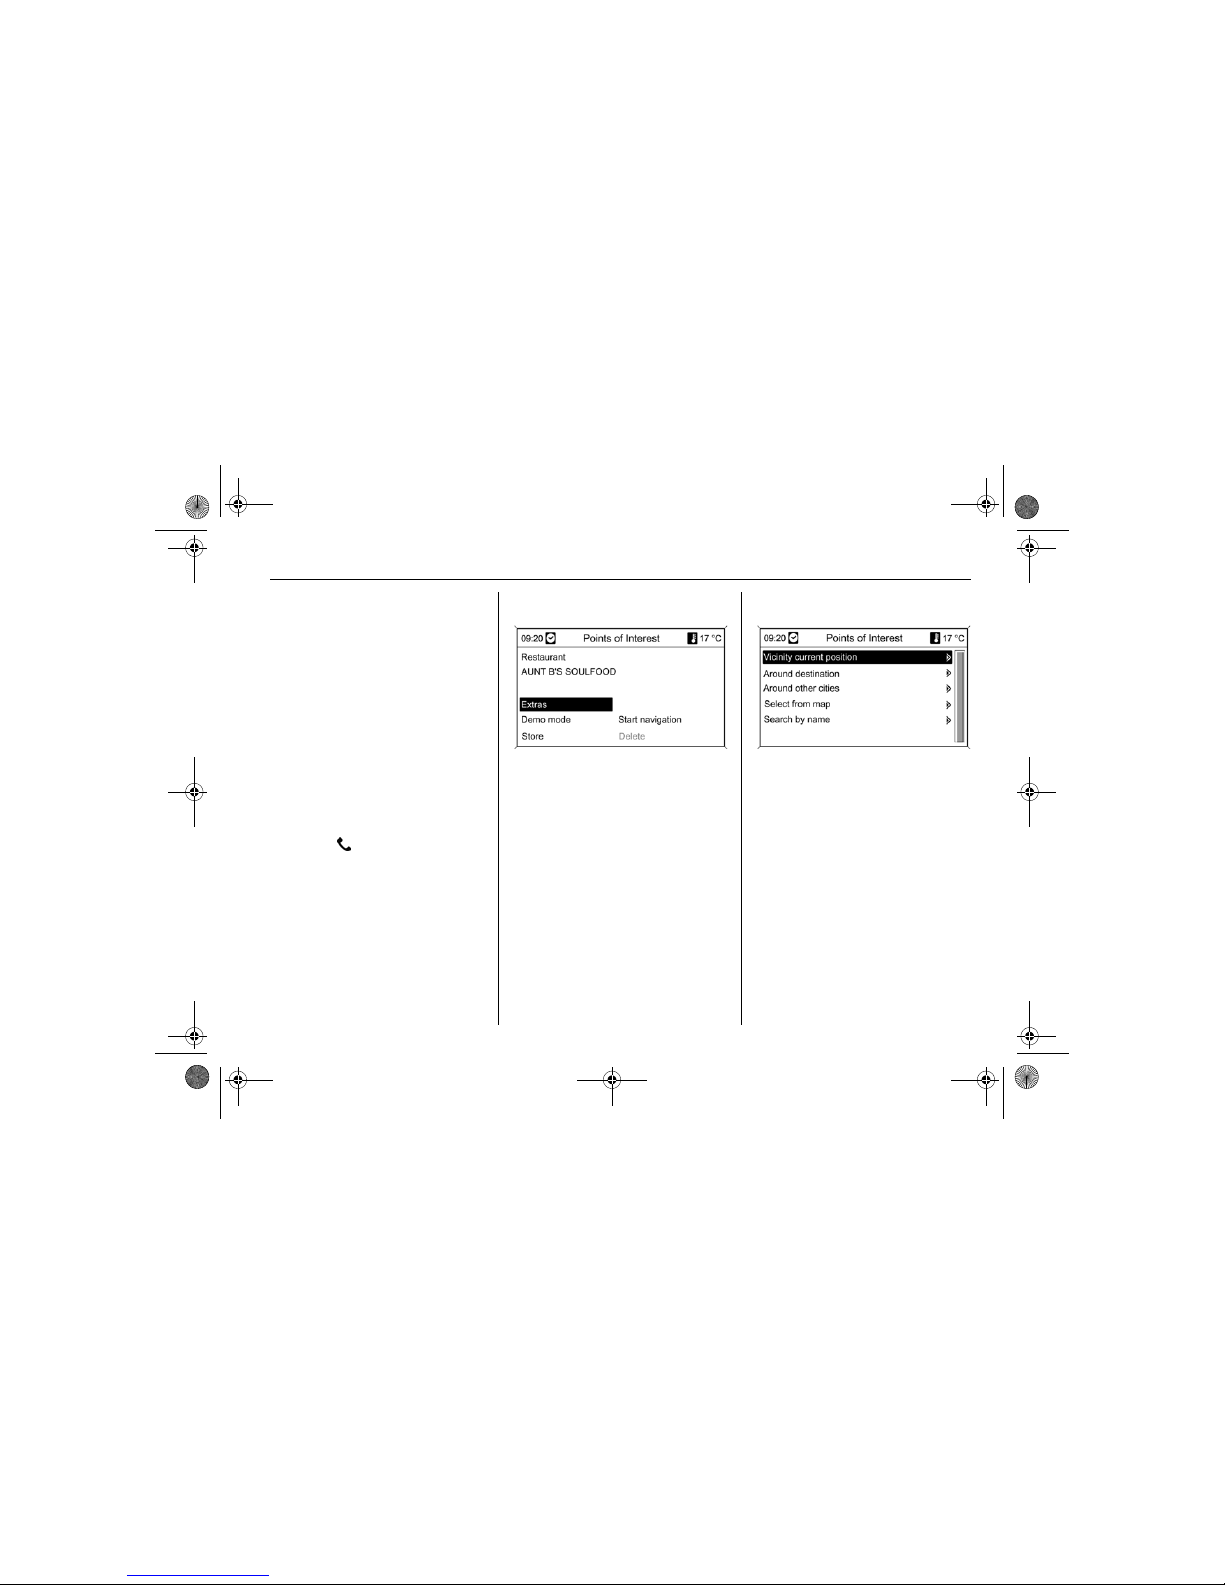
After the selection of a restaurant, the
route guidance window appears with
the following options:
Extras: if available the telephone
number and address of the
selected restaurant are displayed.
Accept telephone number. A call is
made to the establishment by
selecting .
Demo mode: the route guidance is
simulated.
Start navigation: the selected
point of interest is copied to the
navigation.
Store: the destination is saved in
the address book.
Around destination
Display of points of interest around
the destination entered. For example,
you are looking for a petrol station.
Select Car category.
Accept Car and then Petrol station.
A list of all petrol station brands
around the destination appears.
The number of petrol stations can
also be reduced by marking petrol
station brands.
After accepting Start search all
petrol stations or the selected petrol
stations around the destination are
displayed with information on
distance.
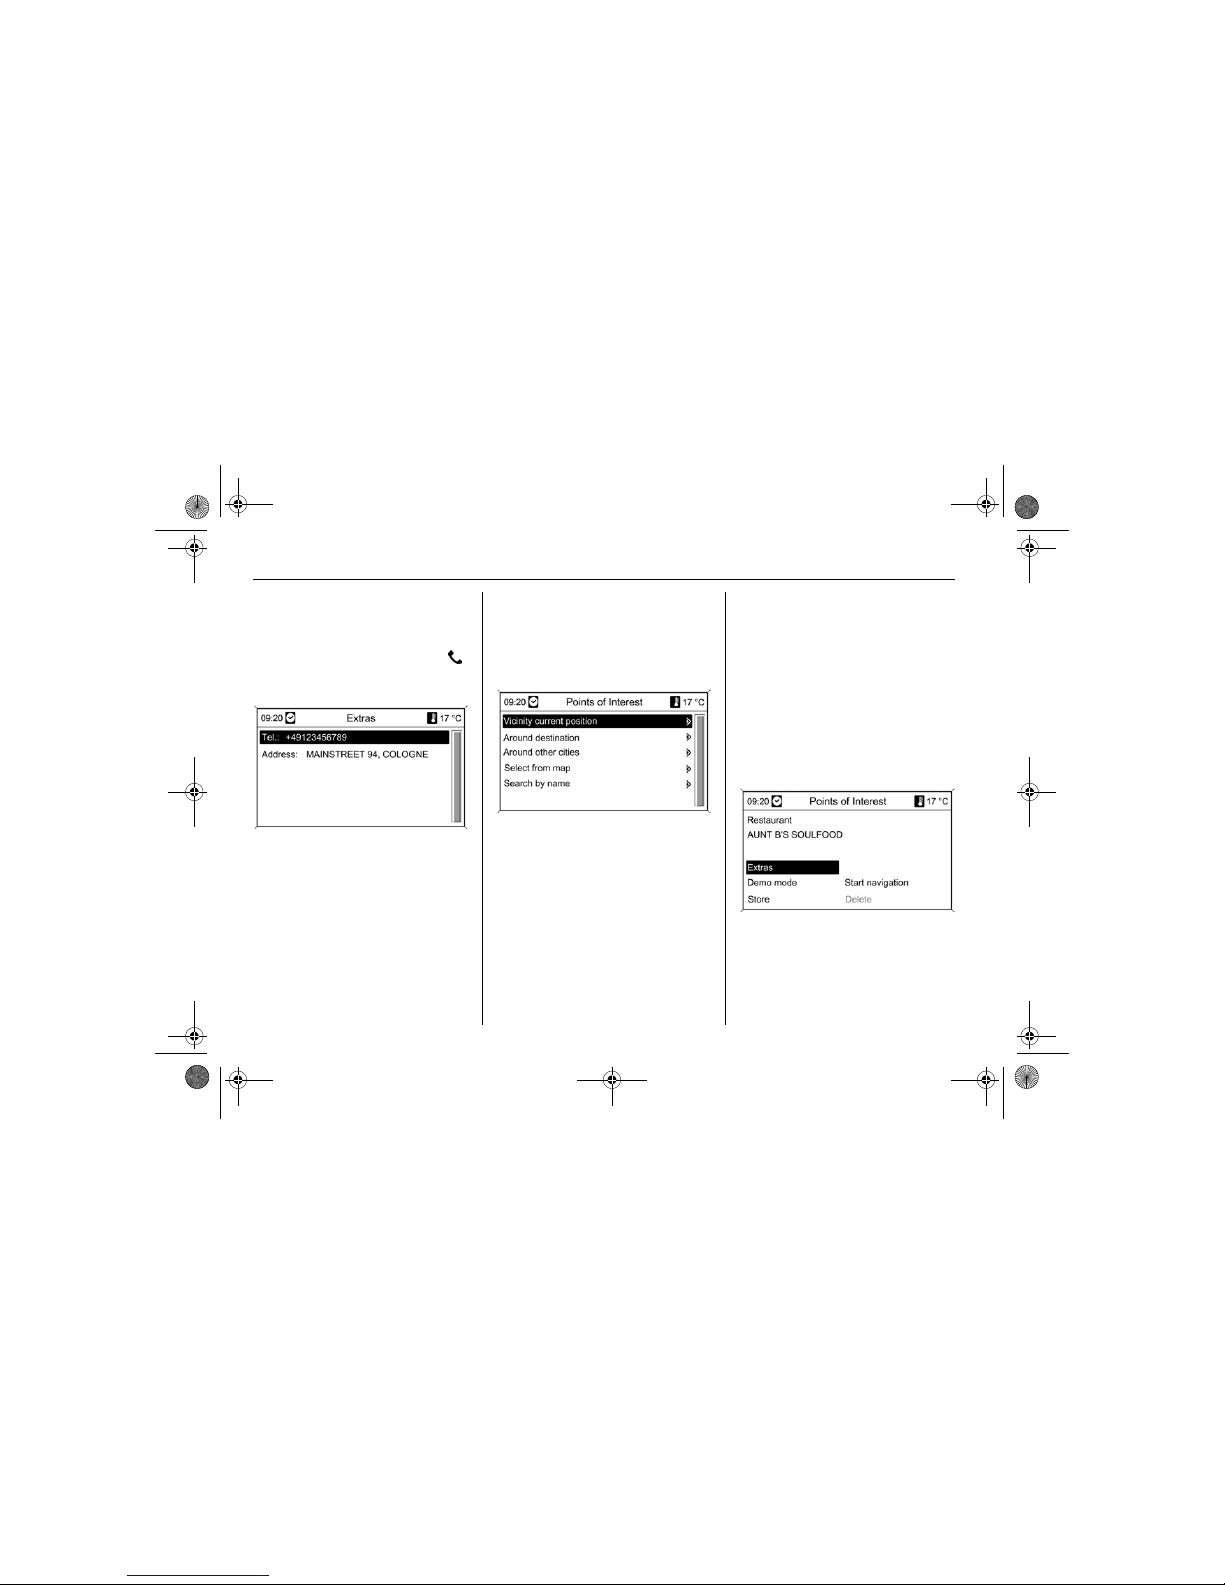
After the selection of a petrol station,
the route guidance window appears
with the following options:
DVD800.book Page 7 Tuesday, August 26, 2008 1:51 PM
Page 40
4 - 8 Navigation
Extras: if available the telephone
number and address of the petrol
station are displayed. Accept
telephone number. A call is made
to the petrol station by selecting .
Demo mode: the route guidance is
simulated.
Start navigation: the selected
point of interest is copied to the
navigation.
Store: the destination is saved in
the address book.
Around other places
Display of points of interest around
any area. For example, you are
looking for a shopping centre.
Select the required country from the
list of countries.
Enter the place using the letter
function 3 4-4. Accept selection.
Select Shopping category.
After accepting, select Shopping
centres.
After accepting Start search, a list of
shopping centres around the selected
place appears with information on
distance.
After the selection of a shopping
centre, the route guidance window
appears with the following options:
Extras: address of the shopping
centre is displayed.
Demo mode: the route guidance is
simulated.
Start navigation: the selected
point of interest is copied to the
navigation.
DVD800.book Page 8 Tuesday, August 26, 2008 1:51 PM
Page 41
4 - 9Navigation
Store: the destination is saved in
the address book using a name.
Point of interest from the map
Using eight-way switch on the
multifunction knob, position
crosswires on a point of interest on
the map.
Map scale can be changed by turning
the multifunction knob.
After the selection of a destination
Start navigation 3 4-13 or Store
3 4-5.
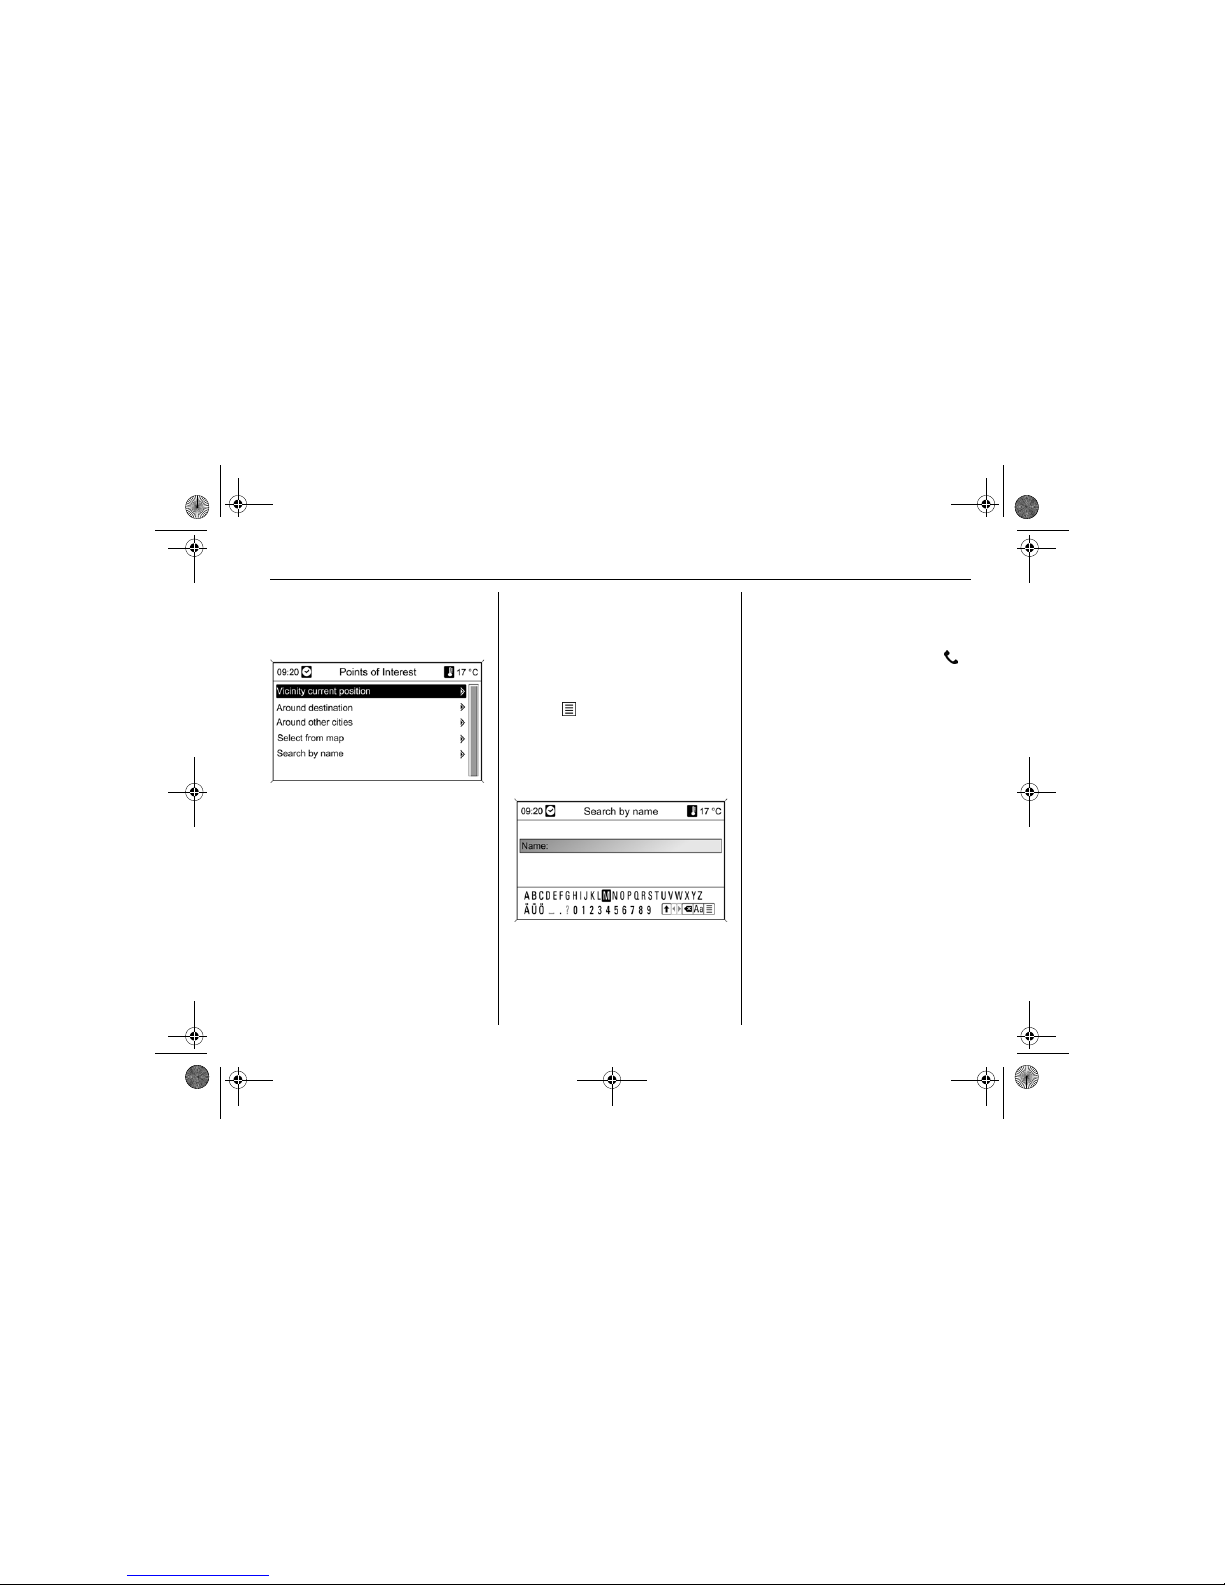
Name search
Select country and enter name of
a point of interest using the letter
function 3 4-4. A list appears when
the entry is unambiguous.
Alternatively, all terms for names can
be displayed by selecting the list
function in the entry box. The
search selection can be reduced by
first entering letters. The more letters
that are entered, the shorter the list.
After the selection of a destination,
the route guidance window appears
with the following options:
Extras: if available, telephone
number and address of the
destination are displayed. Accept
telephone number. A call is made
to the destination by selecting .
Demo mode: the route guidance is
simulated.
Start navigation: the selected
point of interest is copied to the
navigation.
Store: the destination is saved in
the address book; accept the
default name or enter a name using
letter function.
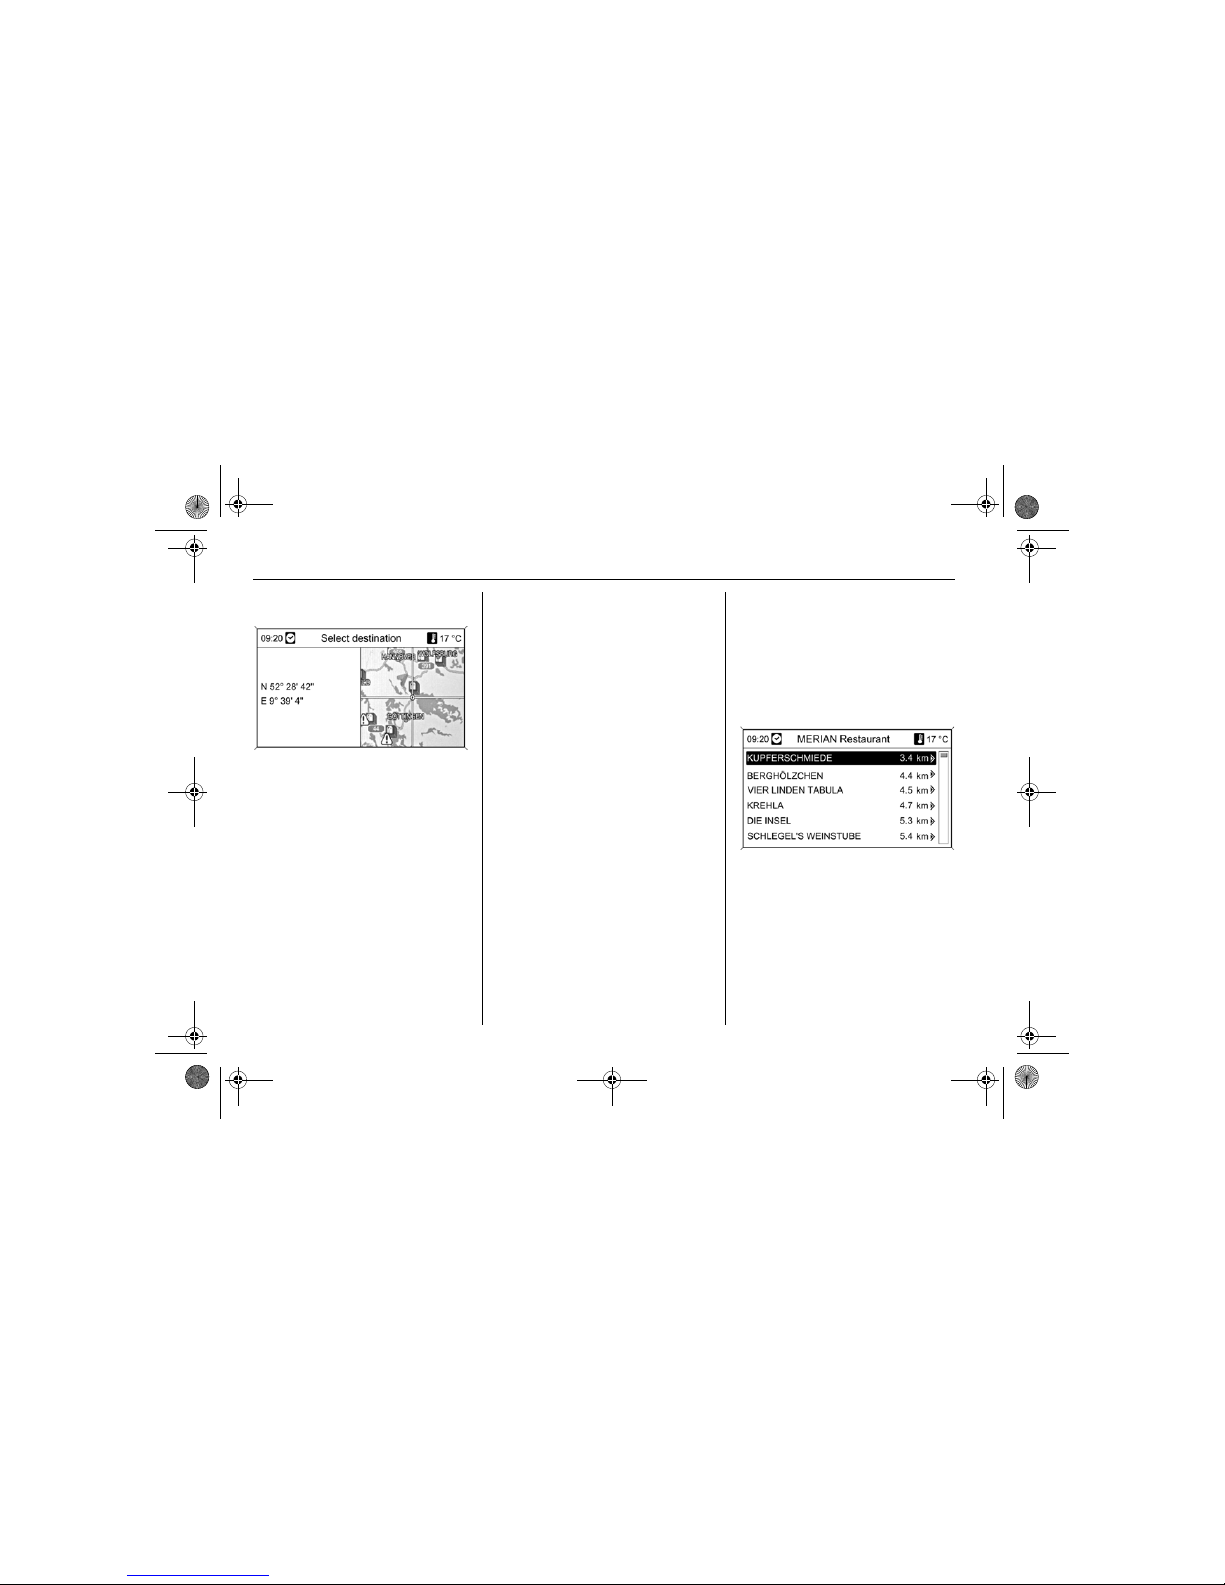
Destination from the map
Press DEST button and then select
Destination from Map.
DVD800.book Page 9 Tuesday, August 26, 2008 1:51 PM
Page 42
4 - 10 Navigation
Using eight-way switch on the
multifunction knob to position
crosswires on a destination on the
map.
Change map scale by turning the
multifunction knob.
After the selection of a destination
Start navigation 3 4-13 or Store
3 4-5.
Travel guide
Press DEST button and then select
Travel guide.
If data from the internal memory is
used for navigation, the travel guide
is only available for the regions
saved.
A selection of travel guide
recommendations appears from the
following submenus to which further
categories (e.g. Eating and
drinking, Going out, Sights or
Accommodation) are assigned:
Around actual position
Display of recommendations around
the related position. For example, you
are looking for a restaurant
recommendation.
Select Eating and drinking
category.
After accepting, select a restaurant
type from Bar, Cafe, FastFood,
Restaurant.
Select Restaurant.
A search window with further criteria
for restaurants appears. The number
of restaurants can be reduced by
selecting criteria (beer garden,
seafood restaurant, vegetarian...).
After selecting criteria, press BACK
button to return to the previous menu.
Select Start search.
A list of restaurants around the
current position appears with
distance information.
After the selection of a restaurant, an
information page opens with a short
description, opening times, prices
and addresses.
After accepting the page, the route
guidance window appears with the
following options:
DVD800.book Page 10 Tuesday, August 26, 2008 1:51 PM
Page 43
4 - 11Navigation
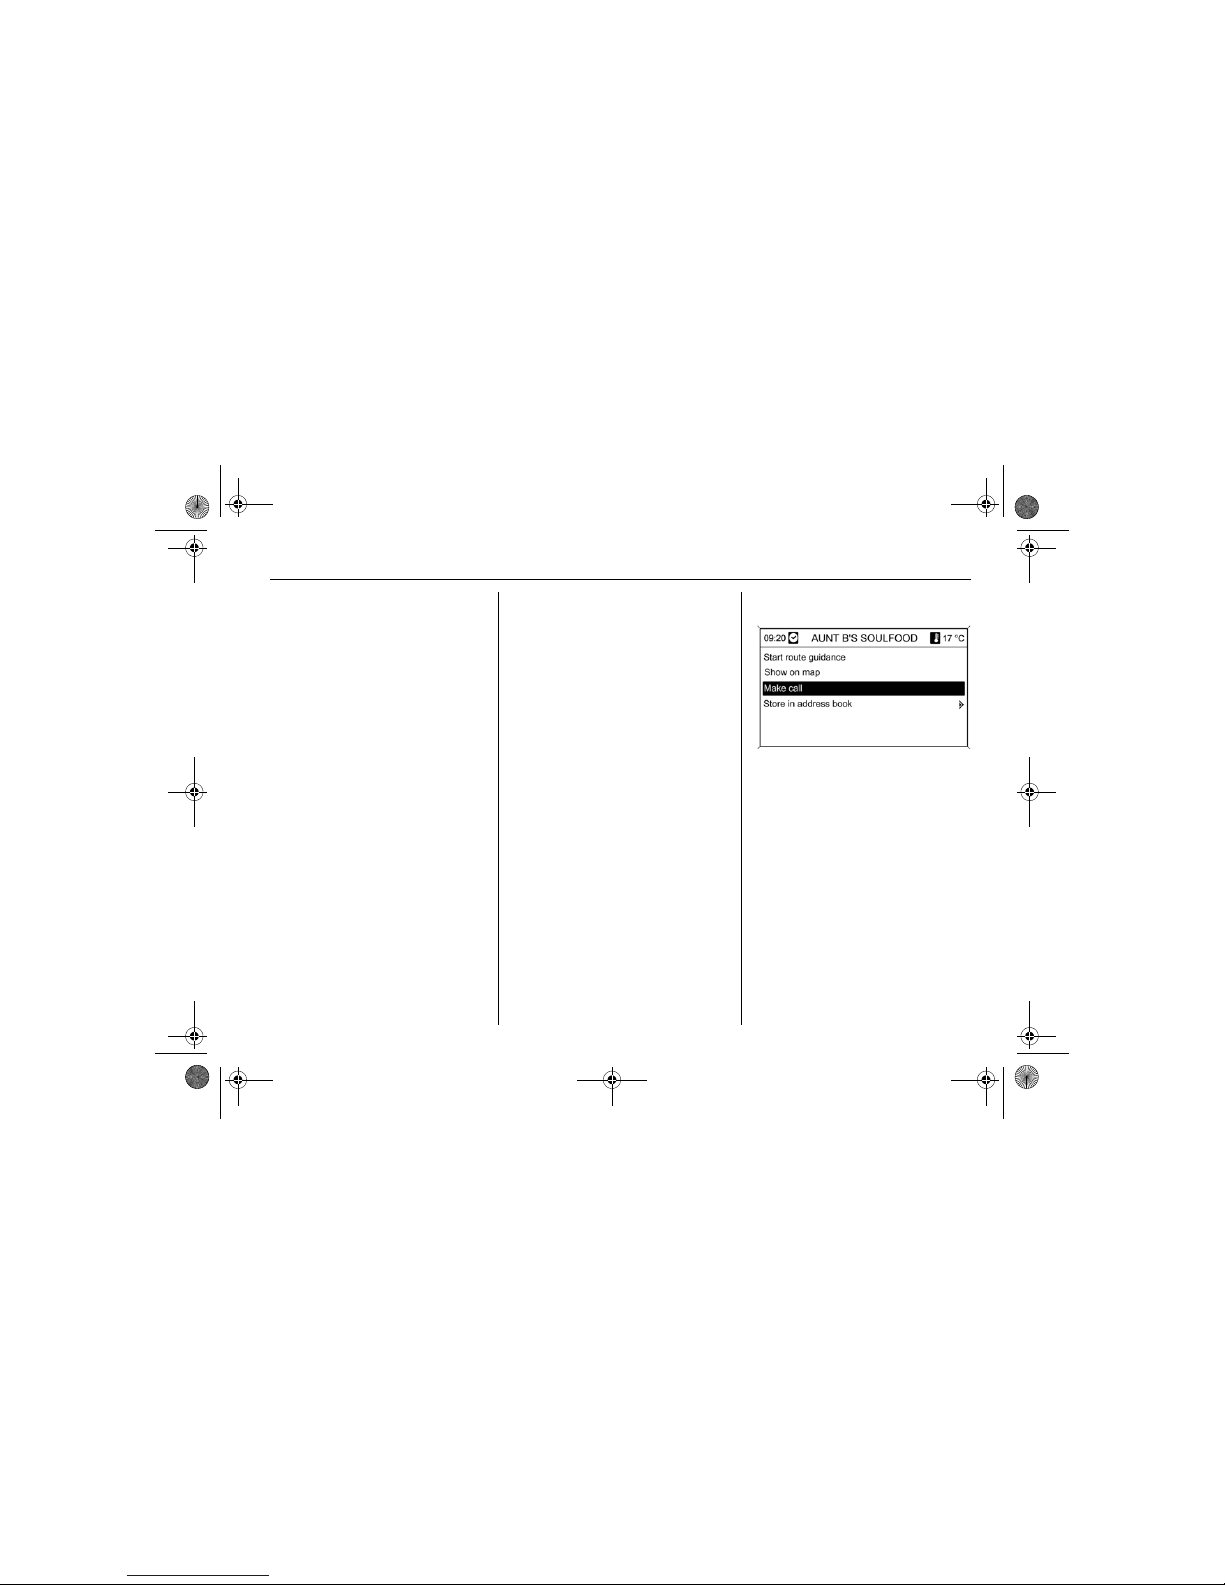
Start route guidance: the
selection is copied to the
navigation.
Show on map: the position of the
restaurant is displayed on the map.
Make call: if available, a telephone
call is made to the restaurant.
Store in address book: after the
entry of a name, the destination is
saved in the address book.
Around destination
Display of recommendations around
the destination entered.
For example, you are looking for
sights.
Select Sights category.
After accepting, further criteria for
selecting sights are available.
Select Museum.
After accepting, further criteria for the
specification of museums are
available.
Select Start search.
A list of the museums specified
around the selected destination
appears with distance information.
On the selection of a museum, an
information page opens with a short
description, opening times, prices
and addresses.
After accepting the page, the route
guidance window appears with the
following options:
Start route guidance: the
selection is copied to the
navigation.
Show on map: the position of the
museum is displayed on the map.
Make call: if available, a telephone
call is made to the museum.
Store in address book: the
destination is saved under a name
in the address book.
DVD800.book Page 11 Tuesday, August 26, 2008 1:51 PM
Page 44
4 - 12 Navigation
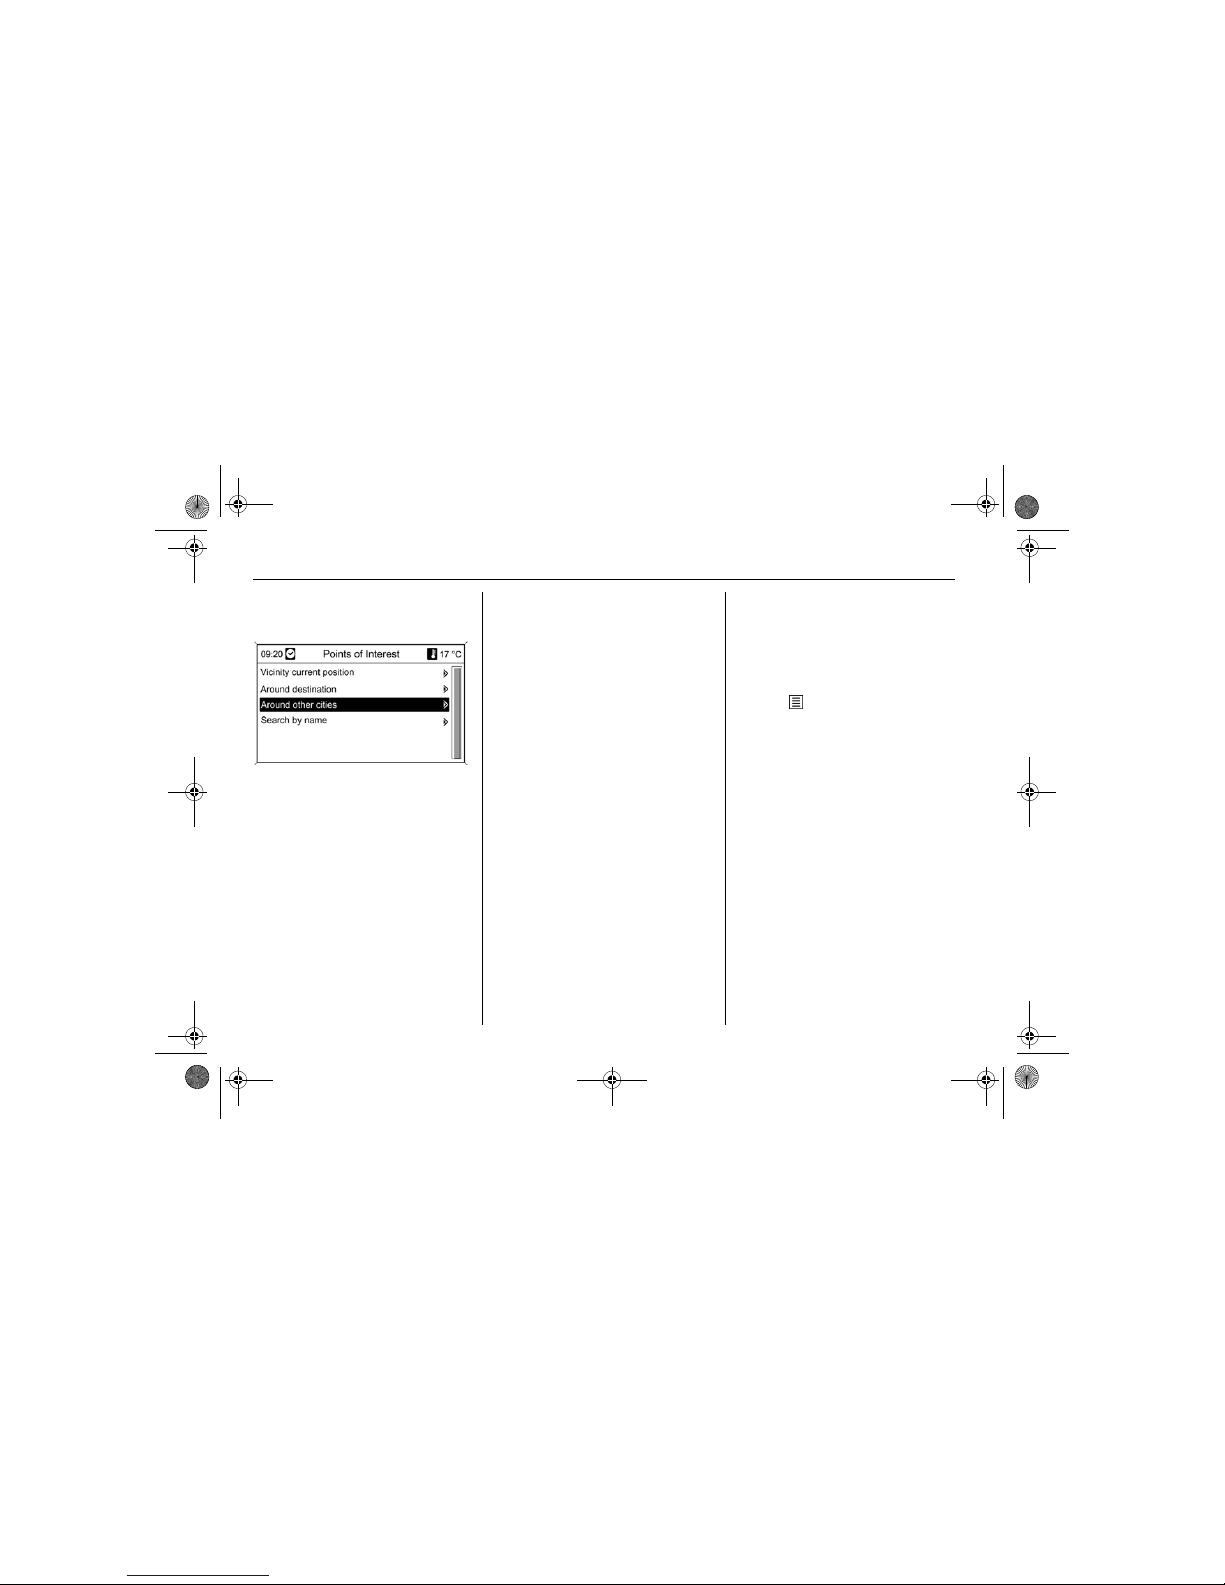
Around other places
Display of points of interest around
any place. For example, you are
looking for a swimming pool.
Select the required country from the
list of countries.
Enter the place using the letter
function 3 4-4. Accept selection.
Select Sport and leisure category.
After accepting, further criteria for
selecting sports activities are
available.
Select Swimming.
You can select between different
types of swimming pools.
Select Start search.
A list of pools around the selected
place appears with distance
information.
After the selection of a pool, an
information page opens with a short
description, opening times, prices
and addresses.
After accepting the page, the route
guidance window appears with the
following options:
Start route guidance: the
selection is copied to the
navigation.
Show on map: the position of the
destination is displayed on the map.
Make call: if available, a telephone
call is made to the destination.
Store in address book: the
destination is saved under a name
in the address book.
Name search
Select country and enter name of
a point of interest using the letter
function 3 4-4. A list appears when
the entry is unambiguous.
Alternatively, all terms for names can
be displayed by selecting the list
function in the entry box. The
search selection can be reduced by
first entering letters. The more letters
that are entered, the shorter the list.
After the selection of a destination, an
information page opens with a short
description, opening times, prices
and addresses. The information
displayed is dependent on the type of
destination.
After accepting the page, the route
guidance window appears with the
following options:
Start route guidance: the
selection is copied to the
navigation.
Show on map: the position of the
destination is displayed on the
map.
Make call: if available, a telephone
call is made to the destination.
DVD800.book Page 12 Tuesday, August 26, 2008 1:51 PM
Page 45
4 - 13Navigation
Store in address book: after the
entry of a name or accepting the
default name, the destination is
saved in the address book.
Route guidance
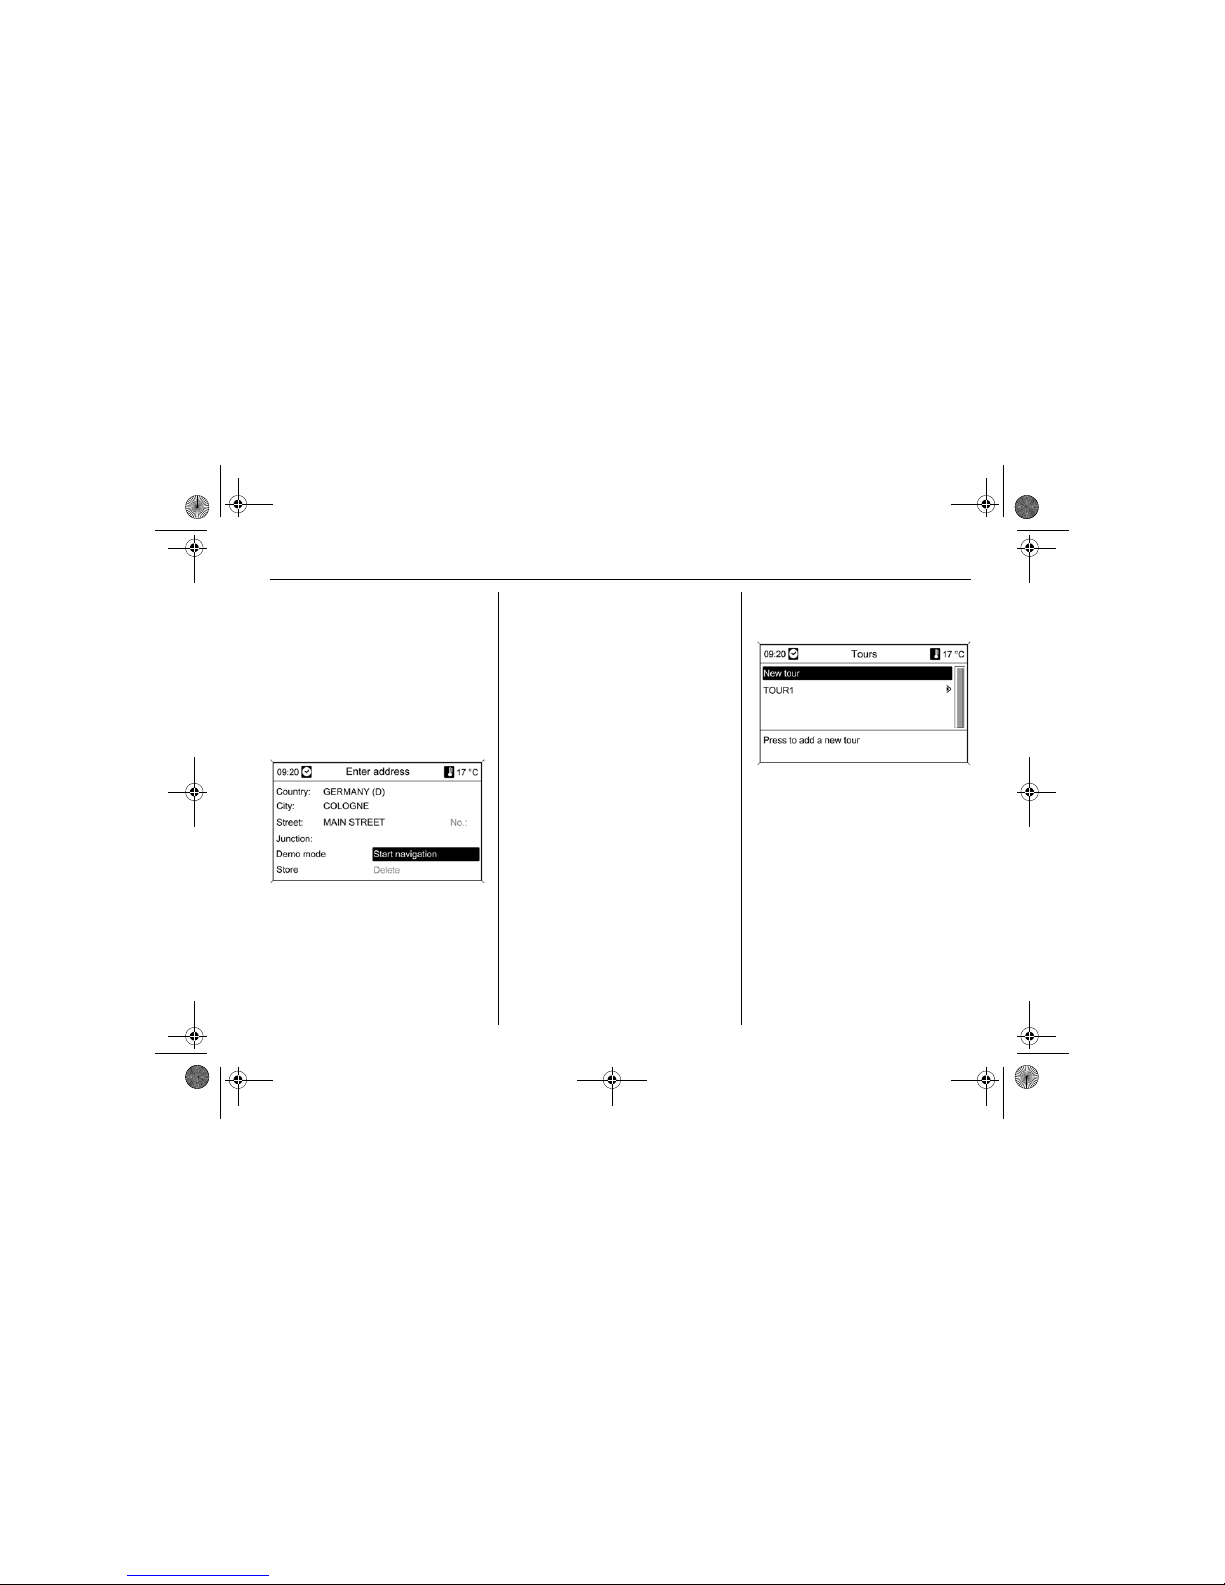
After selection of the destination, the
following options are available on the
Enter address menu:
Demo mode
Start navigation
Store
Delete
Demo mode
The route guidance to the destination
entered is simulated.
Start navigation
The route guidance to the destination
entered is started.
Store
The destination entered is saved in
the address book by entering a name.
Delete
A selected destination is deleted from
the address book.
Tours
A tour makes it possible to enter a
series of destinations for driving to
one after the other. This function is
suitable for regular, repetitive tours so
that it is not necessary to re-enter
individual destinations. Tours are
saved using a name. A maximum of
ten tours with 9 intermediate
destinations can be saved. An
existing tour can be changed by
modifying the order of the destinations
or by adding or deleting destinations.
DVD800.book Page 13 Tuesday, August 26, 2008 1:51 PM
Page 46
4 - 14 Navigation
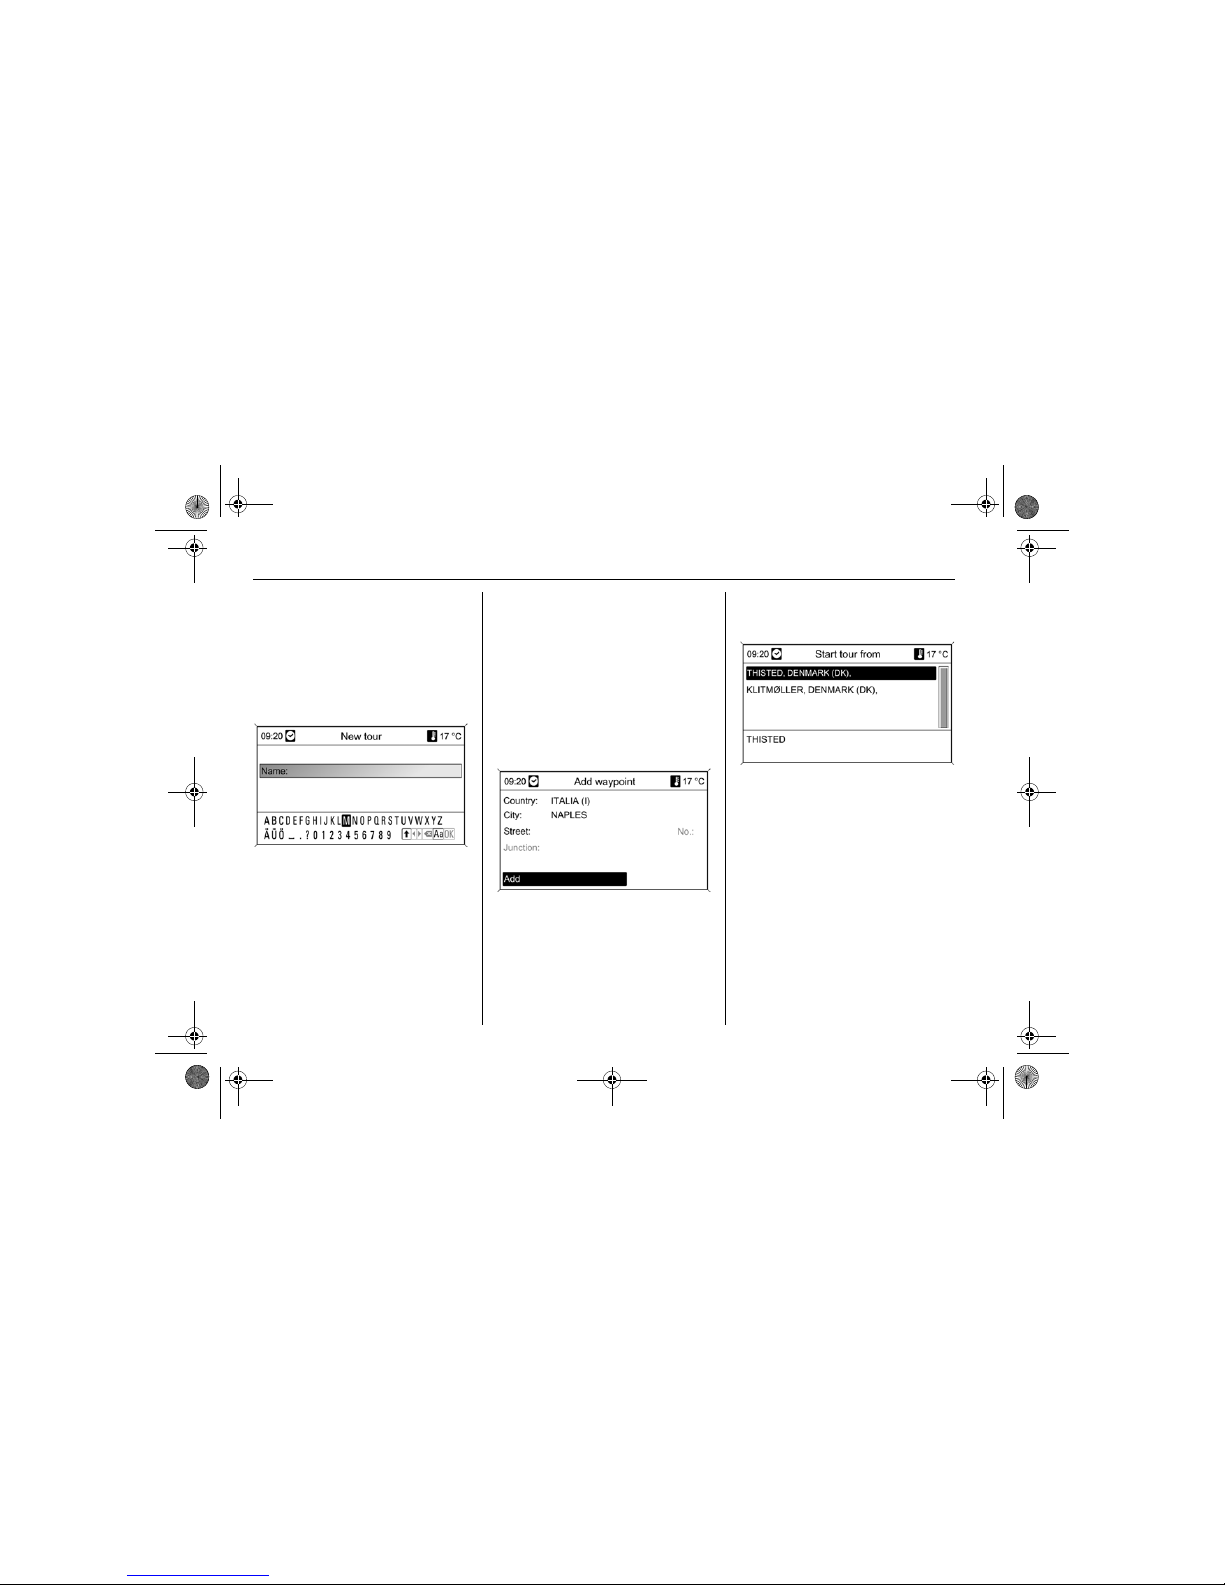
Adding a tour
Press NAV button and then select
Tours.
After selecting the New tour menu,
enter name for tour using the letter
function. Accept name using OK.
The name appears on the Tours
menu.
To add destinations to the tour, open
Tour.
Select Add waypoint menu. The
destinations can be selected from the
options
Enter waypoint (Enter address)
Address book
Last destinations
Select from map
Points of Interest.
After selecting destination, accept
using Add. For further intermediate
destinations, repeat procedure.
The tour is saved on the Tours menu
using the name.
For navigation, press Start tour.
Starting a tour
Press NAV button and then select
Tours.
Select a tour from the list.
After selection of Start tour the
navigation is started.
By selecting Start tour from the
navigation starts from a previously
marked destination on the existing
tour.
DVD800.book Page 14 Tuesday, August 26, 2008 1:51 PM
Page 47
4 - 15Navigation
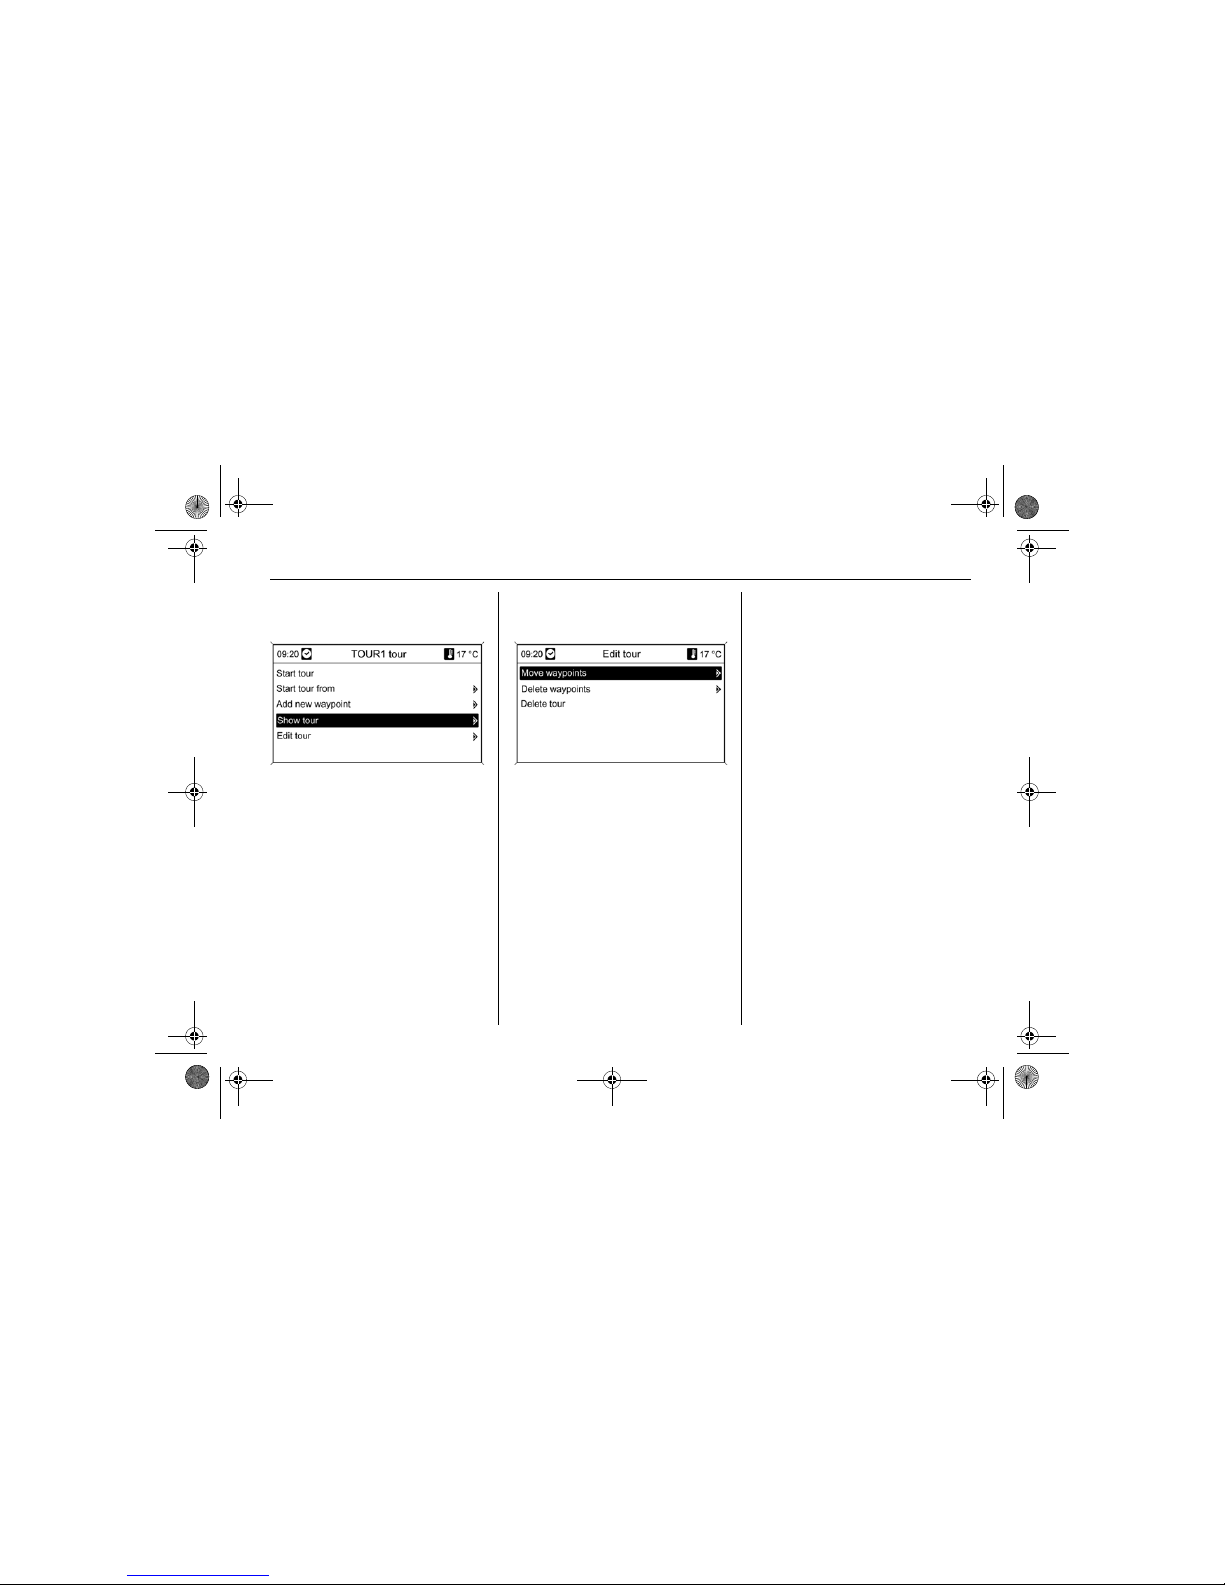
Displaying a tour
Press NAV button and then select
Tours.
Select a Tour from the list.
After selection of Show tour the
destinations on the tour are
displayed.
Editing a tour
Press NAV button and then select
Tours.
Select the tour to be edited from the
list.
Select Edit tour. The following
options are available.
Move waypoints
The destinations on the tour are
displayed.
Mark destination to be moved and
press twice. The destination is placed
at the end.
Delete waypoints
The destinations on the tour are
displayed.
Mark destination to be deleted and
accept. The destination is deleted
from the tour.
Delete tour
The tour opened is deleted in its
entirety.
Adding new intermediate
destination
Press NAV button and then select
Tours.
Select the tour to be edited from the
list.
Select Add waypoint menu. The
destinations can be selected from the
options
Enter waypoint (address entry)
Address book
Last destinations
Select from map
Points of Interest.
DVD800.book Page 15 Tuesday, August 26, 2008 1:51 PM
Page 48
4 - 16 Navigation
After selecting destination, accept
using Add. For further intermediate
destinations, repeat procedure.
The destination is added to the tour
with the tour name.
Functions for active route
guidance
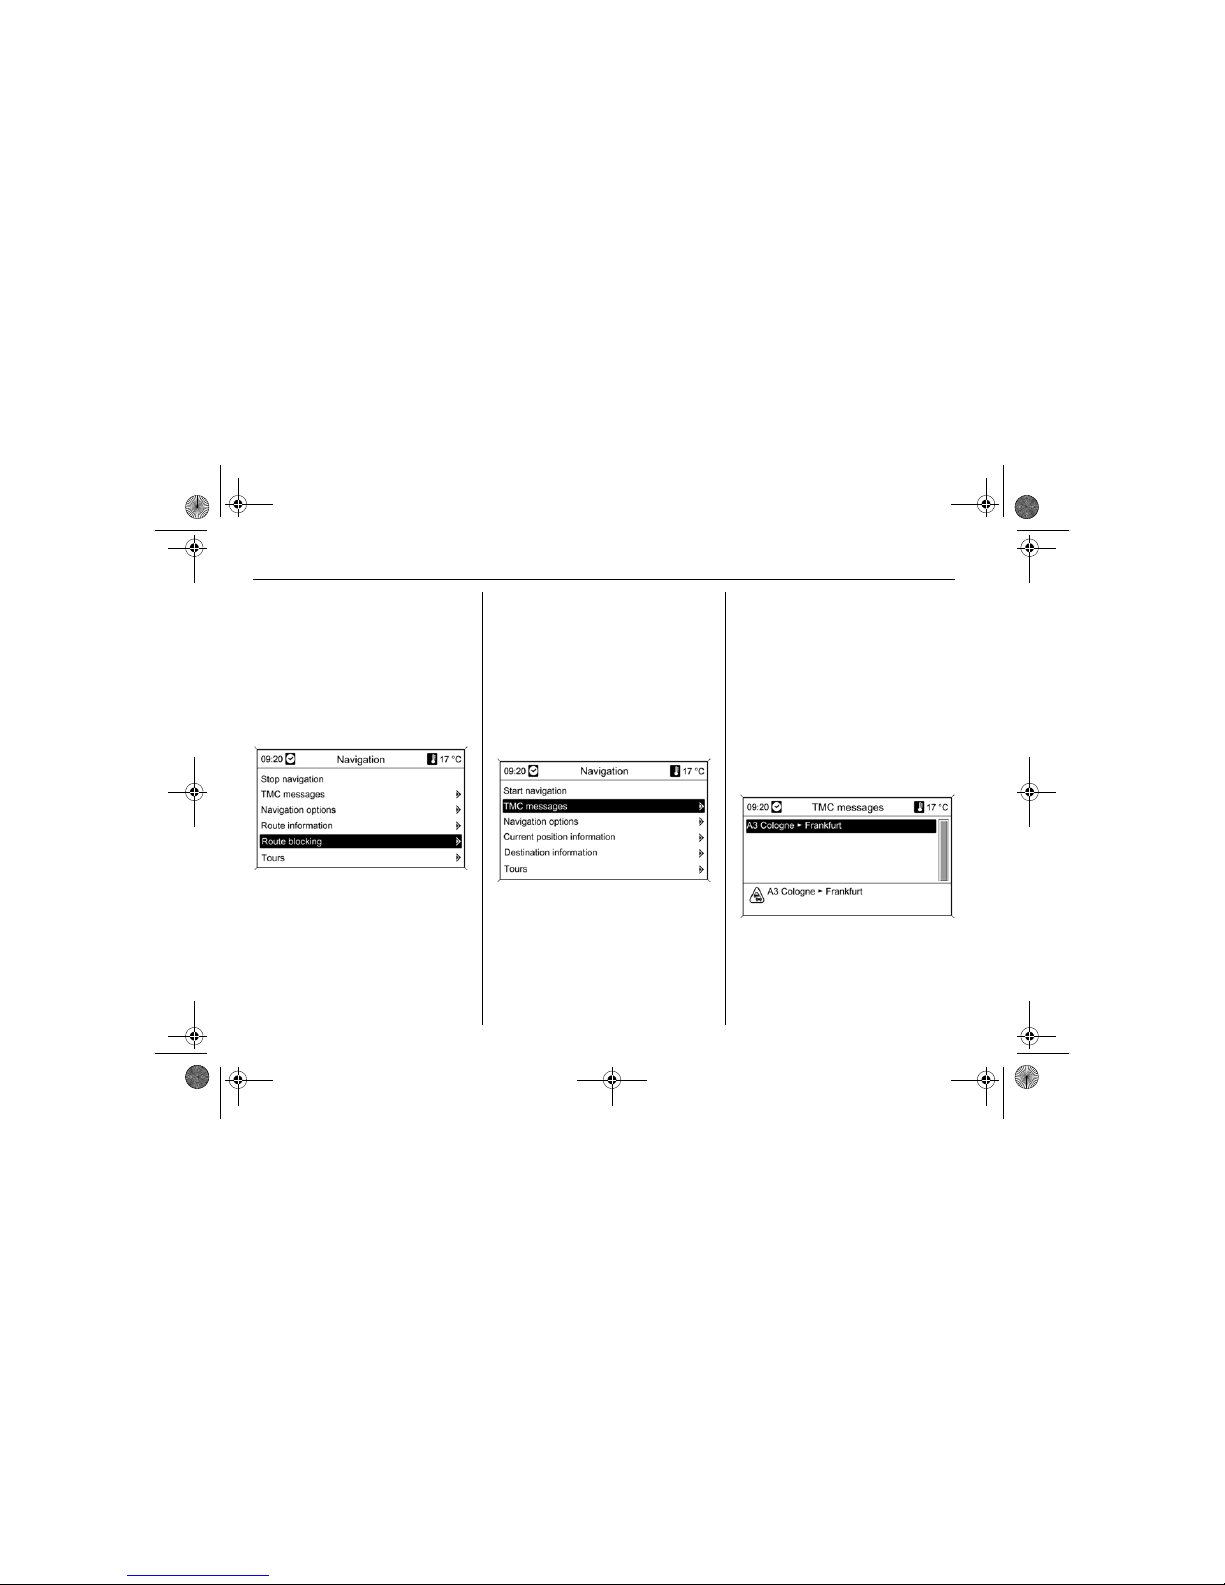
Press NAV button and then press
multifunction knob.
With active route guidance, the
following options are available when
the multifunction knob is pressed:
Stop navigation
TMC messages
Navigation options
Route information
Route blocking
Tours
Stopping navigation
Active route guidance is stopped. The
Navigation menu appears.
TMC messages
(traffic news)
The driver can obtain information on
the current traffic situation both on the
route driven and on all routes using
TMC traffic information reception.
TMC traffic information is displayed
as symbols in the route guidance
display or on the TMC messages
menu as a detailed text message
3 4-17.
The traffic information received is
used as the basis for the dynamic
route guidance 3 4-22. The route is
selected with avoidance of traffic
problems based on pre-set criteria
3 4-17.
To be able to use TMC traffic
information, the system has to
receive TMC stations in the related
region.
DVD800.book Page 16 Tuesday, August 26, 2008 1:51 PM
Page 49
4 - 17Navigation
Dynamic route guidance only works if
traffic information is received via the
TMC traffic information system.
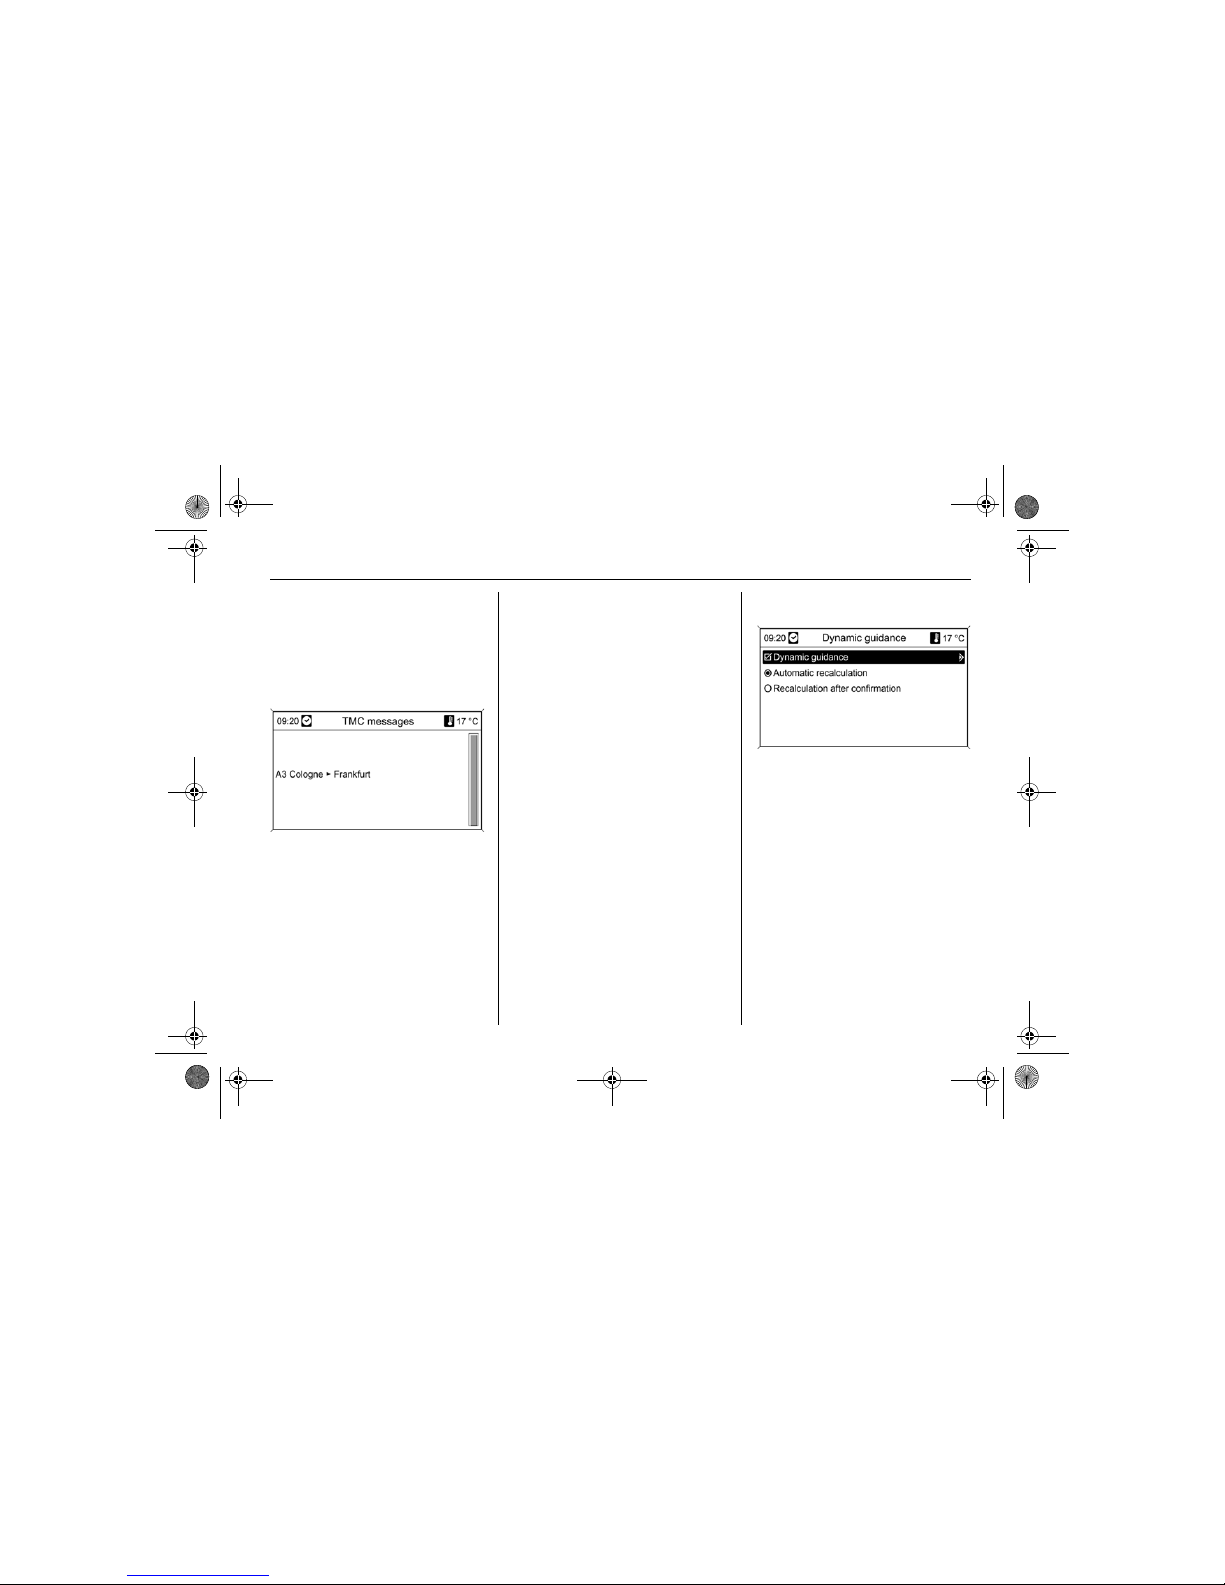
Displaying detailed traffic
information as a text message
Press NAV button and then select
TMC messages.
A list of all TMC traffic information
received is displayed.
Depending on the filter criteria
selected 3 4-24, either all traffic
messages or only those along the
selected route are displayed.
Detailed information appears after
accepting a traffic message. To
leave, press BACK button.
Navigation options
The following options with further
submenus are available:
Route criteria
The planning of the route can be
defined by the following criteria:
Fastest
Shortest
Economic
Avoid freeways
Avoid toll roads
Avoid tunnels
Avoid ferries
Dynamic route guidance
Mark selection and accept. The
function is activated or deactivated by
pressing Dynamic guidance again
(check mark appears in line on the
menu).
With dynamic route guidance active,
the route can be recalculated
automatically if there are traffic
problems, or only after a prompt is
accepted, whichever option is
selected.
Dynamic guidance 3 4-22.
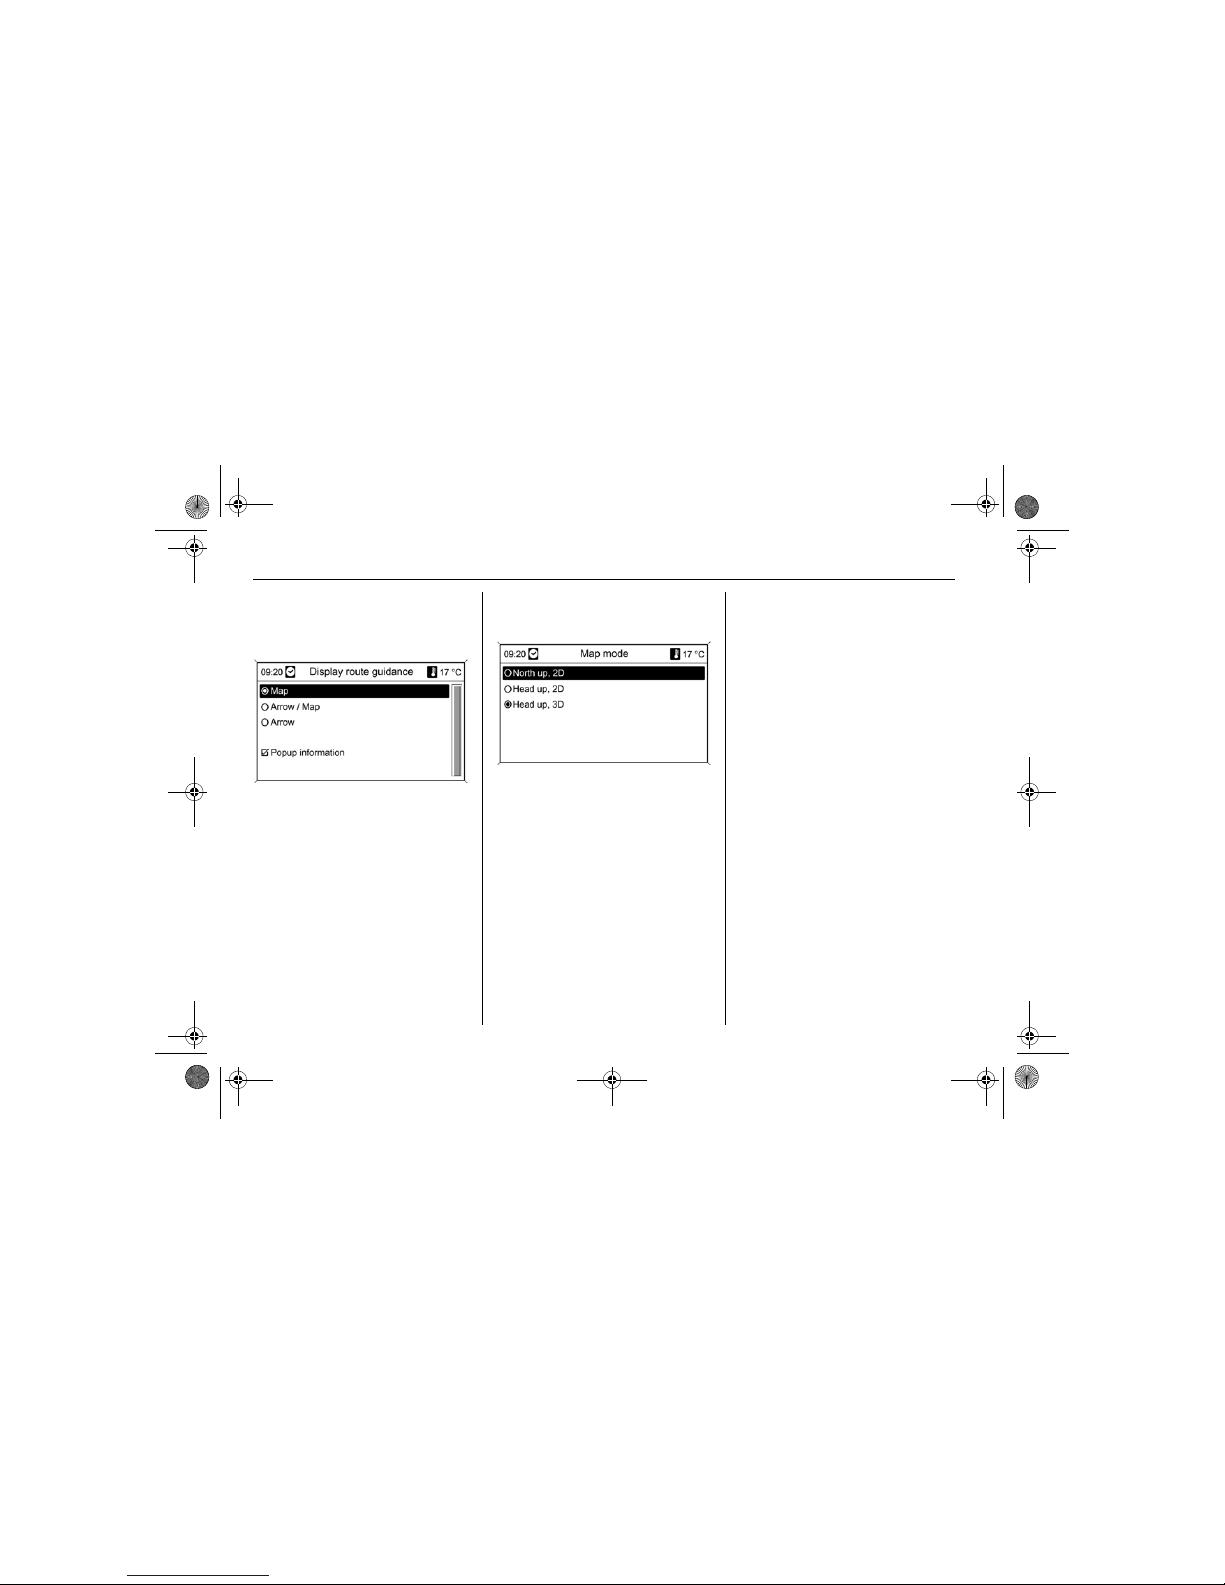
Route guidance display
The following options are available
for the display of the route guidance:
Map: route guidance is displayed
on the map.
Arrow / Map: route guidance is
displayed on the map, navigation
arrows also appear.
DVD800.book Page 17 Tuesday, August 26, 2008 1:51 PM
Page 50
4 - 18 Navigation
Arrow: route guidance is only
displayed with navigation arrows.
Using the Popup information option,
you can select whether route
guidance information from the
navigation is to be displayed in popup
windows in other operating modes
(e.g. radio). The information is hidden
after a set time or by pressing the
BACK button.
Map options
Map alignment
Selection between orientation in
direction of travel (North Up/Head
Up) and dimension (2D/3D) on the
map display.
Mark selection using multifunction
knob and accept.
Displaying points of interest on the
map
Select whether and which points of
interest are to be displayed on the
map.
In User defined you can define the
type of points of interest that are to be
displayed, e.g.: restaurant,
hotel,
public places,
etc.
Mark selection using multifunction
knob and accept.
Arrival time/journey time
Selection of the expected arrival time
or the journey time The time is
displayed in the top line on the route
guidance screen
Route information
The following information can be
accessed on the Route information
menu:
Route list
Current position information
Destination information
Overview current route
DVD800.book Page 18 Tuesday, August 26, 2008 1:51 PM
Page 51
4 - 19Navigation
Route list
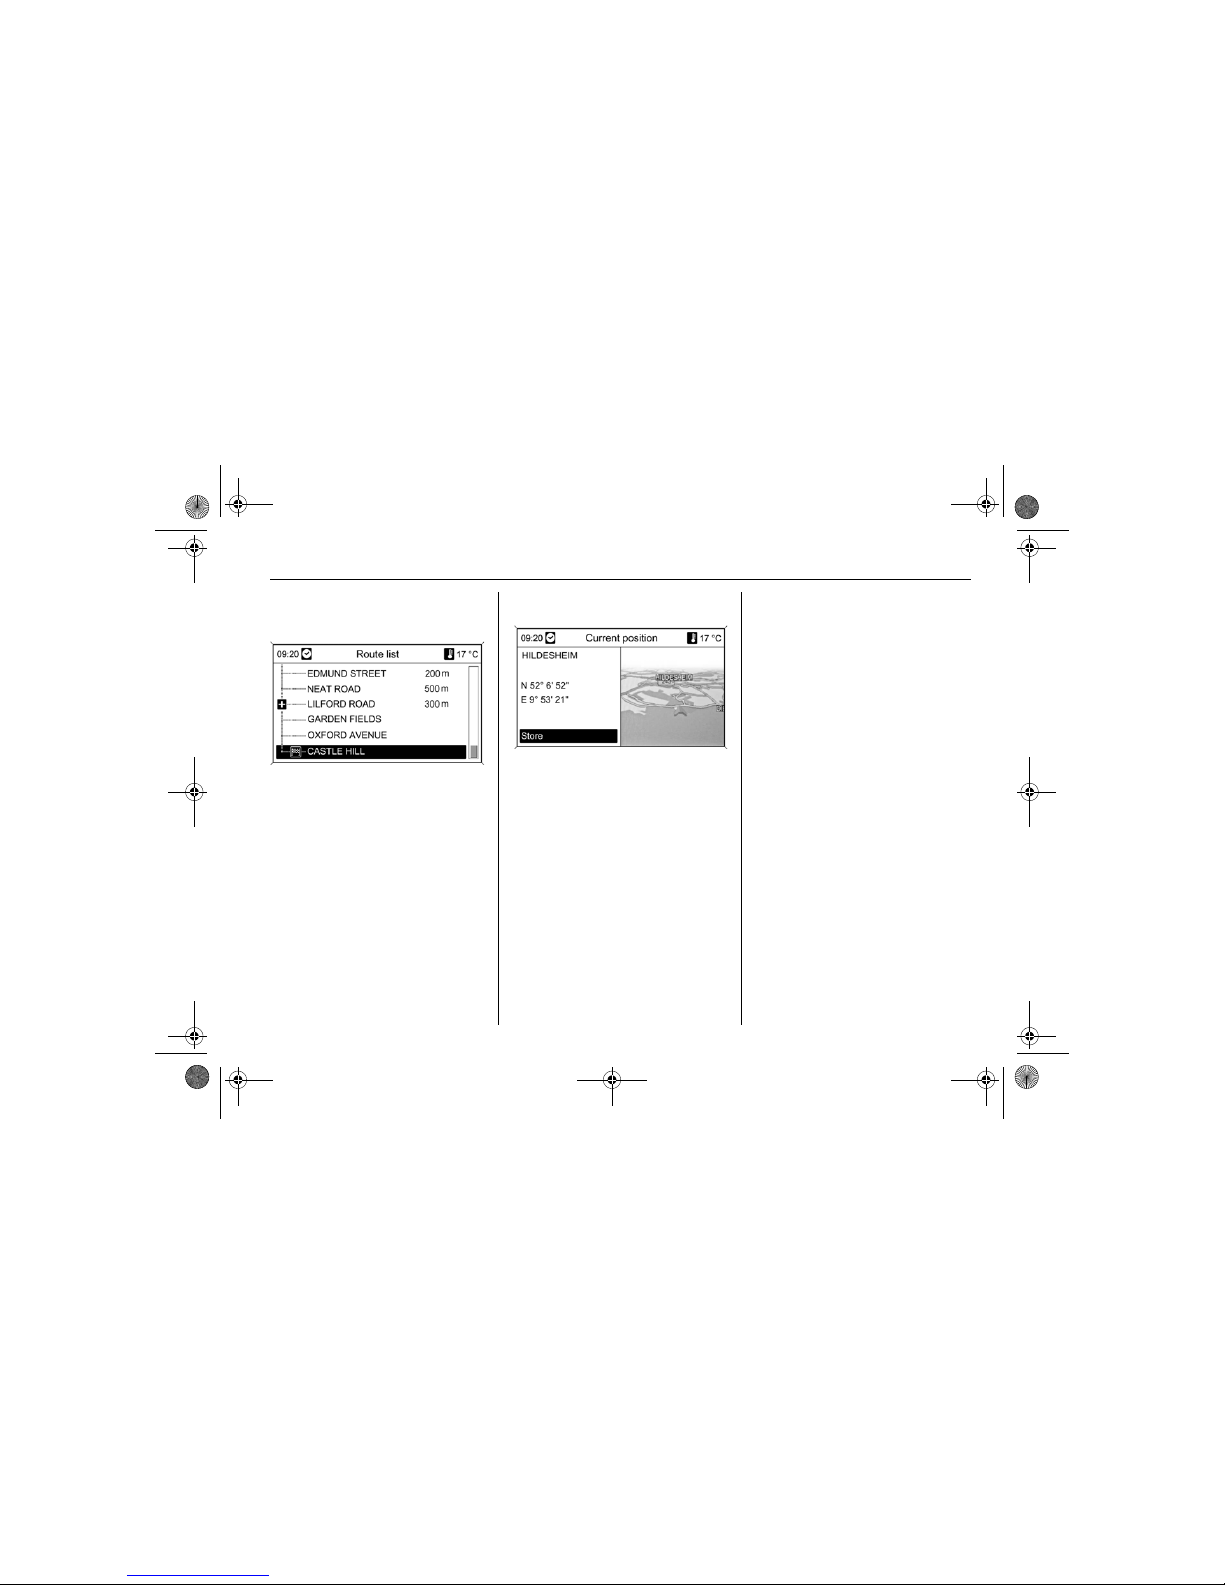
All roads on the route calculated are
given with the related distances.
Current position information
The following information on the
current position is displayed:
Place
Street name
Longitude
Latitude
Map display
The actual position can be copied to
the address book using Store. For
this purpose, assign a name using
the letter function 3 4-4.
Destination information
The following information on the
destination is displayed:
Place
Street name
Longitude
Latitude
Map display
The display will be different if Points
of Interest or Destination from Map
is selected.
The destination is copied to the
address book using Store. For this
purpose, assign a name using the
letter function 3 4-4.
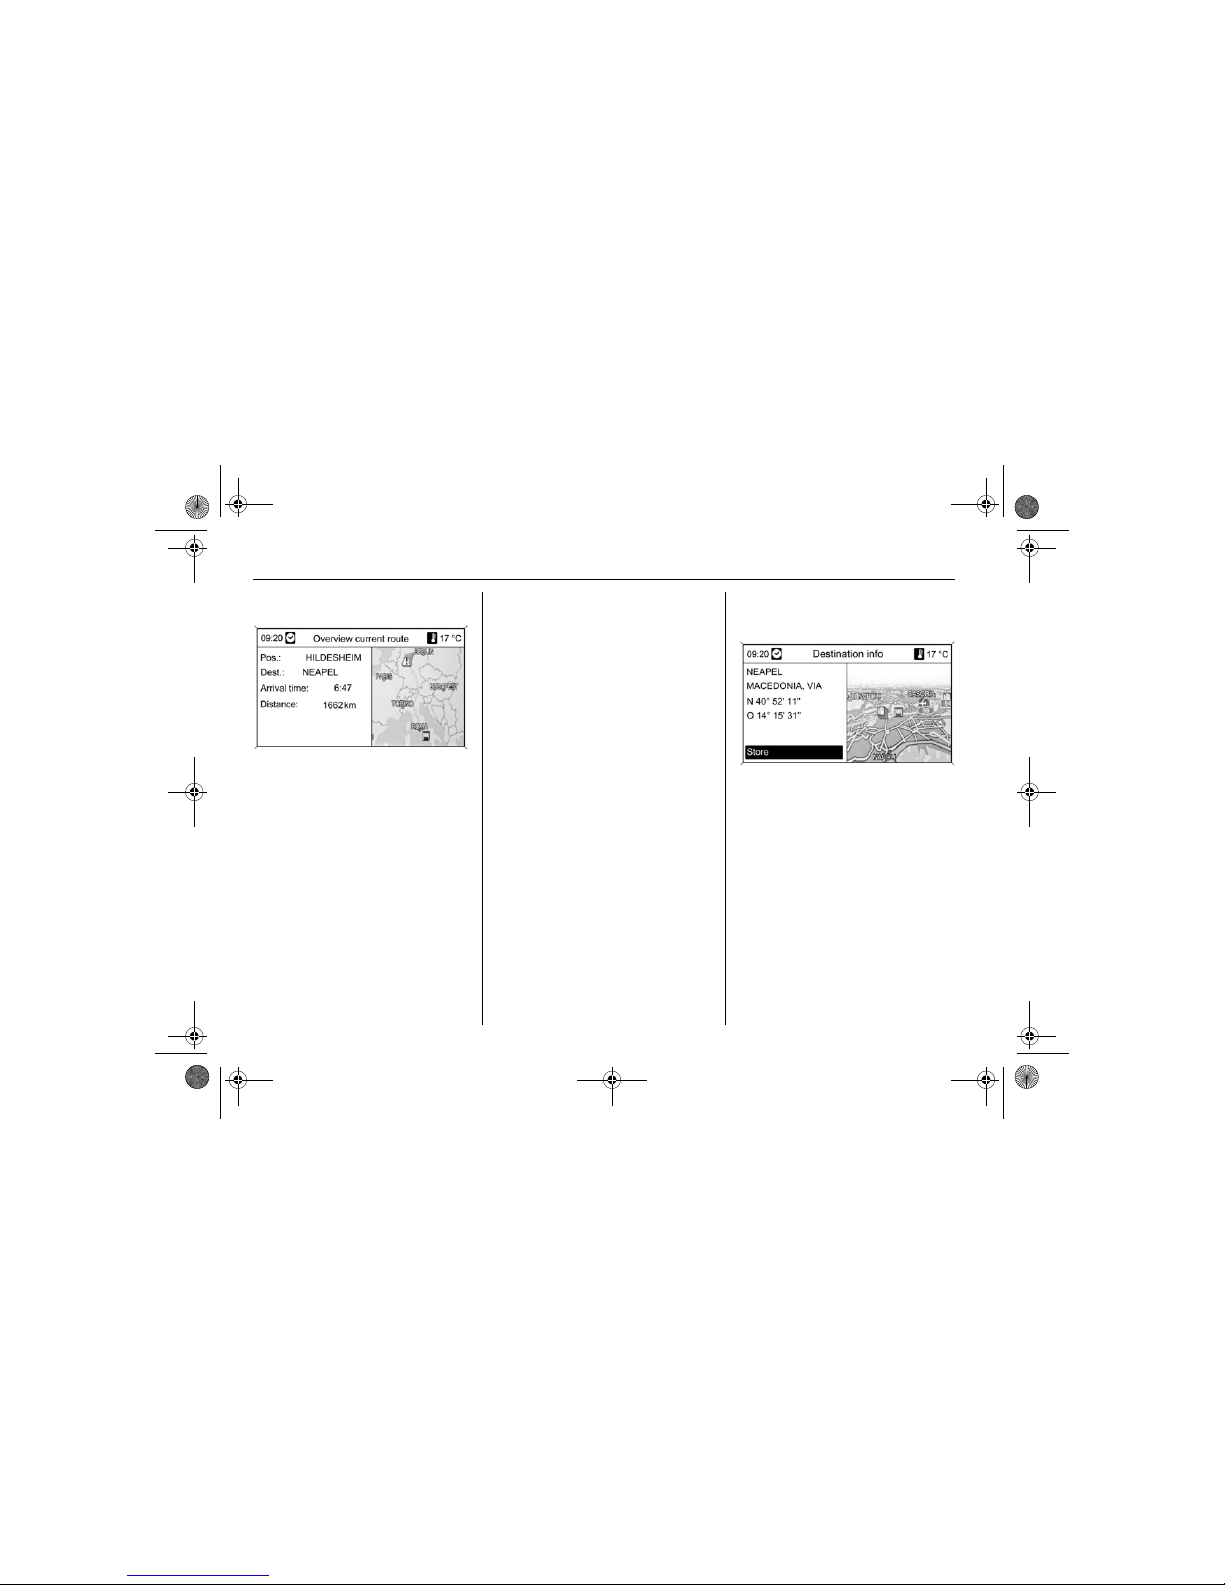
Overview current route
The following information on the
current route is displayed:
Position
Destination
Arrival time
Distance
Map display
DVD800.book Page 19 Tuesday, August 26, 2008 1:51 PM
Page 52
4 - 20 Navigation
Route blocking
In the list of street names on the
route, streets or areas can be
excluded from the route guidance by
marking them. These areas are
displayed crossed-out.
The route blocking entered remains
active until a new route calculation is
performed.
When you leave the page by pressing
the BACK button, after acceptance
the route is re-calculated taking into
account the excluded areas.
Tours
Description 3 4-20.
Functions with route
guidance inactive
Unlike the displays with route
guidance active, with route guidance
inactive the following options are
available:
Start navigation
Press NAV button and then select
Start navigation.
The Enter address menu appears,
description 3 4-4.
Current position information
The following information on the
current position is displayed:
Place
Street name
Longitude
Latitude
Map display
Destination information
The following information on the
destination is displayed:
Place
Street name
Longitude
Latitude
Map display
Information on the display
Indications on the display
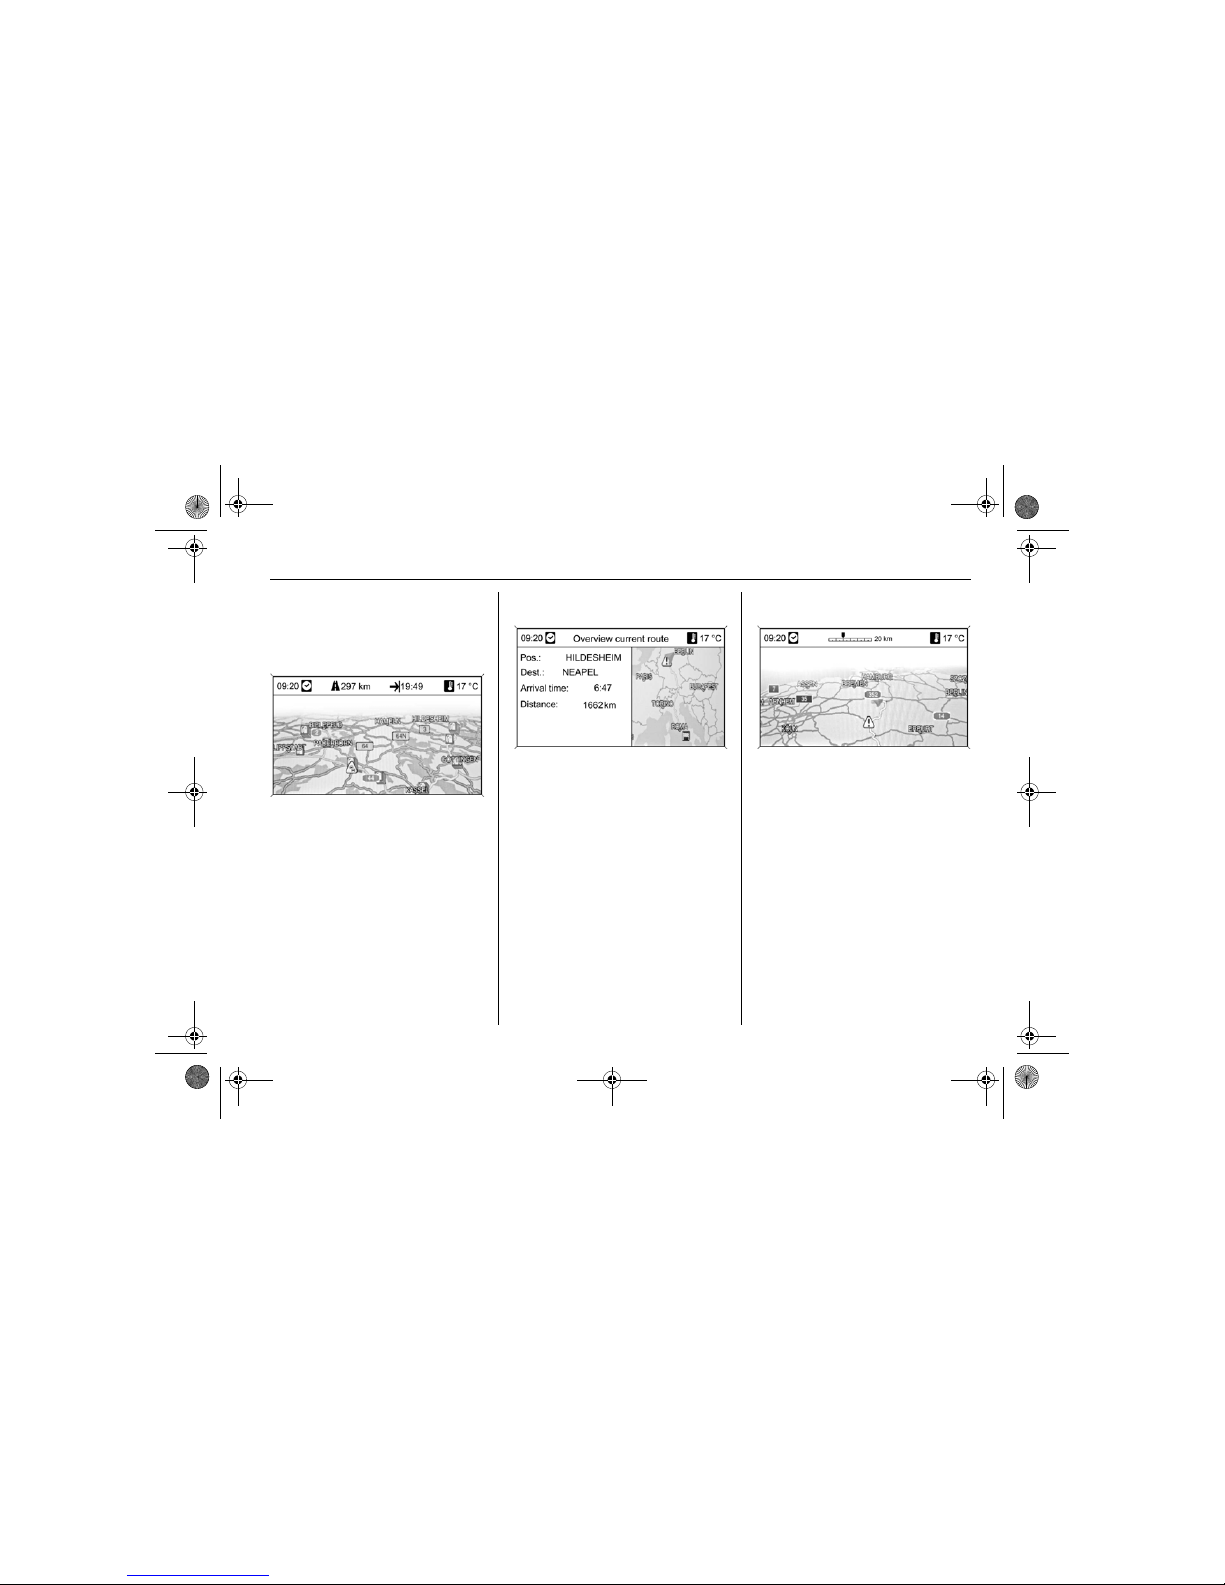
In the top line the following is
displayed:
DVD800.book Page 20 Tuesday, August 26, 2008 1:51 PM
Page 53
4 - 21Navigation
Time / distance to destination /
arrival time or journey time /
exterior temperature
On the menus, the menu name
appears in the top line.
On the map display the route
guidance is displayed as a blue route.
The starting point is displayed as a
red triangle, the destination as a
chequered flag.
Symbols along the route indicate
traffic information and general
information or points of interest.
Overview of the symbols 3 4-26.
Map scale
Change the map scale in the
navigation display by turning the
multifunction knob.
The scale is displayed in the top line
of the display.
The map display changes
automatically to the North Up format if
the scale is set to greater than or
equal to 20 km.
DVD800.book Page 21 Tuesday, August 26, 2008 1:51 PM
Page 54
4 - 22 Navigation
Dynamic route guidance
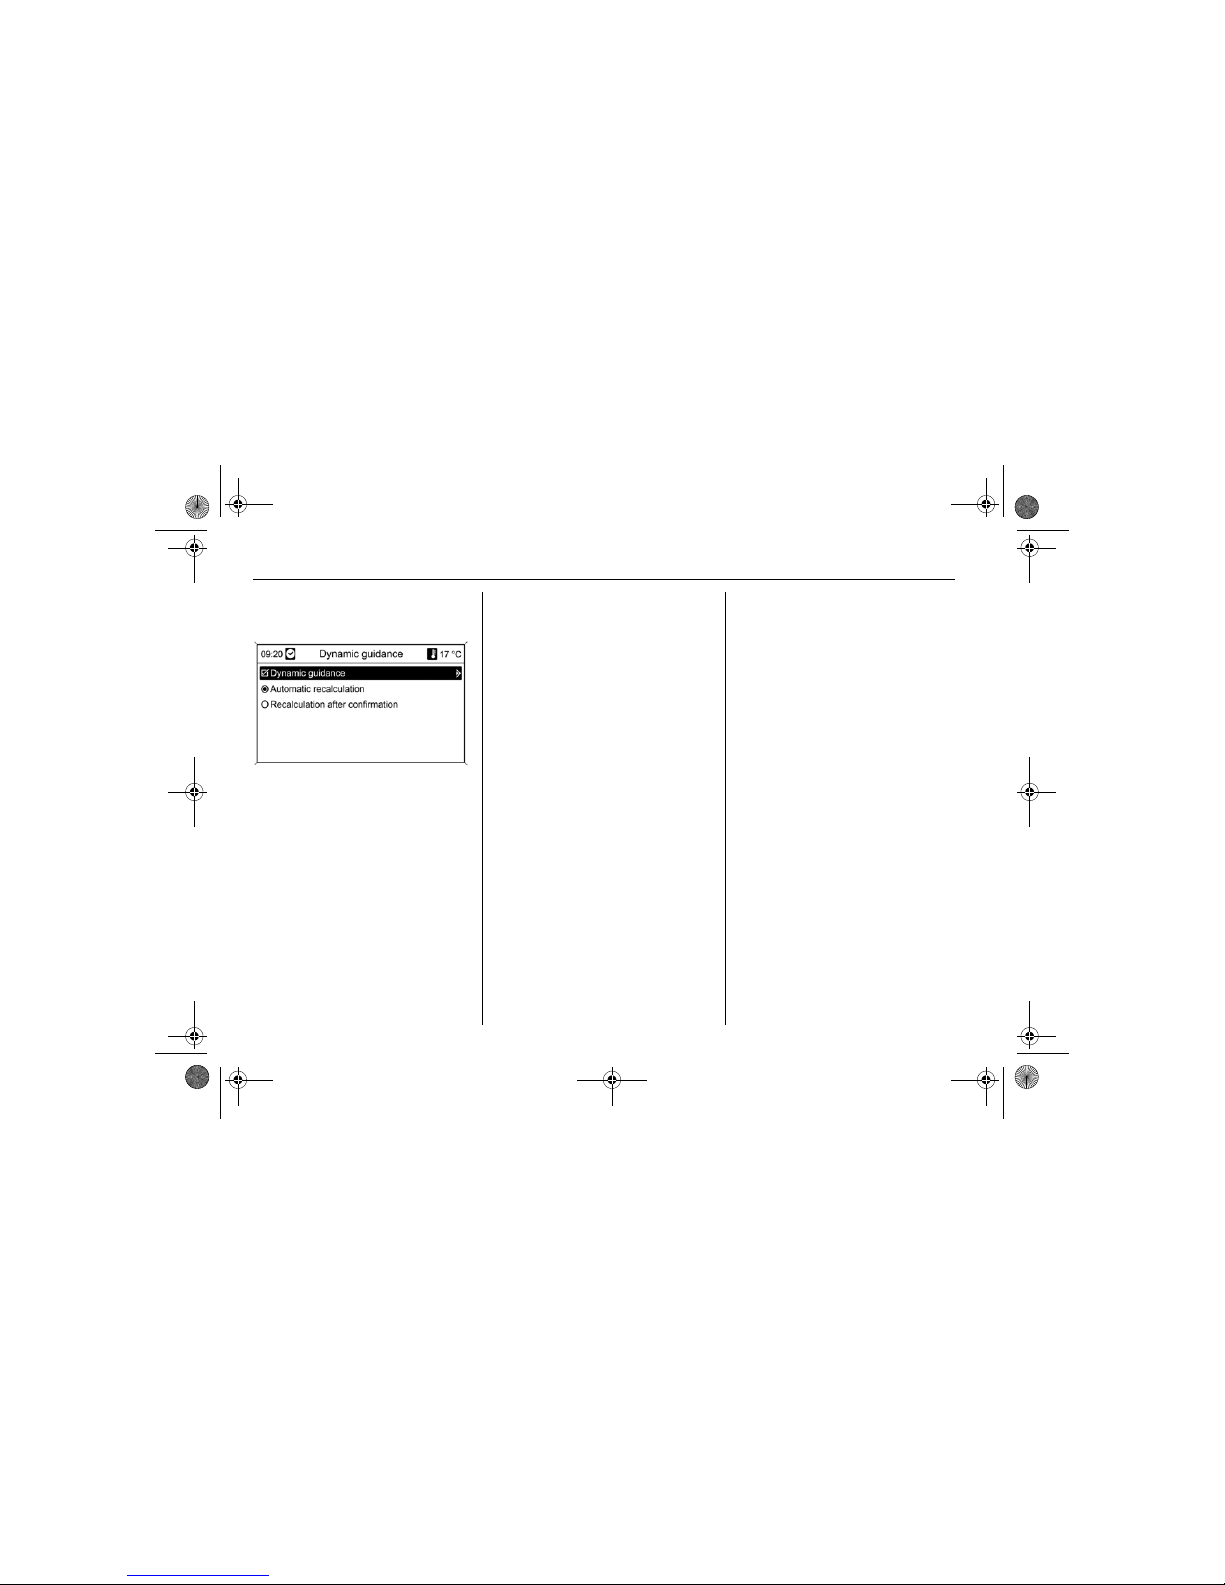
If dynamic route guidance is active,
the entire current traffic situation that
the Infotainment system receives
over TMC is included in the
calculation of the route. The route is
suggested taking into account all
traffic problems or restrictions as per
the pre-set criteria 3 4-17.
In the case of a traffic problem
(e.g. traffic jam, road shut) on the
route driven, a message is displayed
and a voice message output
indicating the nature of the problem.
The driver can decide whether to
drive around the traffic problem
taking the suggested change to the
route or to carry on through the traffic
problem.
Nearby traffic problems are also
reported if route guidance is not
active.
If route guidance is active, the system
continuously checks, based on the
traffic information, whether it would
be better to recalculate the route or
take an alternative route taking into
account the current traffic situation.
If route guidance is active, you
can choose between automatic
recalculation or recalculation of the
route after accepting a prompt 3 4-17.
The activation and deactivation of
dynamic route guidance, as well as
criteria for the calculation of the route
and other settings for navigation, are
made on the Navigation options
menu.
For this purpose, press NAV button,
then select Navigation options,
Route criteria, Dynamic guidance
3 4-17.
Dynamic route guidance only works if
traffic information is received via the
RDS-TMC traffic information system.
The possible delay due to a
traffic problem calculated by the
Infotainment system is based on data
that the system receives via the RDSTMC station currently set. The actual
delay may be different to that
calculated.
DVD800.book Page 22 Tuesday, August 26, 2008 1:51 PM
Page 55
4 - 23Navigation
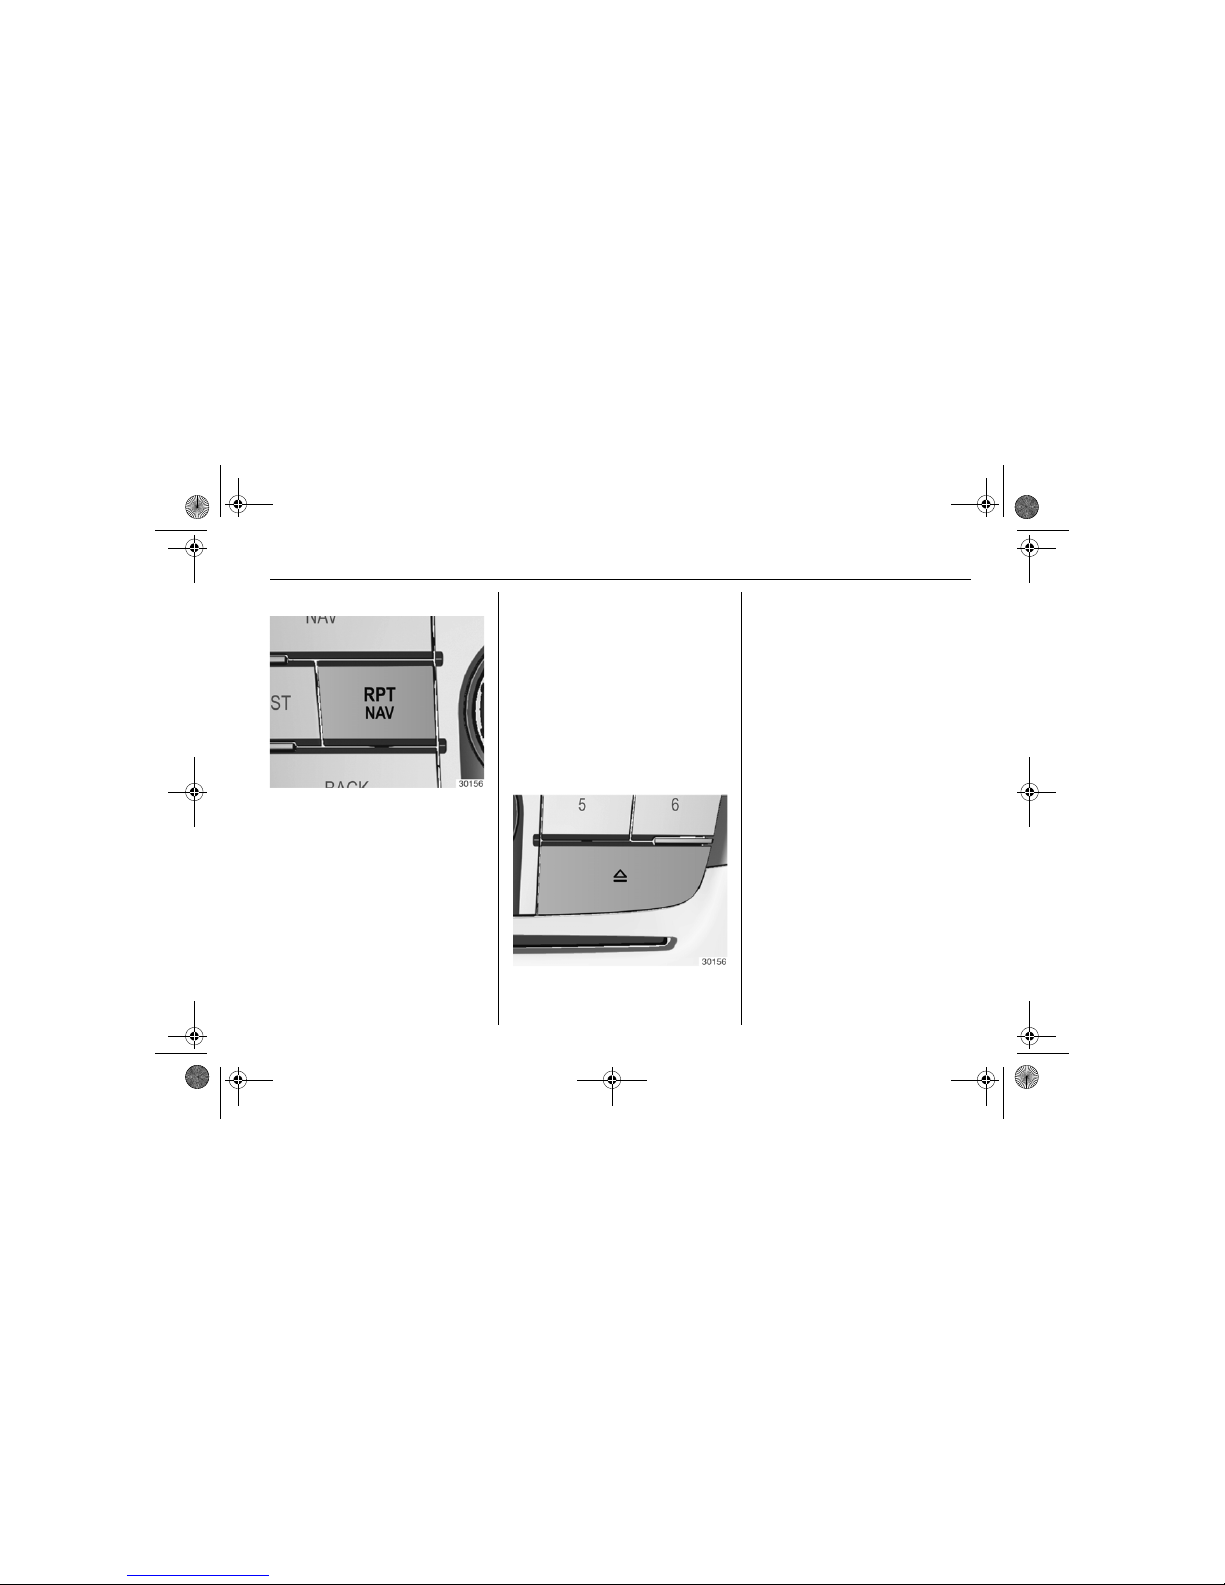
RPT NAV button
The last route guidance message is
repeated by pressing the RPT NAV
button.
Inserting navigation DVD
To load additional map material for a
country, insert navigation DVD in the
DVD/CD slot with the labelled side
pointing upwards. It will be pulled in
automatically.
Important information on
navigation DVDs
Only use navigation DVDs/CDs
approved by the vehicle
manufacturer. The Infotainment
system will not read navigation
DVDs/CDs from other
manufacturers.
It is recommended to always use
the latest navigation DVD/CD for
the Infotainment system.
Removing navigation DVD
The DVD/CD is ejected by pressing
the a button.
If the DVD/CD is not removed from
the slot within 10 seconds, it is pulled
back into the slot for safety reasons.
Navigation-specific settings
Press CONFIG button and then
select Navigation settings.
The following options are available.
Navigation volume
TMC settings
Delete lists
Map data add / remove
Erase map data memory
Navigation volume
Setting the relative volumes of the
navigation message and the audio
source (background) during a
navigation message.
DVD800.book Page 23 Tuesday, August 26, 2008 1:51 PM
Page 56
4 - 24 Navigation
TMC settings
Infotypes
Select whether and which traffic
message infotypes are to be
displayed on the active route
guidance map.
In User defined only selected
infotypes are displayed.
Mark selection using multifunction
knob and accept.
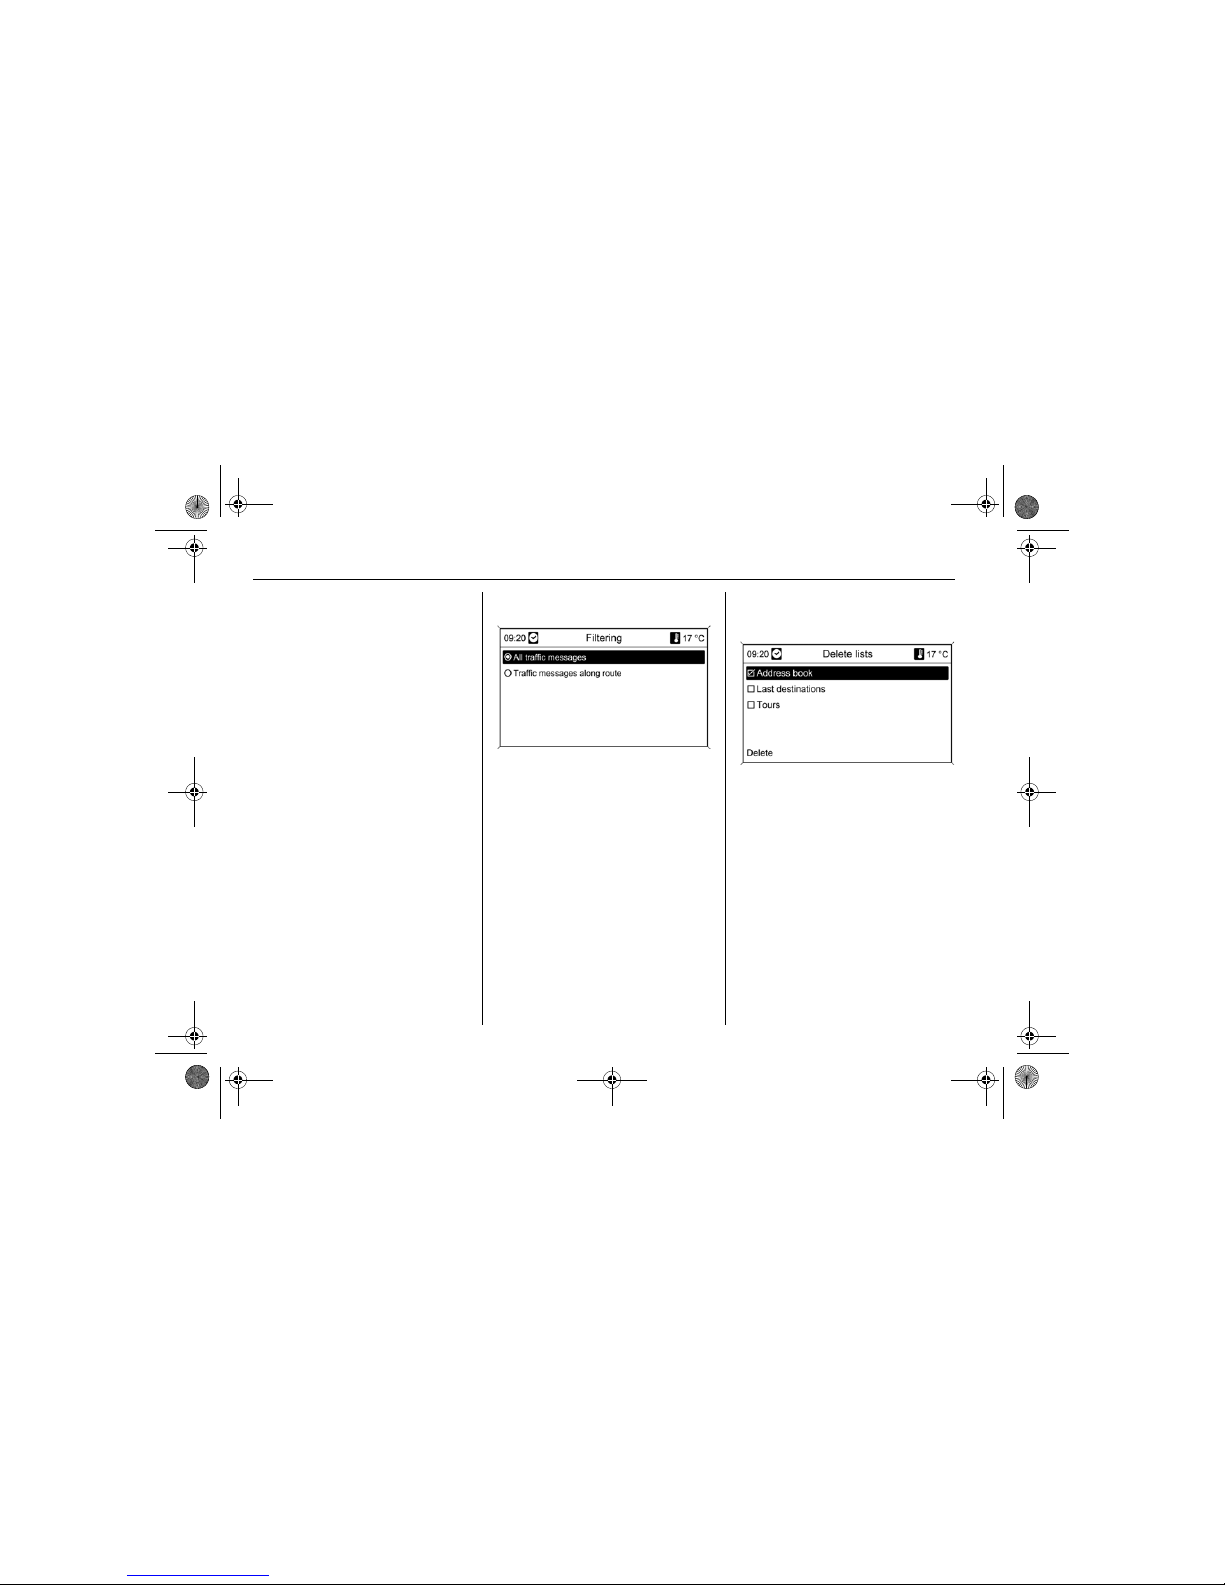
Filtering
Select whether only Traffic
messages along route or All traffic
messages are to be displayed on the
map as symbols and on the TMC
messages menu as detailed text.
Mark selection using multifunction
knob and accept.
Sort criteria
Select whether traffic messages are
to be displayed in order based on
distance or based on the street name.
Mark selection using multifunction
knob and accept.
Deleting lists
By selecting and accepting
Address book 3 4-5
Last destinations 3 4-6
Tours 3 4-13
the related entries are deleted.
Map data add / remove
Insert navigation DVD.
DVD800.book Page 24 Tuesday, August 26, 2008 1:51 PM
Page 57
4 - 25Navigation
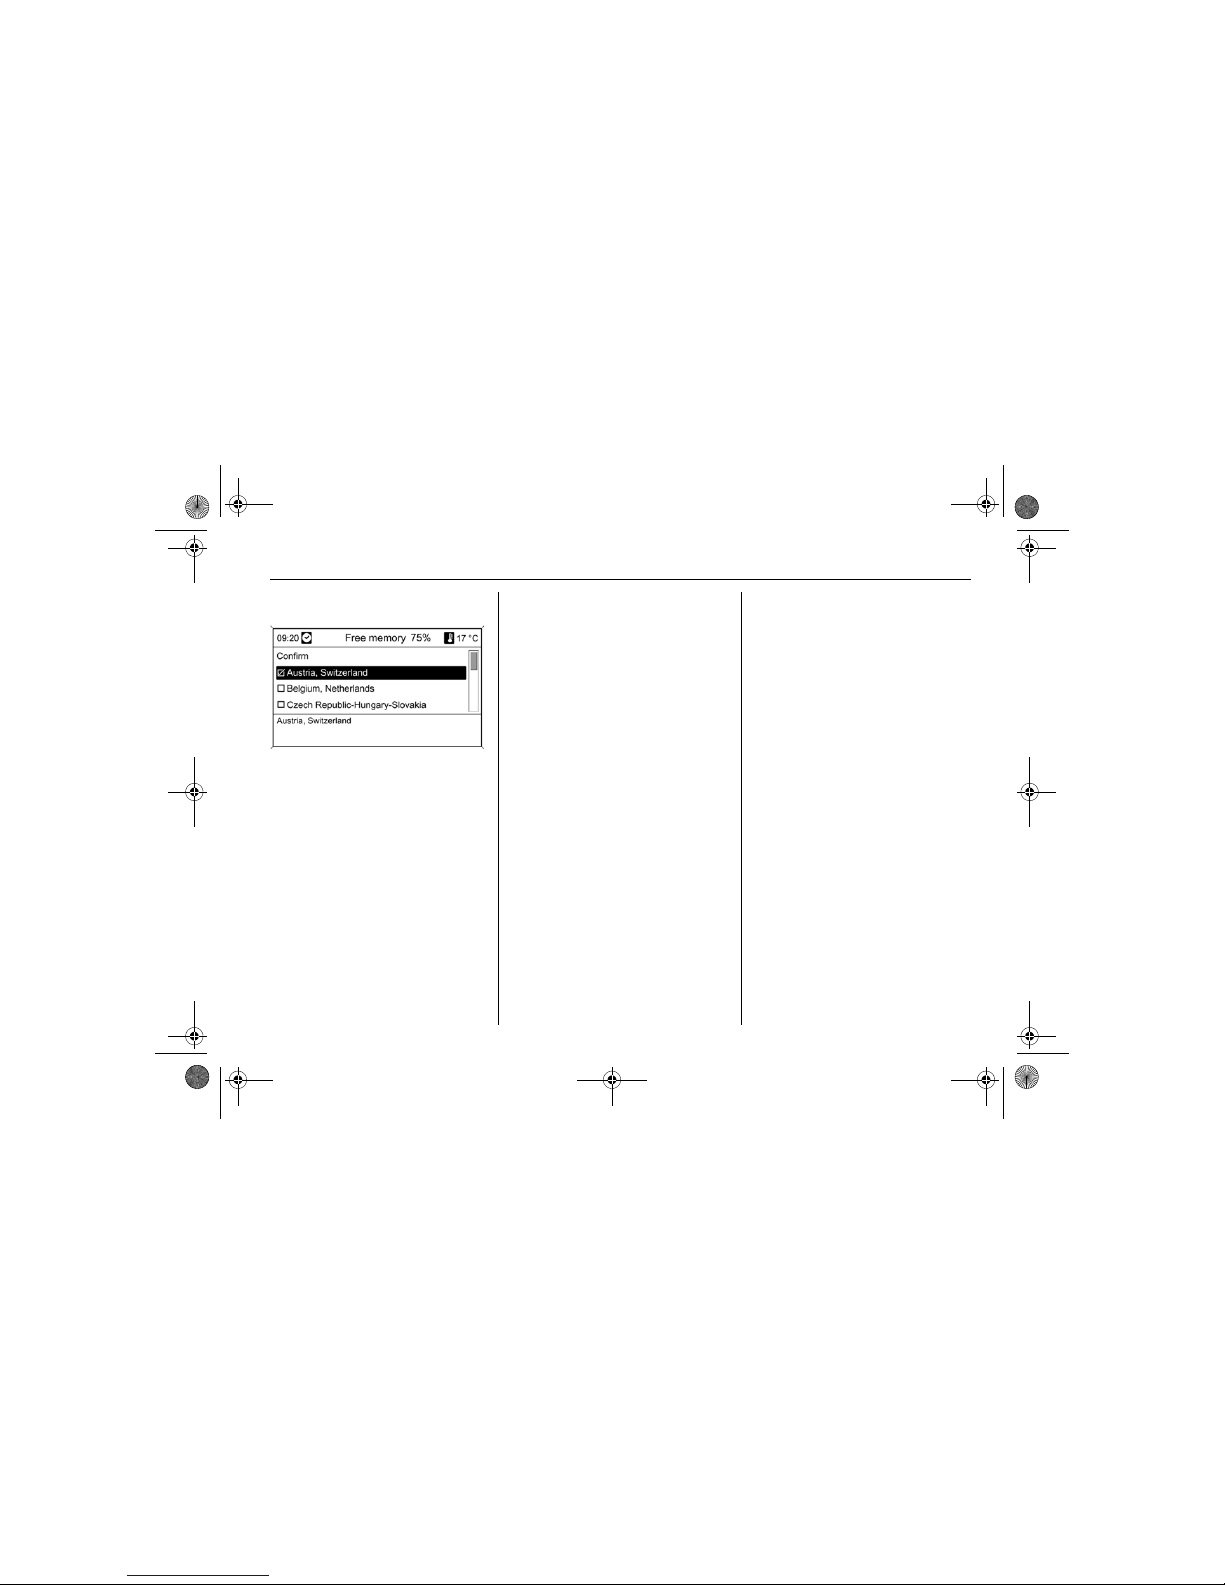
The map data can be loaded from the
DVD into the Infotainment system’s
internal memory on the Map data
add / remove menu.
The maps to be saved are selected
and marked using the multifunction
knob. The selection of the maps to be
removed from the memory must be
cleared. Delete and load maps using
the Confirm command.
The copying process may take some
time depending on the amount of
data to be copied.
The free memory is displayed in the
top line.
Route guidance is not possible at the
same time as maps are added or
removed.
The duration of the copying process
given is a rough estimate that does
not take into account any other active
functions, e.g. playing MP3 files.
If the copying process is interrupted
by switching off the system, the
copying process must be restarted
manually after the system is switched
on.
The related map material already
copied will be deleted from the
memory if the copying process is
cancelled manually. This process can
take some time.
Erase map data memory
If navigation is not possible using the
data from the internal memory, or
there is an error message on copying
map material, this command should
be used to quickly and completely
erase the internal memory
DVD800.book Page 25 Tuesday, August 26, 2008 1:51 PM
Page 58
4 - 26 Navigation
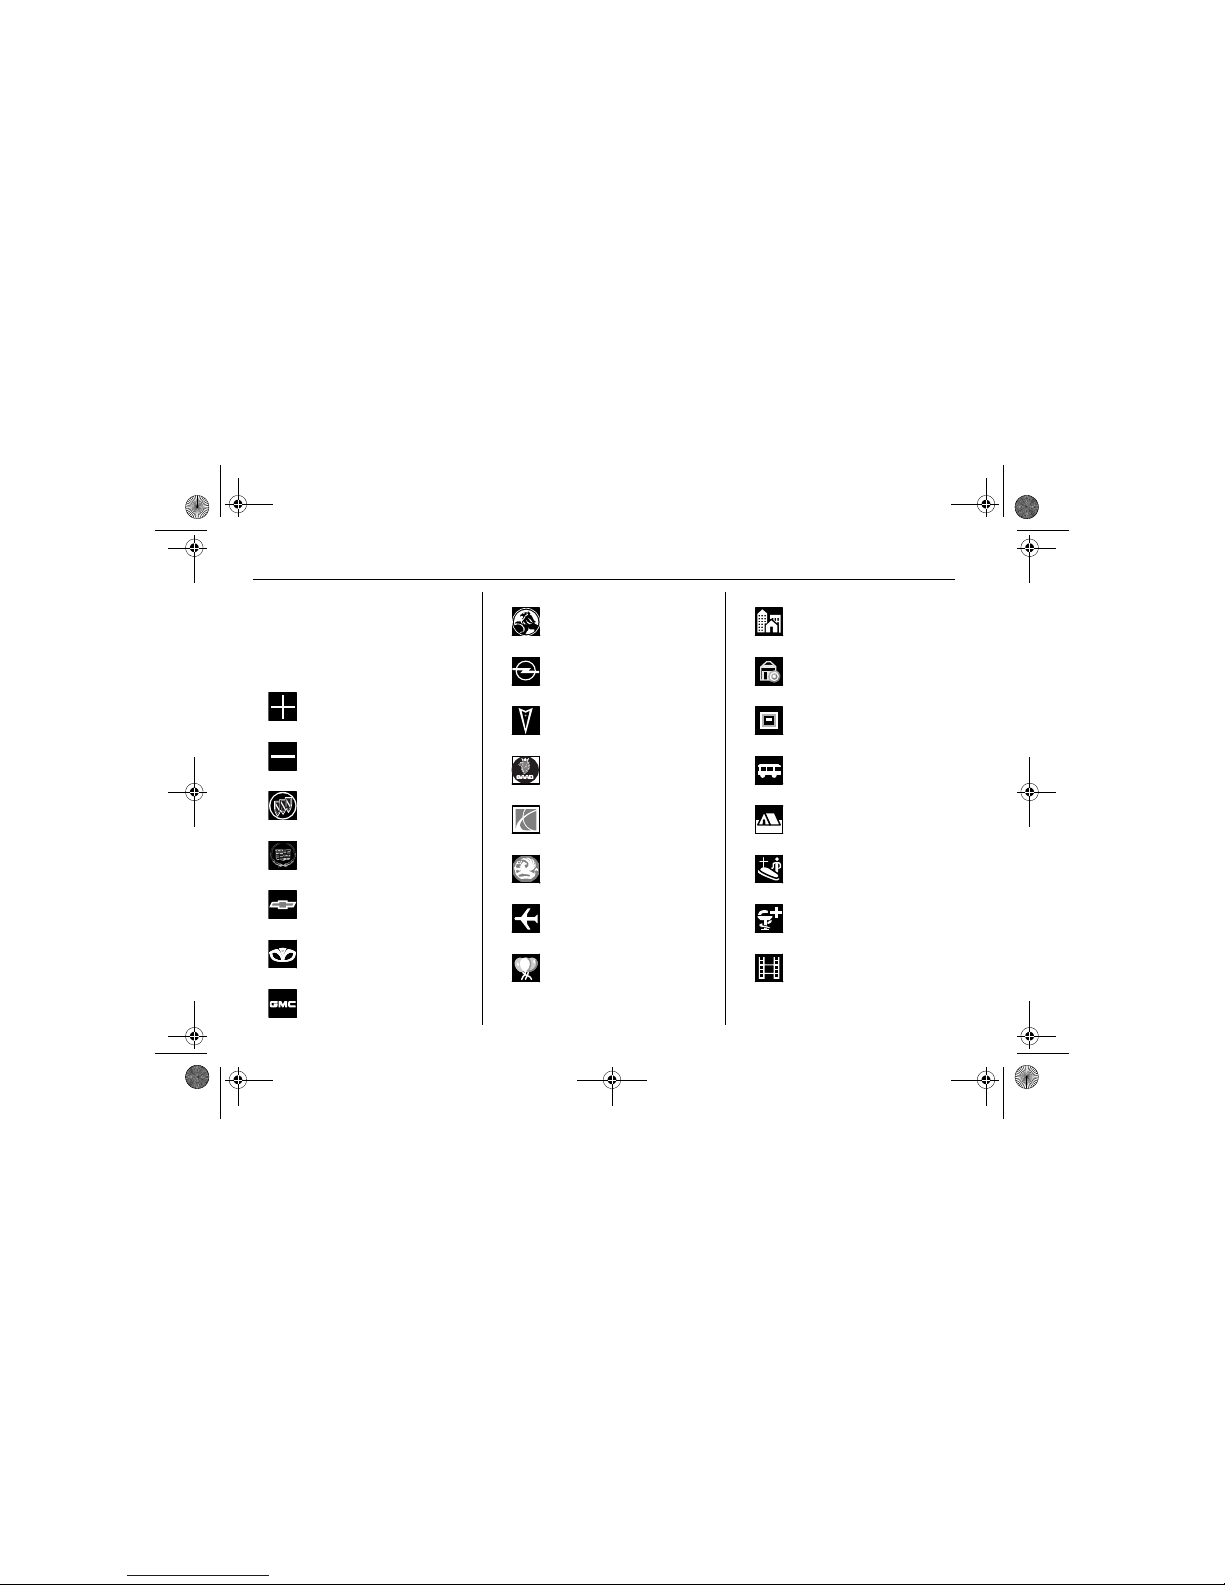
Overview of the
symbols
General symbols
Open list
Close list
Buick dealer
Cadillac dealer
Chevrolet dealer
Daewoo dealer
GMC dealer
Holden dealer
Opel dealer
Pontiac dealer
Saab dealer
Saturn dealer
Vauxhall dealer
Airport
Amusement park
City
Bank
Cash machine
Bus station
Camp site
Cemetery
Chemist
Cinema
DVD800.book Page 26 Tuesday, August 26, 2008 1:51 PM
Page 59
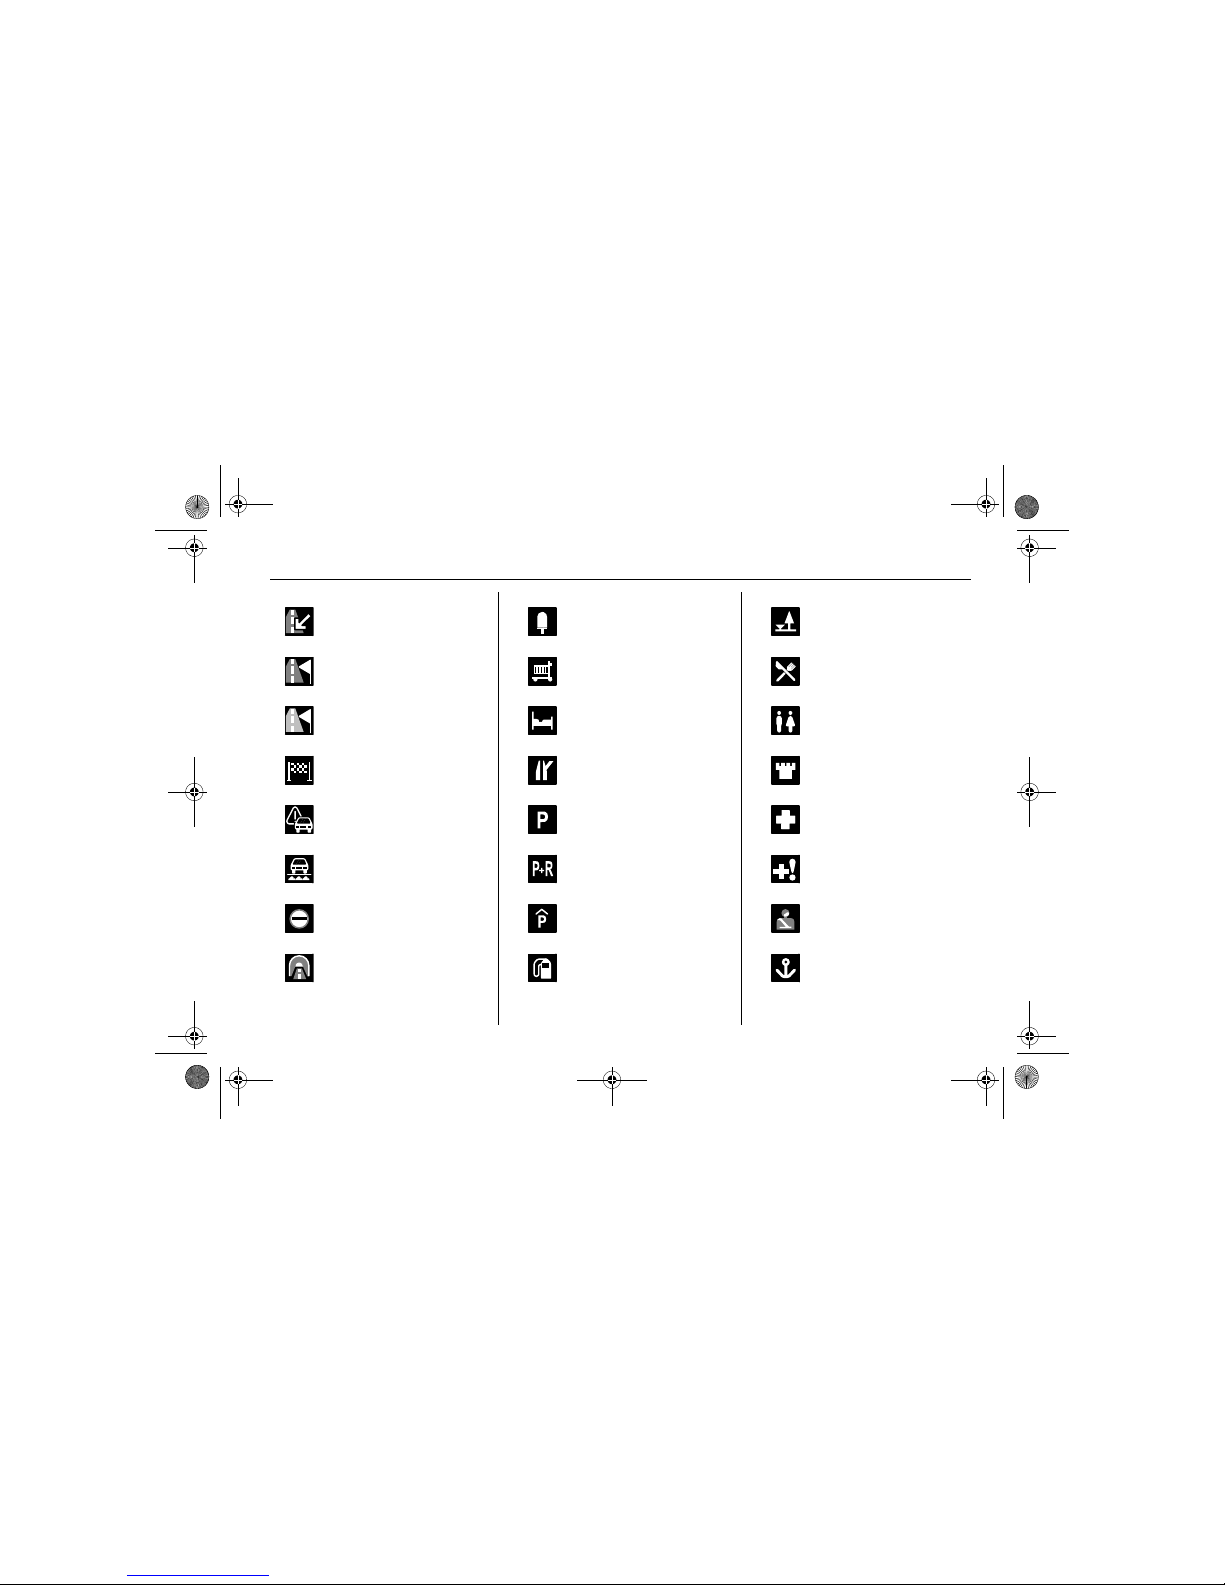
4 - 27Navigation
Actual position
Intermediate destination
Next intermediate
destination
Destination
Traffic message
Ferry
Border
Tunnel
Kiosk
Food
Hotel / motel
Motorway exit
Car park
Park & ride
Multi-storey car park
Petrol station
Service area
Restaurant
WC
Historical monument
Hospital
Emergency
Police
Harbour
DVD800.book Page 27 Tuesday, August 26, 2008 1:51 PM
Page 60
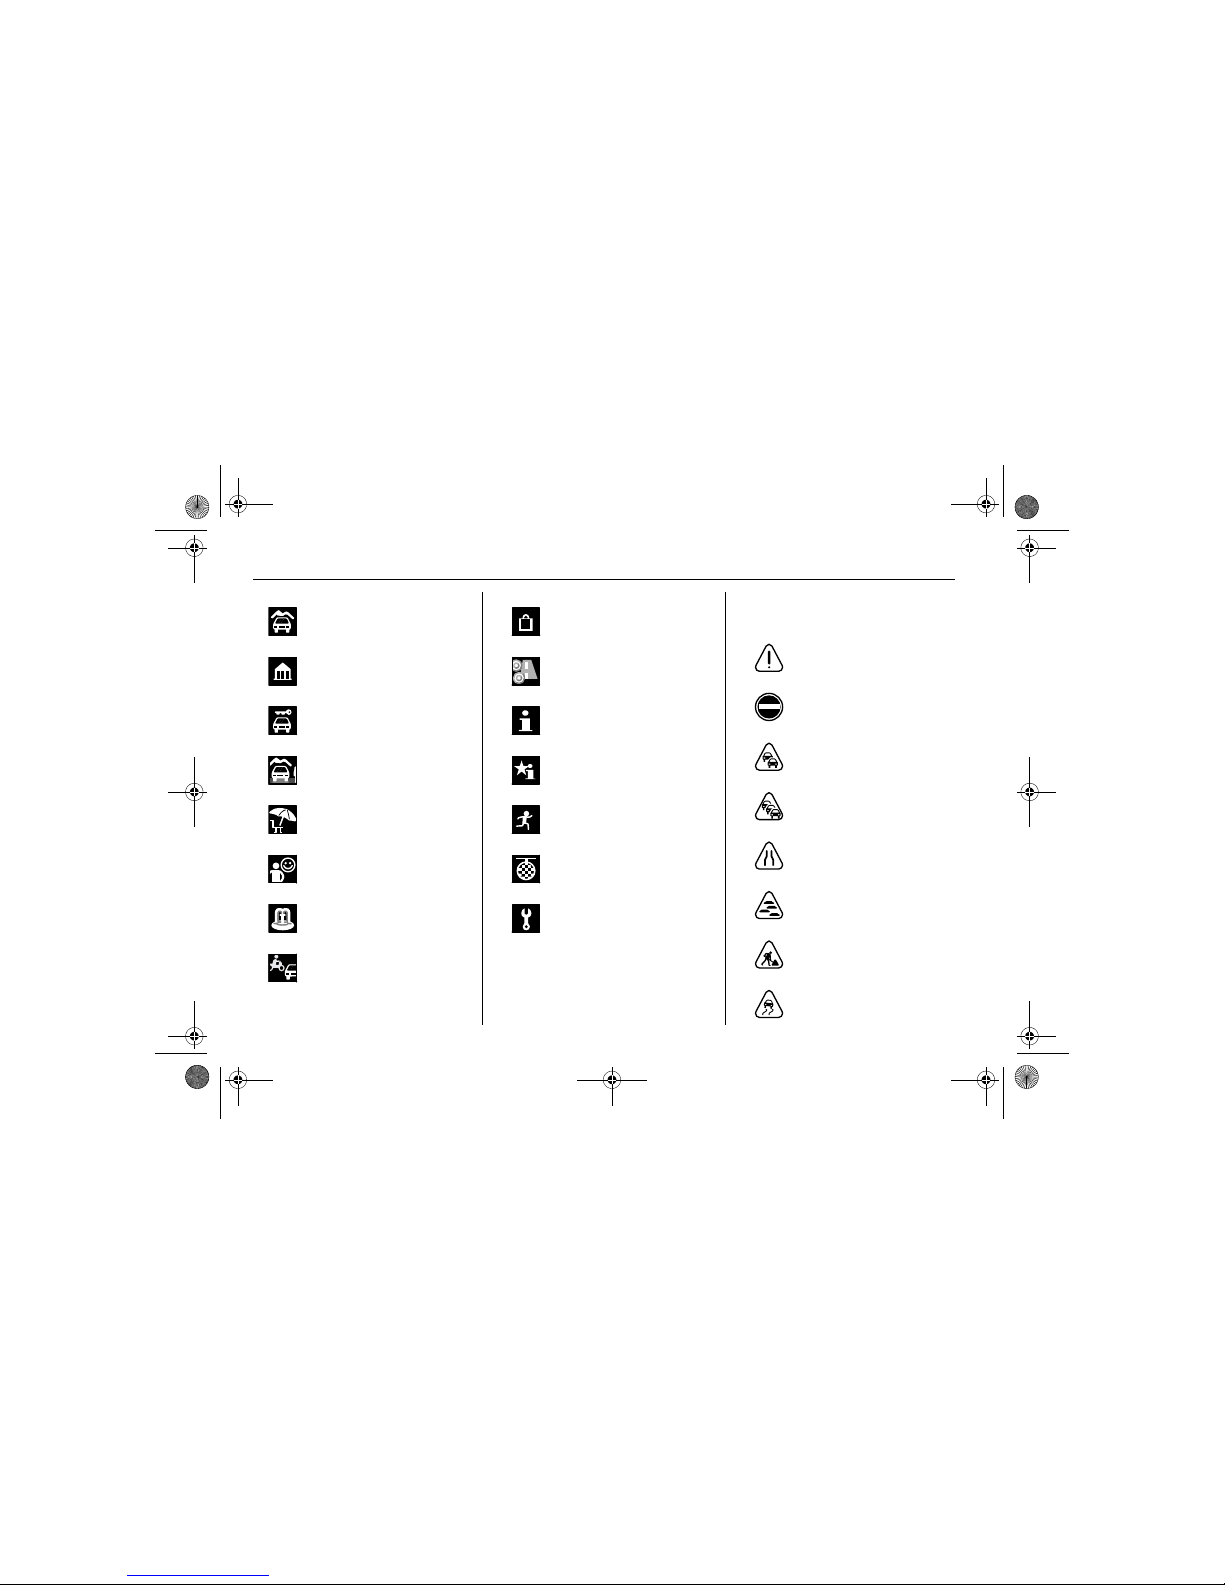
4 - 28 Navigation
Traffic symbols
Mountain pass
Museum
Car rental
Travel information
Leisure activity
Provision of services
Public place
Related to the car
Shopping centre
Toll road
Tourist information
Sight
Sport & leisure
Going out
Garage
Caution / warning
Road closed
Dense traffic
Traffic jam
Narrow lanes
Fog
Road works
Icy road
DVD800.book Page 28 Tuesday, August 26, 2008 1:51 PM
Page 61
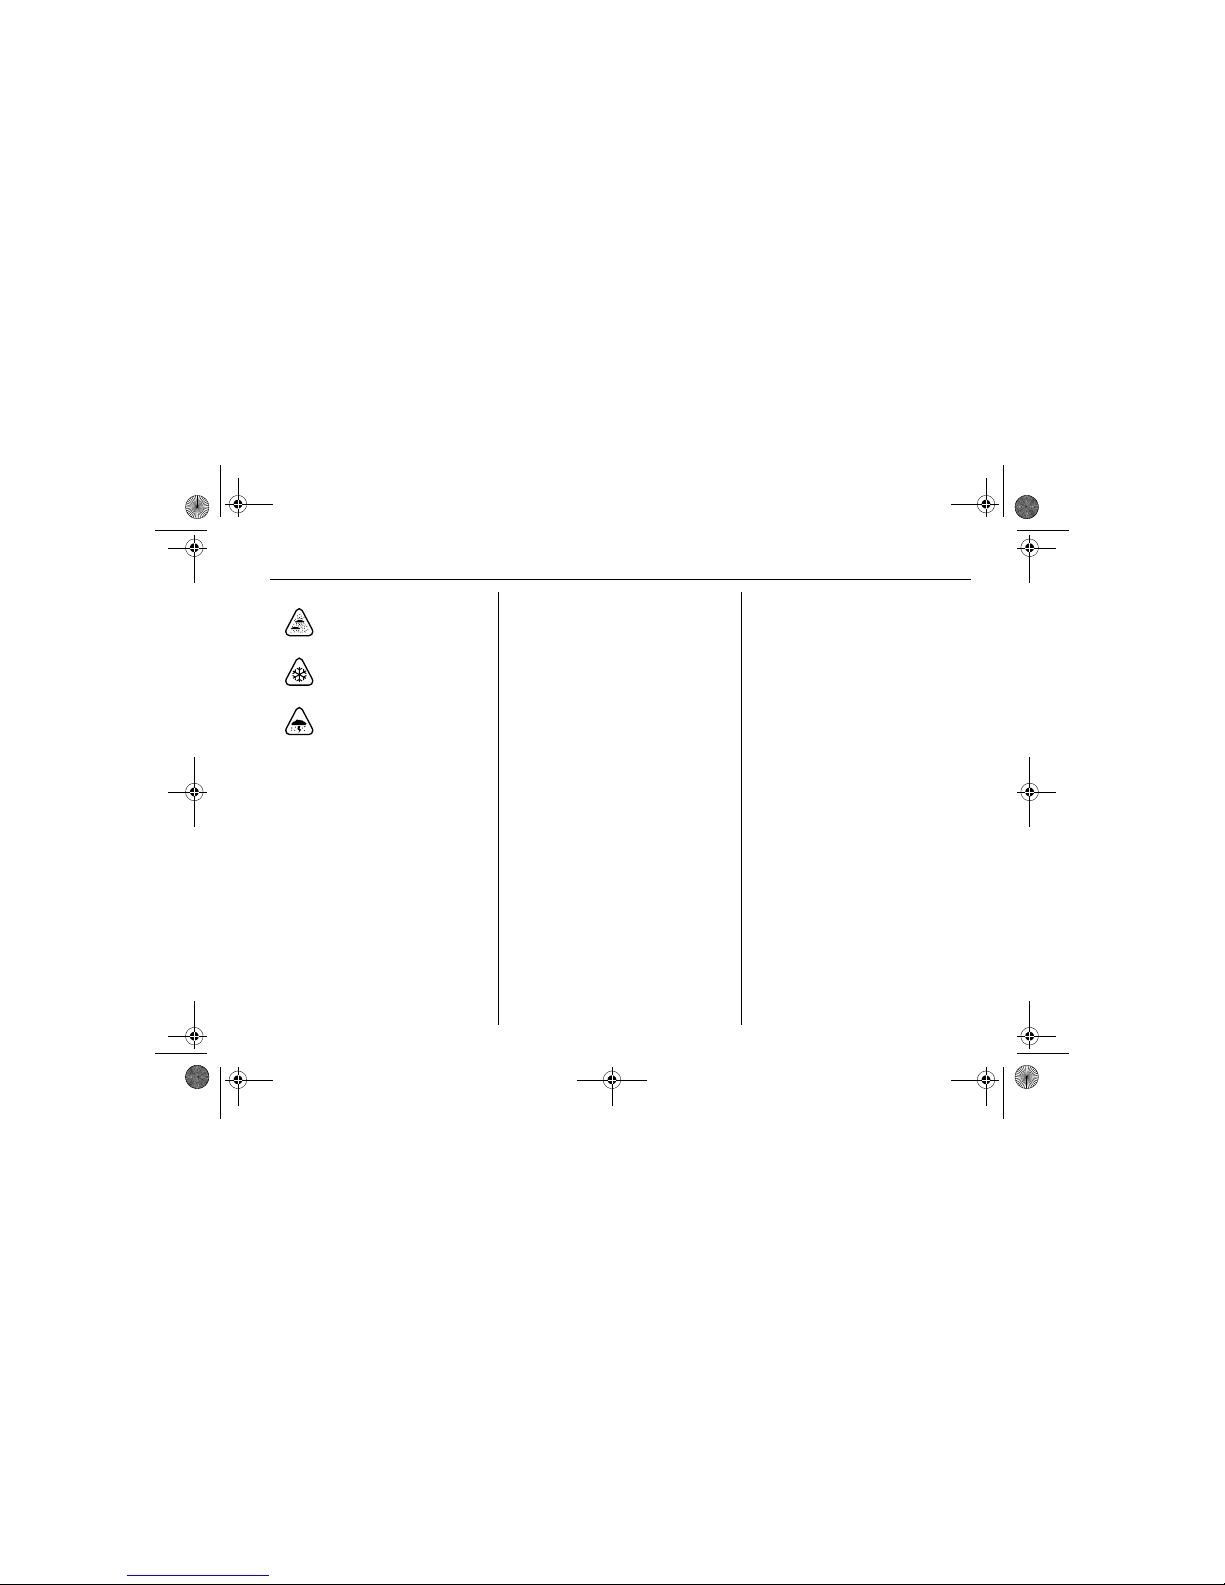
4 - 29Navigation
Smog
Snow
Storm
DVD800.book Page 29 Tuesday, August 26, 2008 1:51 PM
Page 62
5 - 1 Mobile Phone Portal
Mobile Phone
Portal
Introduction
General information
The mobile phone portal provides you
with the possibility of holding mobile
phone conversations via a vehicle
microphone and the vehicle
loudspeakers as well as operating
the most important mobile phone
functions via the Infotainment system
in the vehicle.
The mobile telephone portal can be
operated optionally with voice control.
The mobile telephone can be
operated via an external antenna by
inserting it into an adapter that is
specific to the phone.
Not all mobile phone portal functions
are supported by every mobile
phone. The possible phone functions
depend on the relevant mobile phone
and network provider. You will find
further information on this in the
operating instructions for your mobile
phone or you can enquire about them
with your network provider.
Important information for
operation and traffic safety
Introduction.......................... 5-1
Telephone connection ......... 5-3
Emergency call.................... 5-6
Telephone operation ........... 5-7
Voice control........................ 5-10
9 Warning
Mobile phones have effects on
your environment. For this reason
safety regulations and stipulations
have been prepared. You should
find out about the related
stipulations before you use the
telephone function.
DVD800.book Page 1 Tuesday, August 26, 2008 1:51 PM
Page 63
5 - 2Mobile Phone Portal
Bluetooth™
The mobile phone portal supports
Bluetooth™ Handsfree Profile V. 1.5
and is specified in accordance with
the Bluetooth™ Special Interest
Group (SIG).
You will find further information about
the specification on the Internet at
http://qualweb.bluetooth.org.
For security reasons, a randomly
selected, four-digit PIN code should
be used for the Bluetooth™
connection.
Operating the voice control
Do not use the voice control in
emergencies, because in stress
situations your voice can change
so much that it can no longer be
recognised sufficiently to set up the
desired connection quickly enough.
Base plate for the telephone
specific adapter
Keep the contacts of the base plate
free from dust and dirt.
Recharging the phone
battery
The phone batteries are recharged as
soon as the mobile phone portal is
switched on and the phone is inserted
into the telephone specific adapter.
Control elements
The most important telephone specific control elements are as follows:
PHONE button: open telephone main
menu. With the ignition switched off,
switch on and off the mobile phone
portal.
Steering wheel remote control:
, : take call, activate voice
control.
, : end/reject call, deactivate
voice control.
The mobile phone portal can be
operated optionally via voice control
3 5-10.
9 Warning
Use of the hands-free facility while
driving can be dangerous because
your concentration is reduced
when telephoning. Park your
vehicle before you use the handsfree facility. Take heed of the
stipulations of the country in which
you find yourself at present.
Do not forget to heed the special
regulations that apply in specific
areas and always switch off the
mobile phone if the use of mobile
phones is prohibited, if interference
is caused by the mobile phone or if
dangerous situations can occur.
DVD800.book Page 2 Tuesday, August 26, 2008 1:51 PM
Page 64
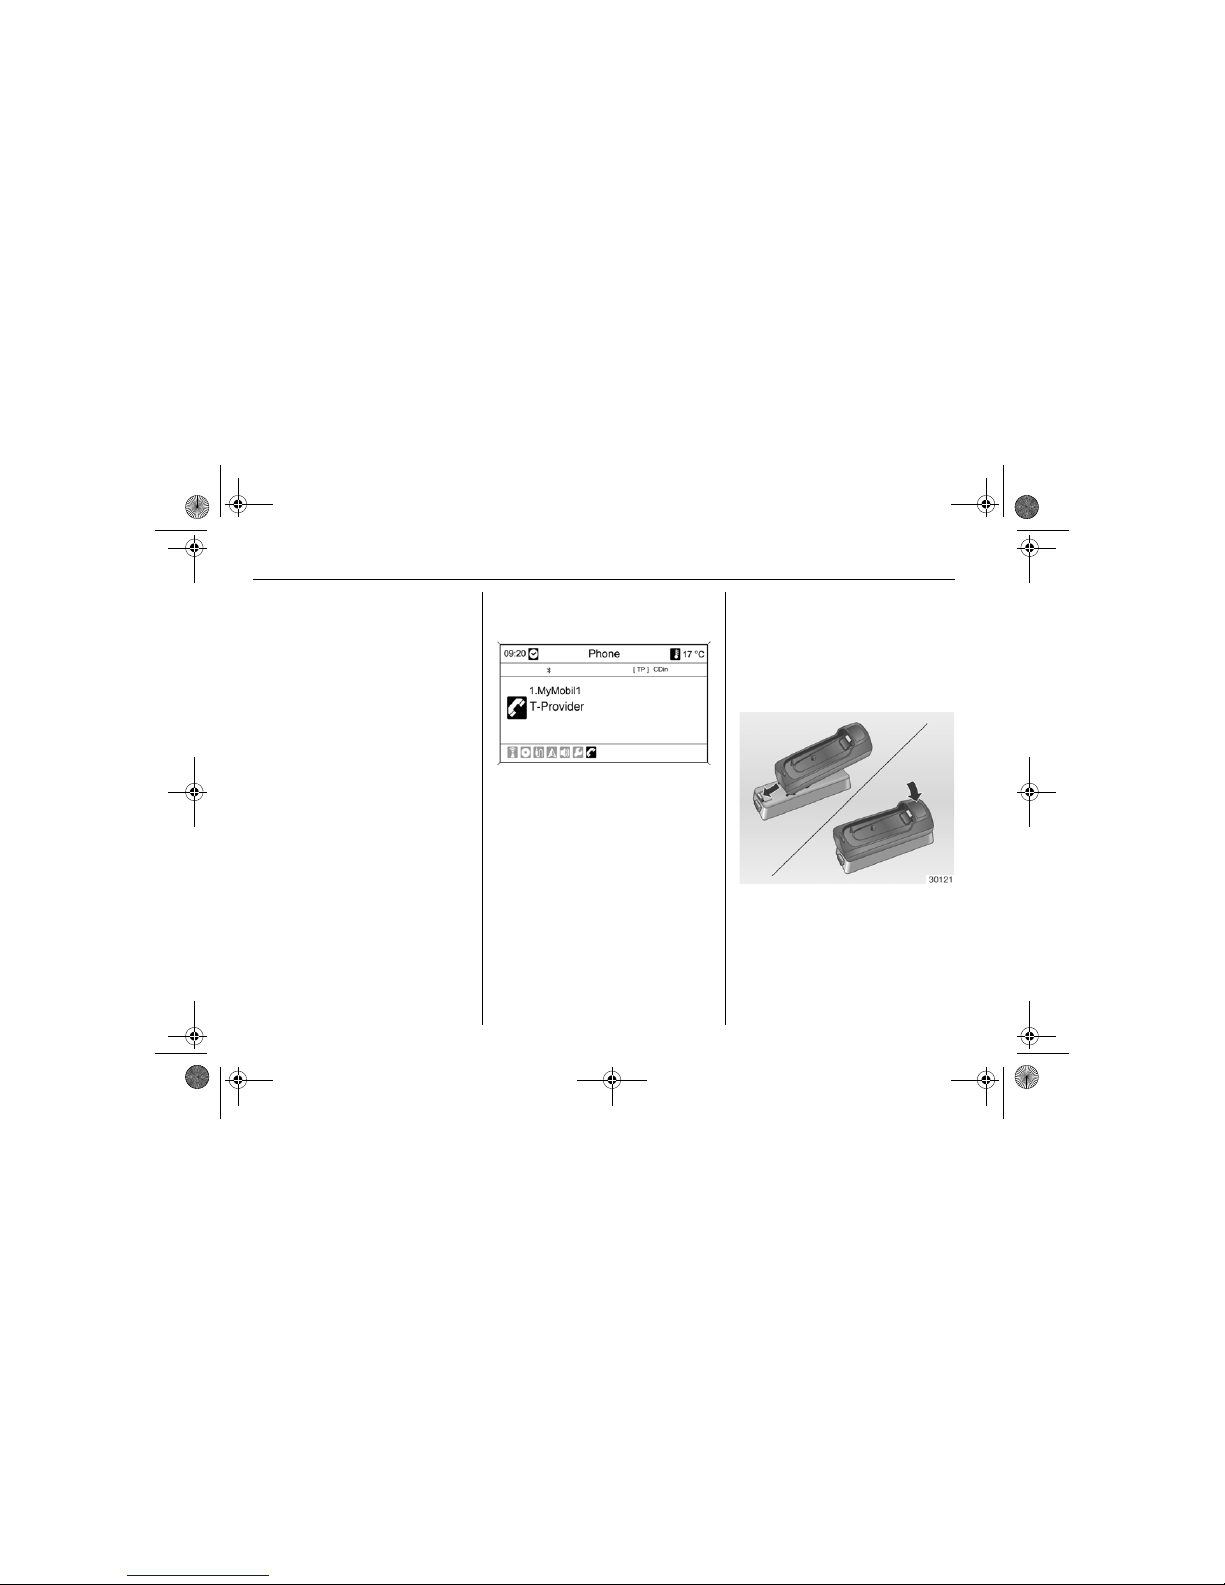
5 - 3 Mobile Phone Portal
Telephone connection
The mobile phone portal switches
itself on and off via the ignition. When
the ignition is turned off you can turn
the mobile phone portal on and off via
the Infotainment system.
A connection can be set up between
the mobile phone and the mobile
phone portal via Bluetooth™. For this
purpose your mobile phone must
support Bluetooth™.
To be able to set up a Bluetooth™
connection the mobile phone portal
must be switched on and Bluetooth™
must be activated.
For information on the Bluetooth™
function of your mobile phone please
refer to the operating instructions for
the mobile phone.
Telephone main menu
As soon as the mobile phone portal is
switched on and the mobile phone is
logged on, the telephone main menu
is displayed on the display.
Telephone specific adapter
If you are using a telephone specific
adapter, the mobile phone is
operated via the external antenna.
The adapter also serves as a
charging station.
Do only use adapters that are
approved for your vehicle and your
mobile phone.
For each adapter there are specific
installation instructions that are
enclosed with the product. Before
installing the adapter please inform
yourself about the exact installation
procedure.
Installing the adapter
Fasten the adapter to the base plate.
Make sure that the contacts are
correctly connected. An engaging
sound must be audible when the
adapter engages.
To remove, press the unlocking
button on the base plate.
DVD800.book Page 3 Tuesday, August 26, 2008 1:51 PM
Page 65
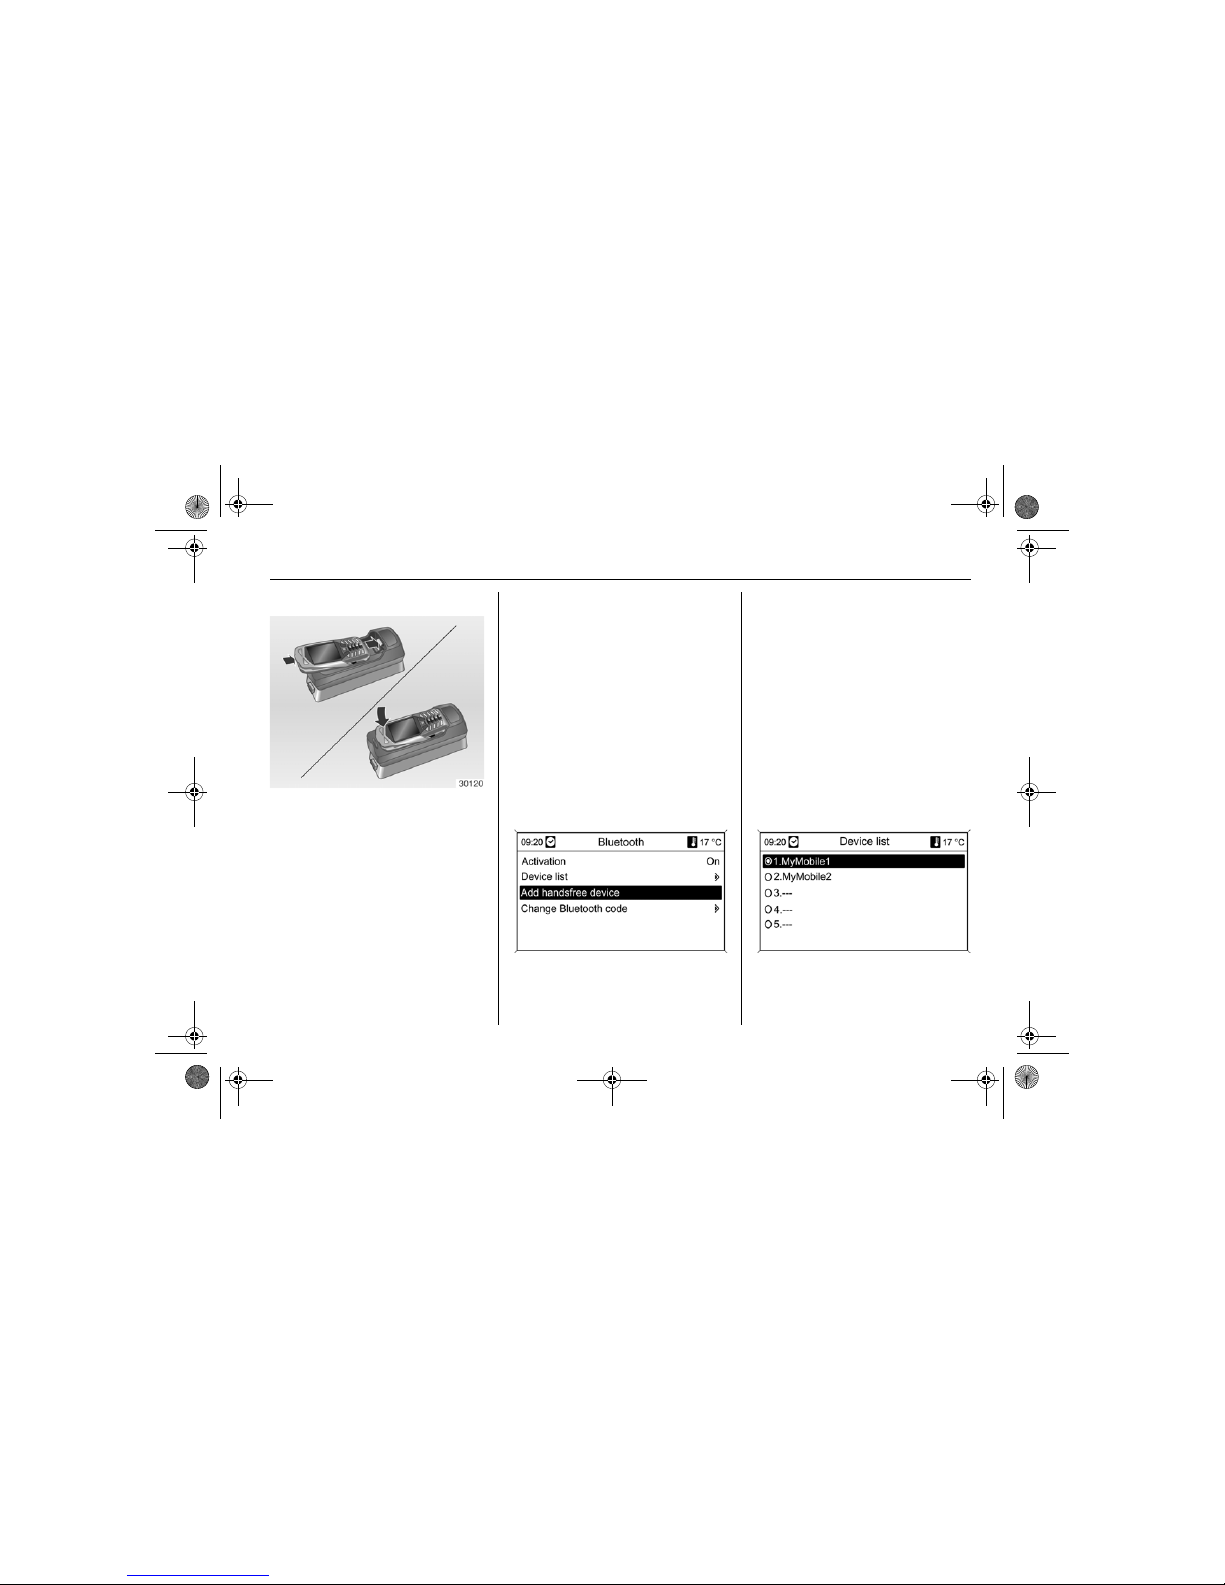
5 - 4Mobile Phone Portal
Inserting the mobile phone
Insert the mobile phone into the
adapter.
Make sure that the contacts are
correctly connected. An engaging
sound must be audible when the
mobile phone engages.
To remove, press the unlocking
button on the adapter.
Bluetooth™ connection
Bluetooth™ is a radio standard for
the wireless connection of, for
example, a telephone with other
devices. Information such as a
telephone book, call lists, the network
operator’s name and field strength
can be transferred. The functionality
can be restricted depending on the
telephone type.
To be able to set up a Bluetooth™
connection with the mobile phone
portal, the Bluetooth™ function of the
mobile phone has to be activated and
the mobile phone has to be set to
"visible". Fur further information
please refer to the operating
instructions for the mobile phone.
Bluetooth™ menu
Press CONFIG button
Select Phone settings and then
Bluetooth.
Activating Bluetooth™
If the Bluetooth™ function of the
mobile phone portal is deactivated:
Set Activation to On and confirm the
subsequent message.
Device list
When a mobile phone is connected to
the mobile phone portal for the first
time via Bluetooth™, the mobile
phone is saved in the device list.
A maximum of 5 mobile phones can
be saved in the device list.
DVD800.book Page 4 Tuesday, August 26, 2008 1:51 PM
Page 66
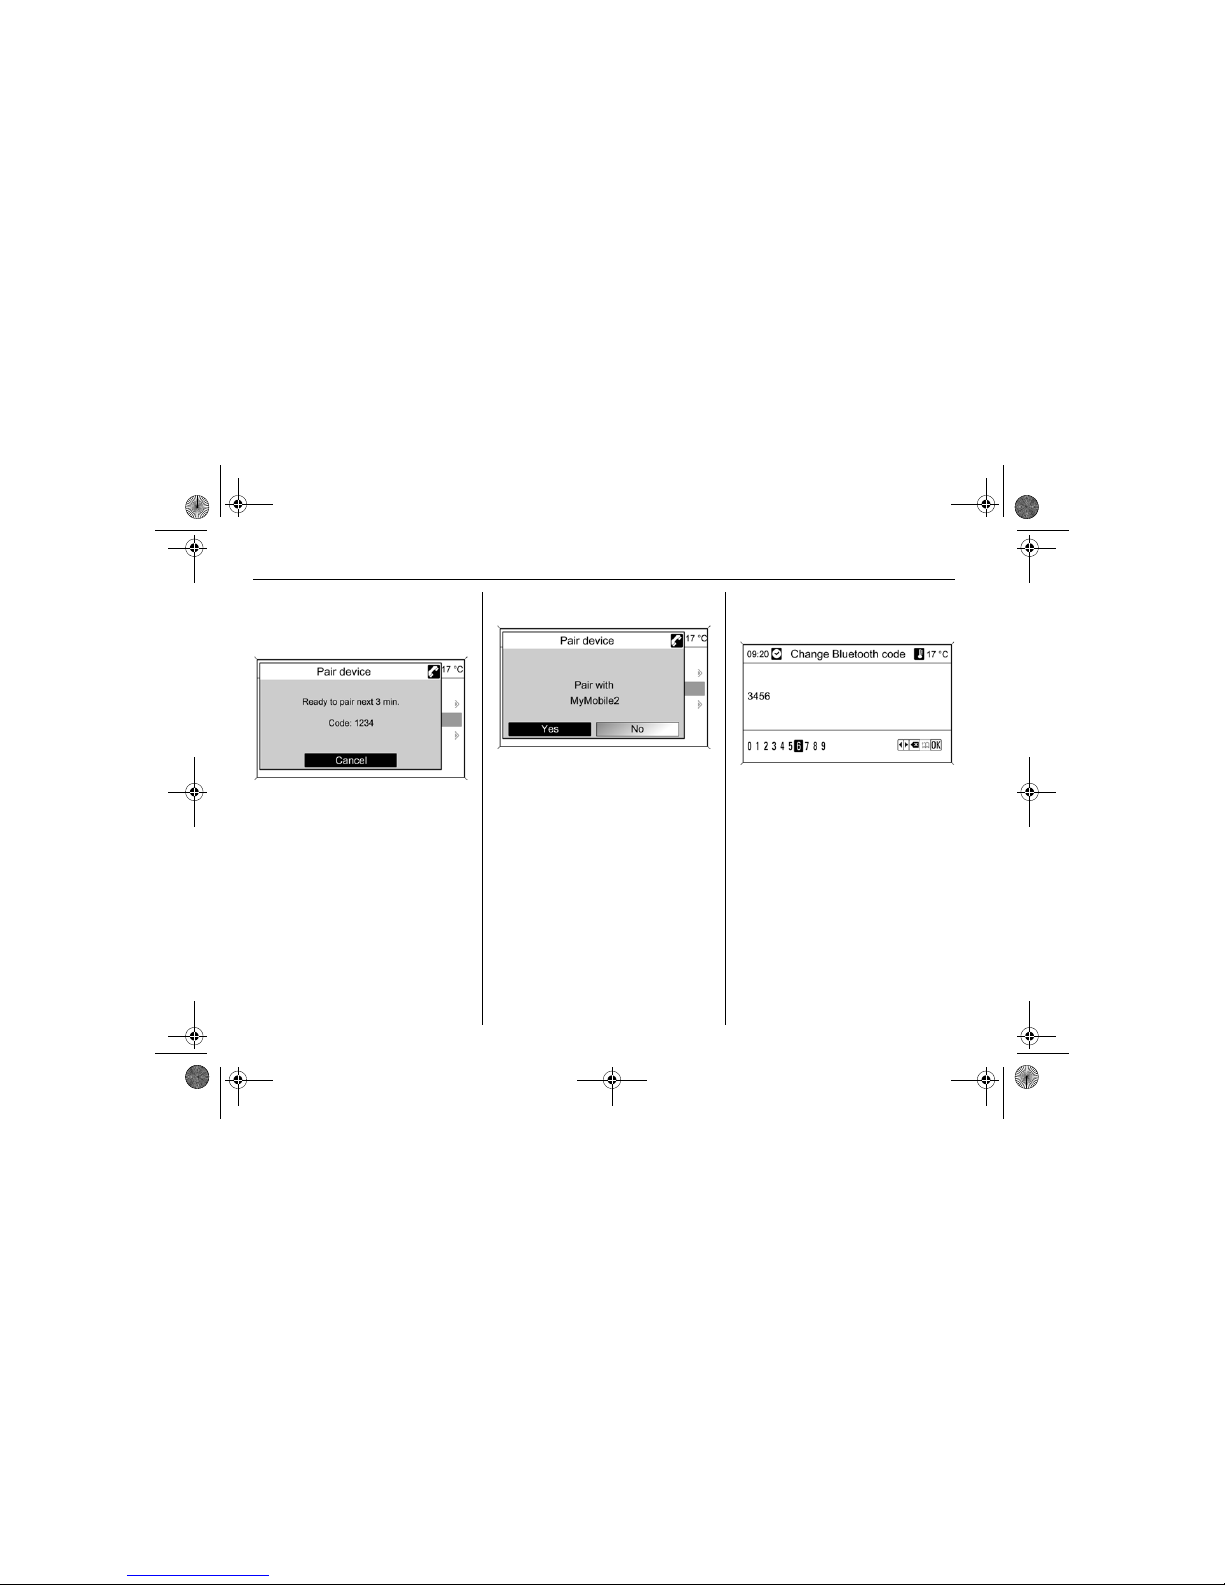
5 - 5 Mobile Phone Portal
Connecting a mobile phone for the
first time
Select Add handsfree device. The
Bluetooth™ code to be entered into
the mobile phone is displayed.
The mobile phone portal can now be
detected by other Bluetooth™
devices.
As soon as the mobile phone has
detected the mobile phone portal the
Bluetooth™ code can be entered on
the mobile phone.
As soon as the mobile phone portal
has detected the mobile phone, the
connection set-up can be confirmed
using Yes.
The mobile phone is adopted in the
device list and can be operated via
the mobile phone portal.
Changing the Bluetooth™ code
The first time a Bluetooth™
connection to the mobile phone portal
is set up, a default code is displayed
that can be changed at any time. For
security reasons a four-digit and
randomly selected code must be
used for pairing devices.
Select Change Bluetooth code. On
the menu displayed, edit the actual
Bluetooth™ code and accept the
modified code using OK.
DVD800.book Page 5 Tuesday, August 26, 2008 1:51 PM
Page 67
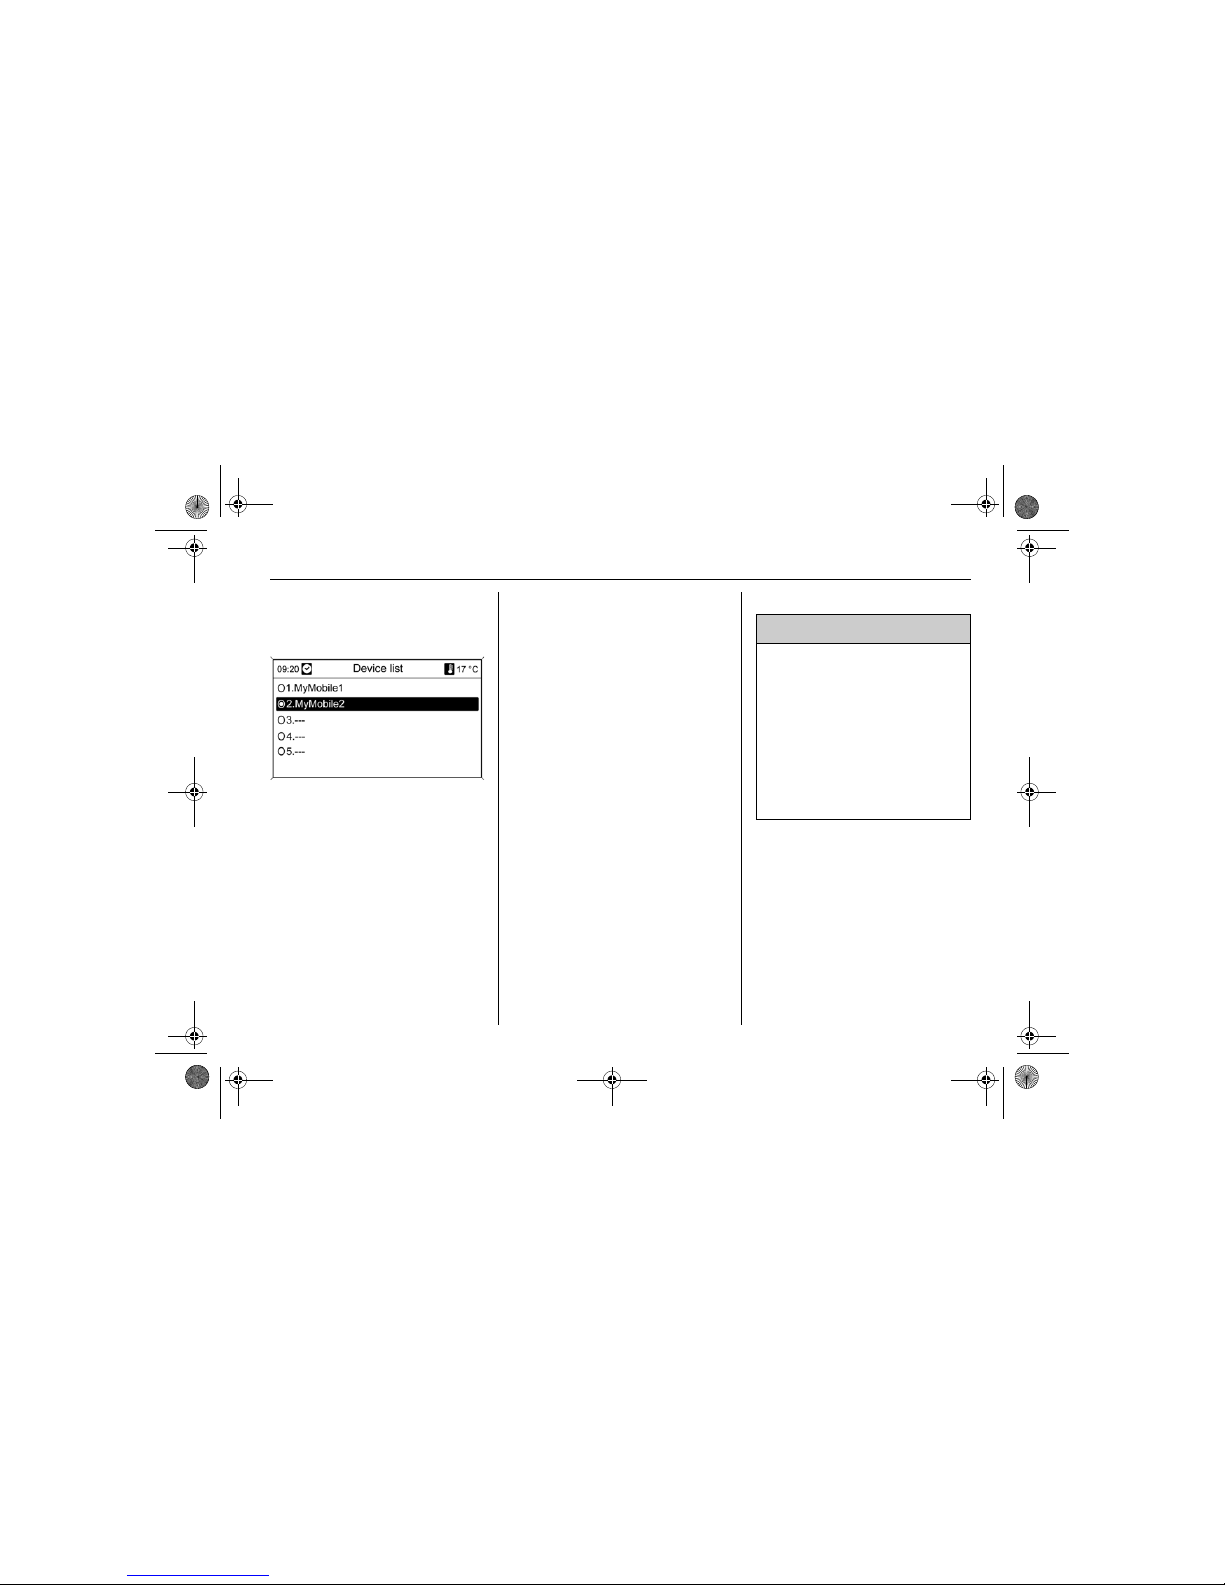
5 - 6Mobile Phone Portal
Connecting a mobile phone saved
in the device list
Select the desired mobile phone and
then select the option Select in the
menu displayed.
As soon as the mobile phone portal
has detected the mobile phone, the
connection setup can be confirmed.
The mobile phone can be operated
via the mobile phone portal.
Removing mobile phone from
device list
Select desired mobile phone from the
device list. In the menu displayed
select Delete and confirm the
subsequent message.
Removing all entries from device
list
Press CONFIG button.
Select Phone settings and then
Factory settings.
Emergency call
9 Warning
Connection setup cannot be
guaranteed in all situations. For
this reason you should not rely
exclusively on a mobile phone
when a vitally important
communication (e.g. a medical
emergency) is concerned.
In some networks it may be
necessary for a valid SIM card to
be properly inserted in the mobile
phone.
DVD800.book Page 6 Tuesday, August 26, 2008 1:51 PM
Page 68
5 - 7 Mobile Phone Portal
Sending an emergency call
Dial the emergency call number
(e.g. 112).
The telephone connection to the
emergency call centre is set up.
Answer when the service personnel
question you about the emergency.
Telephone operation
Introduction
As soon as a connection via
Bluetooth™ has been set up between
your mobile phone and the
Infotainment system, you can also
operate many functions of your
mobile phone via the Infotainment
system.
Via the Infotainment system, you can,
e.g., set up a connection to the call
numbers stored in your mobile phone
or change the call numbers.
As a rule operation via the mobile
phone continues to be possible, e.g.
taking a call or adjusting the volume.
After setup of a connection between
the mobile phone and the
Infotainment system the mobile
phone data is transmitted to the
Infotainment system. This can take
some time depending on the phone
model. During this period operation of
the mobile phone is possible via the
Infotainment system only to a
restricted extent.
9 Warning
Bear in mind that you can make
and receive calls with the mobile
phone, if it is in a service area with
a sufficiently strong signal. Under
certain circumstances emergency
calls cannot be made on all mobile
phone networks; it is possible that
they cannot be made when certain
network services and/or telephone
functions are active. You can
enquire about this with the local
network operators.
The emergency call number can
differ depending on the region
and country. Please enquire
beforehand about the correct
emergency call number for the
relevant region.
9 Warning
Do not end the call until you are
requested to do so by the
emergency call centre.
DVD800.book Page 7 Tuesday, August 26, 2008 1:51 PM
Page 69
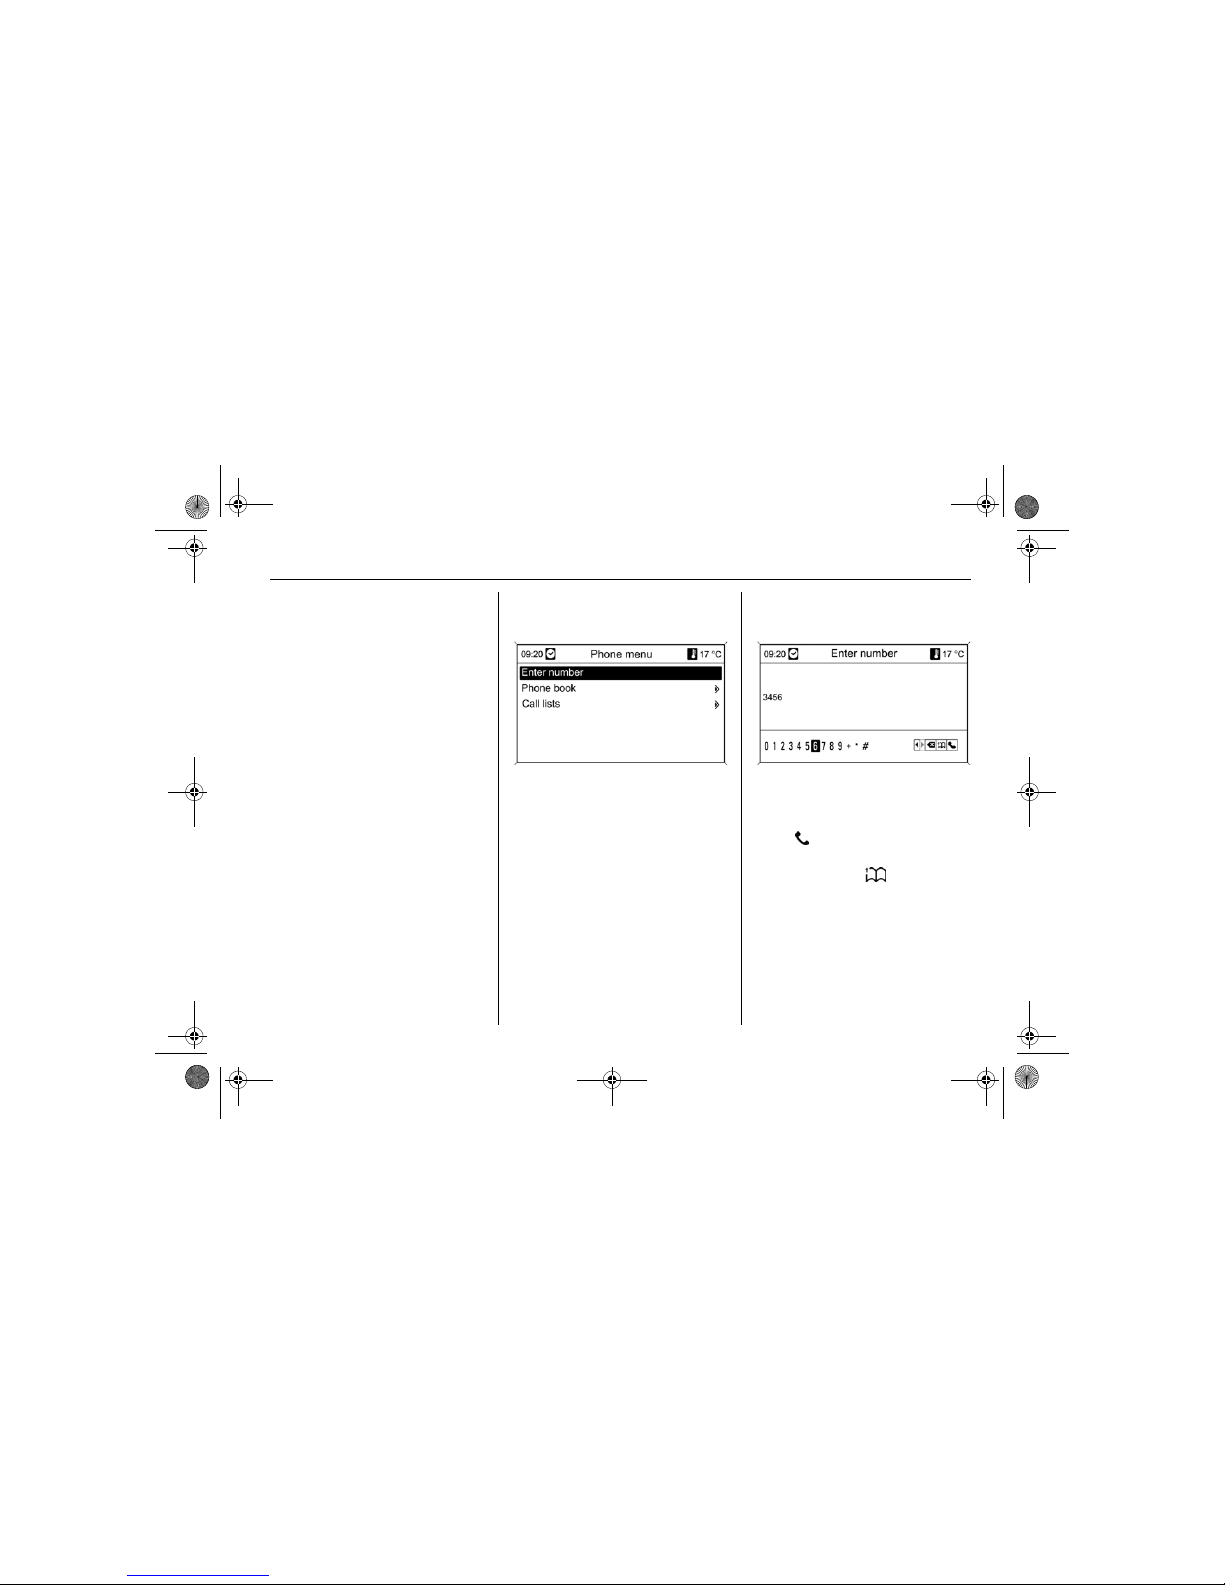
5 - 8Mobile Phone Portal
Not every telephone supports all
functions of the mobile phone portal.
There can therefore be deviations
from the function content described
with these specific telephones. For
further information please refer to the
instructions for the telephone specific
adapter.
Setting the volume for
hands-free facility
Turn the O-knob of the Infotainment
System or press the buttons + / - at
the steering wheel.
Adjust ring tones
Press CONFIG button.
Select Phone settings and then
Ringtone.
Select required option.
Dialling a telephone number
Several options for dialling telephone
numbers are available via the Phone
menu.
With the telephone main menu active,
press the multifunction knob to open
the relevant submenu.
Entering a number manually
Select Enter number, then enter the
desired number sequence.
Select , to start the dialling process.
You can switch to the telephone book
menu by selecting .
Telephone book
After setting up the connection the
telephone book is compared with the
telephone book in the temporary
memory, provided that the same SIM
card or same telephone is concerned.
During this period any newly added
entries are not displayed.
DVD800.book Page 8 Tuesday, August 26, 2008 1:51 PM
Page 70
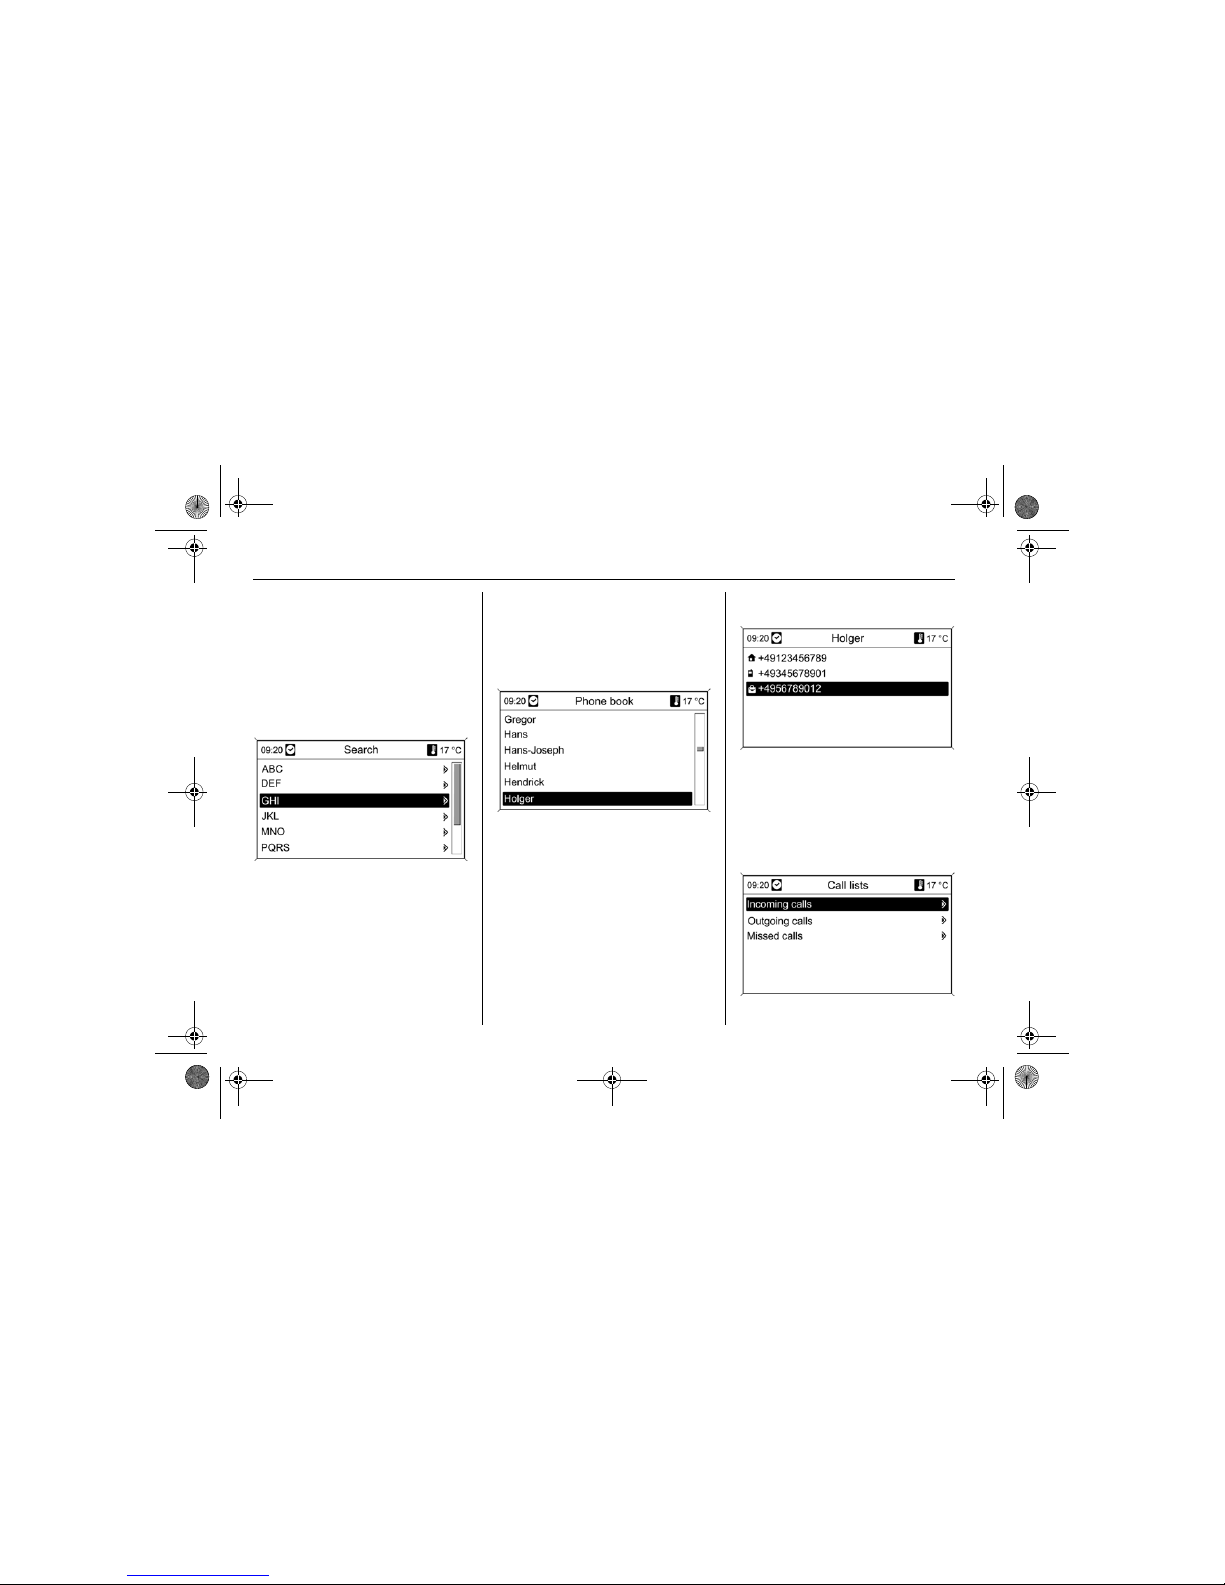
5 - 9 Mobile Phone Portal
If the SIM card or telephone are
different, the telephone book is
reloaded. This process can take a
few minutes depending on the phone
model.
Selecting a telephone number
from the telephone book
Select Phone book.
On the Search menu displayed,
select the desired first letter range to
start a preselection of the telephone
book entries that you want displayed.
After having performed the
preselection: select the desired entry
in the telephone book to display the
numbers saved under this entry.
Select the desired number to start the
dialling process.
Call lists
DVD800.book Page 9 Tuesday, August 26, 2008 1:51 PM
Page 71

5 - 10Mobile Phone Portal
Via the menu Call lists the possibility
exists of viewing incoming, outgoing
and missed calls and dialling the
relevant numbers.
To start a dialling process:
select the desired call list, an entry in
the call list and finally the desired
telephone number.
Incoming call
When there is an incoming call a
menu is displayed for you to accept or
decline the telephone call.
Select required option.
Functions during a
telephone call
If you currently have a telephone call,
press the multifunction knob to open
a submenu.
Various options are available
depending on the situation and
functional scope of the mobile phone:
Hang up: disconnect the telephone
connection.
Call number: enter a telephone
number to make a second
telephone call or perform DTMF
(touch-tone dialling), e.g. for voice
mail or telephone banking.
Detach call: detach the connection
to a conference participant in a
telephone conference.
Merge calls: merge two calls when
there are several active calls.
Switch calls: switch between calls,
if there are several calls.
Mute call: mute a call.
Voice control
The voice control of the mobile phone
portal enables you to operate several
functions of the mobile phone via
voice input. It recognises commands
and numeric sequences
independently of the relevant
speaker. The commands and
numeric sequences can be spoken
without a voice pause between the
individual words.
You can also save telephone
numbers using a name of your
choice (voice tag). The telephone
connection can be set up using this
name.
In the event of incorrect operation or
incorrect codes the voice control
gives you acoustic feedback and
requests you to re-enter the desired
command. Apart from this, the voice
control acknowledges important
commands and will enquire if
necessary.
DVD800.book Page 10 Tuesday, August 26, 2008 1:51 PM
Page 72

5 - 11 Mobile Phone Portal
In order that conversations inside the
vehicle do not lead to unintentional
triggering of the mobile phone, the
voice control does not start until it has
been activated.
Activating voice control
To activate the voice control of the
mobile phone portal press the
button on the steering wheel.
For the duration of the dialogue any
audio source that is active is muted
and any traffic news fade-in is
cancelled.
Adjusting the volume for
voice output
Turn the volume knob on the
Infotainment system or press the + / buttons on the steering wheel.
Cancelling the dialogue
There are various possibilities of
deactivating the voice control and
cancelling the dialogue:
Press the button on the steering
wheel.
Enter the command "Cancel".
A command is not entered for some
time.
After the third unrecognised
command.
Operation
With the aid of the voice control the
mobile phone can be operated very
conveniently via voice input. It is
sufficient to activate the voice control
and say the desired command.
After input of the command the
Infotainment system guides you
through the dialogue with appropriate
questions and feedback to achieve
the desired action.
Main commands
After activation of the voice control a
short tone signals that the voice
control is expecting input.
Main commands available:
"Dial"
"Call"
"Redialing"
"Save"
"Delete"
"Directory"
"Pair"
"Select device"
"Voice feedback"
Commands that are frequently
available
"Help": the dialogue is terminated
and all commands available in the
current context are enumerated.
"Cancel": the voice control is
deactivated.
"Yes": a suitable action is triggered
depending on the context.
"No": a suitable action is triggered
depending on the context.
Entering a telephone number
After the commando "Dial" the voice
control requests input of a number.
The telephone number must be
spoken in your normal speech
without any artificial pauses between
the numbers.
DVD800.book Page 11 Tuesday, August 26, 2008 1:51 PM
Page 73

5 - 12Mobile Phone Portal
Recognition is best, if a pause of at
least half a second is made after
every three to five digits. The
Infotainment system then repeats the
numbers recognised.
You can then enter further numbers
or the following commands:
"Dial": the inputs are accepted.
"Delete": the number last entered
or the block of numbers last
entered is deleted.
"Plus": a preceding "+" is entered
for a call abroad.
"Verify": the inputs are repeated
by the voice output.
"Asterisk": An asterisk "*" is
entered.
"Hash": A hash "#" is entered.
"Help"
"Cancel"
The telephone number entered can
have a maximum length of 25 digits.
To be able to make a call abroad you
can say the word "Plus" (+) at the
beginning of your number. The plus
allows you to call from any country
without knowing the prefix for calls
made abroad in that country. Then
say the required country code.
Example of a dialogue
User: "Dial"
Voice output: "Please, say the
number to dial"
User: "Plus Four Nine"
Voice output: "Plus Four Nine"
User: "Seven Three One"
Voice output: "Seven Three One"
User: "One One Nine Nine"
Voice output: "One One Nine Nine"
User: "Dial"
Voice output: "The number is being
dialled"
Entering a name
Using the "Call" command a
telephone number is entered that has
been stored in the telephone book
under a name (voice tag).
Commands available:
"Yes"
"No"
"Help"
"Cancel"
Example of a dialogue
User: "Call"
Voice output: "Please, say the
nametag to call"
User: <Name>
Voice output: "Do you want to call
<Michael>?"
User: "Yes"
Voice output: "The number is being
dialled"
DVD800.book Page 12 Tuesday, August 26, 2008 1:51 PM
Page 74

5 - 13 Mobile Phone Portal
Starting a second call
A second call can be started during
an active telephone call. To do so,
press the button .
Commands available:
"Send": activate manual DTMF
(touch-tone dialling), e.g. for voice
mail or telephone banking.
"Send nametag": activate DTMF
(touch-tone dialling) by entering a
name (voice tag).
"Dial"
"Call"
"Redialing"
"Help"
"Cancel"
Example of a dialogue
User: <if a telephone call is active:
press the button>
User: "Send"
Voice output: "Please, say the
number to send."
(for number input see the dialogue
example for "Entering a telephone
number")
User: "Send"
Redialling
The number last dialled is redialled
with the command "Redialing".
Saving
With the command "Save" a
telephone number is stored in the
telephone book under a name (voice
tag).
The name entered must be repeated
once. The pitch and pronunciation
must be as identical as possible for
both name inputs, otherwise the
voice control will reject the inputs.
A maximum of 50 voice tags can be
stored in the telephone book.
Voice tags are speaker-dependent,
i.e. only the person who recorded a
voice tag can open it.
To avoid the start of the recording of
a saved name from being cut off, a
short pause should be left after an
input request.
To be able to use the voice tag
independently of the location,
i.e. including other countries, all
telephone numbers should be
entered with a "plus" character and a
country code.
Commands available:
"Save": the inputs are accepted.
"Verify": the last input is repeated.
"Help"
"Cancel"
Example of a dialogue
User: "Save"
Voice output: "Please, say the
number to save"
(for number input see the dialogue
example for "Entering a telephone
number")
User: "Save"
Voice output: "Please, say the
nametag to save"
User: <Name>
Voice output: "Please, repeat the
nametag to confirm"
User: <Name>
Voice output: "Saving the nametag"
DVD800.book Page 13 Tuesday, August 26, 2008 1:51 PM
Page 75

5 - 14Mobile Phone Portal
Deleting
A previously saved voice tag is
deleted with the command "Delete".
Commands available:
"Yes"
"No"
"Help"
"Cancel"
Listening to stored names
The voice output of all stored names
(voice tags) is started with the
command "Directory".
Commands available during voice
output of the voice tags:
"Call": the telephone number of
the voice tag last read aloud is
selected.
"Delete": the entry of the voice tag
last read aloud is deleted.
Saving a mobile phone to or
deleting it from the device list
With the command "Pair" a mobile
phone can be saved to or deleted
from the device list of the mobile
phone portal 3 5-4.
Commands available:
"Add"
"Delete"
"Help"
"Cancel"
Example of a dialogue
User: "Pair"
Voice output: "Do you want to add or
delete a device?"
User: "Add"
Voice output: "Using the pair function
in the external device, enter <1234>
to pair."
(for number input see the dialogue
example for "Entering a telephone
number")
Voice output: "Do you want to pair the
device?"
User: "Yes"
Voice output: "The device is
connected as the number
<device_number>"
Selecting a mobile phone from
the device list
Using the "Select device"
command, a mobile phone can be
selected in the device list for setting
up a Bluetooth
TM
connection.
Example of a dialogue
User: "Select device"
Voice output: "Please, say a device
number to select"
User: <device_number>
Voice output: "Do you want to select
the device number
<device_number>?"
User: "Yes"
Voice output: "Do you want to pair the
device?"
User: "Yes"
Voice output: "One moment. The
system searches for the selected
device"
Voice output: "Device number
<dev_num> is selected"
DVD800.book Page 14 Tuesday, August 26, 2008 1:51 PM
Page 76
5 - 15 Mobile Phone Portal
Voice feedback
Each voice input is answered or
commented on by the Infotainment
system by way of a voice output that
is adapted to the situation.
To switch the voice output on or off,
enter "Voice feedback" or press the
button .
EU R&TTE Compliance
Hereby, General Motors Corporation
declares that this UHP High and UHP
Low are in compliance with the
essential requirements and other
relevant provisions of Directive 1999/
5/EC.
DVD800.book Page 15 Tuesday, August 26, 2008 1:51 PM
Page 77

6 - 1Index
Index
A
Active route guidance ...............4-16
Address
address entry ...........................4-4
direct entry ...............................4-4
Address book ..............................4-5
adding an address ...................4-5
opening an address .................4-6
saving an address ...................4-5
AM menu .....................................2-3
AM station list ..............................2-4
AS ............................................... 2-2
Audio player ................................3-1
Automatic switch-off ..................1-10
Autostore lists ............................. 2-2
AUX input ....................................3-4
B
Batteries ......................................5-2
Bluetooth connection .................. 5-4
C
Call lists .......................................5-9
Category list ................................2-5
CD player .................................... 3-1
CDs/DVDs
fast forward/rewind .................. 3-3
inserting ................................... 3-2
next/previous track ..................3-2
random .................................... 3-3
random order ........................... 3-3
removing.................................. 3-3
selecting tracks directly ...........3-2
skip track forward/skip
track backward ........................ 3-2
track search forward/track
search backward ......................3-3
Changing a Bluetooth code......... 5-5
Changing the language .............1-16
Compensated volume ...............1-11
Connecting a mobile phone ........ 5-5
Copy protection ...........................3-1
DVD800.book Page 1 Tuesday, August 26, 2008 1:51 PM
Page 78

6 - 2 Index
D
Deleting .................................... 4-13
Deleting lists ............................. 4-24
Demo mode .............................. 4-13
Destination from the map ........... 4-9
Dialling a telephone
number...................... 5-8, 5-9, 5-11
DVD player ................................. 3-1
Dynamic route guidance.... 4-2, 4-22
E
Eight-way switch ......................... 4-3
Emergency call ........................... 5-6
Enhanced Other Networks ......... 2-6
Entering destination .................... 4-4
EON............................................ 2-6
F
FAV ............................................ 2-3
Favourite lists ............................. 2-3
Favourites list .............................. 2-4
FM category list .......................... 2-5
FM menu .................................... 2-3
FM station list ............................. 2-4
H
Hands-free facility
setting volume ......................... 5-8
I
Information on the display ........ 4-20
iPod
®
connecting............................... 3-5
models supported ................... 3-5
operating .................................. 3-6
removing device ...................... 3-6
selecting track ......................... 3-6
M
Map material............................... 4-2
Menu operation ........................ 1-12
Menus
operation ................................. 4-3
Mobile phone portal .................... 5-1
device list ................................ 5-4
Multifunction knob ............. 1-11, 4-3
Mute ......................................... 1-11
N
Navigation................................... 4-1
starting .................................... 4-3
Navigation DVD ........................ 4-23
removing ............................... 4-23
Navigation options .................... 4-17
dynamic route guidance ........ 4-17
map options........................... 4-18
route criteria .......................... 4-17
route guidance display .......... 4-17
Navigation system
function.................................... 4-1
Navigation volume .................... 4-23
Navigation-specific
settings ................................... 4-23
DVD800.book Page 2 Tuesday, August 26, 2008 1:51 PM
Page 79

6 - 3Index
O
On-screen displays ..................... 1-2
Opening last destinations ...........4-6
Opening points of interest........... 4-6
around actual position ............. 4-6
around destination ................... 4-7
around other places................. 4-8
destination from the map .........4-9
name search............................ 4-9
Overview of the symbols ........... 4-26
general symbols .................... 4-26
traffic symbols .......................4-28
P
Phone batteries ........................... 5-2
R
Radio Data System..................... 2-6
Radio text ....................................2-7
Radio traffic service .................... 2-5
RDS ............................................ 2-6
RDS scrolling text ....................... 2-7
Redialling ..................................5-13
Regionalization ........................... 2-7
Repeat
route guidance message......... 4-23
Retrieving a station ..............2-2, 2-3
Route guidance .........................4-13
Route guidance active
route blocking ........................ 4-20
route information ....................4-18
stopping navigation ................4-16
Route guidance inactive............ 4-20
current position information ...4-20
destination information ...........4-20
starting navigation .................4-20
RPT NAV .................................. 4-23
S
Saving .......................................4-13
Scrolling text ............................... 2-7
Selecting station ..........................2-1
Selecting the waveband .............. 2-1
Setting display ...........................1-16
Setting indication....................... 1-16
Setting the time/date .................1-16
Setting the volume .................... 1-10
Speed compensated
volume..................................... 1-11
Start navigation ......................... 4-13
Station lists.................................. 2-4
Station search
automatic ................................. 2-1
manual .....................................2-2
Stations lists
updating ...................................2-4
Storing a station ...................2-2, 2-3
Switch on volume...................... 1-10
Switching on and off ..................1-10
Symbols
general................................... 4-26
overview .................................4-26
traffic symbols........................ 4-28
System settings .........................1-15
DVD800.book Page 3 Tuesday, August 26, 2008 1:51 PM
Page 80

6 - 4 Index
T
TA volume .................................. 2-7
Telephone book........................... 5-8
Telephone specific adapter ........ 5-3
Theft protection .......................... 1-3
TMC............................................ 4-2
TMC messages ........................ 4-16
displaying as text message... 4-17
TMC settings ............................ 4-24
Tone settings............................ 1-13
Tours ........................................ 4-13
adding intermediate
destination ............................. 4-14
adding new
intermediate destination........ 4-15
adding tours .......................... 4-14
displaying tours ..................... 4-15
editing a tour ......................... 4-15
starting tours ......................... 4-14
TP ............................................... 2-5
Traffic announcements
volume ................................... 1-15
Traffic information system .......... 4-2
Traffic messages
settings .................................. 4-24
Traffic news .............................. 4-16
displaying as text message ... 4-17
Traffic programme (TP) .............. 2-5
Travel guide .............................. 4-10
around actual position ........... 4-10
around destination ................. 4-11
around other places .............. 4-12
name search ......................... 4-12
U
USB
connecting device ................... 3-4
operating data source ............. 3-4
removing device...................... 3-5
V
Voice control
aborting ................................. 5-11
activating ............................... 5-11
call .........................................5-11
connecting a device .............. 5-14
deleting .................................. 5-14
DTMF (touch-tone) ................ 5-13
making a call ......................... 5-12
operation ............................... 5-11
redialling ................................ 5-13
saving.................................... 5-13
selecting a device.................. 5-14
voice feedback ...................... 5-15
Volume of the traffic
announcements ............... 1-15, 2-7
DVD800.book Page 4 Tuesday, August 26, 2008 1:51 PM
 Loading...