

HOBO® RX3003 Station Quick Start (RX3003-SYS-KIT-80x)
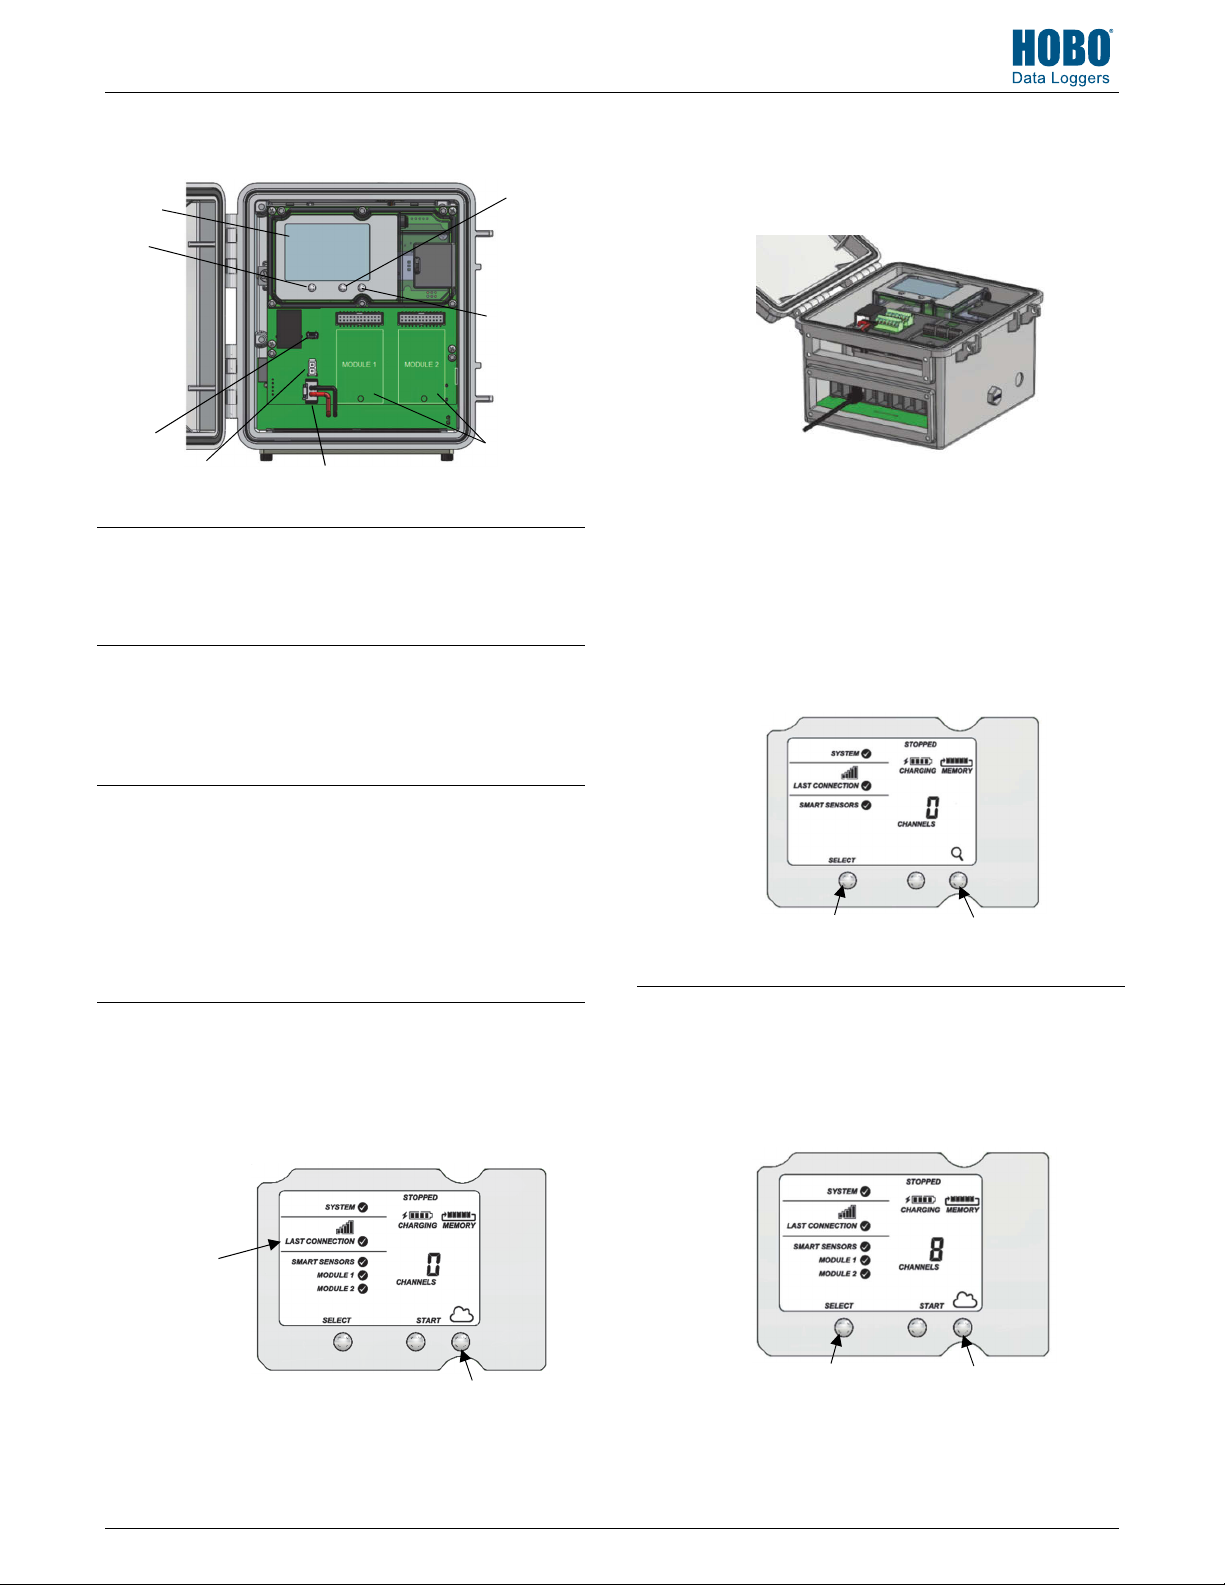
RX3000 Station Key Components
LCD
Select
button
USB port
Charging port
Log in to HOBOlink.
1
Go to www.hobolink.com and log in to an existing
account or create a new one. You’ll receive an email to
activate the new account.
Register the station.
2
In HOBOlink, click Devices and then click the Register a
Device link. Give the station a name and enter the serial
number and device key from the label inside the station
door.
Battery port, cable connected
Start/
Stop
button
Connect/
Search
button
Slots for
optional
user-installed
modules
Plug in and search for smart sensors.
5
a. Plug in smart sensors into the connectors in the
bottom of the case.
Tip: Refer to the RX3000 manual for instructions on
wire routing and environmental sealing of wires.
b. Press the Select button to view the smart sensors on
the LCD and then press the Search button (the
magnifying glass icon should be visible as in the
example below). The station will search for all
connected smart sensors and show the number of
channels after a few seconds. Note that some smart
sensors have multiple channels (such as the
temperature/RH sensors).
Plug in the battery and charging device.
3
Connect the battery port connector followed by the
appropriate charging port connector. Once the battery
cable is plugged in, “Initializing System” will flash on the
LCD. A checkmark appears next to “System” after the
system initialization is complete.
Tip: Refer to the RX3000 manual for instructions on
wire routing and environmental sealing of wires.
Check or configure device communications.
4
The station will automatically connect to HOBOlink after
powering up the station. Make sure a checkmark
appears next to Last Connection. If not, press the
Connect button and wait for the station to connect to
HOBOlink.
A checkmark appears
next to Last Connection
after connecting to
HOBOlink
Connect button
Press the Select button to view
the smart sensor channels
Connect to HOBOlink.
6
Use the Select button to return to the main LCD screen
that shows all sensors and modules and then press the
Connect button (the cloud icon should be visible as
shown in the example). This is necessary for HOBOlink to
identify the newly added sensors.
Press the Select button to
return to the main LCD screen
Press the Search button for the station
to identify connected smart sensors
Press the Connect button
21376-A MAN-RX3003-SYS-KIT
Configure the station in HOBOlink.
g
7
Go to Devices > List and click the icon next to your
station or click the station name and then click
Configure at the top of the station page. Make changes
and click Next to move through the Configuration
Assistant to configure the following:
• System settings
and connection interval.
• Smart sensor logging interval and sampling interval.
• Settings for each smart sensor (labels, graph, and
scaling).
Any configuration changes will be transferred to the
station the next time it connects with HOBOlink.
Start logging.
8
Press the Start button on the station to start logging;
the station will connect to HOBOlink.
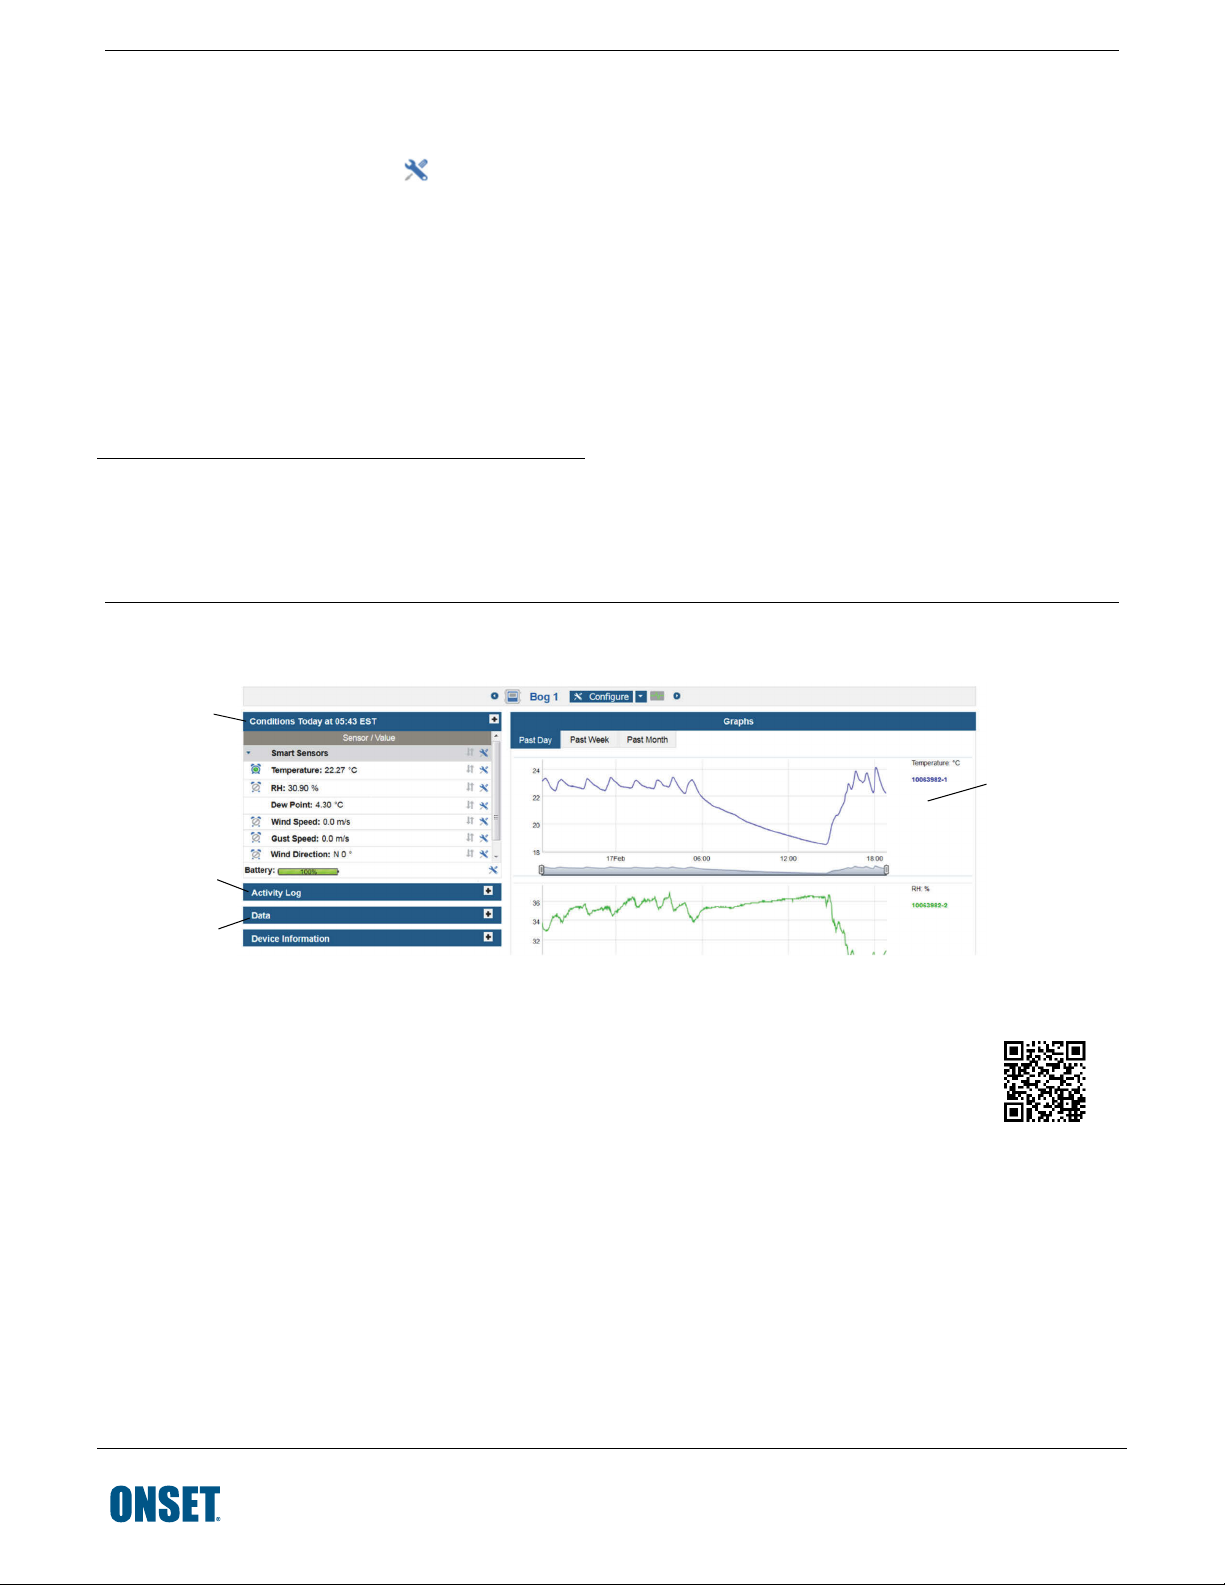
Checking the Station in HOBOlink
View smart
sensor readings
from the last
connection
Check the latest
connection,
configuration,
and alarm lo
Export logged
data and set
up scheduled
delivery of
exported files
s
View graphs of
sensor data (if
enabled); hover
over a series to
see individual
data points on
the graph
Test Equipment Depot - 800.517.8431 - 99 Washington Street Melrose, MA 02176 - TestEquipmentDepot.com
© 2017 Onset Computer Corporation. All rights reserved. Onset, HOBO, and HOBOlink are trademarks or registered trademarks
of Onset Computer Corporation. All other trademarks are the property of their respective companies.
This product has been manufactured by Onset Computer Corporation and in compliance with Onset’s ISO 9001:2008 Quality
Management System.
21376-A MAN-RX3003-SYS-KIT
 Loading...