

Page 1
1
Using the Main Unit with <C-HDSAT> Tuner Board
Instruction Manual for ONKYO TX-NR1000 / Integra DTR-10.5 / Integra Research RDC-7.1
Thank you for purchasing the Tuner Board <C-HDSAT>. When this optional board is inserted into option slot “K” on the main
unit’s rear panel, it can be used as the XM or SIRIUS/FM Stereo/AM tuner terminal. Furthermore, <C-HDSAT> becomes capable
of supporting HD Radio™ functionality and RDS as well.
Usage varies depending on the main unit to which you want to add the optional board. Refer to the user’s manual that comes with
your main unit before starting operations.
Caution:
• Before connecting or disconnecting the board, make sure to power off the main unit, and then unplug the power cord from the
AC outlet. Connecting or disconnecting the board while power is being supplied to the main unit may cause failure.
• Plug the optional board into the individual designated slot. Plugging it into the wrong slot may cause failure.
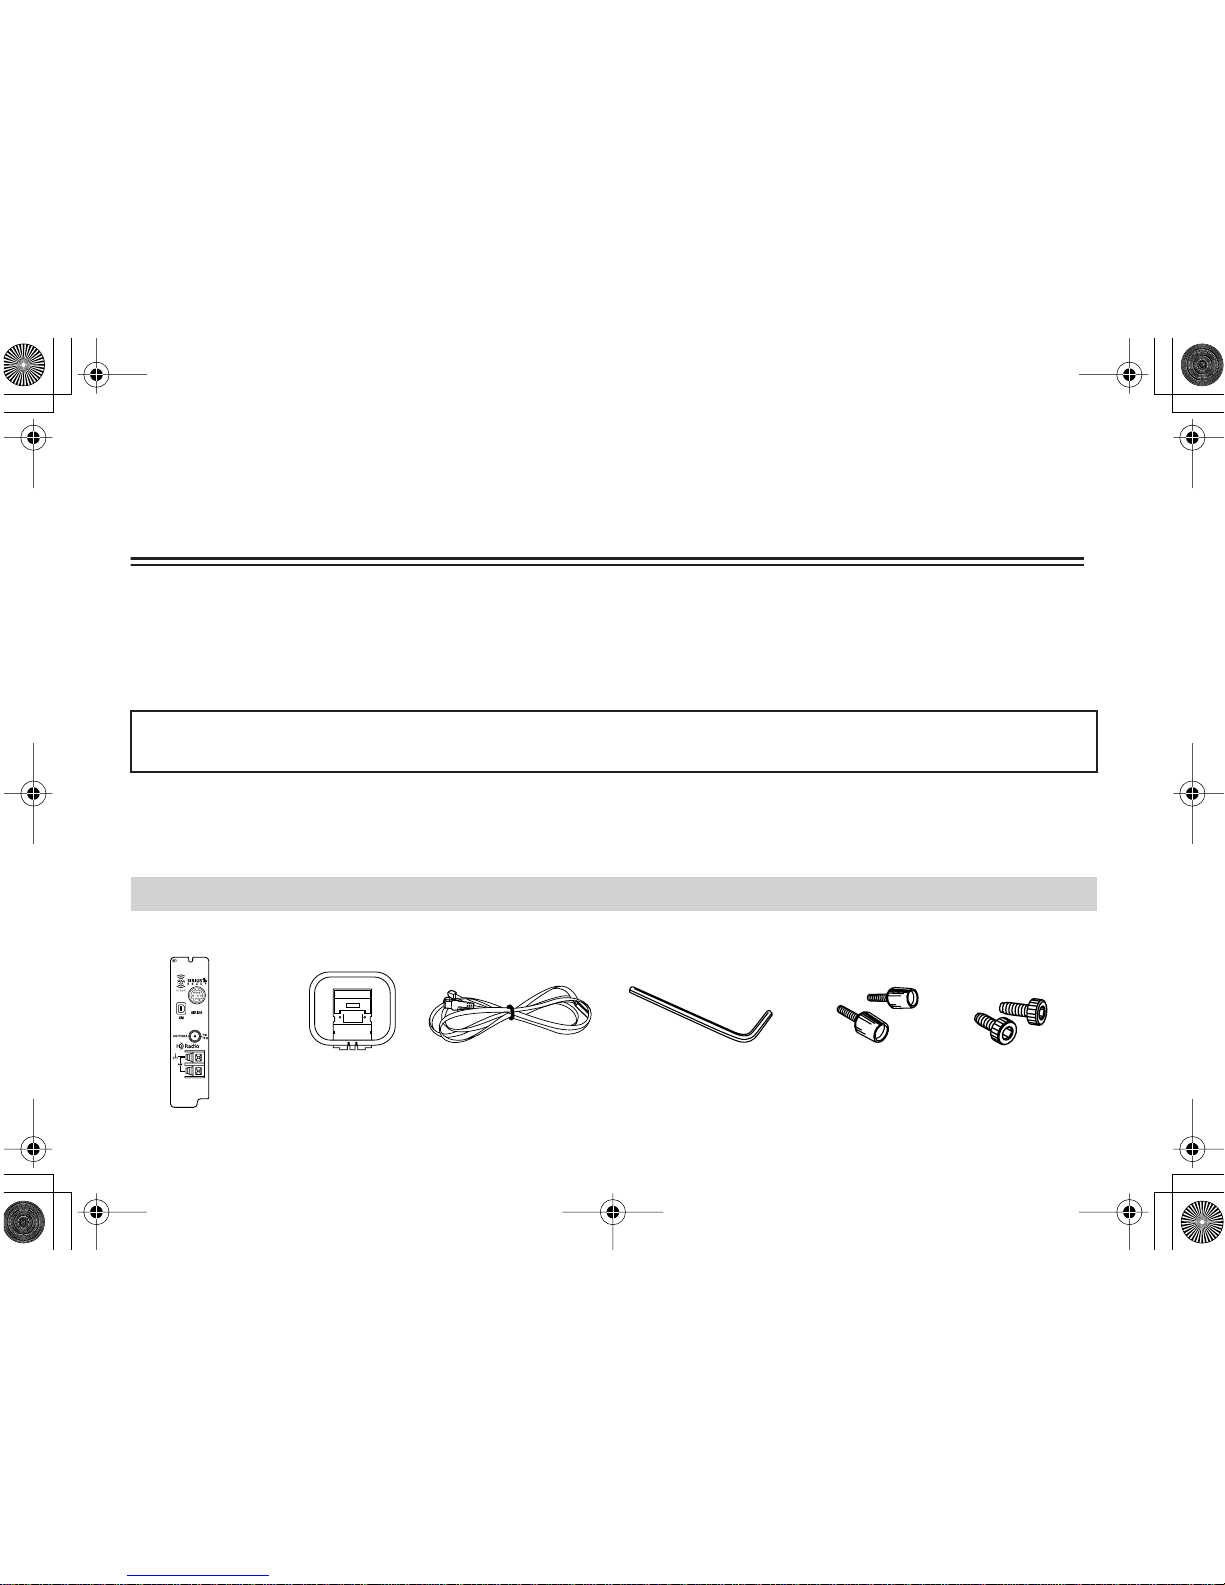
Verify the following items are included in the package:
Supplied Accessories
Board
Allen wrench (1 EA)
Hand screws for
removing board
Hexagon
screwsFM antennaAM antenna
For some main units, instructions may be provided in the user’s manual. In this case, please find instructions in the manual
that comes with your main unit.
C-HDSAT.fm 1ページ 2007年3月7日 水曜日 午後1時53分
Page 2
2
Installing Board
1
Power off the main unit, and then unplug the
power cord from the AC outlet.
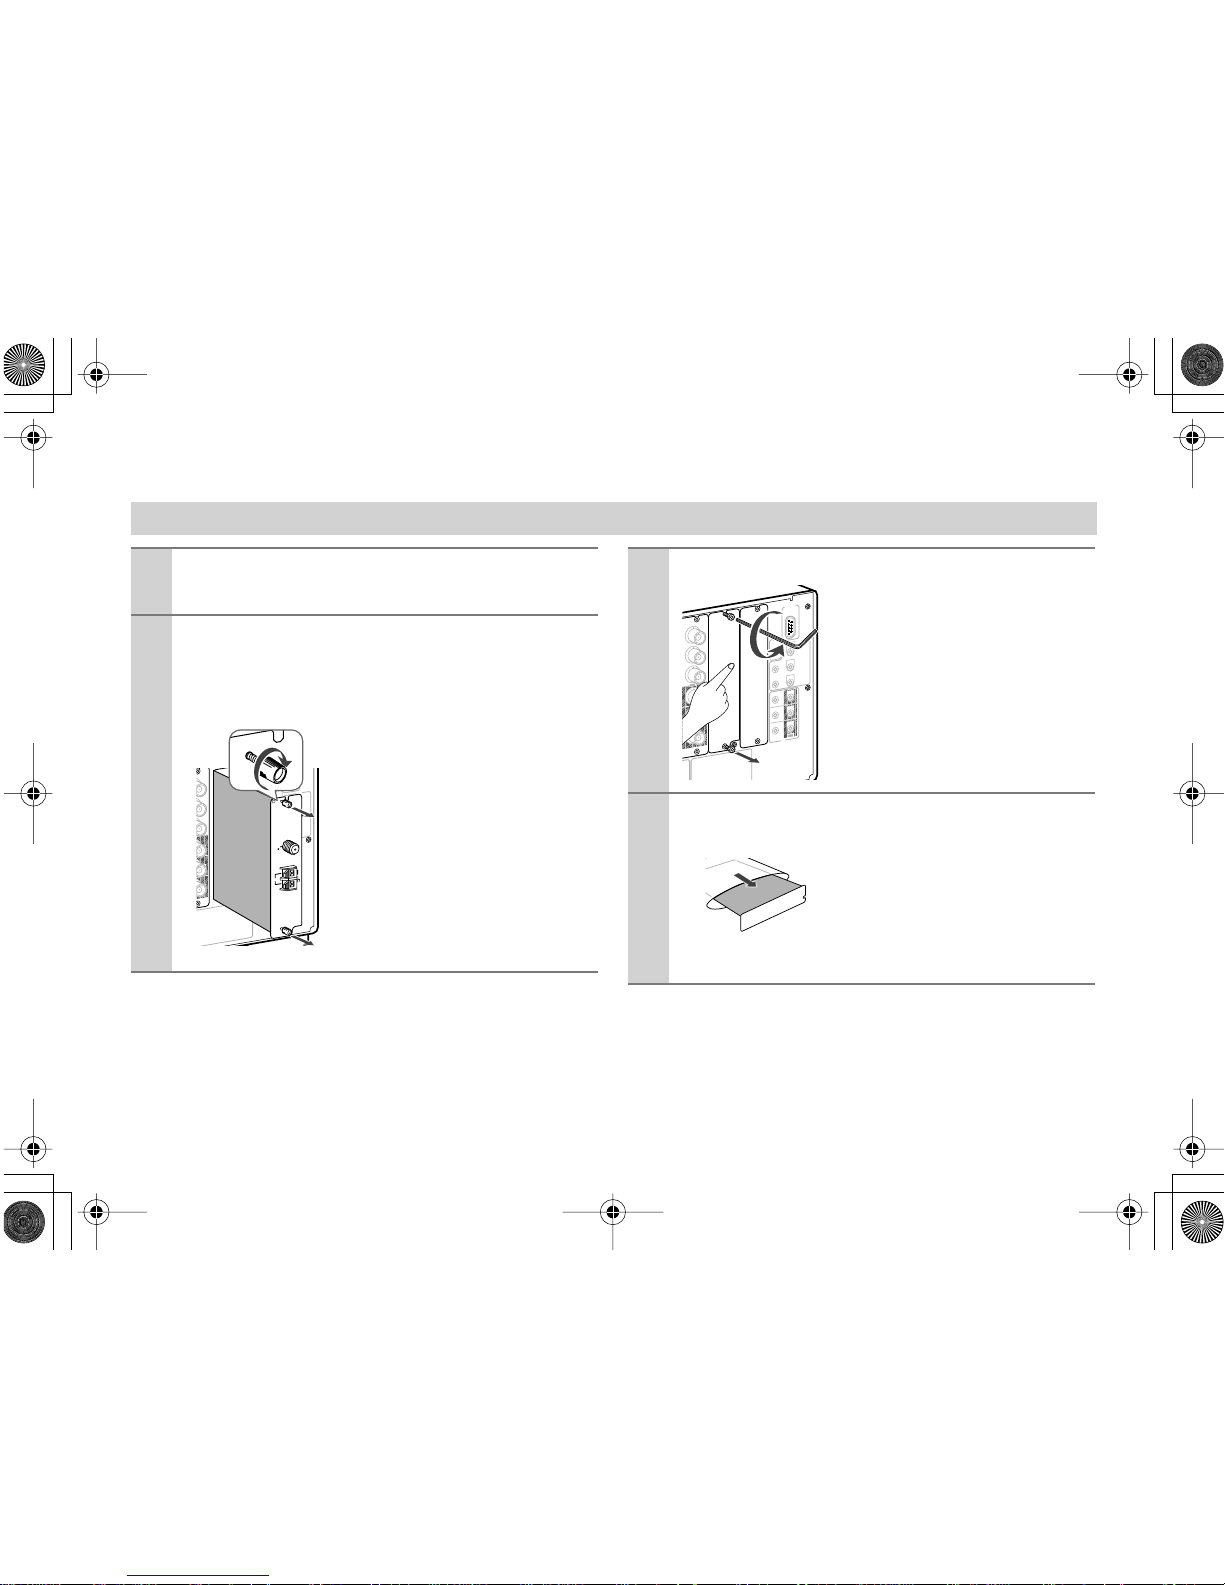
2
Remove the “K” sub-panel or board from the
main unit to which you want to add on the
optional board.
■
If any other slot is already used:
Remove the hexagon screws, one
top and one bottom of slot “K,”
using the provided Allen wrench
in the same way described below.
Retain the hexagon screws for
subsequent reuse.
Next, introduce the hand screws
attached to the board into the top
and bottom screw holes, and
drive them in as deep as about 3/
16" (5 mm). Hold the screw
heads to pull out the board.
R
E
M
O
T
E
C
O
N
T
R
O
L
A
C
B
M
A
I
N
1
2
V
T
R
I
G
G
E
R
O
U
T
I
R
UPP
D
E
2
0
0
m
A
M
A
X
.
1
0
0
m
A
M
A
X
.
1
0
0
m
A
M
A
X
.
1
0
0
m
A
M
A
X
.
1
0
0
m
A
M
A
X
.
Z
O
N
E
2
Z
O
N
E
3
O
U
T
I
N
Y
P
B
P
R
Y
P
B
P
R
T
V
I
D
E
O
IN
K
A
N
T
E
N
N
A
F
M
7
5
A
M
■
If this is the first time a slot is used:
Using the provided Allen wrench,
loosen the hexagon screws, one
top and one bottom of slot “K,” to
remove the sub-panel from the
rear panel. In doing so, loosen the
screws gradually while holding
the sub-panel to prevent it from
falling. Retain the hexagon
screws for subsequent reuse.
3
Remove the sealing sticker carefully and take
the board out of the bag.
Do not touch any parts, solder
surfaces, or contact points of the
connectors with bare hands to
prevent electrostatic damage on
the circuit. Be sure to hold the
outer edges or panel part of the printed circuit board.
R
E
M
O
T
E
C
O
N
T
R
O
L
A
C
B
M
A
I
N
1
2
V
T
R
I
G
G
E
R
O
U
T
I
R
UPP
D
E
2
0
0
m
A
M
A
X
.
1
0
0
m
A
M
A
X
.
1
0
0
m
A
M
A
X
.
1
0
0
m
A
M
A
X
.
1
0
0
m
A
M
A
X
.
Z
O
N
E
2
Z
O
N
E
3
R
S
23
2
O
U
T
I
N
O
U
T
/
BNC
)
Y
P
B
P
R
Y
P
B
P
R
C
O
M
P
O
N
E
N
T
V
I
D
E
O
IN
C-HDSAT.fm 2ページ 2007年3月7日 水曜日 午後1時53分
Page 3
3
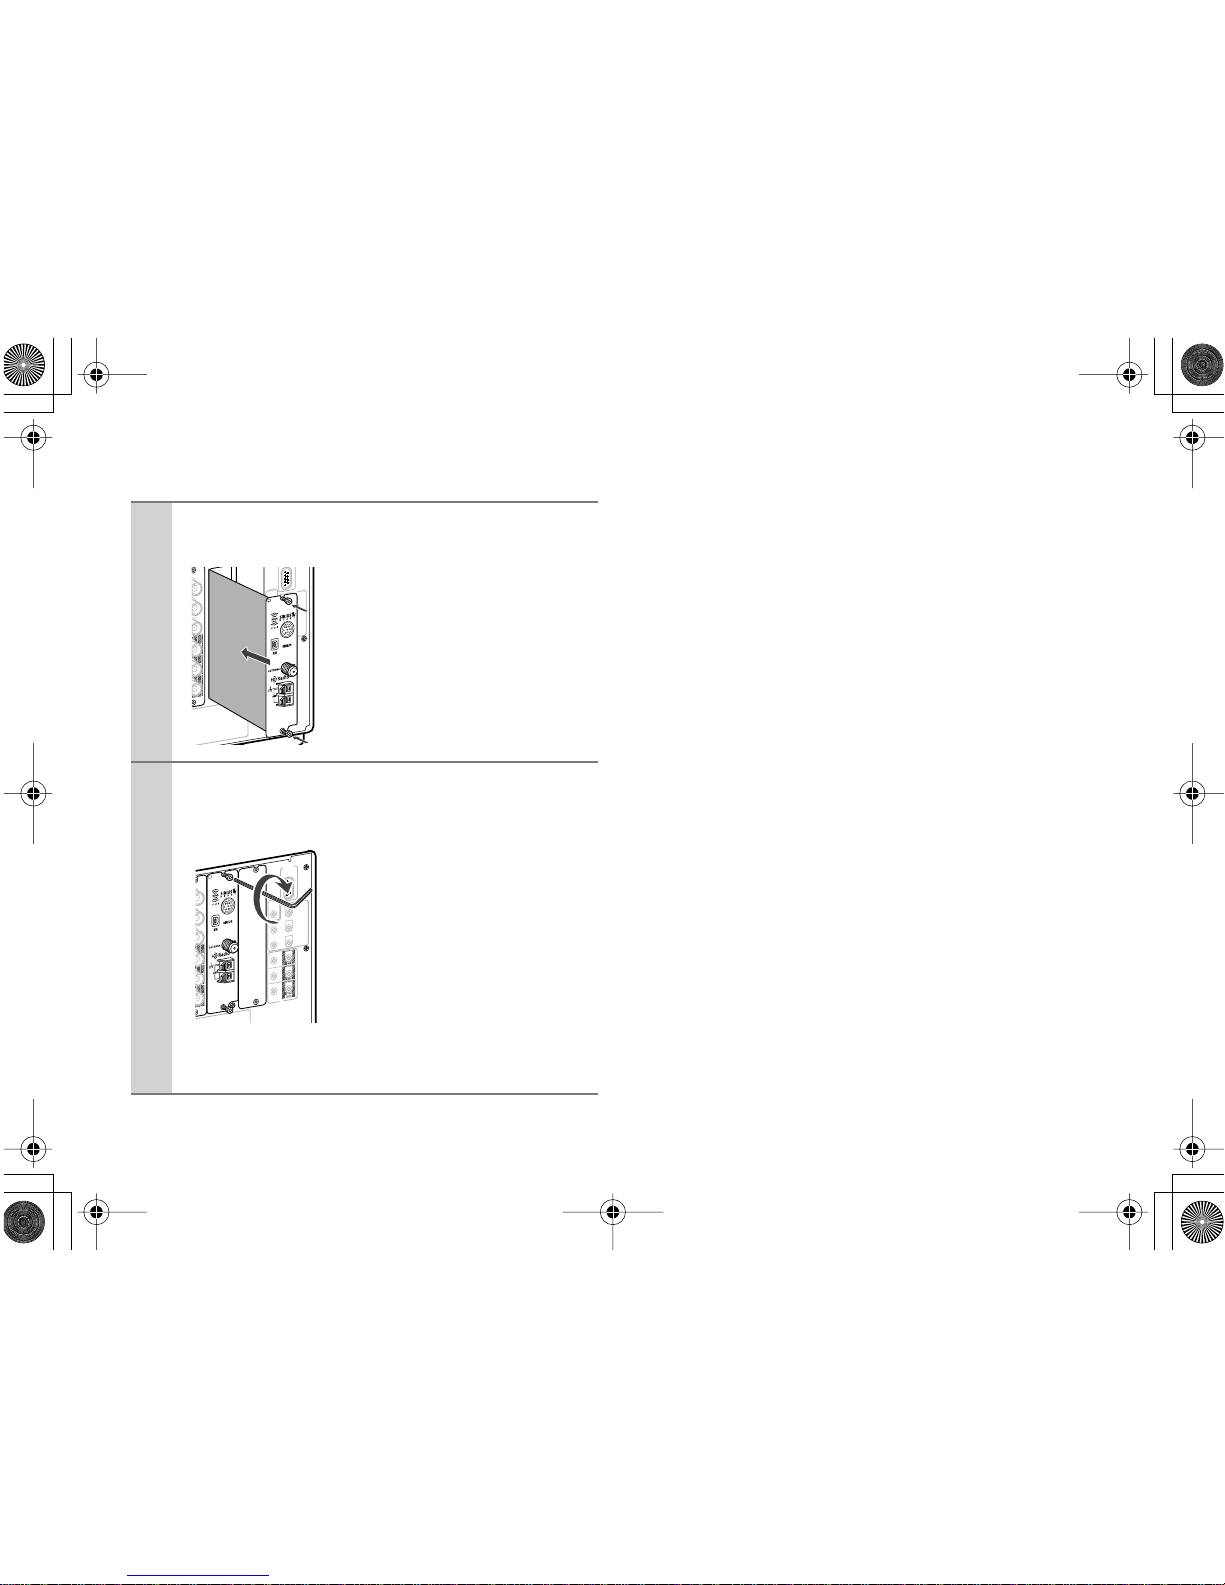
4
Insert the option board along the upper and
lower guide rails.
When the board hits the connector,
apply a little more pressure so that
the connector can be inserted completely. Make sure the surface of
the panel becomes flush for perfect
insertion.
5
Fix the option board firmly to the main unit
using the hexagon screws on the top and bottom.
Make sure to fasten the two screws
completely. If they are loose, the
electrical contact between the terminals and the ground or the signal
line may be poor and it may cause
failure.
Caution:
Be sure to fasten the screws with
washers, if exist, that were previously used to secure any board on the
slot.
R
E
M
O
T
E
C
O
N
T
R
O
L
A
C
B
M
A
I
N
1
2
V
T
R
I
G
G
E
R
O
U
T
I
R
UPP
D
E
2
0
0
m
A
M
A
X
.
1
0
0
m
A
M
A
X
.
1
0
0
m
A
M
A
X
.
1
0
0
m
A
M
A
X
.
1
0
0
m
A
M
A
X
.
Z
O
N
E
2
Z
O
N
E
3
O
U
T
I
N
Y
P
B
P
R
Y
P
B
P
R
T
V
I
D
E
O
I
N
K
K
R
E
M
O
T
E
C
O
N
T
R
O
L
A
C
B
M
A
I
N
1
2
V
T
R
I
G
G
E
R
O
U
T
I
R
UPP
D
E
2
0
0
m
A
M
A
X
.
1
0
0
m
A
M
A
X
.
1
0
0
m
A
M
A
X
.
1
0
0
m
A
M
A
X
.
1
0
0
m
A
M
A
X
.
Z
O
N
E
2
Z
O
N
E
3
R
S
2
32
O
U
T
I
N
Y
P
B
P
R
Y
P
B
P
R
V
I
D
E
O
IN
C-HDSAT.fm 3ページ 2007年3月7日 水曜日 午後1時53分
Page 4
4
Using XM Satellite Radio
Note:
Hardware and required monthly subscription sold separately.
Other fees and taxes, including a one-time activation fee may
apply. Subscription fee is consumer only.
All fees and programming subject to change. Channels with
frequent explicit language are indicated with an XL. Channel
blocking is available for XM radio receivers by calling 1-800XMRADIO (US residents) and 1-877-GET-XMSR (Canadian
residents).
For a full listing of the XM commercial-free channels and
advertising-supported channels, visit
lineup.xmradio.com (US residents) or xmradio.ca (Canadian
residents).
Subscriptions subject to Customer Agreement available at
xmradio.com (US residents) and xmradio.ca (Canadian residents). Only available in the 48 contiguous United States and
Canada. ©2007 XM Satellite Radio Inc. All rights reserved.
All other trademarks are the property of their respective owners.
Listening to XM Satellite Radio
®
Important XM Radio Information
XM Satellite Radio offers an extraordinary variety of
commercial-free music, plus the best in sports, news,
talk and entertainment. XM is broadcast in superior digital audio from coast to coast. From rock to reggae,
from classical to hip hop, XM has something for every
music fan. XM’s dedication to playing the richest selection of music is matched by its passion for live sporting
events, talk radio, up-to-the-minute news, stand-up
comedy, children’s programming, and much more. For
U.S. customers, information about XM Satellite Radio
is available online at
www.xmradio.com. For Canadian customers, information about XM Canada is online at
www.xmradio.ca.
C-HDSAT.fm 4ページ 2007年3月7日 水曜日 午後1時53分
Page 5
5
A warning against reverse engineering:
It is prohibited to, and you agree that you will not, copy,
decompile, disassemble, reverse engineer, hack, manipulate,
or otherwise access and/or make available any technology
incorporated in receivers compatible with the XM Satellite
Radio system. Furthermore, the AMBE
®
voice compression
software included in this product is protected by intellectual
property rights including patent rights, copyrights, and trade
secrets of Digital Voice Systems, Inc. The software is licensed
solely for use within this product. The user of this or any other
software contained in an XM Radio is explicitly prohibited
from attempting to copy, decompile, reverse engineer, hack,
manipulate or disassemble the object code, or in any other way
convert the object code into human-readable form.
Connecting the XM Mini-Tuner and Home Dock
To receive XM Satellite Radio, you need an XM Mini-Tuner
and Home Dock, which includes a home antenna. These are
sold separately. For connection information, refer to the
instruction manual supplied with the XM Mini-Tuner and
Home Dock.
XM Mini-Tuner jack
C-HDSAT.fm 5ページ 2007年3月7日 水曜日 午後1時53分
Page 6
6
You can use your main unit and the remote controller supplied with your main unit to perform XM Radio operations.
Button names may vary depending on the model you use. The following table shows the button names of the main unit and of the
remote controller, respectively, and their corresponding operations.
* In this Instruction Manual, all the button names are essentially provided in capital letters. On some models, however, the names may be different
and written in small letters except for their initial character. Refer to the above table for proper operations.
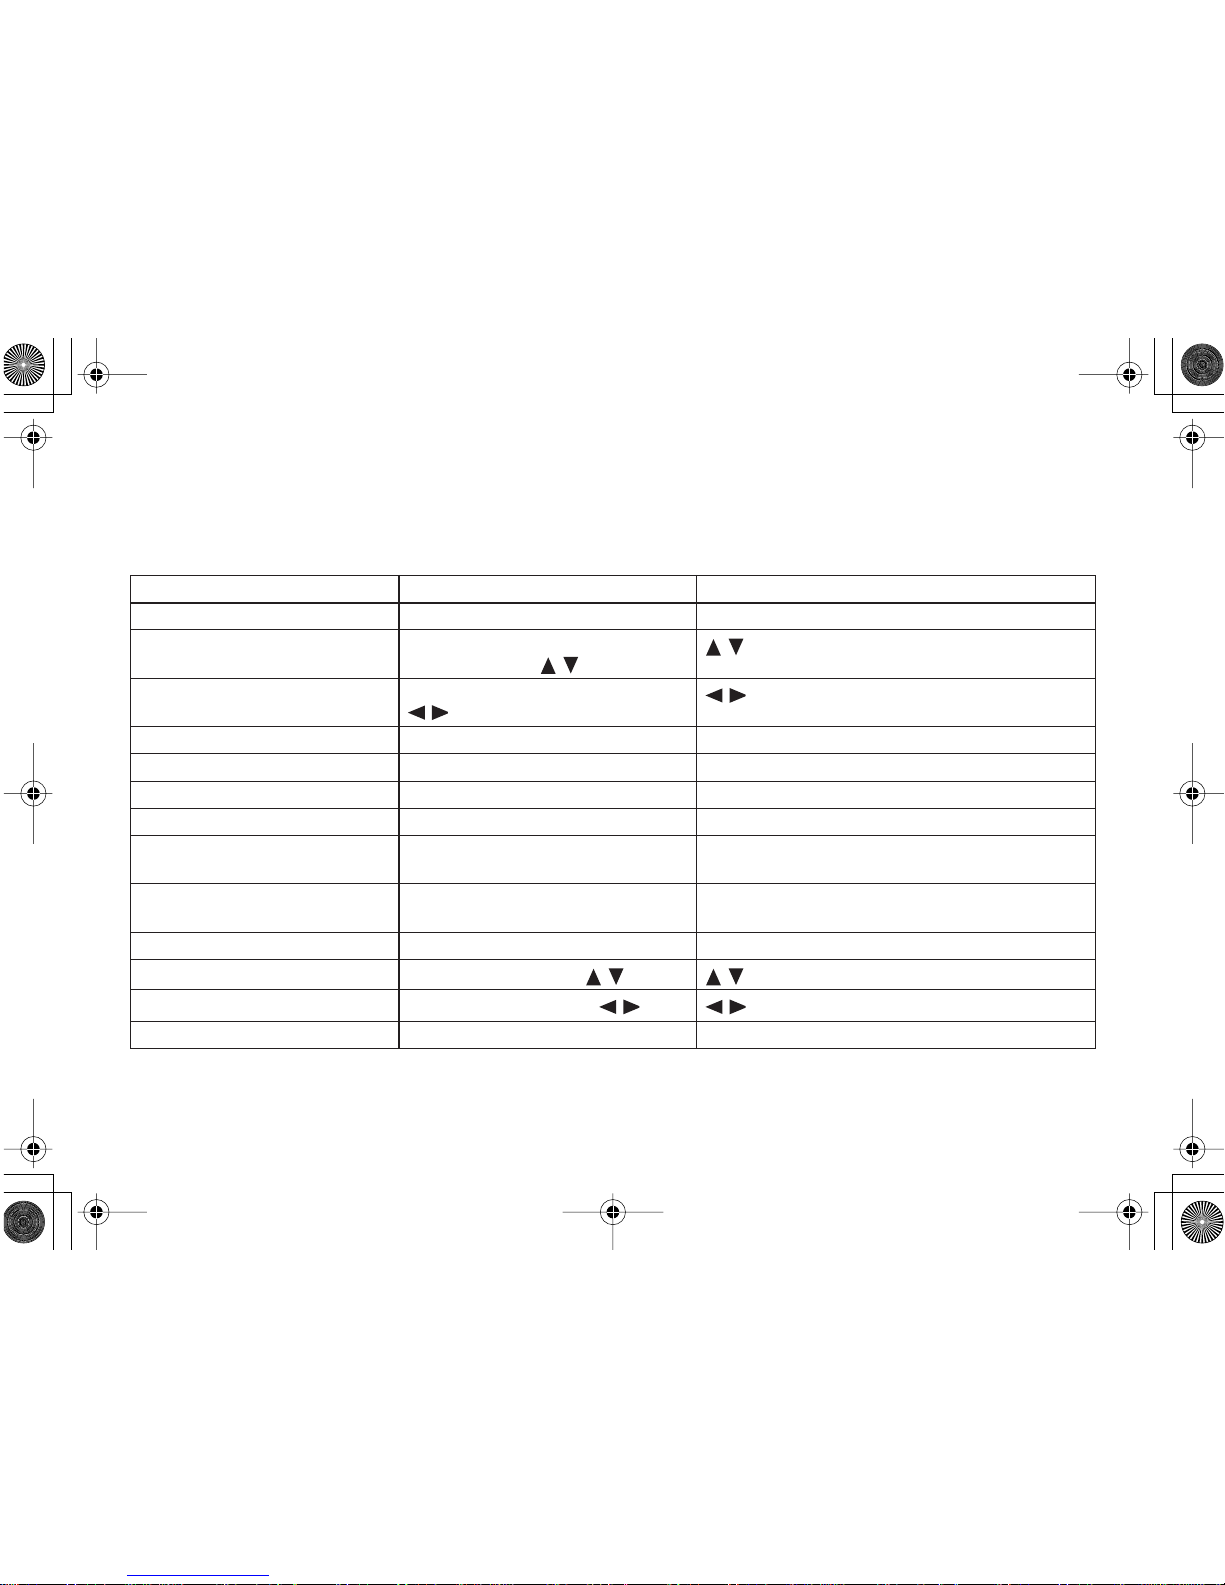
XM Radio Operation Main Unit button names Remote Controller button names
FM-AM-XM band select
TUNER/Tuner selector Scroll wheel
Channel Up/Down
CONTROL/TUNING dial
Tuning Up/Down, /
/
Category Up/Down
Push SELECT/PRESET dial
/
/
Search Mode select
TUNING MODE/Tuning Mode ENTER/Enter
Previous Channel
EXIT/Exit RETURN/Return
Display
DISPLAY/Display DISPLAY/Display
Preset
MEMORY/Memory -
Preset Clear
MEMORY + TUNING MODE
Memory + Tuning Mode
-
Preset Up/Down
SELECT/PRESET dial
Preset Up/Down
CH +/–
Direct Tuning
- DIRECT TUNING and Number buttons
Setup Up/Down
SELECT/PRESET dial, / /
Setup Left/Right
CONTROL/TUNING dial,
//
Setup Enter
Push SELECT/PRESET dial, Enter ENTER/Enter
C-HDSAT.fm 6ページ 2007年3月7日 水曜日 午後1時53分
Page 7
7
Setting the Satellite Radio Mode
Selecting XM Satellite Radio
Signing Up for XM Satellite Radio
Before you can use XM Satellite Radio, you must first sign up for
an account. You’ll need a major credit card and your XM Satellite
Radio ID, which you can get from the main unit, as explained
below, or from the Mini-Tuner System package and itself.
Notes:
• “RADIO ID” cannot be selected in Category Search mode.
You must select Channel Search mode (see page 8).
• The following letters are not used in XM Satellite Radio
IDs: I, O, S, F.
1
Press the [SETUP] button.
2
Use the [ ]/[ ] buttons to select “Hardware
Setup,” and then press [ENTER].
3
Use the [ ]/[ ] buttons to select “SAT Radio,”
and then press [ENTER].
4
Use the [ ]/[ ] buttons to select “XM.”
None : Select if you’re not using satellite radio.
XM
: Select to use XM Satellite Radio.
SIRIUS : Select to use SIRIUS Satellite Radio.
5
Press the [SETUP] button.
1
Press the [TUNER] input selector button
repeatedly to select XM.
1
Use the [ ]/[ ] buttons or CONTROL/TUNING
dial to select “RADIO ID.”
Your XM Satellite Radio ID number is displayed. Write
it below.
ID
2
To sign up, go to:
http://activate.xmradio.com
Or call: 1-800-967-2346
For XM Canada, go to:
http://xmradio.ca
Or call: 1-877-GET-XMSR
C-HDSAT.fm 7ページ 2007年3月7日 水曜日 午後1時53分
Page 8
8
There are three ways to select XM radio channels:
• Channel Search mode: select any channel.
• Category Search mode: select channels by category.
• Direct tuning: enter channel number.
■
Channel Search Mode
■
Category Search Mode
■
Direct Tuning
You can select an XM radio channel directly by entering its
number by remote controller.
Selecting the Previous Channel:
To listen to the previously selected XM channel, press the
[RETURN] or [EXIT] button.
Selecting XM Radio Channels
1
Press the [ENTER] or [TUNING MODE] button
to select “Channel Search” mode.
2
Use the [ ]/[ ] buttons or CONTROL/TUNING
dial to select a channel.
You can also use the [ ]/[ ] buttons or push
SELECT/PRESET dial to select a category.
1
Press the [ENTER] or [TUNING MODE] button
to select “Category Search” mode.
2
Use the [ ]/[ ] buttons to select a category, and
use the [ ]/[ ] buttons to select a channel in
that category.
Or push the SELECT/PRESET dial to select a category,
and rotate the CONTROL/TUNING dial to select a
channel in that category.
1
Press the [DIRECT TUNING] button.
2
Within 8 seconds, use the number buttons to
enter the channel number.
The channel is selected.
For example, to select channel #20, press 0, 2, 0, or 2, 0,
[ENT].
C-HDSAT.fm 8ページ 2007年3月7日 水曜日 午後1時53分
Page 9

9
You can store a combination of up to 40 of your favorite XM
channels and AM/FM radio stations as presets.
■
Selecting Presets
■
Deleting Presets
Presetting XM Radio Channels
1
Tune into the XM channel that you want to store
as a preset.
2
Press the [MEMORY] button.
The MEMORY indicator appears and the preset number
flashes.
3
While the MEMORY indicator is displayed
(about 4 seconds), use the SELECT/PRESET
dial or Preset Up/Down buttons to select a preset number from 1 through 40.
4
Press the [MEMORY] button again to store the
channel.
The channel is stored and the preset number stops flashing.
Repeat this procedure for all of your favorite XM channels.
1
To select a preset, use the SELECT/PRESET
dial or Preset Up/Down buttons, or the remote
controller’s CH [+/–] button.
1
Select the preset that you want to delete.
See the previous section.
2
While holding down the [MEMORY] button,
press the [TUNING MODE] button.
The preset is deleted and its number disappears from the
display.
C-HDSAT.fm 9ページ 2007年3月7日 水曜日 午後1時53分
Page 10

10
Press the [DISPLAY] button repeatedly to cycle
through the available information.
The indication on the Channel Name switches among the following titles:
Channel name
Category name (CAT)
Artist name (NAME)
Song title (TITL)
Listening Mode
Note:
• If the category, artist, or song title is not available,
“- - -” will be displayed instead.
■
Displaying XM Information on Your TV
When you select a different XM channel, or the artist or song
title changes, the following information is displayed on your
TV for 3 seconds.
Tip:
You can display this information at anytime by pressing the
[DISPLAY] button.
■
XM Radio Messages
The following messages may appear while using XM radio.
CHECK ANTENNA
The XM antenna is not properly connected to the Mini-Tuner
Dock. Check the connection. Check the antenna cable for
damage.
UPDATING
XM is updating your Mini-Tuner with the latest encryption
code. Simply wait a few seconds until the update is done. OR,
You may be attempting to tune to a channel that is blocked or
that you cannot receive with your subscription package. To
receive that channel, contact XM Satellite Radio.
NO SIGNAL
The XM Mini-Tuner can not receive the satellite signal. Check
the XM antenna for obstructions to the southern sky. Check the
antenna positioning with the Antenna Aiming feature.
LOADING
The AV receiver is tuning or decoding audio or text data.
Please wait. If this occurs often, check the XM antenna position with the Antenna Aiming feature.
Displaying XM Radio Information
Channel Number
Channel Name Preset Number
XM
CHANNEL : Channel name
CAT: Category name
NAME: Artist name
TITLE: Song title
0 5ch50
C-HDSAT.fm 10 ページ 2007年3月7日 水曜日 午後1時53分
Page 11

11
OFF AIR
The XM channel you selected is not currently broadcasting.
Select another channel
.
You can check the signal strength of the XM radio signal and
adjust the position of the XM Mini-Tuner System accordingly.
Positioning the XM Mini-Tuner System
1
Press the [SETUP] button.
2
Use the [ ]/[ ] buttons to select “SAT Radio
Setup,” and then press [ENTER].
3
Use the [ ]/[ ] buttons to select “Antenna
Aiming,” and then press [ENTER].
XM Listener Care phone number:
US: 1-800-967-2346
Canada: 1-877-438-9677
4
Adjust the position of the XM Mini-Tuner
Antenna so that the Satellite signal strength
bar is as long as possible.
The best signal is acheived when the antenna
is pointing to the southern sky through an
unobstructed window.
If you can’t receive the “Satellite” signal, adjust your
XM Mini-Tuner System so that the “Terrestrial” signal
strength bar is as long as possible.
Terrestrial signals are only available in certain areas.
So long as the signal strength is good, you can enjoy
XM Radio by using either satellite or terrestrial reception.
Press the [ ] button to display “Terrestrial” signal on
the main unit’s display.
C-HDSAT.fm 11 ページ 2007年3月7日 水曜日 午後1時53分
Page 12
12
Using SIRIUS Satellite Radio
Note:
Hardware and required basic monthly subscription sold separately. Installation costs and other fees and taxes, including a
one-time activation fee may apply. Subscription fee is consumer only. All fees and programming subject to change.
What is SIRIUS Satellite Radio?
Simply The Best Radio on Radio™ with all your favorite
entertainment including 100% commercial-free music, plus
superior sports coverage, uncensored talk and comedy, worldclass entertainment, news, weather and more for your car,
home or office. For more information visit sirius.com or siriuscanada.ca
A warning against reverse engineering:
It is prohibited to copy, decompile, disassemble, reverse
engineer, or manipulate any technology incorporated in tuner
boards compatible with the SIRIUS Satellite Radio system.
Listening to SIRIUS Satellite Radio
®
“SIRIUS” and the SIRIUS dog logo are
registered trademarks of Sirius Satellite
Radio Inc.
Important SIRIUS Satellite Radio Information
SIRIUS is available in the US for subscribers with
addresses in the continental US and is available in
Canada for subscribers with a Canadian address. To
Get SIRIUS Satellite Radio a subscription and
compatible tuner and antenna are required and sold
separately. Visit sirius.com for the most complete
and up-to-date channel lineup and information.
C-HDSAT.fm 12 ページ 2007年3月7日 水曜日 午後1時53分
Page 13

13
Setting Up the SiriusConnect™ Home Tuner
The optional SiriusConnect Home tuner kit includes everything for easy home installation, including the SiriusConnect
receiver, indoor/outdoor antenna with 21-foot cable, 8-pin
mini DIN connector cable, and an AC power adapter. See the
SiriusConnect Home tuner’s instructions for more information.
Use the 8-pin mini DIN connector cable to connect the SiriusConnect receiver to the SIRIUS jack on the board.
To use the included antenna indoors, you must place it at a
north-, west-, or east-facing window, depending on where you
live. If this isn’t possible, you’ll need to install it outside, away
from any overhead obstructions.
Positioning the Antenna
For a consistent satellite signal, the antenna must be positioned
correctly. Use the following map to determine which area you
are in and position the antenna accordingly.
Area 1: Point the antenna toward the sky in the east , north-
east , or southeast , either through a window or outside.
Area 2: Point the antenna toward the sky in the north or north-
east , either through a window or outside.
Area 3: Point the antenna toward the sky in the north or north-
west , either through a window or outside.
Area 4: Point the antenna toward the sky in the west , north-
west , or southwest , either through a window or outside.
Area 5: Put the antenna outside and point it straight up . The
antenna cannot be used indoors.
SiriusConnect
receiver
8-pin mini DIN
connector cable
AC power
Indoor/outdoor antenna
with 21 foot cable
SIRIUS
jack
1
2
3
4
5
HORIZON
SKY
SOUTH
WEST EAST
NORTH
C-HDSAT.fm 13 ページ 2007年3月7日 水曜日 午後1時53分
Page 14

14
You can use your main unit and the remote controller supplied with your main unit to perform Sirius Satellite Radio operations.
Button names may vary depending on the model you use. The following table shows the button names of the main unit and of the
remote controller, respectively, and their corresponding operations.
* In this Instruction Manual, all the button names are essentially provided in capital letters. On some models, however, the names may be different
and written in small letters except for their initial character. Refer to the above table for proper operations.
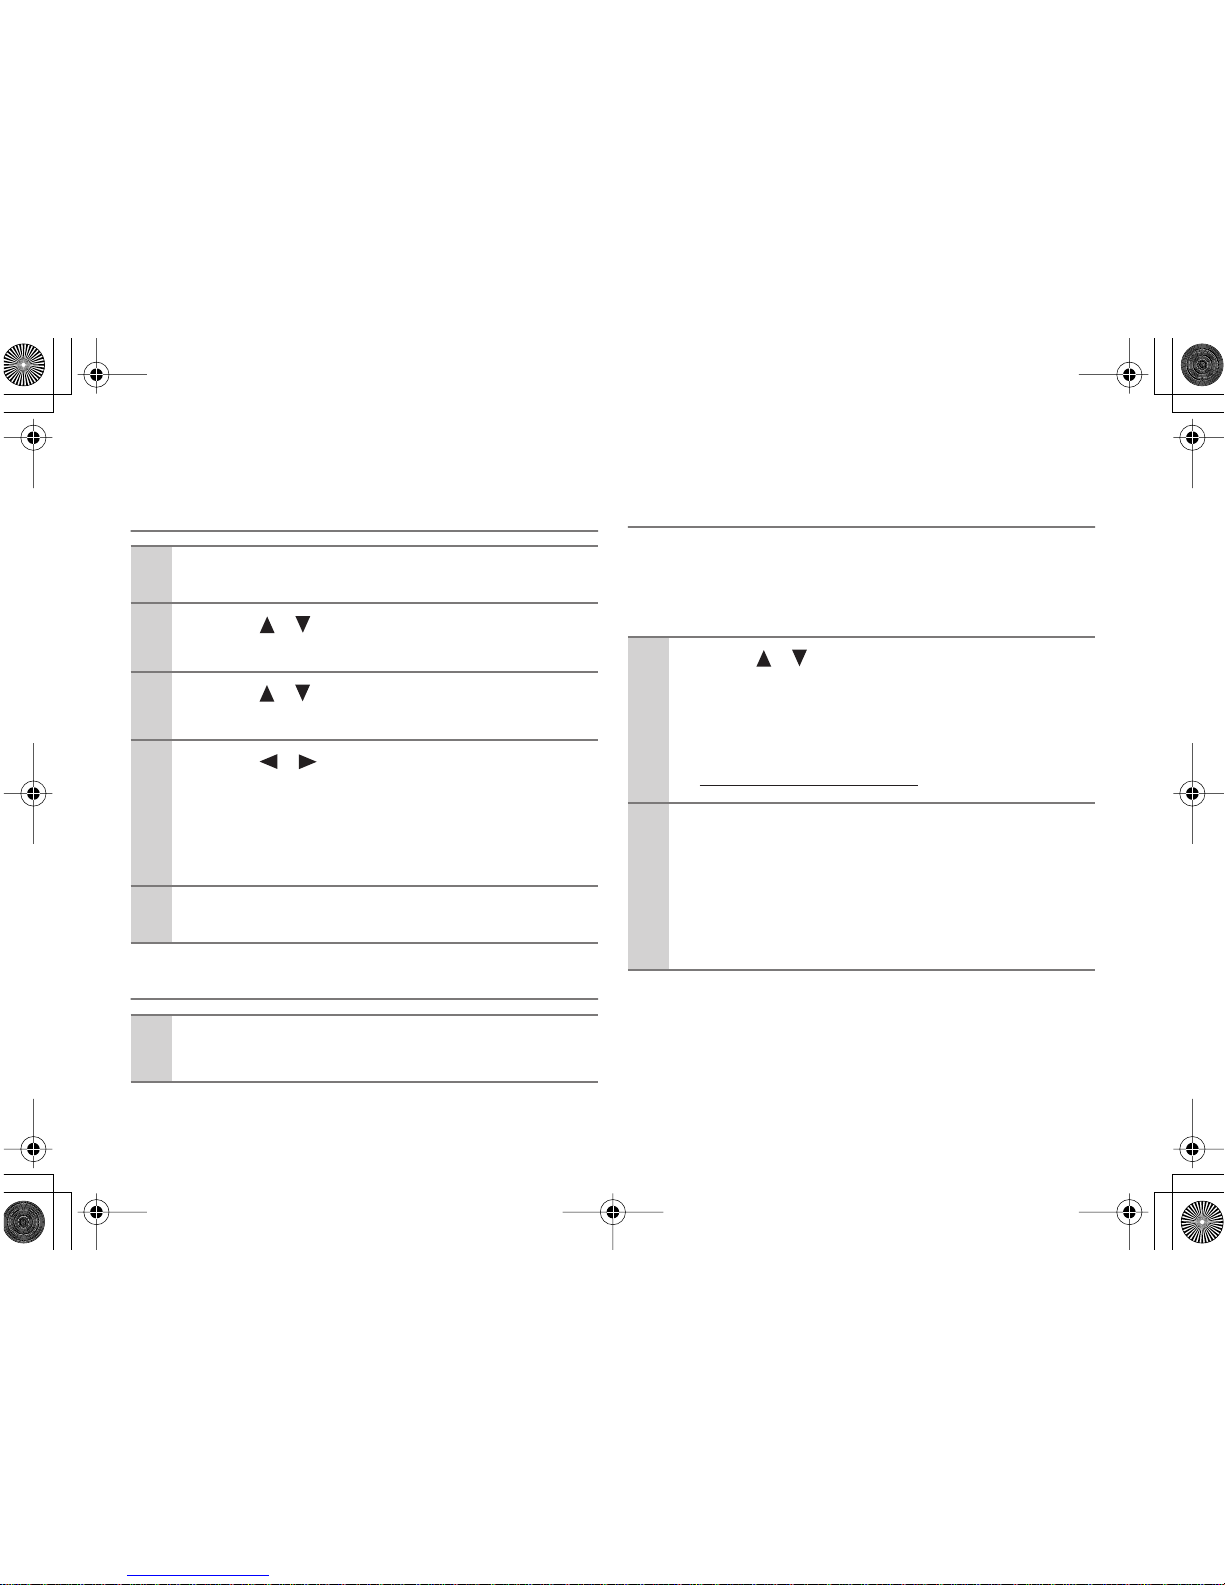
Sirius Radio Operation Main Unit button names Remote Controller button names
FM-AM-Sirius band select
TUNER/Tuner selector Scroll wheel
Channel Up/Down
CONTROL/TUNING dial
Tuning Up/Down, /
/
Category Up/Down
Push SELECT/PRESET dial
/
/
Search Mode select
TUNING MODE/Tuning Mode ENTER/Enter
Previous Channel
EXIT/Exit RETURN/Return
Display
DISPLAY/Display DISPLAY/Display
Preset
MEMORY/Memory -
Preset Clear
MEMORY + TUNING MODE
Memory + Tuning Mode
-
Preset Up/Down
SELECT/PRESET dial
Preset Up/Down
CH +/–
Direct Tuning
- DIRECT TUNING and Number buttons
Setup Up/Down
SELECT/PRESET dial, / /
Setup Left/Right
CONTROL/TUNING dial,
//
Setup Enter
Push SELECT/PRESET dial, Enter ENTER/Enter
C-HDSAT.fm 14 ページ 2007年3月7日 水曜日 午後1時53分
Page 15

15
Setting the Satellite Radio Mode
Selecting SIRIUS Satellite Radio
Signing Up for SIRIUS Satellite Radio
Before you can use SIRIUS Satellite Radio, you must first sign
up for an account. You’ll need a major credit card and your
SIRIUS Satellite Radio ID, which you can get from the main
unit, as explained below, or from the SiriusConnect Home
tuner package.
1
Press the [SETUP] button.
2
Use the [ ]/[ ] buttons to select “Hardware
Setup,” and then press [ENTER].
3
Use the [ ]/[ ] buttons to select “SAT Radio,”
and then press [ENTER].
4
Use the [ ]/[ ] buttons to select “SIRIUS.”
None : Select if you’re not using satellite radio.
SIRIUS : Select to use SIRIUS Satellite Radio.
XM
: Select to use XM Satellite Radio.
5
Press the [SETUP] button.
1
Press the [TUNER] input selector button
repeatedly to select “SIRIUS.”
1
Press [SETUP] button.
2
Use the [ ]/[ ] buttons to select "SAT Radio
Setup," and then press [ENTER].
3
Use the [ ]/[ ] buttons to select "Sirius ID,"
and then press [ENTER].
Your SIRIUS Satellite Radio ID number is displayed.
Write it below.
ID
4
To sign up, go to:
http://activate.siriusradio.com
Or call: 1-888-539-SIRIUS (7474)
C-HDSAT.fm 15 ページ 2007年3月7日 水曜日 午後1時53分
Page 16

16
There are three ways to select channels:
• Channel Search mode: select any channel.
• Category Search mode: select channels by category.
• Direct tuning: enter channel number.
■
Channel Search Mode
■
Category Search Mode
■
Direct Tuning
You can select a SIRIUS Satellite Radio channel directly by
entering its number by remote controller.
Selecting the Previous Channel:
To listen to the previously selected SIRIUS Satelite Radio
channel, press the [RETURN] or [EXIT] button.
Selecting SIRIUS Satellite Radio Channels
1
Press the [ENTER] or [TUNING MODE] button
to select “Channel Search” mode.
2
Use the [ ]/[ ] buttons or CONTROL/TUNING
dial to select a channel.
You can also use the [ ]/[ ] buttons or push
SELECT/PRESET dial to select a category.
1
Press the [ENTER] or [TUNING MODE] button
to select “Category Search” mode.
2
Use the [ ]/[ ] buttons to select a category,
and use the [ ]/[ ] buttons to select a chan-
nel in that category.
Or push the SELECT/PRESET dial to select a category,
and use the CONTROL/TUNING dial to select a channel in that category.
1
Press the [DIRECT TUNING] button.
2
Within 8 seconds, use the number buttons to
enter the channel number.
The channel is selected.
For example, to select channel #20, press 0, 2, 0, or 2, 0,
[ENT].
C-HDSAT.fm 16 ページ 2007年3月7日 水曜日 午後1時53分
Page 17

17
You can store a combination of up to 40 of your favorite SIRIUS Satellite Radio channels and AM/FM radio stations as
presets.
■
Selecting Presets
■
Deleting Presets
Presetting SIRIUS Channels
1
Tune into the SIRIUS channel that you want to
store as a preset.
2
Press the [MEMORY] button.
The MEMORY indicator appears and the preset number
flashes.
3
While the MEMORY indicator is displayed
(about 4 seconds), use the SELECT/PRESET
dial or Preset Up/Down buttons to select a preset number from 1 through 40.
4
Press the [MEMORY] button again to store the
channel.
The channel is stored and the preset number stops flashing.
Repeat this procedure for all of your favorite SIRIUS
Satellite Radio channels.
1
To select a preset, use the SELECT/PRESET
dial or Preset Up/Down buttons, or the remote
controller’s CH [+/–] button.
1
Select the preset that you want to delete.
See the previous section.
2
While holding down the [MEMORY] button,
press the [TUNING MODE] button.
The preset is deleted and its number disappears from the
display.
C-HDSAT.fm 17 ページ 2007年3月7日 水曜日 午後1時53分
Page 18

18
Press the [DISPLAY] button repeatedly to cycle
through the available information.
The indication on the Channel Name switches among the following titles:
Channel name
Category name (CAT)
Artist/Composer name (NAME)
Song title (TITL)
Listening Mode
Note:
• If the category, artist, or song title is not available, “- - -” will
be displayed instead.
■
Displaying Sirius Information on Your TV
When you select a different Sirius channel, or the artist or song
title changes, the following information is displayed on your
TV for 3 seconds.
Tip:
You can display this information at anytime by pressing the
[DISPLAY] button.
■
SIRIUS Satellite Radio Messages
The following messages may appear while using SIRIUS Satellite Radio.
❑
ACQUIRING SIGNAL
The SiriusConnect receiver is acquiring the signal or no
signal is present. Make sure the SiriusConnect Home tuner
is connected properly and that there are no obstacles close
by.
❑
ANTENNA ERROR
Make sure the SiriusConnect Home tuner is connected
properly.
❑
SUBSCRIPTION UPDATED
Displayed while your subscription is being updated. No
operations can be performed until this message has
cleared.
❑
UPDATING CHANNELS XXX%
Displayed while the channel map is being updated. Wait
until the updating is complete.
❑
UPDATING
Displayed while the SiriusConnect receiver’s firmware is
being updated.
Displaying SIRIUS Satellite Radio Information
Channel Number
Channel Name Preset Number
S I R I US
CH : Channel name
CAT: Category name
NAME: Artist name
T I T L: Title name
OTHR: Composer name
0 5ch50
C-HDSAT.fm 18 ページ 2007年3月7日 水曜日 午後1時53分
Page 19

19
❑
INVALID CHANNEL
Displayed if you select an unavailable channel.
❑
CALL SIRIUS
Displayed when you select a channel to which you are not
subscribed. Call SIRIUS if you want to subscribe.
❑
CHECK SIRIUS TUNER
Displayed if the SiriusConnect receiver is not connected.
Make sure the SiriusConnect receiver is connected properly, and make sure its AC adapter is plugged in.
You can check the strength of the SIRIUS Satellite Radio signal and adjust the position of the SiriusConnect Home antenna
accordingly.
Positioning the SiriusConnect
™
Home Antenna
1
Press the [SETUP] button.
2
Use the [ ]/[ ] buttons to select “SAT Radio
Setup,” and then press [ENTER].
3
Use the [ ]/[ ] buttons to select “Antenna
Aiming,” and then press [ENTER].
4
Adjust the position of the SiriusConnect Home
antenna so that the SAT signal strength bar is
as long as possible.
If you can’t receive a satellite signal, adjust your
antenna so that the Terrestrial signal strength bar is as
long as possible.
Terrestrial signals are only available in certain areas.
So long as the signal strength is good, you can enjoy
SIRIUS Satellite Radio by using either satellite or terrestrial reception.
C-HDSAT.fm 19 ページ 2007年3月7日 水曜日 午後1時53分
Page 20

20
You can lock out channels that you do not want to receive.
To unlock a previously locked channel, select the
“Unlocked” in the step 7.
Parental Lock
1
Press the [SETUP] button.
2
Use the [ ]/[ ] buttons to select “SAT Radio
Setup,” and then press [ENTER].
3
Use the [ ]/[ ] buttons to select “Parental
Lock,” and then press [ENTER].
“Enter Code : <0>” appears on the display.
4
Enter the PIN number.
Use the [ ]/[ ] buttons to change the number displayed between the angle brackets < >, and then press
[ENTER].
Repeat this step to enter a four-digit number.
5
Use the [ ]/[ ] buttons to select “Lock/
Unlock,” and then press [ENTER].
6
Use the [ ]/[ ] buttons to select the channel
that you want to lock out.
7
Press the [ ]/[ ] buttons to select “Locked,”
and then press the [ENTER] button.
8
Press the [SETUP] button.
A locked channel is not displayed in “Channel Search”
and “Category Search” modes. When you have selected
a locked channel by direct tuning, you will be prompted
for PIN number. To listen to the channel, enter a correct
PIN number.
C-HDSAT.fm 20 ページ 2007年3月7日 水曜日 午後1時53分
Page 21

21
Changing the PIN Number
For some models with jog dials on the main unit:
To control setup, you can use the SELECT/PRESET dial
instead of the / buttons, and the CONTROL/TUNING
dial instead of the / buttons. To confirm your selection,
push the SELECT/PRESET dial in stead of the [ENTER] button.
1
Press the [SETUP] button.
2
Use the [ ]/[ ] buttons to select “SAT Radio
Setup,” and then press [ENTER].
3
Use the [ ]/[ ] buttons to select “Parental
Lock,” and then press [ENTER].
4
Enter the PIN number.
For operation, refer to step 4 under "Parental Lock."
5
Use the [ ]/[ ] buttons to select “Edit Code,”
and then press [ENTER].
6
Enter a new PIN Code.
For operation, refer to step 4 under "Parental Lock."
7
Enter the new PIN number again.
A message appears saying "Complete" to indicate you
have successfully changed the PIN number.
If you enter the wrong PIN number, “Wrong Code!”
appears on the display. You’ll be returned to step 5, and
will need to start again.
8
Press the [SETUP] button.
Setup closes.
C-HDSAT.fm 21 ページ 2007年3月7日 水曜日 午後1時53分
Page 22

22
Using the HD Radio™ Receiver
HD Radio technology is a breakthrough that brings digital broadcasting to function in conventional analog AM and FM radio
stations. With digitally broadcasted programs, listeners will enjoy dramatically enhanced audio quality, improved reception, and
new data services. In addition to these features, supplemental HD Radio program services provide multicast broadcasting; listeners can select from up to 8 programs on a single FM HD Radio channel.
HD Radio technology achieves CD-quality sound during FM broadcast and high-quality sound equivalent to analog FM stereo
during AM broadcast. This Tuner Board also supports text display function for song titles, artist names and so on.
For more information on HD Radio technology, visit “www.ibiquity.com”.
For information on how to connect FM/AM antenna and to
tune, refer to the Instruction Manual for your main unit.
“HD” indicator lights up on the display if received
FM/AM radio wave supports HD Radio functionality.
• A station name, when received from an HD Radio station,
will be displayed in place of band and frequency.
• When music information is received, song title/artist name
will be displayed next to the HD indicator.
• When an HD Radio station has multicast channels, the currently selected HD Radio channel will be displayed on the
right side of the HD indicator.
HD Radio™ Technology Manufactured Under License From iBiquity Digital Corporation.
“iBiquity Digital” and the “HD Radio” and “HD” Symbols are registered trademarks of iBiquity Digital
Corporation. “HD Radio” is a trademark of iBiquity Digital Corporation. U.S. and Foreign Patents.
Listening to the HD Radio Receiver
Band Frequency HD indicator
HD Radio
Channel
numbers
C-HDSAT.fm 22 ページ 2007年3月7日 水曜日 午後1時53分
Page 23

23
You can select a channel by performing the following steps for
an FM HD Radio station that has multicast channels:
You can select either to receive analog broadcast or digital by
performing the following step:
For HD Radio stations with multicast channels, select Channel
1 before you switch between “Auto” and “Analog.” Channel 28 support digital broadcasts only.
Press the [DISPLAY]/[Display] button repeatedly to cycle
through other display modes.
1. Song Title/Artist information
Displays the song title and artist name on air.
2. Station information (INFO)
Displays HD Radio station information.
3. Artist information (NAME)
Displays the playing artist name on air.
4. Song Title information (TITL)
Displays the song title on air.
Selecting HD Radio Multicast Channels
1
Press the [CONTROL/TUNING] dial or [ENTER].
HD Radio channel number blinks on and off on the display.
2
Use the [CONTROL/TUNING] dial or [ ]/[ ] button to select a channel.
If you select a channel with no broadcast underway, you
will see [+] symbol next to the “HD” indicator; the
channel will not change over, but remain in a channel
reserve state. Upon receiving signals from any station
when it comes on the air, the reserve mode is disengaged to switch channel to that station automatically.
Note:
Multicast channel is not available in AM broadcast.
Channel Reserve
Selecting Audio Format (Blend Mode)
1
Press the [AUDIO SELECTOR] / [Audio SEL] button.
Selection switches over between “Auto” and “Analog.”
Auto: Receives digital broadcast as preference.
Analog: Receives analog broadcast.
Displaying HD Radio Information
C-HDSAT.fm 23 ページ 2007年3月7日 水曜日 午後1時53分
Page 24

24
SN 29344282
Printed in Japan
D0704-1
(C) Copyright 2007 ONKYO CORPORATION Japan. All rights reserved.
* 2 9 3 4 4 2 8 2 *
En
Receiving RDS Radio
RDS stands for Radio Data System and is a type of FM broadcasting. RDS was developed within the National Radio Systems Committee (NRSC) and is available in the North
America.
Many FM stations now transmit RDS signals which contain
additional information. RDS provides you with various services so that you can choose a station broadcasting your favorite categories of music or other information. The information
of Program Service Name, Radio Text and Program Type is
available for display on this tuner board
For information on how to connect FM antenna and to tune,
refer to the Instruction Manual for your main unit.
The RDS indicator lights up when an RDS station is
received.
Note:
• If radio signals are weak, RDS may not be received.
Press the [DISPLAY] / [Display] button repeatedly to cycle
through the available information.
1. Frequency and Listening mode
(If available, Program Service Name will be displayed)
2. Radio Text
(if Radio Text available)
3. Program Type
Listening to the RDS Radio
RDS indicator
Displaying RDS Information
C-HDSAT.fm 24 ページ 2007年3月7日 水曜日 午後1時53分
 Loading...