

Page 1
TVM PRO Television Wall Mount
Installation Instructions
Models: TVM 21 PRO
TVM 27 PRO
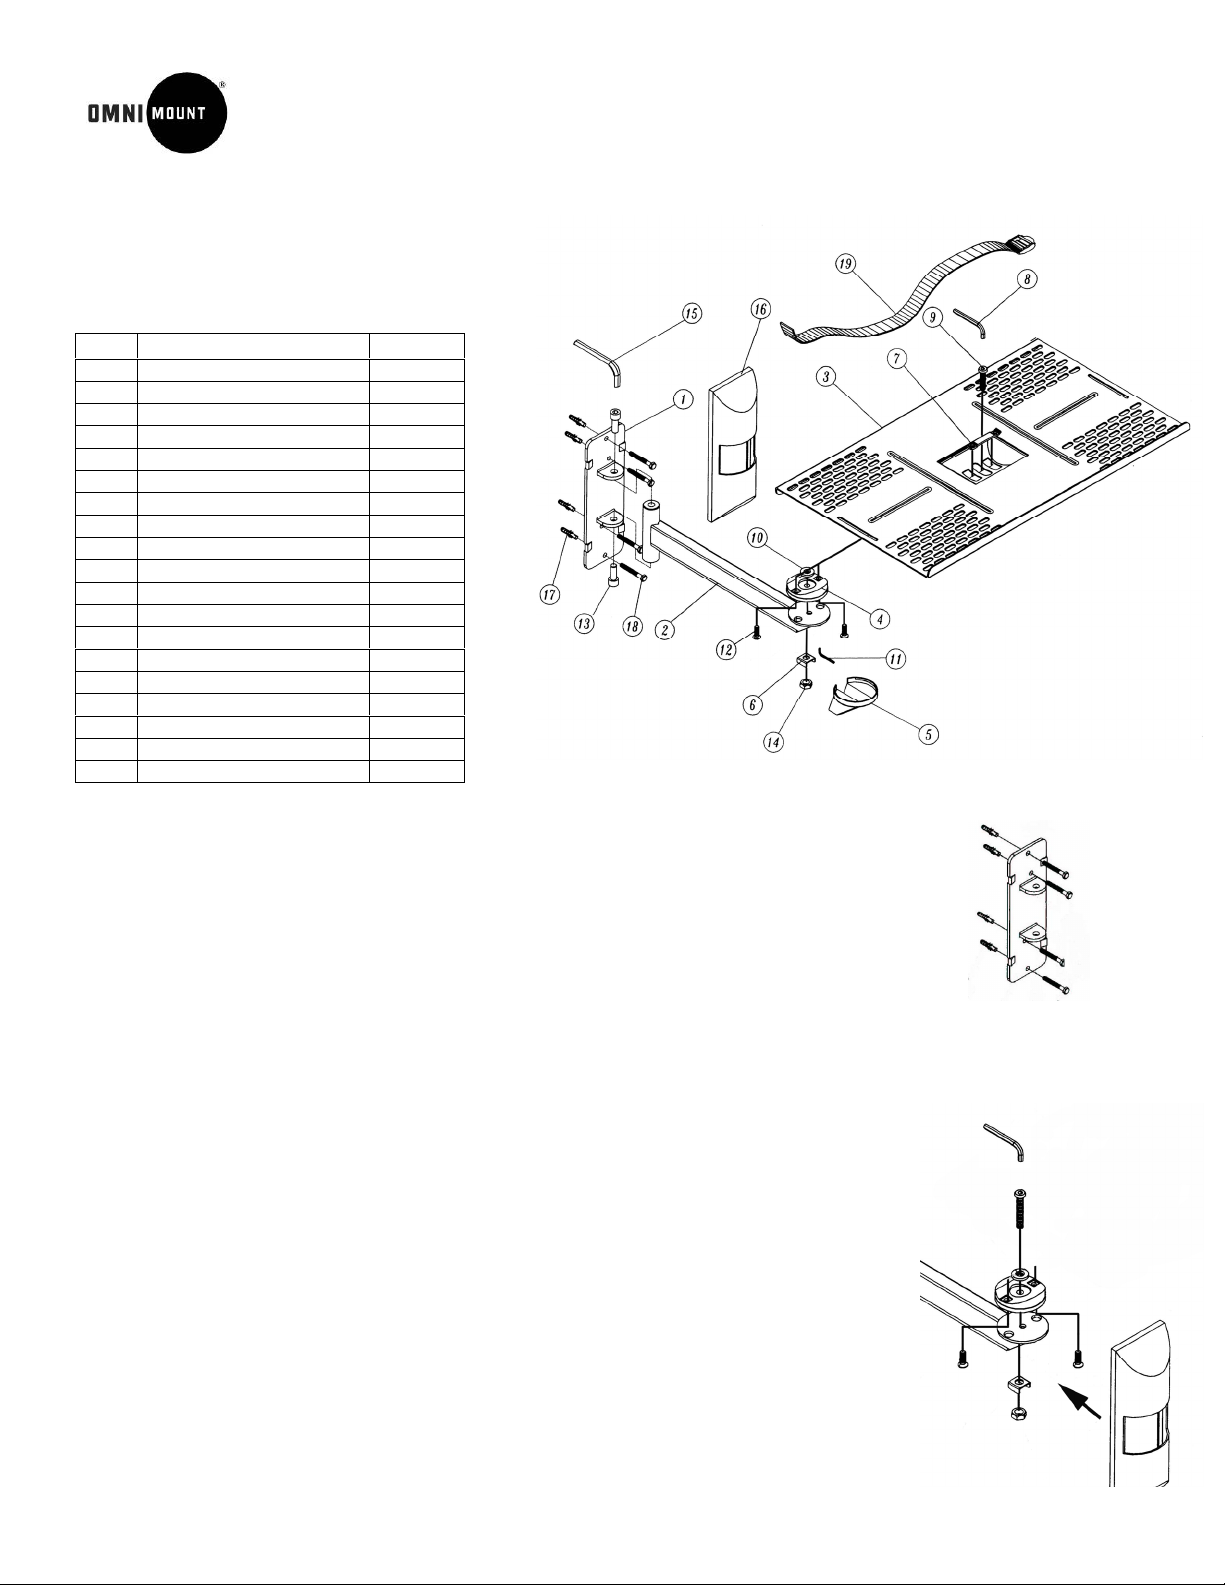
Parts List:
Item
Description Quantity
1 Wall Bracket 1
2 Support Arm 1
3 Platform 1
4 Platform Swivel Bracket 1
5 Nose Piece 1
6 Square Washer 1
7 Platform Slide Bar 1
8 Medium Hex Wrench 1
9 5/16” x 1” Platform Screw 1
10 Flat Washer 1
11 Small Hex Wrench 1
12 M6 x 20mm Tilt Screws 2
13 3/8” x ½” Pivot Bolts 2
14 5/16” Platform Lock Nut 1
15 Large Hex Wrench 1
16 Wall Bracket Cover 1
17 Wall Anchors 4
18 ¼” x 2” Lag Bolts 4
19 Security Strap 1
Step 1
Use electronic stud finder to locate center of stud.
Note: When mounting to masonry, go directly to Step 2
Step 2
Use wall bracket (1) as template to mark mounting hole locations.
Wooden Stud Mounting:
Using 1/8” drill bit, drill mounting holes to a depth of 2”.
Using a 10mm wrench, bolt the wall bracket to the wall with the supplied ¼” lag bolts (18).
Note: To make installation easier, dab a bit of liquid soap onto the bolt threads before driving bolt into the stud.
Masonry Mounting:
Use a 3/8” masonry drill bit, and drill mounting holes to a depth of 2”.
Insert wall anchors (17) into mounting holes, and tap flush with hammer.
Using a 10mm wrench, bolt the wall bracket to the wall with the supplied ¼” lag bolts (18).
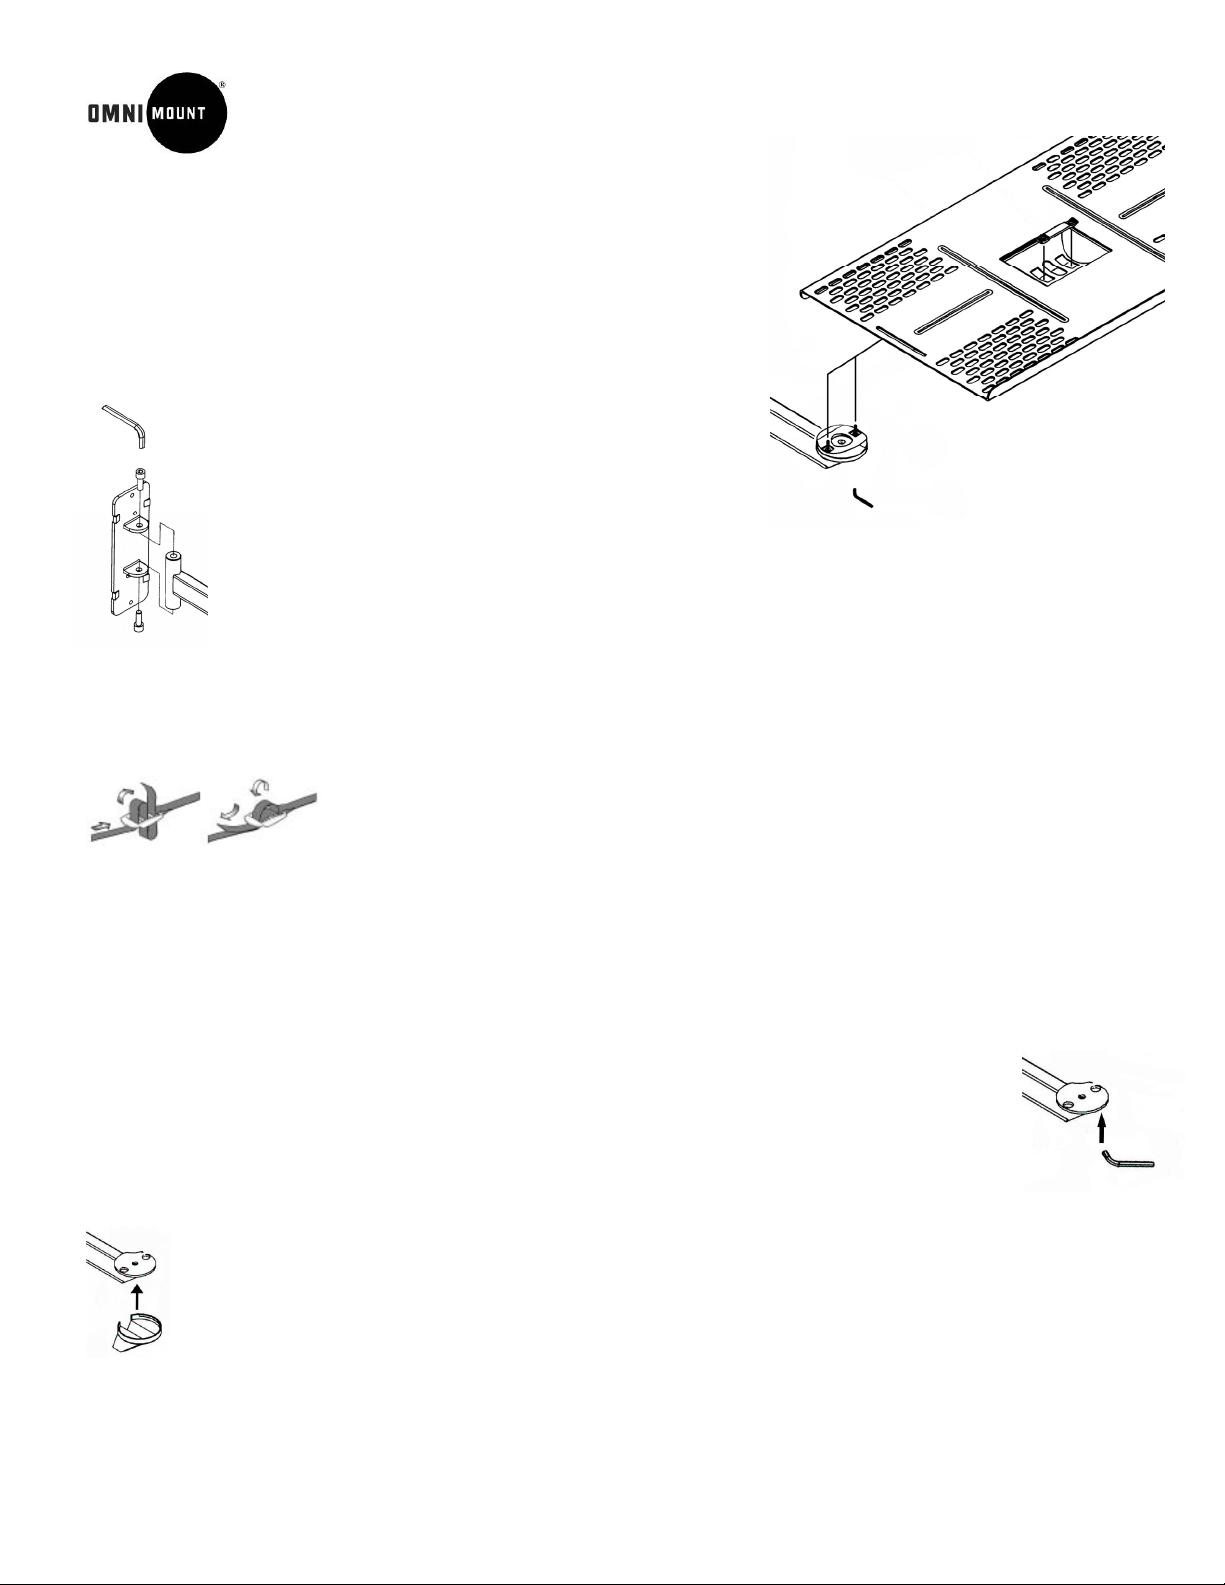
Step 3
3a) Slide wall bracket cover (16) over support arm, with flat side facing wall.
Place flat washer (10) into round depression in center of platform swivel bracket (4).
Insert platform tilt screws (12) up through two countersunk holes in bottom of platform
swivel bracket.
3b) Insert 5/16” platform screw (9) down through center of platform swivel bracket. Place
platform swivel bracket assembly onto top plate at end of support arm, with main bolt
passing through center hole.
Install square washer (6) onto platform main bolt, and then thread platform lock nut (14)
onto platform screw. Tighten platform screw with medium hex wrench (8). Do not overtighten or platform will not swivel.
Page 2
TVM PRO Television Wall Mount
3c) Place platform on top of platform swivel bracket, with platform tilt
screws passing through slots on platform as shown. Turn front edge of
platform at right angles to support arm, as shown. Insert small hex wrench
through holes in bottom of platform support, and thread platform tilt screws
into threaded ends of platform slide bar (7). using small hex wrench (11),
as shown.
Step 4
Insert support arm into wall bracket. Thread 3/8” pivot bolts
into support arm, and secure with large hex wrench.
Do not over tighten lock nut, or arm will not swing freely.
Snap wall bracket cover into place.
Note: If using the optional TVC component mount, install it at this time.
Step 5
Thread open end of security strap (19) up through a slot on the outer edge of platform, across the platform, and then
down through the other slot. Place TV squarely onto platform.
Pull two ends of security strap over TV, thread strap ends through strap buckle (as shown),
and secure tightly.
Optional: Bolt TV to the platform by passing security screws (not supplied) through grid on bottom of platform into
threaded lands on bottom of TV.
Note: You must consult the TV manufacturer for the correct size and length of bolts to use for your make/model of
television. Failure to do so may result in damage to the TV.
Step 6
Adjust platform for desired amount of tilt:
To increase tilt angle, hold top of TV and carefully push front edge of platform backwards.
To decrease tilt angle, hold top of TV and carefully pull front edge of platform forwards.
With tilt angle set, turn front edge of platform at right angles to support arm. Insert small hex wrench
through holes in bottom of platform support as shown, and tighten tilt screws securely.
Step 7
If desired, press nose piece (5) into place at end of support arm, as shown.
OmniMount Systems, Inc.
th
8201 S. 48
1-800-MOUNT-IT • www.omnimount.com
Street • Phoenix, AZ 85044
 Loading...