

Page 1
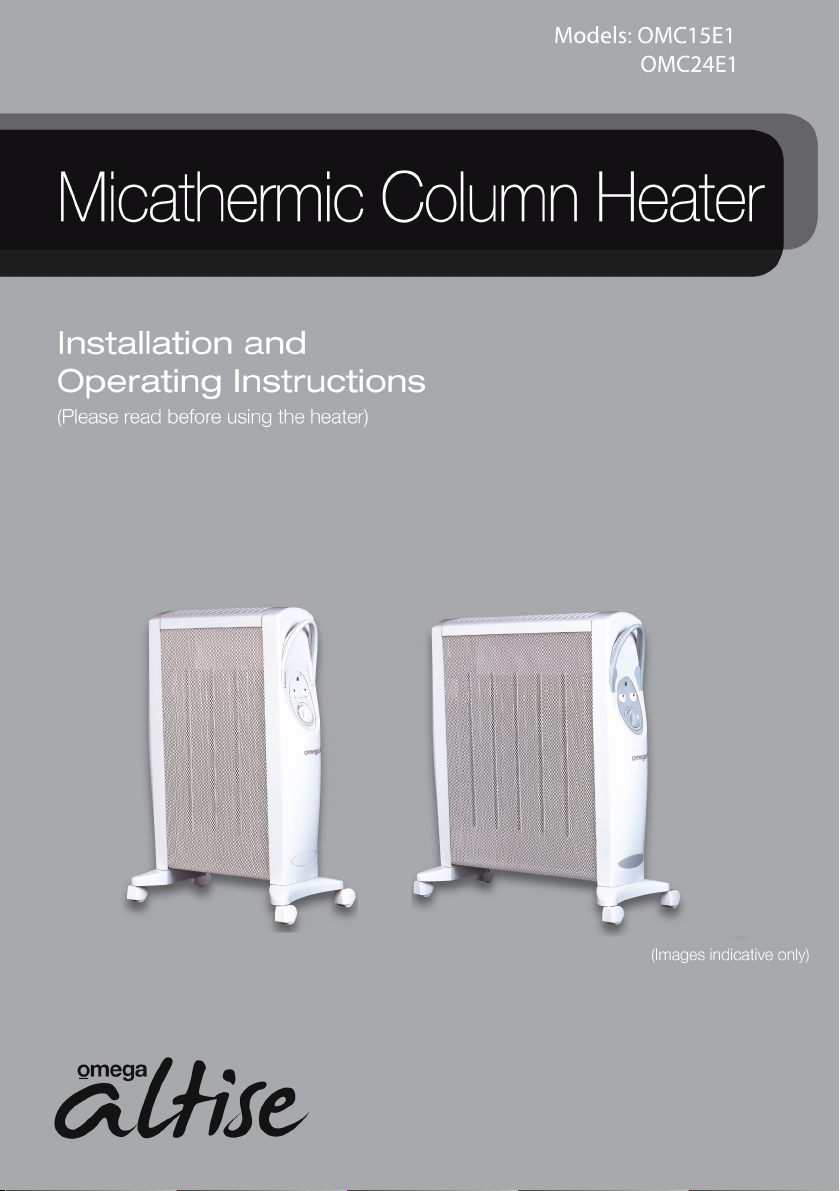
Models: OMC15E1
OMC24E1
Page 2
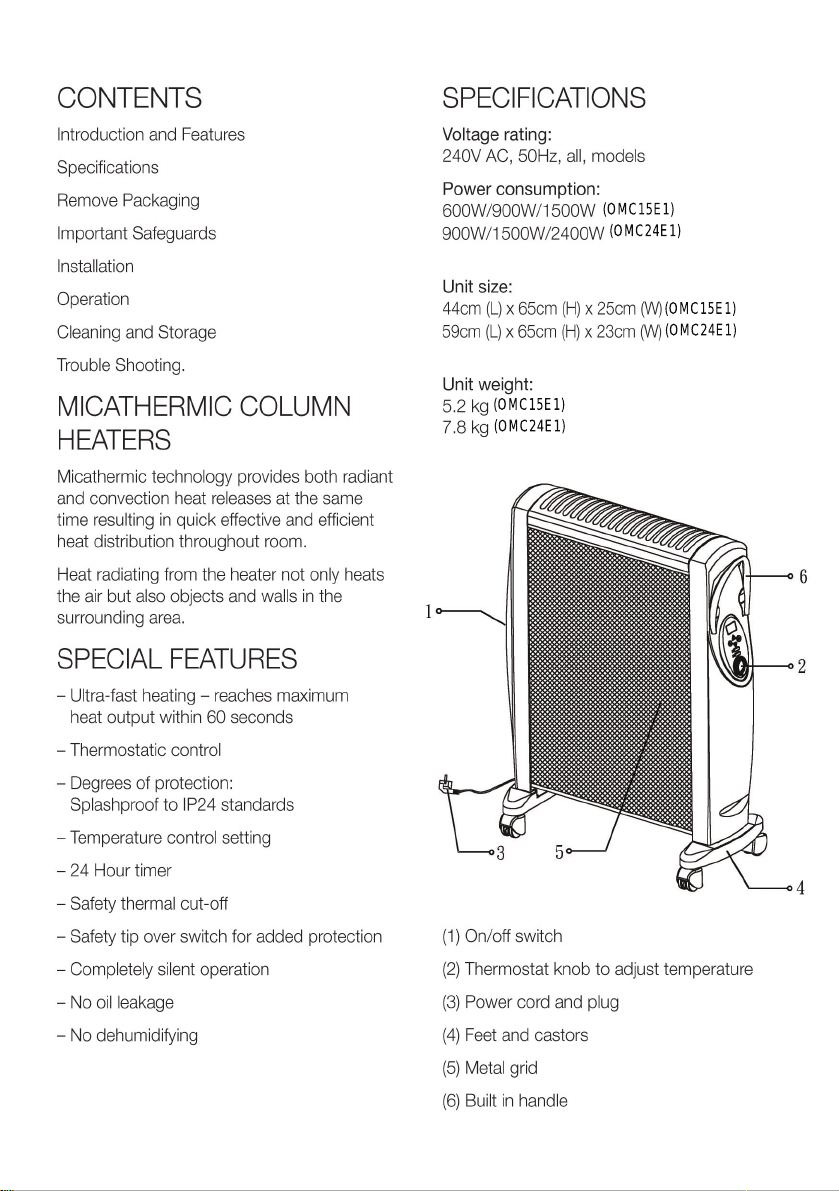
(OMC15E1)
(OMC24E1)
(OMC15E1)
(OMC24E1)
(OMC15E1)
(OMC24E1)
Page 3
Page 4

REMOVE PACKAGING
Please read instructions before using
the heater.
(1) Take heater out of the box and remove the
polyfoam and polybag.
(2) Inside are:
– 1 polybag containing product and user
manual
– 2 feet supports in individual polybags
inserted in polyfoam
– 4 castors in individual polybags inserted in
polyfoam
(3) Save the packaging to store the heater
when not in use.
IMPORTANT SAFEGUARDS
PLEASE READ INSTRUCTIONS BEFORE
USING THE HEATER.
(1) To avoid burns, do not touch the hot
surfaces of the heater when it is in use.
Use handle when moving this heater. keep
combustible materials, such as drapery and
other furnishings at least 900mm from the
front of the heater and away from the side
and the rear.
(2) Do not allow children or infirm persons to
use this heater without proper supervision.
(3) Do not use outdoors.
(4) This heater can be used in bathrooms,
laundry areas or similar indoor locations.
Never locate the heater where it may be
reached from a bathtub, basin or shower.
(5) This heater will become hot during use.
DO NOT use the heater in areas where
petroleum, paint and cleaning solvents or
any other flammable liquids are used or
stored.
(6) Do not insert foreign objects into any
ventilation or exhaust opening as this may
cause and electric shock, fire or damage to
the heater.
(7) Always unplug the heater when not in use.
(8) The use of an extension cord is not
recommended, however if its use is
unavoidable then the conductor wire inside
the cord must be at least 1mm in diameter
and rate not less than 13 amp.
(9) Do not run the cord under carpet and do not
cover it with throw rugs, runners or the like.
Place the cord away from a traffic area and
where it will not be tripped over.
(10) Never use a damaged cord or plug. If
damaged they must be returned to an
Authorised Eurolux Service Agent.
(11) Connect the heater to properly grounded
outlets only.
(12) Use the heater only as described in this
manual. Any other use not recommended
by the manufacturer may cause fire,
electric shock or injury to persons.
(13) Do not use this heater with a programmer,
timer or any other device that switches the
heater on automatically.
(14) The heater must not be located
immediately below a power outlet.
(15) Do not cover this heater with any items as
this may cause over heating.
(16) Do not use this heater in the immediate
surroundings of a bath, shower or
swimming pool.
(17) Caution: In order to avoid hazards due to
inadvertent resetting of the thermal cut-out,
this appliance must not be connected
to power through an external switching
device, such as a timer, or connected to a
circuit that is regularly switched on and off
by that utility.
(18) Do not use the heater on the floor without
mounting the feet.
Page 5

WARNING: DO NOT USE THE HEATER ON
THE FLOOR WITHOUT MOUNTING THE
FEET.
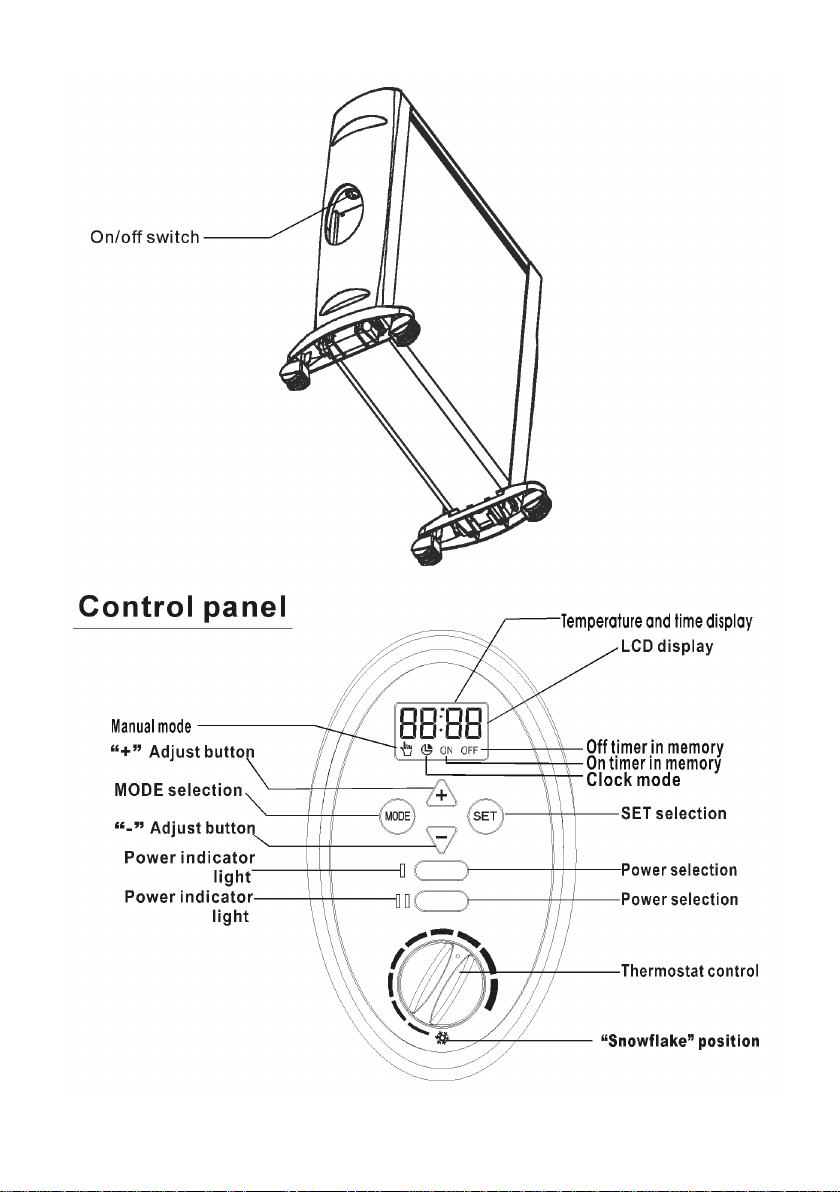
– Insert the plastic shaft of the castors into the
feet supports.
– Insert the feet support on each side of the
heater using the built-in clips.
OPERATION
Please read instructions before
using the heater.
(1) Ensure that the Thermostat Control Knob
is on ‘Snowflake’. Make sure the ON/OFF
switch is off.
(2) Plug the power cord into a suitable
electrical outlet (Rated not less than 13
amp)
(3) Turn the ON/OFF switch to on.
(4) The heater will operate by default in
MANUAL mode and ‘Display’ will show
the room temperature and ‘MANUAL’
symbol…… If ‘ON’ and ‘OFF’ time have
been set, the ‘ON’ and ‘OFF’ symbols will
be displayed.
(5) For the heater to start operating, the user
must select a power, ‘Power 1’, ‘Power II’
or ‘Power I+II’. The indicator lights PI and
PII show the power selected. If PI+PII are
on, power in use is PIII.
(6) Choose a thermostat knob position set
at a higher temperature than the room
temperature. In a short time, heat will
come out of the heater.
You can adjust the thermostat temperature
from 5 to 32 degrees Celsius anytime while
the heater is turned on. Select temperature
by turning the knob clockwise (higher
temperature) and anti-clockwise (lower
temperature). When the room temperature
reaches the selected temperature, heater
will turn off automatically.
(7) Press ‘MODE’ button to set and use the timer.
(8) To set the timer, press MODE once. LCD
screen displays the clock 00:00, glittering.
Press +/- to set the time, press the keys
once, minutes will scroll up or down one
by one, keep the keys depressed and
minutes will scroll up or down in 10 minute
increments. Once you set the desired time,
press the SET button to confirm it, the LCD
will stop glittering.
(9) To set the heater to start working, go to
the ‘ON TIME’ mode. The LCD displays
the clock 00:00, glittering. Press +/- to set
the time, press the keys once, minutes will
scroll up or down unit-by-unit, keep the
keys depressed and minutes will scroll up
or down in 10 minute increments. Once
you set the desired ‘ON TIME’, press the
‘SET’ button to confirm it, the LCD will
stop glittering.
(10) To set the time for the heater to stop
working, go to the ‘OFF TIME’ mode.
The LCD displays the clock 23:59
glittering. This is the default OFF time.
Press +/- to set the time, press the keys
once , minutes will scroll up or down
unit-by-unit, keep the keys depressed
and minutes will scroll up or down in 10
minute increments. Once you set the
desired ‘OFF TIME’, press the ‘SET’
button to confirm it, the LCD will stop
glittering.
(11) It is possible to choose the working
power for a specific ‘ON/OFF’ time.
Select a ‘Power I’, ‘Power II’ or ‘Power
I+II’ button,then press ‘SET’ button to
confirm. If ‘ON/OFF’ times are already
saved, the program will start using the
last power confirmed. If there are no ‘ON/
OFF’ times saved, after confirming the
power do again steps 8 and 9 above.
Page 6

(12) When it is ‘ON TIME’, heater starts
heating using the confirmed power, the
corresponding power indicator light is on.
User can change the power by choosing
a new power. When it is ‘OFF TIME’,
heater stops heating.
(13) User has to press the ‘SET’ button after
selecting power; otherwise the previously
set power cannot be overridden.
(14) In Manual and timer mode, heater can be
switched off by pressing the ‘ON/OFF’
button.
(15) To select the anti-frost function, turn the
knob to ‘snowflake’ symbol position.
When temperature falls to or below 5ºC,
heater starts working and the ‘Power I’
and ‘Power II’ indicating lights are on.
(16) Once ‘ON’ and ‘OFF’ times are set,
heater will stat and stop daily at the set
times unless the ‘ON/OFF’ switch at the
bottom of the control end cap is switched
off.
(17) When the power is resumed, the ‘SET
ON/OFF’ times are still operational but
not the clock time. User has to re-set
the clock time to have the timer function
operates.
In manual mode, press the ‘SET’ button for a few
seconds and ‘SET ON/OFF’ times are discarded.
CLEANING
(1) Before cleaning, turn off the heater, unplug
the power cord and allow the heater to
cool down.
(2) Do not immerse the heater, power cord
and plug in water or other liquid. Do not
pour water or other liquid over the heater.
(3) Use a vacuum cleaner to remove dust and
lint on the metal grid of the heater.
(4) Wipe the heater with a dry cloth to remove
dust and a damp cloth (not wet) to clean
off stains.
(5) Do not use detergents, abrasive cleaning
powder or polish of any kind on the body
of the heater, as these can damage the
heater.
STORAGE
Store the heater in a cool dry place. To
prevent dust and dirt getting in the heater use
the old packaging to repack the unit.
If the heater is not used regularly or if it is
stored uncovered, the heater may produce
small amounts of smoke and/or smell upon
first use. This is normal, it is due to the
accumulation of humidity and dust on the
heating element.
TROUBLE SHOOTING
IF YOUR HEATER IS NOT WORKING THEN
CHECK THE FOLLOWING:
HEATER NOT WARM:
(1) Check if the heater is turned on or not.
(2) Check the Thermostat Control Knob is on
maximum position or not.
(3) Check if any objects are covering the
heater.
HEATER NOT OPERATING:
(1) Check if the power cord is plugged into an
electrical outlet or not.
(2) Check if the electrical supply in the main
house or the main fuse is working or not.
(3) Make sure the power switch is on.
(4) Check the Thermostat Control Knob is on
maximum position.
If after you have carried out the above checks
the heater is still not working then return it
to your nearest Authorised Eurolux Service
Agent.
Page 7

IMPORTANT:
Do not attempt to try and fix the heater yourself as any tampering will invalidate the warranty.
Repairs carried out improperly by unqualified persons may create serious consequences for the
user and the heater.
When your heater has reached the end of its life please dispose of it correctly by contacting your
local authority for recycling advice in your area.
Page 8

104 Vanessa Street
Kingsgrove
NSW 2208
1300 739 033
 Loading...