

OLYMPUS
'
Quick Start Guide

Learn
more about your MIC-D, down-load free software and explore
vast image libraries at the Olympus MIC-D website.
Focus
Control
Knob
_.
..
...
---
--
-
_
..
.
_-
-
-_
..
._
--
-Rotation
Ann
Slide
MIC·OOblique
Illumination
Mode
LED
illuminator
~
/j
C~anrr£1
~
-'
( Wires
illuminator
Head
Diffusion
FlIler-
~
Condenser
Lens---
Stage
Glass
Body
Housing
Focus
ing"""':
Lens-
Reflected"'-
Light
Port
Zoom
Handle-
ElliptiCally . nd
Ci~u
lllrty
Pol.,.tzod
Li9 htW.~
••
~.~~
"
Abs
orpti
on Spo<:lta 01Human Visual
Pigmen~
, --
--
O.B _ G_
-"~
Detailed software installation instructions may also be found at
the
MIC-D Website
Quick
Start
Guide
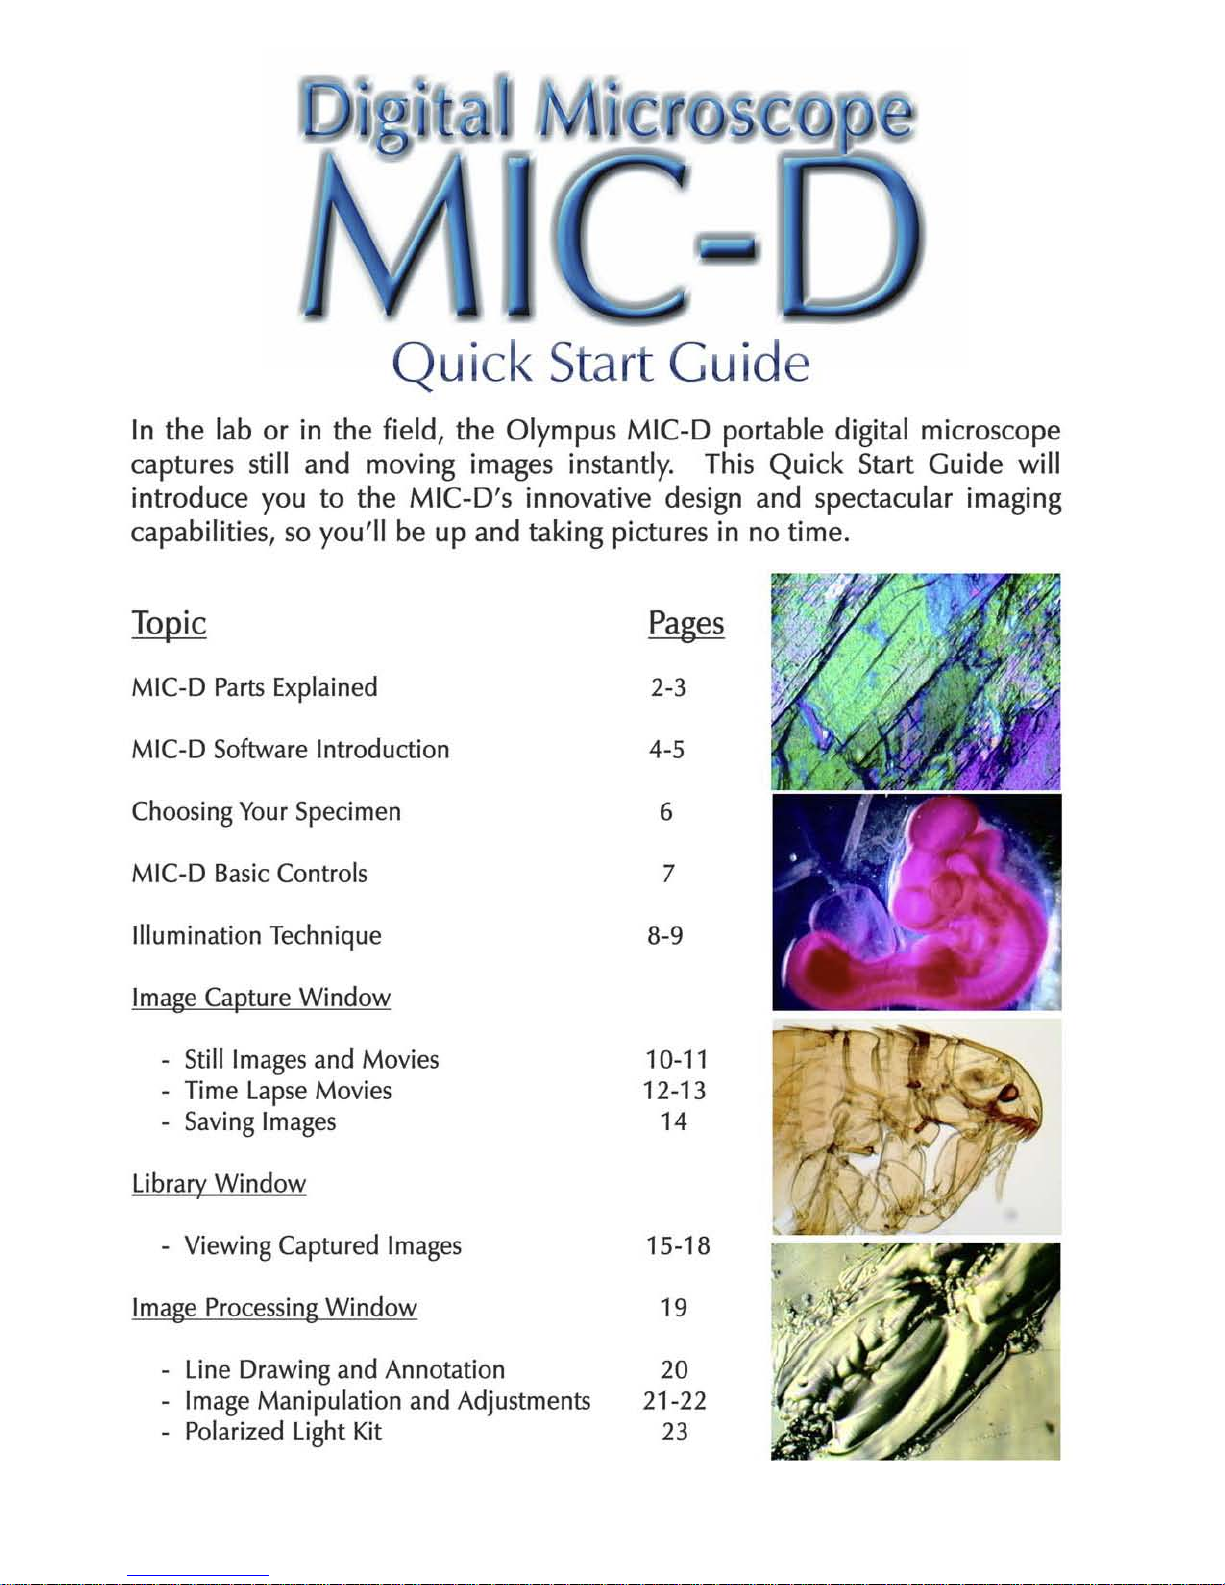
In the lab or in the field, the Olympus M I
C-D
por
table
digita
l microscope
captures still and moving images instantly. This Quick Start Guide will
int
roduce you
to
the MIC-D's i
nnovat
ive design and spectacular imaging
capab ilities, so
yo
u'll be up and taking p
ictur
es in no ti me.
MIC-D Pa
rts
Explained
MIC-D
Software
Introduction
Choos
ingYour Specimen
MIC-D
Basic
Controls
Illumination Technique
Image Capture Window
Still Imagesand Mov
ies
Time LapseMovies
Sav
ing Images
Library Window
- ViewingCaptured Images
Image
Process
ingWindow
Line Drawingand Annotation
Image Manipulation and Adjustme
nts
Polarized Light Kit
2-3
4-5
6
7
B-9
10-11
12-13
14
15-1B
19
20
21-22
23
2
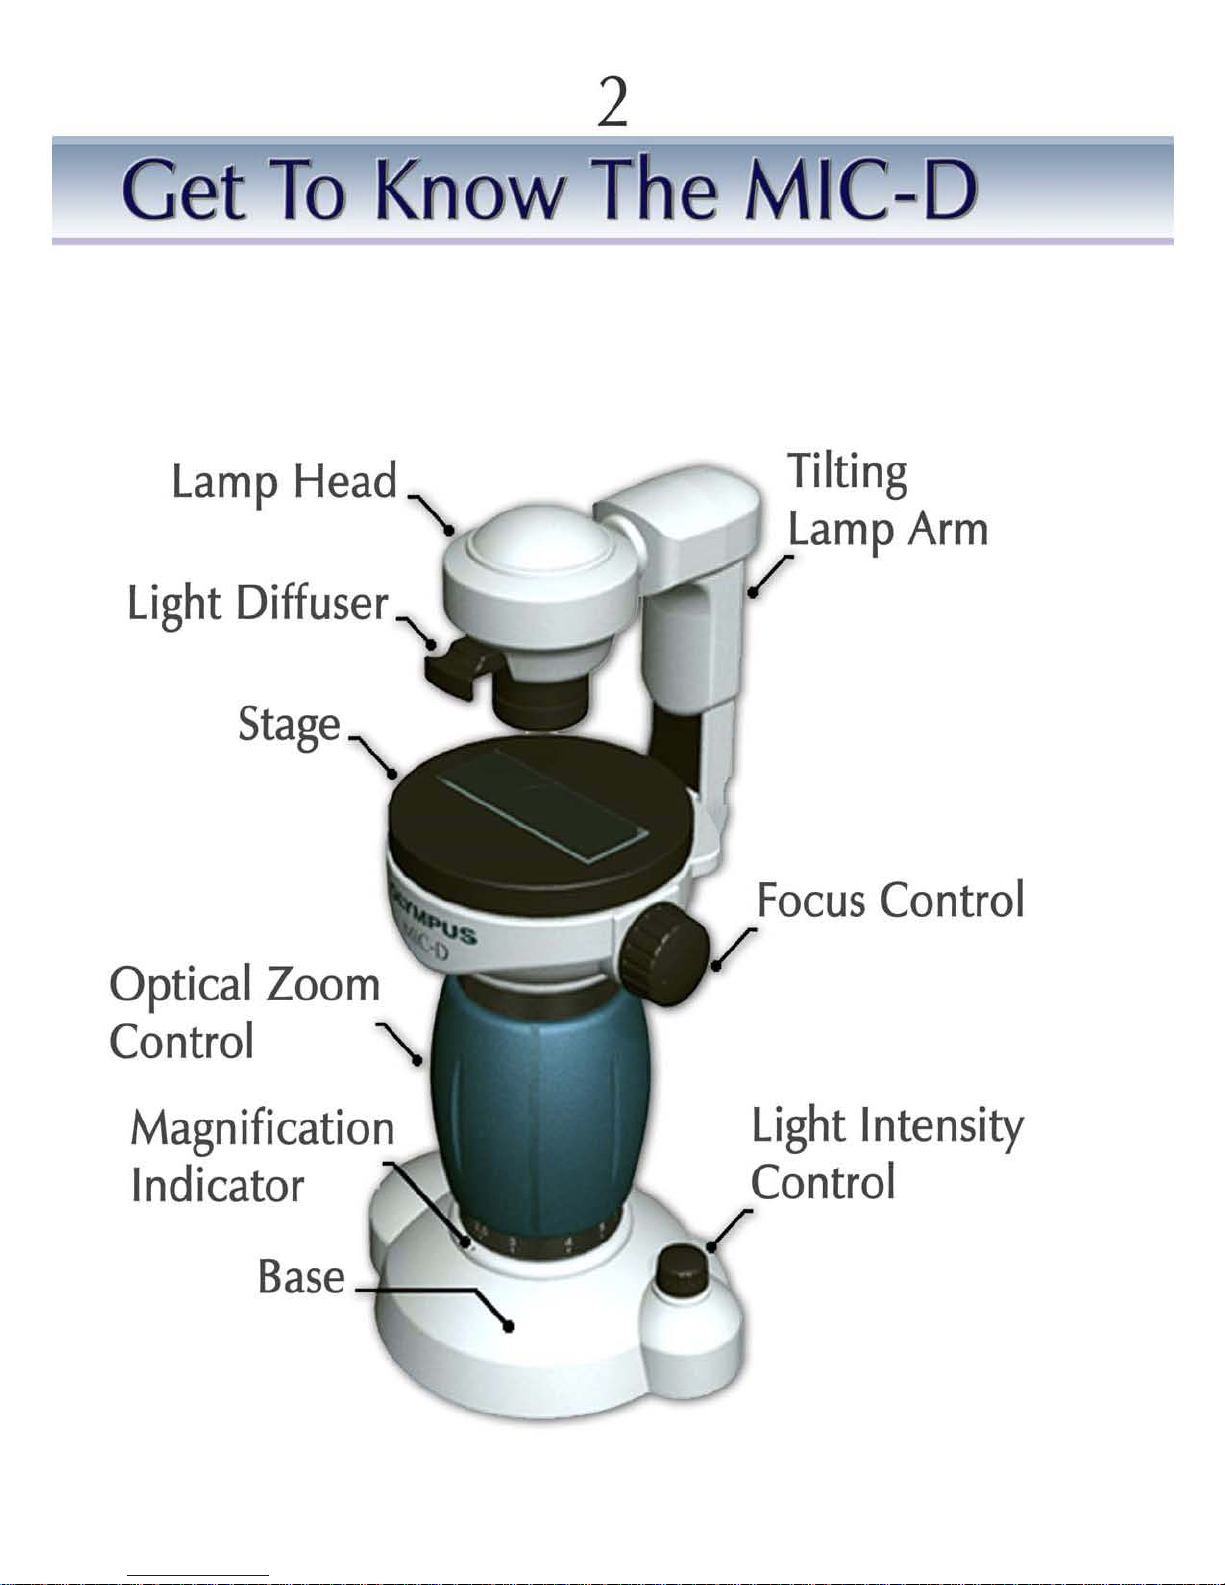
Get
To
Know
The
M C-D
Lamp
Head
"-
Light Diffuser~
Stage
'\.
Optical Zoom
Control
'\.
Magnification
Indicator
Base
Tilting
Lamp
Arm
/
(
Focus
Control
/
Light Intensity
Control
/

3
....._ Lamp
/;I
ead
~~
The Lamp Head contains an extreme ly bright whiteL.E.D. This device is brighte r than an
ordinary bulb and uses less power. The Lamp Head rotates slightly to allow fine tuning to
the illumination angle. Make sure th
at
it is rotated all the way clockwise for Transmitt
ed
Light work (Brightfield) and all
the
way
co
unter clockwise for ReflectedLight work.
....._Light Diffuser
__
TheLight Diffuser ca n be pushed in and pulled out. Keep the Diffuser allthe way in
during Transmitted
Li
ght Illumination, and allthe way out for Reflected
Li
ght
Ill
umination . Vary as ne
eded
for Oblique and Darkfield settings.
....._I ilting Lamp Arm
Adjustments to the angle of the L
amp
Arm are the key to the different illumination
tec hniques. Use the live image to guide adjustments. The Arm should be set to the
vertical position for Transmitted
Lig
ht, to 11 o'clock for
Ob
lique
Ill
umination
andtoabout
10:30 forDarkfield . The arm should be rotated all the way counter clockwise for the
Reflect
edLight Setting.
......
Gliding
Stage
__
The Glid ing Stage is
the
platform to place specimens or samples for observation. The MIC-
D's Stage glides 5mm in any horizontal direction,
and
can be ro
tat
ed 360 degrees. Use
the Gliding Stage to adjust the specimen position. Reme
mbe
r t
hat
up, down and rotational
movements are inverted.
_
-.Lo
oom Control
The MIC-D boasts an all glass optical
zoo
m lens to enable continuous magnification
changes. The magnification range is an amazing 22x to 255x.
_
-I
'vlagnification Indicator
Use
the
Magnification Scale to read the zoom
pow
er, by aligning
the
scale markings on
the blue
zoom
handle to the
spot
below. Adjust the Magnification Slide Bar in
the
Image
C
apture
software window to match the setting on
the
MIC-D, in ord er to calibrate
the
scale mark ing in
the
live image window and captured image.
....._Light
Intensity.
Control
Li
ght intensity (and focus) should be initially set with the
zoomat
minimum powerto
preve nt und er exposure. The
MI
C-D's expos ure setting will then be auto
mat
ically
adjuste d to maintain consiste nt brightness in
the
live image. For Reflected
Li
ght
Illumin
at
ion turn
the
Lig
ht Intensity Control to maximum.
....._F.ocusControl
Rotate this knob to bring specime ns and sam ples into clea r focus. The MIC-D's lens can
focus on surfaces up to 5mm above the stage.
4
MIC-D
Software
Image
Capture
Window
.
-
.-
Library
Window
Image
Processing
Window
ki
l
5
MIC-D
Software
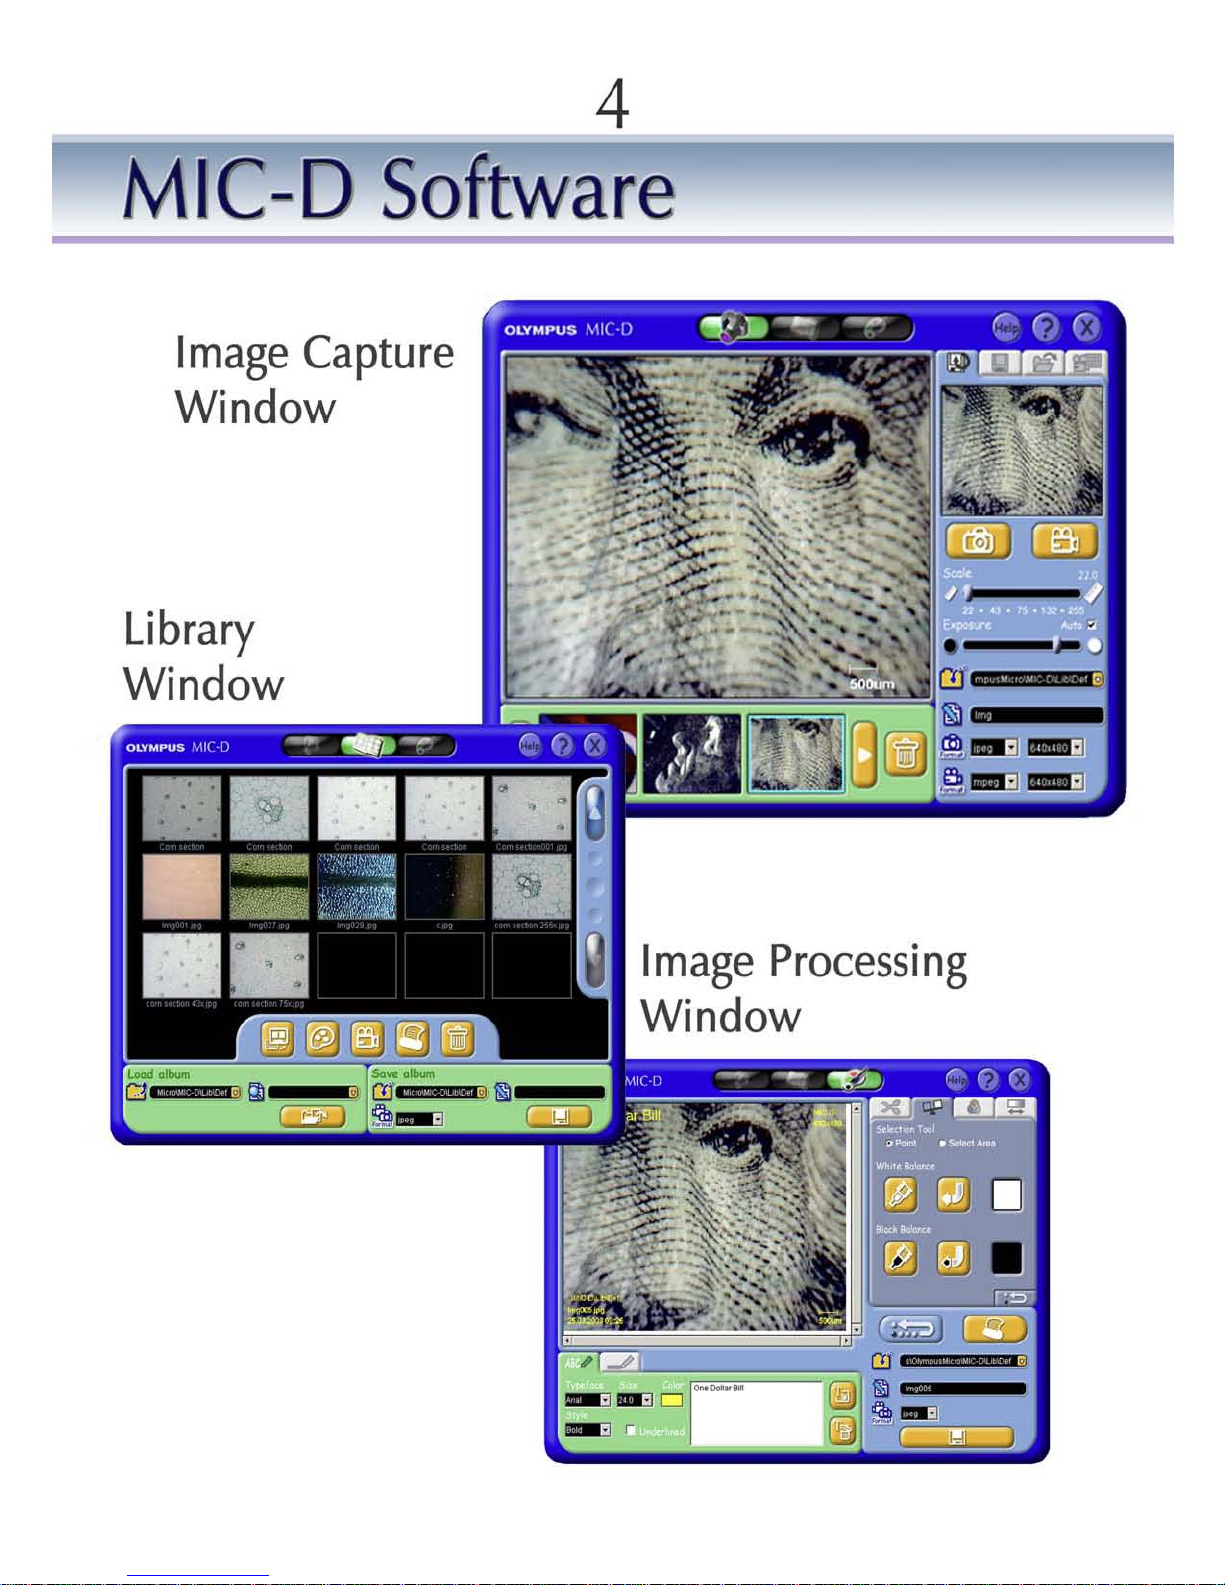
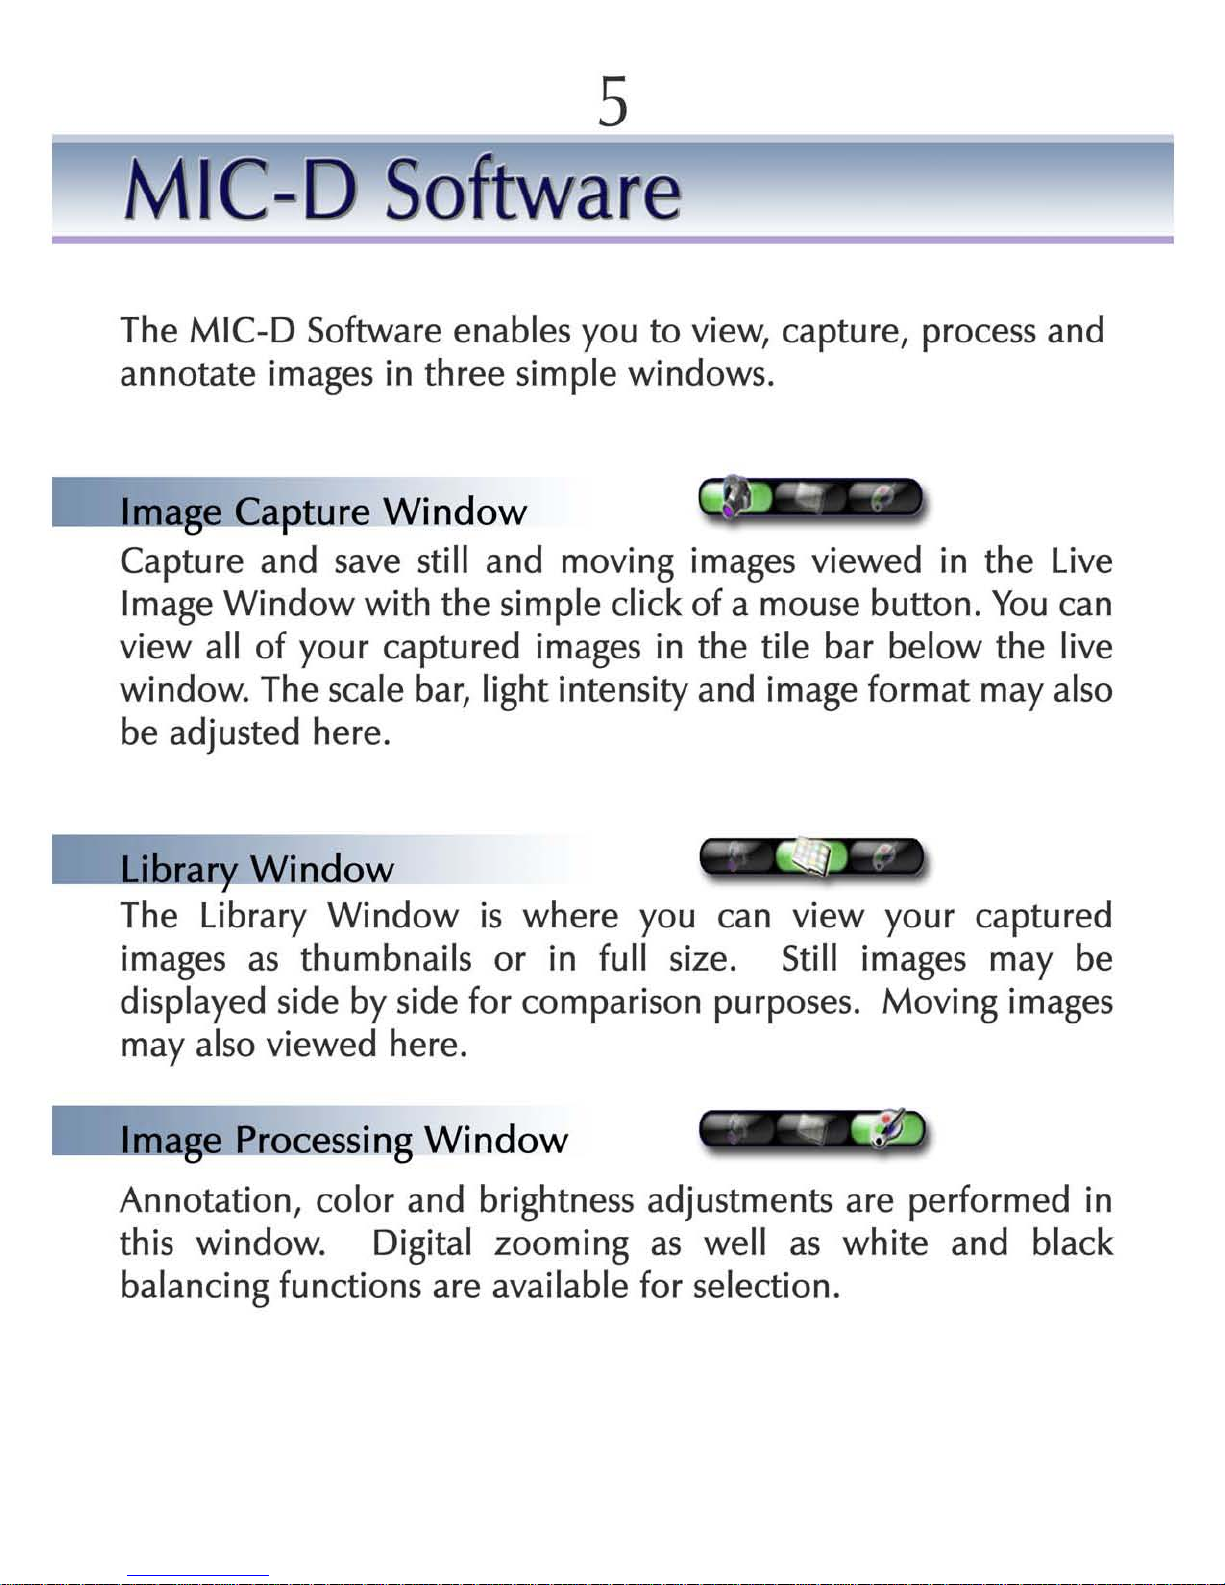
The MIC-D Software enables you to view, capture, process and
annotate
images in
three
simple windows.
Io-_Image
Capture
Window
Capture and save still and moving images viewed in
the
Live
Image Window with
the
simple click of a mouse button.
You
can
view all of your captured images in
the
tile bar below
the
live
window. The scale bar, light intensity and image format may also
be adjusted here .
Io-_Librar.y.
Window
The Library Window
is
where
you can view your captured
images as thumbnails or in
full
size. Still images may be
displayed side by side for compar ison purposes. Moving images
may also viewed here.
Io-_Image
P-
rocessing
Window
Annotation, color and brightness adjustments are performed in
this window. Digital zooming as well as white and black
balancing functions are available for selection.
6
Choose
Your
5
ecimen
or
Sam
~le
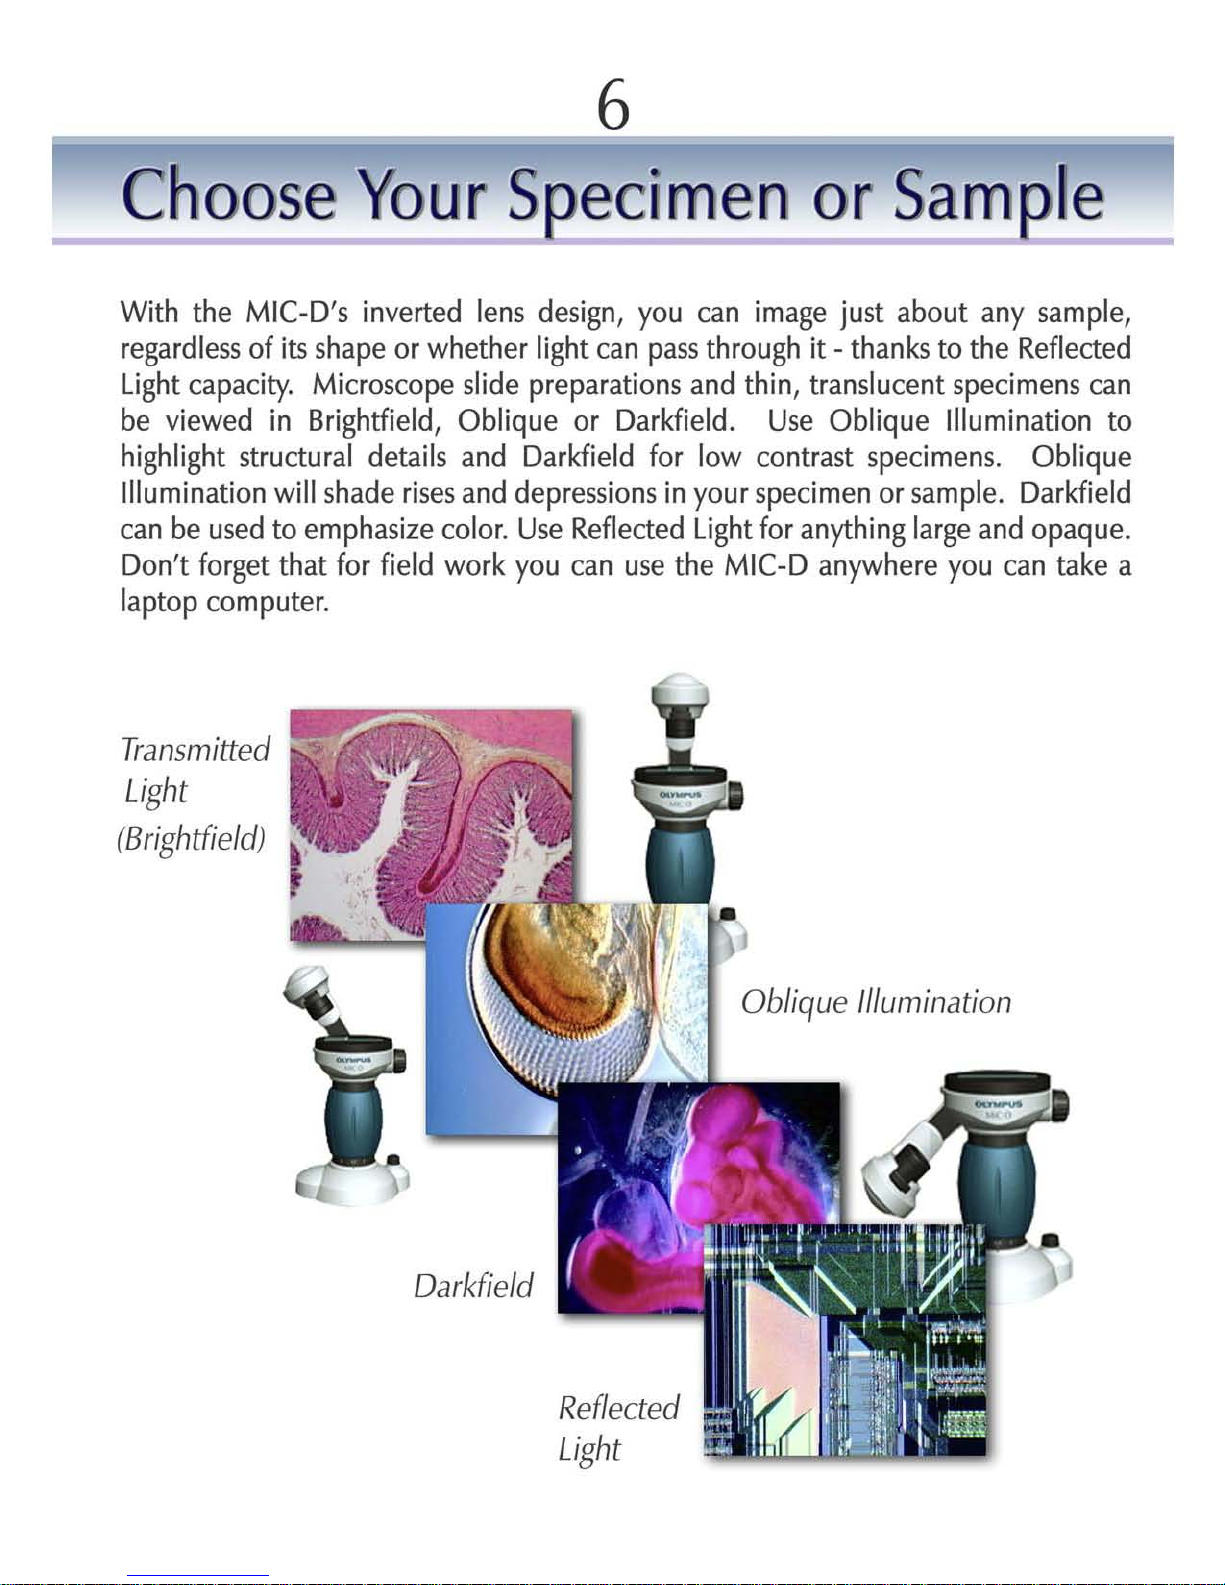
With
the
MIC-D'sinv
erted
lens
design,
you
can
image
just about any sample,
regardless
of
its
shape orwhether
light
can
pass
through
it-
thanks
to the
Reflected
Light
capacity.
Micros
cope
slide
preparations and thin, translucent specimens can
be
viewed
in
Brightfield
, Oblique or
Darkfield.Use
Oblique
Illumination
to
highl
ight
structural details and
Darkfield
for
low
contrast specimens. Oblique
Illumination
will
shade
rises
and depressionsinyour
specimen or sample.
Darkfield
can be
used
to emphasize
color.Use
Refle
cted
Light
for
anything
large
and opaque.
Don't
forget
that
for
field
work
you
can
use
the
MIC-D
anywhere
you
can take a
laptop computer.
Transmitt
ed
Light
!Brightfield!
Oarkfield
Reflected
Light
Obliq
ue
Illumin
ation
7
MIC-D
Basic
Controls
Let's
start
by
getting
familiar
with
the
basic
hardware
controls.Keep
an
eye onthe
Live
Image
Window
as
you
manipulate the
MIC-D
controls
.
Make
sure
that the
Light
Diffuserispushed
in,
the
Illumination
Armisin
the
vertical
position
and the
lamp
head
is
rotated
fully
clockwise.Turn
the
MIC-D's
light
source on and
increase
the
light
intensity
by
turning the
control
clockwise,
about one
half
as
far
as
it
will
go.The
MIC-D
will
automatically
make
adjustments to the
light
intensity
afteritis
initially
set.
Turn
the
Optical
Zoom
Control
to a
minimum
setting.
The
Optical
Zoom
Control
enables the
user
to
physically
adjust the
position
of the
microscope's
lens
to obtain
magnification
powers
from
22x
to
255x!
Bring
the
specimen
into
focus
in
the
Live
Image
Window
by
rotating
the
Focus
Control
Knob.
Make
any
final
adjustments to the
light
intensity.
Notice
that the
Gliding
Stage
Moves
freely
in
any
direction.
Moving
the
Gliding
Stage
instead
ofthe specimen or
sample
will
allow
you
to
scroll
the
image
smoothly,
even
at
high
magnification.When
you
have
found
an interesting deta
il,
center it
in
the
Live
Image
Window
and
zoom
in.
Continue to
make
adjustments to the
focus
as
needed.

8
Illumination
Techni9
_ue
_
There are four different illumination techniques that you can use to
view your specimen or sample
Transmitted
Li
ght
Use
thistechnique to viewconventional microscopeslidesor especially
thin specimens.
This
technique
is
also
known
as 'Brightfield'.
1. Rotate the Illumination
Arm
fully
clockwise to the vertical position.
. Rotate the
Lamp
Head
fully
counter clockwise.
3.
Push
in the
Light
Diffuser
Obli
que and Darkfield Illumin ation
Use
either of these techniques on any transmitted light specimen or
sample to emphasize contrast.
Use
Oblique Illumination to highlight
structural detail by shadowing the 'hills' and 'valleys'.
Use
Darkfield
to create a black background and to emphasize specimen color.
1. Rotate the
Lamp
Head counter-clockwise.
2.
Pull
out the
Light
Diffuser. Adjustments to the light
diff-
user position
may
be required.
3.
Slowly
rotate the Illumination
Arm
counter-clockwise:
-
For
Oblique Illumination rotate the arm
until
the background just begins to darken. Three dimensional details
should display a shadowing effect.
-
For
Darkfield Illumination rotate the
Illum
ination
Arm
further counter-clockwise. Stop when the background
turns black.
Best
results are achieved at
high
magnification.

9
Illumination
Techni
9
_ue
_
4.
Make
anyfinal
adjustmentstothe
Illumination
Arm
and
Lamp
Head
angle
so
that
the
background
appears
evenly
lit.
R
efl
ected
Li
ght
Use
the
Reflected
Light
Illumination
setting
to
view
opaque
specimens
and
samples-Le.
acircuit
board
ora
frog'sskin.
•
Rotate
the
Illumination
Arm
fully
counter-clockwise
.
2.
Rotate
the
Lamp
Head
fully
clockwise.
3.
Pull
out
the
Light
Diffuser
and
turn
the
Light
Intensity
Control
all
the
way
up.

10
MIC-D
Software
I.ooo-
Image
Capture
Window
Li
ve Image Window
Ca
pture Image,
Sav
e Image and
Tim
e LapseTabs
La
st
Captured Image
ImageCaptu
re
Re
cord
Movie
Set
Sca
le
Man
ua
l Exposure
Se
tting
'SaveTo' Directory
Resolution Adj
us
tment
Sti
ll Image Format
S
el
ected
Image
(circle
d)
Captured Im
age
s
Film
St
rip
MovingI
mage
Format
EraseSelected
Captured
Image
Double C
lick
on the
LiveIm
age Wi
ndow
to
goto
Full
Scree
nMode!

11
MIC-D
Software
I....-.
Image Capture
Window
The Image Capture Window iswhere you 'take' or
'capture'
still and moving
images viewed in
the
Live
Image Window. Capturing images is as simple as
clicking on
the
Image Capture button (ol to capture a photo, or clicking
on
the
Record Movie button ;;. to record a movie -
one
click to start
recording and another to finish. After you click to finish recording
the
computer
will
take a moment to load
the
new movie.
The last image that was captured
will
be displayed in
the
Last
Image
Captured Window.
Other
images captured in
the
same session are
displayed in the
Film
Strip at
the
bottom of
the
screen.
J
In the bottom right corner of
the
Live
Image Window there is a Scale Bar.
This needs to be adjusted to match
the
optical zoom level of
the
microscope.
To
do
this, first read
the
zoom level from
the
scale below
the
Optical Zoom Control of the microscope, then
set
the Slide Bar in
the
Image
Capture Window to
the
same value. The software
will
adjust the Scale bar
in
the
Live
Image Window.
The MIC-D Software
will
automatically set
the
camera exposure setting to
match
the
zoom level when 'Auto-Exposure' is selected. De-sele ct 'Auto
Exposure' to adjust
the
exposure manually using
the
slide bar.
C!J
Ad
" MU
!,
"
'
~
~
lIIlI
.
__
To
save images, first give them a name and then select a folderto save them
to. It is re
commended
that
you do not use
the
default Library Folder.
Instead, create a special folder for MIC-D images on your hard drive.
llll IIlIEl
1IIIIlII
~
.
~
1lllII·
1IIIIlII
·
The format and resolution of captured still
and
moving images may also be
changed.
Still
images can be saved in either ]pEG,
TIFF
or
BMP
formats.
Moving Images may be saved in either
MPEG
or
AVI
formats.

12
MIC-D
Software
.....-.
........
ne
Lapse
Movie
Recording
Time Lapse
Mov
ie Recording
Tab
Record
Mo
vie-
Start/Stop
Timelapse:
Select On
/Off
Integral Select-
Seconds
Integral Select-
Mi
nutes
Numb
er
Of
Frames
Select

13
MIC-D
Software
.....
_I,ime
Lapse
Movies
Explained
Time Lapse Movies
are
'fast-motion' movies,
where
a moving image
sequence
is
created
by rapidly playing back several still images
that
are
taken in
sequence
over a period of time. Each individual still image comprises a single frame of
the
finished movie. Time Lapse Movies
appear
faster
than
life
because
the
time
between
each
frame of
the
finished movie
when
it is played back is shorter
than
the
time
that
passed
between
each
frame being
captured.
The
amount
of time
that
passes
between
the
capture
of
each
still image is called
the
integral,
and
it
can
be measured in minutes or seconds. The longer
the
integral,
the
speedier
the
movie will appear. So, to make a relatively short, fast motion movie of a
process
that
takes a very long time, like root growth, an integral of many minutes
should be chosen. To make a movie of a relatively fast process, such as salt
crystals dissolving in cool water, an integral of a few
seconds
should
be
chosen.
,--_
Iim Lapse Movie Record Tab
Click on this
tab
to pull up
the
Time Lapse Movie Recording
Window
,--_
l ime Lapse Select
On/Of
When this button is blue, the Time Lapse function is off, and pressing the Record
Movie will record a normal video sequence in real time. Click on this button to
turn
the
Time Lapse function on. The button will turn red. Clicking on the button
again will exit Time Lapse Mode.
....._Integral Select, Minutes
Use this pull-down menu to select an integral measured in minutes. For instance,
if this integral is set to
'2',
then
one
frame will be captured every two minutes.
,--_
Integral Select, Seconds
Use this pull-down menu to select an integral measured in seconds . Ifthe minutes
integral is also set, then add the selected number of seconds to the minutes. For
instance, if 2 is displayed under minutes and 25 is displayed under seconds, then
one
frame will be captured every 2 minutes and 25 seconds .
.....
_Numb e
~
Of
Frames Select
Enter the number of frames
that
you want to be included in your movie here.
Entering more frames will create longer movies with larger file sizes. The length of
the finished movie is displayed here also.
You
may stop a recording at any time.

14
MIC-D
Software
.......
Sav.ing
Images
Click on the 'Save Image Tab' to save a captured still or moving image.
First,
select a folder to save your images to. Remember that images in the Default
Folder risk being erased when the software is closed or
opened.You
should save
your images to a special folder that you create, such as 'My MIC-D Photos' on
your Hard Drive. The small downward pointing arrow on the right side of the
'Folder Select/Browse' bar opens up a directory so that you can browse for a pre-
existing folder. Don't forget to give your images a name in the 'Image Name' bar.
Use a name
that
will help you identify
the
image if you
don't
have it open, such
as 'Tomato Seed,
SOx
Mag.'
Finally,
select the format that you want to save the
image in. Use either ]PEG,
BMP
or
TIFF
for still images
and
AVI
or
MPEG
for
moving images (including time-lapse movies). Don't forget to click on the 'Save'
button after you have entered your settings.
Save Image Tab
Folder
Select/Browse
Image
Name
Image Format
Se
lect
Click To
Save

15
MIC-D
Software
L....-Librar¥ Window
Delete Image
Scroll Buttons
-Up/
Dow
n
Se
lected Image Information
-Date
-Time
-Resolution
-S
ize
-Location
Save
Image to Album
Saved Image Name
Se
lected Image(s)
Display
se
lected image(s) FullScreen
Image Processing
Display Movie
Print Image
Upload
Image(s)
S
I I
(
)
f
II
I d
Saved Album Location
e ect mage s or p oa
Up
load Album Location Saved Image Format

16
MIC-D
Software
....._ Selected Images
Click on an Image Thumbnail to select it. Movie Thumbnails willbe displayed with
a movie icon in the bottomright h
and
corner. Hold down the shift key while
clicking on several Thumbnails to select multiple stillimages for si
de
by si
de
comparison.
Bri
ng the images into fullview by clicking on the 'Display Selected
Im
ages' button, or by double clicking on a single image.
....._ Display Selected
Images
Full Screen
Use this button to display selected Image Thumbnails in the full screen mode.
Selected Image Thumbn ails are surroun
ded
by a turquoise border.
....._ImageP.rocessing
Click on this button to go to the Image Processing Window. The selec
ted
Image
Thumbn ail wi
ll
appea r in the Processing Window only.
....._ Display Movie
Click on this button to play a selected movie, or just double click on the Movie
Thumbn ail.
....._P.rint Image
__
Click here to print a selecte d image.
....._ Delete Image
__
Click here to delete a selec
ted
image or movie. A confirmation win
dow
will p
op
up asking you if you are sure thatyou want to delete the image or movie.
....._ Scroll Buttons
Use these buttons to scroll through selected images. If images exist thatare out of
view the Scroll Buttons w
ill
be lit.
....._ Selected Image Information
If a stillImage Thumbnail is selected, information ab
out
that image willbe dis-
la ed here. The date, time, resolution, image
fil
e size and location are displayed.
....._ Upload Ibum Location
Locate the file containing the images that you would like to upload to the Library
Window here. Ifyou
do
n't recall the location of the album you can use the browse
function on the right hand sideof the text bar.
....._ Select Image for Upload
After you have selected an album in the ' Upload Album Folder Directory', you can
select single images for upload here.

17
MIC-D
Software
,,----,Upload Image_
After you have selected an image or album for upload, click here to import them
into the
Li
brary Window.
"---_Saved Image Location
Select and locate a file or album to where you want to save selected images. It is
recomm
end
ed that you do not use the Default MIC-D Software folder,as images
risk bein erased when the program is closed or
ope
ned.
__
Saved
Image Name
Don't forget to name your images and movies. It helps to give images descriptive
names, such as 'Earthworm, 22x mag' for locating saved images at a lat
er
date.
__
Image Eorrnat
Different formats are available for stilland moving images. St
ill
images may be
saved in JPEG, BMP or
TIFF.Moving images may be saved in MPEG or
AVI.
"---_
Save Image
__
Finally, click on the 'Save Image' button to save a selected stillor moving image
to
the
folder selected in the 'Saved Image Folder' Director
y.

18
MIC-D
Software
L....-
Eull Screen
Window
•
I
Double clicking on an image
thumbnail
will
bring it up in
full
screen mode. Alterna-
tively, click on an image
once
so
that
it is highlighted
and
click on
the
'display selected
image' button. Movies playback is also in
the
full screen
mode
.
L....-
Image Comparison
Window
Holding down
the
shift key
and
clicking on two or more
thumbnails allows several
images to be selected.
Once
the
images are selected click
on
the
'Display Selected
Images' button to view
the
images side by side. This is a
great way
to
compare
shots
O ·IO'@OO'"
~~~~'
C!l
1iOi!'"
"'""
&ll
that
are
captured
using dif-
Sll
IlllEl
( I
l-d
l I ferent illumination tech-
.
nlques.

19
MIC
-D
Software
L....-
Image Erocessing Window
The Image Processing Window contains tools that you can use to make
adjustments to digital still images. Movies
cannot
be imported into
the
Image Processing Window. Adjustments that you can make to your
images include:
Annotation
-Labeling & Line Drawing
-Date
& Time
Stamp
-Resolution
-Scale Bar
Image Manipulation
and
Adjustment
-Cropping
-Rotation
-Digital
Zooming
-White
& Black
Balance
-Color
Adjustment
-Brightness
-Contrast
-Sharpness
-Gamma
Correction

20
MIC-D
Software
L...-
Annotation and Line Drawing
Anno
tat
ion andLine Drawing can be performed easily within the
MI
C-D Software
Image Processing Window. Text Color, F
ont
, Size and Style ca n be adjus
ted
. Use
the Text Color function to maintain contrast with the background image when
you are labeling. For instance, if the picture has a black backgr
ound,
choose a
yellow coloration. To import a text item, simply click on the ' Import Text to
Imag
e'
button then click
and
drag the text to the desir
ed
position in the image.
For line drawing, select the line style you want, click the Imp
ort
button and move
the mouse cursorto the image. Clickonce to begin the line and again where you
w
ant
the line to end. Clicking and dragging import
ed
elements allows you to
position them. Clicking on an element and pressing
the
'Discard' button erases
that element from the image.
Te
xt Typeface,Size
and Color Text Entry
() "
0--- -- - -- -
() .
(1 _ •• _ ••_ •• _ ••
_.
Text Style and
Underline
TIssueSection
Line Weight and
Color
Import Text to
Image
Discard
Te
xt
Line Type

21
MIC-D
Software
I.ooo-
Image Adjustment
and
Manipulation
•
Se
lect Area for Cropping/Rotation
Crop Selected Area
Rotate
Se
lected Area
Flip
Horizont
al
Flip Vertical
Digital Zoom
Select
Po
int or
Area for
Wh
ite
or Black Balance
Sampling
Reset Selected
Fun
cti
on
Information and Scale Bar
Color
Select White Balance
Apply White Balance
Se
lect Black Balance
Apply Black Balance
,
,
,
Bri
ghtness and
Contrast Adjustm
ent
s
..
,
,
Includ e Image Information
Include Scale Bar
Ca lor Adjustments
CJ-l
~
~

22
MIC-D
Software
I.ooo-
Image Adjust
rn
ent and Manipulation
Most images that you take willrequire verylittle if any adjustment. Remember to e nter
the White Balance Number (WB#) from the base of the microscope to maximize color
rendition. Some important features to note and understand in the Image
Process
ing
Win
dow
are:
White and
Black
Balance
Adjusting the White and Black Balance ensures that corresponding areas of the image
are correctly interpreted by the softwa re, so that white areas are 'seen' as being white
and 'blacks ' as black. To perform a White Balance
ope
ration, select an area of the image
that you think should be white. This is the region you will te
ll
the processing software it
should interpret as being white in case it is tinted. If this area is very sma
ll
(just a few
pixe
ls)
then use the 'Point' sampling tool, which willenable you to samp le a very sma
ll
area or point. If the region is larger, use the 'Area' tool to draw a box over a'white' part
of the image. Next, click on the 'Select White Balance' button and draw a box over an
area of the image with the cursor that you think ought to appear white. A single click of
the mouse over a white area is sufficient if you are using the 'Point' sampling tool. Next,
click on 'Apply White Balance' . Note the slight difference in the image. Carry out the
corresponding Black Balance adjustment, if you think that there are re
gi
ons of the image
that ought to
appea
r black.
Digital VersusOptic
al
Zo
omi
ng
The Digital Zoom is useful for zooming in on a captured image. It is important to note
that digital zooming is quite different from
opt
ical zooming (performed with the MIC-D
Microscope itsel
f.)
When you zoo m digitally, you are merely enla
rgi
ng a fixed number
of pixelsso
that
they are spread over a larger space on the comp uter monitor or in print.
Detail is not
added
to the image.Existing detailis merely expanded. So, a ten pixel by
ten pixel digital image (
100
pixel area) that is blown up two times will still only contain
one hundred pixelsworth of image information. W hen an O ptical Zoom isinc
rease
d in
power, the light recieved from the actual specimen or sample (containing detail that
could not be detected at a lower magnification beca
use
it was too small or too fine) is
revealed. An area of a specimen that spans a
100
pixelsarea in the Live Image Window
wi
ll
be see n by four times that number of pixelsafter two times
opt
ical zooming, with
four times as much visible detail revealed.
Digital ZoomO ptical Zoom
•
'"
Vs.
•
,
~
6i
' :
. ,
" - .

23
MIC-D
Software
I.ooo-
P-
olarized
Light
Kit
The
MI
C-D PolarizedLight Kit cons ists of a Polarizer and an Analyzer,which
are identical to one anothe
r.
To install the Polarizer, remove the screws to the left
and right of the Gliding Stage.
Lift
the stage from the
MI
C-D frame and turn it over.
The Analyzer screws into the raised section on the underside of the Gliding Stage
that surrounds the circular glass window. Replace the Gliding Stage and screws. To
install the Polarizer, simply screw it into the threads just beneath the front lens of
the Lamp Head.
With the Polarizer and Analyzer installed, turn on the
MI
C-D and set the
Ill
umination Arm and Lamp Head to the
Tr
ansmitted
Li
ght position. It is
recommended that you pull out the
Li
ght Diffuser to maximize light intensity. It is
also best to turn off the Auto-
Ex
posure setting in theLive Image Window and set
the Exposure and the
Li
ght Intensity manually for the next s
tep
, and to achieve the
best possible polarized light image. Remove any specimen or sample from the
stage. With one eye on the
Li
ve Image Window, rotate the Gliding Stage until the
LiveIm
age appears darkest. At the darkest position theLive Image should ap
pea
r
black. If the
Li
ve Image
does
not appear black, slowly redu ce theLight Intensity
Dial until it does. Now that the Polarizer and Analyzer are "crossed", you have
achieved "Extinction". Place a specime n or sample that affects polarized
li
ght on
the stage. Granulated Sugar is a readily available sample that wi
ll
show up under
polarized
li
ght. It is recommended that you place polarized light speci mens on a
microsc
op
e slide so thatyou can rotate
themindependen
tly of
the
Gliding Stage.
Yo
u can rotate the Gliding Stage slightly away from Extinction to "Partia
lly
Cross"
the Polarizer' and
'A
nalyzer'. This will enable you to better see the entire specimen
or sample against a brighter background. You can also tilt the Illumination Arm to
ob
tain an
Oblique
ly PolarizedLight Setting.
M
IC-oPolariz
ed
Light
Confi
gurat
ion
Polarization of Light Waves
Po
lartzer
2
(HOriZ
onta
l),
To
learnmore about thistechnique and the physicsof polarized light, visit the M IC-D Website.

Notes

Notes

OLYMPUS
'
1
www.mic-d.com
OLYMPUS AMERICA
INe.
2 Corporate Center Drive, Melville,NY1174 7-3157, U.S.A.
www.olympu
samerica.com
 Loading...